1
Daniel Schröer, Andreas K. Hüttel, Stefan Geißler, Christian
Butschkow, and others
Lab::Measurement documentation
March 22, 2015
2
Contents
1 The
1.1
1.2
1.3
1.4
1.5
1.6
1.7
1.8
1.9
1.10
Lab::Measurement package
Lab::Measurement 3.10 . . . . . . . . . . . . . . . . . . . .
Lab::Measurement 3.00 (initial release) . . . . . . . . . . .
COPYRIGHT AND LICENCE . . . . . . . . . . . . . . .
Lab::Measurement::Installation . . . . . . . . . . . . . . .
Lab::Measurement::Tutorial . . . . . . . . . . . . . . . . .
1.5.1 Introduction . . . . . . . . . . . . . . . . . . . . .
1.5.2 Measurement automation basics . . . . . . . . . .
1.5.3 Architecture . . . . . . . . . . . . . . . . . . . . .
1.5.4 Using the Lab::Instrument class . . . . . . . . . . .
1.5.5 Using Lab::Instrument::xxx virtual instruments . .
1.5.6 Using the high-level Lab::Measurement and related
1.5.7 References . . . . . . . . . . . . . . . . . . . . . . .
Implementing a current/voltage source driver . . . . . . .
Example scripts . . . . . . . . . . . . . . . . . . . . . . . .
1.7.1 yoko-goto.pl . . . . . . . . . . . . . . . . . . . . . .
1.7.2 query_id.pl . . . . . . . . . . . . . . . . . . . . . .
1.7.3 query_id.pl . . . . . . . . . . . . . . . . . . . . . .
1.7.4 srs_read.pl . . . . . . . . . . . . . . . . . . . . . .
1.7.5 gatesweep.pl . . . . . . . . . . . . . . . . . . . . .
1.7.6 biasfield.pl . . . . . . . . . . . . . . . . . . . . . .
Utility scripts . . . . . . . . . . . . . . . . . . . . . . . . .
1.8.1 plotter.pl . . . . . . . . . . . . . . . . . . . . . . .
1.8.2 metainfo.pl . . . . . . . . . . . . . . . . . . . . . .
1.8.3 make_filelist.pl . . . . . . . . . . . . . . . . . . . .
1.8.4 make_overview.pl . . . . . . . . . . . . . . . . . .
High-level tool classes . . . . . . . . . . . . . . . . . . . .
1.9.1 Lab::Measurement . . . . . . . . . . . . . . . . . .
1.9.2 Lab::Data::Writer . . . . . . . . . . . . . . . . . .
1.9.3 Lab::Data::Meta . . . . . . . . . . . . . . . . . . .
1.9.4 Lab::Data::XMLtree . . . . . . . . . . . . . . . . .
1.9.5 Lab::Data::Plotter . . . . . . . . . . . . . . . . . .
XPRESS . . . . . . . . . . . . . . . . . . . . . . . . . . . .
1.10.1 Examples . . . . . . . . . . . . . . . . . . . . . . .
1.10.2 General classes . . . . . . . . . . . . . . . . . . . .
1.10.3 . . . . . . . . . . . . . . . . . . . . . . . . . . . . .
. . . .
. . . .
. . . .
. . . .
. . . .
. . . .
. . . .
. . . .
. . . .
. . . .
classes
. . . .
. . . .
. . . .
. . . .
. . . .
. . . .
. . . .
. . . .
. . . .
. . . .
. . . .
. . . .
. . . .
. . . .
. . . .
. . . .
. . . .
. . . .
. . . .
. . . .
. . . .
. . . .
. . . .
. . . .
.
.
.
.
.
.
.
.
.
.
.
.
.
.
.
.
.
.
.
.
.
.
.
.
.
.
.
.
.
.
.
.
.
.
.
.
.
.
.
.
.
.
.
.
.
.
.
.
.
.
.
.
.
.
.
.
.
.
.
.
.
.
.
.
.
.
.
.
.
.
.
.
.
.
.
.
.
.
.
.
.
.
.
.
.
.
.
.
.
.
.
.
.
.
.
.
.
.
.
.
.
.
.
.
.
.
.
.
.
.
.
.
.
.
.
.
.
.
.
.
.
.
.
.
.
.
.
.
.
.
.
.
.
.
.
.
.
.
.
.
5
5
5
6
7
11
11
11
12
13
14
15
21
23
27
27
29
31
33
35
37
39
39
41
43
45
47
47
51
53
57
61
63
63
85
85
3
Contents
1.10.4 . . . . . . . . . . . . . . . . . . . . . . .
1.10.5 Dedicated Sweep Classes . . . . . . . . .
1.10.6 . . . . . . . . . . . . . . . . . . . . . . .
1.10.7 . . . . . . . . . . . . . . . . . . . . . . .
1.10.8 . . . . . . . . . . . . . . . . . . . . . . .
1.10.9 . . . . . . . . . . . . . . . . . . . . . . .
1.10.10 . . . . . . . . . . . . . . . . . . . . . . .
1.10.11 . . . . . . . . . . . . . . . . . . . . . . .
1.10.12 . . . . . . . . . . . . . . . . . . . . . . .
1.10.13 . . . . . . . . . . . . . . . . . . . . . . .
1.10.14 . . . . . . . . . . . . . . . . . . . . . . .
1.10.15 . . . . . . . . . . . . . . . . . . . . . . .
1.10.16 . . . . . . . . . . . . . . . . . . . . . . .
1.10.17 . . . . . . . . . . . . . . . . . . . . . . .
1.10.18 . . . . . . . . . . . . . . . . . . . . . . .
1.10.19 . . . . . . . . . . . . . . . . . . . . . . .
1.11 Instrument control classes . . . . . . . . . . . .
1.11.1 Lab::Instrument . . . . . . . . . . . . .
1.11.2 Multimeters . . . . . . . . . . . . . . . .
1.11.3 Voltage sources . . . . . . . . . . . . . .
1.11.4 Lock-in amplifiers . . . . . . . . . . . .
1.11.5 RF generators . . . . . . . . . . . . . .
1.11.6 RF detectors . . . . . . . . . . . . . . .
1.11.7 Superconducting magnet power supplies
1.11.8 Temperature control devices . . . . . . .
1.11.9 Cryostat handling devices . . . . . . . .
1.11.10 Stepper motors . . . . . . . . . . . . . .
1.12 Connection classes . . . . . . . . . . . . . . . .
1.12.1 Lab::Connection . . . . . . . . . . . . .
1.12.2 Lab::Connection::DEBUG . . . . . . . .
1.12.3 Lab::Connection::GPIB . . . . . . . . .
1.12.4 Lab::Connection::RS232 . . . . . . . . .
1.12.5 Lab::Connection::LinuxGPIB . . . . . .
1.12.6 Lab::Connection::MODBUS_RS232 . .
1.12.7 Lab::Connection::VISA . . . . . . . . .
1.12.8 Lab::Connection::VISA_GPIB . . . . .
1.12.9 Lab::Connection::VISA_RS232 . . . . .
1.12.10 Lab::Connection::IsoBus . . . . . . . . .
1.12.11 Lab::Connection::LinuxGPIB . . . . . .
1.13 Bus classes . . . . . . . . . . . . . . . . . . . .
1.13.1 Lab::Bus . . . . . . . . . . . . . . . . .
1.13.2 Lab::Bus::DEBUG . . . . . . . . . . . .
1.13.3 Lab::Bus::DEBUG::HumanInstrument .
1.13.4 Lab::Bus::LinuxGPIB . . . . . . . . . .
4
.
.
.
.
.
.
.
.
.
.
.
.
.
.
.
.
.
.
.
.
.
.
.
.
.
.
.
.
.
.
.
.
.
.
.
.
.
.
.
.
.
.
.
.
.
.
.
.
.
.
.
.
.
.
.
.
.
.
.
.
.
.
.
.
.
.
.
.
.
.
.
.
.
.
.
.
.
.
.
.
.
.
.
.
.
.
.
.
.
.
.
.
.
.
.
.
.
.
.
.
.
.
.
.
.
.
.
.
.
.
.
.
.
.
.
.
.
.
.
.
.
.
.
.
.
.
.
.
.
.
.
.
.
.
.
.
.
.
.
.
.
.
.
.
.
.
.
.
.
.
.
.
.
.
.
.
.
.
.
.
.
.
.
.
.
.
.
.
.
.
.
.
.
.
.
.
.
.
.
.
.
.
.
.
.
.
.
.
.
.
.
.
.
.
.
.
.
.
.
.
.
.
.
.
.
.
.
.
.
.
.
.
.
.
.
.
.
.
.
.
.
.
.
.
.
.
.
.
.
.
.
.
.
.
.
.
.
.
.
.
.
.
.
.
.
.
.
.
.
.
.
.
.
.
.
.
.
.
.
.
.
.
.
.
.
.
.
.
.
.
.
.
.
.
.
.
.
.
.
.
.
.
.
.
.
.
.
.
.
.
.
.
.
.
.
.
.
.
.
.
.
.
.
.
.
.
.
.
.
.
.
.
.
.
.
.
.
.
.
.
.
.
.
.
.
.
.
.
.
.
.
.
.
.
.
.
.
.
.
.
.
.
.
.
.
.
.
.
.
.
.
.
.
.
.
.
.
.
.
.
.
.
.
.
.
.
.
.
.
.
.
.
.
.
.
.
.
.
.
.
.
.
.
.
.
.
.
.
.
.
.
.
.
.
.
.
.
.
.
.
.
.
.
.
.
.
.
.
.
.
.
.
.
.
.
.
.
.
.
.
.
.
.
.
.
.
.
.
.
.
.
.
.
.
.
.
.
.
.
.
.
.
.
.
.
.
.
.
.
.
.
.
.
.
.
.
.
.
.
.
.
.
.
.
.
.
.
.
.
.
.
.
.
.
.
.
.
.
.
.
.
.
.
.
.
.
.
.
.
.
.
.
.
.
.
.
.
.
.
.
.
.
.
.
.
.
.
.
.
.
.
.
.
.
.
.
.
.
.
.
.
.
.
.
.
.
.
.
.
.
.
.
.
.
.
.
.
.
.
.
.
.
.
.
.
.
.
.
.
.
.
.
.
.
.
.
.
.
.
.
.
.
.
.
.
.
.
.
.
.
.
.
.
.
.
.
.
.
.
.
.
.
.
.
.
.
.
.
.
.
.
.
.
.
.
.
.
.
.
.
.
.
.
.
.
.
.
.
.
.
.
.
.
.
.
.
89
91
91
95
99
101
105
107
111
115
117
121
125
127
131
133
137
137
141
157
175
177
179
181
187
197
201
203
203
207
209
211
213
215
217
219
221
223
225
227
227
229
231
233
Contents
1.13.5
1.13.6
1.13.7
1.13.8
1.13.9
Lab::Bus::RS232 . . . . . . .
Lab::Bus::MODBUS_RS232
Lab::Bus::VISA . . . . . . . .
Lab::Bus::IsoBus . . . . . . .
Lab::Bus::LinuxGPIB . . . .
.
.
.
.
.
.
.
.
.
.
.
.
.
.
.
.
.
.
.
.
.
.
.
.
.
.
.
.
.
.
.
.
.
.
.
.
.
.
.
.
.
.
.
.
.
.
.
.
.
.
.
.
.
.
.
.
.
.
.
.
.
.
.
.
.
.
.
.
.
.
.
.
.
.
.
.
.
.
.
.
.
.
.
.
.
.
.
.
.
.
.
.
.
.
.
.
.
.
.
.
237
239
241
243
245
2 The Lab::VISA package
249
2.1 Lab::VISA::Installation . . . . . . . . . . . . . . . . . . . . . . . . . . . . 249
2.2 Lab::VISA . . . . . . . . . . . . . . . . . . . . . . . . . . . . . . . . . . . 255
5
Contents
6
1 The Lab::Measurement package
1.1 Lab::Measurement 3.10
Lab::Bus and Lab::Connection classes
* Initial support for the USBtmc Linux kernel driver
* GPIB termination characters are now handled identically in LinuxGPIB and
VISA_GPIB
* New VISA_RS232 connection which takes all arguments as RS232
Lab::Instrument classes
* HP34420A nanovoltmeter re-added
* Many improvements in the Oxford Instruments ITC503 driver
* Re-named the Oxford Instruments IPS12010 driver to OI_IPS, since it works with
not only the IPS 120-10
* New driver: Trinamic PD-110-42 stepper motor
Lab::Measurement classes
* Started refactoring the keyboard handling code
1.2 Lab::Measurement 3.00 (initial release)
This section gives an overview of the most important points when you port a measurement script from the old (i.e., pre-2.9 or distributed under the name Lab::VISA)
Lab::Instrument and Lab::Tools distribution to Lab::Measurement.
Lab::Instrument classes
• The abbreviated way of specifying a GPIB board and address in the constructor
is not supported anymore. Instead of the old
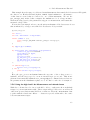
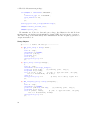
my $hp = new Lab :: Measurement :: HP34401A ( $board , $address ) ;
you now have to explicitly provide
7
1 The Lab::Measurement package
my $hp = new Lab :: Measurement :: HP34401A ({
connection_type = > ’ L i n u x G P I B ’ ,
gpib_board
= > $board ,
gpib_address
= > $address ,
}) ;
• The configuration parameters "gpib_board" and "gpib_address" are now for consistency spelled all in lowercase. Your script will fail if you use the uppercase
"GPIB" variant.
• Every device now needs a configuration parameter "connection_type" (see above).
• In general, functions that read out device values are all prefixed with "get_" now,
instead of "read_".
• Since the Lab::Instrument::Source class has been extended to cover current and
voltage sources, the parameters for influencing gate protect have been renamed.
Instead of "gp_max_voltage" you now have to use "gp_max_units", and analogously for all other gateprotect parameters.
• SR830 functions like get_range and get_tc do not return strings anymore, but
values in SI base units
Lab::Measurement class
• The default file suffixes have been changed from "DATA" and "META" to "dat"
and "meta".
• You can not abort the scripts using Lab::Measurement with "CTRL-C" anymore.
Instead, just press "q", and the script will cleanly terminate at the next measurement point. The background for this is that some device drivers cannot handle
an interruption, leading to undefined hardware behaviour.
1.3 COPYRIGHT AND LICENCE
( c ) 2011 ,2012 Andreas K . H t t e l
8
1.4 Lab::Measurement::Installation
1.4 Lab::Measurement::Installation
Installation guide for Lab::Measurement
Introduction
Since Lab::Measurement does not contain any device driver code itself, its installation is
pretty straightforward. However, before you can actually use it, you will have to install
a driver binding back-end, such as Lab::VISA or Linux-GPIB, plus its dependencies.
Please see the documentation of these packages for more details.
Installation on Windows XP with ActiveState Perl
Install Perl.
• Tested with ActivePerl from http://www.activestate.com/Products/activeperl/index.mhtml
• Make sure to include Perl Package Manager.
• Make sure to activate the check box to include perl directory in PATH
variable.
Install gnuplot (not mandatory)
• Download from http://sourceforge.net/project/showfiles.php?group_id=2055
(gp425win32.zip)
• Extract and put it somewhere
• Add directory containing pgnuplot.exe to path: My Computer => Properties => Advanced => Environment Variables
Install the dependencies of our perl modules. Depending on how familiar you are
with the perl infrastructure, the easiest might be to use PPM, the Perl Package
Manager included with ActivePerl.
Lab::Measurement needs
XML :: Generator ( PPM would write it as XML - Generator )
XML :: DOM
XML :: Twig
YAML
Install Lab::Measurement
9
1 The Lab::Measurement package
• Unzip/copy sources
• Run the following commands in the source directory
perl Build . PL
perl Build
perl Build install
Have fun!
Installation on Windows XP with Strawberry Perl
Strawberry Perl is a Perl distribution for Windows that most closely mimics a Perl
installation under Linux. It comes with gcc compiler, dmake and the other relevant
tools included.
Lab::Measurement should in principle install out of the box with just the command
cpan Lab :: Measurement
executed on the commandline.
Installation on Linux
As a Linux user you will probably be able to figure out most things yourself.
Install the dependencies
Best you’ll use your distribution package management. You need
XML :: Generator
XML :: DOM
XML :: Twig
YAML
... and GnuPlot
Install Lab::Measurement
• Unzip/copy sources
• Run the following commands in the source directory
perl Build . PL
perl Build
perl Build install
10
1.4 Lab::Measurement::Installation
Have fun!
COPYRIGHT AND LICENCE
( c ) 2010 , 2011 Daniel S c h r e r , Andreas K . H t t e l , Daniela Taubert ,
and others .
2012
Andreas K . H t t e l
11
1 The Lab::Measurement package
12
1.5 Lab::Measurement::Tutorial
1.5 Lab::Measurement::Tutorial
Tutorial on using the Lab::Measurement package stack
1.5.1 Introduction
The Lab::Measurement package stack allows to perform test and measurement tasks
with Perl scripts. It provides an interface several hardware driver backends. Dedicated
instrument driver classes relieve the user from taking care for internal details and make
measurements as easy as
$voltage = $multimeter - > get_voltage () .
The Lab::Measurement software stack consists of several parts that are built on top
of each other. This modularization allows support for a wide range of hardware on different operating systems. As hardware drivers vary in API details, each supported one
is encapsulated into perl modules of types Lab::Bus and Lab::Connection. Normally
you won’t have to care about this; at most, your Instrument object (see below) gets
different initialization parameters.
A typical measurement script is based on the high-level interface provided by the
modules Lab::Instrument and Lab::Measurement. The former silently handles all the
protocol overhead. You can write commands to an instrument and read the result.
Drivers for specific devices are included, implementing their specific command syntax;
more can easily be added to provide high-level functions. The latter includes tools for
metadata handling (what was that amplifier setting in the measurement again?!), data
plotting, and similar.
This tutorial will explain how to write measurement scripts. However, this tutorial
does not intend to teach the Perl language itself. Some introduction into VISA and
GPIB terminology is given, but then some familarity also with these concepts is assumed. If you feel the need for more information on Perl or VISA/GPIB, please see
the References section [1-6].
1.5.2 Measurement automation basics
This section provides a very brief introduction to various ways of connecting measurement instruments to your control PC. We focus on the methods not so well-known
to average PC users, i.e. VISA and GPIB programming. Usage of the higher level
modules from the Lab::Instrument package requires almost no knowledge about VISA
and GPIB at all, though.
VISA
Traditionally, test and measurement instruments can be connected and controlled via
various standards and protocols. VISA, the Virtual Instrument Software Architecture [1,2], is an effort to provide a single standarised interface to communicate with
13
1 The Lab::Measurement package
instruments via several protocols. It was developed by the VXIplug&play Systems Alliance[4] and is currently maintained by the IVI foundation [5]. VISA can control VXI,
GPIB, serial, or computer-based instruments and makes the appropriate driver calls
depending on the type of instrument used. Hence, VISA is located in the application
layer. The National Instruments NI-VISA library is one implementation of the VISA
standard.
In one word: VISA tries to make it unimportant, how an instrument is connected
physically.
GPIB
GPIB (IEEE488)[3] is a lower lying standard invented by Hewlett-Packard. It describes a way of connecting instruments. The standard is divided into the physical
layer IEEE488.1 that defines cables and signals and the command layer IEEE488.2 that
describes a syntax for messages between communicating instruments. SCPI (Standard
Commands for Programmable Instruments) is an extension of IEEE488.2 and refines
the available commands further, with the goal of obtaining a language that is independent of the exact model of the instruments in use. This could be very useful, as, in
theory, it would allow you to exchange one instrument in your setup with a similar one
from another manufacturer, without having to change your measurement software. In
practise however, not many instruments support this standard, and even if, small differences make things a pain. As described below, the Lab::Instrument package follows
another route to achieve interchangeability by providing common interfaces for similar
instruments at a much higher level (e.g. the Lab::Instrument::Source interface).
In one word: GPIB tries to make communication with various instruments more
similar.
RS232
RS232 is the abbreviation for the serial port that used to be built into each PC. It
provides a point-to-point connection to one instrument.
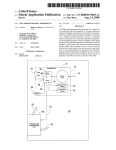
1.5.3 Architecture
A schematic view of the various software layers between your perl measurement script
and the instrument hardware is depicted in the graphics http://www.labmeasurement.de/structure.png.
The lowermost layer is provided by the hardware driver library and its Perl binding.
One option for this is under Linux the package LinuxGPIB, which comes wth its own
Perl bindings module. Alternatively, National Instruments NI-VISA can be used. In
that case, the module Lab::VISA is required to access the library functions from Perl;
it makes the standard VISA calls available from within Perl programs. This layer is
not part of the Lab::Measurement distribution, but must be installed separately.
Each hardware backend is encapsulated into a class of the Lab::Bus type. A Bus can
be imagined as a cable, connecting your control computer with several measurement
hardware components. On top of the Bus classes, classes of type Lab::Connection
14
1.5 Lab::Measurement::Tutorial
operate. Each connection, well, connects one measurement instrument with your script.
Usually, the handling of Bus and Connection is transparent; as long as you dont want
to add more backends or enhance the functionality, you will never have any need to
directly address these levels.
The Lab::Instrument classes build on top and simplify the routine tasks of opening
a connection to an instrument, sending and receiving messages. This is the level where
usually customized measurement scripts access the protocol stack. Classes derived
from Lab::Instrument as e.g. Lab::Instrument::KnickS252 are specialized modules for
certain instruments. Most other measurement software packages would call this a
virtual instruments or an instrument drivers. Each such class provides methods that
are specific for one instrument. The Lab::Instrument::IPS120_10 class for example
class is dedicated to a certain magnet power supply and therefore provides methods
like set_target_field. Similar instruments (e.g. various voltage sources) can share
common interfaces (e.g. Lab::Instrument::Source) to make interchangeability of similar
instruments possible.
The highest abstraction layer is provided by the Lab::Measurement class, which
contains methods for data and metadata handling, plotting and rudimentary keyboard
control.
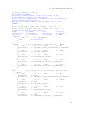
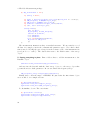
1.5.4 Using the Lab::Instrument class
The Lab::Instrument class can do for us the routine work of connecting to an instrument.
#! / u s r / b i n / p e r l
use strict ;
use Lab :: Instrument ;
################################
unless ( @ARGV > 0) {
print " Usage : ␣ $0 ␣GPIB−a d d r e s s \ n " ;
exit ;
}
my $gpib = $ARGV [0];
print " Q u e r y i n g ␣ ID ␣ o f ␣ i n s t r u m e n t ␣ a t ␣GPIB␣ a d d r e s s ␣ $ g p i b \ n " ;
my $i = new Lab :: Instrument (
connection_type = > ’ L i n u x G P I B ’ ,
gpib_address = > $gpib ,
gpib_board = >0 ,
);
my $id = $i - > query ( ’ ∗IDN ? ’ ) ;
15
1 The Lab::Measurement package
print " Query ␣ r e s u l t : ␣ \" $ i d \ " \ n " ;
This program opens a GPIB instrument for communication, sends the command
*IDN? and reads out its response, the identification string of the instrument. All
handling of GPIB boards, resource managers etc. is done within the Lab::Instrument
class; we don’t have to care about string lengths and cleaning up. Lab::Instrument
does it for us. Now that’s already quite nice, eh?
By only using Lab::Instrument you should already be able to do about everything
that can be done with the instruments in your lab.
1.5.5 Using Lab::Instrument::xxx virtual instruments
Many common tasks, like reading a voltage from a digital multimeter, require that a
series of GPIB commands is sent to an instrument. These commands are different for
similar instruments from different manufacturers.
The virtual instrument classes in the Lab::Instrument package attempt to hide these
details from the user by providing high level methods like set_voltage($voltage)
and get_voltage().
Additionally they provide an optional safety mechanism for voltage sources. This is
used to protect sensitive samples which could be destoyed by sudden voltage changes.
See the documentation of the Lab::Instrument::Source module for details.
#! / u s r / b i n / p e r l
use strict ;
use Lab :: Instrument :: HP34401A ;
################################
unless ( @ARGV > 0) {
print " Usage : ␣ $0 ␣GPIB−a d d r e s s \ n " ;
exit ;
}
my $hp_gpib = $ARGV [0];
print " R e a d i n g ␣ v o l t a g e ␣ f r o m ␣ HP34401A ␣ a t ␣GPIB␣ a d d r e s s ␣ $ h p _ g p i b \ n " ;
my $hp = new Lab :: Instrument :: HP34401A (
connection_type = > ’ L i n u x G P I B ’ ,
gpib_address = > $hp_gpib ,
gpib_board = >0 ,
);
my $volt = $hp - > $get_voltage_dc (10 ,0.00001) ;
print " R e s u l t : ␣ $ v o l t ␣V\ n " ;
16
1.5 Lab::Measurement::Tutorial
This example show the usage of a dedicated virtual instrument class, namely Lab::Instrument::HP34401A,
the driver for a Hewlett-Packard/Agilent 34401A digital multimeter. An instance
of this class is created that is connected to one certain instrument. We use the
get_voltage_dc() method that configures the multimeter for dc voltage measurement in the range given by the parameters, triggers one measurement, and returns the
measured voltage value.
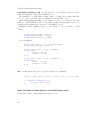
Next we show an example on how to use the safety mechanism of Lab::Instrument::Source
that is inherited by voltage sources like Lab::Instrument::Yokogawa7651.
#! / u s r / b i n / p e r l
use strict ;
use Lab :: Instrument :: Yokogawa7651 ;
unless ( @ARGV > 0) {
print " Usage : ␣ $0 ␣GPIB−a d d r e s s ␣ [ T a r g e t −v o l t a g e ] \ n " ;
exit ;
}
my ( $gpib , $goto ) = @ARGV ;
my $source = new Lab :: Instrument :: Yokogawa7651 (
connection_type = > ’ L i n u x G P I B ’ ,
gpib_address = > $gpib ,
gpib_board = >0 ,
gate_protect = >1 ,
g p _m ax _un it _p er _se co nd = >0.05 ,
g p _max_unit_per_step = >0.005
g p _m ax _st ep _p er _se co nd = >10 ,
);
if ( defined $goto ) {
$source - > set_voltage ( $goto ) ;
} else {
print $source - > get_voltage () ;
}
Here the gate_protect mechanism limits the step size of the voltage source to
0.005mV, and the sweep speed to at most 10 such steps per second. This is implemented automatically within the set_voltage($goto) command; after we have set
the parameters in the initialization phase, we do not have to take care of it anymore.
1.5.6 Using the high-level Lab::Measurement and related classes
With the tools introduced so far you should be able to easily write short individual
scripts for your measurement tasks. These scripts will probably serve as well as all
other home grown solutions using LabView or whatever. The Lab::Measurement class
together with the related Lab::Data:... classes now provide additional tools to write
better measurement scripts.
17
1 The Lab::Measurement package
One main goal is to provide means to keep additional information stored along with
the raw measured data. Additional information means all the notes that you would
usually write down in your laboratory book, like date and time, settings of additional
instruments, the environment temperature, the color of the shirt you were wearing
while recording the data and everything else that might be of importance for a later
interpretation of the data. In my experience, having to write these things in a book
by hand is tedious and error-prone. It’s the kind of job that computers were made for.
Another goal is to free the experimenter from having to repeat himself all the time
when the data is used for analysis or presentation. Let us assume that, for example, you
are measuring a very small current with the help of a current amplifier. This current
amplifier will output a voltage that is proportional to the original current, so in fact you
will be measuring a voltage that can be converted to the original current by multiplying
it with a certain factor. But as long as the precise formula for this transformation is
not stored together with the data, you will still find yourself repeatedly typing in the
same expressions, whenever you work with the data. This is where the axis concept
comes into play. Already at the time you are preparing your measurement script, you
define an axis named current that stores the expression to calculate the current from
the voltage. From there you work with the current-axis and will never have to care
about the conversion again. And of course you can define many different axes. Read
on!
The metadata
The general concept is that a dataset is composed out of data and metadata, i.e. additional information about the data. This metadata is maintained by the Lab::Data::Meta
class and is usually stored in a file dataset_filename.meta, while the data is saved
in dataset_filename.dat.
The meta file is stored in YAML or XML format and contains a number of elements
which are defined in Lab::Data::Meta. The most important ones are column, block, axis
and plot. For the following discussion of these fields, let’s assume a data file that looks
like this:
0.01
0.01
0.01
2.0
2.1
2.2
3
3.4
2.9
0.02
0.02
0.02
2.0
2.1
2.2
1.7
2.4
2.2
This dataset shows an example where one quantity (third column) is measured in
dependence of two others (first and second column). The data was recorded in two
traces, where one input value is kept constant (1st column) and then for every setting
of the other input value (2nd column) a datapoint is taken (3rd column). Then the
the first input value is increased and the next trace is recorded.
18
1.5 Lab::Measurement::Tutorial
column The above example measurement has three columns. You will want to store
additional information for each of these columns: What is being set or measured, what
is the unit of the stored value etc. This information is stored in the column records
of the meta file. More details on the available fields is given in the Lab::Data::Meta
manpage.
block The example data above was aquired in two traces or scans or sweeps, which are
separated by an empty line in the data file now. Lab::Data::Meta adopts the Gnuplot[7]
terminology and calls these blocks. Along with every block, additional information like
the time the trace was started can be saved. Most of this is done automatically. See
the Lab::Data::Meta and Lab::Measurement manpages.
axis Usually you will not want to work with the raw data as it is stored in the columns
of the file. For example you could want to plot the sum of two columns. Also you
might want to display the data using another unit. Therefor you can define a new
axis, that is defined as the sum of these two columns times any factor (which can be
saved as a constant, see below) for the right unit. The expression amp * ($C1 + 10
* $C2) defines an axis as the sum of two columns multiplied with a constant amp.
Additionally, axes have labels, ranges and such.
plot With the plot element, default views on the data be defined. These views can
then be plotted with a single command, using the Lab::Data::Plotter module and the
script plotter.pl. Because all the necessary information is stored in the meta file,
these plots will automatically contain the right axes, ranges, labels, units and any other
information you wish! Plots can already be defined at the time the measurement script
is written, and can also be added later. If you use the Lab::Measurement module, you
can display any of these plots live, while the data is being aquired. Since this entire
system can run on Linux, you can X-forward this graph to your remote desktop at the
beach. Imagine the possibilities.
constant This section of meta data can be used to store additional values that are
important for the later interpretation of the raw data. Examples for such values could
be amplification factors, voltage dividers etc. Constants have names that can be used
in expressions of axis definitions.
The Lab::Measurement class
The Lab::Measurement class makes it easy to write a measurement script that takes
advantage of the meta data system introduced above...
Examples
19
1 The Lab::Measurement package
use
use
use
use
use
use
strict ;
Lab :: Instrument :: Yokogawa7651 ;
Lab :: Instrument :: IPS12010 ;
Lab :: Instrument :: HP34401A ;
Lab :: Instrument :: SR830 ;
Lab :: Measurement ;
# measurement r a n g e and r e s o l u t i o n
my $Vbiasstart = -0.0036;
# V, a f t e r d i v i d e r
my $Vbiasstop = 0.0036;
# V, a f t e r d i v i d e r
my $Vbiasstep = 0.00002;
# V, a f t e r d i v i d e r
my $Bstart =0.1;
# T
my $Bstop =0;
# T
my $Bstep =0.01;
# T
# g e n e r a l measurement s e t t i n g s and c o n s t a n t s
my $Vbiasdivider = 0.01;
# <1, v o l t a g e d i v i d e r v a l u e
my $currentamp = 1e -9;
# A/V
my $sample = " n a n o t u b e " ;
my @starttime = localtime ( time ) ;
my $startstring = sprintf ( "%04u−%02u−%02u_%02u−%02u−%02u " ,
$starttime [5]+1900 , $starttime [4]+1 , $starttime [3] ,
$starttime [2] , $starttime [1] , $starttime [0]) ;
my $title = " B i a s ␣ v e r s u s ␣ m a g n e t i c ␣ f i e l d " ;
my $filename = $startstring . " _ b i a s f i e l d " ;
# the bias voltage source
my $YokBias = new Lab :: Instrument :: Yokogawa7651 ({
’ c o n n e c t i o n _ t y p e ’ => ’ LinuxGPIB ’ ,
’ gpib_board ’
=> 0,
’ g p i b _ a d d r e s s ’ => 3,
’ g a t e _ p r o t e c t ’ = > $Vbiasprotect ,
’ g p _ m a x _ u n i t _ p e r _ s e c o n d ’ = > 0.05/ $Vbiasdivider ,
’ g p_ ma x_s te p_ pe r_s ec on d ’ = > 10 ,
’ g p _ m a x _ u n i t _ p e r _ s t e p ’ = > 0.005/ $Vbiasdivider ,
’ f a s t _ s e t ’ => 1,
}) ;
# t h e l o c k −i n : ac measurement
my $SRS = new Lab :: Instrument :: SR830 ({
’ c o n n e c t i o n _ t y p e ’ => ’ LinuxGPIB ’ ,
’ gpib_board ’
=> 0,
’ gpib_address ’
}) ;
# t h e m u l t i m e t e r : dc measurement
my $HP = new Lab :: Instrument :: HP34401A ({
’ c o n n e c t i o n _ t y p e ’ => ’ LinuxGPIB ’ ,
’ gpib_board ’
=> 0,
’ gpib_address ’
}) ;
# t h e s u p e r c o n d u c t i n g magnet c o n t r o l
my $magnet = new Lab :: Instrument :: IPS12010 ({
’ c o n n e c t i o n _ t y p e ’ => ’ LinuxGPIB ’ ,
’ gpib_board ’
=> 0,
’ gpib_address ’
}) ;
20
=> 8,
= > 12 ,
= > 24 ,
1.5 Lab::Measurement::Tutorial
# g e n e r a l comments f o r t h e l o g
my $comment = < < COMMENT ;
Bias sweeps versus magnetic field ; gate voltage -3.74 V
B from $Bstart to $Bstop step size $Bstep
Bias voltage from $Vbiasstart to $Vbiasstop step size $Vbiasstep
Current preamp $currentamp A / V
SRS lock - in : integrate 100 ms , freq 117.25 Hz , sensit . 10 mV
COMMENT
# t h e " measurement " : t h i n g s l i k e f i l e n a m e , l i v e p l o t , e t c ,
# p l u s a l l t h e metadata ( d a t a f i l e columns , axes , p l o t s , . . . )
my $measurement = new Lab :: Measurement (
sample
= > $sample ,
title
= > $title ,
filename_base
= > $filename ,
description
= > $comment ,
live_plot
=> ’ c u r r e n t a c x ’ ,
live_refresh
= > ’ 200 ’ ,
constants
=> [
{
’ name ’
=> ’ currentamp ’ ,
’ value ’
= > $currentamp ,
},
],
columns
= > [ # d o c u m e n t a t i o n o f t h e d a t a f i l e columns
{
’ unit ’
= > ’T ’ ,
’ label ’
= > ’B ’ ,
’ description ’
=> ’ magnetic ␣ f i e l d ␣ p e r p e n d i c u l a r ␣ to ␣ nanotube ’ ,
},
{
’ unit ’
= > ’V ’ ,
’ label ’
=> ’ Vbias ’ ,
’ description ’
= > " dc ␣ b i a s ␣ v o l t a g e " ,
},
{
’ unit ’
= > ’A ’ ,
’ label ’
=> ’ I d c ’ ,
’ description ’
= > " m e a s u r e d ␣ dc ␣ c u r r e n t " ,
},
{
’ unit ’
= > ’A ’ ,
’ label ’
=> ’ Iac , x ’ ,
’ description ’
= > " m e a s u r e d ␣ a c ␣ c u r r e n t , ␣ x ␣ component " ,
},
{
’ unit ’
= > ’A ’ ,
’ label ’
=> ’ Iac , y ’ ,
’ description ’
= > " m e a s u r e d ␣ a c ␣ c u r r e n t , ␣ y ␣ component " ,
},
],
axes
= > [ # p o s s i b l e a x e s f o r p l o t t i n g , and t h e i r d a t a
columns
{
’ unit ’
= > ’T ’ ,
’ label ’
= > ’B ’ ,
’ expression ’
= > ’ $C0 ’ ,
’ description ’
=> ’ magnetic ␣ f i e l d ␣ p e r p e n d i c u l a r ␣ to ␣ nanotube ’ ,
},
{
’ unit ’
= > ’V ’ ,
’ label ’
=> ’ Vbias ’ ,
’ expression ’
= > ’ $C1 ’ ,
’ description ’
= > ’ dc ␣ b i a s ␣ v o l t a g e ’ ,
},
{
’ unit ’
= > ’A ’ ,
’ label ’
=> ’ I d c ’ ,
’ expression ’
= > ’ $C2 ’ ,
’ description ’
= > ’ m e a s u r e d ␣ dc ␣ c u r r e n t ’ ,
},
{
’ unit ’
=> ’ I ’ ,
’ label ’
=> ’ Iac , x ’ ,
’ expression ’
= > ’ $C3 ’ ,
’ description ’
= > ’ m e a s u r e d ␣ a c ␣ c u r r e n t , ␣ x ␣ component ’ ,
21
1 The Lab::Measurement package
},
{
’ unit ’
’ expression ’
’ description ’
},
],
plots
=> ’ I ’ ,
’ label ’
=> ’ Iac , y ’ ,
= > ’ $C4 ’ ,
= > ’ m e a s u r e d ␣ a c ␣ c u r r e n t , ␣ y ␣ component ’ ,
= > { # p l o t s t h a t can be made u s i n g t h e a x e s above
’ currentdc ’
=> {
’ type ’
= > ’ pm3d ’ ,
’ xaxis ’
=> 0,
’ yaxis ’
=> 1,
’ cbaxis ’
=> 2,
’ grid ’
=> ’ x t i c s ␣ y t i c s ’ ,
},
’ currentacx ’
=> {
’ type ’
= > ’ pm3d ’ ,
’ xaxis ’
=> 0,
’ yaxis ’
=> 1,
’ cbaxis ’
=> 3,
’ grid ’
=> ’ x t i c s ␣ y t i c s ’ ,
},
},
);
# c o r r e c t the sign of the step s i z e s i f r e q u i r e d
unless (( $Bstop - $Bstart ) / $Bstep > 0) { $Bstep = - $Bstep ; }
unless (( $Vbiasstop - $Vbiasstart ) / $Vbiasstep > 0) { $Vbiasstep = $Vbiasstep ; }
my $Bstepsign = $Bstep / abs ( $Bstep ) ;
my $Vbiasstepsign = $Vbiasstep / abs ( $Vbiasstep ) ;
## ENOUGH PREPARATION, NOW THE MEASUREMENT STARTS : )
# go t o s t a r t f i e l d
print " Ramping ␣ magnet ␣ t o ␣ s t a r t i n g ␣ f i e l d . . . ␣ " ;
$magnet - > set_field ( $Bstart ) ;
print " ␣ done ! \ n " ;
# h e r e you c o u l d eg . c h e c k t h e t e m p e r a t u r e
# t h e o u t e r measurement l o o p : m a g n e t i c f i e l d
for ( my $B = $Bstart ; $Bstepsign * $B <= $Bstepsign * $Bstop ; $B += $Bstep )
{
$measurement - > start_block () ;
# s e t the f i e l d
$magnet - > set_field ( $B ) ;
# t h e i n n e r measurement l o o p : b i a s v o l t a g e
for ( my $Vbias = $Vbiasstart ;
$Vbiasstepsign * $Vbias <= $Vbiasstepsign * $Vbiasstop ;
$Vbias += $Vbiasstep ) {
# s e t the bias voltage
$YokBias - > set_voltage ( $Vbias / $Vbiasdivider ) ;
22
1.5 Lab::Measurement::Tutorial
# r e a d dc s i g n a l from m u l t i m e t e r
my $Vdc = $HP - > get_value () ;
# r e a d t h e ac s i g n a l from t h e l o c k −i n
my ( $Vacx , $Vacy ) = $SRS - > get_xy () ;
# we m u l t i p l y w i t h ( −1) ∗ $ c u r r e n t a m p ( i n v e r t i n g a m p l i f i e r )
my $Idc = - $Vdc * $currentamp ;
my $Iacx = - $Vacx * $currentamp ;
my $Iacy = - $Vacy * $currentamp ;
# w r i t e the v a l u e s i n t o the data f i l e
$measurement - > log_line ( $B , $Vbias , $Idc , $Iacx , $Iacy ) ;
}
};
# a l l done
$measurement - > finish_measurement () ;
print " End ␣ o f ␣ Measurement ! \ n " ;
1.5.7 References
[1] NI-VISA User Manual (http://www.ni.com/pdf/manuals/370423a.pdf)
[2] NI-VISA Programmer Manual (http://www.ni.com/pdf/manuals/370132c.pdf)
[3] NI 488.2 User Manual (http://www.ni.com/pdf/manuals/370428c.pdf)
[4] http://www.vxipnp.org/
[5] http://www.ivifoundation.org/
[6] http://perldoc.perl.org/
[7] http://www.gnuplot.info/
23
1 The Lab::Measurement package
24
1.6 Implementing a current/voltage source driver
1.6 Implementing a current/voltage source driver
This document is ment as a guideline to and a help with the implementation of drivers
for current and voltage sources. Since the complexity of the Lab::Instrument and
Lab::Instrument::Source classes increases, it becomes more and more cumbersome
to carefully read the (sometimes outdated) class documentation to keep track of correct
interfaces, i.e., required methods and return values, to provide source device drivers.
The config hash
Let us start with what comes first, the config hash. It is used to provide default values
for parameters that control the higher level functionality, namely gate_protect and
to define the device parameters that should be stored internally (e.g. the range or the
current output mode). At the moment when this documentation is written, an example
for a correct config hash can be found in the class definition of the YokogawaGS200:
our % fields = (
s u p port ed_c onnec tion s = > [ ’ VISA_GPIB ’ , ’ GPIB ’ , ’ VISA ’ , ’DEBUG ’
],
# d e f a u l t s e t t i n g s f o r the supported connections
c onnection_settings = > {
gpib_board = > 0 ,
gpib_address = > 22 ,
},
device_settings = > {
gate_protect
=> 1,
gp_equal_level
= > 1e -5 ,
g p_ m ax _u n it s _p er _ se c on d = > 0.05 ,
gp_ max_ unit s_per _ste p
= > 0.005 ,
gp _m ax _st ep _p er _se co nd = > 10 ,
stepsize
= > 0.01 ,
sweep w i t h o u t g a t e p r o t e c t
# default stepsize for
max_sweep_time = >3600 ,
min_sweep_time = >0.1 ,
},
# If
c l a s s d o e s n o t p r o v i d e s e t _ $ v a r f o r t h o s e , AUTOLOAD w i l l
take care .
device_cache = > {
function
= > "VOLT" , # ’VOLT ’ −
v o l t a g e , ’CURR ’ − c u r r e n t
range
= > undef ,
level
= > undef ,
output
= > undef ,
},
25
1 The Lab::Measurement package
device_cache_order = > [ ’ f u n c t i o n ’ , ’ r a n g e ’ ] ,
);
Let me introduce the objects in this hash. connection_settings is more or less
self-explanatory and should be overwritten by the user anyway.
The device_settings hash
The device_settings hash contains, in the case of a source driver, all the settings
that are important to use the gate_protect feature of the Lab::Instrument::Source
class. The values given are a careful choice, the user who wants to use gate protect
will redefine them anyway. For a new driver, the hash can just be copy/pasted.
The device_cache hash
The device_cache hash contains all device parameters, i.e., parameters that can be
set and read to and from the device, which should be stored on the software side. It is
your decision what variables you add to the list, but make sure you
1. implement getter and setter for all these variables except the Current/Voltage
level.
2. use undef as default if it is likely that this parameter is given on init. If it is not
given, it will be read from the device.
The device_cache_order array
If the order of initializing parameters on the device is important, you should specify
the order in this array.
The getter methods
The default for the getter should be to return the cached variable, i.e. the variable
which is stored on the computer. If the option
from_device = > 1
is given, the variable should be read from the device.
The setter methods
should always set both on device and in the software cache. You can also use a
error_check = >1
in the $self-write> command, then a possible error which appears on the device
will automatically be set. Read also the section on error checking.
26
1.6 Implementing a current/voltage source driver
Default values
Best is to use undef.
Methods that MUST be provided by the device class
Please make sure you implement the following:
1. get/set for each variable in the device_cache with one exception: set_level.
The setter should return the set value.
2. The sub _set_level($target) which will be called from Lab::Instrument::Source
to use gate protect. Implement instead of set_level().
3. A function get_status().
The status sub
The sub get_status should read out the status byte of the device and create a hash
with a descriptive flag and the state of the corresponding bit. The error bit should
have the key "ERROR".
Methods that should be implemented
It is convenient to implement the follwoing functions if possible:
1. A sub _sweep_to_level($target,$time).
2. A sub get_error().
The sweep function
_sweep_to_level($target,$time) is given a target level $target and a sweep time
$time. If the device supports this functionality, it should be implemented here. It
should return $target.
get_error()
should read out the device’s error stack. It should return ONE error at once in a single
array with
[ $errorcode , $errormessage ]
27
1 The Lab::Measurement package
The error checking framework
It is possible to wrap every write($cmd) call by an error checking routine. This can
be invoked by providing the option error_check. For example:
$self - > write ( $cmd , ’ e r r o r _ c h e c k ’ = > 1)
After sending the command in $cmd to the device, the framework will use get_status()
to read out the ERROR status bit. If it is set, get_error() will be used to fetch the
error from the device.
General remarks on device driver developement
Allow pass-through of commands in set & get
The advanced user should be given the possibility to do dirty workarounds when using
the driver. To do this, he can provide options in the write() call, that are interpreted
on connection level. This should in general also be possible when using set_level or
any command that involves a write() call.
28
1.7 Example scripts
1.7 Example scripts
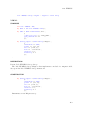
1.7.1 yoko-goto.pl
Sweeps a Yokogawa 7651 dc voltage source to a value given on the command line.
Usage example
$ perl yoko_goto . pl 12 0.8
Sweeeps the Yokogawa 7651 dc voltage source with GPIB address 12 (on GPIB
adaptor 0) to 0.8V, using a maximum step size of 5mV and at most 10 steps per
second.
Author / Copyright
( c ) Andreas K . H t t e l 2011
29
1 The Lab::Measurement package
30
1.7 Example scripts
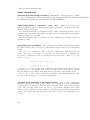
1.7.2 query_id.pl
Queries and prints the instrumet ID of a GPIB instrument; the GPIB address is the
only command line parameter.
Usage example
$ perl query_id . pl 3
Author / Copyright
( c ) Andreas K . H t t e l 2011
31
1 The Lab::Measurement package
32
1.7 Example scripts
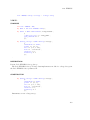
1.7.3 query_id.pl
Queries and prints the instrumet ID of an IsoBus instrument; the IsoBus address is
the only command line parameter.
You will have to adapt this script first to use the correct IsoBus base connection.
This base connection describes how the IsoBus is connected to your measurement PC.
For example, the IsoBus could be connected to a bus master device (often an IPS
magnet power supply), and that in turn has a GPIB address. Then, the base connection
would be the GPIB connection to the bus master device.
Alternatively, as shown above, the IsoBus is connected directly to the PC, and the
base connection is then just the serial port.
Usage example
$ perl isobus_query_id . pl 3
Author / Copyright
( c ) Andreas K . H t t e l 2011 ,2013
33
1 The Lab::Measurement package
34
1.7 Example scripts
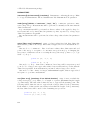
1.7.4 srs_read.pl
Reads out reference amplitude, reference frequency, and current r and phi values of a
Stanford Research SR830 lock-in amplifier. The only command line parameter is the
GPIB address.
Usage example
$ perl srs_read . pl 8
Author / Copyright
( c ) Andreas K . H t t e l 2011
35
1 The Lab::Measurement package
36
1.7 Example scripts
1.7.5 gatesweep.pl
Script to record a trace I(Vg), i.e. dc current as function of gate voltage, in a Coulomb
blockade measurement.
Measurement setup
Script: configuration section
Script: metadata section
Script: actual measurement loop
Author / Copyright
( c ) Daniel Schmid , Markus Gaass , David Kalok , Andreas K . H t t e l 2011
37
1 The Lab::Measurement package
38
1.7 Example scripts
1.7.6 biasfield.pl
Script to record Idc(B,Vbias) and the lock-in output Iac(B,Vbias) in a Coulomb blockade measurement.
Author / Copyright
( c ) Daniel Schmid , Markus Gaass , David Kalok , Andreas K . H t t e l 2011
Andreas K . H t t e l 2012
39
1 The Lab::Measurement package
40
1.8 Utility scripts
1.8 Utility scripts
1.8.1 plotter.pl
Plot data with GnuPlot
SYNOPSIS
plotter.pl [OPTIONS] METAFILE
DESCRIPTION
This is a commandline tool to plot data that has been recorded using the Lab::Measurement
module.
OPTIONS AND ARGUMENTS
The file METAFILE contains the meta information for the data that is to be plotted.
The name OR number of the plot that you want to draw must be supplied with the
--plot option, unless you use the --list_plots option, that lists all available plots
defined in the METAFILE.
--help|-?
Print short usage information.
--man
Show manpage.
--listplots
List available plots defined in METAFILE.
--plot=name --plot=number
Show the plot with name name or number number. Numbers are given by the
--list_plots option.
--dump=filename
Do not plot now, but dump a gnuplot file filename instead.
--eps=filename
Don’t plot on screen, but create eps file filename.
--fulllabels
Also show axis descriptions in plot.
41
1 The Lab::Measurement package
42
1.8 Utility scripts
1.8.2 metainfo.pl
Show info from meta file.
SYNOPSIS
metainfo.pl [OPTIONS] METAFILE
DESCRIPTION
This is a commandline tool to...
OPTIONS AND ARGUMENTS
The file METAFILE contains meta information about one dataset. This information is
printed.
43
1 The Lab::Measurement package
44
1.8 Utility scripts
1.8.3 make_filelist.pl
Generate a list of all plots defined in all metafiles of the current directory
SYNOPSIS
huettel@pc55508 ~ $ make_filelist . pl
DESCRIPTION
This is a commandline tool to quickly generate a list of all plots defined in the current
directory. It generates a file filelist.txt suitable as input of make_overview.pl.
45
1 The Lab::Measurement package
46
1.8 Utility scripts
1.8.4 make_overview.pl
Generate a LaTeX overview file with plots of all measurements in a directory
SYNOPSIS
huettel@pc55508 ~ $ make_overview . pl
Evaluates filelist.txt in the current directory, reads the specified metafiles, generates the specified plots and a LaTeX file overview.tex.
SYNTAX of filelist.txt
% Chapter 1 title
%% Section 1.1 title
Plotname
MYMEASUREMENT . META
Plotname
MYMEASUREMENT2 . META
% Chapter 2 title
Plotname
ANOTHERMEASUREMENT . META
Pretty simple, huh? The only important thing is - the separator between the plot
name and the file name has to be a TAB.
47
1 The Lab::Measurement package
48
1.9 High-level tool classes
1.9 High-level tool classes
1.9.1 Lab::Measurement
Log, describe and plot data on the fly
SYNOPSIS
use Lab :: Measurement ;
my $measurement = new Lab :: Measurement (
sample
= > $sample ,
title
= > $title ,
filename_base
=> ’ qpc_pinch_off ’ ,
description
= > $comment ,
live_plot
= > ’QPC␣ c u r r e n t ’ ,
columns
{
=> [
’ unit ’
’ label ’
’ description ’
. ’,
= > ’V ’ ,
=> ’ Gate ␣ v o l t a g e ’ ,
=> ’ A p p l i e d ␣ to ␣ g a t e s ␣ v i a ␣ low ␣ path ␣ f i l t e r
},
{
’ unit ’
= > ’V ’ ,
’ label ’
=> ’ A m p l i f i e r ␣ output ’ ,
’ description ’
= > " V o l t a g e ␣ o u t p u t ␣ by ␣ c u r r e n t ␣ a m p l i f i e r ␣
s e t ␣ t o ␣$amp . " ,
}
],
axes
=> [
{
’ unit ’
’ expression ’
’ label ’
’ min ’
$start_voltage
’ max ’
$end_voltage :
’ description ’
. ’,
= > ’V ’ ,
= > ’ $C0 ’ ,
=> ’ Gate ␣ v o l t a g e ’ ,
= > ( $start_voltage < $end_voltage ) ?
: $end_voltage ,
= > ( $start_voltage < $end_voltage ) ?
$start_voltage ,
=> ’ A p p l i e d ␣ to ␣ g a t e s ␣ v i a ␣ low ␣ path ␣ f i l t e r
’ unit ’
’ expression ’
’ label ’
’ description ’
=>
=>
=>
=>
’ unit ’
’ expression ’
= > ’ 2 e ^2/ h ’ ,
= > " ( \ $A1 / $v_sd ) / $g0 ) " ,
},
{
’A ’ ,
" a b s ( \ $C1 ) ∗$amp " ,
’QPC␣ c u r r e n t ’ ,
’ C u r r e n t ␣ t h r o u g h ␣QPC ’ ,
},
{
49
1 The Lab::Measurement package
’ label ’
=> " T o t a l ␣ conductance " ,
},
{
’ unit ’
= > ’ 2 e ^2/ h ’ ,
’ expression ’
= > " ( 1 / ( 1 / a b s ( \ $C1 ) −1/$U_Kontakt ) ) ␣ ∗ ␣ (
$amp / ( $v_sd ∗ $g0 ) ) " ,
’ label ’
= > "QPC␣ c o n d u c t a n c e " ,
’ min ’
= > -0.1 ,
’ max ’
=> 5
},
],
plots
=> {
’QPC␣ c u r r e n t ’
=>
’ type ’
’ xaxis ’
’ yaxis ’
’ grid ’
},
’QPC␣ c o n d u c t a n c e ’ = >
’ type ’
’ xaxis ’
’ yaxis ’
’ grid ’
}
},
{
=>
=>
=>
=>
’ line ’,
0,
1,
’ xtics ␣ ytics ’,
{
=>
=>
=>
=>
’ line ’,
0,
3,
’ ytics ’,
);
$measurement - > start_block () ;
my $stepsign = $step / abs ( $step ) ;
for ( my $volt = $start_voltage ; $stepsign * $volt <= $stepsign * $end_voltage ;
$volt += $step ) {
$knick - > set_voltage ( $volt ) ;
usleep (500000) ;
my $meas = $hp - > read_voltage_dc (10 ,0.0001) ;
$measurement - > log_line ( $volt , $meas ) ;
}
my $meta = $measurement - > finish_measurement () ;
DESCRIPTION
This module simplifies the task of running a measurement, writing the data to disk
and keeping track of necessary meta information that usually later you don’t find in
your lab book anymore.
If your measurements don’t come out nice, it’s not because you were using the wrong
software.
50
1.9 High-level tool classes
CONSTRUCTORS
new
$measurement = new Lab :: Measurement (% config ) ;
where %config can contain
’
’
’
’
’
’,
’,
’,
’,
’,
sample
title
filename
filename_base
description
=>
=>
=>
=>
=>
columns
axes
plots
= > [] ,
= > [] ,
= > [] ,
live_plot
live_refresh
live_latest
=> ’ ’ ,
=> ’ ’ ,
=> ’ ’ ,
writer_config = > {} ,
# s e e Meta
# single line
# f o r auto_naming
# multi l i n e
# S e e Meta
# Name o f p l o t t h a t i s t o be p l o t t e d l i v e
# C o n f i g u r a t i o n o p t i o n s f o r Lab : : Data : : W r i t e r
METHODS
start_block
$block_num = $measurement - > start_block ( $label ) ;
log_line
$measurement - > log_line ( @data ) ;
finish_measurement
$meta = $measurement - > finish_measurement () ;
now_string
$now = $measurement - > now_string () ;
log($datum,$column,$description)
magic log. deprecated.
51
1 The Lab::Measurement package
52
1.9 High-level tool classes
1.9.2 Lab::Data::Writer
Write data to disk
SYNOPSIS
use Lab :: Data :: Writer ;
my $writer = new Lab :: Data :: Writer ( $filename , $config ) ;
$writer - > log_comment ( " T h i s ␣ i s ␣my␣ t e s t ␣ l o g " ) ;
my $num = $writer - > log_start_block () ;
$writer - > log_line (1 ,2 ,3) ;
DESCRIPTION
This module can be used to log data to a file, comfortably.
CONSTRUCTOR
new
$writer = new Lab :: Data :: Writer ( $filename , $config ) ;
See configure below for available configuration options.
METHODS
configure
$writer - > configure (\% config ) ;
Available options and default values are
output_data_ext
output_meta_ext
=> " dat " ,
= > " meta " ,
output_col_sep
output_line_sep
output_block_sep
o u tp u t _comment_char
=>
=>
=>
=>
"\t ",
" \n" ,
" \n" ,
"#␣ " ,
Example usage is like this:
$writer - > configure ({
output_col_sep
=> " : " ,
o utput_comment_char = > " // ␣ " ,
}) ;
53
1 The Lab::Measurement package
get_filename
( $filename , $filepath ) = $writer - > get_filename ()
log_comment
$writer - > log_comment ( $comment ) ;
Writes a comment to the file.
log_line
$writer - > log_line ( @data ) ;
Writes a line of data to the file.
log_start_block
$num = $writer - > log_start_block () ;
Starts a new data block.
import_gpplus(%opts) Imports GPplus TSK-files. Valid parameters are
filename = > ’ p a t h / t o / one / o f / t h e / t s k − f i l e s ’ ,
newname = > ’ p a t h / t o / new / d i r e c t o r y / newname ’ ,
archive = > ’ [ c o p y | move ] ’
The path path/to/new/directory/ must exist, while newname shall not exist there.
54
1.9 High-level tool classes
1.9.3 Lab::Data::Meta
Meta data for datasets
SYNOPSIS
use Lab :: Data :: Meta ;
my $meta2 = new Lab :: Data :: Meta ({
dataset_title = > " t e s t t e s t " ,
column
=> [
{ label = > ’ h a l l o ’ } ,
{ label = > ’ s e l b e r ␣ h a l l o ’ ,
unit
= > ’mV ’ } ,
],
axis
=> [
{
unit
=> ’ s ’ ,
description = > ’ t h e ␣ t i m e ’ ,
},
{
unit
= > ’ eV ’ ,
description = > ’ k i n e t i c ␣ e n e r g y ’ ,
},
],
}) ;
DESCRIPTION
This module maintains meta information on a dataset. It’s build on top of Lab::Data::XMLtree.
CONSTRUCTOR
new
$meta = new Lab :: Data :: Meta (\% metainfo ) ;
Currently, Lab::Data::Meta supports the following bits of meta information:
data_complete
= > [ ’ SCALAR ’ ] ,
dataset_title
d a ta s e t_description
sample
data_file
descriptiondatei
=>
=>
=>
=>
block
’ARRAY ’ ,
’ id ’,
{
[ ’ SCALAR ’ ] ,
[ ’ SCALAR ’ ] ,
[ ’ SCALAR ’ ] ,
[ ’ SCALAR ’ ] ,
# boolean
# multiline
# r e l a t i v zur
=> [
55
1 The Lab::Measurement package
original_filename
unterst tzt
timestamp
:%S
description
label
= > [ ’ SCALAR ’ ] ,
# nur von GPplus−Import
= > [ ’ SCALAR ’ ] ,
# Format %Y/%m/%d−%H:%M
= > [ ’ SCALAR ’ ] ,
= > [ ’ SCALAR ’ ] ,
}
],
column
=> [
’ARRAY ’ ,
’ id ’,
{
unit
= > [ ’ SCALAR ’ ] ,
label
= > [ ’ SCALAR ’ ] , # e v t l . weg
description
= > [ ’ SCALAR ’ ] , # e v t l . weg
min
= > [ ’ SCALAR ’ ] , # u n n t z , a b e r von
GPplus−Import u n t e r s t t z t
max
= > [ ’ SCALAR ’ ] , # d i t o
}
],
axis
=> [
’ARRAY ’ ,
’ id ’,
{
label
= > [ ’ SCALAR ’ ] ,
unit
= > [ ’ SCALAR ’ ] ,
expression
= > [ ’ SCALAR ’ ] ,
min
= > [ ’ SCALAR ’ ] ,
max
= > [ ’ SCALAR ’ ] ,
description
= > [ ’ SCALAR ’ ] , # e v t l . weg
}
],
plot
=> [
’HASH ’ ,
’ name ’ ,
{
type
= > [ ’ SCALAR ’ ] , # l i n e , pm3d
xaxis
= > [ ’ SCALAR ’ ] ,
xformat
= > [ ’ SCALAR ’ ] ,
yaxis
= > [ ’ SCALAR ’ ] ,
yformat
= > [ ’ SCALAR ’ ] ,
zaxis
= > [ ’ SCALAR ’ ] ,
zformat
= > [ ’ SCALAR ’ ] ,
cbaxis
= > [ ’ SCALAR ’ ] ,
cbformat
= > [ ’ SCALAR ’ ] ,
logscale
= > [ ’ SCALAR ’ ] , # z . b : ’ x ’ o d e r ’ yzxcb ’
time
= > [ ’ SCALAR ’ ] , # ? ? ? ( was : w i e oben (
a n d e r s a l s i n GnuPlot ) ( Achsen m s s e n %s−Format haben ) )
grid
= > [ ’ SCALAR ’ ] , # z . B . ’ y t i c s ’ o d e r ’
xtics ytics ’
palette
= > [ ’ SCALAR ’ ] ,
label
=> [
’ARRAY ’ ,
’ id ’,
56
1.9 High-level tool classes
{
= > [ ’ SCALAR ’ ] ,
= > [ ’ SCALAR ’ ] ,
= > [ ’ SCALAR ’ ] ,
text
x
y
}
],
}
],
constant
’ARRAY ’ ,
’ id ’,
{
name
value
}
],
=> [
= > [ ’ SCALAR ’ ] ,
= > [ ’ SCALAR ’ ] ,
new_from_file
$meta = new_from_file Lab :: Data :: Meta ( $filename ) ;
METHODS
save
$meta - > save ( $filename ) ;
get_abs_path
my $path = get_abs_path () ;
57
1 The Lab::Measurement package
58
1.9 High-level tool classes
1.9.4 Lab::Data::XMLtree
Handle and store XML and perl data structures with precise declaration.
SYNOPSIS
use Lab :: Data :: XMLtree ;
my $data_declaration = {
info
= > [#
type B
’ SCALAR ’ ,
{
basename
= > [ ’ PSCALAR ’ ] ,#
type A
title
= > [ ’ SCALAR ’ ] ,#
type A
place
= > [ ’ SCALAR ’ ]#
type A
}
],
column
= > [#
type K
’ARRAY ’ ,
’ id ’,
{
# PSCALAR means t h a t t h i s e l e m e n t w i l l n o t
# be s a v e d . Does n o t work f o r YAML y e t .
min
= > [ ’ PSCALAR ’ ] ,#
type A
max
= > [ ’ PSCALAR ’ ] ,#
type A
description = > [ ’ SCALAR ’ ]#
type A
}
],
axis
= > [#
type F
’HASH ’ ,
’ label ’,
{
unit
= > [ ’ SCALAR ’ ] ,#
type A
logscale
= > [ ’ SCALAR ’ ] ,#
type A
description = > [ ’ SCALAR ’ ]#
type A
}
]
};
#c r e a t e Lab : : Data : : XMLtree o b j e c t from f i l e
$data = Lab :: Data :: XMLtree - > read_xml ( $data_declaration , ’ f i l e n a m e . xml ’ )
;
#t h e a u t o l o a d e r
# get
print $data - > info_title ;
# get with $id
print $data - > column_description ( $id ) ;
# s e t w i t h $key and $ v a l u e
$data - > axis_description ( $label , ’ d e s c r i p t i o n t e x t ’ ) ;
#s a v e d a t a a s YAML
$data - > save_yaml ( ’ f i l e n a m e . yaml ’ ) ;
59
1 The Lab::Measurement package
DESCRIPTION
Lab::Data::XMLtree will take you to similar spots as XML::Simple does, but in a
bigger bus and with fewer wild animals.
That’s not a bad thing. You get more control of the data transformation processes
and you get some extra functionality.
DATA DECLARATION
Lab::Data::XMLtree uses a data declaration, that describes, what the perl data structure looks like, and how this data structure is converted to XML.
CONSTRUCTORS
new($declaration,[$data]) Create a new Lab::Data::XMLtree. $data must be hashref
and should match the declaration. Returns Lab::XMLtree object.
The first two elements define the folding behaviour.
SCALAR|PSCALAR
Element occurs zero or one time. No folding necessary.
Examples:
$data - >{ dataset_title }= ’ c o n t e n t ’ ;
ARRAY|PARRAY
Element occurs zero or more times. Folding will be done using an array reference.
If $id is given, this XML element will be used as an id.
Example:
$data - >{ column } - >[4] - >{ label }= ’ t e s t l a b e l ’ ;
HASH|PHASH
Element occurs zero or more times. Folding will be done using a hash reference.
If $key is given, this XML element will be used as a key.
Example:
$data - >{ axis } - >{ gate voltage } - >{ unit }= "mV" ;
read_xml($declaration,$filename) Opens a XML file $filename. Returns Lab::Data::XMLtree
object.
60
1.9 High-level tool classes
read_yaml($declaration,$filename)
object.
Opens a YAML file $filename. Returns Lab::Data::XMLtree
METHODS
merge_tree($tree) Merge another Lab::Data::XMLtree into this one. Other tree
must not necessarily be blessed.
save_xml($filename)
Saves the tree as XML to $filename.
save_yaml($filename) Saves the tree as YAML to $filename. PSCALAR etc. don’t
work yet.
to_string() Returns a stringified version of the object. (Using Data::Dumper.)
autoload
Get/set anything you want. Accounts the data declaration.
PRIVATE FUNCTIONS
_load_xml($declaration,$filename)
_merge_node_lists($declaration,$destination_perlnode_list,$source_perlnode_list)
_parse_domnode_list($domnode_list,$defnode_list)
_write_node_list($generator,$defnode_list,$perlnode_list)
_getset_node_list_from_string($perlnode_list,$defnode_list,$nodes_string)
_get_defnode_type($defnode)
_magic_keys($defnode_list,$perlnode_list,$node_name,[@types])
_magic_get_perlnode($defnode_list,$perlnode_list,$node_name,$key,[@types])
_magic_set_perlnode($defnode_list,$perlnode_list,$node_name,$key,$value,[@types])
61
1 The Lab::Measurement package
62
1.9 High-level tool classes
1.9.5 Lab::Data::Plotter
Plot data with Gnuplot
SYNOPSIS
use Lab :: Data :: Plotter ;
my $plotter = new Lab :: Data :: Plotter ( $metafile ) ;
my % plots = $plotter - > available_plots () ;
my @names = keys % plots ;
$plotter - > plot ( $names [0]) ;
DESCRIPTION
This module can plot data with GnuPlot. It plots data from .DATA files and takes into
account the data information in the corresponding .META file.
The module also offers the possibility to plot data live, while it is being aquired.
CONSTRUCTOR
new
$plotter = new Lab :: Data :: Plotter ( $meta ,\% options ) ;
Creates a Plotter object. $meta is either an object of type Lab::Data::Meta or a
filename that points to a .META file.
Available options are
dump
eps
jpg
fulllabels
last_live
METHODS
available_plots
my % plots = $plotter - > available_plots () ;
plot
$plotter - > plot ( $plot ) ;
63
1 The Lab::Measurement package
start_live_plot
$plotter - > start_live_plot ( $plot ) ;
update_live_plot
$plotter - > update_live_plot () ;
stop_live_plot
$plotter - > stop_live_plot () ;
64
1.10 XPRESS
1.10 XPRESS
1.10.1 Examples
XPRESS for DUMMIES
Abstract
This is a simple , but fully functional Lab :: Measurment script ,
which makes use of the XPRESS add - on .
Its purpose as a measurement script is to record a single IV curve . However it is also a step - by - step tutorial ( for
beginners ) in writing a XPRESS - style Lab :: Measurement script
.
.
Introduction XPRESS is an add-on to Lab::Measurement, that serves several purposes: make writing scripts easy and structured, improve the script readability, save
keystrokes and implement a whole bunch of features, that probably would make your
scripts really messy if you would have to do it by your own. In order to fulfill those
goals, we chose a very modular approach, that enables you to interchange elements
within a script, and by that creating a whole new measurement without writing everything from scratch.
There is a simple recipe for a XPRESS style measurment script:
Ingredients :
-
Measurement instruments
Sweep Objects
A Datafile
Measurement instructions
Throw everything together and start the script .
It’s really that easy! In the following we would like to show you how to obtain the
ingredients and how to put everything in place, using the example of a simple IV-curve
measurement.
.
Step by step tutorial - How to write an IV-curve measurement
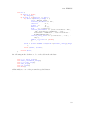
0. Import Lab::Measurement First thing to do in a script: write the following line
use Lab :: Measurement ;
This is how you import the Lab::Measurement library. For basic usage, that’s typically everything you need. So you’re now ready to start...
65
1 The Lab::Measurement package
1. Measurement instruments For the measurment we need a voltage source and a
multimeter to measure the current through our device. Physically the equipment is
already next to the computer and connected via National Instruments GPIB interface.
But how do we get it into the script? Here is, how it’s done for the voltage source (We
chose a Yokogawa7651):
my $voltage_source = Instrument ( ’ Yokogawa7651 ’ ,
{
connection_type = > ’ VISA_GPIB ’ ,
gpib_address = > 5 ,
gate_protect = > 0
}) ;
The function Instrument() returns the Instrument as a Lab::Measurement object,
which we assign to the variable $voltage_source. As first parameter, we have to pass
the name of the instrument. The second parameter, the part wrapped in {}, is the
configuration hash. This hash should always contain at least the connection_type (here
VISA_GPIB) and depending on the connection a corresponding address. Here we use,
furthermore, the parameter gate_protect. Gate protection is a really great feature,
which comes with Lab::Mesurement, that can help you protecting your samples. But
since this is no gate, we don’t want to use it now. We just turn it off by setting the
parameter to 0. The next example will introduce a gate, and explain the feature in
more detail. However, the hash can contain more than that. The available options and
parameters can be found in the particular instrument driver documentations. Let’s try
it on the example of our multimeter:
my $multimeter = Instrument ( ’ A g i l e n t 3 4 4 1 0 A ’ ,
{
connection_type = > ’ VISA_GPIB ’ ,
gpib_address = > 3 ,
nplc = > 10
#
i n t e g r a t i o n t i m e i n number o f p o w e r l i n e c y l c e s
[10∗(1/50) ]
}) ;
In addition to the connection parameters, we specified the integration time of the
multimeter, which will be set in the device automatically with the initialization, according to the given value. Those are enough instruments for this simple experiment.
Let’s get the next ingrediant.
2. Sweep Objects Sweeps are executable objects, which define the basic character
of the experiment. Which variable is beeing changed during the experiment, and at
which range? How fast is it changed? How often will the experiment be repeated? To
create a Sweep Object works very similar to initializing an instrument, but this time
using the function Sweep():
66
1.10 XPRESS
my $voltage_sweep = Sweep ( ’ V o l t a g e ’ ,
{
instrument = > $voltage_source ,
points = > [ -5e -3 , 5e -3] ,
# [ s t a r t i n g point ,
target ] in Volts
rate = > [0.1 , 0.5 e -3] ,
# [ r a t e to approach
s t a r t , s w e e p i n g r a t e f o r measurement ] i n V o l t s / s
interval = > 1
# measurement
i n t er v a l in s
}) ;
Again we have to specify the type of sweep (’Voltage’ here) and a configuration hash.
In the config hash we have to pass the Yokogawa as the conducting instrument of the
sweep to the parameter instrument. The points parameter defines the starting point
and the target of the Sweep in an array. In the rate array, the first value specifies the
rate at which the starting point is approached, while the second value defines the rate
at which the target will be approached. Here points and rate are of length 2, but one
could provide many more, in order to get a complex sweep sequence with changing
sweep rates or reversing sweep directions. This is demonstrated in one of the other
XPRESS example files. Besides that, there are many other parameters and options
available to characterise the sweep, which are documented under the particular types
of Sweep.
3. The DataFile In order to log our measurements, we need a DataFile object. It
can be obtained using the function DataFile():
my $DataFile = DataFile ( ’ I V c u r v e _ s a m p l e 1 . d a t ’ ) ;
where we have to pass the desired filename as first argument. Furthermore, columns
have to be defined. For the purpose of the IV-curve, the following 3 are enough.
$DataFile - > add_column ( ’ V o l t a g e ’ ) ;
$DataFile - > add_column ( ’ C u r r e n t ’ ) ;
$DataFile - > add_column ( ’ R e s i s t a n c e ’ ) ;
The data will later be logged in the DataFile, corresponding to the order you added
the columns. If you wish you can also add a plot to the DataFile, which will refresh
live, each time a new data point is logged. In it’s simplest form this can look like this:
$DataFile - > add_plot (
{
x - axis = > ’ V o l t a g e ’ ,
y - axis = > ’ C u r r e n t ’
}) ;
There are more parameters, that modify the look and type of the plot. Details can
be found in the documentation of Lab::XPRESS::Data::XPRESS_DataFile.
67
1 The Lab::Measurement package
4. The measurement instructions As the last ingredient, we have to define how
the data values per single measurement are generated. This set of instruction has to
be wrapped into a subroutine, which will be executed each second while the sweep is
sctive. First, let’s have a look on the entire block, before discussing it in detail.
my $my_measurement = sub {
my $sweep = shift ;
my $voltage = $voltage_source - > get_value () ;
my $current = $multimeter - > get_value () *1 e -7;
my $resistance = ( $current != 0) ? $voltage / $current : ’
? ’;
$sweep - > LOG ({
Voltage = > $voltage ,
Current = > $current ,
Resistance = > $resistance
}) ;
};
Ok now have a closer look:
• my $my_measurement = sub { ... -- Here we indicate by the word ’sub’, that
a new subroutine is created, which instructions, are enclosed by {}. At the same
time, the subroutine is assigned to the variable $my_measurement. This allows
us to work with it later on.
• my $sweep = shift; -- This line delivers us the current sweep object, which is
important for propper logging of the data.
• my $voltage = $voltage_source->get_value(); -- By using the function get_value()
of the voltage_source we retrieve the currently applied voltage.
• my $current = $multimeter->get_value()*1e-7; -- Same as before, however
since we are using a current to voltage converter, we have to multiply the measured value with an amplification factor.
• my $resistance = ($current != 0) ? $voltage/$current : ’?’; -- This
looks complicated, well but isn’t. You have to read it like: If $current is not zero
(?) then $resistance = $voltage / $current. Else (:) $resistance = ’?’. This
prevents from dividing by 0, which is not allowed. It might be unlikely, that
$current is exactly 0, but we don’t want to break our script in the middle of a
measurement.
• $sweep->LOG({ Voltage => $voltage, Current => $current, Resistance
=> $resistance }); -- To store the generated values use $sweep->LOG().
With the hash you put into the function, you connect the freshly measured values
with the columns you defined before in your DataFile.
• }; -- close block and terminate with semicolon
68
1.10 XPRESS
5. Putting everything in place Now we have all ingredients together. But an onion
and a potatoe lying side-by-side still make no dish. So, we have to put everything
in place. First, the DataFile has to know whats to do to generate a single line of
data. That’s why, we have to connect our created measurement subroutine with the
DataFile:
$DataFile - > add_measurement ( $my_measurement ) ;
But also, the Sweep has to know the DataFile:
$voltage_sweep - > add_DataFile ( $DataFile ) ;
The internal process is the following: Every time a measurement should be performed
(in our example every second, defined by the interval-parameter of the sweep), the
sweep will call all of it’s DataFiles (it can have several - i.e. if you have two or more
samples -) and command them to log a new line of data. Therefore the DataFile will
have to create the data first, using the instructions saved in $my_measurement.
Last but not least, the sweep has to be started:
$voltage_sweep - > start () ;
Otherwise the script won’t do anything. And that’s it!
69
1 The Lab::Measurement package
70
1.10 XPRESS
Example 2
Nested Sweeps
Abstract
This is a simple , but fully functional Lab :: Measurment script ,
which makes use of the XPRESS add - on .
Its purpose as a measurement script is to record a set of IV curves at a series of gate voltages .
However it is also a tutorial , that introduces the XPRESS nested
Sweeps feature .
Beginners should read Example1 first .
.
Introduction Example 1 presented a step by step tutorial in writing simple Lab::Measurement/XPRESS
script. In this example we show, how to extend this script, in order to get a set of
IV-curves at a series of gate voltages. XPRESS offers a nice feature to implement those
extensions in a very simple and mostly already familiar way. In the following, we will
focus the new parts of our script and discuss it’s meaning.
.
The code
Instrument initialization
#−−−−−−−− 0 . Import Lab : : Measurement −−−−−−−
use Lab :: Measurement ;
#−−−−−−−− 1 .
I n i t i a l i z e I n s t r u m e n t s −−−−−−−−
my $bias = Instrument ( ’ Yokogawa7651 ’ ,
{
connection_type = > ’ VISA_GPIB ’ ,
gpib_address = > 3 ,
gate_protect = > 0
}) ;
my $multimeter = Instrument ( ’ A g i l e n t 3 4 4 1 0 A ’ ,
{
connection_type = > ’ VISA_GPIB ’ ,
gpib_address = > 17 ,
nplc = > 10
#
i n t e g r a t i o n t i m e i n number o f p o w e r l i n e c y l c e s
[10∗(1/50) ]
}) ;
71
1 The Lab::Measurement package
my $gate = Instrument ( ’ Yokogawa7651 ’ ,
{
connection_type = > ’ VISA_GPIB ’ ,
gpib_address = > 6 ,
gate_protect = > 1 ,
gp_min_units = > -10 ,
gp_max_units = > 15 ,
g p_ m ax _u n it s _p er _ se c on d = > 10 e -3
}) ;
In this first part of this script, we are doing more or less the same as in Example 1.
Import the Lab::Measurement library, then initialize the instruments we need. Now
what’s new is, that we initialize here a third instrument, the gate, which is again a
Yokogawa7651. No big deal, so far. New is, that we are using the gate protection
mode this time. It’s turned on by <gate_protect = 1>>. With <gp_min_units
= -10>> and <gp_max_units = 15>> we define the lower and upper limits, which
we do not want to be exceeded by the source instrument. So if the Yokogawa is in
voltage sourcing mode (which we expect to be for now), the output Voltage will be
limited to values between -10V and 15V. If it would be in current mode, it would not
be limited at all, because 15A might be a little bit to much for this device :) With
<gp_max_units_per_second = 10e-3>> we define the highest possible sweep rate, so
it will sweep no faster than 10mV per second.
Sweep Objects
#−−−−−−−− 2 . D e f i n e t h e Sweeps −−−−−−−−−−−−−
my $gate_sweep = Sweep ( ’ V o l t a g e ’ ,
{
mode = > ’ s t e p ’ ,
instrument = > $gate ,
points = > [ -5 , 5] ,
# [ s t a r t i n g point , t a r g e t ] in
Volts
stepwidth = > [0.1] ,
rate = > [5 e -3] ,
# [ r a t e to approach
s t a r t , s w e e p i n g r a t e f o r measurement ] i n V o l t s / s
}) ;
my $bias_sweep = Sweep ( ’ V o l t a g e ’ ,
{
instrument = > $bias ,
points = > [ -5e -3 , 5e -3] ,
# [ s t a r t i n g point ,
target ] in Volts
rate = > [0.1 , 0.5 e -3] ,
# [ r a t e to approach
s t a r t , s w e e p i n g r a t e f o r measurement ] i n V o l t s / s
interval = > 1 ,
# measurement
i n t e r v a l in s
delay_before_loop = > 10
begins in s
}) ;
72
# d e l a y b e f o r e Sweep
1.10 XPRESS
In this experiment, we want to measure the current through our sample, depending
on two parameters: the source-drain voltage and the gate voltage. Of course, that
means we need instead of only one sweep, now two sweeps. And as you see, we created
a second sweep, which we called $gate_sweep. Unlike $source_sweep, this one is in
mode ’step’. This means, that instead of sweeping and measuring simultaniously, the
instrument will sweep, stop, make a new data value, sweep to the next step ... and
so on. And in our case it will be: go to the next step, make an IV-curve and so on.
Therefore we have to define the parameter stepwidth, while the rates parameter defines
the rate, which is used to approach the steps.
The DataFile
#−−−−−−−− 3 . C r e a t e a D a t a F i l e −−−−−−−−−−−−−
my $DataFile = DataFile ( ’ G a t e _ I V _ s a m p l e 1 . d a t ’ ) ;
$DataFile - > add_column ( ’ G a t e V o l t a g e ’ ) ;
$DataFile - > add_column ( ’ B i a s V o l t a g e ’ ) ;
$DataFile - > add_column ( ’ C u r r e n t ’ ) ;
$DataFile - > add_column ( ’ R e s i s t a n c e ’ ) ;
$DataFile - > add_plot ({
’ type ’
= > ’ pm3d ’
’ x−a x i s ’ = > ’ G a t e V o l t a g e ’ ,
’ y−a x i s ’ = > ’ B i a s V o l t a g e ’ ,
’ cb−a x i s ’ = > ’ C u r r e n t ’
}) ;
Almost nothing new here, besides: plot-type is now pm3d. This creates a color
coded 2D plot. Therefore we have to specify a third axis, the cb-axis, which defines
the values, which will be presented color-coded in the plot later on.
4. The measurement instructions
#-------- 4. Measurement Instructions -------
my $my_measurement = sub {
my $sweep = shift ;
my
my
my
my
$gate_voltage = $gate - > get_value () ;
$bias_voltage = $bias - > get_value () ;
$current = $multimeter - > get_value () *1 e -7;
$resistance = ( $current != 0) ? $voltage / $current : ’
? ’;
$sweep - > LOG ({
GateVoltage = > $gate_voltage ,
Voltage = > $bias_voltage ,
Current = > $current ,
Resistance = > $resistance
}) ;
};
73
1 The Lab::Measurement package
Again, almost nothing new here. But its getting really interesting in the next paragraph, so stay with us!
5. Putting everything in place Ok now we are finally, at the heart of this lesson!
That’s where most of the logic takes place, so we will do it step by step.
#−−−−−−−− 5 . Put e v e r y t h i n g t o g e t h e r −−−−−−−
$DataFile - > add_measurement ( $my_measurement ) ;
$voltage_sweep - > add_DataFile ( $DataFile ) ;
We still remember the first two lines. But why is the DataFile only connected to
the voltage sweep, and not to the gate sweep? Thats because the voltage sweep is the
one, during which the actual measurements take place. But to define which sweep acts
first, and which one is controlled by the other one, we introduce a new object. The
Frame:
my $frame = Frame () ;
You can assign masters and slaves in a frame, just like this:
$frame - > add_master ( $gate_sweep ) ;
$frame - > add_slave ( $bias_sweep ) ;
The master, has to be a sweep-object, which is in mode ’step’ or ’list’, here $gate_sweep.
Each frame can have only one master. For the slave, you have more freedom. You
can put as many slaves as you want into the frame, just by calling add_slave multiple
times. It’s possible to assign sweep objects of any type as a slave. It’s even possible
to put your own individual, handwritten code, into the frame as a slave, which will be
called each time the master makes a new step. We will show you how to do this in one
of the next examples. And you can use another frame as a slave. This way, one can
reach an unlimited degree of nesting sweeps, and create experiments, that last years!
Last but not least, as always, you have to start the whole thing. But this time we
start the frame instead of one particular sweep:
$frame - > start () ;
Otherwise the script won’t do anything. And that’s it!
74
1.10 XPRESS
XPRESS for DUMMIES
Abstract
This is a simple , but fully functional Lab :: Measurment script ,
which makes use of the XPRESS add - on .
The script will perform a magnetic field sweep and backsweep ,
while measuring the DC resistance of two samples .
The data will be written in two seperate files , one for each
sample .
.
Introduction In this example, the main novelty is the usage of two datafiles, for
example to separate the measurements coming from two different samples. Those two
files are populated with data, during the same sweep. Besides that, we introduce the
magnet type sweep, and a few features, related with the configuration of sweeps.
.
The code
Instrument initialization
#−−−−−−−− 0 . Import Lab : : Measurement −−−−−−−
use Lab :: Measurement ;
#−−−−−−−− 1 .
I n i t i a l i z e I n s t r u m e n t s −−−−−−−−
my $voltage_source1 = Instrument ( ’ Yokogawa7651 ’ ,
{
connection_type = > ’ VISA_GPIB ’ ,
gpib_address = > 3 ,
gate_protect = > 0
}) ;
my $multimeter1 = Instrument ( ’ A g i l e n t 3 4 4 1 0 A ’ ,
{
connection_type = > ’ VISA_GPIB ’ ,
gpib_address = > 17 ,
nplc = > 10
#
i n t e g r a t i o n t i m e i n number o f p o w e r l i n e c y l c e s
[10∗(1/50) ]
}) ;
my $voltage_source2 = Instrument ( ’ Yokogawa7651 ’ ,
{
connection_type = > ’ VISA_GPIB ’ ,
gpib_address = > 5 ,
gate_protect = > 0
}) ;
75
1 The Lab::Measurement package
my $multimeter2 = Instrument ( ’ A g i l e n t 3 4 4 1 0 A ’ ,
{
connection_type = > ’ VISA_GPIB ’ ,
gpib_address = > 11 ,
nplc = > 10
#
i n t e g r a t i o n t i m e i n number o f p o w e r l i n e c y l c e s
[10∗(1/50) ]
}) ;
my $magnet = Instrument ( ’ I P S W e i s s 1 ’ ,
{
connection_type = > ’ I s o B u s ’ ,
isobus_address = > 2 ,
base_connection = > Connection ( ’ VISA_GPIB ’ , { gpib_address
= > 24})
}) ;
Certainly, it does not come as a surprise to you, that for a magnetic field sweep, we
need a instrument, which can control the magnet. Here we use IPSWeiss1, which is
an individual child-class of Lab::Instrument::IPS (the Oxford IPS) we use in Regensburg. Since it is connected via IsoBus in this example, the initialization has to be
slightly different. Under the term IsoBus we understand, that multiple instruments
communicate via the same ’base_connection’, but are still individualy accessible using
the isobus_address. In order to provide this base_connection, we request directly a
connection of type ’VISA_GPIB’ with adsress 24.
Sweep Objects
#−−−−−−−− 3 . D e f i n e t h e Sweeps −−−−−−−−−−−−−
my $magnet_sweep = Sweep ( ’ Magnet ’ ,
{
instrument = > $magnet ,
points = > [ -10 , -1 , 1 , 10] ,
intermediate steps , target ]
rate = > [1 , 0.7 , 0.2 , 0.7] ,
s t a r t , . . . next s e c t i o n , . . .
min
interval = > 1 ,
i n t e r v a l in s
backsweep = > 1
}) ;
# [ s t a r t i n g point ,
in Tesla
# [ r a t e to approach
,
. . . target ] in Tesla /
# measurement
Now we use (for the first time), the magnet sweep. There are almost no differences
to a voltage sweep, but for this script, we used some other features. Most striking is,
that ’points’ contains more than 2 values. But how can it have more than a start and
a target value? The answer is, something changes at those points in between. Here it
is the rate, why also the ’rate’ array is extended. Now what will happen here is: The
field goes from its initial value to -10T at 1T/min, and beginns to sweep to 10T at
0.7T/min. It will change the rate at -1T to 0.2T/min, and at 1T back to 0.7T/min.
you can put as many steps into the points array as you want, and even change the
76
1.10 XPRESS
direction within it. If you do not provide enough rates, it will use the last one for the
rest of the sequence. Since we define the parameter ’backsweep’ to be 1, the sweep will
automatically process the sequence in reverted direction, after finishing the original
sweep.
The DataFileS
#−−−−−−−− 3 . C r e a t e a D a t a F i l e −−−−−−−−−−−−−
my $DataFile1 = DataFile ( ’ M a g n F i e l d S w e e p _ s a m p l e 1 . d a t ’ ) ;
$DataFile1 - > add_column ( ’ F i e l d ’ ) ;
$DataFile1 - > add_column ( ’ V o l t a g e ’ ) ;
$DataFile1 - > add_column ( ’ C u r r e n t ’ ) ;
$DataFile1 - > add_column ( ’ R e s i s t a n c e ’ ) ;
$DataFile1 - > add_plot ({
’ x−a x i s ’ = > ’ F i e l d ’ ,
’ y−a x i s ’ = > ’ R e s i s t a n c e ’
}) ;
my $DataFile2 = DataFile ( ’ M a g n F i e l d S w e e p _ s a m p l e 2 . d a t ’ ) ;
$DataFile2 - > add_column ( ’ F i e l d ’ ) ;
$DataFile2 - > add_column ( ’ V o l t a g e ’ ) ;
$DataFile2 - > add_column ( ’ C u r r e n t ’ ) ;
$DataFile2 - > add_column ( ’ R e s i s t a n c e ’ ) ;
$DataFile2 - > add_plot ({
’ x−a x i s ’ = > ’ F i e l d ’ ,
’ y−a x i s ’ = > ’ R e s i s t a n c e ’
}) ;
Just defining two DataFiles, instead of only one. Really nothing interesting here.
4. The measurement instructions However, now since we have two DataFiles, and
the first two examples still in mind, the question arises: How can the two DataFiles
be addressed individually? The answer is in the following code:
my $my_measurement1 = sub {
my $sweep = shift ;
my $voltage = $voltage_source1 - > get_value () ;
my $current = $multimeter1 - > get_value () *1 e -7;
my $resistance = ( $current != 0) ? $voltage / $current : ’
? ’;
77
1 The Lab::Measurement package
$sweep - > LOG ({
Field = > $magnet - > get_value ()
} , 0) ;
#<−−−− 0 i s t h e g e n e r a l d a t a s p a c e
#
v
p
h
w
be
a
in
b
D
$sweep - > LOG ({
Voltage = >
Current = >
Resistance
} , 1) ;
#<−−−−
$voltage ,
$current ,
= > $resistance
T h i s w i l l be d i r e c t e d t o D a t a F i l e 1
};
my $my_measurement2 = sub {
my $sweep = shift ;
my $voltage = $voltage_source2 - > get_value () ;
my $current = $multimeter2 - > get_value () *1 e -7;
my $resistance = ( $current != 0) ? $voltage / $current : ’
? ’;
$sweep - > LOG ({
Voltage = >
Current = >
Resistance
} , 2) ;
#<−−−−
$voltage ,
$current ,
= > $resistance
T h i s w i l l be d i r e c t e d t o D a t a F i l e 2
};
Of course, both DataFiles should have measurement instructions, since both have to
know how to collect the data for a single measurement line. So we got $my_measurement1
78
1.10 XPRESS
and $my_measurement1. By adding the integers 1 or 2 at the end of the LOG instruction, we can specify to which file these data-values should be directed. There is
also the option to put the data via LOG into space 0. This data will be available
in both files. In this example, we retrieve and log the magnetic field only once in
$my_measurement1, since it should be more or less the same for both samples.
5. Putting everything in place It’s not hard to gues how to proceed. Of course we
have to connect DataFiles with the corresponding measurement instructions:
$DataFile1 - > add_measurement ( $my_measurement1 ) ;
$DataFile2 - > add_measurement ( $my_measurement2 ) ;
And then add the two DataFiles to the sweep, since both should be called each time
$magnet_sweep decides it’s time for a new measurement point.
$magnet_sweep - > add_DataFile ( $DataFile1 ) ;
$magnet_sweep - > add_DataFile ( $DataFile2 ) ;
Last but not least, start the sweep:
$magnet_sweep - > start () ;
Otherwise the script won’t do anything. And that’s it!
79
1 The Lab::Measurement package
80
1.10 XPRESS
XPRESS for DUMMIES
Abstract
This is a slightly more advanced Lab :: Measurment script , which makes
use of the XPRESS add - on .
The script will perform a nested sweep : For each value of RF power ,
AC conductance is measured for different values of gate voltage
and RF frequency .
The data will be written in several 2 d data files , labeled by the
the RF power value .
.
Introduction In this example, the main novelty is the usage of two nested frames to
record a 3-dimensional dataset.
.
The code
Instrument initialization
#−−−−−−−− 1 .
I n i t i a l i z e I n s t r u m e n t s −−−−−−−−
my $sens = -1e -9;
my $Biasvoltage = -0.01;
my $voltage_bias = Instrument ( ’ YokogawaGS200 ’ ,
{
connection_type = > ’ L i n u x G P I B ’ ,
gpib_address = > 2 ,
gate_protect = > 0 ,
}) ;
my $vo ltage_backgate = Instrument ( ’ YokogawaGS200 ’ ,
{
connection_type = > ’ L i n u x G P I B ’ ,
gpib_address = > 1 ,
gate_protect = > 0 ,
}) ;
my $srs = Instrument ( ’ SR830 ’ ,
{
connection_type = > ’ L i n u x G P I B ’ ,
gpib_address = > 14
}) ;
my $multimeter = Instrument ( ’ HP3458A ’ ,
{
connection_type = > ’ L i n u x G P I B ’ ,
gpib_address = > 22 ,
nplc = > 5
}) ;
81
1 The Lab::Measurement package
our $FRQSRC = Instrument ( ’ HP83732A ’ ,
{
connection_type = > ’ L i n u x G P I B ’ ,
gpib_address = > 28 ,
}) ;
$voltage_bias - > set_voltage ( $Biasvoltage ) ;
$FRQSRC - > enable_external_am () ;
$FRQSRC - > power_on () ;
We initialize two Yokos for bias and gate voltage, the SR830 for the AC Lock-in
measurement, an Agilent 3458A multimeter (named HP) and a frequency generator.
The bias voltage is set immediately after initialization and the frequency generator’s
output is switched on.
Sweep Objects
#−−−−−−−− 3 . D e f i n e t h e Sweeps −−−−−−−−−−−−−
my $RF_power_sweep = Sweep ( ’ Power ’ ,
{
mode = > ’ s t e p ’ ,
instrument = > $FRQSRC ,
points = > [ -15 ,5] ,
stepwidth = > 5 ,
rate = > [5] ,
delay_before_loop = > 1
}) ;
my $gate_sweep = Sweep ( ’ V o l t a g e ’ ,
{
mode = > ’ s t e p ’ ,
instrument = > $voltage_backgate ,
points = > [5.73 ,5.81] ,
# [ s t a r t i n g point , t a r g e t ]
stepwidth = > [0.0004] ,
rate = > [0.05 , 0.05] ,
# [ r a t e to approach s t a r t , sweeping
r a t e f o r measurement ] i n V o l t s / s
jump = > 1 ,
delay_before_loop = > 1
# d e l a y b e f o r e Sweep b e g i n s i n s
}) ;
my $RF_frequency_sweep = Sweep ( ’ F r e q u e n c y ’ ,
{
mode = > ’ s t e p ’ ,
instrument = > $FRQSRC ,
points = > [114.5 e6 , 116.1 e6 ] ,
# [ s t a r t i n g point , t a r g e t ]
stepwidth = > [1.5 e3 ] ,
rate = > [15000 , 15000] ,
# [ r a t e to approach s t a r t , sweeping
r a t e f o r measurement ] i n Hz/ s
delay_before_loop = > 3
}) ;
82
1.10 XPRESS
We want to record conductance on an gate/frequency array for different power values
so we have to define three sweep objects: RF power, gate voltage and RF frequency.
It might be neccessary to check the duration of the 2d-sweep (gate vs frequency in this
case) to carefully choose the amount of steps in RF power. For sweeping RF power,
the according sweep object provides only the step mode at the moment. Of course,
one can use the "delay_before_loop" flag as well as other default sweep flags (see the
documentation of the Sweep base class for details). The gate and frequency sweeps do
not contain any novelty. Make sure you specify the frequency in Herz for this sweep
object.
The DataFile
#−−−−−−−− 3 . C r e a t e a D a t a F i l e −−−−−−−−−−−−−
my $DataFile = DataFile ( ’ AC_Power_Gate_Frq . d a t ’ ) ;
$DataFile - > add_column ( ’ G a t e ’ ) ;
$DataFile - > add_column ( ’ RF_Frequency ’ ) ;
$DataFile - > add_column ( ’ C u r r e n t ’ ) ;
$DataFile - > add_column ( ’X ’ ) ;
$DataFile - > add_column ( ’Y ’ ) ;
$DataFile - > add_column ( ’R ’ ) ;
$DataFile - > add_column ( ’ RF_Power ’ ) ;
$DataFile - > add_plot ({
’ t y p e ’ = > ’ pm3d ’ ,
’ x−a x i s ’ = > ’ G a t e ’ ,
’ y−a x i s ’ = > ’ RF_Frequency ’ ,
’ cb−a x i s ’ = > ’ C u r r e n t ’ ,
’ r e f r e s h ’ => ’ b l o c k ’
}
);
$DataFile - > add_plot ({
’ t y p e ’ = > ’ pm3d ’ ,
’ x−a x i s ’ = > ’ G a t e ’ ,
’ y−a x i s ’ = > ’ RF_Frequency ’ ,
’ cb−a x i s ’ = > ’R ’ ,
’ r e f r e s h ’ => ’ b l o c k ’
}
);
We provide all variables we are interested in to the datafile object. Note that we do
NOT have to define a data file for each value of RF power: This is done automatically.
The XPRESS module will add a string to the filename of the form _RF_Power=X.
We also add live plots for DC current and AC conductivity.
4. The measurement instructions
#−−−−−−−− 4 . Measurement I n s t r u c t i o n s −−−−−−−
83
1 The Lab::Measurement package
my $my_measurement = sub {
my $sweep = shift ;
my
my
my
my
my
$gate = $voltage_backgate - > get_value ({ read_mode = > ’ c a c h e ’ }) ;
$RF_Frequency = $FRQSRC - > get_frq () ;
$RF_Power = $FRQSRC - > get_power () ;
$current = $multimeter - > get_value () * $sens ;
( $X , $Y ) = $srs - > get_xy () ;
$sweep - > LOG ({
Gate = > $gate ,
RF_Frequency = > $RF_Frequency ,
Current = > $current ,
X = > $X * $sens ,
Y = > $Y * $sens ,
R = > sqrt ( $X **2+ $Y **2) * $sens ,
RF_Power = > $RF_Power
}) ;
};
The measurement instructions have a standard structure. We successively record
all data for a single point in the 3-dimensional parameter space. Note that a little
time is saved collecting the gate voltage from the software cache of the instrument via
{read_mode => ’cache’}. The data is then sent to the LOG routine of the sweep
object.
5. Putting everything in place
DataFile object
First of all, we have to add the measurement to the
$DataFile - > add_measurement ( $my_measurement ) ;
and associate the data file with the "fast" sweep object, i.e., the sweep object that
governs the most volatile parameter. In our case this is the frequency sweep:
$RF_frequency_sweep - > add_DataFile ( $DataFile ) ;
Finally, there comes the magic of XPRESS. We just define the inner frame object
as we would do for a simple 2d scan:
my $gateframe = Frame () ;
$gateframe - > add_master ( $gate_sweep ) ;
$gateframe - > add_slave ( $RF_frequency_sweep ) ;
Looks familiar, does it. The outer frame
my $powerframe = Frame () ;
$powerframe - > add_master ( $RF_power_sweep ) ;
$powerframe - > add_slave ( $gateframe ) ;
84
1.10 XPRESS
contains the power sweep as master and the other (gate vs. frequency) frame is
provided as slave. That’s it. We do not have to care about the details or count
brackets of for-loops. Last but not least, start the sweep
$powerframe - > start () ;
$FRQSRC - > disable_external_am () ;
$FRQSRC - > power_off () ;
and switch the frequency generator of once we are done to not heat the sample
unneccessarily. Enjoy!
85
1 The Lab::Measurement package
86
1.10 XPRESS
1.10.2 General classes
Lab :: XPRESS :: Sweep :: Sweep - base class for Sweeps
1.10.3 .
SYNOPSIS
Lab :: XPRESS :: Sweep :: Sweep is meant to be used as a base class
for inheriting Sweeps .
It should not be used directly .
.
DESCRIPTION
The Lab::XPRESS::Sweep::Sweep class implements major parts of the Lab::XPRESS
framework, a modular way for easy scripting measurements in perl and Lab::Measurement.
Direct usage of this class would not result in any action. However it constitutes the
fundament for more spezialized subclass Sweeps e.g. Lab::XPRESS::Sweep::Magnet. .
SWEEP PARAMETERS
The configuration parameters are described in the particular subclasses (e.g. Lab::XPRESS::Sweep::Magnet).
.
METHODS
add_DataFile [Lab::XPRESS::Data::XPRESS_DataFile object] use this method
to assign a DataFile object with a sweep if it operates as a slave or as a individual sweep.
The sweep will call the user-defined measurment routine assigned with the DataFile.
Sweeps accept multiple DataFile objects when add_DataFile is used repeatedly.
.
start
.
use this method to execute the sweep.
get_value returns by default the current value of the points array or the current step.
The method is intended to be overloaded by Sweep-Subclasses, in order to return the
current value of the sweeping instrument.
.
87
1 The Lab::Measurement package
LOG [hash, int (default = 0)] use this method to store the data collected by userdefined measurment routine in the DataFile object.
The hash has to look like this: $column_name => $value The column_name has
to be one of the previously defined columnames in the DataFile object.
When using multiple DataFile objects within one sweep, you can direct the data
hash one of the DataFiles by the second parameter (int). If this parameter is set to 0
(default) the data hash will be directed to all DataFile objects.
Examples: $sweep->LOG({ ’voltage’ => 10, ’current’ => 1e-6, ’reistance’ => $R
});
OR:
$sweep - > LOG ({ ’ v o l t a g e ’ = > 10}) ;
$sweep - > LOG ({ ’ c u r r e n t ’ = > 1e -6}) ;
$sweep - > LOG ({ ’ r e i s t a n c e ’ = > $R }) ;
for two DataFiles:
# t h i s v a l u e w i l l be l o g g e d i n both D a t a F i l e s
$sweep - > LOG ({ ’ v o l t a g e ’ = > 10} ,0) ;
# t h i s v a l u e s w i l l be l o g g e d i n D a t a F i l e 1
$sweep - > LOG ({
’ c u r r e n t ’ = > 1e -6 ,
’ r e i s t a n c e ’ = > $R1
} ,1) ;
# t h i s v a l u e s w i l l be l o g g e d i n D a t a F i l e 2
$sweep - > LOG ({
’ c u r r e n t ’ = > 10 e -6 ,
’ r e i s t a n c e ’ = > $R2
} ,2) ;
.
last
use this method, in order to stop the current sweep. Example:
# Stop a v o l t a g e Sweep i f d e v i c e c u r r e n t e x e e d s a c r i t i c a l
.
if ( $current > $high_limit ) {
$voltage_sweep - > last () ;
}
.
HOW TO DEVELOP SUBCLASS OF Lab::XPRESS::Sweep::Sweep
preefine the default_config hash values in method ’new’:
88
limit
1.10 XPRESS
sub new {
my $proto = shift ;
my @args = @_ ;
my $class = ref ( $proto ) || $proto ;
my $self - >{ default_config } = {
id = > ’ Magnet_sweep ’ ,
filename_extension = > ’B= ’ ,
interval
=> 1,
points = >
[] ,
duration
= > [] ,
mode
=> ’ c o n t i n u o u s ’ ,
allowed_i nstruments = > [ ’ Lab : : I n s t r u m e n t : : IPS ’ ,
’ Lab : : I n s t r u m e n t : : I P S W e i s s 1 ’ , ’ Lab : :
I n s t r u m e n t : : I P S W e i s s 2 ’ , ’ Lab : : I n s t r u m e n t : :
I P S W e i s s D i l l F r i d g e ’ ],
allowed_sweep_modes = > [ ’ c o n t i n u o u s ’ , ’ l i s t ’ , ’
s t e p ’ ],
number_of_points = > [ undef ]
};
$self = $class - > SUPER :: new ( $self - >{ default_config } , @args
);
bless ( $self , $class ) ;
return $self ;
}
the following methodes have to be overloaded in the subclass:
sub
sub
sub
sub
sub
sub
go_to_sweep_start {}
st ar t_ co nti nu ou s_s we ep {}
go_to_next_step {}
exit_loop {}
get_value {}
exit {}
additionally see one of the present Sweep-Subclasses.
.
89
1 The Lab::Measurement package
90
1.10 XPRESS
Lab :: XPRESS :: Sweep :: Frame -
1.10.4 .
SYNOPSIS
use Lab :: XPRESS :: hub ;
my $hub = new Lab :: XPRESS :: hub () ;
my $frame = $hub - > Frame () ;
$frame - > add_master ( $sweep_0 ) ;
$frame - > add_slave ( $sweep_1 ) ;
$frame - > add_slave ( $sweep_2 ) ;
$frame - > add_slave ( $sweep_3 ) ;
$frame - > start () ;
.
DESCRIPTION
Parent: Lab::XPRESS::Sweep::Sweep
The Lab::XPRESS::Sweep::Frame class implements a module to organize a nested
sweep structure in the Lab::XPRESS::Sweep framework.
The Frame object has no parameters. .
CONSTRUCTOR
my $frame = $hub - > Frame () ;
Instantiates a new Frame object.
.
METHODS
add_master
$frame - > add_master ( $sweep ) ;
use this methode to add a master sweep to the frame object. A Frame accepts only
a single master sweep.
.
91
1 The Lab::Measurement package
add_slave
$frame - > add_slave ( $sweep ) ;
use this methode to add a slave sweep to the frame object. A Frame can have several
slave sweeps.
The order in which the slave sweeps are added to the frame object, defines the
sequence in which the individual slave sweeps will be executed.
$frame - > add_slave ( $sweep_1 ) ;
$frame - > add_slave ( $sweep_2 ) ;
$frame - > add_slave ( $sweep_3 ) ;
The frame object accepts also another frame object as a slave sweep. This way you
can build up a multi level nested sweep structure.
my $inner_frame = $hub - > Frame () ;
my $outer_frame = $hub - > Frame () ;
$inner_frame - > add_master ( $sweep_0 ) ;
$inner_frame - > add_slave ( $sweep_1 ) ;
$inner_frame - > add_slave ( $sweep_2 ) ;
$inner_frame - > add_slave ( $sweep_3 ) ;
$outer_frame - > add_master ( $sweep_10 ) ;
$outer_frame - > add_slave ( $sweep_11 ) ;
$outer_frame - > add_slave ( $inner_frame ) ;
$outer_frame - > add_slave ( $sweep_11 ) ;
$outer_frame - > start () ;
.
start
$frame - > start () ;
use this methode to execute the nested sweeps.
92
1.10 XPRESS
1.10.5 Dedicated Sweep Classes
Lab :: XPRESS :: Sweep :: Magnet - magnetic field sweep
1.10.6 .
SYNOPSIS
use Lab :: XPRESS :: hub ;
my $hub = new Lab :: XPRESS :: hub () ;
my $IPS = $hub - > Instrument ( ’ IPS ’ ,
{
connection_type = > ’ VISA_GPIB ’ ,
gpib_address = > 24
}) ;
my $sweep_magnet = $hub - > Sweep ( ’ Magnet ’ ,
{
instrument = > $IPS ,
points = > [ -10 ,10] ,
rate = > [1.98 ,1] ,
mode = > ’ c o n t i n u o u s ’ ,
interval = > 1 ,
backsweep = > 1
}) ;
.
DESCRIPTION
Parent: Lab::XPRESS::Sweep::Sweep
The Lab::XPRESS::Sweep::Magnet class implements a module for magnetic field
Sweeps in the Lab::XPRESS::Sweep framework.
.
CONSTRUCTOR
my $sweep_magnet = $hub - > Sweep ( ’ Magnet ’ ,
{
instrument = > $IPS ,
points = > [ -10 ,10] ,
rate = > [1.98 ,1] ,
mode = > ’ c o n t i n u o u s ’ ,
interval = > 1 ,
backsweep = > 1
}) ;
Instantiates a new Magnet-sweep.
.
93
1 The Lab::Measurement package
SWEEP PARAMETERS
instrument [Lab::Instrument] (mandatory) Instrument, conducting the sweep. Must
be of type Lab:Instrument. Allowed instruments: Lab::Instrument::IPS, Lab::Instrument::IPSWeiss1,
Lab::Instrument::IPSWeiss2, Lab::Instrument::IPSWeissDillFridge
.
mode [string] (default = ’continuous’ | ’step’ | ’list’) continuous: perform a continuous magnetic field sweep. Measurements will be performed constantly at the timeinterval defined in interval.
step: measurements will be performed at discrete values of the magnetic field between
start and end points defined in parameter points, seperated by the magnetic field values
defined in parameter stepwidth
list: measurements will be performed at a list of magnetic field values defined in
parameter points
.
points [float array] (mandatory) array of magnetic field values (in Tesla) that defines
the characteristic points of the sweep. First value is appraoched before measurement
begins.
Case mode => ’continuous’ : List of at least 2 values, that define start and end
point of the sweep or a sequence of consecutive sweep-sections (e.g. if changing the
sweep-rate for different sections or reversing the sweep direction). points => [-5, 5] #
Start: -5 / Stop: 5
points = > [ -5 , -1 , 1 , 5]
points = > [0 , -5 , 5]
Case mode => ’step’ : Same as in ’continuous’ but magnetic field will be swept in
stop and go mode. I.e. Magnet approaches field values between start and stop at the
interval defined in ’stepwidth’. A measurement is performed, when magnet is idle.
Case mode => ’list’ : Array of magnetic field values, with minimum length 1, that
are approached in sequence to perform a measurment.
.
rate [float array] (mandatory if not defined duration) array of rates, at which the
magnetic field is swept (Tesla / min). Has to be of length 1 or greater (Maximum
length: length of points-array). The first value defines the rate to approach the starting
point. The following values define the rates to approach the magnetic field values
defined by the points-array. If the number of values in the rates-array is less than the
length of the points-array, the last defined rate will be used for the remaining sweep
sections.
94
1.10 XPRESS
points = > [ -5 , -1 , 1 , 5] ,
rates = > [1 , 0.5 , 0.2]
rate
rate
rate
rate
to
to
to
to
approach
approach
approach
approach
-5 T ( the starting point ) : 1 T / min
-1 T : 0.5 T / min
1 T : 0.2 T / min
5 T
: 0.2 T / min ( last defined rate )
.
duration [float array] (mandatory if not defined rate) can be used instead of ’rate’.
Attention: Use only the ’duration’ or the ’rate’ parameter. Using both will cause an
Error!
The first value defines the duration to approach the starting point. The second value
defines the duration to approach the magnetic field value defined by the second value
of the points-array. ... If the number of values in the duration-array is less than the
length of the points-array, last defined duration will be used for the remaining sweep
sections.
.
stepwidth [float array] This parameter is relevant only if mode = ’step’ has been
selected. Stepwidth has to be an array of length ’1’ or greater. The values define
the width for each step within the corresponding sweep sequence. If the length of the
defined sweep sequence devided by the stepwidth is not an integer number, the last
step will be smaller in order to reach the defined points-value.
points = [0 , 0.5 , 3]
stepwidth = [0.2 , 0.5]
== > steps : 0 , 0.2 , 0.4 , 0.5 , 1.0 , 1.5 , 2.0 , 2.5 , 3
.
number_of_points [int array] can be used instead of ’stepwidth’. Attention: Use
only the ’number_of_points’ or the ’stepwidth’ parameter. Using both will cause an
Error! This parameter is relevant only if mode = ’step’ has been selected. Number_of_points has to be an array of length ’1’ or greater. The values defines the
number of steps within the corresponding sweep sequence.
points = [0 , 0.5 , 3]
number_of_points = [5 , 2]
== > steps : 0 , 0.1 , 0.2 , 0.3 , 0.4 , 0.5 , 1.75 , 3
.
95
1 The Lab::Measurement package
interval [float] (default = 1) interval in seconds for taking measurement points.
Only relevant in mode ’continuous’.
.
backsweep [int] (default = 0 | 1 | 2) 0 : no backsweep (default) 1 : a backsweep
will be performed 2 : no backsweep performed automatically, but sweep sequence will
be reverted every second time the sweep is started (relevant eg. if sweep operates as a
slave. This way the sweep sequence is reverted at every second step of the master)
.
id [string] (default = ’Magnet_sweep’)
.
Just an ID.
filename_extention [string] (default = ’B=’)
pended to the filenames if necessary.
.
Defines a postfix, that will be ap-
delay_before_loop [int] (default = 0) defines the time in seconds to wait after the
starting point has been reached.
.
delay_in_loop [int] (default = 0) This parameter is relevant only if mode = ’step’
or ’list’ has been selected. Defines the time in seconds to wait after the value for the
next step has been reached.
.
delay_after_loop [int] (default = 0) Defines the time in seconds to wait after the
sweep has been finished. This delay will be executed before an optional backsweep or
optional repetitions of the sweep.
.
96
1.10 XPRESS
Lab :: XPRESS :: Sweep :: Voltage - voltage sweep
1.10.7 .
SYNOPSIS
use Lab :: XPRESS :: hub ;
my $hub = new Lab :: XPRESS :: hub () ;
my $Yoki = $hub - > Instrument ( ’ Yokogawa7651 ’ ,
{
connection_type = > ’ VISA_GPIB ’ ,
gpib_address = > 2
}) ;
my $sweep_voltage = $hub - > Sweep ( ’ V o l t a g e ’ ,
{
instrument = > $Yoki ,
points = > [ -1 ,1] ,
rate = > [0.1 ,0.001] ,
mode = > ’ c o n t i n u o u s ’ ,
interval = > 1 ,
backsweep = > 1
}) ;
.
DESCRIPTION
Parent: Lab::XPRESS::Sweep::Sweep
The Lab::XPRESS::Sweep::Voltage class implements a module for voltage Sweeps in
the Lab::XPRESS::Sweep framework.
.
CONSTRUCTOR
my $sweep_voltage = $hub - > Sweep ( ’ V o l t a g e ’ ,
{
instrument = > $Yoki ,
points = > [ -1 ,1] ,
rate = > [0.1 ,0.001] ,
mode = > ’ c o n t i n u o u s ’ ,
interval = > 1 ,
backsweep = > 1
}) ;
Instantiates a new voltage-sweep.
.
97
1 The Lab::Measurement package
PARAMETERS
instrument [Lab::Instrument] (mandatory) Instrument, conducting the sweep. Must
be of type Lab:Instrument. Allowed instruments: Lab::Instrument::Yokogawa7651
.
mode [string] (default = ’continuous’ | ’step’ | ’list’) continuous: perform a continuous voltage sweep. Measurements will be performed constantly at the time-interval
defined in interval.
step: measurements will be performed at discrete values of the applied voltage between start and end points defined in parameter points, seperated by voltage steps
defined in parameter stepwidth
list: measurements will be performed at a list voltage values defined in parameter
points
.
points [float array] (mandatory) array of voltage values (in volts) that defines the
characteristic points of the sweep. First value is appraoched before measurement begins.
Case mode => ’continuous’ : List of at least 2 values, that define start and end
point of the sweep or a sequence of consecutive sweep-sections (e.g. if changing the
sweep-rate for different sections or reversing the sweep direction). points => [-5, 5] #
Start: -5 / Stop: 5
points = > [ -5 , -1 , 1 , 5]
points = > [0 , -5 , 5]
Case mode => ’step’ : Same as in ’continuous’ but voltage will be swept in stop and
go mode. I.e. voltage source approaches values between start and stop at the interval
defined in ’stepwidth’. A measurement is performed, when voltage source is idle.
Case mode => ’list’ : Array of voltages, with minimum length 1, that are approached
in sequence to perform a measurment.
.
rate [float array] (mandatory if not defined duration) array of rates, at which the
voltage is swept (V / sec). Has to be of length 1 or greater (Maximum length: length
of points-array). The first value defines the rate to approach the starting point. The
following values define the rates to approach the voltages defined by the points-array.
If the number of values in the rates-array is less than the length of the points-array,
the last defined rate will be used for the remaining sweep sections.
points = > [ -5 , -1 , 1 , 5] ,
rates = > [1 , 0.005 , 0.02]
98
1.10 XPRESS
rate
rate
rate
rate
to
to
to
to
approach
approach
approach
approach
-5 V ( the starting point ) : 1 V / sec
-1 V : 0.005 V / sec
1 V
: 0.02 V / sec
5 V
: 0.02 V / sec ( last defined rate )
.
duration [float array] (mandatory if not defined rate) can be used instead of ’rate’.
Attention: Use only the ’duration’ or the ’rate’ parameter. Using both will cause an
Error!
The first value defines the duration to approach the starting point. The second value
defines the duration to approach the voltage value defined by the second value of the
points-array. ... If the number of values in the duration-array is less than the length of
the points-array, last defined duration will be used for the remaining sweep sections.
.
stepwidth [float array] This parameter is relevant only if mode = ’step’ has been
selected. Stepwidth has to be an array of length ’1’ or greater. The values define
the width for each step within the corresponding sweep sequence. If the length of the
defined sweep sequence devided by the stepwidth is not an integer number, the last
step will be smaller in order to reach the defined points-value.
points = [0 , 0.5 , 3]
stepwidth = [0.2 , 0.5]
== > steps : 0 , 0.2 , 0.4 , 0.5 , 1.0 , 1.5 , 2.0 , 2.5 , 3
.
number_of_points [int array] can be used instead of ’stepwidth’. Attention: Use
only the ’number_of_points’ or the ’stepwidth’ parameter. Using both will cause an
Error! This parameter is relevant only if mode = ’step’ has been selected. Number_of_points has to be an array of length ’1’ or greater. The values defines the
number of steps within the corresponding sweep sequence.
points = [0 , 0.5 , 3]
number_of_points = [5 , 2]
== > steps : 0 , 0.1 , 0.2 , 0.3 , 0.4 , 0.5 , 1.75 , 3
.
interval [float] (default = 1) interval in seconds for taking measurement points.
Only relevant in mode ’continuous’.
.
99
1 The Lab::Measurement package
backsweep [int] (default = 0 | 1 | 2) 0 : no backsweep (default) 1 : a backsweep
will be performed 2 : no backsweep performed automatically, but sweep sequence will
be reverted every second time the sweep is started (relevant eg. if sweep operates as a
slave. This way the sweep sequence is reverted at every second step of the master)
.
jump [int] (default = 0 | 1 ) can be used to switch off the sweeping between adjacent
points in step or list mode.
0 : a sweep is performed between adjacent steps (default) 1 : the voltage is set
without sweeping, given that gateprotect does not trigger a sweep.
.
id [string] (default = ’Voltage_sweep’) Just an ID.
.
filename_extention [string] (default = ’V=’)
pended to the filenames if necessary.
.
Defines a postfix, that will be ap-
delay_before_loop [int] (default = 0) defines the time in seconds to wait after the
starting point has been reached.
.
delay_in_loop [int] (default = 0) This parameter is relevant only if mode = ’step’
or ’list’ has been selected. Defines the time in seconds to wait after the value for the
next step has been reached.
.
delay_after_loop [int] (default = 0) Defines the time in seconds to wait after the
sweep has been finished. This delay will be executed before an optional backsweep or
optional repetitions of the sweep.
.
100
1.10 XPRESS
Lab :: XPRESS :: Sweep :: Time - simple time controlled repeater
1.10.8 .
SYNOPSIS
use Lab :: XPRESS :: hub ;
my $hub = new Lab :: XPRESS :: hub () ;
my $repeater = $hub - > Sweep ( ’ Time ’ ,
{
duration = > 5
}) ;
.
DESCRIPTION
Parent: Lab::XPRESS::Sweep::Sweep
The Lab::XPRESS::Sweep::Time class implements a simple time controlled repeater
module in the Lab::XPRESS::Sweep framework.
.
CONSTRUCTOR
my $repeater = $hub - > Sweep ( ’ Time ’ ,
{
repetitions = > 5
}) ;
Instantiates a new Repeater.
.
PARAMETERS
duration [int] (default = 1) duration for the time controlled repeater. Default value
is 1, negative values indicate a infinit number of repetitions.
.
interval [int] (default = 1) interval in seconds for taking measurement points.
.
id [string] (default = ’Repeater’)
.
Just an ID.
101
1 The Lab::Measurement package
delay_before_loop [int] (default = 0) defines the time in seconds to wait after the
starting point has been reached.
.
delay_after_loop [int] (default = 0) Defines the time in seconds to wait after the
sweep has been finished. This delay will be executed before an optional backsweep or
optional repetitions of the sweep.
.
102
1.10 XPRESS
Lab :: XPRESS :: Sweep :: Motor - stepper motor sweep
1.10.9 .
SYNOPSIS
use Lab :: XPRESS :: hub ;
my $hub = new Lab :: XPRESS :: hub () ;
my $stepper = $hub - > Instrument ( ’ PDPD11042 ’ ,
{
connection_type = > ’ VISA_RS232 ’ ,
gpib_address = > 2
}) ;
my $sweep_motor = $hub - > Sweep ( ’ Motor ’ ,
{
instrument = > $stepper ,
points = > [ -10 ,10] ,
rate = > [1.98 ,1] ,
mode = > ’ c o n t i n u o u s ’ ,
interval = > 1 ,
backsweep = > 1
}) ;
.
DESCRIPTION
Parent: Lab::XPRESS::Sweep::Sweep
The Lab::XPRESS::Sweep::Motor class implements a module for stepper motor sweeps
in the Lab::XPRESS::Sweep framework.
.
CONSTRUCTOR
my $sweep_motor = $hub - > Sweep ( ’ Motor ’ ,
{
instrument = > $stepper ,
points = > [ -10 ,10] ,
rate = > [1.98 ,1] ,
mode = > ’ c o n t i n u o u s ’ ,
interval = > 1 ,
backsweep = > 1
}) ;
Instantiates a new stepper motor sweep
.
103
1 The Lab::Measurement package
SWEEP PARAMETERS
instrument [Lab::Instrument] (mandatory) Instrument, conducting the sweep. Must
be of type Lab:Instrument. Allowed instruments: Lab::Instrument::PD11042, Lab::Instrument::ProSte
.
mode [string] (default = ’continuous’ | ’step’ | ’list’) continuous: perform a continuous stepper motor sweep. Measurements will be performed constantly at the timeinterval defined in interval.
step: measurements will be performed at discrete values between start and end points
defined in parameter points, seperated by a step defined in parameter stepwidth
list: measurements will be performed at a list of values defined in parameter points
.
points [float array] (mandatory) array of values (in deg) that defines the characteristic points of the sweep. First value is appraoched before measurement begins.
Case mode => ’continuous’ : List of at least 2 values, that define start and end
point of the sweep or a sequence of consecutive sweep-sections (e.g. if changing the
sweep-rate for different sections or reversing the sweep direction). points => [0, 180]
# Start: 0 / Stop: 180
points = > [0 , 90 , 180 , 360]
points = > [0 , -90 , 90]
Case mode => ’step’ : Same as in ’continuous’ but stepper motor will be swept in
stop and go mode. I.e. stepper motor approaches values between start and stop at the
interval defined in ’stepwidth’. A measurement is performed, when the motor is idle.
Case mode => ’list’ : Array of values, with minimum length 1, that are approached
in sequence to perform a measurment.
.
rate [float array] (mandatory if not defined duration) array of rates, at which the
stepper motor is swept (deg / min). Has to be of length 1 or greater (Maximum length:
length of points-array). The first value defines the rate to approach the starting point.
The following values define the rates to approach the values defined by the points-array.
If the number of values in the rates-array is less than the length of the points-array,
the last defined rate will be used for the remaining sweep sections.
points = > [ -90 , 0 , 90 , 180] ,
rates = > [1 , 0.5 , 0.2]
rate
rate
rate
rate
104
to
to
to
to
approach
approach
approach
approach
-90 deg ( the starting point ) : 1 deg / min
0 deg : 0.5 deg / min
90 deg : 0.2 deg / min
180 deg
: 0.2 deg / min ( last defined rate )
1.10 XPRESS
.
duration [float array] (mandatory if not defined rate) can be used instead of ’rate’.
Attention: Use only the ’duration’ or the ’rate’ parameter. Using both will cause an
Error!
The first value defines the duration to approach the starting point. The second
value defines the duration to approach the value defined by the second value of the
points-array. ... If the number of values in the duration-array is less than the length of
the points-array, last defined duration will be used for the remaining sweep sections.
.
stepwidth [float array] This parameter is relevant only if mode = ’step’ has been
selected. Stepwidth has to be an array of length ’1’ or greater. The values define
the width for each step within the corresponding sweep sequence. If the length of the
defined sweep sequence devided by the stepwidth is not an integer number, the last
step will be smaller in order to reach the defined points-value.
points = [0 , 90 , 180]
stepwidth = [10 , 25]
== > steps : 0 , 10 , 20 , 30 , 40 , 50 , 60 , 70 , 80 , 90 , 115 , 140 , 165 ,
180
.
number_of_points [int array] can be used instead of ’stepwidth’. Attention: Use
only the ’number_of_points’ or the ’stepwidth’ parameter. Using both will cause an
Error! This parameter is relevant only if mode = ’step’ has been selected. Number_of_points has to be an array of length ’1’ or greater. The values defines the
number of steps within the corresponding sweep sequence.
points = [0 , 90 , 180]
number_of_points = [5 , 2]
== > steps : 0 , 18 , 36 , 54 , 72 , 90 , 135 , 180
.
interval [float] (default = 1) interval in seconds for taking measurement points.
Only relevant in mode ’continuous’.
.
105
1 The Lab::Measurement package
backsweep [int] (default = 0 | 1 | 2) 0 : no backsweep (default) 1 : a backsweep
will be performed 2 : no backsweep performed automatically, but sweep sequence will
be reverted every second time the sweep is started (relevant eg. if sweep operates as a
slave. This way the sweep sequence is reverted at every second step of the master)
.
id [string] (default = ’Motor_sweep’) Just an ID.
.
filename_extention [string] (default = ’PHI=’) Defines a postfix, that will be appended to the filenames if necessary.
.
delay_before_loop [int] (default = 0) defines the time in seconds to wait after the
starting point has been reached.
.
delay_in_loop [int] (default = 0) This parameter is relevant only if mode = ’step’
or ’list’ has been selected. Defines the time in seconds to wait after the value for the
next step has been reached.
.
delay_after_loop [int] (default = 0) Defines the time in seconds to wait after the
sweep has been finished. This delay will be executed before an optional backsweep or
optional repetitions of the sweep.
.
106
1.10 XPRESS
Lab :: XPRESS :: Sweep :: Repeater - simple repeater
1.10.10 .
SYNOPSIS
use Lab :: XPRESS :: hub ;
my $hub = new Lab :: XPRESS :: hub () ;
my $repeater = $hub - > Sweep ( ’ R e p e a t e r ’ ,
{
repetitions = > 5
}) ;
.
DESCRIPTION
Parent: Lab::XPRESS::Sweep::Sweep
The Lab::XPRESS::Sweep::Repeater class implements a simple repeater module in
the Lab::XPRESS::Sweep framework.
.
CONSTRUCTOR
my $repeater = $hub - > Sweep ( ’ R e p e a t e r ’ ,
{
repetitions = > 5
}) ;
Instantiates a new Repeater.
.
PARAMETERS
repetitions [int] (default = 1) number of repetitions. default value is 1, negative
values indicate a infinit number of repetitions.
.
id [string] (default = ’Repeater’)
.
Just an ID.
filename_extention [string] (default = ’#=’)
pended to the filenames if necessary.
.
Defines a postfix, that will be ap-
107
1 The Lab::Measurement package
delay_before_loop [int] (default = 0) defines the time in seconds to wait after the
starting point has been reached.
.
delay_in_loop [int] (default = 0) This parameter is relevant only if mode = ’step’
or ’list’ has been selected. Defines the time in seconds to wait after the value for the
next step has been reached.
.
delay_after_loop [int] (default = 0) Defines the time in seconds to wait after the
sweep has been finished. This delay will be executed before an optional backsweep or
optional repetitions of the sweep.
.
108
1.10 XPRESS
Lab :: XPRESS :: Sweep :: Temperature - temperature sweep
1.10.11 .
SYNOPSIS
use Lab :: XPRESS :: hub ;
my $hub = new Lab :: XPRESS :: hub () ;
my $tsensor = $hub - > Instrument ( ’ ITC ’ ,
{
connection_type = > ’ VISA_RS232 ’ ,
gpib_address = > 2
}) ;
my $sweep_temperature = $hub - > Sweep ( ’ T e m p e r a t u r e ’ ,
{
instrument = > $tsensor ,
points = > [90 ,4] ,
mode = > ’ l i s t ’
}) ;
.
DESCRIPTION
Parent: Lab::XPRESS::Sweep::Sweep
The Lab::XPRESS::Sweep::Temperature class implements a module for temperature
sweeps in the Lab::XPRESS::Sweep framework.
.
CONSTRUCTOR
my $sweep_temperature = $hub - > Sweep ( ’ T e m p e r a t u r e ’ ,
{
instrument = > $tsensor ,
points = > [90 ,4] ,
mode = > ’ l i s t ’
}) ;
Instantiates a new temperature sweep
.
PARAMETERS
instrument [Lab::Instrument] (mandatory) Instrument, conducting the sweep. Must
be of type Lab:Instrument. Supported instruments: Lab::Instrument::ITC
.
109
1 The Lab::Measurement package
mode [string] (default = ’continuous’ | ’step’ | ’list’) continuous: perform a continuous temperature sweep. After the starting temperature has been stabalized by the
temperature controller, the heater will be switched off in order to cool down to the
final value. Measurements will be performed constantly at the time-interval defined in
interval.
step: measurements will be performed at discrete values between start and end points
defined in parameter points, seperated by a step defined in parameter stepwidth
list: measurements will be performed at a list of values defined in parameter points
.
points [float array] (mandatory) array of values (in deg) that defines the characteristic points of the sweep. First value is appraoched before measurement begins.
Case mode => ’continuous’ : List of exactly 2 values, that define start and end
point of the sweep. The starting point has to be higher value than the endpont. points
=> [180, 4] # Start: 180 K / Stop: 4 K
Case mode => ’step’ : Same as in ’continuous’ but the temperature controller will
stabalize the temperature at the defined setpoints. A measurement is performed, when
the motor is idle.
Case mode => ’list’ : Array of values, with minimum length 1, that are approached
in sequence to perform a measurment.
.
stepwidth [float array] This parameter is relevant only if mode = ’step’ has been
selected. Stepwidth has to be an array of length ’1’ or greater. The values define
the width for each step within the corresponding sweep sequence. If the length of the
defined sweep sequence devided by the stepwidth is not an integer number, the last
step will be smaller in order to reach the defined points-value.
points = [0 , 90 , 180]
stepwidth = [10 , 25]
== > steps : 0 , 10 , 20 , 30 , 40 , 50 , 60 , 70 , 80 , 90 , 115 , 140 , 165 ,
180
.
number_of_points [int array] can be used instead of ’stepwidth’. Attention: Use
only the ’number_of_points’ or the ’stepwidth’ parameter. Using both will cause an
Error! This parameter is relevant only if mode = ’step’ has been selected. Number_of_points has to be an array of length ’1’ or greater. The values defines the
number of steps within the corresponding sweep sequence.
points = [0 , 90 , 180]
number_of_points = [5 , 2]
110
1.10 XPRESS
== > steps : 0 , 18 , 36 , 54 , 72 , 90 , 135 , 180
.
interval [float] (default = 1) interval in seconds for taking measurement points.
Only relevant in mode ’continuous’.
.
id [string] (default = ’Temperature_sweep’)
.
filename_extention [string] (default = ’T=’)
pended to the filenames if necessary.
.
Just an ID.
Defines a postfix, that will be ap-
delay_before_loop [int] (default = 0) defines the time in seconds to wait after the
starting point has been reached.
.
delay_in_loop [int] (default = 0) This parameter is relevant only if mode = ’step’
or ’list’ has been selected. Defines the time in seconds to wait after the value for the
next step has been reached.
.
delay_after_loop [int] (default = 0) Defines the time in seconds to wait after the
sweep has been finished. This delay will be executed before an optional backsweep or
optional repetitions of the sweep.
.
111
1 The Lab::Measurement package
112
1.10 XPRESS
Lab :: XPRESS :: Sweep :: Sweep - base class for Sweeps
1.10.12 .
SYNOPSIS
Lab :: XPRESS :: Sweep :: Sweep is meant to be used as a base class
for inheriting Sweeps .
It should not be used directly .
.
DESCRIPTION
The Lab::XPRESS::Sweep::Sweep class implements major parts of the Lab::XPRESS
framework, a modular way for easy scripting measurements in perl and Lab::Measurement.
Direct usage of this class would not result in any action. However it constitutes the
fundament for more spezialized subclass Sweeps e.g. Lab::XPRESS::Sweep::Magnet. .
SWEEP PARAMETERS
The configuration parameters are described in the particular subclasses (e.g. Lab::XPRESS::Sweep::Magnet).
.
METHODS
add_DataFile [Lab::XPRESS::Data::XPRESS_DataFile object] use this method
to assign a DataFile object with a sweep if it operates as a slave or as a individual sweep.
The sweep will call the user-defined measurment routine assigned with the DataFile.
Sweeps accept multiple DataFile objects when add_DataFile is used repeatedly.
.
start
.
use this method to execute the sweep.
get_value returns by default the current value of the points array or the current step.
The method is intended to be overloaded by Sweep-Subclasses, in order to return the
current value of the sweeping instrument.
.
113
1 The Lab::Measurement package
LOG [hash, int (default = 0)] use this method to store the data collected by userdefined measurment routine in the DataFile object.
The hash has to look like this: $column_name => $value The column_name has
to be one of the previously defined columnames in the DataFile object.
When using multiple DataFile objects within one sweep, you can direct the data
hash one of the DataFiles by the second parameter (int). If this parameter is set to 0
(default) the data hash will be directed to all DataFile objects.
Examples: $sweep->LOG({ ’voltage’ => 10, ’current’ => 1e-6, ’reistance’ => $R
});
OR:
$sweep - > LOG ({ ’ v o l t a g e ’ = > 10}) ;
$sweep - > LOG ({ ’ c u r r e n t ’ = > 1e -6}) ;
$sweep - > LOG ({ ’ r e i s t a n c e ’ = > $R }) ;
for two DataFiles:
# t h i s v a l u e w i l l be l o g g e d i n both D a t a F i l e s
$sweep - > LOG ({ ’ v o l t a g e ’ = > 10} ,0) ;
# t h i s v a l u e s w i l l be l o g g e d i n D a t a F i l e 1
$sweep - > LOG ({
’ c u r r e n t ’ = > 1e -6 ,
’ r e i s t a n c e ’ = > $R1
} ,1) ;
# t h i s v a l u e s w i l l be l o g g e d i n D a t a F i l e 2
$sweep - > LOG ({
’ c u r r e n t ’ = > 10 e -6 ,
’ r e i s t a n c e ’ = > $R2
} ,2) ;
.
last
use this method, in order to stop the current sweep. Example:
# Stop a v o l t a g e Sweep i f d e v i c e c u r r e n t e x e e d s a c r i t i c a l
.
if ( $current > $high_limit ) {
$voltage_sweep - > last () ;
}
.
HOW TO DEVELOP SUBCLASS OF Lab::XPRESS::Sweep::Sweep
preefine the default_config hash values in method ’new’:
114
limit
1.10 XPRESS
sub new {
my $proto = shift ;
my @args = @_ ;
my $class = ref ( $proto ) || $proto ;
my $self - >{ default_config } = {
id = > ’ Magnet_sweep ’ ,
filename_extension = > ’B= ’ ,
interval
=> 1,
points = >
[] ,
duration
= > [] ,
mode
=> ’ c o n t i n u o u s ’ ,
allowed_i nstruments = > [ ’ Lab : : I n s t r u m e n t : : IPS ’ ,
’ Lab : : I n s t r u m e n t : : I P S W e i s s 1 ’ , ’ Lab : :
I n s t r u m e n t : : I P S W e i s s 2 ’ , ’ Lab : : I n s t r u m e n t : :
I P S W e i s s D i l l F r i d g e ’ ],
allowed_sweep_modes = > [ ’ c o n t i n u o u s ’ , ’ l i s t ’ , ’
s t e p ’ ],
number_of_points = > [ undef ]
};
$self = $class - > SUPER :: new ( $self - >{ default_config } , @args
);
bless ( $self , $class ) ;
return $self ;
}
the following methodes have to be overloaded in the subclass:
sub
sub
sub
sub
sub
sub
go_to_sweep_start {}
st ar t_ co nti nu ou s_s we ep {}
go_to_next_step {}
exit_loop {}
get_value {}
exit {}
additionally see one of the present Sweep-Subclasses.
.
115
1 The Lab::Measurement package
116
1.10 XPRESS
Lab :: XPRESS :: Sweep :: Frame -
1.10.13 .
SYNOPSIS
use Lab :: XPRESS :: hub ;
my $hub = new Lab :: XPRESS :: hub () ;
my $frame = $hub - > Frame () ;
$frame - > add_master ( $sweep_0 ) ;
$frame - > add_slave ( $sweep_1 ) ;
$frame - > add_slave ( $sweep_2 ) ;
$frame - > add_slave ( $sweep_3 ) ;
$frame - > start () ;
.
DESCRIPTION
Parent: Lab::XPRESS::Sweep::Sweep
The Lab::XPRESS::Sweep::Frame class implements a module to organize a nested
sweep structure in the Lab::XPRESS::Sweep framework.
The Frame object has no parameters. .
CONSTRUCTOR
my $frame = $hub - > Frame () ;
Instantiates a new Frame object.
.
METHODS
add_master
$frame - > add_master ( $sweep ) ;
use this methode to add a master sweep to the frame object. A Frame accepts only
a single master sweep.
.
117
1 The Lab::Measurement package
add_slave
$frame - > add_slave ( $sweep ) ;
use this methode to add a slave sweep to the frame object. A Frame can have several
slave sweeps.
The order in which the slave sweeps are added to the frame object, defines the
sequence in which the individual slave sweeps will be executed.
$frame - > add_slave ( $sweep_1 ) ;
$frame - > add_slave ( $sweep_2 ) ;
$frame - > add_slave ( $sweep_3 ) ;
The frame object accepts also another frame object as a slave sweep. This way you
can build up a multi level nested sweep structure.
my $inner_frame = $hub - > Frame () ;
my $outer_frame = $hub - > Frame () ;
$inner_frame - > add_master ( $sweep_0 ) ;
$inner_frame - > add_slave ( $sweep_1 ) ;
$inner_frame - > add_slave ( $sweep_2 ) ;
$inner_frame - > add_slave ( $sweep_3 ) ;
$outer_frame - > add_master ( $sweep_10 ) ;
$outer_frame - > add_slave ( $sweep_11 ) ;
$outer_frame - > add_slave ( $inner_frame ) ;
$outer_frame - > add_slave ( $sweep_11 ) ;
$outer_frame - > start () ;
.
start
$frame - > start () ;
use this methode to execute the nested sweeps.
118
1.10 XPRESS
Lab :: XPRESS :: Sweep :: Magnet - magnetic field sweep
1.10.14 .
SYNOPSIS
use Lab :: XPRESS :: hub ;
my $hub = new Lab :: XPRESS :: hub () ;
my $IPS = $hub - > Instrument ( ’ IPS ’ ,
{
connection_type = > ’ VISA_GPIB ’ ,
gpib_address = > 24
}) ;
my $sweep_magnet = $hub - > Sweep ( ’ Magnet ’ ,
{
instrument = > $IPS ,
points = > [ -10 ,10] ,
rate = > [1.98 ,1] ,
mode = > ’ c o n t i n u o u s ’ ,
interval = > 1 ,
backsweep = > 1
}) ;
.
DESCRIPTION
Parent: Lab::XPRESS::Sweep::Sweep
The Lab::XPRESS::Sweep::Magnet class implements a module for magnetic field
Sweeps in the Lab::XPRESS::Sweep framework.
.
CONSTRUCTOR
my $sweep_magnet = $hub - > Sweep ( ’ Magnet ’ ,
{
instrument = > $IPS ,
points = > [ -10 ,10] ,
rate = > [1.98 ,1] ,
mode = > ’ c o n t i n u o u s ’ ,
interval = > 1 ,
backsweep = > 1
}) ;
Instantiates a new Magnet-sweep.
.
119
1 The Lab::Measurement package
SWEEP PARAMETERS
instrument [Lab::Instrument] (mandatory) Instrument, conducting the sweep. Must
be of type Lab:Instrument. Allowed instruments: Lab::Instrument::IPS, Lab::Instrument::IPSWeiss1,
Lab::Instrument::IPSWeiss2, Lab::Instrument::IPSWeissDillFridge
.
mode [string] (default = ’continuous’ | ’step’ | ’list’) continuous: perform a continuous magnetic field sweep. Measurements will be performed constantly at the timeinterval defined in interval.
step: measurements will be performed at discrete values of the magnetic field between
start and end points defined in parameter points, seperated by the magnetic field values
defined in parameter stepwidth
list: measurements will be performed at a list of magnetic field values defined in
parameter points
.
points [float array] (mandatory) array of magnetic field values (in Tesla) that defines
the characteristic points of the sweep. First value is appraoched before measurement
begins.
Case mode => ’continuous’ : List of at least 2 values, that define start and end
point of the sweep or a sequence of consecutive sweep-sections (e.g. if changing the
sweep-rate for different sections or reversing the sweep direction). points => [-5, 5] #
Start: -5 / Stop: 5
points = > [ -5 , -1 , 1 , 5]
points = > [0 , -5 , 5]
Case mode => ’step’ : Same as in ’continuous’ but magnetic field will be swept in
stop and go mode. I.e. Magnet approaches field values between start and stop at the
interval defined in ’stepwidth’. A measurement is performed, when magnet is idle.
Case mode => ’list’ : Array of magnetic field values, with minimum length 1, that
are approached in sequence to perform a measurment.
.
rate [float array] (mandatory if not defined duration) array of rates, at which the
magnetic field is swept (Tesla / min). Has to be of length 1 or greater (Maximum
length: length of points-array). The first value defines the rate to approach the starting
point. The following values define the rates to approach the magnetic field values
defined by the points-array. If the number of values in the rates-array is less than the
length of the points-array, the last defined rate will be used for the remaining sweep
sections.
120
1.10 XPRESS
points = > [ -5 , -1 , 1 , 5] ,
rates = > [1 , 0.5 , 0.2]
rate
rate
rate
rate
to
to
to
to
approach
approach
approach
approach
-5 T ( the starting point ) : 1 T / min
-1 T : 0.5 T / min
1 T : 0.2 T / min
5 T
: 0.2 T / min ( last defined rate )
.
duration [float array] (mandatory if not defined rate) can be used instead of ’rate’.
Attention: Use only the ’duration’ or the ’rate’ parameter. Using both will cause an
Error!
The first value defines the duration to approach the starting point. The second value
defines the duration to approach the magnetic field value defined by the second value
of the points-array. ... If the number of values in the duration-array is less than the
length of the points-array, last defined duration will be used for the remaining sweep
sections.
.
stepwidth [float array] This parameter is relevant only if mode = ’step’ has been
selected. Stepwidth has to be an array of length ’1’ or greater. The values define
the width for each step within the corresponding sweep sequence. If the length of the
defined sweep sequence devided by the stepwidth is not an integer number, the last
step will be smaller in order to reach the defined points-value.
points = [0 , 0.5 , 3]
stepwidth = [0.2 , 0.5]
== > steps : 0 , 0.2 , 0.4 , 0.5 , 1.0 , 1.5 , 2.0 , 2.5 , 3
.
number_of_points [int array] can be used instead of ’stepwidth’. Attention: Use
only the ’number_of_points’ or the ’stepwidth’ parameter. Using both will cause an
Error! This parameter is relevant only if mode = ’step’ has been selected. Number_of_points has to be an array of length ’1’ or greater. The values defines the
number of steps within the corresponding sweep sequence.
points = [0 , 0.5 , 3]
number_of_points = [5 , 2]
== > steps : 0 , 0.1 , 0.2 , 0.3 , 0.4 , 0.5 , 1.75 , 3
.
121
1 The Lab::Measurement package
interval [float] (default = 1) interval in seconds for taking measurement points.
Only relevant in mode ’continuous’.
.
backsweep [int] (default = 0 | 1 | 2) 0 : no backsweep (default) 1 : a backsweep
will be performed 2 : no backsweep performed automatically, but sweep sequence will
be reverted every second time the sweep is started (relevant eg. if sweep operates as a
slave. This way the sweep sequence is reverted at every second step of the master)
.
id [string] (default = ’Magnet_sweep’)
.
Just an ID.
filename_extention [string] (default = ’B=’)
pended to the filenames if necessary.
.
Defines a postfix, that will be ap-
delay_before_loop [int] (default = 0) defines the time in seconds to wait after the
starting point has been reached.
.
delay_in_loop [int] (default = 0) This parameter is relevant only if mode = ’step’
or ’list’ has been selected. Defines the time in seconds to wait after the value for the
next step has been reached.
.
delay_after_loop [int] (default = 0) Defines the time in seconds to wait after the
sweep has been finished. This delay will be executed before an optional backsweep or
optional repetitions of the sweep.
.
122
1.10 XPRESS
Lab :: XPRESS :: Sweep :: Voltage - voltage sweep
1.10.15 .
SYNOPSIS
use Lab :: XPRESS :: hub ;
my $hub = new Lab :: XPRESS :: hub () ;
my $Yoki = $hub - > Instrument ( ’ Yokogawa7651 ’ ,
{
connection_type = > ’ VISA_GPIB ’ ,
gpib_address = > 2
}) ;
my $sweep_voltage = $hub - > Sweep ( ’ V o l t a g e ’ ,
{
instrument = > $Yoki ,
points = > [ -1 ,1] ,
rate = > [0.1 ,0.001] ,
mode = > ’ c o n t i n u o u s ’ ,
interval = > 1 ,
backsweep = > 1
}) ;
.
DESCRIPTION
Parent: Lab::XPRESS::Sweep::Sweep
The Lab::XPRESS::Sweep::Voltage class implements a module for voltage Sweeps in
the Lab::XPRESS::Sweep framework.
.
CONSTRUCTOR
my $sweep_voltage = $hub - > Sweep ( ’ V o l t a g e ’ ,
{
instrument = > $Yoki ,
points = > [ -1 ,1] ,
rate = > [0.1 ,0.001] ,
mode = > ’ c o n t i n u o u s ’ ,
interval = > 1 ,
backsweep = > 1
}) ;
Instantiates a new voltage-sweep.
.
123
1 The Lab::Measurement package
PARAMETERS
instrument [Lab::Instrument] (mandatory) Instrument, conducting the sweep. Must
be of type Lab:Instrument. Allowed instruments: Lab::Instrument::Yokogawa7651
.
mode [string] (default = ’continuous’ | ’step’ | ’list’) continuous: perform a continuous voltage sweep. Measurements will be performed constantly at the time-interval
defined in interval.
step: measurements will be performed at discrete values of the applied voltage between start and end points defined in parameter points, seperated by voltage steps
defined in parameter stepwidth
list: measurements will be performed at a list voltage values defined in parameter
points
.
points [float array] (mandatory) array of voltage values (in volts) that defines the
characteristic points of the sweep. First value is appraoched before measurement begins.
Case mode => ’continuous’ : List of at least 2 values, that define start and end
point of the sweep or a sequence of consecutive sweep-sections (e.g. if changing the
sweep-rate for different sections or reversing the sweep direction). points => [-5, 5] #
Start: -5 / Stop: 5
points = > [ -5 , -1 , 1 , 5]
points = > [0 , -5 , 5]
Case mode => ’step’ : Same as in ’continuous’ but voltage will be swept in stop and
go mode. I.e. voltage source approaches values between start and stop at the interval
defined in ’stepwidth’. A measurement is performed, when voltage source is idle.
Case mode => ’list’ : Array of voltages, with minimum length 1, that are approached
in sequence to perform a measurment.
.
rate [float array] (mandatory if not defined duration) array of rates, at which the
voltage is swept (V / sec). Has to be of length 1 or greater (Maximum length: length
of points-array). The first value defines the rate to approach the starting point. The
following values define the rates to approach the voltages defined by the points-array.
If the number of values in the rates-array is less than the length of the points-array,
the last defined rate will be used for the remaining sweep sections.
points = > [ -5 , -1 , 1 , 5] ,
rates = > [1 , 0.005 , 0.02]
124
1.10 XPRESS
rate
rate
rate
rate
to
to
to
to
approach
approach
approach
approach
-5 V ( the starting point ) : 1 V / sec
-1 V : 0.005 V / sec
1 V
: 0.02 V / sec
5 V
: 0.02 V / sec ( last defined rate )
.
duration [float array] (mandatory if not defined rate) can be used instead of ’rate’.
Attention: Use only the ’duration’ or the ’rate’ parameter. Using both will cause an
Error!
The first value defines the duration to approach the starting point. The second value
defines the duration to approach the voltage value defined by the second value of the
points-array. ... If the number of values in the duration-array is less than the length of
the points-array, last defined duration will be used for the remaining sweep sections.
.
stepwidth [float array] This parameter is relevant only if mode = ’step’ has been
selected. Stepwidth has to be an array of length ’1’ or greater. The values define
the width for each step within the corresponding sweep sequence. If the length of the
defined sweep sequence devided by the stepwidth is not an integer number, the last
step will be smaller in order to reach the defined points-value.
points = [0 , 0.5 , 3]
stepwidth = [0.2 , 0.5]
== > steps : 0 , 0.2 , 0.4 , 0.5 , 1.0 , 1.5 , 2.0 , 2.5 , 3
.
number_of_points [int array] can be used instead of ’stepwidth’. Attention: Use
only the ’number_of_points’ or the ’stepwidth’ parameter. Using both will cause an
Error! This parameter is relevant only if mode = ’step’ has been selected. Number_of_points has to be an array of length ’1’ or greater. The values defines the
number of steps within the corresponding sweep sequence.
points = [0 , 0.5 , 3]
number_of_points = [5 , 2]
== > steps : 0 , 0.1 , 0.2 , 0.3 , 0.4 , 0.5 , 1.75 , 3
.
interval [float] (default = 1) interval in seconds for taking measurement points.
Only relevant in mode ’continuous’.
.
125
1 The Lab::Measurement package
backsweep [int] (default = 0 | 1 | 2) 0 : no backsweep (default) 1 : a backsweep
will be performed 2 : no backsweep performed automatically, but sweep sequence will
be reverted every second time the sweep is started (relevant eg. if sweep operates as a
slave. This way the sweep sequence is reverted at every second step of the master)
.
jump [int] (default = 0 | 1 ) can be used to switch off the sweeping between adjacent
points in step or list mode.
0 : a sweep is performed between adjacent steps (default) 1 : the voltage is set
without sweeping, given that gateprotect does not trigger a sweep.
.
id [string] (default = ’Voltage_sweep’) Just an ID.
.
filename_extention [string] (default = ’V=’)
pended to the filenames if necessary.
.
Defines a postfix, that will be ap-
delay_before_loop [int] (default = 0) defines the time in seconds to wait after the
starting point has been reached.
.
delay_in_loop [int] (default = 0) This parameter is relevant only if mode = ’step’
or ’list’ has been selected. Defines the time in seconds to wait after the value for the
next step has been reached.
.
delay_after_loop [int] (default = 0) Defines the time in seconds to wait after the
sweep has been finished. This delay will be executed before an optional backsweep or
optional repetitions of the sweep.
.
126
1.10 XPRESS
Lab :: XPRESS :: Sweep :: Time - simple time controlled repeater
1.10.16 .
SYNOPSIS
use Lab :: XPRESS :: hub ;
my $hub = new Lab :: XPRESS :: hub () ;
my $repeater = $hub - > Sweep ( ’ Time ’ ,
{
duration = > 5
}) ;
.
DESCRIPTION
Parent: Lab::XPRESS::Sweep::Sweep
The Lab::XPRESS::Sweep::Time class implements a simple time controlled repeater
module in the Lab::XPRESS::Sweep framework.
.
CONSTRUCTOR
my $repeater = $hub - > Sweep ( ’ Time ’ ,
{
repetitions = > 5
}) ;
Instantiates a new Repeater.
.
PARAMETERS
duration [int] (default = 1) duration for the time controlled repeater. Default value
is 1, negative values indicate a infinit number of repetitions.
.
interval [int] (default = 1) interval in seconds for taking measurement points.
.
id [string] (default = ’Repeater’)
.
Just an ID.
127
1 The Lab::Measurement package
delay_before_loop [int] (default = 0) defines the time in seconds to wait after the
starting point has been reached.
.
delay_after_loop [int] (default = 0) Defines the time in seconds to wait after the
sweep has been finished. This delay will be executed before an optional backsweep or
optional repetitions of the sweep.
.
128
1.10 XPRESS
Lab :: XPRESS :: Sweep :: Motor - stepper motor sweep
1.10.17 .
SYNOPSIS
use Lab :: XPRESS :: hub ;
my $hub = new Lab :: XPRESS :: hub () ;
my $stepper = $hub - > Instrument ( ’ PDPD11042 ’ ,
{
connection_type = > ’ VISA_RS232 ’ ,
gpib_address = > 2
}) ;
my $sweep_motor = $hub - > Sweep ( ’ Motor ’ ,
{
instrument = > $stepper ,
points = > [ -10 ,10] ,
rate = > [1.98 ,1] ,
mode = > ’ c o n t i n u o u s ’ ,
interval = > 1 ,
backsweep = > 1
}) ;
.
DESCRIPTION
Parent: Lab::XPRESS::Sweep::Sweep
The Lab::XPRESS::Sweep::Motor class implements a module for stepper motor sweeps
in the Lab::XPRESS::Sweep framework.
.
CONSTRUCTOR
my $sweep_motor = $hub - > Sweep ( ’ Motor ’ ,
{
instrument = > $stepper ,
points = > [ -10 ,10] ,
rate = > [1.98 ,1] ,
mode = > ’ c o n t i n u o u s ’ ,
interval = > 1 ,
backsweep = > 1
}) ;
Instantiates a new stepper motor sweep
.
129
1 The Lab::Measurement package
SWEEP PARAMETERS
instrument [Lab::Instrument] (mandatory) Instrument, conducting the sweep. Must
be of type Lab:Instrument. Allowed instruments: Lab::Instrument::PD11042, Lab::Instrument::ProSte
.
mode [string] (default = ’continuous’ | ’step’ | ’list’) continuous: perform a continuous stepper motor sweep. Measurements will be performed constantly at the timeinterval defined in interval.
step: measurements will be performed at discrete values between start and end points
defined in parameter points, seperated by a step defined in parameter stepwidth
list: measurements will be performed at a list of values defined in parameter points
.
points [float array] (mandatory) array of values (in deg) that defines the characteristic points of the sweep. First value is appraoched before measurement begins.
Case mode => ’continuous’ : List of at least 2 values, that define start and end
point of the sweep or a sequence of consecutive sweep-sections (e.g. if changing the
sweep-rate for different sections or reversing the sweep direction). points => [0, 180]
# Start: 0 / Stop: 180
points = > [0 , 90 , 180 , 360]
points = > [0 , -90 , 90]
Case mode => ’step’ : Same as in ’continuous’ but stepper motor will be swept in
stop and go mode. I.e. stepper motor approaches values between start and stop at the
interval defined in ’stepwidth’. A measurement is performed, when the motor is idle.
Case mode => ’list’ : Array of values, with minimum length 1, that are approached
in sequence to perform a measurment.
.
rate [float array] (mandatory if not defined duration) array of rates, at which the
stepper motor is swept (deg / min). Has to be of length 1 or greater (Maximum length:
length of points-array). The first value defines the rate to approach the starting point.
The following values define the rates to approach the values defined by the points-array.
If the number of values in the rates-array is less than the length of the points-array,
the last defined rate will be used for the remaining sweep sections.
points = > [ -90 , 0 , 90 , 180] ,
rates = > [1 , 0.5 , 0.2]
rate
rate
rate
rate
130
to
to
to
to
approach
approach
approach
approach
-90 deg ( the starting point ) : 1 deg / min
0 deg : 0.5 deg / min
90 deg : 0.2 deg / min
180 deg
: 0.2 deg / min ( last defined rate )
1.10 XPRESS
.
duration [float array] (mandatory if not defined rate) can be used instead of ’rate’.
Attention: Use only the ’duration’ or the ’rate’ parameter. Using both will cause an
Error!
The first value defines the duration to approach the starting point. The second
value defines the duration to approach the value defined by the second value of the
points-array. ... If the number of values in the duration-array is less than the length of
the points-array, last defined duration will be used for the remaining sweep sections.
.
stepwidth [float array] This parameter is relevant only if mode = ’step’ has been
selected. Stepwidth has to be an array of length ’1’ or greater. The values define
the width for each step within the corresponding sweep sequence. If the length of the
defined sweep sequence devided by the stepwidth is not an integer number, the last
step will be smaller in order to reach the defined points-value.
points = [0 , 90 , 180]
stepwidth = [10 , 25]
== > steps : 0 , 10 , 20 , 30 , 40 , 50 , 60 , 70 , 80 , 90 , 115 , 140 , 165 ,
180
.
number_of_points [int array] can be used instead of ’stepwidth’. Attention: Use
only the ’number_of_points’ or the ’stepwidth’ parameter. Using both will cause an
Error! This parameter is relevant only if mode = ’step’ has been selected. Number_of_points has to be an array of length ’1’ or greater. The values defines the
number of steps within the corresponding sweep sequence.
points = [0 , 90 , 180]
number_of_points = [5 , 2]
== > steps : 0 , 18 , 36 , 54 , 72 , 90 , 135 , 180
.
interval [float] (default = 1) interval in seconds for taking measurement points.
Only relevant in mode ’continuous’.
.
131
1 The Lab::Measurement package
backsweep [int] (default = 0 | 1 | 2) 0 : no backsweep (default) 1 : a backsweep
will be performed 2 : no backsweep performed automatically, but sweep sequence will
be reverted every second time the sweep is started (relevant eg. if sweep operates as a
slave. This way the sweep sequence is reverted at every second step of the master)
.
id [string] (default = ’Motor_sweep’) Just an ID.
.
filename_extention [string] (default = ’PHI=’) Defines a postfix, that will be appended to the filenames if necessary.
.
delay_before_loop [int] (default = 0) defines the time in seconds to wait after the
starting point has been reached.
.
delay_in_loop [int] (default = 0) This parameter is relevant only if mode = ’step’
or ’list’ has been selected. Defines the time in seconds to wait after the value for the
next step has been reached.
.
delay_after_loop [int] (default = 0) Defines the time in seconds to wait after the
sweep has been finished. This delay will be executed before an optional backsweep or
optional repetitions of the sweep.
.
132
1.10 XPRESS
Lab :: XPRESS :: Sweep :: Repeater - simple repeater
1.10.18 .
SYNOPSIS
use Lab :: XPRESS :: hub ;
my $hub = new Lab :: XPRESS :: hub () ;
my $repeater = $hub - > Sweep ( ’ R e p e a t e r ’ ,
{
repetitions = > 5
}) ;
.
DESCRIPTION
Parent: Lab::XPRESS::Sweep::Sweep
The Lab::XPRESS::Sweep::Repeater class implements a simple repeater module in
the Lab::XPRESS::Sweep framework.
.
CONSTRUCTOR
my $repeater = $hub - > Sweep ( ’ R e p e a t e r ’ ,
{
repetitions = > 5
}) ;
Instantiates a new Repeater.
.
PARAMETERS
repetitions [int] (default = 1) number of repetitions. default value is 1, negative
values indicate a infinit number of repetitions.
.
id [string] (default = ’Repeater’)
.
Just an ID.
filename_extention [string] (default = ’#=’)
pended to the filenames if necessary.
.
Defines a postfix, that will be ap-
133
1 The Lab::Measurement package
delay_before_loop [int] (default = 0) defines the time in seconds to wait after the
starting point has been reached.
.
delay_in_loop [int] (default = 0) This parameter is relevant only if mode = ’step’
or ’list’ has been selected. Defines the time in seconds to wait after the value for the
next step has been reached.
.
delay_after_loop [int] (default = 0) Defines the time in seconds to wait after the
sweep has been finished. This delay will be executed before an optional backsweep or
optional repetitions of the sweep.
.
134
1.10 XPRESS
Lab :: XPRESS :: Sweep :: Temperature - temperature sweep
1.10.19 .
SYNOPSIS
use Lab :: XPRESS :: hub ;
my $hub = new Lab :: XPRESS :: hub () ;
my $tsensor = $hub - > Instrument ( ’ ITC ’ ,
{
connection_type = > ’ VISA_RS232 ’ ,
gpib_address = > 2
}) ;
my $sweep_temperature = $hub - > Sweep ( ’ T e m p e r a t u r e ’ ,
{
instrument = > $tsensor ,
points = > [90 ,4] ,
mode = > ’ l i s t ’
}) ;
.
DESCRIPTION
Parent: Lab::XPRESS::Sweep::Sweep
The Lab::XPRESS::Sweep::Temperature class implements a module for temperature
sweeps in the Lab::XPRESS::Sweep framework.
.
CONSTRUCTOR
my $sweep_temperature = $hub - > Sweep ( ’ T e m p e r a t u r e ’ ,
{
instrument = > $tsensor ,
points = > [90 ,4] ,
mode = > ’ l i s t ’
}) ;
Instantiates a new temperature sweep
.
PARAMETERS
instrument [Lab::Instrument] (mandatory) Instrument, conducting the sweep. Must
be of type Lab:Instrument. Supported instruments: Lab::Instrument::ITC
.
135
1 The Lab::Measurement package
mode [string] (default = ’continuous’ | ’step’ | ’list’) continuous: perform a continuous temperature sweep. After the starting temperature has been stabalized by the
temperature controller, the heater will be switched off in order to cool down to the
final value. Measurements will be performed constantly at the time-interval defined in
interval.
step: measurements will be performed at discrete values between start and end points
defined in parameter points, seperated by a step defined in parameter stepwidth
list: measurements will be performed at a list of values defined in parameter points
.
points [float array] (mandatory) array of values (in deg) that defines the characteristic points of the sweep. First value is appraoched before measurement begins.
Case mode => ’continuous’ : List of exactly 2 values, that define start and end
point of the sweep. The starting point has to be higher value than the endpont. points
=> [180, 4] # Start: 180 K / Stop: 4 K
Case mode => ’step’ : Same as in ’continuous’ but the temperature controller will
stabalize the temperature at the defined setpoints. A measurement is performed, when
the motor is idle.
Case mode => ’list’ : Array of values, with minimum length 1, that are approached
in sequence to perform a measurment.
.
stepwidth [float array] This parameter is relevant only if mode = ’step’ has been
selected. Stepwidth has to be an array of length ’1’ or greater. The values define
the width for each step within the corresponding sweep sequence. If the length of the
defined sweep sequence devided by the stepwidth is not an integer number, the last
step will be smaller in order to reach the defined points-value.
points = [0 , 90 , 180]
stepwidth = [10 , 25]
== > steps : 0 , 10 , 20 , 30 , 40 , 50 , 60 , 70 , 80 , 90 , 115 , 140 , 165 ,
180
.
number_of_points [int array] can be used instead of ’stepwidth’. Attention: Use
only the ’number_of_points’ or the ’stepwidth’ parameter. Using both will cause an
Error! This parameter is relevant only if mode = ’step’ has been selected. Number_of_points has to be an array of length ’1’ or greater. The values defines the
number of steps within the corresponding sweep sequence.
points = [0 , 90 , 180]
number_of_points = [5 , 2]
136
1.10 XPRESS
== > steps : 0 , 18 , 36 , 54 , 72 , 90 , 135 , 180
.
interval [float] (default = 1) interval in seconds for taking measurement points.
Only relevant in mode ’continuous’.
.
id [string] (default = ’Temperature_sweep’)
.
filename_extention [string] (default = ’T=’)
pended to the filenames if necessary.
.
Just an ID.
Defines a postfix, that will be ap-
delay_before_loop [int] (default = 0) defines the time in seconds to wait after the
starting point has been reached.
.
delay_in_loop [int] (default = 0) This parameter is relevant only if mode = ’step’
or ’list’ has been selected. Defines the time in seconds to wait after the value for the
next step has been reached.
.
delay_after_loop [int] (default = 0) Defines the time in seconds to wait after the
sweep has been finished. This delay will be executed before an optional backsweep or
optional repetitions of the sweep.
.
137
1 The Lab::Measurement package
138
1.11 Instrument control classes
1.11 Instrument control classes
1.11.1 Lab::Instrument
Instrument base class
SYNOPSIS
Lab::Instrument is meant to be used as a base class for inheriting instruments. For
very simple applications it can also be used directly, like
$ g en e r ic _instrument = new Lab :: Instrument ( connection_type = >
VISA_GPIB , gpib_address = > 14 ) ;
my $idn = $generic_instrument - > query ( ’ ∗IDN ? ’ ) ;
Every inheriting class constructor should start as follows:
sub new {
my $proto = shift ;
my $class = ref ( $proto ) || $proto ;
my $self = $class - > SUPER :: new ( @_ ) ;
$self - > $ {\( __PACKAGE__ . ’ : : _ c o n s t r u c t ’ ) }( __PACKAGE__ ) ;
supported connections , i n i t i a l i z e f i e l d s etc .
...
}
# check f o r
Beware that only the first set of parameters specific to an individual GPIB board or
any other bus hardware gets used. Settings for EOI assertion for example.
If you know what you’re doing or you have an exotic scenario you can use the connection parameter "ignore_twins => 1" to force the creation of a new bus object, but this
is discouraged - it will kill bus management and you might run into hardware/resource
sharing issues.
DESCRIPTION
Lab::Instrument is the base class for Instruments. It doesn’t do much by itself, but
is meant to be inherited in specific instrument drivers. It provides general read, write
and query methods and basic connection handling (internally, _set_connection,
_check_connection).
CONSTRUCTOR
new This blesses $self (don’t do it yourself in an inheriting class!), initializes the
basic "fields" to be accessed via AUTOLOAD and puts the configuration hash in $self>config to be accessed in methods and inherited classes.
Arguments: just the configuration hash (or even-sized list) passed along from a child
class constructor.
139
1 The Lab::Measurement package
METHODS
write
$instrument - > write ( $command <, { optional hashref / hash } > ) ;
Sends the command $command to the instrument. An option hash can be supplied
as second or also as only argument. Generally, all options are passed to the connection/bus, so additional named options may be supported based on the connection and
bus and can be passed as a hashref or hash. See Lab::Connection.
Optional named parameters for hash:
error_check = > 1/0
Invoke $instrument->check_errors after write. Defaults to off.
read
$result = $instrument - > read ({ read_length = > < max length > , brutal = >
<1/0 >) ;
Reads a result of ReadLength from the instrument and returns it. Returns an
exception on error.
If the parameter brutal is set, a timeout in the connection will not result in an
Exception thrown, but will return the data obtained until the timeout without further
comment. Be aware that this data is also contained in the the timeout exception object
(see Lab::Exception).
Generally, all options are passed to the connection/bus, so additional named options
may be supported based on the connection and bus and can be passed as a hashref or
hash. See Lab::Connection.
query
$result = $instrument - > query ({ command = > $command ,
wait_query = > $wait_query ,
read_length = > $read_length ) ;
Sends the command $command to the instrument and reads a result from the instrument and returns it. The length of the read buffer is set to read_length or to the
default set in the connection.
Waits for wait_query microseconds before trying to read the answer.
Generally, all options are passed to the connection/bus, so additional named options
may be supported based on the connection and bus and can be passed as a hashref or
hash. See Lab::Connection.
get_error
( $errcode , $errmsg ) = $instrument - > get_error () ;
Method stub to be overwritten. Implementations read one error (and message, if
available) from the device.
140
1.11 Instrument control classes
get_status
$status = $instrument - > get_status () ;
if ( $instrument - > get_status ( ’ERROR ’ ) ) {...}
Method stub to be overwritten. This returns the status reported by the device (e.g.
the status byte retrieved via serial poll from GPIB devices). When implementing, use
only information which can be retrieved very fast from the device, as this may be used
often.
Without parameters, has to return a hashref with named status bits, e.g.
$status = > {
ERROR = > 1 ,
DATA = > 0 ,
READY = > 1
}
If present, the first argument is interpreted as a key and the corresponding value of
the hash above is returned directly.
The ’ERROR’-key has to be implemented in every device driver!
check_errors
$instrument - > check_errors ( $last_command ) ;
# try
eval { $instrument - > check_errors ( $last_command ) };
# catch
if ( my $e = Exception :: Class - > caught ( ’ Lab : : E x c e p t i o n : :
D e v i c e E r r o r ’ )) {
warn " E r r o r s ␣ f r o m ␣ d e v i c e ! " ;
@errors = $e - > error_list () ;
@devtype = $e - > device_class () ;
$command = $e - > command () ;
}
Uses get_error() to check the device for occured errors. Reads all present errors and
throws a Lab::Exception::DeviceError. The list of errors, the device class and the last
issued command(s) (if the script provided them) are enclosed.
_check_args
my ( $arg_1 , $arg_2 , ... ) = $instrument - > _check_args (\ @args ,
@arg_names ) ;
This methode is expected to be used to deal with the different
possibilities a user can pass arguments when calling an
instruments methode .
@args are the users arguments . The expected arguments of a
specific methode may be $arg_1 and $arg_2 .
Using the old style calling a methode , you have to pass the two
arguments in the right order .
141
1 The Lab::Measurement package
Using the new style , you can pass the arguments as a HASH using
the arguments ’ ␣ names ␣ @arg_names . ␣You␣ don ’ t have to take care
of the right order in this case .
Furthermore the methode triggers a waring if it finds unknown
parameter in the arguments hash ( this is to cathch typos in
the script ) .
142
1.11 Instrument control classes
1.11.2 Multimeters
Lab::Instrument::Multimeter
Generic digital multimeter interface
DESCRIPTION The Lab::Instrument::Multmeter class implements a generic interface to digital all-purpose multimeters. It is intended to be inherited by other classes,
not to be called directly, and provides a set of generic functions. The class
CONSTRUCTOR
my $hp = new (\% options ) ;
METHODS
get_value
$value = $hp - > get_value () ;
Read out the current measurement value, for whatever type of measurement the
multimeter is currently configured.
id
$id = $hp - > id () ;
Returns the instruments ID string.
display_on
$hp - > display_on () ;
Turn the front-panel display on.
display_off
$hp - > display_off () ;
Turn the front-panel display off.
display_text
$hp - > display_text ( $text ) ;
Display a message on the front panel.
display_clear
$hp - > display_clear () ;
Clear the message displayed on the front panel.
143
1 The Lab::Measurement package
144
1.11 Instrument control classes
Lab::Instrument::HP34401A
HP/Agilent 34401A digital multimeter
SYNOPSIS
use Lab :: Instrument :: HP34401A ;
my $Agi = new Lab :: Instrument :: HP34401A ({
connection = > new Lab :: Connection :: GPIB (
gpib_board = > 0 ,
gpib_address = > 14 ,
),
}
DESCRIPTION The Lab::Instrument::HP34401A class implements an interface to
the 34401A digital multimeter by Agilent (formerly HP). This module can also be
used to address the newer 34410A and 34411A multimeters, but doesn’t include new
functions. Use the Lab::Instrument::HP34411A class for full functionality (not ported
yet).
CONSTRUCTOR
my $Agi = new (\% options ) ;
METHODS
fetch
$hp - > fetch () ;
Fetches the instrument buffer. Returns an array of values.
autozero
$hp - > autozero ( $setting ) ;
$setting can be 1/’ON’, 0/’OFF’ or ’ONCE’.
When set to "ON", the device takes a zero reading after every measurement. "ONCE"
perform one zero reading and disables the automatic zero reading. "OFF" does... you
get it.
configure_voltage_dc
$hp - > c onfigure_voltage_dc ( $range , $integration_time , $resolution ) ;
145
1 The Lab::Measurement package
Configures all the details of the device’s DC voltage measurement function.
$range is a positive numeric value (the largest expected value to be measured) or
one of ’MIN’, ’MAX’, ’AUTO’. It specifies the largest value to be measured. You can
set any value, but the HP/Agilent 34401A effectively uses one of the values 0.1, 1, 10,
100 and 1000V.
$integration_time is the integration time in seconds or MIN MAX DEF. This implicitly sets the provided resolution.
$resolution sets the resolution of the measurment. If set, $integration_time is overwritten.
configure_voltage_dc_trigger
$hp - > c o n f i g u r e _ v o l t a g e _ d c _ t r i g g e r ( $range , $integration_time ,
$count , $delay , $resolution )
Configures the device for successive triggered reading events. Does not initiate the
trigger facility. Reading can then be performed calling triggered_read(). The first
three parameters are just passed to configure_voltage_dc.
$count is an integer for the number of successive readings that follow one single
trigger event.
$delay is the delay in seconds between these readings.
triggered_read
@data = $hp - > triggered_read () ;
Sends a trigger pulse and fetches the values from the instrument buffer once the
reading is finished.
read_trig()
facility.
Sends a read trigger to the device. It does not initialize the trigger
init() Initializes the trigger facility. The device is then in the state "waiting for
trigger".
get_value
$data = hp - > get_value () ;
Inherited from Lab::Instrument::Multimeter. Performs a single reading in the current
configuration.
get_voltage_dc
$datum = $Agi - > get_voltage_dc ( $range , $resolution ) ;
Preset and make a dc voltage measurement with the specified range and resolution.
146
1.11 Instrument control classes
get_voltage_ac
$datum = $Agi - > get_voltage_ac ( $range , $resolution ) ;
Preset and make a ac voltage measurement with the specified range and resolution.
get_current_dc
$datum = $hp - > get_current_dc ( $range , $resolution ) ;
Preset and make a dc current measurement with the specified range and resolution.
get_current_ac
$datum = $hp - > get_current_ac ( $range , $resolution ) ;
Preset and make a ac current measurement with the specified range and resolution.
get_resistance
$resistance = $Agi - > get_resistance ( $range , $resolution ) ;
Preset and measure resistance with specified range and resolution.
get_4wresistance
$resistance = $Agi - > get_4wresistance ( $range , $resolution ) ;
Preset and measure the four way resistance with specified range and resolution.
get_status() Returns a status string from the device.
get_error()
Returns the error string from the device.
pl_freq Parameter: pl_freq
$hp - > pl_freq ( $new_freq ) ;
$npl_freq = $hp - > pl_freq () ;
Get/set the power line frequency at your location (50 Hz for most countries, which
is the default). This is the basis of the integration time setting (which is internally
specified as a count of power line cycles, or PLCs). The integration time will be set
incorrectly if this parameter is set incorrectly.
set_display_text
$Agi - > display_text ( $text ) ;
print $Agi - > display_text () ;
Display a message on the front panel. The multimeter will display up to 12 characters in a message; any additional characters are truncated. Without parameter the
displayed message is returned. Inherited from Lab::Instrument::Multimeter
147
1 The Lab::Measurement package
set_display_state
$Agi - > set_display_state ( $state ) ;
Turn the front-panel display on ($state = "ON") or off ($state = "OFF").
$range
Range is given in terms of volts and can be [0.1|1|10|100|1000|MIN|MAX|DEF].
DEF is default.
$resolution
Resolution is given in terms of $range or [MIN|MAX|DEF]. $resolution=0.0001
means 4 1/2 digits for example. The best resolution is 100nV: $range=0.1;
$resolution=0.000001.
get_voltage_ac
$datum = $Agi - > get_voltage_ac ( $range , $resolution ) ;
Preset and make an ac voltage measurement with the specified range and resolution. For ac measurements, resolution is actually fixed at 6 1/2 digits. The resolution
parameter only affects the front-panel display.
get_current_dc
$datum = $Agi - > get_current_dc ( $range , $resolution ) ;
Preset and make a dc current measurement with the specified range and resolution.
get_current_ac
$datum = $Agi - > get_current_ac ( $range , $resolution ) ;
Preset and make an ac current measurement with the specified range and resolution. For ac measurements, resolution is actually fixed at 6 1/2 digits. The resolution
parameter only affects the front-panel display.
configure_voltage_dc_trigger
$device - > trigger_mode ( $intt , $range , $count , $delay , $resolution
)
Configure the multimeter for a triggered reading.
$intt
The integration time in seconds. You can also set "MIN" or "MAX". This value
is overwritten if the resolution is specified.
$range
The range for the measurment.
148
1.11 Instrument control classes
$count
The number of measurements which are performed after one single trigger impulse.
$delay
The delay between the $count measurements (the integration time is not included).
$resolution
The resolution for the measurement. If given, this overwrites the $intt parameter.
trigger_read
$data = $device - > trigger_read ()
Sends a trigger signal and fetches the value(s) from the multimeter.
trigger
$device - > trigger ()
Sends a trigger signal to the device.
fetch
$data = $device - > fetch ()
Fetches the data which is currently in the output buffer of the device.
scroll_message
$Agi - > scroll_message ( $message ) ;
Scrolls the message $message on the display of the HP.
beep
$Agi - > beep () ;
Issue a single beep immediately.
get_error
( $err_num , $err_msg ) = $Agi - > get_error () ;
Query the multimeter’s error queue. Up to 20 errors can be stored in the queue.
Errors are retrieved in first-in-first out (FIFO) order.
reset
$Agi - > reset () ;
Reset the multimeter to its power-on configuration.
149
1 The Lab::Measurement package
150
1.11 Instrument control classes
Lab::Instrument::HP34420A
HP/Agilent 34420A digital multimeter
SYNOPSIS
use Lab :: Instrument :: HP34420A ;
my $Agi = new Lab :: Instrument :: HP34420A ({
connection = > new Lab :: Connection :: GPIB (
gpib_board = > 0 ,
gpib_address = > 14 ,
),
}
DESCRIPTION The Lab::Instrument::HP34420A class implements an interface to
the 34420A digital multimeter by Agilent (formerly HP). This module is in big parts
equal to the 34410A and 34411A multimeter drivers.
CONSTRUCTOR
my $Agi = new (\% options ) ;
METHODS
fetch
$hp - > fetch () ;
Fetches the instrument buffer. Returns an array of values.
autozero
$hp - > autozero ( $setting ) ;
$setting can be 1/’ON’, 0/’OFF’ or ’ONCE’.
When set to "ON", the device takes a zero reading after every measurement. "ONCE"
perform one zero reading and disables the automatic zero reading. "OFF" does... you
get it.
configure_voltage_dc
$hp - > c onfigure_voltage_dc ( $range , $integration_time ) ;
Configures all the details of the device’s DC voltage measurement function.
$range is a positive numeric value (the largest expected value to be measured) or
one of ’MIN’, ’MAX’, ’AUTO’. It specifies the largest value to be measured. You can
set any value, but the HP/Agilent 34401A effectively uses one of the values 0.1, 1, 10,
100 and 1000V.
$integration_time is the integration time in seconds. This implicitly sets the provided resolution.
151
1 The Lab::Measurement package
pl_freq Parameter: pl_freq
$hp - > pl_freq ( $new_freq ) ;
$npl_freq = $hp - > pl_freq () ;
Get/set the power line frequency at your location (50 Hz for most countries, which
is the default). This is the basis of the integration time setting (which is internally
specified as a count of power line cycles, or PLCs). The integration time will be set
incorrectly if this parameter is set incorrectly.
set_display_text
$Agi - > display_text ( $text ) ;
print $Agi - > display_text () ;
Display a message on the front panel. The multimeter will display up to 12 characters in a message; any additional characters are truncated. Without parameter the
displayed message is returned. Inherited from Lab::Instrument::Multimeter
set_display_state
$Agi - > set_display_state ( $state ) ;
Turn the front-panel display on ($state = "ON") or off ($state = "OFF").
get_resistance
$resistance = $Agi - > get_resistance ( $range , $resolution ) ;
Preset and measure resistance with specified range and resolution.
get_voltage_dc
$datum = $Agi - > get_voltage_dc ( $range , $resolution ) ;
Preset and make a dc voltage measurement with the specified range and resolution.
$range
Range is given in terms of volts and can be [0.1|1|10|100|1000|MIN|MAX|DEF].
DEF is default.
$resolution
Resolution is given in terms of $range or [MIN|MAX|DEF]. $resolution=0.0001
means 4 1/2 digits for example. The best resolution is 100nV: $range=0.1;
$resolution=0.000001.
get_voltage_ac
$datum = $Agi - > get_voltage_ac ( $range , $resolution ) ;
Preset and make an ac voltage measurement with the specified range and resolution. For ac measurements, resolution is actually fixed at 6 1/2 digits. The resolution
parameter only affects the front-panel display.
152
1.11 Instrument control classes
get_current_dc
$datum = $Agi - > get_current_dc ( $range , $resolution ) ;
Preset and make a dc current measurement with the specified range and resolution.
get_current_ac
$datum = $Agi - > get_current_ac ( $range , $resolution ) ;
Preset and make an ac current measurement with the specified range and resolution. For ac measurements, resolution is actually fixed at 6 1/2 digits. The resolution
parameter only affects the front-panel display.
configure_voltage_dc_trigger
$device - > c o n f i g u r e _ v o l t a g e _ d c _ t r i g g e r ( $intt , $range , $count ,
$delay , $resolution )
Configure the multimeter for a triggered reading.
$intt
The integration time in seconds. You can also set "MIN" or "MAX". This value
is overwritten if the resolution is specified.
$range
The range for the measurment.
$count
The number of measurements which are performed after one single trigger impulse.
$delay
The delay between the $count measurements (the integration time is not included).
$resolution
The resolution for the measurement. If given, this overwrites the $intt parameter.
trigger_read
$data = $device - > trigger_read ()
Sends a trigger signal and fetches the value(s) from the multimeter.
trigger
$device - > trigger ()
Sends a trigger signal to the device.
153
1 The Lab::Measurement package
fetch
$data = $device - > fetch ()
Fetches the data which is currently in the output buffer of the device.
beep
$Agi - > beep () ;
Issue a single beep immediately.
get_error
( $err_num , $err_msg ) = $Agi - > get_error () ;
Query the multimeter’s error queue. Up to 20 errors can be stored in the queue.
Errors are retrieved in first-in-first out (FIFO) order.
reset
$Agi - > reset () ;
Reset the multimeter to its power-on configuration.
154
1.11 Instrument control classes
Lab::Instrument::HP3458A
Agilent 3458A Multimeter
SYNOPSIS
use Lab :: Instrument :: HP3458A ;
my $dmm = new Lab :: Instrument :: HP3458A ({
gpib_board
=> 0,
gpib_address = > 11 ,
}) ;
print $dmm - > get_voltage_dc () ;
DESCRIPTION The Lab::Instrument::HP3458A class implements an interface to the
Agilent / HP 3458A digital multimeter.
CONSTRUCTOR
my $hp = new (% parameters ) ;
METHODS
pl_freq Parameter: pl_freq
$hp - > pl_freq ( $new_freq ) ;
$npl_freq = $hp - > pl_freq () ;
Get/set the power line frequency at your location (50 Hz for most countries, which
is the default). This is the basis of the integration time setting (which is internally
specified as a count of power line cycles, or PLCs). The integration time will be set
incorrectly if this parameter is set incorrectly.
get_voltage_dc
$voltage = $hp - > get_voltage_dc () ;
Make a dc voltage measurement. This also enables autoranging. For finer control,
use configure_voltage_dc() and triggered_read.
_head2 triggered_read
@values = $hp - > triggered_read () ;
$value = $hp - > triggered_read () ;
Trigger and read value(s) using the current device setup. This expects and digests
a list of values in ASCII format, as set up by configure_voltage_dc().
155
1 The Lab::Measurement package
triggered_read_raw
$result = $hp - > triggered_read_raw ( read_until_length = > $length ) ;
Trigger and read using the current device setup. This won’t do any parsing and just
return the answer from the device. If $read_until_length (integer) is specified, it will
try to continuously read until it has gathered this amount of bytes.
configure_voltage_dc
$hp - > configure_voltage_dc ( $range , $integration_time ) ;
Configure range and integration time for the following DCV measurements.
$range is a voltage or one of "AUTO", "MIN" or "MAX". $integration_time is given
in seconds or one of "DEFAULT", "MIN" or "MAX".
configure_voltage_dc_trigger
$hp - > c o n f i g u r e _ v o l t a g e _ d c _ t r i g g e r ( $range , $integration_time ,
$count , $delay ) ;
Configures range, integration time, sample count and delay (between samples) for
triggered readings.
$range, $integration_time: see configure_voltage_dc(). $count is the sample count
per trigger (integer). $delay is the delay between the samples in seconds.
configure_voltage_dc_trigger_highspeed
$hp - > c o n f i g u r e _ v o l t a g e _ d c _ t r i g g e r _ h i g h s p e e d ( $range ,
$integration_time , $count , $delay ) ;
Same as configure_voltage_dc_trigger, but configures the device for maximum measurement speed. Values are transferred in SINT format and can be fetched and decoded
using triggered_read_raw() and decode_SINT(). This mode allows measurements of
up to about 100 kSamples/second.
$range: see configure_voltage_dc(). $integration_time: integration time in seconds.
The default is 1.4e-6. $count is the sample count per trigger (integer). $delay is the
delay between the samples in seconds.
set_display_state
$hp - > set_display_state ( $state ) ;
Turn the front-panel display on/off. $state can be each of ’1’, ’0’, ’on’, ’off’.
set_display_text
$hp - > set_display_text ( $text ) ;
Display a message on the front panel. The multimeter will display up to 12 characters
in a message; any additional characters are truncated.
156
1.11 Instrument control classes
display_clear
$hp - > display_clear () ;
Clear the message displayed on the front panel.
beep
$hp - > beep () ;
Issue a single beep immediately.
get_error
( $err_num , $err_msg ) = $hp - > get_error () ;
Query the multimeter’s error queue. Up to 20 errors can be stored in the queue.
Errors are retrieved in first-in-first out (FIFO) order.
check_errors
$instrument - > check_errors ( $last_command ) ;
# try
eval { $instrument - > check_errors ( $last_command ) };
# catch
if ( my $e = Exception :: Class - > caught ( ’ Lab : : E x c e p t i o n : : D e v i c e E r r o r ’ )
) {
warn " E r r o r s ␣ f r o m ␣ d e v i c e ! " ;
@errors = $e - > error_list () ;
@devtype = $e - > device_class () ;
$command = $e - > command () ;
} else {
$e = Exception :: Class - > caught () ;
ref $e ? $e - > rethrow ; die $e ;
}
Uses get_error() to check the device for occured errors. Reads all present error and
throws a Lab::Exception::DeviceError. The list of errors, the device class and the last
issued command(s) (if the script provided them) are enclosed.
set_nplc
$hp - > set_nplc ( $number ) ;
Sets the integration time in units of power line cycles.
reset
$hp - > reset () ;
Reset the multimeter to its power-on configuration. Same as preset(’NORM’).
157
1 The Lab::Measurement package
preset
$hp - > preset ( $config ) ;
$config can be any of the following settings:
’ FAST ’
’NORM ’
’ DIG ’
/ 0
/ 1
/ 2
Choose one of several configuration presets.
selftest
$hp - > selftest () ;
Starts the internal self-test routine.
autocalibration
$hp - > autocalibration ( $mode ) ;
Starts the internal autocalibration. Warning... this procedure takes 11 minutes with
the ’ALL’ mode!
$mode can be each of
’ ALL ’
’DCV ’
’AC ’
’OHMS ’
/
/
/
/
0
1
2
4
decode_SINT
@values = $hp - > decode_SINT ( $SINT_data , < $iscale > ) ;
Takes a data blob with SINT values and decodes them into a numeric list. The used
$iscale parameter is read from the device by default if omitted. Make sure the device
still has the same settings as used to obtain $SINT_data, or iscale will be off which
leads to invalid data decoding.
158
1.11 Instrument control classes
1.11.3 Voltage sources
Lab::Instrument::Source
Base class for voltage source instruments
SYNOPSIS
DESCRIPTION This class implements a general voltage source, if necessary with
several channels. It is meant to be inherited by instrument classes that implement real
voltage sources (e.g. the Lab::Instrument::Yokogawa7651 class).
The class provides a unified user interface for those voltage sources to support the
exchangeability of instruments.
Additionally, this class provides a safety mechanism called gate_protect to protect
delicate samples. It includes automatic limitations of sweep rates, voltage step sizes,
minimal and maximal voltages.
There’s no direct user application of this class.
CONSTRUCTOR
$self = new Lab :: Instrument :: Source (\% config ) ;
This constructor will only be used by instrument drivers that inherit this class, not by
the user. It accepts an additional configuration hash as parameter ’default_device_settings’.
The first hash contains the parameters used by default for this device and its subchannels, if any. The second hash can be used to override options for this instance while
still using the defaults for derived objects. If \%config is missing, \%default_config is
used.
The instrument driver (e.g. Lab::Instrument::Yokogawa7651 ) has e.g. a constructor
like this:
$yoko = new Lab :: Instrument :: Yokogawa7651 ({
connection_type = > ’ L i n u x G P I B ’ ,
gpib_board
= > $board ,
gpib_address
= > $address ,
gate_protect
[...]
= > $gp ,
}) ;
METHODS
configure
$self - > configure (\% config ) ;
159
1 The Lab::Measurement package
Supported configure options:
In general, all parameters which can be changed by access methods of the class/object
can be used. In fact this is what happens, and the config hash given to configure() ist
just a shorthand for this. The following are equivalent:
$source - > set_gate_protect (1) ;
$source - > s e t _ g p _ m a x _ u n i t s _ p e r _ s e c o n d (0.1) ;
...
$source - > configure ({ gate_protect = >1 , g p_ m ax _ un it s _p e r_ se c on d = >0.1 ,
...)
Options in detail:
fast_set
This parameter controls the return value of the set_voltage function and can
be set to 0 (off, default) or 1 (on). For fast_set off, set_voltage first requests
the hardware to set the voltage, and then reads out the actually set voltage via
get_voltage. The resulting number is returned. For fast_set on, set_voltage
requests the hardware to set the voltage and returns without double-check the
requested value. This, albeit less secure, may speed up measurements a lot.
gate_protect
Whether to use the automatic sweep speed limitation. Can be set to 0 (off)
or 1 (on). If it is turned on, the output voltage will not be changed faster
than allowed by the gp_max_units_per_second, gp_max_units_per_step and
gp_max_step_per_second values. These three parameters overdefine the allowed
speed. Only two parameters are necessary. If all three are set, the smallest
allowed sweep rate is chosen.
Additionally the maximal and minimal output voltages are limited.
This mechanism is useful to protect sensible samples that are destroyed by abrupt
voltage changes. One example is gate electrodes on semiconductor electronics
samples, hence the name.
gp_max_units_per_second
How much the output voltage is allowed to change per second.
gp_max_units_per_step
How much the output voltage is allowed to change per step.
gp_max_step_per_second
How many steps are allowed per second.
gp_min_units
The smallest allowed output voltage.
160
1.11 Instrument control classes
gp_max_units
The largest allowed output voltage.
gp_equal_level
Voltages with a difference less than this value are considered equal.
set_level
$new_volt = $self - > set_level ( $srclvl ) ;
Sets the output to $srclvl (in Volts or Ampere). If the configure option gate_protect
is set to a true value, the safety mechanism takes into account the gp_max_units_per_step,
gp_max_units_per_second etc. settings, by employing the sweep_to_level method.
Returns for fast_set off the actually set output source level. This can be different
from $srclvl, due to the gp_max_units, gp_min_units settings. For fast_set on,
set_level returns always $level.
For a multi-channel device, add the channel number as a parameter:
$new_volt = $self - > set_voltage ( $voltage , $channel ) ;
_set_level($targetlvl) Function Stub. Has to be overwritten by device driver.
The function should set the source level to $targetlvl on the device. Should return
the newly set source level.
get_level() Function Stub. Has to be overwritten by device driver.
The function should return the source level from the device cache. If called with
the option from_device => 1 , the value should be fetched from the device. Should
return the current source level.
get_range() Function Stub. Has to be overwritten by device driver.
The function should return the source range from the device cache. If called with
the option from_device => 1 , the value should be fetched from the device. Should
return the current source range.
set_range() Function Stub. Has to be overwritten by device driver.
The function should set the source range on the device. Should return the newly set
source range.
sweep_to_level
$new_volt = $self - > sweep_to_level ( $srclvl ) ;
$new_volt = $self - > sweep_to_level ( $srclvl , $channel ) ;
161
1 The Lab::Measurement package
This method sweeps the output source level to the desired value and only returns
then. If the specific Instrument implemented _sweep_to_level, this version is preferred.
Returns the actually set output source level. This can be different from $srclvl,
due to the gp_max_units, gp_min_units settings.
get_level
$new_volt = $self - > get_level () ;
$new_volt = $self - > get_level ( $channel ) ;
Returns the source level currently set.
create_subsource
$bigc2 = $bigsource - > create_subsource ( channel = >2 ,
g p_ ma x _u n it s _p er _ se c on d = >0.01 ) ;
Returns a new instrument object with its default channel set to
channel $channel_nr of the parent multi - channel source .
The device_settings given to the parent at instantiation ( or the
d ef au l t_ d ev i ce _s e tt i ng s if present ) will be used as default
values , which can be overwritten by parameters to create_subsource () .
162
1.11 Instrument control classes
Lab::Instrument::DummySource
Dummy voltage source
DESCRIPTION The Lab::Instrument::DummySource class implements a dummy voltage source that does nothing but can be used for testing purposes.
Only developers will ever make use of this class.
163
1 The Lab::Measurement package
164
1.11 Instrument control classes
Lab::Instrument::Yokogawa7651
Yokogawa 7651 DC source
SYNOPSIS
use Lab :: Instrument :: Yokogawa7651 ;
my $gate14 = new Lab :: Instrument :: Yokogawa7651 (
connection_type = > ’ L i n u x G P I B ’ ,
gpib_address = > 22 ,
gate_protecet = > 1 ,
level = > 0.5 ,
);
$gate14 - > set_voltage (0.745) ;
print $gate14 - > get_voltage () ;
DESCRIPTION The Lab::Instrument::Yokogawa7651 class implements an interface
to the discontinued voltage and current source 7651 by Yokogawa. This class derives
from Lab::Instrument::Source and provides all functionality described there.
CONSTRUCTORS
new( %configuration_HASH ) HASH is a list of tuples given in the format
key => value,
please supply at least the configuration for the connection: connection_type =>
"LinxGPIB" gpib_address =>
you might also want to have gate protect from the start (the default values are
given):
gate_protect = > 1 ,
gp_equal_level
= > 1e -5 ,
g p_ m ax _u n it s _p er _ se c on d = > 0.05 ,
gp_ max_ unit s_per _ ste p
= > 0.005 ,
gp _m ax _st ep _p er _s e co nd = > 10 ,
g p_ m ax _u n it s _p er _ se c on d = > 0.05 ,
gp_ max_ unit s_per _ste p
= > 0.005 ,
max_sweep_time = >3600 ,
min_sweep_time = >0.1 ,
If you want to use the sweep function without using gate protect, you should specify
stepsize = >0.01
Additinally there is support to set parameters for the device "on init":
165
1 The Lab::Measurement package
function
= > Voltage , # s p e c i f y "
V o l t a g e " o r " C u r r e n t " mode , s t r i n g i s c a s e
insensitive
range
= > undef ,
level
= > undef ,
output
= > undef ,
If those values are not specified, the current device configuration is left unaltered.
METHODS
set_voltage
$src - > set_voltage ( $voltage )
Sets the output voltage to $voltage. Returns the newly set voltage.
get_voltage Returns the currently set $voltage. The value is read from the driver
cache by default. Provide the option
device_cache = > 1
to read directly from the device.
set_current
$src - > set_current ( $current )
Sets the output current to $current. Returns the newly set current.
get_current Returns the currently set $current. The value is read from the driver
cache by default. Provide the option
device_cache = > 1
to read directly from the device.
set_level
$src - > set_level ( $lvl )
Sets the level $lvl in the current operation mode.
get_level
$lvl = $src - > get_level ()
Returns the currently set level. Use
device_cache = > 1
to enforce a reading directly from the device.
166
1.11 Instrument control classes
sweep_to_level
$src - > sweep_to_level ( $lvl , $time )
Sweep to the level $lvl in $time seconds.
set_range
$src - > set_range ( $range )
Set the output range for the device. $range should be either in decimal or scientific
notation. Returns the newly set range.
get_info Returns the information provided by the instrument’s ’OS’ command, in the
form of an array with one entry per line. For display, use join(’,’,$yoko->get_info());
or similar.
set_output
$src - > set_output ( $onoff )
Sets the output switch to "1" (on) or "0" (off). Returns the new output state;
get_output Returns the status of the output switch (0 or 1).
set_voltage_limit($limit)
set_current_limit($limit)
get_status() Returns a hash with the following keys:
CAL_switch
memory_card
calibration_mode
output
unstable
error
execution
setting
The value for each key is either 0 or 1, indicating the status of the instrument.
INSTRUMENT SPECIFICATIONS
167
1 The Lab::Measurement package
DC voltage The stability (24h) is the value at 23 +- 1°C. The stability (90days),
accuracy (90days) and accuracy (1year) are values at 23 +- 5°C. The temperature
coefficient is the value at 5 to 18°C and 28 to 40°C.
Range
Maximum
Output
Resolution
Stability 24 h
Stability 90 d
+ -(% of setting + -(% of setting
+ V )
+ V )
------------------------------------------------------------10 mV
+ -12.0000 mV 100 nV
0.002 + 3
0.014 + 4
100 mV + -120.000 mV 1 V
0.003 + 3
0.014 + 5
1V
+ -1.20000 V 10 V
0.001 + 10
0.008 + 50
10 V
+ -12.0000 V 100 V
0.001 + 20
0.008 + 100
30 V
+ -32.000 V
1 mV
0.001 + 50
0.008 + 200
Range
Accuracy 90 d
Accuracy 1 yr
Temperature
+ -(% of setting + -(% of setting Coefficient
+ V )
+ V )
+ -(% of setting
+ V )/ C
----------------------------------------------------10 mV
0.018 + 4
0.025 + 5
0.0018 + 0.7
100 mV 0.018 + 10
0.025 + 10
0.0018 + 0.7
1V
0.01 + 100
0.016 + 120
0.0009 + 7
10 V
0.01 + 200
0.016 + 240
0.0008 + 10
30 V
0.01 + 500
0.016 + 600
0.0008 + 30
Range
Maximum Output
Output Resistance
Output Noise
DC to 10 Hz DC to 10 kHz
( typical data )
---------------------------------------------------------10 mV
approx . 2 Ohm
3 Vp - p
30 Vp - p
100 mV
approx . 2 Ohm
5 Vp - p
30 Vp - p
1V
+ -120 mA less than 2 mOhm
15 Vp - p
60 Vp - p
10 V
+ -120 mA less than 2 mOhm
50 Vp - p
100 Vp - p
30 V
+ -120 mA less than 2 mOhm
150 Vp - p
200 Vp - p
Common mode rejection: 120dB or more (DC, 50/60Hz). (However, it is 100dB or
more in the 30V range.)
DC current
Range
Maximum
Output
Stability (24 h )
Stability (90 days )
+ -(% of setting
+ -(% of setting
+ A )
+ A )
----------------------------------------------------------------------1 mA
+ -1.20000 mA 10 nA
0.0015 + 0.03
0.016 + 0.1
10 mA
+ -12.0000 mA 100 nA
0.0015 + 0.3
0.016 + 0.5
100 mA
+ -120.000 mA 1 A
0.004 + 3
0.016 + 5
Range
Accuracy (90 days )
+ -(% of setting
+ A )
168
Resolution
Accuracy (1 year )
+ -(% of setting
+ A )
Temperature
Coefficient
+ -(% of setting
+ A )/ C
1.11 Instrument control classes
----1 mA
10 mA
100 mA
Range
-----------------------------------------------------0.02 + 0.1
0.03 + 0.1
0.0015 + 0.01
0.02 + 0.5
0.03 + 0.5
0.0015 + 0.1
0.02 + 5
0.03 + 5
0.002 + 1
Maximum
Output
Output
Resistance
Output Noise
DC to 10 Hz DC to 10 kHz
( typical data )
----------------------------------------------------------------1 mA
+ -30 V
more than 100 MOhm
0.02 Ap - p
0.1 Ap - p
10 mA
+ -30 V
more than 100 MOhm
0.2 Ap - p
0.3 Ap - p
100 mA + -30 V
more than 10 MOhm
2 Ap - p
3 Ap - p
Common mode rejection: 100nA/V or more (DC, 50/60Hz).
169
1 The Lab::Measurement package
170
1.11 Instrument control classes
Lab::Instrument::YokogawaGS200
Yokogawa GS200 DC source
SYNOPSIS
use Lab :: Instrument :: YokogawaGS200 ;
my $gate14 = new Lab :: Instrument :: YokogawaGS200 (
connection_type = > ’ L i n u x G P I B ’ ,
gpib_address = > 22 ,
function = > ’VOLT ’ ,
level = > 0.4 ,
);
$gate14 - > set_voltage (0.745) ;
print $gate14 - > get_voltage () ;
DESCRIPTION The Lab::Instrument::YokogawaGS200 class implements an interface to the discontinued voltage and current source GS200 by Yokogawa. This class
derives from Lab::Instrument::Source and provides all functionality described there.
CONSTRUCTORS
new( %configuration_HASH ) HASH is a list of tuples given in the format
key => value,
please supply at least the configuration for the connection: connection_type =>
"LinxGPIB" gpib_address =>
you might also want to have gate protect from the start (the default values are
given):
gate_protect = > 1 ,
gp_equal_level
= > 1e -5 ,
g p_ m ax _u n it s _p er _ se c on d = > 0.05 ,
gp_ max_ units _per _ ste p
= > 0.005 ,
gp _m ax _st ep _p er _s e co nd = > 10 ,
g p_ m ax _u n it s _p er _ se c on d = > 0.05 ,
gp_ max_ unit s_per _ste p
= > 0.005 ,
max_sweep_time = >3600 ,
min_sweep_time = >0.1 ,
Additinally there is support to set parameters for the device "on init":
function
voltage ,
range
level
output
= > undef , # ’VOLT ’ −
’CURR ’ − c u r r e n t
= > undef ,
= > undef ,
= > undef ,
If those values are not specified, they are read from the device.
171
1 The Lab::Measurement package
METHODS
sweep_to_level
$src - > sweep_to_level ( $lvl , $time )
Sweep to the level $lvl in $time seconds.
set_voltage
$src - > set_voltage ( $voltage )
Sets the output voltage to $voltage. Returns the newly set voltage.
get_voltage Returns the currently set $voltage. The value is read from the driver
cache by default. Provide the option
device_cache = > 1
to read directly from the device.
set_current
$src - > set_current ( $current )
Sets the output current to $current. Returns the newly set current.
get_current Returns the currently set $current. The value is read from the driver
cache by default. Provide the option
device_cache = > 1
to read directly from the device.
set_level
$src - > set_level ( $lvl )
Sets the level $lvl in the current operation mode.
get_level
$lvl = $src - > get_level ()
Returns the currently set level. Use
device_cache = > 1
to enforce a reading directly from the device.
172
1.11 Instrument control classes
set_range($range)
Fixed voltage mode
10 E -3
10 mV
100 E -3
100 mV
1 E +0
1V
10 E +0
10 V
30 E +0
30 V
Fixed current mode
1E -3
10 E -3
10 mA
100 E -3
100 mA
200 E -3
1 mA
200 mA
Please use the format on the left for the range command .
program_run($program) Runs a program stored on the YokogawaGS200. If no
prgram name is given, the currently loaded program is executed.
program_pause
Pauses the currently running program.
program_continue Continues the paused program.
set_function($function) Sets the source function. The Yokogawa supports the values
"CURR" for current mode and "VOLT" for voltage mode.
Returns the newly set source function.
set_voltage_limit($limit)
new voltage limit.
Sets a voltage limit to protect the device. Returns the
set_current_limit($limit)
See set_voltage_limit.
output_on() Sets the output switch to on and returns the new value of the output
status.
output_off() Sets the output switch to off. The instrument outputs no voltage or
current then, no matter what voltage you set. Returns the new value of the output
status.
get_error() Queries the error code from the device. This is a very useful thing to do
when you are working remote and the source is not responding.
get_output()
173
1 The Lab::Measurement package
get_range()
174
1.11 Instrument control classes
Lab::Instrument::KnickS252
Knick S 252 DC source
SYNOPSIS
use Lab :: Instrument :: KnickS252 ;
my $gate14 = new Lab :: Instrument :: KnickS252 (0 ,11) ;
$gate14 - > set_range (5) ;
$gate14 - > set_voltage (0.745) ;
print $gate14 - > get_voltage () ;
DESCRIPTION The Lab::Instrument::KnickS252 class implements an interface to
the Knick S 252 dc calibrator. This class derives from Lab::Instrument::Source and
provides all functionality described there.
CONSTRUCTOR
$knick = new Lab :: Instrument :: KnickS252 ( $gpib_board , $gpib_addr ) ;
# Or any o t h e r t y p e o f c o n s t r u c t i o n s u p p o r t e d by Lab : : I n s t r u m e n t .
METHODS
set_voltage
$knick - > set_voltage ( $voltage ) ;
get_voltage
$voltage = $knick - > get_voltage () ;
set_range
$knick - > set_range ( $range ) ;
# $ r a n g e i s 5 o r 20
# 5
i s 5V
# 20
i s 20V
get_range
$range = $knick - > get_range () ;
# $ r a n g e i s 5 o r 20
# 5
i s 5V
# 20
i s 20V
175
1 The Lab::Measurement package
176
1.11 Instrument control classes
1.11.4 Lock-in amplifiers
Lab::Instrument::SR830
Stanford Research SR830 Lock-In Amplifier
SYNOPSIS
use Lab :: Instrument :: SR830 ;
my $sr = new Lab :: Instrument :: SR830 (
connection_type = > ’ L i n u x G P I B ’ ,
gpib_address = >12 ,
);
( $x , $y ) = $sr - > get_xy () ;
( $r , $phi ) = $sr - > get_rphi () ;
DESCRIPTION The Lab::Instrument::SR830 class implements an interface to the
Stanford Research SR830 Lock-In Amplifier.
CONSTRUCTOR
$sr830 = new Lab :: Instrument :: SR830 ( $board , $gpib ) ;
METHODS
get_xy
( $x , $y ) = $sr830 - > get_xy () ;
Reads channels x and y simultaneously; returns an array.
get_rphi
( $r , $phi ) = $sr830 - > get_rphi () ;
Reads amplitude and phase simultaneously; returns an array.
set_sens
$string = $sr830 - > set_sens (1 E -7) ;
Sets sensitivity (value given in V); possible values are: 2 nV, 5 nV, 10 nV, 20 nV, 50
nV, 100 nV, ..., 100 mV, 200 mV, 500 mV, 1V If the argument is not in this list, the
next higher value will be chosen.
Returns the value of the sensitivity that was actually set, as number in Volt.
177
1 The Lab::Measurement package
get_sens
$sens = $sr830 - > get_sens () ;
Returns the value of the sensitivity, as number in Volt.
set_tc
$string = $sr830 - > set_tc (1 E -3) ;
Sets time constant (value given in seconds); possible values are: 10 us, 30us, 100 us,
300 us, ..., 10000 s, 30000 s If the argument is not in this list, the next higher value
will be chosen.
Returns the value of the time constant that was actually set, as number in seconds.
get_tc
$tc = $sr830 - > get_tc () ;
Returns the time constant, as number in seconds.
set_frequency
$sr830 - > set_frequency (334) ;
Sets reference frequency; value given in Hz. Values between 0.001 Hz and 102 kHz
can be set.
get_frequency
$freq = $sr830 - > get_frequency () ;
Returns reference frequency in Hz.
set_amplitude
$sr830 - > set_amplitude (0.005) ;
Sets output amplitude to the value given (in V); values between 4 mV and 5 V are
possible.
get_amplitude
$ampl = $sr830 - > get_amplitude () ;
Returns amplitude of the sine output in V.
id
$id = $sr830 - > id () ;
Returns the instruments ID string.
178
1.11 Instrument control classes
1.11.5 RF generators
Lab::Instrument::HP83732A
HP 83732A Series Synthesized Signal Generator
SYNOPSIS
DESCRIPTION
CONSTRUCTOR
METHODS
179
1 The Lab::Measurement package
180
1.11 Instrument control classes
1.11.6 RF detectors
Lab::Instrument::U2000
Agilent U2000 series USB Power Sensor
DESCRIPTION The Lab::Instrument::U2000 class implements an interface to the
U2000 series power sensors from Agilent.
CONSTRUCTOR
my $power = new (\% options ) ;
METHODS
get_value
$value = $power - > read () ;
Read out the current measurement value, for whatever type of measurement the
sensor is currently configured. Waits for trigger.
id
$id = $power - > id () ;
Returns the instruments ID string.
set_sample_rate $power->set_sample_rate(string); Valid values are MIN, MAX,
NORM, DOUBLE, FAST and 1-110 (rate in Hz).
set_step_detect $power->set_step_detect(string); Valid values are ON and OFF.
set_frequency $power->set_frequency(string or number) Sets frequency for internal frequency correction (in Hz). Valid values are DEF, MIN, MAX and 1kHz to
1000GHz.
181
1 The Lab::Measurement package
182
1.11 Instrument control classes
1.11.7 Superconducting magnet power supplies
Lab::Instrument::MagnetSupply
Base class for magnet power supply instruments
( c ) 2010 David Borowsky , Andreas K . H t t e l
2011 Andreas K . H t t e l
183
1 The Lab::Measurement package
184
1.11 Instrument control classes
Lab::Instrument::OI_IPS
Oxford Instruments IPS series superconducting magnet supply
Tested with the Oxford Instruments IPS 120-10 and IPS 180 superconducting magnet
power supplies.
( c ) 2010 , 2011 , 2012 Andreas K . H t t e l
185
1 The Lab::Measurement package
186
1.11 Instrument control classes
Lab::Instrument::Cryogenic
Cryogenic SMS120 superconducting magnet supply
(c)
2013
David Borowsky
Andreas K . H t t e l
187
1 The Lab::Measurement package
188
1.11 Instrument control classes
1.11.8 Temperature control devices
Lab::Instrument::TemperatureControl
Base class for temperature control instruments
( c ) 2011 Andreas K . H t t e l
189
1 The Lab::Measurement package
190
1.11 Instrument control classes
Lab::Instrument::TRMC2
ABB TRMC2 temperature controller
SYNOPSIS
use Lab :: Instrument :: TRMC2 ;
DESCRIPTION The Lab::Instrument::ILM class implements an interface to the ABB
TRMC2 temperature controller. The driver works, but documentation is lacking.
CONSTRUCTOR
my $trmc =...
191
1 The Lab::Measurement package
192
1.11 Instrument control classes
Lab::Instrument::OI_ITC503
Oxford Instruments ITC503 Intelligent Temperature Control
SYNOPSIS
use Lab :: Instrument :: OI_ITC503 ;
my $itc = new Lab :: Instrument :: OI_ITC503 (
isobus_address = >3 ,
);
DESCRIPTION The Lab::Instrument::OI_ITC503 class implements an interface to
the Oxford Instruments ITC intelligent temperature controller (tested with the ITC503).
This driver is still work in progress and also lacks documentation.
193
1 The Lab::Measurement package
194
1.11 Instrument control classes
Lab::Instrument::TLK43
Electronic process controller TLKA41/42/43 (SIKA GmbH)
SYNOPSIS
use Lab :: Instrument :: TLK43 ;
my $tlk = new Lab :: Instrument :: TLK43 ({ Port = > ’ / d e v / t t y S 0 ’ ,
slave_address = > 1 , Baudrate = > 19200 , Parity = > ’ none ’ ,
Databits = > 8 , Stopbits = > 1 , Handshake = > ’ none ’ }) ;
or
my $Bus = new Lab :: Bus :: MODBUS ({ Port = > ’ / d e v / t t y S 0 ’ , Interface
= > ’ RS232 ’ , slave_address = > 1 , Baudrate = > 19200 , Parity
= > ’ none ’ , Databits = > 8 , Stopbits = > 1 , Handshake = > ’ none ’
}) ;
my $tlk = new Lab :: Instrument :: TLK43 ({ Bus = > $Bus }) ;
print $tlk - > read_temperature () ;
$tlk - > set_setpoint (200) ;
DESCRIPTION The Lab::Instrument::TLK43 class implements an interface to SIKA
GmbH’s TLK41/42/43 process controllers. The devices have to be equipped with the
optional RS485 interface. The device can be fully programmed using RS232 and an
interface converter (e.g. "GRS 485 ISO" RS232 - RS485 Converter).
The following parameter list configures the RS232 port correctly for a setup with
the GRS485 converter and a speed of 19200 baud: Port => ’/dev/ttyS0’, Interface
=> ’RS232’, Baudrate => 19200, Parity => ’none’, Databits => 8, Stopbits => 1,
Handshake => ’none’
CONSTRUCTOR
my $tlk = new (\% options ) ;
METHODS
read_temperature
$temp = read_temperature () ;
Returns the currently measured temperature, or undef on errors.
195
1 The Lab::Measurement package
set_setpoint
$success = $tlk - > set_setpoint ({ Slot = > $Slot , Value = > $Value })
Set the value of setpoint slot $Slot.
$Slot
The TLK controllers provide 4 setpoint slots. $Slot has to be a number of (1..4)
and may not exceed the nSP-parameter set in the device (set_setpoint return
undef in this case)
$Value
Float value to set the setpoint to. Internally this is held by a 16bit number.
set_setpoint() will cut off the decimal values according to the value of the "dP"
parameter of the device. (dP=0..3 meaning 0..3 decimal points. only 0,1 work
for temperature sensors)
set_active_setpoint
$success = $tlk - > set_active_setpoint ( $Value ) ;
Set the value of the currently active setpoint slot.
$Value
Float value to set the setpoint to. Internally this is held by a 16bit number.
set_setpoint() will cut off the decimal values according to the value of the "dP"
parameter of the device. (dP=0..3 meaning 0..3 decimal points. only 0,1 work
for temperature sensors)
read_range
$value = $tlk - > read_range ({ mem_addresss = > (0 x0200 ..0 xFFFF || Name ) ,
MemCount = > (1..4) })
Read the values of $MemCount memory slots from $mem_address on. The Address
may be specified as a 16bit Integer in the valid range, or as an address name (see
TLK43.pm, %fields{’MemTable’}). $MemCount may be in the range 1..4. Returns
the memory as an array (one byte per field)
read_address_int
$value = $tlk - > read_range ({ mem_addresss = > (0 x0200 ..0 xFFFF || Name ) ,
MemCount = > (1..4) })
Read the value of the 16bit word at $mem_address on. The Address may be specified as a 16bit Integer in the valid range, or as an address name (see TLK43.pm,
%fields{’MemTable’}). Returns the value as unsigned integer (internally (byte1 <<
8) + byte2)
196
1.11 Instrument control classes
write_address
$success = $tlk - > write_address ({ mem_address = > (0 x0200 ...0 xFFFF ||
Name ) , mem_value = > Value (16 bit word ) }) ;
Write $Value to the given address. The Address may be specified as a 16bit Integer
in the valid range, or as an address name (see TLK43.pm, %fields{’MemTable’}).
set_setpoint_slot
$success = $tlk - > set_setpoint_slot ({ Slot = > $Slot })
Set the active setpoint to slot no. $Slot.
$Slot
The TLK controllers provide 4 setpoint slots. $Slot has to be a number of (1..4)
and may not exceed the nSP-parameter set in the device (set_setpoint_slot
return undef in this case)
197
1 The Lab::Measurement package
198
1.11 Instrument control classes
1.11.9 Cryostat handling devices
Lab::Instrument::OI_ILM210
Oxford Instruments ILM Intelligent Level Meter
SYNOPSIS
use Lab :: Instrument :: OI_ILM210 ;
my $ilm = new Lab :: Instrument :: OI_ILM210 (
connection_type = > ’ I s o B u s ’ ,
base_connection = >... ,
isobus_address = >5 ,
);
DESCRIPTION The Lab::Instrument::OI_ILM210 class implements an interface to
the Oxford Instruments ILM helium level meter (tested with the ILM210).
CONSTRUCTOR
my $ilm = new Lab :: Instrument :: OI_ILM210 (
connection_type = > ’ I s o B u s ’ ,
base_connection = > $iso ,
isobus_address = > $addr ,
);
Instantiates a new ILM210 object, attached to the GPIB or RS232 connection (of
type Lab::Connection) $iso, with IsoBus address $addr.
METHODS
get_level
$perc = $ilm - > get_level () ;
$perc = $ilm - > get_level (1) ;
Reads out the current helium level in percent. Note that this command does NOT
trigger a measurement, but only reads out the last value measured by the ILM. This
means that in slow mode values may remain constant for several minutes.
As optional parameter a channel number can be provided. This defaults to 1.
199
1 The Lab::Measurement package
200
1.11 Instrument control classes
Lab::Instrument::OI_Mercury
Oxford Instruments Mercury Cryocontrol
SYNOPSIS
use Lab :: Instrument :: OI_Mercury ;
my $m = new Lab :: Instrument :: OI_Mercury (
connection_type = > ’ S o c k e t ’ ,
remote_port = >7020 ,
remote_addr = >1.2.3.4 ,
);
DESCRIPTION The Lab::Instrument::OI_Mercury class implements an interface to
the Oxford Instruments Mercury cryostat control system.
METHODS
get_catalogue
$mcat = $m - > get_catalogue () ;
print " $mcat \ n " ;
Returns the hardware configuration of the Mercury system. A typical response would
be
STAT : SYS : CAT : DEV : GRPX : PSU : DEV : MB1 . T1 : TEMP : DEV : GRPY : PSU : DEV : GRPZ : PSU :
DEV : PSU . M1 : PSU : DEV : PSU . M2 : PSU : DEV : GRPN : PSU : DEV : DB5 . L1 : LVL
Here, each group starting with "DEV:" describes one hardware component. In this
case, we obtain for example:
DEV : GRPX : PSU
DEV : GRPY : PSU
DEV : GRPZ : PSU
DEV : MB1 . T1 : TEMP
DEV : DB5 . L1 : LVL
|
| - a 3 - axis magnet power supply unit
|
-- a temperature sensor
-- a cryogen level sensor
In each of these blocks, the second component after "DEV:" is the UID of the device;
it can be used in other commands such as get_level to address it.
get_temperature
$t = $m - > get_temperature ( ’MB1 . T1 ’ ) ;
Read out the designated temperature channel. Result is in Kelvin (?).
201
1 The Lab::Measurement package
get_he_level
$he = $m - > get_he_level ( ’ DB5 . L1 ’ ) ;
Read out the designated liquid helium level meter channel. Result is in percent as
calibrated.
202
1.11 Instrument control classes
1.11.10 Stepper motors
Lab::Instrument::PD11042
42mm stepper motor with integrated controller/driver
SYNOPSIS
use Lab :: Instrument :: PD11042 ;
...
DESCRIPTION The Lab::Instrument::PD11042 class implements an interface to the
Trinamic PD-110-42 low-cost 42mm stepper motor with integrated controller/driver.
CONSTRUCTOR
...
METHODS
...
...
...
203
1 The Lab::Measurement package
204
1.12 Connection classes
1.12 Connection classes
1.12.1 Lab::Connection
Connection base class
SYNOPSIS
This is the base class for all connections. Every inheriting classes constructors should
start as follows:
sub new {
my $proto = shift ;
my $class = ref ( $proto ) || $proto ;
my $self = $class - > SUPER :: new ( @_ ) ;
$self - > _construct ( __PACKAGE__ ) ; # i n i t i a l i z e
...
}
f i e l d s etc .
DESCRIPTION
Lab::Connection is the base class for all connections and implements a generic set of
access methods. It doesn’t do anything on its own.
A connection in general is an object which is created by an instrument and provides
it with a generic set of methods to talk to its hardware counterpart. For example
Lab::Instrument::HP34401A can work with any connection of the type GPIB, that is,
connections derived from Lab::Connection::GPIB.
That would be, for example Lab::Connection::LinuxGPIB Lab::Connection::VISA_GPIB
Towards the instrument, these look the same, but they work with different drivers/backends.
CONSTRUCTOR
new Generally called in child class constructor:
my $self = $class - > SUPER :: new ( @_ ) ;
Return blessed $self, with @_ accessible through $self->Config().
METHODS
Clear Try to clear the connection, if the bus supports it.
205
1 The Lab::Measurement package
Read
my $result = $connection - > Read () ;
my $result = $connection - > Read ( timeout = > 30 ) ;
configuration hash options :
brutal = > <1/0 >
# suppress timeout e r r o r s i f s e t to 1
read_length = > <int >
# how many b y t e s / c h a r a c t e r s t o r e a d
... see bus documentation
Reads a string from the connected device. In this basic form, its merely a wrapper
to the method connection_read() of the used bus. You can give a configuration hash,
which options are passed on to the bus. This hash is also meant for options to Read
itself, if need be.
Write
$connection - > Write ( command = > ’ ∗CLS ’ ) ;
configuration hash options :
command = > < command string >
... more ( see bus documentation )
Write a command string to the connected device. In this basic form, its merely a
wrapper to the method connection_write() of the used bus. You need to supply a
configuration hash, with at least the key ’command’ set. This hash is also meant for
options to Read itself, if need be.
Query
my $result = $connection - > Query ( command = > ’ ∗IDN ? ’ ) ;
configuration hash options :
command = > < command string >
wait_query = > < wait time between read and write in seconds >
o v e r w r i t e s the connection d e f a u l t
brutal = > <1/0 >
# suppress timeout e r r o r s i f s e t to true
read_length = > <int >
# how many b y t e s / c h a r a c t e r s t o r e a d
... more ( see bus documentation )
#
Write a command string to the connected device, and immediately read the response.
You need to supply a configuration hash with at least the ’command’ key set. The
wait_query key sets the time to wait between read and write in usecs. The hash is
also passed along to the used bus methods.
BrutalRead
BrutalQuery
LongQuery
206
The same as read with the ’brutal’ option set to 1.
The same as Query with the ’brutal’ option set to 1.
The same as Query with ’read_length’ set to 10240.
1.12 Connection classes
config
Provides unified access to the fields in initial @_ to all the cild classes. E.g.
$GPIB_Address = $instrument - > Config ( gpib_address ) ;
Without arguments, returns a reference to the complete $self->Config aka @_ of
the constructor.
$Config = $connection - > Config () ;
$GPIB_Address = $connection - > Config () - >{ ’ g p i b _ a d d r e s s ’ };
207
1 The Lab::Measurement package
208
1.12 Connection classes
1.12.2 Lab::Connection::DEBUG
Debug connection
DESCRIPTION
Connection to the DEBUG bus.
209
1 The Lab::Measurement package
210
1.12 Connection classes
1.12.3 Lab::Connection::GPIB
Base class for GPIB connections
SYNOPSIS
This is the base class for all connections providing a GPIB interface. Every inheriting
class constructor should start as follows:
sub new {
my $proto = shift ;
my $class = ref ( $proto ) || $proto ;
my $self = $class - > SUPER :: new ( @_ ) ;
$self - > _construct ( __PACKAGE__ ) ; # i n i t i a l i z e
...
}
f i e l d s etc .
DESCRIPTION
Lab::Connection::GPIB is the base class for all connections providing a GPIB interface. It is not usable on its own. It inherits from Lab::Connection.
Its main use so far is to define the data fields common to all GPIB interfaces.
CONSTRUCTOR
new Generally called in child class constructor:
my $self = $class - > SUPER :: new ( @_ ) ;
Return blessed $self, with @_ accessible through $self->Config().
METHODS
This just calls back on the methods inherited from Lab::Connection.
If you inherit this class in your own connection however, you have to provide the
following methods. Take a look at e.g. Lab::Connection::VISA_GPIB and at the basic
implementations in Lab::Connection (they may even suffice).
Write() Takes a config hash, has to at least pass the key ’command’ correctly to the
underlying bus.
Read()
Takes a config hash, reads back a message from the device.
Clear() Clears the instrument.
211
1 The Lab::Measurement package
config
Provides unified access to the fields in initial @_ to all the child classes. E.g.
$GPIB_PAddress = $instrument - > Config ( GPIB_PAddress ) ;
Without arguments, returns a reference to the complete $self->Config aka @_ of
the constructor.
$Config = $connection - > Config () ;
$GPIB_PAddress = $connection - > Config () - >{ ’ GPIB_PAddress ’ };
212
1.12 Connection classes
1.12.4 Lab::Connection::RS232
Base class for RS232 connections
SYNOPSIS
This is the base class for all connections providing a RS232 interface. Every inheriting
class constructor should start as follows:
sub new {
my $proto = shift ;
my $class = ref ( $proto ) || $proto ;
my $self = $class - > SUPER :: new ( @_ ) ;
$self - > _construct ( __PACKAGE__ ) ; # i n i t i a l i z e
...
}
f i e l d s etc .
DESCRIPTION
Lab::Connection::RS232 is the base class for all connections providing a GPIB interface. It is not usable on its own. It inherits from Lab::Connection.
CONSTRUCTOR
new Generally called in child class constructor:
my $self = $class - > SUPER :: new ( @_ ) ;
Return blessed $self, with @_ accessible through $self->Config().
METHODS
This just calls back on the methods inherited from Lab::Connection.
If you inherit this class in your own connection however, you have to provide the
following methods. Take a look at e.g. Lab::Connection::VISA_RS232 and at the basic
implementations in Lab::Connection (they may even suffice).
Write() Takes a config hash, has to at least pass the key ’command’ correctly to the
underlying bus.
Read()
Takes a config hash, reads back a message from the device.
Clear() Clears the instrument.
config
Provides unified access to the fields in initial @_ to all the child classes. E.g.
213
1 The Lab::Measurement package
214
1.12 Connection classes
1.12.5 Lab::Connection::LinuxGPIB
Connection class which uses LinuxGPIB (libgpib0) as a backend.
SYNOPSIS
This is not called directly. To make a GPIB suppporting instrument use Lab::Connection::LinuxGPIB,
set the connection_type parameter accordingly:
$instrument = new HP34401A( connection_type => ’LinuxGPIB’, gpib_board =>
0, gpib_address => 14 )
DESCRIPTION
Lab::Connection::LinuxGPIB provides a GPIB-type connection with the bus Lab::Bus::LinuxGPIB,
using Linux GPIB (aka libgpib0 in debian) as backend.
It inherits from Lab::Connection::GPIB and subsequently from Lab::Connection.
For Lab::Bus::LinuxGPIB, the generic methods of Lab::Connection suffice, so only a
few defaults are set: wait_status=>0, # usec; wait_query=>10, # usec; read_length=>1000,
# bytes
CONSTRUCTOR
new
my $connection = new Lab :: Connection :: LinuxGPIB (
gpib_board = > 0 ,
gpib_address = > $address ,
gpib_saddress = > $secondary_a ddress
}
METHODS
This just falls back on the methods inherited from Lab::Connection.
config
Provides unified access to the fields in initial @_ to all the child classes. E.g.
$GPIB_Address = $instrument - > Config ( gpib_address ) ;
Without arguments, returns a reference to the complete $self->Config aka @_ of
the constructor.
$Config = $connection - > Config () ;
$GPIB_Address = $connection - > Config () - >{ ’ g p i b _ a d d r e s s ’ };
215
1 The Lab::Measurement package
216
1.12 Connection classes
1.12.6 Lab::Connection::MODBUS_RS232
Connection class for Lab::Bus::MODBUS_RS232
217
1 The Lab::Measurement package
218
1.12 Connection classes
1.12.7 Lab::Connection::VISA
VISA-type connection class which uses Lab::Bus::VISA and thus NI VISA (Lab::VISA)
as a backend.
SYNOPSIS
This is not called directly. To make a VISA suppporting instrument use Lab::Connection::VISA,
set the connection_type parameter accordingly:
$instrument = new HP34401A( connection_type => ’VISA’, resource_name =>
’GPIB0::14::INSTR’, )
DESCRIPTION
Lab::Connection::VISA provides a VISA-type connection with Lab::Bus::VISA using
NI VISA (Lab::VISA) as backend.
It inherits from Lab::Connection.
CONSTRUCTOR
new
my $connection = new Lab :: Connection :: VISA (
connection_type = > ’ VISA ’ ,
resource_name = > ’ GPIB0 : : 1 4 : : INSTR ’ ,
}
METHODS
This just falls back on the methods inherited from Lab::Connection.
config
Provides unified access to the fields in initial @_ to all the child classes. E.g.
$GPIB_Address = $instrument - > Config ( gpib_address ) ;
Without arguments, returns a reference to the complete $self->Config aka @_ of
the constructor.
$Config = $connection - > Config () ;
$GPIB_Address = $connection - > Config () - >{ ’ g p i b _ a d d r e s s ’ };
219
1 The Lab::Measurement package
220
1.12 Connection classes
1.12.8 Lab::Connection::VISA_GPIB
GPIB-type connection class which uses Lab::Bus::VISA and thus NI VISA (Lab::VISA)
as a backend.
SYNOPSIS
This class is not called directly. To make a GPIB suppporting instrument use Lab::Connection::VISA_GPIB,
set the connection_type parameter accordingly:
$instrument = new HP34401A (
connection_type = > ’ VISA_GPIB ’ ,
gpib_board = > 0 ,
gpib_address = > 14
)
DESCRIPTION
Lab::Connection::VISA_GPIB provides a GPIB-type connection with Lab::Bus::VISA
using NI VISA (Lab::VISA) as backend.
It inherits from Lab::Connection::GPIB and subsequently from Lab::Connection.
The main feature is to assemble the standard gpib connection options gpib_board
gpib_address gpib_saddress into a valid NI VISA resource name (see Lab::Connection::VISA
for more details).
CONSTRUCTOR
new
my $connection = new Lab :: Connection :: VISA_GPIB (
gpib_board = > 0 ,
gpib_address = > $address ,
gpib_saddress = > $secondary_a ddress
}
METHODS
This just falls back on the methods inherited from Lab::Connection.
config
Provides unified access to the fields in initial @_ to all the child classes. E.g.
$GPIB_Address = $instrument - > Config ( gpib_address ) ;
Without arguments, returns a reference to the complete $self->Config aka @_ of
the constructor.
$Config = $connection - > Config () ;
$GPIB_Address = $connection - > Config () - >{ ’ g p i b _ a d d r e s s ’ };
221
1 The Lab::Measurement package
222
1.12 Connection classes
1.12.9 Lab::Connection::VISA_RS232
RS232-type connection class which uses Lab::Bus::VISA and thus NI VISA (Lab::VISA)
as a backend.
SYNOPSIS
This class is not called directly. To make a RS232 suppporting instrument use Lab::Connection::VISA_RS232,
set the connection_type parameter accordingly:
$instrument = new BlaDeviceType (
connection_type = > ’ VISA_RS232 ’ ,
port = > ’ ASRL1 ’ ,
)
DESCRIPTION
Lab::Connection::VISA_RS232 provides a RS232-type connection with Lab::Bus::VISA
using NI VISA (Lab::VISA) as backend.
It inherits from Lab::Connection::RS232 and subsequently from Lab::Connection.
The main feature is to set upon initialization all the RS232 libe parameters baud_rate
...
CONSTRUCTOR
new
my $connection = new Lab :: Connection :: VISA_RS232 (
port = > ’ ASRL1 ’ ,
baud_rate = > 9600 ,
)
METHODS
This just falls back on the methods inherited from Lab::Connection.
config
Provides unified access to the fields in initial @_ to all the child classes. E.g.
$GPIB_Address = $instrument - > Config ( gpib_address ) ;
Without arguments, returns a reference to the complete $self->Config aka @_ of
the constructor.
$Config = $connection - > Config () ;
$GPIB_Address = $connection - > Config () - >{ ’ g p i b _ a d d r e s s ’ };
223
1 The Lab::Measurement package
224
1.12 Connection classes
1.12.10 Lab::Connection::IsoBus
IsoBus connection class which uses Lab::Bus::IsoBus as a backend.
SYNOPSIS
This is not called directly. To make an Isobus instrument use Lab::Connection::IsoBus,
set the connection_type parameter accordingly:
$instrument = new ILM210( connection_type => ’IsoBus’, isobus_address => 3,
)
DESCRIPTION
Lab::Connection::IsoBus provides a connection with Lab::Bus::IsoBus, transparently handled via a pre-existing bus and connection object (e.g. serial or GPIB).
It inherits from Lab::Connection.
CONSTRUCTOR
new
my $connection = new Lab :: Connection :: IsoBus (
connection_type = > ’ I s o B u s ’ ,
isobus_address = > 3 ,
}
METHODS
This just falls back on the methods inherited from Lab::Connection.
config
Provides unified access to the fields in initial @_ to all the child classes. E.g.
$IsoBus_Address = $instrument - > Config ( isobus_address ) ;
Without arguments, returns a reference to the complete $self->Config aka @_ of
the constructor.
$Config = $connection - > Config () ;
$IsoBus_Address = $connection - > Config () - >{ ’ i s o b u s _ a d d r e s s ’ };
225
1 The Lab::Measurement package
226
1.12 Connection classes
1.12.11 Lab::Connection::LinuxGPIB
Connection class which uses LinuxGPIB (libgpib0) as a backend.
SYNOPSIS
This is not called directly. To make a GPIB suppporting instrument use Lab::Connection::LinuxGPIB,
set the connection_type parameter accordingly:
$instrument = new HP34401A( connection_type => ’LinuxGPIB’, gpib_board =>
0, gpib_address => 14 )
DESCRIPTION
Lab::Connection::LinuxGPIB provides a GPIB-type connection with the bus Lab::Bus::LinuxGPIB,
using Linux GPIB (aka libgpib0 in debian) as backend.
It inherits from Lab::Connection::GPIB and subsequently from Lab::Connection.
For Lab::Bus::LinuxGPIB, the generic methods of Lab::Connection suffice, so only a
few defaults are set: wait_status=>0, # usec; wait_query=>10, # usec; read_length=>1000,
# bytes
CONSTRUCTOR
new
my $connection = new Lab :: Connection :: LinuxGPIB (
gpib_board = > 0 ,
gpib_address = > $address ,
gpib_saddress = > $secondary_a ddress
}
METHODS
This just falls back on the methods inherited from Lab::Connection.
config
Provides unified access to the fields in initial @_ to all the child classes. E.g.
$GPIB_Address = $instrument - > Config ( gpib_address ) ;
Without arguments, returns a reference to the complete $self->Config aka @_ of
the constructor.
$Config = $connection - > Config () ;
$GPIB_Address = $connection - > Config () - >{ ’ g p i b _ a d d r e s s ’ };
227
1 The Lab::Measurement package
228
1.13 Bus classes
1.13 Bus classes
1.13.1 Lab::Bus
Bus base class
SYNOPSIS
This is a base class for inheriting bus types.
DESCRIPTION
Lab::Bus is a base class for individual buses. It does not do anything on its own. For
more detailed information on the use of bus objects, take a look on a child class, e.g.
Lab::Bus::LinuxGPIB.
Lab::Bus::BusList contains a hash with references to all the active buses in your
program. They are put there by the constructor of the individual bus Lab::Bus::new()
and have two levels: Package name and a unique bus ID (GPIB board index offers itself
for GPIB). This is to transparently (to the use interface) reuse bus objects, as there
may only be one bus object for every (hardware) bus. weaken() is used on every
reference stored in this hash, so it doesn’t prevent object destruction when the last
"real" reference is lost. Yes, this breaks object orientation a little, but it comes so
handy!
our % Lab :: Bus :: BusList = [
$Package = > {
$UniqueID = > $Object ,
}
’ Lab : : Bus : : GPIB ’ = > {
’ 0 ’ = > $Object ,
}
" 0 " is the gpib board index
Place your twin searching code in $self-_search_twin()>. Make sure it evaluates
$self-IgnoreTwin()>. Look at Lab::Bus::LinuxGPIB.
CONSTRUCTOR
new Generally called in child class constructor:
my $self = $class - > SUPER :: new ( @_ ) ;
Return blessed $self, with @_ accessible through $self->Config().
METHODS
config
Provides unified access to the fields in initial @_ to all the child classes.
connection_new Empty stub function for overloading
229
1 The Lab::Measurement package
connection_read
connection_write
230
Empty stub function for overloading
Empty stub function for overloading
1.13 Bus classes
1.13.2 Lab::Bus::DEBUG
Interactive debug bus
DESCRIPTION
This will be an interactive debug bus, which prints out the commands sent by the
measurement script, and lets you manually enter the instrument responses.
Unfinished, needs testing.
231
1 The Lab::Measurement package
232
1.13 Bus classes
1.13.3 Lab::Bus::DEBUG::HumanInstrument
Interactive debug bus with WxWindow interface
DESCRIPTION
This will be an interactive debug bus, which prints out the commands sent by the
measurement script, and lets you manually enter the instrument responses.
Unfinished, needs testing.
233
1 The Lab::Measurement package
234
1.13 Bus classes
1.13.4 Lab::Bus::LinuxGPIB
LinuxGPIB bus
SYNOPSIS
This is the GPIB bus class for the GPIB library linux-gpib (aka libgpib0 in the
debian world).
my $GPIB = new Lab :: Bus :: LinuxGPIB ({ gpib_board = > 0 }) ;
or implicit through instrument and connection creation:
my $instrument = new Lab :: Instrument :: HP34401A ({
connection_type = > ’ L i n u x G P I B ’ ,
gpib_board = > 0 ,
gpib_address = >14 ,
}
DESCRIPTION
See http://linux-gpib.sourceforge.net/ for details on the LinuxGPIB package. The package provides both kernel drivers and Perl bindings. Obviously, this will work for Linux
systems only. On Windows, please use Lab::Bus::VISA. The interfaces are (errr, will
be) identical.
Note: you don’t need to explicitly handle bus objects. The Instruments will create
them themselves, and existing bus will be automagically reused.
In GPIB, instantiating two bus with identical parameter "gpib_board" will logically
lead to the reuse of the first one. To override this, use the parameter "ignore_twins"
at your own risk.
CONSTRUCTOR
new
my $bus = Lab :: Bus :: GPIB ({
gpib_board = > $board_num
}) ;
Return blessed $self, with @_ accessible through $self->config().
gpib_board: Index of board to use. Can be omitted, 0 is the default.
Thrown Exceptions
Lab::Bus::GPIB throws
235
1 The Lab::Measurement package
Lab :: Exception :: GPIBError
fields :
’ i b s t a ’ , the raw ibsta status byte received from linux - gpib
’ i b s t a _ h a s h ’ , the ibsta bit values in a named hash ( ’DCAS ’ = > $val ,
’DTAS ’ = > $val , ... ) .
Use Lab :: Bus :: GPIB :: VerboseIbstatus () to get a nice
string representation
Lab :: Exception :: GPIBTimeout
fields :
’ Data ’ , this is meant to contain the data that ( maybe ) has been read
/ obtained / generated despite and up to the timeout .
... and all the fields of Lab :: Exception :: GPIBError
METHODS
connection_new
$GPIB - > connection_new ({ gpib_address = > $paddr }) ;
Creates a new connection ("instrument handle") for this bus. The argument is a
hash, whose contents depend on the bus type. For GPIB at least ’gpib_address’ is
needed.
The handle is usually stored in an instrument object and given to connection_read,
connection_write etc. to identify and handle the calling instrument:
$InstrumentHandle = $GPIB - > connection_new ({ gpib_address = > 13 }) ;
$result = $GPIB - > connection_read ( $self - > InstrumentHandle () , { options
}) ;
See Lab::Instrument::Read().
TODO: this is probably not correct anymore
connection_write
$GPIB - > connection_write ( $InstrumentHandle , { Cmd = > $Command } ) ;
Sends $Command to the instrument specified by the handle.
connection_read
$GPIB - > connection_read ( $InstrumentHandle , { Cmd = > $Command ,
ReadLength = > $readlength , Brutal = > 0/1 } ) ;
Sends $Command to the instrument specified by the handle. Reads back a maximum
of $readlength bytes. If a timeout or an error occurs, Lab::Exception::GPIBError or
Lab::Exception::GPIBTimeout are thrown, respectively. The Timeout object carries
the data received up to the timeout event, accessible through $Exception->Data().
Setting Brutal to a true value will result in timeouts being ignored, and the gathered
data returned without error.
236
1.13 Bus classes
timeout
$GPIB - > timeout ( $connection_handle , $timeout ) ;
Sets the timeout in seconds for GPIB operations on the device/connection specified
by $connection_handle.
config
Provides unified access to the fields in initial @_ to all the child classes. E.g.
$GPIB_Address = $instrument - > config ( gpib_address ) ;
Without arguments, returns a reference to the complete $self->config aka @_ of the
constructor.
$config = $bus - > config () ;
$GPIB_PAddress = $bus - > config () - >{ ’ g p i b _ a d d r e s s ’ };
237
1 The Lab::Measurement package
238
1.13 Bus classes
1.13.5 Lab::Bus::RS232
RS232 or Virtual Comm port bus
SYNOPSIS
my $bus = Lab :: Bus :: RS232 ({
port = > ’ / d e v / ttyACM0 ’
}) ;
Return blessed $self, with @_ accessible through $self->config().
port: Device name to use (e.g. COM1 under Windows or /dev/ttyUSB1 under Linux)
TODO: check this!!!
DESCRIPTION
This is a bus for Lab::Measurement to communicate via RS232 or Virtual Comm port
e.g. for FTDI devices.
CONSTRUCTOR
new All parameters are used as by Device::SerialPort. port is needed in every
case. An additional parameter reuse is avaliable if two instruments use the same port.
This is mainly implemented for USBprologix gateway. reuse can be a SerialPort object
or a Lab::Instrument... package. Default value for timeout is 500ms and can be set
by the parameter "timeout". Other options: handshake, baudrate, databits, stopbits
and parity
METHODS
Used by Lab::Instrument. Not for direct use!!!
Read Reads data.
Write
Handle
Sent data to instrument
Give instrument object handle
239
1 The Lab::Measurement package
240
1.13 Bus classes
1.13.6 Lab::Bus::MODBUS_RS232
RS232/RS485 MODBUS RTU protocol bus
SYNOPSIS
use Lab :: Bus :: MODBUS_RS232 ;
my $h = Lab :: Bus :: MODBUS_RS232 - > new ({
Interface = > ’ RS232 ’ ,
Port = > ’COM1| / d e v / ttyUSB1 ’
slave_address = > ’ 1 ’
}) ;
COM1 is the Windows notation, /dev/ttyUSB1 the Linux equivalent. Use as needed.
DESCRIPTION
This is an interface package for Lab::Measurement to communicate via RS232/RS485
with a MODBUS RTU enabled device. It uses Lab::Bus::RS232 (RS485 can be done
using a RS232<->RS485 converter for now). It’s main use is to calculate the checksums
needed by MODBUS RTU.
Refer to your device for the correct port configuration.
As of yet, this driver does NOT fully implement all MODBUS RTU functions. Only
the function codes 3 and 6 are provided.
CONSTRUCTOR
new All parameters are used as by Device::SerialPort respectively Lab::Bus::RS232.
’port’ is needed in every case. Default value for timeout is 500ms and can be set by the
parameter "Timeout". Other options you probably have to set: Handshake, Baudrate,
Databits, Stopbits and Parity.
METHODS
Used by Lab::Connection. Not for direct use!!!
connectionRead Reads data. Arguments: function (0x01,0x02,0x03,0x04 - "Read
Coils", "Read Discrete Inputs", "Read Holding Registers", "Read Input Registers")
slave_address (0xFF) mem_address ( 0xFFFF, Address of first word ) mem_count (
0xFFFF, Count of words to read )
connectionWrite Send data to instrument. Arguments:
function (0 x05 ,0 x06 ,0 x0F ,0 x10 - " W r i t e ␣ S i n g l e ␣ C o i l " , " W r i t e ␣ S i n g l e ␣
R e g i s t e r ", " Write ␣ M u l t i p l e ␣ C o i l s ", " Write ␣ M u l t i p l e ␣ R e g i s t e r s ")
241
1 The Lab::Measurement package
Currently only 0x06 is implemented.
slave_address (0 xFF )
mem_address ( 0 xFFFF , Address of word )
Value ( 0 xFFFF , value to write to mem_address )
242
1.13 Bus classes
1.13.7 Lab::Bus::VISA
National Instruments VISA bus
SYNOPSIS
This is the VISA bus class for the NI VISA library.
my $visa = new Lab :: Bus :: VISA () ;
or implicit through instrument creation:
my $instrument = new Lab :: Instrument :: HP34401A ({
BusType = > ’ VISA ’ ,
}
DESCRIPTION
soon
CONSTRUCTOR
new
my $bus = Lab :: Bus :: VISA ({
}) ;
Return blessed $self, with @_ accessible through $self->config().
Options: none
Thrown Exceptions
Lab::Bus::VISA throws
Lab :: Exception :: VISAError
fields :
’ s t a t u s ’ , the raw ibsta status byte received from linux - gpib
Lab :: Exception :: VISATimeout
fields :
’ d a t a ’ , this is meant to contain the data that ( maybe ) has been read
/ obtained / generated despite and up to the timeout .
... and all the fields of Lab :: Exception :: GPIBError
243
1 The Lab::Measurement package
METHODS
connection_new
$visa - > connection_new ({ resource_name = > " GPIB0 : : 1 4 : : INSTR " }) ;
Creates a new instrument handle for this bus.
The handle is usually stored in an instrument object and given to connection_read,
connection_write etc. to identify and handle the calling instrument:
$InstrumentHandle = $visa - > connection_new ({ resource_name = > " GPIB0
: : 1 4 : : INSTR " }) ;
$result = $visa - > connection_read ( $self - > InstrumentHandle () , { options
}) ;
See Lab::Instrument::Read().
connection_write
$visa - > connection_write ( $InstrumentHandle , { command = > $command ,
wait_status = > $wait_status } ) ;
Sends $command to the instrument specified by the handle, and waits $wait_status
microseconds before evaluating the status.
connection_read
$visa - > connection_read ( $InstrumentHandle , { command = > $command ,
read_length = > $read_length , brutal = > 0/1 } ) ;
Sends $Command to the instrument specified by the handle. Reads back a maximum
of $readlength bytes. If a timeout or an error occurs, Lab::Exception::VISAError or
Lab::Exception::VISATimeout are thrown, respectively. The Timeout object carries
the data received up to the timeout event, accessible through $Exception->Data().
Setting Brutal to a true value will result in timeouts being ignored, and the gathered
data returned without error.
connection_query
$visa - > connection_query ( $InstrumentHandle , { command = > $command ,
read_length = > $read_length , wait_status = > $wait_status ,
wait_query = > $wait_query , brutal = > 0/1 } ) ;
Performs an connection_write followed by an connection_read, each given the supplied parameters. Waits $wait_query microseconds betweeen Write and Read.
244
1.13 Bus classes
1.13.8 Lab::Bus::IsoBus
Oxford Instruments IsoBus bus
SYNOPSIS
This is the IsoBus bus class. Typically you create it implicit through instrument
creation:
my $instrument = new Lab :: Instrument :: IPS ({
BusType = > ’ I s o B u s ’ ,
base_connection = > new Lab :: Bus :: VISA_GPIB ({ gpib_board = > 0 ,
gpib_address = > 24}) ,
isobus_addres = > 2 ,
}
METHODS
connection_new
$isobus - > connection_new ({ resource_name = > $isobus_address }) ;
Creates a new instrument handle for this bus.
The handle is usually stored in an instrument object and given to connection_read,
connection_write etc. to identify and handle the calling instrument:
$In strumentHandle = $isobus - > connection_new ({ resource_name = >
$isobus_address }) ;
$result = $isobus - > connection_read ( $self - > InstrumentHandle () , {
options }) ;
See Lab::Instrument::Read().
connection_write
$isobus - > connection_write ( $InstrumentHandle , { command = > $command ,
wait_status = > $wait_status } ) ;
Puts in front of the $command-string the isobus_adress, e.g. "@1$command". Passes
the modified argument hash to the base_connection. For further information refer to
the specific connection class of $base_connection.
connection_read
$isobus - > connection_read ( $InstrumentHandle , { command = > $command ,
read_length = > $read_length , timeout = > $seconds , brutal = > 0/1 }
);
Puts in front of the $command-string the isobus_adress, e.g. "@1$command". Passes
the modified argument hash to the base_connection. For further information refer to
the specific connection class of $base_connection.
245
1 The Lab::Measurement package
connection_clear
$isobus - > connection_clear ( $InstrumentHandle ) ;
Clears the specified connection $InstrumentHandle.
connection_query
$isobus - > connection_query ( $InstrumentHandle , { command = > $command ,
read_length = > $read_length , wait_status = > $wait_status ,
wait_query = > $wait_query , brutal = > 0/1 } ) ;
Puts in front of the $command-string the isobus_adress, e.g. "@1$command". Passes
the modified argument hash to the base_connection. For further information refer to
the specific connection class of $base_connection.
246
1.13 Bus classes
1.13.9 Lab::Bus::LinuxGPIB
LinuxGPIB bus
SYNOPSIS
This is the USB TMC (Test & Measurement Class) bus class.
my $tmc = new Lab :: Bus :: USBtmc ({ }) ;
or implicit through instrument and connection creation:
my $instrument = new Lab :: Instrument :: HP34401A ({
connection_type = > ’ USBtmc ’ ,
tmc_address = >1 ,
}
DESCRIPTION
Driver for the interface provided by the usbtmc linux kernel module.
Obviously, this will work for Linux systems only. On Windows, please use Lab::Bus::VISA.
The interfaces are (errr, will be) identical.
Note: you don’t need to explicitly handle bus objects. The Instruments will create
them themselves, and existing bus will be automagically reused.
CONSTRUCTOR
new
my $bus = Lab :: Bus :: USBtmc ({
}) ;
Return blessed $self, with @_ accessible through $self->config().
Thrown Exceptions
Lab::Bus::USBtmc throws
Lab :: Exception :: TMCOpenFileError
Lab :: Exception :: CorruptParameter
247
1 The Lab::Measurement package
METHODS
connection_new
$tmc - > connection_new ({ tmc_address = > $addr }) ;
Creates a new connection ("instrument handle") for this bus. The argument is a
hash, whose contents depend on the bus type. For TMC at least ’tmc_address’ is
needed.
The handle is usually stored in an instrument object and given to connection_read,
connection_write etc. to identify and handle the calling instrument:
$InstrumentHandle = $GPIB - > connection_new ({ gpib_address = > 13 }) ;
$result = $GPIB - > connection_read ( $self - > InstrumentHandle () , { options
}) ;
See Lab::Instrument::Read().
connection_write
$GPIB - > connection_write ( $InstrumentHandle , { Cmd = > $Command } ) ;
Sends $Command to the instrument specified by the handle.
connection_read
$GPIB - > connection_read ( $InstrumentHandle , { Cmd = > $Command ,
ReadLength = > $readlength , Brutal = > 0/1 } ) ;
Sends $Command to the instrument specified by the handle. Reads back a maximum
of $readlength bytes. If a timeout or an error occurs, Lab::Exception::GPIBError or
Lab::Exception::Timeout are thrown, respectively. The Timeout object carries the
data received up to the timeout event, accessible through $Exception->Data().
Setting Brutal to a true value will result in timeouts being ignored, and the gathered
data returned without error.
timeout
$GPIB - > timeout ( $connection_handle , $timeout ) ;
Sets the timeout in seconds for GPIB operations on the device/connection specified
by $connection_handle.
config
Provides unified access to the fields in initial @_ to all the child classes. E.g.
$GPIB_Address = $instrument - > config ( gpib_address ) ;
Without arguments, returns a reference to the complete $self->config aka @_ of the
constructor.
248
1.13 Bus classes
$config = $bus - > config () ;
$GPIB_PAddress = $bus - > config () - >{ ’ g p i b _ a d d r e s s ’ };
249
1 The Lab::Measurement package
250
2 The Lab::VISA package
2.1 Lab::VISA::Installation
Installation guide for Lab::VISA
Introduction
Lab::VISA has been tested to work on Linux and Windows, both with ActiveState
Perl and the Microsoft VC++ Compiler, and Strawberry Perl with the included gcc
compiler.
Installation on Windows XP with ActiveState Perl
Work with administrator account during installation.
Install VISA (and GPIB drivers) if necessary.
• Download current VISA release from NI (tested with 4.4.1, 4.5.0)
• Run installer
• Check location of visa32.lib (eg. C:\Programme\IVI Foundation\VISA\WinNT\lib\msc\visa32.lib)
and remember for later.
Install Microsoft Visual C++ from http://www.microsoft.com/express/Downloads/
From now on run all commandline programs during installation only from the
"Visual Studio Command line", which can be found in the Start menu.
Install Perl.
• Tested with ActivePerl from http://www.activestate.com/Products/activeperl/index.mhtml
• Make sure to include Perl Package Manager.
• Make sure to activate the check box to include perl directory in PATH
variable.
251
2 The Lab::VISA package
Install gnuplot (not mandatory)
• Download from http://sourceforge.net/project/showfiles.php?group_id=2055
(gp425win32.zip)
• Extract and put it somewhere
• Add directory containing pgnuplot.exe to path: My Computer => Properties => Advanced => Environment Variables
Install dependencies of our perl modules. Depending on how familiar you are
with the perl infrastructure, the easiest might be to use PPM, the Perl Package
Manager included with ActivePerl.
Install Lab::VISA
• Unzip/copy sources
• In file Makefile.PL adapt the LIBS and INC settings according to your
installation (the location looked up above). This is what worked for me:
’ LIBS ’ = > [ ’ −" l C : \ \ Programme \\ I V I ␣ F o u n d a t i o n \\ VISA \\WinNT\\
l i b \\ msc \\ v i s a 3 2 . l i b " ’ ]
’ INC ’ = > ’ "− I C : \ \ Programme \\ I V I ␣ F o u n d a t i o n \\ VISA \\WinNT\\
include " ’
You can find the LIBS folder by checking the registry key "InstDir" in folder
"HKEY_LOCAL_MACHINE\SOFTWARE\National Instruments\NI-VISA
for Windows 95/NT".
• Run the following commands in the source directory
perl Makefile . PL
nmake
nmake install
Have fun!
Installation on Windows XP with Strawberry Perl
Strawberry Perl is a Perl distribution for Windows that most closely mimics a Perl
installation under Linux. It comes with gcc compiler, dmake and the other relevant
tools included.
252
2.1 Lab::VISA::Installation
Lab::VISA should in principle install out of the box with just the command
cpan Lab :: VISA
executed on the commandline. Unfortunately there is a bug in ExtUtils::MakeMaker
(see here) that prevents this. Two possible workarounds are explained below.
Have Windows and Strawberry Perl installed
Install NI-VISA
Download 361mb file visa462full.exe from NI’s website
Install only ’Run Time Support’ (I chose all items below that; it’s not much)
Locate msc version of visa32.lib and visa.h and adjust Makefile.PL. This is
what worked for me:
’ LIBS ’ = > q ( "−l C : / Programme / I V I ␣ F o u n d a t i o n / VISA /WinNT/ l i b / msc /
v i s a 3 2 . l i b "),
’ INC ’ = > q ( "−I C : / Programme / I V I ␣ F o u n d a t i o n / VISA /WinNT/ i n c l u d e " )
,
Work around the bug (known to be present in ExtUtils-MakerMaker-6.56)
Option 1: Patch ExtUtils::MakeMaker
Apply the change described at https://rt.cpan.org/Ticket/Display.html?id=49026
to the file Kid.pm of your installation of ExtUtils::MakeMaker
perl Makefile.PL
Option 2: Edit generated Makefile
If you don’t like to modify the installed version of ExtUtils::MakeMaker, you
can edit the generated Makefile. These changes will be lost after executing
perl Makefile.PL again though. This option is recommended if you just
want to install Lab::VISA.
253
2 The Lab::VISA package
perl Makefile.PL
In the generated file Makefile:
Find the two lines containing the words EXTRALIBS and LDLOADLIBS.
Add the "C:\path\to\visa32.lib" to each of of these lines. On my
system they read:
EXTRALIBS = "C : \ Programme \ I V I ␣ F o u n d a t i o n \ VISA \WinNT\ l i b \
msc \ v i s a 3 2 . l i b " C :\ strawberry \ c \ lib \ libmoldname . a ...
LDLOADLIBS = "C : \ Programme \ I V I ␣ F o u n d a t i o n \ VISA \WinNT\ l i b \
msc \ v i s a 3 2 . l i b " C :\ strawberry \ c \ lib \ libmoldname . a ...
dmake
dmake install
Installation on Linux
As a Linux user you will probably be able to figure out things yourself. Here is a rough
outline:
Before you start, you must have the VISA library by National Instrument installed. If you plan to use GPIB connections (which is very likely), you must also
have the necessary drivers (NI-488.2) for your GPIB adapter card installed. Refer
to National Instruments’ very good documentation for additional information:
http://digital.ni.com/softlib.nsf/webcategories/85256410006C055586256BBB002C0E91?opendocum
In file Makefile.PL adapt the LIBS and INC settings according to your installation. This is what worked for me:
’ LIBS ’
’ INC ’
Then do the usual
254
= > [ ’− l v i s a ’ ] ,
= > ’− I / u s r / l o c a l / v x i p n p / l i n u x / i n c l u d e / ’ ,
2.1 Lab::VISA::Installation
perl Makefile . PL
make
make install
Testing the installation
Here is a quick test program that you can run with perl -Mblib test.pl:
#! / u s r / b i n / p e r l
use Lab :: VISA ;
my ( $status , $sesn ) = Lab :: VISA :: viOpenDefaultRM () ;
printf " s t a t u s : ␣%x ␣(% s ) \ n " , $status , (( $status == $Lab :: VISA ::
VI_SUCCESS ) ? " s u c c e s s " : " no ␣ s u c c e s s " ) ;
print " s e s n : ␣ $ s e s n \ n " ;
my ( $status , $findList , $retcnt , $instrDesc ) = Lab :: VISA :: viFindRsrc
( $sesn , " ASRL1 : : INSTR " ) ;
printf " s t a t u s : ␣%x ␣(% s ) \ n " , $status , (( $status == $Lab :: VISA ::
VI_SUCCESS ) ? " s u c c e s s " : " no ␣ s u c c e s s " ) ;
print " f i n d L i s t : ␣ $ f i n d L i s t \ n " ;
print " r e t c n t : ␣ $ r e t c n t \ n " ;
print " i n s t r D e s c : ␣ $ i n s t r D e s c \ n " ;
__END__
COPYRIGHT AND LICENCE
(c) 2010,2011 Daniel Schröer, Andreas K. Hüttel, Daniela Taubert, and others. 2012
Andreas K. Hüttel
255
2 The Lab::VISA package
256
2.2 Lab::VISA
2.2 Lab::VISA
Perl interface to the National Instruments VISA library
SYNOPSIS
use Lab :: VISA ;
DESCRIPTION
This library offers a Perl interface to National Instruments’ NI-VISA library.
With this library you can easily control the instruments in your lab (multimeters,
voltage sources, magnet sources, pulse generators etc.) with Perl. You can perform
complicated measurement jobs with just some Perl loops.
Lab::VISA provides a low-level interace; it is one of the possible backends for the
high-level measurement control package Lab::Measurement [1].
This document describes the perl syntax of the API. Each function is explained
with some sentences cited from [2]. See this manual for further documentation on the
library.
Installation instructions can be found in Lab::VISA::Installation.
A general tutorial for using Lab::VISA and assorted packages is located in Lab::VISA::Tutorial.
[1] http://www.labmeasurement.de/
[2] NI-VISA Programmer Reference Manual. Part Number 370132C-01.
FUNCTIONS
viClear
$status = Lab :: VISA :: viClear ( $vi ) ;
The viClear() operation performs an IEEE 488.1-style clear of the device.
viClose
$status = Lab :: VISA :: viClose ( $object ) ;
The viClose() operation closes a session, event, or a find list. In this process all the
data structures that had been allocated for the specified vi are freed. Calling viClose()
on a VISA Resource Manager session will also close all I/O sessions associated with
that resource manager session.
viFindNext
( $status , $instrDesc ) =
Lab :: VISA :: viFindNext ( $findList ) ;
The viFindNext() operation returns the next device found in the list created by
viFindRsrc(). The list is referenced by the handle that was returned by viFindRsrc().
257
2 The Lab::VISA package
viFindRsrc
( $status , $findList , $retcnt , $instrDesc ) =
Lab :: VISA :: viFindRsrc ( $sesn , $expr ) ;
The viFindRsrc() operation matches the value specified in the expr parameter with
the resources available for a particular interface.
On successful completion, this function returns the first resource found (instrDesc)
and returns a count (retcnt) to indicate if there were more resources found for the
designated interface. This function also returns, in the findList parameter, a handle
to a find list. This handle points to the list of resources and it must be used as an
input to viFindNext(). When this handle is no longer needed, it should be passed to
viClose().
The search criteria specified in the expr parameter has two parts: a regular expression over a resource string and an optional logical expression over attribute values.
The regular expression is matched against the resource strings of resources known to
the VISA Resource Manager. If the resource string matches the regular expression, the
attribute values of the resource are then matched against the expression over attribute
values. If the match is successful, the resource has met the search criteria and gets
added to the list of resources found.
All resource strings returned by viFindRsrc() will always be recognized by viOpen().
However, viFindRsrc() will not necessarily return all strings that you can pass to
viParseRsrc() or viOpen(). This is especially true for network and TCPIP resources.
viGetAttribute
( $status , $attrState ) =
Lab :: VISA :: viGetAttribute ( $object , $attribute ) ;
The viGetAttribute() operation is used to retrieve the state of an attribute for
the specified session, event, or find list.
viOpen
( $status , $vi ) =
Lab :: VISA :: viOpen ( $sesn , $rsrcName , $accessMode , $openTimeout ) ;
The viOpen() operation opens a session to the specified resource. It returns a session
identifier that can be used to call any other operations of that resource. The address
string passed to viOpen() must uniquely identify a resource.
For the parameter accessMode, the value VI_EXCLUSIVE_LOCK (1) is used to acquire
an exclusive lock immediately upon opening a session; if a lock cannot be acquired, the
session is closed and an error is returned. The value VI_LOAD_CONFIG (4) is used to
configure attributes to values specified by some external configuration utility. Multiple
access modes can be used simultaneously by specifying a bit-wise OR of the values other
than VI_NULL. NI-VISA currently supports VI_LOAD_CONFIG only on Serial INSTR
sessions.
258
2.2 Lab::VISA
viOpenDefaultRM
( $status , $sesn ) =
Lab :: VISA :: viOpenDefaultRM () ;
The viOpenDefaultRM() function must be called before any VISA operations can
be invoked. The first call to this function initializes the VISA system, including the
Default Resource Manager resource, and also returns a session to that resource. Subsequent calls to this function return unique sessions to the same Default Resource
Manager resource.
When a Resource Manager session is passed to viClose(), not only is that session
closed, but also all find lists and device sessions (which that Resource Manager session
was used to create) are closed.
viRead
( $status , $buf , $retCount ) =
Lab :: VISA :: viRead ( $vi , $count ) ;
The viRead() operation synchronously transfers data. The data read is to be stored
in the buffer represented by buf. This operation returns only when the transfer terminates. Only one synchronous read operation can occur at any one time.
viSetAttribute
$status = Lab :: VISA :: viSetAttribute ( $vi , $attribute , $attrState ) ;
The viSetAttribute() operation is used to modify the state of an attribute for the
specified object.
viWrite
( $status , $retCount ) =
Lab :: VISA :: viWrite ( $vi , $buf , $count ) ;
The viWrite() operation synchronously transfers data. The data to be written
is in the buffer represented by buf. This operation returns only when the transfer
terminates. Only one synchronous write operation can occur at any one time.
259
2 The Lab::VISA package
260