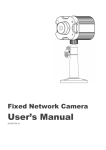
1
Preface
Thank you for choosing our product, for a better understanding of the product, we
recommend you read the instruction and safety information before use.
◆Notice:
This user manual is an operation guide only. it has no implied or stated warranty, or
guaranty of the product described herein. The copy right and all right reserved to the
company. Please do not reprint and spread without authority. Please note the latest
bulletin of the company for the updated version.
◆Remark:
Please keep in temperature between 0℃ and 40℃, Keep away from harsh environment
like humid
Keep out of direct sunlight and devices generating heat
Do not install it in harsh environment including humid, dust and smoke
Keep horizontal mounting
Keep installing in stable location, prevent it from falling
Do not place other devices onto it
Install in Well-ventilated locations. Do not block the vents.
Only operated in the rated input and output range
Do not dismantle the product as your wish
2
Contents
1
System startup .................................................................................................................................. 4
1.1 System startup ....................................................................................................................... 4
2 Setup Wizard ..................................................................................................................................... 4
2.1 Wizard interface ..................................................................................................................... 4
2.2 Administrator Login Interface ................................................................................................ 5
2.3 Basic Setup ............................................................................................................................. 6
2.4 Network setup........................................................................................................................ 7
2.5 Network testing ...................................................................................................................... 7
2.6 DDNS & Port Setup ................................................................................................................. 8
2.7 Record Mode & Record Setup ................................................................................................ 9
2.8 HDD Setup ............................................................................................................................ 10
3 User login ........................................................................................................................................ 11
4 Remote device management .......................................................................................................... 11
5 Interface Introduction ..................................................................................................................... 13
6 Basic Record Setup .......................................................................................................................... 13
7 Record Bit rate Setup ...................................................................................................................... 14
8 Schedule ........................................................................................................................................ 145
9 Display ............................................................................................................................................. 16
10 Network Setup .............................................................................................................................. 17
11 DDNS Setup ...................................................................................................................................... 21
3
1 System startup
1.1
System startup
Power on/off
Connect the power plug to the power port on the back of the DVR. The system will
automatically run a status check, and will start after few seconds. You will see a wizard
interface after the system loading.
2 Setup Wizard
Setup Wizard is a quick-set to enter the whole CMS. You can finish the NVR basic
settings according to your requirements. This setup wizard contains all the basic settings,
like time setup, network setup, HDD format reminder, etc. The NVR will achieve basic
functions after the setup wizard has finished. If personalized settings are desired, please
login to the main menu and setup to complete this function.
2.1 Wizard interface
Wizard interface is shown below. We recommend the initial user finish the guide step by
step for the basic settings. Place a check mark '√' in the box in the lower left corner and
then click 'Next' to perform the basic settings.
4
2.2
Administrator Login Interface
Here we recommend you setup a password for administrator and then click "Next" for
more settings; if you click "Cancel”, you will enter directly into the "Main Menu"; if you
click "Prev.", the system goes to the previous page.
Note: By default, the administrator user name is: admin. There is no password, but for
better security, we strongly recommend that you setup a password here.
5
2.3
Basic Setup
Date/Time, date format, time format, time zone, camera system, language, should be
setup according to the user’s needs, as below:
Date/Time Setup: Click calendar and choose the date; Click time, a digital keyboard will
appear, and then set to local time.
Date Format: Three format types: MM/DD/YYYY, DD/MM/YYYY, and YYYY/MM/DD.
Time Format: 24-hour/ 12-hour.
Time Zone: Click the down arrow, time zone options will be displayed, please select your
time zone.
Note: Once the DVR connects with the internet, it will automatically adjust the time to
the time zone you have chosen. Please make sure the time zone you chosen is the
desired local time zone.
Camera System: PAL/NTSC optional.
Language: Choose your local language or the language you want.
6
2.4
Network setup
There are 2 kinds of network setup: obtain an IP automatically or static IP, select the
type according to your network requirements, as displayed below:
2.5
Network testing
The system will test your network setup automatically. If a network connection is
abnormal, please return to the previous page to correct the settings and then click
“Next”. If no testing is required, just click “Skip” to go to the next page, as displayed
below:
7
2.6
DDNS & Port Setup
DDNS: Enable/Disable, please enable the DDNS to use a domain name server.
Server: Choose your domain name server: 3322, dyndns, no-ip, changip or dnsexit.
Host Name: Enter the host name you registered on the domain name server.
User Name: Enter the user name you registered on the domain name server.
Password: Enter the password you registered on the domain name server.
As displayed below:
Port Setup
Media Port: one private communication port that between DVR and PC, default: 9000. If
this port was occupied by other server port, please change to an idle port.
Web Port: Http port, default: 80, if change the web port, like to: 8088, when need to
access through browser, need to add the web port after the IP address.
E.g.: http://ip address:8088
Note: port range: 1-65535, some local ISP’s may block port “80”. We recommend you
change to something such as eg. 86 See display below:
8
2.7
Record Mode & Record Setup
Setup recording and audio for each channel; please tick the mark '√' to enable recording
and audio.
There are two record modes: Always/Schedule.
For ease, setup one channel and then copy to the others, as shown below:
9
2.8
HDD Setup
HDD Information: You can check the HDD capacity and HDD quantity in the HDD setup.
HDD Format: tick '√' under format, and then click “Format”.
Note: The newly installed HDD must be formatted through our NVR before usage.
Overwrite: There are three options to choose from; “by days”, “by capacity” and
“never” .Please selects desired method.
After the setup of disk, save and confirm interface will be shown on screen and click
“Save to log out.
After the completion of setup wizard, NVR can be worked properly. If personalized
settings are needed, you can login to the menu to setup. As shown below:
10
3 User login
Open the main menu:
Click “START” in the task bar, by default the taskbar is at the bottom of the screen, click
and hold the taskbar, you can then drag it to any position, if the taskbar is not displayed,
right click the mouse button:
Click “START” to enter the login interface, insert the Device ID, the default Device ID is
“0”. The initial user name is: admin with no password, but if you setup a password
during the setup wizard, you now need to input your password here.
4 Remote device management
4.1 Connect the IPC by POE port
1) Device connection: Connect the IPC to the NVR RJ45 port by the RJ45 cable. (Note:
The IPC should support POE)
2) IP distribution: NVR has the function to distibutor the IP address to the RJ45 port. The
device connected by the RJ45 port have the IP address automatically distributed by NVR.
And the IP range can be freely chosen according to the situation.
3) Live view: NVR will automatically display the video for the IPC connected to RJ45 port,
do not need to manually add the device to the NVR.
11
4.2 Add the IPC by LAN search
1) Device search: The NVR can search of the IPC connected by the POE port in the LAN
by the search function of NVR remote device management interface.
2) Add device: Search the device by the channel wanted, tick the chosen IPC, click add
and save.
3) Live view: View the relevant channel after adding successfully of the device.
4.3 Manually add the IPC
1) Add device: Add the IP address, media port, user name, password and protocol of the
device by the device edit function of the NVR remote management interface. If the
device is from our company, do not need to fill in with user name and password.
4) Live view: View the relevant channel after adding successfully of the device.
12
5 Interface Introduction
In live view, “ ”means normal recording, “ ” means alarm recording, “ ” means not
recording.
6 Basic Record Setup
Login to the Main Menu, click “Basic”, and then click “RECORD”, as displayed below:
1) CH: Order of the DVR channel
13
2) Enable: click to enable the basic setting
3) Audio: click to enable audio recording
4) Mode: Click “Always” or “Time recording” to make the DVR record when start up or
recording according to the set schedule.
5) Copy CH: Copy one CH setting to another CH.
7 Record Bit rate Setup
1) CH: Order of the DVR channel
2) Resolution: NVR will acquire the resolution of IPC, based on the actual
situation.
3) Bit rate: NVR will acquire the bit rate of IPC, based on the actual
situation.
4) Quality:”Best””Better””Good”””Normal” for option
5) Copy CH: Copy one CH setting to another CH.
14
8 Schedule
1) CH: Order of the DVR channel
2) Set the mode of recording.”Manual” ”Normal” ”Alarm”
3) Double click the recording schedule; the “schedule” window will pop up. You can set
the recording schedule here.
15
Copy CH: Copy one CH setting to another CH.
9 Display
In main menu, click “Search”, display as below.
1) After entering playback interface, DVR will automatically search current day’s (today)
recording files and show in the right window. If there is no recording, the right
window would be empty.
2) Calendar: green & red date background means there is recording that day, gray
background means there is no recording that day, blue back ground shows the date
you have selected.
Note: When you open the playback interface, the calendar displays the current
month, and the blue background date is the current date (today).
3) Record Type: All/Alarm/Normal
4) CH: Choose the channel you want to playback.
5) First, Prev., Next, Last: Check the recording page by page.
6) Lock/unlock: Place a check mark '√'for the recording you want to lock, then click lock,
after locked, the recording cannot delete and overwrite.
7) If want to unlock, just click “Unlock”.
8) Backup: check '√' the recording files that you want to backup on the right window,
and then click backup. If the files capacity you select is larger than your USB capacity,
the system will prompt you to change to a bigger capacity USB or reduce the quantity
16
of selected recording files.
Search: click “SEARCH”, and the right window will display the recording files.
Playback: click “PLAYBACK” to enter into playback interface.
The left side shows the calendar, the right side displays the playback time zone.
Green color means normal recording, red color means alarm recording, and black
color (back ground color) means no recording. On the time line, there is a time bar
that you can drag to any time you want to playback.
Control buttons:
1) Click “PLAY/STOP”, “STEP”, “FAST FORWARD”, “FAST BACKWARD” and “SLOW” to do
corresponding operation.
1) Drag the slider to adjust volume, if you don’t need audio, click the speaker to mute.
2) Click “X” to exit playback interface.
10 Network Setup
Click “ADVANCE” in main menu, and then click “NETWORK”.
1. Lan
17
1) Obtain an IP address automatically
2) Use the following IP address
IP address: Fill in the IP address according to your network settings.
Subnet mask: Fill in the subnet mask according to your network settings.
Default gateway: Fill in the default gateway according to your network settings.
If there is no router in your network, fill in the IP you get from your Internet Service
Provider (ISP). If there is a router in your network, make sure you have set the subnet
mask correctly.
3) Obtain DNS server address automatically.
4) Use following DNS sever addresses.
Preferred DNS server: fill in the DNS you get from your Internet Service Provider (ISP).
Alternate DNS server: fill in the DNS you get from your Internet Service Provider (ISP).
Attention: Click “Apply” after setup.
2. ADSL
1)ADSL: Enable the ADSL
2)Fill the user name and password of your PPPOE which is provided by your Internet
Service Provider (ISP). The system will restart after clicking OK. If the user name and
password are correct, the system will connect to the network via the PPPOE. And the IP
address will be filled automatically.
Note: Click “Apply” after setup.
3. Port
18
3) Media Port: one private communication port that is between the DVR and PC, the
default is Port: 9000. If this port is occupied by another server port, please change to
an idle port.
2) Web Port: Http port, default is Port: 80, if a change of the web port is required, like
to example Port:8088, the user will need to add the new port after the IP address
when accessing the DVR via the web.
E.g.: http://192.168.x.x:8088
Note: Port Range: 1-65535, some ISP’s may block port “80”, so we recommend to
change to another, example Port:8086.
Attention: Click “Apply” after setup.
4.
Sub-stream1
19
All the setup here is for network transfer.
1) CH: All DVR channels.
2) Enable: Place a check mark '√' which means use sub-stream for network transfer.
3) Resolution: QVGA/VGA
4) Frame rate:: 1 to 30.
5) Quality: Normal/Good/Better/Best
Copy: For ease, setup one channel and then copy to the others.
Attention: Click “Apply” after setup.
5. Sub-stream2
All the setup here is for network transfer.
1) CH: All DVR channels.
2) Enable: Place a check mark '√' which means use sub-stream for network transfer.
3) Resolution: Sub-stream2 Resolution
4) Frame rate: Sub-stream2 Resolution
5) Quality: Normal/Good/Better/Best
Copy: For ease, setup one channel and then copy to the others.
Attention: Click “Apply” after setup.
Note: Sub-stream2 is mainly used for the intelligently switch of by the Viewcam of
mobile phone or Pad.
20
11 DDNS Setup
Click “ADVANCE” in the main menu, and then click “COMM”.
1) DDNS: Enable/Disable, please enable the DDNS when you use domain name server.
2) Server: Choose your domain name server: 3322, dyndns, no-ip, changip or dnsexit.
3) Host name: The host name you registered on the domain name server.
4) User name: The user name you registered on the domain name server.
5) Password: The password you registered on the domain name server.
6) Test: After setup, click “Test” to check connected or not.
Attention: Click “Apply” after setup.
21
22