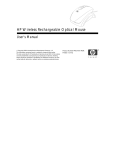
1
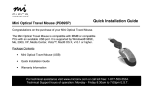
Wireless Optical Mouse
User’s Manual
Model PD950P
FCC STATEMENT
PD950P
This device complies with part 15 of FCC Rules. Operation is subject to the following two conditions: (1) this device may not cause harmful
interference, and (2) this device must accept any interference received, including interference that may cause undesired operation. This equipment
has been tested and found to comply with the limits for a Class B digital device, pursuant to part 15 of FCC Rules. These limits are designed to
provide reasonable protection against harmful interference when the equipment is operated in a residential installation. This equipment generates,
uses, and can radiate radio frequency energy and, if not installed and used in accordance with the instruction guide, may cause harmful
interference to radio communications. However, there is no guarantee that interference will not occur in a particular installation. If this equipment
does cause harmful interference to radio or television reception, which can be determined by turning the equipment off and on, the user is
encouraged to try to correct the interference by one or more of the following measures:
•
Reorient or relocate the receiving antenna.
•
Increase the separation between the equipment and the receiver.
•
Connect the equipment into an outlet on a circuit different from that to which the receiver is connected.
•
Consult a service representative for help.
Properly shielded and grounded cables and connectors must be used in order to comply with FCC emission limits. Micro Innovations is not
responsible for any radio or television interference caused by using other than recommended cables and connectors or by unauthorized changes or
modifications to this equipment. Unauthorized changes or modifications could void the user’s authority to operate the equipment.
Responsible party:
Micro Innovations
400 Clearview Ave.
Edison, NJ 08837
Telephone: 1(877) 550-5534
Tested To Comply With FCC Standards
FOR HOME OR OFFICE USE
This Class B digital apparatus complies with Canadian ICES-003. Cet appareil numérique de classe B est conforme à la norme NMB-003 du
Canada.
2
Table of Contents
Welcome…………………………………..…………………………………………………………………………..….….
Page 4
Installation Procedures…...………………….……………………………………………………….……………….……
Page 5
Mouse Settings………………………………………………………………………………..………………………...…..
Page 6
Troubleshooting…………………………………………………………………………………………………………......
Page 7
Mouse Care and Technical Support………………………………………………………………..………………..…...
Page 8
3
Welcome
Congratulations on the purchase of your new Wireless Optical Mouse. Its advanced design and enhanced performance features
makes the device simple to install and easy to use. The following information in the manual will help your install, use, and maintain
your new product.
The mouse is compatible with IBM and 100% compatible computers with an available PS/2 mouse port, and is supported by
Windows 98SE, Windows ME, Windows 2000 and Windows XP.
Features and Benefits
•
Optical Sensing Technology
At 800 dpi our optical sensor scans the desktop up to 2300 frames per second providing lightning fast cursor speed and
accuracy
•
RF Wireless Connectivity
Using state-of-the art Radio Frequency (RF) technology, you can comfortably control your PC while eliminating the
bothersome cables that are associated with traditional mice
•
Scroll Wheel Button for Easy Navigation
Customizable button which provides access to some of your favorite Windows applications
Package Contents
•
•
•
•
•
•
Micro Wireless Optical Mouse
RF Receiver (PS/2)
CD-ROM
Quick Installation Guide
User's Manual
Warranty Information
4
Installation Procedures
STEP 1 - Install the batteries into the mouse paying close attention to the proper polarities. *Note that the red optical light underneath
the mouse should light if the batteries are correctly installed. (See Fig.1)
STEP 2 - Turn your computer off.
STEP 3 - Connect the RF receiver to the PS/2 (Green) mouse port on your computer. (See Fig.2)
STEP 4 - Turn your computer on.
STEP 5 - Synchronize the devices.
Press the button on the RF receiver (See Fig. 3) then using a pen or pencil press the button located underneath the mouse (See
Fig.4) At this point the cursor (arrow) on your PC screen should be working. If not, try re-synchronizing the devices.
STEP 6 - Insert the CD into an available CD-ROM drive (See Fig. 5) and follow the onscreen instructions. Note some operating
systems need to be restarted in order for the program to function properly. It is recommended to restart your PC after installing this
software program.
Fig. 1
Fig. 2
Fig. 3
5
Fig. 4
Fig. 5
Mouse Settings
The following icon
will appear in
the lower right-hand corner of your
system tray once the software is
correctly installed. To launch the
program simply click on the icon or
click Start, go to Programs, choose
Micro Innovations and select
Optical Mouse.
Configuring Wheel Modes
This feature will allow you to choose
performance modes and wheel
speed of the mouse.
Assigning the Wheel Button
You can increase your productivity
by assigning the wheel button to
various basic Windows functions
such as page up or down, cut, copy,
paste, etc. You can even launch
your default browser or e-mail
application. It is recommended that
you try different settings until you
are satisfied with the performance.
6
Troubleshooting
Problem
Resolution
Red light underneath mouse is not lit
Make sure the batteries are installed correctly.
Cannot launch Mouse Settings
Try re-ins talling the software CD.
* Note you may need to uninstall any previous mouse software on your PC.
Mouse pointer (cursor) moves erratic
Move mouse closer to RF receiver.
Batteries may be low on power. Replace the batteries in your mouse and resynchronize the mouse with the receiver.
RF receiver maybe subjected to interference from other electronic devices, such as a
monitor, printer or scanner. For optimal performance place the receiver 8 inches
(approx. 20cm) away from any other electrical devices.
Mouse pointer (cursor) is not responding
Try re-synchronizing the devices.
You may have connected the receiver while the computer was on. Turn your
computer off and turn it on again with the receiver attached and try re-synchronizing
the devices.
Batteries may have been consumed (drained). Replace the batteries in your mouse
and re-synchronize the mouse with the receiver.
Try using the mouse on a different surface. *Note the mouse may not function
correctly when used on clear glass, black, or extremely dark colored work areas.
7
Mouse Care
•
Maintaining your product will ensure longer life and will minimize the chance of causing damage to your mouse or
computer.
•
Always disconnect the RF receiver before cleaning the device.
•
Keep all beverages away from the mouse working area and avoid any spills.
•
Keep the bottom of the mouse clean and free of any dust or film by wiping off the bottom with just a damp soft cloth.
•
Note this device is dependent on battery current for operation. Only alkaline batteries should be used.
•
The batteries that ship with this device are not rechargeable. Do not try to recharge them.
•
There are no user serviceable parts. Only Micro Innovations may service or repair this product.
Technical Support
For technical assistance call toll free: 1-877-550-5534 or visit www.microinv.com
Technical Support hours of operation: Monday - Friday 8:30am to 7:00pm E.S.T.
8