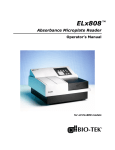
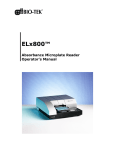
Download Doc-To-Help Standard Template - Bio-Tek
Transcript
BIO-TEK ® KC4 User’s Guide Signature for KC4 and KC4 v3.4 . User’s Guide to KC4™ v3.4 and KC4™ Signature March 2005 Copyright 2005 PN 5291000 Revision E Bio-Tek Instruments, Inc. . Notices BIO-TEK INSTRUMENTS, INC. P.O. Box 998, Highland Park Winooski, Vermont 05404-0998 USA Customer Service & Sales: Phone: Fax: E-Mail: Internet: (888) 451-5171 (toll free in the U.S.) (802) 655-4740 (outside the U.S.) (802) 655-7941 [email protected] http://www.biotek.com Service/Technical Assistance Center (TAC): Phone: Fax: E-Mail: (800) 242-4685 (toll free in the U.S.) (802) 655-4740 (outside the U.S.) (802) 655-3399 [email protected] European Coordination Center Bio-Tek® Instruments GmbH Kocherwaldstrasse 34 D-74177 Bad Friedrichshall Germany Phone: Fax: E-Mail: All Rights Reserved +49 (0) 7136 9680 +49 (0) 7136 968 111 [email protected] Copyright © 2005, Bio-Tek® Instruments, Incorporated. This publication is protected by copyright and all rights are reserved. No part of this manual may be reproduced or transmitted in any form, or by any means electronic or mechanical, including photocopying and recording, for any purpose other than the purchaser’s personal use without written permission of Bio-Tek® Instruments, Inc. Printed in the United States of America. Bio-Tek Part Number 5291000. Trademarks Bio-Tek® is a registered trademark, and KC4, KC4 v3.4, and KC4 Signature are trademarks of Bio-Tek Instruments, Inc. Bio-Cell is a trademark of Bio-Tek Instruments and Bio-Cell™ is patented under U.S. patent number 5,963,318. Microsoft is a registered trademark and Windows, Windows 95/98/ NT/2000/XP, Word, and Excel are trademarks of Microsoft Corporation. All other trademarks are the property of their respective holders. Restrictions and Liabilities Information in this document is subject to change, and does not represent a commitment by Bio-Tek Instruments, Inc. Changes made to the information in this document will be incorporated in new editions of the publication. No responsibility is assumed by Bio-Tek for the use or reliability of software or equipment that is not supplied by Bio-Tek, or its affiliated dealers. Limited Software Warranty Bio-Tek Instruments, Inc. (“Bio-Tek”) warrants, for a period of ninety (90) days after the date of delivery, that all software manufactured and sold by Bio-Tek (the “Software”) will conform, as to all substantial operational features, to Bio-Tek’s then current published specifications (meaning those specifications in effect as of the date of purchase) and will be free of defects which, in Bio-Tek’s sole judgment, substantially affect system performance. This Warranty is limited to the original purchaser (the “Purchaser”) and cannot be assigned or transferred. All claims under this Limited Warranty must be made in writing or fax to Bio-Tek attention: Service Department. The Purchaser must notify Bio-Tek in writing within ninety (90) days after the date of delivery of the Software to the Purchaser of any claim under this Limited Warranty. This 90 day period shall not be extended by the delivery or receipt of any subsequent modifications to the Software. Modifications to Software within a version (“Updates”) are expressly excluded from the terms of this Warranty. If the Software is found to be defective by Bio-Tek, Bio-Tek’s sole obligation under this Warranty is to use efforts consistent with Bio-Tek’s regular business practices to attempt to remedy such defect. In no event shall Bio-Tek’s liability under this warranty exceed the original purchase price of the Software. This is a limited warranty. This warranty contains the entire obligation of Bio-Tek. No other warranties, express, implied, or statutory, are given. The implied warranties of merchantability and of fitness for any particular purpose are expressly excluded and do not apply to the software. Under no circumstances shall Bio-Tek be liable to the purchaser or any other person for any direct, incidental, or consequential damages, whether arising out of breach of warranty or otherwise. This warranty shall not be changed or modified in any way without the express written permission of an officer of Bio-Tek Instruments, Inc. This Warranty shall be NULL AND VOID if any modifications are made to the Software by the Purchaser. Correction of difficulties or defects traceable to Purchaser’s errors or system changes shall be billed to Purchaser at Bio- Tek’s standard time and materials charge. Licensing Agreement LICENSE: Single Use: You have the non-exclusive right to use the enclosed KC4 program. This program can only be used on a single computer, unless a site license or additional network passwords have been purchased through Bio-Tek Instruments. You may transfer the program from one computer to another provided that the program is used with only one computer at a time. You may not electronically transfer the program from one computer to another. You may not distribute copies of the program(s) or documentation without the prior written consent of Bio-Tek Instruments, Inc., or as stipulated in a sub-licensing agreement. Network Use: You have the non-exclusive right to use the enclosed program. This program can only be used on a single file server. The number of concurrent users on the network at any time may not exceed the number of licensed copies of this software. You may transfer the program from one server to another provided that the program is used with only one server at a time. You may not distribute copies of the program(s) or documentation without the prior written consent of Bio-Tek Instruments, Inc., or as stipulated in a sub-licensing agreement. You may not use, copy, modify, loan, lease or transfer the program(s) or documentation, or any copy except as expressly provided in this Agreement. COPYRIGHT: The KC4 program and its documentation are copyrighted. You may not copy any program or the documentation except as for loading the program into the computer/server as part of executing that program and for back-up purposes, respectively. You must reproduce and include the copyright notice on the back-up copy TERMS: This license is effective until terminated. You may terminate it by destroying the programs and documentation and all copies thereof. This license will also terminate if you fail to comply with any term or condition of this Agreement. You agree upon such termination to destroy all copies of the programs and documentation. Document Revision Rev / Date Changes A / March, 2001 First Issue. B / December, 2002 Updated entire manual to correlate with new licensing options, KC4 v3.1 and KC4 Signature, and their related new and modified features. C / September, 2003 Changed KC4 “v3.1” to “v3.3” Added instructions for creating Read & Dispense protocols for SynergyHTTR w/Injectors. Added instructions for configuring and controlling the Dispense Module. Added instructions for using the Database Upgrade Utility. D / July, 2004 Changed KC4 “v3.3” to “v3.4” Added instructions for using KC4 to control the new Clarity™ Microplate Luminometer. Added instructions for using the new Multi-Mode detection method for the Synergy™ HT line of instruments. Added information for handling an unexpected termination of a kinetic read. Updated the system requirements for using PowerReports to include Microsoft® Office XP and Office 2003. Updated information on COM port selection (now supports up to nine ports). Additional cosmetic changes throughout. E / March, 2005 Revision D1 one-page insert removed; revision letter changed as a result. Contents INTRODUCTION................................................................................................................. 1 KC4 Software ..................................................................................................................... 1 Technical Support ............................................................................................................... 4 Phone Support .............................................................................................................. 4 Facsimile Support......................................................................................................... 4 Written Communication ............................................................................................... 4 Electronic Communication........................................................................................... 4 INSTALLATION AND CONFIGURATION ......................................................................... 5 Important! ........................................................................................................................... 5 Appointing a System Administrator ................................................................................... 8 Administrator Requirements ........................................................................................ 8 Verifying Minimum System Requirements ........................................................................ 9 Upgrading from an earlier version of KC4 ....................................................................... 10 Installing KC4................................................................................................................... 11 Starting KC4 ..................................................................................................................... 18 Changing the System Administrator’s Password.............................................................. 21 Copying KCShared.mdb to a Secure Network Location .................................................. 22 Creating New User Accounts............................................................................................ 24 Connecting Reader(s) to the Computer............................................................................. 25 Where to go from here ...................................................................................................... 26 GETTING STARTED ........................................................................................................ 27 Overview........................................................................................................................... 27 Essential Information ........................................................................................................ 28 File Types ................................................................................................................... 28 File Storage ................................................................................................................ 28 Record Retention and Archival .................................................................................. 29 Plate Data Acquisition................................................................................................ 29 User’s Guide to KC4 Contents • i Data Reduction and Analysis......................................................................................29 Biograph......................................................................................................................30 File Signatures ............................................................................................................30 Audit Trails .................................................................................................................30 Main Screen.......................................................................................................................30 Title Bar ......................................................................................................................30 Menu Bar ....................................................................................................................31 Toolbar........................................................................................................................31 Status Bar....................................................................................................................31 Quick Reference Guides....................................................................................................32 Data Menu...................................................................................................................32 Edit Menu ...................................................................................................................33 Protocol Menu.............................................................................................................33 Display Menu..............................................................................................................35 System Menu ..............................................................................................................35 About Menu ................................................................................................................36 Navigating the Help System..............................................................................................37 Quick Start.........................................................................................................................38 Quick Start for Clarity™ Microplate Luminometer Users................................................39 Sample Files ......................................................................................................................40 DATA MENU .....................................................................................................................41 Overview ...........................................................................................................................41 Working with Data Files ...................................................................................................42 Where and How is Plate Data Stored? ........................................................................42 Creating a New Data File............................................................................................43 Opening Existing Data Files .......................................................................................44 Modifying Data Files ..................................................................................................45 Saving Data Files ........................................................................................................46 Closing Data Files.......................................................................................................47 Reading Plates ...................................................................................................................48 Unintentional Termination of a Kinetic Read.............................................................49 Entering Plate Data Manually .....................................................................................50 Reading Plate Data from a File ...................................................................................51 Signing Data Files .............................................................................................................54 Append to Kinetic File ......................................................................................................56 Exporting Plate Data .........................................................................................................57 Printing Reports.................................................................................................................59 Print.............................................................................................................................59 Print Preview...............................................................................................................59 Print Setup...................................................................................................................59 ii • Contents User’s Guide to KC4 Plate Description............................................................................................................... 60 Samples............................................................................................................................. 61 Auto Numbering......................................................................................................... 62 Import Sample Names ................................................................................................ 62 Export Sample Names ................................................................................................ 62 Printing Sample IDs ................................................................................................... 62 Data Audit Trail ................................................................................................................ 63 EDIT MENU ...................................................................................................................... 65 Editing Tools..................................................................................................................... 65 PROTOCOL MENU .......................................................................................................... 67 Overview........................................................................................................................... 67 Working With Protocols ................................................................................................... 68 Where and How Are Protocols Stored?...................................................................... 68 Opening Existing Protocol Files................................................................................. 68 Creating New Protocols.............................................................................................. 69 Modifying Protocol Parameters.................................................................................. 71 Saving Protocol Files.................................................................................................. 71 Closing Protocol Files ................................................................................................ 72 Signing Protocol Files ................................................................................................ 73 Plate Description............................................................................................................... 75 Defining Reading Parameters ........................................................................................... 76 Clarity™..................................................................................................................... 77 ELx800™ ................................................................................................................... 78 ELx808™ ................................................................................................................... 79 FL600™ ..................................................................................................................... 80 FLx800™ ................................................................................................................... 81 PowerWave™/PowerWave HT.................................................................................. 82 PowerWaveX™.......................................................................................................... 83 PowerWaveX™ Select............................................................................................... 84 PowerWave™ XS ...................................................................................................... 85 Synergy™ HT ............................................................................................................ 86 Synergy™ HT / Time-Resolved................................................................................. 87 Synergy™ HT / Time-Resolved / Injectors................................................................ 88 µQuant™ .................................................................................................................... 89 Reading Parameters Reference ......................................................................................... 90 Automatic Sensitivity Adjustment ............................................................................. 90 Bandwidth Verification .............................................................................................. 92 Detection Method ....................................................................................................... 94 Dispense Option ......................................................................................................... 94 Eject Between Filter Set Read.................................................................................... 95 Excitation/Emission Filter Sets (FL600™) ................................................................ 95 User’s Guide to KC4 Contents • iii Excitation/Emission Filter Sets (FLx800, Synergy HT) .............................................97 Filters ..........................................................................................................................99 First Well / Last Well..................................................................................................99 General Options (FL600™) ........................................................................................99 General Options (Synergy™ HT) .............................................................................101 Kinetic Parameters ....................................................................................................102 Kinetic Parameters (FL600)......................................................................................103 Measurement Options ...............................................................................................104 Measurement Mode (FL600) ....................................................................................104 Measurement Mode (FLx800, Synergy HT).............................................................105 Measurement Mode (Synergy™ HT / Time-Resolved)............................................106 Monitor Wells ...........................................................................................................107 Multi-Mode...............................................................................................................108 Pathlength Correction ...............................................................................................109 Plate Type .................................................................................................................111 Pre-Read Blank Plate ................................................................................................111 Read Barcode ............................................................................................................111 Read & Dispense ......................................................................................................112 Read Mode................................................................................................................112 Reader/Read Method ................................................................................................112 Reading Direction .....................................................................................................113 Reading Type ............................................................................................................113 Scales for Kinetic Reads ...........................................................................................114 Scales for Spectrum Reads........................................................................................114 Scanning....................................................................................................................115 Shaking .....................................................................................................................116 Temperature Control.................................................................................................117 Time-Resolved Fluorescence (Synergy™ HT).........................................................117 Top Probe Vertical Offset.........................................................................................117 Wavelengths..............................................................................................................118 Creating a Read & Dispense Protocol .............................................................................119 Plate Mode Options...................................................................................................120 Well Mode Options...................................................................................................124 Raw Data Correction .......................................................................................................128 Blank Plate Subtraction.............................................................................................129 Blank Wells Subtraction ...........................................................................................130 Pathlength Correction ...............................................................................................130 Kinetic Analysis ..............................................................................................................131 Data to Process..........................................................................................................131 Mean V .....................................................................................................................132 Max V .......................................................................................................................132 Mean Min/Max .........................................................................................................134 Onset OD / Onset OD %...........................................................................................135 Formula.....................................................................................................................136 No Calculation ..........................................................................................................136 Integral ......................................................................................................................136 iv • Contents User’s Guide to KC4 Spectrum Analysis .......................................................................................................... 137 Data to Process ......................................................................................................... 137 Min/Max................................................................................................................... 137 Formula .................................................................................................................... 138 Scanning Analysis........................................................................................................... 139 Mean, Std Dev, CV .................................................................................................. 139 Mean Min/Max......................................................................................................... 140 Integral ..................................................................................................................... 141 Plate Layout .................................................................................................................... 142 Well Types and IDentifiers ...................................................................................... 143 Selecting and Customizing Well Types & IDs......................................................... 144 Assigning Well IDs .................................................................................................. 149 Defining and Assigning Dilutions ............................................................................ 151 Defining and Assigning Concentrations................................................................... 155 Single Plate Transformations.......................................................................................... 159 Formula Syntax ........................................................................................................ 160 Formula Examples.................................................................................................... 161 Multi Plate Transformations ........................................................................................... 162 Syntax....................................................................................................................... 163 Automatic Formula Generation................................................................................ 163 Curves ............................................................................................................................. 164 Curve Description..................................................................................................... 164 Curve Axes ............................................................................................................... 165 Curve Fit................................................................................................................... 166 Curve Interpolation................................................................................................... 169 Validation........................................................................................................................ 171 Cutoffs ............................................................................................................................ 173 Selecting the Data to Interpret.................................................................................. 173 Defining Cutoffs....................................................................................................... 174 Defining Symbols..................................................................................................... 175 Cutoffs Evaluation.................................................................................................... 176 Reports ............................................................................................................................ 177 Audit Trail Reports................................................................................................... 178 Calculation Log Report ............................................................................................ 178 Kinetic Curves Report .............................................................................................. 179 Well Zoom Report.................................................................................................... 179 Validation Report ..................................................................................................... 180 Cutoffs Report .......................................................................................................... 180 Sample Name List Report ........................................................................................ 180 Plate vs. Table Format.............................................................................................. 181 Statistics Report........................................................................................................ 181 Export.............................................................................................................................. 182 User’s Guide to KC4 Contents • v Protocol Audit Trail.........................................................................................................183 Security............................................................................................................................184 Protocol Options..............................................................................................................185 Raw Data...................................................................................................................185 Report........................................................................................................................186 Export........................................................................................................................187 Calculation ................................................................................................................188 DISPLAY MENU..............................................................................................................189 Overview .........................................................................................................................189 Curve(s) ...........................................................................................................................189 Calculation Warnings ......................................................................................................190 Validation Results ...........................................................................................................192 SYSTEM MENU ..............................................................................................................193 Overview .........................................................................................................................193 Reader Selection..............................................................................................................194 Port Selection ............................................................................................................195 Filters/Wavelengths ..................................................................................................196 Reader Configuration................................................................................................201 Dispenser Configuration ...........................................................................................202 Controlling Multiple Instruments Simultaneously....................................................204 Diagnostics ......................................................................................................................205 Optics Test ................................................................................................................205 System Test (Clarity) ................................................................................................206 Optics Test (FL600)..................................................................................................206 Universal Plate Test ..................................................................................................207 Security............................................................................................................................211 User Accounts...........................................................................................................212 Login and Password Parameters ...............................................................................216 Protected Functions...................................................................................................218 Audit Trail Notification Options...............................................................................220 Signature Reasons.....................................................................................................221 File Storage and Format Options ..............................................................................222 LogIn/LogOut..................................................................................................................223 Audit Trail .......................................................................................................................224 Exporting Audit Trail Events....................................................................................225 Maintain Files..................................................................................................................226 Edit Options ..............................................................................................................227 Exporting Files..........................................................................................................227 vi • Contents User’s Guide to KC4 Importing Files ......................................................................................................... 228 Registration/Upgrade ...................................................................................................... 229 Setup ............................................................................................................................... 230 Protocol Defaults...................................................................................................... 230 Formats..................................................................................................................... 231 Start-Up .................................................................................................................... 232 Database ................................................................................................................... 233 Toolbar............................................................................................................................ 237 Plate Format .................................................................................................................... 240 Plate Description ...................................................................................................... 241 Microplate Measurement.......................................................................................... 242 Exporting/Importing Plate Formats.......................................................................... 242 Reader Control................................................................................................................ 245 Information............................................................................................................... 245 Door/Carrier ............................................................................................................. 245 Pre-Heating............................................................................................................... 246 Dispenser .................................................................................................................. 247 Clarity Control.......................................................................................................... 249 RESULTS ....................................................................................................................... 251 Overview......................................................................................................................... 251 Data Sets ......................................................................................................................... 253 Concentrations.......................................................................................................... 254 Symbols.................................................................................................................... 256 Pathlengths ............................................................................................................... 257 Kinetic Data.............................................................................................................. 258 Spectral Scan Data.................................................................................................... 260 Area Scan Data......................................................................................................... 262 Linear Scan Data ...................................................................................................... 263 Statistics .......................................................................................................................... 264 BIOGRAPH..................................................................................................................... 265 Overview......................................................................................................................... 265 File Menu........................................................................................................................ 266 Creating a New Curve .............................................................................................. 266 Closing a Curve ........................................................................................................ 266 Saving a Curve (Graph File) .................................................................................... 266 Opening a Graph File ............................................................................................... 267 Printing Curves......................................................................................................... 267 Exiting Biograph ...................................................................................................... 268 View Menu ..................................................................................................................... 268 User’s Guide to KC4 Contents • vii The Toolbar...............................................................................................................268 The Status Bar...........................................................................................................268 Graph Menu.....................................................................................................................269 Standards...................................................................................................................269 Axes, Fit, Interpolations............................................................................................269 Overlaying Graphs ....................................................................................................270 Curve Window ................................................................................................................271 POWERREPORTS..........................................................................................................273 High-Powered Reporting.................................................................................................273 How it Works............................................................................................................274 System Requirements................................................................................................276 Preparing KC4 for PowerReporting ................................................................................276 Setting Global Options..............................................................................................276 Setting Protocol-Specific Options.............................................................................277 Defining the Protocol Parameters .............................................................................278 Creating/Editing Documents.....................................................................................278 Working with Results Objects.........................................................................................279 The Results Objects Toolbar.....................................................................................279 Object Components...................................................................................................280 Object Fulfillment.....................................................................................................281 Designing the Document .................................................................................................282 Inserting Field Objects..............................................................................................282 Inserting Plate Objects ..............................................................................................283 Inserting Table Objects .............................................................................................286 Inserting Curve Objects ............................................................................................302 Previewing and Printing the Report ................................................................................306 Previewing Options...................................................................................................306 Special Notations ......................................................................................................307 Performing the Data Export.............................................................................................308 Direct Export to Excel ..............................................................................................308 APPENDIX A: RECORDS SUBMISSION .....................................................................309 Records Submission ........................................................................................................309 APPENDIX B: WINDOWS FILE CACHING ..................................................................311 Windows File Caching ....................................................................................................311 INDEX..............................................................................................................................313 viii • Contents User’s Guide to KC4 Introduction KC4 Software Bio-Tek’s KC4™ software provides rapid, flexible, and powerful assay analysis with a multitude of applications. The user interface is simple and uncluttered, and provides a quick, step-by-step setup and read process for even the most complex assays. Applications include: • Research • DNA quantitation • Fluorescence assays • Bio-Industrial • Pharmaceutical • Development Interfaces with most Bio-Tek autoreaders: Clarity™ FLx800™ PowerWaveX 340 EL800™ PowerWave™ PowerWaveX Select ELx800™ PowerWave 340 PowerWave XS EL808™ PowerWave HT Synergy™ HT ELx808™ PowerWave HT 340 µQuant™ FL600™ PowerWaveX™ Extensive and complete analysis of your laboratory applications: • Fluorescence and absorbance ELISA • Spectral scanning from 200-999 nm with the µQuant and all PowerWave, PowerWaveX, and Synergy HT models • Endpoint assays • Kinetic assays • Endotoxin analysis • Cytotoxicity and titer assays User’s Guide to KC4™ Introduction • 1 Defines and controls all reading protocols: • Selection of filters/wavelengths • Shaking parameters • Incubation • Flexible kinetic options • Read/Dispense options • Optional manual entry of data • Reader diagnostics testing and archiving Customized assay development: • Graphical input for template creation with auto-replication and fill, and customized well ID text and colors • Quick entry of standard concentrations and sample dilutions with auto-increment and auto-factor • Control and assay validations may be created for each assay • Multiple sample curves displayed and analyzed simultaneously, including interpolations • Powerful multi-level transformation formulas allow manipulation of raw data, transformed data, curve-fit results, or statistical calculations at any point in the analysis • KC4’s zoom feature allows detailed information observed for each well, including the ability to highlight specific kinetic reaction wells (absorbance and fluorescence) • Sample IDs may be entered manually or imported from a file • Extensive curve-fitting capabilities, including Linear or Log axis definition, Point-toPoint, Linear, Polynomial, Cubic Spline, 4-P, and interpolation and graphic editing features Customized display and printed reports: • Quick access to all available results data including raw measurement values, transformed values, kinetic calculations, concentrations, plate layout, and statistical data on controls, standards, and samples • Masking and recalculation capability for authorized users • Kinetic options: Real-time display of kinetic reactions, individual well zoom, Mean V, Max V, time at Max V, Min/Max OD, Integral (area under the curve), and Onset calculations • Screening options: Definition of cutoffs by algebraic formulae, and positive, negative, etc., range calculations • Validation options: Formula to validate the Mean, Standard Deviation, or CV of controls • Printed reports are completely customizable and can include results data sets in matrix or column format; standard, kinetic, or dilution curves; sample list; audit trail; protocol description; custom header; and page breaks 2 • Introduction User’s Guide to KC4™ • For users with Microsoft® Word/Excel 2000 (or greater) and Windows 98/NT/2000/XP, PowerReports links KC4 with Excel and Word, providing a powerful format for creating custom publication-quality report and export documents • Reports can be previewed before printing Data exporting: • Data may be exported automatically for use with other programs including Excel™, Lotus™, and Paradox™ for further manipulation or report merging • Exporting is not limited to just raw data; all calculated results may be exported KC4 Signature complies with FDA’s Electronic Signatures rule, 21 CFR Part 11: • System Administrator. A site-designated System Administrator creates and maintains Standard User (low level) and Power User (high level) accounts, and specifies which KC4 functions shall be protected from use by Standard Users. The System Administrator sets special password and login characteristics including minimum password length, password aging, and idle session time-out. • Support for multiple users. Each user is identified by a unique combination of User ID and encrypted password. Users must log into KC4 with these identifiers to gain access. • Time-stamped audit trails. Activities such as user login/logout, protocol and data file creation and modification, and plate reading are permanently logged in a secure database. • Embedded signatures. Authorized users can electronically sign protocol and data files. Electronic signatures are permanent and remain a part of the overall data record for the life of that record. • Secure record storage. KC4 proprietary files (.prt, .pla, and .glb) are stored in a secure shared-access database. Activities performed on files within this database (such as rename, move, copy, overwrite, and delete) are performed within the KC4 environment, and every change is tracked in an audit trail. In addition, the System Administrator can configure the system so that these activities may only be performed by Power Users. • Protected functions. The System Administrator can protect a variety of functions from use by Standard Users. These functions include the deletion, rename, modification, and overwrite of various record types. User’s Guide to KC4™ Introduction • 3 Technical Support KC4 is backed by a superior support staff. If the software fails to function perfectly, please contact the Technical Assistance Center (TAC) and provide the following information: • The KC4 software version and revision numbers (such as Version # 3.4, Rev # x) found under the About menu. • The license type (‘v3.4’ or ‘Signature’). • The product serial number. • The specific steps which reproduce your problem. • Any error messages displayed on the screen. • A daytime phone number and fax number (if available). • Your name and company information. Phone Support Contact the Technical Assistance Center between 8:30 AM and 5:30 PM Eastern Standard Time (EST), and/or Customer Service between 8:00 AM and 5:30 PM EST, Monday through Friday, excluding holidays. Bio-Tek Instruments’ Main Number: (802) 655-4040 Technical Assistance Center: (800) 242-4685 (toll free in the U.S.) (802) 655-4740 (outside the U.S.) European Coordination Center: +49 (0) 7136 9680 Facsimile Support Send a fax with your questions or requests for help 24 hours a day to: Technical Assistance Center: (802) 655-3399 European Coordination Center: +49 (0) 7136 968 111 Written Communication Send your written comments to: Bio-Tek Instruments, Inc. Technical Assistance Center P.O. Box 998, Highland Park Winooski, Vermont USA 05404-0998 Bio-Tek Instruments, GmbH Kocherwaldstrasse 34 D-74177 Bad Friedrichshall Germany Electronic Communication Send E-Mail or find us on the Web: E-Mail: [email protected] Web: http://www.biotek.com To visit the our website from within KC4, select About|Bio-Tek Home Page. 4 • Introduction User’s Guide to KC4™ Installation and Configuration Important! There is a certain sequence of events that must be followed to ensure that KC4 is properly installed and configured. This chapter describes the essential installation and configuration tasks. Review the installation options provided on the following pages and choose the one required by your site to determine which tasks must be performed. Turn to the appropriate page number for detailed instructions on each task. User’s Guide to KC4™ Installation and Configuration • 5 Special note for Clarity™ Microplate Luminometer users: The Clarity PC software must also be installed on the PC(s). Install Clarity before performing the step “Connect reader(s) to the computer and establish communication.” KC4 v3.4 – Single PC with one or more users Step Task Page 1 Ensure that the computer meets the minimum system requirements 9 2 Install KC4 and restart the computer 11 3 Start KC4 and log in as the System Administrator 18 4 (Optional) Change the System Administrator’s password 21 5 (Optional) Copy KCShared.mdb to a secure network location 22 6 (Required if step 5 was performed) Configure KC4 to use the KCShared.mdb file on the network 23 7 Connect reader(s) to the computer and establish communication 25 KC4 v3.4 – Multiple PCs in a network environment Step Task Page 1 Ensure that all computers meet the minimum system requirements 9 2 Install KC4 on one computer and restart the computer 11 3 Start KC4 and log in as the System Administrator 18 4 Change the System Administrator’s password 21 5 Copy KCShared.mdb to a secure network location 22 6 Configure KC4 to use the KCShared.mdb file on the network 23 7 Connect reader(s) to the computer and establish communication 25 8 Repeat steps 2, 3, 6, and 7 for the remaining computers 6 • Installation and Configuration User’s Guide to KC4™ Special note for Clarity™ Microplate Luminometer users: The Clarity PC software must also be installed on the PC(s). Install Clarity before performing the step “Connect reader(s) to the computer and establish communication.” KC4 Signature – Single PC with one or more users Step Task Page 1 Appoint a System Administrator 8 2 Ensure that the computer meets the minimum system requirements 9 3 Install KC4 and restart the computer 11 4 Start KC4 and log in as the System Administrator 18 5 Change the System Administrator’s password 21 6 Copy KCShared.mdb to a secure network location 22 7 Configure KC4 to use the KCShared.mdb file on the network 23 8 Create one or more new user accounts 24 9 Connect reader(s) to the computer and establish communication 25 KC4 Signature – Multiple PCs in a network environment Step Task Page 1 Appoint a System Administrator 8 2 Ensure that all computers meet the minimum system requirements 9 3 Install KC4 on one computer and restart the computer 11 4 Start KC4 and log in as the System Administrator 18 5 Change the System Administrator’s password 21 6 Copy KCShared.mdb to a secure network location 22 7 Configure KC4 to use the KCShared.mdb file on the network 23 8 Create new user accounts 24 9 Connect reader(s) to the computer and establish communication 25 10 Repeat steps 3, 4, 7, and 9 for the remaining computers User’s Guide to KC4™ Installation and Configuration • 7 Appointing a System Administrator KC4 Signature Before installing the software, one individual at the site must be appointed as the KC4 System Administrator. The System Administrator is typically responsible for the following: • Determining which computers will have KC4 installed on them • Determining which users will have access to certain KC4 functions • Installing KC4 • Creating and maintaining user accounts • Customizing security settings • Reviewing records • Establishing a procedure and schedule for record retention and archival Administrator Requirements The FDA’s Electronic Signatures Rule (21 CFR Part 11) contains requirements that sites must meet in order to be in compliance. The KC4 Signature System Administrator should be cognizant of the following: • Administrator: The site shall select an “Administrator” whom will be the person responsible for all high-level administration of the program. This person will control access to the program by adding new users, structuring the individual users authority levels, and reporting to management, as appropriate, on any unauthorized use of the program. • Personnel Qualifications: Personnel that develop, maintain, or use electronic record/electronic signatures shall have the education, training and experience necessary to perform their assigned tasks. • Written Policies: There shall be written policies which hold individuals accountable and responsible for action initiated under their electronic signatures, in order to deter record and signature falsification. There shall be written revision and change control procedures to ensure that the program is administered in compliance with the FDA’s requirements. • Record Archiving and Deletion: The site is responsible to ensure that archiving or other file management techniques are suitable such that electronic records generated by the system shall be accurate and readily retrievable. Records may be removed by deleting the entire shared database or individual files within the database. This action may be conducted by the Administrator or by any Power User. • User Identity: Any person that will be authorized to use an electronic signature will have their identity confirmed by the Administrator prior to granting them program access. Only the genuine owner of the electronic signature is allowed to access the program through their ID/password combination. System users should be informed that accessing the program using someone else’s logon is a violation of the FDA rule. 8 • Installation and Configuration User’s Guide to KC4™ • Password Expiration/Recall: All passwords must be checked, recalled, or revised at an interval appropriate with the security needs of the organization. Personnel whom no longer work at the establishment shall have their program access capabilities deactivated in a timely manner. • Certification to FDA: The site must certify to FDA that the electronic signatures utilized on records are intended to be as legally binding as handwritten signatures, prior to or at the time of record submission to FDA. The FDA rule should be consulted for details and method to be used. • Notification of Attempted Security Breaches: The software utilizes an error log system to notify the Administrator of log-in failure incidents that exceed the limits they have established. The administrator is responsible to “immediately and urgently” notify the appropriate personnel at the site if the activity appears to be an attempt to breach security. • Signature Representations: The administrator should be made aware that while electronic signatures representations cannot be excised or added they can be copied by screen copy techniques and pasted into other documents. These modified documents cannot be resaved in the secure program but may be printed out as is. Verifying Minimum System Requirements KC4 v3.4 KC4 Signature Before installing KC4, verify that the computer(s) meet or exceed the following requirements: • Pentium processor / 100 MHz minimum * • Microsoft Windows 95/98/NT/2000/XP operating system * • 64 MB of RAM minimum * • 30 MB of available hard drive space for the KC4 program files • Additional available hard drive space for storing protocol and plate data files • CD ROM drive • Super VGA color monitor • Keyboard and mouse ports • Serial port (for autoreader connection) • USB port (with USB-to-serial adapter, if required) * For users with Microsoft® Word/Excel 2000 (or greater) and Windows 98/NT/2000/XP, PowerReports links KC4 with Excel and Word, providing a powerful format for creating custom publication-quality report and export documents. For the PowerReports feature to run successfully, the computer(s) must meet or exceed the following requirements: • Pentium II processor / 300 MHz minimum • Microsoft Windows 98/NT/2000/XP operating system • 128 MB RAM recommended • Microsoft Office 2000 (9.0.3821 SR-1 or newer), Office XP, Office 2003 User’s Guide to KC4™ Installation and Configuration • 9 Upgrading from an earlier version of KC4 KC4 v3.4 KC4 Signature Upgrade Notes: • If you are upgrading from KC4 version 3.1, 3.2, or 3.3 and you plan to uninstall your existing version, we recommend you do so after successfully installing version 3.4. This will allow the 3.4 installation program to recognize your current registration information. • You are not required to uninstall an earlier KC4 version. If you choose to uninstall a pre-3.1 version of KC4, however, be sure to preserve the KC4_32.pld file found in the root KC4 folder. This file may contain custom plate formats that must be imported into the new plate database to support any protocols that reference custom plate formats. See “Plate Format” in System Menu to learn more. • If you are upgrading from KC4 version 3.1, 3.2, or 3.3 and you plan to reuse existing Local, Shared, and/or Diagnostic databases, make a note of the names and current locations of these databases. They will have to be upgraded for use with version 3.4. During the version 3.4 installation, KC4 will automatically run a Database Upgrade Utility to do this. KC4 will search all fixed, non-removable drives (e.g., diskette, ZIP, JAZ, and network drives are not automatically searched), for the following files: KCLocal.mdb, KC*.mdb, and Calib.mdb. You will have an opportunity to specify additional databases for upgrade during the installation. You can also run the utility after KC4 is installed via the System|Setup, Database menu option. Note: When KC4 prepares to upgrade a database, it makes and saves a copy of the original. The original database will remain unchanged and it can still be used with the earlier KC4 version. The upgraded databases are not backwards-compatible. That is, a KC4 version 3.4 database will not be recognized by KC4 version 3.1. 10 • Installation and Configuration User’s Guide to KC4™ Installing KC4 KC4 v3.4 KC4 Signature Follow these steps to install KC4: 1. Start Windows. Note: If you are prompted with a Windows password entry dialog, enter a valid password; this helps to ensure a complete installation. If you were not prompted with the Windows password entry, disregard this note. 2. Close any unnecessary Windows programs. 3. Place the CD in the CD ROM drive. 4. Click the Windows Start button and select Run. 5. When the Run dialog appears, type <drive>:\Setup.exe, where <drive> represents the CD rom drive. Alternatively, use the Browse function to access the drive and then click on setup.exe. 6. Click OK. After a brief pause, the Welcome dialog appears. 7. Click Next to continue. An informational dialog appears: User’s Guide to KC4™ Installation and Configuration • 11 8. Click Next to continue. The Software License Agreement dialog appears: 9. If you accept these terms, click Yes to continue. Otherwise, click No to discontinue the software installation. If you click Yes, the Choose Destination Location dialog appears: 12 • Installation and Configuration User’s Guide to KC4™ 10. The default location for the software is displayed. Click Next to accept the default location, or click Browse to specify a different location. After a location is specified, the Select Components dialog appears: 11. Check the components you want to install and click Next. The Select Program Folder dialog appears: 12. Accept the default Program Folder or enter a new one. Click Next to continue with the installation process. User’s Guide to KC4™ Installation and Configuration • 13 After a few moments, the Registration dialog appears: 13. Enter the License Number provided with your KC4 package. 14. Click the Registration Card button to verify the number and open a registration form: 14 • Installation and Configuration User’s Guide to KC4™ 15. Enter the required information and click Send by Fax to print a copy of this form for later faxing, or Send by E-mail to send the information to Bio-Tek via email. Bio-Tek will respond within two business days with your password. If you are upgrading from a previous KC4 version or from KCjunior, enter the requested KC4 hardlock serial number, KC4 software license number, or KCjunior serial number, as appropriate. Click Check to verify the number. If you are reinstalling KC4, you must submit a separate Reinstallation Form to obtain another password. Reinstallation is defined as (1) re-installing a KC4 version on the same PC (for example, after a hard disk replacement), or (2) un-installing a KC4 version from one PC and installing the same version on another PC. A Reinstallation Form (.doc and .txt formats) complete with instructions can be found in the root KC4 folder when the installation process is complete. 16. Click Close to return to the Registration window and then click OK to continue. KC4 will automatically run the Database Upgrade Utility. This utility is used to update Shared, Local, and Calibration databases created with earlier versions of KC4 so that they will be compatible with the current version of KC4. For example, if you are upgrading from KC4 version 3.1 to 3.4, your version 3.1 databases must be converted before they can be used by KC4 version 3.4. KC4 automatically begins a search of the fixed, non-removable drives (e.g., diskette, ZIP, JAZ, and network drives are not automatically searched). KC4 searches for the following files: KCLocal.mdb, KC*.mdb, and Calib.mdb. Note: This automatic search will not find Shared database files if their names do not begin with “KC”. 17. If you know the names and locations of the databases you wish to upgrade, and/or if the databases reside on a drive that is not automatically searched, click the Stop button to advance to the Database Upgrade Utility dialog (see next step). When the search is complete, if KC4 has detected database files created by former KC4 versions, an upgrade option message box appears: 18. Click Yes to upgrade the database(s) now, or No to skip the upgrade at this time. The Database Upgrade Utility can be run manually through KC4, via System|Setup, Database. User’s Guide to KC4™ Installation and Configuration • 15 If you click Yes, the Database Upgrade Utility dialog appears: Click the drop-down arrows to see which databases KC4 found. Click on the desired database name to select it for upgrading. Click the Browse button to search for a database. When the database is located, highlight it and click Open. KC4 will insert the name in the appropriate field (Shared, Local, or Diagnostics). 19. Click Start Upgrading to begin the process. When prompted, enter name(s) for the converted databases. (The original databases will remain unchanged). Default names contains a date and time stamp, as shown below. 20. Click Save to complete the upgrade. When the process is complete, KC4 will ask if you would like to read the Readme file: 16 • Installation and Configuration User’s Guide to KC4™ 21. Click Yes or No as desired. If you click No, or when you exit the text editor, the installation process finishes and then the Setup Complete dialog appears: 22. Remove the CD from the drive and click Finish to restart the computer. User’s Guide to KC4™ Installation and Configuration • 17 Starting KC4 KC4 v3.4 KC4 Signature To start KC4: 1. Double-click on the KC4 icon on the desktop, or open the Start menu and select Programs > KC4 3.4 Rev # > KC4. KC4’s opening dialog appears (KC4 Signature users will see a different picture): 2. Click Run KC4 in Trial Mode. 18 • Installation and Configuration User’s Guide to KC4™ KC4’s main dialog appears: Note: KC4 may attempt to communicate with an attached microplate reader. If you have not yet attached a reader, do not be concerned at this time if messages resembling “NO READER RESPONSE” and “Error when getting wavelength table from reader” appear. These messages will disappear when a reader is properly connected and configured. KC4 Signature users will be presented with a Login dialog: Enter “admin” in the Password field and click OK. The dialog will disappear and “System Administrator” will appear in KC4’s status bar at the bottom of the dialog. User’s Guide to KC4™ Installation and Configuration • 19 TplRep_1 Error Message Under certain circumstances, an error message resembling ‘TplRep_1.xla could not be found’ may appear in KC4. It is most likely to appear if an earlier version of KC4 was uninstalled and the remaining KC4 root folder was moved, renamed, or deleted. This error message occurs because one of the files used for building PowerReports cannot be found. The error may occur: • When starting KC4, if Excel is the default reporting or exporting engine and the Preferred file format is GLB. • When creating a new protocol or GLB file, if Excel is the default reporting or exporting engine. Follow these steps to solve the problem: 1. Close KC4. 2. Launch Microsoft Excel. The ‘TplRep_1.xla could not be found’ message will appear. 3. Click OK. 4. In Excel, select Tools/Add-Ins. The ‘TplRep_1.xla’ Add-In will be selected. 5. Unselect the ‘TplRep_1.xla’ Add-In. Excel will display an error message indicating that the file could not be found and prompts you to delete this Add-In. 6. Click Yes to delete the Add-In. 7. Quit Excel. 8. Restart KC4. The ‘TplRep_1.xla could not be found’ message should no longer appear. 20 • Installation and Configuration User’s Guide to KC4™ Changing the System Administrator’s Password KC4 v3.4 KC4 Signature We recommend that you change the System Administrator’s password immediately following software installation to ensure a secure operating environment. To change the System Administrator’s password: 1. Log in as the System Administrator if you have not already done so. KC4 v3.4: Select System|Administrator LogIn. KC4 Signature: Select System|LogIn/LogOut. 2. When the Login dialog appears, enter the password “admin” and click OK. 3. Select System|Security and click the Edit button. 4. Enter a new password, confirm the password, and then click OK. Important! Do not forget the Administrator’s password. If you do, you will have to reinstall KC4. User’s Guide to KC4™ Installation and Configuration • 21 Copying KCShared.mdb to a Secure Network Location KC4 v3.4 (optional) KC4 Signature KCShared.mdb is a database file installed by KC4. • With KC4 v3.4, KCShared contains security and plate format information. • With KC4 Signature, KCShared contains security and plate format information; user accounts; protocol, plate data, and global data files and their associated audit trails; and a system audit trail for shared events. Following installation, KCShared.mdb is stored on the computer’s hard drive but a copy of it can be stored in a network location for secure record storage and for multi-user access. Note: It is important to keep either the original KCShared.mdb file or a copy of the network file on each user’s hard drive in case the user needs to revert to it following an extended network connection failure. To locate the installed KCShared.mdb file and copy it to the network: 1. In KC4, select System|Setup and click the Database tab. 2. The Path field in the Shared Database section contains the current location of KCShared. (To see the full pathname, click once in the Path field and press the right arrow key.) 3. Launch Microsoft Explorer and go to this location. Tip: With some operating systems, KCShared.mdb is installed in the Application Data folder under \Documents and Settings\All Users. If you are looking for the Application Data folder on your computer and can’t find it, it is probably hidden. To reveal this folder, open Microsoft Explorer and select Tools|Folder Options|View. Make sure that ‘Show hidden files and folders’ is enabled. 4. Copy KCShared.mdb to the clipboard and paste it in a secure, shared-access location on the network. 5. Return to KC4. 22 • Installation and Configuration User’s Guide to KC4™ To configure KC4 to use the KCShared.mdb file on the network: 1. Within the System|Setup, Database dialog, click the Browse button. A standard Windows-style Open dialog will appear. 2. Use the file tree to locate the KCShared.mdb file on the network. Highlight the file and click Open. The Database dialog will reappear and the Path field will update to show the new location. 3. Click OK to close the Database dialog. Note: With KC4 Signature, an Audit Trail dialog will appear to log this event. Enter an appropriate comment and click Close. 4. KC4 will display the following message. Click Yes to quit KC4. 5. Restart KC4. User’s Guide to KC4™ Installation and Configuration • 23 Creating New User Accounts KC4 Signature KC4 Signature supports the creation of individual user accounts to ensure that only authorized users can gain access to the system and to any protected functions. To create a new user account: 1. Select System|Security|Users. 2. Click New. The KC4 User Settings dialog will appear. 3. Enter a unique ID using 1 to 16 alphanumeric characters. The user will enter or select this ID when logging into KC4 and when signing files. 4. Enter the user’s Full Name. This name will be associated with events logged by this user’s actions and with signatures applied by this user. 5. Choose a Group Membership. Standard Users are denied access to protected functions. (The System Administrator determines which functions shall be protected from use by Standard Users.) Power Users are permitted access to protected functions. Power Users cannot administer user accounts or modify Security settings. 6. Enter a temporary password for the user in the New and Confirm fields. Share the password with the user with instructions to change it as soon as possible. 24 • Installation and Configuration User’s Guide to KC4™ 7. (Optional) Specify a folder location from which the user will most often access protocol files. When the user selects Data|New Plate to initiate a plate read, the protocol selection dialog will default to this Protocols Folder. The user is permitted to modify his or her Protocols Folder. 8. Click OK to save the changes and return to the Security dialog. Connecting Reader(s) to the Computer KC4 v3.4 KC4 Signature Before KC4 can be used to communicate with a microplate reader, the reader must be properly connected to the computer on which KC4 is installed. The following briefly describes how to connect the reader to the computer. For more detailed information on reader setup, refer to the reader’s user manual. 1. Attach the appropriate cable or adapter to an available serial or USB port on the back of the computer. 2. Plug the other end of the cable to the serial or USB port on the reader. 3. Connect the power cable to the back or side of the reader. 4. Plug all power cords into grounded electrical outlets. Use of a surge protector is strongly recommended. 5. Use KC4 to set and test the communication parameters, as described under “Reader Selection” in the System Menu chapter. User’s Guide to KC4™ Installation and Configuration • 25 Where to go from here KC4 v3.4 KC4 Signature KC4 is a powerful software program with many features and customizable options. Learn more now by following these recommendations: • Go to the Getting Started chapter and: Review essential information on file types, plate data acquisition, data reduction, and more. Learn about KC4’s menu structure, and how to navigate the Help system. Get started with the Quick Start. Examine sample protocol and plate data files, and read the corresponding assay descriptions. • Go to the Data Menu chapter and read “Working with Data Files” to learn how to access, generate, modify, and save plate and global data files. • Go to the Protocol Menu chapter and read “Working with Protocols” to learn how to access, create, modify, and save protocol files. • Go to the System Menu chapter and read: “Security” to understand all of the security options available to the System Administrator. “Protected Functions” to learn how to protect certain KC4 functions from use by unauthorized users. “Database” to learn about the different databases used by KC4. “Exporting/Importing Plate Formats” to update the plate format database to support pre-version 3.1 protocols that reference custom plate formats. “Importing Files” to transfer your pre-version 3.4 protocol and data files into the shared-access database (KC4 Signature users only). 26 • Installation and Configuration User’s Guide to KC4™ Getting Started Overview Welcome to KC4! Getting Started introduces some important concepts for KC4 users, including: • A description of KC4’s key features, under Essential Information. • A tour of KC4’s Main Screen. • An overview of each menu’s contents, under Quick Reference Guides. • Tips on Navigating the Help System. • A typical sequence of events under Quick Start. • A Quick Start just for Clarity Microplate Luminometer users. • Instructions for locating and working with Sample Files. User’s Guide to KC4™ Getting Started • 27 Essential Information KC4 allows you to define instructions for controlling a microplate reader, acquiring measurement data from that reader, for reducing and analyzing the retrieved data, and for printing, exporting, and saving the results. The minimum instructions required for reader control and plate data acquisition are called reading parameters. Reading parameters varying according to reader model but generally include reading type (endpoint, kinetic, spectrum), reading method (absorbance, fluorescence, luminescence), filters/wavelengths, shaking and incubation instructions, well monitoring instructions, plate geometry, and various pre-reading options including pathlength correction. Reading parameters can be combined with data reduction instructions in a protocol. In addition to storing the reading parameters, a protocol can store plate layout information, single plate transformations, multi plate transformations, curve-fitting parameters, cut-off and validation criteria, report and export templates, security settings, and more. The KC4 software package also contains the Biograph module for viewing and manipulating curves. Biograph can be used either alone or in conjunction with KC4. File Types KC4 uses several proprietary file formats to store information: • Protocol (*.PRT) files contain instructions for controlling the attached microplate reader. Protocols also contain information required by KC4 to analyze plate measurement data. • Plate data (*.PLA) files contain raw measurement values, plate description information (prompts, comments, date and time of reading), and sample names. • Global data (*.GLB) files contain plate data and protocol information. The GLB file format is offered as an alternative to maintaining two separate protocol and plate data files, and is the required data file format for electronic signature support. In addition, Clarity™ Microplate Luminometer users will work with Clarity protocol files, which use a .BPF extension. These files are referenced by KC4’s PRT and GLB files and they contain the reading parameters required to control the luminometer. File Storage File storage options vary depending on site requirements and the current KC4 configuration. • Files may be stored individually on the computer’s hard drive, on a CD or diskette, or on a network to which the computer is attached. This is the storage method that users of KC4 version 3.0x and earlier are familiar with. Windows Explorer or a similar application can be used to view the file names and their locations, and to move, copy, rename, and delete files. • With KC4 Signature, PRT, PLA, and GLB files may also be stored inside a secure, shared-access database. This database, named KCShared.mdb, can be stored on a user’s computer or on a shared-access computer. KC4 provides a special file maintenance utility for viewing the file names and their locations, and for moving, copying, renaming, deleting, importing, and exporting files. 28 • Getting Started User’s Guide to KC4™ Record Retention and Archival With KC4, users create and save protocol, plate data, and global data files containing valuable assay information and test results. KC4 does not automatically delete or archive any of these records. It is therefore the site’s responsibility to establish a procedure and schedule for record retention and archival. Important: Regardless of license type, KC4 stores information using three different databases: KCShared.mdb, KCLocal.mdb, and CALIB.mdb. See “Database” in System Menu to learn more about their functions and locations. Because file or network problems can potentially create unrecoverable database errors, these databases should be backed up on a regular basis. • KC4 v3.4 Users: Protocol, plate data, and global data files are stored individually on a user’s computer or on a network computer to which the user has access. Windows Explorer or a similar application can be used to backup/archive files by copying them to the desired medium. • KC4 Signature Users: Protocol (PRT), plate data, and global data files are typically stored inside KCShared.mdb (they can also be stored outside this database, see “File Storage and Format Options” in System Menu for more information). To backup/archive files you can either copy the entire database to the desired medium, or you can export files to a disk and then copy them to the desired medium. See “Maintain Files” in System Menu to learn more about exporting and optionally deleting files from the shared database. See also “Audit Trail” in System Menu to learn about exporting and optionally deleting system audit trail events to reduce the size of KCShared.mdb. Plate Data Acquisition KC4 provides three methods for acquiring plate data: retrieving results from a microplate reader, entering plate data manually, and reading data in from an existing text file. Refer to the following for more information: • “Reading Plates” on page 48 • “Entering Plate Data Manually” on page 50 • “Reading Plate Data from a File” on page 51 Data Reduction and Analysis When the data has been retrieved and data reduction is complete, KC4 displays the raw data associated with the first defined filter/wavelength. The availability of additional data sets depends on the current protocol parameters and can include raw data at other filters/wavelengths, blanked data, corrected data, concentrations, symbols, kinetic curves, and more. Refer to the following for more information: • “Results Overview” on page 251 • “Data Sets” on page 253 User’s Guide to KC4™ Getting Started • 29 Biograph The KC4 software package includes the Biograph module for curve viewing and manipulation. Biograph can be used either as a stand-alone product or in conjunction with KC4. See “Biograph” for more information. File Signatures KC4 Signature users can electronically sign protocol files and global data files. Signing a file is easy; select Protocol|Sign or Data|Sign and KC4 will guide you through the process. Electronic signatures are permanent and cannot be modified, and they remain a part of the overall protocol or global data file for the life of that file. Signatures can be viewed by selecting Data|Audit Trail or Protocol|Audit Trail. Audit Trails KC4 automatically logs events for user actions and stores these events inside audit trails: • KC4 v3.4 maintains a Data Audit Trail for each plate and global data file. These audit trails contain events for Change and Mask actions applied to the measurement data. • KC4 Signature maintains three types of audit trails: Protocol, Data, and System. These audit trails contain events for many user activities including login/logout, protocol and global data file creation and modification, plate reading, and more. Main Screen KC4’s functions are controlled through the main screen, which contains a Title Bar, Menu Bar, Toolbar and Status Bar. Title Bar The title bar shows the current open file(s). Its appearance depends on the current Preferred Data File Format setting (selected via System|Security|Files). When the Preferred Data File Format is set to .GLB: • The set of brackets [ ] embraces the Global Data File name (extension GLB). • If a previously-saved protocol was used to generate the .GLB file, the title bar includes the text “created from <protocol name>.prt” When the Preferred Data File Format is set to .PLA: • The first set of brackets [ ] embraces the Plate Data File name (extension PLA). • The second set of brackets [ ] embraces the Protocol File name (extension PRT). • An asterisk (*) next to any file name indicates that its contents have changed but the file has not yet been saved. 30 • Getting Started User’s Guide to KC4™ Menu Bar • The Data menu contains functions for acquiring and processing measurement data. • The Edit menu provides tools for copying data from the screen in KC4 and pasting it into a spreadsheet, word processor, database manager, or text editor. (Data cannot be pasted back into KC4.) • The Protocol menu contains functions for creating, modifying, and saving assay protocols. • The Display menu provides access to the Biograph module and also displays the results of the Validation criteria defined in the protocol. • The System menu contains special functions for configuring readers, maintaining user accounts, configuring security parameters, setting global parameters, performing reader diagnostics, and more. • On the far right of the menu bar, the About menu provides access to the Help system, Bio-Tek’s home page, and the About KC4 screen. Toolbar The Toolbar contains buttons that, when clicked, provide quick access to KC4 functions. Accessibility of a particular toolbar button depends on whether or not its function applies to the current environment. For example, the Biograph button is accessible only if results are displayed and a curve has been generated. When KC4 is installed, the toolbar contains a set of default buttons. These buttons can be customized by selecting System|Toolbar. Status Bar The Status Bar at the bottom of the main screen displays the current function, reader and COM port; the name of the person currently logged in (if applicable); and any enabled keyboard functions. User’s Guide to KC4™ Getting Started • 31 Quick Reference Guides This section briefly describes the contents of each menu in KC4. Data Menu The Data Menu contains functions for acquiring and processing plate data. New Plate Clear memory to prepare to read a new plate. Open... Open an existing plate (.PLA) or global (.GLB) data file. Close Close the open data file. If the file has not yet been saved, KC4 provides the option to save before closing. Save Save the current plate data (.PLA) or global data (.GLB) file. Save As Save the open file under a new name. Read Plate... Read a plate using the attached reader, enter plate data manually, or read plate data in from a file. Sign Electronically sign the current .GLB data file. Export Export data to a text file, to an Excel spreadsheet, or to a Word document. Append to Kinetic File... Append the current set of plate data to an existing file. Print... Print a report according to the Protocol|Report settings. Print Preview Preview the report before printing. Print Setup Define the print setup before printing. Plate Description... Enter information about the current plate using up to six free-text fields plus a large comments field. Samples... Define the names of samples. Audit Trail View the contents of the Data Audit Trail. Exit Exit KC4. 32 • Getting Started User’s Guide to KC4™ Edit Menu The Edit Menu contains editing functions commonly found in Windows. Cut Deletes selected data from the document and copies it to the Clipboard. Copy Copies selected data to the Clipboard. Paste Pastes data from the Clipboard into the document. Protocol Menu The Protocol Menu contains functions for creating, modifying, and saving assay protocols. New Create a new protocol. Wizard Launch the Wizard for help with creating protocols. Open... Open an existing protocol (.PRT) file. Close Close the current protocol file. If the file has not yet been saved, KC4 provides the option to save before closing. Save Save the current protocol (.PRT) file. Save As... Save the open file under a new name. Sign Electronically sign the protocol file. Plate Description Define the names of up to six free-text fields to appear at read time to allow the operator to enter relevant information, such as the site name and lot number. User’s Guide to KC4™ Getting Started • 33 Reading Define the reading parameters, such as reading type, filters/wavelengths, shaking and incubation instructions, and plate type. Raw Data Correction Enable/Disable corrections to raw data. Options can include Blank Plate Subtraction, Blank Wells Subtraction, and Pathlength Correction. Kinetic Analysis Select the primary (and optional secondary) set of data for kinetic analysis, as well as the calculation type. Spectrum Analysis Select the data set for spectrum analysis, as well as the calculation type. Scanning Analysis Select the calculation type and related options for linear scanning analysis. Plate Layout Configure the layout, names, and colors of blanks, standards, controls, and samples. Define expected concentrations or dilutions. Single Plate Transformations Define and apply formulas to one or more wells within the plate. Multi-Plate Transformation Define calculations between different sets of plate data. Curves Define curve-fitting parameters. Validation Define the criteria used to assess the validity of the results or the suitability of calibrators for inclusion in subsequent calculations. Cutoffs Define the conditions used to screen selected data into defined categories based on fixed or variable threshold limits. Report Customize the contents and appearance of the report. Export Customize the contents and format of the data export file. Audit Trail View the contents of the Protocol Audit Trail. Security (Administrator and Power Users) Specify which protocol- and platespecific functions, if any, shall be protected from use by Standard Users. Options Select automated functions. Choose the reporting and exporting engines. Enable the protocol audit trail function. Advanced Select Advanced to access special protocol menu options: Plate Description, Raw Data Correction, Multi Plate Transformations, Validation, and Cutoffs. 34 • Getting Started User’s Guide to KC4™ Display Menu The Display Menu provides access to the Biograph module and also displays the results of the Validation criteria defined in the protocol. Curve(s) Launch Biograph and view the curve(s). Calculation Log Report View calculation warnings associated with the current data. Validation Results Check the status of every Validation condition defined in the protocol. Toolbar Show or hide the toolbar. System Menu The System Menu contains special functions for configuring readers, configuring system security, setting global parameters, performing reader diagnostics, and more. Readers Change or configure the current reader. Diagnostics Run an Optics Test or Universal Plate Test on the attached reader. Define characteristics for a Universal Test Plate. View historical test results. User’s Guide to KC4™ Getting Started • 35 Security Configure system security parameters and maintain user accounts. Administrator LogIn/LogOut Log into KC4 as the System Administrator (single-user system). LogIn/LogOut Log into KC4 using a unique ID and password combination (multi-user system). Audit Trail View the contents of the System Audit Trail. Registration/ Upgrade Enter a license number and password to ensure continuous use of KC4 after the trial period is over. Setup Set up global parameters including the import/export text separator, time format for kinetics, weighting of standard deviation, and Word/Excel options. Tell KC4 whether or not to use out-of-range values in statistics. Toolbar Customize the appearance of the toolbar by adding/removing icons. Plate Formats Create and modify plate formats, and specify a default format for new protocols. Reader Control Send a command to the reader to open or close the door, insert or eject the plate, and to control the temperature. About Menu The About Menu provides access to the Help system, Bio-Tek, and the About KC4 screen. Help Topics Open the Help window with its Contents, Index, and Find functions. Using Help Tips on using the Help system. Bio-Tek Home Page Automatically launch the browser and go to Bio-Tek’s home page (www.biotek.com). About KC4 Check the software version and revision numbers, view current system performance parameters, and find telephone and fax numbers for technical assistance. 36 • Getting Started User’s Guide to KC4™ Navigating the Help System Most KC4 dialogs contain a Help button that, when clicked, opens an informational Help dialog. In addition to this context-sensitive help, KC4 provides access to the entire Help system. Select Help Index from the About menu to open the Help Topics dialog. • Double-click on a book to see a topic’s sub-topics. • Double-click on a page to view the text for a topic. • Highlight a topic then click Open to view the text for the topic. • Click the Index tab to perform a keyword search. • Click the Find tab to search the entire help system for a specific word or phrase. • Click Print to print the text for a topic. • Click Cancel to close the Help Topics dialog and return to KC4. User’s Guide to KC4™ Getting Started • 37 Quick Start When using KC4, you will typically follow some version of the steps shown below: 1. Connect a microplate reader to the computer (if not already connected). 2. Start KC4 and log in (if required). 3. Select System|Readers to define reader setup parameters and establish communication. 4. Select System|Setup to define global parameters, including special Word/Excel reporting options. 5. Select Data|New Plate to prepare to read a plate. 6. Open an existing protocol or begin with an empty protocol. 7. Select Protocol|Reading to define reading parameters such as wavelengths, plate type, and temperature. 8. Return to the main view and define the data reduction parameters: create the plate layout by defining and assigning well identifiers select curve parameters specify cut-off and validation criteria create single- and multi-plate transformations define reporting and exporting options 9. Select Data|Read Plate to read a microplate. 10. Review the results. 11. Select Data|Print to print reports. 12. Select Data|Save to save the information, or with KC4 Signature select Data|Sign to electronically sign and then save the information. 13. Select Display|Curves to view the curve. 38 • Getting Started User’s Guide to KC4™ Quick Start for Clarity™ Microplate Luminometer Users Clarity users will follow a slightly different sequence of events: 1. Connect the luminometer to the computer (if not already connected). 2. Start the Clarity software and set up the communications port. 3. Important: Close the Clarity software. 4. Start KC4 and log in (if required). 5. Select System|Readers and set Clarity as the current reader. 6. Select System|Setup to define global parameters, including special Word/Excel reporting options. 7. Select Data|New Plate to prepare to read a plate. 8. Open an existing KC4 protocol or begin with an empty one. 9. Select Protocol|Reading to open or create a Clarity Protocol File and define its reading parameters. (See “Parameter Input” in Chapter 4 of the Clarity Operator’s Manual to learn about the reading parameters.) 10. Return to KC4’s main view and define the data reduction parameters: create the plate layout by defining and assigning well identifiers select curve parameters specify cut-off and validation criteria create single- and multi-plate transformations define reporting and exporting options 11. Select Data|Read Plate to read a microplate. 12. Review the results. 13. Select Data|Print to print reports. 14. Select Data|Save to save the information, or with KC4 Signature select Data|Sign to electronically sign and then save the information. 15. Select Display|Curves to view the curve. User’s Guide to KC4™ Getting Started • 39 Sample Files KC4’s installation program copies many sample protocol (PRT) and plate data files into a special SAMPLES folder inside the root KC4 folder and, with KC4 Signature, inside the KCShared database. Examine these files to learn how to create KC4 protocols to support your assays. The sample files cover a range of protocol options, including single plate transformations, multi plate transformations, curve fitting parameters, cutoff criteria, and more. Important! The sample protocols must be considered as examples provided for demonstration and guidance purposes only. If you plan to use these protocols or similar ones in a real application, it is your responsibility to validate the protocol parameters, including the Excel sheet content (if PowerReports is used), before using them. • The SAMPLES folder in the KC4 root folder also contains a Sample Protocol Descriptions.doc file describing the protocols. • Files with the extension .PRT represent protocol files. • Files with the extension .PLA represent plate data files. • Files with the extension .GLB represent global data files (containing plate data and protocol parameters). • Open protocol and plate data files with similar names, such as Quantitative.prt and Quantitative.pla. Note: Not every .PRT file has a corresponding .PLA file. 40 • Getting Started User’s Guide to KC4™ Data Menu Overview The Data Menu contains functions for acquiring, processing, and storing plate data. This chapter covers the following topics: • Creating, opening, saving, and closing data files • Reading plates • Entering plate data manually • Retrieving plate data from an external file • Applying electronic signatures to global data files • Appending a new set of plate data to an existing kinetic file • Exporting plate data • Printing and previewing reports • Entering descriptive information for the plate • Entering sample names • Viewing the data file’s audit trail User’s Guide to KC4™ Data Menu • 41 Working with Data Files This section describes accessing, generating, modifying, and saving files that contain plate measurement data. Where and How is Plate Data Stored? In KC4, there are two types of files used for storing plate data: • Plate data files contain raw measurement values, plate description information (prompts, comments, date and time of reading), and sample names. Plate data files are identified by the extension .PLA (DNA-Quant.pla) • Global data files contain plate data and protocol information. The GLB file format is offered as an alternative to maintaining two separate protocol and plate files, and is the required data file format for electronic signature support. Global data files are identified by the extension .GLB (DNA-Quant.glb) File storage options vary depending on site requirements and the current KC4 configuration. • Files may be stored individually on the computer’s hard drive, on a CD or diskette, or on a network to which the computer is attached. This is the storage method that users of KC4 version 3.0x and earlier are familiar with. Windows Explorer or a similar application can be used to view the file names and their locations, and to move, copy, rename, and delete files. • (KC4 Signature) Files may also be stored inside a secure, shared-access database. This database, named KCShared.mdb, can be stored on a user’s computer or on a sharedaccess computer. KC4 provides a special file maintenance utility for viewing the file names and their locations, and for moving, copying, renaming, deleting, importing, and exporting files. 42 • Data Menu User’s Guide to KC4™ Creating a New Data File Before a plate can be read, and before plate data can be entered manually or read in from a file, a new data file must be created. To create a new data file: 1. Select System|Readers and set the Current Reader to the appropriate target reader model. 2. Select Data|New Plate (or click the toolbar icon shown above) to clear memory to prepare to read a new plate. 3. If KC4 is currently configured* to create plate data (PLA) files by default, do one of the following: Select Protocol|New to create a new protocol. Select Protocol|Open to open an existing protocol. Select Data|Read Plate to initiate the plate read. If KC4 is currently configured* to create global data (GLB) files by default, selecting Data|New Plate opens the New Data File dialog: This dialog allows you to choose which protocol to open and use for the plate reading. Click the Browse button to search through the folder structure. Highlight the desired protocol and click OK. To start with an empty protocol and customize its parameters, highlight Empty Protocol and click OK. * The “Preferred Data File Format” is selected via System|Security|Files. User’s Guide to KC4™ Data Menu • 43 Opening Existing Data Files Select Data|Open to open a previously saved plate or global data file. Note: The layout of the Open dialog varies slightly depending on whether or not the Secured Protocol and Data File Storage option is enabled, but the functionality is the same. (In the example below, this option is enabled.) • The Current Folder field or the Look In field (you will see one or the other) shows your current location within the overall folder structure. If the drive is represented as DB:, this means that files are currently being stored in KC4’s secure, shared-access database. If the drive is represented by a single letter, such as C: or D:, this means that files are stored individually on the computer’s hard drive or on a network to which the computer is attached. See “Where and How is Plate Data Stored?” for more information. • Click • Click on a folder • Click the Type drop-down arrow to change the type of files being viewed. Options include: to move up one folder level. to open it and view its contents. KC4 Data (*.PLA) KC4 Data+Protocol (*.GLB) All Files (*.*) • Click on a file • Click to update the view to show any folders/files that may have been added by another user after you opened this dialog. 44 • Data Menu and click OK to open it. User’s Guide to KC4™ Modifying Data Files After data has been retrieved from the reader (or entered manually, or read in from a file), KC4 permits authorized users to change or mask raw measurement values. KC4 automatically logs an event to the file’s Data Audit Trail any time a change or mask action occurs. Note: Data Audit Trail behavior differs between KC4 v3.4 and KC4 Signature. Turn to page 63 to learn more. Important! Changing or masking wells may significantly alter or even invalidate results. • Only raw measurement values can be changed. Raw data set names resemble M 405, M#3 490, and M 485/528. • When a well is masked, KC4 excludes its raw measurement value from further calculations. To change a raw measurement value within any data file: 1. Open the desired file. 2. Within the Results window, click the Data drop-down arrow and select a data set that contains raw measurement values (e.g. M 405 or M#2 485/528). 3. Click the Change box. The System Administrator can protect the use of the Change function. If you are trying without success to use this function, you may not be authorized to use it. 4. Click on a well in the grid and change its value. 5. When the changes have been made, click OK to recalculate results. KC4 automatically updates the Data Audit Trail to reflect the action: To mask a well within any data file: 1. Open the desired file. 2. Within the Results window, click the Data drop-down arrow and select the desired data set. Note: When a well is masked, KC4 excludes its raw measurement value from further calculations. 3. Click the Mask box. The System Administrator can protect the use of the Mask function. If you are trying without success to use this function, you may not be authorized to use it. 4. Click on a well in the grid to mask it (click again to unmask). 5. When the well(s) have been masked, click OK to recalculate results. User’s Guide to KC4™ Data Menu • 45 KC4 automatically updates the Data Audit Trail to reflect the action: To modify protocol parameters within a GLB file: 1. Open the desired file. 2. Use the Protocol menu to select a parameter category to modify, such as Plate Layout, Single Plate Transformations, Report, and so on. Select Protocol|Advanced to see additional options including Cutoffs and Validation. Note: Reading parameters (such as filters/wavelengths and plate geometry) cannot be modified after a plate has been read. 3. Within the appropriate protocol parameter dialog, make the desired change and click OK to recalculate results. The System Administrator can protect some or all protocol parameters from being modified. If you are trying without success to modify these parameters, you may not be authorized to do so. KC4 Signature automatically updates the Data Audit Trail to reflect the action: Saving Data Files After creating or modifying a data file, save it by selecting Data|Save or Data|Save As. Save stores the data file under its current name. (If the file does not have a name, KC4 will ask you to enter one.) Save As copies the contents of an existing data file to a new data file with a different name. Note: The layout of the Save or Save As dialog varies slightly depending on whether or not the Secured Protocol and Data File Storage option is enabled, but the functionality is the same. (In the following example, this option is enabled.) 46 • Data Menu User’s Guide to KC4™ • The Current Folder field or the Save In field (you will see one or the other) shows your current location within the overall folder structure. If the drive is represented as DB:, this means that files are currently being stored in KC4’s secure, shared-access database. If the drive is represented by a single letter, such as C: or D:, this means that files are stored individually on the computer’s hard drive or on a network to which the computer is attached. See “Where and How is Plate Data Stored?” for more information. • The default file name is NewPlate. • Enter a new File Name and click OK to save it. • Click to move up one folder level. • Click to create a new folder. • Click on a folder • Click the Type drop-down arrow to change the type of files being viewed. Options include: to open it and view its contents. KC4 Data (*.PLA) KC4 Data+Protocol (*.GLB) All Files (*.*) • If an existing file name is entered, KC4 will provide a warning to prevent an accidental overwrite. Click Yes to continue with the overwrite, or No to rename the file before saving. Closing Data Files Select Data|Close to close the current data file. If the file has not already been named, the Save As dialog will appear requesting entry of a file name. Note: Clicking User’s Guide to KC4™ in the upper right corner of the Results window does not close the data file. Data Menu • 47 Reading Plates Once the new data file has been created (see “Creating a New Data File” on page 43), select Data|Read Plate to initiate a plate read, or to enter data manually or read data from a file. If no protocol is open, a Reading parameters dialog appears. Parameters available within this dialog are reader-specific: • Define the required Reading parameters and then click OK to continue. The Plate Reading dialog appears: 48 • Data Menu User’s Guide to KC4™ The Plate Reading dialog allows optional information and comments to be added to the plate. This information is filed along with the data for future reference. (Optional) Enter data in the Plate Description fields, and enter Comments. Tip: The data entry field names can be customized via Protocol|Plate Description. Click Start Reading to initiate communication with the attached microplate reader. Following a successful plate read, the measurement values will be transferred to KC4 and displayed in the Results window. Click Enter Manually to enter plate data using the keyboard. See “Entering Plate Data Manually” on page 50 for more information. Click Read From File to read plate data from a stored file. See “Reading Plate Data From a File” on page 51 for more information. Unintentional Termination of a Kinetic Read If a kinetic read is unintentionally terminated, or if at the end of the read KC4 receives an error status from the reader, KC4 presents the following message: As the message states, the read was interrupted and KC4 is providing the opportunity to save or discard the kinetic data received up to this point. The data is unvalidated, which means the reader did not (or could not) provide KC4 with the expected valid status at the end of the plate read. The term “unintentional termination” applies to the following situations: • The reader was turned off or the serial cable was disconnected during the read. • KC4 received an error status string at the end of the kinetic read. Note: If the unvalidated data is saved after this error, the last kinetic point for each well is deleted due to its proximity to the error status. • KC4 received an unexpected response from the reader or the reader stopped operating during the read (possibly due to a hardware error or an internal software error). • MS® Windows™ experienced a communication error in the low level COM processes. If the message shown above appears in KC4, take a moment to try to determine its cause. If the reader was inadvertently turned off or the serial cable was disconnected, the reader may have performed normally up to the point of termination, in which case the data would be valid. If the termination appears to have been induced by the reader, the data may not be valid. If a 4-digit error code is also supplied, consult the reader’s Operator’s Manual. Within the message box: • If NO is selected, all data collected up to this point is permanently deleted and cannot be retrieved. • If YES is selected, all data collected up to this point will be saved. It is strongly advised that the data be analyzed to determine its validity. User’s Guide to KC4™ Data Menu • 49 KC4 Signature users: If Yes is selected an event is logged to the Data Audit Trail, as demonstrated below: Entering Plate Data Manually KC4 provides the option to enter Endpoint and Kinetic plate data manually via the keyboard. Typically this information comes from other instruments or from previously acquired data. • Use the up and down arrow keys to move from well to well in the matrix. When the down arrow is pressed from a well in the bottom row, the cursor automatically jumps to the well in the top row of the next column. • Place the cursor over the desired well and enter the OD (or RFU/RLU if fluorescence / luminescence) value. • Click OK to end the editing process and calculate results. • For multi-wavelength reads, enter data for the first wavelength and click OK. For the remaining wavelengths, select the appropriate data set and click Change to enter values. • For kinetic reads, enter data for Reading #1 and click OK. For the remaining readings, update the Reading # field and click Change to enter values. Note: With kinetic plate data, each reading number set must be incremented to mimic the kinetic plate reading cycle. The time base will be taken from the kinetic reading parameters defined in the protocol. 50 • Data Menu User’s Guide to KC4™ Reading Plate Data from a File KC4 can read endpoint or kinetic data from an ASCII Text file. The file must be formatted properly, and the data must be delimited with acceptable separators. To import Endpoint or Kinetic data: • Examine the text file to see what character is used to delimit the data. Typical delimiters include semi-colon, comma, and tab. • In KC4, select System|Setup. Set the Import/Export Separator so that it matches the character used within the text file. • If desired, create or open a protocol. • Select Data|Read Plate|Read from File, then select the desired file. If the file is formatted properly, KC4 will read the data then calculate results according to the protocol parameters. Import File Format for an Endpoint Read The file block size must correspond with the plate layout defined in the protocol. For example, a 96-well plate has 8 rows and 12 columns and a 24-well plate has 4 rows and 6 columns. The following example represents the 96-well plate format: 0.003;1.409;0.483;2.022;1.463;1.200;0.876;2.240;2.057;1.867;0.435;2.147 1.776;1.284;0.760;0.037;0.229;0.911;0.368;0.415;2.471;1.114;0.298;0.012 0.022;0.945;1.329;1.428;1.504;1.518;0.416;1.658;1.127;0.880;0.143;1.519 1.958;2.007;1.300;0.755;2.190;1.817;2.390;2.314;1.348;0.356;1.155;0.588 2.156;0.524;1.949;2.109;2.492;2.499;1.529;0.981;0.666;0.743;2.100;0.059 0.940;0.232;1.693;0.141;0.022;2.297;0.690;0.682;1.470;1.728;2.094;1.816 1.212;0.513;1.859;1.171;1.145;2.373;1.861;0.271;1.498;0.963;1.838;1.522 1.431;0.903;0.379;0.563;1.063;2.007;1.293;2.475;1.879;0.864;0.422;1.643 User’s Guide to KC4™ Data Menu • 51 Import File Format for a Kinetic Read Before importing a kinetic text file, create a protocol that specifies the exact number of kinetic reads that will be imported. The first line in the text file can optionally contain a time indicator. This value will be stored in the protocol (overwriting protocol settings, if they are different), and used for any kinetic plotting. If the file contains no time indicators then the time parameters defined via Protocol|Reading parameters will be used as defaults. The following example represents the kinetic data set generated from 5 readings, in the 24-well format (to ensure a successful import of all five reads shown in this example, create a protocol and set the kinetic parameters so that the Reading Number is 5.): Time=00:00:00 0.000;0.007;0.013;0.020;0.026;0.033 0.004;0.011;0.017;0.024;0.030;0.037 0.008;0.014;0.021;0.028;0.034;0.041 0.012;0.018;0.025;0.032;0.038;0.045 Time=00:00:30 0.000;0.026;0.053;0.079;0.105;0.132 0.016;0.042;0.068;0.095;0.121;0.147 0.032;0.058;0.084;0.110;0.137;0.163 0.047;0.074;0.100;0.126;0.153;0.179 Time=00:01:00 0.000;0.059;0.118;0.178;0.237;0.296 0.036;0.095;0.154;0.213;0.272;0.331 0.071;0.130;0.189;0.249;0.308;0.367 0.107;0.166;0.225;0.284;0.343;0.402 Time=00:01:30 0.000;0.099;0.197;0.248;0.284;0.356 0.056;0.195;0.194;0.295;0.322;0.381 0.171;0.188;0.231;0.318;0.390;0.401 0.167;0.216;0.275;0.337;0.403;0.499 Time=00:02:00 0.000;0.176;0.251;0.299;0.378;0.446 0.117;0.281;0.295;0.375;0.397;0.441 0.257;0.275;0.331;0.388;0.438;0.482 0.239;0.296;0.369;0.402;0.492;0.557 52 • Data Menu User’s Guide to KC4™ Importing Clarity Luminescence Data Files Applies to Clarity™ Microplate Luminometer users only. KC4 supports the importing of Clarity results files (*.bti) through its ‘Read from File’ feature when Clarity is the currently selected reader. You can, for example, import a data file containing raw luminescence data and then create a KC4 protocol to apply transformations, calculate curves, generate reports, and so on. The following requirements must be met to ensure a successful import: • The Clarity file must have a .bti extension. • Before the .bti file is saved in the Clarity PC software, the Displayed digits after period field under Options|Visual Settings must be set to 0. • If you wish to import a .bdf file, open it in the Clarity PC software, select File|Save As, and select the .bti file type. • Batch Protocols must contain a maximum of 300 reads and have a total measurement time of less than 48 hours. • If the file has a measurement comment associated with it (Measurement|Measurement Comment), the comment cannot contain any empty lines. For example, the following comment would cause the file import to fail because the second line is empty: (1st line) Measurement performed by Brian Smith (2nd line) <empty> (3rd line) Results approved by Sharon Jones Notes on background measurement values: If the Clarity file specified a background measurement and the ‘Subtract instrument background’ option was enabled, KC4 imports the subtracted values as well as the background value for informational purposes. This value can be viewed in KC4 by selecting Protocol|Reading when the data file is open. If the Clarity file specified a background measurement and the ‘Subtract instrument background’ option was not enabled, KC4 imports the raw data values and the background value and then subtracts the background value from all wells. User’s Guide to KC4™ Data Menu • 53 Signing Data Files KC4 Signature provides an option for users to permanently attach, or sign, their names to global data (GLB) files. Notes: • While KC4 does not permit users to sign plate data (PLA) files, if a plate data file and a protocol file are open at the same time, selecting Data|Sign will combine the two individual files into one signed GLB file. • KC4 only supports file signatures when the multi-user identification feature is in use. See “Security” in System Menu for more information. To sign a global data file: 1. Open the desired file (if it is not already open). 2. Select Data|Sign or click the Sign toolbar icon. The New Data Audit Trail Signature dialog will appear: 3. Click the Reason drop-down arrow and select the reason to be associated with this signature. Signature Reasons are site-defined by the System Administrator under System|Security|Signature Reasons. 54 • Data Menu User’s Guide to KC4™ 4. (Optional) If two users are signing on behalf of a third KC4 user, check the Representative of box and then choose a name from the drop-down list. 5. Enter or select your User ID. If ‘Representative Of’ is checked, two users must enter or select their User IDs. 6. 7. Enter your Password. The characters will not be visible on the screen. Click Sign & Save. If the file has not yet been saved, a Save As dialog will appear: 8. Using the folder location tools provided, select the storage location. 9. Enter the desired File Name and click OK. The signature is applied immediately and KC4 logs the event in the Data Audit Trail (select Data|Audit Trail to view): User’s Guide to KC4™ Data Menu • 55 Append to Kinetic File KC4 provides the option to build a kinetic file using individual endpoint read plates. The currently-open plate can be appended to the previously read plate. This feature allows plates to be read on a discontinuous time base, unlike pure kinetic readings. • Alternatively, it is possible to append several kinetic readings to one file. If a kinetic reading sequence is halted (ex. to inject reagents) then it is possible to resume the kinetic reading and append the resumed data onto an existing file. • The Append feature can be set to perform automatically after a plate read. See “Protocol Options” in Protocol Menu for more information. To append a set of plate data to a kinetic file: • When the plate read is complete, select Data|Append to Kinetic File. The Append to Kinetic File dialog appears: The last opened plate file name appears as the default. Change the path and/or file name if desired. Click New if this set of data represents the starting kinetic read (i.e., if subsequent reads will be appended to this one). If no file name has been entered, KC4 will produce the standard Save As dialog. Click Open to search through the directory structure to locate the target file. Click OK to continue. A dialog will appear requesting entry of a Reading Time relative to the first reading. The default value represents the elapsed time since the last plate read; enter a new value if required. Note: The time format is defined under System|Setup. For an interval greater than 99:59:59, set the time format to HHH:MM. 56 • Data Menu User’s Guide to KC4™ Exporting Plate Data KC4 can export plate measurement data to a text file, a Microsoft® Excel spreadsheet, or a Microsoft® Word document. This section contains instructions for exporting to a text file only (using the KC4 export engine). • See “Export” in Protocol Menu for more information on the available export engines. • See PowerReports for more information on the Excel and Word exporting engines. The export file format can be defined within a protocol (under Protocol| Export), or after the plate is read (by selecting Data|Export). The text delimiter used during the export is selected under System|Setup. To export data: • When the plate read is complete, select Data|Export. • If export parameters are defined in the protocol, KC4 requests the entry of a file name. Enter the file name and then click Save to export the data. Data exported to a text file can be used by any other program with the ability to read an ASCII file. • If export parameters are not already defined in the current Protocol, an Export template appears. The example below shows the template used to export data to a text file: • Select the desired data sets and then click OK to begin the export. KC4 requests the entry of a file name. Enter the file name then click Save to export the data. Data exported to a text file can be used by any other program with the ability to read an ASCII file. Regardless of the Secured Protocol and Data File Storage setting, data is exported as an individual .txt file outside the shared-access database. See “Export” in Protocol Menu for information on customizing the export template. User’s Guide to KC4™ Data Menu • 57 Sample Export Text File [ProtocolDescr] Name=C:\KC4 3.4\Sample Export.prt Modified=No [ReadingParameters] PlateSize=4,6 PlateType=24 WELL PLATE Wells=A1-D6 ReadBlankPlate=No PathlengthCorrection=No ReadBioCell=No MonitorWell=No Filter1=405 Calibrate=No [DataDescription] Name=C:\KC4 3.4\Sample Export.pla Barcode=123-ABC-7890 ReadingDate=03/14/01 13:19:16 ReadingType=Reader Temperature= PromptTitles=Prompt #1:;Prompt #2:;Prompt #3:;Prompt #4:; Prompt #5:;Prompt #6: Prompts=;;;;; Comment=This is a sample. ReportTime=03/14/01 13:21:41 [Plate: Template] ;1;2;3;4;5;6 A;STD1:10.000;SPL1;SPL3;SPL5;SPL7;SPL9 B;STD2:20.000;SPL1;SPL3;SPL5;SPL7;SPL9 C;STD3:30.000;SPL2;SPL4;SPL6;SPL8;SPL10 D;STD4:40.000;SPL2;SPL4;SPL6;SPL8;SPL10 [Plate: M 405] ;1;2;3;4;5;6 A;0.006;2.818;0.967;4.044;2.925;2.399 B;0.751;4.480;4.114;3.733;0.871;4.295 C;1.532;2.568;1.520;0.075;0.457;1.822 D;2.737;0.829;4.943;2.228;0.595;0.023 [Plate: Concentrations] ;1;2;3;4;5;6 A;11.065;>41.500;21.774;>41.500;>41.500;37.731 B;19.367;>41.500;>41.500;>41.500;20.704;>41.500 C;28.070;39.614;27.936;11.834;16.091;31.302 D;41.498;20.236;>41.500;35.826;17.629;11.255 [Plate: Symbols] ;1;2;3;4;5;6 A;NEG;OUT+;EQV;OUT+;OUT+;POS B;EQV;OUT+;OUT+;OUT+;EQV;OUT+ C;POS;POS;EQV;NEG;NEG;POS D;POS;EQV;OUT+;POS;NEG;NEG 58 • Data Menu User’s Guide to KC4™ Printing Reports After plate measurement data has been acquired and calculations are complete, KC4 can generate a user-customizable set of results reports. Reporting options are selected and customized within each protocol by selecting Protocol|Reports. Print Select Data|Print or click the appropriate toolbar icon to print the reports selected in the protocol. Print Preview Select Data|Print Preview to see what the report will look like before it is printed. Print Setup To change the printer, paper size or source, or page orientation, select Data|Print Setup to access a standard Print Setup dialog. User’s Guide to KC4™ Data Menu • 59 Plate Description The Plate Description dialog appears just prior to each plate read, to provide the optional entry of plate-specific information. • The Reading Date and Time are automatically logged when the plate is read. Enter additional data as desired and then click OK to continue with the plate read. Data entry field names can be customized by selecting Protocol|Plate Description. • The information contained within this dialog is automatically stored in the data file when Data|Save is selected. 60 • Data Menu User’s Guide to KC4™ Samples Select Data|Samples to assign names to the sample groups previously defined under Protocol|Plate Layout. Each sample ID can be entered manually, or the Auto Numbering feature can be used to automatically increment ID suffix numbers. • The ID entered in cell #1 will be assigned to every replicate in Sample group one, the ID in cell #2 will be assigned to every replicate in Sample group two, and so on. • Up to 20 alphanumeric characters can be used for each ID. Note: If a sample name cannot be printed in its entirety, it is truncated and the character ‘\’ is added at the beginning of the name to indicate that the name has been truncated. For example: ‘\LE001’, ‘\LE002’, etc. • Sample IDs can be entered using a barcode scanner attached to the computer. To do this, place the cursor in cell #1 (or any empty cell). Scan the item with the barcode scanner. The first 12 characters of the ID will appear in KC4. Move the cursor down to the next empty cell, then scan the next item. User’s Guide to KC4™ Data Menu • 61 Auto Numbering To automatically number the sample IDs sequentially: • Check the Auto Numbering box. • In cell #1, type the identifying name and starting number (e.g., Smp1) for Sample group #1. Leave the cursor in cell #1. • Press the down arrow through as many cells as there are sample groups on the plate. KC4 will automatically increment the suffix number (Smp2, Smp3, and so on). Import Sample Names The Import option allows you to import a sample name list from a text file. Click Import and then locate and select the file to import. • • The import file must contain one name label per line. The number of IDs in the file should equal the number of samples as defined under Protocol|Plate Layout. If there are more IDs in the text file than samples defined on the plate, the extra IDs at the end of the file will remain unused. • If a Sample ID in the text file exceeds 12 characters, only the first 12 characters will be imported. Export Sample Names The Export option allows you to export the generated identification labels to a text file for future use. Enter the Sample IDs as required and then click Export to specify the export file name. The export file will contain one name label per line. Printing Sample IDs The Print options allow you to print the Sample IDs in a plate or list format. • Click Print As Plate to print the Sample IDs in a matrix format corresponding with the plate format selected in the protocol. The plate must be configured via Protocol|Plate Layout prior to using this feature. • Click Print As List to print the Sample IDs in a list format. One Sample ID will be printed on each line. 62 • Data Menu User’s Guide to KC4™ Data Audit Trail Every data file (plate and global) has a Data Audit Trail associated with it. This audit trail automatically records events performed on the file since the file was created. Each event records an action such as "Sample Plate read" or "Mask Value - <well ID>" and includes a date and time stamp, the ID of the user logged in at the time (if applicable), and any comments that were entered by the user when the action was performed. The audit trail cannot be edited and it remains a permanent part of the file for the life of that file (that is, if the file is deleted, the audit trail is also deleted). • With KC4 v3.4, only Change, Mask, Read, and Re-Read (delete initial values) actions are logged in the audit trail. A file’s audit trail cannot be viewed from within KC4 but it can be added to report and export templates. • With KC4 Signature, Change, Mask, and many other actions may be logged to the audit trail. A file’s audit trail can be added to report and export templates, and can also be viewed by selecting Data|Audit Trail: Events are sorted by date/time stamp and include the ID of the user logged in at the time, the action taken, and any comments that were entered by the user when the action was performed. The contents of the data audit trail can be copied to the Clipboard by highlighting the desired cells and pressing Ctrl+C. The contents of the data audit trail cannot be edited or deleted. User’s Guide to KC4™ Data Menu • 63 64 • Data Menu User’s Guide to KC4™ Edit Menu Editing Tools KC4 provides some editing tools for working with data in KC4. The two most commonly used tools are Copy to copy selected data to the clipboard, and Undo to remove the most recent unsaved change. Availability of editing tools depends on the current working environment; for example, the Cut and Paste options are not available within any measurement data grids or audit trail tables, but they are available within data entry fields (such as formulas). Editing tools are available through the Edit menu, by clicking the right mouse button, or by pressing the shortcut key combination, and they can include: • Cut (Ctrl+X): Deletes the selected data from KC4 and moves it to the clipboard. This function is not available within measurement data grids or audit trail tables. • Copy (Ctrl+C): Copies the selected data from KC4 to the clipboard without deleting it. This function is available within measurement data grids, audit trail tables, and data entry fields. Note: The values copied to the clipboard are separated by the character selected under System|Setup|Formats. • Paste (Ctrl+V): Pastes data from the clipboard into the current KC4 location (wherever the cursor is placed). This function is not available within measurement data grids or audit trail tables. • Delete (Delete key): Deletes the selected data from KC4 without moving it to the clipboard. This function is not available within measurement data grids or audit trail tables. • Select All: Selects (highlights) all text within the current field or cell. For example, place the cursor in a formula cell within the Single Plate Transformation dialog, click the right mouse button and click Select All to select the entire formula. • Undo (Ctrl+Backspace): Erase the last (unsaved) change made and restore any items that had been modified by that last change. For example, if within the Plate Layout dialog you mistakenly applied Sample well identifiers atop existing Standard well identifiers, choosing Undo will restore the Standard wells. User’s Guide to KC4™ Edit Menu • 65 66 • Edit Menu User’s Guide to KC4™ Protocol Menu Overview A Protocol contains instructions for controlling a microplate reader and for analyzing and reducing plate measurement data. Protocol parameters can be stored in a protocol file (which has a .PRT extension) or in a global data file (which has a .GLB extension). The topics in this chapter describe how to create and customize protocols. Customizable protocol parameters include the following: • Detection method (Absorbance, Fluorescence, or Luminescence) • Reading type (Endpoint, Kinetic, or Spectrum) • Read mode (Normal, Rapid, or Sweep) • Read/Dispense parameters (for instruments with fluid injection) • Wavelength selection • Linear and area scanning • Plate type and reading zone selections • Blank plate / well subtraction • Pathlength correction • Well monitoring • Kinetic, spectrum, and scanning analysis • Plate layout • Single plate transformations • Multi plate transformations • Curve-fitting parameters • Validation criteria • Cutoff criteria • Reporting and exporting options User’s Guide to KC4™ Protocol Menu • 67 Working With Protocols This section provides instructions for creating, modifying, saving, and accessing protocols. Where and How Are Protocols Stored? KC4 stores protocols using a proprietary file format and the .PRT extension. File storage options vary depending on site requirements and the current KC4 configuration. • Files may be stored individually on the computer’s hard drive, on a CD or diskette, or on a network to which the computer is attached. This is the storage method that users of KC4 version 3.0x and earlier are familiar with. Windows Explorer or a similar application can be used to view the file names and their locations, and to move, copy, rename, and delete files. • (KC4 Signature) Files may also be stored inside a secure, shared-access database. This database, named KCShared.mdb, can be stored on a user’s computer or on a sharedaccess computer. KC4 provides a special file maintenance window for viewing the file names and their locations, and to move, copy, rename, and delete files. Opening Existing Protocol Files Select Protocol|Open to open a previously saved protocol file. (If the Open option is not available in the Protocol menu, close the plate data file.) Note: The layout of the Open dialog varies slightly depending on whether or not the Secured Protocol and Data File Storage option is enabled, but the functionality is the same. (In the example below, this option is enabled.) • The Current Folder field or the Look In field (you will see one or the other) shows your current location within the overall folder structure. If the drive is represented as DB:, this means that files are currently being stored in KC4’s secure, shared-access database. If the drive is represented by a single letter, such as C: or D: this means that files are stored individually on the computer’s hard drive or on a network to which the computer is attached. See “Where and How Are Protocols Stored?” for more information. 68 • Protocol Menu User’s Guide to KC4™ • Click • Click on a folder • Click on a file • Click to update the view to show any folders/files that may have been added by another user after you opened this dialog. to move up one folder level. to open it and view its contents. and click OK to open it. Upon opening a protocol, KC4 evaluates it to determine (1) if it was created with an earlier version of KC4, and (2) which reader model it was created for. • If the protocol was created using an earlier version of KC4, the following message appears: “This file has been created with a former version of KC4. It is going to be converted. As a precaution, please verify after conversion that all of its parameters have been properly recovered. Then save the converted file.” KC4 will not automatically save the converted file; it is your responsibility to verify and then save the file either under its existing name or a new one. • If the protocol’s reader model does not match the one currently selected under System|Readers, the following message appears: “Protocol file is not compatible with the current reader. The current reader will be changed.” Click OK to open the protocol and allow KC4 to update the current reader selection under System|Readers, or click Cancel to return to the main view without opening the protocol. If you click OK, KC4 will set the ‘current reader’ to the reader that was selected when the protocol was created. If a different reader is then selected from the System menu, KC4 will delete the reading parameters of the open protocol, but will retain the data reduction steps of the protocol. It will also set the protocol name to “New Protocol.prt”. The reading parameters must be re-entered and the data reduction steps (i.e. data in for curve fits, transformations, etc.) checked for correct input. The protocol can then be saved under a similar or new name. Note: If the attached reader does not match the one KC4 is expecting, the messages INCORRECT READER MODEL CONNECTED or NO READER RESPONSE (TIMEOUT) and then Error when getting wavelength table from the reader may appear. KC4 will proceed and change the reader under System|Readers but you will have to attach the correct reader before running the protocol. When the protocol is open, KC4’s title bar changes to show the file name. Use the Protocol menu or the toolbar icons to modify or view the protocol’s parameters. Creating New Protocols Important: Before creating a new protocol, select System|Readers and set the Current Reader to the appropriate target reader model. The reader does not have to be connected to the computer when you are creating or modifying protocols. Clarity™ Microplate Luminometer users: See page 77 for information on creating protocols. To create a new protocol, begin by doing one of the following to enable the options under the Protocol menu: • • Close any open plate data files and then select Protocol|New. If the Preferred Data File Format is set to .GLB, select Data|New and then choose Empty Protocol. User’s Guide to KC4™ Protocol Menu • 69 The next step is to define the protocol parameters required by your assay to control the reader and perform data reduction. Do this by opening the Protocol menu and selecting each option in turn: Reading, Kinetic Analysis, Plate Layout, and so on. Select ‘Advanced’ to see additional options including Cutoffs and Validation. The major headings in the remainder of this chapter are aligned with the Protocol menu options; refer to these sections for further instruction. You may not need to use all of the options, but you must at a minimum define the Reading parameters. For more information see “Defining Reading Parameters” later in this chapter. Protocol Wizard As an alternative to using the Protocol Menu to create a new protocol, KC4 provides a Wizard to guide you through the process. Protocol parameters are conveniently categorized for easy selection and intuitive setup. Click the Wizard toolbar button or select Protocol|Wizard to begin. • Click on a button (e.g. Settings) to define related parameters. KC4 displays a check mark ( ) next to each category after it is accessed. You do not have to define the parameters associated with every button. At a minimum, however, you should define the Reading Parameters under the Plate Settings tab. • Click on a tab (e.g. Basic Analysis) to see more buttons. • Click < Back or > Next to switch between tabs. • Click OK to close the Wizard. 70 • Protocol Menu User’s Guide to KC4™ Modifying Protocol Parameters To modify protocol parameters within an existing protocol (.prt) or global data (.glb) file, begin by opening the desired file. Once the file is open, use the Protocol menu or the toolbar buttons to select a parameter category to modify, such as Reading, Plate Layout, Single Plate Transformations, and so on. Notes: Select Protocol|Advanced to see additional menu options, including Multi Plate Transformations, Cutoffs, and Validation. When a file is being modified, an asterisk appears next to its name in the title bar as a reminder to save the changes: [Oligo-Quant.prt*] With KC4 Signature, KC4 automatically logs an event to the file’s audit trail any time a change is made. Saving Protocol Files After creating or modifying a protocol file, save the information by selecting Protocol|Save or Protocol|Save As. Save stores the protocol under its current name. (If it does not have a name, KC4 will ask you to enter one.) Save As copies the contents of an existing protocol to a new protocol with a different name. Note: The layout of the Save or Save As dialog varies slightly depending on whether or not the Secured Protocol and Data File Storage option is enabled, but the functionality is the same. (In the following example, this option is enabled.) • The Current Folder field or the Save In field (you will see one or the other) shows your current location within the overall folder structure. If the drive is represented as DB:, this means that files are currently being stored in KC4’s secure, shared-access database. If the drive is represented by a single letter, such as C: or D: this means that files are stored individually on the computer’s hard drive or on a network to which the computer is attached. See “Where and How Are Protocols Stored?” for more information. User’s Guide to KC4™ Protocol Menu • 71 • The default file name is NewProtocol.prt • Enter a new File Name and click OK to save it. • Click to move up one folder level. • Click to create a new folder. • Click on a folder • If an existing file name is entered, KC4 will provide a warning to avoid an accidental overwrite. Click Yes to continue with the overwrite, or No to rename the file before saving. to open it and view its contents. Closing Protocol Files To close a protocol file, select Protocol|Close. If the protocol is newly created, or if modifications were made to an existing protocol, KC4 provides an option to save: • Click Yes to save the new or modified information and close the protocol. • Click No to close the protocol without saving changes. • Click Cancel to close this dialog and return to the open protocol. The new or modified information is retained but not yet saved. 72 • Protocol Menu User’s Guide to KC4™ Signing Protocol Files KC4 Signature provides an option for users to permanently attach, or sign, their names to protocol files. Note: KC4 only supports file signatures when the multi-user identification feature is in use. See “Security” in System Menu for more information. To sign a protocol file: 1. Open the desired file (if it is not already open). 2. Select Protocol|Sign. The New Protocol Signature dialog will appear: 3. Click the Reason drop-down arrow and select the reason to be associated with this signature. Signature Reasons are site-defined by the System Administrator under System|Security|Signature Reasons. 4. (Optional) If two users are signing on behalf of a third KC4 user, check the Representative of box and then choose a name from the drop-down list. 5. Enter or select your User ID. If ‘Representative Of’ is checked, two users must enter or select their User IDs. 6. Enter your Password. The characters will not be visible on the screen. 7. Click Sign & Save. User’s Guide to KC4™ Protocol Menu • 73 If the file has not yet been saved, a Save As dialog will appear: 8. Using the folder location tools provided, select the storage location. 9. Enter the desired File Name and click OK. The signature is applied immediately and KC4 logs the event in the Protocol Audit Trail (select Protocol|Audit Trail to view): 74 • Protocol Menu User’s Guide to KC4™ Plate Description The Plate Description dialog appears just prior to each plate read, to provide the optional entry of plate-specific information. This dialog gathers information to be stored in the plate file along with the measurement data. KC4 allows you to define up to six free-text fields to appear in this dialog (they are shown above as Name, Title, Site, Lot Code, Water Lot, and Test). Select Protocol|Plate Description to customize the names of these fields. • Text entered here substitutes the Prompt # text seen in the Data|Plate Description and Data|Plate Read dialogs. • To customize a prompt, simply overwrite the default text in the Prompt # field. • Enter up to 15 alphanumeric characters in each field. • If a field is left empty, the prompt will be kept out of the Plate Description dialog. User’s Guide to KC4™ Protocol Menu • 75 Defining Reading Parameters The configuration of the Reading parameters controls plate reading and measurement data collection. The availability of Reading parameters varies depending on the reader type currently selected under System|Readers. To define Reading parameters, select Protocol|Reading or click the Settings toolbar button to open the Reading dialog. The following pages are organized by reader model; locate your model to find the basic instructions for defining Reading parameters. To learn more about a particular parameter, search through the Reading Parameters Reference, which is organized alphabetically. 76 • Protocol Menu User’s Guide to KC4™ Clarity™ When KC4 is used to control the Clarity Microplate Luminometer, two protocols are required: a Clarity protocol file to specify the reading parameters and a KC4 protocol to specify the data reduction parameters. The KC4 protocol references the Clarity protocol file. Clarity protocol files have a BPF extension and they are typically (but not necessarily) stored on the PC in the C:\Program Files\BioTek\Clarity\protocols folder. BPF files cannot be stored in KC4’s shared database. Clarity protocol files can be created and edited through either the Clarity PC Software or KC4. In either case, information on Clarity’s reading parameters can be found in Chapter 4 of the Clarity Operator’s Manual under the “Parameter Input” heading. To create/edit/reference a Clarity protocol file within a KC4 protocol, make sure that Clarity is set as the current reader (System|Readers) and then select Protocol|Reading. The Reading dialog will appear, as shown below: • To create a new Clarity protocol file, click Create New. The Create Protocols dialog will appear. Select a protocol type and click Create to advance to the parameter input series of dialogs. • To search for and open an existing Clarity protocol file, click Browse. The file’s extension must be .BPF. Highlight the file and click Open. The file’s name and location will appear in the Path field. • To edit reading parameters for the currently selected file, click Edit. The Protocol Settings dialog will appear. Make the necessary changes and then click Save to store the settings using the current file name, or Save As to store the settings using a new file name. • (Optional) For Fast Kinetic protocols, click the Kinetic Scales button to adjust the min/max t and min/max y scales for curve displays. • When finished, click OK to save changes or Cancel to discard them. You can now define data reduction parameters via the Protocol Menu (Plate Layout, Transformations, Cutoffs, Reports, etc.) or run the protocol by selecting Data|Read Plate. User’s Guide to KC4™ Protocol Menu • 77 ELx800™ 1. Select a Reading Type of Endpoint or Kinetic. 2. Select the filter(s) to be used. 3. Select a Plate Type and define the First and Last Wells. 4. For a kinetic protocol, click the Kinetic… button to define the read time and interval. 5. For an endpoint area scanning protocol, enable the Scanning checkbox and then click the Scanning… button to define the read matrix size. 6. (Optional) Select Pre-Read Blank Plate. 7. (Optional) Select Monitor Wells and then click Options… to define related parameters. 8. Click OK to verify the parameters and close this dialog. 78 • Protocol Menu User’s Guide to KC4™ ELx808™ 1. Select a Reading Type of Endpoint or Kinetic. 2. Select the filter(s) to be used. 3. Define a rectangle of wells to be read if reading a partial plate. 4. For a kinetic protocol, click the Kinetic… button to define the read time and interval. 5. For an endpoint linear scanning protocol, click the Scanning… button to define the horizontal reading points. 6. (Optional) Define Shaking parameters. 7. (Optional) Define Temperature Control parameters. 8. (Optional) Select Pre-Read Blank Plate. 9. (Optional) Select Read Barcode to instruct the instrument to scan the barcode as the plate is drawn in to the reading chamber. 10. (Optional) Select Monitor Wells and then click Options… to define related parameters. 11. Click OK to verify the parameters and close this dialog. User’s Guide to KC4™ Protocol Menu • 79 FL600™ 1. Select a Detection Method of Absorbance, Fluorescence, or Luminescence. 2. Select a Reading Type of Endpoint or Kinetic. 3. For a fluorescence or luminescence protocol, define the Filter Sets to be used. 4. For an absorbance protocol, define the Wavelengths and Optics Position to be used. 5. Select a Plate Type and choose a Reading Direction. 6. For a kinetic protocol, click the Kinetic… button to define the read time and interval. 7. For an endpoint or kinetic scanning protocol, enable the Scanning checkbox and then click the Scanning… button to define the read matrix size. 8. (Optional) For a spectrum protocol, click the Scales… button to customize the graphical data display. 9. (Optional) Define General Options parameters. 10. (Optional) Define Shaking parameters. 11. (Optional) Define Temperature Control parameters. 12. (Optional) Select Pre-Read Blank Plate. 13. (Optional) Select Monitor Wells and then click Options… to define related parameters. 14. Click OK to verify the parameters and close this dialog. 80 • Protocol Menu User’s Guide to KC4™ FLx800™ 1. Select a Detection Method of Fluorescence or Luminescence. 2. Select a Reading Type of Endpoint or Kinetic. 3. (Optional) Click Update Filters to retrieve current filter values from the instrument. 4. Define the Filter Sets to be used. 5. Select a Plate Type and define the First and Last Wells. 6. For a kinetic protocol, click the Kinetic… button to define the read time and interval. 7. For an endpoint area scanning protocol, enable the Scanning checkbox and then click the Scanning… button to define the read matrix size. 8. (Optional) Define Shaking parameters. 9. (Optional) Define Temperature Control parameters. 10. (Optional) Select Pre-Read Blank Plate. 11. (Optional) Select Monitor Wells and then click Options… to define related parameters. 12. (Optional) Select Eject Between Filter Set Read. 13. Click OK to verify the parameters and close this dialog. User’s Guide to KC4™ Protocol Menu • 81 PowerWave™/PowerWave HT 1. Select a Reading Type of Endpoint, Kinetic, or Spectrum. 2. Define the Wavelengths and Read Mode to be used. Calibrate the wavelengths if necessary. 3. Select a Plate Type and define the First and Last Wells. 4. For a kinetic protocol, click the Kinetic… button to define the read time and interval. 5. For an endpoint linear scanning protocol, click the Scanning… button to define the horizontal reading points. 6. (Optional) For a spectrum protocol, click the Scales… button to customize the graphical data display. 7. (Optional) Define Shaking parameters. 8. (Optional) Define Temperature Control parameters. 9. (Optional) Select and define Pre-Reading options. 10. (Optional) Select Read Barcode to instruct the instrument to scan the barcode as the plate is drawn in to the reading chamber. 11. (Optional) Select Monitor Wells and then click Options… to define related parameters. 12. Click OK to verify the parameters and close this dialog. 82 • Protocol Menu User’s Guide to KC4™ PowerWaveX™ 1. Select a Reading Type of Endpoint, Kinetic, or Spectrum. 2. Define the Wavelengths to be used. Calibrate the wavelengths if necessary. 3. Define a rectangle of wells to be read if reading a partial plate. 4. For a kinetic protocol, click the Kinetic… button to define the read time and interval. 5. For an endpoint linear scanning protocol, click the Scanning… button to define the horizontal reading points. 6. (Optional) For a spectrum protocol, click the Scales… button to customize the graphical data display. 7. (Optional) Define Shaking parameters. 8. (Optional) Define Temperature Control parameters. 9. (Optional) Select and define Pre-Reading options. 10. (Optional) Select Read Barcode to instruct the instrument to scan the barcode as the plate is drawn in to the reading chamber. 11. (Optional) Select Monitor Wells and then click Options… to define related parameters. 12. Click OK to verify the parameters and close this dialog. User’s Guide to KC4™ Protocol Menu • 83 PowerWaveX™ Select 1. Select a Reading Type of Endpoint, Kinetic, or Spectrum. 2. Define the Wavelengths to be used. Calibrate the wavelengths if necessary. 3. Select a Plate Type and define the First and Last Wells. 4. For a kinetic protocol, click the Kinetic… button to define the read time and interval. 5. For an endpoint linear scanning protocol, click the Scanning… button to define the horizontal reading points. 6. (Optional) For a spectrum protocol, click the Scales… button to customize the graphical data display. 7. (Optional) Define Shaking parameters. 8. (Optional) Define Temperature Control parameters. 9. (Optional) Select and define Pre-Reading options. 10. (Optional) Select Read Barcode to instruct the instrument to scan the barcode as the plate is drawn in to the reading chamber. 11. (Optional) Select Monitor Wells and then click Options… to define related parameters. 12. Click OK to verify the parameters and close this dialog. 84 • Protocol Menu User’s Guide to KC4™ PowerWave™ XS 1. Select a Reading Type of Endpoint, Kinetic, or Spectrum. 2. Define the Wavelengths and Read Mode to be used. Calibrate the wavelengths if necessary. 3. Select a Plate Type and define the First and Last Wells. 4. For a kinetic protocol, click the Kinetic… button to define the read time and interval. 5. For an endpoint area scanning protocol, enable the Scanning checkbox and then click the Scanning… button to define the read matrix size. 6. (Optional) For a spectrum protocol, click the Scales… button to customize the graphical data display. 7. (Optional) Define Shaking parameters. 8. (Optional) Define Temperature Control parameters. 9. (Optional) Select and define Pre-Reading options. 10. (Optional) Select Monitor Wells and then click Options… to define related parameters. 11. Click OK to verify the parameters and close this dialog. User’s Guide to KC4™ Protocol Menu • 85 Synergy™ HT 1. Select a Detection Method of Absorbance, Fluorescence, Luminescence, or Multi-Mode. 2. Select a Reading Type of Endpoint, Kinetic, or Spectrum. 3. For an absorbance protocol, define the Wavelengths and Read Mode to be used. Calibrate the wavelengths if necessary. 4. For a fluorescence, luminescence, or multi-mode protocol, define the Filter Sets to be used. 5. Select a Plate Type and define the First and Last Wells. 6. For a kinetic protocol, click the Kinetic… button to define the read time and interval. 7. For an endpoint area scanning protocol, enable the Scanning checkbox and then click the Scanning… button to define the read matrix size. 8. (Optional) For a spectrum protocol, click the Scales… button to customize the graphical data display. 9. (Optional) Define Shaking parameters. 10. (Optional) Define General Options parameters. 11. (Optional) Define Temperature Control parameters. 12. (Optional) Select and define Pre-Reading options. 13. Click OK to verify the parameters and close this dialog. 86 • Protocol Menu User’s Guide to KC4™ Synergy™ HT / Time-Resolved 1. Select a Detection Method of Absorbance, Fluorescence, Luminescence, or Multi-Mode. 2. Select a Reading Type of Endpoint, Kinetic, or Spectrum. 3. (Optional) For a fluorescence protocol, enable the Time-Resolved option. 4. For an absorbance protocol, define the Wavelengths and Read Mode to be used. Calibrate the wavelengths if necessary. 5. For a fluorescence, luminescence, or multi-mode protocol, define the Filter Sets to be used. 6. Select a Plate Type and define the First and Last Wells. 7. For a kinetic protocol, click the Kinetic… button to define the read time and interval. 8. For an endpoint area scanning protocol, enable the Scanning checkbox and then click the Scanning… button to define the read matrix size. 9. (Optional) For a spectrum protocol, click the Scales… button to customize the graphical data display. 10. (Optional) Define Shaking parameters. 11. (Optional) Define General Options parameters. 12. (Optional) Define Temperature Control parameters. 13. (Optional) Select and define Pre-Reading options. 14. Click OK to verify the parameters and close this dialog. User’s Guide to KC4™ Protocol Menu • 87 Synergy™ HT / Time-Resolved / Injectors 1. Select a Detection Method of Absorbance, Fluorescence, Luminescence, or Multi-Mode. 2. Select a Reading Type of Endpoint, Kinetic, or Spectrum. 3. (Optional) For a fluorescence or luminescence protocol, check Dispense. 4. (Optional) For a fluorescence protocol, enable the Time-Resolved option. 5. For a fluorescence, luminescence, or multi-mode protocol, define the Filter Sets. 6. For a Dispense protocol, click Read & Dispense to define additional parameters. 7. For an absorbance protocol, define the Wavelengths and Read Mode to be used. Calibrate the wavelengths if necessary. 8. Select a Plate Type and define the First and Last Wells. 9. For a kinetic protocol, click the Kinetic… button to define the read time and interval. 10. For an endpoint area scanning protocol, enable the Scanning checkbox and then click the Scanning… button to define the read matrix size. 11. (Optional) For a spectrum protocol, click the Scales… button to customize the graphical data display. 12. (Optional) Define Shaking parameters. 13. (Optional) Define General Options parameters. 14. (Optional) Define Temperature Control parameters. 15. (Optional) Select and define Pre-Reading options. 16. Click OK to verify the parameters and close this dialog. 88 • Protocol Menu User’s Guide to KC4™ µQuant™ 1. Select a Reading Type of Endpoint, Kinetic, or Spectrum. 2. Define the Wavelengths to be used. Calibrate the wavelengths if necessary. 3. Select a Plate Type and define the First and Last Wells. 4. For a kinetic protocol, click the Kinetic… button to define the read time and interval. 5. For an endpoint area scanning protocol, enable the Scanning checkbox and then click the Scanning… button to define the read matrix size. 6. (Optional) For a spectrum protocol, click the Scales… button to customize the graphical data display. 7. (Optional) Select and define Pre-Reading options. 8. (Optional) Select Monitor Wells and then click Options… to define related parameters. 9. Click OK to verify the parameters and close this dialog. User’s Guide to KC4™ Protocol Menu • 89 Reading Parameters Reference All possible reading parameters and certain related topics are discussed on the following pages. Information is organized alphabetically by parameter name or topic. Clarity™ Microplate Luminometer users: Refer to Chapter 4 of the Clarity Operator’s Manual for information on reading parameters. Automatic Sensitivity Adjustment Enable Automatic Sensitivity Adjustment to let KC4 automatically select the most appropriate sensitivity value for a particular filter set. There are three methods to choose from: Scale to High Wells, Scale to Low Wells, and Best Signal to Noise Ratio. The best method depends on your application (some experimentation may be necessary). Note for Synergy™ HT w/Injector models. With Dispense protocols, if two filter sets are defined and Automatic Sensitivity Adjustment is enabled for the first filter set, ‘Use first filter set sensitivity’ is the required selection for the second filter set. Scale to High Wells Scale to High Wells searches for two consecutive gain values where the measured values are lower and higher than the defined high well values. • The High Wells represent those wells on which the calibration measurements will be taken. They are typically wells with the highest expected signal (measurement value) on the plate, such as the high standard wells. • The High Value represents the upper limit of the expected range of values for the entire microplate. The default value for the FL600™ is 90000 RFU/RLU with a valid range of 0 to 99999. The default value for the FLx800™ and the Synergy™ HT is 80000 RFU/LFU with a valid range of 0 to 99998. The recommended high value for all of these readers is 50,000 to 70,000 RFU/RLU. • The default Starting Sensitivity is 100. The valid range is from 25 to 255. The recommended starting sensitivity is 25. Scale to Low Wells Scale to Low Wells searches for two consecutive gain values where the measured values are lower and higher than the defined low value wells. Scale to Low Wells is recommended for weakly luminescent reactions. 90 • Protocol Menu User’s Guide to KC4™ • The Low Wells represent those wells on which the calibration measurements will be taken. They are typically wells with the lowest expected signal (measurement value) on the plate, such as blank wells, negative controls, or the zero standard wells. • The Low Value represents the lower limit of the expected range of values for the entire microplate. The default value is 25 RFU/RLU, and the valid range is from 0 to 99999 for the FL600™, 0 to 99998 for the FLx800™ and the Synergy™ HT. The recommended low value for all of these readers is 100 to 200 RFU/RLU. • The default Starting Sensitivity is 100. The valid range is from 25 to 255. The recommended starting sensitivity is 25. Best Signal to Noise Ratio With the Best Signal to Noise Ratio method, KC4 instructs the reader to perform several prereadings on the plate to determine the optimal sensitivity. The optimum sensitivity is based on the best signal-to-noise ratio obtained during these pre-readings. • Designate certain wells on the plate as Low, Experimental, and High Wells. Enter a single well location (ex. A1) or a ‘rectangle’ (ex. B1-C2) of well locations. Low Wells are usually blank wells, buffer wells, or negative controls, and are expected to yield a low RFU or RLU value. Experimental Wells are usually low standards or low positive controls, and are expected to yield a mid-range RFU or RLU value. High Wells are usually the highest standards or high positive controls, and are expected to yield a high (but not over range) RFU or RLU value. User’s Guide to KC4™ Protocol Menu • 91 • Specify the Base and High Values. The Base Value is the fluorescence or luminescence value that the Low and Experimental Wells must exceed during sensitivity determination. This ensures that the plate produces values that are large enough to be meaningful. The High Value is the fluorescence or luminescence value that the High Well(s) should approach but not exceed. The default setting is 90000 RFU/RLU, and the maximum value is 99999 for the FL600™ and 99998 for the FLx800™ and the Synergy™ HT. Practically, this value could be anywhere from 10000 to 90000. Note: If the Best signal to Noise Ratio cannot be calculated, use Scale to High Wells. Use First Filter Set Sensitivity If multiple filter sets are defined, you can opt to use the sensitivity determined with filter set #1 for other filter sets, by choosing Use First Filter Set Sensitivity. Bandwidth Verification (Only applies to fluorescence/luminescence readers.) KC4 evaluates each filter set against two criteria: 1) Overlap Evaluation By definition, the bandwidth rating on the filters used for standard fluorescence reads represents the bandwidth at the 50% transmission level. The transmission profile of these filters is essentially rectangular and therefore the bandwidth does not vary very much when the transmission levels change. When KC4 checks for overlap it ensures that the excitation and emission filter center wavelengths are far enough apart that there is no overlap of their bandwidths. The formula used to evaluate each pair of filter sets for overlap is as follows: |CW excitation - CW emission| > (BW excitation + BW emission)/2, where: CW excitation is the center wavelength of the excitation filter CW emission is the center wavelength of the emission filter BW excitation is the bandwidth of the excitation filter* BW emission is the bandwidth of the emission filter * If the Time-Resolved option is enabled, the value of BW excitation must be multiplied by 2 prior to substituting it into the formula to account for the triangular shape of the transmission profile when using the monochromator. Specifically, although the monochromator has a bandwidth of 10 nm at 50% transmission levels, it approximately doubles by the time the transmission levels approach zero. 92 • Protocol Menu User’s Guide to KC4™ If the absolute value of the difference in the excitation and emission center wavelengths is greater than half the sum of the excitation and emission bandwidths, then no overlap condition exists. If it is less than or equal to, then an overlap condition does exist. • When all of the reading parameters have been defined and the user attempts to validate them (by clicking OK), to KC4 evaluates each filter set pair against the overlap formula. If the result is such that there is no overlap condition for any of the defined filter set pairs, and there are no other parameter definition violations, KC4 will allow you to "OK" out of the Reading Parameters dialog. If the result is such that there is an overlap condition for any filter set pair, KC4 will display a message resembling the following: "Please select alternative filters for filter set #1. The bandpasses overlap." KC4 will not allow you to "OK" out of the Reading Parameters dialog until there are no overlapping filter set pairs. 2) Proximity Evaluation Although the transmission profile is quite vertical, it does "flair out" at very low transmission levels indicating an increase in the bandwidth. In order to account for the bandwidth at these lower transmission levels, KC4 performs a proximity check on each filter set pair. The formula used to evaluate each pair of filter sets to determine if they are "too close" to each other is as follows: |CW excitation - CW emission| > BW maximum + (BW minimum/2), where: CW excitation is the center wavelength of the excitation filter CW emission is the center wavelength of the emission filter BW maximum is the larger of the two bandwidths* BW minimum is the smaller of the two bandwidths* * If the Time-Resolved option is enabled, the determination of BW maximum and BW minimum must be made by comparing the emission bandwidth to twice the excitation bandwidth. Once again, this accounts for the triangular shape of the transmission profile when using the monochromator. If the absolute value of the difference in the excitation and emission center wavelengths is greater than the sum of the maximum bandwidth and half the minimum bandwidth, then no proximity condition exists. If it is less than or equal to, then a proximity condition does exist. • When all of the reading parameters have been defined and the user attempts to validate them (by clicking OK), to KC4 evaluates each filter set pair against the proximity formula. If the result is such that there is no proximity condition for any of the defined filter set pairs, and there are no other parameter definition violations, KC4 will allow you to "OK" out of the Reading Parameters dialog. If the result is such that there is proximity condition for any filter set pair, KC4 will display a message resembling the following: "Warning: the bandpasses for filter set #2 are too close." However, KC4 does not prohibit you from saving and running protocols that produce proximity warning messages. User’s Guide to KC4™ Protocol Menu • 93 Detection Method Certain readers, such as the FL600™, FLx800™, and Synergy™ HT, have multi-detection read capability. Before defining additional Reading parameters, click the radio button associated with the detection method required for the assay. • Multi-Mode is only available for the Synergy HT line of instruments. When Multi-Mode is selected, more than one detection method can be defined within a single protocol. When a Detection Method is selected, KC4 customizes the Reading Parameters dialog so that only the options supported by the Detection Method are available for selection. The Detection Method selection also instructs KC4 to display measurement values as OD (optical density), RFU (relative fluorescence unit), or RLU (relative luminescence unit). Dispense Option The Synergy™ HT with Injectors provides the ability to dispense fluid into microwells as part of a Read & Dispense protocol. When the Dispense option is enabled, the following limitations are applied: • Area scanning is not supported. • 1 or 2 filter sets may be defined. • The Shaking options are disabled within the main Reading Parameters dialog. A Shake step may be added to Plate Mode readings in the Read & Dispense dialog. • The Lag Time option is disabled. • The Eject Between Filter Sets option is disabled. • The Top Probe Vertical Offset option is disabled. The top probe height will be automatically set to 1 mm above the top of the plate. Note: The Dispense option is not available when Multi-Mode is selected. 94 • Protocol Menu User’s Guide to KC4™ Eject Between Filter Set Read This feature is available for fluorescence and luminescence protocols if you are defining an endpoint read with two or more filter sets. Enable Eject between Filter Set Read to: • Perform an initial reading of a blank plate, followed by the assay plate(s) at some later time. • Provide the ability to add reagents to the same plate between readings. • Enable reading up to 6 different plates with one protocol and plate file. If this feature is enabled, KC4 ejects the plate after one filter set read, then displays a message to click OK to start the next filter set read. See also “General Options (FL600)” or “General Options (Synergy HT).” Excitation/Emission Filter Sets (FL600™) The FL600 can take measurements with up to six uniquely defined Filter Sets. There are many applications for multiple filter sets, including: • Assays that have more than one fluorophore in the well. • Comparison of results between the top and bottom optics positions. • Comparison of results between rapid and static mode. • Comparison of results with varying static mode settings. • Comparison of results with varying sensitivity settings. To define Filter Sets: • Ensure the protocol is appropriately set for Absorbance, Fluorescence, or Luminescence detection method. • Select the Filter Set radio button corresponding with the number of sets required. • Define the wavelengths: Absorbance detection method: For each filter set, use the drop-down lists to select the desired wavelength. Fluorescence detection method: For each filter set, use the drop-down lists to select the Excitation and Emission wavelengths. User’s Guide to KC4™ Protocol Menu • 95 Luminescence detection method: For maximum sensitivity, select Lum/E to indicate an empty position in the filter wheel and a plug in position E in the excitation wheel. For each filter set, use the drop-down lists to select the Emission wavelength. • Note: To prevent damage to the reader, KC4 performs bandwidth verification as part of the validation within the Reading Parameters dialog. • The instrument may be equipped with one or two optical probes, positioned above (Top) and/or below (Bottom) the assay plate. Specify the Optics Position to be used for each filter set. Tips: Evaluate the proper reading position by specifying two (or more) filter sets, one each for the Top and Bottom optics positions. The top position is advantageous for homogeneous solutions using solid black plates. The bottom position is advantageous for cellular assays and assays requiring a covered plate to maintain sterility. The recommended Optics Position for Absorbance readings is Bottom. KC4 provides a warning if Top is selected, although this selection will not be prohibited. The recommended Optics Position for Luminescence readings is Top. • Fluorescence or Luminescence method only: Specify the Sensitivity setting for each individual filter set. Valid settings are 0 and integers from 25 to 255. ‘Auto’ indicates that the Auto Sensitivity Adjustment feature has been enabled. The signal from the range of fluorescence and luminescence assays can be very weak, very strong, or anywhere in between. For each assay, the sensitivity of the photomultiplier (PMT) should be adjusted to ensure that the signals from all wells fall within the appropriate dynamic range of 0 to 99999 relative fluorescence or luminescence units (RFU or RLU). Tips: Typical assays using 96- (or fewer) well plates require sensitivities between 75 and 190. Assays using 384-well or other higher-density plates will likely require much higher sensitivities due to narrower optical probes. Luminescent reactions may require sensitivities up to 255. To determine the optimum sensitivity for an assay, use Scale to High Wells or Scale to Low Wells. Scale to High Wells is used for fluorescence and bright luminescence assays. Scale to Low Wells is used for weakly luminescent reactions. See Automatic Sensitivity Adjustment for more information. As the sensitivity setting increases, so will the fluorescence values. If many wells result in “OVRFLW” (indicating RFU or RLU values greater than 99999), the sensitivity setting is probably too high. If each well contains more than one fluorophore, one of which might give brighter or weaker results, assign each filter set its own sensitivity. If the field shows ‘Auto’, the Automatic Sensitivity Adjustment feature is enabled. • Click the Options… button to specify the Measurement Options for each individual filter set (Endpoint Readings), or once for all filter sets (Kinetic Readings). 96 • Protocol Menu User’s Guide to KC4™ Excitation/Emission Filter Sets (FLx800, Synergy HT) The FLx800™ and Synergy™ HT can take measurements with up to six uniquely defined Filter Sets for endpoint reads and up to two for kinetic reads. There are several applications for multiple filter sets, including: • Assays that have more than one fluorophore in the well. • Comparison of results between the top and bottom optics positions. • Comparison of results with varying sensitivity settings. To define Filter Sets: • Select either the Fluorescence or Luminescence detection method. • Select Endpoint or Kinetic reading type. • Click the radio button corresponding with the number of Filter Sets required. Endpoint reads without area scanning: 1 to 6 Endpoint reads with area scanning: 1 or 2 Kinetic reads: 1 or 2 Dispense feature enabled: 1 or 2 • Define the wavelengths: Fluorescence detection method: For each filter set, use the drop-down lists to select the Excitation and Emission wavelengths. Fluorescence detection method with Time-Resolved enabled (Synergy HTTR): For each Excitation filter set, enter a wavelength value between 200 and 999 nm. The bandpass is not variable; it is pre-defined to be 10 nm. For each Emission filter set, use the drop-down lists to select the wavelengths. Luminescence detection method: For maximum sensitivity, select Lum/E to indicate an empty position in the filter wheel and a plug in position E in the excitation wheel. For each filter set, use the drop-down lists to select the Emission wavelength. • Note: To prevent damage to the reader, KC4 performs bandwidth verification as part of the validation within the Reading Parameters dialog. User’s Guide to KC4™ Protocol Menu • 97 • The instrument may be equipped with one or two optical probes, positioned above (Top) and/or below (Bottom) the assay plate. Specify the Optics Position to be used for each filter set. Tips: Evaluate the proper reading position by specifying two (or more) filter sets, one each for the Top and Bottom optics positions. The top position is advantageous for homogeneous solutions using solid black plates. The bottom position is advantageous for cellular assays and assays requiring a covered plate to maintain sterility. The recommended Optics Position for Luminescence readings is Top. • Specify the Sensitivity setting for each individual filter set. Valid settings are 0 and integers from 25 to 255. ‘Auto’ indicates that the Auto Sensitivity Adjustment feature has been enabled. Note: With Dispense protocols, if two filter sets are defined the field for the second filter set always shows Auto and will use the first filter set’s sensitivity. The signal from the range of fluorescence and luminescence assays can be very weak, very strong, or anywhere in between. For each assay, the sensitivity of the photomultiplier (PMT) should be adjusted to ensure that the signals from all wells fall within the appropriate dynamic range of 0 to 99998 relative fluorescence or luminescence units (RFU or RLU). Tips: Typical assays using 96- (or fewer) well plates require sensitivities between 35 and 150. Assays using 384-well or other higher-density plates will likely require much higher sensitivities due to narrower optical probes. Luminescent reactions may require sensitivities up to 255. To determine the optimum sensitivity for an assay, use Scale to High Wells or Scale to Low Wells. Scale to High Wells is used for fluorescence and bright luminescence assays. Scale to Low Wells is used for weakly luminescent reactions. See Automatic Sensitivity Adjustment for more information. As the sensitivity setting increases, so will the fluorescence values. If many wells result in “OVRFLW” (indicating RFU or RLU values greater than 99998), the sensitivity setting is probably too high. If each well contains more than one fluorophore, one of which might give brighter or weaker results, assign each filter set its own sensitivity. If the field shows ‘Auto’, the Automatic Sensitivity Adjustment feature is enabled. • Click the Options… button to specify the Measurement Options for each individual filter set. 98 • Protocol Menu User’s Guide to KC4™ Filters The Filters parameters include: • Meas. Filter: select the measurement filter for a single- or dual- wavelength read. • Refr. Filter: select the reference filter for a dual-wavelength read. First Well / Last Well Most readers support reading a subset of the entire plate, based on contiguous microplate wells. To specify the range of wells to be read: • If applicable, select the appropriate Plate Type. The default Last Well field value will automatically update to match the selected plate type. • Set the First Well and Last Well fields to indicate the range of wells to be read. For example, if First Well is set to A1 and Last Well is set to B3, KC4 reads a ‘rectangle’ of wells: A1, A2, A3, B1, B2, and B3. General Options (FL600™) KC4 provides options for controlling certain reader functions preceding and during plate reads, such as lamp control and plate ejection. Click the Options button from within the Reading Parameters dialog to open the General Options dialog. The available/recommended settings vary, depending on the reading mode. User’s Guide to KC4™ Protocol Menu • 99 Absorbance mode: • Enable Eject between Filter Set Read to perform an initial reading of a blank plate followed by the assay plate(s) at some later time; provide the ability to add reagents to the same plate between readings; or enable reading up to 6 different plates with one protocol and plate file. This feature is available for Endpoint reads only. • Skip reference wells is selected for absorbance readings, and cannot be changed. • Enable Check Lamp before measurement to check lamp output prior to measurement. This feature is selected by default. Deselecting this feature speeds up the reading process, however, a lamp output failure may not be detected. • Enable Set Lamp Off during measurement to allow for the reading of an unexcited signal. This feature is deselected by default. Fluorescence mode: • Enable Eject between Filter Set Read to perform an initial reading of a blank plate followed by the assay plate(s) at some later time; provide the ability to add reagents to the same plate between readings; or enable reading up to 6 different plates with one protocol and plate file. This feature is available for Endpoint reads only. • Skip reference wells is deselected by default. The FL600 is equipped with fluorescent plastic compounds call reference wells which help provide the best results when using Rapid Mode to read the assay plate. Skip reference wells should be deselected for use with Rapid Mode reads. • Enable Check Lamp before measurement to check lamp output prior to measurement. This feature is selected by default. Deselecting this feature speeds up the reading process, however, a lamp output failure may not be detected. • Enable Set Lamp Off during measurement to allow for the reading of an unexcited signal. This feature is deselected by default. Luminescence mode: • Enable Eject between Filter Set Read to perform an initial reading of a blank plate, followed by the assay plate(s) at some later time; provide the ability to add reagents to the same plate between readings; or enable reading up to 6 different plates with one protocol and plate file. This feature is available for Endpoint reads only. • Skip reference wells is deselected for luminescence readings, and cannot be changed. • Check Lamp before measurement is deselected by default. The lamp does not need to be checked before measurement. • Set Lamp Off during measurement is selected for luminescence readings, and cannot be changed. The lamp is turned off during measurement to avoid damage to the photomultiplier. 100 • Protocol Menu User’s Guide to KC4™ Reading the Reference Wells It is strongly recommended that you read the reference wells if Rapid Mode is enabled. If, however, reading the Reference Wells must be skipped, consider the following: • During an Endpoint read, when prompted to "Insert plate and press OK", do so within 60 seconds. • If a Lag Time is specified for an Endpoint or Kinetic read, the maximum recommended time is 60 seconds. If a longer lag time is required, read the reference wells first or use Static Mode to read the plate. • During a Kinetic read, the maximum time interval is 60 seconds. If a longer time interval is required, read the reference wells first or use Static Mode to read the plate. If the Reference Wells are skipped and the above time limits are exceeded, the FL600 can provide unexpectedly high fluorescence values in the first well that is read on the assay plate. Usually the first well is A1 but since the software provides the ability to change the starting well, the first well can be anywhere on the plate. General Options (Synergy™ HT) KC4 provides options for controlling certain reader functions preceding and during plate reads, such plate ejection and top probe positioning. If you are defining an endpoint read with two or more filter sets and are utilizing either the fluorescence or luminescence detection method, enable Eject between Filter Set Read to: • Perform an initial reading of a blank plate, followed by the assay plate(s) at some later time. • Provide the ability to add reagents to the same plate between readings. • Enable reading up to 6 different plates with one protocol and plate file. If this feature is enabled, KC4 ejects the plate after one filter set read, then displays a message to click OK to start the next filter set read. The Top Probe Vertical Offset parameter is available for fluorescence or luminescence reads when at least one of the filter sets uses the "top" optics position. It allows you to define how far the top probe is positioned from the top surface of the plate during the read. The valid range for the offset parameter is determined on a plate by plate basis. The calculation is based on the plate height and the maximum travel of the top probe: User’s Guide to KC4™ Protocol Menu • 101 In order to be considered valid, the vertical offset value must satisfy the following conditions: • 1.0 mm < = offset < = 32.5 - plate height* • offset > = 15.0 mm - plate height* * Plate heights are defined via System|Plate Formats. Kinetic Parameters If the Kinetic reading type is selected in the Reading dialog, click the Kinetic… button to define related parameters. Notes: • If the FL600™ is the current reader, the Kinetic dialog contains some additional parameters. See the next section for more information. • The default time format for kinetics is HH:MM:SS. To change the time format, select System|Setup. Specify the total kinetic Run Time and the Kinetic Interval. KC4 automatically generates the Reading Number based on these settings. • Run Time: Defines the duration of the complete kinetic run. The maximum run time is 48 hours. 102 • Protocol Menu User’s Guide to KC4™ • Interval: Defines the time interval between individual kinetic reads. The maximum valid Interval is equal to the current Run Time. The minimum valid Interval depends on the current reader type and certain protocol parameters, such as the number of wavelengths specified, the plate format, the number of wells to be read, and whether or not shaking is selected. For certain readers, a Minimum button is available under the Interval box. When this button is clicked, KC4 communicates with the reader to determine the minimum kinetic interval based on the currently selected Reading parameters. For all readers, when the OK button is clicked, KC4 automatically checks the validity of the Interval value. If it is insufficient for the currently defined Reading parameters, a theoretical minimum value is displayed. Note: For readers that support more than one read mode (speed), the returned value is based on the current reading mode. For some instruments, the read mode is set through the instrument’s front panel. For others, it is defined as part of the protocol. • Reading Number: Represents the total number of kinetic reads. KC4 calculates this automatically, based on the currently defined Run Time and Interval. The maximum number of kinetic reads is 300. • Allow Well Zoom During Read: If this feature is enabled, you can click on one or more wells in the Results dialog to view the kinetic curve(s) as the plate is being read. KC4 updates the graph and kinetic calculations as each measurement value is retrieved from the reader. Important! When the Allow Well Zoom During Read box is checked, a warning message appears. If the computer speed is less than 100 MHz, or if there is insufficient memory, this feature should not be used. Kinetic Parameters (FL600) The Kinetic dialog contains special Mode parameters for the FL600™. • In Plate Mode, the FL600 repeatedly reads a whole or partial plate for a specified number of times and for up to 6 filter sets. User’s Guide to KC4™ Protocol Menu • 103 • In Well Mode, the FL600™ repeatedly reads a well for a specified number of times for up to 2 filter sets. This mode is typically used for fast kinetic reactions. Check Eject between well to eject the assay plate between well readings. This feature is useful, for example, for accommodating reagent addition. Measurement Options To define Measurement Options such as Sampling or Automatic Sensitivity Adjustment for a particular filter set, start by clicking its Options button. Note: If the current reader is the FL600 and the reading type is Kinetic, click the Options button associated with Filter Set 1. Options selected here are applied to all defined filter sets. Measurement Mode (FL600) To define the measurement mode parameters for the FL600: • Choose between Rapid and Static mode: Rapid Mode reads each well while the assay plate is in motion. This provides for faster reading than with Static mode, but the CVs might be lower. The FL600 is equipped with fluorescent plastic compounds called reference wells which help provide the best results when using Rapid Mode to read the assay plate. See “General Options (FL600)” for more information. Static Mode performs a specified number of reads in each well, with a specified delay between each read. The reading performs more slowly than with Rapid Mode, but the CVs are usually better. Nb Samples, Delay before sampling, and Delay between samples pertain specifically to Static Mode. 104 • Protocol Menu User’s Guide to KC4™ If Static Mode was selected, specify the Sampling options: • Nb Samples is the number of measurements taken per well. Valid options are 1, 2, 3, 4, 10, 20, 50, and 100 measurements. The value reported for each well represents the average of its measurements. Usually, the more samples per well the better the CVs, although selecting a large number of samples per well typically results in only marginal improvement. Consider a setting that represents the optimal combination of sensitivity and speed. The recommended setting to achieve a balance between speed and sensitivity is 10 measurements per well. Note: The reader takes approximately 10 milliseconds to perform each measurement. • Delay before sampling is the pause time of the optical probe above or below the microwell before the measurement is taken. Valid options are 0.10, 0.35, 0.50, and 2.00 seconds. The recommended setting for fluorescence assays to ensure the probe is stopped for measurement, but for the minimum amount of time is 0.35 seconds. For luminescence reads that allow long reading times, a delay of 2.0 seconds will provide lower CVs. This delay of 2.0 seconds is not recommended for fluorescence reads. • Delay between samples is the time delay between measurements taken in each well. The valid range is from 0 to 2550 milliseconds. The recommended setting is 10 milliseconds. Longer delays between samples may result in better CVs between replicates. Measurement Mode (FLx800, Synergy HT) To define the measurement mode parameters for the FLx800™ and Synergy™ HT: • Nb Samples is the number of measurements taken per well. The valid range is from 1 to 255 measurements. The value reported for each well represents the average of its measurements. Usually, the more samples per well the better the CVs, although selecting a large number of samples per well typically results in only marginal improvement. Consider a setting that represents the optimal combination of sensitivity and speed. The recommended setting to achieve a balance between speed and sensitivity is 10 measurements per well. Note: The reader takes approximately 10 milliseconds to perform each measurement. • Delay before sampling is the pause time of the optical probe above or below the microwell before the measurement is taken. The valid range is from 10 to 2550 milliseconds. The recommended setting to ensure the probe is stopped for measurement, but for the minimum amount of time, is 350 milliseconds. • Delay between samples is the time delay between measurements taken in each well. The valid range is from 0 to 255 milliseconds. The recommended setting is 1 millisecond. Longer delays between samples may result in better CVs between replicates. User’s Guide to KC4™ Protocol Menu • 105 Measurement Mode (Synergy™ HT / Time-Resolved) Specify the Sampling options: • Nb Samples is the number of measurements taken per well. The valid range is from 1 to 255 measurements. The value reported for each well represents the average of its measurements. Usually, the more samples per well the better the CVs, although selecting a large number of samples per well typically results in only marginal improvement. Consider a setting that represents the optimal combination of sensitivity and speed. The recommended setting to achieve a balance between speed and sensitivity is 10 measurements per well. • Delay before sampling is the pause time of the optical probe above or below the microwell before the first flash. The valid range is from 10 to 2550 milliseconds. The recommended setting to ensure the probe is stopped for measurement, but for the minimum amount of time is 350 milliseconds. • Delay between samples is the time delay between the end of data collection and the beginning of the next flash in each well. The valid range is from 0 to 255 milliseconds. The recommended setting is 5 milliseconds. Longer delays between samples may result in better CVs between replicates. • Note for Injector models. The following values are “fixed” for Dispense protocols: Plate Mode: Well Mode: Nb Samples per well: 10 Nb Samples per well: 1 Delay before sampling: 350 Delay before sampling: 10 Delay between samples: 24 Delay between samples: 0 If the Time-Resolved option in the Reading Parameters dialog is checked, specify the TimeResolved Fluorescence options: • Delay is time delay between the flash and the beginning of data collection. It is also referred to as the delay before integration. Valid values are 0 µsec and 20 to 16000 µsec. The default value is 20 µsec. Note: A delay of 0 µsec is not the same as a fluorescence read with the time-resolved option turned off. They differ in two ways: (1) the excitation wavelength is generated by the monochromator; and (2) the user can specify the data collection time which is not an available parameter for normal fluorescence reads. 106 • Protocol Menu User’s Guide to KC4™ • Data Collection Time is the amount of time for which readings are collected after the delay before integration time has expired. The valid range is from 20 to 16000 µsec. The default value is 100 µsec. The following is a simplified schematic of the measurement mode parameters: 1 = Nb Samples per well 2 = Delay before sampling 3 = Delay between samples 4 = Delay 5 = Data Collection Time Monitor Wells If the currently selected reader supports well monitoring, the Monitor Wells option is available. The feature enables the instrument to repeatedly read a single well or a group of wells and evaluate the measurements against pre-defined criteria. Once the criteria are met, the plate read begins. Click the Options button to define the criteria: • Select the Data to Monitor representing the filter or wavelength value to be used during well monitoring. The available options depend on the current selections in the Reading dialog. Only measured raw absorbance, fluorescence, or luminescence values are presented for selection. User’s Guide to KC4™ Protocol Menu • 107 • Enter the well or Wells to Monitor. Multiple wells must be contiguous and entered as a range, e.g. A1-A2, or G10-H12. • Define the Stop Monitoring When criteria, to tell the instrument when to conclude the monitoring process: Choose a conditional option: ‘At least one well’ in the range must meet the criteria; the ‘Average’ of the monitored wells must meet the criteria; or ‘All wells’ in the range must meet the criteria. Choose an operator: >, >=, <, or <=. Enter the measurement value to be met. For Absorbance protocols, the valid range is -1.000 to 5.000. For Fluorescence and Luminescence protocols, the valid range is 0 to 99998 (FLx800™ and Synergy™ HT) or 99999 (FL600™). • If desired, enter a Delay Between Readings of the monitored well(s), in HH:MM:SS format. The default setting of 00:00:00 allows the well(s) to be read as quickly as possible. Multi-Mode (Only applies to the Synergy™ HT line of instruments.) Synergy HT instruments with basecode versions of 2.10 or higher support KC4’s Multi-Mode detection method option. When Multi-Mode is selected, more than one detection method can be defined within a single protocol. When Multi-Mode is enabled, the following Reading parameters are supported: • End Point reading type with up to 6 wavelengths or filter sets • Kinetic reading type with up to 6 wavelengths or filter sets • Time-Resolved Fluorescence (HTTR) • Pre-Read Blank Plate • Monitor Wells • Automatic Sensitivity Adjustment The following Reading parameters are not supported: • Rapid and Sweep read modes (absorbance reads are always performed in Normal mode) • Spectrum reading type • Area scanning • Pathlength correction • Absorbance wavelength calibration (via the Reading Parameters dialog and before performing the read) • Eject between filter set reads • Read & Dispense 108 • Protocol Menu User’s Guide to KC4™ If dispensing is required during a kinetic read, here are two options: Manual Dispense: Create a protocol with a long kinetic interval. During an interval, when the reader is idle: Push the carrier eject button on the front of the reader to eject the plate Perform the dispense using a pipette Push the carrier eject button to draw the plate back in The read will continue as scheduled Reader Dispense: (Injector model only) Create and run a total of three protocols: A Kinetic protocol to start the read. Save results in a .PLA file. A “Dispense-only” protocol to dispense the reagent. A second Kinetic protocol to complete the kinetics after dispense. Note: Reading parameters in the second protocol must be identical to the first, although kinetic settings can differ. Gather the results in a single .PLA file using KC4’s Append to Kinetic File feature. Pathlength Correction Check Pathlength Correction to normalize absorbances to 1 cm. This option is available for readers that support multiple wavelength reads up to 999 nm. If Pathlength Correction is enabled, KC4: 1. Calculates the pathlength for each well. 2. Calculates the corrected absorbance for each well. 3. Reports the Corrected Data after Pathlength Correction is applied. Pathlength Calculation KC4 calculates each well’s pathlength according to the following formula: (A977 nm - A900 nm)well (A977 nm - A900 nm)1.0 cm water • The well is measured at 977 nm and again at 900 nm. KC4 calculates the difference in measurements, then divides that result by the absorbance of water at 1 cm. Note: 977 nm and 900 nm represent default Test and Reference Wavelengths, respectively. These wavelengths can be changed by clicking the Options button. User’s Guide to KC4™ Protocol Menu • 109 • KC4 uses a default value of 0.18 for the absorbance of water at 1 cm. This value can be changed by clicking Options and defining a different Absorbance of Solution at 1 cm. Alternatively, click Bio-Cell to calculate the absorbance of water at 1 cm value using Bio-Tek’s Bio-Cell plate. Use the drop-down menu to select the location of the cuvette in the plate. Corrected Absorbance Calculation KC4 calculates the corrected absorbance in each well according to the following formula: (Awavelength)well pathlength of well • If a Blank Plate is pre-read, and/or if blank subtraction is performed, select the advanced protocol option Raw Data Correction to control the data used in this formula. Pathlength Correction Options Click the Options button to change the Test or Reference Wavelength values, or to change the pathlength constant. • The valid range for the Test and Reference Wavelength fields is 200 to 999 nm. • The default Absorbance of solution at 1 cm value is 0.18. To use a different constant value when calculating pathlengths, simply enter the desired value. Reporting the Pathlength Values KC4 automatically reports the Corrected Data after Pathlength Correction is applied. You can easily create a Multi Plate Transformation to report the Pathlength for each well on the plate. Look in the Help system contents under Results|Data Sets|Pathlengths for more information. 110 • Protocol Menu User’s Guide to KC4™ Plate Type Important! Be sure to select the appropriate Plate Type. Just prior to plate reading, KC4 sends the plate’s dimensions to the instrument. This information guides the optical probe(s) to the correct reading positions relative to the microplate. Choosing an inappropriate plate type could adversely affect results. • Select a Plate Type from the drop-down menu. The items presented for selection come from the plate database, which is maintained under System|Plate Formats. • The First Well and Last Well fields default to include the entire plate. You can change one or both settings to read a partial plate. Pre-Read Blank Plate Check Pre-Read Blank Plate to perform two reads at each defined wavelength. The first read is performed on an empty (or blank) plate, and the second on the sample plate. The "Blank Plate" can represent a dry empty plate or a plate filled with solution. • For Endpoint and Kinetic reads, the blank plate is read at each wavelength or filter set defined in the protocol. • For Spectrum reads, the blank plate is scanned using the wavelength range defined in the protocol. • This option is not available if Scanning is enabled. The Blank Plate data is subtracted from the actual microplate data if the Blank Plate Subtraction option is selected in the Raw Data Corrections dialog (an advanced protocol option). Read Barcode If the attached reader is equipped with an internal plate barcode scanner, use the Read Barcode feature to read the code when the plate is read. If for any reason the barcode cannot be read, you will be prompted to manually enter the plate barcode. See Protocol Options at the end of this chapter to find out how to use the scanned or entered barcode as the data file name. User’s Guide to KC4™ Protocol Menu • 111 Read & Dispense The Synergy™ HT with Injectors provides the ability to dispense fluid into microwells as part of a “Read & Dispense” protocol. To enable this feature, click the Dispense checkbox. To define the Dispense, Shake, and/or Read steps, click Read & Dispense. See “Creating a Read & Dispense Protocol” starting on page 119 for detailed instructions. Read Mode Some reader models support multiple Read Modes for absorbance protocols. The selection of one read mode over another generally depends on the desired outcome of the assay (better precision versus faster plate reading). The available read modes are: • Normal mode is the slowest of the three available modes. After positioning the well over the probe, the instrument waits 100 milliseconds before taking the measurement. This delay is to allow for more complete fluid settling. • Rapid mode is faster than Normal mode because the instrument does not wait before taking the measurement. • Sweep mode is the fastest of the three available modes; the instrument does not stop before taking measurements. Reader/Read Method The Reading parameters dialog displays the name of the currently selected Reader and the computer port to which it is attached. (This information is configured under System|Readers.) The available Read (or Detection) Methods are reader-dependent. If more than one option is presented, select the desired method by clicking its radio button. This selection instructs KC4 to represent measured values as optical densities (OD), relative fluorescence units (RFU), or relative luminescence units (RLU). It also customizes the Reading parameters dialog to present further options specific to the read method. 112 • Protocol Menu User’s Guide to KC4™ Reading Direction Some readers also support a Reading Direction setting. Choose to read in a horizontal direction (A1-A12, B1-B12, … H1-H12), or in a vertical direction (A1-H1, A2-H2, … A12-H12). • The faster method for reading a full plate is Horizontal. • The faster method for reading a single column is Vertical. Reading Type Select a Reading Type before defining additional Reading parameters. The Reading Type options Endpoint and Kinetic are available for all readers supported by KC4. For certain readers, the Spectrum reading type is also available. • During an Endpoint Read, every well on the plate is read with one, two, or multiple wavelengths. If supported by the current reader, the Scanning feature is available for endpoint protocols. Click the Scanning… button to define linear or area scanning parameters. • During a Kinetic Read, every well on the plate is read a user-specified number of times with one, two, or multiple wavelengths. Click the Kinetic… button to define kinetic reading parameters. • During a Spectrum Read, multiple readings are taken across a wavelength range. The objective is to plot a graph with absorbance or transmittance versus wavelength. Click the Scales… button to customize the graphical data displays (optional). • The Reading Type options for the Synergy™ HT with injectors contains an additional Dispense checkbox, to enable the fluid dispense option. User’s Guide to KC4™ Protocol Menu • 113 Scales for Kinetic Reads By default, the Scales parameters automatically calculate an appropriate box size to display the kinetic reactions. The default values can be manually overridden by deselecting one or both Auto checkboxes. • Absorbance reads: min t is automatically set to a zero time value, min y is set to -1.0000 OD, max t is set to the Run Time value, and max y is set to 5.0000 OD. • Fluorescence and luminescence reads: min t and min y are automatically set to zero values, max t is set to the Run Time value, and max y is set to 99999 RFU/RLU (FL600), or to 99998 RFU/RLU (FLx800™ and Synergy™ HT). • Individual Well Auto Scaling individually adjusts the min/max t and min/max y settings for each well to best display its curve. It overrides the settings of the min/max t and min/max y. Note: This setting only affects the scale of an individual zoomed well. The kinetic curves display, showing all wells on the plate, is not affected. Scales for Spectrum Reads By default, the Scales parameters automatically calculate an appropriate box size to display the spectrum curves. The default values can be overridden manually to change the scaling of the x and y axes. If the Spectrum reading type is selected in the Reading dialog, click the Scales… button to open the Scales dialog: • The Scales parameter defaults are set as follows: min w is set to the Start Wavelength max w is set to the Stop Wavelength min y is set to -1.0000 OD max y is set to 5.0000 OD The default values can be manually overridden by deselecting the Auto checkboxes. • Individual Well Auto Scaling individually adjusts the min/max w and min/max y settings for each well to best display each well’s curve. It overrides the settings of the min/max w and min/max y. 114 • Protocol Menu User’s Guide to KC4™ Scanning If supported by the current reader, the Scanning feature is available for Endpoint reads. Some readers support Linear scanning, others support Area scanning: • When performing a Linear Scan, the reader takes multiple measurements in a line across the center of each well. Linear scanning allows you to observe a pattern that may be present in the well bottom, such as an agglutination pattern. Readers that support Linear scanning include the ELx808™ and all PowerWave™ models. Note for PowerWaveX™ Select: Linear scanning is supported for the 96-well plate type only. • When performing an Area Scan, the reader takes multiple measurements down and across each well, in a “matrix” format. Area scanning more accurately assesses cellular assays than reading once in the center of the well. Readers that support area scanning include the ELx800™, µQuant™, FLx800™, and Synergy™ HT. • Note: If the Scanning button is dimmed and inaccessible, well scanning cannot be performed with the currently defined plate type. This may be due to a hardware limitation or an unacceptable combination of optic probe size and well diameter. • Click the Scanning… button to define the measurement points: With Linear scanning: • The Horizontal Reading Points setting represents the total number of points to be read across the center of each well. Valid entries are odd integers from 1 to 31. • Individual Well Auto Scaling individually adjusts the min/max x and min/max y settings for each well to best display its scanning curve. If enabled, this feature overrides the settings of the min/max x and min/max y. Note: This feature only affects the scale of an individual zoomed well. The scanning curves display, showing all wells on the plate, is not affected. User’s Guide to KC4™ Protocol Menu • 115 With Area scanning: • Read Matrix Size represents the number of measurements taken across and down each well. If, for example, the Read Matrix Size is 5 x 5 a total of 25 measurements are taken. • Individual Well Color Auto Scaling determines how the color palette is built when the measurement points are graphically displayed. On color monitors and printers, blue shades represent the lowest measurement values, purple shades represents mid-range measurement values, and red shades represent highest measurement values. On blackand-white monitors and printers, white represents the lowest measurement values, increasing shades of gray represent increasing measurement values, and black represents the highest measurement values. Tip: If the plate is likely to yield values ranging from very low to very high, enable Individual Well (Color) Auto Scaling to help with the visual differentiation between points within each well. Shaking If plate shaking is available with the currently selected reader, the Shaking parameters are accessible. • Endpoint / Spectrum protocols: Shaking occurs immediately before the plate is read. • Kinetic protocols: Shaking can occur before the first reading only, or before every reading. • Intensity: Acceptable values include: 0 1 2 3 4 No Shaking Low Medium High Variable (not supported by all readers that support shaking) • Duration: Defines the absolute time period for shaking, in seconds. • Before First / Before Every Reading: Defines when the shaking will occur. For non- kinetic reads, shaking occurs before the first reading. For kinetic reads, shaking can occur before the first read or before every read. 116 • Protocol Menu User’s Guide to KC4™ Temperature Control For readers that support computer-controlled incubation, the Temperature Control parameters are accessible: • Select Yes to indicate plate incubation. • Select No to indicate no incubation (default). • Check Pre-Heating to pre-heat the incubator before the plate carrier is drawn in. • Enter the desired set point Temperature in °C. • Define the Lag Time to elapse before the reader initiates the first reading cycle. The reader draws the plate carrier into the reading chamber, waits for the Lag Time to elapse, then reads the plate. Lag Time is available for all reader models, including those that do not support incubation. The valid entry range for most readers is 00:00:00 to 00:59:59 (HH:MM:SS). For the FL600™, the range is 00:00:00 to 08:00:00. Time-Resolved Fluorescence (Synergy™ HT) If supported by the reader, the Time-Resolved option is available when the selected detection method is Fluorescence. If this option is enabled, additional measurement mode parameters become available in the Measurement Options dialog (accessed by clicking the Option button located in the Filters box), to specify the length of time to delay before collecting readings and the length of time during which readings will be taken. Top Probe Vertical Offset See “General Options (Synergy HT).” User’s Guide to KC4™ Protocol Menu • 117 Wavelengths For readers equipped with a monochromator (e.g., PowerWave™, PowerWaveX™, µQuant™, Synergy™ in Absorbance mode), the Wavelengths set of parameters is available within the Reading parameters dialog. For Endpoint and Kinetic reads: • Click the radio button associated with the desired number of wavelengths. • Click to open a list of available wavelengths, then click on a wavelength to select it. If the desired wavelength is missing from the list, type the value directly into the wavelength field. • (Optional) If the reader is connected, clicking Calibrate will update KC4’s wavelength table and the reader’s internal wavelength table. If KC4’s wavelength table already matches the reader’s wavelength table, calibration is not necessary. If calibration is necessary but the reader is not connected right now, calibration will perform automatically when a plate read begins. For Spectrum reads: • Define the wavelength range by entering the Start and Stop values, in nanometers. • Define the reading interval by entering the Step value, in nanometers. For example, if the Start, Stop, and Step values are 300, 600, and 50 nm, respectively, the plate will be read at 300, 350, 400, 450, 500, 550, and 600 nm. • (Optional) Select Calibrate: If Calibrate is selected, the reader will always perform calibration at the wavelengths specified in the protocol, just prior to plate reading. If Calibrate is not selected, the reader will calibrate at only those wavelengths specified in the protocol that have not yet been calibrated since the reader was turned on. 118 • Protocol Menu User’s Guide to KC4™ Creating a Read & Dispense Protocol The Synergy™ HT with injectors provides the ability to dispense fluid into microwells as part of a “Read & Dispense” protocol. To enable this feature, begin by clicking the Dispense checkbox within the Reading parameters dialog. • Note: The Dispense option is not available if Multi-Mode is selected. • Define or select additional Reading parameters within this dialog, including Reading Type, Filter Set(s), Plate Type, and Temperature Control. • Click the Read & Dispense button to open the Read & Dispense dialog. Use this dialog to define the Dispense, Shake, and/or Read steps for this protocol. • Select a Read Mode: If Plate mode is selected, each step in the sequence is performed on all wells of the plate, step after step. For example, if the step sequence is Dispense / Read, fluid is dispensed into all wells of the plate and then the wells are read. Timings are generally long. User’s Guide to KC4™ Protocol Menu • 119 If Well mode is selected, the full sequence of steps is performed on each well, well after well. For example, if the step sequence is Dispense / Read, fluid is dispensed into well A1 and the well is read, fluid is dispensed into well A2 and the well is read, and so on. Timings are generally short (fast). • The Time is approximate indication at the bottom of this dialog means that Start and End times displayed with an asterisk (*) were calculated using appromixation logic. KC4 uses approximation logic when: A step is added with “Shortest, after…” selected. The reader is not communicating with KC4. The reader is unable to validate the Read & Dispense settings. In addition, the asterisk will appear if the reader provided a time that can vary based on other reader settings that may change before the protocol is executed (e.g., injector position). Plate Mode Options The Dispense, Shake, and Read steps are all available with Plate Mode. In addition, the Timing Control feature is available. • Timing Control is enabled by default. To disable Timing Control, check the box. When Timing Control is enabled, all steps are processed in the same way with regard to timing: Incubation time is exactly the same for each well. Dispense and Read steps are performed at the same pace. When Timing Control is disabled, all steps are performed as quickly as possible: Incubation time may vary across the microplate. Dispense and Read steps may be performed at different speeds. 120 • Protocol Menu User’s Guide to KC4™ • Click the Dispense, Shake, and Read buttons to create new steps. Up to nine (9) steps may be defined. Steps cannot overlap. They must be performed one after another. With Endpoint protocols, only one Read step may be defined. Endpoint protocols do not require a Read step (the protocol can be “Dispense-only”). Kinetic protocols require at least one Read step. Note: If the protocol contains two or more Read steps, the Kinetic Interval is represented as ‘Uneven’ on reports. A Kinetic Read step with Shake During Read enabled counts as two steps. • The steps are listed in the order in which they will be executed. The Description column provides key information about the step, such as volume, rate, or intensity. The Start column indicates the time the step will begin. The End column indicates the time the step will complete. The Comment column contains additional information about the step, such as tip prime settings. To edit a step, highlight it and double-click or click the right mouse button and select Edit. To delete a step, highlight it and press the Delete key or click the right mouse button and select Delete. • The steps are also displayed graphically to show how they will be executed on the plate over time. Dispense step: The solid area represents the action on the first well. Cross hatches represent the time necessary to process other wells on the plate. Shake step: The solid area represents the action on the entire plate. Read step: The solid area represents the action on the first well (and for each kinetic interval, if this is a kinetic protocol). Cross hatches represent the time necessary to process other wells on the plate. Time indicators: A Process time indicates the time at which a particular step will begin, relative to the start time of the very first step in the operation. Process times are displayed in grey (light) text. (Kinetic protocols only.) A Kinetic time indicates the time at which a reading begins, relative to the start time of the very first read in the operation (which is always 00:00:00). Kinetic times are displayed underneath the Process times in black (dark) text. Note that in a kinetic protocol, each read step will have a Process time and a Kinetic time associated with it. User’s Guide to KC4™ Protocol Menu • 121 Dispense Step Parameters Use this dialog to create or modify a Dispense step: • Select the number of the Dispenser to be used for this step. The numbers available for selection correspond to the numbers on the dispense box. • Select a Tip Prime option. Tip priming is performed in a small, removable priming trough located in the left rear. The purpose of tip priming is to compensate for any fluid loss at the dispense tip due to evaporation since the last dispense. The trough holds up to 1 ml of liquid and must be periodically emptied and cleaned by the user. KC4 must then be “told” that the trough has been emptied (via the System > Reader Control dialog). If the trough overflows, refer to the Synergy™ HT Operator’s Manual for decontamination instructions. None: No prime. Before the process: Prime the tip with fluid once before the entire process begins. Before the dispense: Prime the tip with fluid before each dispense to a well. • If tip priming will be performed, enter the Volume in microliters. The valid range is 5 to 20. The dispense rate will be the same as that selected for the well dispense. • Set the Start Time for the step. Enter the time manually (HH:MM:SS), or check Shortest and select the step immediately after which this Dispense step shall be performed. • Enter the dispense Volume, in microliters. The valid range is 5 to 1000. • Select the dispense Rate in microliters per second. The default rate is the maximum available for the attached instrument. • Click OK to save the settings and add the Dispense step to the list. 122 • Protocol Menu User’s Guide to KC4™ Shake Step Parameters Use this dialog to create or modify a Shake step: • Set the Start Time for the step. Enter the time manually (HH:MM:SS), or check Shortest and select the step immediately after which this Shake step shall be performed. • Specify the shake Intensity. Acceptable values include: 1 2 3 4 Low Medium High Variable • Specify the shake Duration in seconds. • Click OK to save the settings and add the Shake step to the list. • Note: Shaking can also be defined as a part of the Read step if repeated shaking is required between each kinetic reading interval. Read Step Parameters Use this dialog to create or modify a Read step: • Set the Start Time for the step. Enter the time manually (HH:MM:SS), or check Shortest and select the step immediately after which this Read step shall be performed. • Kinetic protocols only: Specify the Run Time. This is the length of time from the start of the first kinetic read to the start of the last kinetic read. User’s Guide to KC4™ Protocol Menu • 123 Specify the time Interval for repeat reading of the plate, section of wells, or individual well. The maximum valid Interval is equal to the current Run Time. KC4 automatically calculates the Reading Number by dividing the Run Time by the Interval and adding 1. If Shaking before each kinetic read is required, specify the shake Intensity and then specify the shake Duration in seconds (a Duration of 0 means no shaking will occur). Note: Shaking can also be defined as an individual step outside of the Read step, using the Shake button in the Read & Dispense dialog. Acceptable Intensity values include: 1 2 3 4 • Low Medium High Variable Click OK to save the settings and add the Read step to the list. Well Mode Options The Dispense and Read steps are available with Well Mode. The Timing Control feature is not available. • Click the Dispense and Read buttons to create new steps. Up to nine (9) steps may be defined. Shaking is not permitted in Well Mode. Endpoint protocols require one Read step. 124 • Protocol Menu User’s Guide to KC4™ Kinetic protocols require at least one Read step. Note: If the protocol contains two or more Read steps, the Kinetic Interval is represented as ‘Uneven’ on reports. Dispense steps cannot overlap. (Only one dispenser can be in use at a time.) A Read step can overlap a Dispense step. For example, the dispense may occur during a kinetic read, to show the rate of change immediately following the injection of fluid. (This can also be accomplished by creating two Read steps, one immediately before and one immediately after the Dispense step). • The steps are listed in the order in which they will be executed. The Description column provides key information about the step, such as volume, rate, or intensity. The Start column indicates the time the step will begin. The End column indicates the time the step will complete. The Comment column contains additional information about the step if needed. To edit a step, highlight it and double-click or click the right mouse button and select Edit. To delete a step, highlight it and press the Delete key or click the right mouse button and select Delete. • The steps and are also displayed graphically to show how they will be executed on each well over time. Dispenser #1, Dispenser #2, and Read steps are shown in parallel. Dispense step: The solid area represents the execution of the Dispense for one well. Read step: The solid area represents the execution of the Read step for one well. Time indicators: A Process time indicates the time at which a particular step will begin, relative to the start time of the very first step in the operation. Process times are displayed in grey (light) text. (Kinetic protocols only.) A Kinetic time indicates the time at which a reading begins, relative to the start time of the very first read in the operation (which is always 00:00:00). Kinetic times are displayed underneath the Process times in black (dark) text. Note that in a kinetic protocol, each read step will have a Process time and a Kinetic time associated with it. User’s Guide to KC4™ Protocol Menu • 125 Dispense Step Parameters Use this dialog to create or modify a Dispense step: • Select the number of the Dispenser to be used for this step. The numbers available for selection correspond to the numbers on the dispense box. • Select a Tip Prime option. Tip priming is performed in a small, removable priming trough located in the left rear of the carrier. The purpose of tip priming is to compensate for any fluid loss at the dispense tip due to evaporation since the last dispense. The trough holds up to 1 ml of liquid and must be periodically emptied and cleaned by the user. KC4 must then be “told” that the trough has been emptied (via the System > Reader Control dialog). If the trough overflows, refer to the Synergy™ HT Operator’s Manual for decontamination instructions. None: No prime. Before the process: Prime the tip with fluid once before the entire process begins. Before each well: Prime the tip with fluid before dispensing to each well. • If tip priming will be performed, enter the Volume in microliters. The valid range is 5 to 20. • Set the Start Time for the step. Enter the time manually (SSSSS.sss), or check Shortest and select the step immediately after which this Dispense step shall be performed. • Enter the dispense Volume, in microliters. The valid range is 5 to 1000. • Select the dispense Rate in microliters per second. The default rate is the maximum available for the attached instrument. • Click OK to save the settings and add the Dispense step to the list. 126 • Protocol Menu User’s Guide to KC4™ Read Step Parameters Use this dialog to create or edit a Read step: • Enter the Start Time in seconds (sssss.sss). • Kinetic protocols only: Specify the Run Time. This is the length of time from the start of the first kinetic read to the start of the last kinetic read. Specify the time Interval for repeat reading of the plate, section of wells, or individual well. The maximum valid Interval is equal to the current Run Time. KC4 automatically calculates the Reading Number by dividing the Run Time by the Interval and adding 1. • (Optional) For non-TR Fluorescence reads, check Block light between reads to block the light between measurements to inhibit photo bleaching. Single filter set protocols: If light blocking is enabled, a blocking filter (Plug) must be placed in the excitation filter wheel in one of the two positions next to the excitation filter that is specified in the protocol. Dual filter set protocols: If light blocking is enabled, two blocking filters (Plugs) must be placed next to each other in the excitation filter wheel. • Click OK to save the settings and add the Read step to the list. User’s Guide to KC4™ Protocol Menu • 127 Raw Data Correction Raw data, or the optical density or fluorescence unit values retrieved from a microplate reader, can be corrected using Blank Plate Subtraction, Blank Wells Subtraction, and/or Pathlength Correction. The advanced protocol option Raw Data Correction controls the use of these correction options. • Blank Plate Subtraction is accessible if "Pre-Read Blank Plate" is selected in the Reading parameters dialog. • Blank Wells Subtraction is accessible if one or more blank wells are defined under Plate Layout. • Pathlength Correction is accessible if it is selected in the Reading parameters dialog. • Raw Data Correction calculations are performed in the order Blank Plate Subtraction, Blank Wells Subtraction, then Pathlength Correction. The following example describes the plate processing and calculation steps performed when a protocol specifies Pre-Read Blank Plate, Pathlength Correction with Bio-Cell, and the plate is configured with blank wells. This example is for explanation only, the typical application does not use all three raw data correction options. Processing steps: 1. The Blank Plate is read at every wavelength defined in the Reading parameters dialog. 2. The Bio-Cell is read at 977 nm and 900 nm. 3. The Sample Plate is read at 977 nm and 900 nm. 4. The Sample Plate is read at every wavelength defined in the Reading parameters dialog. Calculation steps performed for each wavelength defined in the Reading parameters dialog: 1. The basis of calculations begins with the raw Sample Plate readings. 2. The Blank Plate readings are subtracted from the Sample Plate readings. The result of this calculation becomes the basis for step 3. 3. The mean of the blank wells is calculated and subtracted from every well on the plate. The result of this calculation becomes the basis for step 4. 4. The value in each well is multiplied by the difference in readings of the Bio-Cell at 977 nm and 900 nm. The result of this calculation becomes the basis for step 5. 5. The value in each well is divided by the difference in readings of the Sample Plate at 977 nm and 900 nm. The result of this calculation is the final corrected value. 128 • Protocol Menu User’s Guide to KC4™ The image below shows the data sets available following a three-wavelength read with Blank Plate Subtraction, Blank Wells Subtraction, and Pathlength Correction enabled: • M 977 (SP) and M 900 (SP) contain the values of the Sample Plate read at 977 nm and 900 nm, respectively (necessary for pathlength correction calculation). • • Measurement numbers (M#1, M#2, M#3) correspond with the wavelength selection order in the Reading parameters dialog. M#1 405, M#2 450, and M#3 630 contain the raw Sample Plate values at 405 nm, 450 nm, and 630 nm. • M#1 405 Blank, M#2 450 Blank, and M#3 630 Blank contain the values calculated by subtracting the Blank Plate readings at the specified wavelength from the raw Sample Plate readings at the specified wavelength. These values do not represent Blank Well Subtraction. • M#1 405 Corr., M#2 450 Corr., and M#3 630 Corr. contain the final values after all Raw Data Correction options have been applied. Blank Plate Subtraction With most readers, the Pre-Read Blank Plate option is available within the Reading parameters dialog. If this option is selected, a blank plate is read before the sample plate, at the wavelengths defined in the protocol. KC4 then calculates the difference in measurements between the two sets of data (sample - blank). Note: The blank plate can represent an empty dry plate or a plate filled with solution for blanking. If Blank Plate Subtraction is enabled: • Endpoint read: For each wavelength defined in the protocol, KC4 subtracts the value of each well of the blank plate from the corresponding well of the sample plate. • Kinetic read: For each wavelength defined in the protocol, within each kinetic read, KC4 subtracts the value of each well of the blank plate from the corresponding wells of the sample plate. • Spectrum read: At each wavelength read within the defined spectrum range, KC4 subtracts the value of each well of the blank plate from the corresponding well and wavelength of the sample plate. User’s Guide to KC4™ Protocol Menu • 129 Blank Wells Subtraction Within any protocol, if one or more wells are defined as ‘Blank’ under Plate Layout, the Blank Wells Subtraction Raw Data Correction option automatically becomes enabled. When this option is enabled: • Endpoint read: For each wavelength defined in the protocol, the average of the blank well(s) is subtracted from every well on the plate. Note: For readers that do not accept multiple (> 2) wavelengths, if a dual-wavelength read is defined, KC4 automatically calculates the Delta OD first. The average of the Delta OD values in the blank wells is then subtracted from every well on the plate. • Kinetic read: For each wavelength defined in the protocol, within each kinetic read, the average of the blank wells is subtracted from every well on the plate. Note: For readers that do not accept multiple (> 2) wavelengths, if a dual-wavelength read is defined, KC4 automatically calculates the Delta OD first. Within each kinetic read, the average of the Delta OD values in the blank wells is then subtracted from every well on the plate. • Spectrum read: A blank average is calculated for each wavelength in the spectrum reading range. The blank average for each wavelength is then subtracted from the absorbance read at the corresponding wavelength in each well. Pathlength Correction With readers that support multiple-wavelength reads up to 999 nm, the Pathlength Correction option is available within the Reading parameters dialog. If this option is selected, absorbances are normalized to 1 cm. If Pathlength Correction is enabled, KC4 first calculates the pathlength for each well. The absorbance in each well is then divided by the pathlength, resulting in the corrected absorbance. See “Pathlength Correction” in the Reading Parameters Reference section to learn more. 130 • Protocol Menu User’s Guide to KC4™ Kinetic Analysis Use Kinetic Analysis to select pre-data reduction parameters for kinetic reads. This option becomes available within the Protocol menu when the Kinetic read method is selected. Data to Process This option allows the selection of the type of data to be analyzed, i.e., the measured response value for kinetic analysis. The drop-down list displays the available data types. Typical uses of this feature: • To blank data prior to the kinetic slope calculation. First, define one or more blank wells in the Plate Layout, and make sure Blank Wells Subtraction is enabled in the Raw Data Correction dialog. Then, select ‘<wavelength> Corr.’ from the Kinetic Analysis Data to Process pull-down list. • With some readers it is possible to perform kinetic reading with multiple filters or wavelengths. In this case, two levels of Data to Process options can be selected (e.g., ‘M#1 405’ and ‘M#2 550’) to perform and compare kinetic calculations. Note: When two data sets are selected, the kinetic curves are automatically overlaid in the kinetic graphs and in the kinetic zooms. User’s Guide to KC4™ Protocol Menu • 131 Mean V Mean V is the calculated value of the mean slope. KC4 determines the mean slope by calculating a linear regression on points that are in the calculation zone. To set the calculation zone, select Mean V, then click on Calculation Options. Calculation Zone Typically, the Calculation Zone is adjusted to ignore erroneous data point(s) generated at the beginning of a kinetic assay due to assay "noise". • From t / To t : Defines a calculation zone based on time. The default values span the defined kinetic Run Time. • From # / To # : Defines a calculation zone based on number of reads. The default values include all reading points. Units • mOD or OD dependent on kinetic dynamic range. • Per sec or Per sec2 dependent on rate order. • Per min or Per min2 dependent on rate order. • Per hour or Per hour2 dependent on rate order. Max V With Max V, the calculated value is the maximum slope. KC4 calculates the maximum slope as follows: • Starting at the first point in the calculation zone, KC4 evaluates n points and calculates the slope among these n points. • Next, KC4 repeats the operation, starting at the second point in the calculation zone, and repeats again, starting at the third point, and so on. • KC4 then compares all calculated slopes to determine the maximum slope. • KC4 will register the Delta t time in the middle of the point where the V max is calculated. 132 • Protocol Menu User’s Guide to KC4™ KC4 also calculates the kinetic Lag Time, which is the time intercept between the line of maximum slope of the propagation phase and the absorbance baseline at time = 0, as illustrated below: By default, the calculation zone starts at time zero. To change the calculation zone, select Max V, then click Calculation Options. Calculation Zone Typically, the Calculation Zone is adjusted to ignore erroneous data point(s) generated at the beginning of a kinetic assay due to assay “noise”. • From t / To t : Defines a calculation zone based on time. The default values span the defined kinetic Run Time. • From # / To # : Defines a calculation zone based on number of reads. The default values include all reading points. User’s Guide to KC4™ Protocol Menu • 133 V calculation on n points • This option defines the number of successive points to be included in the calculation of the maximum slope. • The minimum number of points is 2. The maximum number of points is the total number of points within the calculation zone. • Only the points defined within the calculation zone are used. Units • mOD or OD dependent on kinetic dynamic range. • Per sec or Per sec2 dependent on rate order. • Per min or Per min2 dependent on rate order. • Per hour or Per hour2 dependent on rate order. Mean Min/Max The Mean Min OD is the mean minimum OD based on n points. The Mean Max OD is the mean maximum OD based on n points. KC4 calculates the Mean Min and Mean Max ODs as follows: • Starting at the first point in the calculation zone, KC4 evaluates n points and calculates the mean among these n points. • Next, KC4 repeats the operation, starting at the second point in the calculation zone, and repeats again, starting at the third point, and so on. • KC4 then compares all of the calculated means to determine the minimum and maximum of these values. • KC4 also calculates the Delta t at Min/Max OD. • Note: For fluorescence and luminescence reads, KC4 performs calculations based on fluorescence units (Mean Min/Max RFU) and luminescence units (Mean Min/Max RLU), respectively. To set the calculation zone, select Mean Min/Max OD, then click Calculation Options. 134 • Protocol Menu User’s Guide to KC4™ Calculation Zone Typically, the Calculation Zone is adjusted to ignore erroneous data point(s) generated at the beginning of a kinetic assay due to assay "noise". • From t / To t : Defines a calculation zone based on time. The default values span the defined kinetic Run Time. • From # / To # : Defines a calculation zone based on number of reads. The default values include all reading points. Mean Min/Max on n points • Selects the number of points to be included in the average calculation. Onset OD / Onset OD % The calculated value is the time when the OD reaches a set decrease/increase (Onset OD), that can be defined by an absolute value or a relative value (%), compared with a reference OD (the Basis Value). You can either manually enter this value, or have KC4 calculate it (mean of the n first points). By default n=1, thus the Basis Value is the OD of the first point. • KC4 returns the time for each well to pass the Onset OD value. • Note: For fluorescence and luminescence reads, KC4 performs calculations based on fluorescence units (Onset RFU) and luminescence units (Onset RLU), respectively. To set the calculation zone, select Onset OD or Onset OD %, then click Calculation Options. Basis Value Calculation • Mean of the n first points: For relative determination of the Basis Value. • OD = : For absolute determination of the Basis Value. Examples: Onset OD=0.5, Basis Value=Mean of first 2 points: KC4 calculates the time that is required for the OD to increase by 0.5 OD, compared with the mean of the 2 first points of the kinetics. Onset OD=15%, Basis Value=Mean of the first point: KC4 calculates the time that is required for the OD to increase by 15%, compared with the first point of the kinetics. Onset OD=1.6, Basis Value=0: KC4 calculates the time that is required for the OD to reach the value of 1.6 (Basis Value + Onset OD). User’s Guide to KC4™ Protocol Menu • 135 Formula Select Formula to define a formula to calculate a value using data from individual reading points from the same well. Designate an individual reading point using the identifier Rn, where n represents the reading number, then enter a Result Name in which to store the formula results. This name can be used as a Data-In setting in Transformations. Formula examples: • The formula R10-R5 calculates the difference in readings between data points 10 and 5. • The formula R# (e.g., R1) extracts a single reading from each well for endpoint data reduction. No Calculation This option, if selected, overrides any calculations on the kinetic data, and allows the display of kinetic graphics without data reduction. • No Calculation is typically used to display overlaid curves. Integral Select Integral to calculate the area under the curve according to the trapezoidal method, shown below: i=n–1 Integral = ∑ (( yi + yi+1 ) / 2 ) × ( xi+1 – xi ) i=1 Where y = measurement value and x = read point value. By default, the calculation zone spans the full Run Time and includes all of the reading points defined in the protocol. Click Calculation Options to change the calculation zone: • From t / To t : Defines a calculation zone based on time. The default values span the defined kinetic Run Time. • From # / To # : Defines a calculation zone based on number of reads. The default values include all reading points. 136 • Protocol Menu User’s Guide to KC4™ Spectrum Analysis KC4 provides the option for performing additional calculations on spectral data. This is available for Spectrum reading types only. Open the Spectrum Analysis dialog by selecting Protocol|Spectrum Analysis: Data to Process Select up to two levels of data to be used in calculations. • When two data sets are selected, the spectrum curves are automatically overlaid in the spectrum graphs and in the spectrum zooms. Min/Max Select Min/Max to determine the minimum and maximum values for the points defined within the calculation zone. This is the default setting. Upon completion of a read, the following is reported for each well: • Minimum OD and Wavelength at Minimum OD • Maximum OD and Wavelength at Maximum OD If the Calculation Type is set for Min/Max, certain calculation parameters may be customized. Access the Spectrum Analysis - Min/Max dialog by clicking the Calculation Options button. User’s Guide to KC4™ Protocol Menu • 137 • From w and To w allow the specification of a range of wavelengths upon which to perform calculations. The default values correspond with the Start and Stop values in the Protocol|Reading Parameters dialog. • From # and To # allow the specification of a range of read numbers upon which to perform calculations. The default values correspond with the total number of wavelengths to be read, based on the Start, Stop, and Step values in the Protocol|Reading Parameters dialog. Example: Start/Stop/Step values set to 400/600/10, respectively. The default From # and To # values are 1 and 21, indicating a calculation zone from 400-600 nm. Setting From # to 2, and To # to 18 would change the calculation zone to 410-570 nm. • Mean Min/Max specifies the number of successive wavelength readings to be averaged prior to the determination of the Minimum and Maximum OD values. Formula Check the Formula radio button to define a formula to structure calculations by a formula. Enter the formula into the long field. Example: The formula W1+W2+W3 calculates the sum of the ODs for the readings at wavelengths 1, 2, and 3. If the plate is read from 400 to 410 nm in 2 nm increments, W1 will correspond with the OD at 400 nm, W2 with the OD at 402 nm, and W3 with the OD at 404 nm. • Enter a Result Name in which to store the formula results. This name can be used as a Data-In variable in Transformations. • Mean Min/Max specifies the number of successive wavelength readings to be averaged prior to the determination of the Minimum and Maximum OD values. 138 • Protocol Menu User’s Guide to KC4™ Scanning Analysis If linear scanning is selected in an endpoint protocol, select Protocol|Scanning Analysis to specify data reduction options: • Select the Calculation Type to be performed on each scanned well. • Click the Calculation Options button to define the calculation zone. By default, the calculation zone includes all of the Horizontal Reading Points defined in the protocol. Mean, Std Dev, CV Select Mean, Std Dev, CV to calculate and report the Mean, Standard Deviation, and Coefficient of Variation for all points in the calculation zone. By default, the calculation zone includes all of the Horizontal Reading Points defined in the protocol. To change the calculation zone, click Calculation Options. • Currently, only the "From x: / To x: " method for determining the calculation zone is supported. By default, From x: represents the outermost scanned point to the left of center (0), and To x: represents the outermost scanned point to the right of center. These values can be changed to base calculations on a subset of all scanned points. User’s Guide to KC4™ Protocol Menu • 139 In the example below, the number of Horizontal Reading Points in the protocol is 13. The default From x: and To x: settings are - 6 and 6, respectively. To change the calculation zone to include only the three points to the left and right of center (0), set From x: to -3 and To x: to 3. -6 -3 0 3 6 Points in calculation zone All scanned points (13 total) Mean Min/Max Select Mean Min/Max to determine and report the Mean Minimum and Mean Maximum measurement values based on n points. By default, the calculation zone includes all of the Horizontal Reading Points defined in the protocol, and the n value is 1. To change the calculation zone and/or the n value, click Calculation Options. • Currently, only the "From x: / To x: " method for determining the calculation zone is supported. See "Mean, Std Dev, CV" for more information. • The default number of points (n) used to calculate the Mean Minimum and Mean Maximum values is 1. KC4 calculates the Mean Minimum and Mean Maximum values as follows: Starting at the first point in the calculation zone, KC4 evaluates n points and calculates the mean. KC4 repeats the operation, starting at the second point in the calculation zone, then repeats again starting at the third point, and so on. KC4 then compares all mean values to determine the minimum and maximum values. 140 • Protocol Menu User’s Guide to KC4™ Integral Use the Integral calculation option to provide the area under the curve according to the trapezoidal method, shown below: i=n–1 Integral = ∑ (( yi + yi+1 ) / 2 ) × ( xi+1 – xi ) i=1 Where y = absorbance and x = scan point value. Note that in linear scanning, ( xi+1 - xi ) is equal to 1, and thus the calculation formula is reduced to: i=n–1 Integral = ∑ yi – (( y1 + yn ) / 2 ) i=1 By default, the calculation zone includes all of the Horizontal Reading Points defined in the protocol. To change the calculation zone, click the Calculation Options button in the Scanning Analysis dialog. • Currently, only the "From x: / To x: " method for determining the calculation zone is supported. See Mean, Std Dev, CV for more information. User’s Guide to KC4™ Protocol Menu • 141 Plate Layout KC4 allows you to describe the layout of the microplate(s) that will be associated with a protocol. You are not required to do this. To perform blank well subtraction, generate curves, assign dilution values, or define formulas that reference well identifiers, however, you must create a Plate Layout. The process involves: • Selecting a well type (Blank, Assay Control, Sample, Sample Control, or Standard). • Defining well identifier(s) to be associated with the well type. • Defining dilution or concentration values (if required). • Assigning the well identifiers to the appropriate locations on a row x column grid. To perform these tasks, select Protocol|Plate Layout, or click the Layout toolbar icon. The Plate Layout dialog appears, in the row x column format of the plate type selected under Protocol|Reading: 142 • Protocol Menu User’s Guide to KC4™ • For readers that support multiple plate formats, make sure that the correct plate type is selected in the Reading parameters dialog before creating the plate layout. • Use the Well Settings options to select a well type, customize the text and color of its IDentifier(s), and define dilutions or concentrations (if required). • Enter the number of Replicates then select the replicate mapping direction, Horizontal or Vertical. • Check an Auto Selection option to automatically increment well ID group numbers and/or concentration or dilution values. • Select the group mapping direction, Horizontal or Vertical. • Highlight one or more or wells in the grid to assign the identifier(s). Tips: • Click the Undo button to undo the last action. • Click the Print button to print the current plate layout. If the plate contains 384 wells, the printout will cover four pages, one per plate quadrant. • The Plate Layout dialog can be maximized to fill your entire screen. Click the maximize icon in the upper right corner of the Plate Layout dialog. • Within the grid, rows and columns can be resized (to see all wells of a 384-well plate, for example). Place the cursor over a row or column separator until it changes shape. Click and hold the mouse, then drag the cursor up or to the left to make rows or columns smaller. Drag the cursor down or to the right to make rows or columns larger. Well Types and IDentifiers Select and customize Well Types and Well IDentifiers within the Well Settings area of the Plate Layout dialog, then assign them to one or more locations within the grid area of the dialog. • The Well Type tells KC4 which function to perform using the measurement value in the well. KC4 supports five different Well Types: Blank, used during full plate blank subtraction. Assay Control, used during assay validation or as calibrators. Sample, representing the unknown samples to be processed. Sample Control, representing the control well(s) that are associated with a specific sample. Standard, used to generate a standard curve on which data will be interpolated. • The Well ID is the descriptive link between the measurement value retrieved for the well and the Well Type assigned to it. For example: The average of the values in the wells of type Blank and labeled with the Well ID "BLK" will be subtracted from every well on the plate, as a part of KC4’s blank subtraction function. User’s Guide to KC4™ Protocol Menu • 143 Selecting and Customizing Well Types & IDs The customization features vary among the different Well Types. Each Well Type is addressed individually starting below and continuing on the following pages. Blank Wells During data reduction, the average of the raw data values in the blank wells is subtracted from the raw data values in all wells on the plate (or from the corrected data values if a Blank Plate was read). KC4 requires that the same identifier be used for all blank wells. The maximum number of blank wells that can be defined is limited only by the number of available wells on the plate. You cannot define concentrations or dilutions for blank wells. The default blank well ID is BLK, and its default color is white (it will print in black on reports). To change the ID text and/or color, or to define a descriptive name for the blank wells for use on reports, click the "…" box to the right of the ID field. • Enter an ID using 1 to 10 characters. The ID can contain letters, numbers, and underscores. It cannot contain any spaces. ‘Blank_Well’ is valid, ‘Blank Well’ is not. The ID cannot be identical to a formula operand (X, MIN, MAX, LOG, POW, SQRT, CV, SD, and MEAN are not valid IDs). If an ID is currently used in the grid, its text can be changed here. The change will automatically be reflected in the grid. • (Optional) Enter a descriptive Name using up to 20 alphanumeric characters. This name can be included on reports. • Click on the Color box to open a drop-down list showing all of the available colors. Click on the desired color. 144 • Protocol Menu User’s Guide to KC4™ Assay Control Wells Assay control wells are typically used to validate the assay, or they can be used as calibrators. Unique IDs must be used to distinguish between the different control groups (e.g. “NC” for negative controls, “PC” for the positive controls). The maximum number of unique assay control well IDs that can be defined is limited only by the number of available wells on the plate. Concentrations and dilutions can be optionally assigned. The default IDs are CTL1, CTL2, CTL3, etc., each with a different color. To change the IDs and/or colors, or to define descriptive names for use on reports, click the “…” box to the right of the ID field. • Enter an ID using 1 to 10 characters. The ID can contain letters, numbers, and underscores. It cannot contain any spaces. ‘High_POS’ is valid, ‘High POS’ is not. The ID cannot be identical to a formula operand (X, MIN, MAX, LOG, POW, SQRT, CV, SD, and MEAN are not valid IDs). If an ID is currently used in the grid, its text can be changed here. The change will automatically be reflected in the grid. If an ID is not currently used in the grid, it can be deleted from this list by deleting the contents of the ID field. • (Optional) Enter a descriptive Name using up to 20 alphanumeric characters. This name can be included on reports. • Click on the Color box to open a drop-down list showing all of the available colors. Click on the desired color. User’s Guide to KC4™ Protocol Menu • 145 Sample Wells Sample wells contain the unknown sample solutions to be processed. Dilutions or concentrations can be optionally assigned. Unique IDs should be used to distinguish between the different sample groups. The maximum number of unique sample well IDs that can be defined is limited only by the number of available wells on the plate. The default ID prefix is SPL, and the default IDs are SPL1, SPL2, SPL3, etc. The default color for all IDs is black. To change the ID prefix and/or colors, click the "…" box to the right of the ID field. • Enter an ID Prefix using 1 to 7 characters. The prefix can contain letters, numbers, and underscores. It cannot contain any spaces, and it cannot end in a number. If the prefix is currently used in the grid, its text can be changed here. The change will automatically be reflected in the grid. • For each group number, click on the Color Sequence box to open a drop-down list showing all of the available colors. Click on the desired color. KC4 uses the first color for SPL1, then the second for SPL2, and so on. It restarts with the first color when the whole list of colors has been used. To remove the last color of the current sequence, set it to End of Sequence (the last item in the list). 146 • Protocol Menu User’s Guide to KC4™ Sample Control Wells Sample Controls are the controls that are associated with specific samples. For example, SPLC1 is associated with SPL1 (assuming the default names are used). This well type can be used to represent sample blanks, or spikes. Unique IDs should be used to distinguish between the different sample control groups. The maximum number of unique sample control well IDs that can be defined is limited only by the number of available wells on the plate. The default ID prefix is SPLC, and the default IDs are SPLC1, SPLC2, SPLC3, etc. The default color for all IDs is dark purple. To change the ID prefix and/or colors, click the “…” box to the right of the ID field. • Enter an ID Prefix using 1 to 7 characters. The prefix can contain letters, numbers, and underscores. It cannot contain any spaces, and it cannot end in a number. If the prefix is currently used in the grid, its text can be changed here. The change will automatically be reflected in the grid. • For each group number, click on the Color Sequence box to open a drop-down list showing all of the available colors. Click on the desired color. KC4 uses the first color for SPLC1, then the second for SPLC2, and so on. It restarts with the first color when the whole list of colors has been used. To remove the last color of the current sequence, set it to End of Sequence (the last item in the list). User’s Guide to KC4™ Protocol Menu • 147 Standard Wells Standard wells are used to generate a standard curve on which data will be interpolated. Expected concentrations must be defined for each standard group. Unique IDs must be used to distinguish between the different standard groups. The minimum number of standard groups that can be defined is 2, and the maximum number is 20. Note: Each curve fit type has its own required minimum number of standards. The default ID prefix is STD, and the default IDs are STD1, STD2, STD3, etc. The default color for all standard wells is dark blue. To change the ID prefix and/or color, click the “…” box to the right of the ID field. • Enter an ID Prefix using 1 to 7 characters. The prefix can contain letters, numbers, and underscores. It cannot contain any spaces, and it cannot end in a number. If the prefix is currently used in the grid, its text can be changed here. The change will automatically be reflected in the grid. • (Optional) Enter a descriptive Name using up to 20 alphanumeric characters. This name can be included on reports. • Click on the Color box to open a drop-down list showing all of the available colors. Click on the desired color. 148 • Protocol Menu User’s Guide to KC4™ Assigning Well IDs After defining the Well Settings, assign the Well ID(s) in the grid area of the Plate Layout dialog. Here is a very simple example for assigning blank wells to the plate: • Select the Blank well type from the Type drop-down menu: • The ID field shows the default identifier, BLK: • Assuming you wish to use the "BLK" identifier, highlight the well(s) in the template that should contain blanks, then release the mouse button: • The average of the measurement values in wells A1 and A2 will be subtracted from every well on the plate. KC4 provides options for defining replicates and automatically updating the Well ID numbers. The following example shows you how to define Replicates and use the Auto Select and Filling features to assign samples in triplicate. • Select the Sample well type from the Type drop-down menu: • The ID field shows the first ID in the sequence, SPL1: User’s Guide to KC4™ Protocol Menu • 149 • Set the number of Replicates to 3, then select the Horizontal filling option. Sample replicates will be assigned horizontally, A1/A2/A3, B1/B2/B3, and so on. • Choose the Auto Select option Next ID. This automatically increments sample groups, SPL1, SPL2, SPL3, and so on. • Select the Filling option Vertical to assign groups vertically. • Finally, go to the grid and click the mouse once in the box above the A and to the left of the 1. This fills all wells with samples. • During data reduction, KC4 will automatically calculate and display the Mean, Standard Deviation, and CV % for each sample group (click the Statistics button from within the Data display to view this information): 150 • Protocol Menu User’s Guide to KC4™ Defining and Assigning Dilutions KC4 provides the ability to define dilutions for Assay Controls, Samples, and Sample Controls. Defining Dilutions Dilution values can be assigned to wells when the well IDs are assigned, or they can be assigned to existing well IDs by clicking the Dilutions Only button. This section discusses assigning dilutions and well IDs at the same time. When defining dilutions, start by selecting the desired well type. The dilution values will remain associated with this well type. Customize the well IDs if necessary. When the Type and ID fields are set, click the "…" button to the right of the Dil. Field. The Concentrations\Dilutions dialog appears: Use this dialog to enter the dilution values required for the assay. Dilutions are must be entered in ascending or descending order, starting with Dilution #1 (10.000 in the example above): • Choose the Conc./Dil. Type option Dilution. • Enter the starting dilution in cell #1. Subsequent dilutions can be entered manually or automatically: Enter dilutions manually in cells #2, #3, and so on. Use the down arrow key to advance to the next cell, or click the mouse in the desired cell. To increase dilutions automatically, choose an Auto option of Incr or Fact. Enter the required Increment or Factor value, then click on cell #2 to assign the next dilution. Use the down arrow key to advance to the next cell, or click the mouse in the desired cell. User’s Guide to KC4™ Protocol Menu • 151 Incr: Increments dilutions by the entered value. In the example above, the starting dilution is 10, and subsequent dilutions increase by 10. Enter a negative number (e.g. 10) to decrement dilution values. Fact: Increase dilutions by an entered factor value. If the starting dilution is 2, increasing by a factor of 2, subsequent dilutions become 4, 8, 16, 32, 64, and so on. • Click the Clear button to delete all values from all cells. • When all of the dilution values have been entered, click OK to return to the Plate Layout dialog. Assigning Dilutions There are different techniques for assigning dilutions. You may wish to experiment with the software, to get comfortable with assigning Replicates, choosing neither, one, or both Auto Select options, and toggling the Horizontal/Vertical filling options. It might also be helpful to sketch your plate map on a piece of paper to use as a reference. To assign dilutions (with Well IDs): • Select the necessary Well Settings (Type, #, and ID), then choose the first dilution value to be assigned. • Enter the number of dilution Replicates per control or sample. • Choose the dilution replicate filling direction, Horizontal or Vertical. • To advance well IDs and/or dilution values automatically, choose Next ID (if available), and/or Next Dil. • Choose the dilution group filling direction, Horizontal or Vertical. • Highlight the well(s) to assign dilutions and well IDs. Examples are provided on the following pages. 152 • Protocol Menu User’s Guide to KC4™ • Dilution values are defined as 2.000, 4.000, 8.000, 16.000, 32.000, and 64.000. • The Auto Select option Next Dilution is selected. The Next ID option is not available for Assay Control groups; they must be incremented manually. • Wells A1 through A6 are highlighted to assign CTRL1 and its dilutions. CTRL2 is then selected and assigned to wells B1 through B6. User’s Guide to KC4™ Protocol Menu • 153 • Dilution values are defined as 10.000, 20.000, 30.000, 40.000, 50.000, and 60.000. • Replicates is set to 3, and both Auto Select options are enabled. • Wells A1 through F12 are highlighted to assign IDs and dilutions. • Dilution values are defined as 1.000, 10.000, 100.000, and 1000.000. • Replicates is set to 1, and both Auto Select options are selected. • Wells A2 through D2 are highlighted to assign the ID and dilutions, then A4 through D4, and so on to A12 through D12. 154 • Protocol Menu User’s Guide to KC4™ Defining and Assigning Concentrations If the plate layout contains Standard wells, or if you want to generate curves based on control or sample wells (e.g. for a titer assay), the location and the expected concentrations of these wells must be defined and assigned in the plate layout. KC4 uses the expected concentration values as the basis for calculating the curve; they represent the x-axis values. The measurement values retrieved from the reader (or the results of transformations applied to them), represent the y-axis values. KC4 provides the ability to define concentrations for Assay Controls, Samples, Sample Controls, and Standards. Defining Concentrations When defining concentrations, start by selecting the desired well type. The concentration values will remain associated with this well type. Customize the well IDs if necessary. When the Type and ID fields are set, click the "…" button to the right of the Conc. field (for well types other than Standard, this field will initially be labeled “Dil.”). The Concentrations or Concentrations\Dilutions dialog will appear, depending on the well type. Use this dialog to enter the expected concentration values required for the assay. Values must be entered in ascending or descending order, starting with concentration #1 (1.000 and 5.000E-3 in the examples above): • Enter the starting concentration in cell #1. Subsequent concentrations can be entered manually or automatically: When entering concentrations manually, use the down arrow key to advance to the next cell, or click the mouse in the desired cell. User’s Guide to KC4™ Protocol Menu • 155 To increase concentrations automatically after entering the starting concentration, choose an Auto option of Incr or Fact then define the required Increment or Factor value. Click on cell #2 to assign the next concentration. Use the down arrow key to advance to the next cell, or click the mouse in the desired cell. Incr: Increments concentrations by the defined value. If the starting concentration is 10.000 with an Increment of 10, subsequent concentrations become 20.000, 30.000, and so on. Enter a negative number (e.g. -5) to decrement concentration values. Fact: Increases concentrations by the defined value. If the starting concentration is 1.000 with a Factor of 2, subsequent concentrations become 2.000, 4.000, 8.000, 16.000, and so on. • (Optional) Enter the Unit of measure for the X-axis values on the curve, using up to five alphanumeric characters. • Click the Clear button to delete all values from all cells. • For Sample Controls, KC4 provides the Calculate Recovery % option. If this feature is enabled, KC4 automatically generates a “Recovery %” results data set, containing the results of the following formula: [Conc(SPLCn) - Conc(SPLn) ÷ ExpectedConc(SPLCn)] x 100 • When all of the concentration values have been entered, click OK to return to the Plate Layout dialog. 156 • Protocol Menu User’s Guide to KC4™ Assigning Concentrations To assign concentrations (with well IDs): • Select the necessary Well Settings (Type, #, and ID), then choose the first concentration value to be assigned. • Enter the number of standard, sample, or control Replicates. • Choose the replicate filling direction, Horizontal or Vertical. • If you want well IDs and/or concentration values to advance automatically, choose Next ID (if available), and/or Next Dil. • Choose the group filling direction, Horizontal or Vertical. • Highlight the well(s) to assign the concentrations and well IDs. Examples are provided below and on the next page. • Concentrations are defined as 10, 20, 30, 40, 50, and 60. • The Auto Select option Next Concentration is selected. The Next ID option is not available for Standard groups; they must be incremented manually. • Wells A1 through F2 are highlighted to assign the concentrations and IDs. User’s Guide to KC4™ Protocol Menu • 157 • Concentrations are defined as 1, 2.5, 5, 10, 20, 40, 80, and 160. • Replicates is set to 2, and both Auto Select options are selected. • Wells A1 through H12 are highlighted to assign the concentrations and IDs. 158 • Protocol Menu User’s Guide to KC4™ Single Plate Transformations KC4 provides for up to three levels of Single Plate Transformations. The three different levels of transformations may be interdependent, or completely independent of each other. Typical uses include: • Using specific wells as local blanks for other wells. • Calculating ratios between wells. The Single Plate Transformation dialog functions similarly to a spreadsheet. The data entry template resembles a microplate in row x column format. Formulas are entered in "cells" representing the wells within the microplate. To define Single Plate Transformations: • For readers that support multiple plate formats, ensure the correct format is selected under Protocol|Reading. • Ensure that identifiers have been assigned under Protocol|Plate Layout. • Select Protocol|Single Plate Transformations: Place the cursor in a well and enter the desired formula. The formula is visible in the Current Formula box at the bottom of the dialog. The Transf. # field indicates the current transformation level. Level 1 transformations can be passed for further manipulation into Level 2 and Level 3 transforms for successive manipulation. Data In represents the data set upon which the formulas will be applied. The Data In choices will vary depending on the defined protocol parameters. User’s Guide to KC4™ Protocol Menu • 159 For kinetic protocols, a Kinetic checkbox is provided. If this box is checked, the Data-In options represent plate data, such as “M#1 405” or “M#2 630”. If this box is not checked, the Data-In options represent the results of kinetic calculations, such as “Max V” and “Coeff Reg”. The Data Out field assigns a name to the transformed data. The transformed data can then be used for further calculations, including Multi Plate Transformations. Select Copy Current Formula to copy the current formula into one or more wells. Clicking on the title row or column auto-fills the wells selected with the current formula. Clicking on the top left corner auto-fills the whole plate. Select Edit Well to edit the formula in a particular well. Select Diff. Between Lines to perform subtraction between rows, then select A-B or B-A. Select Diff. Between Cols to perform subtraction between columns, then select 1-2 or 2-1. Click Init. All Transf. to reinitialize all Single Plate Transformations to their most recently saved settings. to expand the width of the columns, to view and access long formulas. Click The maximum expansion shows a single column of wells in full screen. Click to contract the width of the columns. Formula Syntax The following tables contain symbols and functions that can be used in Single-Plate Transformations: Type of Symbol Description/Example Algebraic symbols +,-, /,*,() Figures (scientific notation) 2.45E-08 x or X Represents the current well value. coordinates of the well Represents the value of a particular well, such as A2 or H12. 160 • Protocol Menu User’s Guide to KC4™ Functions Applied to the Identifier Description/Example MEAN[POS1] Represents the mean of identifier POS1. ‘POS1’ by itself also represents the mean of all POS1 wells on the plate. SD[NEG1] Represents the standard deviation of all valid wells in group NEG1. CV[BLK] Represents the coefficient of variation of all valid wells in group BLK. Advanced Mathematical Functions Description/Example LOG(x) Represents the log10 function. POW(x;y) Raises x to the power of y. POW(10;x) Calculates the Anti-Log of the current well. SQRT(x) Square root of x. MIN(x1;x2;x3...) Minimum value of defined variables. Example: MIN(A1;B1;C1). MAX(x1;x2;x3...) Maximum value of defined variables. Example: MAX(CV[CTRL1];CV[CTRL2]). Formula Examples See also the installed sample protocol files for both Single and Multi Plate Transformation examples; these can be found in the SAMPLES folder in your main KC4 folder. CTRL1-3*SD[CTRL1] The result of this formula is the mean of the wells containing the identifier CTRL1 minus three Standard Deviations of these wells. It is the equivalent of MEAN[CTRL1]3*SD[CTRL1]. X+(A5+A6)/2 The result of this formula is the sum of the current well value and the mean of the A5 and A6 wells. LOG(X/MEAN[POS1]) The result of this formula will log the ratio of the current well over the mean of POS1. MAX(A1;A2;A3)-MIN(B1;B2;B3) This formula calculates the difference between the maximum value of A1, A2, A3 and minimum value of B1, B2, B3. % = (SPLn-BLKn) / (CTRLn-BLKn) This formula can be used for toxicology assays, to calculate toxicity percentages. User’s Guide to KC4™ Protocol Menu • 161 Multi Plate Transformations KC4 provides for up to three levels of Multi Plate Transformations. The three different levels of transformations may be interdependent, or completely independent of each other. In addition, the results of any Single Plate Transformations can be incorporated into a Multi Plate Transformation. To define Multi Plate Transformations: • Ensure that all protocol parameters that have an effect on data reduction have been defined. • Select Protocol|Multi Plate Transformations: The Transf. # field indicates the current transformation level. Level 1 transformations can be passed for further manipulation into Level 2 and Level 3 transforms for successive manipulation. Data In represents the data set upon which the formulas will be applied. The Data In choices will vary depending on the protocol type and reading parameters. Within one Multi Plate Transformation, you can select up to three discrete assay data sets for combined calculations. You must select and position each data set in the appropriate location holder (i.e., X1, X2 and X3). The data sets must be of similar type. 162 • Protocol Menu User’s Guide to KC4™ You can select previously stored data files (these files must be correctly formatted text files and only contain end-point readings). For kinetic protocols, Reading # can be set to All, or from 1 to the total number of readings. Use the location variables X1, X2 and X3 to construct the Formula. The Name field assigns a name to the transformed data and saves the settings and formula. The transformed data can then be used as the Data-In for further calculations, including Kinetic Analysis and other Multi Plate Transformations. Syntax The following table contains symbols that can be used in Multi Plate Transformations: Type of Symbol Description/Example Algebraic symbols +,-, /,*,() Figures (scientific notation) 2.45E-08 Automatic Formula Generation For readers with multiple wavelength (> 2) reading capability, a default Multi Plate Transformation is automatically created when exactly 2 wavelengths or filter sets are specified. These default parameters can be changed. • The Protocol menu switches to Advanced Mode. • The Multi Plate Transformation dialog contains: X1 = <Meas. OD#1> X2 = <Meas. OD#2> Formula = X1 - X2 Data Out = Delta OD • In addition, if the protocol is Kinetic: The ‘Kinetic’ checkbox becomes enabled. The Reading # fields for both X1 and X2 are set to All. Note: Once the Reading Parameters dialog is saved and closed with 2 filter sets/wavelengths specified, the Delta OD Multi-Plate Transformation will not automatically ‘clear’ if the protocol is then changed to 1 or 3-6 filter sets/wavelengths. The user must open the Multi Plate Transformation dialog and manually empty/modify the fields. User’s Guide to KC4™ Protocol Menu • 163 Curves Select Protocol|Curves to define various curve fitting parameters, including the data set to interpolate and the fitting method. Interpolations are defined here as well. Curve Description Select Protocol|Curves to select the data set to be used for curve calculations, and to specify the origin of the curve. • The Data to Interpolate setting represents the type of data to be used for curve fitting. • Select Current Plate if the standard curve will be generated using data from the current plate. • Select File if the standard curve will be based on a previously stored curve. The stored curve will be used as the basis for calculating concentrations for the current plate. Click Browse... to search for the desired file. The file must have a *.GPH extension. Refer to the Biograph module for information on storing curves. If a stored curve is used and the plate layout contains standard identifiers, then any use of STDn in formulas will refer to the standard well(s) on the current plate and not to the standards in the stored curve. 164 • Protocol Menu User’s Guide to KC4™ Curve Axes By default, the x- and y-Axis data is transformed linearly, and the Extrapolation Factor is set to 1.1. These options can be modified by selecting Protocol|Curves|Axes. • Select either Lin or Log for the transformation of x axis or y axis data. • If Display Grid is checked, the graph will be displayed and printed with gridlines. • The text in the x Axis and y Axis Title fields appears on standard curve displays and reports. To modify a title (e.g., "% toxicity" or "Delta OD"), overwrite the existing text. • The Extrapolation Factor enables you to extend the abscissa range of the curve fitting routine beyond the limits of the standard data points generated from the assay. See Defining Extrapolation below for more information. Exercise caution when using extrapolation, as the implied assumption is that the relationship of the x and y variables is valid outside the range defined by the standards. This type of extrapolation should only be applied when prior knowledge of the relationship is known. Typically this feature is used in assays where linear relationships are known. Inappropriate use of the Extrapolation Factor feature may invalidate results generated from data falling into the extrapolation zone. • By default, the Min and Max y axis values (for display and reporting purposes) are determined automatically by KC4. These values can be overridden by deselecting Auto and manually entering the Min and Max values. User’s Guide to KC4™ Protocol Menu • 165 Defining Extrapolation The extrapolation factor range must be between 1 and 3. Using a factor of 1 implies that the defined upper and lower standards are the limits for concentration interpretation. However, given some assays, the upper and lower limits may be extended, in this case tentative extension of the range may be imposed. • Example: Assuming a linear x axis we wish to extend the upper and lower limit by 20%. The lower limit denoted by the first standard is 50 units. The upper limit denoted by the last standard is 150 units. The dynamic range therefore is 150-50 = 100 units. Imposing the 20% extension means that the new range will be: 100 x 1.2 equals 120 units. This represents an increase in the dynamic of 10 units at the lower limit and 10 units at the upper limit. Therefore the new lower limit will be 50-10 equals 40 units. The new upper limit will be 150 + 10 equals 160 units. • Notes: Sample values that fall into the new limits will be calculated. Those that fall outside these limits will be assigned > than or < than, respectively. Extrapolation cannot be used for the Spline routine nor the Point-to-Point fit. These algorithms cannot calculate values outside the upper and lower defined standard points. Curve Fit Use the Protocol|Curves|Curve Fit dialog to select the method by which the standard curve will be generated. The default setting is Linear Regression. 166 • Protocol Menu User’s Guide to KC4™ It is important that the appropriate curve fit is applied to the data otherwise the results may be invalid. Whichever curve fitting routine is used, it is essential to check the shape of the curve prior to evaluating data. The curve fit methods are described below. Point to Point Linear interpolation between standard points. The minimum number of standards is 2. Linear Regression Linear regression y = ax + b. y represents unknown response x represents concentration a represents the slope of the linear regression b represents the intercept to the y axis • The linear regression fit uses the least squares technique. The better the quality of the fit the more the absolute value of R tends to 1. This type of curve fitting technique can be used when you think the data will fall in a predictable linear pattern. It may be necessary to transform the x and/or y components using Log axes. • Click the Options button to enable or disable the averaging of standard replicates before curve calculation. By default, average replicates is enabled. Polynomial Regression This type of regression fitting is an extension of the linear regression equations. y = an Xn + an-1 Xn-1 + … a1 X + a0 n represents the degree of the polynomial regression. Note: The degree must be less than or equal to the number of standards minus 2. The unknown concentrations are calculated by using an approximate calculation method, linear interpolation between 200 points evenly spaced on the x axis. • Certain assays require forcing the curve through the origin. KC4 provides a feature that allows you to specify the point at which the curve should meet the Y axis. Click the Options button to enable this feature and then enter the Y axis intercept value. Enter 0 (the default value) to force the curve through the origin. User’s Guide to KC4™ Protocol Menu • 167 The value entered here determines the coefficient ‘a’ of the polynomial equation: y = g*x6 + f*x5 + e*x4 + d*x3 + c*x2 + b*x + a Note: By forcing the curve through the origin, the R-squared value may be decreased because the equation may not describe the data of the standards as well. It is the user’s responsibility to check the validity of the data when using this feature. Spline with Smoothing Spline fitting with a smoothing factor. The curve will appear smoother as the smoothing factor is increased. The zero factor will force the curve fit through all data points. The minimal number of standards for the spline fit is 4. Note: The unknown concentrations are calculated using an approximate calculation method, linear interpolation between 200 points evenly spaced on the x axis. 4 Parameter logistic fit a = (theoretical) response at concentration = 0 b = measure of slope of curve at its inflection point c = value of x at inflection point d = (theoretical) response at infinite concentration x = concentration y = response (OD) The minimum number of standards is 4. It is recommended that: • at least one standard is not far from each asymptote. • at least 2 standards fall within the linear area of the curve, one either side of the inflection point. 168 • Protocol Menu User’s Guide to KC4™ Curve Interpolation Select Protocol|Curves|Curve Interpolation to define Y values and/or formulas for which a concentration will be calculated. KC4 supports the definition of up to 25 Interpolation values and formulas. • Before defining interpolations that reference well identifiers, ensure that all identifiers have been assigned under Protocol|Plate Layout. • Each interpolation can contain any of the following: Numeric values, such as 1.500, 85000, or 2.0E-8. Well identifiers, such as NC, BLK, or STD1. Well coordinates, such as A1 , H12, or P24. A formula combining any or all of the above, such as CTL1/CTL2*100. • Click the Biograph button after a plate is read to view the Interpolation Results. • Interpolation results can be included on reports and in export files. • Interpolation formula syntax is described on the next page. User’s Guide to KC4™ Protocol Menu • 169 Interpolation Formulas The following table contains valid symbols and functions for use within Interpolation formulas: Symbol or Function Description Example + Addition CTL1+0.100 - Subtraction or negation BLK-0.010 / Division CTL1/CTL2 * Multiplication STD1*0.10 Represents inclusion (CTL1/CTL2)*100 Well coordinates The value of a specific well A1/B1 MEAN[<ID>] The mean of the specified well identifier MEAN[POS1] SD[<ID>] The standard deviation of the specified well identifier SD[BLK] CV[<ID>] The coefficient of variation of the specified well identifier CV[STD1] LOG(<x>) Represents the LOG10 function LOG(SPL10) POW(<x>;<y>) The value of <x> raised to the power of <y> POW(STD1;3) SQRT(<x>) The square root of <x> SQRT(A1*B1) MIN(<x>;<y>;<z>;…) The minimum of the defined variables MIN(CV[CTL1]; CV[CTL2]) MAX(<x>;<y>;<z>;…) The maximum of the defined variables MAX(A1;B1;C1) ( ) 170 • Protocol Menu User’s Guide to KC4™ Validation Validation is a set of determinant criteria used to assess the suitability of calibrators for the inclusion in subsequent calculations. Validation criteria, or Conditions, are expressions based on threshold limits previously determined from known standardized conditions. Select Protocol|Validation (with the Protocol Menu in ‘Advanced’ mode) to define Validation Sets and Conditions. • Before defining validation criteria, ensure that all identifiers have been selected and defined under Protocol|Plate Layout. • Define up to 5 different Validation Sets, each containing up to 10 Conditions. • The Data Type setting represents the set of data to which the Conditions equations will be applied. • The Conditions fields allow fixed thresholds and/or algebraic formulas to be used in validating data to satisfy known conditions of the defined assay. A Condition typically combines well identifiers (see Plate Layout) with the following symbols: < less than <= less than or equal to > greater than >= greater than or equal to User’s Guide to KC4™ Protocol Menu • 171 • Example 1: Conditions to be met: 1) During the first of several kinetic readings, the mean value of STD1 must fall between 0.200 and 0.300 OD, and the mean value of STD2 must fall between, 0.900 and 1.300 OD. 2) For each kinetic reading point, the mean value of POS1 must be less than the mean value of POS2. • Example 2: Condition to be met: The mean of every sample replicate group must be greater than 0: The # (pound) sign is a generic symbol that can be used to represent all indices of a particular identifier. 172 • Protocol Menu User’s Guide to KC4™ Cutoffs Cutoffs screen selected data into defined categories based on fixed or variable threshold limits. During data reduction, KC4 evaluates results against the cutoff criteria assigns each well a Symbol. Select Protocol|Cutoffs (with the Protocol Menu in ‘Advanced’ mode) to define Cutoffs and Symbols. • After plate reading, open the Symbols data set to see the assigned symbols and the calculated cutoff values. Selecting the Data to Interpret The Data to Interpret setting represents the set of data to which the cutoffs will be applied. For example, if Data to Interpret is set to ‘Concentrations’, the cutoffs will be applied to the calculated concentrations. KC4 presents for selection the applicable data sets that are made available by the current protocol definition. User’s Guide to KC4™ Protocol Menu • 173 Defining Cutoffs KC4 supports the definition of up to 40 cutoffs. These are the criteria against which the plate data will be evaluated. • Enter cutoff values or formulas in the C.O.#. = fields. Click previous 8 fields. • Before defining cutoffs that reference well identifiers, ensure that all identifiers have been assigned under Protocol|Plate Layout. • Cutoffs must be entered in ascending order. If entering formulas, the calculated results of the formulas must be in ascending order to be considered valid. or to see the next or For example, if Data to Interpret is set to ‘Concentrations’ and the cutoffs are defined as ‘STD1’, ‘STD2’, and ‘STD3’, then the calculated concentrations must be in ascending order, such as 10.000, 20.000, and 30.000. • Each cutoff can contain any of the following: Numeric values (1.500, 85000, 2.0E-8) Well identifiers (NC, BLK, STD1) Well coordinates (A1 , H12, P24) A formula combining any of the above (CTL1/CTL2*100) Cutoff Formulas The following table contains valid symbols and functions for use within cutoff formulas: Symbol or Function Description Example + Addition CTL1+0.100 - Subtraction or negation BLK-0.010 / Division CTL1/CTL2 * Multiplication STD1*0.10 Represents inclusion (CTL1/CTL2)*100 Well coordinates The value of a specific well A1/B1 MEAN[<ID>] The mean of the specified well identifier MEAN[POS1] SD[<ID>] The standard deviation of the specified well identifier SD[BLK] CV[<ID>] The coefficient of variation of the specified well identifier CV[STD1] LOG(<x>) Represents the LOG10 function LOG(SPL10) POW(<x>;<y>) The value of <x> raised to the power of <y> POW(STD1;3) SQRT(<x>) The square root of <x> SQRT(A1*B1) MIN(<x>;<y>;<z>;…) The minimum of the defined variables MIN(CV[CTL1]; CV[CTL2]) MAX(<x>;<y>;<z>;…) The maximum of the defined variables MAX(A1;B1;C1) ( ) 174 • Protocol Menu User’s Guide to KC4™ Defining Symbols Symbols are assigned to wells after cutoff evaluation. After plate reading, open the ‘Symbols’ results data set to see the assigned symbols as well as the calculated cutoff values. The number of available Symbols fields exceeds the number of defined cutoffs by one. During data reduction, if the value of a well is less than the first cutoff, the first symbol is assigned to the well. If the value of a well is greater than or equal to the first cutoff, but less than the second cutoff, the second symbol is assigned to the well, and so on. See Results, Symbols later in this manual for more information. Each Symbol can contain up to 8 alphanumeric characters. Common symbols include NEG, EQV, POS, -, +. The appearance of each symbol can be customized by clicking its corresponding Font button: • The default Font is MS Sans Serif Regular 10 point (or similar), in Black. KC4 presents for selection the fonts that are already installed on your PC (typically in your \Windows\Fonts folder. • Change the Font, Font Style, Size, and color, as desired. Add Effects such as a Strikeout or an Underline. Symbols will appear on the results display and on printed reports as they are defined within this dialog. User’s Guide to KC4™ Protocol Menu • 175 Out-of-Range Symbols When ‘Data to Interpret’ is set to ‘Concentrations’, the Out of Range Symbols fields are available at the bottom of the Cutoffs dialog. Following data reduction: • Wells with concentrations less than the minimum standard concentration are assigned the ‘Concentration below minimum’ symbol. • Wells with concentrations greater than the maximum standard concentration are assigned the ‘Concentration above maximum’ symbol. • Note: Use of the Extrapolation Factor may cause the upper and lower limits for concentration interpretation to be extended. The default out of range symbols are OUT- and OUT+. Each Symbol field can contain 0 to 8 alphanumeric characters. The appearance of each symbol can be customized by clicking its corresponding Font button, as described in the previous section. Cutoffs Evaluation Cutoffs are evaluated during data reduction. If the cutoffs are in increasing order, symbol assignment is determined as follows: • Each well is evaluated against the first cutoff. If the value of the well is less than the criteria, then the first symbol is assigned to the well. • If the value of the well is greater than or equal to the first cutoff, then it is evaluated against the next cutoff. If the value of the well is less than the next criteria, then the symbol immediately preceding the cutoff criteria is assigned to the well. • This process continues until the last cutoff criteria is encountered. If the value of the well is less than the last criteria, then the symbol immediately preceding the last cutoff criteria is assigned to the well. If the value of the well is greater than or equal to the last criteria, then the symbol immediately following the last cutoff criteria is assigned to the well. 176 • Protocol Menu User’s Guide to KC4™ Reports With KC4’s standard reporting function you can customize the contents, and to some extent the appearance, of printed reports. All KC4 users have access to this standard function. Reporting through Microsoft® Excel 2000 and Word 2000 is also supported with KC4’s PowerReports feature. This section only discusses the standard reporting function (the KC4 report engine). The report engine is selected under Protocol|Options. Select Protocol|Reports to customize the report for the open protocol: • Check Header and enter the text to appear at the top of every report. • Check Protocol Description and Assay Description to include this information on reports. • The Available Data window displays the data and information available for reporting. Available Data selectable items are dependent upon the type of protocol selected, as well as the defined Reading Parameters. Click the left mouse button to select an individual item. To select groups of like items, hold the Ctrl key down while highlighting them. Click the Add>> button to append the item(s) to the Selected Data list. User’s Guide to KC4™ Protocol Menu • 177 Click the Insert>> button to insert item(s) into the Selected Data list. Highlight the item in the Selected Data list above which the inserted item should appear. You can drag and drop selected items between the two lists. The Form Feed option inserts a page break. Audit Trail Reports If Protocol Audit Trail is selected, a list of all changes made to the protocol is included on the report. If Data Audit Trail is selected, a list of all changes made to the data file is included on the report. Calculation Log Report If Calculation Log Report is selected, warning(s) appear on reports if a special event occurs during the calculations. Events can include a failure during the calculation of a transformation, the standard curve, or cut-offs: 178 • Protocol Menu User’s Guide to KC4™ Kinetic Curves Report The Kinetic Curves report shows the kinetic curve in every well, in a plate format. For example: Well Zoom Report Each Well Zoom report contains the kinetic curve for one well. • To specify a Well Zoom report, highlight Well Zoom in the Available Data box, enter the desired Wells for kinetic zoom, then click the Add button. • Up to 8 kinetic wells can be overlaid in a single graph. Select the Wells for kinetic zoom, then click Overlay Wells. User’s Guide to KC4™ Protocol Menu • 179 Validation Report The Validation report contains every validation condition defined for the protocol and its resulting status. • The possible status values are Verified, Not Verified, and Could Not Be Evaluated. Cutoffs Report The Cutoffs report lists the defined cutoffs and their calculated results. • In the example above, cutoffs were based on the Concentrations. Sample Name List Report The Sample Name List contains all sample names defined for the plate. 180 • Protocol Menu User’s Guide to KC4™ Plate vs. Table Format Depending on the nature of the item chosen under Available Data, information can be reported either in Plate format or in Table format. • With the Plate format selected, data will print in a matrix format corresponding with the plate layout. • Data for individual kinetic reads can be printed in the Plate format. Select the type of data (e.g., Meas. OD, Delta OD), then set the range of reads to include in the report using the From # and To # fields. • The Table format is available for kinetic and scanned data. All kinetic or scanned readings for one or multiple wells. Set the range of wells to include in the report using the From and To fields. Statistics Report Statistical expansion of the data can be reported. This information is specifically related to the Identifiers, e.g. controls, standards or samples. • To specify a Statistics report, select an item from the Available Data box, click the Controls, Standards, or Samples radio button in the Statistics box, then click the Add button. User’s Guide to KC4™ Protocol Menu • 181 Export With KC4’s standard exporting function you can customize the contents of export files. All KC4 users have access to this standard function. Exporting through Microsoft® Excel 2000 and Word 2000 is also supported with KC4’s PowerReports function. This section only discusses the standard exporting function (the KC4 report engine). The export engine is selected under Protocol|Options. Select Protocol|Export to customize the export file for the open protocol: • Check Protocol Description and Assay Description to include this information in the file. • The Available Data window displays the data and information available for exporting. Available Data selectable items are dependent upon the type of protocol selected, as well as the defined Reading Parameters. Select an individual item by clicking it with the left mouse button. To select groups of like items, hold the Ctrl key down while highlighting them. Click the Add>> button to transfer the item(s) to the bottom of the Selected Data list. Click the Insert>> button to insert item(s) into the Selected Data list. Highlight the item in the Report field above which the inserted item should appear. • See “Formats” in System Menu, Setup for information on choosing the text delimiter. 182 • Protocol Menu User’s Guide to KC4™ Protocol Audit Trail This feature only applies to KC4 Signature Every protocol file has a Protocol Audit Trail associated with it. This audit trail automatically records events performed on the file since the file was created (first saved). Each event records an action such as "Plate Layout changed" or "Reading parameters changed" and includes a date and time stamp, the ID of the user logged in at the time, and any comments that were entered by the user when the action was performed. The audit trail cannot be edited and it remains a permanent part of the file for the life of that file (that is, if the file is deleted, the audit trail is also deleted). To view a protocol’s audit trail, select Protocol|Audit Trail: • Events are sorted by date/time stamp and include the ID of the user logged in at the time, the action taken, and any comments that were entered by the user when the action was performed. • The contents of the protocol audit trail can be copied to the Clipboard by highlighting the desired cells and pressing Ctrl+C. • The contents of the protocol audit trail cannot be edited or deleted. User’s Guide to KC4™ Protocol Menu • 183 Security KC4 provides the ability for the Administrator to protect the use of certain protocol/data functions by unauthorized users. To view or modify the protected functions associated with a particular protocol, select Protocol|Security (advanced function). Checked functions may not be performed by unauthorized users. • With KC4 v3.4, an unauthorized user is any user other than the System Administrator. • With KC4 Signature, an unauthorized user is one who is designated as a Standard User. The following list includes all protocol-level protectable functions and describes the behavior the unauthorized user can expect from KC4 for each function when it is protected: • Re-read plate. The user cannot re-read a plate if one is already open, because re-reading a plate deletes the initial values. The user must first select Data|New Plate and then Data|Read Plate. • Mask a value. Within the Results window, the user cannot click the Mask box to exclude wells from calculations. • Change a value. Within the Results window, the user cannot click the Change box to change any measurement values. • Edit Protocol Parameters. If this box is checked, the user cannot edit any protocol parameters. • Edit <individual protocol parameter>. The user cannot modify the particular protocol parameter. For example, if ‘Edit Plate Layout’ is protected, the user cannot define or assign new well IDs, expected concentration values, or dilution values. The user can, however, select Protocol|Plate Layout to view the layout. 184 • Protocol Menu User’s Guide to KC4™ Protocol Options Select Protocol|Options to customize various options for this protocol, including automatic file saving, report printing, and data exporting. Reporting, exporting, and calculation options can also be modified here if the desired options are different than the default ones specified under System|Setup. Raw Data Select Protocol|Options|Raw Data to specify automatic save and append options for raw data. • Enter the Save Directory in which to store plate data files (*.pla and *.glb) associated with this protocol. Click Browse to search for and select the desired location. Note: If files will not be saved automatically (see below), this location can be changed manually by selecting Plate|Save or Plate|Save As. • Check Automatic Save after reading to automatically initiate the save plate data file function when the read is complete. Select Prompt for Name to prompt the operator to manually enter the file name after the plate read, or select Auto Name to let KC4 automatically name the file, using the system date and a sequence number. The use of ‘Auto Name’ ensures a unique file name each time. • If the reader is equipped with a barcode scanner and "Read Barcode" is selected under Protocol|Reading, the Use barcode as filename option is available. Select this option to automatically save the data file using the barcode name. User’s Guide to KC4™ Protocol Menu • 185 • Select Automatic Append to Kinetic File after reading to append the current data to an existing data file. This feature allows you to perform several endpoint reads on one plate. You can temporarily remove the plate to incubate it externally, or perhaps to add reagents. Enter the target directory and file name in the Kinetic File Name field. Click the Browse button to search for and select the desired file. Note: ‘Automatic Append to Kinetic File’ is not available if the protocol specifies pathlength correction or the pre-reading of a blank plate. Report Select Protocol|Options|Report to select the reporting engine and to set printing options. • Select the Engine for designing report templates: KC4: This is the standard method for designing reports that KC4 has always provided. The contents are customizable but the appearance is completely controlled by KC4 (you cannot change the font style or size, for example). Word: If your computer has Microsoft® Word 2000 installed on it, you can design the report using Word and take advantage of all its formatting features. Excel: If your computer has Microsoft® Excel 2000 installed on it, you can design the report using Excel and take advantage of all of its formatting features. In addition, you can create custom Excel formulas that reference KC4 data. • If you chose Word as the engine, choose a Document Formatting option to tell KC4 how to prepare documents for printing and print previewing. If Standard is selected, document formatting is faster because KC4 does not apply any custom font characteristics from the Plate Layout or Cutoffs dialogs. Well IDs and cutoff symbols are printed using just the default font characteristics. If Enhanced is selected, document formatting is slower because KC4 does apply custom font characteristics to Well IDs and cutoff symbols. • Select Automatic Print after reading to automatically print reports when the plate read is complete. This is available for all reporting engines. • Select Keep Open After Printing to keep Word or Excel open after the print preview or after printing, to allow for temporary formatting adjustments. Note: To make permanent changes, modify the report via Protocol|Report. If Keep Open After Printing is enabled, the Protect option can be enabled to prevent unauthorized changes to the document. 186 • Protocol Menu User’s Guide to KC4™ Export Select Protocol|Options|Export to select the export engine and define related parameters. • Select the Engine for designing export templates: KC4: This is the standard method for designing export files that KC4 has always provided. The contents are customizable but the appearance is completely controlled by KC4 (you cannot change the font style or size, for example). Word: If your computer has Microsoft® Word 2000 installed on it, you can design export file templates using Word and take advantage of all of its formatting features. Excel: If your computer has Microsoft® Excel 2000 installed on it, you can design export file templates using Excel and take advantage of all of its formatting features. In addition, you can create custom Excel formulas that reference KC4 data. • If you chose Word as the engine, choose a Document Formatting option of Standard or Enhanced. If Standard is selected, document formatting is faster because KC4 does not apply any custom font characteristics from the Plate Layout or Cutoffs dialogs. Well IDs and cutoff symbols are printed using just the default font characteristics. If Enhanced is selected, document formatting is slower because KC4 does apply custom font characteristics to Well IDs and cutoff symbols. • Enter the Export Directory in which to store exported files associated with this protocol. Click Browse to search for and select the desired location. Note: Select the export text file delimiter under System|Setup. • Select Automatic Export after reading to automatically export plate data to a file when the read is complete. If ‘Automatic Save after reading’ is selected, the export file name will match the manually entered file name, the automatically generated file name, or the barcode, depending on the automatic save parameters, and will have a .txt extension. If ‘Automatic Save after reading’ is not selected, the export file name will be NONAME.TXT. • If the export engine is Excel, choose a File Format of Excel, Excel CSV, or Excel Text. User’s Guide to KC4™ Protocol Menu • 187 • Select Keep Open After Exporting to keep the Word or Excel application open after the preview or after exporting, to allow for temporary formula and/or formatting adjustments. (To make permanent changes, modify the export file via Protocol|Export.) If Keep Open After Exporting is enabled, the Protect option can be enabled to prevent unauthorized changes to the document. Calculation Select Protocol|Options|Calculation to select a weighting of standard deviation and tell KC4 whether or not to include out-of-range values in statistics calculations. • • Select an option for the Weighting of Standard Deviation: N-1 Used in calculations where the data is assumed to represent a sample from a larger population. N Used in calculations where the data is assumed to represent the total population from which the sample was taken. Choose whether or not to use out of range values in statistics. Out of range values are those values reported as ‘<xxxx’ or as ‘>xxxx’. Example: SPL1 has three replicates reported with the following concentrations: well A1 : 10.230 well A2 : <10 (out of range value) well A3 : 10.450 If the option is not selected, the software will not use the concentration of well A2 in the statistic calculations. Therefore the mean, standard deviation and CV of SPL1 will be 10.34, 0.155, and 1.5%, respectively. If the option is selected, concentration of well A2 is taken into account (the value of 10 is used in the statistic calculations). Therefore the mean, standard deviation and CV of SPL1 will be reported as <10.22, 0.225, and 2.2%, respectively. Important! Exercise caution when enabling this option, as it can lead to biased results particularly for standard deviation and CV. As a warning, statistic results arising out of the use of this option are displayed in italic in the report. 188 • Protocol Menu User’s Guide to KC4™ Display Menu Overview The Display menu allows you to check the verification status of your data and/or to activate the Biograph module to view, adjust, and otherwise interact with test results as displayed on a curve or set of curves. Curve(s) Select Display|Curves to load Biograph and view the curve or curves generated using the current plate data. This option is available only if the protocol defines a standard curve or dilution curves. • When Biograph is loaded, every curve calculated for the current plate appears in a window. See “Biograph” for information on changing the curve fitting method, deleting standard points, printing the graph, and more. • To quit Biograph and return to KC4, select File|Exit. User’s Guide to KC4™ Display Menu • 189 Calculation Warnings Select Display|Calculation Warnings to view a list of data reduction calculation warnings issued by KC4 against the current set of data. (If this list is empty, KC4 found no errors with the calculations.) Warnings and their probable causes include: • At least one validation condition failed. The protocol defines validation conditions and one or more conditions has failed. Select Display|Validation Results to see the current status of each condition. • Cutoffs are not in increasing order. Symbols can not be determined. The protocol defines cutoff criteria, the results of which are not in increasing order and therefore Symbols (+, -, Pos, Neg, etc.) cannot be determined. For example, if criteria is defined like this: and if CTL1=2.050 and CTL2=1.432, cutoffs are not in increasing order. Select Protocol|Cutoffs to view/modify the criteria. 190 • Display Menu User’s Guide to KC4™ • Data In not available for Multi Plate Transformation #<1, 2, or 3> A multi plate transformation references a data set that no longer exists. Select Protocol|Multi Plate Transformation to choose another data set and then recalculate results. • Data In not available for Single Plate Transformation #<1, 2, or 3> A single plate transformation references a data set that no longer exists. Select Protocol|Single Plate Transformation to choose another data set and then recalculate results. • Data to interpolate are not available. Standards could not be calculated. The data set specified for curve fit calculation may no longer exist. Select Protocol|Curves, Curve Description. If the Data to Interpolate field contains asterisks, this is the case. Choose another data set and recalculate results. • Data to process <#> not available for kinetic calculations. The data set specified for kinetic analysis may no longer exist. Select Protocol|Kinetic Analysis. If the Data to Process (1 or 2) field is empty, this is the case. Choose another data set and recalculate results. • Log Axis cannot be used with a negative or null value. KC4 was unable to calculate the curve because one or both Axes is set to calculate logarithmically and an input value (such as a standard OD) is negative or null. Select Protocol|Curves, Curve Fit to view the current curve parameters. • Not enough valid standards. Each curve fit requires a minimum number of valid standards; either not enough standards are defined in the plate layout, or following results calculation too many standards were determined to be invalid. • Some cutoffs could not be calculated. Symbols could not be determined. The cutoff criteria may reference a data set or well ID that no longer exists, or a referenced well ID may contain an invalid value. Select Protocol|Cutoffs to examine the current criteria. • The archived curve could not be loaded. Path is probably wrong. This message was likely preceded by a "<pathname><filename>.gph was not found" message. If this is the case, the protocol references a stored curve in the location specified in that message. Select Protocol|Curves, Curve Description. Under Curve Origin, if File is selected click Browse to locate the appropriate .gph stored curve file. • The curve fit method is not compatible with the standards. The curve could not be calculated. Every curve fit requires a minimum number of valid standards; there may not be enough valid standards to support the current curve fit. Select Protocol|Plate Layout to add more standard wells or select Protocol|Curves to choose another curve fit and then recalculate results. • The curve is not strictly increasing nor strictly decreasing. The curve is ambiguous; more than one X value was calculated for a particular Y value (ex. more than one concentration was calculated for at least one OD/FU/LU). User’s Guide to KC4™ Display Menu • 191 • There must be at least two valid standards. The plate currently contains only one valid standard and at least two are required to calculate the curve. Check to see if any of the standard wells is currently masked or contains an out-of-range or another non-numeric notation. • Values out of range. Log Axis cannot be calculated. KC4 was unable to calculate the curve because one or both Axes is set to calculate logarithmically and an input value (such as a standard OD) is out of range. Select Protocol|Curves, Curve Fit to view the current curve parameters. Validation Results Selecting Display|Validation Results shows the current status of each of the Validation conditions defined in the protocol: • • The Condition column lists the Validation criteria defined in the protocol. The Status column tells you whether or not each Condition has been met: VERIFIED: The condition has been met. NOT VERIFIED: The condition has not been met and results are therefore suspect. COULD NOT BE EVALUATED: The condition could not be evaluated. This may occur if, for example, a condition refers to an identifier with masked replicate values. • Important! If a validation condition receives the status NOT VERIFIED then the results are suspect. The responsibility for any masking or editing of the data lies with the user. 192 • Display Menu User’s Guide to KC4™ System Menu Overview The options available under the System menu allow you to: • Select the current reader and then set and test communication parameters. • Run an optics test or a universal plate test on the attached microplate reader and view/print/store results. • Configure security settings, set up user accounts, and define protected functions. • Log into and out of KC4. • Set protocol default settings, including report and export engine, and the weighting standard deviation. • Set global parameters, including the import/export text separator and the time format for kinetics. • Customize the arrangement of the toolbar buttons. • Create and maintain microplate measurement information. User’s Guide to KC4™ System Menu • 193 Reader Selection Select System|Readers to select or change the current reader. Important! Be sure to set and test communication parameters before attempting to read a microplate. • Choose a reader from the Available Readers list, then define the Configuration, Port, and Filters/Wavelengths parameters. • Click Port to define communication parameters including Port number, Transmission Speed, Data Bits, Stop Bits, and Parity. • Click Filters/Wavelengths to align KC4’s wavelengths table with the reader’s internal table. • If applicable, click Configuration to define the optical probe size so that it matches the current hardware configuration. • When all parameters are set, click the Current Reader button. KC4 will attempt to communicate with the attached reader. If communication fails, KC4 provides information for solving the problem. Follow the instructions and then try again. Note: If the current reader is set to “Clarity”, the Configuration and Port buttons are dimmed and inaccessible because configuration parameters and port settings can only be accessed through the Clarity™ PC software. The Filters/Wavelengths button is dimmed and inaccessible because it does not apply to the luminometer. Note: If the computer has more than one COM port, you can control more than one instrument at a time by running multiple instances of KC4. See “Controlling Multiple Instruments Simultaneously” at the end of this section for more information. 194 • System Menu User’s Guide to KC4™ Port Selection Use the Port Selection dialog to select the COM port number (1 to 9), and to access additional communication parameters. Clarity™ Microplate Luminometer users: Port settings can only be accessed through the Clarity PC software. See the Clarity Operator’s Manual for more information. • Click the drop-down arrow and select the number that represents the COM Port KC4 should use when communicating with the reader. • Click Setup to define additional communication parameters. Important! It is the user’s responsibility to define the correct parameters, otherwise communication errors will likely occur. Ensure the communication settings match those defined on the reader. Transmission speed: Values commonly accepted by readers are between 2400 and 9600 bps. Data Bits: Options range from 4-8 bits. Parity: Options include No, Odd, Even and Mark. Stop bits: Options include 1, 1.5 and 2 bits. User’s Guide to KC4™ System Menu • 195 Filters/Wavelengths Use the Wavelengths dialog to ensure that KC4’s wavelengths table is aligned with the reader’s internal table. Note: It is essential that you conform to the specific Bio-Tek reader procedures for altering the configuration. When using filter-based readers, it is your responsibility to ensure that correct filters are allocated to their respective positions otherwise incorrect data will result. Clarity™ Microplate Luminometer users: KC4’s Filters/Wavelengths options do not apply to the luminometer. ELx-Series / PowerWave Series / µQuant Note: To exchange wavelength information between KC4 and the instrument, the two must be communicating. The currently selected reader and COM port are displayed at the top of this dialog. If you need to change the COM port, click Cancel now to exit this dialog and then click the Port button. KC4’s currently-defined Wavelength values are displayed in nanometers in fields 1 through 6. The settings here will be made available as default selections within the Protocol|Reading Parameters dialog. • To change, download, and calibrate wavelength values, entered the desired values in these fields and then click Send Wavelengths. The values will be downloaded to the instrument, overwriting its existing wavelength table. • To retrieve wavelength values from the instrument, click Get Wavelengths. The values will be uploaded to KC4, overwriting the values in this dialog. 196 • System Menu User’s Guide to KC4™ FL600™ KC4 cannot automatically retrieve the wavelength information from the FL600, therefore this information must be entered manually. Consult the Order Entry Form that was shipped with the unit to determine which filters were originally installed. If this information cannot be found, note the reader serial number then contact Bio-Tek Instruments. Tip: If the exact filter setup is unknown, you can remove the FL600’s shroud to examine the filters in the Excitation and Emission filter wheels. The filters should be imprinted with the wavelength and bandwidth. Refer to the FL600 Hardware Guide for instructions. • A - F represent the 6 filter positions on the Excitation and Emission filter wheels. Excitation refers to the light directed at the sample in the well. Emission refers to the light emitted by the sample in the well. • Center is the center wavelength, in nanometers, of the installed filter. • Bandwidth is the filter bandpass width, in nanometers (nm), of the installed filter (does not apply to absorbance filters). Example: The Excitation/Center setting of 485/20 refers to a center wavelength of 485 nm with a the total bandpass of 20 nm. This combination will transmit light from 475 to 495 nm (10 nm on either side of the center). • A check in the Absorb. column informs the software that the corresponding filter is an absorbance filter. If at least one Absorb. box is checked, the ‘HOLE’ notation appears in the Center field for Excitation position F. Note: It is not advised to check Absorb. for fluorescence filters because the bandpass is not fixed at 8 to 10 nm but can be as wide as 50 nm or more. Some fluorescence filters with narrower bandpasses, however, might be able to function as absorbance filters. • A check in the Lum. column informs the software that the corresponding filter will be used for luminescence reading. If at least one Lum. box is checked, the ‘PLUG’ notation appears in the Center field for the Excitation position E. Note: When a Lum. box is checked, its corresponding Bandwidth field is not disabled, although the bandwidth is not used during luminescence plate reading. User’s Guide to KC4™ System Menu • 197 FLx800™ The FLx800 has one four-position excitation wheel and one four-position emission filter wheel. Each filter wheel can contain any combination of filters, plugs, and empty locations, depending on assay requirements. Use this dialog to specify the exact contents of each filter wheel. The settings here will be made available as default selections within the Protocol|Reading Parameters dialog. Important! It is essential that you conform to the specific Bio-Tek instrument procedures for altering the filter wheel configuration. The FLx800 does not automatically detect which filters (if any) are installed. Therefore, it is your responsibility to ensure that KC4’s wavelength table exactly matches the contents of each filter wheel. For instructions for physically changing filters, see the FLx800 operator’s manual. Note: To exchange wavelength information between KC4 and the reader, the two must be communicating. The currently selected reader and COM port are displayed at the top of this dialog. If you need to change the COM port, click Cancel to exit this dialog now and then click the Port button. To change the current settings and download them to the instrument: • Enter wavelength values in the Center fields, or use the drop-down boxes to select PLUG or HOLE. ‘PLUG’ indicates a solid plug in the filter wheel. A plug in the Excitation filter wheel is typical for luminescence assays, to prevent ambient light from entering the measurement chamber. ‘HOLE’ indicates an empty location in the filter wheel. An empty location in the Emission filter wheel is typical for luminescence assays. • For each Center wavelength value, enter its accompanying Bandwidth. Note: This information is printed on the side of each filter. See the FLx800 operator’s manual for details. ‘Bandwidth’ is the filter bandpass width, in nanometers, of the installed filter. For example, the Center/Bandwidth combination of 485/20 will transmit light from 475 to 495 nm (10 nm on either side of the center). • When all values have been entered, click Send Filters. The values will be downloaded to the instrument, overwriting its existing wavelength table. To retrieve filter wheel settings from the instrument: • Click Get Filters. The values will be uploaded to KC4, overwriting the values in this dialog. 198 • System Menu User’s Guide to KC4™ Synergy™ HT (Absorbance) The Synergy HT performs absorbance reads in the range of 200 to 999 nm. Use this dialog to specify and calibrate six wavelengths to be made available as default selections within the Reading Parameters dialog. Note: To exchange wavelength information between KC4 and the instrument, the two must be communicating. The currently selected reader and COM port are displayed at the top of this dialog. If you need to change the COM port, click Cancel to exit this dialog now and then click the Port button. KC4’s currently defined wavelength values are displayed in fields 1 through 6. • To change, download, and calibrate wavelength values, entered the desired values in these fields and then click Send Wavelengths. The values will be downloaded to the instrument, overwriting its existing wavelength table. • To retrieve wavelength values from the instrument, click Get Wavelengths. The values will be uploaded to KC4, overwriting the values in this dialog. User’s Guide to KC4™ System Menu • 199 Synergy™ HT (Fluorescence/Luminescence) The Synergy HT instrument has one four-position excitation wheel and one four-position emission filter wheel. Each filter wheel can contain any combination of filters, plugs, and empty locations, depending on assay requirements. Use this dialog to specify the contents of each filter wheel. The settings here will be made available as default selections within the Reading Parameters dialog. Important! It is essential that you conform to the specific Bio-Tek instrument procedures for altering the filter wheel configuration. The Synergy HT does not automatically detect which filters (if any) are installed. Therefore, it is your responsibility to ensure that KC4’s wavelength table exactly matches the contents of each filter wheel. For specific instructions on changing filters, see the Synergy HT Operator’s Manual. Note: To exchange wavelength information between KC4 and the instrument, the two must be communicating. The currently selected reader and COM port are displayed at the top of this dialog. If you need to change the COM port, click Cancel to exit this dialog now and then click the Port button. To change the current settings and download them to the instrument: • Enter wavelength values in the Center fields, or use the drop-down boxes to select PLUG or HOLE. ‘PLUG’ indicates a solid plug in the filter wheel. A plug in the Excitation filter wheel is typical for luminescence assays, to prevent ambient light from entering the measurement chamber. ‘HOLE’ indicates an empty location in the filter wheel. An empty location in the Emission filter wheel is typical for luminescence assays. • For each Center wavelength value, enter its accompanying Bandwidth. This is the filter bandpass width, in nanometers, of the installed filter. For example, the Center/Bandwidth combination of 485/20 will transmit light from 475 to 495 nm (10 nm on either side of the center). The bandwidth is printed on the side of each filter. See the SynergyHT Operator’s Manual for details. • When all values have been entered, click Send Filters. The values will be downloaded to the instrument, overwriting its existing wavelength table. 200 • System Menu User’s Guide to KC4™ To retrieve filter wheel settings from the instrument: • Click Get Filters. The values will be uploaded to KC4, overwriting the values in this dialog. Special filter position requirements for the Synergy™ HT with Injectors model: • For Read & Dispense protocols, KC4 offers an option to block the light between measurements to inhibit photo bleaching. Single filter set protocols: If light blocking is enabled, a blocking filter (Plug) must be placed in the excitation filter wheel in one of the two positions next to the excitation filter that is specified in the protocol. Dual filter set protocols: If light blocking is enabled, two blocking filters (Plugs) must be placed next to each other in the excitation filter wheel. Reader Configuration KC4 provides probe size information for some readers via the Reader Configuration dialog. Clarity™ Microplate Luminometer users: KC4’s Reader Configuration parameters do not apply to the luminometer. The contents of this dialog vary depending on the currently selected reader. The following parameters/options may be available: • The Absorbance Probe size field displays the diameter of the absorbance probe. • The Top Probe size field displays the diameter of the top probe. If the reader is an FL600™, use the drop-down list to choose the size. • The Bottom Probe size field displays the diameter of the bottom probe. If the reader is an FL600, use the drop-down list to choose the size. • If supported by the reader, click the Get Probe Sizes button to retrieve the size(s) of the probe(s) currently installed in the attached reader. User’s Guide to KC4™ System Menu • 201 Dispenser Configuration For the Synergy™ HT with injectors, KC4 provides access to special configuration functions and settings. Initializing the Dispenser If the dispenser module was connected before the reader was turned on, or if a system test was run, the dispenser should initialize automatically. If for any reason the dispenser does not initialize automatically, you can initialize it from KC4. This may be necessary if the module was connected to the reader after the reader was turned on, or following the installation of a new syringe. To initialize the dispenser: • In KC4, select System|Readers, click the Configuration button, and then click the appropriate Dispenser tab (#1 or #2). • Click the Initialize button. The syringe drive will move to its home position and its sensors will be verified. Upon successful completion, the Status should show “Initialized.” 202 • System Menu User’s Guide to KC4™ Setting the Injector Position The instrument dispenses fluid using two injectors. The injector heads can be positioned to dispense fluid from three possible locations: two adjacent to the top probe and one above the bottom probe. The default positioning is one adjacent to the top and one above the bottom. Moving the injector head from one position to another must be done manually (see the Synergy™ HT Operator’s Manual for instructions). After making an adjustment, the new position(s) must be configured in KC4 for recognition by the reader. To configure the injector positions in KC4: • In KC4, select System|Readers, click the Configuration button, and then click the appropriate Dispenser tab (#1 or #2). • Click the radio button corresponding with the current physical injector head position, Next to Top Probe or Above Bottom Probe. • Click OK to save the change and close the dialog. Syringe Setup KC4 provides access to special syringe setup functions for maintenance and calibration purposes. Important! Do not change the syringe positions or calibrate the dispensers unless instructed to do so as part of installation, upgrade, or maintenance. Moving a Syringe to its Maintenance Position If a syringe needs to be installed or replaced, it must first be moved to its Maintenance Position. To do this using KC4: • In KC4, select System|Readers, click the Configuration button, and then click the appropriate Dispenser tab (#1 or #2). • Click Move Syringe to its Maintenance Position. • The syringe plunger will move to its furthest-from-home position. The syringe can then be disconnected form the drive bracket and unscrewed from the valve (see the Synergy HT Operator’s Manual for detailed instructions.) • Click OK to close the dialog. User’s Guide to KC4™ System Menu • 203 Controlling Multiple Instruments Simultaneously If the computer has more than one COM port, more than one instrument can be controlled at a time by running multiple instances of KC4. Important! Please review the items under “Technical Issues” before attempting to control multiple instruments simultaneously. To control multiple instruments simultaneously: • Connect the instruments to the computer, one per COM port. • Launch a single instance of KC4. • Open System|Readers. • Select a reader model, define and test its Port settings, then set up its Filter/Wavelengths table. Repeat for each attached reader. • Once communication is established for all attached readers, launch additional instances of KC4 (one per reader). • Create, open, and run protocols within each KC4 instance. Technical Issues The use of certain functions is restricted when running multiple instances of KC4. These restrictions are in place to maintain integrity with respect to communication, data retrieval, data reduction, and reporting. When running multiple instances of KC4: • Individual KC4 instances must control unique reader models. For example, KC4 cannot control two ELx808 instruments at the same time. KC4 can control an ELx808 instrument and an ELx808-I instrument at the same time. • Under System|Readers a new Current Reader can be set but its communication and filter/wavelength parameters cannot be changed. • Software filter/wavelengths tables cannot be updated at any time. For example, clicking the Calibrate button from within the Protocol|Reading dialog generates an error message. • System|Setup parameters cannot be modified. • System|Users parameters cannot be modified. • System|Plate Formats parameters cannot be modified. • Only one PowerReports document can be edited/printed at a time. 204 • System Menu User’s Guide to KC4™ Diagnostics The Optics Test and Universal Plate Test should be performed routinely to validate and document the consistency of a reader’s optical and electronic performance, alignment, accuracy, reproducibility, and linearity. Optics Test The Optics Test (also referred to as the “System Test”) validates and documents the consistency of reader optical and electronic performance. For most readers, this test can be performed from within KC4. To perform an Optics Test for all readers except the Clarity™ and the FL600™: • Ensure that the reader is properly connected to the computer, and that all communication parameters are set correctly. • Select System|Diagnostics|Run Optics Test. The Run Optics Test dialog appears. • Enter the reader serial number, then click Start to run the test. When the test is complete, the Identification dialog appears: Enter the From, Company, Telephone, Fax Number, and Comments as appropriate. Click OK to continue. KC4 displays the results and then saves them in a database in the KC4 folder. User’s Guide to KC4™ System Menu • 205 Optics Test History Following each Optics Test, KC4 saves the test results in a database (CALIB.MDB), located in the KC4 folder. To view historical Optics Test results: • Select Setup|Diagnostics|Optics Test History. The Optic Test History dialog appears: To view a list of tests for a specific reader, click the Reader drop-down arrow. To view a list of tests for a specific operator, click the Operator drop-down arrow. To view test results, highlight the desired date/time from the list then click View. To permanently delete test results from the database, highlight the desired date/time from the list, then click Delete. System Test (Clarity) The System Test for the Clarity™ Microplate Luminometer must be performed using the Clarity PC software. Refer to the Clarity Operator’s Manual for instructions. Optics Test (FL600) To perform an Optics Test with the FL600™: • Ensure that the reader is properly connected to the computer, and that all communication parameters are set correctly. • Select System|Diagnostics|Optics Test. • The FL600 Reader Diagnostics dialog will appear. Click Start to run the test. • As each individual test completes, its pass/fail status appears on the display. • When the tests are complete, the results will resemble the following: 206 • System Menu User’s Guide to KC4™ Click View Report to see a complete listing of commands exchanged between KC4 and the FL600 during the diagnostic procedures. This report can be printed and faxed to Bio-Tek for help with technical support. Click Close to close the dialog and return to the main display. Test results are automatically saved in a database in the KC4 folder. Universal Plate Test The Universal Plate Test uses Bio-Tek’s Universal Calibration Test Plate to validate and document the consistency of an absorbance reader’s alignment, accuracy, reproducibility, and linearity. Every Bio-Tek Universal Test Plate comes with a Calibration Test Plate data sheet. The data sheet lists the expected absorbance reading for each location in the test plate at several different wavelengths. This data must be entered into KC4 before the Universal Test Plate can be used. To define Universal Test Plates: • Select Setup|Diagnostics|Define Universal Plates. The Define Universal Test Plates dialog appears, listing the currently defined test plates by serial number. To modify an existing plate, highlight the desired serial number then click Modify, or to add a new plate, click Add. User’s Guide to KC4™ System Menu • 207 The Edit Universal Plate dialog appears: If this is a new plate, select the Plate Type then enter its Serial Number. The top row of the wavelength grid shows eight unique wavelengths for use with the Universal Plate Test. The default wavelengths correspond with the calibration test plate data sheet. To modify one or more of these wavelengths click Wavelength List. Refer to the calibration data sheet that came with the test plate to determine the expected OD for each test well at each wavelength. For each Location (C1, D4, E2, F5, G3, H6), enter the OD associated with that well at each wavelength. For readers that support spectral scanning, a Peak Wavelength value is required. Enter the value in nanometers (nm) . Click OK to save the changes and close the dialog, or Cancel to close the dialog without saving changes. To run the Universal Plate Test: • Ensure that the reader is properly connected to the computer, and that all communication parameters are set correctly. • The reader should be equipped with the necessary filters to perform the test. Refer to the calibration data table that came with the test plate to determine the required wavelengths. • Select System|Diagnostics|Run Universal Plate Test. 208 • System Menu User’s Guide to KC4™ The Run Universal Plate Test dialog will appear. Enter the Serial Number of the reader under test, or click the drop-down arrow to choose an existing number. Click the Universal Plate drop-down arrow to select the test plate to be used. If the desired test plate is not in the list, select Setup|Diagnostics|Define Universal Plate to define a new test plate. If supported by the reader, the Peak Absorbance Search option is available. If the box is checked, the Peak Absorbance Search is performed in addition to the standard Universal Plate Test. Choose the wavelength(s) to be included in the test by clicking the required cells in the Test (Yes/No) column. Click in a cell to toggle Yes/No. Note: If ‘N/A’ appears for a wavelength that you want to test, update the reader’s filter/wavelength table to include the wavelength. Enter the Operator name, or click the drop-down arrow to choose an existing name. Enter Comments pertaining to this plate test (optional). Click Run Test to begin. Follow the directions provided for loading and turning the test plate. When the test is complete, KC4 displays the results and then saves them in the CALIB.MDB database in the KC4 folder. User’s Guide to KC4™ System Menu • 209 Universal Plate Test History Following each Universal Plate Test, KC4 saves the test results in a database (CALIB.MDB), located in the KC4 folder. To view historical Universal Plate Test results: • Select Setup|Diagnostics|Universal Plate Test History. The Universal Plate Test History dialog will appear. To view a list of tests for a specific reader, click the Reader drop-down arrow. To view a list of tests for a specific operator, click the Operator drop-down arrow. To view test results, highlight the desired date/time from the list then click View. To permanently delete test results from the database, highlight the desired date/time from the list, then click Delete. 210 • System Menu User’s Guide to KC4™ Security KC4 provides several security options to help protect the system and its data from intentional or inadvertent harm or loss. Select System|Security to view or edit these options: Up to six feature tabs are available within the Security dialog. Availability depends on the current KC4 license and whether or not the System Administrator is logged in. KC4 v3.4 KC4 Signature Users Edit the Administrator’s password. Edit the Administrator’s password. Establish and edit individual user accounts and enable or disable Multi-User Identification. Login (does not apply) Enable and define various Login and Password parameters for application in a multi-user environment. Protected Functions Determine which KC4 functions shall be protected from use when the Administrator is not logged in. Determine which KC4 functions shall be protected from use by Standard Users. Audit Trail (does not apply) Enable or disable the appearance of an Audit Trail Notification dialog each time an event is logged to a Data or Protocol Audit Trail, or to the System Audit Trail. Signature Reasons (does not apply) Define a list of terms for users to choose from when signing files, to explain why they are signing. Files Select a Preferred Data File format. Enable or disable the Secured Protocol and Data File Storage feature and select a Preferred Data File format. User’s Guide to KC4™ System Menu • 211 User Accounts This feature only applies to KC4 Signature A significant component of a secure software environment is the ability to create individual user accounts to ensure that only authorized users can gain access to the system and to any restricted functions. KC4 Signature’s Multi-User Identification feature allows a site-designated System Administrator to create and maintain user accounts. Multi-User Identification is automatically enabled upon KC4 Signature software installation, and it must remain enabled to ensure 21 CFR Part 11 compliance. If, however, you wish to disable this feature, select System|Security and uncheck the Multi-User Identification box. This action will cause all user accounts, except the Administrator’s, to be permanently deleted. When Multi-User Identification is disabled, users are not required to login to KC4 but the Administrator can still log in and perform the following tasks: • Change the Administrator’s password • Define system-level protected functions • Set audit trail notification options • Enable or disable the Secured Protocol and Data File Storage feature • Select a Preferred Data File Format 212 • System Menu User’s Guide to KC4™ Creating and Modifying User Accounts (Administrator) To create or modify a user account: 1. Login as the System Administrator. 2. Select System|Security and click New, or highlight the desired account name and click Edit. The KC4 User Settings dialog will appear: 3. Enter a unique ID using 1 to 16 alphanumeric characters. The user will enter or select this ID when logging into KC4 and when signing files. 4. Enter the user’s Full Name. This name will be associated with events logged by this user’s actions and with signatures applied by this user. 5. Choose a Group Membership. Standard Users are denied access to protected functions. (The System Administrator determines which functions shall be protected from use by Standard Users.) Power Users are permitted access to protected functions. Power Users cannot administer user accounts or modify Security settings. 6. Enter a temporary password for the user in the New and Confirm fields. Share the password with the user with instructions to change it as soon as possible. 7. (Optional) Specify a folder location from which the user will most often access protocol files. When the user selects Data|New Plate to initiate a plate read, the protocol selection dialog will default to this Protocols Folder. 8. Click OK to save the changes and return to the Security dialog. User’s Guide to KC4™ System Menu • 213 Modifying User Accounts (Standard and Power Users) Standard Users and Power Users are authorized to modify the Password and Protocols Folder fields within their own accounts. (The ID, Full Name, Group Membership, and Status parameters can only be modified by the System Administrator.) To modify your user account, begin by logging into KC4 with your user ID and Password. Once logged in, select System|Security, highlight your name, and click Edit. The KC4 User Settings dialog will appear. To set a new password: 1. Enter your Current password (if one exists). 2. Enter a New password using up to ten alphanumeric characters (no spaces). Note: If the New password field is inaccessible, the correct Current password must first be entered. 3. Enter the new password again to Confirm it. 4. Click OK to save the password and close the dialog. If the message "Password minimum length is not respected" appears, this means that the System Administrator has set a minimum password length between 2 and 10 characters and the password you entered is too short. Important! The System Administrator cannot retrieve your password if you forget it. If you do forget your password, contact the System Administrator to request a temporary one and then change it immediately. 214 • System Menu User’s Guide to KC4™ To specify a Protocols Folder: 1. Using the Browse button, select the folder location from which you will most often access protocol files. When you select Data|New Plate to initiate a plate read, the protocol selection dialog will default to the folder defined here. If no folder is specified, KC4 will default to the most recently-accessed folder. 2. Click OK to save the change and close the dialog. Specifying a Protocols Folder is optional, and is only available if the ‘Secured Protocol and Data File Storage’ feature is in use. Deleting a User Account (Administrator) To permanently delete a user account: 1. Login as the System Administrator. 2. Select System|Audit Trail to see if the user is currently logged into KC4. You can still delete the account but it will not take effect until the user logs out and tries to log back in, or tries to sign a file. 3. Select System|Security. 4. Highlight the desired account name and then click Delete. A confirmatory message will appear; click Yes to confirm or No to cancel the process. Note: The System Administrator’s account cannot be deleted. Changing an Account's Status (Administrator) The Status box within the KC4 User Settings dialog shows whether or not that user’s account is currently locked, and allows the System Administrator to lock or unlock the account. When a user’s account is locked, the user cannot log into KC4 and cannot sign files. A user’s account may become locked through one of three ways: • Intentional lock by the Administrator through this dialog • Automatic lock if the user has exceeded the defined number of successive failed login attempts • Automatic lock if the user’s password has expired To unlock an account, uncheck the Status box and click OK to return to the Security dialog. Click OK again to return to the main view. The change is effective immediately; the unlocked user is now permitted log into KC4 and to sign files. To lock an account, check the Status box and click OK to return to the Security dialog. Click OK again to return to the main view. The change is effective immediately; the locked user is no longer permitted to log into KC4 or to sign files. • Note: If the user is presently logged into another KC4 session, he or she is prevented from signing files but is not automatically logged out. User’s Guide to KC4™ System Menu • 215 Login and Password Parameters This feature only applies to KC4 Signature Select System|Security, Login to access Login and Password parameters. Only the System Administrator is authorized to modify these parameters. Note: The options shown as enabled above must be enabled to ensure 21 CFR Part 11 compliance. The options’ values, however, are site-definable. To set Login parameters: 1. Enable the desired Login parameters by checking the appropriate boxes. 2. Specify the number of successive failed login attempts a user may make before becoming locked out of KC4. This feature only applies to Standard and Power User accounts; the System Administrator’s account cannot become locked. Only the System Administrator is permitted to reinstate locked user accounts. Valid entry range: 2 to 10 attempts. 3. Specify the number of minutes that the KC4 session may remain idle before it becomes locked and users are required to re-login. A session is considered idle if the user is not operating the keyboard or mouse and if the software is not currently controlling an instrument. Valid entry range: 1 to 1440 minutes. Note: For security purposes, KC4 prevents lower-level users from logging in after a higher-level user has been automatically logged out of a session (if a user intentionally logs out, this restriction does not apply). For example, if the Administrator is automatically logged out, only the Administrator is permitted to re-login. If a Power User is automatically logged out, only Power Users and the Administrator are permitted to re-login. If a Standard User is automatically logged out, any valid user may re-login. 216 • System Menu User’s Guide to KC4™ 4. Enable Force user to type ID to require the user to manually type in his or her User ID in the Login and Signature dialogs. Disable this option to permit the user to select his or her User ID from a drop-down list. 5. Click OK to save the changes and close this dialog. To set Password parameters: 1. Enable the desired Password parameters by checking the appropriate boxes. 2. Specify the minimum number of alphanumeric characters required to define a valid password. Valid entry range: 2 to 10 characters. 3. Specify the number of days that a password may be used before it KC4 requires the user to change it. If a user allows a password to expire, his or her account will become locked. Only the System Administrator is permitted to reinstate locked user accounts. Valid entry range: 1 to 10000 days. 4. Specify the number of days in advance of the password expiration date that KC4 should alert the user to the upcoming expiration. Valid entry range: 1 to the Password Expiration value or 30, whichever is smaller. 5. Specify the number of unique passwords that KC4 shall “remember” for each user’s account to prevent that user from defining a recently used password. Valid entry range: 2 to 20 passwords. 6. Click OK to save the changes and close this dialog. User’s Guide to KC4™ System Menu • 217 Protected Functions Select System|Security, Protected Functions to access a list of functions which the System Administrator can protect from use by unauthorized users. Note: The picture below shows all system-level protectable functions; it may or may not represent your present KC4 configuration. KC4 Signature users: The functions shown as protected below must be protected to ensure 21 CFR Part 11 compliance. Checked functions may not be performed by unauthorized users. • With KC4 v3.4, an unauthorized user is anyone other than the System Administrator. • With KC4 Signature, an unauthorized user is one who is designated as a Standard User. 218 • System Menu User’s Guide to KC4™ The following list includes all system-level protectable functions and describes the behavior the unauthorized user can expect from KC4 for each function when it is protected: • Modify Reader Settings: Under System|Readers, the user can change the current reader but cannot alter the Configuration, Port, or Filter/Wavelengths settings. The user will be prevented from changing the current reader or from reading a plate if the action requires an update to KC4’s filters/wavelengths table. • Modify Plate Formats: Under System|Plate Formats, the user can view the dimensions of any plate. The user cannot create, modify, or delete plates. • Modify System Setup: Under System|Setup, the user can view the current Protocol Defaults, Formats, Start-Up, and Database settings. The user cannot modify any of these settings. • Repair/Compact Databases: Under System|Setup, Database tab, the user cannot access the Repair/Compact buttons for the KCShared and KCLocal databases. • Define Universal Plates: Under System|Diagnostics|Define Universal Test Plates the user can view the test plate settings but cannot add, modify, or delete a test plate. The user can run a Universal Plate Test. • Delete Optics tests/Universal Plate tests from history: Under System|Diagnostics|Optics Test History and Universal Plate Test History, the user can view historical test results but cannot delete any of them. The remaining functions are only found in KC4 Signature: • Delete System Audit Trail events after export: Via the Export button within the System|Audit Trail dialog the user can export audit trail events to a text file but cannot select the ‘Delete events after export’ option. • Create Folder (in secured file storage): When ‘Secured Protocol and Data File Storage’ is enabled, the user cannot create new storage folders within the System|Maintain Files, Protocol|Save As, and Data|Save As dialogs. • Rename Folder/File (in secured file storage): When ‘Secured Protocol and Data File Storage’ is enabled, the user cannot rename folders or files within the System|Maintain Files, Protocol|Save As, and Data|Save As dialogs. • Delete/Overwrite Folder/File (from secured file storage): When ‘Secured Protocol and Data File Storage’ is enabled, the user cannot delete or overwrite existing folders or files within the System|Maintain Files dialog. • Move Folder/File (in secured file storage): When ‘Secured Protocol and Data File Storage’ is enabled, the user cannot move folders or files within the System|Maintain Files dialog. • Import File (to secure file storage): When ‘Secured Protocol and Data File Storage’ is enabled, the user cannot import (paste from clipboard or drag-and-drop from another location) folders or files into the System|Maintain Files dialog. • Export File (from secured storage): When ‘Secured Protocol and Data File Storage’ is enabled, the user cannot export folders or files out of the System|Maintain Files dialog. User’s Guide to KC4™ System Menu • 219 Audit Trail Notification Options This feature only applies to KC4 Signature Select System|Security, Audit Trail to enable or disable the appearance of an Audit Trail Notification dialog each time an event is logged to the Data, Protocol, or System Audit Trail. Only the System Administrator is authorized to modify these options. Enabling the User Notification options allows users to enter comments for an event. For example, if a user modifies a protocol’s Plate Layout, the logged event is simply ‘Plate Layout changed.’ If the Protocol Audit Trail notification option is enabled, however, the user can provide additional text that will be logged with the event, such as "Added blank wells A1 and A2". Here is a sample Audit Trail Notification dialog: Here is a sample Protocol Audit Trail showing the comments entered above: 220 • System Menu User’s Guide to KC4™ Signature Reasons This feature only applies to KC4 Signature Select System|Security, Signature Reasons to define a list of terms for users to select from when signing protocols and data files to explain why they are signing. Only the System Administrator is authorized to modify these terms. Here is a sample ‘New Data Signature’ dialog showing the Reason drop-down list: User’s Guide to KC4™ System Menu • 221 File Storage and Format Options Select System|Security, Files to enable or disable the Secured Protocol and Data File Storage feature and to select a Preferred Data File Format. Only the System Administrator is authorized to modify these parameters. Secured Protocol and Data File Storage (KC4 Signature only) If this option is enabled, all protocol, plate data, and global data files are stored inside a secure, shared-access database (named KCShared.mdb by default). • These files can only be accessed from within KC4; they cannot be viewed or otherwise manipulated using separate file management software such as Windows Explorer. • Important: To ensure 21 CFR Part 11 compliance, Secured Protocol and Data File Storage must be enabled. • Clarity™ Microplate Luminometer users: Clarity protocol files (with a BPF extension) cannot be stored in KC4’s Shared Database. See page 77 for more information. Preferred Data File Format When a user chooses to read a plate, the default data file format will be PLA (raw data) or GLB (raw data with protocol parameters), whichever is selected as the Preferred Data File Format in this dialog. • For sites unconcerned with 21 CFR Part 11 requirements, the selection made here is merely a matter of preference (pre-version 3.1 KC4 users may be more comfortable with setting this parameter to .pla). • For 21 CFR Part 11-compliant sites, setting this parameter to .glb will help to streamline the file signing process. 222 • System Menu User’s Guide to KC4™ LogIn/LogOut During typical use with KC4 v3.4, individual users do not log into the software. A System Administrator can optionally log into change the Administrator password, specify protected functions, and specify a preferred data file format. During typical use with KC4 Signature, users must log into KC4 to gain access. Each user is identified by a short User ID, a longer Full Name, and a 2 to 10 character Password (see “User Accounts” on page 212 for more information). In addition, the System Administrator logs in to set up and maintain user accounts, and to customize security options. To log into KC4: 1. Select System|LogIn or System|Administrator LogIn. The Login dialog will appear: With KC4 Signature, the Login dialog also appears each time KC4 is launched. 2. Click the User drop-down arrow and select your User ID. If the User field does not have a drop-down arrow, type the ID directly into the field. 3. Type your Password. For security purposes it will appear as asterisks on the screen. 4. Click OK. KC4 will determine whether or not the User ID / Password combination is valid, and will check to see if your account is "locked" for any reason. If the combination is valid and the account is not locked, KC4’s main view will appear. The system may be configured to automatically lock user accounts after a certain number of successive failed login attempts. If your account is locked, contact the System Administrator. To log out of KC4 v3.4: 1. Select System|Administrator LogOut. Control will return to KC4’s main view and all unprotected functions will become accessible. To log out of KC4 Signature: 1. Select System|LogOut. The Login dialog will appear. KC4’s functions will remain inaccessible until the Administrator or another user logs back in. Recommendation: To maintain a secure environment, log out any time you are away from the computer. The Login dialog will remain on the screen and you (or another user) can log in at any time. The System Administrator may also set KC4 to automatically log out after a set number of minutes if the system is idle. User’s Guide to KC4™ System Menu • 223 Audit Trail This feature only applies to KC4 Signature Select System|Audit Trail to view a list of all system-level events stored in the shared and local databases currently in use (to see which databases are in use, select System|Setup|Database): The System Audit Trail displays Shared and Local events recorded for the following activities: • User login and logout • System security updates (user accounts, login and password parameters, protected functions, audit trail notifications, and file location and format) • Plate format modifications • Universal test plate modifications • Reader settings changes (reader type, probe selection, communication parameters, and filters/wavelengths) • System setup changes (protocol defaults, format settings, start-up options, and database settings) • User-customizable application settings (such as toolbar and window characteristics) A note on event sorting under the Shared tab: The Shared tab displays events recorded by all computers on the network. The date of an event is supplied by the computer on which the event occurs. Because the clocks on different computers are not synchronized, consecutive events on different computers may not be recorded with consecutive dates. Therefore, events under the Shared tab are displayed in the order of their recording in the shared database, not in the order of the event dates. 224 • System Menu User’s Guide to KC4™ Exporting Audit Trail Events System audit trail events can be exported to a text file and optionally deleted from the System Audit Trail. This feature may be used as part of a site’s procedure for archiving past events. Deleting events after export helps to reduce the size of the KCShared and/or KCLocal databases. Important: When audit trail events are exported to a text file, the text file does not reside within KC4’s secure database; it resides as a single file in a user-designated location. It is the site’s responsibility to ensure the security of exported system audit trail event files. To export audit trail events: 1. Select System|Audit Trail. 2. Click the Shared or Local tab. 3. Click Export. The Export Audit Trail Events dialog will appear: 4. Enter a valid date range, in mm/dd/yyyy format. 5. Select a destination folder for the text file. 6. Enter an identifying file name. 7. (Optional) Check Delete events after exportation to permanently remove the events from the audit trail. 8. Click OK to export the events. If events were deleted after export, the System Administrator should do the following to compact the database: 1. Ensure that no KC4 users are currently logged into the shared database. 2. Select System|Setup, Database. 3. In the Shared Database or Local Database area as appropriate, click Repair/Compact, and then click OK. When the process is complete, the database should be smaller in size. User’s Guide to KC4™ System Menu • 225 Maintain Files This feature only applies to KC4 Signature KC4 Signature provides a Windows™ Explorer-style file maintenance utility for working with files stored in the shared database. Authorized users can create folders, move files, delete files, and so on, all within the secure KC4 environment. Events associated with all actions are automatically logged in the System Audit Trail. To access the file maintenance utility, select System|Maintain Files. All files and folders currently stored in the shared database will be displayed: • The Maintain Files dialog contains two frames. The left frame displays the folder/file tree. The right frame displays the contents of the current folder. All changes are made within the right frame. • Click to move up one folder level. • Click to create a new folder. • Click on a folder • Highlight a folder or file and click • Click to update the view to show any folders/files that may have been added by another user after you opened this dialog. • Click the right mouse button to open an editing menu (see “Edit Options” on the next page). 226 • System Menu to open it and view its contents. to delete it. User’s Guide to KC4™ Edit Options Click the right mouse button to open an editing menu: With the options available through this menu, authorized users can: • Export the highlighted item(s) to a user-designated location outside the shared database. • Delete (Cut) the highlighted item(s) and move them to the clipboard. • Copy the highlighted item(s) to the clipboard without deleting them. • Paste (or import) folders and files from the clipboard into the current folder. • Rename the highlighted folder or file. • Delete the highlighted item(s) without first moving them to the clipboard. Exporting Files Protocol, plate data, and global data files residing inside the shared database can be exported out of the database through the Maintain Files dialog. Important: When files are exported out of KC4’s secured database, they will reside on a disk or the network in a user-designated location. It is the site’s responsibility to ensure the security of exported files. To export a file: 1. Select System|Maintain Files. Locate the desired file. 2. Highlight the file, click the right mouse button, and select Export to Disk. The System Administrator can protect the use of the ‘Export’ and ‘Delete Files After Extraction’ functions. If you are trying without success to export and/or delete files, you may not be authorized to do so. User’s Guide to KC4™ System Menu • 227 The Select a Folder dialog will appear. 3. Select the target Drive and Folder (either the local hard drive or a network drive). 4. (Optional) Check Delete files after extraction to permanently remove files from the database after they are exported. 5. Click OK to continue. Files are exported in their proprietary formats. Files can be opened by a KC4 program that does not use the shared database, or they can be imported (pasted from the clipboard) into another shared database. If files were deleted after export, the System Administrator should do the following to compact the database: 1. Ensure that no KC4 users are currently logged into the shared database. 2. Select System|Setup, Database. 3. In the Shared Database area, click Repair/Compact, and then click OK. When the process is complete, the database should be smaller in size. Importing Files Protocol, plate data, and global data files residing outside the shared database can be imported into the database through the Maintain Files dialog. This includes any unsaved files that were automatically saved to a temporary location following a database connection failure. To import a file: 1. Select System|Maintain Files. Locate and make current the folder in which the imported file will reside. 2. Launch Windows Explorer and locate the desired file. 3. Highlight the file, click the right mouse button, and select Copy. 4. Switch back to KC4. Place the cursor inside the Maintain Files dialog, click the right mouse button, and select Paste. The System Administrator can protect the use of the Import function. If you are trying without success to import files, you may not be authorized to do so. 228 • System Menu User’s Guide to KC4™ Registration/Upgrade Twenty one (21) days after installation (when the Trial mode is over), your KC4 software will switch to Demonstration mode unless you enter a valid password. To apply for and enter a password: 1. Select System|Registration. The Registration dialog will appear: 2. If the License Number field is empty, enter the license number provided with your KC4 software package. 3. Click the Registration Card to verify the license number and then open a form. Enter the required information and send the form to Bio-Tek via fax or email. 4. Bio-Tek will respond with a password via fax or email. When you receive your password from Bio-Tek, enter it in the Password field and click OK. KC4 Reinstallation If you are reinstalling KC4, you must fill out and submit a Reinstallation Form to obtain another password. Reinstallation is defined as: • Re-installing a KC4 version on the same PC (for example, after a hard disk replacement). • Un-installing a KC4 version from one PC and installing the same version on another PC. A Reinstallation Form (.doc and .txt formats) complete with instructions can be found in the root KC4 folder. User’s Guide to KC4™ System Menu • 229 Setup Select System|Setup to set various global parameters, including reporting and exporting engines, import/export separator, and startup options. Protocol Defaults Select System|Setup|Protocol Defaults to specify several default settings for new protocols: • Select the default Reporting and Exporting Engines. With KC4’s standard reporting and exporting engines you can customize the contents (and to some extent the appearance) of printed reports and exported plate data. All KC4 users have access to these standard functions. Reporting and exporting with userdesigned Microsoft® Excel 2000 and Word 2000 documents is supported with KC4’s PowerReports feature. For more information on the Word/Excel reporting options, see PowerReports near the end of this manual. If Word was chosen as the reporting and/or exporting engine, choose a Document Formatting option of Standard or Enhanced to tell KC4 how to prepare documents for printing and print previewing. The default selection is Standard. If Standard is selected, document formatting is faster because KC4 does not apply any custom font characteristics from the Plate Layout or Cutoffs dialogs. Well IDs and cutoff symbols are printed using just the default font characteristics. If Enhanced is selected, document formatting is slower because KC4 does apply custom font characteristics to Well IDs and cutoff symbols. 230 • System Menu User’s Guide to KC4™ • • Select the Weighting of Standard Deviation: N-1 Used in calculations where the data is assumed to represent a sample from a larger population. N Used in calculations where the data is assumed to represent the total population from which the sample was taken. Choose whether or not to use out of range values in statistics. Out of range values are those values reported as ‘<xxxx’ or as ‘>xxxx’. Example: SPL1 has three replicates reported with the following concentrations: well A1 : 10.230 well A2 : <10 (out of range value) well A3 : 10.450 If the option is not selected, the software will not use the concentration of well A2 in the statistic calculations. Therefore the mean, standard deviation and CV of SPL1 will be 10.34, 0.155, and 1.5%, respectively. If the option is selected, concentration of well A2 is taken into account (the value of 10 is used in the statistic calculations). Therefore the mean, standard deviation and CV of SPL1 will be reported as <10.22, 0.225, and 2.2%, respectively. Important! Exercise caution when enabling this option, as it can lead to biased results particularly for standard deviation and CV. As a warning, statistic results arising out of the use of this option are displayed in italic in the report. Formats Select System|Setup|Formats to choose an import/export separator and a time format for kinetics. User’s Guide to KC4™ System Menu • 231 • Select an Import/Export Separator (delimiter) for use in export file formats. Choose semi-colon, comma, or tab, or specify a custom separator (such as | ) in the Other field. Before importing a plate data file, ensure that the selected Import/Export Separator matches what is used in the file. • KC4 offers the following Time Formats for Kinetics: HH:MM:SS Average duration kinetics HHH.MM Long duration kinetics SSSS.sss Average duration kinetics, reported in seconds and milliseconds SSSSSSSS Average duration kinetics, reported in seconds sssssssss Fast kinetics, reported in milliseconds When involved in calculations such as Transformations, Cutoffs and Validation conditions, time values are always expressed in milliseconds, regardless of the time formats chosen in the System|Setup menu. If you need to use other units, define a single-plate transformation to make the conversion. When time values are used on the Y axis of a Standard Curve, they are always expressed in seconds. Start-Up Select System|Setup|Start-Up specify behavior each time KC4 is launched. • Specify whether or not to start Word or Excel when launching KC4. Keeping these applications open saves time when creating new report and export templates; you won’t have to wait for them to load each time you make a change. • If you are running KC4 with an external robotic application (such as Bio-Tek’s Bio-Stack PC Control software), click Minimize KC4 when running in OLE mode. When KC4 starts it will automatically minimize, permitting access to the external application. 232 • System Menu User’s Guide to KC4™ Database KC4 uses three different databases for storing information. These databases are secure, meaning that they can only be opened and updated through KC4. • KCShared.mdb contains security and plate format information. With KC4 Signature, this database also contains user accounts; protocol, plate data, and global data files and their associated audit trails; and a system audit trail for shared events. Following installation, KCShared.mdb is stored on the computer’s hard drive but it can be moved to a network location for secure storage and multi-user access. This database may also be copied and renamed (if, for example, your site requires a separate shared database for each project). • KCLocal.mdb contains all of the settings defined by the user under System|Readers and System|Setup. With KC4 Signature, this database also contains an audit trail for local events. KCLocal.mdb is stored on the computer’s hard drive, and it cannot be moved or renamed. • CALIB.mdb contains Optics and Universal Plate Test setup values and saved test results. CALIB.mdb is stored in the root KC4 folder. It cannot be moved or renamed, and there are no special functions associated with it. Select System|Setup|Database to access information and functions related to KC4’s shared and local databases. Shared Database The Shared Database area contains the current location and name of the shared database, a Restore Connection button, and a Repair/Compact button. The Path setting must be changed if the location and/or the name of the KCShared.mdb file changes. For example, following KC4 installation the System Administrator is advised to make a copy of the installed KCShared.mdb file and store the copy on a shared location on the network. To gain access to this shared file, the Path setting must change to reference the network location. • Before changing the Path, a KCShared.mdb file must already exist in the new location; this feature does not create a new KCShared.mdb file. • The shared database name is not required to be KCShared.mdb. If your site requires the use of multiple shared databases (one per project, for example), the file can be renamed via Windows Explorer. The .mdb extension IS required. User’s Guide to KC4™ System Menu • 233 • Tip: With some operating systems, KCShared.mdb is installed in the Application Data folder under \Documents and Settings\All Users. If you are looking for the Application Data folder on your computer and can’t find it, it is probably hidden. To reveal this folder, open Microsoft Explorer and select Tools|Folder Options|View. Make sure that ‘Show hidden files and folders’ is enabled. To change the shared database Path: 1. Click Browse. A standard file open dialog will appear. 2. Locate the desired shared database file and click Open. Control will return to the Database dialog and the Path field will fill in with the new name. 3. Click OK. A confirmatory message will appear, stating that the database change will not take effect until KC4 is closed down and relaunched. “Modify system setup” is a protectable function. If you have tried without success to change the Path, you may not be authorized to do so. Contact your KC4 System Administrator. 4. Click Yes to close KC4. 5. Multi-user sites: Repeat these steps for all computers that use the shared database. The Restore Connection button becomes active after a critical database error is detected (if the database path did not change). This button must be clicked after a critical database error occurs. For example, if the network connection drops while KC4 is open, a critical database error can occur because the shared database is no longer accessible. When the network connection is restored, click Restore Connection to reconnect KC4 with the database. It may be necessary to click the Restore Connection button several times to successfully restore the database connection. If this message appears: • Click Retry to try to restore the database connection again. • Click Cancel to abort the process and regain control of KC4. • Click Quit KC4. Unsaved files will be saved as temporary files on the computer’s hard drive; the pathname will be provided. These files can be renamed and moved using Windows Explorer and optionally imported into the shared database. The Repair/Compact button should be used following these events: • After reconnecting to the shared database following a database error, in case the database has been corrupted. • (KC4 Signature) After System Audit Trail events are exported and deleted, to reduce the size of the database. 234 • System Menu User’s Guide to KC4™ • (KC4 Signature) After files are exported and deleted from the Maintain Files dialog, to reduce the size of the database. • Note: Repair/Compact may only be performed if no other KC4 session is using this file. When Repair/Compact is clicked, KC4 performs a safety backup of the database in its present location (KCShared_yymmdd_hhmmss.mdb) before beginning the repair/compact procedure. Local Database The Local Database area of the Setup|Database dialog contains the current location of KCLocal.mdb and a Repair/Compact button. The Path setting for KCLocal.mdb cannot be changed. If the pathname is larger than the width of the field, click once in the field and press the right arrow button on your keyboard to scroll to the right. Knowing where KCLocal.mdb is stored is useful if your site requires a periodic back up of this file. • Tip: With some operating systems, KCLocal.mdb is installed in the Application Data folder under \Documents and Settings\All Users. If you are looking for the Application Data folder on your computer and can’t find it, it is probably hidden. To reveal this folder, open Microsoft Explorer and select Tools|Folder Options|View. Make sure that ‘Show hidden files and folders’ is enabled. The Repair/Compact button should be used following a KCLocal.mdb database error. When the button is clicked, KC4 performs a safety backup of the database in its present location (KCLocal_ yymmdd_hhmmss.mdb) before beginning the repair/compact procedure. User’s Guide to KC4™ System Menu • 235 Database Upgrade Utility Use the Database Upgrade Utility to update Shared, Local, and Calibration databases created with earlier versions of KC4 so that they will be compatible with the current version of KC4. For example, if you are upgrading from KC4 version 3.1 to 3.4, your version 3.1 databases must be converted before they can be used by KC4 version 3.4. This utility runs automatically during installation. It can also be run manually from the System|Setup, Database dialog. To run the Database Upgrade Utility: 1. If possible, identify the locations and names of all databases to be upgraded. 2. Close all other instances of KC4 running on the PC. 3. If upgrading a database located on a network drive, make sure that no other KC4 users are currently accessing that database. 4. Close any open, unsaved KC4 files. 5. Select System|Setup and click the Database tab. 6. Click the Database Upgrade Utility button. KC4 automatically begins a search of the fixed, non-removable drives (e.g., diskette, ZIP, JAZ, and network drives are not automatically searched). KC4 searches for the following files: KCLocal.mdb, KC*.mdb, and Calib.mdb. Note: This automatic search will not find Shared database files if their names do not begin with “KC”. If you know the names and locations of the databases you wish to upgrade, and/or if the databases reside on a drive that is not automatically searched, click the Stop button. When the search is complete, or when the Stop button is clicked, the Database Upgrade Utility dialog appears: • Click the drop-down arrows to see which databases KC4 found. Click on the desired database name to select it for upgrading. • Click the Browse button to search for a database. When the database is located, highlight it and click Open. KC4 will insert the name in the appropriate field (Shared, Local, or Diagnostics). • Click Start Upgrading to begin the process. When prompted, enter the name(s) for the converted databases. (The original databases will remain unchanged). • When the process is complete, restart KC4. The upgraded database(s) will be in use. 236 • System Menu User’s Guide to KC4™ Toolbar The Toolbar contains buttons that, when clicked, allow quick access to KC4 functions. Accessibility of a particular toolbar button depends on whether or not its function may be used in the current environment. For example, the Biograph button is accessible only if results are displayed and a curve has been generated. When KC4 is installed, the toolbar contains a set of default buttons. These buttons can be customized by selecting System|Toolbar. • To add a button to the toolbar, highlight the desired button under Available Toolbar Buttons, then click Add. • To remove a button from the toolbar, highlight the button under Current Toolbar Buttons, then click Remove. • To change the position of a button in the Current toolbar list, highlight it then click Move Up or Move Down. • To restore the toolbar to its default buttons, click Reset. • To save the changes and update the toolbar, click Close. On most displays, the toolbar can easily display up to 16 icons. All possible icons are shown and described below and on the following pages: Create a protocol using the Protocol Wizard. This is offered as an alternative to using the Protocol Menu. (Protocol|Wizard) Initialize memory for a New data file. Click this button before reading a plate. (Data|New) User’s Guide to KC4™ System Menu • 237 Read a plate (or enter data manually, or read data from a file). Before clicking this button, ensure that the reader is connected to the computer, and that the communication parameters are properly configured. (Data|Read Plate) Save a data file. Plate data files (raw data) use the extension *.PLA. Global data files (raw data + protocol parameters) use the extension .GLB. Selection of the target directory is possible using the Browse facility. (Data|Save) Sign a data file. In a multi-user system, global data files (raw data + protocol parameters) can be electronically signed. (Data|Sign) Print the results report. The appearance of the button depends on the Report Engine setting under Protocol|Options (Excel, Word, or KC4). Report templates are created under Protocol|Report. (Data|Print) Preview the results report before printing. The appearance of the button depends on the Report Engine setting under Protocol|Options (Excel, Word, or KC4). Report templates are created under Protocol|Report. (Data|Print Preview) Export the plate data to a file. The appearance of the button depends on the Export Engine setting under Protocol|Options (Excel, Word, or KC4). Export templates are created under Protocol|Export. (Data|Export) Enter Sample IDs associated with the plate. This can be done before a plate is read, or after a plate read when results are displayed in KC4. (Data|Samples) Define the text to replace the prompts in the Data|Plate Description and Data|Read Plate dialogs. (Protocol|Plate Description) Define or modify reading parameter settings. If this button is inaccessible, select Protocol|New Protocol to select a protocol type, then click Settings to define the reading parameters. (Protocol|Reading) Configure the plate Layout by assigning a meaningful identifier to each well. Typical identifiers include “BLK”, “STD”, and “SPL”. Standard concentrations and dilutions are also defined here. (Protocol|Plate Layout) For kinetic, spectrum, or scanning protocols, define related Analysis parameters for data reduction. (Protocol|<type> Analysis) Define or modify Single Plate Transformations to perform calculations within the same plate/data set. Typical uses include using specific wells as local blanks for other wells and calculating ratios between wells. (Protocol|Single Plate Transformations) Define or modify Multi Plate Transformations to perform calculations utilizing more than one plate/data set. For example, create a multi plate transformation to subtract the 630 nm measurement values from the 405 nm measurement values in all wells. (Protocol|Multi Plate Transformations) 238 • System Menu User’s Guide to KC4™ Define or modify Curve fitting parameters. Configurable parameters include Data to Interpolate, Curve Fit Method, and Interpolation values. This button is available if well identifiers with concentrations or dilutions are defined in the Plate Layout. (Protocol|Curve) Define up to five sets of Validation criteria to assess the suitability of select wells. If the criteria are not met, KC4 generates a warning to indicate that results are suspect. (Protocol|Validation) Define Cutoffs to screen selected data into defined categories based on fixed or variable threshold limits. During data reduction, results are evaluated against the cutoff criteria and each well is assigned a user-defined symbol. (Protocol|Cutoffs) Create a report template. The appearance of the button depends on the Report Engine setting under Protocol|Options (Excel, Word, or KC4). The template is stored with the protocol when it is saved. (Protocol|Report) Create an export template. The appearance of the button depends on the Export Engine setting under Protocol|Options (Excel, Word, or KC4). The template is stored with the protocol when it is saved. (Protocol|Export) Define various protocol options including the report and export engines, and automatic save, append, report, and export procedures. (Protocol|Options) Specify which functions in the currently open protocol shall be protected from use by unauthorized users. (Protocol|Security) Open the Maintain Files dialog to create folders, move files, delete files, and so on, within the shared database. (System|Maintain Files) Launch the Biograph application to view the calculated curve(s). This button is accessible only if results are displayed and a curve has been successfully generated. (Display|Curve) Control the attached reader’s door/carrier movement or incubation. This button is accessible only if these functions are supported by the current reader. (System|Reader Control) User’s Guide to KC4™ System Menu • 239 Plate Format This dialog lists all of the plate types currently stored in the shared database. For each plate type, the database contains formatting information such as width, length, height, and the number of rows and columns. When a plate read is initiated, KC4 checks to see which plate type is selected in the Reading Parameters dialog and then sends the appropriate formatting information to the reader. The reader uses this information to precisely position the plate when taking measurements. Not all readers support all of the plate formats in this list. Consult your reader’s operator’s manual for a list of supported plate sizes. KC4 comes with format information for more than forty industry-standard microplates. You can add your own microplates by selecting System|Plate Formats: The Plate Formats dialog lists the currently defined plate types. • To add a new plate, click New. • To modify a plate, highlight the plate name and click Modify. Warning! Modifying the dimensions of the installed plate types is not recommended; consider adding a new plate type instead. Please contact Bio-Tek with any questions regarding the current dimensions. • To view the format information for any plate, highlight the plate name and click View. • To delete a plate, highlight the plate name and click Delete. • To export plate format information to a text file, click Export. The export function is useful if you wish to add custom plate formats from earlier KC4 versions. See “Exporting/Importing Plate Formats” for more information. • To import the contents of an external plate database file (either a .txt or a .pld file), click Import. The import function is useful if you wish to work with custom plate formats created with an earlier KC4 version. See “Exporting/Importing Plate Formats” for more information. 240 • System Menu User’s Guide to KC4™ Plate Description When creating or modifying a plate, information is entered in the Plate Description dialog: • Name stores descriptive, unique text appropriate for the microplate. This name appears in the Plate Type selection list within the Reading Parameters dialog. • Manufacturer stores the name of the microplate manufacturer. • Catalogue # stores the microplate identification number. • Length is the longest dimension of the plasticware (the x axis). • Width is the shorter dimension of the plasticware (the y axis). • Top Left X is the distance from the left side of the plate to the center of well A1. • Top Left Y is the distance from the top of the plate to the center of well A1. • Bottom Right X is the distance from the left side of the plate to the center of the last well on the plate. In the case of a 96-well plate, this would be H12. • Bottom Right Y is the distance from the top of the plate to the center of the last well on the plate. In the case of a 96-well plate, this would be H12. • Nb Columns is the number of vertical columns of wells when viewing the plate in its normal orientation. In the case of a 96-well plate, this would be 12. • Nb Rows is the number of horizontal rows of wells when viewing the plate in its normal orientation. In the case of a 96-well plate, this would be 8. • Well Diameter is the diameter of any well. • Height is the distance from the bottom mounting surface of the plate to the top face of the plate. User’s Guide to KC4™ System Menu • 241 Microplate Measurement When creating or updating plate dimensions, it is essential that precise measurements be taken. Use calipers with precision to 0.01 microns to gather the following measurements. A standard ruler is not precise enough. Important! Dimension values are used by the software to calculate reading positions. Any inaccuracies in these dimensions could significantly affect your results. The following diagram demonstrates the proper method for taking measurements for a standard 96-well plate. Top Left X Diameter Top Left Y Width Bottom Right Y Bottom Right X Length Exporting/Importing Plate Formats If the following message appears when opening a protocol created with a 3.0x/2.x version of KC4, the protocol references a custom plate format not currently found in KC4: If you wish to work with 3.0x/2.x protocols that reference custom plate formats, you have two options: #1 Export the current plate format information into a text file, manually add the custom plate format(s) to this file, and then re-import the file back into the shared database. This will both preserve your current plate format information and add the custom plate formats. #2 Import the plate database (KC4_32.pld) from the earlier KC4 version. Warning! This will overwrite the current plate format information in the shared database. 242 • System Menu User’s Guide to KC4™ To manually update KC4 with the custom plate formats from the earlier KC4 version (option #1): 1. Locate the KC4_32.pld file containing the desired custom plate formats (this file can be found in the root KC4 3.0x/2.x folder). Open this file using a text editor such as Notepad. Keep this file open in the background. 2. Launch KC4 v3.4 / KC4 Signature. 3. Select System|Plate Formats and click Export. The Export plate database as dialog will appear. Tip: If the Plate Formats option is not available in the System Menu, this means that the currently selected reader does not support customizable plate formats. Select System|Readers and choose a more appropriate reader. 4. Using the file tree, choose a target location. Enter an identifying file name and click Save. 5. Open this file using a text editor such as Notepad. 6. Switch to the open KC4_32.pld file. Locate the custom plate format; it will resemble the following: 7. Highlight the entire line, click the right mouse button, and select Copy. 8. Switch to the open <plate database>.txt file. Scroll to the end and place the cursor on the first available blank line. Click the right mouse button and select Paste. The custom plate format should appear. 9. Save the <plate database>.txt file and close it. Return to KC4. 1034789489=Custom Format 1;126570,84830;25150,22860,102310,61740;2,3;34990;Bio-Tek;12345 10. Within the System|Plate Formats dialog, click Import. Locate the modified <plate database>.txt file and click Open. The Plate Formats list will update to show the contents of this file. Important: KC4 does not verify that the imported file has a valid structure or contains valid values. It is the user’s responsibility to verify the structure and content of the plate formats after they have been imported. 11. Click OK to return to the main view. Note: KC4 version 3.02 introduced a new Plate Height dimension for plate formats. This is the distance from the bottom mounting surface of the plate to the top face of the plate. If you are importing a plate database from an earlier KC4 version, be sure to measure the plate height and add it via the Modify button in the Plate Formats dialog. User’s Guide to KC4™ System Menu • 243 To import the plate database from the earlier KC4 version (option #2): 1. Launch KC4 v3.4 / KC4 Signature. 2. Select System|Plate Formats and click Import. The Select plate database file to import dialog will appear. Tip: If the Plate Formats option is not available in the System Menu, this means that the currently selected reader does not support customizable plate formats. Select System|Readers and choose a more appropriate reader. 3. Set Files of Type to ‘KC4 3.0x/2.x Plate Database (*.pld)’. 4. Use the file tree to locate the KC4_32.pld file from the previous KC4 version, and then click Open. The Plate Formats list will update to show the contents of this file. Important: KC4 does not verify that the imported file has a valid structure or contains valid values. It is the user’s responsibility to verify the structure and content of the plate formats after they have been imported. 5. Click OK to return to the main view. Note: KC4 version 3.02 introduced a new Plate Height dimension for plate formats. This is the distance from the bottom mounting surface of the plate to the top face of the plate. If you are importing a plate database from an earlier KC4 version, be sure to measure the plate height and add it via the Modify button in the Plate Formats dialog. 244 • System Menu User’s Guide to KC4™ Reader Control If supported by the current reader, Reader Control is available under the System menu. This feature can be used to view information about the attached reader, control the reader door or carrier, and to control incubation. Information Before contacting Bio-Tek for technical assistance, use the Information dialog to retrieve the serial number, part number, software version, and basecode checksum from the attached reader. Door/Carrier The Door/Carrier functions are reader-dependent. The attached reader must have robotic capability (such as the ELx808™ or FL600™). • Select Plate In to move the plate carrier into the plate reading chamber and close the door (if applicable). • Select Plate Out to move the plate carrier out of the plate reading chamber and open the door (if applicable). User’s Guide to KC4™ System Menu • 245 Pre-Heating Use the Pre-Heating dialog to set the reading chamber temperature, turn the incubation unit on or off, or to set a timer to beep after a specified duration or when the requested temperature has been reached. • To set the reading chamber temperature, enter the temperature in the Requested field and then check On to begin pre-heating. On enables the incubation unit; the temperature will rise or fall to the Requested temperature, as appropriate. Off disables the incubation unit; the temperature will fall to ambient. • The Actual field reports the current temperature (Celsius) of the incubation unit. • For the FL600™, the Ambient field reports the current temperature of the outside environment, via a sensor located within the reader (refer to the FL600 user manual for sensor location information). • The Total Time field reports the total time elapsed since the On box was checked. Associated with the Total Time field, the Beep after checkbox and field can be enabled to request that KC4 "beep" continuously after a specified duration. The duration begins when the incubation unit is turned on. • The Time since reached field reports the total time elapsed since the incubation temperature has reached the Requested temperature. Associated with the Time since reached field, the Beep after checkbox and field can be enabled to request that KC4 "beep" continuously after a specified duration. The duration begins when the incubation temperature reaches the Requested temperature. • The REACHED indication appears when the incubation temperature has reached the Requested temperature. Note: As the temperature of the incubation unit approaches the Requested temperature, it may take a few minutes to settle within an acceptable tolerance (+/- 0.5° C). During this settling period, the REACHED indication may appear for a few seconds, disappear, then reappear moments later. The Time since reached field will automatically reset to 00:00:00 each time the REACHED indication appears. If the Beep after checkbox associated with Time since reached field is enabled and set to, for example, 10 minutes, KC4 will "beep" 10 minutes after the incubation temperature has consistently settled within +/- 0.5° C of the Requested temperature. 246 • System Menu User’s Guide to KC4™ Dispenser Synergy™ HT with injectors Use the Dispenser dialog to perform dispenser-specific functions such as prime and purge. Priming the Dispenser Before running a Read & Dispense protocol, the syringe(s) and tubing must be primed with the fluid to be used. To prime the dispenser: • Fill the supply bottle with a sufficient volume of the fluid to be used for the prime. • Important! Place the priming plate on the carrier (Bio-Tek PN 7142002). • In KC4, select System|Reader Control and click the Dispenser tab. • Select the Dispenser (1 or 2) associated with the supply bottle. • Enter the volume to be used for the prime, from 5 to 5000 µl. • Select a prime Rate in µl/second. • Click Prime to start the process. • When the process is complete, carefully remove the priming plate from the carrier and dispose of the fluid. Purging the Dispenser KC4 provides a special utility to purge fluid from the dispense tubing and syringes by pumping the fluid in reverse, back into the supply bottle. To purge the dispenser: • In KC4, select System|Reader Control and click the Dispenser tab. • Select the Dispenser (1 or 2) associated with the supply bottle. • Enter the desired purge Volume from 5 to 5000 µl. • Select a prime Rate in µl/second. • Click Purge to start the process. User’s Guide to KC4™ System Menu • 247 Emptying the Tip Prime Trough Read & Dispense protocols can specify a tip prime to compensate for any fluid loss at the dispense tip due to evaporation since the last dispense. Tip priming is performed in a small, removable priming trough located in the left rear of the carrier. The prime trough holds up to 1 ml of liquid and must be periodically emptied and cleaned by the user. The trough must be emptied periodically, and KC4 must be “told” that the trough has been emptied. To empty the tip prime trough: • Carefully remove the trough from the carrier and empty it. • Clean the trough as required by your site and then put it back on the carrier. Refer to the Synergy HT Operator’s Manual for decontamination instructions. • In KC4, select System|Reader Control and click the Dispenser tab. The Tip Prime Vessel value shows KC4’s estimate of how much fluid is in the trough. • Click Dump all Tip Prime Troughs. The Tip Prime Vessel value will reset to 0. Note: If the tip priming trough overflows, refer to the Synergy HT Operator’s Manual for decontamination instructions. Note: When running a Read & Dispense protocol, KC4 may prompt you to empty the tip prime trough. In this case, KC4 will automatically open the System|Reader Control, Dispenser dialog. 248 • System Menu User’s Guide to KC4™ Clarity Control Clarity™ Microplate Luminometer Use the Clarity Control dialog to control the microplate holder, prime the reagent lines and injectors, and control plate heating. Microplate Holder Control The Clarity’s microplate holder can be opened and closed only through software control. • To extend the microplate holder, click Plate Out. • To retract the microplate holder into the reading and heating chamber, click Plate In. Note: Do not forcibly push in or pull out the microplate holder! If for any reason you cannot control the holder using the software, use the Allan key supplied with the instrument to extend or retract the holder. Refer to the Clarity™ Operator’s Manual for more information. Prime The reagent lines and injectors should be primed with the dispensing fluid before running the protocol. Click the Prime button to open the Priming Parameters dialog. Refer to the Clarity Operator’s Manual for complete priming instructions. To prime the injectors: 1. Fill the reagent bottle(s) with the fluid to be dispensed. 2. Access the Priming Parameters dialog. All installed injectors are displayed. Injectors marked by an asterisk (*) have yet to be initialized. Initialization takes place automatically when the injector is used. 3. Click on the injector’s check box. The drop-down list boxes Direction, Volume [µl] and Strokes are enabled. User’s Guide to KC4™ System Menu • 249 4. In the Direction list box select To Mpl. In the Volume [µl] box specify the injection volume, and in the Strokes box specify the number of cycles. The total liquid volume is displayed in the Total Volume column. 5. Click <Prime> to prime the injector(s). Heating The Clarity’s optional incubator is controlled via software. Click the Heating button to access the Temperature Control dialog. Refer to the Clarity Operator’s Manual for complete heating instructions. 250 • System Menu User’s Guide to KC4™ Results Overview When plate reading is complete, or after data has been entered manually or read from a file, KC4 displays the Results as demonstrated below: • Click the Data drop-down arrow to view a different data set. • Click Statistics to view statistical information for the identifiers assigned to this plate. • Check Change to modify one or more raw data values, then click OK to recalculate and revalidate results. Note: The System Administrator can protect the use of the Change function. User’s Guide to KC4™ Results • 251 • Check Mask to mask one or more wells to temporarily exclude them from calculations. Click on the desired well(s) then click OK to recalculate and revalidate results. To unmask a well, click Mask, click on the well, then click OK. Results will automatically recalculate. Important! Masking wells may significantly change or even invalidate the results. The System Administrator can protect the use of this function. • To copy data to another application, highlight the desired wells then select Copy from the Edit menu. Switch to the target application and select a Paste option. • For all instruments except the FL600, a well will contain '?????' if any of the following conditions occurs: The plate layout specifies the contents of a well that is not read. The absorbance value for the well cannot be calculated (absorbance reads only). The RFU/RLU value exceeds 99998 (fluorescence and luminescence reads only). Tip: If many or most of the wells contain '?????' the sensitivity setting in the protocol may be too high. Note: Wells containing ????? are excluded from transformation equations and statistical calculations. • For the FL600™, a well will contain '?????' if the plate layout specifies the contents of a well that is not read, or if the absorbance value for the well cannot be calculated (absorbance reads only). Note: Wells containing ????? are excluded from transformation equations and statistical calculations. • For the FL600™ a well will contain 'OVRFLW' if the absorbance value for a well can be calculated, but it is greater than 4.0 O.D. (absorbance reads only), or if the RFU/RLU value exceeds 99999 (fluorescence and luminescence reads only). Tip: If many or most of the wells contain 'OVRFLW', the sensitivity setting in the protocol may be too high. Note: Wells containing OVRFLW are excluded from transformation equations and statistical calculations. 252 • Results User’s Guide to KC4™ Data Sets The Results data sets presented for viewing depend on the current protocol parameters. Click the Data menu drop-down arrow to choose from a list of available data sets. The following describes just a subset of the many different Results data sets: • Template displays the identifier and any concentration or dilution value assigned to each well under the Protocol|Plate Layout dialog. • M 977 (SP) and M 900 (SP) contain the measurement values of the Sample Plate at 977 nm and 900 nm, respectively (necessary for pathlength correction calculation). • Measurement numbers (M#1, M#2, … M#6) correspond with the wavelength selection order in the Reading parameters dialog. • A data set resembling M#1 405 represents the raw measurement values for the Sample Plate at this wavelength. • A data set resembling M#1 405 Blank represents the measurement values for the Blank Plate at this wavelength. • A data set resembling M#1 405 Corr. represents the corrected values after Blank Plate Subtraction, Blank Wells Subtraction, and/or Pathlength Correction. • The Delta OD data set represents the difference in measurement values between two wavelengths. • The Concentrations data set represents the calculated concentration values. (Launch Biograph to see the curve.) • The Conc./Dil. data set contains values calculated by multiplying the interpolated concentrations by any dilution factor imposed on the concentration. • The Symbols data set contains the cut-off symbols assigned in accordance with the cutoff criteria defined in the protocol. • The Kinetic Curves and Scanning Curves data sets contain the graphical representation of the measurement values in each well. • The results of any single- or multi-plate transformation can be identified by the name defined within the Protocol| Single Plate Transformation dialog or the Protocol|Multi Plate Transformation dialog. For example, if the name of a single plate transformation is '% toxicity' select the '% toxicity' data set to view the results. User’s Guide to KC4™ Results • 253 Concentrations Concentrations are reported if standards are defined in the Plate Layout and the curve generated successfully. • Values outside the range of the standard curve are reported as '<lowest conc.' or as '>highest conc.' where the 'lowest conc.' and 'highest conc.' represent the minimum and maximum concentrations plotted on the standard curve, respectively. Note: These two values may be different than the min/max standard concentrations if an extrapolation factor is applied. See System Menu, Setup, Format for information on using 'out of range' values in statistical calculations. • To calculate values outside the normal limits of the curve, select Protocol|Curves|Axes to increase the Extrapolation Factor. • If a concentration could not be calculated for a well, the ????? symbol is reported. One reason this may occur is if the value exceeds the limits of the standard curve. 254 • Results User’s Guide to KC4™ • Select Display|Curve(s) or click the Biograph toolbar button to view curves: User’s Guide to KC4™ Results • 255 Symbols If Cutoffs are defined in the protocol, the specified set of data is evaluated against the cutoff criteria and each well is assigned a user-defined Symbol. To view the assigned symbols, select the Symbols data set: • If the cutoffs are in increasing order, symbol assignment is determined as follows: Each well is evaluated against the first cutoff. If the value of the well is less than the criteria, then the first symbol is assigned to the well. If the value of the well is greater than or equal to the first cutoff, then it is evaluated against the next cutoff. If the value of the well is less than the next criteria, then the symbol immediately preceding the cutoff criteria is assigned to the well. This process continues until the last cutoff criteria is encountered. If the value of the well is less than the last criteria, then the symbol immediately preceding the last cutoff criteria is assigned to the well. If the value of the well is greater than or equal to the last criteria, then the symbol immediately following the last cutoff criteria is assigned to the well. • If the cutoffs are not in increasing order, the message "Cutoffs are not in increasing order. Symbols can not be determined" appears, and ????? is assigned to every well in the Symbols data set. • ????? may also appear in one or more wells if a cutoff formula references a well ID that is not defined in the Plate Layout, a well that is masked, or a well that is out-of-range or has been failed by the attached microplate reader. • 256 • Results If a well contains OUT- or OUT+ cutoffs are based on concentrations and the well fell below or above the lowest or greatest X value of the calculated standard curve. User’s Guide to KC4™ • Click the Cutoffs button to see the cutoff criteria and the calculated cutoff value(s). Cutoffs Values The contents of the Formulae in this dialog correspond with the Cutoffs defined within the protocol. The calculated value of each cutoff is displayed in the Value column. If a Value is ????? the cutoff could not be calculated. Possible causes include: • A cutoff formula references a well ID that is not defined in the Plate Layout. • A cutoff formula references a well that is masked. • A cutoff formula references a well that is out-of-range or has been failed by the attached microplate reader. Pathlengths Pathlength Correction can be enabled to normalize absorbances to 1 cm. Its use is controlled within the Protocol|Reading parameters dialog. If Pathlength Correction is enabled, KC4 first calculates the pathlength for each well. The absorbance in each well is then divided by the pathlength, resulting in the corrected absorbance. When calculations are complete, KC4 automatically reports the corrected values, available by selecting M 405 Corr., M 630 Corr., etc. from the Data drop down list. You can easily create a Multi Plate Transformation to report the pathlength of each well. You can give the transformation a descriptive name such as "Pathlengths" and the resulting data set will be available from the Data drop down list. To learn how to do this, access KC4’s help system contents and select Results > Data Sets > Pathlengths. Click on “Click here for more information on reporting the pathlength for each well.” User’s Guide to KC4™ Results • 257 Kinetic Data KC4 provides several options for viewing kinetic data. The default view is Kinetic Curves. • Each well displays a graph of the measurement values taken over time. • Hold down the Ctrl key and click on up to 8 wells to overlay the kinetic curves in one display. • Click the Scales button to adjust the data points displayed for each well. The current scaling parameters are shown in the lower left corner of the Kinetic Curves display. • Click the Calculations button to alter the kinetic calculation zone for all wells. • Click on a well to enlarge the view of its kinetic curve: 258 • Results User’s Guide to KC4™ This dialog can display up to 8 overlaid kinetic curves. Kinetic calculations such as Max V, Coeff Reg, Delta t at Max V, and Lag Time associated with the currently selected plot are displayed. Click on the down arrow associated with Selected Curve to choose a different curve. Moving the mouse cursor over a kinetic data point in the currently selected curve will display coordinates for that point. Data displayed can include Read #, OD, and Reading Time. Click on an individual data point to temporarily exclude it from further calculations, then click the Recalculate button to exclude the point from kinetic calculations. Important! Modifying data may adversely affect the final results. To restore an excluded data point, click on the point and then click Recalculate. Click the Options button to adjust the Kinetic Analysis parameters for the curves shown in this dialog. Refer to Kinetic Analysis under “Protocol Reading Parameters” in the Protocol Menu section of this guide for more information. Dispense During Kinetic Read The Synergy™ HT with injectors model provides the ability to dispense fluid into microwells as part of a fluorescence or luminescence Read & Dispense protocol. When the protocol specifies a dispense operation during a kinetic read, the Kinetic Curves display will represent the dispense operation in a box with cross hatches on the Time axis, as shown below. No readings are taken during a dispense operation. User’s Guide to KC4™ Results • 259 Spectral Scan Data The default view for spectral scan data is Spectrum Curves: • Each well displays a graph of the measurement values taken across a wavelength range. • Hold down the Ctrl key and click on up to 8 wells to overlay the spectrum curves in one display. • Click the Scales button to adjust the data points displayed for each well. The current scaling parameters are shown in the lower left corner of the Spectrum Curves display. • Click the Calculations button to alter the spectrum calculation zone for all wells. 260 • Results User’s Guide to KC4™ • Click on a well to enlarge the view of its spectrum curve. The spectrum curve initially contains all values measured at all wavelengths as defined in the protocol. Note: If a data point is "missing" for a particular wavelength, this most likely means that the measurement value over ranged. Spectrum calculations such as Min OD/Max OD and W at Min OD/Max OD, associated with the currently selected plot are displayed. Click on the down arrow associated with Selected Curve to choose a different curve. Moving the mouse cursor over a data point in the currently selected curve will display coordinates for that point. Data displayed can include Wavelength #, OD, and Wavelength value in nanometers. Click on an individual data point to temporarily exclude it from further calculations, then click the Recalculate button to exclude the point from calculations. Important! Modifying data may adversely affect the final results. To restore an excluded data point, click on the point then click Recalculate. Click the Options button to adjust the Spectrum Analysis parameters for the curves shown in this dialog. User’s Guide to KC4™ Results • 261 Area Scan Data The default view for area scan results contains the graphical representation of the measurements taken down and across each well: • To view a different set of data, click the Data drop-down arrow and select Mean OD/RFU/RLU, Std Dev OD/RFU/RLU, or CV OD/RFU/RLU. • Click on a well to zoom in on it: Picture Mode (the default view) is a graphical representation of all measurements taken across the well. Place the cursor over any point in the well to see its value and its X/Y location on the plate. Click Data Mode to view the measurement values for all points. To exclude/restore a point from the scanning calculations, click on the desired point and then click Recalculate. 262 • Results User’s Guide to KC4™ Linear Scan Data The default view for linear scan results contains the graphical representation of the measurements taken across each well: • To view a different set of data, click the Data drop-down arrow and select Mean OD, Std Dev OD, or CV OD. • Click on a well to zoom in on it: Place the cursor over any point in the well to see its measurement value and its X location in the well. If the graph contains more than one curve, use the Selected Curve menu to choose a different curve and view its Mean OD, Std Dev OD, and CV OD values. Click Options to adjust the Calculation Zone, then click Recalculate to update the calculations. User’s Guide to KC4™ Results • 263 Statistics From within any Results window, click the Statistics button to view the statistical data associated with the results. • Tip: To view statistics for a different data set, go back to the main Results window, choose the desired data set and then click Statistics. • To view statistics for a different set of identifiers, click Samples, Controls, or Standards. • The available columns are protocol-dependent: Name: The name of the sample associated with the current well. Conc.\Dil.: Concentration or dilution of the current well. Well: Coordinates of the current well. Nb: Represents the number of replicates that were used to calculate statistics. Mean: Mean of the replicate group. Std Dev: Standard deviation of the replicate group. CV (%): Coefficient of variation of the replicate group, i.e. the standard deviation expressed as a percentage of the mean. 264 • Results User’s Guide to KC4™ Biograph Overview The KC4 software package includes the Biograph module for curve viewing and manipulation. Biograph can be used either as a stand-alone product or in conjunction with KC4. The Biograph functions are described in the following sections. • To start Biograph from within KC4 and view the current curve(s), select Display|Curves or click the Biograph toolbar button. • To launch Biograph in stand-alone mode, select Biograph.exe from within the KC4 folder. Both KC4 and Biograph allow you to select the mathematical curve that best fits the standards, and this curve is used for calculating unknowns. Each curve is displayed with its formula and the calculated coefficients and correlation parameters. User’s Guide to KC4™ Biograph • 265 File Menu Use the File Menu to work with curves and graph (.gph) files. Creating a New Curve Select File|New to define a new curve by manually entering the coordinates of the standard points. • Enter the abscissa values in the x column. These are typically the standard concentration values. • Enter the ordinate values in the y columns. These are typically the measurement values (OD, RFU, RLU). You can enter up to 12 ‘y’ values (replicates) per standard. The M y column calculates the mean for each row of y values. Note: The curve is calculated based on the mean y values, not the individual replicate values. The SD y column calculates the standard deviation for each row of y values. • To mask a y value, check the Mask box then click on the desired y value. It will temporarily change to *****. • To unmask a y value, keep the Mask box checked and click on the desired *****. It will change back to its original value. • Click OK to display the new curve. Closing a Curve Select File|Close to close the current curve. • If the current curve is one generated dynamically using data from KC4, clicking Close will close both the curve and the Biograph application. • If the current curve is a stored .gph file, clicking Close will close the file but leave Biograph open. Saving a Curve (Graph File) Select File|Save or File|Save As to save the current curve as a graph file. • Graph files of the type *.GPH contain calculated curve-fitting values. A stored .GPH file can be used as the basis for calculating concentrations in a protocol that does not contain standard wells. • Tip: You can use refer to this curve in KC4 as the basis for calculating concentrations in a protocol that contains no standards. To do this, select Protocol|Curves in KC4, then enter the name of this .GPH file in the Curve Origin, File field. 266 • Biograph User’s Guide to KC4™ Opening a Graph File Select File|Open to retrieve a stored graphic file with the extension .GPH and manipulate it in the same manner as newly created graphs. • To open a file, highlight its name then click Open. • To look for a file in a different folder, click the drop-down arrow next to the Look In field, or click the previous folder button. Printing Curves Select File|Print to print the current curve, File|Print Preview to preview the printout, or File|Print Setup to adjust the printer settings. The report contains a picture of the curve, the name of the curve fit method, the equation, and the calculated coefficients. User’s Guide to KC4™ Biograph • 267 Exiting Biograph Select File|Exit to close Biograph and return to KC4 or Windows, wherever Biograph was originally launched from. • Upon returning to KC4, all changes are lost and the following message appears: View Menu Use the View Menu to customize Biograph by hiding/displaying the status bar and the tool bar. The Toolbar By default, the Toolbar is displayed below the menu options: • To hide the Toolbar, select View|Toolbar to remove the checkmark. • To redisplay the Toolbar, select View|Toolbar to reinstate the checkmark. The Status Bar By default, the Status Bar is displayed at the bottom of the screen: • To hide the Status Bar, select View|Status Bar to remove the checkmark. • To redisplay the Status Bar, select View|Status Bar to reinstate the checkmark. 268 • Biograph User’s Guide to KC4™ Graph Menu Use the Graph Menu to view and/or modify certain characteristics of the current curve. Standards Use the Standards dialog to view, enter, or modify the ‘x’ and ‘y’ values of standards. Note: When Biograph is launched from KC4, these values cannot be modified. • The abscissa values are listed in the x column. These are typically the standard concentration values. • The ordinate values are listed in the y columns. These are typically the measurement values (OD, RFU, RLU). You can enter up to 12 ‘y’ values (replicates) per standard. The M y column calculates the mean for each row of y values. Note: The curve is calculated based on the mean y values, not on the individual replicate values. The SD y column calculates the standard deviation for each row of y values. • To mask a y value, check the Mask box then click on the desired y value. It will temporarily change to *****. • To unmask a y value, keep the Mask box checked and click on the desired *****. It will change back to its original value. • Click OK to display the curve. Axes, Fit, Interpolations These features function similarly to functions of the same name in KC4. See “Curves” under Protocol Menu for more information. User’s Guide to KC4™ Biograph • 269 Overlaying Graphs Biograph allows you to view multiple graphs in the same session. • The graphs must be open before they can be overlaid. • Up to 8 graphs can be overlaid, regardless of curve fit type, but all must have the same axes (either all linear or all logarithmic). The curve overlay will display in a new window labeled OVERLAYED CURVES. The curves in this window cannot be edited. New interpolations can, however, be imposed. Interpolations cannot be adjusted within this window (make adjustments in the individual curve windows). However, any changes which you make to an individual curve or curves are reflected immediately in the "shadow curve" in the OVERLAYED CURVES window once you have calculated the change using Graph|Recalculate. 270 • Biograph User’s Guide to KC4™ Curve Window The replicate of each data point is displayed with a green square and the mean replicate value is displayed in a red circle. • Click on an individual data point to temporarily exclude it from further calculations, then select Graph|Recalculate button to recalculate the curve without the point. Important! Modified data may adversely affect the final results. Changes made here are not automatically transferred over to KC4. To make permanent curve-fitting changes, return to KC4 and select Protocol|Curves. • To restore an excluded data point, click on the point then select Graph|Recalculate. • Select File|Print to print the graph. User’s Guide to KC4™ Biograph • 271 272 • Biograph User’s Guide to KC4™ PowerReports High-Powered Reporting Since its inception, KC4 has helped users with designing professional, high-quality reports tailored to meet their specific needs. KC4 now takes information presentation to an even higher level with PowerReports. PowerReports links KC4 with Microsoft® Excel/Word 2000, providing you with a new format for creating custom report and export documents. With PowerReports you can: • Take full advantage of Excel/Word’s document customization features to generate publication-quality reports. • Include pictures, drawings, and company logos in reports. • Create custom formulas in Excel to perform additional calculations on KC4 data. • Take advantage of Excel’s charting capabilities to create bar graphs, pie charts, and more. • Perform a direct export of plate data to Excel without first having to create an export template. User’s Guide to KC4™ PowerReports • 273 How it Works PowerReports uses Object Linking and Embedding (OLE) technology to interact with Microsoft Excel and Word, providing you with total control over all report formatting using results objects created by KC4. KC4 sends information about the current protocol parameters to an Excel or Word document. You design the document by selecting the pieces of information to include on the report or in the export file, defining the locations for the different pieces of information, and customizing the appearance of the document. The document then becomes a part of the protocol, and is available for editing any time the protocol is open. 274 • PowerReports User’s Guide to KC4™ User’s Guide to KC4™ PowerReports • 275 System Requirements To put the power in PowerReports, your computer must meet or exceed the following requirements: • Pentium II processor (or equivalent) / 300 MHz or faster • 64 MB RAM (128 recommended) • Microsoft Office 2000 (9.0.3821 SR-1 or newer), Office XP, Office 2003 To check your Office 2000 version, launch Word or Excel and select Help|About Microsoft Word (or Excel). • Windows 98/2000/NT/XP Important! If your computer does not currently meet all of these requirements, you can still print reports and export data. With KC4’s standard reporting and exporting functions you can customize the contents, and to some extent the appearance, of printed reports and exported plate data. All KC4 users have access to these standard functions. Preparing KC4 for PowerReporting KC4 offers three reporting/exporting drivers, or engines: KC4, Microsoft Excel, and Microsoft Word. KC4 needs to know which engine(s) to you want to engage for editing, previewing, and printing reports and for editing and performing exports. The following topics explain how to select default global reporting and exporting engines and how to override them when necessary. Setting Global Options Under System|Setup|Protocol Defaults, KC4 allows you to select a default Reporting Engine and a default Exporting Engine. When you create a new protocol, KC4 refers to these settings to know which engine(s) to engage. These default settings can be overridden within a protocol (explained in the next section). • Select the default Reporting Engine and Exporting Engine (the ones you plan to use most frequently). 276 • PowerReports User’s Guide to KC4™ • If you have selected Microsoft Word for either or both engines, choose a Word Document Formatting option of Standard or Enhanced. With Standard formatting, the print preview and print functions perform quickly but any custom Plate Layout or Cut-Offs fonts are not applied. With Enhanced formatting, the print preview and print functions may take longer but all of your custom Plate Layout and Cut-Offs fonts will be applied. • Click the Start-up tab to customize additional options: (Optional) Check Start when launching KC4 if you want Word and/or Excel to open automatically when KC4 is launched. With the program open in the background, document opening and formatting will perform more quickly. Setting Protocol-Specific Options If you have opened a protocol and want to change the reporting or exporting engine but do not want to change the global default settings, select Protocol|Options or click the Options toolbar button. Click the Report or Export tab as appropriate. • Select the desired Report and/or Export Engines, and modify other parameters as necessary. User’s Guide to KC4™ PowerReports • 277 Important! If you change the engine after a document has been created for the protocol, the current document will be discarded and a new one must be created: Click OK to approve the selection of a new report or export engine. The current document (if one exists) will be discarded. Click Cancel to keep the previous engine and retain the current document (if one exists). • See “Protocol Options” at the end of Protocol Menu for more information on the different Report and Result Export options. Defining the Protocol Parameters It is a good idea to define all or at least the majority of the protocol parameters before creating a report or export document. KC4 customizes its lists of options that can be inserted into the document based on the current protocol parameters. For example: • Define Standard wells in the Plate Layout dialog and set the curve-fitting parameters if the report will contain information about the standard curve (such as a picture of the curve, the curve equation, and the R/R2 values). • Define Sample wells in the Plate Layout dialog and specify cutoff criteria if the report will contain custom formulas to determine the frequency of symbols assigned to samples and then generate a pie chart showing the percentages. • Define the wavelengths in the Reading parameters dialog and assign blank wells in the Plate Layout dialog if the export file will contain raw and blanked measurement data at 405 nm and 490 nm. Creating/Editing Documents When you are ready to create or edit a document, select Protocol|Report or Protocol|Export, or click the appropriate toolbar button: Create/edit an Excel Create/edit an Excel report document. export document. Create/edit a Word Create/edit a Word report document. export document. Tip: If you don’t see these buttons in KC4’s toolbar, you can add them by selecting System|Toolbar. 278 • PowerReports User’s Guide to KC4™ Working with Results Objects A Results Object is a placeholder of information in an Excel or Word document that is filled in with results data during the print preview, print, or export function. The Results Objects Toolbar When KC4 launches Excel or Word, it automatically adds a Result Objects toolbar to the standard Excel/Word toolbar: Remember that a results object is a placeholder of information which will be filled in by KC4 after the plate is read. Each object specifies which item of information to use, where the information will be located in the document, and how it will be presented (font style, color, size, etc.). Insert a Field Object. Each object contains a single piece of information, such as a cut-off value, a file name, or a curve coefficient. Clicking the Fields button opens a dialog with lists of available categories and related items to choose from. Categories include Curve Fit, Cut-Offs, File Information, Plate Description, and Reading Parameters. Insert a Plate Object to present data in a row x column format matching the plate type defined in the protocol. Clicking the Plates button opens a list of available items to include in the plate, such as Well ID, 405, 405 Corr., and Concentrations. Insert a Table Object to present data in a columnar format. Clicking the Tables button opens a list of available items to present in this format, including Statistics, Well Data Analysis, and Fitting Results. Insert a Curve Object, such as a standard curve, a set of dose response curves, or a kinetic, scanning, or spectrum well zoom. Delete an object. The cursor must be placed inside the object when this button is clicked. Close (minimize) Excel or Word and return to KC4. The document is automatically saved as a part of the protocol. Get Help on PowerReports. User’s Guide to KC4™ PowerReports • 279 Object Components Objects are inserted into the document using the Result Objects toolbar. See Field Objects, Plate Objects, Table Objects, or Curve Objects for specific instructions for inserting the different types of objects. The example below shows a Field Object in an Excel document: In the report or export document, any object contains 3 unique items: • An identifying title, as shown in cell B2. The text and appearance of this title can be modified. To change the text, simply overwrite the existing title. To change the appearance, use the application’s font customization tools. • A dollar sign ($) character, as shown in cell C2. The dollar sign will be replaced by actual information during the print, print preview, or export process. In the example above, the dollar sign will be replaced by the system date recorded when the plate was read. By default, the font color of this character is set to ‘Auto’. The color will be whatever the color is in KC4. The color (and font type and size) can be overridden in the template using the application’s font customization tools. Do not delete or move a dollar sign without deleting or moving the entire object. • A gray editing button, as shown in cell D2. To change the contents of an existing object, double-click the gray editing button. The subsequent dialog depends on the object type. 280 • PowerReports User’s Guide to KC4™ Object Fulfillment After a plate is read and the operator initiates the print preview, print, or export function KC4 begins the formatting process and transfers data into the prepared document. A Formatting Office document… message lets you know that something is happening: When formatting is complete, the document can be printed, viewed, or exported depending on the current process. User’s Guide to KC4™ PowerReports • 281 Designing the Document This section explains how to work with Field, Plate, Table, and Curve Objects. Inserting Field Objects A Field Object represents a single item of information, such as the name of the protocol file, the calculated value of a cut-off, or the r-squared value of a curve. To insert a Field Object, click the Fields button in the RSO toolbar. The Insert Field Object dialog appears: • Select the Category of information that represents this Field Object. Available options include Curve Fit, Cut-Offs, File Information, Plate Description, Reading Parameters, and System Information. • Select the Name of the field within that category. If the only available item in the list is ‘*****’ the current protocol parameters do not generate any fields for this category. For example, if the protocol does not specify cut-off criteria there will be no items available under the Cut-Offs category. Tip: To learn more about the different fields and to see some examples, click on the Insert Field Object Help button then click on a Category link. • If the field will contain a numeric value, set the Notation to Decimal (ex. 0.003) or Scientific (ex. 3E-03). • If Decimal notation is selected, specify the number of decimal places (Nb Dec) to be displayed, 0 to 5. • Click OK to close this dialog and insert the Field Object into the document. The document shown on the next page contains six Field Objects. Each object is represented by a 1 row x 3 column table. Notice that Field objects do not have to be separated by a blank line or row. See “Object Components” for more information. 282 • PowerReports User’s Guide to KC4™ Inserting Plate Objects A Plate Object presents information in a matrix corresponding with the plate type selected in the protocol. For example, if the protocol specifies a 96-well plate, the plate object contains 8 rows and 12 columns of data. To insert a Plate Object, click the Plate button in the RSO toolbar. A drop-down list appears, containing all of the data sets available for inclusion in the Plate Object: • Data set availability is based on the current protocol settings. • Each object can contain from 1 to 20 data sets. For example, an object can contain the Well ID, the corrected data value, and the concentration value for every well. Or, it can contain just the concentrations. • To proceed, select one data set (even if you want to include multiple data sets in the same object). User’s Guide to KC4™ PowerReports • 283 The Plate Properties dialog appears: The Top-Left Well and Bottom-Right Well set the boundaries for the plate object. The default settings coordinate with the plate type defined in the protocol. The Reading # field is available for kinetic protocols to specify which kinetic read to include in the object. Each plate object can display information for one kinetic read. • Click the Data tab to select the data sets to include in the plate object. KC4 presents one or more default Data sets for inclusion in the object, although any available data set(s) can be selected. To add a data set, highlight the first empty Data field and click the left mouse button once. A list of available data sets will appear; click on the desired set to select it. To change an existing data set, highlight it and click the left mouse button once. A list of available data sets will appear; click on the desired set to select it. To delete an existing data set, highlight its entire row then click the right mouse button and select Delete. 284 • PowerReports User’s Guide to KC4™ To insert a new data set between two existing sets, highlight the row above which the new data set will be inserted. Click the right mouse button and select Insert. For data sets that represent numerical information, click the corresponding Format field then select Decimal or Scientific. For the Decimal format, click the corresponding Precision field to set the number of decimal places (0 to 5). Click OK to save the settings and insert the new Plate object into the document, as demonstrated below: User’s Guide to KC4™ PowerReports • 285 Inserting Table Objects A Table Object presents results data in a columnar format. To insert a Table object, click the Table button in the RSO toolbar. A drop-down list of available data categories appears: • This list contains all available categories of data, based on the current protocol settings. • Available categories can include Statistics, Well IDs, Well Data, Well Analysis Results, Validation Results, Fitting Results, Protocol/Data Audit Trail, and Calculation Log Report. Statistics A Statistics table calculates the Mean, Standard Deviation, and Coefficient of Variation (CV%) for the Standard, Sample, Control, and/or Blank groups defined in the protocol. To create a Statistics table, click the Tables button in the RSO toolbar, then highlight Statistics. A list of available data sets appears: • The list contains those data sets made available by the current protocol parameters. • Select the data set to be represented in the table. 286 • PowerReports User’s Guide to KC4™ The Statistic Table Properties dialog appears: Select the Identifier(s) to be represented in the table. If Sample and/or Assay Control is selected, Index is by default set to All, meaning all sample and/or assay control wells will be included in the table. To include a subset of all sample and/or assay control wells, use the Index From and To fields to enter the limiting group numbers. In the example above, Sample groups 1 through 10 (SPL1 to SPL10) will be represented in the table. Click the Data tab to customize the contents of the table. User’s Guide to KC4™ PowerReports • 287 KC4 presents some default Data sets for inclusion in the table, although any available data set(s) can be selected. To add a data set, highlight the first empty Data field and click the left mouse button once. A list of available data sets will appear; click on the desired set to select it. To change an existing data set, highlight it and click the left mouse button once. A list of available data sets will appear; click on the desired data set to select it. To delete an existing data set, highlight the entire row then click the right mouse button and select Delete. To insert a new data set between two existing sets, highlight the row above which the new data set will be inserted. Click the right mouse button and select Insert. For data sets that represent numerical information, an Operator can be applied to perform a specific calculation. Nb displays the number of wells in the group. Mean calculates the average measurement for each well group. Std Dev calculates the Standard Deviation for each well group. CV (%) calculates the Coefficient of Variation for each well group as (Std Dev / Mean) x 100. Click OK to close this dialog and insert the object into the document. 288 • PowerReports User’s Guide to KC4™ Well IDs A Well IDs Table lists well identifiers and their names. To create a Well IDs table, click the Tables button in the RSO toolbar and then click on Well IDs. The Statistic Table Properties dialog appears. • Select the Identifier(s) to be represented in the table. • If Sample and/or Assay Control is selected, Index is by default set to All, meaning all sample and/or assay control wells will be included in the table. To include a subset of all sample and/or assay control wells, use the Index From and To fields to enter the limiting group numbers. In the example above, Sample groups 1 through 10 (SPL1 to SPL10) will be included in the table. User’s Guide to KC4™ PowerReports • 289 • Click the Data tab to customize the contents of the table. For the Well IDs table, KC4 automatically inserts the Well ID and Name data sets. Any available data set can be included in the list. See “Statistics” for information on working with data sets. Click OK to close this dialog and insert the object into the document. 290 • PowerReports User’s Guide to KC4™ Well Data A Well Data table presents measurement values for kinetic, spectrum, or scanning protocols. • For Kinetic protocols, the table lists measurement values by time of kinetic reading • For Spectrum protocols, the table lists measurement values by wavelength • For Linear Scanning protocols, the table lists measurement values by reading position • For Area Scanning protocols, each table presents one well’s data in a matrix format To create a Well Data table, click the Tables button in the RSO toolbar and then highlight Well Data to open a list of available data sets. Click on the data set to be represented in the table; the Well Data Table Properties dialog appears. Kinetic, Spectrum, and Linear Scanning protocols: • Define a rectangle of wells to be included in this table. Note: This table reports information in columns, one column per well. You may wish to experiment with the maximum number of columns that can display legibly per table. If you want to display information for many wells (i.e. more than 10-12), consider inserting multiple Well Data Table objects. Area Scanning protocols: • Each table reports the area scanning data for one well. Specify the Well to be represented in the table. User’s Guide to KC4™ PowerReports • 291 • Area scanning data is reported in a matrix format, representing the measurement points taken across and down each well. Specify the First and Last Matrix Column to include in this table object. Note: If Word is the reporting/exporting engine, each table object can contain a maximum of 15 columns, so you may need to create multiple table objects to print all of the information for the well. For example, if the Read Matrix Size is 25 x 25, create one table object with First and Last Matrix Columns set to 1 and 15, then create another table object with First and Last Matrix Columns set to 16 and 25. All protocols: • Click the Data tab to change and/or customize the data set. Each Well Data table reports information for one data set. If the current protocol parameters generate multiple data sets, click on the Data field to open a drop-down list of all available data sets. Click the Format field then select Decimal or Scientific. Click the Precision field to set the number of decimal places (0 to 5). Click OK to close this dialog and insert the object into the document. 292 • PowerReports User’s Guide to KC4™ Well Analysis Results A Well Analysis Results table lists various statistics for kinetic, spectrum, or scanning protocols. • For Kinetic protocols, the table lists the kinetic analysis calculations (e.g. Max V, Delta t at Max V, Lag Time, etc.), determined for each well. • For Spectrum protocols, the table lists the Minimum and Maximum measurements and their corresponding wavelength values for each well. • For Area and Linear Scanning protocols, the table lists the Mean OD, Standard Deviation, and Coefficient of Variation calculated for each well. To create a Well Analysis Results table, click the Tables button in the RSO toolbar and then click on Well Analysis Results. The Well Analysis Table Properties dialog appears: • The Selected Wells list contains all wells that will be included in the table. To append a well to the Selected Wells list, enter the well’s Coordinate in a format resembling A1 or F11, then click the Add>> button. To remove a well from the Selected Wells list, highlight the well then click <<Remove. User’s Guide to KC4™ PowerReports • 293 • Click the Data tab to customize the information to be included in the table for the selected wells. KC4 presents a default list of Data sets to be included in the table, although any available data set can be selected. See “Statistics” for information on working with data sets. Click OK to close this dialog and insert the object into the document. 294 • PowerReports User’s Guide to KC4™ Validation Results A Validation Results table lists the validation conditions and their corresponding statuses. To create a Validation Results table, click the Tables button in the RSO toolbar, then click on Validation Results. The table object is automatically inserted into the document. User’s Guide to KC4™ PowerReports • 295 Fitting Results A Fitting Results table lists coefficient values for all curves in the assay. To create a Fitting Results table, click the Tables button in the RSO toolbar, and then click on Fitting Results. The Curve Parameter Table Properties dialog appears. • Select the Identifier(s) to be represented in the table. If Sample and/or Assay Control is selected, Index is by default set to All, meaning all sample and/or assay control wells will be included in the table. To include a subset of all sample and/or assay control wells, use the Index From and To fields to enter the limiting group numbers. In the example above, Sample groups 1 and 2 (SPL1 and SPL2), will be included in the table. 296 • PowerReports User’s Guide to KC4™ • Click the Data tab to customize the contents of the table. KC4 presents a default set of Data items that will be included in the table, although any available item can be included in the list. To add an item to the list, highlight the first empty Data field and click the left mouse button once. A list of available data items will appear. Click on the desired item. To modify an item in the list, highlight it and click the left mouse button once. A list of available data items will appear. Click on the desired item. To delete an item from the list, highlight the row then click the right mouse button and select Delete. To insert a new item between two existing items, highlight the row above which the new item will be inserted. Click the right mouse button and select Insert. For data sets that represent numerical information: Click the corresponding Format field then select Decimal or Scientific. For the Decimal format, click the corresponding Precision field to set the number of decimal places (0 to 5). Click OK to close this dialog and insert the object into the document. User’s Guide to KC4™ PowerReports • 297 Interpolation Results An Interpolation Results table lists the calculated X-values for the Y-values and formulas entered under Protocol|Curves|Interpolations. To create an Interpolation Results table, click the Tables button in the RSO toolbar, and then click on Interpolation Results. The Curve Parameter Table Properties dialog appears: • Standard is the only Identifier that can be included in an Interpolation Results report. • Click the Data tab to customize the contents of the Interpolation Results table. 298 • PowerReports User’s Guide to KC4™ KC4 presents a default set of Data items that will be included in the table, although any available item can be included in the list. See the previous topic, “Fitting Results” for information on working with Data items. Click OK to close this dialog and insert the object into the document. User’s Guide to KC4™ PowerReports • 299 Protocol/Data Audit Trail Protocol and Data Audit Trail information can be included on reports and in export files. Note: The Protocol Audit Trail is only available if the Preferred Data File Format setting is PLA. To create a Protocol or Data Audit Trail table, click the Tables button in the RSO toolbar then click on Protocol Audit Trail or Data Audit Trail. The table is automatically inserted into the document (the example below shows two separate tables). 300 • PowerReports User’s Guide to KC4™ Calculation Log Report A Calculation Log Report can be included on reports and in export files. To create a Calculation Log Report table, click the Tables button in the RSO toolbar and then click on Calculation Log Report. The table is automatically inserted into the document: User’s Guide to KC4™ PowerReports • 301 Inserting Curve Objects A Curve Object inserts a graph showing one or multiple overlaid curves. To insert a Curve Object, click the Curves button in the RSO toolbar. A drop-down list showing the available curve type will appear: • This list contains all available curve types, based on the current protocol settings. Available curve types can include Standard, Dose Response, and Well Zoom. Standard Curve A standard curve is generated by a protocol that has Standard wells defined in the Plate Layout. To insert a Standard Curve, click on the Curves button in the RSO toolbar, then click on Standard Curve to insert the object. • KC4 generates a temporary curve using fictitious data. After the plate is read, KC4 rebuilds the curve with real plate data. • Certain characteristics of this curve can be modified, including colors and labels. Double-click anywhere on the graph to enter the editing mode; a shaded box should appear around the graph. When this box appears, click the right mouse button once to open a menu of items that can be edited. 302 • PowerReports User’s Guide to KC4™ Dose-Response Curve(s) Dose response curves are generated by a protocol with assay control, sample, or sample control wells with concentrations or increasing dilutions defined. Up to 5 curves can be overlaid in one curve object. To insert a Dose Response curve, click on the Curves button in the RSO toolbar, then click on Dose Response. The Graph Properties dialog appears, listing all available curves by Well ID: • The Available Curves box lists all curves made available by the current protocol parameters. • The Selected Curves box lists all curves that will be overlaid in a single curve object. • To add a curve to the list, highlight an available curve, then click Add >>. • To remove a curve from the list, highlight the curve, then click << Remove. • Click OK to close the dialog and insert the object into the document. User’s Guide to KC4™ PowerReports • 303 KC4 generates temporary curve(s) using fictitious data. After the plate is read, KC4 rebuilds the curve(s) with real plate data. Certain characteristics of this curve can be modified, including colors and labels. Double-click anywhere on the graph to enter the editing mode; a shaded box should appear around the graph. When this box appears, click the right mouse button once to open a menu of items that can be edited. Well Zoom Curve(s) Well zoom curves are available for kinetic, spectrum, and scanning protocols. Up to five curves can be overlaid in one object. To insert a Well Zoom curve object, click on the Curves button in the RSO toolbar, then click on Well Zoom. The Well Zoom Properties dialog appears: The Selected Curves box lists all wells that will be overlaid in the curve object. • To add an item to the Selected Curves list: Choose a Data Type from the drop-down list. The contents of this list depend on the current protocol parameters. Data types can represent raw, blank plate, and corrected data. Enter the Well coordinates. The corresponding Well ID and Conc./Dil. value will appear, if applicable. Click Add >>. • To remove an item from the list, highlight the item then click << Remove. • Click OK to close the dialog and insert the object into the document. 304 • PowerReports User’s Guide to KC4™ KC4 generates temporary curve(s) using fictitious data. After the plate is read, KC4 rebuilds the curve(s) with real plate data. Certain characteristics of this curve can be modified, including colors and labels. Double-click anywhere on the graph to enter the editing mode; a shaded box should appear around the graph. When this box appears, click the right mouse button once to open a menu of items that can be edited. User’s Guide to KC4™ PowerReports • 305 Previewing and Printing the Report When plate reading and data reduction are complete, the report is ready for formatting and then previewing and/or printing. To format the report (that is, to fill all of the objects in with current plate data), select Data|Print Preview or Data|Print, or click the appropriate toolbar button. During the formatting process, KC4 displays a progress bar, as shown below: Previewing Options When preparing to print a newly created or recently edited report, it’s a good idea to preview it first to check column widths, page breaks, fonts, colors, and so on. If a change is required before printing, two options are available: • Modify the report document and go through the print preview process again. This is the recommended option because changes will be saved with the protocol. • Make a temporary change in the preview document. The Protocol|Options parameter Keep Open After Printing must be enabled. 306 • PowerReports User’s Guide to KC4™ Special Notations When displaying results or when reporting results using the standard (KC4) reporting engine, KC4 uses various font characteristics to denote masked wells and biased values. When exporting results or when reporting results using the Excel and Word reporting engines, KC4 uses some special characters to denote masked wells and biased values. This is to avoid conflict with any special font characteristics that may be assigned by the report/export file designer. • To denote a masked well, KC4 surrounds the value with asterisks: *0.234*, *?????*, *98999*. • To denote biased values, KC4 surrounds the value with exclamation points: !0.068!, !23.456!. Note: Biased values may appear in a Statistics table if Use out of range values in statistics is enabled under System|Setup. If, for example, the concentration for one of three standard replicates is reported as ‘>40’, the Standard Deviation and CV% values are considered suspect. KC4 surrounds the values with exclamation points to indicate that it is the user’s responsibility to determine whether or not the results are valid. User’s Guide to KC4™ PowerReports • 307 Performing the Data Export When plate reading and data reduction are complete, the export document is ready for formatting and saving. To format the export document (that is, to fill all of the objects in with current plate data), select Data|Export or click the appropriate toolbar button. When formatting completes, KC4 displays the Save As dialog: • Change the current folder and file name if desired, then click Save to complete the export. • If the Protocol|Options parameter Keep Open After Exporting is enabled, the document stays open after the export is complete. This allows you to, for example, print the contents of the file. • See “Special Notations” on the previous page for information on how KC4 denotes masked wells and biased values in export files. Direct Export to Excel KC4 provides a way to directly export data to Excel without first having to create an export template. To export plate data directly to Excel: 1. Under Protocol|Options (or under System|Setup if no protocol is open) set the export engine to Microsoft® Excel. 2. Read the plate. 3. Select Data|Export. KC4 will launch Excel and insert the RSO toolbar. 4. Insert objects (Field, Plate, Table, and/or Curve) as explained throughout this chapter. 5. Click Save As to export the data. 308 • PowerReports User’s Guide to KC4™ Appendix A: Records Submission Records Submission When preparing electronic records for submission to the FDA, contact Bio-Tek Instruments’ Marketing & Sales Department for guidance, and to obtain a demonstration copy of KC4 to include with your package. The FDA will need KC4 to view and print your records. Contact information: Phone: (888) 451-5171 (toll free in the U.S.) (802) 655-4740 (outside the U.S.) Fax: (802) 655-7941 E-mail: [email protected] User’s Guide to KC4™ Appendix A: Records Submission • 309 310 • Appendix A: Records Submission User’s Guide to KC4™ Appendix B: Windows File Caching Windows File Caching This topic applies to sites accessing a shared database stored on a network/server. By design, most write and read database operations are intended to be performed synchronously by KC4. For example, when a system audit trail event or a file is created by a KC4 instance, it should be immediately visible in other instances using the same database. However, because of other factors beyond the control of KC4, like network and operating system delayed-write optimizations, there is no way to guarantee such behavior. To improve synchronization, it is recommended, when KC4 is used on several networked PCs connected to the same shared database, to disable the network redirector file caching. In addition, while file caching is enabled there is a potential for data loss following a network connection failure. According to Microsoft, when the Windows redirector opens a file for read or read/write access, the redirector utilizes the Windows system cache. Therefore, when data is written to the file, it is written to the cache and not immediately flushed to the redirector. The cache manager flushes the data at a later time. If an unrecoverable network error occurs while the data is being transferred to the remote server, it may cause the write request to fail and an application error to occur. Here is an example scenario: The network connection failed because of a problem on the server. The KC4 user, unaware of the failure, chose to save a GLB file to the shared database just seconds after the failure. Because file caching was enabled, the file actually went into temporary storage in the Windows system cache, to await redirection to the shared database on the network. KC4 gave the appearance that the file was saved successfully (no error message appeared, and the asterisk disappeared from the title bar). After a moment, Windows detected the failure and displayed an appropriate error message, and the user decided to quit KC4. Upon closing, KC4 did not present an option to save the file because KC4 “thought” that the file was already saved. When the network connection was re-established, the user launched KC4 but could not locate the GLB file because it never reached the shared database. For more information, visit http://support.microsoft.com and search for current articles on “file caching” or “write caching”. User’s Guide to KC4™ Appendix B: Windows File Caching • 311 312 • Appendix B: Windows File Caching User’s Guide to KC4™ Index !#! indication in statistics, 307 *#* indication in statistics, 307 ????? indication in Symbols, 256 4 Parameter logistic fit, 164, 168 A Absorb. checkbox, 197 Absorbance read method, 112 Administrator Appointing a System Administrator, 8 Initial password, 19 System Administrator requirements, 8 Administrator:, 8 Allow well zoom during read, 103 Anti-Log, 160 Append to kinetic file, 56, 185 Application Data folder, not visible in Explorer, 22, 234, 235 Archiving records, 29 Area scanning, 115, 262 Area under the curve, 136 Assay control wells, 143, 145 Assay description, 177, 182 Assigning names to sample groups, 61 Audit trail, 63 Data audit trail, 63 Notification dialog, 220 User’s Guide to KC4™ PowerReports, 300 Protocol audit trail, 183 System audit trail, 224 Automatic append to kinetic file after reading, 185 Automatic export after reading, 187 Automatic print after reading, 186 Automatic save after reading, 185 Automatic sensitivity adjustment Best signal to noise ratio, 91 Scale to high wells, 90 Scale to low wells, 90 Selecting in a protocol, 96, 98 Available readers, 194 Averaging in formulas, 160 Axes, 165 B Bandwidth, 197, 200 Bandwidth verification, 92 Barcode Enabling the option to read, 111 Using as file name, 185 Base value, 92 Basis value calculation, 135 BDF file, 53 Importing, 53 Best signal to noise ratio, 91 Bias value, 96, 98 Biograph, 189, 265 Index • 313 Bio-Stack Minimizing KC4 when running in OLE mode, 232 Sample IDs, 61 Bio-Tek, contacting for technical assistance, 4 Blank plate subtraction, 111, 128 Blank wells, 143, 144 Blank wells subtraction, 128 Block light between reads Filter position requirements, 201 Read step option, 127 BPF file, 77 Clarity protocol files, 28 Creating new, 77 Opening existing, 77 BTI file, 53 Importing, 53 Buttons in toolbar, 237 C Calculate recovery percent, 155 Calculation log report, 178, 301 Calculation options, 188 Calculation warnings, 190 CALIB.mdb database, 233 Calibrate Endpoint reads, 118 Kinetic reads, 118 Spectrum reads, 118 Calibration plate test, 205, 207 Calibrators, 143 Changing measurement values How to, 45 Results window, 251 Check Lamp before measurement, 99, 100 Clarity, 77 Background measurement value, 53 File importation failures, 53 Heating, 250 314 • Index Importing BTI files, 53 Priming, 249 Protocol definition, 77 Protocol files, 28 Reader control, 249 Reading parameters, 77 Coefficient of variation, 160 Coefficient of Variation, 264 Communication port, 195 Compact database After exporting and deleting audit trail events, 225 After exporting and deleting files, 227 Local database, 235 Shared database, 233 Computer requirements, 9 Concentrations Defining in plate layout, 155 Contacting Bio-Tek Instruments, Inc., 4 Control wells, 143 Controlling multiple instruments simultaneously, 194 Converting databases, 15, 236 Copy Current Formula, 160 Corrected data, 128 Critical database error Restoring connection to KCShared, 234 Current folder, 44, 47, 68, 71 Current plate, 164 Current reader, 194 Curve axes, 165 Curve description, 164 Curve fitting, 164, 166 Curve interpolation, 169 Curve objects in PowerReports, 279, 302 Curve through origin, 168 Curves Printing, 189 Stored, 266 Viewing, 189 Custom plate formats, 240, 242 User’s Guide to KC4™ Cutoffs Defining, 173 Evaluation method, 176 Evaluation of results, 256 Examples, 174 Formula examples, 174 Report, 180 Symbols, 173 Viewing calculated values, 257 Viewing results, 256 CV function, 160, 264 D Data audit trail Data menu, 63 PowerReports, 300 Data bits, 195 Data files, 42 Changing measurement values, 45 Contents, 28 Exporting, 57 Masking wells, 45 Modifying protocol parameters, 45 Plate description, 60, 75 Signing electronically, 54 Storage options, 28 Data mode, 262 Data to interpolate, 164 Data to interpret, 173 Data to monitor, 107 Data to process, 131, 137 Database connection error Restoring connection to KCShared, 234 Database upgrade utility, 15, 236 Databases KCLocal.mdb, 233, 235 KCShared.mdb, 233 DB (database) drive, 44, 47, 68, 71 Default reporting and exporting engines, 230 Delay before sampling, 105 Delay between readings, 108 Delay between samples, 105 Delimiters, 231 User’s Guide to KC4™ Delta OD, 130, 163, 181 Detection method, 94, 108, 112 Diagnostics CALIB database, 233 Optics test, 205, 206 Universal plate test, 205, 207 Dilutions, 151 Direct export to Excel, 308 Dispense protocol, 94, 119 Dispenser Configuration, 202 Control, 247 Display grid, 165 Document formatting options for Word, 277 Dose response curves, 303 Duration, plate shaking, 116 E Eject between filter set read FLx800, 95 Eject between Filter Set Read FL600, 100 SynergyHT/HTTR, 101 Eject between well, FL600, 104 Electronic signatures Data audit trail, 63 Global data files, 54 Protocol audit trail, 183 Protocol files, 73 ELx800, 78, 196 ELx808, 79, 196 Emission filter wheel, 197, 200 Emission wavelength, 95, 97 Endpoint read Selecting in a protocol, 113 Engine Export, 187 Report, 186 Error when getting wavelength table from the reader, 69 Index • 315 Excel Reporting or exporting engine, 276 Requirement for PowerReports, 276 Using to design reports and export files, 273 Excitation filter wheel, 197, 200 Excitation wavelength, 95, 97 Experimental wells, 91 Export engine, 187 Exporting a plate database, 242 Exporting events, 225 Exporting files from the shared database, 227 Exporting plate data Automatic export after reading, 187 Direct export to Excel, 308 Excel, 187, 308 Exporting sample names, 61, 62 KC4, 182, 187 Keep open after exporting, 187 Protecting the document, 187 Selecting a text separator, 231 Selecting data sets for export, 57 Selecting the exporting engine, 187, 230 Word, 187, 308 Extrapolation factor, 165, 254 F Failed login attempts, 216 Failed to open document, 242 Fax numbers, Bio-Tek, 4 Field objects in PowerReports, 279, 282 File format options, 222 316 • Index File importation failure, possible causes, 53 Files File types, 28 Maintenance, 226 Signing, 30 Storage options, 222 Filter Sets, 95, 97, 103 Filter wheels, 197, 200 Filters/Wavelengths, 194, 196 Filter sets for SynergyHT/HTTR, 97 Filter sets for the FLx800, 97 KC4 wavelength table setup, 196 First well, 99 Fitting results, 296 FL600, 80 Absorbance mode, 112 Eject between well, 104 Filter Sets, 95, 103 Fluorescence mode, 112 General Options, 99 Kinetic reading parameters, 103 Luminescence read method mode, 112 Measurement Options, 104 Optics Position, 96 Plate Mode, 103 Rapid/Static Mode, 100, 104 Reader Configuration, 201 Sensitivity, 96 Well Mode, 104 Fluorescence Read method, 112 Time resolved, 117 Fluorophore, 95, 97 FLx800, 81 Fluorescence mode, 112 Luminescence read method, 112 Measurement Options, 104 Sensitivity, 98 Wavelengths table, 198 Force user to type ID, 217 Formats, 231 User’s Guide to KC4™ Formula examples, 40, 159, 162, 170, 174 Formula for kinetic analysis, 136 Formula for spectrum analysis, 137, 138 Formula syntax, 160 Multi plate transformations, 163 Single plate transformations, 160 G General Options, FL600, 99 General Options, SynergyHT, 101 Get filters from reader, 201 Get wavelengths from reader, 196, 199 GLB files Global data files, 28, 42 Signing electronically, 54 Global data files, 28, 42 GPH files, 266 Graph files, 266 Group membership, 213 H High value, 92 High wells, 90, 91 HOLE notation, 197, 200 Horizontal Reading Points, linear scanning, 115 I Identifiers, 181 Importing a plate database, 242 Importing files into the shared database, 228 Importing plate data Clarity BTI files, 53 Importing plate data, 51 Expected file formats, 51 Importing sample names, 61 Selecting a text separator, 231 Importing sample IDs, 61 User’s Guide to KC4™ INCORRECT READER MODEL CONNECTED message, 69 Incubation Pre-heating, 117, 246 Temperature control, 117 Individual Well Auto Scaling, 114, 115 Individual Well Color Auto Scaling, 116 Init. All Transf., 160 Installing the software, 11 Instruments, controlling more than one at a time, 194 Integral, 136 Kinetics, 136 Scanning, 141 Intensity, plate shaking, 116 Interpolation, 169 Examples, 169, 170 Formula syntax, 170 Interpolation results, 298 K KC4_32.pld file, 10, 244 KCLocal database Compacting, 235 Explained, 233 Location, 235 Repairing, 235 KCShared database Compacting, 233 Configuring KC4, 22 Explained, 233 Location, 233 Renaming, 233 Repairing, 233 Restoring connection to, 233 Used for file storage, 222 Keep open after exporting, 187 Keep open after printing, 186 Kinetic analysis, 131, 163, 259 Data to process, 131 Formula, 136 Index • 317 Integral, 136 Lag time, 133 Max V, 132 Mean Min/Max, 134 Mean V, 132 No calculation, 136 Onset OD, 135 Kinetic curves Overlaying, 258 Report, 179 Viewing results, 258 Kinetic interval, 103 Uneven indication on reports, 121, 125 Kinetic read, 131 Choosing the time format, 231 Read was interrupted, 49 Real time kinetic zoom, 103 Selecting in a protocol, 113 Kinetic reading parameters, 102, 103 Allow well zoom during read, 103 Eject between well, 104 FL600, 103 Interval, 103 Minimum kinetic interval, 103 Plate Mode, 103 Reading Number, 103, 136 Run Time, 102 Scales, 114 Well Mode, 104 L Lag time Delay before reading, 101 Kinetics, 133, 259 Lamp control, 99 Last well, 99 Lin axis, 165 Linear regression, 166 Linear Regression, 164, 167 Linear scanning, 115, 139 Local database Compacting, 235 Explained, 233 318 • Index Location, 235 Repairing, 235 Log axis, 165 LOG function, 160 Log report, 301 Logging in to and out of KC4, 223 Login parameters, 216 Low wells, 90, 91 Lum. checkbox, 197 Luminescence, 197 Emission filter wheel, 200 Read method, 112 M Maintain files, 226 Manual data entry, 50 Masking wells How to, 45 Results window, 252 MAX function, 161 Max V, 132 MEAN function, 160 Mean Min/Max, 134, 138 Mean V, 132 Meas. Filter, 99 Measurement Options, 104 Microplates, measuring, 242 MIN function, 161 Min/Max, spectrum analysis, 137 Minimize KC4, 232 Minimum kinetic interval, 103 Minimum password length, 217 Monitor wells, 107 Multi plate transformations, 162 Multi Plate Transformations Formula syntax, 163 Overview, 162 Multi user identification, 211, 212 Multi-mode, 94, 108 Multiple instruments, controlling simultaneously, 194 Multiple shared databases, using, 233 User’s Guide to KC4™ Multiple wavelength reads, 109, 118 N Naming samples, 61 No Calculation, 136 NO READER RESPONSE (TIMEOUT) message, 69 Normal Mode, 112 Normalizing absorbances to 1 cm, 109 O OLE mode, 232 OLE mode, minimizing KC4, 232 Onset OD/FU/LU, 135 Optics Position, 96, 98 Optics test, 205, 206 OUT indication, 256 Out of range wells, 256 OVRFLW, 252 P Parity, 195 Password parameters, 216 Passwords, 213 Changing, 214 Expiration, 217 Minimum length, 217 Unique, 217 Pathlength Correction, 130 Enabling, 109 Raw data correction, 128 Pathlengths Calculating, 109 Reporting the pathlength for each well, 257 Peak OD test, 208 Picture mode, 262 PLA files Plate data files, 28, 42 Plate data files, 28, 42 Plate database Exporting, 242 Importing, 242 Plate definition not found, 242 User’s Guide to KC4™ Viewing contents of, 240 Plate definition not found in plate database, 242 Plate description, 60, 75 Plate format, reports, 181 Plate formats Custom, 242 Exporting, 242 Importing, 242 List of, 240 Plate height, 241 Plate In/Plate Out, 245 Plate layout Assay control wells, 145 Blank wells, 144 Dilutions, 151 Sample control wells, 147 Sample wells, 146 Standard wells, 148 Undo the last action, 143 Well IDs, 143, 144 Well settings, 143 Plate Layout, 142, 181 Plate mode FL600, 103 SynergyHTTR with Injectors, 119 Plate objects in PowerReports, 279, 283 Plate shaking, 116 Plate Shaking Before First / Every Reading, 116 Duration, 116 Intensity, 116 Plates Signing electronically, 54 PLD file, 10, 244 PLUG notation, 197, 200 Point to Point curve fit, 164, 167 Polynomial Regression, 164, 167 Port, 195 POW function, 161 Power users Group membership, 213 Protocol-level protected functions, 184 Index • 319 System-level protected functions, 218 PowerReports Curve objects, 279, 302 Dollar sign character, 280 Editing an object, 280 Field objects, 279, 282 How it works, 274 Overview, 273 Plate objects, 279, 283 Results objects, 279 RSO toolbar, 279 System requirements, 276 Table objects, 279, 286 PowerWave, 82, 196 PowerWaveHT, 82, 196 PowerWaveX, 83, 196 PowerWaveX Select, 84, 196 PowerWaveXS, 85 Preferred data file format, 222 Pre-Heating, 117, 246 Pre-read blank plate, 111 Print a list of sample names, 61 Printing data automatically, 186 Printing reports, 177, 306 Probe orientation, FL600, 96 Probe orientation, FLx800/SynergyHT/H TTR, 98 Probe size, 194, 201 Prompt #, 75 Prompt for name, 185 Protected functions Protocol level, 184 System level, 218 Protocol Creating a new protocol, 69 Defaults, 230 Defined, 28, 67 Modify, 71 Options, 185 Protected functions, 184 Save, Save As, 71 Security, 184 Protocol audit trail PowerReports, 300 320 • Index Protocol menu, 183 Protocol defaults, 230 Protocol description, 177, 182 Protocol file not compatible with current reader, 69 Protocol files Contents, 28 Creating, modifying, etc., 68 Signing electronically, 73 Storage options, 28 Protocol options Calculation, 188 Export, 187 Raw data, 185 Report, 186 Protocol reading parameters Automatic sensitivity adjustment, 96, 98 Endpoint read, 113 Filter Sets, 95, 97 Kinetic read, 113, 131 Measurement Options, 104 Optics Position, 96, 98 Plate shaking, 116 Read Mode, 112 Reading Type, 113 Sensitivity, 96, 98 Spectrum read, 113 Temperature Control, 117 Protocols folder in user account, 213 PRT files Protocol files, 68 Protocol Files, 28 Signing electronically, 73 Q Quick Start, 38 For Clarity luminometer users, 39 For other instrument users, 38 R Rapid Mode, 100, 104, 112 Raw data Options, 185 Raw data correction, 128 User’s Guide to KC4™ Read and dispense protocol, 94, 119 Read from file, 51 Read Matrix Size, area scanning, 116 Read method, 94, 108, 112 Read Mode Defining in protocol, 112 Reader configuration, 194 Reader Configuration, 201 Reader control, 245 Reader model, 112 Readers, controlling more than one at a time, 194 Reading direction, 113 Reading Number, 103, 136 Reading parameters Clarity, 77 ELx800, 78 ELx808, 79 FL600, 80 FLx800, 81 PowerWave, 82 PowerWaveHT, 82 PowerWaveX, 83 PowerWaveX Select, 84 PowerWaveXS, 85 SynergyHT, 86 SynergyHTTR, 87 SynergyHTTR with Injectors, 88 uQuant, 89 Reading parameters reference, 90 Reading plate data from a file, 51 Reading Type, 113 Real time kinetic zoom, 103 Records, 29 Archival, 29 Retention, 29 Recovery percent calculation, 155 Reference wells, FL600, 100, 104 Refr. Filter, 99 Registering KC4, 229 Reinstalling KC4, 229 Report Engine, 186 User’s Guide to KC4™ Reports Excel, 186 KC4, 177, 186 Keep open after printing, 186 Preview before printing, 59 Printing, 59 Protecting the document, 186 Selecting the reporting engine, 186, 230 Word, 186 Restoring connection to KCShared, 234 Retaining records, 29 Run KC4 in trial mode, 18 Run Time, 102 S Sample control wells, 143, 147 Sample name list report, 180 Sample names, 61 Sample protocol and plate data files, 40 Sample wells, 143, 146 Saving data automatically, 185 Scale to high wells, 90 Scale to low wells, 90 Scales Individual Well Auto Scaling, 114 Kinetic reads, 114 Spectrum reads, 114 Scanning, 262 Analysis, 139 Area, 115 Integral, 141 Linear, 115, 139 SD function, 160 Secured protocol and data file storage, 222 Security, 184, 211 Send filters to reader, 200 Send wavelengths to reader, 196, 199 Sensitivity, 96, 98 Session idle timer, 216 Index • 321 Session timeout, 216 Set Lamp Off during measurement, 100 Setup, 230 Formats, 231 Protocol defaults, 230 Shaking, 116 Shared database Explained, 233 File maintenance, 226 Location, 233 Renaming, 233 System audit trail, 224 Used for file storage, 222 Signature reasons Applying, 54, 73 Defining, 221 Signing files Global data files, 54 Protocol files, 73 Simulation data, 50 Single Plate Transformations, 159 Formula syntax, 160 Overview, 159 Skip reference wells, 100 Software Trial mode, 18 Software installation, 11 Software version and revision numbers, 4 SP data, 129 Spectral scanning, 118 Spectrum analysis, 137, 261 Data to process, 137 Formula, 137, 138 Min/Max, 137 Spectrum read Selecting in a protocol, 113 Spectrum reading parameters Scales, 114 Wavelengths, 118 Spline curve fit, 164, 168 SQRT function, 161 Standard curve, printing, 302 Standard deviation, 160 Standard deviation, weighting of, 188, 230 Standard users 322 • Index Group membership, 213 Protocol-level protected functions, 184 System-level protected functions, 218 Standard wells, 143, 148 Standards, defining, 155 Static Mode, 104 Statistics, 181, 230, 251, 264 Statistics report, 181, 286 Status bar, 31 Stop bits, 195 Stop monitoring when, 108 Stored curves, 266 Sweep Mode, 112 Symbols, 160, 163, 171 ????? indication, 256 Defining for cutoffs, 175 How they are assigned, 176 Method of assignment, 256 Out of range, 176 OUT+/- indication, 256 Viewing results, 256 SynergyHT, 86, 199, 200 SynergyHT/HTTR Detection method, 112 Measurement Options, 104 Reader Configuration, 201 Sensitivity, 98 Top Probe Vertical Offset, 101 SynergyHTTR, 87 SynergyHTTR with Injectors Dispenser configuration, 202 Dispenser control, 247 Emptying the tip prime troughs, 247 Initializing the dispenser, 202 Priming the dispenser, 247 Purging the dispenser, 247 Read and dispense protocol, 119 Reading parameters, 88 Setting the injector position, 202 Syringe setup, 202 User’s Guide to KC4™ System Administrator Administrator requirements, 8 Appointing, 8 Initial password, 19 System audit trail Exporting events, 225 Local events, 224 Shared events, 224 System menu Diagnostics, 205 Overview, 193 Plate formats, 240 Reader control, 245 Readers, 194 Setup, 230 System requirements, 9 System security, 211 System test, 205 T Table format, reports, 181 Table objects in PowerReports, 279, 286 Technical assistance center (TAC), 4 Technical support, 4 Temperature Control, 117 Temporary files Creation following database connection failure, 233 Importing into shared database, 228 Text separators for importing and exporting, 231 Time formats for kinetics, 231 Time is approximate indication, 120 Time resolved fluorescence, 117 Timeout, session, 216 Timing control, 120 Tip prime troughs, 247 Tip prime troughs, 122 Toolbar, 31, 237 Buttons, 237 User’s Guide to KC4™ Customizing, 237 Top Probe Vertical Offset, 101 TplRep_1 could not be found, 20 Transformations Formula syntax, 160, 163 Multi Plate, 162 Single Plate, 159 Transmission speed, 195 Trial mode, 18 U Unauthorized users Protected functions, 218 Protocol security options, 184 Uneven kinetic interval, 121, 125 Uninstall notes, 10 Universal plate test, 205, 207 Unmasking wells, 252 Upgrade notes, 10 Upgrading databases, 15, 236 uQuant, 89, 196 Use barcode as filename, 185 Use first filter set sensitivity, 92 Use out of range values in statistics, 188, 230 User accounts, 211 Creating, 24, 212 Deleting, 215 Locking or unlocking, 215 Modifying, 214 Status, 215 User ID, 213 User notification options, 220 V Validation, 171 Validation report, 180 Validation results, 192, 295 Index • 323 W Wavelength Selection, 118 Filter Sets, 95 Filters, 99 Wavelengths (using monochromators), 118 Wavelengths Defining in protocol, 118 Spectrum reads, 118 Weighting of standard deviation, 188, 230 Well analysis results, 293 Well IDs, 143, 144 Well mode 324 • Index FL600, 104 SynergyHTTR with Injectors, 120 Well settings, 143 Well zoom curves, 304 Well zoom report, 179 Wells to monitor, 108 WL#, 95 Word Reporting or exporting engine, 276 Requirement for PowerReports, 276 Using to design reports and export files, 273 User’s Guide to KC4™