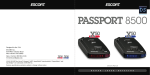
1
Ultimate Radar/Laser Detection
Easy 3D Navigation
Register @www.EscortInc.com
U L T I M A T E
D R I V I N G
User’s Manual
C O M P A N I O N
CONGRATULATIONS You’ve just purchased the most intelligent personal navigation and radar/laser detection device in the world—the PASSPORT iQ. In addition to offering the latest in personal navigation technology, PASSPORT iQ delivers extreme long‐
range warning on all radar bands, including X, K, Superwide Ka, Ku, and instant‐on Pop modes. Multiple front and rear laser sensors provide 360‐degree laser protection, including the widest field of view. For the ultimate in laser protection, PASSPORT iQ can also be used in conjunction with our Laser Shifter product. Visit our website, www.EscortRadar.com, or call us toll‐free at 800‐433‐3487 for more details. The PASSPORT iQ’s GPS‐powered intelligence provides permanent relief from false alarms, including automatic door openers, motion sensors, and other radar‐based sensors. And, it comes pre‐loaded with thousands of red‐light and fixed‐position speed camera locations throughout North America. In addition, PASSPORT iQ boasts the following state‐of‐the‐art performance and features: • Personal navigation system comes complete with Navteq mapping, branded points of interest, speed limit data, and lane assist. • AutoLearnTM feature automatically learns and rejects false radar sources based on exact location and frequency. • New proprietary threat‐signal ranking (TSR) software intelligently sorts, ranks, and rejects traffic‐flow monitoring false alarms automatically. • Cruise Alert feature offers modified radar alerts within specified speeds. • Defender Database stores thousands of red‐light and fixed‐position speed cameras throughout North America. • Revolutionary AutoSensitivityTM mode provides real‐time radar performance based on vehicle speed, plus Highway and Auto No X settings. • Mark Location feature allows you to instantly “mark” known speed traps, cameras and other places of interest. • Exclusive SpecDisplayTM provides actual numeric frequency for any radar signal. • Selectable radar and laser bands allow you to customize which bands are monitored. • Selectable markers allow you to customize which markers (speed traps, cameras) are monitored. • Exclusive SmartCord for easy access to Mute and TrueLockTM features. If you’ve used GPS navigation and radar detection devices before, a review of the accompanying Quick‐
Reference Guide will help you get started. If you are new to GPS or radar detection, please read this Owner’s Manual in detail to get the most out of your PASSPORT iQ’s revolutionary performance and innovative features. Please drive safely. 2 CONTENTS SECTION 1: SETTING UP PASSPORT iQ What’s Included 7 Controls and Features 7 Smart Cord 8 Connecting the Power 8 Charging the Battery 9 Mounting in Your Vehicle 10 Important Safety and Product Information 11 SECTION 2: USING PASSPORT iQ Power Options 13 Initial Setup 13 Warning Screen 14 Main Menu Screen 15 Volume 16 Routes 16 Battery Charge Status 16 GPS Status 16 16 Go‐To Screen/GPS Navigation Menu 17 Creating a Route to an Address 18 20 21 22 Resuming a Route after Stopping 22 Avoiding a Route Segment 22 Setting Your Home Address 24 Searching for a Point of Interest 25 Browsing Points of Interest 26 Using Your Favorites List 28 Viewing latitude and longitude To an intersection To an address in another state Stopping a Route in Progress 3 Adding favorites 28 Sorting favorites 29 Deleting favorites 29 Navigating to favorites 29 Using Your Recent Locations List 30 30 30 32 Changing the Map View 33 Zooming In and Out 34 Panning the Map 34 34 Playing Back Directional Voice Prompts 34 Muting Directional Voice Prompts 34 Using the Lane Assist Feature 34 35 Navigating to a recent location Managing Your Routes Map View Viewing Turn‐by‐Turn Maneuvers Using the On‐Screen Radar/Laser Alert Area Adjusting detector sensitivity 36 Viewing actual speed 36 Muting alerts 36 Locking out false alerts (TrueLock) 37 Viewing Speed Limit Data 38 Marking Locations 39 Viewing Estimated Arrival Time 40 41 Choosing Your Detector Screen 42 Selecting Your Color Palette 42 42 Detector View Using the On‐Screen Radar/Laser Alert Area Adjusting detector sensitivity 43 Muting alerts 43 Locking out false alerts (TrueLock) 44 Playing Back Directional Voice Prompts 44 Muting Directional Voice Prompts 44 4 Viewing Actual Speed 44 Marking Locations 44 Switching to Map View 44 Settings and Preferences 45 GPS Navigation Settings 46 46 Day/night color palette 47 My Car icon 47 Points of interest (POIs) 48 Clearing lists 48 Managing routes 48 49 Detection sensitivity 49 AutoLearn 50 Signal‐strength meter 50 Cruise Alert 51 Band monitoring 51 Detector voice 52 Cameras and speed‐traps 52 TrueLock GPS Radar/Laser Detector Filter 52 Clearing marked locations 52 Illegal state alert Map view Detector Settings 52 Detector AutoMute 52 Alert tones 52 Laser shifters (optional feature) 53 Restoring detector settings 53 General Settings 54 Screen brightness 54 Language and units 54 Time options 55 Wallpaper (background image) 55 Over‐speed‐limit alert 56 5 Restoring all factory settings 56 About PASSPORT iQ 57 Legal information 57 GPS and memory status 57 Demo (route simulation) 57 Calibration 57 58 SECTION 3: UNDERSTANDING PASSPORT iQ Understanding Your Detector How radar works 58 How Pop works 59 How laser works 59 How threat‐signal ranking works 59 How red‐light cameras work 59 How speed cameras work 60 Interpreting alerts 60 Understanding GPS 61 Specifications 62 SECTION 4: TROUBLESHOOTING, MAINTENANCE & SERVICE Troubleshooting 64 Software Updates 65 Accessories 65 Service Procedure 66 66 67 ESCORT Extended Service Plan SECTION 5: LEGAL INFORMATION 6 SECTION 1: SETTING UP PASSPORT iQ What’s Included 5” GPS/radar‐detection device SmartCord USB cable Mounting bracket Owner’s Manual on CD Quick‐Reference Guide Device Controls and Features Component Description Power Switch Charge Light Reset Button Power Jack (telephone‐type jack) Earphone Jack Switches PASSPORT iQ on or off, or locks the screen Red: Unit is plugged in, and battery is not fully charged Alternating red and green: Battery is almost completely charged Green: Battery is completely charged 5” touch‐sensitive screen Used only for connecting PASSPORT iQ to your PC or laptop to download software updates or charge the battery Press to reset the device if unit stops responding For connecting your SmartCord to power PASSPORT iQ with your vehicle’s battery For connecting 3.5 mm mono earphone Micro SD Card Slot For adding future optional features LCD Screen USB Port 7 Alert Light Rear Laser Lens For indicating radar or laser alerts For receiving laser alerts Audio Speaker For audible alerts and voice prompts External GPS Port Accepts external GPS device for improved reception Mount Release Button For conveniently releasing PASSPORT iQ from the windshield mount Front Laser Lens For receiving laser alerts (ensure clear view of road ahead) Radar Antenna For receiving radar alerts (ensure clear view of road ahead) SmartCord The SmartCord is a special power cord with a power‐on indicator (which only lights up when PASSPORT iQ is turned on), a bright LED alert light that warns of radar or laser, and a mute button right on the plug for convenient access to PASSPORT iQ’s Mute and TrueLock features. It’s perfect for any car where reaching the device’s mute button on the windshield is a stretch. For details on connecting PASSPORT iQ to the Smart Cord, see “Connecting the Power.” Optional power cords An optional Direct‐Wire SmartCord is also available. This version includes a small display module that can be wired directly into your electrical system, with a 10‐ft. straight cord to route to your PASSPORT iQ. For more information or to order, visit our website, www.EscortRadar.com, or call us toll‐free at 800‐
433‐3487. Connecting the Power PASSPORT iQ is supplied with a SmartCord for power while in a vehicle. Caution: Disconnect PASSPORT iQ from the SmartCord when starting the vehicle. To power PASSPORT iQ, plug the small end of the SmartCord (telephone‐type connector) into the modular jack on the device’s right side and plug the lighter‐plug adapter into your vehicle’s lighter socket or accessory socket, as shown in the illustration below. 8 PASSPORT iQ operates on 12‐volt DC negative ground only. The lighter plug provided is a standard size and will work in most vehicles. Note: Depending on your vehicle, the lighter socket power may be continuously on or it may be switched on and off with your ignition switch. Charging the Battery PASSPORT iQ comes with a built‐in rechargeable battery. Charge the battery fully before using it for the first time. To charge the battery, connect PASSPORT iQ to a desktop or laptop computer via the USB cable or to an AC/DC 12‐volt wall adapter via the SmartCord. Charging time is normally about eight hours (or overnight) via USB computer connection or two hours via wall adapter. A fully charged battery delivers about two hours of use. Note: Radar/laser detection features cannot run on the PASSPORT iQ battery alone. These functions will only work when your device is connected to your vehicle via the SmartCord. Battery warnings If these guidelines are not followed, the internal lithium‐ion battery may experience a shortened lifespan or may present a risk of damage to PASSPORT iQ, fire, chemical burn, electrolyte leak, and/or injury. • Do not remove or attempt to remove the non‐user‐replaceable battery. • Do not leave PASSPORT iQ exposed to a heat source or in a high‐temperature location, such as in the sun in an unattended vehicle. To prevent damage, remove from the vehicle or store it out of direct sunlight, such as in a glove box. • Do not puncture or incinerate. • When storing PASSPORT iQ for an extended time, store within the following temperature range: 32°F to 77°F (0°C to 25°C). • Do not operate PASSPORT iQ outside of the following temperature range: ‐4°F to 131°F (‐20°C to 55°C). • When disposing of PASSPORT iQ, take it to a professional, such as a waste electronics treatment facility, to have the battery removed and recycled. Warning: PASSPORT iQ, its packaging, and its components contain chemicals known to the state of California to cause cancer, birth defects, or reproductive harm. This notice is provided in accordance with California’s Proposition 65. 9 Mounting in Your Vehicle Warning: Do not mount PASSPORT iQ where it impairs the driver’s view of the road. Make sure that airbags are not obstructed by the device. Mounting location Be sure to mount PASSPORT iQ level and high enough on your front windshield to provide a clear view of the road ahead. In order for the GPS features to work properly, the top case must have a clear view of the sky. For optimum radar and laser sensitivity, center PASSPORT iQ between the driver and passenger and ensure the back of the device faces forward. Mount PASSPORT iQ away from windshield wipers, other solid objects, and heavily tinted areas that might obstruct the radar antenna or laser lens. Mounting instructions PASSPORT iQ’s EasyMount windshield bracket is designed for unobtrusive and hassle‐free mounting. To attach the EasyMount bracket to your windshield, press the suction cup firmly onto the glass, then flip the locking clamp to ensure the suction cup is adhered to the windshield securely. Be sure to keep both your windshield and the suction cup clean. To attach PASSPORT iQ to the EasyMount bracket, slide PASSPORT iQ downward so the EasyMount bracket locks into the slot on the back of the device. To adjust PASSPORT iQ on your windshield, move the adjustable EasyMount bracket arm to your preferred view. You can leave the EasyMount bracket in place on your windshield and easily remove PASSPORT iQ by pressing the EasyMount release button and sliding PASSPORT iQ off the mount. Again, be sure to position the bracket where it won’t present a hazard in the event of an accident. 10 Important Safety and Product Information 1. Read these instructions. 2. Keep these instructions. 3. Heed all warnings. 4. Follow all instructions. 5. Do not use this device near water. 6. Clean only with a damp cloth. 7. Maintain well‐ventilated conditions around PASSPORT iQ to avoid overheating. Install this device according to the instructions in this manual. 8. Do not install near any heat sources, such as radiators, heat registers, stoves, or other devices (including amplifiers) that produce heat. 9. Only use attachments and accessories specified by the manufacturer. 10. Disconnect this device during lightning storms or when it will not be used for a long period of time. 11. Refer all servicing to qualified service personnel. Servicing is required when PASSPORT iQ has been damaged in any way, such as damage to a power supply cord or plug, exposure to rain or moisture, operational failure, or if dropped. 12. Keep PASSPORT iQ away from liquids that might drip or splash on it. Do not place liquid‐
filled containers on it. 13. Failure to avoid the following potentially hazardous situations could result in an accident or collision resulting in death or serious injury: • When installing PASSPORT iQ in a vehicle, place the unit securely, so it does not obstruct the driver’s view of the road or interfere with vehicle operating controls, such as the steering wheel, foot pedals, or transmission levers. Do not place in front of or above any airbag. • When navigating, carefully compare information displayed on PASSPORT iQ to all available navigation sources, including information from street signs, visual sightings, and maps. For safety, always resolve any discrepancies or questions before continuing navigation and defer to posted road signs. • Always operate the vehicle in a safe manner. Do not become distracted by PASSPORT iQ while driving and always be fully aware of all driving conditions Minimize the amount of time spent viewing PASSPORT iQ’s screen while driving and use voice prompts when possible. Do not input destinations, change settings, or access any functions requiring prolonged use of PASSPORT iQ’s controls while driving. Pull over in a safe and legal manner before attempting such operations. • PASSPORT iQ is designed to provide route suggestions. It is not designed to replace the need for driver attentiveness regarding road closures or road conditions, traffic congestion, weather conditions, or other factors that may affect safety while driving. Important: Always be sure that PASSPORT iQ and any external device connected to it are switched off and unplugged from the power supply before you attempt to connect it to another external device. 11 Map data information One of the goals of ESCORT is to provide customers with the most complete and accurate cartography that is available to us at a reasonable cost. We use a combination of governmental and private data sources, which we identify in product literature and copyright messages displayed to the consumer. Virtually all data sources contain some inaccurate or incomplete data. In some countries, complete and accurate map information is either not available or is prohibitively expensive. Notice regarding windshield mounting legal restrictions State law in Minnesota and California prohibits or restricts drivers from using suction mounts on their windshields while operating motor vehicles (see California Vehicle Code 26708(a); Minnesota Statutes Section 169.71). Other ESCORT mount options should be used when driving in those states. Many other states have enacted restrictions against placing “non‐transparent material” upon the windshield or placing objects upon the windshield that obstruct the driver’s vision (e.g., New Jersey law currently prohibits windshield objects that “unduly interfere” with the driver’s vision to the front or sides). Check your state and local laws and ordinances where you drive before using the suction‐cup mount on your windshield. IT IS THE USER’S RESPONSIBILITIY TO USE THE PASSPORT iQ AND ESCORT MOUNTING OPTIONS IN SUCH A MANNER THAT THE USER IS IN COMPLIANCE WITH ALL APPLICABLE LAWS AND ORDINANCES. Remember to always mount your PASSPORT iQ in a location that does not obstruct the driver’s view of the road. ESCORT does not assume any responsibility for any fines, penalties, or damages that may be incurred as a result of disregarding this notice or as a result of any state or local law or ordinance relating to the use of your PASSPORT iQ. 12 SECTION 2: USING PASSPORT iQ Note: The screens shown in this guide may be different than the ones you see on PASSPORT iQ, depending on the firmware version. Power Options •
To turn on PASSPORT iQ, slide the power switch on top of the device to the right. •
To turn off PASSPORT iQ, slide the power switch on top of the device to the right and hold for four seconds. PASSPORT iQ will shut down completely. (Note: Touching Cancel will switch PASSPORT iQ into Battery‐Only mode.) •
When connected to 12‐volt switched power (lighter plug turns on/off with the ignition), PASSPORT iQ will automatically go into Suspend mode (for approximately two hours) when you turn off the ignition. A message will appear acknowledging this change. Suspend mode provides a quick start once 12‐volt power is applied again. •
When connected to unswitched 12‐volt power (lighter plug has a constant 12 volts), use the power switch to shut off completely. Unplugging the cord will put PASSPORT iQ into Suspend mode (see above). •
To lock PASSPORT iQ’s screen, slide the power switch to the left. Putting PASSPORT iQ in lock mode when not in use or while traveling will keep the device from using its internal battery. Initial Setup Upon powering on PASSPORT iQ for the first time, you will be asked to select your preferred language, voice (for directional prompts and radar/laser alerts), and time zone. Simply touch the options you’d like to select and save the settings. The Safety Warning screen appears. Note: For details on how to edit these preferences, see “General Settings” in the Settings and Preferences section. 13 Warning Screen When you turn on PASSPORT iQ, a splash screen appears for a few seconds, then the safety warning appears. Be sure you understand these warnings. To continue on to PASSPORT iQ features, touch I Agree at the bottom right of the screen. The Main Menu screen appears. 14 Main Menu Screen From the Main Menu screen, you can view your current location, set a route to a destination, view radar/laser alert screens, adjust volume, and set PASSPORT iQ preferences. To view radar signals, touch Detector. To see where you are, touch Map. To enter a destination address on the keypad, touch Go to... PASSPORT iQ automatically calculates the best route choice to direct you to that address. See “Creating a Route to an Address” for step‐by‐step instructions. To set PASSPORT iQ preferences, including Detector Settings, touch Settings. To learn more about these settings, see “Settings and Preferences.” 15 Volume To adjust the volume, touch Volume at the bottom of the Main Menu screen. The volume scale appears. Touch the scale to adjust the volume. To mute the PASSPORT iQ voice, touch Mute Audio. (Note: Radar/laser alerts will continue to sound.) Routes Here you can create and save routes your regularly travel, as well as calculate alternate routes to avoid upcoming traffic slow‐downs or incidents along your current route. For step‐by‐step instructions, see “Managing Your Routes” and “Avoiding a Route Segment” in the GPS Navigation section. Battery Charge Status The battery charge status is represented by the battery icon at the upper left of the Main Menu screen. When the icon shows three bars, the battery is fully charged. GPS Status The satellite icon at the upper left of the screen indicates whether or not you are receiving a satellite signal. If a red line appears on this icon, PASSPORT iQ is not acquiring a satellite signal. Viewing latitude and longitude coordinates From the Main Menu screen, touch the satellite icon to view the latitude and longitude coordinates of your current location. 16 Go‐To Screen/GPS Navigation Menu This screen lets you set up a route to an address in your city, in another city, in another state, or to a restaurant, gas station, park, hospital, or other common public locale. Once you set your home address, you can calculate a route to go home from wherever you travel. You can also search for a particular point of interest by name in Search or browse them by category in Browse. Favorites allows you to get directions from your location to places you have saved in your favorites list. Recent allows you to navigate to your most recent destinations without having to enter them again. 17 Creating a Route to an Address The route to your destination address is based on your current GPS location. Be sure PASSPORT iQ is in clear view of the sky. To create a route to an address from your current GPS location to a destination in the same city: 1. Touch Go To... on the Main Menu screen, then touch Address on the Go To… screen. The city in which you are located displays, along with cities to which you have recently navigated. If this is the first time you are using the device, only the name of the city of your current GPS location displays. 2. Once you select the city, the Enter Street Name keypad opens. Enter the name of the street. 3. After entering a few characters, PASSPORT iQ displays a list of street names that include those 18 characters. If a list is not automatically displayed, simply touch NEXT to have PASSPORT iQ search for the street name. 4. Touch the street name you want. If the street name is not on the list, touch Back and re‐enter the street name. The Enter House Number keypad opens. 5. Enter the house number, then touch NEXT. The address card for your destination displays. 6. Touch Go. The device calculates your route. When the calculation is complete, the route is highlighted on the Map View; the My Car marker shows your starting location, and the voice prompts begin. For details on how to use the various features in this view, see “Map View.” 19 Creating a route to an intersection You might know the intersecting street names but not the exact address of your destination. You can enter an intersection to get routing instructions. 1. Touch Go To... on the main Menu screen, then touch Address on the Go To… screen. The Address is in... list opens. 2. Touch the city name. Or touch Other city to enter it on the Enter City Name keypad. 3. When the Enter Street Name keypad displays, type the street name. After entering a few characters, PASSPORT iQ displays a list of street names that include those characters. 4. Touch the street name you want. When the Enter House Number keypad displays, touch SKIP. 5. The Where on Street? screen displays. Touch Go to street to display an address card for that street. OR, Touch Intersection to display the Enter Next Street keypad and enter the name. OR, Touch Pick address range to display a list of address ranges on that street, then touch the address range you want to display on the address card. 6. Touch Go to calculate the route and start voice prompts. 20 Creating a route to an address in another state 1. Start as you would to create a route to an address by touching Go To... on the Main Menu screen, then touching Address on the Go To… screen. 2. When the list of cities to which you have created routes opens, touch Other City in the top right corner of the screen. The City Is In... screen opens showing the list of states to which you have navigated. 3.
4.
5.
6.
7.
8.
Touch Other State. The Enter State/Prov or Code keypad displays. Enter the state, the province, or number code. A list of states with the same beginning characters displays. Touch the name of the state you want or touch Back to return to the keypad and continue to enter the state name. Type the name of the city on the Enter City/Postal Code keypad that displays. A list of cities with the same beginning letter displays. OR, Enter the ZIP code and touch NEXT. A list of cities with that ZIP code displays. Touch the name of the city you want or touch Back to return to the keypad and continue to enter the name or code. Continue as you would to create a route to an address as described in “Creating a route to an address” or follow the steps for “Creating a route to an intersection.” 21 Stopping a Route in Progress You might need to cancel directions while you are en route to your destination. To stop turn‐by‐turn directions to a destination: 1. From the Map View, touch Menu at the bottom of the screen. 2. When the Main Menu screen displays, touch Stop. This cancels your route. Resuming a Route after Stopping To resume a route after cancelling it: 1. Touch Go to... on the Main Menu screen, then touch Recent on the Go To... screen. A list of your recent addresses opens. 2. Touch the destination on the list. 3. When the address card for your destination opens, touch Go to calculate the route and start voice prompts. 4. PASSPORT iQ starts directions from your current location. Avoiding a Route Segment If there is an upcoming traffic slow‐down or incident along your route, you may choose to avoid the affected portion of the route. To calculate an alternate route: 1. From the Map View, touch Menu at the bottom of the screen. 2. When the Main Menu screen displays, touch Routes. 3. Touch Avoid Route Segment. 22 4. Touch the portion of the route (street name) you’d like to avoid. If possible, PASSPORT IQ will calculate a new route avoiding that roadway. 23 5. Touch the Detour button that displays in the top right corner of the screen to begin following the alternate route. Setting Your Home Address Setting your home address can save you time re‐entering this information later. When you want to navigate home from a new location, you can touch Go to... then touch Go Home. The address card opens. Touch Go for your routing instructions. To set your home address: 1. Touch Go To... on the Main Menu screen, then touch Go Home on the Go To… screen. The Home Is Not Yet Saved screen opens. 2. Touch one of the following: • Save current position to use your GPS location. • Type address to enter a state, city, street name, and house number. • Choose from favorites to select an address or destination from a list of favorites you created. • Choose from recents to select an address or destination from a list of recent destinations to which you created routes. 3. When the address card displays with your home address, touch Save at the bottom of the screen. 24 4. Touch Back or Menu to exit this screen. Searching for a Point of Interest To search for a particular point of interest: 1. Touch Go to… on the Main Menu screen, then touch Search on the Go To… screen to search for points of interest, such as restaurants, lodging, things to do, public locales, etc. 2. Type in the name of the place you’d like to go (e.g., post office); then touch Search. The Search Is In... screen lists the names of cities to which you have recently created routes. 3. When the list of cities to which you have created routes opens, select the city. OR, Touch Other City in the top right corner of the screen. The City Is In... screen opens showing the list of states to which you have navigated. Select the state or touch Other State to enter the state name. A list of states with the same beginning characters displays. Touch the name of the state you want or touch Back to return to the keypad and continue to enter the state name. Type the name of the city on the Enter City keypad that displays. A list of cities with the same beginning letter displays. Touch the name of the city you want or touch Back to return to the keypad and continue to enter the name.
OR, Touch Area near me now to display search results based on your current GPS location. 4. A list of search results appears, along with the distance to each. You can sort the list alphabetically or by distance by touching Sort in the top right corner of the screen. 25 5. Touch a search result to select it. The address card for the point of interest displays. 6. Touch Go to calculate the route and start voice prompts. OR, Touch Back to return to the search results and choose another. OR, Touch Save to save to your favorites list. For detailed instructions on adding a destination to your favorites list, see “Adding a Favorite.” Browsing Points of Interest Browse lets you search points of interest by category. 1. Touch Go to… on the Main Menu screen, then touch Browse on the Go To… screen to locate points of interest, such as restaurants, lodging, things to do, public services, etc. 26 2. Touch the category you want (e.g., Restaurant). The Search Is In... screen lists the names of cities to which you have recently created routes. 3. When the list of cities to which you have created routes opens, select the city. OR, Touch Other City in the top right corner of the screen. The City Is In... screen opens showing the list of states to which you have navigated. Select the state or touch Other State to enter the state name. A list of states with the same beginning characters displays. Touch the name of the state you want or touch Back to return to the keypad and continue to enter the state name. Type the name of the city on the Enter City keypad that displays. A list of cities with the same beginning letter displays. Touch the name of the city you want or touch Back to return to the keypad and continue to enter the name.
OR, Touch Area near me now to display search results based on your current GPS location. 4. A list of restaurants appears, along with the distance to each. You can sort the list alphabetically or by distance by touching Sort in the top right corner of the screen. 5. Touch the name of the restaurant you’d like. The address card for the restaurant displays. 6. Touch Go to calculate the route and start voice prompts OR, Touch Back to return to the search results and choose another. OR, Touch Save to save to your favorites list. For detailed in instructions on adding a destination to your favorites list, see “Adding a Favorite.” 27 Using Your Favorites List Adding a favorite To add a destination to your favorites list: 1. Start as you would to create a route to an address. You can also follow the steps to search or browse points of interest. 2. When the address card displays, touch Save at the bottom of the screen. 3. The keypad displays with the name of your search or destination or prompts you to Enter Favorite Name. 4. Touch NEXT to save the name shown on the keypad. OR, Enter a name to identify your favorite, then touch NEXT. 5. When the address card opens, touch Back or Menu at the bottom of the address card to save and exit this screen. OR, Touch Go to calculate the route and start voice prompts. 28 Sorting favorites On the Favorites screen, touch Sort in the top right corner of the screen. You can sort your favorites by recently used (recent addresses on top), most used, or alphabetically. Touch the sorting method you would like, then touch OK. Deleting favorites To remove a name from your favorites list: 1. Touch Go To… on the Main Menu screen, then touch Favorites on the Go To… screen. Your favorites list is displayed. 2. Touch the favorite you want to delete. The address card displays. 3. Touch the X at the bottom of the screen to delete the favorite. Navigating to a favorite You can save some steps when finding a route to a favorite destination. 1. Touch Go To… on the Main Menu screen, then touch Favorites on the Go To… screen. The list of favorites you have saved displays. 2. Touch the name of the destination to which you’d like directions. When you select a favorite, the address card displays. 3. Touch Go to calculate the route and start voice prompts. 29 Using Your Recent Locations List Navigating to a recent location You can save some steps when finding a route to a recent destination. 1. Touch Go To… on the Main Menu screen, then touch Recent on the Go To… screen. The list of destinations to which you have created routes displays. 2. Touch the name of the destination to which you’d like directions. When you select a recent destination, the address card displays. 3. Touch Go to calculate the route and start voice prompts. Managing Your Routes To create and save routes you regularly travel: 1. From the Map View, touch Menu at the bottom of the screen. 2. When the Main Menu screen displays, touch Routes. 3. Touch Manage Routes. The Manage Routes screen displays. 4. Touch Create a new route. The Select Route Origin screen displays. 30 5. On the Select Route Origin screen, touch one of the following: • Use current location—To add your current GPS location • Enter an address—To create a route as you would to any destination as described in “Creating a route to an address” • Select from Recent—To select a destination to which you have recently created a route • Select from Favorites—To select a saved favorite destination 6. When the address card displays with your selected origin, touch Select Destination. 7. Touch an option on the Select Route Destination screen: • Use current location • Enter an address • Select from Recent • Select from Favorites 8. When the address card displays with your selected origin and destination, touch the disk icon. 9. The Enter Route Name keypad opens. 10. Type a name to identify the route. 11. Touch NEXT. The address card displays with the route name. 12. Touch Back or Menu to exit and save the route. OR, Touch Edit to rename or delete the route, or change the origin or destination. OR, Touch Drive to calculate the route and start voice prompts. 31 Map View In the Map View, you can view your current location and route highlighted on a map. You also can view your current speed and mark radar or safety camera locations for future warnings. 32 Changing the Map View You can view the map as 3D or 2D, and you can also set the heading or compass direction. PASSPORT iQ offers three different Map View options: Car Up—The top of the Map View always represents the direction you are heading. The screen is in 2D, which appears as if you are looking straight down at the map. North Up—The top of the Map View is always north. 3D—The map appears in perspective as though a horizon is in the distance. This is the factory setting. The top of the Map View represents the direction you are heading. To change the Map View while in Map View, simply touch the compass icon. Touch it again to switch to the next view option. AutoZoom—Available with any of the Map Views, the AutoZoom feature automatically zooms in on your current location when approaching the next directional prompt. To activate/deactivate, 33 touch Settings on the Main Menu screen, then touch Map View in the Settings Menu. Touch the checkbox next to AutoZoom to turn on or off. Zooming In and Out Touch the plus and minus icons on the right side of the screen to zoom in and out on the Map View. Panning the Map To switch to click‐and‐drag Pan mode while in Map View, simply touch the center of the map. Then tap and drag your finger across the screen to pan. Touch Center Car at the bottom of the screen to center the view back on your current location. Touch Back to exit Pan mode and return to Map View. Viewing Turn‐by‐Turn Maneuvers Touch the street name at the top of the Map View screen to view the list of turn‐by‐turn maneuvers. Playing Back Last Directional Voice Prompt Touch the first green turn arrow to replay the last directional voice prompt. Muting Directional Voice Prompts Touch the speaker icon on the right side of the Map View to mute directional voice prompts. (Note: Radar/laser alerts will continue to sound.) Using the Lane Assist Feature When traveling a route in Map View, you can receive advance notification as to which lane you should be in to stay along the planned route. As you approach road intersections and other critical junctures such as lane splits and highway exits, the Lane Assist icon appears below the green turn arrow, instructing you to maneuver to the green highlighted lane(s) to ensure you continue on your desired route. Note: Lane Assist is not available in all areas. 34 Using the On‐Screen Radar/Laser Alert Area Located at the bottom left of the Map View screen, the On‐Screen Radar/Laser Alert Area not only provides visual indication of alerts, it also shows your current detection sensitivity and actual speed. 35 Adjusting detector sensitivity PASSPORT iQ has three detection sensitivity modes, as well as an option to turn radar/laser detection off. You can easily select any of these options by touching the On‐Screen Radar/Laser Alert Area when you are not receiving an alert. The area will display one of the following, and PASSPORT iQ will provide a voice confirmation of your selection: H (Highway sensitivity)—Provides maximum sensitivity on all bands. A (Auto sensitivity)—Provides real‐time radar performance based on your vehicle speed. As your vehicle speed increases, the radar sensitivity (X‐ and K‐band) is set to maximum range. As the vehicle speed decreases, the radar sensitivity (X‐ and K‐band only) is minimized to further reduce unwanted false alarms. Full sensitivity is maintained on all other bands. This mode is recommended for most driving. ANX (Auto No X sensitivity)—Provides the same detection sensitivity as Auto mode, but with the X‐band turned off. OFF (Radar/laser detection off)—This setting is particularly useful when you are driving in a state in which radar detectors are illegal. Viewing your actual speed In the Map View, your actual speed is displayed in the On‐Screen Radar/Laser Alert Area, to the right of the detection sensitivity icon. Muting alerts You can easily mute a radar/laser alert that is in progress by touching the On‐Screen Radar/Laser Alert Area during the alert. You can also silence an alert by pressing the SmartCord mute button. 36 Locking out false alerts (TrueLock GPS Radar/Laser Detector Filter) PASSPORT iQ is equipped with a TrueLock GPS Radar/Laser Detector Filter to lock out and store in its memory false alerts. For details on how to activate or deactivate the GPS Radar/Laser Detector Filter, refer to “Activating/deactivating the GPS Detector Filter.” To lock out a false alert (X‐band, K‐band or laser only), press the mute button on the SmartCord or touch the On‐Screen Radar/Laser Alert Area three times during the alert. Pressing the first time will silence the audio. Pressing a second time will generate a prompt on the display that will read “Lockout?” Press a third time to confirm you want to lock this signal out by location and frequency. A “Stored” message will be displayed. 37 Once a signal has been stored, PASSPORT iQ will reject the signal the next time you approach this area and will display the locked‐out alert in the On‐Screen Radar/Laser Alert Area with either a gray bar (Standard Bar Graph mode) or white text (SpecDisplay mode). To unlock a signal that has already been stored, simply press and hold the SmartCord mute button or touch the On‐Screen Radar/Laser Alert Area while receiving the locked out “alert.” The display will read “Unlock?” Press the SmartCord mute button or touch the On‐Screen Radar/Laser Alert Area again to unlock it from memory. The display will then read “Unlocked” to confirm your action. Viewing Speed Limit Data PASSPORT iQ is equipped with posted speed limit data for most major highways and a number of side roads. The posted speed limit for your current location appears in the speed limit icon on the left side of the Map View screen. 38 Marking a Location The mark icon allows you to mark a specific location and label it for future reference. Once marked, PASSPORT iQ will provide an audible and visual on‐screen alert when you reach this area again. PASSPORT iQ will also give you an advance warning at the following distances: • Red‐light cameras: 250 ft. or 10 seconds • Speed cameras: 500 ft. when traveling below 55 mph; 1,000 ft. when traveling above 55 mph • Speed traps: 0.3 mi. or approximately 1,584 ft. • Other: 500 ft. when traveling below 55 mph; 1,000 ft. when traveling above 55 mph To mark a location, touch the mark icon. The display will show the following icons: speed camera, red‐
light camera, speed trap, and other. Touch the corresponding icon to confirm the type of location you are marking. The marker you selected will appear in the location along your route. 39 Note: When a location is marked the first time, you must travel at least 1 mile away from that location to receive an alert. To unmark a location, touch the mark icon when you are receiving a “marked location” alert. The display will read “Unmark?” in the Radar/Laser Alert Area. Touch the mark icon again to confirm. Returning to the Main Menu Touch the Menu button at the bottom of the screen to return to the Main Menu screen. Viewing Estimated Arrival Time You can view your estimated time of arrival, as well as the estimated time or distance to your destination in the bottom right corner of the Map View. To change your arrival display option (e.g., from miles to destination to minutes to destination), simply touch this area of the screen. 40 Detector View In Detector View, you can view the radar signal‐strength meter, as well as your speed and your compass heading direction. You can also mark radar or safety camera locations for future warnings. 41 Choosing Your Detector Screen Your detector screen can be displayed with a digital or classic speedometer. Digital and classic tech screens can simultaneously track and display up to four different radar signals. The most severe alert will be displayed in the primary alert area, with additional alerts listed below. To change the detector screen display mode, simply touch Screen. Touch it again to switch to the next display option. Selecting Your Color Palette Your detector screen can be displayed with blue, red or yellow accents to match the dashboard lighting of various vehicles. To change the detector color palette, simply touch Color. Touch it again to switch to the next color option. Using the On‐Screen Radar/Laser Alert Area Located below or to the right of your current speed on the Detector View screen, the On‐Screen Radar/Laser Alert Area not only provides visual indication of alerts, it also shows your current detection sensitivity setting. 42 Adjusting detector sensitivity PASSPORT iQ has three detection sensitivity modes, as well as an option to turn radar/laser detection off. You can easily select any of these options by touching the right side of the On‐Screen Radar/Laser Alert Area when you are not receiving an alert. The area will display one of the following, and PASSPORT iQ will provide a voice confirmation of your selection: Highway (Highway sensitivity)—Provides maximum sensitivity on all bands. Auto (Auto sensitivity)—Provides real‐time radar performance based on your vehicle speed. As your vehicle speed increases, the radar sensitivity (X‐ and K‐band) is set to maximum range. As the vehicle speed decreases, the radar sensitivity (X‐ and K‐band only) is minimized to further reduce unwanted false alarms. Full sensitivity is maintained on all other bands. This mode is recommended for most driving. Auto No X (Auto No X sensitivity)—Provides the same detection sensitivity as Auto mode, but with the X‐band turned off. OFF (Radar/laser detection off)—This setting is particularly useful when you are driving in a state in which radar detectors are illegal. Muting alerts You can easily mute a radar/laser alert that is in progress by touching the right side of the On‐Screen Radar/Laser Alert Area during the alert. You can also silence an alert by pressing the SmartCord mute button. 43 Locking out false alerts (TrueLock GPS Radar/Laser Detector Filter) PASSPORT iQ is equipped with a TrueLock GPS Radar/Laser Detector Filter to lock out and store in its memory false alerts. For details on how to activate or deactivate the GPS Radar/Laser Detector Filter, refer to “Activating/deactivating the GPS Detector Filter.” For details on how to lock out false alerts, see “Locking out false alerts” in the Map View section. Playing Back Last Directional Voice Prompt Touch the green turn arrow to replay the last directional voice prompt. Muting Directional Voice Prompts Touch the speaker icon on the right side of the Map View to mute directional voice prompts. (Note: Radar/laser alerts will continue to sound.) Viewing Your Actual Speed In the Detector View, your actual speed is displayed in digital or analog view, depending on your screen selection. Marking a Location The mark icon allows you to mark a specific location and label it for future reference. Once marked, PASSPORT iQ will provide an audible and visual on‐screen alert when you reach this area again. For details on how to use this feature, see “Marking a Location” in the Map View section. Returning to the Main Menu Touch the Menu button at the bottom of the screen to return to the Main Menu screen. Switching to Map View Touch Map at the bottom of the screen to switch to the Map View. 44 Settings and Preferences You can customize the way the screen appears and set control functions to accommodate the way you use PASSPORT iQ. To set up the features described in this section, touch Settings in the top right corner of the Main Menu screen to display the Settings screen. Touch the down arrow to display more settings. Touch the up arrow to return to the previous screen. 45 Touch the button for the setting you want to adjust. To save your new settings, you can touch Back and return to the Settings screen or you can touch Menu to return to the Main Menu screen. Adjusting Your GPS Navigation Settings Changing the Map View From the Settings screen, touch Map View to view the options, then touch the option you’d like. A sample of your selection displays on the right. Car Up—The top of the Map View always represents the direction you are heading. The screen is in 2D, which appears as if you are looking straight down at the map. North Up—The top of the Map View is always north. 46 3D—The map appears in perspective as though a horizon is in the distance. This is the factory setting. The top of the Map View represents the direction you are heading. AutoZoom—Available with any of the Map Views, the AutoZoom feature automatically zooms in on your current location when approaching the next directional prompt. Touch the checkbox next to AutoZoom to turn on or off. Touch any button at the bottom of the screen to exit and save your changes. Setting day or night color palette From the Settings screen, touch Day/Night to view the settings, then touch the option you’d like. Auto—Automatically switches the day and night colors according to the time of day at your current GPS location. When a GPS signal is not available, the Auto setting changes from night to day at 8 a.m. and vice versa at 8 p.m. Day—Day colors are displayed with a light background and street names in black text. Night—Night provides contrasting colors that are easier to see in the dark. Touch any button at the bottom of the screen to exit and save your changes. Choosing your vehicle icon From the Settings screen, touch My Car to choose the icon you want to depict your current location: • Fun • Sport • Minivan • Sedan • Point 47 Touch the option you’d like. A preview will display to the right. Touch any button at the bottom of the screen to exit and save your changes. Choosing points of interest to display You can select points of interest (POIs) you want to display as icons on the Map View. From the Settings screen, touch POI to display the options. Touch the POIs you’d like displayed on the Map View. You can select more than one POI. Touch the down and up arrows to scroll through the list. Touch Back or Menu at the bottom of the screen to exit and save your changes. Clearing your recent or favorites lists From the Settings screen, touch Clear My Lists to remove information you have saved in your recent destinations or favorites lists. You can select one or both. Touch any button at the bottom of the screen to exit and save. You will be prompted to confirm the clearing action. Touch Yes to clear the list(s). Managing your routes Here you can create and save routes you regularly travel. You can also do this from the Main Menu screen by touching Routes, then touching Manage Routes. For step‐by‐step instructions, see “Managing Your Routes” in the GPS Navigation section. 48 Adjusting Your Detector Settings Your detector has a number of user‐selectable options to customize PASSPORT iQ to your own preferences. To review your current settings or change any settings, touch Detector… on the main Settings screen. The Detector Settings screen will display, presenting a menu of options. Touch the down arrow to display more settings. Touch the up arrow to return to the previous screen. Setting detection sensitivity PASSPORT iQ has three detection sensitivity modes, as well as an option to turn radar/laser detection off: Highway sensitivity—Provides maximum sensitivity on all bands. Auto sensitivity—Provides real‐time radar performance based on your vehicle speed. As your vehicle speed increases, the radar sensitivity (X‐ and K‐band) is set to maximum range. As the vehicle speed decreases, the radar sensitivity (X‐ and K‐band only) is minimized to further 49 reduce unwanted false alarms. Full sensitivity is maintained on all other bands. This mode is recommended for most driving. Auto No X sensitivity—Provides the same detection sensitivity as Auto mode, but with the X‐
band turned off. OFF—This setting is particularly useful when you are driving in a state in which radar detectors are illegal. To set the sensitivity, touch Sensitivity on the Detector Settings screen. Touch the mode to select it, then touch any button at the bottom of the screen to exit and save your changes. Activating/deactivating the AutoLearn feature The AutoLearn feature analyzes (over time) the source of radar signals by location and frequency. This allows PASSPORT iQ to determine if a signal is a real threat or a false one. If it determines that the signal is an automatic door opener, motion sensor, etc., it automatically locks out this source at this particular location. A “stored” message, accompanied by a single beep, will appear on the display when a signal has been automatically locked out. To turn AutoLearn on or off, touch AutoLearn on the Detector Settings screen. Touch the mode to select it, then touch any button at the bottom of the screen to exit and save your changes. Note: AutoLearn typically needs to encounter the exact frequency in the same location approximately three times to lock it out. Since some door openers are turned on and off routinely, some variations may occur. When AutoLearn is on, PASSPORT iQ will also un‐learn signals to protect you from locking out real threats. If a particular signal is no longer present at a location that was previously locked out, PASSPORT iQ will unlock that signal. Selecting the signal‐strength display mode PASSPORT iQ has two settings for displaying radar signal strength: Standard Bar Graph—Provides information on a single radar signal. If there are multiple signals present, PASSPORT iQ will determine which one is the most important threat to display. In this mode, when radar is detected, PASSPORT iQ displays the band (X, K, Ka, or Ku), and a precise bar graph of the signal strength. When PASSPORT iQ detects a laser signal, the display will read “Laser.” This is the default option for PASSPORT iQ. Note: The radar/laser alert bar graph appears in red. If the signal has been locked out as false, it will appear in gray. 50 SpecDisplay—This option is for the experienced detector user. In this mode, PASSPORT iQ will display the actual numeric frequency of the radar signal being received. For example, “K 24.150” shows one K‐band signal at 24.150 gigahertz. Even long‐time detector users will require some time to get familiar with this new level of information about detected signals. Note: The radar/laser alert frequency text appears in red. If the signal has been locked out as false, it will appear in white. To select your preferred signal‐strength display mode, touch Meter on the Detector Settings screen. Touch the mode to select it, then touch any button at the bottom of the screen to exit and save your changes. Modifying alerts within specified speeds (Cruise Alert) The Cruise Alert feature allows you to modify audible alerts when traveling within specified speeds (25–
95 mph). To set, touch Cruise Alert on the Detector Settings screen, then touch the option to select it. Touch any button at the bottom of the screen to exit and save your changes. All alerts received while traveling below the specified speed will give you a double‐beep alert for that band. Modifying band detection Selectable radar and laser bands allow you to customize which bands are monitored. The factory setting for PASSPORT iQ is all radar and laser frequencies (with the exception of Pop mode) monitored. It is recommended that you keep PASSPORT iQ in this mode. To monitor additional bands or modify your band detection in any way, touch Bands On/Off on the Detector Settings screen. Touch the checkboxes next to the bands to select/deselect them for monitoring, touching the up and down arrows to scroll through the list. Touch Back or Menu to exit and save your changes. For details on the various radar/laser bands, see “Understanding Your Detector.” 51 Activating/deactivating the detector voice PASSPORT iQ is set to communicate all radar/laser alerts and instructions using a voice announcement in addition to alert tones. If you prefer to turn the voice announcements off, only tones will be used for alerts. To turn the detector voice on or off, touch Voice On/Off on the Detector Settings screen. Touch the mode to select it, then touch any button at the bottom of the screen to exit and save your changes. Activating/deactivating camera and speed‐trap database PASSPORT iQ’s Defender Database stores thousands of red‐light and fixed‐position speed cameras throughout North America. The factory setting is for all markers in the database to be reported as you approach them. It is recommended that you use PASSPORT iQ in this mode. To modify which markers are reported, touch Cameras, … on the Detector Settings screen. Touch the checkboxes next to the various markers to select/deselect them for reporting. Touch any button at the bottom of the screen to exit and save your changes. Activating/deactivating the GPS Radar/Laser Detector Filter (TrueLock) PASSPORT iQ is equipped with a TrueLock GPS Radar/Laser Detector Filter to lock out and store in its memory false alerts. For details on how to use this feature, see “Locking out false alerts.” To turn the TrueLock feature on or off, you must activate or deactivate the TrueLock GPS Radar/Laser Detector Filter. To do so, touch Detector Filter on the Detector Settings screen. Touch the mode to select it, then touch any button at the bottom of the screen to exit and save your changes. Clearing marked locations At some point, you may want to clear all of the data in your detector database. This includes all marked locations. To do so, touch Clear… on the Detector Settings screen, then touch Yes or No. Activating/deactivating the illegal‐state alert In some states, the use of a radar detector is illegal. PASSPORT iQ is equipped to alert you when you enter one of these states, so that you can turn your detector off. To turn the illegal‐state alert on or off, touch Illegal States on the Detector Settings screen. Touch the mode to select it, then touch any button at the bottom of the screen to exit and save your changes. Activating/deactivating the detector AutoMute feature PASSPORT iQ comes equipped with our patented AutoMute feature. After your detector alerts you to a radar encounter at the volume you have selected, the AutoMute feature will automatically reduce the alert volume to a lower level. This keeps you informed without the annoyance of a continuous full‐
volume alert. If you prefer, you can turn the AutoMute feature off. To turn AutoMute on or off, touch AutoMute on the Detector Settings screen. Touch the mode to select it, then touch any button at the bottom of the screen to exit and save your changes. Setting your alert tones When you encounter radar, a distinct audible alert will sound and occur faster as the signal gets stronger. When the signal is very strong, the audible alerts will blend into a solid tone. This allows you to judge the distance from the signal source without taking your eyes from the road. 52 Each band has a distinct tone for easy identification. PASSPORT iQ offers two radar alert tone settings: Classic—This is the factory setting for your PASSPORT iQ. It uses the standard ESCORT radar alert tones: • X‐band = beep tone • K‐band = raspy brap tone • Ka‐band = double brap tone • Ku‐band = beep tone (same as X‐band) • Pop = solid brap tone • Laser = solid brap tone Note: Since Pop and laser signals are a possible threat no matter how weak, PASSPORT iQ will provide a solid audio alert for these signals (Classic mode only). Mild—This setting offers softer, simpler alert tones, which are less obtrusive to the driving experience: • X‐band, K‐band, Ka‐band, Ku‐band, and Pop = Doorbell chime • Laser = Same as Classic mode (solid brap tone) To set the style of your alert tones, touch Alert Tones on the Detector Settings screen. Touch Classic or Mild, then touch any button at the bottom of the screen to exit and save your changes. Activating/deactivating the laser shifters (optional feature) Our optional SHIFTER ZR4™ laser‐shifting system is the most advanced defense against targeting laser guns. It includes three (two front, one rear) highly sensitive laser transceivers that detect laser signals and transmit back a pulsed signal to “shift” or confuse the targeting laser gun. To avoid undue attention sometimes caused by laser guns providing “jamming” codes to the officer, the SHIFTER ZR4 offers a Receive Only mode. In this mode, simply touch the On‐Screen Radar/Laser Alert Area or press the SmartCord mute button to manually shut off the laser transceivers once you have corrected your speed. The shifters remain in Receive Only mode for approximately 60 seconds, giving you time to pass the speed trap. Once this time has expired, the shifters return to active mode. To turn this feature on or off, or to switch to Receive Only mode, touch Laser Shifters on the Detector Settings screen. Touch the mode to select it, then touch any button at the bottom of the screen to exit and save your changes. Restoring detector settings To restore PASSPORT iQ’s detector to its original factory settings, touch Restore… on the Detector Settings screen, then touch Yes. 53 Adjusting Your General Settings Setting screen brightness From the Settings screen, touch Brightness to view the brightness scale. Touch the scale to adjust the brightness. You will see a preview of the brightness as you touch each level on the scale. Touch any button at the bottom of the screen to exit and save your changes. Setting language and units From the Settings screen, touch Language & Units to set the spoken language for voice prompts and the written language for text display. American English is the factory setting. You can also set units of distance you want to use: miles or kilometers. 54 Touch Language to choose your preferred language and Voice to choose your preferred voice. Touch Units to choose miles or kilometers. When you touch the arrow next to an option, a secondary screen appears that provides the available choices for that option. Touch the button to make your selection, then touch any button at the bottom of the screen to exit and save your changes. Setting time options From the Settings screen, touch Time to view and select: Format—12‐hour clock or 24‐hour clock Zone—Time zones Daylight Savings—Auto, On, or Off When you touch the arrow next to an option, a secondary screen appears that provides the available choices for that option. Touch the button to make your selection, then touch any button at the bottom of the screen to exit and save your changes. Selecting your background image You can choose the background image you want to display on the Main Menu screen. From the Settings screen, touch Wallpaper to display the options. Touch the down arrow to display more options. Touch the option you’d like. A preview displays to the right. Touch Back or Menu at the bottom of the screen to exit and save your new background. 55 Setting the over‐speed‐limit alert PASSPORT iQ is equipped with posted speed limit data for most major highways and a number of side roads. The posted speed limit for your current location appears in the speed limit icon on the left side of the Map View and Detector View screens. PASSPORT iQ can also provide voice alerts that you are traveling over the posted speed limit for your current location. You can customize this feature to provide voice alerts at 5 mph, 10 mph, or 15 mph over the posted speed limit, or you can turn it off. To set or deactivate the over‐speed‐limit alert, touch Over Speed… on the Settings screen. Touch the down arrow to display more options. Touch an option to select it. Touch Back or Menu at the bottom of the screen to exit and save your changes. Restoring all factory settings From the Settings screen, touch Restore to return all settings to the original factory settings. You are prompted to confirm your selection. Touch Yes to restore the factory settings. 56 Viewing information about PASSPORT iQ From the Settings screen, touch About to view the following information: • Device name • Model number • Map data version • Software version • ESCORT Web address Touch any button at the bottom of the screen to exit this screen. Viewing legal information From the Settings screen, touch Legal to view legal and safety agreements. Touch Back or Menu at the bottom of the screen to exit. Viewing GPS and memory status From the Settings screen, touch Status to view GPS status and available memory. Touch any button at the bottom of the screen to exit. Simulating a route (enabling/disabling Demo mode) To simulate a route, you must first enable Demonstration mode by touching Demo on the Settings Menu screen. Touch the arrow next to “Disabled,” and a secondary screen appears with the options to enable or disable the Demo mode. Touch the button to make your selection, then touch any button at the bottom of the screen to exit and save your changes. Once enabled, you can create a route as usual, and PASSPORT iQ will simulate the route on screen. However, you must disable Demonstration mode to acquire a GPS satellite signal and drive the route. Note: PASSPORT iQ cannot receive a GPS satellite signal while in Demonstration mode. Ensure Demonstration mode is disabled when not in use. Calibrating the screen You may want to calibrate PASSPORT iQ to ensure accuracy and response of screen touches. To do so: 1. Touch Calibration on the Settings Menu screen. A target will appear on the screen. 2. Carefully tap the center of the target. 3. Repeat as the target moves around the screen. 4. When calibration is complete, the target will disappear. The new calibration settings have been measured. 5. Tap the screen to save the new settings. OR, Wait 30 seconds to cancel and keep the current settings. 57 SECTION 3: UNDERSTANDING PASSPORT iQ Understanding Your Detector How radar works Traffic radar, which consists of microwaves, travels in straight lines and is easily reflected by objects such as cars, trucks, even guardrails and overpasses. Radar works by directing its microwave beam down the road. As your vehicle travels into range, the microwave beam bounces off your car, and the radar antenna looks for the reflections. Using the Doppler principle, the radar equipment then calculates your speed by comparing the frequency of the reflection of your car to the original frequency of the beam sent out. Traffic radar has limitations, the most significant of these being that it typically can monitor only one target at a time. If there is more than one vehicle within range, it is up to the radar operator to decide which target is producing the strongest reflection. Since the strength of the reflection is affected by both the size of the vehicle and its proximity to the antenna, it is difficult for the radar operator to determine if the signal is from a sports car nearby or a semi truck several hundred feet away. Radar range also depends on the power of the radar equipment itself. The strength of the radar unit’s beam diminishes with distance. The farther the radar has to travel, the less energy it has for speed detection. Because intrusion alarms and motion sensors often operate on the same frequency as X‐ and K‐band radar, your detector will occasionally receive non‐police radar signals. Since these X‐band transmitters are usually contained inside of a building or aimed toward the ground, they will generally produce much weaker readings than will a true radar encounter. As you become familiar with the sources of these pseudo alarms in your daily driving, they will serve as confirmation that PASSPORT iQ’s radar detection abilities are fully operational. 58 How Pop works Pop mode is a relatively new feature for radar gun manufacturers. It works by transmitting an extremely short burst, within the allocated band, to identify speeding vehicles in traffic. Once the target is identified, or “popped,” the gun is then turned to its normal operating mode to provide a vehicle tracking history (required by law). Note: According to radar gun manufacturers, tickets should not be issued in Pop mode. How laser works Laser speed detection is actually Light Detection and Ranging (LIDAR). LIDAR guns project a beam of invisible infrared light. The signal is a series of very short infrared‐light energy pulses that move in a straight line, reflecting off your car and returning to the gun. LIDAR uses these light pulses to measure the distance to a vehicle. Speed is then calculated by measuring how quickly these pulses are reflected, given the known speed of light. LIDAR is a newer technology whose use is not as widespread as conventional radar; therefore, you may not encounter it on a daily basis. And unlike radar detection, LIDAR is not prone to false alarms. Because LIDAR transmits a much narrower beam than does radar, it is much more accurate in its ability to distinguish between targets and is also more difficult to detect. As a result, even the briefest laser (LIDAR) alert should be taken seriously. There are limitations to LIDAR equipment. LIDAR is much more sensitive to weather conditions than radar, and a LIDAR gun’s range will be decreased by anything affecting visibility, such as rain, fog, or smoke. A LIDAR gun cannot operate through glass, and it must be stationary in order to get an accurate reading. Because LIDAR must have a clear line of sight and is subject to cosine error (an inaccuracy that increases as the angle between the gun and the vehicle increases), police typically use LIDAR equipment parallel to the road or from an overpass. LIDAR can be used day or night. How threat‐signal ranking works PASSPORT iQ includes a new boost in anti‐falsing software to eliminate excessive alerts from erroneous X‐ and K‐band sources. One example of this is traffic‐flow monitoring systems. These systems, which are becoming more widely used in cities across the U.S., generate K‐band signals to measure the flow of traffic on a given road. Unfortunately, most detectors see this as a real threat and will alert you to it unnecessarily. Our new proprietary threat‐signal ranking (TSR) software intelligently sorts, ranks, and rejects these types of false alarms automatically. The result is ultimate protection without excessive false alarms. We suggest you turn TSR on if you are experiencing extreme false alerts in your area. For instructions on how to activate TSR, see “Modifying band detection.” How red‐light cameras work Red‐light cameras use three basic things: a camera, a device to trigger the camera, and a computer. An intersection may have more than one camera to monitor traffic from multiple directions. The trigger is typically a series of wires buried just beneath the surface of the road. These wires are separated by a 59 pre‐set distance in order to create a magnetic field or induction loop. Once a vehicle is in the intersection, the loop or circuit becomes closed and alerts the computer to take a picture. In some states, tickets are issued to the car’s owner, no matter who’s actually driving. In this case, the red‐light camera only needs to photograph the vehicle’s rear license plate. In other states, the actual driver is responsible for paying the ticket. In this case, the system needs a second camera in front of the car to get a shot of the driver’s face. How speed cameras work There are several types of fixed‐position speed cameras used, including radar, laser, induction‐loop, and photo‐based. Radar‐and laser‐based cameras are typically mounted near the road and transmit a short‐range signal across the lanes monitored. Since this signal is transmitted across the road instead of down the road like with many handheld systems, detecting them in time is critical. Another technology used is an induction‐loop system. This type of system utilizes wires buried just beneath the surface of the road to trigger a computer that calculates speed between the two points. Photo‐based systems take two sets of pictures of all passing vehicles between two separate fixed locations. Both sets of photographs are date and time stamped, which enables the system to calculate average speed between the two locations. Fixed‐speed cameras can also be set up to monitor one to four lanes of traffic in the same direction. To achieve this, a sensor is installed in each lane, and a wide‐angle camera lens is used to photograph the vehicle that is speeding. Interpreting alerts Although PASSPORT iQ has a comprehensive warning system, only experience will teach you what to expect from your detector and how to interpret what it tells you. The specific type of radar being used, the type of transmission (continuous or instant‐on), and the location of the radar source affect the alerts you receive. The following examples will give you an introduction to understanding PASSPORT iQ’s warning system for radar and laser alerts. Note: This guide applies to alerts in Classic mode. For details on how to set your alert tones, see “Setting Your Alert Tones.” Alert: Detector begins to sound slowly, then the rate of alert increases until it becomes a solid tone. The signal meter ramps accordingly. Explanation: You are approaching a continuous radar source aimed in your direction. Alert: Detector emits short alerts for a few seconds, then falls silent, only to briefly alert and fall silent again. 60 Explanation: An instant‐on radar source is being used ahead of you and out of your view. Alert: Detector suddenly sounds a continuous tone for the appropriate band received. Explanation: An instant‐on radar or laser source is being used nearby. This kind of alert requires immediate attention. Alert: Detector sends a brief laser alert. Explanation: Laser is being used in the area. Because laser is inherently difficult to detect, any laser alert may indicate a source very close by. Alert: Detector receives weak signals. These signals may be a little stronger as you pass large, roadside objects. The signals increase in frequency. Explanation: A moving patrol car with continuous radar is overtaking you from behind. Because these signals are reflected (reflections are increased by large objects), they may or may not eventually melt into a solid point, even when the patrol car is directly behind you. Alert: Detector alerts slowly for a while, then abruptly jumps to a strong alert. Explanation: You are approaching a radar unit concealed by a hill or an obstructed curve. Alert: Detector alerts intermittently. Rate and strength of alerts may be consistent or vary wildly. Explanation: A patrol car is traveling in front of you with a radar source aimed forward. Because signals are sometimes reflected off of large objects and sometimes not, the alerts may seem inconsistent. Alert: Detector alerts intermittently. Rate and strength of signal increases with each alert. Explanation: A patrol car is approaching from the other direction, sampling traffic with instant‐on radar. Such alerts should be taken seriously. Alert: Detector gives an X‐band alert intermittently. Explanation: You are driving through an area populated with radar motion sensors (door openers, burglar alarms, etc.). Since these transmitters are usually contained inside buildings or aimed toward or away from you, they are typically not as strong or lasting as a real radar encounter. Caution: Overconfidence in an unfamiliar area can be dangerous. Likewise, if an alert in a commonly traveled area is suddenly stronger or on a different band than usual, speed radar may be set up nearby. Understanding GPS The Global Positioning System (GPS) was developed by the U.S. military and is made up of 24 orbiting satellites. There are at least four satellites visible at any given time every day. A GPS receiver is designed to locate and receive data from four of these satellites. This data includes the distance to your location from each of the satellites. Once the distance from each satellite is known, the receiver can calculate and pinpoint your exact location. 61 Specifications Operating bands X‐band 10.525 GHz ±25 MHz K‐band 24.150 GHz ±100 MHz Ka‐band 34.700 GHz ±1300 MHz Ku‐band 13.450 GHz ±25 MHz Laser 904nm, 33 MHz bandwidth Radar receiver/detector type Superheterodyne, varactor‐tuned VCO Scanning frequency discriminator Digital signal processing GPS receiver SiRFstar III Laser detection Quantum limited video receiver Multiple laser sensor diodes Display type 5” LCD screen with OneTouch user interface 480 x 272 resolution Power requirement 12‐volt DC, negative ground SmartCord (included) Auto‐calibration circuitry
SmartShieldVG2Immunity
Dimensions 5.35"L x 3.71"H x 1.62"W
62 SECTION 4: TROUBLESHOOTING, MAINTENANCE & SERVICE Troubleshooting Important: Be sure that PASSPORT iQ is in clear view of the sky. The device needs a GPS satellite signal to function properly. Be sure that PASSPORT iQ is fully charged. For details about charging PASSPORT iQ, refer to “Charging the Battery.” Take the steps described in the following table to solve simple problems before contacting Customer Service. If problems persist, turn the power off, disconnect the power connector from the device, and contact Customer Service. Never try to repair PASSPORT iQ yourself, because it is dangerous to do so. Problem Solution(s) You cannot turn on the device. The SmartCord is not connected properly. Make sure it is firmly attached at both ends of the cable. The built‐in rechargeable battery is weak. Use the SmartCord to supply power or charge the battery. The unit has not been used for a long time, and the built‐in battery is overly discharged. To reset PASSPORT iQ, first disconnect it from external power. Press the reset button on the bottom of the device. Reconnect PASSPORT iQ to external power source and slide the power switch to the right. The device will not activate after sliding the power switch when connected to the SmartCord or USB cable for charging. There is no sound. The screen is very dark. The GPS cannot receive satellite signals or cannot orient itself. The GPS has intermittent or unstable reception. The volume may be turned down or turned off. Turn up the volume. See “Volume” for details on how to adjust. The brightness may be turned down. See “Setting screen brightness” for details on how to adjust. The GPS might be obstructed by buildings or blocked by a metal enclosure. Make sure to use the unit outside. The built‐in rechargeable battery is weak. Use the SmartCord to supply power or charge the battery. The system software fails to function after a change. Turn the unit off and on again. 63
The detector beeps briefly at the same location every day, but no radar source is in sight. The detector does not seem sensitive to radar or laser. An X‐band motion sensor or intrusion alarm is located within range of your route. See “Locking out false alerts” for details on how to lock out this alert. The detector did not alert when a police car was in view. VASCAR (Visual Average Speed Computer and Recorder), a stopwatch method of speed detection, may be in use. Officer may not have radar or laser unit turned on. Make sure the windshield wipers do not block PASSPORT iQ’s radar antenna and that the laser lens is not behind tinted areas. Determine if your vehicle has an Instaclear®, ElectriClear®, or solar reflective windshield, which may deflect radar or laser signals. Detector’s audible alerts Detector is in AutoMute mode. See “Activating/deactivating the become softer after the first detector AutoMute feature” for details. few alerts. Other possibilities Static or other external interference may cause the unit to function abnormally. To recover normal status, reset PASSPORT iQ. First, disconnect it from external power. Press the reset button on the bottom of the device. Reconnect PASSPORT iQ to the external power source and slide the power switch to the right. If problems persist, turn off the power and contact Customer Service. Software Updates PASSPORT iQ’s firmware, or operating software, can easily be updated using our exclusive detector software tools found on our website. Subscription updates to map software and the Defender Database are also available online. In order to have access to these updates, you must register PASSPORT iQ at www.EscortRadar.com. Once registered, you will receive e‐mail notifications that updates are available for your database or firmware. PASSPORT iQ will need to be powered up to use the software tools. If you have a laptop computer, you can take it out to the vehicle to download the updates via PASSPORT iQ’s USB data port. Accessories The following accessories and replacement parts are available for PASSPORT iQ. Coiled SmartCord* $29.95 Straight SmartCord* $29.95 Direct‐Wire SmartCord* $29.95 Travel Case $29.95 64
Bean‐Bag Mount $19.95 Platform Mount $19.95 *Available in red or blue Service Procedure If PASSPORT iQ ever needs service, please follow these simple steps: 1. Check the Troubleshooting section of this manual. It may have a solution to your problem. 2. Call us toll‐free at 800‐543‐1608. We may be able to solve your problem over the phone. If the problem requires that you send PASSPORT iQ to the factory for repair, we will provide you with a Return Authorization Number, which must be included on the outside of your shipping box. 3. Enclose the following information with PASSPORT iQ: • Your Service Order Number • Your name and return address • Your daytime telephone number • A description of the problem you are experiencing • The vehicle power adapter you have been using • If you have owned PASSPORT iQ less than one year and did not purchase directly from ESCORT, please include a copy of your receipt from an Authorized Reseller Out‐of‐warranty repairs For out‐of‐warranty repairs, include prepayment in the amount you were quoted by the ESCORT Customer Service Representative. If PASSPORT iQ has been damaged, abused, or modified, the repair cost will be calculated on a parts‐and‐labor basis. If it exceeds the basic repair charge, you will be contacted with an estimate. If the additional payment is not received within 30 days (or if you notify us that you do not wish to have PASSPORT iQ repaired at the price quoted), PASSPORT iQ will be returned without repair. Payment can be made by check, money order, or credit card. Mail to: ESCORT Inc. Customer Service Department Return Authorization Number _________ 5440 West Chester Road West Chester, OH 45069 For your own protection, we recommend that you ship your PASSPORT iQ prepaid and insured. Insist on a proof of delivery and keep the receipt until the return of your PASSPORT iQ. ESCORT Extended Service Plan ESCORT offers an optional extended service plan. Contact ESCORT Sales at 800‐433‐3487 for details. 65
SECTION 5: LEGAL INFORMATION End‐User License Agreement PLEASE READ THE FOLLOWING TERMS AND CONDITIONS CAREFULLY BEFORE INSTALLING OR USING THE SOFTWARE OR ANY ACCOMPANYING DOCUMENTATION (COLLECTIVELY, THE “SOFTWARE”). THE TERMS AND CONDITIONS OF THIS END‐USER LICENSE AGREEMENT (“AGREEMENT”) GOVERN USE OF THE SOFTWARE. IF YOU DO NOT ACCEPT ALL THE TERMS OF THIS AGREEMENT, THEN ESCORT INC. IS UNWILLING TO LICENSE THE SOFTWARE TO YOU. IF YOU INSTALL OR USE THE SOFTWARE, THEN YOU HAVE INDICATED THAT YOU UNDERSTAND THIS AGREEMENT AND ACCEPT ALL OF ITS TERMS. 1. Grant of License. Subject to your compliance with the terms and conditions of this Agreement, ESCORT Inc. and/or its licensors grant you a non‐exclusive and non‐transferable license to install and use the executable form of Software on a single device, solely for your personal, non‐commercial use. ESCORT Inc. and/or its licensors reserve all rights in the Software not expressly granted to you in this Agreement. 2. Restrictions. Except as expressly specified in this Agreement, you may not: (a) copy or modify the Software; (b) transfer, sublicense, lease, lend, rent or otherwise distribute the Software to any third party; or (c) make the functionality of the Software available to multiple users through any means, including, without limitation, by uploading the Software to a network or file‐sharing service or through any hosting, application services provider, service bureau, or any other type of services. You acknowledge and agree that portions of the Software, including, without limitation, the source code and the specific design and structure of individual modules or programs, constitute or contain trade secrets of ESCORT Inc. and its licensors. Accordingly, you agree not to disassemble, decompile, or otherwise reverse engineer the Software, in whole or in part, or permit or authorize a third party to do so, except to the extent such activities are expressly permitted by law notwithstanding this prohibition. 3. Ownership. The Software is licensed, not sold. You own the media (if any) on which the Software is recorded, but ESCORT Inc. and/or its licensors retain ownership of the Software, including all intellectual property rights therein. The Software is protected by U.S. copyright law and international treaties. You will not delete or in any manner alter the copyright, trademark, and other proprietary rights notices or markings appearing on the Software as delivered to you. 4. Term. This Agreement remains effective until terminated. You may terminate it at any time by destroying all copies of the Software in your possession or control. This Agreement will automatically terminate without notice if you breach any term of this Agreement. Upon termination, you must promptly destroy all copies of the Software in your possession or control. 5. Government Users. The Software and Documentation are “commercial computer software” and “commercial computer software documentation,” respectively, as such terms are used in FAR 12.212. Any use, duplication, or disclosure of the Software or the Documentation by or on behalf of the U.S. government is subject to restrictions as set forth in this Agreement. Manufacturer is ESCORT Inc. 6. Export Law. You agree to comply fully with all U.S. export laws and regulations to ensure that neither the Software nor any technical data related thereto nor any direct product thereof is exported or re‐exported directly or indirectly in violation of, or used for any purposes 66
prohibited by, such laws and regulations. 7. No Warranty. THE SOFTWARE IS PROVIDED “AS IS,” WITHOUT WARRANTY OF ANY KIND. ESCORT INC. EXPRESSLY DISCLAIMS ALL WARRANTIES AND CONDITIONS, EXPRESS OR IMPLIED, INCLUDING ANY IMPLIED WARRANTIES AND CONDITIONS OF MERCHANTABILITY, FITNESS FOR A PARTICULAR PURPOSE AND NONINFRINGEMENT, AND ANY WARRANTIES AND CONDITIONS ARISPNG OUT OF COURSE OF DEALING OR USAGE OF TRADE. NO ADVICE OR INFORMATION, WHETHER ORAL OR WRITTEN, OBTAINED FROM ESCORT INC. OR ELSEWHERE WILL CREATE ANY WARRANTY OR CONDITION NOT EXPRESSLY STATED IN THIS AGREEMENT. 8. Limitation of Liability. ESCORT INC. AND OR ITS LICENSORS’ TOTAL LIABILITY TO YOU FROM ALL CAUSES OF ACTION AND UNDER ALL THEORIES OF LIABILITY WILL BE LIMITED TO AND WILL NOT EXCEED THE AMOUNTS PAID TO ESCORT INC. BY YOU FOR THE SOFTWARE. IN NO EVENT WILL ESCORT INC. BE LIABLE TO YOU FOR ANY SPECIAL, INCIDENTAL, EXEMPLARY, PUNITIVE, OR CONSEQUENTIAL DAMAGES (INCLUDING LOSS OF USE, DATA, BUSINESS, OR PROFITS) OR FOR THE COST OF PROCURING SUBSTITUTE PRODUCTS ARISING OUT OF OR IN CONNECTION WITH THIS AGREEMENT OR THE USE OR PERFORMANCE OF THE SOFTWARE, WHETHER SUCH LIABILITY ARISES FROM ANY CLAIM BASED UPON CONTRACT, WARRANTY, TORT (INCLUDING NEGLIGENCE), STRICT LIABILITY, OR OTHERWISE, AND WHETHER OR NOT ESCORT INC. HAS BEEN ADVISED OF THE POSSIBILITY OF SUCH LOSS OR DAMAGE. THE FOREGOING LIMITATIONS WILL SURVIVE AND APPLY EVEN IF ANY LIMITED REMEDY SPECIFIED IN THIS AGREEMENT IS FOUND TO HAVE FAILED OF ITS ESSENTIAL PURPOSE. 67
ESCORT One‐Year Limited Warranty What this warranty covers: ESCORT warrants your product against all defects in materials and workmanship. For how long: One (1) year from the date of the original purchase What we will do: ESCORT, at our discretion, will either repair or replace your product free of charge. What we will not do: ESCORT will not pay shipping charges that you incur for sending your product to us. What you must do to maintain this warranty: Show original proof of purchase from an authorized ESCORT dealer. Warranty exclusions: Warranty does not apply to your product under any of the following conditions: • The serial number has been removed or modified. • Your product has been subjected to misuse or damage (including water damage, physical abuse, and/or improper installation). • Your product has been modified in any way. • Your receipt or proof of purchase is from a non‐authorized dealer or Internet auction site, including E‐bay, U‐bid, or other non‐authorized resellers. • You are not the original purchaser of the product from an authorized dealer or did not receive it as a gift from the original purchaser of product from an authorized dealer. To obtain service: Contact ESCORT (800‐543‐1608) to obtain a Return Authorization Number. Properly pack your product and include: your name, complete return address, written description of the problem with your product, daytime telephone number, and a copy of the original purchase receipt. Label the outside of the package clearly with your Return Authorization number. Ship the product prepaid (insured, for your protection) to: ESCORT Inc., 5440 West Chester Road, West Chester, OH 45069. LIMITATION OF WARRANTY: EXCEPT AS EXPRESSLY PROVIDED HEREIN, YOU ARE ACQUIRING THE PRODUCT “AS IS” AND “WHERE IS,” WITHOUT REPRESENTATION OR WARRANTY. ESCORT SPECIFICALLY DISCLAIMS ANY REPRESENTATION OR WARRANTY, INCLUDING, BUT NOT LIMITED TO, THOSE CONCERNING THE MERCHANTABILITY AND SUITABILITY OF THE PRODUCT FOR A PARTICULAR PURPOSE. ESCORT SHALL NOT BE LIABLE FOR CONSEQUENTIAL, SPECIAL, OR INCIDENTAL DAMAGES, INCLUDING, WITHOUT LIMITATION, DAMAGES ARISING OUT OF THE USE, MISUSE, OR MOUNTING OF THE PRODUCT. The above limitations or exclusions shall be limited to the extent they violate the laws of any particular state. ESCORT is not responsible for products lost in shipment between the owner and our service center. Other legal rights: This Warranty gives you specific rights. You may have other legal rights, which vary from state to state. 68
Restricted Rights/Special License Rights The documentation is provided with RESTRICTED RIGHTS. Use, duplication, or disclosure by the Government is subject to restrictions as set forth in the License Agreement and in subparagraphs (c)(1)(ii) of the Rights in Technical Data and Computer Software clause at DFARS 252.227‐7013 or subparagraphs (c)(1) and (2) of the Commercial Computer Software—Restricted Rights at 48 CFR 52.227‐
19, or their equivalent, as applicable. Manufacturer is ESCORT Inc., 5440 West Chester Road, West Chester, OH 45069. Disclaimer of Warranties and Accuracy of Data Although the information found in this document is believed to be reliable, no warranty, expressed or implied, is made regarding the accuracy, adequacy, completeness, legality, reliability, or usefulness of any information, either isolated or in the aggregate. The information is provided “as is.” All warranties of any kind, express or implied, including but not limited to the implied warranties of merchantability, fitness for a particular purpose, and non‐infringement of proprietary rights, are disclaimed. Changes may be periodically made to the information by ESCORT Inc.; these changes may or may not be incorporated into this document. Since the use of the software and the conditions by which the software are used are beyond the control of ESCORT Inc., it is the obligation of the customer to determine the correct and safe selection and settings and conditions of use of the software. To the extent that the law permits, any liability which may be incurred as a result of the use or future use of software developed by ESCORT Inc., is limited to the cost of repairing or replacing the failed software within the warranty period and does not extend to any loss or damage which may be caused as a consequence of misuse of the software. ESCORT Inc. makes no representations or warranties regarding results that may be obtained from a user modification of the software, and said modification shall be done at your own discretion and risk. ESCORT Inc. shall not, in any event, be liable for economic loss of profits, bodily injuries, or indirect, special, or consequential damages. FCC Certification This equipment has been tested and found to comply with limits for Class B digital device, pursuant to part 15 of the FCC Rules. These limits are designed to provide reasonable protection against harmful interference in a residential installation. This equipment generates, uses, and can radiate radio frequency energy. If the equipment is not installed and used in accordance with the instructions, it may cause harmful interference to radio or television reception. Such interference can be determined by turning the equipment off and on. The user is encouraged to try to correct the interference by one or more of the following measures: 1. Reorient or relocate the receiving antenna. 2. Increase the separation between the equipment and the receiver. Connect the equipment into an outlet on a circuit different from that to which the receiver is connected. 3. Consult the dealer or an experienced radio/TV technician for help. FCC note: Modifications not expressly approved by the manufacturer could void the user’s FCC‐granted authority to operate the equipment. 69 ESCORT Inc. 5440 West Chester Road West Chester, OH 45069 Sales/Service 800.543.1608 www.EscortRadar.com ©2010 ESCORT Inc. ESCORT®, PASSPORT®, TrueLock™, SpeedAlert™, AutoLearn™, AutoSensitivity™, and SpecDisplay™ are trademarks of ESCORT Inc. Features, specifications, and prices subject to change without notice. 70