1
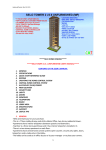
InkWelle on the Web:
www.inkwelle.com
InkWelle in Second Life:
Nevia 128, 128, 24
InkWelle Dynamic Sign User Manual
The InkWelle Dynamic Sign provides an eye-catching way to creatively present your
signs and messages in Second Life. We feel that the huge rotating billboards around SL
invite resentment from residents because so very often these signs ruin the beauty of
residential neighborhoods. Our answer to that issue is a smaller billboard with over 50
scripted transitions to make it something that your potential customers will stop to
watch and may even invite others to come and see. You can restrict the access to the
control of the sign to just yourself or your group, or leave it available for anyone in SL.
The surface of the InkWelle Dynamic Sign is made up of multiple triangular blocks that
automatically resize and offset textures, and which transition between textures in an
artistic and interesting way. The sign operates when an avatar is within visual range.
For more information and for technical support, please IM Davie Zinner. You can see a
demo of the InkWelle Dynamic Sign at the InkWelle Store.
In this
1.
2.
3.
4.
5.
6.
7.
8.
Document:
Components
Default Settings
Load Your Images
Running The InkWelle Dynamic Sign
Adding an Optional Frame
Using Multiple InkWelle Dynamic Signs
Menu Commands
About Lag
1. COMPONENTS
There are two parts to the InkWelle Dynamic Sign product. First is the Dynamic Sign
Generator which is your control box for creating and commanding the sign. Next,
contained inside the Generator, is the Master Block which contains your textures to be
displayed.
2. DEFAULT SETTINGS
When you first start the InkWelle Dynamic Sign, the default setting is for it to create a
surface that is 2meters x 2 meters, using 25 blocks in a 5x5 array, with an interval of
30 seconds between transitions. When you click the RESET button on the menu, it will
be returned to this default.
3. LOAD YOUR IMAGES
The textures that display on your sign are stored in the Master Block, which is an
object stored inside of the Generator.
a) Drag the Dynamic Sign Generator from your inventory to rez it on the ground.
b) Right-click and then Edit the Generator, then click the Contents tab. You should
see one script and one "Master Block" object. Drag the Master Block object from the
contents to rez it on the ground.
c) Right click and then Edit the Master Block, then click the Contents tab. You should
see one script and a few demo textures. Remove the demo textures that you don't
want and add your own textures or snapshots into the contents of the Master Block.
Any texture you use must be copyable because the Master Block will be rezzed
repeatedly to form the cell array that makes up the final Dynamic Sign. The images
will be shown in alphabetic order, so you should rename the textures in order to
control their order.
d) When you are finished loading your textures, take the Master Block into your
inventory, then drag it back into the Contents of the Generator. Note: There must be
ONLY ONE Master Block in the Generator contents, so be sure to delete the original
copy from the Generator. The Generator contents should now contain your modified
Master Block, the original script, and nothing else.
e) Take the Generator back into your inventory (unless of course you have already
positioned it where you want the Dynamic Sign to be generated).
4. RUNNING THE INKWELLE DYNAMIC SIGN
Now that your images have been loaded into the Generator, you are ready to start it
running and generate your Dynamic Sign.
a) Rez the Dynamic Sign Generator on the ground. The Dynamic Sign will be generated
so that the lower left edge of the sign is aligned with the Generator. Before
proceeding, position the generator so it is roughly in the correct position.
b) Adjust the Size
Touch the Generator, then click the “Run” button on the menu. The Generator will
create a Dynamic Sign that is an array of 25 cells in a 5x5 matrix in an area 2 meters
wide and high. Click the menu options (described in detail below) to set the Dynamic
Sign surface to the size that you desire.
c) Adjust the Position.
Once the size is set, if you wish to adjust the position of the Dynamic Sign, you may do
this by moving the Generator. Click the “Reset” button to withdraw the sign, move the
Generator, then start it running it again.
Note that in SL you only see items as you get near to them, depending on your drawing
distance. The larger an item is, the faster that it will appear to you as you approach it
from a distance. In order to reduce lag, the InkWelle Dynamic Sign disables transitions
and shows a steady image if no one is near enough to see it. When an avatar is
detected, the transition will trigger and the sign will continue cycling as normal. The
distance it scans for an avatar depends on what the current cell size is set to, but is
generally 40-80 meters. (In case you want the details, the distance is computed as the
cell size times 86m. For example, if the cell size is set to 0.5m, then an avatar would
have to be within 0.5*86 = 43 meters to make the sign to trigger; if the cell size is
0.25m, the distance is 21.5m; etc.)
5. ADDING AN OPTIONAL FRAME
An object is included with the InkWelle Dynamic Sign which called Frame. This is made
of three prims and can optionally be used as a frame around your sign. To add the
frame, first set up, configure, and run your dynamic sign. Next rez the frame object
and position it so that is approximately positioned as you desire. The frame is a good
size for a sign surface that is 5meters x 5 meters. If you would like to resize the
frame, first unlink it. Then use the SL tools to resize it to whatever size you want. For
best effect, we suggest that you resize the frame so that there is blank space between
its inside edge and the sign. If desired, change the frame’s color or add your own
textures. Be sure that the frame is set to "Phantom."
6. USING MULTIPLE INKWELLE DYNAMIC SIGNS
Multiple InkWelle Dynamic Signs won't interfere with each other if you keep them 20
or more than meters apart. However special attention should be paid to the subject of
lag (discussed later in this document).
7. MENU COMMANDS
Adjustments to the InkWelle Dynamic Sign are controlled by the menu you get by
clicking on the Dynamic Sign Generator. Use the menu to change the size of the
display, the number of cells used, and the time to display each image. The menu
displayed depends on whether the Dynamic Sign is in Run mode or Pause Mode.
Following is a complete list of the menu buttons
Access
This menu button controls who can access the menu: Owner, Owner + Group, or
Everyone. The default access level is owner.
(Pause Mode and Run Mode menus)
-----//----Interval
This menu button change how long each image is displayed.
(Pause Mode and Run Mode menus)
-----//-----
KillCells
This menu button de-rezzes any existing screen cells. Use this to clean up if needed.
(Pause Mode menu only)
-----//----NumCells
This menu button select the number of cells to divide the screen into. The choices
range from 2x2 to16x16. Note that the larger sizes use a lot of prims (16x16 uses 256
prims). You must be sure to keep the number of prims within what is allowable in the
area where you run the sign. Also, because each cell is scripted and because they
become physical objects during some transition effects, the larger sizes could
contribute to lag in a sim. (See more about lag below.)
(Pause Mode menu only)
-----//----Pause
This menu button puts the Dynamic Sign into “Pause Mode” in which it freezes the
display on the current image and stops all transitions.
(Run Mode menu only)
-----//----Physics Off/Physics On
This menu button turns the display of “physics-enabled” transitions on and off. If your
sign is in an area with a lot of lag, you can help reduce the lag by clicking the Physics
off button. This will limit the transitions to that that do not enable physics. Please see
“About Lag” later in this document for more information.
(Pause Mode and Run Mode menus)
-----//----Redraw&Run
If you see a missing cell, a mis-drawn texture, or other problem in the display, this
menu button will kill the current cells and re-rez (redraw) them. This happens
automatically on occasion, but this button forces the redraw to happen immediately.
The system then resumes normal operation.
(Run Mode menu only)
-----//----RepeatLast
If you see a transition effect that you liked and want to see it happen again
immediately, this menu button will show the next texture but will repeat the last
transition. Press it as many times as you like.
(Run Mode menu only)
-----//----Reset
This menu button erases the current screen cells and resets the Generator object.
Touch the Generator object for a new menu to start over.
(Pause Mode and Run Mode menus)
-----//----Run
This menu button puts the Dynamic Sign into “Run Mode” in which it cycles through
the textures in the Master Block using random transition effects.
(Pause Mode menu only)
-----//----ScreenSize
This menu button select the overall width/height of the screen (it's always square).
The cells will re-rez to fit the screen size.
(Pause Mode menu only)
-----//----8. ABOUT LAG
Lag is what it is called when the performance of objects and scripts in SL use up a
disproportionate amount of server resources such that it causes a slowdown of the
things around them – such as other scripts and avatars. While the InkWelle Dynamic
Sign is not a “high-lag” product, it does use system resources for its transitions, so if
you use it in an area that is already “laggy” then you may need to reduce the number
of cells in your sign to reduce lag.
We explain the lag expectations for this product below, and we also provide technical
details. If a region administrator or someone else asks you about the sign and the lag it
may be contributing, you should supply them with this information.
We measure performance by noting the effect that the InkWelle Dynamic Sign has on
frame time as reported by the statistics bar in an empty class 5 sim. Using frame time
instead of script time is the only honest way to measure lag. Frame time includes not
only script time, but also the physics engine and everything else necessary to support
objects of any kind.
We are confident that the InkWelle Dynamic Sign will not contribute significantly to
lag in a region if you use the default configuration of 5 x 5 cells in a 2m-wide screen.
We have found that although larger screen widths or a greater number of cells are not
very laggy during the static display time, they can contribute to lag in a region during
the time that some transition effects take place. The worst case is the array of 16 x 16
cells. That's 256 cells -- about ten times the number of cells in an 5 x 5 array.
5x5 array in 2m-wide screen: Minimum: around 0.1 - 0.3 ms frame time between
transition effects and during some effects. Maximum: around 1.0 ms frame time for
0.2 to 3.0 seconds during complex transition effects.
16x16 array in 4m-wide screen: Minimum: around 0.8 ms frame time between
transition effects and during some effects. Maximum: between 2 - 5 ms frame time
for 0.2 to 3.0 seconds during complex transition effects
If a sim is already running at near 20 ms frame time, then the added 5 ms could cause
a perceptible time dilation to occur in the sim during those brief periods. However, if
your sim is running at under 20 ms frame time, then it is your responsibility to
determine if a 5ms frame time hit once every few transitions is acceptable or not.
You can get a quick idea of the amount of lag that occurs during transitions at your
own location by using the "Repeat Last" button on the Generator menu. Just wait until
you see a particularly complex transition, then press that button repeatedly while
using your avatar to walk around the area. If your walking becomes jerky during the
transition, then you can try using a smaller screen or smaller number of cells.