1
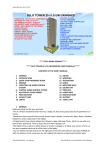
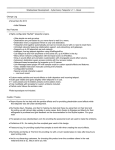
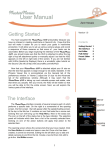
One-Prim Animated Door
User Manual
by Becky's Gadgets
Your model may appear different, but the operation is the same.
Overview
Thank you for your interest in Second Life's easiest-to-use and most versatile one-prim animated door.
The door is a single regular prim with a script-controlled texture. Opening and closing is done using
low-lag animated textures instead of moving prims. The door is modifiable, so you can edit it in-world
and change its size or aspect ratio to whatever you need.
The door will operate automatically at any angle, whether it is linked with the rest of the build or not.
The door will operate correctly in all situations with factory default settings, but you can easily change
many preferences with a mouse, using the door's built-in graphical interface and context-sensitive help.
Where to Get It
It's convenient to obtain a door product from Marketplace for yourself or as a gift. A box of fully
functional demos is also available for L$1. Here's the URL:
http://marketplace.secondlife.com/stores/101517
Quick Start Guide
It's the simplest door in Second Life to use – just Rez, Move, and Use. Link it if you want – or not.
Resize it if needed. Make as many copies as you need from the original copy in Inventory.
If you received a door in a box, unpack it first: drag the box to the ground, right click -> Open, then
copy the contents to inventory. Locate the door object in inventory (ctrl-I, Recent tab, or enter “door” in
the search bar at the top of Inventory) then drag it to the ground.
The door is one prim and modifiable, so you can edit it in-world to change its size or shape. Move it
1
into position, and it's ready to use.
The owner can click and hold the mouse down for four seconds, and the door texture will change into
the preferences panel. The hovertext will guide you, or press ? for help. Press X to close the preferences
panel. More details below.
The factory-default preferences are set to:
•
•
•
•
•
Owner, Group, and Public may open the door with a click
Auto-close after 10 seconds
Sounds enabled
One-script-per-door mode
Proximity, collision, keycode, notifications, and messages, are disabled
Refining Access Control
By default, anyone can open the door. In the preferences menu,
access can be allowed or denied for group members, and for the
general public. Additionally, access can be fine-tuned by adding
“allow” and “deny” names or UUIDs in a notecard named
“access”. The owner always has access. To change preferences,
click and hold the mouse down on any door for more than four
seconds and the door texture will change into a preferences panel.
To modify the “access” notecard, edit the door, click the Contents
tab, double-click the notecard named “access,” and enter or
remove names or UUIDs as shown in the examples in the notecard.
Here is what the access notecard looks like from the factory. Just
add as many lines as you need.
2
Preferences
To change preferences, click any door and hold the mouse
button down for more than four seconds. The door texture will
change into a configuration panel as shown at the right, and the
Preference settings will appear in hovertext. Click the OPT
arrows to scroll through the options, and click the VAL arrows
to change the value of any setting. Click the X button to close
the configuration panel. Pressing the ? button at any time will cause more help information to appear in
chat.
The preferences are numbered 0 through 13. Below is a summary of the preferences and their values.
The factory defaults are shown in bold. See further below for more details on each preference.
Pref # Preference
Values
0
Script Control Mode
One-script-per-door, One-script-per-linkset
1
Public access
Deny, Allow
2
Group access
Deny, Allow
3
Use access notecard if present
Off, On
4
Click opens door
Off, On
5*
Proximity opens door
Off, 1m, 2m, 3m, 5m, 10m
6*
Collision opens door
Off, On
7*
Keycode opens door (channel 1)
Off, On (editable keycode number)
8
Auto-close timeout
Off, 2, 5, 10, 20, 60 seconds
9
Owner notification of use
Off, On-each-use, Daily summary
10
Owner notification method
OwnerSay, IM
11
Sounds
Off, On
12
Message on opening
Off, or an editable message
13
Message on locked
Off, or an editable message
* Proximity, collision, and keycode preferences are only available in one-script-per-door mode.
3
Preferences – Details
0: Script control
Changing to “One script per door” will cause a script to be inserted automatically into every door in the
linkset that doesn't have a script. Changing to “One script per linkset” will cause all the door scripts to
be deleted from all the child-prim doors and a script will be inserted into the root prim. If the root prim
is itself a door, the process is fully automatic with no interruption in service. If the root prim is not a
door, then you'll need to take the linkset into inventory, re-rez it, edit the linkset, and choose Build>Scripts->Set Scripts to Running. This preference is available only when a door is linked with
something. See the separate section about One-Script-Per-Linkset for more details.
Door prims can be renamed and relinked as long as the 4-character model number appears somewhere
in the prim name or description. That's how the script(s) identifies which prims are doors.
1: Public access
Choose “allow” to allow anyone to open the door. Use the “Group access” setting to control access by
group members. The owner always has access. If enabled, entries in the access notecard take
precedence.
2: Group access
Choose “allow” to allow group members to open the door. Use the “Public access” preference to
control access by non-group members. The owner always has access. If enabled, entries in the “access”
notecard take precedence.
3: Use “access” notecard
This lets you enable or disable the use of the notecard in Contents named “access” (case-sensitive).
Each door prim that has a script needs a copy of the access notecard. When in one-script-per-linkset
mode, only the access notecard in the root prim will be used. When changing from one-script-per-door
to one-script-per-linkset or vice versa, the access notecard(s) will need to be copied manually to the
prims with the script(s). The “access” notecard contains lines with the word “allow” or “deny” on each
line followed by an avatar UUID or name. To edit the access notecard, edit a door in-world, select the
Contents tab, double-click the notecard named “access” and edit following the examples in the
notecard. Notecard directives, if enabled, take precedence over the “allow group” and “allow public”
settings.
4: Click opens door
When “on,” anyone with access permission can open the door with a mouse click.
5: Proximity opens door
When enabled, the door will open automatically when an avatar is sensed within the specified distance.
Because of SL sensor limitations, this option is operational only in the default one-script-per-door
mode.
4
6: Collision opens door:
When enabled, the door will automatically open when an avatar or object bumps into the door. This
option is operational only when in the default one-script-per-door mode.
7: Keycode (channel 1) opens door
When enabled, any avatar with access permission can open the door by entering the keycode on
channel 1 (type /1 plus a space and the keycode). To change the keycode, choose “Edit,” then type a
new code in chat. This option is operational only in the default one-script-per-door mode.
8: Automatic door closing after a timeout
When enabled, the door will automatically close after the specified time. If “off,” an open door will
stay open until clicked.
9: Notify owner of door use
When enabled, the owner will be notified when the door is used by anyone other than the owner. Use
the setting “Owner notification method” to change the method by which notifications are delivered.
The option “daily-summary” will cause only a summary of each day's door usage to be sent to the
owner about once a day. The option “each-use” will send full information to the owner for every use of
the door.
10: Owner notification method
This option is meaningful only when the setting “Notify owner of door use” is enabled. When enabled,
you can choose to receive owner notifications by OwnerSay or IM. OwnerSay works only when the
owner is logged in and resident in the same region. IM works when the owner is not in the same region
or not logged in, but IMs can be capped.
11: Sound
You can enable sounds to play when the door opens, closes, or is locked. When in one-script-per-door
mode, the sound will seem to come from the door, but when in one-script-per-linkset mode, the sound
will be emitted from the root's center, and so its localization may seem to be a little off. If that's a
problem, use one-script-per-door mode. To change the sounds, just replace the sound files in Contents
with new sounds. They must be named exactly “open”, “close” and “locked”, case sensitive.
12: Message on opening
When enabled, this IM message will be sent to the avatar who successfully opens the door. To change
the message, choose “Edit” and type in a new one-line message into open chat.
13: Message to display to the user when a door is locked
When enabled, this one-line IM message will be sent to the avatar who tries to open a door but does not
have access permission. To change the message, choose “Edit” and type in a new one-line message in
open chat.
5
Advanced Topics: Script Reduction - One-Script-Per-Linkset
In the default one-script-per-door mode, each door contains a script. If you link more than one door in
a linkset, each door prim will continue to use a separate script. That's the default mode because it works
well in all situations. However, you can reduce the number of scripts in use and reduce server lag by
switching to one-script-per-linkset mode in which a single door script in the root prim controls all the
doors linked in the linkset. It's the same script, just different modes of operation.
Here is how to switch to one-script-per-linkset mode using the preferences interface:
1. Rez your doors, link them in the linkset, and confirm that they are working properly in the
default one-script-per-door mode.
2. Click-and-hold any door in the linkset to open the preferences interface. Scroll to preference #0
called “Script Mode” and change the mode to one-script-per-linkset. This will copy a door
script to the root prim, but unless the root prim is itself a door, the root prim script won't
automatically run until you do the next step.
3. To finish the switch to per-linkset mode, “take” the linkset into inventory, rez it again, and start
the script in the root prim running. To start the script running, edit the linkset and choose Build>Scripts->Set Scripts to Running (or the equivalent in your viewer version). The script will
discover it is in the root prim and will automatically assume control of all the doors in the
linkset, and all the other door scripts will be deleted from the child prims.
Here is how to switch back to the default one-script-per-door mode using the preferences interface:
1. Click and hold any door in the linkset to open the preferences interface. Scroll to preference #0
called “Script Mode” and change the mode to one-script-per-door.
2. You're done. Each child prim door will now contain its own script, and the door script in the
root prim will be deleted (unless, of course, the root prim itself is a door).
If you prefer not to use the Preferences menu, you can manually configure a linkset for one-script-perlinkset mode:
1. Manually place a copy of the door script into the root prim. You can get a copy of the door
script by dragging one out of any door into inventory, then drag a copy from inventory into the
root prim.
2. Reset the script in the root prim if necessary, and you're done. The script will assume control of
all the doors in the linkset, and all the door scripts in the child prim doors will be deleted.
To manually switch a linkset back to the default one-script-per-door mode:
1. Delete any door script from the root prim.
2. Manually drag a copy of the door script into each child prim door that does not have a script.
3. If necessary, reset the scripts in the doors, and you're done. All doors will be running off their
own scripts.
Here's how it works behind the scenes: If a door script discovers itself to be inside the root prim of a
linkset, and if it determines it is safe to do so, it will assume control of all the doors of the same model
6
in the linkset and will announce its presence to the child prims. The child prim door scripts will then
delete themselves. In all other cases, the scripts default to one-script-per-door mode.
Differences in the modes
There are limitations to how much control a script has over child prims when running from the root
prim, so there are some disadvantages to switching to one-script-per-linkset mode. Here's a
comparison:
7
One-script-per-door mode
One-script-per-linkset mode
Each door prim needs a door script
Only the root prim needs a door script
Default factory setting
Invoked from Preferences
More doors = more scripts = more server lag
Fewer scripts = less server-side lag
Access control is separate for each door
Access control applies to all doors
Keycode option, separate for each door
Keycode option disabled
Proximity option, separate for each door
Proximity option disabled
Messages option, separate for each door
Same message settings apply to all doors
Sounds are localized, emitted from each door
Sounds are emitted from the root prim
No restrictions on link order
The controlling script must be in the root prim
The problem with the root prim and phantom
The root prim in any linkset behaves a little differently than the child prims, and so you probably don't
want to have a texture-based door as the root prim if you have a choice. Why? Scripts are allowed to set
an individual child prim phantom to let an avatar pass through an open door, but scripts have no way to
set just the root prim phantom without setting the entire linkset phantom. If your door is linked as the
root prim, and it's linked with your house's floor, then when the root prim door opens, the floor and
everything else will go phantom too. Oops.
The easiest solution is to relink the linkset so that the root prim isn't a door. That's all you have to do in
the default one-script-per-door mode. If you have already switched to one-script-per-linkset mode, you
can change the link order, and then manually move the door script (and the access notecard and sounds
if desired) back into the root prim.
Troubleshooting and FAQ
It's a good idea to keep your original copy of the door in inventory where you can easily find it, make a
backup copy, and rez all the doors you need by making copies from the original. If a door isn't
operating as you expect it should, you can try resetting the scripts. Frankly, the scripts are pretty
foolproof and forgiving. But if a door happens to turn red, vibrates, and spews particles, just delete the
problem door and rez a fresh copy from your original in inventory.
Q. How do I reset a door to factory original settings?
A. To reset an individual script, edit the linkset, and choose Build->Scripts->Set Scripts to Running
Q. I'm using the graphical preferences interface, but some preference are missing, like collisions.
A. The proximity, collision, and keycode options are not available after you have switched to onescript-per-linkset mode. See the descriptions above for each preference.
8
Q. I replaced the three sound files in Contents with new sounds, but I don't hear anything.
A. The sounds must be renamed to exactly “open”, “close”, and “locked”, case sensitive, with no extra
spaces.
Q. Why does the entire linkset go phantom when the root prim door is opened?
A. That's a scripting limitation when using any kind of phantom door at the root prim. Relink so that
the root prim is not a door. For more see the section above about “The problem with the root prim
and phantom.”
Q. My entire linkset is phantom all the time and I can't figure out why.
A. Check if the “phantom” setting has accidentally been enabled on the Object tab of the edit window
and uncheck that option.
Q. Why do only some of my doors work and others don't? Or one of my doors shouts an error message
when I try to use it.
A. If a door is not functioning correctly, check that the door prim still contains the four-character model
number somewhere in the prim name or description. The model number is case sensitive. If in the
default one-script-per-door mode, check that each door contains a door script with a name that
matches the door model. For example, a door prim named “My HC12 door” must contain the script
named “Door HC12.”
Q. After switching to one-script-per-linkset mode, can I link in an additional door and have it also
controlled by the controlling script?
A. Just rez a door from your original copy in Inventory and link it in. The script in the new door will
automatically detect that the doors are operating in one-script-per-linkset mode and will delete itself
so that the door can be controlled by the controlling script in the root prim.
Q. I have several different models of your doors linked in a large house object. How can I use one
script to control all of the different door models?
A. You'll need to use a separate script for each model door. The model number of the door must appear
in the door prim's name or description, and must match the model number in a script's name. For
example, if you have several model HC17 doors and several model EY23 doors, treat them as two
independent door systems, and put a copy of the “Door HC17” script and a copy of the “Door
EY23” script into the root prim, and they will assume control of both door systems. Note that in this
configuration, the scripts in the root prim will share the use of the same “access” notecard and the
sound files, if they exist.
Warranty, Sales, and Support
Satisfaction guaranteed. Free door replacements for misdelivery or if you lose your original copy.
Contact Becky Pippen in-world for sales, support, questions, or comments.
♥ Becky Pippen ♥
Becky's Gadgets
9