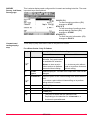
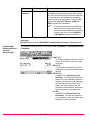
1
Leica GPS1200
System
Field Manual
Version 5.0
English
Introduction
Purchase
Congratulations on the purchase of a GPS1200 Series instrument.
)
To use the product in a permitted manner, please refer to the detailed safety directions in the User Manual.
Product
identification
Symbols
The type and the serial number of your product are indicated on the type plate.
Enter the type and serial number in your manual and always refer to this information
when you need to contact your agency or Leica Geosystems authorized service
workshop.
Type:
_____________________
Serial No.:
_____________________
The symbols used in this manual have the following meanings:
Type
)
Trademarks
Description
Important paragraphs which must be adhered to in practice as
they enable the product to be used in a technically correct and
efficient manner.
•
Windows and Windows CE are a registered trademark of Microsoft Corporation
•
CompactFlash and CF are trademarks of SanDisk Corporation
•
Bluetooth is a registered trademark of Bluetooth SIG, Inc
All other trademarks are the property of their respective owners.
Validity of this
manual
Available
documentation
2
•
This manual applies to all GPS1200 instruments. Differences between the
various models are marked and described.
•
The RX1200 is available as RX1210 or with touch screen functionality as
RX1210T, RX1250X, RX1250Xc, RX1250T or RX1250Tc. The name RX1210 is
used throughout the manual and may also represent the touch screen models.
Only use the supplied stylus on the screens of the touch screen models.
•
This manual covers standard real-time surveying applications. Refer to the
GPS1200 Technical Reference Manual for information about other functionality
available.
Name
Description
Format
User Manual
All instructions required in order to
operate the product to a basic level are
contained in the User Manual. Provides
an overview of the product together with
technical data and safety directions.
x
GPS1200
Introduction
x
Name
Description
Format
-
x
Application Programs Describes specific onboard application
Field Manual
programs in standard use. Intended as a
quick reference field guide. The RoadRunner application program is described
in a separate manual.
x
x
Technical Reference
Manual
-
x
System Field Manual
Describes the general working of the
product in standard use. Intended as a
quick reference field guide.
Overall comprehensive guide to the
product and program functions. Included
are detailed descriptions of special software/hardware settings and software/hardware functions intended for
technical specialists.
Refer to the following resources for all GPS1200 documentation and software:
• the SmartWorx DVD
•
Introduction
http://www.leica-geosystems.com/downloads
GPS1200
3
Table of Contents
In this manual
Chapter
1
User Interface
2
1.1 Keyboard
1.2 Screen
1.3 Operating Principles
1.4 Icons
1.5 Symbols
Equipment Setup
7
9
10
13
19
21
3
2.1 Receiver Ports
2.2 Post-Processed Static Reference on Pillar
2.3 Real-Time Reference, Single Tripod
2.4 Real-Time Reference using SmartAntenna, RX1250 and GHT56
2.5 SmartRover - External Radio
2.6 Real-Time Rover, Pole and Minipack
2.7 Real-Time Rover, All-on-Pole
Determining Antenna Heights
21
22
23
24
25
26
28
29
4
Using RX1250
31
4.1
4.2
4.3
5
Switching between Leica software and Windows CE desktop
Sleep Mode
Interface Configuration
4.3.1
Overview
4.3.2
Configuring SmartAntenna Interface
4.3.3
Configuring Clip-On Interface
Receiver Protection with PIN
31
32
33
33
34
35
37
6
Manage... - Getting Started
39
7
Manage...\Jobs
43
8
7.1 Overview
7.2 Creating a New Job/Editing a Job
Manage...\Data
43
44
47
8.1
8.2
Overview
Point Management
8.2.1
Creating a New Point/Editing a Point
8.2.2
Mean Page
8.3 Line/Area Management
8.3.1
Overview
8.3.2
Creating a New Line/Area/Editing a Line/Area
8.4 Point Sorting and Filters
8.4.1
Sorting and Filters for Points, Lines and Areas
8.4.2
Point, Line and Area Code Filter
Manage...\Codelists
47
48
48
52
55
55
56
59
59
61
63
9.1
9.2
63
64
9
4
Page
7
Creating a New Codelist/Editing a Codelist
Creating a New Code/Editing a Code
GPS1200
Table of Contents
10 Linework
67
10.1 Performing Linework
10.2 Combining Linework and Coding
11 Manage...\Coordinate Systems
67
70
73
11.1 Overview
11.2 Creating a New Coordinate System/Editing a Coordinate System
11.3 Transformations/Ellipsoids/Projections
11.3.1
Accessing Transformation/Ellipsoid/Projection Management
11.3.2
Creating/Editing a Transformation/Ellipsoid/Projection
11.4 Geoid/CSCS Models
12 Manage...\Configuration Sets
73
74
76
76
77
79
81
12.1 Overview
12.2 Creating a New Configuration Set
12.3 Editing a Configuration Set
13 Manage...\Antennas
81
82
83
85
13.1 Overview
13.2 Creating a New Antenna/Editing an Antenna
14 Convert...\Export Data from Job
85
86
89
14.1 Overview
14.2 Exporting ASCII Data
15 Convert...\Import Data to Job
89
90
93
15.1 Overview
15.2 Importing ASCII/GSI Data
15.3 Importing DXF Data
16 Convert...\Copy Points Between Jobs
93
94
96
97
17 Config...\Survey Settings...
99
17.1 ID Templates
17.1.1
Overview
17.1.2
Creating a New ID Template/Editing an ID Template
17.2 Display Settings
17.3 Coding & Linework
17.4 Quality Control Settings
17.5 Logging of Raw Obs
17.6 Point Occupation Settings
18 Config...\Instrument Settings...
99
99
100
101
103
105
106
108
113
18.1 Antenna & Antenna Heights
18.2 Satellite Settings
18.3 Time Zone
18.4 Instrument ID
19 Config...\General Settings...
113
114
116
117
119
19.1
19.2
19.3
19.4
19.5
19.6
Table of Contents
Wizard Mode
Hot Keys & User Menu
Units & Formats
Language
Display, Beeps, Text
Start Up & Power Down
GPS1200
119
120
121
124
125
127
5
6
20 Config...\Interfaces... - General
129
20.1 Overview
20.2 Real-Time
20.2.1
Overview
20.2.2
Configuration without Real-Time Interface
20.2.3
Configuration of a Reference Real-Time Interface
20.2.4
Configuration of a Rover Real-Time Interface
20.2.5
Configuration of SBAS
20.2.6
Configuration of GGA Message Sending for Reference
Network Applications
20.3 Hidden Point
20.4 SmartAntenna
20.5 Internet
21 Configuration of Devices
129
131
131
132
133
138
143
21.1 Overview
21.2 Accessing CONFIGURE Devices / GPRS Internet Devices
21.3 Creating a New Device / Editing a Device
22 Config...\Interfaces... - Controlling Devices
153
154
156
159
22.1 Accessing Config...\Interfaces... - Controlling Devices
22.2 Digital Cellular Phones
22.3 Radios
22.4 Hidden Point Measurement Devices
22.5 GPRS / Internet Devices
22.6 Creating a New Station to Dial/Editing a Station to Dial
22.7 Creating a New Server to Connect/Editing a Server to Connect
23 Tools...
159
160
163
164
165
166
168
171
23.1 Format Memory Device
23.2 Transfer Objects...
23.3 Upload System Files...
23.4 Calculator and File Viewer
23.5 Licence Keys
24 STATUS
171
172
173
174
175
177
24.1 STATUS: Survey...
24.1.1
Satellite Status
24.1.2
Real-Time Status
24.1.3
Current Position
24.1.4
Logging Status
24.1.5
Occupation Information Status
24.2 STATUS: Battery & Memory
24.3 STATUS: System Information
24.4 STATUS: Interfaces...
25 NTRIP via Internet
177
177
179
184
186
189
191
193
194
195
25.1 Overview
25.2 Configuring a Real-Time Rover for Using NTRIP Service
25.2.1
Configuring an Access to the Internet
25.2.2
Configuring to Connect to a Server
25.2.3
Using the NTRIP Service with a Real-Time Rover
26 Menu Tree
195
196
196
198
200
203
Index
205
GPS1200
144
146
149
151
153
Table of Contents
1
1.1
User Interface
Keyboard
Keyboard
ESC
j
PROG
OFF
F1
Q
W
A
F2
E
R
S
Z
D
F4
T
Y
F
X
C
F8
F7
F3
G
V
F5
U
H
B
SPACE
F9
F6
I
F10
a
b
P
O
J
N
ON
K
M
L
CAPS
F11
c
d
e
f
g
F12
SHIFT
7
8
4
5
1
6
2
0
PgUp
9
PgDn
3
.
ESC
CE
USER
h
PROG
OFF
ON
i
RX12_001
)
Keys
Function keys F1-F6
Alpha keys
CAPS
Hot keys F7-F12
SPACE, SHIFT
ENTER
Arrow keys
CE, ESC, USER, PROG
Numeric keys
For RX1250: Windows key symbol. It
is the Microsoft flag logo located
between PROG and ESC.
For the purpose of the illustration, a RX1250 model has been selected which is
representative for all models. Differences to other RX1200 models are outlined.
Key
Function
Function keys
F1-F6
Correspond to the six softkeys that appear on the bottom of the
screen when the screen is activated.
Hot keys
F7-F12
User definable keys to execute chosen commands or access
chosen screens.
Alpha keys
To type letters.
Numeric keys
To type numbers.
CAPS
Switches between upper case to lower case letters.
CE
•
Clears all entry at the beginning of user input.
•
Clears the last character during user input.
•
Leaves the current menu or dialogue without storing any
changes made.
•
Turns receiver off when hold for 2 s in GPS1200 Main
Menu.
•
If the sensor is off: hold for 2 s to turn the sensor on.
•
If the sensor is on: press at any time to access XX
Programs to select an application.
ESC
PROG (ON)
User Interface
a)
b)
c)
d)
e)
f)
g)
h)
i)
j)
GPS1200
7
Key combinations
Key
Function
SHIFT
Switches between the first and the second level of function
keys.
SPACE
Enters a blank.
USER
Calls the user defined menu.
Arrow keys
Move the focus on the screen.
ENTER
•
Selects the highlighted line and leads to the next logical
menu / dialog.
•
Starts the edit mode for edit fields.
•
Opens a choicelist.
Keys
Function
PROG plus USER •
For RX1210/RX1250:
Turns instrument off.
SHIFT
Pages up.
SHIFT
Pages down.
SHIFT PROG (
8
) For RX1250:
Displays either the Windows CE task bar and start menu.
GPS1200
User Interface
1.2
Screen
Screen
f
a
b
c
g
d
h
i
j
e
k
GPS12 129
Elements
a)
b)
c)
d)
e)
f)
g)
h)
i)
j)
k)
Time
Caption
Title
Screen area
Message line
Icons
ESC
CAPS
SHIFT icon
Quick coding icon
Softkeys
Element
Description
Time
The current local time is shown.
Caption
Shows location either in Main Menu, under PROG key or
USER key.
Title
Name of the screen is shown.
Screen area
The working area of the screen.
Message line
Messages are shown for 10 s.
Icons
Shows current status information of the instrument. Refer to
"1.4 Icons". Can be used with touch screen.
ESC
Can be used with touch screen. Same functionality as the fixed
key ESC. The last operation will be undone.
CAPS
The caps mode for upper case letters is active.The caps mode
is activated and deactivated by pressing the CAPS key.
SHIFT icon
Shows the status of the SHIFT key; either first or second level
of softkeys is selected. Can be used with touch screen and has
the same functionality as the fixed key SHIFT.
Quick coding icon Shows the quick coding configuration. Can be used with touch
screen to turn quick coding on and off.
Softkeys
User Interface
Commands can be executed using F1-F6 keys. The
commands assigned to the softkeys are screen dependent.
Can be used directly with touch screen.
GPS1200
9
1.3
Operating Principles
Keyboard and
touch screen
The user interface is operated either by the keyboard or by the touch screen with
supplied stylus.
The workflow is the same for keyboard and touch screen. The difference is the way
information is selected and entered.
Operation by keyboard
Information is selected and entered using the keys. Refer to "1.1 Keyboard" for a
detailed description of the keys on the keyboard and their function.
Operation by touch screen
Information is selected and entered on the screen using the supplied stylus.
Operation
Description
To select an item
Tap on the item.
To start the edit mode in
input fields
Tap on the input field.
To highlight an item or
parts of it for editing
Drag the supplied stylus from the left to the right.
Tap on the screen outside of the input field.
To accept data entered
into an input field and exit
the edit mode
Turn receiver on
Hold PROG for 2 s.
Turn receiver off
The receiver can only be turned off in GPS1200 Main Menu.
Press both USER and PROG simultaneously.
OR
Hold ESC for 2 s.
Lock/Unlock
keyboard (only
RX1210/RX1210T)
Option Description
Lock
To lock the keyboard press and hold SHIFT for 3 s. The message
’Keyboard locked’ is momentariliy displayed on the Message Line.
Unlock To unlock the keyboard press and hold SHIFT for 3 s. The message
’Keyboard unlocked’ is momentariliy displayed on the Message Line.
Selecting from a
menu
.
Appearance
Description
To select an item from a menu, do one of the following:
Move the focus to the item. ENTER or CONT (F1).
OR
Type the complete selection number in front of the
item. ENTER or CONT (F1) are not required.
10
GPS1200
User Interface
Appearance
Description
OR
Tap on the item.
Selecting a page
Appearance
Description
To select a page in a screen, do one of the following:
PAGE (F6).
OR
Tap on the page tab.
Edit an entire value
in input fields
.
Appearance
Description
1. Highlight the field.
2. Type numeric and/or alphanumeric characters to
overwrite.
3. ENTER or tap outside of the field.
Edit an individual
character in input
fields
.
Appearance
Description
A character can be inserted or overwritten. The procedure is the same for both cases.
1. Highlight the field.
2. For the keyboard: ENTER. The edit mode is activated where additional functions like insert and
overwrite are available.
3. For the touch screen: Highlight the characters to
be changed.
4. Type numeric and/or alphanumeric characters.
5. ENTER or tap outside of the field.
Access special
alphanumeric characters for input
User Interface
Step
1.
Description
Highlight the input field.
2.
For the keyboard: ENTER.
3.
Toggle to the desired special character set by using the up/down arrow
keys.
4.
Press the function key assigned to the required character group.
5.
Press the function key with the required character.
6.
Repeat step 4. and 5. for entering more special characters of the same
character set.
7.
ENTER
GPS1200
11
Appearance and
selection from a
choicelist
Choicelists have various appearances.
Closed choicelist
.
Appearance
Description
Selection
to
Triangles on the right indi- Use the arrow keys
toggle through the list or
cate further available
tap the triangles on the
choices.
screen.
ENTER or tap on the field to access the choicelist. Opening a choicelist reveals
either a simple listbox or a comprehensive listbox dialogue.
Simple listbox
.
Appearance
Description
Selection
•
Choicelist shows
items to select.
•
Highlight an item and
ENTER.
•
A search field is
shown if necessary.
•
To exit without
changes ESC or tap
outside the simple
listbox.
•
A scroll bar is shown if
necessary.
Listbox dialogue
.
Appearance
12
Description
Selection
•
Choicelist fills the
whole screen.
•
Highlight an item and
CONT (F1) or ENTER.
•
A search field is
shown.
•
•
A scroll bar is shown if
necessary.
To exit without
changes press ESC or
tap .
•
The functionalities
comprise adding,
editing and deleting of
items.
•
Listbox dialogues are
explained in detail at
appropriate places in
the manuals.
GPS1200
User Interface
1.4
Icons
Description
)
Icons show the current status information of the receiver.
The icons provide information related to basic receiver functions. The icons that
appear depend upon which GPS1200 receiver is used and the current receiver
configuration.
Position of the
icons on the screen
a b c d ef
a)
b)
c)
d)
g h i
j
k
GPS12_130
Position status
e)
f)
g)
h)
i)
j)
k)
Position status
Number of visible satellites
Contributing satellites
Real-time device and real-time
status, Internet online status
Position mode
Bluetooth
Line/area
CompactFlash card/internal memory
Battery
SHIFT
Quick coding
Displays the status of the current position.
Touch screen: Tapping the icon leads to STATUS Position.
Icon
No icon
Description
No position available
Autonomous solution available.
Code solution available.
Phase fixed solution available. The ticks indicate that an ambiguity check is being made.
Number of visible
satellites
Displays the number of theoretically visible satellites above the configured cut off
angle according to the current almanac.
Touch screen: Tapping the icon leads to STATUS Satellites.
Icon
Description
The number of satellites above the <Cut Off Angle:> configured in CONFIGURE Satellite Settings.
The number of satellites above the <Cut Off Angle:> configured in CONFIGURE Satellite Settings. Receiver is configured to accept an external oscillator input.
User Interface
GPS1200
13
Contributing satellites
Displays the number of satellites that are contributing to the currently computed position solution.
Touch screen: Tapping the icon leads to STATUS Satellites.
.
Icon
Description
When a position status icon is displayed, the number of satellites currently used for the position computation are shown.
If no position is currently available but satellites are being
tracked then the L1 and L2 values (GPS only) or the G and R
values (GPS & GLONASS) show how many satellites are
being tracked.
)
)
Real-time device
and real-time
status
The number of contributing satellites can differ from
the number of visible satellites. This may be either
because satellites cannot be viewed or the
observations to these satellites are considered to be
too noisy to be used in the position solution.
The number of contributing GLONASS satellites
could be zero if five or more GPS satellites are used
for the position computation. The processing algorithm automatically selects the best possible set of
satellite combinations for the position computation.
A position computation with R = 0 is certainly within
the specified reliability.
Displays the real-time device configured to be used and its status.
Touch screen: Tapping the icon leads to STATUS Real-Time Input.
Real-time mode: Reference
An arrow pointing up indicates a reference configuration, it does not indicate if the
device is working. The arrow flashes when a real-time message is sent. When two
real-time devices are configured, then the icon for the real-time 1 device is shown.
Icon
Description
Digital cellular phone connecting
Digital cellular phone transmitting
Radio transmitting
RS232 transmitting
Bluetooth enabled device attached and transmitting. A digital
cellular phone is shown as an example.
14
GPS1200
User Interface
Real-time mode: Rover
An arrow pointing down indicates a rover configuration. The arrow flashes when realtime messages are received.
Icon
Description
Digital cellular phone connecting
Digital cellular phone receiving
Radio receiving
RS232 receiving
Bluetooth enabled device attached and receiving. A digital
cellular phone is shown as an example.
The Wide Area Augmentation System, European Geostationary Navigation Overlay Service or MTSAT Satellite-based
Augmentation System is being used.
Internet online
status
Position mode
Icon
Receiver is online in the Internet.
Displays the current position mode depending on the configuration defined.
Symbols are added to the basic position mode icon when raw data logging or logging
of auto points is configured. As soon as this icon becomes visible the receiver is in
a stage where practical operation can commence.
Touch screen: Tapping the icon leads to STATUS Logging.
Icon
User Interface
Description
Position
mode
Point
occupation
Raw data
logging
Logging of auto
points
Move
antenna
Static
Yes
No
No
No
Static
Yes
Yes
No
No
Moving
No
No
No
Yes
Moving
No
Yes
No
Yes
GPS1200
15
Icon
Bluetooth
Position
mode
Point
occupation
Raw data
logging
Logging of auto
points
Move
antenna
Moving
No
Yes
By time
Yes
Moving
No
Yes
By distance or height Yes
Moving
No
Yes
By stop & go
Yes
The status of each Bluetooth port and any Bluetooth connection is displayed.
Touch screen: Tapping the icon leads to STATUS Bluetooth.
Icon
Description
RX1250 or TPS instrument with Communication side cover is
Bluetooth capable. In case of a RX1250, Bluetooth is integrated.
A Bluetooth connection is established and active.
Bluetooth connection not established. Bluetooth port 1, 2 and
3 are down. Port 2 and 3 are only available on RX1250.
Bluetooth connection established. Bluetooth port 1, 2 and 3
are active. Port 2 and 3 are only available on RX1250.
Line/area
The number of lines and areas currently open in the active job is displayed.
Touch screen: Tapping the icon leads to MANAGE Data: Job Name.
.
Icon
Description
The number of lines and areas which are currently open in the
active job is shown.
CompactFlash
card/internal
memory
The status of the CompactFlash card and internal memory are displayed. For the
CompactFlash card, the capacity of used space is shown in seven levels. For the
internal memory, the capacity of used memory is shown in nine levels.
Touch screen: Tapping the icon leads to STATUS Memory & Battery, Memory
page.
.
Icon
Description
The CompactFlash card is inserted and can be removed.
The CompactFlash card is inserted and cannot be removed.
It is strongly recommended not to remove the CompactFlash
card to avoid loss of data.
16
GPS1200
User Interface
Icon
Description
The internal memory is the active memory device.
No icon
Battery
The CompactFlash card is the active memory device. No
CompactFlash card inserted.
The status and source of the battery is displayed. The remaining power in the battery
is indicated by six levels.
For GPS1200 receivers: If two internal batteries are inserted, the battery with the
lower voltage is used. If an external power supply is connected and one or two
internal batteries are inserted, then the external power is used.
For GRX1200 Pro/GRX1200 GG Pro receivers: If two external power supplies are
attached, then the system uses the one which is configured as the preferred power
supply.
Touch screen: Tapping the icon leads to STATUS Memory & Battery, Battery
page.
.
Icon
Description
For GPS1200 receivers: One internal battery in battery
compartment A is in use.
For GPS1200 receivers: One internal battery in battery
compartment B is in use.
For GPS1200 receivers: Two internal batteries, one in each
battery compartment A and B. Black indicates the battery
currently in use.
For GPS1200 receivers: External battery attached and in use.
For RX1250: Internal battery is in use.
SHIFT
The status of the SHIFT key is displayed.
Touch screen: Tapping the icon shows additional softkeys.
.
Icon
Description
Additional softkeys are available in the currently visible screen.
The SHIFT key has been pressed.
Quick coding
The quick coding is displayed.
Touch screen: Tapping the icon turns the quick coding on or off.
.
Icon
Description
Quick coding is turned on. Quick codes with one digit are used
from the active codelist.
User Interface
GPS1200
17
Icon
Description
Quick coding for quick codes with one digit is turned off.
Quick coding is turned on. Quick codes with two digits are used
from the active codelist.
Quick coding for quick codes with two digits is turned off.
Quick coding is turned on. Quick codes with three digits are
used from the active codelist.
Quick coding for quick codes with three digits is turned off.
18
GPS1200
User Interface
1.5
Symbols
Description
Filter
The symbols provide information regarding settings.
Symbol
Description
Example
The filter symbol is shown on the Point, Line,
Area or Map page if a point, line or area filter is
active.
Attributes
Symbol
Description
Example
The attribute symbol is displayed in MANAGE
Codes to indicate codes that have attributes
attached.
Limits
Symbol
Description
Example
Indicates a defined limit has been exceeded. For
example, the exceeding of a residual limit in the
Determine Coordinate System application
program.
Largest residual
Symbol
Description
Example
This symbol is used to indicate the largest residual
in DET C SYS Step 4: Check Residuals.
Staked out
Symbol
Description
Example
This symbol is used in MANAGE Data: Job Name
to indicate points which have been staked out.
Wake-Up Sessions
Symbol
Description
Example
This symbol is used in WAKE-UP Wake-Up
Sessions to indicate which wake-up session is
next to be activated.
User Interface
GPS1200
19
20
GPS1200
User Interface
2
2.1
Equipment Setup
Receiver Ports
Description
All receiver ports on the GPS1200 are located on the receiver front panel.
Ports at the
receiver front panel
GX1210, GX1220, GX1230, GX1230 GG, GX1200 with PPS/Event option,
GRX1200 Classic and GRX1200 Lite
a
b
c
d
e
h
i
P
P
S
E1 E2
P
3
R
X
P
W
R
P
2
A
N
T
P
1
f
j
k
g
l
GPS12_001a
a) Port E2: Event input 2, on GX1200 with g)
PPS/Event option
b) Port E1: Event input 1, on GX1200 with h)
PPS/Event option
c) Battery compartment A
i)
with CompactFlash card compartment
d) LED indicators
j)
e) Port P3: Power out, data in/out, or
remote interface in/out. 8 pin LEMO
f) Port PWR: Power in. 5 pin LEMO
Ports to connect
equipment
Port ANT: GNSS antenna in.
Battery compartment B, not for
GRX1200 Pro/GRX1200 GG Pro
Port PPS: PPS output, on GX1200
with PPS/Event option
Port RX: RX1200 in/out or remote
interface in/out. 8 pin LEMO
k) Port P2: Power out, data in/out, or
remote interface in/out. 8 pin LEMO
l) Port P1: Power out, data in/out, or
remote interface in/out. 8 pin LEMO
Equipment
Port
RX1210 without cable
Direct clip on the receiver
RX1210 using a cable
Port RX
GNSS antenna
Port ANT
Radio in a housing, without cable
Port P1 or port P3
Radio without housing, using a cable
Port P1, port P2 or port P3
Radio in a System 500 housing, using a cable Port P1, port P2 or port P3
External power
Equipment Setup
Port PWR
GPS1200
21
2.2
Post-Processed Static Reference on Pillar
Use
Equipment setup
The equipment setup described below is to be used for static operations on fixed
surveying pillars.
a
b
c
d
e
f
g
h
i
j
GPS12_012
a) GNSS antenna
f)
AX1201/AX1202 GG/AT504/AT504 GG
b) Carrier
g)
c) Tribrach
h)
d) Pillar plate if required
i)
e) RX1210, if required
j)
22
GPS1200
Receiver GX1210/GX1220/
GX1230/GX1230 GG
Two batteries
2.8 m antenna cable
CompactFlash card
Transport container
Equipment Setup
2.3
Real-Time Reference, Single Tripod
Use
The equipment setup described below is to be used for real-time reference stations
with normal radio coverage. Raw observation data may also be collected for postprocessing.
Equipment setup
a
b
l
c
d
e
f
g
m
h
i
n
j
k
o
GPS12_016
a) Radio antenna
b) Radio antenna arm 15 cm long
c) GNSS antenna AX1201/AX1202 GG
d) Height hook
e) Carrier
f) Tribrach
g) 1.2 m antenna cable to connect
receiver and GNSS antenna
h) Tripod
Equipment Setup
GPS1200
i)
j)
RX1210, if required
Receiver GX1210/GX1220/
GX1230/GX1230 GG
k) Radio in housing
l) Transport container
m) 1.2 m antenna cable to connect
radio housing to radio antenna
n) Two batteries
o) CompactFlash card
23
2.4
Real-Time Reference using SmartAntenna, RX1250 and GHT56
Use
The equipment setup described below is to be used for real-time reference stations
using SmartAntenna (ATX1230 or ATX1230 GG), RX1250 and GHT56. This setup
is intended for surveys with the need of normal radio coverage. Raw observation
data may also be collected for post-processing.
Equipment setup
a
b
c
j
d
e
k
l
f
m
n
g
h
o
i
RX12_28TR
a) SmartAntenna
(ATX1230 or ATX1230 GG)
b) Battery for SmartAntenna
c) Height hook
d) Carrier
e) Tribrach
f) Tripod
g) GHT57
h) GHT56
24
GPS1200
i)
Radio housing
j)
k)
l)
m)
n)
o)
Transport container
RX1250
Radio antenna
Battery for RX1250
CompactFlash card
Battery for radio
Equipment Setup
2.5
SmartRover - External Radio
Use
The equipment setup described below is to be used for real-time rover using
SmartAntenna, RX1250X, GHT56 and an external radio.
Equipment setup
a
b
c
h
i
d
j
e
k
f
l
g
RX12_31
a) SmartAntenna
g)
b) Battery for SmartAntenna
h)
c) Upper half aluminium pole with screw i)
or stub
d) Grip for pole
j)
e) GHT56
k)
f) Radio in housing
l)
Equipment Setup
GPS1200
Lower half aluminium pole
Radio antenna
Battery for RX1250X
CompactFlash card
RX1250X
Battery for radio
25
2.6
Real-Time Rover, Pole and Minipack
Use
Equipment setup
The equipment setup described below is to be used for a real-time rover with
extended periods of use in the field. Raw observation data may also be collected for
post-processing.
a
n
b
o
p
q
g
c
d
e
r
i
j
k
f
l
h
m
GPS12_018
a) GNSS antenna AX1201/AX1202 GG j)
b) Upper half aluminium pole with screw k)
or stub
c) Grip for pole
l)
d) RX1210
m)
e) Holder for RX1210 on pole
n)
f) Lower half aluminium pole
o)
g) 1.2 m antenna cable
p)
1.8 m, RX to GX cable
Receiver GX1210/GX1220/
GX1230/GX1230 GG
Two batteries
CompactFlash card
Radio antenna
Radio antenna arm 3 cm long
1.2 m antenna cable to connect radio
housing and radio antenna
q) Telescopic rod
r) Minipack
h) 1.6 m antenna cable
i) Radio in housing
26
GPS1200
Equipment Setup
Position of cables
in the minipack
c
a
b
a) 1.6 m antenna cable
b) 1.8 m, RX to GX cable
c) 1.2 m antenna cable to connect radio
housing and radio antenna
GPS12_036
Equipment Setup
GPS1200
27
2.7
Real-Time Rover, All-on-Pole
Use
Equipment setup
The equipment setup described below is to be used for a real-time rover with short
periods of use, especially where there are many obstacles such as fences.
a
b
c
d
k
e
f
l
g
h
i
j
m
n
GPS12_019
a) GNSS antenna AX1201/AX1202 GG
b) Upper half aluminium pole with screw
c)
d)
e)
f)
g)
28
1.8 m antenna cable
Grip for pole
Holder for RX1210 on pole
Lower half aluminium pole
Radio antenna
GPS1200
h) Radio in housing
i) Receiver GX1210/GX1220/
GX1230/GX1230 GG
j) Holder for receiver on pole
k) RX1210
l) 1.0 m RX to GX cable
m) Two batteries
n) CompactFlash card
Equipment Setup
3
Determining Antenna Heights
Pillar setup
a
b
c
d
a)
b)
c)
d)
Mechanical reference plane
Vertical phase centre offset for L1
Vertical phase centre offset for L2
Vertical height reading
An AX1201/AX1202 GG antenna is
shown. Vertical offset = 0
GPS12_031
GPS12_037
GPS12_038
GRT144 carrier with GAD31 screw-tostub adapter.
Determining Antenna Heights
109 mm
36.5 mm
145.5 mm
99.7 mm
36.5 mm
145.5 mm
9.3 mm
Carrier and adapter
dimensions
GPS1200
GRT146 carrier.
29
Tripod setup
a
c
b
d
e
Mechanical reference plane
Vertical phase centre offset for L1
Vertical phase centre offset for L2
Vertical offset
For Leica standard antenna plus
accessories: 0.36 m
e) Vertical height reading
An AX1201/AX1202 GG antenna is
shown.
GPS12_032
Pole setup
a)
b)
c)
d)
a
c
a)
b)
c)
d)
b
d
Mechanical reference plane
Vertical phase centre offset for L1
Vertical phase centre offset for L2
Vertical height reading:
• For Leica standard pole consisting
of an upper and a lower half:
2.00 m.
• For Leica standard pole consisting
of an upper and a lower half with an
additional 1.00 m pole section
added: 3.00 m.
• For the lower half of the pole alone:
1.00 m.
An AX1201/AX1202 GG antenna is
shown. Vertical offset = 0
GPS12_033
30
GPS1200
Determining Antenna Heights
4
4.1
Using RX1250
Switching between Leica software and Windows CE desktop
Graphic
a
b
d
a) Icon to start Leica
software
b) Windows CE desktop
c) Task bar
d) Start button
c
RX12_33
Access Leica software
Access Windows
CE desktop
IF
THEN
RX1250 is started
the Leica software starts up automatically.
Windows CE
desktop is active
double click
OR
SHIFT PROG (
Leica software is
minimised
double click
to maximise it.
OR
select SmartRover in the task bar to maximise it.
to display the Leica software.
) to display the Leica software.
IF
THEN
Leica software is to be minimised
SHIFT MINIM (F5) in Main Menu.
Leica software is to be closed
SHIFT EXIT (F6) in Main Menu.
Windows CE task bar is to be displayed SHIFT PROG (
Using RX1250
GPS1200
).
31
4.2
Sleep Mode
Description
In sleep mode, the RX1250 shuts down and reduces power consumption. Rebooting
RX1250 from sleep mode is quicker than a cold start after turning off.
Putting RX1250
into sleep mode
The RX1250 can only be put into sleep mode in the Main Menu screen.
Press SHIFT SLEEP (F3).
32
GPS1200
Using RX1250
4.3
Interface Configuration
4.3.1
Overview
Description
The required interface configurations for the RX1250 depend on the type of equipment setup.
Equipment setup
Interface configurations
Refer to
chapter
Real-Time Reference using
SmartAntenna, RX1250 and
GHT56
•
SmartAntenna interface via
Bluetooth or USB
4.3.2
•
Clip-on interface for radio or
digital cellular phone in clipon-housing
4.3.3
•
SmartAntenna interface via
Bluetooth or USB
4.3.2
•
Clip-on interface for radio or
digital cellular phone in clipon-housing
4.3.3
SmartRover - External Radio
Using RX1250
GPS1200
33
4.3.2
Configuring SmartAntenna Interface
Configuration stepby-step
Step
1.
Description
Select Main Menu: Config...\Interfaces... in the Leica software.
2.
Highlight SmartAntenna.
3.
EDIT (F3)
4.
CONFIGURE SmartAntenna Interface
<Use Device: Yes>
Select a free Bluetooth port.
5.
DEVCE (F5)
6.
CONFIGURE Devices
Highlight ATX1230.
7.
CONT (F1)
8.
SRCH (F4) to search for Bluetooth devices.
)
9.
SmartAntenna must be turned on.
CONFIGURE Search Bluetooth Device
All available Bluetooth devices are displayed.
10.
Highlight the SmartAntenna to be used.
11.
CONT (F1)
)
)
34
If the SmartAntenna selected is connected for the first time, a Windows
CE authentication request comes up. Type in 0000 as identification
number for Leica’s Bluetooth and click OK.
Once the Bluetooth connection is established, the Bluetooth LED on the
SmartAntenna starts flashing in blue.
GPS1200
Using RX1250
4.3.3
Configuring Clip-On Interface
Configuration stepby-step
Step
1.
Description
Select Main Menu: Config...\Interfaces... in the Leica software.
2.
Highlight Real-Time.
3.
EDIT (F3)
4.
CONFIGURE Real-Time Mode
<R-Time Mode: Rover> or <R-Time Mode: Reference>
<Port: Clip-on>
Using RX1250
5.
DEVCE (F5) to select the device attached to the GHT56.
6.
CONT (F1) returns to CONFIGURE Interfaces.
GPS1200
35
36
GPS1200
Using RX1250
5
Receiver Protection with PIN
Description
The receiver can be protected by a Personal Identification Number. If the PIN protection is activated, the receiver prompts for PIN code entry after starting up and before
GPS1200 Main Menu comes up.
If a wrong PIN has been typed in five times, a Personal UnblocKing code is required.
This chapter explains the workflow of entering PIN and PUK.
Access
GPS1200 Enter Security PIN Code is automatically accessed during starting up the
receiver when <Use PIN: Yes> in CONFIGURE Start Up & Power Down, PIN
Code page and a PIN has been defined before.
GPS1200 Enter Security PUK Code is automatically accessed during starting up
the receiver when a wrong PIN code has been typed in five times.
GPS1200
Enter Security PIN
Code
OK (F4)
To accept the PIN code and to
continue with the subsequent screen.
SHIFT QUIT (F6)
To turn off the receiver.
Description of fields
Field
Option
Description
PIN Code
User input
The PIN code as previously defined in
CONFIGURE Start Up & Power Down, PIN
Code page. The correct PIN code must be typed
in within five attempts or the PUK code is
required.
Next step
IF the PIN code
entered is
THEN
correct
GPS1200 Main Menu is displayed.
wrong
GPS1200 Enter Security PIN Code Error: 479 is displayed.
OK (F4) to return to GPS1200 Enter Security PIN Code where
a PIN code can be typed in again.
Receiver Protection with PIN
GPS1200
37
IF the PIN code
entered is
THEN
wrong the fifth time the PUK code is required. GPS1200 Enter Security PIN
Code Error: 478 is displayed.
OK (F4) to access GPS1200 Enter Security PUK Code.
Refer to paragraph "GPS1200 Enter Security PUK Code".
GPS1200
Enter Security PUK
Code
Refer to paragraph "GPS1200 Enter Security PIN Code" for information on softkeys.
Description of fields
Field
Option
Description
PUK Code
User input
The PUK code as generated by Leica Geosystems.
Serial No.
Output
•
For receivers delivered with firmware
version 2.10 or higher, the PUK code comes
with the receiver.
•
For receivers delivered with firmware
versions lower than v2.10, contact a Leica
representative to obtain a PUK code.
The serial number of the receiver. This is
needed to obtain the PUK code from Leica
Geosystems.
Next step
IF the PUK code entered THEN
is
38
correct
the old PIN code is cleared and the PIN protection is
deactivated. GPS1200 Main Menu is displayed.
wrong
GPS1200 keeps asking for the correct PUK code.
SHIFT QUIT (F6) to turn off the receiver.
GPS1200
Receiver Protection with PIN
6
Manage... - Getting Started
Accessing
MANAGE XX stepby-step
Step
Description
1.
Select Main Menu: Manage....
2.
GPS1200 Management
Select an option in the menu.
3.
)
MANAGE
XX
CONT (F1) to access MANAGE XX.
MANAGE XX can directly be accessed from a choicelist in some screens
for example the begin screen of application programs.
MANAGE Jobs (Device) is shown as an example. Additional softkeys are available
on other screens.
The listed options are stored in the database DB-X. Any unavailable information is
shown as -----.
The screen for MANAGE Data: Job Name consists of several pages. The objects
listed and their order depend on the active sort and filter settings. An active filter for
a page is indicated by shown to the right of the name of the page. On the Lines
(X) page and the Areas (X) page, the number in brackets next to the name of the
page indicate the number of open lines/areas. Example: Lines (2)/Areas (2) means
that two lines are open.
CONT (F1)
To select an option and to return to
the previous screen. For MANAGE
Codelists, the codes from the highlighted codelist are copied to the
active job.
NEW (F2)
To create an option. After storing a
new line/area, all existing lines and
areas which are open are closed.
EDIT (F3)
To edit the option. For MANAGE
Configuration Sets, the first screen
of the sequential configuration set
wizard for the highlighted configuration set is accessed.
DEL (F4)
To delete the option. Available unless
MANAGE Data: Job Name, Lines
(X) page and MANAGE Data: Job
Name, Areas (X) page.
Manage... - Getting Started
GPS1200
39
CLOSE (F4) and OPEN (F4)
To change between the options in the
Open column of the highlighted
line/area. The options are:
Yes: The line/area is open. Measured
points are assigned to the line/area.
No: The line/area is closed. Measured points are not assigned to the
line/area.
MORE (F5)
To display more information in the
second column. Available unless
MANAGE Jobs (Device) and
MANAGE Antennas.
PAGE (F6)
Available for MANAGE Data: Job
Name. To change to another page on
this screen.
CFCRD (F6) or INTL (F6)
Available for MANAGE Jobs. Available for receivers with internal
memory. To change between viewing
jobs stored on the CompactFlash
card or internal memory.
SHIFT LOG (F4)
Available for MANAGE Data: Job
Name, Points page. To view points,
lines, areas and free codes stored
with the job sorted by time.
SHIFT DEL (F4)
Available for MANAGE Data: Job
Name, Lines (X) page and MANAGE
Data: Job Name, Areas (X) page. To
delete the line/area.
SHIFT SET-D (F4)
Available for MANAGE Coordinate
Systems and MANAGE Configuration Sets. Available unless a default
coordinate system/configuration set
is highlighted. To turn the highlighted
coordinate system/configuration set
into a user defined default coordinate
system/configuration set stored in the
receiver.
SHIFT FILT (F5)
Available for MANAGE Data: Job
Name. To define sort and filter
settings.
40
GPS1200
Manage... - Getting Started
SHIFT DEFLT (F5)
Available for MANAGE Coordinate
Systems, MANAGE Configuration
Sets and MANAGE Antennas. To
recall the deleted default coordinate
systems/configuration sets/ antennas
and to reset default configuration
sets/antennas to the default settings.
Next step
IF an option
THEN
is to be selected
highlight the desired option.
CONT (F1) closes the screen and returns to the screen from
where MANAGE XX was accessed.
is to be created or
edited
highlight the option and NEW (F2)/EDIT (F3). Refer to the
individual chapters.
Manage... - Getting Started
GPS1200
41
42
GPS1200
Manage... - Getting Started
7
7.1
Manage...\Jobs
Overview
Description
Manage...\Jobs
Jobs
• structure surveying projects.
•
contain all points, lines, areas and codes that are recorded and stored.
•
can be downloaded to LGO for post-processing or for data transfer to a further
program.
•
can be uploaded from LGO, for example, for real-time stake out operations.
•
may be stored on the CompactFlash card or internal memory, if fitted.
GPS1200
43
7.2
Creating a New Job/Editing a Job
Access step-bystep
)
Step
Description
1.
Refer to "6 Manage... - Getting Started" to access MANAGE Jobs
(Device).
2.
In MANAGE Jobs (Device) highlight a job. When creating a new job, the
settings of this job are applied to the new job, the codelist must be
selected.
3.
NEW (F2)/EDIT (F3) to access MANAGE New Job/MANAGE Edit Job.
Editing jobs is similar to creating a new job. For simplicity, the screens are called
MANAGE XX Job and differences are clearly outlined.
MANAGE
XX Job,
General page
STORE (F1)
To store the settings and to return to
MANAGE Jobs (Device).
DATA (F5)
Available for editing a job. To view,
edit and delete points, lines and
areas stored with the job. Points,
lines and areas are shown on separate pages. Selected sort and filter
settings apply.
SHIFT LOG (F5)
Available for editing a job. To view,
edit and delete points, lines and
areas stored with the job. Points,
lines and areas are sorted by time in
one list.
Description of fields
Field
Option
Description
<Name:>
User input
A unique name for the new job. The name may
be up to 16 characters long and may include
spaces. Input required.
<Description:>
User input
Two lines for a detailed description of the job.
This can be for example, work to be performed
or the classes contained in the job. Input
optional.
<Creator:>
User input
The person’s name who is creating/editing the
job. Input optional.
Choicelist
For receivers with internal memory.
Output
For receivers without internal memory and when
editing a job.
<Device:>
44
The device on which the job will be stored.
GPS1200
Manage...\Jobs
Next step
PAGE (F6) changes to the Codelist page.
IMPRT (F2)
Available for editing a job. To add
additional codes from a new codelist
to the job. The name of this codelist is
copied to the job.
CODES (F4)
Available for editing a job. To view,
edit, delete, sort and group codes
currently stored in the job. The functionality of this screen is mainly the
same as for MANAGE Codes.
DATA (F5)
To view, edit and delete points, lines
and areas stored with the job. Points,
lines and areas are shown on separate pages. Selected sort and filter
settings apply.
SHIFT EXPRT (F2)
Available for editing a job. To copy
codes from the job to an existing or
new codelist.
MANAGE
XX Job,
Codelist page
Description of fields
Field
Option
Description
<Codelist:>
Choicelist
Available for creating a new job or for editing a
job if no codes are stored in the job. Choosing a
codelist copies the codes to the job.
Output
Available for editing a job if codes are stored in
the job. If codes had been copied from a System
RAM codelist, then the name of the codelist is
displayed. If codes have not been copied from a
System RAM codelist but typed in manually,
then the name of the active job is displayed.
Next step
PAGE (F6) changes to the Coord System page.
MANAGE
XX Job,
Coord System
page
Choosing a coordinate system attaches it to the job. If it is not known which coordinate system to use, select <Coord System: WGS 1984 >.
All other fields on this screen are output fields. They depend on the transformation
type of the selected coordinate system.
Next step
PAGE (F6) changes to the Avge page.
Manage...\Jobs
GPS1200
45
MANAGE
XX Job,
Avge page
In order to check measurements, the same point can be measured more than once.
If activated, an average or an absolute difference is calculated. Refer to paragraph
"MANAGE XX Job, General page" for information on the softkeys.
Description of fields
Field
Option
Description
<Averaging
Mode:>
Defines the averaging principles for multiple
measured points.
Average
Computes the average for the position and the
height. Points exceeding the defined limits are
marked with in MANAGE Edit Point, Mean
page.
Absolute Diffs
Computes the absolute differences between two
points selected from a list of measured points
which are all stored with the same point ID.
Off
Averaging is turned off.
<Points to
Use:>
Choicelist
The type of points which will be taken into
account for averaging or for absolute differences.
<Avge Limit
Pos:> and
<Avge Limit
Ht:>
User input
Available for <Averaging Mode: Average>.
The acceptable difference for the position and
height components.
User input
From
<Easting:> to
<Cartesian
Z:>
Available for <Averaging Mode: Absolute
Diffs>. The acceptable absolute differences for
each coordinate component.
Next step
STORE (F1) stores the job and returns to MANAGE Jobs (Device).
46
GPS1200
Manage...\Jobs
8
8.1
Manage...\Data
Overview
Description
Data is a generic term for points, lines and areas.
Data management is the administration of data stored in the active job. This includes
• viewing data with their related information.
Objects
Manage...\Data
•
editing data.
•
creating new data.
•
deleting existing data.
•
filtering existing data.
Objects
• are points, lines and areas.
•
have a unique identification ID. This is the point ID, the line ID and the area ID.
•
may or may not have a code attached. This is a point code for a point, a line code
for a line and an area code for an area.
GPS1200
47
8.2
Point Management
8.2.1
Creating a New Point/Editing a Point
Access step-bystep
Step
Description
1.
Refer to "6 Manage... - Getting Started" to access MANAGE Data: Job
Name, Points page.
2.
MANAGE Data: Job Name, Points page
If a point is to be edited, then highlight the point.
3.
)
NEW (F2)/EDIT (F3) to access MANAGE New Point/MANAGE Edit
Point: Point ID.
Editing points is similar to creating a new point. For simplicity, the screens are called
MANAGE XX Point and differences are clearly outlined. If editing a point, then the
visible pages and softkeys on this screen depend on the properties of the point being
edited.
MANAGE
XX Point,
Coords page
48
STORE (F1)
To store the point and all associated
information and to return to
MANAGE Data: Job Name, Points
page.
COORD (F2)
To view other coordinate types.
NORTH (F3) or SOUTH (F3)
Available for local geodetic or
WGS 1984 geodetic coordinates
when <Local Lat:> or <WGS 1984
Lat:> is highlighted. To change
between North and South latitude.
EAST (F3) or WEST (F3)
Available for local geodetic or
WGS 1984 geodetic coordinates
when <Local Long:> or <WGS 1984
Long:> is highlighted. To change
between East and West longitude.
MORE (F5)
Available for editing a point. To
display information about class, sub
class, 3D coordinate quality, time and
date of when point was stored, instrument source and the flag for Linework
if available.
SHIFT ELL H (F2) or SHIFT ORTH (F2)
Available for local coordinates. To
change between the ellipsoidal and
the orthometric height.
GPS1200
Manage...\Data
SHIFT INDIV (F5) or SHIFT RUN (F5)
To change between entering an individual point ID different to the defined
ID template and the running point ID
according to the ID template.
Description of fields
Field
Option
Description
<Point ID:>
User input
The name of the new point. The configured point
ID template is used. The ID can be changed in
the following way:
•
To start a new sequence of point ID’s type
over the point ID.
•
For an individual point ID independent of the
ID template SHIFT INDIV (F5). SHIFT RUN
(F5) changes back to the next free ID from
the configured ID template.
If editing a point, then changing the point ID for
a point of any class applies this new point ID to
all other points with the same original name,
regardless of class.
Coordinates
Output
Points of <Class: REF> cannot be renamed.
User input
Negative geodetic coordinates are interpreted
as being of the opposite hemisphere or other
side of the meridian. For example, entering 25 °N will be stored as 25 °S, entering -33 °E
will be stored as 33 °W.
Output
If editing, then points of <Class: REF> cannot
be renamed.
Next step
PAGE (F6) changes to the next page. Refer to the relevant paragraph below.
MANAGE
Edit Point: Point ID,
Obs page
For GNSS points
The name of the real-time reference station from where the GNSS point was measured, the name of antenna used to measure the point and the baseline values are
shown in output fields.
For TPS points
It is possible to edit the reflector height. Changing the reflector height recalculates
the point height.
The name of the station from where the point was measured is shown in an output
field.
Next step
PAGE (F6) changes to the next page. Refer to the relevant paragraph below.
Manage...\Data
GPS1200
49
MANAGE
XX Point,
Code page
The setting for <Thematc Codes:> in CONFIGURE Coding & Linework determines the availability of the subsequent fields and softkeys. For <Thematc Codes:
Without Codelist> none of the keys is available except for STORE (F1).
STORE (F1)
To store the point and all associated
information and to return to
MANAGE Data: Job Name, Points
page.
NEW-A (F2)
To create additional attributes for the
point code.
NAME (F3) or VALUE (F3)
Available for attributes for which an
attribute name can be typed in.
To highlight <Attribute n:> or the
field for the attribute value. The name
of <Attribute n:> can be edited and
an attribute value can be typed in.
LAST (F4)
To recall the last used attribute
values which were stored with this
point code.
DEFLT (F5)
To replace all currently displayed
attribute values with the default
values.
Description of fields
50
Field
Option
Description
<Point
Code:>
Choicelist
Available for <Thematc Codes: With
Codelist>. All point codes of the job codelist can
be selected. The description of the code is
shown as an output field. The attributes are
shown as output, input or choicelist fields
depending on their definition.
<Code:>
User input
Available for <Thematc Codes: Without
Codelist>. The code to be stored with the point.
A check is performed to see if a point code of
this name already exists in the job. If so, the
according attribute values are shown.
<Attribute
n:>
User input
Available for <Thematc Codes: Without
Codelist>. Up to eight attribute values are available.
GPS1200
Manage...\Data
Next step
MANAGE
Edit Point: Point ID,
Annots page
IF
THEN
creating a point
STORE (F1) stores the point and all associated information
and returns to MANAGE Data: Job Name, Points page.
editing a point
•
PAGE (F6) changes to the Annots page, if available.
•
PAGE (F6) changes to the Mean page, if available. Refer
to "8.2.2 Mean Page" for information on softkeys and
fields on the Mean page.
The comments to be stored with the point can be edited except for <4:> if a GPS
seismic value has been recorded.
Next step
STORE (F1) stores the changes and returns to MANAGE Data: Job Name.
Manage...\Data
GPS1200
51
8.2.2
Mean Page
Description
Various measured coordinate triplets for one point can be recorded using the same
point ID. If the averaging mode is activated, an average is calculated.
It is checked if the deviations of each single point are within the configured limits.
After averaging, the Mean page becomes available in MANAGE Edit Point: Point
ID and accessible from the Survey application program SURVEY Survey: Job
Name, Survey page.
Averaging
Defining the averaging mode and configuring the limits
The averaging mode and the limits are configured in MANAGE New Job, Avge
page or in MANAGE Edit Job: Job Name, Avge page. Refer to "7.2 Creating a New
Job/Editing a Job".
Description of averaging modes
Access step-bystep
MANAGE
Edit Point: Point ID,
Mean page
Averaging
mode
Description
Average
The horizontal and height distances from the measured points to
the average are computed and displayed on the Mean page.
Absolute
Diffs
The same as for Average above applies for Absolute Diffs.
Additionally, the absolute difference between two points selected
from a list of measured points, which are all stored with the same
point ID, are computed.
Off
Averaging functionality is turned off.
Access within data management
Step
Description
1.
Refer to "6 Manage... - Getting Started" to access MANAGE Data: Job
Name.
2.
In MANAGE Data: Job Name, Points page highlight a point to be edited.
3.
EDIT (F3) to access MANAGE Edit Point: Point ID, Mean page.
All measured coordinate triplets recorded using the same point ID are shown.
STORE (F1)
To store the changes and to return to
the screen from where this screen
was accessed.
USE (F2)
To include or exclude the highlighted
coordinate triplet in or from the calculation of the average.
52
GPS1200
Manage...\Data
EDIT (F3)
To view and edit the highlighted
measured coordinate triplet.
DEL (F4)
To delete the highlighted coordinate
triplet. The average is recomputed.
MORE (F5)
To display more information in the
second column.
SHIFT DIFFS (F5)
Available for <Averaging Mode:
Absolute Diffs> and Yes set in the
Use column for exactly two measurements. To display the absolute coordinate differences when a local coordinate system is active. Differences
exceeding the defined limit are indicated by .
Description of columns
Column
Description
Use
The use of a measured coordinate triplet in the averaging.
•
Auto
The coordinate triplet is included in the averaging computation
if within the defined averaging limit.
•
Yes
The coordinate triplet is always included in the averaging
computation even if it would fall outside the defined averaging
limit.
•
No
The coordinate triplet is never included in the averaging
computation.
•
----The coordinate triplet cannot be included in the averaging
computation. Automatically set by the system.
USE (F2) changes between the options.
dPos
The horizontal distance from the measured coordinate triplet to the
average.
dHt
The height distance from the measured coordinate triplet to the
average.
Available for measured coordinate triplets with Auto or Yes in the
Use column if <Averaging Mode: Average>. Indicates an
exceeding of the limits.
Manage...\Data
GPS1200
53
Next step
IF a measured
coordinate triplet
THEN
is not to be viewed STORE (F1) stores the changes and returns to MANAGE
Data: Job Name.
is to be viewed
54
highlight a measured coordinate triplet and EDIT (F3).
Codes cannot be changed. A change in codes must
be an overall change for the average point.
)
GPS1200
Manage...\Data
8.3
Line/Area Management
8.3.1
Overview
Description
A line/area consists of points and can be created/edited in MANAGE Data: Job
Name. The individual points are measured within any application program. These
can be all points except auxiliary points. Points can be simultaneously assigned to
one or more lines and/or areas.
A line/area can have
• a style for display in MapView.
•
)
Manage...\Data
a code independent of the point code of the points comprising the line/area.
Points are assigned to a line/area when the line/area is open. Press USE (F4) to
open/close a line/area.
GPS1200
55
8.3.2
Creating a New Line/Area/Editing a Line/Area
)
Access step-bystep
Creating/editing lines/areas and the functionality of all screens and fields are similar
for lines/areas. For simplicity, only the creation/editing of a line is explained in this
chapter.
Step
Description
1.
Refer to "6 Manage... - Getting Started" to access MANAGE Data: Job
Name.
2.
PAGE (F6) until the Lines (X) page is active.
3.
MANAGE Data: Job Name, Lines (X) page
If a line is to be edited, then highlight the line.
4.
)
NEW (F2)/EDIT (F3) to access MANAGE New Line/MANAGE Edit Line:
Line ID.
Editing lines/areas is similar to creating a new line/area. For simplicity, the screens
are called MANAGE XX Line and differences are clearly outlined.
MANAGE
XX Line,
General page
STORE (F1)
To store the line and all associated
information and to return to
MANAGE Data: Job Name, Lines
(X) page. Any existing lines and
areas which are open are closed.
MORE (F5)
Available on MANAGE Edit Line:
Line ID. To display additional fields
with more information.
SHIFT INDIV (F5) or SHIFT RUN (F5)
To change between entering an individual line ID different to the defined
ID template and the running line ID
according to the ID template.
Description of fields
56
Field
Option
Description
<Line ID:>
User input
The name of the new line.
<Pts to
Store:>
All Points, Only The type of points which are used to form the
line during a survey.
Msd Pts, Only
Auto Pts, Only
Offset1 Pts or
Only Offset2 Pts
GPS1200
Manage...\Data
Field
Option
Description
<Line Style:> Choicelist
Available on MANAGE New Line. This is the
line style in which lines/areas are represented in
MapView and LGO. For <Line Code: <None>>
on the Code page a line style can be selected
from a choicelist. Otherwise the line style as
defined for the selected line code on the Code
page is shown.
<No. of Pts:> Output
The number of points contained within the line.
<Length:>
Output
Available on MANAGE Edit Line: Line ID. The
sum of the distances between the points in the
sequential order in which they are stored for the
line. This can be a horizontal grid distance or a
geodetic distance on the WGS 1984 ellipsoid.
Output
<Start
Time:> and
<Start Date:>
Available on MANAGE Edit Line: Line ID. The
time/date when the line was created.
<End Time:> Output
and <End
Date:>
Available on MANAGE Edit Line: Line ID after
pressing MORE (F5). The time/date when the
last point was added to the line. The values do
not change after deleting the last added point or
after editing unless an additional point is added
to the line.
Next step
MANAGE
Edit Line: Line ID,
Points page
IF
THEN
creating a line
PAGE (F6) changes to the Code page. Refer to paragraph
"MANAGE XX Line, Code page".
editing a line
PAGE (F6) changes to the Points page. Refer to paragraph
"MANAGE Edit Line: Line ID, Points page".
All points belonging to the line are listed. The point that was added last to the line is
at the top of the list.
ADD (F2)
To add an existing point from the
active job to the line. A new point is
added before the point which was
highlighted when ADD (F2) was
pressed.
Manage...\Data
GPS1200
57
REMOV (F4)
To remove the highlighted point from
the line. The point itself is not deleted.
MORE (F5)
To display more information in the
second column.
Next step
PAGE (F6) changes to the Code page.
MANAGE
XX Line,
Code page
The functionality is very similar to MANAGE New Point, Code page. Refer to "8.2.1
Creating a New Point/Editing a Point".
Next step
STORE (F1) stores the changes and returns to MANAGE Data: Job Name, Lines
(X) page.
Creating
lines/areas most
efficiently
IF the task is to
create
multiple lines/areas use the hot key/user menu function FUNC Create New Line
(Quick)/FUNC Create New Area (Quick). Pressing the hot
with subsequent
key or selecting the function from the user menu creates and
line/area ID’s
immediately stores the new line/area. For the line/area ID, the
line/area ID template as defined in CONFIGURE ID
Templates is used. The code and attributes are taken over
from the last created line/area.
lines/areas with
certain codes
58
THEN
use quick coding. The job codelist must contain quick codes
for lines/areas. By tying the quick code a new line/area is
created and immediately stored with that line/area code and
attributes. For the line/area ID, the line/area ID template as
defined in CONFIGURE ID Templates is used.
GPS1200
Manage...\Data
8.4
Point Sorting and Filters
8.4.1
Sorting and Filters for Points, Lines and Areas
Description
)
Access step-bystep
The sort settings define the order of the objects in the active job.
The filter settings define the objects to be viewed.
An active filter for an object is indicated in MANAGE Data: Job Name by
right hand side of the page name.
Step
on the
Description
1.
Refer to "6 Manage... - Getting Started" to access MANAGE Data: Job
Name.
2.
In MANAGE Data: Job Name on the Points, Lines (X) or Areas (X)
page, SHIFT FILT (F5) to access MANAGE Sorts & Filters.
3.
MANAGE Sorts & Filters
The page for an object is displayed when the equivalent page is displayed
in MANAGE Data: Job Name.
)
MANAGE
Sorts & Filters,
Points page
The functionality on the Lines (X) and Areas (X) page is similar to that on the Points
page. For simplicity, only the Points page is described.
The available fields on this screen depend on the selected setting for <Filter:>.
CONT (F1)
To close the screen and to return to
the screen from where this screen
was accessed.
STAKE (F5)
To filter points for the Stakeout application program.
Description of fields
Field
Option
<Sort:>
Always available. The method by which points
Ascend Point
are sorted.
ID, Descend
Point ID,
Forward Time or
Backward Time
Description
<Filter:>
Manage...\Data
Always available. The method the points are
filtered by.
No Filter
Shows all points.
Highest Class
Shows points of highest class.
GPS1200
59
Field
Option
Description
Range of Pt ID's Shows points with point ID’s between the
entered start and end ID. The points are left
aligned and sorted by the first digit.
Pt ID Wildcard
Shows points with point ID’s matching the wildcard. * and ? are supported. * indicates an undefined number of unknown characters. ? indicates a single unknown character.
Time
Shows points which were recorded within a
defined time window.
Class
Shows points of the selected class.
Instrument
Shows points originating from the selected
instrument or software program type.
Coordinate
Type
Shows points of the selected type of coordinates.
Point Code
Shows points with selected codes attached.
Radius From Pt Shows points within the defined radius from a
particular point. The radius is the horizontal
distance.
Individual Line
Shows points forming a selected line. This may
for example be useful during stakeout.
Individual Area
Shows points forming a selected area. This may
for example be useful during stakeout.
Next step
CONT (F1) returns to the screen from where MANAGE Sorts & Filters was
accessed.
60
GPS1200
Manage...\Data
8.4.2
Point, Line and Area Code Filter
)
Access step-bystep
For each object, a code filter exists. The point, line and area code filters are independent from each other. The functionality is identical. For simplicity, only the point
code filter is explained.
Step
Description
1.
Refer to "8.4.1 Sorting and Filters for Points, Lines and Areas" to access
MANAGE Sorts & Filters.
2.
MANAGE Sorts & Filters
<Filter: Point Code>
3.
MANAGE
Point Code Filter
CODES (F4) to access MANAGE Point Code Filter.
This screen shows the point codes from the active job and codes currently used as
filter.
CONT (F1)
To close the screen and return to the
screen from where this screen was
accessed.
GROUP (F4)
To activate and deactivate code
groups. Codes belonging to a deactivated code group are not displayed in
MANAGE Code Filter.
USE (F5)
To activate and deactivate the filter
for the highlighted code.
NONE (F6) or ALL (F6)
To deactivate or activate all point
codes.
SHIFT SORT (F5)
To define the order of the codes.
Manage...\Data
GPS1200
61
62
GPS1200
Manage...\Data
9
9.1
Manage...\Codelists
Creating a New Codelist/Editing a Codelist
)
Access step-bystep
)
It is recommended to create a codelist in LGO. A codelist can be transferred from
LGO to the System RAM of the receiver using the CompactFlash card.
Step
Description
1.
Refer to "6 Manage... - Getting Started" to access MANAGE Codelists.
2.
NEW (F2)/EDIT (F3) to access MANAGE New Codelist/MANAGE Edit
Codelist.
Editing codelists is similar to creating a new codelist. For simplicity, the screens are
called MANAGE XX Codelist and differences are clearly outlined.
MANAGE
XX Codelist
STORE (F1)
To store the codelist and to return to
MANAGE Codelists.
CODES (F4)
To access MANAGE Codes where
codes can be created, edited or
deleted and code groups can be
accessed.
Description of fields
Field
Option
Description
<Name:>
User input
A unique name for the codelist. The name may
be up to 16 characters long and may include
spaces. Input required.
<Description:>
User input
A detailed description of the codelist. This can
be for example, work to be performed. Input
optional.
<Creator:>
User input
The person’s name who is creating the new
codelist. Input optional.
Next step
STORE (F1) stores the codelist and returns to MANAGE Codelists.
Manage...\Codelists
GPS1200
63
9.2
Creating a New Code/Editing a Code
Access step-bystep
Step
Description
1.
Refer to "6 Manage... - Getting Started" to access MANAGE Codelists.
2.
In MANAGE Codelists highlight the codelist of which codes are to be
managed.
3.
EDIT (F3) to access MANAGE Edit Codelist.
4.
CODES (F4) to access MANAGE Codes.
5.
MANAGE Codes
)
)
)
6.
Codes from currently active code groups are shown. The indicates codes
which have attributes attached.
MORE (F5) displays information about the code description, the quick
codes if available, the code groups and the code type.
SHIFT GROUP (F4) to view, create, delete, activate and deactivate code
groups.
SHIFT SORT (F5) sorts codes by code name, code description, quick
code or the last use.
MANAGE Codes
If a code is to be edited, then highlight the code.
7.
)
NEW (F2)/EDIT (F3) to access MANAGE New Code/MANAGE Edit
Code.
Editing codes is similar to creating a new code. For simplicity, the screens are called
MANAGE XX Code and differences are clearly outlined.
MANAGE
XX Code
STORE (F1)
To add the new code and any associated attributes to the System
RAM/job codelist and to return to the
screen from where this screen was
accessed.
NEW-A (F2)
To add a new input field for an
attribute of attribute type normal and
of value type text. Attributes of
attribute type mandatory or fixed and
of value type real or integer must be
created in LGO. Up to twenty
attributes can be created.
64
GPS1200
Manage...\Codelists
NAME (F3) or VALUE (F3)
Available for attributes for which an
attribute name can be typed in. To
highlight the field for the attribute
name or the field for the attribute
value. The attribute name can be
edited and the attribute value to be
used as the default attribute value
can be typed in.
Description of fields
Field
Option
Description
<Code:>
User input
A unique name for the new code. The name may
be up to 16 characters long and may include
spaces. Input required.
<Code
Desc:>
User input
A detailed description of the code. This can be
for example the full designation if <Code:> is an
abbreviation. Input optional.
<Group:>
Choicelist
The code group to which the code is to be
assigned.
<Code
Type:>
Choicelist
Defines the use of the code. It can be used as
thematical code for points, lines or areas or as a
free code. It makes a code unique. For example
<Code: Oak> can have <Code Type: Point>,
<Code Type: Line>, <Code Type: Area>
and/or <Code Type: Free> within the same
codelist and job.
<Linework:> Choicelist
Available for <Code Type: Point> only. This
field allows a new line or new area to be opened
whenever the point code is newly selected. This
functionality is also available when creating
codelists with LGO Codelist Management.
None
Select this option to disable the functionality. All
other code settings on the instrument are not
affected when this option is set.
Begin Line
When a point code is newly selected, a new line
is opened and the point being stored is added to
the line. When the same point code remains
selected, a new line is not opened. The point
being stored is simply added to the current line.
Begin Area
The behaviour for opening a new area is the
same as the behaviour for opening a new line,
as mentioned above.
<Line Style:> Choicelist
Manage...\Codelists
GPS1200
Not available for <Code Type: Free>. The style
in which lines/areas using this case are represented in MapView and LGO.
65
Next step
STORE (F1) adds the code to the codelist/stores the changes and returns to
MANAGE Codelists.
66
GPS1200
Manage...\Codelists
10
10.1
Linework
Performing Linework
)
Requirements
Access step-bystep
SURVEY
Survey: Job Name,
Survey page
The Survey application program is used here to explain Linework.
•
A display mask with a choicelist for Linework must be configured.
•
The flags for Linework must be defined in CONFIGURE Coding & Linework
Settings, Linework page.
•
<R-Time Mode: None> or <R-Time Mode: Rover> in CONFIGURE Real-Time
Mode.
Step
Description
1.
Select Main Menu: Survey to access SURVEY Survey Begin.
2.
In SURVEY Survey Begin select a job.
3.
Select a configuration set with <R-Time Mode: None> or <R-Time Mode:
Rover>.
4.
Select an antenna.
5.
CONT (F1) to access SURVEY Survey: Job Name.
The most important keys are explained.
OCUPY (F1)
To start recording positions. The
position mode icon changes to the
static icon. (F1) changes to STOP.
STOP (F1)
To end recording of positions when
enough data is collected. (F1)
changes to STORE.
STORE (F1)
To store the point information. (F1)
changes to OCUPY.
Description of fields
Field
Option
Description
<Point ID:>
User input
The identifier for manually occupied points. The
configured point ID template is used. The ID can
be changed in the following ways:
•
Linework
GPS1200
To start a new sequence of point ID’s type
over the point ID.
67
Field
Option
Description
•
<Linework:>
68
For an individual point ID independent of the
ID template SHIFT INDIV (F5). SHIFT RUN
(F5) changes back to the next ID from the
configured ID template.
The linework flag to be stored with the point.
-----
No linework flag is stored.
Begin Line
Opens a new line when the next point is stored.
Any line/area which is currently open is closed
and the last point belonging to that line/area is
given the End Line/Close Area linework flag.
The point may or may not be stored with a point
code.
3pt Curve
Stores the linework flag for a curve through
three points and continues a line/area.
ReOpen Any
Line
Opens a line from a list of all lines which are
currently stored in the job when the next point is
stored. The last code used with the reopened
line is automatically selected when the point is
stored. Any line/area which is currently open is
closed and the last point belonging to that
line/area is given the End Line/Close Area linework flag.
ReOpen Last
Line
Opens the last used line again. The last code
used with the reopened line is automatically
selected when the point is stored.
End Line
Closes all open lines.
Cont Line/Area
Indicates a line/area is open.
Start Spline
Stores the linework flag for beginning a spline
and continues any open line/area.
End Spline
Closes a spline and continues any open
line/area.
Cont Spline
Indicates a line/area is open with spline line
type.
Begin Area
Opens a new area when the next point is stored.
Any line/area which is currently open is closed
and the last point belonging to that line/area is
given the End Line/Close Area linework flag.
The point may or may not be stored with a point
code.
GPS1200
Linework
Field
Option
Description
ReOpen Any
Area
Opens an area from a list of all lines which are
currently stored in the job when the next point is
stored. The last code used with the reopened
area is automatically selected when the point is
stored. Any line/area which is currently open is
closed and the last point belonging to that
line/area is given the End Line/Close Area linework flag.
ReOpen Last
Area
Opens the last used area again. The last code
used with the reopened area is automatically
selected when the point is stored.
Close Area
Closes all open areas.
Next step
Step
1.
Go to the point to be occupied.
2.
Select the linework flag to be stored with the next point.
3.
OCUPY (F1)
4.
STOP (F1)
5.
STORE (F1)
)
Linework
Description
Depending on the option selected for <Linework:>, a line/area is opened,
closed or re-opened.
6.
Repeat steps 1. to 5. until all points are occupied.
7.
SHIFT QUIT (F6) to exit the Survey application program.
8.
Use a format file to export the points including the linework flags.
GPS1200
69
10.2
Combining Linework and Coding
Description
Combining Linework and coding can only be configured if thematical point codes or
if thematical point, line and area codes are available for selection. Thematical coding
can be done with or without codelists.
Requirements
•
A display mask must be configured with
• a field for codes.
• a choicelist for Linework.
•
The configuration of a field for code types in a display mask is required for
working with point, line and area codes without choicelist. Else the configuration
of a field for code types is optional.
•
Configure in CONFIGURE Coding & Linework, Coding page
• <Show Codes: Only Pt Codes> or <Show Codes: All Codes>.
• <Thematc Codes: With Codelist> or <Thematc Codes: Without
Codelist>.
)
Access step-bystep
70
•
In CONFIGURE Coding & Linework Settings, Linework page define the flags
for Linework.
•
<R-Time Mode: None> or <R-Time Mode: Rover> in CONFIGURE Real-Time
Mode.
The Survey application program is used here to explain the combination of Linework
and coding.
Step
Description
1.
Select Main Menu: Survey to access SURVEY Survey Begin.
2.
In SURVEY Survey Begin select a job.
3.
Select a configuration set with <R-Time Mode: None> or <R-Time Mode:
Rover>.
4.
Select an antenna.
5.
CONT (F1) to access SURVEY Survey: Job Name.
GPS1200
Linework
SURVEY
Survey: Job Name,
Survey page
This is what a display mask configured for Linework and coding looks like. The most
important keys are explained.
OCUPY (F1)
To start recording positions. (F1)
changes to STOP.
STOP (F1)
To end recording of positions when
enough data is collected. (F1)
changes to STORE.
STORE (F1)
To store the point information. (F1)
changes to OCUPY.
Linework and
coding step-bystep
These step-by-step instructions refer to the previous screen.
For <Show Codes: Only Pt Codes>
Step
1.
Field
<Code:>
)
With codelist
Without codelist
Select a code from the
choicelist. Only point codes
are available for selection.
Type in a code.
<None> to store a point
without code or to perform
Linework without coding.
----- to store a point without
code or to perform Linework
without coding.
2.
<Code
Type:>
3.
<Linework:> Select an option for the Linework flag to be stored with the
point.
)
Point is displayed. This field is an output field. It can not be
changed.
----- to store a point without Linework flag or to perform
coding without Linework.
4.
-
OCUPY (F1)
5.
-
STOP (F1)
6.
-
STORE (F1)
-
•
The point is stored with the selected code.
-
•
Depending on the selection for <Linework:>, a
line/area is opened/closed.
)
Linework
Description for thematical coding
GPS1200
71
For <Show Codes: All Codes>
Step
Field
Description for thematical coding
With codelist
1.
<Code:>
)
Type in a code.
Select a code from the
choicelist. Point, line and
area codes are available for
selection.
<None> to store a point
without code or to perform
Linework without coding.
----- to store a point without
code or to perform Linework
without coding.
Select the type of the
The type of the selected
code. This field is an output entered code.
field. It can not be changed.
2.
<Code
Type:>
3.
<Linework:> Select an option for the Linework flag to be stored with the
point.
)
----- to store a point without Linework.
4.
-
OCUPY (F1)
5.
-
STOP (F1)
6.
-
STORE (F1)
-
•
If a point code was selected, the point is stored with the
selected code.
-
•
If a line/area code was selected, the point is stored as
part of the line/area.
-
•
Depending on the selection for <Linework:>, a
line/area is opened/closed.
)
72
Without codelist
GPS1200
Linework
11
11.1
Manage...\Coordinate Systems
Overview
Description
A coordinate system
• consists of up to five elements.
•
Elements of coordinate system
allows the conversion from WGS 1984 geodetic or cartesian coordinates to local
cartesian, geodetic or grid coordinates and back.
The five elements which define a coordinate system are:
• a transformation
•
a projection
•
an ellipsoid
•
a geoid model
•
a Country Specific Coordinate System model
Manage...\Coordinate Systems
GPS1200
73
11.2
Creating a New Coordinate System/Editing a Coordinate System
Access step-bystep
)
MANAGE
XX Coordinate
System
Step
Description
1.
Refer to "6 Manage... - Getting Started" to access MANAGE Coordinate
Systems.
2.
In MANAGE Coordinate Systems highlight a coordinate system. When
creating a new coordinate system, a copy of this coordinate system is
taken for further configurations.
3.
NEW (F2)/EDIT (F3) to access MANAGE New Coordinate
System/MANAGE Edit Coordinate System.
Editing a coordinate system is similar to creating a new coordinate system. For
simplicity, the screens are called MANAGE XX Coordinate System and differences
are clearly outlined.
When editing a coordinate system the transformation type of the selected coordinate
system determines the availability and the options of the subsequent fields. Most
fields are identical with those for the creation of a new coordinate system.
Description of fields
Field
Option
Description
<Name:>
User input
A unique name for the coordinate system. The
name may be up to 16 characters long and may
include spaces.
<Residuals:>
74
Available for transformations with control points.
The method by which residuals are distributed
throughout the transformation area.
None
No distribution is made. Residuals remain with
their associated points.
1/DistanceXX
Distributes the residuals according to the
distance between each control point and the
newly transformed point.
Multiquadratic
Distributes the residuals using a multiquadratic
interpolation approach.
<Transform:>
Choicelist
The type of transformation.
<Pre Transform:>
Output
Available for editing Twostep transformations.
The name of a preliminary 3D transformation
which is used together with the selected projection to obtain preliminary grid coordinates to be
used for a final 2D transformation.
<Ellipsoid:>
Choicelist
Available unless projection <Type: Customised>. The local coordinates are based on this
ellipsoid.
<Projection:>
Choicelist
The map projection.
GPS1200
Manage...\Coordinate Systems
Field
Option
Description
<Geoid
Model:>
Choicelist
The geoid model.
<CSCS
Model:>
Choicelist
The Country Specific Coordinate System model.
Next step
STORE (F1) stores the coordinate system and returns to MANAGE Coordinate
Systems.
Manage...\Coordinate Systems
GPS1200
75
11.3
Transformations/Ellipsoids/Projections
11.3.1
Accessing Transformation/Ellipsoid/Projection Management
Access step-bystep
Step
Description
1.
Refer to "6 Manage... - Getting Started" to access MANAGE Coordinate
Systems.
2.
In MANAGE Coordinate Systems highlight a coordinate system to be
edited.
3.
EDIT (F3)
4.
In MANAGE Edit Coordinate System highlight <Transform:>, <Ellipsoid:> or <Projection:>.
5.
ENTER to access MANAGE XX.
)
)
The screen is similar to MANAGE Coordinate Systems. Refer to "6
Manage... - Getting Started" for information on the softkeys.
In MANAGE Transformations all Classic 3D transformations stored in
the database DB-X are listed.
Next step
IF
THEN
highlight the desired transformation/ellipsoid/projection.
a transformaCONT (F1) closes the screen and returns to the screen from
tion/ellipsoid/projection is to where MANAGE XX was accessed.
be selected
a transformation/an highlight the transformation/ellipsoid/projection and NEW
ellipsoid/projection (F2)/EDIT (F3). Refer to "11.3.2 Creating/Editing a Transforis to be created or mation/Ellipsoid/Projection".
edited
76
GPS1200
Manage...\Coordinate Systems
11.3.2
Creating/Editing a Transformation/Ellipsoid/Projection
)
)
Access step-bystep
)
MANAGE
XX Transformation,
General page
Creating/editing an ellipsoid/projection is very similar to creating/editing a transformation which is explained below. The main difference is that MANAGE XX Ellipsoid
and MANAGE XX Projection do not use pages and all the information is input on
one screen.
Classic 3D transformations can be created.
Step
Description
1.
Refer to "11.3.1 Accessing Transformation/Ellipsoid/Projection Management" to access MANAGE Transformations.
2.
In MANAGE Transformations highlight a transformation. When creating
a new transformation/ellipsoid/projection, a copy of this transformation/ellipsoid/projection is taken for further configurations.
3.
NEW (F2)/EDIT (F3) to access MANAGE New Transformation/MANAGE Edit Transformation.
Editing a transformation is similar to creating a new transformation. For simplicity,
the screens are called MANAGE XX Transformation and differences are clearly
outlined.
Description of fields
Field
Option
Description
<Name:>
User input
A unique name for the transformation. The
name may be up to 16 characters long and may
include spaces.
<Type:>
Output
No other transformations than Classic 3D can
be created.
Next step
PAGE (F6) changes to the Parameters page.
MANAGE
XX Transformation,
Parameters page
Enter the known values of the transformation parameters.
MANAGE
XX Transformation,
More page
Description of fields
Next step
PAGE (F6) changes to the More page.
Field
Option
Description
<Height
Mode:>
Choicelist or
Output
The type of heights to be computed. When
editing a transformation, the option cannot be
changed.
Manage...\Coordinate Systems
GPS1200
77
Field
Option
Description
<Transf
Model:>
Choicelist
The transformation model to be used. For
<Transf Model: Molodensky-Bad>, additional
input fields are available.
Next step
STORE (F1) stores the transformation and returns to MANAGE Transformations.
78
GPS1200
Manage...\Coordinate Systems
11.4
Geoid/CSCS Models
)
Access step-bystep
MANAGE
Geoid Models
The creation of CSCS models on the receiver and the functionality of all screens and
fields is similar to those for geoid models. For simplicity, geoid models are used as
an example in this chapter.
Step
Description
1.
Refer to "6 Manage... - Getting Started" to access MANAGE Coordinate
Systems.
2.
In MANAGE Coordinate Systems highlight a coordinate system to be
edited.
3.
EDIT (F3) to access MANAGE Edit Coordinate System.
4.
In MANAGE Edit Coordinate System highlight <Geoid Model:>.
5.
ENTER to access MANAGE Geoid Models.
All geoid models stored in the database DB-X are listed. Any unavailable information
is shown as -----, for example, if the geoid field file which was associated to the geoid
model is not available on the CompactFlash card / internal memory.
CONT (F1)
To select the highlighted geoid model
and to return to the previous screen.
CFCRD (F2)
To create a new geoid model. For
each geoid field file on the CompactFlash card, one geoid model is automatically created.
EDIT (F3)
To view the highlighted geoid model.
None of the fields can be edited.
DEL (F4)
To delete the highlighted geoid
model. The geoid field file which was
associated with this geoid model is
then also deleted.
INTL (F6)
To create a new geoid model. For
each geoid field file in the internal
memory, one geoid model is automatically created.
Manage...\Coordinate Systems
GPS1200
79
80
GPS1200
Manage...\Coordinate Systems
12
12.1
Manage...\Configuration Sets
Overview
Description
The receiver has numerous user configurable parameters and functions. This allows
a variety of preferences to be addressed. The configuration of the parameters and
functions for an individual measuring technique are combined in a configuration set.
Default configuration sets
Default configuration sets exist on the instrument. They use standard settings for the
majority of application programs. Default configuration sets can be edited and
deleted. It is always possible to restore the default configuration sets.
User defined
configuration sets
New configuration sets can be created. The configuration set wizard assists in
editing configuration sets.
Manage...\Configuration Sets
GPS1200
81
12.2
Creating a New Configuration Set
Access step-bystep
MANAGE
New Configuration
Set
Step
Description
1.
Refer to "6 Manage... - Getting Started" to access MANAGE Configuration Sets.
2.
In MANAGE Configuration Sets highlight a configuration set. A copy of
this configuration set is taken for further configurations.
3.
NEW (F2) to access MANAGE New Configuration Set.
Description of fields
Field
Option
Description
<Name:>
User input
A unique name for the new configuration set.
<Description:>
User input
A detailed description of the configuration set,
since the name of a configuration set is usually
an abbreviation. Input optional.
<Creator:>
User input
The person’s name who creates the new configuration set. Input optional.
Next step
STORE (F1) accesses the next subsequent screen in the configuration wizard.
Refer to the chapters "Config...\XX" for information on the screens.
82
GPS1200
Manage...\Configuration Sets
12.3
Editing a Configuration Set
Access step-bystep with using
configuration set
wizard
Access without
using the configuration set wizard
Step
Description
1.
Refer to "6 Manage... - Getting Started" to access MANAGE Configuration Sets.
2.
In MANAGE Configuration Sets highlight a configuration set to be
edited.
3.
EDIT (F3) to access CONFIGURE Wizard Mode. This starts the sequential configuration set wizard.
4.
Refer to the chapters "Config...\XX" for information on the screens.
The currently active configuration set can be edited. Choose one of the following
options and access the required screens to edit the configuration set.
Select Main Menu: Config....
OR
From inside an application program press USER and then CONF (F2).
OR
In CONFIGURE Wizard Mode, press LIST (F6).
Manage...\Configuration Sets
GPS1200
83
84
GPS1200
Manage...\Configuration Sets
13
13.1
Manage...\Antennas
Overview
Description
Manage...\Antennas
•
Leica Geosystems antennas are predefined as default and can be selected from
a list.
•
Additional antennas can be defined.
•
Default antennas contain an elevation dependent correction model.
•
New antenna correction models can be set up and transferred to the receiver
using LGO.
GPS1200
85
13.2
Creating a New Antenna/Editing an Antenna
Access step-bystep
)
Step
Description
1.
Refer to "6 Manage... - Getting Started" to access MANAGE Antennas.
2.
In MANAGE Antennas highlight an antenna. When creating a new
antenna, highlight the antenna with offset characteristics similar to those
required by the new antenna.
3.
NEW (F2)/EDIT (F3) to access MANAGE New Antenna/MANAGE Edit
Antenna.
Editing antennas is similar to creating a new antenna. All fields can be edited except
those of Leica default antennas. For simplicity, the screens are called MANAGE XX
Antenna.
MANAGE
XX Antenna,
General page
STORE (F1)
To store the new antenna and to
return to MANAGE Antennas.
Description of fields
Field
Option
Description
<Name:>
User input
A unique name for the new antenna.
<Hz Offset:> User input
Horizontal offset of measurement reference
point.
<V Offset:>
User input
Vertical offset of measurement reference point.
<L1
PhOffset:>
User input
Offset of L1 phase centre.
<L2
PhOffset:>
User input
Offset of L2 phase centre.
<Copy Addi- Yes or No
tional
Corrections:>
Allows additional corrections to be copied from
the antenna which was highlighted when
MANAGE New Antenna was accessed.
Next step
PAGE (F6) changes to the IGS page.
86
GPS1200
Manage...\Antennas
MANAGE
New Antenna,
IGS page
The combination of values typed in on this page provides a unique standardised ID
for the antenna being used.
Description of fields
Field
Option
Description
<IGS Name:> User input
The International GPS Service name of the
antenna.
<Serial
Number:>
User input
The serial number of the antenna.
<Set Up
Number:>
User input
The set up number of the antenna. This identifies the version number of the current calibration.
Next step
STORE (F1) stores the antenna and returns to MANAGE Antennas.
Manage...\Antennas
GPS1200
87
88
GPS1200
Manage...\Antennas
14
14.1
Convert...\Export Data from Job
Overview
Description
The settings on this screen define the data that is converted and exported and what
format is used.
Data is exported from the selected job. Currently active view, filter and sort settings
are applied. The points that are exported are those that are visible in MANAGE
Data: Job Name.
Data can be exported
• to a file on the CompactFlash card.
Export format
•
to a file on the internal memory, if fitted.
•
via RS232 to a Leica TPS400/700 instrument.
The export format must be composed individually as format file using LGO. Refer to
the online help of LGO for information on creating format files.
Convert...\Export Data from Job
GPS1200
89
14.2
Exporting ASCII Data
Requirements
At least one format file was created using LGO and has been transferred to the
System RAM.
Access
Select Main Menu: Convert...\Export Data from Job.
EXPORT
Export ASCII Data
from Job
CONT (F1)
To export the data.
CONF (F2)
To define the default extension for
the export file and to select the
behaviour for the Setup measurements.
FILT (F4)
To set the sort and filter settings for
export. The setting for <Sort:> on the
Points page defines the order in
which points, lines and areas are
exported. The setting for <Filter:> on
each page defines which points, lines
or areas are exported.
IFACE (F5)
Available for <Export To: RS232>.
To choose the port and device to
which the data should be exported.
CSYS (F6)
To update the coordinate system in
which the coordinates are exported.
Description of fields
Field
Option
Description
Defines to where the exported file should be
<Export To:> CF Card,
written.
Internal
Memory, if fitted,
or RS232
<Directory:> Data, GSI or
/Root
90
GPS1200
Available for <Export To: CF Card>. The data
can be exported to the \Data, the \GIS or the root
directory. Data must be stored to the \GSI directory in order to read it in a TPS1100. For
<Export To: Internal Memory>, the data is
always exported to the \Data directory.
Convert...\Export Data from Job
Field
Option
Description
<Job:>
Choicelist
If points from a job on the internal memory are to
be exported, open this choicelist. When in this
choicelist press CFCRD (F6) or INTL (F6) to
select a job from a different memory device.
<Coord
System:>
Output
The coordinate system currently attached to the
selected <Job:>.
<Format
File:>
Choicelist
The format files currently available in the
System RAM.
<File Name:> User input
Available for <Export To: CF Card> and
<Export To: Internal Memory>. The name of
the file to which the data should be exported.
The name is automatically suggested based on
the job name to be exported and an extension.
<Port:>
Output
Available for <Export To: RS232>. Displays the
port currently configured to be used with RS232.
<Device:>
Output
The device currently configured to be used with
<Port:>.
Convert...\Export Data from Job
GPS1200
91
92
GPS1200
Convert...\Export Data from Job
15
15.1
Convert...\Import Data to Job
Overview
Description
This screen lists all the importers loaded. The data to import must be stored on the
CompactFlash card.
Data can be imported to a job
• on the CompactFlash card.
•
Import formats
Access step-bystep
on the internal memory, if fitted.
Data can be imported in ASCII, GSI8, GSI16 or DXF format.
Step
Description
1.
Select Main Menu: Convert...\Import Data to Job to access IMPORT
Import Data to Job Menu.
2.
IMPORT Import Data to Job Menu
The Import Data to Job menu lists all the converters for importing data.
Highlight the Import Data converter to be started.
3.
)
Convert...\Import Data to Job
CONT (F1) to access the screen for the Import Data converter.
The screens for each Import Data converter can be accessed directly by
pressing a configured hot key or USER.
GPS1200
93
15.2
Importing ASCII/GSI Data
Requirements
•
For ASCII files:
•
At least one ASCII file with any file extension is stored in the \DATA directory of
the CompactFlash card.
For GSI files:
At least one ASCII file in GSI format with the file extension *.gsi is stored in the
\GSI directory of the CompactFlash card.
Access
Refer to "15.1 Overview" to access Import ASCII/GSI Data to Job.
CONT (F1)
To import the data.
CONF (F2)
For <Import: ASCII Data>: To select
the delimiter, the positions of the
particular variables and, if required,
the number of lines used to describe
each point or if the variables are
delimited by one or multi spaces.
For <Import: GSI Data>: Coordinates can be switched for “left
handed” coordinate systems. All
WI 81 data, normally Easting, is then
imported as Northing and all WI 82
data, normally Northing, is then
imported as Easting.
VIEW (F3)
To display the data in <From File:>.
SHIFT HTS (F2)
To define the height type for the
imported data and if the Easting
should be multiplied by -1. This is
required by some coordinate
systems.
IMPORT
Import ASCII/GSI
Data to Job
Description of fields
Field
Option
Description
<From:>
Choicelist
ASCII/GSI data can be imported to a job, from
either the CompactFlash card or internal
memory.
<Import:>
Choicelist
The type of data to be imported.
<From File:> Choicelist
For <Import: ASCII Data> all files in the \DATA
directory on the CompactFlash card can be
selected.
For <Import: GSI Data> all files in the \GSI
directory on the CompactFlash card can be
selected.
94
GPS1200
Convert...\Import Data to Job
Field
Option
Description
<To Job:>
Choicelist
Choosing a job as destination for import makes
this job the active job.
<Header:>
None and from 1 Available for <Import: ASCII Data>. This option
to 10
allows up to ten header lines which may exist in
an ASCII file to be skipped. Select the number of
header lines.
Convert...\Import Data to Job
GPS1200
95
15.3
Importing DXF Data
Requirements
•
At least one DXF file with the file extension *.dxf has to be stored in the \DATA
directory of the CompactFlash card.
Access
Refer to "15.1 Overview" to access Import DXF Data to Job.
DXF IMPORT
Import DXF Data to
Job
CONT (F1)
To import the data.
CONF (F2)
To define an optional prefix for
blocks, points and/or lines, to select
the file units and to activate the creation of points at vertices of the
imported geometric elements, if
required.
Description of fields
96
Field
Option
Description
<From:>
Choicelist
DXF data can be imported to a job, from either
the CompactFlash card or internal memory.
<To Job:>
Choicelist
Choosing a job as destination for import makes
this job the active job.
<Progress:>
Output
Progress bar of the import procedure.
GPS1200
Convert...\Import Data to Job
16
Convert...\Copy Points Between Jobs
Description
This chapter explains the process of copying points from one job to another.
Access
Select Main Menu: Convert...\Copy Points Between Jobs.
COPY
Copy Points
Between Jobs
CONT (F1)
To copy a selection of points.
FILT (F4)
To define the point sort and/or point
filter settings of points from the job
<From Job:>.
DATA (F5)
To view, edit and delete points, lines
and areas stored with the job. Points,
lines and areas are shown on separate pages. Selected sort and filter
settings apply.
CSYS (F6)
To select a different coordinate
system.
Description of fields
Field
Option
Description
<From Job:> Choicelist
Describes where the points are to be copied
from.
<Coord
System:>
Output
The coordinate system which is currently
attached to the job <From Job:>.
<To Job:>
Choicelist
Describes where the points are to be copied to.
Convert...\Copy Points Between Jobs
GPS1200
97
98
GPS1200
Convert...\Copy Points Between Jobs
17
Config...\Survey Settings...
17.1
ID Templates
17.1.1
Overview
Description
ID templates are predefined templates for point, line or area numbers. ID templates
save having to type in the ID for each object. They are useful when many points are
collected quickly, for example in post-processed and real-time kinematic operations.
Access
Select Main Menu: Config...\Survey Settings...\ID Templates.
CONFIGURE
ID Templates
Description of fields
Field
Option
Description
<Survey
Pts:>
Choicelist
Sets the ID templates for manually occupied
points.
<Auto Pts:>
Choicelist
Sets the ID templates for auto points. These
points are automatically recorded at a specific
rate.
<Auxil Pts:>
Choicelist
Sets the ID templates for auxiliary points. These
points are used when trying to find a stake-out
point.
<Lines:>
Choicelist
Sets the ID templates for lines.
<Areas:>
Choicelist
Sets the ID templates for areas.
Next step
CONT (F1) closes the screen and returns to the screen from where CONFIGURE ID
Templates was accessed.
Config...\Survey Settings...
GPS1200
99
17.1.2
Creating a New ID Template/Editing an ID Template
Access step-bystep
)
CONFIGURE
XX ID Template
Step
1.
Description
Refer to "17.1.1 Overview" to access CONFIGURE ID Templates.
2.
In CONFIGURE ID Templates highlight any field.
3.
ENTER to access CONFIGURE ID Template Library.
4.
Highlight an ID template. A copy of this ID template is taken for further
configurations.
5.
NEW (F2)/EDIT (F3) to access CONFIGURE New ID
Template/CONFIGURE Edit ID Template.
)
DEL (F4) deletes the highlighted template.
Editing ID templates is similar to creating a new ID template. For simplicity, the
screens are called MANAGE XX ID Templates and differences are clearly outlined.
Description of fields
Field
Option
Description
<ID:>
User input
The name of the ID template.
<Increment:> Numeric only
The rightmost numeric part is incremented
within the point ID.
Alphanumeric
The rightmost character within the point ID is
incremented regardless of whether that character is numeric or alphanumeric.
<Increment
By:>
User input
The amount by which the ID is incremented.
<Cursor
Posn:>
Last Character
or from 1 to 16
The character position at which the cursor is
placed when ENTER is pressed in <Point ID:>
when surveying points.
Next step
CONT (F1) stores the ID template and returns to CONFIGURE ID Template
Library.
100
GPS1200
Config...\Survey Settings...
17.2
Display Settings
Description
Display settings define the parameters shown on a page on the SURVEY screen.
Four display masks are definable.
Mask 1:
Mask 2:
Mask 3:
Mask 4:
Access
Always shown on the SURVEY screen.
Can be shown or hidden on the SURVEY screen.
Can be shown or hidden on the SURVEY screen.
Never shown on the SURVEY screen. Reserved for application
programs.
Select Main Menu: Config...\Survey Settings...\Display Settings.
CONFIGURE
Display Settings
CONT (F1)
To accept changes and return to the
screen from where this screen was
accessed.
DMASK (F3)
To configure the selected display
mask.
Description of fields
Field
Option
<Define:>
Mask 1, 2, 3 or 4 Selected display mask.
Description
<Use in
Survey:>
Output
Indicates if the display mask is shown or hidden
as a page in SURVEY.
<Position
and Screen
Update:>
From 0.05s to
1.0s
Determines how often positions are computed
and the screen display is updated. The
maximum update rate using Bluetooth on
RX1250 is 0.2 s.
Next step
DMASK (F3) accesses CONFIGURE Define Display Mask n.
Config...\Survey Settings...
GPS1200
101
CONFIGURE
Define Display
Mask n
CONT (F1)
To accept changes and to return to
CONFIGURE Display Settings.
CLEAR (F4)
To set all fields to <XX. Line: Line
Space Full>.
DEFLT (F5)
To recall the default settings.
Description of fields
Field
Option
Description
<Visible:>
Yes or No
Shows or hides the display mask as a page in
SURVEY.
<Fixed
Lines:>
From 0 to 5
Defines how many lines do not scroll in the
survey screen when that display mask is used.
<1st Line:>
Output
Fixed to <1st Line: Point ID>.
<2nd Line:>
to <16th
Line:>
Choicelist
For each line an option can be selected.
Next step
CONT (F1) returns to CONFIGURE Display Settings.
102
GPS1200
Config...\Survey Settings...
17.3
Coding & Linework
Description
The settings on this screen define the method of coding.
Access
Select Main Menu: Config...\Survey Settings...\Coding & Linework Settings.
CONFIGURE
Coding & Linework,
Coding page
Description of fields
Field
Option
Description
<Quick
Code:>
Never, On or Off Determines if quick coding is never available,
activated or available but deactivated.
<Digits:>
1, 2 or 3
Available unless <Quick Code: Never>.
Sets the mostly used number of digits for the
quick code.
<Rec Free
Code:>
After Point or
Before Point
Available unless <Quick Code: Never>.
Determines if a free code measured with a quick
code is stored before or after the point.
<Attributes:> Default Values
or Last Used
Determines the attribute values displayed under
certain circumstances. This is applicable to both
the storing and displaying of attribute values.
<Mand
Attribs:>
The screen XX Enter Mandatory Attribute will
always appear when codes, having one or more
attributes of attribute type mandatory, are being
stored.
Always Prompt
Only If No Value The screen XX Enter Mandatory Attribute will
only appear when codes, having one or more
attributes of attribute type mandatory, are being
stored without an attribute value.
Code Change
Only
The screen XX Enter Mandatory Attribute will
only appear when a new code with a mandatory
attribute was selected.
With Codelist
Codes stored within the job codelist can be
selected to code points, lines and areas.
Without
Codelist
Codes stored within the job codelist cannot be
selected to code points, lines and areas. Each
code must be entered manually.
<Show
Codes:>
Only Pt Codes
or All Codes
Either only point codes or all codes of the job
codelist will be available in the choicelist for
<Code:>/<Point Code:> in a display mask of an
application program. Selecting a line/area code
opens a new line/area.
<String
Attrib:>
Choicelist
Available for <Show Codes: All Codes>. When
this field is active, surveyed points that have the
same code attached are strung to one line.
<Thematc
Codes:>
Config...\Survey Settings...
GPS1200
103
Next step
PAGE (F6) changes to the Linework page.
CONFIGURE
Coding & Linework,
Linework page
The flags for Linework are defined on this screen.
The flags defined on this screen are linked to the options available for <Linework:>
in a display mask of an application program. The selection for <Linework:> in a
display mask determines the flag stored with a point. The availability of <Linework:>
in a display mask is configured in CONFIGURE Define Display Mask n.
Description of fields
Field
Option
Description
<Begin
Line:>
User input
Opens a new line when the next point is stored.
Any lines which are currently open are closed.
The point may or may not be stored with a point
code.
<3pt Curve:> User input
Stores the linework flag for a curve through
three points and continues a line/area.
<ReOpen
Last Line:>
User input
Opens the last used line again.
<End Line:>
User input
Closes all open lines.
<Cont
Line/Area:>
User input
Indicates a line/area is open.
<Start
Spline:>
User input
Stores the linework flag for beginning a spline
and continues any open line/area.
<End
Spline:>
User input
Stores the linework flag to stop a spline.
<Cont
Spline:>
User input
Indicates a line/area is open with spline line
type.
<Begin
Area:>
User input
Opens a new area when the next point is stored.
Any areas which are currently open are closed.
The point may or may not be stored with a point
code.
<ReOpen
Last Area:>
User input
Opens the last used area again.
<Close
Area:>
User input
Closes all open areas.
Next step
CONT (F1) returns to the screen from where CONFIGURE Coding & Linework was
accessed.
104
GPS1200
Config...\Survey Settings...
17.4
Quality Control Settings
Description
The settings on this screen define the limits for coordinate quality and DOP values
accepted for point occupations.
Access
Select Main Menu: Config...\Survey Settings...\Quality Control Settings.
CONFIGURE
Quality Control
Settings
Description of fields
Field
Option
<CQ
Control:>
None, Pos Only, The type of coordinate quality to be checked
Height Only or before storing a point. If activated, the limit
defined in <Maximum CQ:> is checked before
Pos & Height
storing a point.
Description
<Maximum
CQ:>
User input
Available unless <CQ Control: None>.
The maximum acceptable coordinate quality.
If activated, the limit defined in <Maximum
<DOP Limit:> None, GDOP,
PDOP, HDOP or DOP:> is checked. GPS positions are unavailable when the limit is exceeded.
VDOP
<Maximum
DOP:>
User input
Available unless <DOP Limit: None>.
The maximum acceptable DOP value.
<Allow 2D
Posn:>
Yes
2D positions can be obtained with only three
satellites available. The height is fixed to that of
the last position computed with height.
No
2D positions cannot be obtained with only three
satellites available.
Next step
CONT (F1) returns to the screen from where CONFIGURE Quality Control
Settings was accessed.
Config...\Survey Settings...
GPS1200
105
17.5
Logging of Raw Obs
Description
Logged raw observations are used for
• static and kinematic operations. With these operations, raw data is always postprocessed in the office. Raw data must therefore be logged on both reference
and rover receivers.
•
real-time operations
to check the work in the office by post-processing.
OR
to fill in gaps when a real-time position could not be calculated in the field.
This can happen due to problems with the real-time data reception.
Observations must be logged on all receivers which will be used for post-processing.
Access
Select Main Menu: Config...\Survey Settings...\Logging of Raw Obs.
CONFIGURE
Logging of Raw
Obs
CONT (F1)
To accept changes and return to the
screen from where this screen was
accessed.
FILES (F6)
Available unless <Log Raw Obs:
Never> or <Log Raw Obs: No>. To
configure the files for raw observations.
Description of fields
106
Field
Option
Description
<Log Raw
Obs:>
Available unless <R-Time Mode: Reference>.
Never, Static
Only or Static & Determines if raw observation are logged and
during what circumstances they are logged.
Moving
If Radio Down
Available for <R-Time Mode: Rover>. Continuous raw observation logging during static and
moving intervals when no real-time corrections
are being received by a receiver.
Yes or No
Available for <R-Time Mode: Reference>.
Determines if the reference logs raw observations.
<Log After:> User input
Available for <Log Raw Obs: If Radio Down>.
Raw data logging begins after the specified time
if radio contact is lost.
<For
Minimum:>
Available for <Log Raw Obs: If Radio Down>.
Raw data logging continues for the specified
time, also after the radio link is regained.
User input
GPS1200
Config...\Survey Settings...
Field
Option
Description
<Log Rate:>
From 0.05s to
300.0s
Rate at which raw observations are logged. The
maximum logging rate using Bluetooth on
RX1250 is 0.2 s.
Next step
IF files for raw
observations
THEN
are not to be config- CONT (F1) closes the screen and returns to the screen from
ured
where CONFIGURE Logging of Raw Obs was accessed.
are to be configured
CONFIGURE
Raw Observation
Files
FILES (F6). Refer to paragraph "CONFIGURE Raw Observation Files".
Description of fields
Field
Option
Description
<Use Separate Files:>
Yes or No
Stores all raw observations into one or into
separate files.
<Obs File
Size:>
From 1 min to
24 hours
Available for <Use Separate Files: Yes>.
Splits the recorded data up into files of a specific
period of time.
<Split
Tracks:>
Yes or No
Available for <Use Separate Files: Yes> and
unless <R-Time Mode: Reference>.
Activates the interruption of static intervals when
the time set for <Obs File Size:> is reached.
The data is then recorded to a new file.
Moving intervals are always interrupted and
written to a new file when the time set for <Obs
File Size:> is reached.
<Delete Old
Files:>
Yes or No
<When Older From 1 day to
Than:>
30 days
Available for <Use Separate Files: Yes>.
Deletes the recorded data after a specified
period of time.
Available for <Delete Old Files: Yes>. The
period of time after which the recorded data is
deleted.
Next step
Step
Description
1.
CONT (F1) returns to CONFIGURE Logging of Raw Obs.
2.
CONT (F1) returns to the screen from where CONFIGURE Logging of
Raw Obs was accessed.
Config...\Survey Settings...
GPS1200
107
17.6
Point Occupation Settings
Description
The settings on this screen define the way in which points are occupied and
recorded.
Access
Select Main Menu: Config...\Survey Settings...\Point Occupation Settings.
CONFIGURE
Point Occupation
Settings
CONT (F1)
To accept changes and return to the
screen from where this screen was
accessed.
PARAM (F3)
To configure the time interval after
which a point occupation can be
stopped automatically. Refer to paragraph "CONFIGURE Post-Process
Stop Criteria".
Description of fields
Field
Option
Description
<Pt Occupation:>
Normal
Records observations between pressing
OCUPY (F1) and STOP (F1).
Instantaneous
Records the time tag when OCUPY (F1) is
pressed. A coordinate is interpolated between
the positions at the neighbouring two epochs to
filter out effects of slight movement.
<Auto
OCCUPY:>
<Auto
STOP:>
108
Available for <Pt Occupation: Normal>.
No
Starts point occupation when pressing OCUPY
(F1).
Yes
Starts point occupation automatically when
entering SURVEY Survey: Job Name. All
subsequent points must be occupied by
pressing OCUPY (F1).
Timed
Starts point occupation automatically at a
certain time. The start time is specified in
SURVEY Survey: Job Name.
Yes or No
Available for <Pt Occupation: Normal>.
Stops the measurements automatically when
the parameter defined for <STOP Criteria:>
reaches 100 %.
GPS1200
Config...\Survey Settings...
Field
Option
Description
<STOP
Criteria:>
Choicelist
Available for <Pt Occupation: Normal> and
<Auto STOP: Yes>.
Defines the method used for <Auto STOP:>.
The setting determines the computation and
value to be shown for <% Completed:> in the
display mask and in STATUS Occupation
Information.
<% Indicator:>
Choicelist
Available for <Pt Occupation: Normal> and
<Auto STOP: No>.
The setting determines the computation and
value to be shown for <% Completed:> in the
display mask and in STATUS Occupation
Information. This is an indicator when to stop
the point occupation.
<Beep On
STOP:>
Yes or No
Activates that a beep is made when the point
occupation is ended by <Auto STOP:>.
<Auto
STORE:>
Yes or No
Stores points automatically after stopping the
point occupation.
<Beep On
STORE:>
Yes or No
Activates that a beep is made when the point is
stored by <Auto STORE:>.
<End
Survey:>
Available for <Pt Occupation: Normal>.
Manual
Exits SURVEY when pressing ESC.
Automatically
Exits SURVEY automatically when pressing
STORE (F1) and returns to main menu.
Auto & Turn Off Exits SURVEY automatically when pressing
STORE (F1) and turns receiver off.
Next step
IF parameters for
<Auto STOP:>
AND
are not to be config- ured
THEN
CONT (F1) closes the screen and
returns to the screen from where
CONFIGURE Point Occupation
Settings was accessed.
are to be configured <R-Time Mode: None> PARAM (F3) changes to
CONFIGURE Post-Process Stop
Criteria. Refer to paragraph
"CONFIGURE Post-Process Stop
Criteria".
Config...\Survey Settings...
GPS1200
109
IF parameters for
<Auto STOP:>
AND
THEN
are to be configured <R-Time Mode: Rover> PARAM (F3) changes to
CONFIGURE Real-Time Stop
Criteria. Refer to paragraph
"CONFIGURE Real-Time Stop
Criteria".
CONFIGURE
Post-Process Stop
Criteria
Description of fields
The parameters shown on this screen depend on the setting for <STOP Criteria:>
in CONFIGURE Point Occupation Settings.
Field
Option
Description
<Time at
Point:>
User input
Sets the required observation time for each
point. Counting time starts when OCUPY (F1) is
pressed.
<Number of
Obs:>
User input
Sets the required number of observations that
should be recorded at each point. Counting
observations starts when OCUPY (F1) is
pressed.
<At Logging
Rate:>
Output
Displays the rate at which static raw observations are logged as configured in CONFIGURE
Logging of Raw Obs.
<n satellites
for:>
User input
Sets the required observation time depending
on the number of satellites available. Counting
time starts when OCUPY (F1) is pressed. The
receiver stops measuring when the set length of
time for a certain number of satellites is reached.
Should the number of available satellites
change during observation, the observations
already recorded will be taken into account.
Next step
Step
110
Description
1.
CONT (F1) closes the screen.
2.
CONT (F1) returns to the screen from where CONFIGURE Point Occupation Settings was accessed.
GPS1200
Config...\Survey Settings...
CONFIGURE
Real-Time Stop
Criteria
Description of fields
The parameters shown on this screen depend on the setting for <STOP Criteria:>
in CONFIGURE Point Occupation Settings.
Field
Option
Description
<Pos Quality <:>
and
<Ht Quality <:>
User input
Sets the maximum position and height qualities
for each point occupation. Calculating the qualities starts when OCUPY (F1) is pressed. The
receiver stops measuring when the position and
height qualities are both less than the configured
values.
<Positions:>
User input
Raw data is logged for a minimum number of
positions even when the <Pos Quality <:> and
<Ht Quality <:> is already less than the specified maximum.
<Position
Update:>
Output
Displays the value for <Position and Screen
Update:> as configured in CONFIGURE
Display Settings.
<No. of Positions:>
User input
Sets the number the positions which must be
observed before the receiver stops measuring.
Next step
Step
Description
1.
CONT (F1) returns to CONFIGURE Point Occupation Settings.
2.
CONT (F1) returns to the screen from where CONFIGURE Point Occupation Settings was accessed.
Config...\Survey Settings...
GPS1200
111
112
GPS1200
Config...\Survey Settings...
18
18.1
Config...\Instrument Settings...
Antenna & Antenna Heights
Description
The settings on this screen define the antenna and the default height for the
antenna.
Access
Select Main Menu: Config...\Instrument Settings...\Antenna & Antenna Heights.
CONFIGURE
Antenna & Antenna
Heights
Description of fields
Field
Option
Description
<Antenna:>
Choicelist
Antennas in the receiver’s System RAM or as
defined in Main Menu: Manage...\Antennas.
<Default Ht:> User input
Sets the default antenna height for the current
configuration. The antenna height can still be
changed during a survey. The change will not
update <Default Ht:> in the configuration.
<Vert
Offset:>
Output
The vertical antenna offset for the selected
antenna.
<Meas
Type:>
Slope or Vertical The way the antenna height will be measured.
<Horiz
Offset:>
Output
Available for <Meas Type: Slope>. The horizontal antenna offset for the selected antenna.
<Moving Ht:> User input
Sets the default antenna height for auto points
and for the moving part of a track when logging
raw observations.
Next step
CONT (F1) returns to the screen from where CONFIGURE Antenna & Antenna
Heights was accessed.
Config...\Instrument Settings...
GPS1200
113
18.2
Satellite Settings
Description
The settings on this screen define which satellite system (available for GX1230 GG/
ATX1230 GG), satellites and satellite signals will be used by the receiver.
Access
Select Main Menu: Config...\Instrument Settings...\Satellite Settings.
CONFIGURE
Satellite Settings
CONT (F1)
To accept changes and return to
GPS1200 Main Menu.
HELTH (F4)
Available for <SV Health: User
Defined>. To configure the satellites
used in the survey.
Description of fields
Field
Option
Description
<Sat
System:>
Available for GX1230 GG/ATX1230 GG.
Defines the satellite signals accepted by the
receiver when tracking satellites.
GPS Only
Only GPS satellites are tracked.
GPS & Glonass GPS and GLONASS satellites are tracked.
<L2C
Tracking:>
Automatic or
Always Track
Available for GX1230 (serial numbe > 465000)/
ATX1230 (serial number > 160000)/
GX1230 GG/ATX1230 GG.
Defines if the L2C signal will be tracked. The
recommended setting is Automatic.
<Cut Off
Angle:>
User input
Sets the elevation in degrees below which satellite signals are not recorded and are not shown
to be tracked. Recommended settings:
For real-time: 10°.
For purely post-processing applications: 15°.
<Loss of
Lock:>
Beep &
Message or No
Beep/Message
Activates an acoustic warning signal and a
message given by the receiver when satellites
are lost and therefore no position can be
computed.
<SV Health:> Automatic
User Defined
114
Incoming satellite signals are monitored by the
receiver. Data from signals which are flagged as
unhealthy are neither recorded nor used for realtime computations.
Satellites must manually be included/excluded
from data recording and real-time computations
with HELTH (F4).
GPS1200
Config...\Instrument Settings...
Field
Option
Description
<Suppress
MPath:>
Automatic or
Always On
Available for GX1230 GG/ATX1230 GG.
Defines if phase multipath mitigation techniques
will be used. The recommended setting is
Automatic.
Next step
CONT (F1) closes the screen and returns to GPS1200 Main Menu.
Config...\Instrument Settings...
GPS1200
115
18.3
Time Zone
Description
The settings on this screen help the receiver to quickly locate and track satellites.
Access
Select Main Menu: Config...\Instrument Settings...\Time Zone.
CONFIGURE
Local Time Zone
CONT (F1)
To accept changes and to return to
GPS1200 Main Menu.
116
GPS1200
Config...\Instrument Settings...
18.4
Instrument ID
Description
The settings on this screen define the instrument identification number. This number
is used for the generation of the file names. Using format files, the instrument ID can
be output together with data from the instrument. This means that it can be identified
which instrument was used for certain measurements.
Access
Select Main Menu: Config...\Instrument Settings...\Instrument ID.
CONFIGURE
Instrument ID
Description of fields
Field
Option
Description
<Instrument
ID:>
User input
Sets a four digit number as instrument identification number. By default the last four numbers of
the serial number are used.
Next step
CONT (F1) returns to GPS1200 Main Menu.
Config...\Instrument Settings...
GPS1200
117
118
GPS1200
Config...\Instrument Settings...
19
19.1
Config...\General Settings...
Wizard Mode
Description
The settings on this screen define the behaviour of the configuration set wizard.
Access
Select Main Menu: Config...\General Settings...\Wizard Mode.
CONFIGURE
Wizard Mode
CONT (F1)
To accept changes and to return to
GPS1200 Main Menu.
LIST (F6)
To list all screens within a configuration set. Allows to access these individual screens and change settings.
Description of fields
Field
Option
Description
<Wizard
Mode:>
View All
Screens
All configuration screens are shown in the
configuration set wizard. Application program
configuration screens are not included. They
can be configured within each application
program.
Reduced
A reduced set of screens are shown in the
configuration set wizard.
Next step
CONT (F1) returns to GPS1200 Main Menu.
Config...\General Settings...
GPS1200
119
19.2
Hot Keys & User Menu
Description
The settings on this screen assign a particular function, screen or application
program to each of the first and second level of hot keys and to the USER key.
Access
Select Main Menu: Config...\General Settings...\Hot Keys & User Menu.
CONFIGURE
Hot Keys & User
Menu
Description of fields
Field
Option
Description
<F7:> to
<F12:>
Choicelist
Available on the Hot Keys page and the Shift
Hot Keys page. All functions, screens or application programs which can be assigned to the
particular key.
<1:> to <9:>
Choicelist
Available on the User Menu page. All functions,
screens or application programs which can be
assigned to the individual lines in the user
defined menu.
Next step
PAGE (F6) changes to another page on this screen.
120
GPS1200
Config...\General Settings...
19.3
Units & Formats
Description
The settings on this screen define
• the units for all types of measurement data displayed.
•
information related to some types of measurement data.
•
the order in which coordinates are displayed.
Access
Select Main Menu: Config...\General Settings...\Units & Formats.
CONFIGURE
Units & Formats,
Units page
Description of fields
Field
Option
Description
<Distance
Unit:>
Metre (m), Int Ft The units shown for all distance and coordinate related fields.
(fi), Int Ft/Inch
(fi), US Ft (ft),
US Ft/Inch (ft),
US Miles (mi) or
Kilometres (km)
<Distance Dec:> From 0 Decimals to 4 Decimals
The number of decimal places shown for all
distance and coordinate related fields. This is
for data display and does not apply to data
export or storage.
<Angle Unit:>
400 gon, 360 ° '
", 360° dec or
6400 mil
The units shown for all angular and coordinate related fields. More angle settings can
be defined on the Angle page.
<Angle Dec:>
Choicelist
The number of decimal places shown for all
angular and coordinate related fields. This is
for data display and does not apply to data
export or storage.
<Grade Unit:>
The input and output format for grades.
h:v
Horizontal by vertical distance.
v:h
Vertical by horizontal distance.
% (v/h * 100)
Percentage of vertical by horizontal distance.
Elev Angle
Elevation angle.
<Velocity Unit:> Km/h (kmh),
Mph (mph) or
Knots (kn)
<Area Unit:>
m2, Int Acres
(Ai), US Acres
(A), Hectares
(ha), fi2 or ft2
The units shown for all velocity related fields.
The units shown for all area related fields.
<Volume Unit:> m3, fi3, ft3,or yd3 The units shown for all volume related fields.
<Temp Unit:>
Config...\General Settings...
Celsius (°C) or
Fahrenheit (°F)
GPS1200
The units shown for all temperature related
fields.
121
Field
Option
Description
<Press Unit:>
mbar, mmHg,
Inch Hg (inHg),
hPa or psi
The units shown for all pressure related
fields.
PSI = pounds per square inch.
Next step
PAGE (F6) changes to the Angle page.
CONFIGURE
Units & Formats,
Angle page
Description of fields
Field
Option
Description
<Direc Ref:> North Azimuth, Sets the reference direction as well as the direcSouth Azimuth, tion from where and how azimuths are
North Anticlock computed.
or Bearing
<Direc
Base:>
True or
Magnetic
Sets the North direction.
<Mag
Declin:>
User input
Available for <Direc Base: Magnetic>.
The value for the magnetic declination. It is
considered when computing or using any
azimuth values.
Next step
PAGE (F6) changes to the Time page.
CONFIGURE
Units & Formats,
Time page
Description of fields
Field
Option
Description
<Time
Format:>
24 hour or 12
hour (am/pm)
How the time is shown in all time related fields.
<Date
Format:>
Day.Month.Year, How the date is shown in all date related fields.
Month/Day/Year
or
Year/Month/Day
Next step
PAGE (F6) changes to the Format page.
CONFIGURE
Units & Formats,
Format page
122
Description of fields
Field
Option
Description
<Grid
Format:>
East,North or
North,East
The order in which grid coordinates are shown in
all screens. The order in display masks depends
on the user settings.
GPS1200
Config...\General Settings...
Field
Option
Description
<Geodetic
Format:>
Lat,Long or
Long,Lat
The order in which geodetic coordinates are
shown in all screens. The order in display masks
depends on the user settings.
Next step
PAGE (F6) changes to the first page on this screen.
Config...\General Settings...
GPS1200
123
19.4
Language
Description
The setting on this screen defines the language used on the instrument. Three
languages can be stored on the receiver at one time - English and two others.
English cannot be deleted.
Access
Select Main Menu: Config...\General Settings...\Language.
CONFIGURE
Languages on
Instrument
Description of columns
Field
Description
Language
The languages available on the receiver. The selected language is
used for the system software. If a language is not available for the
system software, the English language is used instead. Application
programs run in the language they were loaded.
Next step
CONT (F1) returns to GPS1200 Main Menu.
124
GPS1200
Config...\General Settings...
19.5
Display, Beeps, Text
Description
The settings on this screen allow the screen appearance to be configured, turn the
notification beeps on and off and define the behaviour of the keys. The settings are
stored on the RX1200 itself. If RX1200’s are exchanged, the settings stored on the
new RX1200 apply.
Access
Select Main Menu: Config...\General Settings...\Display, Beeps, Text.
CONFIGURE
Display, Beeps,
Text,
Display page
CONT (F1)
To accept changes and return to
GPS1200 Main Menu.
CALIB (F5)
To calibrate the touch screen.
Description of fields
Field
Option
Description
<Touch
Screen:>
On or Off
Turns touch screen on and off.
<Screen
Beep:>
Off, Soft or Loud Controls the beep upon touching the touch
screen.
<Screen
Illum:>
Off, Always On, Controls the screen illumination to be on, off or
On for 1 min, On on for the specified time after the last key was
for 2 min or On pressed, or touch screen event.
for 5 min
<Key Illum:> Off, Same as
Screen or
Always On
Controls the keyboard illumination.
<Contrast:>
From 0% to
100%
Adjust the contrast level for the display with the
right and left arrow key when the field is highlighted or using the supplied stylus on the slider.
<Heating:>
Automatic
The screen heating comes on automatically at
5°C and shuts off again at 7°C.
Off
The screen heating never comes on.
Next step
PAGE (F6) changes to the Beeps page.
Config...\General Settings...
GPS1200
125
CONFIGURE
Display, Beeps,
Text,
Beeps page
Description of fields
Field
Option
<Warning
Beeps:>
Off, Soft or Loud Controls the beep for acoustic warning signals.
Description
<Key
Beeps:>
Off, Soft or Loud Controls the beep upon key presses on the
RX1200.
Next step
PAGE (F6) changes to the Text page.
CONFIGURE
Display, Beeps,
Text,
Text page
Description of fields
Field
Option
Description
<Deflt
αNum:>
Choicelist
Sets the set of extra characters available
through αNUM or F1-F6 whenever an entry is
made.
The choices available depend on the character
sets loaded on the instrument and the language
configured to be used on the instrument.
Next step
PAGE (F6) changes to the first page on this screen.
126
GPS1200
Config...\General Settings...
19.6
Start Up & Power Down
)
Power Down is unavailable for a RX1250 with SmartAntenna.
Description
The settings on this screen
•
define the behaviour of the instrument for a general start up.
•
define the behaviour of the instrument when starting up after a power loss.
•
define a PIN code which needs to be typed in on starting up the receiver. A PIN
is a Personal Identification Number.
Access
Select Main Menu: Config...\General Settings...\Start Up & Power Down.
CONFIGURE
Start Up & Power
Down,
Start Up page
Description of fields
Field
Option
Description
<Start
Screen:>
Choicelist
Determines the screen entered after turning on
the receiver.
<Port 1:>
<Port 2:>
<Port 3:>
Yes or No
Determines if the receiver powers up when a
pulse is received at one of the ports. The fields
are unavailable for RX1250 with SmartAntenna.
Next step
PAGE (F6) changes to the Power Down page.
CONFIGURE
Start Up & Power
Down,
Power Down page
This page is not available for RX1250 with SmartAntenna.
Description of fields
Field
Option
Description
<Recovery:> Sudden Loss
Only
<Set
Primary:>
Config...\General Settings...
The receiver turns itself back on automatically
once power is restored after a sudden power
loss.
Always
The receiver turns itself back on automatically
once power is restored after a sudden power
loss or after gradual power loss. The receiver
returns to the screen in which it was operating
when the power failed.
External A,
External B or
Automatic
Available for the GRX1200 Series where
batteries can be attached to port PWR with a Ycable. Sets the external battery which is always
used when sufficient power is available, regardless of the status of the other battery. Primary
power sources must provide a minimum voltage
of 11.4 V.
GPS1200
127
Next step
PAGE (F6) changes to the PIN Code page.
CONFIGURE
Start Up & Power
Down,
PIN Code page
The appearance of the screen varies with the setting for <Use PIN:> when this
screen is accessed.
<Use PIN: No>
<Use PIN: Yes>
Description of fields
Field
Option
Description
Use PIN
Yes or No
Activates the PIN code protection. This setting is
not part of the configuration set.
New PIN
User input
The PIN code must be a number with four to six
digits.
PIN Code
User input
The PIN code as previously defined on this
page. The correct PIN code must be typed in
within five attempts or the PUK code is required.
Change PIN
Yes or No
Activates <New PIN:> to type in a new PIN
code.
Next step
PAGE (F6) changes to the first page on this screen.
128
GPS1200
Config...\General Settings...
20
20.1
Config...\Interfaces... - General
Overview
Description
The receiver has a variety of interfaces which can be configured to be used with
different ports and devices. The configuration varies depending on the individual
application.
Interface, port and
device
Description of the technical terms
Technical term Description
Example
Interface
An interface should be considered as a function of Real-Time
the receiver.
Port
Port P1
The physical port on the instrument which will be
used for the interface functionality. It is sometimes
necessary to use particular ports with certain interfaces.
Device
The hardware which is connected to the chosen
port.
Radio
Access
Select Main Menu: Config...\Interfaces....
CONFIGURE
Interfaces
The screen gives an overview of all interfaces with the currently assigned port and
device. If a second real-time interface is configured it will also be shown.
CONT (F1)
To return to the screen from where
this screen was accessed.
EDIT (F3)
To configure the parameters related
to the highlighted interface. Refer to
the sections on each individual interface below.
CTRL (F4)
Available for certain devices
connected to certain interfaces. To
configure additional parameters, for
example changing channels of
radios.
SHIFT CONEC (F4) and SHIFT DISCO
(F4)
Available for a real-time interface
configured to use a device of type
digital cellular phone or modem. To
dial the number of another station
configured in the active configuration
set and to hang up again.
Config...\Interfaces... - General
GPS1200
129
Description of columns
Column
Option
Description
Port
1, 2 or 3
The physical port P1, P2 or P3 on the instrument
which will be used for the interface functionality.
BT x
The Bluetooth port which will be used for the
interface functionality. Available for RX1250.
Clip
Clip-on-contacts on RX1250. It is used for
RX1250 with GHT56 when a device is attached
to the GHT56.
NETx
The logical NET port which will be used for the
interface functionality. Available for an activated
Internet interface.
<Port x>
Default device for the physical ports P1, P2 and
P3.
<Clip-on>
Default device for the physical LEMO port on the
GHT56. It is displayed for RX1250 with GHT56
when <Port: Clip-on> is selected.
Device
Next step
CONT (F1) returns to the screen from where this screen was accessed.
130
GPS1200
Config...\Interfaces... - General
20.2
Real-Time
20.2.1
Overview
Description
The real-time interface allows real-time related parameters to be configured. This
includes defining if the receiver should work as a reference or a rover and the realtime messages to be used. Up to two real-time interfaces can be configured on the
receiver.
Config...\Interfaces... - General
GPS1200
131
20.2.2
Configuration without Real-Time Interface
Access
Select Main Menu: Config...\Interfaces.... Highlight Real-Time. EDIT (F3).
CONFIGURE
Real-Time Mode
<R-Time Mode: None> means the receiver is not to be used as a real-time reference or as a real-time rover.
Next step
IF a Space-Based THEN
Augmentation
System
needs to be config- SHIFT SBAS (F5) to access CONFIGURE SBAS Tracking
ured
Mode.
does not need to be CONT (F1) returns to the screen from where CONFIGURE
configured
Real-Time Mode was accessed.
132
GPS1200
Config...\Interfaces... - General
20.2.3
Configuration of a Reference Real-Time Interface
Access
Select Main Menu: Config...\Interfaces.... Highlight Real-Time. EDIT (F3).
CONFIGURE
Real-Time Mode
The available fields and keys on this screen depend on the selected settings.
CONT (F1)
To accept changes and return to the
screen from where this screen was
accessed.
REF (F2)
To configure additional settings relevant to reference, e.g. time slicing.
RATES (F3)
To configure the data rates for the
selected real-time data format.
SRCH (F4)
Available on RX1250 with <Port:
Bluetooth x> and a Bluetooth device
being selected. To search for all
available Bluetooth devices. If more
than one Bluetooth device is found a
list of available devices is provided.
DEVCE (F5)
Available unless <Port: NETx>. To
create, select, edit or delete a device.
SHIFT RT-2 (F2)
To accept the settings and configure
a second reference real-time interface.
SHIFT SBAS (F5)
To configure the Space-Based
Augmentation System to be used.
)
Two real-time devices can be attached to two different ports, for example a radio and
a digital cellular phone. On the reference, the two devices can operate simultaneously. Press SHIFT RT-2 (F2) to configure a second real-time interface.
Description of fields
Field
Option
Description
<R-Time
Mode:>
None, Reference or Rover
<R-Time Data: Reference> activates a reference real-time interface.
<R-Time
Data:>
Leica
The proprietary Leica real-time GPS data
format. This is recommended when working
exclusively with Leica receivers.
CMR
CMR+
CMR and CMR+ are compacted formats used to
broadcast data for third party receivers.
Config...\Interfaces... - General
GPS1200
133
Field
Option
Description
Use RTCM when rover units from a different
manufacturer are to be used.
<Port:>
134
RTCM v3
Message according to RTCM version 3. Higher
efficiency than RTCM v2.x. Supports real-time
services with significantly reduced bandwidth.
For real-time GPS operation and network operations according to Master-Auxiliary Concept.
RTCM 1,2 v2
Message according to RTCM version 2.x. Differential and delta differential GPS corrections.
Message 3 is also generated. Use for DGPS
applications. Accuracy at the rover: 0.25 - 1 m
rms.
RTCM 9,2 v2
Message according to RTCM version 2.x. GPS
partial correction set and delta differential GPS
corrections. Message 3 is also generated. Use
for DGPS applications with a slow data link in
the presence of interference. Accuracy at the
rover: 0.25 - 1 m rms.
RTCM 18,19 v2
Message according to RTCM version 2.x.
Uncorrected carrier phase and pseudorange.
Message 3 is also generated. Use for real-time
operations where the ambiguities will be
resolved at the rover. Accuracy at the rover:
1 - 5 cm rms after a successful ambiguity resolution.
RTCM 20,21 v2
Message according to RTCM version 2.x. Realtime carrier phase corrections and high-accuracy pseudorange corrections. Message 3 is
also generated. Use for real-time operations.
Accuracy at the rover: 1 - 5 cm rms after a
successful ambiguity resolution.
RTCM
1,2,18,19 v2
Message according to RTCM version 2.x.
Combination of RTCM 1,2 v2 and RTCM 18,19
v2.
RTCM
1,2,20,21 v2
Message according to RTCM version 2.x.
Combination of RTCM 1,2 v2 and RTCM 20,21
v2.
Bluetooth x
Available for RX1250. The Bluetooth port which
will be used for the interface functionality.
Clip-on
Available for RX1250. The clip-on-contacts. It is
used for RX1250 with GHT56 when a device is
attached to the GHT56.
NETx
Available for an activated Internet interface. If
these ports are not assigned to a specific interface, then these ports are additional remote
ports.
GPS1200
Config...\Interfaces... - General
Field
Option
Description
Port x
The physical port P1, P2 or P3 on the instrument
to which the device is attached.
Port 1
Available for RX1250. LEMO port on RX1250.
Next step
REF (F2) changes to CONFIGURE Additional Reference Options, General page.
CONFIGURE
Additional Reference Options,
General page
Description of fields
Field
Option
Description
<Ref Stn ID:> User input
An identification for a reference station. It is
converted into a compact format and sent out
with real-time data in all real-time data formats.
It is different from the point ID of the reference
station.
An ID of the reference station is required if
working with several reference stations in time
slicing mode on the same frequency. In this
case, the ID of the reference station from which
data is to be accepted must typed in at the rover.
<Time
Slicing:>
Yes or No
The possibility to send real-time messages
delayed. This is required when real-time
messages from different reference stations are
sent on the same radio channel. Time slicing
works for all device types.
<Used Ref
Stations:>
2, 3 or 4
Available for <Time Slicing: Yes>.
The number of reference stations in use from
where real-time messages are sent.
<Time Slot:> 2, 3 or 4
The contents of
the choicelist
depends on the
settings for
<Used Ref
Stations:>.
Available for <Time Slicing: Yes>.
The time slot represents the actual time delay.
The number of possible time slots is the number
of reference stations in use. The time delay
equals 1 s divided by the total number of reference stations.
<End of
Message:>
Nothing or CR
To add a Carriage Return at the end of the realtime message.
<RTCM
Version:>
2.1, 2.2 or 2.3
Available for <R-Time Data: RTCM XX v2> in
CONFIGURE Real-Time Mode.
The same version must be used at the reference
and the rover.
Next step
PAGE (F6) changes to the NTRIP page.
Config...\Interfaces... - General
GPS1200
135
CONFIGURE
Additional Reference Options,
NTRIP page
Description of fields
Field
Option
Description
<Use
NTRIP:>
Yes or No
Activates NTRIP.
<Password:> User input
A password for authentication is required to
send data to the NTRIP Caster. Contact the
NTRIP administrator for information.
<Mountpnt:> User input
Identifies from where data is streamed to the
NTRIP Caster.
Next step
Step
CONFIGURE
Real-Time Data
Rates
Description
1.
CONT (F1) closes the screen and returns to CONFIGURE Real-Time
Mode.
2.
RATES (F3). Refer to paragraph "CONFIGURE Real-Time Data Rates".
Description
For all real-time data formats, parts of the message can be output at different rates.
The settings on this screen define the output rates for the various parts of the
selected real-time data format. The available fields on this screen depend on the
selected setting for <R-Time Data:> in CONFIGURE Real-Time Mode.
Description of fields
136
Field
Option
Description
<Data:>
From 0.1s to
60.0s
Rates for the transmission of raw observations.
The default settings are suitable for standard
applications.
<Coords:>
From 10s to
120s
Rate for the transmission of reference coordinates.
<Messages:> Choicelist
Available for <RTCM Version: 2.3> in
CONFIGURE Additional Reference Options,
General page. The messages sent within the
coordinate message.
<Info:>
From 10s to
120s
Rate for the transmission of reference station
information such as point ID.
<Msge
Type:>
Choicelist
The message type of <R-Time Data: RTCM
v3>. <Msge Type: Compact> is suitable for
standard applications.
GPS1200
Config...\Interfaces... - General
Next step
Step
CONFIGURE
Real-Time Mode (2)
Description
1.
CONT (F1) closes the screen and returns to CONFIGURE Real-Time
Mode.
2.
SHIFT RT-2 (F2) changes to CONFIGURE Real-Time Mode (2). Refer to
paragraph "CONFIGURE Real-Time Mode (2)".
Description
The second real-time interface is completely independent from the first one. All
settings can be configured differently. The port that is used must be different to the
first real-time interface.
Refer to paragraph "CONFIGURE Real-Time Mode" above for information on the
fields and keys. The difference is, that SHIFT RT-2 (F2) is replaced by SHIFT RT-1
(F2) and returns to CONFIGURE Real-Time Mode.
Next step
CONT (F1) accepts the changes, closes the screen and returns to the screen from
where CONFIGURE Real-Time Mode was accessed.
Config...\Interfaces... - General
GPS1200
137
20.2.4
Configuration of a Rover Real-Time Interface
Access
Select Main Menu: Config...\Interfaces.... Highlight Real-Time. EDIT (F3).
CONFIGURE
Real-Time Mode
The available fields and keys on this screen depend on the selected settings.
)
138
CONT (F1)
To accept changes and return to the
screen from where this screen was
accessed.
ROVER (F2)
To configure additional settings relevant to rover operations. Available
unless a SBAS data format has been
selected for <R-Time Data>.
SRCH (F4)
Available on RX1250 with <Port:
Bluetooth x> and a Bluetooth device
being selected. To search for all
available Bluetooth devices. If more
than one Bluetooth device is found a
list of available devices is provided.
DEVCE (F5)
To create, select, edit or delete a
device. Available unless a SBAS data
format has been selected for <RTime Data>.
SHIFT PRED (F3)
To activate and deactivate the prediction of real-time observations
between the data rate of the reference. Available unless <R-Time
Data: RTCM 1,2 v2> or <R-Time
Data: RTCM 9,2 v2>.
SHIFT FILT (F4)
To activate and deactivate the height
filter for height smoothing. Available
unless a SBAS data format has been
selected for <R-Time Data>.
SHIFT SBAS (F5)
To configure the Space-Based
Augmentation System to be used.
The configuration of SBAS determines the options available for <RTime Data:> in CONFIGURE RealTime Mode.
Two real-time devices can be attached to two different ports, for example a radio and
a digital cellular phone. Due to the nature of a rover, the two devices cannot operate
simultaneously. It is recommended to choose two different configuration sets, one
for each real-time device. Change the configuration set to change the active device.
GPS1200
Config...\Interfaces... - General
Description of fields
Field
Option
Description
<R-Time
Mode:>
None, Reference or Rover
<R-Time Data: Rover> activates a rover realtime interface.
<R-Time
Data:>
Leica
CMR/CMR+
RTCM v3
RTCM 1,2 v2
RTCM 9,2 v2
RTCM 18,19 v2
RTCM 20,21 v2
Refer to "20.2.3 Configuration of a Reference
Real-Time Interface" for information about these
real-time data formats.
The availability of the following options depend
on the selection made for <SBAS Tracking:> in
CONFIGURE SBAS Tracking Mode.
WAAS/EGNOS/
MSAS, EGNOS,
WAAS, MSAS,
EGNOS (Test) or
WAAS (Test)
Wide Area Augmentation System
European Geostationary Navigation Overlay
Service
MTSAT Satellite-based Augmentation System
where MTSAT stands for Multi-functional Transport SATellite
Bluetooth x
Available for RX1250. The Bluetooth port which
will be used for the interface functionality.
Clip-on
Available for RX1250. The clip-on-contacts. It is
used for RX1250 with GHT56 when a device is
attached to the GHT56.
NETx
Available for an activated Internet interface. If
these ports are not assigned to a specific interface, then these ports are additional remote
ports.
Port x
The physical port P1, P2 or P3 on the instrument
to which the device is attached.
<ID
Address:>
Output
Available on RX1250 with <Port: Bluetooth x>
and a Bluetooth device being selected.
The ID address of the SmartAntenna to be used.
<Ref
Sensor:>
Choicelist
The receiver type used at the reference. If the
real-time data format does not contain the information of the receiver type certain corrections
based on the information of the receiver type are
applied in order to provide correct results. The
real-time data formats Leica, CMR and CMR+
contain this information. This is mainly important
when a System300 receiver is used as reference.
<Port:>
Config...\Interfaces... - General
GPS1200
139
Field
Option
Description
<Ref
Antenna:>
Choicelist
The antenna used at the reference. If the realtime data format does not contain the information of the antenna certain corrections based on
the information of the antenna are applied in
order to provide correct results. The real-time
data formats Leica, RTCM v2.3, CMR and
CMR+ contain this information.
)
If the reference data is corrected by
absolute antenna calibration values
and a Leica standard antenna is being
used on the rover, select ADVNULLANTENNA as reference antenna.
Next step
ROVER (F2) accesses CONFIGURE Additional Rover Options, General page.
CONFIGURE
Additional Rover
Options,
General page
The available fields depend on the selected <R-Time Data:> in CONFIGURE RealTime Mode.
CONT (F1)
To accept changes and return to the
screen from where this screen was
accessed.
GGA (F4)
To activate the sending of a GGA
message for reference network applications.
GETID (F5)
Available for <Accept Ref: User
Defined>. To display and select the
station ID of the available reference
stations, the latency of the message
and the data format. When using
radios, the radio channel can be
switched and the stations received on
the new frequency are displayed.
1st (F6)
Available for <Accept Ref: First
Received>. To force the system to
try to establish a new connection with
a different reference station.
140
GPS1200
Config...\Interfaces... - General
Description of fields
Field
Option
Description
<Accept
Ref:>
User Defined
Incoming real-time data is accepted from the
reference station defined in <Ref Stn ID:>.
First Received
Incoming real-time data from the first recognised reference station is accepted.
Any Received
Incoming real-time data from any reference
station is accepted.
<Ref Stn ID:> User input
Available for <Accept Ref: User Defined>.
The special ID of the reference station from
which real-time data is to be received.
<Ref
Network:>
Defines the type of reference network to be
used.
None
To survey without reference station network.
Nearest
The rover sends its position via NMEA GGA
message to LEICA GPS Spider. From this position, LEICA GPS Spider determines the reference in a reference network that is closest to the
rover.
i-MAX
The rover sends its position via NMEA GGA
message to LEICA GPS Spider where the
Master-Auxiliary corrections are calculated. The
corrections are also individualsied by LEICA
GPS Spider, which means it determines the best
suitable corrections for that rover.
MAX
The rover typically does not send its position to
LEICA GPS Spider. LEICA GPS Spider calculates and sends Master-Auxiliary corrections to
the rover. The rover individualises the corrections for its position, which means it determines
the best suitable corrections.
VRS
If this option is selected, a NMEA GGA message
must be activated using GGA (F4).
FKP
Area correction parameters.
<Send User
ID:>
Yes or No
Activates the sending of a Leica proprietary
NMEA message defining the user.
<User ID 1:>
and
<User ID 2:>
User input
Available for <Send User ID: Yes>.
The specific user ID’s to be sent as part of the
Leica proprietary NMEA message. By default
the serial number of the instrument is displayed.
<RTCM
Version:>
1.x, 2.1, 2.2 or
2.3
Available for <R-Time Data: RTCM XX v2> in
CONFIGURE Real-Time Mode.
The same version must be used at the reference
and the rover.
Config...\Interfaces... - General
GPS1200
141
Field
Option
Description
<Bits / Byte:> 6 or 8
Defines the number of bits/byte in the RTCM
message being received.
Next step
PAGE (F6) changes to the NTRIP page.
CONFIGURE
Additional Rover
Options,
NTRIP page
Description of fields
Field
Option
Description
<Use
NTRIP:>
Yes or No
Activates NTRIP.
<User ID:>
User input
A user ID is required to receive data from the
NTRIP Caster. Contact the NTRIP administrator
for information.
<(cont):>
User input
Allows the <User ID:> string to continue onto a
new line.
<Password:> User input
A password is required to receive data from the
NTRIP Caster. Contact the NTRIP administrator
for information.
<Mountpnt:> User input
The NTRIP Source from where real-time data is
required. SRCE (F5) to download the NTRIP
Source table if <Mountpnt:> is unknown.
Next step
Step
142
Description
1.
CONT (F1) returns to CONFIGURE Real-Time Mode.
2.
CONT (F1) returns to the screen from where CONFIGURE Real-Time
Mode was accessed.
GPS1200
Config...\Interfaces... - General
20.2.5
Configuration of SBAS
Description
Access step-bystep
CONFIGURE
SBAS Tracking
Mode
Allows a Space-Based Augmentation System to be configured to provide additional
corrections.
Step
Description
1.
Refer to "20.2.1 Overview" to access CONFIGURE Real-Time Mode.
2.
SHIFT SBAS (F5) to access CONFIGURE SBAS Tracking Mode.
Description of fields
Field
Option
Description
<SBAS
Tracking:>
The Space-Based Augmentation System to
use. The options available for <R-Time Data:>
in CONFIGURE Real-Time Mode depend on
the selection made here.
Automatic
SBAS
SBAS satellites will be tracked and the SBAS
service used will be automatically selected,
including MSAS.
WAAS, EGNOS
or MSAS
Satellites of one of the following systems will be
tracked:
Wide Area Augmentation System
European Geostationary Navigation Overlay
System
MTSAT Satellite-based Augmentation System
EGNOS (Test)
To track European Geostationary Navigation
Overlay System satellites while the system is
still in test mode.
WAAS (Test)
To track Wide Area Augmentation System satellites while the system is still in test mode.
Next step
Step
Description
1.
CONT (F1) returns to CONFIGURE Real-Time Mode.
2.
CONT (F1) returns to the screen from where CONFIGURE Real-Time
Mode was accessed.
Config...\Interfaces... - General
GPS1200
143
20.2.6
Configuration of GGA Message Sending for Reference
Network Applications
Description
Access step-bystep
Most reference networks require an approximate position of the rover. For reference
network applications, a rover dials into the reference network and submits its approximate position in form of a NMEA GGA message.
Step
1.
Description
Select Main Menu: Config...\Interfaces....
2.
Highlight Real-Time.
3.
EDIT (F3)
4.
CONFIGURE Real-Time Mode
<R-Time Mode: Rover>
5.
ROVER (F2) to access CONFIGURE Additional Rover Options.
6.
GGA (F5) to access CONFIGURE Send GGA NMEA.
CONFIGURE
Send GGA NMEA
CONT (F1)
To accept changes and return to the
screen from where this screen was
accessed.
COORD (F2)
Available for <GGA Position: From
Job> and <GGA Position:
LAST/HERE Posn>. To view other
coordinate types.
LAST (F3)
Available for <GGA Position:
LAST/HERE Posn>. To use the
same coordinates in the GGA
message as when the receiver was
last used in a reference network
application.
HERE (F4)
Available for <GGA Position:
LAST/HERE Posn>. To use the
coordinates of the current navigation
position in the GGA message.
SHIFT ELL H (F2) and SHIFT ORTH (F2)
Available for local coordinates. To
change between the ellipsoidal and
the orthometric height.
144
GPS1200
Config...\Interfaces... - General
Description of fields
Field
Option
Description
<GGA Position:>
Automatic
The current rover position is sent to the reference network.
From Job
For the position, a point from the active job can
be selected in <Point ID:>.
LAST/HERE
Posn
The position last used in a reference network
application or the current navigation position
can be selected using LAST (F3) or HERE (F4).
None
No GGA message is sent to the reference
network.
Choicelist
Available for <GGA Position: From Job>.
The coordinates of this point are sent out as
position in the GGA message.
<Point ID:>
Next step
Step
Description
1.
CONT (F1) returns to CONFIGURE Additional Rover Options.
2.
CONT (F1) returns to CONFIGURE Real-Time Mode.
3.
CONT (F1) returns to the screen from where CONFIGURE Real-Time
Mode was accessed.
Config...\Interfaces... - General
GPS1200
145
20.3
Hidden Point
Description
Hidden point measurement devices are used for measuring to points which cannot
be directly measured with GNSS, for example house corners or trees. The measurements made with a hidden point measurement device are directly transferred to the
receiver for the calculation of the coordinates of the hidden point. They can also be
entered manually.
)
The configuration of hidden point measurements is possible for <R-Time Mode:
Rover> and <R-Time Mode: None> in CONFIGURE Real-Time Mode.
Access
Select Main Menu: Config...\Interfaces.... Highlight Hidden Pt. EDIT (F3).
CONT (F1)
To accept changes and return to the
screen from where this screen was
accessed.
OFSET (F2)
To configure the heighting and
external angle offsets.
SRCH (F4)
Available on RX1250 with <Port:
Bluetooth x> and a Bluetooth device
being selected. To search for all
available Bluetooth devices. If more
than one Bluetooth device is found a
list of available devices is provided.
DEVCE (F5)
To create, select, edit or delete a
device.
CONFIGURE
Hidden Point Measurements
Description of fields
146
Field
Option
Description
<Compute
Ht:>
Yes or No
To compute a hidden point with height.
<Est Pos
Qlty:>
User input
The estimated value for the position quality
assigned to all hidden points.
<Est Ht
Qlty:>
User input
Available for <Compute Ht: Yes>.
The estimated value for the height quality
assigned to all hidden points.
<Use
Device:>
Yes or No
Activates the hidden point interface. For <Use
Device: No>, the measured values must be
entered manually.
<Port:>
Bluetooth x
Available for RX1250. The Bluetooth port which
will be used for the interface functionality.
Port x
The physical port P1, P2 or P3 on the instrument
to which the device is attached.
GPS1200
Config...\Interfaces... - General
Field
Option
Description
Port 1
Available for RX1250. LEMO port on RX1250.
Next step
OFSET (F2) to access CONFIGURE Hidden Pt Device Offsets.
CONFIGURE
Hidden Pt Device
Offsets
Description of fields
Field
Option
Description
<Height
Offset:>
None
No height offsets are used. The result is the
delta height between the centre of the device
and the aimed point.
Device Ht
When measuring hidden points, the height of the
hidden point measurement device can be typed
in. This option should be used when the hidden
point can be directly measured using the hidden
point device.
Device & Trgt Ht When measuring hidden points, the height of the
hidden point measurement device as well as the
target height can be typed in. This option should
be used when the hidden point cannot be
directly measured with a hidden point device but
a target point can be used to calculated the position of the hidden point.
<Device Ht:> User input
The height of the hidden point measurement
device. This is the distance from the ground to
the centre of the device.
<Target Ht:> User input
The distance from the hidden point to the aimed
point.
<Dist
Offset:>
The offset is automatically added to the measured distance.
User input
<EAO
Method:>
Sets the default method for entering an External
Angle Offset. EAO is an offset angle between
the North of the device being used and
WGS 1984 geodetic North. EAO’s are applied
when measuring hidden points using a device
capable of measuring azimuths.
None
No EAO value is applied to the azimuth measurement received from the hidden point measurement device.
Permanent
Applies a default value for the offset angle. The
value is changeable.
New for Each Pt Offset angle values must be entered for each
new hidden point.
<Offset:>
Config...\Interfaces... - General
User input
GPS1200
Available for <EAO Method: Permanent>.
The default value for the offset angle.
147
Next step
Step
148
Description
1.
CONT (F1) returns to CONFIGURE Hidden Point Measurements.
2.
CONT (F1) returns to the screen from where CONFIGURE Hidden Point
Measurements was accessed.
GPS1200
Config...\Interfaces... - General
20.4
SmartAntenna
Description
)
Establish connection automatically
The SmartAntenna interface is used to send the measurement data from the SmartAntenna to the RX1250.
The settings on this screen define the port and the device through which a connection to the SmartAntenna should be established.
The configuration of a SmartAntenna interface is only possible for RX1250.
Automatic connection
Establishing a connection is initiated automatically upon
switching on RX1250.
OR
double clicking the icon
on Windows CE desktop to display the Leica software.
Requirements
The SmartAntenna interface is configured such that SmartAntenna is being
used via Bluetooth.
AND
An <ID Address:> is available.
AND
A SmartAntenna is found that matches <ID Address:> configured. This can be
the last used <ID address:>.
If one of these requirements is not fulfilled, a search for a SmartAntenna is
performed.
Access
Select Main Menu: Config...\Interfaces.... Highlight SmartAntenna. EDIT (F3).
CONFIGURE
SmartAntenna
Interface
CONT (F1)
To accept changes and return to the
screen from where this screen was
accessed. To establish a connection
to the SmartAntenna.
SRCH (F4)
Available for <Use Device: Yes>. To
search for all available SmartAntenna’s. If more than one SmartAntenna is found a list of available
SmartAntenna’s is provided.
DEVCE (F5)
Available for <Use Device: Yes>. To
create, select, edit or delete a device.
Description of fields
Field
Option
Description
<Use
Device:>
Yes or No
Activates the SmartAntenna interface.
Config...\Interfaces... - General
GPS1200
149
Field
Option
Description
<Port:>
<Device:>
<ID
Address:>
Port to which the SmartAntenna will be
connected.
Bluetooth x
The Bluetooth port which will be used for the
interface functionality. Enables cablefree
communication between the SmartAntenna and
the RX1250.
Port 1
LEMO port on RX1250. To be selected when
RX1250 and SmartAntenna are connected via
USB cable.
Output
The device that is currently configured to
<Port:>.
<Bluetooth x>
The Bluetooth device inside the RX1250 that is
currently configured to <Port:>.
Output
The ID address of the SmartAntenna to be used.
Next step
CONT (F1) returns to the screen from where CONFIGURE SmartAntenna Interface was accessed. A connection to the SmartAntenna is established.
150
GPS1200
Config...\Interfaces... - General
20.5
Internet
Description
The Internet interface
• allows accessing the Internet using a GPS1200 receiver plus a GPRS or CDMA
device.
•
Access
can be used together with the Real-Time interface to receive real-time data from
a NTRIP Caster via Internet communication.
Select Main Menu: Config...\Interfaces.... Highlight Internet. EDIT (F3).
CONFIGURE
Internet Interface
CONT (F1)
To accept changes and return to the
screen from where this screen was
accessed.
DEVCE (F5)
To create, select, edit or delete a
device.
Description of fields
Field
Option
Description
<Internet:>
Yes or No
Activates the Internet interface.
<Port:>
Bluetooth x
Available for RX1250. The Bluetooth port which
will be used for the interface functionality.
Port x
The physical port P1, P2 or P3 on the instrument
to which the device is attached.
Port 1
Available for RX1250. LEMO port on RX1250.
Dynamic
Each time a GPS1200 receiver wants to access
the Internet via the device a new IP address is
assigned to the receiver. When using GPRS to
connect to the Internet then the network provider
always dynamically assigns the IP address.
Static
Each time GPS1200 wants to access the
Internet via the device the same IP address
identifies the receiver. This is important if
GPS1200 is used as a TCP/IP server. This
option should only be selected if a static IP
address is available for the receiver.
<IP
Address:>
<Set IP Adr:> User input
Config...\Interfaces... - General
GPS1200
Available for <IP Address: Static>. To set the
IP address.
151
Field
Option
Description
<User ID:>
User input
Some providers ask for a user ID to allow
connecting to the Internet via GPRS or CDMA.
Contact your provider if a user ID needs to be
used.
<(cont):>
User input
Allows the <User ID:> string to continue onto a
new line.
<Password:> User input
Some providers ask for a password to allow
connecting to the Internet via GPRS or CDMA.
Contact your provider if a password is required.
Next step
CONT (F1) returns to the screen from where CONFIGURE Internet Interface was
accessed.
152
GPS1200
Config...\Interfaces... - General
21
21.1
Configuration of Devices
Overview
Description
A device is the hardware which is connected to a chosen port of GPS1200. Devices
are used to transmit and receive real-time data and to communicate with the
receiver.
Before using any device it is necessary to configure the interface with which it will be
used. Some devices may be used with different interfaces for different applications.
For example, a radio can be used to receive real-time reference data but a second
radio could also be used to simultaneously output NMEA messages.
Configuration of Devices
GPS1200
153
21.2
Accessing CONFIGURE Devices / GPRS Internet Devices
Description
Access step-bystep
CONFIGURE
Devices;
CONFIGURE
GPRS Internet
Devices
Allows devices to be created, edited, selected and deleted. Refer to "22
Config...\Interfaces... - Controlling Devices" for more information about configuring
devices.
Step
Description
1.
Main Menu: Config...\Interfaces...
2.
Highlight the appropriate interface based on the type of device that needs
to be configured. For example, highlight Real-Time when a radio is to be
configured.
3.
EDIT (F3) to access CONFIGURE XX.
4.
DEVCE (F5) to access CONFIGURE Devices / CONFIGURE GPRS
Internet Devices.
This screen may consist of several pages and provides different devices for selection depending on which interface the screen was accessed from. The functionality
described below is always the same.
CONT (F1)
To select the highlighted device and
return to the screen from where this
screen was accessed.
NEW (F2)
To create a new device.
EDIT (F3)
To edit the highlighted device.
DEL (F4)
To delete the highlighted device.
MORE (F5)
To display information about the type
of device and the creator of the
device.
SHIFT DEFLT (F5)
To recall previously deleted default
devices and to reset default devices
to the default settings.
Description of columns
Column
Description
Name
Names of available devices.
Type
Type of device defined when creating the device.
Creator
The creator of the device. The creator can either be Default if the
device is a default, or User if the device has been created.
)
154
If a Default device is edited by using EDIT (F3) then its
creator is still displayed as Default.
GPS1200
Configuration of Devices
Next step
CONT (F1) closes the screen and returns to the screen from where CONFIGURE
Devices / CONFIGURE GPRS Internet Devices was accessed.
Configuration of Devices
GPS1200
155
21.3
Creating a New Device / Editing a Device
Access step-bystep
)
Step
Description
1.
Refer to "21.2 Accessing CONFIGURE Devices / GPRS Internet Devices"
to access CONFIGURE Devices / CONFIGURE GPRS Internet
Devices.
2.
In CONFIGURE Devices / CONFIGURE GPRS Internet Devices highlight a device of the same type as the device to be created, from the list.
3.
NEW (F2)/EDIT (F3) to access CONFIGURE New Device/CONFIGURE
Edit Device.
Editing a device is similar to creating a new device. For simplicity, the screens are
called CONFIGURE XX Device and differences are clearly outlined.
CONFIGURE
XX Device
STORE (F1)
To store the new device and to return
to the screen from where this screen
was accessed.
ATCMD (F4)
Available for digital cellular phones
and modems. To configure communication commands.
Description of fields
Field
Option
Description
<Name:>
User input
Available when creating a new device. Name of
new device.
Output
Available when editing a device. The name of
the device.
<Type:>
Output
The type of device.
<GRPS/
Internet:>
Yes or No
Available for digital cellular phones and
modems. Defines the device as an Internet
capable device and adds it to the list in
CONFIGURE GPRS Internet Devices.
<Baud
Rate:>
From 2400 to
115200
Frequency of data transfer from receiver to
device in bits per second.
<Parity:>
None, Even or
Odd
Error checksum at the end of a block of digital
data.
<Terminator:>
Available when editing a device and if required
by the interface.
CR/LF
156
The terminator is a carriage return followed by a
line feed.
GPS1200
Configuration of Devices
Field
<Data Bits:>
Option
Description
CR
Not available for RS232 device. The terminator
is a carriage return.
6, 7 or 8
Number of bits in a block of digital data.
<Stop Bits:> 1 or 2
Number of bits at the end of a block of digital
data.
<Flow
Control:>
Activates hardware handshake.
None or
RTS/CTS
Next step
IF the device is a
THEN
radio or device other than digital STORE (F1) to close the screen and to return to
cellular phone or modem
the screen from where CONFIGURE XX Device
was accessed.
digital cellular phone or modem
CONFIGURE
GSM/Modem AT
Command Lines
ATCMD (F4). Refer to paragraph "CONFIGURE
GSM/Modem AT Command Lines".
For <GPRS/Internet: Yes> in CONFIGURE XX Device, this screen consists of two
pages. The following table lists the fields of both pages.
Description of fields
Field
Option
Description
<Init 1:>
User input
Initilisation sequence to initilise digital cellular
phone/modem.
<(cont):>
User input
Allows the <Init X:> or the <Connect:> string to
continue onto a new line.
<Init 2:>
User input
Initilisation sequence to initilise digital cellular
phone/modem.
<Dial:>
User input
Dialing string used to dial the phone number.
<Hangup:>
User input
Hangup sequence used to end the network
connection.
<Escape:>
User input
Escape sequence used to switch to the
command mode before using the hangup
sequence.
<Connect:>
User input
Dialing string used to dial into the Internet.
When the device is used, between <Init 1:> and <Init 2:>, a check for the PIN is
performed.
Next step
Step
1.
Configuration of Devices
Description
STORE (F1) returns to CONFIGURE XX Device.
GPS1200
157
Step
2.
158
Description
STORE (F1) returns to the screen from where CONFIGURE XX Device
was accessed.
GPS1200
Configuration of Devices
22
22.1
Config...\Interfaces... - Controlling Devices
Accessing Config...\Interfaces... - Controlling Devices
Access step-bystep
Step
Description
1.
Main Menu: Config...\Interfaces... to access CONFIGURE Interfaces.
2.
In CONFIGURE Interfaces highlight an interface which has the device
attached that needs to be configured.
3.
CTRL (F4) to access CONFIGURE XX Connection/CONFIGURE Radio
Channel.
Config...\Interfaces... - Controlling
Devices
GPS1200
159
22.2
Digital Cellular Phones
Description
For digital cellular phones, information such as
• the reference stations that can be contacted
•
the phone numbers of the reference stations and
•
the type of protocol to be used
can be defined.
Access
Refer to "22.1 Accessing Config...\Interfaces... - Controlling Devices" to access
CONFIGURE XX Connection.
CONFIGURE
XX Connection
The name of the screen depends on the type of technology of the digital cellular
phone chosen in CONFIGURE Interfaces.
CONT (F1)
To accept the change and to
continue with the subsequent
screen.
NEAR (F2)
Available when reference stations to
dial are already created in
CONFIGURE Stations to Dial. To
find the nearest reference station
with a digital cellular phone.
CODES (F3)
Available for digital cellular phones of
GSM technology. To enter the
Personal Identification Number of the
SIM card.
SRCH (F4)
Available for <Bluetooth: Yes>. To
search for all available Bluetooth
devices.
SHIFT INFO (F2)
Available for CDMA digital cellular
phones. To find out information
about the digital cellular phone. All
information can be printed to a file
CDMA Info.log in the \DATA directory on the CompactFlash card.
SHIFT REG (F3)
Available for CDMA digital cellular
phones. To register the digital
cellular phone.
SHIFT CMND (F4)
To send AT commands to the digital
cellular phone.
160
GPS1200
Config...\Interfaces... - Controlling
Devices
Description of fields
Field
Option
Description
<GSM
Type:>
Output
Available for digital cellular phones of GSM
technology. The type of digital cellular phone
highlighted when CONFIGURE XX Connection
was accessed.
<CDMA
Type:>
Output
Available for digital cellular phones of CDMA
technology. The type of digital cellular phone
highlighted when CONFIGURE XX Connection
was accessed.
<Bluetooth:> Yes or No
GPS1200 receivers detect automatically if the
attached device is bluetooth capable. Some
devices ask for the identification number of the
Bluetooth. The identification number of Leica’s
Bluetooth is 0000. The field is unavailable for
RX1250 with SmartAntenna.
<ID
Address:>
User input
Available for <Bluetooth: Yes>. The ID address
of the Bluetooth device to be used. Refer to the
device’s user manual for information about the
ID address.
<Station:>
Choicelist
The digital cellular phone reference station to be
dialed. Opening the choicelist accesses
CONFIGURE Stations to Dial where new reference stations can be created and existing reference stations can be selected or edited.
<Number:>
Output
The number of the digital cellular phone at the
selected <Station:> as configured in
CONFIGURE Stations to Dial.
<Protocol:>
Output
Available for digital cellular phones of GSM
technology. The configured protocol of the
digital cellular phone at the selected <Station:>
as configured in CONFIGURE Stations to Dial.
<Auto
CONEC:>
Yes or No
Allows for automatic connection between the
rover and the reference when a point is occupied during a survey.
<Net Data
Rate:>
Autobauding,
2400 bps to
56000 bps
Available for digital cellular phones of GSM
technology. The network baud rate. Select
Autobauding for an automatic search of the
network baud rate. For digital cellular phones of
GSM technology that do not support autobauding choose the baud rate from the
choicelist.
<Connection:>
Available for digital cellular phones of GSM
technology. Define if the digital cellular phone
uses Radio Link Protocol.
Transparent
Config...\Interfaces... - Controlling
Devices
GPS1200
For digital cellular phones that do not use RLP.
161
Field
Option
Description
Non-Transparent
For digital cellular phones that use RLP.
Next step
CONFIGURE
CDMA Registration
IF the digital cellular phone is
THEN
not of type CDMA or does not
need to be registered
CONT (F1) to accept the change and to
continue with the subsequent screen.
of type CDMA and needs registering
SHIFT REG (F3) to access CONFIGURE
CDMA Registration. Refer to paragraph
"CONFIGURE CDMA Registration".
Description of fields
Field
Option
Description
<Prog
Code:>
User input
The service program coder provided by the
network provider.
<My Phone
No:>
User input
Type in the mobile directory number provided by
the network provider.
Next step
Step
162
Description
1.
CONT (F1) returns to CONFIGURE Interfaces.
2.
CONT (F1) returns to the screen from where CONFIGURE Interfaces
was accessed.
GPS1200
Config...\Interfaces... - Controlling
Devices
22.3
Radios
Description
For radios the channels on which the radio broadcasts can be changed. Changing
channels changes the frequency at which the radio operates.
Access
Refer to "22.1 Accessing Config...\Interfaces... - Controlling Devices" to access
CONFIGURE Radio Channel.
)
)
Channel changing may contravene radio broadcasting regulations in certain countries. Before operating with radios, check the regulations in force in the working area.
If channel changing is to be used, when configuring the reference real-time interface,
set <Ref Stn ID:> in CONFIGURE Additional Reference Options, General page
to a different ID for each reference site. By doing so, the rover can recognise if the
incoming real-time data after channel changing is being received from a different
reference station or if the original reference station is using a new frequency. In the
first case, the ambiguities are recomputed.
CONFIGURE
Radio Channel
CONT (F1)
To accept the changes and to
continue with the subsequent
screen.
SCAN (F5)
To find out information such as the
station ID, latency and the data
format of incoming signals from
reference stations.
Description of fields
Field
Option
Description
<Radio
Type:>
Output
The type of radio highlighted when
CONFIGURE Radio Channel was accessed.
<Channel:>
User input
The radio channel. The minimum and maximum
allowed input values for a radio depend on the
number of channels supported by the radio and
the spacing between the channels.
<Actual
Freq:>
Output
Available for <Radio Type: Satelline 3AS>.
Displays the actual frequency of the radio.
Config...\Interfaces... - Controlling
Devices
GPS1200
163
22.4
Hidden Point Measurement Devices
Description
Hidden point measurement devices can be used to measure distances, angles and
azimuths to points which are not accessible by means of GPS. A Bluetooth housing
can be used to provide a wireless connection between the receiver and a Bluetooth
enabled hidden point measurement device.
Access
Refer to "22.1 Accessing Config...\Interfaces... - Controlling Devices" to access
CONFIGURE RS232 Connection.
CONFIGURE
RS232 Connection
CONT (F1)
To accept the changes and to
continue with the subsequent
screen.
SRCH (F4)
Available for <Bluetooth: Yes>. To
search for all available Bluetooth
devices.
Description of fields
164
Field
Option
Description
<Type:>
Output
The type of hidden point measurement device
highlighted when CONFIGURE RS232
Connection was accessed.
<Bluetooth:> Output
GPS1200 receivers detect automatically if the
attached devices is bluetooth capable. Some
devices ask for the identification number of the
Bluetooth. The identification number of Leica’s
Bluetooth is 0000. The field is unavailable for
RX1250 with SmartAntenna.
<ID
Address:>
Available for <Bluetooth: Yes>. The ID address
of the Bluetooth device to be used. Refer to the
device’s user manual for information about the
ID address.
User input
GPS1200
Config...\Interfaces... - Controlling
Devices
22.5
GPRS / Internet Devices
Description
GPRS / Internet devices can be used to access the Internet from a GPS1200
receiver.
Access
Refer to "22.1 Accessing Config...\Interfaces... - Controlling Devices" to access
CONFIGURE GPRS/Internet Connection.
CONFIGURE
GPRS/Internet
Connection
CONT (F1)
To accept the changes and to
continue with the subsequent
screen.
CODES (F3)
Available for digital cellular phones of
GSM technology. To enter the
Personal Identification Number of the
SIM card. If the PIN is locked for any
reason, input the Personal
UnblocKing code for access to the
PIN.
SRCH (F4)
Available for <Bluetooth: Yes>. To
search for all available Bluetooth
devices.
SHIFT CMND (F4)
To send AT commands to the GPRS
/ Internet device.
Description of fields
Field
Option
Description
<Device:>
Output
The type of GPRS / Internet device highlighted
when CONFIGURE GPRS/Internet Connection was accessed.
<Bluetooth:> Output
GPS1200 receivers detect automatically if the
attached device is bluetooth capable. Some
devices ask for the identification number of the
Bluetooth. The field is unavailable for RX1250
with SmartAntenna.
<ID
Address:>
User input
Available for <Bluetooth: Yes>. The ID address
of the Bluetooth device to be used. Refer to the
device’s user manual for information about the
ID address.
<APN:>
User input
Available for some GPRS / Internet devices. The
Access Point Name of a server from the network
provider, which allows access to data services.
Contact your provider to get the correct APN.
Mandatory for using GPRS.
Config...\Interfaces... - Controlling
Devices
GPS1200
165
22.6
Creating a New Station to Dial/Editing a Station to Dial
Description
Access step-bystep
CONFIGURE Stations to Dial allows new stations to be created, provides a list of
reference stations that can be dialed and allows existing stations to be edited.
For digital cellular phones of any technology and for modems, the phone numbers
of the device at the reference station must be known. For a reference station to be
dialed, a name, the phone number and, if available, the coordinates can be configured.
The configuration is possible for rover and reference digital cellular phones and
modems.
Step
Description
1.
Refer to "22.1 Accessing Config...\Interfaces... - Controlling Devices" to
access CONFIGURE XX Connection/CONFIGURE Radio Channel.
2.
Open the choicelist for <Station:> to access CONFIGURE Stations to
Dial.
3.
CONFIGURE Station to Dial
If a station is to be edited, then highlight the station.
4.
)
NEW (F2)/EDIT (F3) to access CONFIGURE New Station to
Dial/CONFIGURE Edit Station to Dial.
Editing a station to dial is similar to creating a new station to dial. For simplicity the
screens are called CONFIGURE XX Station to Dial and differences are clearly
outlined.
CONFIGURE
XX Station to Dial
STORE (F1)
To store the changes and to continue
with the subsequent screen.
COORD (F2)
To view other coordinate types.
SHIFT ELL H (F2) or SHIFT ORTH (F2)
Available for local coordinates. To
change between the ellipsoidal and
the orthometric height.
Description of fields
166
Field
Option
Description
<Name:>
User input
A unique name for the new reference station to
be dialed. The name may be up to 16 characters
long and may include spaces. Input optional.
GPS1200
Config...\Interfaces... - Controlling
Devices
Field
Option
Description
<Number:>
User input
The number of the reference station to dial. If the
survey is to be undertaken across country
borders it is necessary to input the phone
number using standard international dialing
codes. For example, +41123456789. Otherwise
it can be input as a standard digital cellular
phone number.
<Protocol:>
Available for digital cellular phones of GSM
technology. The configured protocol of the
digital cellular phone of GSM technology.
Analog
For conventional phone networks.
ISDN v. 110
For GSM networks.
<Enter
Coords:>
Yes or No
Allows the coordinates of the reference station
to be entered.
Coordinates
User input
The coordinate of the reference station.
Next step
Step
Description
1.
STORE (F1) stores the changes and returns to CONFIGURE Stations to
Dial.
2.
CONT (F1) returns to the screen from where CONFIGURE Stations to
Dial was accessed.
Config...\Interfaces... - Controlling
Devices
GPS1200
167
22.7
Creating a New Server to Connect/Editing a Server to Connect
Description
Access step-bystep
CONFIGURE Server to Connect allows new servers to be created, provides a list
of servers to be connect in the internet and allows existing servers to be edited. For
servers to be accessed in the Internet the IP address and the TCP/IP port must be
known. For a server to be accessed in the Internet a name can be configured.
Step
Description
1.
Refer to "22.1 Accessing Config...\Interfaces... - Controlling Devices" to
access CONFIGURE XX Connection/CONFIGURE Radio Channel.
2.
Open the choicelist for <Server:> to access CONFIGURE Server to
Connect.
3.
CONFIGURE Server to Connect
If a server is to be edited, then highlight the server.
4.
)
NEW (F2)/EDIT (F3) to access CONFIGURE New Server to
Connect/CONFIGURE Edit Server to Connect.
Editing a server to connect is similar to creating a new server to connect. For
simplicity the screens are called CONFIGURE XX Server to Connect and differences are clearly outlined.
CONFIGURE
XX Server to
Connect
STORE (F1)
To store the changes and to continue
with the subsequent screen.
Description of fields
168
Field
Option
Description
<Name:>
User input
A unique name for the new server to be
accessed in the Internet. The name may be up
to 16 characters long and may include spaces.
<IP Address:>
User input
The IP address of the server to be accessed in
the Internet.
<TCP/IP Port:> User input
The port of the Internet server through which the
data is provided. Each server has several ports
for various services.
GPS1200
Config...\Interfaces... - Controlling
Devices
Next step
Step
Description
1.
STORE (F1) stores the changes and returns to CONFIGURE Server to
Connect.
2.
CONT (F1) returns to the screen from where CONFIGURE Server to
Connect was accessed.
Config...\Interfaces... - Controlling
Devices
GPS1200
169
170
GPS1200
Config...\Interfaces... - Controlling
Devices
23
23.1
Tools...
Format Memory Device
Description
Allows the CompactFlash card, the internal memory, if fitted, and the System RAM
to be formatted. All data will be erased.
Access
Select Main Menu: Tools...\Format Memory Device.
Way of working
step-by-step
Step
Description
1.
Select the memory device to be formatted.
2.
Select the type of format to be performed.
)
A quick format means that after formatting, data is not visible any
more but still exists on the memory device and is overwritten as
and when required. A complete format fully deletes the data.
Next step
IF
THEN
the CompactFlash card or CONT (F1) to format the selected memory device and
return to GPS1200 Main Menu.
internal memory is to be
formatted
the application programs PROGS (F4) to format the application programs
memory is to be formatted memory. All loadable application programs are
deleted.
the System RAM is to be
formatted
)
Tools...
SYSTM (F5) to format the System RAM.
If the System RAM is formatted all system data such as almanac, user defined
configuration sets, user defined antennas, codelists, geoid field files and CSCS field
files will be lost.
GPS1200
171
23.2
Transfer Objects...
Description
This chapter describes the basic procedure for transferring objects between the
CompactFlash card, and the internal memory, if fitted, and the System RAM.
Access
Select Main Menu: Tools...\Transfer Objects...\XX.
Way of working
step-by-step
Step
)
Description
The available fields on the screen depend on the option selected in Main
Menu: Tools...\Transfer Objects....
1.
Select the memory device to transfer the object from.
2.
Select the memory device to transfer the object to.
3.
Select the object to transfer.
Next step
172
IF all XX
THEN
are to be transferred
ALL (F3) transfers all objects in list.
are not to be transferred
CONT (F1) transfers selected object.
GPS1200
Tools...
23.3
Upload System Files...
Description
)
Access
Way of working
step-by-step
System file uploads are possible from the CompactFlash card to a particular memory
device, depending on the type of file chosen to be uploaded. These files are stored
in the \SYSTEM directory of the memory device.
SmartAntenna must always be connected to RX1250 when uploading the firmware.
Connect SmartAntenna and RX1250 via cable.
Uploading the firmware takes some time.
Select Main Menu: Tools...\Upload System Files...\XX.
Step
Description
1.
Select the memory device to upload the system file from.
2.
Select the memory device to upload the system file to.
3.
Select the system file to upload.
Next step
CONT (F1) uploads the selected system file.
Tools...
GPS1200
173
23.4
)
174
Calculator and File Viewer
Refer to GPS1200 Technical Reference Manual for information on these functionalities.
GPS1200
Tools...
23.5
Licence Keys
Description
A licence key can be used to activate application programs and protected options
and can be used to define the expiry date of the software maintenance.
A licence key file can be uploaded to the receiver/RX1250. To upload a licence key
file the file should be located on the \SYSTEM directory of the CompactFlash card.
Licence key files use the naming convention L_123456.key, where 123456 is the
instrument serial number. Licence keys can also be typed in manually in Main
Menu: Tools...\Licence Keys or the first time the application program is started.
Access
Select Main Menu: Tools...\Licence Keys.
OR
Select an application program not yet activated.
Way of working
step-by-step
Step
Description
1.
Select the method by which the licence key will be input.
2.
Depending on the method chosen the licence key can be typed in.
Next step
CONT (F1) returns to GPS1200 Main Menu or continues with selected application
program.
Tools...
GPS1200
175
176
GPS1200
Tools...
24
STATUS
24.1
STATUS: Survey...
24.1.1
Satellite Status
Description
Access
STATUS
Satellites,
Satellites page;
STATUS
Satellites,
Rover page
STATUS
This screen shows information related to the satellites ordered by the elevation
angle.
Step
Description
1.
Press USER to access GPS1200 User Menu.
2.
Press STAT (F3) to access STATUS Status Menu.
3.
Select Survey...\Satellite Status.
The name of the page changes depending on the active receiver configuration.
The information about the satellites at the reference shown on the Reference page
is identical with the information shown on STATUS Satellites, Rover page
CONT (F1)
To exit STATUS Satellites.
GPS X / GPS 9 (F2)
To hide or show the GPS satellites
(shown by the prefix G). Available for
GX1230 GG/ATX1230 GG when
<Sat System: GPS & Glonass> is
configured in CONFIGURE Satellite
Settings.
GLO X / GLO 9 (F3)
To hide or show the GLONASS satellites (shown by the prefix R).
Available for GX1230 GG/
ATX1230 GG when <Sat System:
GPS & Glonass> is configured in
CONFIGURE Satellite Settings.
HELTH (F4)
To view the numbers of satellites
categorised in good, bad and unavailable.
MORE (F5)
To open and close a window showing
the date of the used almanac, the
number of satellites tracked as
shown on the skyplot and the number
of all satellites available above the
cut off elevation mask as shown on
the skyplot.
GPS1200
177
Description of columns
Column
Description
Sat
The Pseudo Random Noise number (GPS) or the slot number
(GLONASS) of the satellites.
Elev
The elevation angle in degrees. The arrow indicates if a satellite is
rising or falling.
Azmth
The azimuth of the satellite.
S/N 1 and
S/N 2
The signal to noise ratio on L1 and L2. The number is shown in
brackets if the signal is currently not being used in the position
calculations.
Next step
PAGE (F6) changes to the Skyplot page.
STATUS
Satellites,
Skyplot page
The skyplot shows satellite information in a graphical way. Satellites below the
<Cut Off Angle:> configured in CONFIGURE Satellite Settings are marked grey.
The part of the skyplot between the 0° elevation and the cut-off angle is marked grey.
Description of symbols
Symbol
Description
Satellites above the <Cut Off Angle:> configured in CONFIGURE
Satellite Settings.
Satellites below the <Cut Off Angle:> configured in CONFIGURE
Satellite Settings.
Next step
CONT (F1) exits STATUS Satellites.
178
GPS1200
STATUS
24.1.2
Real-Time Status
Description
This screen shows information related to real-time data.
The name of the screen changes depending on the configuration:
Real-time rover configuration:
Real-time reference configuration with one
real-time device:
Real-time reference configuration with two
real-time devices:
STATUS Real-Time Input
STATUS Real-Time Output
STATUS Real-Time Output 1
and STATUS Real-Time Output 2
For simplicity, the screen is named here as STATUS Real-Time. Differences
depending on the configurations are outlined.
Access
Step
1.
Description
Press USER to access GPS1200 User Menu.
2.
Press STAT (F3) to access STATUS Status Menu.
3.
Select Survey...\Real-Time Status.
STATUS
Real-Time,
General page
CONT (F1)
To exit STATUS Real-Time.
DATA (F4)
To view the data being received.
Depending on <R-Time Data:>, the
shown data differ.
REF2 (F5) and REF1 (F5)
Available for <R-Time Mode: Reference> with two real-time devices
configured. To change between the
status information for both real-time
devices.
Description of fields
Field
Description
<R-Time
Data:>
The received real-time data format message type.
<GPS used
L1/L2:>
The number of satellites on L1 and L2 being used in the current
position solution.
<GLO used
L1/L2:>
Available for GX1230 GG/ATX1230 GG/GRX1200 GG Pro when
<Sat System: GPS & GLONASS> is configured in
CONFIGURE Satellite settings. The number of satellites on L1
and L2 being used in the current position solution.
<Last Sent:> Available for <R-Time Mode: Reference>.
Seconds since the last message from the reference was sent.
<Last
Received:>
STATUS
Available for <R-Time Mode: Rover>.
Seconds since the last message from the reference was received.
GPS1200
179
Field
Description
<In Last
Minute:>
Available for <R-Time Mode: Rover>.
The percentage of real-time data received from the reference
compared with the data received from the GNSS antenna within the
last minute. This indicates how well the datalink is working.
<Ref
Network:>
Available for <R-Time Mode: Rover>.
The type of reference network in use.
<Output
NMEA:>
Available for <R-Time Mode: Rover> unless <Ref Network:
None>. The type of NMEA message send to the reference network.
If more than one message is send at a time, then all types are
shown separated by comma.
Next step
PAGE (F6) changes to the Device page.
STATUS
Real-Time,
Device page
The content of this page differs for each type of device in use.
CONT (F1)
To exit STATUS Real-Time.
ACCNT (F3)
Available for Smartgate device. To
view Smartgate account information.
VERS (F4)
Available for Smartgate device. To
view Smartgate version information.
For all devices available
Description of fields
Field
Description
<Name:>
The name of the device.
For digital cellular phones and modems
Description of fields
Field
Description
<Type:>
The type of device.
<Port:>
The port to which the device is connected.
<Firmware:> The software version of the attached digital cellular phone.
180
<Operator:>
The name of the network operator in which the digital cellular phone
is operating.
<Status:>
The actual mode of the digital cellular phone. The options are
Unknown, Searching and Registered.
GPS1200
STATUS
Field
Description
<Bluetooth:> Available if device is connected via bluetooth. Indicates the state of
the connection.
<Signal:>
Indication of received signal strength of the digital cellular phone
network.
For Satelline 3AS radios
Description of fields
Field
Description
<Port:>
The port to which the device is connected.
<Type:>
The type of device.
<Channel:>
The radio channel.
<Actual Freq:>
The actual set frequency of the radio.
<Central Freq:>
The defined central frequency of the radio.
<Firmware:>
The software version of the attached radio.
For Pacific Crest PDL radios
Description of fields
Field
Description
<Port:>
The port to which the device is connected.
<Type:>
The type of device.
<Channel:>
The radio channel.
Next step
PAGE (F6) changes to the Reference page.
STATUS
Real-Time,
Reference page
As shown below, the name of the page changes depending on the type of reference
being used.
Name of page
Description
Reference page
Reference is a real reference station.
Ref (Nearest)
page
Reference is the closest to the rover determined by for
example LEICA GPS Spider.
Ref (i-MAX) page Reference information are individualised Master-Auxiliary
corrections determined and sent by for example LEICA GPS
Spider.
STATUS
Ref (MAX) page
Reference information are Master-Auxiliary corrections determined and sent by for example LEICA GPS Spider.
Ref (VRS) page
Reference is a virtual reference station.
Ref (FKP) page
Reference information are area correction parameters.
GPS1200
181
Description of fields
Field
Description
<Ref Stn ID:> An identification for a reference station. The ID can be converted
into a compact format to be send out with real-time data in all realtime data formats. It is different from the point ID of the reference
station.
<Antenna
Ht:>
•
For <R-Time Data: Leica>, <R-Time Data: RTCM v3.0> or
<R-Time Data: RTCM X v2> with <RTCM Version: 2.3>:
The antenna height at the reference from the marker to the
MRP.
•
For <R-Time Data: CMR/CMR+> and <R-Time Data: RTCM
18, 19 v2> or <R-Time Data: RTCM 18, 19 v2> with <RTCM
Version: 2.2>
The antenna height at the reference from the marker to the
phase center.
•
For all other <R-Time Data:>:
----- is displayed because the data format does not include
information about the antenna height.
<Coords of:> The coordinates for the reference station which are transferred
depend on the active real-time data format.
<No.of Aux
Ref:>
•
For real-time messages which include antenna height and
antenna type: Marker.
•
For real-time messages which do not include antenna Information: Phase Centre of L1.
The number of active auxiliary reference stations from which data
is received.
Next step
CONT (F1) exits STATUS Real-Time.
STATUS
Real-Time Input
Data
The following provides additional information on the satellite data received via realtime message. Information of those satellites is displayed, which are used on both
reference and rover.
Access
DATA (F4) on STATUS Real-Time, General page.
182
GPS1200
STATUS
CONT (F1)
To return to STATUS Real-Time.
SAT- (F2)
To display information about the
satellite with the next smaller PRN.
SAT+ (F3)
To display information about the
satellite with the next larger PRN.
Description of fields
The data being received from the satellites and the layout of the screen depend on
the active real-time data format.
Field
Description
<Sat PRN:>
The PRN number (GPS) or the slot number (GLONASS) of the
satellites shown with the prefix G (GPS) or R (GLONASS).
<Sat Time:>
The GPS time of the satellite.
<Phase L1:>,
<Phase L2:>
The number of phase cycles from the antenna to the satellite on
L1 and L2.
<Msg 18 L1:>,
<Msg 18 L2:>
The uncorrected carrier phases for L1 and L2.
<Msg 20 L1:>,
<Msg 20 L2:>
The carrier phase corrections for L1 and L2.
<Code L1:>,
<Code L2:>
The pseudorange between the antenna to the satellite for L1
and L2.
<Msg 19 L1:>,
<Msg 19 L2:>
The uncorrected pseudoranges for L1 and L2.
<Msg 21 L1:>,
<Msg 21 L2:>
The pseudorange corrections for L1 and L2.
<PRC:>
Pseudorange corrections.
<RRC:>
Rate of change of the corrections.
<IODE:>
Issue Of Data Ephemeris. The identification number of the
ephemeris for a satellite.
Next step
CONT (F1) returns to the screen from where STATUS Real-Time Input Data was
accessed.
STATUS
GPS1200
183
24.1.3
Current Position
Description
Access
This screen shows information related to the current antenna position and the speed
of the antenna. For real-time rover configurations the baseline vector is also shown.
MapView shows the current position in a graphical way.
Step
Description
1.
Press USER to access GPS1200 User Menu.
2.
Press STAT (F3) to access STATUS Status Menu.
3.
Select Survey...\Current Position.
STATUS
Position,
Position page
CONT (F1)
To exit STATUS Position.
COORD (F2)
To see other coordinate types. Local
coordinates are available when a
local coordinate system is active.
SHIFT ELL H (F2) and SHIFT ORTH (F2)
Available for local coordinates. To
change between the ellipsoidal and
the orthometric height.
Description of fields
Field
Description
<Pos
Latency:>
The latency of the computed position. Latency is mainly due to time
required for data transfer and computation of position. Depends on
the use of the prediction mode.
Pos Quality
and
Ht Quality
Available for phase fixed and code only solutions. The 2D coordinate and height quality of the computed position.
HDOP and
VDOP
Available for navigated solutions.
Next step
PAGE (F6) changes to the Baseline or Speed page.
STATUS
Position,
Baseline page
184
Information on the baseline vector is displayed.
Next step
PAGE (F6) changes to the Speed page.
GPS1200
STATUS
STATUS
Position,
Speed page
Description of fields
Field
Description
<Horizontal:>
The speed over ground in the horizontal direction.
<On
Bearing:>
Available for local coordinate systems.
The bearing for the horizontal direction related to the North direction of the active coordinate system.
<Vertical:>
The vertical component of the actual velocity.
Next step
PAGE (F6) changes to the Map page.
STATUS
Position,
Map page
STATUS
The Map page provides an interactive display of the data.
Next step
CONT (F1) exits STATUS Position.
GPS1200
185
24.1.4
Logging Status
Description
Access
This screen shows information related to logging of raw observations, including ring
buffer.
Step
Description
1.
Press USER to GPS1200 User Menu.
2.
Press STAT (F3) to access STATUS Status Menu.
3.
Select Survey...\Logging Status.
STATUS
Logging,
General page
CONT (F1)
To exit STATUS Logging.
Description of fields
Field
Description
<All Static Obs:>
The number of static epochs recorded in the current job.
<All Moving
Obs:>
The number of moving epochs recorded in the current job.
<Recorded DB-X
Pts:>
The number of manually occupied points and auto points
stored in the job.
Next step
186
IF
AND
THEN
at least one ring
buffer is activated
-
PAGE (F6) changes to the Ring Buffer
page. Refer to paragraph "STATUS
Logging, Ring Buffer page".
no ring buffer is
activated
the receiver is a
real-time rover
PAGE (F6) changes to the Reference
page or Ref (VRS) page. Refer to paragraph "STATUS Logging, Reference
page".
no ring buffer is
activated
the receiver is not a CONT (F1) exits STATUS Logging.
real-time rover
GPS1200
STATUS
STATUS
Logging,
Ring Buffer page
Description of fields
Field
Description
<Ring Buffer
No.:>
The number of the active ring buffer.
<No. of Files:>
The number of files stored in the ring buffer.
<Obs Flagged:>
The flag assigned to the stored observations.
<Obs Rate:>
The configured observation rate by which data is logged.
<First Obs at:>
The local time when the first observation available in the ring
buffer is stored.
<Last Obs at:>
The local time when the last observation available in the ring
buffer is stored.
Next step
PAGE (F6) changes to the Reference page, Ref (FKP) or Ref (VRS) page.
STATUS
Logging,
Reference page
As shown below, the name of the page changes depending on the type of reference
used.
Name of page
Description
Reference page
Reference is a real reference station.
Ref (Nearest)
page
Reference is the closest to the rover determined by for
example LEICA GPS Spider.
Ref (i-MAX) page Reference information are individualised Master-Auxiliary
corrections determined and sent by for example LEICA GPS
Spider.
Ref (MAX) page
Reference information are Master-Auxiliary corrections determined and sent by for example LEICA GPS Spider.
Ref (VRS) page
Reference is a virtual reference station.
Ref (FKP) page
Reference information are area correction parameters.
Description of fields
STATUS
Field
Option
Description
<Log Static
Obs:>
A time in sec
The logging rate at the reference. This information is shown if the real-time message format
supports this information and raw observations
are being logged at the reference.
Not known
The real-time message format does not support
this information or the information is not yet
received by the rover.
None
Raw observations are not being logged at the
reference.
GPS1200
187
Next step
CONT (F1) exits STATUS Logging.
188
GPS1200
STATUS
24.1.5
Occupation Information Status
Description
Access
STATUS
Occupation Information (Static);
STATUS
Occupation Information (Moving)
This screen shows information related to the amount of time required at a point and
the amount of time spent on a point.
Step
Description
1.
Press USER to access GPS1200 User Menu.
2.
Press STAT (F3) to access STATUS Status Menu.
3.
Select Survey...\Occupation Information Status.
Available for logging of raw observations. The name of the screen changes with the
static or moving mode of the receiver. The values are reset with each new static
interval. Information on this screen is available for <R-Time Mode: None> and <RTime Mode: Rover>.
For static mode
Description of fields
Field
Description
<Obs
The percentage of collected data required for successful
Completed:> processing.
It is a conservative estimate based on a 10 - 15 km baseline.
The criteria used to display this value depend on the settings for
<Auto STOP:>, <STOP Criteria:> and <% Indicator:> in Main
Menu: Config...\Point Occupation Settings.
<Time to
Go:>
The estimated time in hours, minutes and seconds until the configured criteria for <STOP Criteria:> or <% Indicator:> is reached.
The criteria used to display this value depend on the settings for
<Auto STOP:>, <STOP Criteria:> and <% Indicator:> in Main
Menu: Config...\Point Occupation Settings.
<Time at
Point:>
The time passed since OCUPY was pressed in the SURVEY
screen.
<Cycle Slips The number of cycle slips on L1 and L2 that have occurred since
L1/L2:>
recording started on the current point.
<Obs Rec
Rate:>
Rate at which raw observations are being recorded.
<Static Obs> The number of logged static raw observations. Reset as soon as a
new static interval starts.
STATUS
GPS1200
189
For moving mode
Description of fields
Field
Description
<>5 Sats
Since:>
The time for how long five or more satellites are tracked on L1 and
L2 without interruption. The counter is reset if less than five satellites were tracked. The counter is not reset after OCUPY (F1),
STOP (F1) or STORE (F1).
<GDOP:>
Current GDOP.
<Obs Rec
Rate:>
Rate at which raw observations are being recorded.
<Moving
Obs:>
The number of logged moving raw observations. Reset as soon a
new moving interval starts.
Next step
CONT (F1) exits STATUS Occupation Information (Static) or STATUS Occupation Information (Moving).
190
GPS1200
STATUS
24.2
STATUS: Battery & Memory
Access
Step
Description
1.
Press USER to access GPS1200 User Menu.
2.
Press STAT (F3) to access STATUS Status Menu.
3.
Select Battery & Memory.
STATUS
Battery & Memory
(Rover),
Battery page
CONT (F1)
To exit STATUS Battery & Memory
(Rover).
REF (F5)
Available when the receiver is configured as real-time rover. To view
battery and memory information for
the reference.
Description of fields
Field
Description
Any field
The percentage of remaining power capacity for all batteries
numerically. Batteries not in use are shown in grey.
Next step
PAGE (F6) changes to the Memory page.
STATUS
Battery & Memory
(Rover),
Memory page
STATUS
If no information for a field is available, for example no CompactFlash card is
inserted, then ----- is displayed.
Description of fields
Field
Description
<Device
Used:>
The memory device in use.
<Mem CF
Card:>
The total/free memory for data storage on the CompactFlash card.
<Mem
Instrmnt:>
The total/free memory for data storage in the internal memory. A
grey field and grey dashes indicate an unavailable internal
memory.
<Mem
Programs:>
The total/free system memory used for application programs.
GPS1200
191
Field
Description
<Mem
System:>
The total/free system memory. The system memory stores
• receiver related files such as system settings.
•
survey related files such as codelists and configuration sets.
Next step
IF
THEN
the receiver is a
real-time rover
REF (F5) shows battery and memory information for the realtime reference in use.
the receiver is not a CONT (F1) exits STATUS Battery & Memory (Rover).
real-time rover
STATUS
Battery & Memory
(Reference)
This screen consists of the Battery and the Memory page. Both pages are similar
to those of the rover screen. The information that is displayed depends on the realtime message.
Leica:
RTCM:
CMR/CMR+:
Transfers precise values for all fields.
Transfer of any of the information not part of the message.
Transfers general status information such as O.K. and Low.
Next step
CONT (F1) returns to STATUS Battery & Memory (Rover).
192
GPS1200
STATUS
24.3
STATUS: System Information
Access
STATUS
System Information, Instrument
page
Step
Description
1.
Press USER to access GPS1200 User Menu.
2.
Press STAT (F3) to access STATUS Status Menu.
3.
Select System Information.
Shows the type of receiver, the serial number, the equipment number, the ID of the
receiver, the currently active system language, the serial number of the measurement engine, the availability of additional instrument hardware options such as event
input, L2C, Multipath Mitigation, GLONASS ready, GLONASS permanent and if the
protected OWI commands have been activated by a licence key.
Next step
PAGE (F6) changes to the Firmware page.
STATUS
System Information, Firmware
page
Shows the versions of all system firmware.
Description of fields
Field
Description
<Firmware:>
The firmware version of the onboard software.
<Build:>
The build version of the firmware.
<Maintenance
End:>
The expiry date of the contract is shown.
<Meas Engine:>
The firmware version for the measurement engine.
<Meas Eng Boot:> The firmware version of the boot software for the measurement engine.
<Boot:>
The firmware version of the boot software.
<LB2/OWI:>
The firmware version for the communication.
<Navigation:>
The navigation firmware version with the algorithms for the
signal processing.
<API:>
The firmware version for the application program interface.
<EF Interface:>
The firmware version for the electric front interface.
Next step
PAGE (F6) changes to the Application page.
STATUS
System Information, Application
page
STATUS
Shows the versions of all uploaded application programs.
Next step
CONT (F1) exits STATUS System Information.
GPS1200
193
24.4
STATUS: Interfaces...
Description
This screen shows information about incoming data from the following interfaces/devices:
•
•
•
)
Access
Real-Time Input
Meteo
Remote Interfaces
•
•
•
ASCII Input
Event Input
Bluetooth
•
•
Tilt
Internet
The options Tilt and Meteo are not available for RX1250 with SmartAntenna.
Step
Description
1.
Press USER to access GPS1200 User Menu.
2.
Press STAT (F3) to access STATUS Status Menu.
3.
Select Interfaces....
4.
Highlight an interface.
5.
)
IFACE (F5)
DEVCE (F5) to view information about the device attached to the interface.
Next step
CONT (F1) exits STATUS XX.
STATUS
SmartAntenna
Interface (XX)
STATUS
Bluetooth
194
This screen is accessible for a configured SmartAntenna interface. This is possible
for RX1250 with SmartAntenna.
The way information is displayed indicates the configuration and connection status
of the SmartAntenna.
Information
displayed
SmartAntenna
configured
SmartAntenna
connected
in black
x
x
in grey
x
-
as -----
-
-
The way information is displayed indicates the configuration status of the Bluetooth
port and the connection status of the device.
Information
displayed
Bluetooth port
configured
Device
connected
in black
x
x
in grey
x
-
as -----
-
-
GPS1200
STATUS
25
25.1
NTRIP via Internet
Overview
Description
System components
Networked Transport of RTCM via Internet Protocol
• is a protocol streaming real-time corrections over the Internet.
•
is a generic protocol based on the Hypertext Transfer Protocol HTTP/1.1.
•
is used to send differential correction data or other kinds of streaming data to
stationary or mobile users over the Internet, allowing simultaneous PC, laptop,
PDA, or receiver connections to a broadcasting host.
•
supports wireless Internet access through mobile IP networks like digital cellular
phones or modems.
NTRIP consists of three system components:
•
NTRIP Clients
•
NTRIP Servers
•
NTRIP Caster
Refer to the GPS1200 Technical Reference Manual for more information about
NTRIP.
NTRIP via Internet
GPS1200
195
25.2
Configuring a Real-Time Rover for Using NTRIP Service
25.2.1
Configuring an Access to the Internet
Requirements
)
Configure access
to Internet step-bystep
•
Firmware v1.5 or higher must be loaded on the GPS1200 receiver.
•
Firmware v1.42 or higher must be loaded on the RX1200.
A GPRS device can be connected in a clip-on-housing or with RX1250 via Bluetooth.
Step
Description
1.
Select Main Menu: Config...\Interfaces....
2.
In CONFIGURE Interfaces highlight Internet.
3.
EDIT (F3) to access CONFIGURE Internet Interface.
4.
CONFIGURE Internet Interface
<Internet: Yes:>
<IP Address: Dynamic>
<User ID:> Some providers ask for a user ID to allow connecting to the
Internet via GPRS. Contact your provider if a user ID needs to be used.
<Password:> Some providers ask for a password to allow connecting to
the Internet via GPRS. Contact your provider if a password needs to be
used.
5.
DEVCE (F5) to access CONFIGURE GPRS Internet Device.
6.
CONFIGURE GPRS Internet Devices
)
)
NEW (F2) to create a new GPRS / Internet device.
SRCH (F4) Available on RX1250 with <Port: Bluetooth x> and a Bluetooth device being selected. To search for all available Bluetooth devices.
If more than one Bluetooth device is found a list of available devices is
provided.
7.
CONT (F1) to return to CONFIGURE Internet Interfaces.
8.
CONT (F1) to return to CONFIGURE Interfaces.
9.
CTRL (F4) to access CONFIGURE GPRS/Internet Connection.
10.
)
11.
196
Highlight the GPRS / Internet device to be used.
CONFIGURE GPRS/Internet Connection
<APN:> Available for some devices. The Access Point Name of a server
from the network provider, which allows access to data services. Contact
your provider to get the correct APN. Mandatory for using GPRS.
CODES (F3) Available for digital cellular phones of GSM technology. To
enter the Personal Identification Number of the SIM card. If the PIN is
locked for any reason, for example the wrong PIN was entered, input the
Personal UnblocKing code for access to the PIN.
CONT (F1) to return to GPS1200 Main Menu.
GPS1200
NTRIP via Internet
Step
)
Description
The receiver is now online to the Internet. The Internet online status icon
is displayed. But because GPRS is being used, no charges are yet made
since no data transfer from the Internet has yet taken place.
12.
USER
13.
STAT (F3) to access STATUS Status Menu.
14.
Highlight Interfaces....
15.
ENTER to access STATUS Interfaces.
16.
STATUS Interfaces
Highlight Internet.
NTRIP via Internet
17.
IFACE (F3) to access STATUS Ethernet.
18.
STATUS Ethernet
19.
Check the Internet online status.
20.
CONT (F1) to return to STATUS Interfaces.
21.
CONT (F1) to return to GPS1200 Main Menu.
GPS1200
197
25.2.2
Configuring to Connect to a Server
Requirements
Configure connect
to a server step-bystep
The configurations from the previous chapter must have been completed. Refer to
"25.2.1 Configuring an Access to the Internet".
Step
Description
1.
Select Main Menu: Config...\Interfaces....
2.
CONFIGURE Interfaces
Highlight Real-Time.
3.
EDIT (F3) to access CONFIGURE Real-Time Mode.
4.
CONFIGURE Real-Time Mode
<R-Time Mode: Rover>
<R-Time Data:> Select the type of data to be received from the Internet.
<Port: NETx>
5.
CONT (F1) to return to CONFIGURE Interfaces.
6.
Highlight Real-Time.
7.
CTRL (F4) to access CONFIGURE Set NET Port.
8.
CONFIGURE Set NET Port
<User: Client>
<Server:> The server to be accessed in the Internet. Opening the
choicelist accesses CONFIGURE Server to Connect where new servers
can be created or existing servers can be selected or edited.
<IP Address:> The IP address of the server to be accessed in the
Internet.
<TCP/IP Port:> The port of the Internet server through which the data is
provided. Each server has several ports for various services.
<Auto CONEC: Yes> Allows for automatic connection between the rover
and the Internet when a point is occupied during a survey. Ending the point
occupation also ends the Internet connection.
9.
CONT (F1) to return to CONFIGURE Interfaces.
)
Once the receiver is connected to the server a message is displayed in the
message line.
10.
CONT (F1) to return to GPS1200 Main Menu.
11.
USER
12.
STAT (F3) to access STATUS Status Menu.
13.
Highlight Interfaces....
14.
ENTER to access STATUS Interfaces.
15.
STATUS Interfaces
16.
DEVCE (F5) to access STATUS Device: Internet.
Highlight Real-Time.
198
GPS1200
NTRIP via Internet
Step
Description
17.
STATUS Device: Internet
Check the Internet online status.
NTRIP via Internet
18.
CONT (F1) to return to STATUS Interfaces.
19.
CONT (F1) to return to GPS1200 Main Menu.
GPS1200
199
25.2.3
Using the NTRIP Service with a Real-Time Rover
Requirements
Use NTRIP service
step-by-step
The configurations from the previous chapter must have been completed. Refer to
"25.2.2 Configuring to Connect to a Server".
Step
Description
1.
Select Main Menu: Config...\Interfaces....
2.
In CONFIGURE Interfaces highlight Real-Time.
3.
EDIT (F3) to access CONFIGURE Real-Time Mode.
4.
CONFIGURE Real-Time Mode
<Port: NETx> must be selected.
5.
ROVER (F2) to access CONFIGURE Additional Rover Options.
6.
PAGE (F6) to access CONFIGURE Additional Rover Options, NTRIP
page.
7.
CONFIGURE Additional Rover Options, NTRIP page
8.
<Use NTRIP: Yes>
<User ID:> A user ID is required to receive data from to the NTRIP Caster.
Contact the NTRIP administrator for information.
<Password:> A password is required to receive data from the NTRIP
Caster. Contact the NTRIP administrator for information.
9.
10.
SRCE (F5) to access CONFIGURE NTRIP Source-Table.
CONFIGURE NTRIP Source-Table
All MountPoints are listed. MountPoints are the NTRIP Servers sending
out real-time data. This screen consists of two columns:
•
First column MountPoint:
The abbreviations for the MountPoints.
•
Second column Identifier:
The city where the MountPoint is located.
11.
Highlight a MountPoint about which more information is required. This
information helps to configure the receiver to use the selected MountPoint
as a reference.
12.
INFO (F3) to access CONFIGURE MountPoint: XX.
13.
CONFIGURE MountPoint: XX, General page
<Format:> The real-time data format sent out by the MountPoint.
<FormatDet:> Details about <Format:>, for example the RTCM message
types including update rates in seconds displayed in brackets.
<Authentic:> The type of password protection required for the authorisation to the NTRIP Server. <Authentic: None> if no password is required.
<Authentic: Basic> if the password need not be encrypted. <Authentic:
Digest> if the password must be encrypted.
<NMEA:> Indicates if the MountPoint must receive GGA NMEA data from
the rover in order to compute VRS information.
200
GPS1200
NTRIP via Internet
Step
Description
<Charges:> Indicates if charges are currently made for the connection.
<Carrier:> The type of carrier phase information in the data stream.
<System:> The type of satellite system supported by the MountPoint.
14.
PAGE (F6) to access CONFIGURE MountPoint: XX, Location page.
15.
CONFIGURE MountPoint: XX, Location page
Detailed information about the location of the MountPoint is displayed.
16.
PAGE (F6) to access CONFIGURE MountPoint: XX, Miscell page.
17.
CONFIGURE MountPoint: XX, Miscell page
<Generator:> The hard- or software generating the data stream.
<Compress:> The name of the compression / encryption algorithm.
)
)
PREV (F2) to display information about the previous MountPoint in the list.
NEXT (F3) to display information about the next MountPoint in the list.
18.
CONT (F1) to return to CONFIGURE NTRIP Source-Table.
19.
CONT (F1) to return to CONFIGURE Additional Rover Options.
)
NTRIP via Internet
<Info:> Miscellaneous information if available.
SHIFT CONEC (F3) and SHIFT DISCO (F3) are now available in all applications to connect to and disconnect from the NTRIP Server.
GPS1200
201
202
GPS1200
NTRIP via Internet
26
Menu tree
Menu Tree
Menu Tree
MAIN MENU
|
|—— SURVEY
|
|
|—— PROGRAMS...
|
|
|—— MANAGE...
|
|
|
|
|—— JOBS
|
|
|
|—— DATA
|
|
|
|—— CODELISTS
|
|
|
|—— COORDINATE SYSTEMS
|
|
|
|—— CONFIGURATION SETS
|
|
|
|—— ANTENNAS
|
|
|—— CONVERT...
|
|
|
|
|—— EXPORT DATA FROM JOB
|
|
|
|
|
|
|
|—— EXPORT ASCII
|
|
|
|
|
|—— IMPORT DATA TO JOB
|
|
|
|
|
|
|
|—— IMPORT ASCII/DXF
|
|
|
|
|
|—— DXF IMPORT
|
|
|
|
|
|—— COPY POINTS BETWEEN JOBS
|
|
|—— CONFIG...
|
|
|
|
|—— SURVEY SETTINGS...
|
|
|
|
|
|
|
|—— ID TEMPLATES
|
|
|
|
|
|—— DISPLAY SETTINGS
|
|
|
|
|
|—— CODING & LINEWORK SETTINGS
|
|
|
|
|
|—— QUALITY CONTROL SETTINGS
|
|
|
|
|
|—— LOGGING OF RAW OBS
|
|
|
|
|
|—— POINT OCCUPATION SETTINGS
|
|
|
|
|
|—— SEISMIC RECORDING
|
|
|
|
|
|—— RING BUFFER, not for RX1250 with SmartAntenna
|
|
|
|
|
|—— INSTRUMENT SETTINGS...
|
|
|
|
|
|
|
|—— ANTENNA & ANTENNA HEIGHTS
|
|
|
|
|
|—— SATELLITE SETTINGS
|
|
|
|
|
|—— TIME ZONE
|
|
|
|
|
|—— INSTRUMENT ID
|
|
|
|
|
|—— SET NET PARAMETERS, GRX1200 Pro/GRX1200 GG Pro
|
|
|
|
|
|—— GENERAL SETTINGS...
|
|
|
|
|
|
|
|—— WIZARD MODE
|
|
|
|
|
|—— HOT KEYS & USER MENU
|
|
|
|
|
|—— UNITS & FORMATS
|
|
|
|
|
|—— LANGUAGE
|
|
|
|
|
|—— DISPLAY, BEEPS, TEXT
|
|
|
|
|
|—— START UP & POWER DOWN, GX1200/GRX1200
|
|
|
GPS1200
203
|
|
|
|
|
|
|
|——
|
|
|
|
|
|
|
|
|
|
|
|
|
|
|
|
|
|
|
|
|
|
|
|
|
|
|
|
|
|
|
|
|
|—— TOOLS...
|
|——
|
|
|——
|
|
|
|
|
|
|
|
|
|
|
|
|
|
|
|
|
|
|
|
|
|
|
|
|
|
|
|——
|
|
|
|
|
|
|
|
|
|——
|
|
|——
|
|
|——
204
|—— START UP, for RX1250 with SmartAntenna
INTERFACES...
|
|—— REAL-TIME
|
|—— ASCII INPUT
|
|—— NMEA OUT 1
|
|—— NMEA OUT 2, not for RX1250 with SmartAntenna
|
|—— EXPORT JOB
|
|—— HIDDEN PT
|
|—— TILT, not for RX1250 with SmartAntenna
|
|—— METEO, not for RX1250 with SmartAntenna
|
|—— SMARTANTENNA, for RX1250 with SmartAntenna
|
|—— INTERNET, not for GRX1200 Pro/GRX1200 GG Pro
|
|—— PPS OUTPUT, GX1200 with PPS/GRX1200 Pro/GRX1200 GG Pro
|
|—— EVENT INPUT, GX1200 with Event/GRX1200 Pro/GRX1200 GG Pro
|
|—— EXT OSC, GX1200
|
|—— ASCII REMOTE
|
|—— REMOTE
FORMAT MEMORY DEVICE
TRANSFER OBJECTS...
|
|—— CODELISTS
|
|—— CONFIGURATION SETS
|
|—— COORDINATE SYSTEMS
|
|—— GEOID FIELD FILES
|
|—— CSCS FIELD FILES
|
|—— FORMAT FILES
|
|—— JOBS, if internal memory is fitted
|
|—— SYSTEM RAM CONTENTS
|
|—— MODEM/GSM STATIONS
|
|—— IP HOSTS
|
|—— ANTENNA RECORDS
|
|—— PZ-90-TRANSFORMATION
UPLOAD SYSTEM FILES...
|
|—— APPLICATION PROGRAMS
|
|—— SYSTEM LANGUAGES
|
|—— INSTRUMENT FIRMWARE
CALCULATOR
FILE VIEWER
LICENCE KEYS
GPS1200
Menu Tree
Index
A
B
Absolute coordinate difference
Display ........................................................... 53
Limit exceeded ............................................... 53
Absolute difference between two points ............. 52
Access, MANAGE XX ......................................... 39
ACCNT .............................................................. 180
Activate
Code filter ...................................................... 61
Code group .................................................... 64
Adapter ............................................................... 29
Add point to line .................................................. 57
Angle, display format ........................................ 121
Antenna ............................................................. 113
Create ............................................................ 86
Edit ................................................................. 86
Recall deleted default .................................... 41
Set default height ......................................... 113
Antenna height, determine .................................. 29
Antennas
Default ........................................................... 85
Reset default settings .................................... 41
aNUM ................................................................ 126
Application programs memory, format .............. 171
Area .................................................................... 13
Close .............................................................. 40
Create ............................................................ 56
Edit ................................................................. 56
Icon ................................................................ 16
Open .............................................................. 40
Area code, filter ................................................... 61
Area management .............................................. 55
Areas, sorting and filters ..................................... 59
Arrow keys, right/left ........................................... 12
ASCII ................................................................... 93
ATCMD ............................................................. 156
Attribute, type in new .......................................... 64
Attributes, symbol ............................................... 19
Average ............................................................... 52
Limit, exceeded .............................................. 53
Averaging ............................................................ 52
Configure ....................................................... 46
Include/exclude coordinate triplet .................. 52
Averaging mode, define ...................................... 52
Battery .................................................................13
Icon .................................................................17
Status ...........................................................191
Beep ..................................................................125
Bluetooth .............................................................13
Icon .................................................................16
Identification number ....................................161
Index
C
Calculator ..........................................................174
CAPS .....................................................................7
Carrier ..................................................................29
CE ..........................................................................7
Choicelist .............................................................12
Close
Area ................................................................40
Line .................................................................40
CMND ................................................................160
CMR/CMR+, data format ...................................133
Code
Create .............................................................64
Edit .................................................................64
Code filter for lines and areas ..............................61
Code group
View, create, delete, activate, deactivate .......64
Code type, set .....................................................65
Codelist
Create .............................................................63
Edit .................................................................63
Management ..................................................63
Codes, sort
Codelist management ....................................64
Data management ..........................................61
Coding ...............................................................103
CompactFlash card .............................................13
Icon .................................................................16
Configuration set
Create .............................................................82
Default ............................................................81
Description .....................................................81
Edit .................................................................83
Recall deleted default .....................................41
Turn into user defined default .........................40
User defined ...................................................81
GPS1200
205
Configuration set wizard ......................................81
Configuration sets
Reset default settings .....................................41
Configure
Clip-On interface .............................................35
SmartAntenna interface ..................................34
Connect equipment and ports .............................21
Contrast, screen ................................................125
Coordinate system ...............................................73
Create .............................................................74
Edit .................................................................74
Turn into user defined default .........................40
Coordinate systems
Recall deleted default .....................................41
Coordinate types, display ....................................48
Copy points between jobs ...................................97
Create
Antenna ..........................................................86
Area ................................................................56
Code ...............................................................64
Code group .....................................................64
Codelist ...........................................................63
Configuration set ............................................82
CSCS model ...................................................79
Ellipsoid ..........................................................77
Geoid model ...................................................79
Job ..................................................................44
Line .................................................................56
Point ...............................................................48
Projection ........................................................77
Transformation ...............................................77
CSCS model ........................................................79
Create from CompactFlash card ....................79
Create from internal memory ..........................79
CTRL
GSM .............................................................159
CTS ...................................................................157
Current position, status ......................................184
Cut off angle ......................................................114
206
D
Data ..................................................................... 47
Export ............................................................. 89
Directory .................................................... 90
Import ............................................................. 93
Logged, view .................................................. 40
Data format, real-time ....................................... 133
Data log ............................................................... 40
Data management ............................................... 47
Date, local ......................................................... 116
Deactivate
Code filter ....................................................... 61
Code group .................................................... 64
Default
Recall deleted
Antenna ..................................................... 41
Configuration set ....................................... 41
Coordinate system .................................... 41
Devices ................................................... 154
Settings in display mask ......................... 102
Delete
Area ................................................................ 40
Code group .................................................... 64
Coordinate triplet ............................................ 53
Geoid/CSCS model ........................................ 79
Line ................................................................ 40
Observation files automatically .................... 107
Option in MANAGE ........................................ 39
Point from line ................................................ 58
DEVCE .............................................................. 154
Device ............................................................... 153
Create .......................................................... 156
Description ................................................... 129
Edit ............................................................... 156
Devices
Access CONFIGURE ................................... 154
Configuration ................................................ 153
Control .......................................................... 159
Digital cellular phone, icon .................................. 14
Dimensions, carrier and adapter ......................... 29
Display .............................................................. 125
Settings ........................................................ 101
Display coordinate types ..................................... 48
DMASK ............................................................. 101
Documentation ...................................................... 2
DXF ..................................................................... 93
GPS1200
Index
E
F
EAO, configure .................................................. 147
Edit
Antenna ......................................................... 86
Area ............................................................... 56
Code .............................................................. 64
Codelist .......................................................... 63
Configuration set ............................................ 83
Coordinate system ......................................... 74
Ellipsoid ......................................................... 77
ID template .................................................. 100
Job ................................................................. 44
Line ................................................................ 56
Measured coordinate triplet ........................... 53
Option ............................................................ 39
Point ............................................................... 48
Projection ....................................................... 77
Transformation ............................................... 77
Value in input field ......................................... 11
EGNOS, real-time data format .......................... 139
Elevation mask .................................................. 114
Ellipsoid management, access ........................... 76
Ellipsoid, create/edit ............................................ 77
Ellipsoids ............................................................. 76
End date .............................................................. 57
End time .............................................................. 57
ENTER .................................................................. 8
Equipment setup ................................................. 21
ESC ....................................................................... 7
European Geostationary
Navigation Overlay Service .......................... 139
Exceeded limit
Absolute coordinate difference ...................... 53
Average ......................................................... 53
DOP ............................................................. 105
Exclude coordinate triplet from averaging ........... 52
Expiry date, software maintenance ................... 193
Export
ASCII Data ..................................................... 90
Format ........................................................... 89
EXPRT ................................................................ 45
File Viewer .........................................................174
FILES .................................................................106
FILT .....................................................................40
Height smoothing .........................................138
Filter
Activate/deactivate for codes .........................61
Point, line and area codes ..............................61
Points in Stakeout application program ..........59
Points, lines and areas ...................................59
Symbol ...........................................................19
Filter settings, define ...........................................40
Firmware, version ..............................................193
Format
Export .............................................................89
Import .............................................................93
Format file, export ASCII .....................................89
Format memory device ......................................171
Formats .............................................................121
Frequency, change for radio ..............................163
Front panel ..........................................................21
Index
G
General settings ................................................119
Geoid model ........................................................79
Create from CompactFlash card ....................79
Create from internal memory ..........................79
GGA, key ...........................................................144
Graph, showing satellites ..................................178
GROUP ...............................................................64
GSI16 ..................................................................93
GSI8 ....................................................................93
H
Heating, screen .................................................125
Height filter ........................................................138
Height mode ........................................................77
Height smoothing ...............................................138
Height, pole .........................................................30
HELTH ...............................................................114
Hidden point, interface .......................................146
Hot keys, configure ............................................120
GPS1200
207
I
K
Icons ....................................................................13
ID .........................................................................47
ID template ..........................................................99
Create ...........................................................100
Delete ...........................................................100
Edit ...............................................................100
Identification number .........................................117
Bluetooth ......................................................161
IFACE
Data export .....................................................90
Status ...........................................................194
Illumination
Keyboard ......................................................125
Screen ..........................................................125
Import
Data ................................................................94
Format ............................................................93
IMPRT .................................................................45
Include coordinate triplet in averaging .................52
Increase point ID ...............................................100
Increasing NE, SE, SW, NW .............................122
Incrementation, point ID’s ..................................100
Instrument ID .....................................................117
Instrument settings ............................................113
Interface
Remote port ....................................................21
User ..................................................................7
Interface, description .........................................129
Interfaces... ........................................................129
Interfaces..., status ............................................194
Internal memory ...................................................13
Icon .................................................................16
Internet online status ...........................................13
Icon .................................................................15
Internet, interface ...............................................151
INTL .....................................................................40
Keyboard ......................................................... 7, 10
Illumination ................................................... 125
Lock and unlock ............................................. 10
Keys ...................................................................... 7
Alpha ................................................................ 7
Arrow ................................................................ 8
Combinations ................................................... 8
Function ........................................................... 7
Hot .................................................................... 7
Numeric ............................................................ 7
J
Job .......................................................................43
Create .............................................................44
Edit .................................................................44
208
L
Language
Select ........................................................... 124
Upload .......................................................... 173
Left, arrow key ..................................................... 12
Leica software
Access ............................................................ 31
Activate .......................................................... 31
Exit ................................................................. 31
Minimise ......................................................... 31
Leica, data format ............................................. 133
Length ................................................................. 57
LGO
Download, jobs ............................................... 43
Upload, jobs ................................................... 43
Licence key ....................................................... 175
Limit, exceeded
Absolute coordinate difference ....................... 53
Average .......................................................... 53
Symbol ........................................................... 19
Line
Close .............................................................. 40
Create ............................................................ 56
Edit ................................................................. 56
Icon ................................................................ 16
Open .............................................................. 40
Line code, filter .................................................... 61
Line management ............................................... 55
Line style
Coding ............................................................ 65
New line ......................................................... 57
Lines, sorting and filters ...................................... 59
Linework .............................................................. 67
LIST ................................................................... 119
GPS1200
Index
Local
Date ............................................................. 116
Time ............................................................. 116
Lock, keyboard .................................................... 10
LOG .................................................................... 44
Log raw observations ........................................ 106
Logged data, view ............................................... 40
Logging status ................................................... 186
M
MANAGE XX, access ......................................... 39
Manage..., getting started ................................... 39
Management
Antennas ........................................................ 85
Area ............................................................... 55
Codelists ........................................................ 63
Configuration sets .......................................... 81
Coordinate systems ....................................... 73
Data ............................................................... 47
Getting started ............................................... 39
Jobs ............................................................... 43
Line ................................................................ 55
Points ............................................................. 48
Mean page .......................................................... 52
Access ........................................................... 52
Mechanical reference plane ................................ 29
Memory, status ................................................. 191
Menu tree .......................................................... 203
Menu, select from ............................................... 10
MORE ................................................................. 40
MountPoint ........................................................ 200
MRP .................................................................... 29
MSAS, real-time data format ............................. 139
MTSAT
Satellite-based Augmentation System ......... 139
N
New version, upload ......................................... 173
New, create option .............................................. 39
NTRIP ............................................................... 195
Number of satellites, used in solution ............... 179
Index
O
Object, description ...............................................47
Occupation information, status ..........................189
Offset
Antenna, input ................................................86
Antenna, vertical .............................................30
External angle ..............................................147
Hidden point measurements ........................147
ON .........................................................................7
Open
Area ................................................................40
Line .................................................................40
Oscillator, external, icon ......................................13
OWI commands, status .....................................193
P
Page down .............................................................8
Page up .................................................................8
Personal Identification Number
GSM .............................................................160
Receiver .................................................37, 127
Pillar setup ...........................................................29
PIN .....................................................................160
GSM .............................................................160
Receiver .......................................................127
Point
Add to line ......................................................57
Create .............................................................48
Delete from line ..............................................58
Edit .................................................................48
Point code, filter ...................................................61
Point ID, incrementation ....................................100
Point management ..............................................48
Point occupation settings ...................................108
Points
Copy between jobs .........................................97
Sorting and filters ...........................................59
Points filter, Stakeout application program ..........59
Pole
Height .............................................................30
Setup ..............................................................30
Ports
Connect equipment ........................................21
Description ...................................................129
On receiver front panel ...................................21
Position mode ......................................................13
Icon .................................................................15
Position status, icon .............................................13
GPS1200
209
Power down .......................................................127
PRED .................................................................138
Prediction ...........................................................138
PRN ...................................................................178
PROG ....................................................................7
PROGS ..............................................................171
Projection management, access .........................76
Projection, create/edit ..........................................77
Projections ...........................................................76
Protection by PIN/PUK ........................................37
Pseudo Random Noise ......................................178
Q
Quick access to screens, configure ...................120
Quick coding ........................................................13
Icon .................................................................17
R
Radio
Change channels ..........................................163
Icon .................................................................14
Radio down, log raw observations .....................106
Radio Link Protocol ...........................................161
Raw observations, log .......................................106
Real-time ...........................................................131
Status ...........................................................179
Real-time device ..................................................13
Icon .................................................................14
Real-time status ...................................................13
Icon .................................................................14
Recall
Default attribute values ...................................50
Default display mask ....................................102
Deleted default
Antennas ...................................................41
Configuration set .......................................41
Coordinate system ....................................41
Devices ....................................................154
Last used attribute values ...............................50
Remote interface, port .........................................21
Remove, point from line .......................................58
Reset, default antenna settings ...........................41
Residual, largest, symbol ....................................19
Right, arrow key ...................................................12
RLP ....................................................................161
RT-1 ...................................................................137
RT-2 ...................................................................133
210
RTCM
Data format .................................................. 134
V3 ................................................................. 134
RTS ................................................................... 157
RX1200
Control key beep .......................................... 126
Exchange ..................................................... 125
With/without touch screen ................................ 2
S
S/N .................................................................... 178
Satellite status ................................................... 177
Satellites
Contributing .................................................... 13
Health ........................................................... 114
Icon .......................................................... 13, 14
Number used in solution .............................. 179
Settings ........................................................ 114
Visible ............................................................. 13
SBAS ......................................................... 133, 138
Key ............................................................... 143
Screen ................................................................... 9
Contrast ........................................................ 125
Heating ......................................................... 125
Illumination ................................................... 125
Select from menu ................................................ 10
Serial number .................................................... 193
SET-D ................................................................. 40
Setup ................................................................... 21
Post-processed
Reference on pillar .................................... 22
Real-time reference
Single tripod .............................................. 23
SmartAntenna + RX1250 .......................... 24
Real-time rover
All-on-pole ................................................. 28
Pole and minipack ..................................... 26
SmartRover, external radio ............................ 25
SHIFT .............................................................. 8, 13
Icon ................................................................ 17
Signal to noise ratio ........................................... 178
Skyplot .............................................................. 178
Smoothing heights ............................................ 138
Software upload ................................................ 173
GPS1200
Index
Sort
Codes
Codelist management ............................... 64
Data management .................................... 61
Points, line and areas .................................... 59
Sort settings, define ............................................ 40
SPACE .................................................................. 8
Space-Based Augmentation System ........ 133, 138
Staked out, symbol ............................................. 19
Stakeout, filter points .......................................... 59
Start date ............................................................ 57
Start time ............................................................. 57
Start up ............................................................. 127
STAT ................................................................. 177
Status ................................................................ 177
OWI commands ........................................... 193
Position .......................................................... 13
Survey Settings... ................................................ 99
Survey..., status ................................................ 177
SV health .......................................................... 114
Switching, Leica software and Windows CE ....... 31
Symbols .............................................................. 19
System information, status ................................ 193
SYSTM .............................................................. 171
V
Value, edit in input field .......................................11
VERS .................................................................180
Versions of system firmware .............................193
Vertical offset, antenna ........................................30
View
Code group .....................................................64
Geoid model ...................................................79
Logged data ...................................................40
Points, lines, areas, free code
Stored in job ..............................................40
W
WAAS, real-time data format .............................139
Wake-up sessions, symbol ..................................19
Wide Area Augmentation System ......................139
Wildcard ...............................................................60
Windows CE desktop, access .............................31
Windows CE, activate ..........................................31
Windows key symbol ...................................7, 8, 31
Wizard ...............................................................119
T
Text ................................................................... 125
Time slicing ....................................................... 135
Time zone ......................................................... 116
Time, local ......................................................... 116
Touch screen ...................................................... 10
On, off .......................................................... 125
Transfer objects ................................................ 172
Transformation management, access ................. 76
Transformation model ......................................... 78
Transformation, create/edit ................................. 77
Transformations .................................................. 76
Tripod setup ........................................................ 30
U
Units .................................................................. 121
Unlock, keyboard ................................................ 10
Upload, system files .......................................... 173
USER .................................................................... 8
User interface ........................................................ 7
User menu, configuration .................................. 120
Index
GPS1200
211
Ask your local Leica Geosystems dealer for more information about our TQM
program.
Leica Geosystems AG
Heinrich-Wild-Strasse
CH-9435 Heerbrugg
Switzerland
Phone +41 71 727 31 31
www.leica-geosystems.com
Original text
Printed in Switzerland © 2006 Leica Geosystems AG, Heerbrugg, Switzerland
Leica Geosystems AG, Heerbrugg, Switzerland, has been
certified as being equipped with a quality system which
meets the International Standards of Quality Management
and Quality Systems (ISO standard 9001) and Environmental
Management Systems (ISO standard 14001).
733504-5.0.0en
Total Quality Management: Our commitment to total customer satisfaction.