1
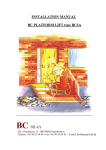
GeoSpotX LTD Advanced Location and Monitoring GPS Solutions systems GeoSpotX Web Client User Manual Version 2.0 Login Press the "Open web site" in the General tab or go to the server address in your internet browser. Enter a username and password of a user defined in SpotXServer. Check “Remember Me” to login automatically next time. Press "Log In". Interface The web client is composed of 3 sections for easy access: Menu bar (top), Control Panel (right) and the Map (main screen). [email protected] www.geospotx.com GeoSpotX LTD Advanced Location and Monitoring GPS Solutions systems Control Panel Devices list box List of all the devices authorized for the current user. Select the group of the devices to display (when more than one group is authorized). Select one or more devices to display on the map. Clicking a device will center the map on the device’s location. Press Ctrl for selecting more than one device. Calendar Enables displaying historic tracking information. Green colored dates are dates with tracking information. Press one of these dates to display the tracking information on the map. Press again on selected date to deselect. Deselecting current day will clear all tracks and will draw new tracks as vehicles start moving. Auto center Check to auto center the map on the selected device when the location is updated. Max Point Set the maximum track points to display on the map. [email protected] www.geospotx.com GeoSpotX LTD Advanced Location and Monitoring GPS Solutions systems Menu Menu -> Reports – select report type to open the report generator: Stop - device stopped for more than 5 min events. Ignition – ignition off events. Drive – all track points. Odometer – daily travel distance. Report Generator Type: report type Group: devices group Device: the device to generate the report for. From – To: report’s range. Generate Report: generate web HTML report. Export Report: download CSV format report. Menu -> Alarms Configure Alarms: open the Configure Alarms dialog. Triggered Alarms: open the Triggered Alarms dialog. Configure Alarms Displays all the configured alarms for the selected device. Delete: delete selected alarm. Edit: edit selected alarm. Open edit alarm dialog. Add: add new alarm. Open new alarm dialog. Report: generate triggered report for the selected alarm. [email protected] www.geospotx.com GeoSpotX LTD Advanced Location and Monitoring GPS Solutions systems Add Alarm dialog Name: alarm name. Set meaningful name for easy management. Enabled: check to enable the alarm. Disabled alarm will not trigger. Disable after one trigger: check to disable the alarm after it triggered once. Time limit: set time range. The alarm will trigger only within this range. Alarm Type: select alarm type: 1. Geofence - define a circular area geofence. a. IN & OUT - Trigger when device enters and exits the geofence. b. IN - Trigger when device enters the geofence. c. OUT - Trigger when device exits the geofence. Adjust the Geofence (displayed as a green circle) to the wanted location by dragging and zooming in/out the map. Press +/- to resize the Geofence. 2. Motion Start – trigger when device starts moving and transmitting data to the server (for devices with motion sensor). 3. Speed limit – trigger when device exeeds the defined speed limit. a. Set the wanted Speed Limit. 4. SOS – trigger when emergency button is pressed on device. 5. Stop – trigger when device stops for more than the defined stop duration. a. Set the wanted Stop Duration. Email Notification: an email notification is sent to this address when alert is triggered. Separate multiply address by semicolon. SMS Notification: an SMS notification is sent to this number when alarm is triggered. Triggered alarm dialog Displays all the alarms that triggered today. This dialog is displayed automatically when an alarm is triggered. [email protected] www.geospotx.com GeoSpotX LTD Advanced Location and Monitoring GPS Solutions systems Menu -> Tools Open in Google Earth – display selected devices on GoogleEarth. Displays only the tracks of the selected days on the calendar. Coordinates finder – displays coordinate offset by azimuth and distance. Press OK to calculate. [email protected] www.geospotx.com