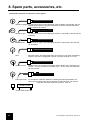
1
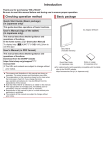
Flex Integral
BC
User’s Manual
YA-898 vers. 1.3
Versions log
List of versions for Y A-898
Rea son
Pages to
be
re place d
First edition
22
Ne w
version
Date of
e mission
Initials
1.00
10 12 92
AR
Ne w d ata for ultrasonic s caler typ e O a nd
turbine type B
1, 2, 25
1.10
20 12 94
AR
HygiFlex Vac Ultra, ultrasonic s caler typ e O
1, 2, 5, 6,
15, 1 6,
17, 2 3
1.20
28 03 95
AR
Correction
26
1.21
10 04 97
Ne w layout + corre ctio ns an d revised
ultras onic scal er type O texts
All
1.3
15 01 98
Flex Integral BC , Users Manual, 1998-01-03
1. Guide
1. Guide
Experience tells us that very few people read a manual before starting to operate new equipment.
This is why this manual is designed as a reference book. You don’t need to read it all before starting.
We do, however, suggest that you read chapter 2 GENERAL and the beginning of each chapter.
The manual focuses on how the equipment works. Should you wish to learn more about optimal methods
of working we recommend our Dental Software compendium. This especially applies if you have not operated Flex equipment before.
We constantly improve our equipment. Your equipment may therefore deviate on a few points from the
description in this manual.
See more about optimal working rouitnes in our
Ergonomics report.
0510
The following equipment is CE-marked
according to the Medical devices directive 93/
42/EEC, which is a subdirective of the EMC
directive 92/31/EEC:
Flex Integral BC
Flex surgical lamp
Flex Integral patient chair /2
Flex Integral BC , Users Manual, 1998-01-03
The equipment fulfills the demands of the following
standards:
EN 60601-1-2
EN 60601-1
EN 28601
EN 21942-1/4
EN ISO 9680
ISO 7494
ISO/DIS 11498
DS/EN 1640
DS/EN 980
prEN ISO 6875
EN ISO 9687
prEN 1041
prEN ISO 13294
3
Contents
1. Guide ..................................................................................................................................................... 3
2. General .................................................................................................................................................. 7
2.1 Power switches ............................................................................................................................... 7
2.2 Foot control ..................................................................................................................................... 7
2.3 Audio signals .................................................................................................................................. 7
3. Use ......................................................................................................................................................... 8
3.1 Surgical lamp .................................................................................................................................. 8
3.2 Patient chair .................................................................................................................................... 8
3.2.1 Control .................................................................................................................................... 8
3.2.2 Headrest ................................................................................................................................. 8
3.3 VarioFlex operator’s stool ................................................................................................................ 9
3.4 Assistant call .................................................................................................................................. 9
3.5 Cuspidor .......................................................................................................................................... 9
3.6 Cup filler .......................................................................................................................................... 9
3.7 Suction ........................................................................................................................................... 9
3.8 Instruments .................................................................................................................................. 10
3.8.1 Syringe .................................................................................................................................. 10
3.8.2 Motor ..................................................................................................................................... 10
3.8.3 Surgery plant ........................................................................................................................ 11
3.8.4 Turbine .................................................................................................................................. 12
3.8.5 Ultrasonic scaler ................................................................................................................... 12
3.8.6 Composite curing lamp ........................................................................................................ 14
3.8.7 Fibre optic probe ................................................................................................................... 14
3.9 Amalgam separator ....................................................................................................................... 15
4 Hygiene and care ................................................................................................................................. 17
4.1 Suction - HygiFlex Vac .................................................................................................................. 17
4.2 Suction - HygiFlex Vac Ultra ......................................................................................................... 17
4.3 Cuspidor and cup filler .................................................................................................................. 18
4.4 Syringe .......................................................................................................................................... 18
4.5 QuickFlex coupling ........................................................................................................................ 18
4.6 Motor ............................................................................................................................................. 18
4.7 Turbine .......................................................................................................................................... 19
4.8 Ultrasonic scaler ........................................................................................................................... 19
4.8.1 Type L .................................................................................................................................... 19
4.8.2 Type O ................................................................................................................................... 19
4.9 Composite curing lamp ................................................................................................................. 19
4.10 Fibre optic probe ......................................................................................................................... 19
4.11 Instrument pad ............................................................................................................................ 20
4.12 Surgical lamp .............................................................................................................................. 20
4.13 Surfaces ...................................................................................................................................... 20
4.14 Spray ducts ................................................................................................................................. 20
4.15 Amalgam separator ........................................................................................................................ 21
4.16 Hygiene routines ........................................................................................................................ 22
4.16.1 Daily .................................................................................................................................... 22
4.16.2 Holidays ............................................................................................................................. 22
4.17 Detergents and cleansing processes ......................................................................................... 22
5. Programming / adjusting .................................................................................................................. 23
5.1 Patient chair .................................................................................................................................. 23
5.2 Spray water ................................................................................................................................... 23
5.3 Extra ............................................................................................................................................. 23
44
Flex Integral BC , Users Manual, 1998-01-03
Contents
6. Maintenance and repairs ...................................................................................................................
6.1 Surgical lamp ................................................................................................................................
6.1.1 Bulb .......................................................................................................................................
6.2 Patient chair ..................................................................................................................................
6.3 QuickFlex coupling ........................................................................................................................
6.4 Motor ............................................................................................................................................
6.4.1 Fibre optic bulb .....................................................................................................................
6.4.2 O-rings ..................................................................................................................................
6.5 Turbine ...........................................................................................................................................
6.5.1 Fibre optic bulb. .....................................................................................................................
6.6 Ultrasonic scaler ...........................................................................................................................
6.6.1 Type L - replacement of the tip ..............................................................................................
6.6.2 Type O - replacement of the ferrite .......................................................................................
6.7 Composite curing lamp .................................................................................................................
6.7.1 Curing test ............................................................................................................................
6.7.2 Bulb .......................................................................................................................................
6.7.3 Light filter ..............................................................................................................................
7. Technical data .....................................................................................................................................
8. Spare parts, accessories, etc. ...........................................................................................................
9. Guarantee conditions .........................................................................................................................
10. Your feedback ....................................................................................................................................
Flex Integral BC , Users Manual, 1998-01-03
25
25
25
25
25
26
26
26
26
26
26
26
26
28
28
28
28
29
30
34
35
5
66
Flex Integral BC , Users Manual, 1998-01-03
2. General
2. General
2.1 Power switches
Switch the equipment on using (1).
The chair can be switched off separately using (2).
When the mains are switched on the buttons will light.
2
1
The unit will give 3 “beeps” as soon as it is operational.
2.2 Foot control
The foot control is mounted on a separate unit, which is normally placed
behind the chair. The pedal can be moved to the:
right
, left
or be pressed down
.
2.3 Audio signals
The unit can give different types of audio signals.
●
Operational signal: 1-3 short high-pitched notes (“beep”). Means
ready or understood.
●
Operation error signal: Low note given in the case of operational or
technical error.
●
Warning signal: Alternation between high and low notes. May mean
overheating. If the signal doesn’t stop when the equipment has
cooled, you ought to call a service technician.
Flex Integral BC , Users Manual, 1998-01-03
7
3. Use
3. Use
In the following we give a description of how the equipment functions
when it leaves the factory. See chapter 5 for possibilities on how to
change the functions.
3.1 Surgical lamp
Switch on/off using...
...switch (1) towards (B)
Switch on or alternate between 3 light intensities using...
...switch (1) towards (A).
When you switch the lamp on it always has the light intensity last used.
3.2 Patient chair
3.2.1 Control
Regulate the chair inclination and height using...
...pedal (1) towards either
N
,S
,E
,W
Choose a programme position using...
...pedal (2) towards either E
or W
Backside of the chair basis
Towards N
the chair will return to the prior position.
Towards S
you reset to the zero position.
Stop a programme movement by...
...touching any of the 2 pedals.
Should the chair knock against e.g. your legs, the chair will automatically
stop the movement and lift itself approximately 5 cm.
3.2.2 Headrest
The headrest can easily be pulled out. To push it back, press lock button
(1) or (2) home.
To adjust the headrest inclination, loosen the lock (3).
88
Flex Integral BC , Users Manual, 1998-01-03
3. Use
3.3 VarioFlex operator’s stool
The chair is operated with the help of the 2 handles.
When you pull the handle (1) up, you lift/lower the chair.
When you push the handle (1) down, you can adjust the position of the
back rest and thus the depth of the stool.
VarioFlex operator chair, top
view
When you pull the handle (2) up, you adjust the seat inclination.
3.4 Assistant call
Activate by...
...pressing the foot control down
place.
while all instruments are in
You can alternatively connect, for example, a door opener.
3.5 Cuspidor
Start the cuspidor flush for 30 seconds by...
...pressing the foot control pedal to the left
ments are in place.
while all instru-
Interrupt the cuspidor flush by...
...moving the foot control pedal to the left
are in place.
while all instruments
3.6 Cup filler
Start/interrupt the cup filler by...
...moving the foot control pedal to the right
ments are in place..
while all instru-
3.7 Suction
The suction is activated when a suction tube is taken down. When
working without an assistant, you can pull the suction holder out.
Flex Integral BC , Users Manual, 1998-01-03
9
3. Use
3.8 Instruments
Instruments with Quick-Flex coupling are disconnected by pressing the
2 lock buttons (1) and (2) down. You connect the instruments by
pressing the instrument down over the pointed end of the coupling. You
can only connect instruments as specified in your order.
If you try to connect an instrument wrongly an operation error signal will
be emitted and the instrument cannot be activated.
The foot control activates the first instrument taken off the suspension
(not the syringe).
Do not activate the foot control pedal while changing an instrument,
unless the foot control is at present controlling another instrument.
The connection must be dry when an instrument is connected
1
2
3.8.1 Syringe
Draw off air using the right switch (1) and drain off water using the left
switch (2).
As an accessory the syringe can be fitted with a heating element. A
green light emitting diode indicates that the heating element is on.
3.8.2 Motor
Take the motor and...
●
activate by moving the foot control to
- the right
- the left
: the motor rotates clockwise
: the motor rotates anti-clockwise which is indicated
by a „beep“
.
●
Choose a spray combination by keeping the foot control pedal
pressed down
, until the desired combination is displayed on
the instrument bridge light emitting diodes (7). Green = water, Yellow
= air. Four combinations are possible (spray, air, water, nothing).
An automatic double chip blow follows after use with water.
The unit can be programmed to produce a chip blow when the pedal is
activated shortly to the right, and to switch on/off the fibre optical light
when the pedal is pressed down shortly.
Talk to your technician about this possibility
1010
Flex Integral BC , Users Manual, 1998-01-03
3. Use
3.8.3 Surgery plant
As an accessory the unit can be fitted with a surgery plant making it
possible to cool with sterilized salt water when the motor rotates. The
normal spray cooling and chip blow functions are automatically disconnected.
Mounting and activating
1) Mount the frame on the right side (or left side) handle on the bridge
(1).
2) Connect the cable to the socket under the bridge (2).
3) Place the salt water bag in the rubber sleeve and hang it on the frame
(3).
4) Clip the 2 clips to either end of the motor tube (where it feels hard)
and mount the thick tube on the clips (4).
5) Draw the piston back while placing the soft part of the tube in the
groove (5).
6) Connect the tube to the bag (6) and pump the rubber sleeve up (7).
7) Take the surgery angle piece.
8) Press the P-button under the instrument bridge (8)
9) Press the pedal downwards.
10) Put the motor back.
The yellow light emitting diode (7, page 10) now flashes to indicate the
surgery position.
Arranging for sterile operation
11) Fit sterilized motor cover, instrument pad, and hand- and
angle-piece.
12) Connect the thin tube to the external duct of the angle-piece (9).
13) Connect the thin and the thick tube (10).
The bridge seen from
below
You disconnect or connect the water cooling by keeping the foot control
pressed down
.
Change to normal motor function by repeating item 7 - 10.
Flex Integral BC , Users Manual, 1998-01-03
11
3. Use
3.8.4 Turbine
The burr is mounted using a push button chuck. Press the burr into
place.
-
The turbine must not rotate without a burr.
Use only burrs and diamonds with a diameter of 1.59 - 1.6 mm and a
maximum length of 26 mm.
The burr must not be mounted on the turbine when out of use for a
length of time.
Take the turbine and...
● activate by pressing the foot control pedal to the right
or left
.
The speed of the turbine is not regulated by the pedal (one step).
●
choose a spray combination by keeping the foot control pedal
pressed down
, iuntil the desired combination is displayed on
the instrument bridge light emitting diodes (7, page 10). Green =
water, Yellow = air. 2 combinations are possible (spray, nothing).
An automatic double chip blow follows after use with water.
The unit can be programmed to produce a chip blow when the pedal is
activated shortly to the right, and to switch on/off the fibre optical light
when the pedal is pressed down shortly.
Talk to your technician about this possibility.
3.8.5 Ultrasonic scaler
1) Take the scaler and choose the power level from 3 different levels by
keeping the foot control pedal pressed down
, until the desired
level is indicated on the instrument bridge light emitting diode (7,
page 10). If no diode is on = minimum. One diode = medium, both on
= maximum.
2) Activate by pressing the foot control pedal to the right
or left
.
Ultrasonic scaler type L:
- Avoid unnecessary wear!
- When handling, hold the handle and not the tip.
- Work using as low a power level as possible.
- Work using as low a contact pressure as possible. (Should the
contact pressure exceed 25 g the instrument automatically closes
down).
- Only trace the side of the tip over the tooth. (If the instrument makes
a noise then the work angle is incorrect).
- Only use on teeth (not on: e.g. ceramics).
The tip must be changed when the front part is shorter than the incisions
on the supplied wrenches.
1212
Flex Integral BC , Users Manual, 1998-01-03
3. Use
Ultrasonic scaler type type O:
The ultrasonic scaler tip is a sophisticated instrument. It is made of
titanium because titanium is the optimal material for transmitting and
withstanding ultrasonic vibrations. The tip has a three dimensional
motion moving in small circles very small diameter (less than 0.02 mm).
It operates at a much higher frequency (42,000 Hz) than other ultrasonic
scalers. Both contributes to its clinical and practical efficiency.
In order to fully benefit from the rotational tip movement and high frequency, it is important that the instrument is properly handled and
applied.
• Always use the instrument parallel to the tooth, with the sides of the
tip applied to the tooth’s surface.
• Do not apply the tip at right angles to the tooth surface. Do not use
the tip as a pick or as you would a sonic/air driven scaler. This will
scratch the enamel/cementum.
• Always apply very lightly to the tooth surface. Use short, sweeping,
paintbrush-like, back and forth strokes over the surface being
treated. Remember - KEEP THE TIP MOVING in this way back and
forth with the end of the tip probing the pocket when necessary.
Increasing the contact pressure will neither increase the efficiency
nor improve the quality or speed of the treatment.
When using the ultrasonic scaler tip in this Way, you will achieve:
• Easy access to any tooth surface without awkward positioning of
handpiece and hand. As the tip rotates and is “active’ on all sides,
you have a 360, highly efficient working surface without “dead
zones”.
• The rotational motion brushes rather than “hammers” the tooth. This
has a gentle polishing effect on the tooth. It is generally much less
painful for the patient and less tiring for the operator.
For those users used to air driven and/or other ultrasonic scalers: Do not
mistake the “hammering’ effect in other scalers for scaling efficiency. It
is as much the cavitation effect created by the ultrasonic frequency as
the mechanical movement which breaks down tartar.
Settings:
• Always use as low a power level setting as possible.
The power setting changes the tip amplitude but not the frequency
(no. of cycles per second) which is constantly 42,000 Hz. The
amplitude is the size or diameter of the rotational tip movement. The
ultrasonic scaler has the smallest amplitude of any ultrasonic scaler
available. It is this which attenuates the painful hammering evident in
other scalers.
• Always use as much irrigation as practically possible. This will
reduce the wear on the tip, thereby prolonging the life expectancy of
the instrument.
Low power level and ample irrigation (cooling) also ensure less patient
discomfort.
When using Thin Line instruments with especially thin tips, Flex Dental
recommend working with max. 50% of the maximum power level.
Flex Integral BC , Users Manual, 1998-01-03
13
3. Use
Caution:
➤ Care should be taken to avoid contact with porcelain crowns,
veneers and temporary restorations.
As in any ultrasonic scaler the vibrations may provoke margin leakage leading to marginal staining and loss of retention in restorations
of the above-mentioned types.
➤ Avoid touching the patient’s lips, tongue or mucosa with the uncooled
part of the instrument tip. The uncooled part of the tip can be
unpleasantly hot. Use the handmirror to keep the lips and tongue
from coming into contact with the tip or apply a lip protector.
Always use as large a water flow as practically possible to avoid unnecessary wear of the instrument.
Always empty the handpiece for any water before applying a new instrument. Wipe off any drops of water before applying an instrument.
Be careful not to expose the instrument to any bumps.
Always make sure that the following parts are tightly secured:
● The black ferrite rod on instruments. (Use special tongue and pin see figure).
● Files in ENDO-instrument. (Carefully use special key).
● Plastic hut on CEM-instrument. (Use your fingers and tighten hard).
See the list of type 0 scalers in chapter 8.
3.8.6 Composite curing lamp
Take the composite curing lamp and...
1) activate for 40 seconds by pressing the foot control to the right
or left
.
The unit will give a „beep“ when starting, half way, and at the end.
2) prolong the duration of light exposure with 20 seconds by activating
the pedal to the right
or left
, while the lamp is
switched on.
-
Never look directly or indirectly into the intense halogen light!
Flex can deliver protective looking glasses, protective shield, and
alternative light probes on demand. See chapter 8.
3.8.7 Fibre optic probe
The fibre optic probe will always be active, as soon as you take it.
The unit can be programmed so you switch on/off the fibre optical light
by pressing the pedal down shortly.
Talk to your technician about this possibility.
1414
Flex Integral BC , Users Manual, 1998-01-03
3. Use
3.9 Amalgam separator
As an accessory the unit can be fitted with a Dürr Amalgam separator.
The present level of waste content in the amalgam receptacle is only
measured when the unit is switched on, i.e. the unit ought to be switched
on every morning even if it has not been switched off the previous
evening.
During normal operation the green section lights up (1).
When the receptacle is 95% full, the orange section lights up (2), the
yellow section lights up (3) and an alarm signal sounds.
Switch the alarm off using (3) if you don’t want to change the receptacle
right away. The yellow section will continue to remind you that the
receptacle needs changing soon.
When the receptacle is 100% full the alarm can no longer be suspended.
The receptacle must be changed.
Display on amalgam
separator
Flex Integral BC , Users Manual, 1998-01-03
15
3. Use
1616
Flex Integral BC , Users Manual, 1998-01-03
4. Hygiene and care
4 Hygiene and care
4.1 Suction - HygiFlex Vac
The HygiFlex Vac-system rinses the suction using either clean water or
a dilution of Flex Vac Clean and water. (Can not be used at the same
time as HygiFlex Rinse.)
If the unit is not fitted with HygiFlex Vac the tubes are rinsed using a
separate tank.
1
3
2
1) Remove the covers on the two suction hose nipples.
2) Connect the tubes to thetwo2 connectors (1) and pull down slightly
to activate the control.
3) Open door (2) and pump two portions of Flex Vac Clean into the
mixing tank (3) and start the rinsing using the P-button (4).
When beginning one “beep” will sound, when ending three “beeps” will
sound.
(When the bottle with Flex Vac Clean is empty, unscrew the pump and
use it on the new bottle).
4) Disconnect the tubes from the unit and press the filters out (5).
5) Wash the filters, filter holders, and covers in a dish washer. Sterilize
the covers.
6) Lubricate the O-rings on the filter holders using Flex silicone grease
before inserting clean filters.
The bridge seen from
below
Change the suction tubes at least every 3 months.
Filters and tubes contain mercury that must be handled in a responsible manner.
4.2 Suction - HygiFlex Vac Ultra
The HygiFlex Vac Ultra system rinses the suction using either clean
water or a dilution of Orotol Ultra and water.
1) Remove the covers on the two suction hose nipples.
2) Connect the tubes to the two connectors (1) and pull down slightly to
activate the control.
3) Load one spoonful of Orotol Ultra into the funnel behind the door (2).
If necessary, tap lightly on the funnel to ensure that all the powder
reaches the container.
4) Activate the process by pressing the P-button (4) under the instrument bridge.
The process will last approx. 5 3/4 min. The unit will “beep” once when
beginning and three times when ready for use.
When you want to rinse with clean water between two patients, just do
not add the disinfectant.
Flex Integral BC , Users Manual, 1998-01-03
17
4. Hygiene and care
5) Disconnect the tubes from the unit and press the filters out.
6) Wash the filters, filter holders and covers in a dish washer.
Sterilize the covers.
7) Lubricate the O-rings using Flex silicone grease before inserting
clean filters.
- Change the suction tubes at least every 3 months.
- Filters and tubes contain mercury that must be handled in a
responsible manner.
- Orotol Ultra is aggressive. Any waste must be removed immediately,
e.g. using the suction. Wear gloves and goggles!
- Read the warning on the container!
- Never wash HygiFlex Vac Ultra with any other disinfectant detergents
than Dürr Orotol Ultra.
4.3 Cuspidor and cup filler
1) Remove the gold trap and rinse it.
The contained material can contain mercury that must be handled in
a responsible manner.
2) Turn the flushing pipe to a side and remove the bowls for cleaning
(not in a dish washer).
3) Lubricate the O-rings using Flex silicone grease before putting the
bowls back in place again.
Change the gold trap filter insertion at least every 3 months.
Clean the cuspidor valve regularly: Press the button for two seconds.
4.4 Syringe
The syringe jackets can be autoclaved. Press the lock button (1) and
pull the jacket off.
- Do not pull the tube!
- You remove the tip of the cover by loosening the union (2).
4.5 QuickFlex coupling
-
-
The QuickFlex couplings must not be autoclaved but only surface
disinfected.
Lubricate the couplings according to requirement using Lubrimed
grease (also used for the turbine).
The O-rings must not be lubricated with silicone grease.
4.6 Motor
The motor jacket (1) can easily be removed for autoclaving.
- Do not pull the tube!
- The motor itself should only be surface disinfected.
1818
Flex Integral BC , Users Manual, 1998-01-03
4. Hygiene and care
4.7 Turbine
The turbine is supplied with a nozzle cleaner and grease gun.
1) Cleanse the tube‘s exterior using a toothbrush dipped in disinfectant.
2) Cleanse the spray ducts using the nozzle cleaner and then blow-dry
them with the syringe.
3) Wrench the grease gun until the grease is visible at the tip.
4) Insert the tip in the burr aperture and wrench the grease gun a halfturn.
5) Insert the burr in the turbine and activate the turbine without spray for
approximately 10 sec.
6) Remove the burr and remove excess grease.
The completely dry turbine and the grease gun can be autoclaved.
The turbine must be lubricated at least twice a day before and after
autoclaving. After the autoclaving the turbine must be removed from the
autoclaver immediately.
4.8 Ultrasonic scaler
4.8.1 Type L
Cleanse the scaler exteriorly using a toothbrush dipped in disinfectant.
The completely dry scaler can be autoclaved.
After the autoclaving the scaler must be removed from the autoclaver
immediately.
4.8.2 Type O
Cleanse the scaler exteriorly using a toothbrush dipped in disinfectant.
The completely dry scaler or the tip can be autoclaved.
Take the instrument off the handle, and protect it with the sterilization
cap before autoclaving.The handle can be sterilized at a temperature of
up to 121°C, the instrument at up to 180°C.
4.9 Composite curing lamp
The composite curing lamp is exteriorly cleansed using a cloth dampened with disinfectant. Remaining composite material is removed
immediately using surgical spirits.
The completely dry light probe can be autoclaved.
After autoclaving the light probe must be removed from the autoclaver
immediately.
4.10 Fibre optic probe
The fibre optic probe is exteriorly cleansed using a cloth dampened with
disinfectant. The completely dry fibre optic probe can be autoclaved.
After autoclaving the fibre optic probe must be removed from the
autoclaver immediately.
Flex Integral BC , Users Manual, 1998-01-03
19
4. Hygiene and care
4.11 Instrument pad
The instrument bridge instrument pad is cleansed in a dish washer and
then autoclaved. Grease residue and the like is removed with benzine.
4.12 Surgical lamp
The operation lamp parabola is cleansed using alcohol. The transparent
cover is cleansed using an antistatic detergent.
4.13 Surfaces
The surfaces of the equipment are cleansed using soap suds of either
soft soap or soap flakes. Lacquered surfaces are treated with Flex Make
Up.
Rubber parts are cleansed using benzine.
The surfaces can be disinfected using a cloth.
4.14 Spray ducts
The HygiFlex Rinse system keeps the bacteria content in the unit water
system is kept at a low level. (Can not be used together with the
HygiFlex Vac.)
If the unit has not been fitted with HygiFlex Rinse the spray ducts ought
to be rinsed in the morning by activating the spray.
Night rinse
1) Turn the cuspidor flushing pipe (1) to the side and place the instrument holder with the intermediate couplings (2) in the bowl.
2) Connect the extension tube to the cup filler tap (3).
3) Remove instruments, contra-angles, and motor, and syringe jackets.
4) Set all suspensions in vertical position and lock them using the lock
button (4) under the instrument bridge.
5) Connect the suspensions to the instrument holder.
In this position the unit will rinse using short flushes with regular
intervals. (The unit must be switched on. The air compressor and water
supply must not be disconnected). Return to normal position following
the opposite procedure.
The bridge seen from
below
Morning rinse
With the thus prepared unit you can activate a morning rinse by moving
the pedal to the right
or left
.
A morning rinse lasts approximately 15 minutes. During the process the
two light emitting diodes on the instrument bridge will flash. When starting one „beep“ will sound. When ending 3 „beeps“ will sound.
2020
Flex Integral BC , Users Manual, 1998-01-03
4. Hygiene and care
4.15 Amalgam separator
The amalgam receptacle must be changed every 6 - 9 months.
1) Switch the unit off and carefully remove the side cover plate by
loosening the 2 lock screws (1) and (2) with a coin.
2) Unscrew the lid on the new receptacle.
3) Put protective gloves on and change the receptacle (3).
4) Change the coarse filter (4) and put the old filter in the filled
receptacle.
5) Pour the disinfectant, that is supplied with the new receptacle, in the
filled receptacle and close it so the markings on the lid and on the
receptacle meet.
If the receptacle is fitted incorrectly an alarm may sound where the
orange section flashes and the audio alarm signal sounds.
Remember to order a new receptacle.
Flex Integral BC , Users Manual, 1998-01-03
21
4. Hygiene and care
4.16 Hygiene routines
4.16.1 Daily
In the morning
After each patient
Evenings after the
last patient
1 Rinse the spray ducts Rinse the suction with Rinse the suction with
clean water
disinfectant
2 Insert gold trap and
suction filters
Clean the equipment
when necessary
Remove the suction
filters and gold trap
3 Disinfect the
equipment
Disinfect the
equipment
4 Mount sterile
accessories and
prepare sterile
instruments
5 Place a new plastic
cup
Mount sterile
accessories and
prepare sterile
instruments
Place a new plastic
cup
Cleanse the equipment
and then treat with Flex
Make Up
Mount HygiFlex Rinse
accessories
Cleanse loose parts
and sterilize according
to specification
4.16.2 Holidays
Before closing for holidays or longer periods where the equipment is not
used, the motors and QuickFlex couplings must be removed by
unscrewing from the suspensions and then cleansed and dried.
4.17 Detergents and cleansing processes
When we in the text refer to a dish washer, we mean a thermo disinfector
for surgical use that operates at a temperature of 90o C. Only thermo
disinfect the parts that specifically have been approved for thermo
disinfection, as stated in this manual.
When we in the text refer to surface disinfection, we mean isopropylic
alcohol solution or surgical spirits denaturalized with isopropylic alcohol
or with Dürr FD-322 disinfectant.
When we in the text refer to autoclaving, we mean an autoclaver that
operates using steam at max. 135o C and 2.2 bar. Only autoclave parts
that specifically have been approved for this treatment, as stated in this
manual. Frequent autoclaving makes the instruments age faster.
Disinfectants that contain acid, phenols, halogens or sulpho compounds
can damage the equipment surfaces.
5. Programming / adjusting
5. Programming / adjusting
5.1 Patient chair
You can programme 2 positions and the zero position.
1) Set the chair in the desired position for programming.
2) Press the programming button on the chair continuously while
moving the position selector (2) to the:W
positions) or S
,E
(the two
(zero position). Release the programming
button.
Patient chair basis
5.2 Spray water
Lift the instrument pad for adjusting the spray water to the instruments
with the key at (1).
The key is fixed beneath the bridge at (2).
5.3 Extra
The following can be programmed/adjusted by a service technician:
Extra functions
● Pedal controlled chip blow (pedal shortly to the right). That means a
short time delay between the activation of the foot control, and the
activation of the instrument.
● Pedal controlled activation of the fibre optic light probe (pedal shortly
pressed down).
Functions that can be removed
● Automatic chip blow
Functions that can be changed/adjusted
● Cup filler and cuspidor bowl water flow
● Turbine speed
● Cooling air flow of the composite curing lamp
● Ultrasonic scaler power
● Syringe air and water flow
● Airflow to motor/turbine/spray.
5. Programming / adjusting
2424
Flex Integral BC , Users Manual, 1998-01-03
6. Maintenance and repairs
6. Maintenance and repairs
Here we describe minor repairs that you may want to do yourself.
6.1 Surgical lamp
6.1.1 Bulb
Do not touch the bulb or the reflector with unprotected fingers. Use
gloves or a cloth.
1) Switch the lamp off.
2) Loosen the cover screw (1) and remove the cover.
3) Press the spring (2) back, turn anti-clockwise and remove.
4) Pull the wire connected bulb out and replace.
Backside of the lamp
6.2 Patient chair
If the chair gives a constant “beeping” sound then it has to be
synchronized.
1) Switch the chair mains off (1)
2) Switch the chair mains on while pressing the position selector (2)
down.
When you let go of the position selector the chair will first be set in zero
position and then move to semi-reclined position. Finally the chair will
confirm the synchronization with 3 “beeps”.
Patient chair basis
6.3 QuickFlex coupling
In the case of leaks between the QuickFlex coupling and instrument,
change the 3 O-rings.
Flex Integral BC , Users Manual, 1998-01-03
25
6. Maintenance and repairs
6.4 Motor
6.4.1 Fibre optic bulb
Motors with INTRA-coupling have built-in halogen bulbs.
Do not touch the bulb with unprotected fingers. Use gloves or a cloth.
1) Pull the motor jacket (1) off.
2) Change the bulb (2)
6.4.2 O-rings
In the case of leaks between the motor and angle-piece, change the 3 Orings (3) on the connection tube.
6.5 Turbine
6.5.1 Fibre optic bulb.
Do not touch the bulb with unprotected fingers. Use gloves or a cloth.
1) Unscrew the rear part (1) from the turbine.
2) Change the bulb
6.6 Ultrasonic scaler
6.6.1 Type L - replacement of the tip
The tip must be replaced when the front part is shorter than the
incisions (1) on the supplied wrenches.
1) Place the wrenches on the handpiece and tip respectively so the
“claws” grip the holes.
2) Hold the handpiece with one wrench and unscrew the tip with the
other.
3) Dry the thread and contact surfaces with a clean, dry, soft cloth and
screw the new tip on.
If the tip is not fitted tightly it will give a screeching sound when used.
Always use the 2 supplied wrenches to change the tip or else the scaler
may be permanently damaged.
2626
Flex Integral BC , Users Manual, 1998-01-03
6. Maintenance and repairs
6.6.2 Type O
The instrument tip and the ferrite rod in particular are susceptible to
impacts. The tip may be bent and the ferrite rod may break into pieces.
➤ Always handle carefully. Do not drop on the floor. Replace any
dropped, bent or otherwise damaged instrument.
➤ In the case that an instrument has been dropped while in the
handpiece, it is important to check the ferrite rod. If broken in the
handpiece, it is extremely important to carefully remove any pieces
and debris of broken ferrite from the inside of the handpiece.
Replacement of the ferrite rod
If the oscillations are not transmitted properly to the instrument, it may
be caused by a worn or broken ferrite rod.
1) Hold the instrument with the tongs.
2) Stick the pin through the small hole close to the ferrite rod.
3) UnscrewtheferriterodandreplaceitWthanewone. Tighten properly.
Note! lt is recommended to perform a regular check to make sure that
the ferrite rod is tightened properly.
Instrument life time
As the instrument tip wears due to use, the effectiveness of the instrument decreases. When a tip no longer seems efficient,
● Check and tighten the ferrite rod
● Check that the inside of the handpiece is free of water and foreign
bodies.
● If this does not correct the problem, replace the ferrite rod.
● If there is still no improvement, then it is necessary to replace the
instrument.
Several factors contribute to the wear of instruments:
The number of pa-tients treated,
The type and consistency of calculus deposits in patients,
The quantity of irrigant being used, etc.
The life time may therefore vary considerably from instrument to instrument.
●
●
●
The average life time for an instrument tip is estimated to 3-4 months
when normal work is undertaken with the one instrument.
Note!
➤ The form and shape of the instrument tips are vital to their function
and lifetime.Thus,do not attempt to bend, sharpen or otherwise alter
the tip shape.
Flex Integral BC , Users Manual, 1998-01-03
27
6. Maintenance and repairs
6.7 Composite curing lamp
6.7.1 Curing test
With the supplied tester you can measure the curing ability of the lamp
using different plastics.
The tester
1) Put the tester on a white piece of paper with the small opening
downwards, fill it with plastic and cover the plastic with a matrix.
2) Place the tip of the light probe in close contact with the matrice and
expose the sample for 40 seconds.
3) After 5 minutes the plastic is pushed out of the mould and the soft
material is removed. Measure the Polymerization depth using a slide
gauge.
There are two curing pieces, one with a diameter of 18 mm, and one
exceeding 19 mm.
Sufficient polymerization depth in a human tooth is 40-60% of the
thickness of the test body if you use the curing piece exceeding 19 mm
in diameter, and 60-80% if you use the curing piece with a diameter of
18 mm.
You ought to test the curing ability of the composite lamp regularly to
avoid slow deterioration.
If the curing ability is reduced, the cause may be that the bulb is losing
its power, or that the light filter is dirty, or that the light diode is
damaged.
6.7.2 Bulb
Do not touch the bulb or reflector with unprotected fingers. Use gloves or
a cloth.
1) Remove the composite curing lamp from the unit and pull the light
diode (1) from the handpiece.
2) Unscrew the bolt (2) and remove the cover (3).
3) Release the reflector and bulb (4) by pressing down and outward.
4) Hold the printed circuit and pull the reflector off. Insert the new one.
5) Fasten the reflector behind the cams. Assemble the lamp and mount
it on a suspension.
6) Hold the tip of the light diode against a thick layer of paper and
activate the composite curing lamp.
7) If the powerful light is not concentrated in the middle of the field, the
position of the bulb must be adjusted.
6.7.3 Light filter
Open the lamp as described in item 6.7.2 and remove the filter (5) and
cleanse with a dry cloth. When you assemble the lamp again, note that
the reflecting surface of the filter must face the bulb.
2828
Flex Integral BC , Users Manual, 1998-01-03
7. Tekniske data
7. Technical data
Flex Integral BC unit
Rated voltage: 220-230 V +/- 10%, 50 Hz.
Rated power: 2,200 VA
Size of group fuse: 10 A
Water pressure: Min. 2.5 bar, max. 5 bar
Air pressure: Min. 5.5 bar, max. 6 bar
Compressed air consumption: 40 l/min (5 bar)
Indoor temperature: 15°C - 35°C
Flex motor
Speed: 100 - 40,000 r.p.m.
Speed control principle: non-linear
Torque: max. 1.5 N cm (contra-angle 1:1)
Flex turbine
Speed:
turbine type B 295,000 r.p.m. (unloaded)
turbine type P 420,000 r.p.m. (unloaded)
Speed control principle: step
Flex scaler
Frequency:
scaler type O 42 kHz
scaler type L 45 kHz
Flex composite curing lamp
Wavelength: 400 - 500 nm
Flex surgical lamp
Light intensity: 22,000, 15,000 and 8,000 Lux
Dürr amalgam separator
Total capacity: max. 5 l/min
Flex Integral BC , Users Manual, 1998-01-03
29
8. Spare parts, accessories, etc.
8. Spare parts, accessories, etc.
This chapter contains a list of tools, lubrication and service agents, spare parts and accessories that
can be purchased.
Parts that are supplied with the equipment are marked with an asterisk (*)
Tools
Order No.
Fork spanner 13/22 mm ................................................................................................................... MC-453
Fork spanner 13 mm ........................................................................................................................ MC-500
Allen key for chair 2.5 mm ................................................................................................................ YA-088
Allen key 3 mm ................................................................................................................................. YA-050
Allen key 4 mm ................................................................................................................................. YA-004
Fork wrench for headrest ................................................................................................................. SD-388
Scaler tip wrenches inc. tip measurer * ........................................................................................... SD-218
Turbine nozzle cleaner * ................................................................................................................... SC-973
Lubrication
Tube Flex silicone grease ................................................................................................................. YR-002
Grease gun turbine * ........................................................................................................................ SA-051
Lubrimed grease for grease gun turbine, 6 cartridges ..................................................................... SD-318
O-rings
QuickFlex coupling * ........................................................................................................................ SC-740
Coupling piece on motor * ................................................................................................................ SA-024
Bulbs
Flex Integral
Flex Integral
Flex Integral
Flex Integral
turbine ......................................................................................................................... HE-005
motor with INTRA-coupling ......................................................................................... HE-005
composite curing lamp ............................................................................................... WH-004
surgical lamp .............................................................................................................. WH-001
Accessories/ spare parts
4 handles for instrument bridge/ surgical lamp ............................................................................... SD-399
Instrument pad ................................................................................................................................ AC-543
Flex 3-function syringe jacket (complete) ........................................................................................ SD-407
Flex 6-function syringe jacket (complete) ........................................................................................ SD-408
Syringe type „S“ syringe jacket (complete) ..................................................................................... SD-310
Flex syringe tip ................................................................................................................................. SD-214
Flex Integral motor jacket ................................................................................................................ SD-216
Scaler tip .......................................................................................................................................... SD-217
Composite curing lamp tester .......................................................................................................... UC-665
Standard fibre optic diode, 8 mm, 70°, for Flex Integral composite curing lamp .............................. SD-220
Alternative fibre optic diode, 8 mm, 90°, for Flex Integral composite curing lamp ........................... SD-221
Alternative fibre optic diode, 13 mm, 70°, for Flex Integral composite curing lamp ......................... SD-222
Protective looking glasses used with the composite curing lamp ................................................... SD-223
Protective shield for composite curing lamp .................................................................................... SD-205
Jacket for large suction .................................................................................................................... MC-188
Jacket for small suction ................................................................................................................... MC-190
Adaptor pieces (Ø 11-7 mm) ........................................................................................................... MC-263
Filter holder for suction .................................................................................................................... AC-153
3030
Flex Integral BC , Users Manual, 1998-01-03
8. Spare parts, accessories, etc.
Consumer goods
Large suction tube without nipple or filter cartridge ......................................................................... AC-279
Small suction tube without nipple and filter cartridge ...................................................................... AC-280
6 filters for suction ........................................................................................................................... SD-400
12 bottles of Flex Vac Clean (12 months supply) ............................................................................. YR-035
Gold trap filter insertion ................................................................................................................... SD-401
Flex Make up for treatment of lacquered surfaces ........................................................................... YR-001
Repair lacquer, light grey ................................................................................................................. YR-037
Repair lacquer, grey ......................................................................................................................... YR-038
Repair lacquer, white ....................................................................................................................... YR-039
Repair lacquer, blue ......................................................................................................................... YR-040
Repair lacquer, green ....................................................................................................................... YR-041
Repair lacquer, red ........................................................................................................................... YR-003
Repair lacquer, "Blackberry" ............................................................................................................ YR-055
Repair lacquer, "Slate" ..................................................................................................................... YR-056
Repair lacquer, "Sea" ....................................................................................................................... YR-057
Repair lacquer, "Wood" .................................................................................................................... YR-058
Repair lacquer, "Lyme grass" ........................................................................................................... YR-059
Repair lacquer, "Sky" ....................................................................................................................... YR-060
Repair lacquer, "Stone" .................................................................................................................... YR-061
50 tube sets for surgery plants ........................................................................................................ BA-061
8 x 1/1 litre sterile salt water ........................................................................................................... BA-062
Amalgam separator Dürr .................................................................................................................. UC-664
Flex Integral BC , Users Manual, 1998-01-03
31
8. Spare parts, accessories, etc.
Instruments and tools for ultrasonic scaler type O:
Standard, straight For removal of supra- and subginigival calculus labially and lingually. Can be
applied interproximally, using the rounded tip to remove calculus and other
heavy deposits and stains.
Standard, right
For removal of supra- and subgingival calculus, in particular in the lst and 3rd
quadrants.
Standard, left
For removal of supra- and subgingival calculus, in particular in the 2nd and
4th quadrants.
Perio
Removes supra- and subgingival stain and calculus in all areas. Particularly
useful for removal of subgingival calculus in pockets as deep as 14 mm.
Crown remover
Enables removal of crowns and bridges without destruction. "Dissolves" the
cement - but only cements of non-plastic type - where - after the restoration
can be removed.
Endo-instrument
For endodontic treatment. Ultrasonic cleaning and canal preparation. Provides smooth canals and easy introduction of Gutta Perchas. Can only be
used with Odontoson Endo files sizes 15, 25 & 40..
ODONTOSON
Tool for Endo-instrument
3232
Flex Integral BC , Users Manual, 1998-01-03
8. Spare parts, accessories, etc.
Instruments and tools for ultrasonic scaler type O:
Instrument, standard, straight .......................................................................................................... FH-106
Instrument, standard, right ............................................................................................................... FH-107
Instrument, standard, left ................................................................................................................. FH-105
Instrument, Perio, standard .............................................................................................................. FH-119
Instrument, crown remover .............................................................................................................. SA-048
Instrument, Endodontal .................................................................................................................... FH-113
File for ENDO instrument (10 x 3 pcs.) ........................................................................................... FH-115
Tool kit for ENDO incl. file ................................................................................................................ FH-116
Tool, ENDO instrument .................................................................................................................... SC-811
Instrument, universal ....................................................................................................................... FH-099
Instrument, thin line, straight ........................................................................................................... FH-123
Instrument, thin line, right ................................................................................................................ FH-124
Instrument, thin line, left .................................................................................................................. FH-125
Instrument, CEM .............................................................................................................................. FH-126
Plastic cover for CEM instrument, 10 pcs. ...................................................................................... UC-759
Lip protector ..................................................................................................................................... FH-127
O-ring, handle, small (rear) .............................................................................................................. SC-714
O-ring, handle, large (front) ............................................................................................................. SC-715
Universal
For removal of supra- and subgingival stain and calculus in all areas. For
general scaling for those patients with moderate plaque or calculus.
Thin line, straight*) Useful for fine planing after gross scaling using other ODONTOSON instruments. Provides good furcation access.
Thin line, right *)
Provides excellent furcation access in the lst and 3rd quadrants. Similar
tactile feeling as with a periodontal probe. To be used only after gross
debridement with another Odontoson instrument.
Thin line, left *)
Same characteristics and applications as Thin Line, right. Particularly
suitable in the 2nd and 4th quadrants..
CEM-instrument
For cementation and exact seating of plastic and porcelain inlays and
onlays. Ensures uniform distribution of the cement under the inlay.
*) The Thin Line instruments are highly specialised instrumentds with extra thin tips. They are
consequently only to be handled and used following the rules below very strictly:
● Use them only for fine-scaling after larger tartars has been removed by means of other instruments.
● Repeated use on large tartars may destroy the Thin Line instrument.
● Never use a Thin Line instrument with a power setting of more than 50% of the max. power.
Flex Integral BC , Users Manual, 1998-01-03
33
9. Guarantee conditions
9. Guarantee conditions
The Flex dealer assumes towards the buyer the responsibility for correct
functioning, faultless material and faultless workmanship for a period of
12 months from the day of delivery.
For ball bearings and rotors for turbines as well as fibre optic light diodes
the guarantee period is 6 months from the day of delivery.
The Flex dealer guarantees that nondurable articles, such as electrical
bulbs, rubber parts, instruments for scalers etc., have no defects on
delivery. Nondurable articles are not covered by guarantee hereafter.
The Flex dealer holds no responsibility for defects due to ordinary tear or
in case of Flex’ instructions concerning use, cleansing, disinfection,
maintenance and installation not being observed.
The Flex dealer is not responsible for defects should the product be
installed or repaired by persons who are not trained by Flex, if the parts
which are not delivered or approved by Flex for this purpose are
mounted in the product, or should modifications in construction be made
by a third party.
The Flex dealer is not responsible for loss of profit, delays, lost earnings
or any other indirect loss.
The Flex dealer´s liability for defects is limited to the price agreed on for
the defective part of the consignment
Any claim for guarantee must be made to the Flex dealer.
3434
Flex Integral BC , Users Manual, 1998-01-03
10. Your feedback
10. Your feedback
Do you have questions related to a faulty Flex product, or if you have suggestions for improvements, we
kindly ask you to fill in the following form and send it to us.
Please state:
Name: .....................................................................................................................................................
Profession: .............................................................................................................................................
Address: .................................................................................................................................................
Which product is concerned?
Flex product type: ..................................................................................................................................
Serial No: ...............................................................................................................................................
Date of installation: ................................................................................................................................
Dealer (subsidiary, if any): .....................................................................................................................
Service report, if any. No.: .....................................................................................................................
And now your question/problem/improvement suggestion:
Function: ................................................................................................................................................
...............................................................................................................................................................
...............................................................................................................................................................
...............................................................................................................................................................
Cleaning: ................................................................................................................................................
...............................................................................................................................................................
...............................................................................................................................................................
...............................................................................................................................................................
Technical service: ..................................................................................................................................
...............................................................................................................................................................
...............................................................................................................................................................
Flex Integral BC , Users Manual, 1998-01-03
35
10. Your feedback
Possible adjustments: ............................................................................................................................
...............................................................................................................................................................
...............................................................................................................................................................
...............................................................................................................................................................
Finish/make: ...........................................................................................................................................
...............................................................................................................................................................
...............................................................................................................................................................
...............................................................................................................................................................
Anything else: ........................................................................................................................................
...............................................................................................................................................................
...............................................................................................................................................................
...............................................................................................................................................................
Suggested solution: ................................................................................................................................
...............................................................................................................................................................
...............................................................................................................................................................
...............................................................................................................................................................
Date and signature: ................................................................................................................................
3636
Flex Integral BC , Users Manual, 1998-01-03