1
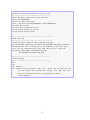
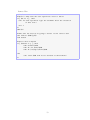
4. Run the code: $ diskutil unmountDisk \dev\disk2
5. Type $ sudo dd if=, then drag and drop the CentOS image file to the terminal
window. This should result in its filesystem location being appended to the command.
Now complete the command with of=/dev/disk2 bs=1m. The final text of the code
should look something like this:
sudo dd if=/Volumes/Images/CentOS-Live-Desktop-x86-64-20-1.iso
of=/dev/disk2 bs=1m
6. Double-check everything looks correct, especially that the line of code is on one line,
not two.
7. Hit Enter and wait for a long time. When you USB stick is ready to use, the terminal
will become active again.
3.3.3
Linux
Because there are so many different linux operating systems, instructions for creating a live
USB and mounting images can be found in various spots on the internet. For this section,
the following procedures are listed to create a live USB for any linux distribution using
GNOME Disk Utility.[7]
1. Download a CentOS image, choose a USB stick that does not contain any data you
need, and connect it
2. Run Nautilus (Files) - for instance, open the Overview by pressing the Start/Super
key, and type Files, then hit enter
3. Find the downloaded image, right-click on it, go to Open With, and click Disk Image
Writer
4. Double-check you are sure you do not need any of the data on the USB stick!
5. Select your USB stick as the Destination, and click Start Restoring...
16