Download AT-610P User Manual
Transcript
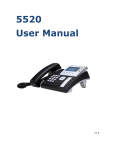
AT-610P User Manual AT-610P User Manual ISSUE 1.0 2009-9-11 ATCOM TECHNOLOGY CO., LIMITED AT-610P User Manual 1st、 AT-610P’s Network Features ................................................................. 4 1、 2、 3、 4、 5、 6、 7、 8、 9、 10、 11、 The View ................................................................................................................ 4 Interfaces .............................................................................................................. 4 Electricity characteristic ................................................................................... 4 Software ................................................................................................................. 4 Network: .............................................................................................................. 5 Management and Maintenance ..................................................................... 5 Protocol .................................................................................................................. 6 Compliant Standard ........................................................................................... 6 Operating Requirement .................................................................................... 6 Packing List ........................................................................................................... 6 Installation ............................................................................................................ 7 2nd、 Feet installation instruction ............................................................ 7 3rd、 Keypad of IP Phone: ..................................................................... 10 4th、 Basic functions and operations ................................................... 12 1、 2、 3、 4、 5、 6、 7、 8、 9、 10、 11、 12、 13、 14、 5th、 1、 2、 3、 4、 Answer the calls ................................................................................................ 12 Make Call ............................................................................................................. 13 Hang up the phone .......................................................................................... 13 Call Transfer ........................................................................................................ 13 3-way conference call ..................................................................................... 14 Call Hold ............................................................................................................... 14 Call History.......................................................................................................... 14 Call pickup ........................................................................................................... 15 Join call ................................................................................................................. 15 Redial/Unredial .................................................................................................. 15 vport ...................................................................................................................... 16 Click to dial ......................................................................................................... 17 Preload Password .............................................................................................. 17 Check the Phone’s IP....................................................................................... 17 Web settings....................................................................................... 17 Current state ...................................................................................................... 18 Network ................................................................................................................ 18 VoIP........................................................................................................................ 20 Advance ................................................................................................................ 23 4.1. SIP.................................................................................................... 23 4.2. Digital Map ...................................................................................... 26 4.3. Stun ................................................................................................. 27 4.4. Call Service ..................................................................................... 28 4.5. Audio Settings ................................................................................ 29 ATCOM TECHNOLOGY CO., LIMITED AT-610P User Manual 5、 6、 7、 Dial Peer ............................................................................................................... 30 Config Manage ................................................................................................... 33 Update .................................................................................................................. 33 7.1. Web Update .................................................................................... 33 7.2. FTP/TFTP Update ........................................................................... 34 7.3. Auto Provisioning ........................................................................... 35 8、 System Manage ................................................................................................. 36 8.1. Account Manage ............................................................................. 36 8.2. Phone Book ..................................................................................... 37 8.3. Syslog Config.................................................................................. 37 8.4. Time Set .......................................................................................... 39 8.5. Call Log............................................................................................ 40 8.6. Logout ............................................................................................... 40 8.7. Reboot ............................................................................................... 40 ATCOM TECHNOLOGY CO., LIMITED AT-610P User Manual 1st、 AT-610P’s Network Features 1、The View 2、Interfaces ¾ ¾ ¾ Power: Output Power: 12VDC, 500mA. WAN: RJ45 port. LAN: RJ45 port. 3、Electricity characteristic ¾ ¾ ¾ ¾ Specialty of electric: output 12V 500mA DC The network connects: 2 RJ45 connect, a WAN, a LAN Headset jack : RJ9 jack * 2 Support PoE 4、Software ¾ ¾ Sip 2.0 (RFC3261) Two lines SIP, support IAX2 ATCOM TECHNOLOGY CO., LIMITED AT-610P User Manual ¾ ¾ ¾ STUN Jitter Buffer(200ms),VAD,CNG G.711A/u、G722、G.723、G.729 Codec ¾ ¾ G.168 compliant 96ms echo cancellation Support SIP domain,SIP authentication(none,basic,MD5). ¾ Support inbound audio, RFC2833 and SIP info , DTMF transmission way ¾ SIP Call Forward、Call transfer、Call hold、Call waiting, 3-way talking、 Pickup、Join call、Redial、Unredial、Call Park、Vport、Click to dial ¾ ¾ Dial without register Support Hotline、DND(Do Not Disturb)、Blacklists、Call Limitation、DND、 Incoming list ¾ Dial-peer calling rule, IP to IP call ¾ SIP server conference ¾ Phone book with 500 records, 100 answered call、missed call for each ¾ Support HTTP、FTP TFTP updating the configuration and firmware ¾ ¾ ¾ ¾ ¾ Syslog Answering machine Support SNTP client Telnet, WEB visit terminal Support different level user management 5、Network: ¾ WAN/LAN:Support bridge or route mode ¾ ¾ Support base of NAT and NAPT Support PPPoE,(ADSL,cable modem use for internet connecting) ¾ ¾ ¾ ¾ WAN support Primary and Alter function WAN support DHCP Client Qos support Diffserv Support Network command tool: include ping, trace route, telnet 6、Management and Maintenance ¾ ¾ ¾ ¾ ¾ ¾ Support safe mode and firmware updating under safe mode Support different level user management Configuration via web , keyboard and command Firmware and configuration updating via HTTP , FTP and TFTP Support system log and calling record configuration auto provision ATCOM TECHNOLOGY CO., LIMITED AT-610P User Manual 7、Protocol ¾ ¾ IEEE 802.3 /802.3 u 10 Base T / 100Base TX PPPoE:PPP over Ethernet ¾ ¾ ¾ ¾ SIP RFC3261, RFC 2543 TCP/IP: Transfer Control Protocol/Internet Protocol RTP: Real-time Transport Protocol RTCP:RTP Control Protocol ¾ ¾ VAD/CNG Telnet:remote host access protocol ¾ ¾ ¾ ¾ DNS: Domain Name Server TFTP:Trivial File Transfer Protocol HTTP:Hypertext Transfer Protocol FTP:File Transfer Protocol 8、Compliant Standard ¾ CE:EN55024,EN55022 ¾ ¾ ¾ FCC part15 Comply with ROHS in EU Comply with ROHS in China ¾ Explanation: The letter “e” is the first letter of “environment: and “electronic”. The rim is a round with two arrow, stands for recycle. The number 20 stands for the years of environment protection. Please note the years of environment protection is not discarding year nor usage life. 9、Operating Requirement ¾ ¾ ¾ 10、 ¾ ¾ ¾ Operation temperature: 0 to 40° C (32° to 104° F) Storage temperature: -30° to 65° C (-22° to 149° F) Humidity: 10 to 90% no dew Packing List AT-610P IP phone Power adaptor (output 12v ,500mA) Manual CD ATCOM TECHNOLOGY CO., LIMITED AT-610P User Manual 11、 Installation Use Ethernet cable to connect AT-610P’s LAN port and your computer. Set computer’s IP to the network 192.168.10.x or using dynamic obtain IP. Open web browser and key in 192.168.10.1. Then user will see the logon page of AT-610P, the default username and password is admin/admin for administrator and guest/guest for guest. Set up page for VoIP user only: 2nd、 Feet installation instruction 1、 Desktop position: A、 Put the bottom side of the IP phone upside and press the plate with letter “PUSH” into the slot, please refer the picture as below: ATCOM TECHNOLOGY CO., LIMITED AT-610P User Manual B、 Press the other plate into the slot in accordance with the direction of the arrow C、 Repeat A and B. It is the right picture of putting on desk after fixing the two feet below: D、 Disassemble the feet: Press the plate with word “PUSH” and pull the feet with the direction of arrow. When the plate is pull out of the slot (there will be a sound of “pa”) you can take off the feet 2、 On wall postion A、 Put the bottom side of the IP phone upside and push the plate with letter “PUSH” into the slot, please refer the picture as below: ATCOM TECHNOLOGY CO., LIMITED AT-610P User Manual B、 Push the other plate into the slot in accordance with the direction of the arrow C、 Repeat A and B. It is the picture of wall mounting after fixing the two feet below: Attention: Please rotate the hook to the position as in picture with a coin or other tools D、 Disassemble the feet way: Press the plate with word “PUSH” and pull the feet with the direction of arrow. When the plate is pull out of the slot (there will be a sound of “pa”) you can take off the feet ATCOM TECHNOLOGY CO., LIMITED AT-610P User Manual 3rd、 Keypad of IP Phone: Sketch Map of Phone Description: Number 1 3、5、7 Function description Network status indicator A、 when the network is OK , it’s on B、 when the network can not connect , it blinks Network mode indicator A、Number 3 stands for DHCP , when the IP phone get IP address in DHCP Mode . the indicator is on , or else it blinks B、Number 5 stands for Static , when the IP phone get IP address in Static mode . the indicator is on , or else it blinks ATCOM TECHNOLOGY CO., LIMITED AT-610P User Manual C、Number 7 stands for PPPoE, when the IP phone get IP address in PPPoE mode . the indicator is on , or else it blinks 2、4、6 Answering mode indicator , A、Number 2 stands for answering call with handset B、Number 4 stands for answering call in hand-free mode C、Number 6 stands for answering call with headset 8 Mute indicator , when the phone is muted , this indicator is on , when the muted mode is canceled the indicator will be off 9、11 Protocol indicator A、Number 9 stands for SIP ¾ When you enable register and successfully register to SIP server , this indicator is on ¾ when you enable register but do not successfully register to server , this indicator blinks ¾ when you disable register , this indicator is off B、 Number 11 stands for IAX protocol ¾ When you enable register and successfully register to IAX server , this indicator is on ¾ when you enable register but do not successfully register to server , this indicator blinks ¾ when you disable register , this indicator is off 10 Missed call indicator , when there is the missed call , this indicator will be on . After you checked all the missed calls , this indicator will turn off 12 Voicemail indicator , when there is new voice mail , this indicator will be on , after you checked all the voicemail , this indicator will turn off 13 incoming call indicator A、 when the phone is in standby without incoming call , the indicator is off B、 when the Ethernet connection is off , the indicator is on C、 when there is the incoming call , indicator blinks D、 when there is a new voicemail , the indicator blinks 14 Monday to Sunday indicator , the correct day will be on while others will be off 15 This is the multi function key 16 A、 In standby mode , press Menu/Enter to enter the Menu B、 In functional menu , press Menu/Enter to confirm selection. Press info to check network status 17 press Pbook to enter the phone book and edit or delete. 18 Press History button to check call history including incoming calls , outgoing calls and missed calls. 19 Exit button A、 when you’re dialing , press exit to delete the dialed number and return to and you can dial a new number B、 in functional menu , press EXIT to exit current menu and return to the upper ATCOM TECHNOLOGY CO., LIMITED AT-610P User Manual menu 4th、 20 conference key , when you want to realize conference call , press CONF key and key in the third party number 21 Transfer key 22 Press Hold to hold the call when you are talking 23 Press mute , you can hear the voice from the other end but he can not hear you speaking. 24 Voice volume key 25 A、 press + to turn up the voice volume B、 press - to turn up the voice volume Numeral leys 26 Hand-free button to enter hand-free mode 27 Dial button , when you finish dialing the telephone number , press this button to send out the phone number 28 Del button is used to delete a single number or letter 29 Headset button is used to enter headset answering mode Basic functions and operations 1、Answer the calls When there is an incoming call, AT610P will remind user with ringing. There are 5 ways to answer the call A、Answer by handset Pick up the handset and talk with the caller. If you want to hang up, just put back the handset. B、Hand-free mode Press the hand-free button in the phone and talk with callers by built-in Micro-phone and Speaker. If you want to hang up, please press the hand-free button again. C、Answer by earphone Keep your earphone connected with the RJ9 earphone jack, when there is an incoming call, press the earphone button on the IP phone and talk with the caller. If you want to hang up, please press the earphone button again. D、Handset to hand-free When you are phoning with the handset and want to phone with hand-free mode, please press the hand-free button and put down the handset. E、Hand-free mode to handset ATCOM TECHNOLOGY CO., LIMITED AT-610P User Manual If you are phoning under hand-free mode and want to change to speaker phone, juts pick up the handset without press any buttons. 2、Make Call A、Use the handset Pickup the handset, the LCD will show the current lines. User can input the number with the keyboard and press # to send the number. When you hear the tones of “du~~du~~” with dialed number showed on the LCD, the called’s phone is ringing. If the called answer the call, the phone call is established and the LCD will show the calling time and the called’s number. B、Answer the phone under hand-free mode Press the Speaker Phone button, the LCD will show the current lines. User can input the number with the keyboard and press # to send the number. When caller hear the tones of “du~~du~~” with dialed number showed on the LCD, the called’s phone is ringing. If the called answers the call, the phone call is established, and the LCD will show the calling time and the called’s number. C、 Used phone book a、 Pick up the phone. b、 Press " Pbook” button . c、 Press “Menu/Enter” to enter the phone list and use "Vol+" or "Vol-" keys to find the contact person. d、 When you find the certain contact person, press" Menu/Enter" to show the details. e、 Press "Edit" to edit the number or press" Dial" to call. 3、Hang up the phone 1) Headset hang up When use handset mode calling, put back the handset to hang up. 2) Hands free hang up When use hands free calling, press soft button “speaker phone” to hang up. 3) Earphone Hang up When use Earphone calling, Press the soft button “headset” to hang up. 4、Call Transfer ¾ Unattended transfer If A is using AT510 talking with B , B want to speak to C. A just press XFER and dial C’s number ¾ Attended transfer: ATCOM TECHNOLOGY CO., LIMITED AT-610P User Manual Only SIP support attended Transfer. If A is using AT510 talking with B , B want to speak to C. A just press Hold and dial C’s number to ask whether he can answer the call from B. C agree , then press Hold to talk with B and press XFER to transfer the call 5、3-way conference call Enable Three Way Call If A is using AT-510 talking with B and B want to make conference call with A and B. A just press Hold and dial C’s number . Then press CONF to initiate conference call 6、Call Hold User can hold the current call by pressing soft button “Hold”. And by pressing soft button “Hold” again,. 7、Call History. AT-610P supports 100 missed calls, incoming calls and dialed calls record. When the storage is full, the latest call will update the history. When the phone reboots or be out of power, all the call history will be cleared. ¾ Missed call 1) When the LCD screen display the Missed call icon and the status LED is 2s on, 500ms off. 2) Press history button, press “Vol+” or “Vol-“ to LCD display “Missed”. 3) Press “Menu/Enter” to display the records of Missed call 4) press “Vol+” or “Vol-“ browse missed call history. 5) Choose the missed call record, press “Redial” button to call this number. ¾ Incoming call 1) Press “History” button and press “Vol+” or “Vol-“to LCD display “RECEIVED”. 2) Press “Menu/Enter” to display received call records. 3) press “Vol+” or “Vol-“ browse received call records. 4) Choose the received call record, press “Redial” button to call this number. If there is no record, the LCD screen display “List is Empty”. ¾ Out coming call 1) Press “History” button and press “Vol+” or “Vol-“to LCD display “DIALED”. 2) Press “Menu/Enter” to display out coming call records. 3) press “Vol+” or “Vol-“ browse out coming call records. ATCOM TECHNOLOGY CO., LIMITED AT-610P User Manual 4) Choose the received call record, press “Redial” button to call this number. If there is no record, the LCD screen display “List is Empty”. 8、Call pickup Call pickup is simulated from “Pickup” function processes from IPPBX. When A call B with no reply after ring tones, C could pick up the call from A for B by inputting the prefix and B’s phone No. C needed to set the dial peer with prefix code as follow To refer *1* as the set prefix code, C could get the call from A to B by dialing *1*+B, *1* prefix could be freely set as long as no confliction with other dialing rules. 9、Join call “A” could join in the conference call,by input a prefix plus a phone No. which is already in the conference. A requested to set the prefix code for dial peer as follow To refer *2* as the set prefix code, “A” could join in the conference by dial *2* plus the call No. which is already in the conference. *2* prefix could be freely set as long as no confliction with other dialing rules. 10、 Redial/Unredial In order to being efficiently to contact the busy line, A could use Redial to call B the busy line with setting prefix. When B is free A could get through the call as usual. When B is busy, A could hang the phone with checking B’s situation with every 60S by the set of prefix. IP Phone of User A would ring and prompt picking up handset if B is available. It would call B automatically once A picking up handset. The call would get through as soon as had set being picked up at B. A could dial the predecessor which set already add number of B to cancel the call before the phone automatic redialing if A is not available suddenly or don’t want to call B ATCOM TECHNOLOGY CO., LIMITED AT-610P User Manual anymore. *3* is the predecessor. Then A could make the redial function via dialing *3* + number of B. *4* is the predecessor. Then A could make the redial function via dialing *4* + number of B. User could name any predecessor like *3*/*4* if it is compliant with present dial rule. 11、 vport Vport makes more flexible calling application. Eg. It could forward a call from Line 1 to one account of Line 2 after configuring forward type and number@line via web interface. The forward could make either from Line 1 to Line 2 or Line 2 to Line 1. But the end user may not aware the configuration being made therefore probably the end user should be advised that it may cost with the forward function. The forwarding could be done via either Line Key to select the line or dialing IP after calling under server. It could be implemented by the following 4 ways: Point to Point Call Forward Make the configuration like @ip:port in the column of Forward Number. Then it could make SIP call point to point with this IP and port in system. User could select forward type accordingly. Point to Point Blind Transfer Transfer the call via dialing IP directly. Call Forward, Call Transfer (Blind Transfer/ Attended Transfer) in different Line. Make the configuration like sip: username@n in the column of Forward Number. Then system would select Line N and make call accordingly. SIP Line (eg:0/1/2. Or 0.0.0.0/0.0.0.1/0.0.0.2/255.255.255.255 which is compliant with former configuration). Call Forward, Call Transfer (Blind Transfer/ Attended Transfer) between SIP Line and Point to Pint. It is compliant for the Call Forward, Call Transfer (Blind Transfer/ Attended Transfer) between SIP Line and Point to Pint. ATCOM TECHNOLOGY CO., LIMITED AT-610P User Manual 12、 Click to dial When User A accesses web interface and calls User B via clicking one link which is direct to B, IP Phone of User A would ring. Then call B automatically once User A picking up handset. 13、 Preload Password There are 2 models to set the authority of web accessing and command line: Guest model and Admin model. User could view and configure all items in Admin model. While user couldn’t change the SIP (1-2) and IAX2 configuration as well as server address and port but only access and view the information. User would enter different model after input different user name and password: z Guest Model User Name:guest Pass word:guest z Admin Model: User Name:admin Pass word:admin 14、 Check the Phone’s IP Press the up or down navigation button to check the phone’s IP address 5th、 Web settings Enter AT-610P IP addresses in the web browser to go to the log on page, and key in the username and password to access AT-610P setting page. Default username and password is: Administrator: Username: admin password: admin User: Username: guest Username: guest ATCOM TECHNOLOGY CO., LIMITED AT-610P User Manual 1、Current state This page shows the IP phone working status. The network part shows the connection status of WAN and LAN. Phone Number part shows the phone number and register status for Line1、 Line2 and IAX2 2、Network There are 3 ways to connect to the internet DHCP, Static and PPPoE, please choose one according to your own situation A、DHCP,the IP phone will get IP address from DHCP server , you do not have to fill in the date of IP address , net mask etc , just choose DHCP and submit . Please refer to the below picture Parameters: 9 Active IP: IP phone’s address 9 Current Net mask:network net mask 9 MAC Address:MAC of IP phone ATCOM TECHNOLOGY CO., LIMITED AT-610P User Manual 9 Current Gateway:the IP address of the router B、If your ISP provide you with the fixed IP address, please choose static and fill in the correct information of IP Address、 Net mask、Gateway、Primary DNS etc. If you do not know it please refer to your ISP provider or network management stuff. The reference picture is as below Parameters: 9 9 9 9 9 9 Static IP Address: fixed IP address Net mask: LAN net mask Gateway: Gateway IP address DNS Domain: input DNS domain name if it’s provided Primary DNS: Primary DNS address Alter DNS: Alternative DNS address C、when you use PPPoE to get IP address,please select “PPPoE”,and input ADSL account information as below picture: ATCOM TECHNOLOGY CO., LIMITED AT-610P User Manual Parameters: PPPoE Server: sever name, if the ITSP have no special requirements, keep the ANY as default Username: ADSL account user name Password: ADSL account password Attention: 1)After configuration setting please click “Apply” to effect the change 2)If the IP address is changed after effecting the configuration change , the webpage will lose response former address, so you must get to the webpage with new address 3)If the LAN IP address is happened to be the same as WAN IP which is allocated from DHCP server. The LAN IP address will be changed automatically by adding 1 at the last digital 3、VoIP ATCOM TECHNOLOGY CO., LIMITED AT-610P User Manual 9 Register Status: SIP server registration status, if succeed display Registered,or else display Unregistered. 9 9 9 9 Server Address: SIP server address , support both IP address and domain name. Server Port: SIP server port , default is 5060. Account Name:SIP account name. Phone Number : SIP account phone number, if leave it as blank , no 9 registration information will be sent out. Display Name:Show the display name that you want to display on the phone 9 of callee. Support number and letter input. Proxy Server Address:Normally the Proxy server is the same as SIP server. If they are different then fill in the correct information that provided by ISP. Proxy Server Port: Set your SIP server port. Proxy Username: Input your SIP register account name. Proxy Password: Input your SIP register password. Domain Realm: config SIP local domain. If the server does not have special requirements for the local domain of SIP terminal, the local domain can be the same as SIP server domain. The user can also leave it as blank; the system will take SIP server domain as the domain realm. 9 Enable Register: Enable or disable registration Advanced SIP setting 9 Register Expire Time: register expire time, default is 600 seconds. AT-610P will auto configure this expire time to the server recommended setting if it is different from the SIP server. ATCOM TECHNOLOGY CO., LIMITED AT-610P User Manual 9 9 9 9 9 9 9 9 9 9 9 9 9 9 9 9 Auto Detect Server Interval: Set examining interval of the server, default is 60 seconds User Agent: Set the user agent if have, the default is VoIP Phone 1.0 Signal Key: Signal encryption Key: Media Key: voice stream encryption Key Local Port: Local SIP signal port,default as 5060 Hotline Number: Set hot line number of each line Enable Conference Num: conference ID Auto Detect Server: Enable/Disable keeps NAT of SIP alive. If some server refuse to register with too short interval time, and has no packets sending to device in private network to keep NAT alive, user could set this function ON. It need set the keep alive interval time less than the NAT server’s. Enable Keep Authentication: Enable/Disable Keep Authentication System will take the last authentication field which is passed the authentication by server to the request packet. It will decrease the server’s repeat authorization work, if it is enable. Enable Via rport: Enable/Disable system to support RFC3581. Via rport is special way to realize SIP NAT. Enable PRACK: Enable or disable SIP PRACK function, suggest use the default config. Long Contact: Set more parameters in contact field. Click to Talk: Set click to Talk (need practical software support). Ban Anonymous Call: Set to ban Anonymous Call. Dial Without Register: Set call out by proxy without registration. Enable Strict Proxy: Support the special SIP server-when phone receives the packets sent from server, phone will use the source IP address, not the 9 9 9 address in via field. Forward Type: Select call forward mode, the default is Off . Off:Close down calling forward. Busy:If the phone is busy, incoming calls will be forwarded to the appointed 9 phone. No answer:If there is no answer, incoming calls will be forwarded to the 9 appointed phone. Always:Incoming calls will be forwarded to the appoint phone directly. 9 9 9 9 ¾ ¾ ¾ 9 9 The phone will prompt the incoming while doing forward. Forward Phone Number: Appoint your forward phone number. Server Type: Select the special type of server which is encrypted, or has some unique requirements or call flows. DTMF Mode: Select DTMF sending mode, there are three modes: DTMF_RELAY DTMF_RFC2833 DTMF_SIP_INFO. Different VoIP Service providers may provide different modes. RFC Protocol Edition: Select SIP protocol version to adapt for the SIP server ATCOM TECHNOLOGY CO., LIMITED AT-610P User Manual 9 9 9 9 9 9 9 9 9 9 9 which uses the same version as you select. For example, if the server is CISCO5300, you need to change to RFC2543; else phone may not cancel call normally. System uses RFC3261 as default. Transport Protocol: Set transport protocols, TCP or UDP. Subscribe Expire Time: Overtime of resending subscribe packet. Suggest using the default config. Conference Number: config certain Conference call number. Signal Encode: enable signal encryption. Rtp Encode: enable voice data encryption. Enable Session Timer: enable rfc4028 to refresh the SIP sessions. Answer With Single Codec: only answer the call with a certain Codec. Auto TCP: enable TCP transmission protocol when the length of message exceed 1300 byte. Enable URI Convert: convert # into %23 when sending URI. Enable Display name Quote: Set to make quotation mark to display name as the phone sends out signal, in order to be compatible with server. Enable GRUU: Set to support GRUU. Enable Subscribe: Enable Subscribe: Overtime of resending subscribe packet. Suggest using the default config. 4、Advance 4.1. SIP 9 Register Status: SIP server registration status, if succeed display Registered,or else display Unregistered. 9 Server Address: SIP server address , support both IP address and domain name. Server Port: SIP server port , default is 5060. Account Name:SIP account name. 9 9 ATCOM TECHNOLOGY CO., LIMITED AT-610P User Manual 9 Phone Number : SIP account phone number, if leave it as blank, no 9 registration information will be sent out. Display Name:Show the display name that you want to display on the phone 9 of callee. Support number and letter input. Proxy Server Address:Normally the Proxy server is the same as SIP server. If they are different then fill in the correct information that provided by ISP. Proxy Server Port: Set your SIP server port. Proxy Username: Input your SIP register account name. Proxy Password: Input your SIP register password. Domain Realm: config SIP local domain. If the server does not have special requirements for the local domain of SIP terminal, the local domain can be the same as SIP server domain. The user can also leave it as blank , the system will take SIP server domain as the domain realm. 9 Enable Register: Enable or disable registration 9 Advanced SIP setting Register Expire Time: register expire time, default is 600 seconds. AT-610P will auto configure this expire time to the server recommended setting if it is different from the SIP server. 9 Auto Detect Server Interval: Set examining interval of the server, default is 60 seconds. User Agent: Set the user agent if have, the default is VoIP Phone 1.0. Signal Key: Signal encryption Key: 9 ATCOM TECHNOLOGY CO., LIMITED AT-610P User Manual 9 9 Media Key: voice stream encryption Key. Local Port: Local SIP signal port,default as 5060. Enable Conference Num: conference ID 9 Auto Detect Server: Enable/Disable keeps NAT of SIP alive. If some server refuse to register with too short interval time, and has no packets sending to device in private network to keep NAT alive, user could set this function ON. It need set the keep alive interval time less than the NAT server’s. Enable Keep Authentication: Enable/Disable Keep Authentication System will take the last authentication field which is passed the authentication by server to the request packet. It will decrease the server’s repeat authorization work, if it is enable. Enable Via rport: Enable/Disable system to support RFC3581. Via rport is special way to realize SIP NAT. Enable PRACK: Enable or disable SIP PRACK function, suggest use the default config. Long Contact: Set more parameters in contact field; Click To Talk: Set click to Talk (need practical software support). Ban Anonymous Call: Set to ban Anonymous Call. Dial without Register: Set call out by proxy without registration. Enable Strict Proxy: Support the special SIP server-when phone receives the packets sent from server, phone will use the source IP address, not the address in via field. Forward Type: Select call forward mode, the default is off. ¾ Off:Close down calling forward. ¾ Busy:If the phone is busy, incoming calls will be forwarded to the appointed ¾ phone. No answer: If there is no answer, incoming calls will be forwarded to the ¾ appointed phone. Always:Incoming calls will be forwarded to the appoint phone directly. The phone will prompt the incoming while doing forward. Forward Phone Number: Appoint your forward phone number. Server Type: Select the special type of server which is encrypted, or has some unique requirements or call flows. DTMF Mode: Select DTMF sending mode, there are three modes: ¾ DTMF_RELAY ¾ DTMF_RFC2833 ¾ DTMF_SIP_INFO。 Different VoIP Service providers may provide different modes. RFC Protocol Edition: Select SIP protocol version to adapt for the SIP server which uses the same version as you select. For example, if the server is CISCO5300, you need to change to RFC2543; else phone may not cancel call normally. System uses RFC3261 as default. Transport Protocol: Set transport protocols, TCP or UDP; Subscribe Expire Time: Overtime of resending subscribe packet. Suggest to use ATCOM TECHNOLOGY CO., LIMITED AT-610P User Manual the 9 9 9 9 9 9 default config. Conference Number: config certain Conference call number Signal Encode: enable signal encryption Rtp Encode: enable voice data encryption Enable Session Timer: enable rfc4028 to refresh the SIP sessions Answer With Single Codec: only answer the call with a certain Codec Auto TCP: enable TCP transmission protocol when the length of message exceed 1300 byte 9 Enable URI Convert: convert # into %23 when sending URI Enable Display name Quote: Set to make quotation mark to display name as the phone sends out signal, in order to be compatible with server. Enable GRUU: Set to support GRUU; Enable Subscribe: Enable Subscribe: Overtime of resending subscribe packet. Suggest using the default config. 4.2. Digital Map Digit map is a set of rules to determine when the user has finished dialing. AT610P support below digital map: 9 End With “#”: Use # as the end of dialing. 9 Fixed Length: The call will be sent out automatically when the length of the number you dial reaches the fixed one. For example if you set number of 11 here, when you dial 11 digits the call will be sent out immediately. 9 Timeout: Specify the timeout of the last dial digit. The call will be sent after timeout. 9 Prefix: User define digital map: 9 [ ] represents the range of digit, can be a range such as [1-4], or use comma such as [1,3,5], or use a list such as [234] ATCOM TECHNOLOGY CO., LIMITED AT-610P User Manual x represents any one digit between 0~9 Tn represents the last digit timeout. n represents the time from 0~9 second, it is necessary. Tn must be the last two digit in the entry. If Tn is not included in the entry, we use T0 as default, it means system will sent the number immediately if the number matches the entry. 9 Example: ¾ [1-8]xxx All number from 1000 to 89999 will be sent immediately. ¾ 9xxxxxxx 8 digits numbers begin with 9 will be sent immediately. ¾ 911 Number 911 will be sent will be immediately ¾ 88xT4 3 digits numbers begin with 88with be sent after four seconds. ¾ 6611x.T4 holds four seconds send out if the number begins 6611 and five digits. 9 Attention:The above configuration can exist at the same time. For example 9 9 you enable # as the signal of sending the call while set fixed length of 11. Either you press # before the number reach 11 or dial 11 digital can send out the call 4.3. Stun 9 STUN NAT Transverse:STUN NAT Transverse status true or false 9 9 9 STUN Server Addr: configure stun server address; STUN Server Port: configure stun server port default 3478 STUN Effect Time: stun detect NAT type interval time .If NAT found a link inactive for a certain time , it will close the link so you need to send a packet within a interval tome to keep the link alive Local SIP Port : config local SIP port , default as 5060Use Stun : 9 enable/disable SIP STUN Attention: SIP STUN is used for NAT transverse. When you config STUN server’s ATCOM TECHNOLOGY CO., LIMITED AT-610P User Manual address and port (default 3478) and enable it, then you can use the normal SIP server to make the IP phone transverse NAT. 4.4. Call Service Hotline: configure hotline number. AT-610P immediately dials this number after hook-off if it is set and the user can not dial any other number. 9 No Answer Time: no answer call forward time setting. 9 No Disturb: DND, do not disturb, when there is an incoming call , the caller will get the message that this line is not available , but you it has no affection when you make outgoing call. 9 Ban Outgoing: Enable this to ban outgoing calls. 9 Enable Call Transfer: Enable Call Transfer by selecting it. Enable Call Waiting: Enable Call Waiting by selecting it. 9 Enable Three Way Call: 3 way conference call. Accept Any Call: If select it, the phone will accept the call even if the called number is not belong to the phone. Auto Answer: If select it, the phone will auto answer when there is an incoming call. P2P IP Prefix: Set Prefix in peer to peer IP call. For example: what you want to dial is 192.168.1.119, If you define P2P IP Prefix as 192.168.1., you dial only #119 to reach 192.168.1.119. Default is “.”. If there is no “.” Set, it means to disable dialing IP. Voicemail Number: Set the voicemail number for each line. Black List: Set Add/Delete Black list , incoming call in these phone numbers will be refused. It support below rules, ¾ You add a certain number in it , when this number call you , it will be refused. ¾ Use “x” to represent any number. For example , 4xx means any incoming 9 ATCOM TECHNOLOGY CO., LIMITED AT-610P User Manual call with 3 digital and the first digital is 4 , will be refused. ¾ DOT (.) means matching any arbitrary number digit. for example, any number with prefix 6 will be forbidden to dialed out. Any digital call with a certain head number, For example 6. means any incoming number with the 6 as the first number will be refused. ¾ if user wants to allow a number or a series of number incoming, he may add the number(s) to the list as the white list rule. the configuration rule is –number, for the settings as below. -7049 means any incoming number is forbidden except 7049 Note: End with DOT (.) when set up the white list Limit List: Set Add/Delete Limit List. Please input the prefix of those phone numbers which you forbid the phone to dial out. For example, if you want to forbid those phones of 001 as prefix to be dialed out, you need input 001 in the blank of limit list, and then you cannot dial out any phone number whose prefix is 001. x and . are wildcard. x means matching any single digit. for example, 4xxx expresses any number with prefix 4 which length is 4 will be forbidden to dialed out . Means matching any arbitrary number digit. For example, 6. expresses any number with prefix 6 will be forbidden to dialed out. 4.5. Audio Settings First Codec:The fist preferential DSP codec:G.711A/u、G722、G.723、G.729 Second Codec:The second preferential DSP codec:G.711A/u、G722、G.723、 G.729 Third Codec:The third preferential DSP codec:G.711A/u、G722、G.723、G.729 Forth Codec: The Forth preferential DSP codec:G.711A/u、G722、G.723、G.729 ATCOM TECHNOLOGY CO., LIMITED AT-610P User Manual Fifth Codec: The fifth preferential DSP codec:G.711A/u、G722、G.723、G.729 Input Volume:Specify Input (MIC) Volume grade; Output Volume:Specify Output (receiver) Volume grade. Hands free Volume:Specify Hands free Volume grade Ring Volume:Specify Ring Volume grade G729 Payload Length:Set G729 Payload Length Signal Standard:Select Signal Standard. G722 Timestamps: 160/20ms or 320/20ms is available; G723 Bit Rate: 5.3kb/s or 6.3kb/s is available; Default Ring Type: Select signal standard; VAD:Select it or not to enable or disable VAD. If enable VAD, G729 Payload length could not be set over 20ms. 5、Dial Peer This functionality offers you more flexible dial rule, you can refer to the following content to know how to use this dial rule. When you want to dial an IP address, the entry of IP addresses is very cumbersome, but by this functionality, you can set number 179 to replace 192.168.1.179 here. When you want to dial a long distance call to China, you need dial an country code 86 before local phone number, but you can also dial number 0 instead of 86 after we make a setting according to this dial rule. For example, you want to dial 8675583018619, but you need dial only 075583018619 to realize your long distance call after you make this setting. AT610P provide flexible dial rule, with different dial-rule configure, user can easily implement the following function: ----Replace, delete or add prefix of the dial number. ----Make direct IP to IP call ----Place the call to different servers according the prefix. You can click “Add” to add a new dial rule. Below is the detail setting of the dial-rule: ATCOM TECHNOLOGY CO., LIMITED AT-610P User Manual Phone Number: The Number suit for this dial rule, can be set as full match or prefix match. Full match means that if the number user dialed is completely the same as this number, the call will use this dial-rule. Prefix match means that if prefix of the number that the user dials is the same as the prefix, the call will use this dial-rule, to distinguish from the full match case, you need to add “T” after the prefix number in the phone number setting. Call Mode: support SIP.. Destination (optional): call destination, can be IP or domain. Default is 0.0.0.0; in this case the call will be routed to the Public SIP server. If you set the destination to 255.255.255.255, then the call will be routed to the private SIP server. Also you can key other address here to make direct IP calls Port (optional): Configure the port of the destination, default is 5060 in SIP Alias (optional): Set up the Alias. We support four Alias as below. Alias need to co-work with the Del Length: ¾ add:xxx, add prefix to the phone number, can set to reduce the dial length. ¾ all: xxx, replace the phone number with the xxx, can use as speed dial function. ¾ Del, delete the first N numbers. N is set in the Del Length. ¾ rep:xxx,replace the first N numbers. N is set in the Del Length. For Example: Use wants to place a call 8610-62281493, then you can set the phone number in the dial rule as 010T, and set the Alias as rep:8610, and set the Del Length to 3. Then all calls begin with 010 will be changed to 8610 xxxxxxxx. Suffix (optional): Configure suffix, show no suffix if not set Instance description as picture: 179 rule: when you dial 179, the call with send to 192.168.1.179, suit for LAN application without set up a sip server. 3T rule: If the call starts with 3, the first 3 will be deleted, and the rest number with be sent to public SIP2 server. 2T rule: if the call starts with 2, the first 2 will be deleted, and the rest number with be sent to IAX2 Server. 123 rule: Dial 123 and will send 8675583018049 to your server. Used as speed dial function. 0T rule: If the calls are begin with 0, the first 0 will be replacing by 86. Mean that if you dial 075583018049 and AT610P will send 8675583018049 to your server. ATCOM TECHNOLOGY CO., LIMITED AT-610P User Manual Phone number:There are two types of matching conditions: one is full matching, the other is prefix matching. In the full matching, you need input your desired phone number in this blank, and then you need dial the phone number to realize calling to what the phone number is mapped. In the prefix matching, you need input your desired prefix number and T; then dial the prefix and a phone number to realize calling to what your prefix number is mapped. The prefix number supports at most 30 digits. Destination:Set Destination address. This is optional config item. If you want to set peer to peer call, please input destination IP address or domain name. If you want to use this dial rule in SIP2 line, you need input 0.0.0.2 in it. If not config, default sip1 as 0.0.0.0. Port: Set the Signal port, the default is 5060 for SIP; Alias: Set alias. This is optional config item. If you don’t set Alias, it will show no alias. Note: There are four types of aliases. 1) add: xxx, it means that you need dial xxx in front of phone number, which will reduce dialing number length. 2) all: xxx, it means that xxx will replace some phone number. 3) del: It means that phone will delete the number with length appointed. 4) Rep: It means that phone will replace the number with length and number appointed. You can refer to the following examples of different alias application to know more how to use different aliases and this dial rule. Call Mode: Select difference signal protocol, SIP or IAX2; Suffix: Set suffix, this is optional config item. It will show no suffix if you don’t set it; Delete Length: Set delete length. This is optional config item. For example: if the delete length is 3, the phone will delete the first 3 digits then send out the rest digits. You can refer to examples of different alias application to know how to set delete length; ATCOM TECHNOLOGY CO., LIMITED AT-610P User Manual 6、Config Manage Save Config: you can save all changes of configurations. Click the Save button, all changes of configuration will be saved, and be effective immediately. Backup Config: Right clicks on “Right click here…” and select “Save Target As….” then you will save the config file in .txt format Clear Config: user can restore factory default configuration and reboot the phone. If you login as Admin, the phone will reset all configurations and restore factory default; if you login as Guest, the phone will reset all configurations except for VoIP accounts (SIP1、SIP2 and IAX2) and version number. 7、Update 7.1. Web Update Click the browse button, find out the config file saved before or provided by manufacturer, download it to the phone directly, press “Update” to save. You can ATCOM TECHNOLOGY CO., LIMITED AT-610P User Manual also update downloaded update file, logo picture, ring, mmiset file by web. 7.2. 9 9 9 9 FTP/TFTP Update Server: FTP/TFTP server address. It can be the format of IP address such as 192.168.1.1 or domain such as ftp.domain.com Meanwhile , it support sub directory such as 192.168.1.1/ftp/config/ or ftp.domain.com/ftp/config Username: FTP user name (TFTP no need) Password: FTP password (TFTP no need) File name: the firmware or configuration file name that IP phone will search for in the server , if leave it as blank the IP phone with search the file with the name of its MAC such as 000102030405 Notice:Users can revise the exported config file by themselves and import the config file with only modules, for example if there is the SIP setting page in the config file , the IP phone will only change SIP setting after import this file and leave other setting as not changed. 9 Type: upgrading type ¾ Application update: update firmware。 ¾ Config file export: export the current configuration to a FTP/TFTP server ¾ Config fie import: import configuration file from a FTP/TFTP server ¾ Protocol: choose server type FTP or TFTP ATCOM TECHNOLOGY CO., LIMITED AT-610P User Manual 7.3. 9 9 9 9 9 9 9 9 9 Auto Provisioning Current Version: the system will display the current version number need to modify the version id need to more than this number on the config file before auto provision update. Server Address: FTP/TFTP server address Username: FTP server user name Password: FTP server password Config File Name: The name of configuration file. Normally users leave it as blank the IP phone search for the file with the name same as its MAC in the server Config Encrypt Key: The encrypt key of confirmation file Protocol Type: The protocol type that used for upgrading. FTP TFTP and Http Update Interval Time: The interval time that the terminals search for new configuration file , counted in hour Update Mode: auto provision mode; A、Disable: not auto update, B、Update after reboot: auto update after reboot, C、Update at time interval: auto update after a certain time ATCOM TECHNOLOGY CO., LIMITED AT-610P User Manual 8、System Manage 8.1. Account Manage Users can add new account or delete and change existing account Keyboard Password:config password that you use keyboard to access the 9 9 menu , must be in number. User Name:set new account name User Level:set new account level;root can read and change setting,general 9 9 can only read Password:config password for new account Confirm:double confirm password If you want to make change on existing account , select the account an click 【Modify】or 【Delete】. General account can only modify or delete general account ATCOM TECHNOLOGY CO., LIMITED AT-610P User Manual 8.2. 9 9 9 Phone Book Phonebook Table: shows phonebook detailed information Add Phone Book: add a new record in phonebook Name: nick name of a number ,when the call of this number comes in the LCD will show the name 9 Number: phone number 9 Ring Type: ring tone If you want to make change on existing account , select the account an click 【Modify】or 【Delete】. General account can only modify or delete general account Notice:Maximum records of phone book is 500pcs 8.3. Syslog Config Syslog is a protocol which is used to record the log messages with client/server mechanism. Syslog server receives the messages from clients, and classifies them based on priority and type. Then these messages will be written into log by some rules ATCOM TECHNOLOGY CO., LIMITED AT-610P User Manual which administrator can configure. This is a better way for log management.8 levels in debug information: Level 0---emergency: This is highest default debug info level. You system can not work. Level 1---alert: Your system has deadly problem. Level 2---critical: Your system has serious problem. Level 3---error: The error will affect your system working. Level 4---warning: There are some potential dangers. But your system can work. Level 5---notice: Your system works well in special condition, but you need to check its working environment and parameter. Level 6---info: the daily debugging info. Level 7---debug: the lowest debug info. Professional debugging info from R&D person. At present, the lowest level of debug information send to Syslog is info, debug level only can be displayed on telnet. The items describe: 9 Server IP: Syslog server IP address 9 Server Port:Syslog server port 9 MGR Log Level:config MGR log level 9 SIP Log Level:config SIPlog level 9 IAX2 Log Level:config IAX2log level 9 Enable Syslog:Enable/Disable Syslog ATCOM TECHNOLOGY CO., LIMITED AT-610P User Manual 8.4. 9 9 9 9 9 9 Time Set Server: type the IP address of time server Timezone: select correct time zone in list box Timeout: longest response time for SNTP Daylight Timeset: daylight setting through manual Manual Timeset: Time setting through manual Enable Daylight: Daylight saving time ATCOM TECHNOLOGY CO., LIMITED AT-610P User Manual 8.5. Call Log Start Time:Display starts time of the outgoing record. Last Time:Display conversation time of the outgoing record. Called Number:Display the account/protocol/line of the outgoing record. Notice: It will cover existing automatically if the call log table has the new record. 8.6. Logout Log out the configuration mode. If you want to re-configuration the phone, need to input the user and password to login again. 8.7. Reboot Reboot IP phone, some setting needs to reboot to make it works. Please always save config before reboot, otherwise the setting will return to previous setting. ATCOM TECHNOLOGY CO., LIMITED


