1
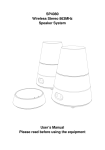
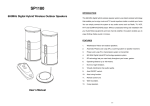
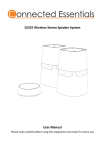
Splash-proof Wireless Speaker System
User’s Manual
Introduction
Speaker receivers – receives and broadcasts the audio signal to the speakers.
This splash-proof wireless speaker system uses latest wireless technology that enables
you to enjoy music and TV sound anywhere inside or outside your home. You can simply
connect the system to any audio source such as Radio, TV, VCR, Hi-Fi and
CD/MP3/VCD/DVD player without complicated wiring or installation. You’ll be to enjoying
thrilling, lifelike stereo sound in minutes.
Features
• Weatherproof indoor and outdoor speakers.
• Automatic Phases Lock Loop (PLL) scanning system on speaker receivers
• Phase Lock Loop (PLL) transmission system on transmitter
Remote Control – allows you to control the speakers wirelessly
• 863 MHz RF technology speaker system giving an operating distance of up to
100m (in ideal conditions) With no line of sight limitation – giving you high
quality sound reproduction
• RF technology lets you roam freely throughout your house, garden (within
stated operating distance).
• Auto ON/OFF control.
• Remote control unit.
• Wall-mountable.
• Add additional speaker sets to the one transmitter – ideal for surround sound systems.
• Transmitter • 3 x mains adapters • Owners manual
• Aerial tube • 6.3mm stereo adapter & 3.5mm to left/right RCA phono plugs
What’s on the equipment
Transmitter – connects to your audio equipment and transmits the audio signal to the
speakers
Setting Up The Transmitter
1. Insert the antenna wiretube into the antenna tube wire.
Contents
• 2 x Speakers
Getting Started
2. Plug Connect the supplied AC power
adaptor into an electrical wall socket.
3. Plug the AC power adaptor in the input
socket DC jack located on the rear of the
transmitter.
4. When the AC adapter is plugged in,
the red POWER LED illuminates. If the
red POWER LED does not illuminate,
make sure the adapter is plugged in and
the wall socket is switched on.
5. The rear of the transmitter has an audio cord that can be plugged into the audio output
socket jack of a TV, Monitor, Video, Radio recorder, CD/MP3/VCD or /DVD players or to
any 3.6mm headphone/earphone socket with the connector provided. If your system has
a 6.3mm socket or stereo outputs please use the additional adaptors provided.
When the transmitter receivesd an audio signal, the blue SIGNAL LED and the red
POWER LED will illuminate together. If the blue SIGNAL LED does not illuminate, ensure the
audio source is turned on and the transmitter is connected.
2
3
Setting Up The Speaker Receivers
1. Speakers can be powered by batteries (not supplied) or from the mains.
The tuning process can also be activated by pressing the
“AUTO TUNE” button on the remote control unit.
•If using batteries, Insert 6 x ‘C’ size
ALKALINE batteries into each of the
speakers battery compartments, ensure
with the correct polarity is used when
inserting the batteries.
4. Volume can be adjusted up by pressing the “+” button
or down by pressing the “-“ button “-“ to the desired
listening level, or you can press the “+” button or “-“
button” on the remote control unit to adjust the volume
level.
•or connect the supplied 9V power adaptor
to the DC input jack on the bottom of each
speaker, then plug it to the wall AC outlet.
Tips for Clear Reception
a) Keep a distance of the speakers up to 7 meters apart
from the transmitter, and then press “AUTO TUNE” button
for the best reception.
2. Press On/Off button and turn the speakers
ON. The POWER LED will light up in Blue.
To switch off the speakers press the ON/OFF
button on the speakers or on the remote
control unit, and the LED will switch off.
3. These speakers also have the added
advantage of being wall mountable. There
are two holes at the back of each speaker
for you to hang them on the wall. (Be sure
to use suitable hanging brackets or screws)
NOTE: WALL MOUNTING TEMPLATE ON THE BACK PAGE OF THE MANUAL?
b) If you get interference, move your channel switch from one channel to the other
channel (there are two channels for selection) on the transmitter, and then press the
“AUTO-TUNE” button again.
Note
Setting Up the Remote Control
1. Remove the battery cover at the rear of the remote control unit and insert 2 x “AAA”
size batteries (included) into the battery compartment following the correct polarity.
2. Replace the cover and close the battery compartment.
Operation
1. Switch on the audio source (TV or audio component) to which the transmitter is
connected to. The blue signal LED on the transmitter will light up.
2. Select transmitter channel 1 or 2. You may need to try each one in turn for the best
performance in your location.
3. Turn on the ON/OFF button on the speakers (the ON/OFF button on the remote control
unit cannot be used as a primary device to switch on the speakers). Press the “AUTO
TUNE” button to get the best tuning reception in the speakers. When the button is
pressed, frequency tuning starts automatically and it stops when a signal is detected.
4
You should now be able to moveplace the speakers freely from room to room without
interferance. Should there be any interferance (signal cuts off or carries distortion), press
the speaker’s “AUTO TUNE” button to maximise the best reception.
If you hear interference from other components, switch on the channel control of transmitter,
and then move the speakers to other free location. You can re-adjust the tuning control by
changing between either channel 1 or 2 of the transmitter, then pressing “AUTO TUNE”
button on the each speaker for best reception.
The signal from the system will become weaker when transmitting / receiving over longer
distances. Remember, the maximum range of 100 metres is in ideal conditions. Walls, furniture
and so on between the transmitter and speaker(s) will reduce the transmission range.
Switching Off
Press the ON/OFF button to turn off the speakers and the LED light will goes off, or simply
press the ON/OFF button on the remote control unit. If you use the remote control unit to
turn off the speakers, the speakers will be at stand-by mode for 5 minutes and the LED
5
will change from blue to yellow. You can switch on the speakers again by using the
remote control unit during the stand-by time. If there is no signal from the remote control
unit in 5 minutes, the speakers will automatically power off.
Remember that the speakers have an AUTO OFF function for the protection of the
transmitter and for power saving, the transmitter will cut off automatically if there is
no/weak operation input signal from the audio source for 4 minutes. However if the signal
comes back then the transmitter will power on and begin to work again automatically.
WARNING:
THE SUPPLIED POWER ADAPTORS ARE FOR INDOOR USE ONLY. IF THE
SPEAKERS ARE BEING USED IN A DAMP ENVIROMENT, THE SPEAKERS
SHOULD ONLY BE OPERATED BY BATTERY
.
This device must be used with the AC/DC adapters supplied in the package.
Trouble Shooting
Please ensure you have set your system up using the guidelines in this manual.
Some common problems are also listed below.
NO SOUND
No sound may be caused by one or more of the following:
• No Power - Ensure the AC/DC adaptor is fully inserted into the mains plug socket and
to the power connection input on the transmitter and speakers.
Specifications
Transmission Mode
:
UHF
Carrier Frequency
:
863 MHz Digital Hybrid
Operation Voltage
:
Transmitter, DC 12.5V 150mA
Speakers, 6 X ‘C’ size Alkaline batteries or
DC 9V 1.5A adaptor
Remote Control Unit, 2 X ‘AAA’ size batteries
Frequency Response
:
40Hz – 12KHz
Distortion
:
1%
S/N Ratio
:
65dB (typical)
Operation Distance
:
Up to 100 meters
Speakers
:
2-way
Output Power
:
2 x 5 Watts
Warning: Changes or modifications to this unit not expressly approved by the party
responsible for compliance could void the users authority to operate the equipment.
Operation is subject to the following two conditions: (1) this device may not cause
interference, and (2) this device must accept any interference, including interference that
may cause undesired operation of the device.
• Not Switched on - Ensure the speakers are switch ON.
Further information can be found at www.easidirect.co.uk
• If using batteries the capacity may be too low - replace with new batteries or use the
supplied AC adaptors.
Licence
• No source - Ensure your connected your the TV or audio component is switched ON
and is operational.
• The volume of speakers is too low - adjust the volume to an appropriate level.
This Connected Essentials RF product conforms with the European R&TTE directive for
RF systems in harmonised frequency ranges. These systems may be sold and operated
in the EU and in EFTA countries. Operation is not permited in countries not named.
The declaration of conformity is available from www.easidirect.co.uk
WEEE Directive
DISTORTED SOUND
Distorted sound may be caused by one or more of the following:
• Need to re-scan - Press the “AUTO-TUNE” button on the speakers until a clear sound
is heard.
• Need to change channels - Change the position of the channel selector on the
transmitter and press the “AUTO TUNE” button on the speakers.
• Battery capacity is too low - Replace with new batteries or use the supplied AC adapters.
• Ensure the volume level of speakers is adjusted properly.
Directive 2002/96/EC OF THE EUROPEAN PARLIAMENT AND COUNCIL OF 27th
January 2003 on waste electrical equipment.
Products that include the WEEE symbol, show below, should not be placed in the normal
house hold rubbish, but should be disposed of using the appropriate WEEE disposal facility.
These facilities may be advised to you by your local council or the organization from
which the product(s) was purchased. For the latest information on the WEEE Directive
please access the following url http://www.dti.gov.uk/sustainability/weee or telephone
Envirowise on 0800 585794
• The speakers are too far away from the transmitter, move them closer.
• The input level of the audio signal is too low. Turn up the volume of the audio source equipment.
If you are still having trouble with your system, you can call our help line on 0871 2002276
(Mon-Fri, 9.00am – 5.30pm, except public holidays,
calls are charged at national rate).
6
7
8


![[ENG] – User Manual](http://vs1.manualzilla.com/store/data/005641771_1-85014c30dcf830cbd17a3e8eaa623838-150x150.png)