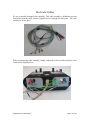
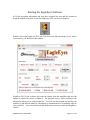
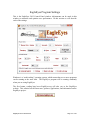
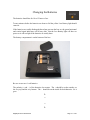
Download EagleEyes 2012
Transcript
EagleEyes 2012 User Manual July 19, 2011 Artwork by Trevor Southey Boston College and The Opportunity Foundation of America Table of Contents Introduction ......................................................... 1 Recommended Computer Equipment .................. 2 Setting Up Your Workspace ................................ 3 Software Installation ........................................... 4 Supplies ............................................................... 7 Basic Concepts .................................................... 9 Starting the System............................................ 11 EagleEyes Box .................................................. 12 EagleEyes Box Settings and Indicators ............. 13 Electrode Cables................................................ 16 Preparing to Connect the User ........................... 17 Left and Right ................................................... 18 Placing the Electrodes ....................................... 19 Eye Control vs. Head Control............................ 21 Starting the Software ......................................... 23 EagleEyes Program Settings.............................. 24 Trying the Person on the System ....................... 33 Eye vs. Head Control: One More Time ............. 35 Adjusting Your Screen ...................................... 36 Getting Comfortable with EagleEyes ................ 37 Disconnecting the User ..................................... 38 Suggested Application Software ....................... 39 Changing the Batteries ...................................... 41 Tips and Troubleshooting .................................. 42 Contact Information .......................................... 45 Introduction Welcome to the Boston College and Opportunity Foundation of America’s computerhuman interface system called EagleEyes. EagleEyes is an innovative mouse substitute that facilitates communication and instruction. Its purpose is to provide access to the computer for individuals with limited motor and verbal abilities. Although EagleEyes is not a substitute for genuine human interaction, its use has the potential to open doors to communication, learning, and entertainment not previously available to individuals with severe disabilities. EagleEyes can be used for academic, communication, and leisure activities including gaining access to the Internet. This manual is designed to aid users in their understanding of EagleEyes and how to incorporate this technology into a consistent training and usage program. Every effort has been made to include within this manual the necessary information to run, operate, and maintain EagleEyes. Should you encounter a problem, have difficulty interpreting any instructions, or feel something important is missing from the document, please contact Professor James Gips at 617-552-3981 or at [email protected]. The Boston College EagleEyes website is http://www.eagleeyes.org. The website of the Opportunity Foundation of America is at http://www.ofoa.net EagleEyes 2012 User Manual Page 1 of 45 Recommended Computer Equipment Below is the list of computer specifications recommended for EagleEyes. A standard desktop or notebook computer with Windows 7, Windows Vista, or Windows XP, an open USB port, and an internet connection. A color printer for printing eye paintings and other output. An appropriate table for the system. EagleEyes 2012 User Manual Page 2 of 45 Setting Up Your Workspace Environmental conditions for the system set-up include: Privacy for the user – Privacy should be protected for the user. It is good if the system is in an area where the user is not distracted. Light and glare – Optimal lighting for viewing the screen is a primary consideration. Pay special attention to reflective glare on the screen. Static electricity – Can be prevented by the purchase of anti-static floor mats placed near your system configuration. Proper ventilation – Air flow should be consistent so as not to overheat the user or the system. Also, it is good to keep the environment relatively dust free. The most essential component of EagleEyes to the user is the monitor or screen. The monitor height should be centered with the user’s nose and placed at a distance of one arm’s length away. It’s usually best if the wheelchair fits under the table or stand holding the monitor. If there is going to be one primary user of the system (for example in a home) then the system should be configured for that person with the monitor placed accordingly. If the system is going to be used by several people (for example in a school or assistive technology center) then it is very useful to invest in an adjustable stand for the monitor. Stands that can be raised or lowered by hand cranks or by the push of a button (motorized) are available. The electrode cables should be loose and out of the user’s line of sight (and grasp, if motor control is an issue). Cables should be kept off the floor and away from the speakers to prevent electrical interference. Lastly, ample room is needed to maneuver the user’s wheelchair in order to maximize the person’s performance. EagleEyes 2012 User Manual Page 3 of 45 Software Installation Please be sure to install the EagleEyes software BEFORE connecting the EagleEyes hardware to the computer. Also, please make sure the EagleEyes box has two 9 volt batteries. 1. Copy the file EE2012Installer.exe onto your disk from the thumb drive or CD provided by OFOA with your system. Or you can download the file at http://www.eagleeyes.org/EE2012Installer.exe. Be sure to Save the Installer file to your disk before running it. 2. Double click on EE2012Installer.exe to run it. If the computer asks for permission to continue, click on Allow to allow the EagleEyes 2012 Installer program to proceed. 3. When the following window appears, click Next. EagleEyes 2012 User Manual Page 4 of 45 4. During the middle of the installation you will see a screen like this, perhaps twice. 5. Just let the installation process finish. This screen will close itself automatically. 6. And, click Finish. EagleEyes 2012 User Manual Page 5 of 45 7. After installing the software, turn on the EagleEyes box and plug the EagleEyes Box into the computer using the USB cable. Two messages might appear briefly in the bottom right corner of the screen. The green USB light should turn on under the face on the EagleEyes box. The green light indicates that the EagleEyes box is communicating with the computer. 8. Double-Click on the EagleEyes 2012 icon on the desktop. 9. The EagleEyes 2011 Control Panel program window should appear: EagleEyes 2012 User Manual Page 6 of 45 Supplies Electrode Gel (available from the Opportunity Foundation of America) Alcohol Pads (available at any pharmacy) Cotton Gauze Pads (available at any pharmacy) EagleEyes 2012 User Manual Page 7 of 45 Electrode Washer Stickies (Optional. Available from the Opportunity Foundation of America) Paper Surgical Tape 3M Micropore (available at any pharmacy) EagleEyes 2012 User Manual Page 8 of 45 Basic Concepts EagleEyes is based on measurement of the user's EOG or electro-oculographic potential. The EOG results because the front of the eye (the cornea) is positively charged relative to the back of the eye (the retina). The EOG also is known as the cornea-retinal potential. The EOG is an electrical potential that is proportional to the angle of the eye in the head. With EagleEyes we place electrodes above and below a person's eye. The difference in the signals sensed by these electrodes gives the vertical EOG, which is proportional to the vertical position of the eye in the head. We also place electrodes to the left and right of the eyes. The difference in the signals sensed by these electrodes is the horizontal EOG, which is proportional to the horizontal position of the eye in the head. A fifth electrode is placed either high on the person's forehead away from the vertical electrodes or, using a clip electrode, on the person's ear. This fifth electrode is used as a reference ground for the system. The electrodes are connected to psychophysiological differential amplifiers in the EagleEyes box, one for the horizontal EOG and one for the vertical EOG. The EOG signals are quite small. Typically the signal is 20 microvolts for each degree of angle of the eye. So if the eyes are 5 degrees to the right of center, the difference in the horizontal electrodes will be about 100 microvolts. This is a small but noticeable signal. The amplifiers multiply the signal typically by a factor of 10,000, so the 100 microvolt signal would become 1 volt. The amplifiers are connected to an analog-to-digital converter board inside the external box which converts the analog electrical signals into digital values that the computer can understand. These digital values are passed to the computer through the USB cable. The EagleEyes driver software reads the horizontal and vertical values from the USB cable and converts them into screen coordinates for the mouse pointer. Thus, EagleEyes is a mouse substitution device. EagleEyes enables a person to control the mouse pointer by changing the angle of the eyes in the head. Basically if you move your eyes to the right the pointer will move to the right on the screen, and so on. Mouse clicks can be generated in the EagleEyes system using "dwell time." This is a setting in the software. If the mouse pointer is held within a certain area of the screen for a certain period of time (typically one second) then a mouse click can be generated. The EagleEyes system is designed to be a general mouse substitution device that conforms with the standards set by Microsoft. The EagleEyes system is designed to work with any software, whether commercial or custom-developed. The only limitation is that EagleEyes 2012 User Manual Page 9 of 45 a person cannot double click or drag with EagleEyes. So the software should be able to be used by moving the mouse pointer and single-clicking for selections. EagleEyes takes some getting used to. When we try the system with Boston College undergraduates it takes them about half an hour to be able to have enough control to spell out messages using an onscreen spelling board. They are able to consistently spell out messages at the rate of one character every 2.5 seconds. (See J.J. Tecce, J. Gips, P. Olivieri, L. Pok, M. Consiglio, "Eye Movement Control of Computer Functions", International Journal of Psychophysiology, vol. 29, no. 3, 1998.) Children with profound disabilities can require much more time to learn the system. First they must learn that there is a cause and effect relationship between their moving their eyes or head and the movement of the mouse pointer on the screen. Then they must acquire the skill of moving the pointer where they want to by controlling the angle of the eyes in the head. Our eyes have longer horizontal movement than they do vertical movement. Also we have involuntary blinks during which our eyes move upwards to be washed off by our eyelids. Also the involuntary movement of the eyelids can affect the vertical signal. The result is that the horizontal signal is easier to control than the vertical signal. People with severe disabilities have become quite capable at using EagleEyes. There can be profound positive effects (for example, to sense of self and to the way a child is treated by family members and others) to becoming even partially proficient at controlling the computer. EagleEyes 2012 User Manual Page 10 of 45 Starting the System It’s best to put the electrodes on the user 5 to 10 minutes before using EagleEyes. This gives the electrodes time to go into electrochemical balance with the skin. Please turn on the EagleEyes box to allow it to warm up for 5 or 10 minutes before use. When you are ready to start using EagleEyes, be sure the computer is turned on. Connect the EagleEyes box to the computer, if it is not already. Then connect the cables to the electrodes on the user’s head and the cables to the EagleEyes box. EagleEyes 2012 User Manual Page 11 of 45 EagleEyes Box This is the second generation EagleEyes box. (The first was white; the second is black.) Each important setting is explained in the following section. Figure 22 Note that there is an ID tag with the exact box number on the bottom of the box. EagleEyes 2012 User Manual Page 12 of 45 EagleEyes Box Settings and Indicators 1) Power Power is controlled by the On/Off switch in the bottom middle of the box. Two 9 volt batteries are needed for use. 2) Low Battery The Low Battery light indicates that the 9 volt batteries need to be changed. The Low Battery light should come on 20 - 30 minutes before the voltage is too low from the batteries and the unit no longer functions. Note that if the battery is very run down then the EagleEyes unit as a whole will no longer function, including the Low Battery light. If the batteries are too low then the green LEDS indicating the vertical and horizontal values will no longer be lit when the unit is turned on. 3) USB light The green USB light turns on when the EagleEyes box successfully is connected to the computer with a USB cable. This is not a power light. The USB light can be on even if the EagleEyes box is turned off. The power for the USB light comes from the computer through the USB cable rather than from the batteries in the EagleEyes box. This light indicates a successful connection with the computer. EagleEyes 2012 User Manual Page 13 of 45 4) Vertical and Horizontal Offset Sliders Default setting: Center The Offset Sliders should only be used rarely. Adjusting these sliders literally changes the position of the pointer on the screen. This means the operator can be making choices, not the user. 5) Auto Center Buttons The white Auto Center button returns the mouse pointer to a center position, either vertically or horizontally depending on the button pressed. These buttons can be used if the signal has drifted. Sometimes you need to press a button twice in succession. 6) Horizontal and Vertical Gain Changes to the Gain setting result in adjustments to the magnification of the signal. Turning the Gain to the left (counterclockwise) will decrease the amplification factor and turning to the right (clockwise) increases the amplification factor. This setting should be adjusted down when small movements on the part of the user result in exaggerated movements of the mouse pointer on screen. This setting should be adjusted upwards when the user seems to be making big eye movements resulting in very small changes in the position of the mouse pointer on screen. EagleEyes 2012 User Manual Page 14 of 45 The Gain is the main setting to make for people using EagleEyes. The horizontal and vertical amplifiers can be set to different gains. People often have a more difficult time moving the vertical, so a larger vertical gain often is appropriate. It also has been shown that the illumination level in the room affects the size of the EOG signal. Thus turning the lights on or off will affect the size of the signals. It is a mistake to set the Gain with the lights on and then turn off the lights for the rest of the session, as the signal will become smaller with the lower illumination. 7) Horizontal and Vertical Signal Indicators The green LEDs indicate the level of the vertical and horizontal signals as reported to the computer. So these take into account the Gain settings on the box and the Horizontal and Vertical Offset sliders. These green LEDs also function as a Power On indicator. Whenever the Power switch is On then one of the vertical LEDs and one of the Horizontal LEDs should be on. If none of the LEDS are on when the Power switch is On then the batteries are dead and need to be changed. 8) Control This setting changes control of the mouse pointer to either the EagleEyes user or the computer operator. This will only have an effect if the EagleEyes Driver Software is set to External Switch under the Method to toggle cursor control between mouse and electrodes setting at the bottom of the window (explained later). Assuming this software selection is made, EagleEyes will give the user control through the electrodes, and Mouse will give the operator control through the mouse. During an EagleEyes session, the operator will use this switch to turn control over to the user and then to take it back, for example to launch a new applications program. EagleEyes 2012 User Manual Page 15 of 45 Electrode Cables We use a specially designed cable assembly. This cable assembly is shielded to prevent interference with the small electrical signals received through the electrodes. The cable assembly is all one piece. When connecting the cable assembly, simply connect the colors as indicated by the color circles on the EagleEyes box. EagleEyes 2012 User Manual Page 16 of 45 Preparing to Connect the User Prior to hooking up an individual to EagleEyes, some basic precautions should be taken. EagleEyes is an exceptionally safe system, but still it employs an electronic device. For this reason, certain measures should be taken to ensure safety before connecting. These are not intended to scare, but rather inform, the EagleEyes user and those assisting him. 1. Please be sure that the toileting needs of a user are met before they use the system. Wet diapers or dampness of any sort should be avoided. 2. If the user is being fed via a G-tube, the connection to the tube should be dry. 3. As with all electronic devices, EagleEyes should not be used during a lighting storm. 4. Do not turn the equipment on or off while the user is connected. 5. Some users who involuntarily drool need to be frequently monitored to remove excess saliva. Scarves or bibs used to collect the saliva should be changed regularly throughout the EagleEyes session so that the user will remain dry. 6. Users producing excess perspiration may require a reapplication of the electrodes. A small fan can be employed to reduce the production of perspiration. 7. It is best not to use moisturizing cream or makeup on the face before an EagleEyes session. EagleEyes senses the user’s eye movements as they are picked up via the electrodes applied to the skin. Therefore, it is imperative that the natural oils of the skin are removed and that the user’s skin is clean and dry. Using the alcohol pads, clean the areas where the electrodes are to be affixed. If the user has had any adverse reactions to the alcohol, the skin may be cleaned with soap and water. Dry off the skin with the cotton gauze. If the user perspires during the operation of EagleEyes you must reattach any electrodes that have lost their adhesion. Clean the area again with alcohol and dry using a gauze pad. Do not connect the user until the computer is fully started up and all the equipment is turned on. Give the electrodes 5 to 10 minutes to settle and the amplifier box 5 to 10 minutes to warm up. EagleEyes 2012 User Manual Page 17 of 45 Left and Right Left in the diagram means the User’s left, not your left. The Upper and Lower electrodes should be placed above and below the User’s Right eye. EagleEyes 2012 User Manual Page 18 of 45 Placing the Electrodes 1. Wipe the users face around the areas where the electrodes will be placed with an alcohol swab. Be sure to remove any moisturizing oil or sun screen or makeup. (It’s best if none is put on prior to an EagleEyes session.) 2. Dry the face with a piece of cotton gauze. 3. Put a small amount of the conductive gel on the backside of the electrode starting with the right “black” horizontal electrode followed by the left “red” horizontal electrode. Draw an imaginary horizontal line through the center of the user’s eyes and place the electrodes along that line. The electrodes should be placed approximately an inch from the eye on the temple. 4. After the placement of each electrode on the user’s face, center a white sticky washer over the electrode. It works best if you put a fold in the washer first (there is a set of sticky washers in the EagleEyes bag with the fold in place as an example). The fold then goes over the electrode wire easier and will stay in place longer. (Alternatively you can use the paper tape to attach the electrodes instead of the paper washers.) EagleEyes 2012 User Manual Page 19 of 45 5. Follow the same process for the vertical placement on the user’s right eye. Draw an imaginary vertical line through the center of the user’s right eye and place the electrodes along that line. The upper “blue” vertical electrode should be placed approximately an inch above the eyebrow and the lower “white” vertical electrode should be placed parallel to the edge of the user’s nostril. After the placement of each electrode on the user’s face, center a white sticky washer over the electrode. 6. The fifth and final electrode is the reference ground electrode. Place the green ground electrode at the top corner of the user’s forehead as far away from the other electrodes as possible but not on the person’s hair. Place a white sticky washer over the electrode. 7. If there is an issue with an electrode not staying firmly on the face, use a piece of surgical tape (as below) over the top of the washer to ensure it stays on. 8. Remember to place the electrodes and allow them to sit for five minutes before using EagleEyes. This allows the electrodes and the skin to come into chemical balance. If you rush to use EagleEyes immediately after putting on the electrodes the person probably will have difficulty controlling the signal for the first five minutes, while the electrodes settle in. 9. After each EagleEyes session clean each electrode with an alcohol swab. (Note that the Upper and Lower electrodes are not quite aligned properly. They should be vertical on the face. But Mady is so cute. Thanks to Vicki, her mom, for the photos.) EagleEyes 2012 User Manual Page 20 of 45 Eye Control vs. Head Control EagleEyes users have two options for controlling the EagleEyes system. The first option allows the user to use eye movements in relation to the position of his head. The second option provides for the movement of the head in relation to the position of the eyes. In other words, the user can: 1. Move his eyes to control the movement of the mouse pointer while keeping his head stationary. 2. Move his head to control the mouse pointer’s movement while keeping his eyes staring at the screen. The key notion is that EagleEyes is measuring the angle of the eyes in the head. Think about it. You can change the angle by keeping your head constant and moving your eyes. You can change the angle by keeping your eyes fixated on a spot on the screen and by moving your head. EagleEyes will work either way. EagleEyes will not work if the user moves his head and keeps his eyes in the center of his head as his head moves. Here the angle of the eyes in the head will be unchanging even though the person will be looking at different places. EagleEyes does not have the mouse pointer follow where the person is looking. EagleEyes has the pointer follow the angle of the eyes in the head. To learn to use EagleEyes a person must become able to control the angle of the eyes in the head. At first this is awkward. We usually don't think about the position of the eyes in the head. After some feedback and practice it becomes a skill like riding a bike or using a mouse. Most people without disabilities prefer to control EagleEyes using Head Control. Here the mouse pointer basically tracks the direction in which they move their head. To move the mouse pointer to the right they stare at the screen and move their head to the right so the angle of the eye in the head changes. Small adjustments for better accuracy can then be made by moving the eyes slightly right or left. Head Control vs. Eye Control is a critical decision that must be made for each person who uses EagleEyes. It is very important that you the person who will be running EagleEyes is proficient on the system and that you have personally used both Head Control and Eye Control so you have a good intuitive feel for the advantages and disadvantages of each. People who come to our facility with full voluntary head movement we usually try first on Camera Mouse (www.cameramouse.org). People who have some voluntary head control we usually try on EagleEyes using Head Control. People who have no voluntary head movement we go immediately to EagleEyes with Eye Control. It is good to explain to the new user how EagleEyes works and to explain about moving the eyes or head and changing the angle of the eyes in the head. EagleEyes 2012 User Manual Page 21 of 45 Both of these methods should be tested to determine which method optimizes performance. Head Control is the inverse of Eye Control. That is, to switch from Eye Control to Head Control we simply need to invert the horizontal and vertical signals. There are several ways to invert the signals in the EagleEyes system. The leads can be switched on the face. The signals can be inverted in the EagleEyes software driver. The best way to switch from head control to eye control is in the EagleEyes software, which is discussed later. Note that when Head Control is selected in the software then the sliders on the box work the opposite way. So that moving the Horizontal slider to the right on the box causes the mouse pointer to move to the left on the screen. It is critical that once you have decided which to use that you be consistent in having a person use either head control or eye control from session to session. This really needs to be monitored. EagleEyes 2012 User Manual Page 22 of 45 Starting the EagleEyes Software All of the preceding information and steps have prepared the user and the operator to begin the EagleEyes session. Locate the EagleEyes 2012 icon on your desktop. Double-click on the EagleEyes 2012 icon. The driver may take a moment to load. After a few moments, you should see this window EagleEyes 2012 is the software that reads the signals from the amplifiers and uses the signals to replace the mouse coordinates. The program always will be running in the background when you are using EagleEyes. You will start the program up and then can minimize it and then run whatever educational or communication or recreational software you would like. You can switch back and forth between mouse control and EagleEyes control. EagleEyes 2012 User Manual Page 23 of 45 EagleEyes Program Settings This is the EagleEyes 2012 Control Panel window. Adjustments can be made in this window to customize and optimize user performance. In this section we will describe each of the settings. Windows is a “multi-tasking” operating system, which means that two or more programs can be running at the same time. The EagleEyes program will be running constantly when you are using EagleEyes. The first button, reading http://www.EagleEyes.org will take you to the EagleEyes website. This website has the latest news, pictures, applications, and information on the EagleEyes project. EagleEyes 2012 User Manual Page 24 of 45 Method to toggle cursor control between mouse and electrodes The EagleEyes program allows you to switch back and forth between controlling the computer the traditional way with the mouse and controlling the computer with EagleEyes. Normally you, the operator of the system, would want to use the mouse to start up, say, Living Books Grandma and Me, but then you would want to turn control over to the person using EagleEyes. There are four ways to switch back and forth between the mouse and EagleEyes. Which way is active is determined by the box at the bottom of the EagleEyes driver window. If External Switch is checked, then you change back and forth between the EagleEyes and the mouse using the Control switch in the middle of the EagleEyes Box. If the Ctrl key setting is checked in the EagleEyes driver window then you would switch back and forth by pressing the Ctrl key on the computer’s keyboard once. If the Num Lock key setting is checked in the EagleEyes driver window then you would switch back and forth by pressing the NumLock key on the computer’s keyboard once. If the Scroll Lock key setting is checked, you would switch back and forth by pressing the ScrollLock key on the computer’s keyboard once. Damping Sometimes the EagleEyes signal seems “jerky,” like it has too much detail in it. Damping allows you to smooth out the signal in the driver program. Damping acts as a shock absorber to the signal; the higher the damping value a user chooses, the smaller the fluctuations in the pointer movement. EagleEyes 2012 User Manual Page 25 of 45 The default damping setting is 1, which is no damping. Some people like damping settings of 3 or 4 or 5 to give them a smoother signal. However, a high damping value may cause the pointer to seem sluggish and less responsive. Controlling EagleEyes with a damping setting of 10 is like trying to drive a car on ice. The pull-down selector controls the amount of damping applied. Gain The Gain determines how small a change in the angle of the eye (or in the voltage of the amplifier) causes how large a change in the movement of the mouse pointer on the screen. Increasing the Gain means that small movements in the angle of the eye cause large movements on the screen. Usually Gain adjustments are made with the knobs on the EagleEyes box. It also is possible to make Gain changes in the software. Changing the Horizontal value would change the horizontal gain. Changing the Vertical value would change the vertical gain. However, the driver Gain settings in the driver software almost always are kept at 1.0. Excluded Zones Sometimes the area of interest for the person using the system is in the top right part of the screen. Through the excluded zone settings, certain areas of the screen become inaccessible. For example, setting the Bottom and Left settings to 50% would restrict the user to the top-right corner of the screen. This can prevent accidental clicking and help the user focus on a certain area. Usually, these settings are kept at 1% and changed for specific applications. EagleEyes 2012 User Manual Page 26 of 45 Eyes / Head This is the place to switch between eye control and head control. If the system is used exclusively by one person, this setting will not be changed. If the system is used by several people, for example in an assistive technology center or school, then this setting may be changed for each different user. There is a lengthy discussion of eye control vs. head control earlier in this manual at page 22. Mouse Click Often we simply want to use EagleEyes to move the mouse pointer around without any mouse clicks. Then the Mouse Click box should be empty or unchecked as above. EagleEyes also has the capability of causing a mouse click to be sent to the active program by using “dwell time.” That is, if the mouse pointer is kept within a certain small area of the screen for a certain length of time then a mouse click will be sent automatically. If you would like the person using EagleEyes to be able to click the mouse by keeping the pointer in a location then click on the box labeled Mouse Click. Turning on Mouse Click enables other settings to be changed. A mouse click will be generated by the EagleEyes driver program if the pointer is kept within a certain area for a certain period of time. The size of the area is determined by the Radius setting. The Radius setting is measured in “pixels.” Each pixel (short for “picture element”) is a spot of color on the screen. The screen might have 800 by 600 pixels or 1024 by 768 pixels, depending on the screen size setting. The Radius determines the size of the area in which the pointer must be kept to generate a mouse click. The usual setting for radius is 30 (or 30 pixels). If the person is having a difficult time controlling the pointer and keeping it steady to make a selection then the radius could be changed to 50 or 75. The period of time required to hold the pointer in the area is determined by the Seconds setting. This is the number of seconds required for the pointer to stay in the area in order for a mouse click to be generated. The eyes, as they are moving around, usually stay in a EagleEyes 2012 User Manual Page 27 of 45 spot for just a fraction of a second so the 1.0 seconds setting normally is a good choice. If the person using EagleEyes unintentionally is clicking too frequently then the Seconds setting could be changed to 1.5 or 2.0. If you want frequent repeated clicks to be issued then the setting could be changed to 0.5 seconds or 0.3 seconds. Sometimes a person using EagleEyes will send a click and then too quickly send another click and then another click. You might want there to be a delay period of 10 seconds or 120 seconds between clicks so, for example, a music or video selected can play through to completion without being interrupted by another click. The Refractory setting allows you to set a time period in seconds. If the Refractory is set at 10 seconds, a new click cannot be generated for at least 10 seconds. Normally the refractory is 0.0 (Off), which allows clicks at any point in time. Head Angle New in EagleEyes 2012 is the Head Angle setting. This feature was suggested by the uncle of a young man with Cerebral Palsy who noticed that his nephew always sat in his wheelchair with his head rotated to the side. The young man cannot hold his head up straight. The uncle wondered if we could add a feature to EagleEyes to take the head rotation into account. If you click on the new Head Angle button the following window appears EagleEyes 2012 User Manual Page 28 of 45 This represents the view from behind the user’s head looking at the computer screen. Drag the vertical line to correspond to the user’s head rotation. Click OK. This value will show in the EagleEyes control panel. The mouse pointer will be moved accordingly. With thanks to Eli’s uncle for suggesting this feature. EagleEyes 2012 User Manual Page 29 of 45 File pull-down menu A combination of settings in the EagleEyes driver is known as a “Configuration” or “Config”. It is possible to save a Configuration under a certain name and then recall it at a later time. If John does best on the Aliens program with a certain Configuration, select Save Config As… in the Options pull-down menu and then type in a name like John Aliens for the Configuration name. EagleEyes 2012 User Manual Page 30 of 45 All EagleEyes 2012 config files automatically are given an extension of .egt. The next time John is on the system and wants to play Aliens select Open Config… and restore the exact configuration. If the majority of the users are using a specific configuration, set up that configuration and then choose Save as Default Config from the File pull-down menu. This will load that configuration every time the program is started. If you are having problems with the configuration, the factory configuration that the program first started with can be loaded by selecting Factory Config. The program can be exited by clicking the Exit command from the File menu. EagleEyes 2012 User Manual Page 31 of 45 Help pull-down menu The help menu displays information About EagleEyes and Directions on how to work the EagleEyes system. When About EagleEyes is selected, the following window will display information about the software. To display information on how to operate the EagleEyes system, select Directions. That should open up this manual. EagleEyes 2012 User Manual Page 32 of 45 Trying the Person on the System The person who will be using EagleEyes is squarely in front of the monitor. The electrodes are firmly attached to the person’s face. The computer is turned on. The EagleEyes box is on. The horizontal and vertical sliders on the EagleEyes box are centered. The EagleEyes box is attached to the computer through the USB port. The electrode cables are attached firmly to the EagleEyes box. The EagleEyes driver software has been started. The “Mouse Click” setting in the driver window should be off. Ask the person to “lazy gaze” at the center of the screen. The green LED lights on the EagleEyes box should be lit in the middle. Maybe they are moving around a little bit, but not too radically. You can press the white Auto Center buttons on the EagleEyes box to move them back to the middle. When the green lights are resting in the middle you can switch control of the mouse pointer over to the user. Move the Control switch in the center of the EagleEyes box from “Mouse” to “EagleEyes”. The user should now be controlling the mouse pointer on the screen through the electrodes. The mouse pointer should be hovering towards the center of the screen. Not all people with disabilities can voluntarily blink, but if this person can, then ask the person to blink. The mouse pointer should jump up when the person blinks. (The eye moves up during a blink to be washed off.) Again, ask the user to “lazy gaze” at the center of the screen. The mouse pointer should float in the center of the screen. Now point to an icon on the left of the screen and ask the user to move the mouse pointer there by looking at it. The person should keep the head still and move the eyes there rapidly. The mouse pointer should go in that direction. If the mouse pointer hits where you are pointing, great! If the mouse pointer goes in that direction but only moves partly there, OK, but you need to turn up the horizontal gain. That is, you need to move the horizontal gain knob on the EagleEyes box clockwise. If the mouse pointer goes in that direction but moves past where you are pointing, you need to turn down the horizontal gain. That is, you need to move the horizontal gain knob on the EagleEyes box counterclockwise. EagleEyes 2012 User Manual Page 33 of 45 If the pointer moves to the right when the user looks to the left (and the driver window setting is on “Eyes”) then the horizontal electrodes have been switched. Detach the left and right electrodes from the user’s face and swap them. Now try pointing to the right. Now try up and down. Often it is more difficult to move the mouse pointer vertically (the eyes have less freedom to move up and down than they do to move left and right). So often it is necessary to set the vertical gain higher than the horizontal gain. The idea is to try to move your finger to different spots on the screen and try to have the person move his eyes or head so that the mouse pointer moves to your finger. Nothing is “cheating” for the person wearing the electrodes when trying to move the mouse pointer. Anything goes. If the person can move his head then by all means let him move his head and his eyes to try to move the mouse pointer. Sometimes it’s helpful to move the head in the opposite direction of the eyes. Sometimes people discover it helps to stick out their tongue or squint or squirm around. Any way they can learn to move the mouse pointer by themselves is fine. If the person has difficulty moving the mouse pointer, for example, to the top left, make sure that the person is sitting square in the chair and his head is level with the screen and pointing straight at the center of the screen. Positioning is very important in getting good results. EagleEyes will not work well if the person’s head is on its side and he is looking at the screen sideways. EagleEyes 2012 User Manual Page 34 of 45 Eye vs. Head Control: One More Time Again, if the person is controlling the computer with his eyes then moving the eyes to the left quickly should cause the mouse pointer to move to the left. Moving the eyes up quickly should cause the mouse pointer to move up. Blinking should also cause the mouse pointer to move up. If the person is controlling the computer with the head then keeping the eyes straight and moving the head to the left fairly quickly should move the pointer to the left. If the person is controlling the computer with the head then keeping the eyes straight and moving the head up should move the pointer up the screen. A blink should result in a downward movement of the pointer. Again, eye control or head control is best set in the EagleEyes software control panel. EagleEyes 2012 User Manual Page 35 of 45 Adjusting your Screen There are two elements to the size of your screen: the physical size and the number of pixels (picture elements) displayed on your screen. The physical size might be 15 inch or 17 inch or 19 inch or 21 inch. (The larger, the better.) The number of pixels might be 640 by 480 or 800 by 600 or 1024 by 768. The EagleEyes driver should work with any physical screen size and any number of pixels. If you would like to adjust the number of pixels displayed on your monitor, first exit the EagleEyes driver. (Don’t minimize it with the underline box. Close the driver by selecting Exit in the File pull-down menu or click on the X box on the top right.) There are several ways to adjust the number of pixels displayed on your screen. The easiest way is to minimize all windows and right-click on the background of your screen with the mouse. A pull-down menu should appear. Select the entry called Properties or Graphics Properties or Personalize. The Display Properties window should appear. Then, click on the Settings tab. Drag the Screen area setting to where you want it. Click OK and OK and Yes until the desktop is resized. Start up the EagleEyes driver again. Note that the driver program only checks the number of pixels being displayed when the program starts up. That is why the program must be closed and reopened when you make a change in the number of pixels displayed. EagleEyes 2012 User Manual Page 36 of 45 Getting Comfortable with EagleEyes By now, the user should be calibrated to the greatest extent possible. It is time to try out some of the other available programs. Calibration can also be achieved with some of these programs. Each operator of the system develops his own style in using the system. Some people like to calibrate just from the driver. Some like to use EaglePaint or EagleAliens. Keep in mind that one of the greatest difficulties for new users with severe disabilities is the notion of computer control. Lack of feedback from users puts the burden of recognizing technical problems or users’ expectations on the shoulders of the operator. Once the user has begun to recognize the relationship between cause and effect, he can begin to succeed using the EagleEyes system. In the dual role of instructor and operator, keep in mind the frustration level of the user and use appropriate software for his comfort and learning level. Software developed for use with EagleEyes is available for free download at http://www.cameramouse.org/EagleEyesApplications2008.exe. See pages 38 – 40 below for more suggestions. EagleEyes is designed to be controlled by changing the angle of the eyes in the head. Many students have used the feedback in the Aliens and Paint software to discover their own unique way to control the pointer through EagleEyes, for example by moving a facial muscle or scrunching the eyes or moving the tongue. We encourage these efforts. Whatever works is great with Boston College and the Opportunity Foundation of America. EagleEyes 2012 User Manual Page 37 of 45 Disconnecting the User The length of each EagleEyes session should be determined by the user. Fatigue, stress, frustration, perspiration, and success should all be taken into consideration when determining session length. New and/or younger users usually do best in sessions lasting from 20-45 minutes. Older and/or veteran users may like to work longer, 45-120 minutes per session. Breaks should always be given at approximately 30-45 minutes during a long session, or more frequently as needed. When disconnecting the user at the end of an EagleEyes session, the following steps should be adhered to: 1. Quit all open applications. Exit the EagleEyes program. 2. Remove the electrodes, removing the green Ground electrode last. 3. With some cotton gauze, gently wipe off any excess electrode gel that may have been left on the user’s face. 4. Turn off the EagleEyes Box. 5. Turn off your computer. EagleEyes 2012 User Manual Page 38 of 45 Suggested Application Software to Use with EagleEyes Aliens and Paint. These are a simple shoot the Aliens video game program and a Paint program that work well with EagleEyes. No clicking required. All-time favorites. Free. Good for learning to use EagleEyes. http://www.eagleeyes.org/EagleEyesApplications2008.exe Clicker by Crick Software is a popular commercial product for education and communication that allows you to use thousands of different onscreen grids or create your own. http://www.cricksoft.com/us/products/clicker/default.asp Planet Wobble is a series of talking books based on Clicker. http://www.cricksoft.com/us/products/clicker/planetwobble/default.asp Sports Illustrated Kids Road Rally http://www.sikids.com/games/roadrally Other Sports Illustrated Kids Sports Games (Some work with just the mouse) http://www.sikids.com/games Starfall.com learn to read website http://www.starfall.com Headsprout (Good site to use following Aliens and Paint but just the first few uses are free) http://www.headsprout.com For teaching cause and effect see the free software at the Priory Woods website. http://www.priorywoods.middlesbrough.sch.uk/resources/restop.htm ZAC Browser is designed for autistic children but is fun for all children. It contains music-making and short videos and games and other software that work well with EagleEyes all within one free downloadable framework. http://www.zacbrowser.com EagleEyes 2012 User Manual Page 39 of 45 Try the many free games at justclickandshot.com. In the Settings you can set the Dwell Time to 0.25 seconds and center the game on the screen and set the Exclude percents so that the mouse pointer is restricted to the region of the screen that contains the game. http://www.justclickandshot.com No Brainer 2 is a simple but intense quiz game. With EagleEyes running, move your head up-and-down for Yes and side-to-side for No. http://www.shockwave.com/gamelanding/nobrainer.jsp For a free onscreen keyboard try Staggered Speech http://www.stagggeredspeech.org EagleEyes 2012 User Manual Page 40 of 45 Changing the Batteries The batteries should last for 10 to 12 hours of use. Twenty minutes before the batteries are about to fail the yellow Low Battery light should come on. If the batteries are totally discharged then when you turn the box on, the green horizontal and vertical signal indicators will all stay dark. But the Low Battery light will have no power so it will not light if the batteries are totally done. The battery compartment is on the bottom of the box. Be sure to use new 9 volt batteries. The polarity (+ and – ) of the batteries does matter. The + should be on the outside, on the very top and the very bottom. The – should be on the inside for both batteries. So it goes + + EagleEyes 2012 User Manual Page 41 of 45 Tips and Troubleshooting Tips Here are the most likely causes of problems: 1. The 9 volt batteries in the bottom of the box need to be replaced. 2. The batteries are not placed in the box the right way, in terms of the + and – poles. 3. You started up too quickly. The electrode-skin connection needs to settle down and/or the box needs to warm up. Please keep the box on for 5 to 10 minutes before starting to use EagleEyes. At the same time please put the electrodes on the face for 5 to 10 minutes before using EagleEyes. 4. One or more electrodes is not tight against the skin. This is a very common problem. 5. The electrode cables are not plugged all the way into the EagleEyes box. 6. The Gain knobs are turned too high (or too low). 7. The Offset sliders are not centered. 8. The USB cable is not plugged into the box and computer. 9. A cell phone near the person using EagleEyes or near the EagleEyes box is disrupting the signal. 10. There is a break in the electrodes cable. The electrodes cable has been folded and there is not good connectivity in one of the cables. EagleEyes 2012 User Manual Page 42 of 45 Troubleshooting I turn the EagleEyes box on but no lights come on. The batteries need to be changed. Use only new 9 volt batteries. The following error message shows up. Check the EagleEyes Box and make sure it is on and plugged in via USB. Close the program and then restart it. If problems still occur, check the USB connections and make sure they are working. If everything is in working order, reinstall the EagleEyes software. The pointer is stuck around the edges of the monitor. Center the offset sliders. Check the Gain knobs; they might be too high. Push the Auto Center buttons a couple of times. Try waiting for a few minutes while the user looks at the center of the screen. Have the user take some deep breaths and relax. You take some deep breaths and relax. I can’t see the pointer on the screen when I’m using EagleEyes. The pointer is probably hiding in a corner and the gain is up too high. Follow the directions in the previous example. The pointer moves in the opposite direction than I want it to. EagleEyes 2012 User Manual Page 43 of 45 Something somewhere is reversed. Usually, two or more of the electrodes are reversed on the head. Also, check the Eyes / Head setting in the EagleEyes software window. The pointer moves too fast and is jumpy. The gain is up too high. Check the gain knobs on the EagleEyes box and the gain settings in the software. Also, movement can be smoothed out with the damping setting on the software. Also, check that all the electrodes are tight against the skin. The pointer is very difficult to move. The gain is down too low. Check the gain knobs on the EagleEyes box and the gain settings in the software. A common setting is vertical for the knobs and 1.0 for the settings in the software. Check that all the electrodes are tight against the skin. I move the switch on the switchbox to EagleEyes but nothing happens. Make sure the EagleEyes driver program is running. Look at the EagleEyes driver window and be sure the correct Control option is checked (External Switch, Ctrl key, NumLock key, or ScrollLock key). Also check to make sure all the cables are securely attached. The pointer just hovers but doesn’t move. Check to make sure all of the electrodes are securely attached to the user and the cables are pushed in all the way at the front of the EagleEyes box. Are the vertical and horizontal green LEDs on? Maybe the batteries need to be replaced. When in doubt, detach the person from the system. Check to make sure the electrodes are tight on the skin and the electrode cables are plugged firmly into the box. Turn off everything. Shut down the computer. Fiddle with the cables. Replace the batteries with new ones. Turn on the EagleEyes box. Start up the computer. Wait a couple of minutes. Start up the EagleEyes program and try again. Ask any veteran of tech support: Half the time turning equipment off and then turning it back on solves any problem. If a problem persists, email or call for help. EagleEyes 2012 User Manual Page 44 of 45 Contact Information Debbie Inkley Executive Director Opportunity Foundation of America 7166 Villandrie Lane Salt Lake City, Utah 84121 801-231-6691 [email protected] http://www.ofoa.net Prof. James Gips Fulton Hall 460 Boston College Chestnut Hill, MA 02467-3808 617-552-3981 [email protected] http://www.cs.bc.edu/~gips For more information on EagleEyes, please visit www.eagleeyes.org and www.ofoa.net Thank you for using EagleEyes! EagleEyes 2012 User Manual Page 45 of 45