1
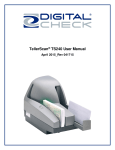
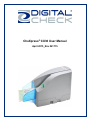
CheXpress® CX30 User Manual April 2015_Rev 041715 CheXpress® CX30 User Manual Rev 041715 Contents About the CheXpress CX30 ............................................................................................................................ 4 Radio Frequency Interference ......................................................................... Error! Bookmark not defined. CheXpress CX30 System Requirements........................................................................................................ 4 CheXpress CX30 Included Equipment ........................................................................................................... 5 CheXpress CX30 Features .............................................................................................................................. 6 External View of the CheXpress CX30 ........................................................................................................... 6 Bottom View of the CheXpress CX30............................................................................................................. 6 Exit Door Positions of the CheXpress CX30 ................................................................................................... 7 CheXpress CX30 Initial Setup ......................................................................................................................... 8 New User Notice ............................................................................................................................................ 8 Unboxing the CheXpress CX30 ..................................................................................................................... 8 Cable Connections and Scanner Placement .................................................................................................. 9 Disconnecting the USB and Power Supply Cables ......................................................................................... 9 Installing the Ink Cartridge............................................................................................................................ 10 Installing the Ink Cartridge (continued) ......................................................................................................... 11 Installing the Franker Roller ......................................................................................................................... 12 Testing the Scanner ...................................................................................................................................... 13 Installing the Optional USB Driver ................................................................................................................ 13 Installing ScanLite2 ...................................................................................................................................... 13 Getting Started with the CheXpress CX30 ................................................................................................... 14 LED Status Indicator .................................................................................................................................... 14 LED Status Indicator (continued) ................................................................................................................. 15 Exit Door Function and Optional Scan Modes .............................................................................................. 15 Inserting an Item into the Scanner ............................................................................................................... 16 Accessing the CheXpress CX30 ................................................................................................................... 17 Removing the Cover .................................................................................................................................... 17 Accessing the Cameras ............................................................................................................................... 18 Accessing the Internal Document Path ........................................................................................................ 18 Page | 2 CheXpress® CX30 User Manual Rev 041715 CheXpress CX30 Routine Maintenance ....................................................................................................... 19 CheXpress CX30 Maintenance Overview .................................................................................................... 19 Inspect the CX30 Document Track............................................................................................................... 19 Cleaning the CX30 Cameras........................................................................................................................ 19 Cleaning the CX30 Drive Rollers .................................................................................................................. 19 Cleaning the CX30 Drive Rollers (continued) ............................................................................................... 20 CheXpress CX30 Troubleshooting ............................................................................................................... 21 Document Feeding Problems ....................................................................................................................... 21 Clearing Jams .............................................................................................................................................. 21 Image Quality ............................................................................................................................................... 21 MICR Errors ................................................................................................................................................. 21 Using the Diagnostic Pop Up ....................................................................................................................... 21 CheXpress CX30 Frequently Asked Questions ........................................................................................... 22 How Many Checks Per Minute Should My CX30 Scan? ............................................................................... 22 Why Am I Getting Skewed or Short Images? ............................................................................................... 22 What is the LED Status Light Sequence?..................................................................................................... 22 What About Avoiding MICR Read Head Interference? ................................................................................. 22 When Should the CX30 Be Cleaned? .......................................................................................................... 22 How Long Does the Ink Cartridge Last? ....................................................................................................... 22 CheXpress CX30 Specifications ................................................................................................................... 23 Digital Check Contact Information ............................................................................................................... 24 Page | 3 CheXpress® CX30 User Manual Rev 041715 About the CheXpress CX30 The CheXpress CX30 is an easy-to-use and compact scanner that connects to a personal computer (PC). The CheXpress CX30 automatically scans the front and/or back of sides of checks and also reads the MICR (Magnetic Ink Character Recognition) code line. The images and data are then transmitted through a Universal Serial Bus (USB) interface to the PC. The CheXpress CX30 model has a single-item manual ‘drop and slide’ feeder that offers several modes of operation. The default mode is the ‘Scan & Return’ operation. Other options are ‘Pass Through’ and ‘Scan, Park & Return’. These are controlled through the application and by the exit door position. See the ‘Exit Door Function and Optional Scan Modes’ section for more information on how to enable the various scan modes. The CheXpress CX30 model is rated at up to 30 documents per minute (DPM) scanning speed. Speeds will vary based on the applications used, the PC processing speeds and mode of operation. The CheXpress CX30 uses mini-connectors in a recessed area in the bottom cover, along with multiple cable channels to minimize desk footprint and increase placement options. The scanner does not use an On / Off switch, but it does have a momentary ‘Reset Button’ that can be pressed to reset the scanner, if needed. The CheXpress CX30 is powered off when the PC powers down, as it senses the loss of power to the ‘USB’ port. FCC - Class B This equipment has been tested and found to comply with the limits for a Class B digital device, pursuant to part 15 of the FCC Rules. These limits are designed to provide reasonable protection against harmful interference in a residential installation. This equipment generates, uses and can radiate radio frequency energy and, if not installed and used in accordance with the instructions, may cause harmful interference to radio communications. However, there is no guarantee that interference will not occur in a particular installation. If this equipment does cause harmful interference to radio or television reception, which can be determined by turning the equipment off and on, the user is encouraged to try to correct the interference by one or more of the following measures: —Reorient or relocate the receiving antenna. —Increase the separation between the equipment and receiver. —Connect the equipment into an outlet on a circuit different from that to which the receiver is connected. —Consult the dealer or an experienced radio/TV technician for help. Industry Canada - Class B This digital apparatus does not exceed the Class B limits for radio noise emissions from digital apparatus as set out in the interference-causing equipment standard entitled “Digital Apparatus,” ICES-003 of the Department of Communications. CheXpress CX30 System Requirements Minimum Recommended 1.6 GHz Pentium IV class processor or faster 1 GB RAM 2.4 GHz Dual Core Processor or faster 2 GB RAM or more 1.5 GB free disk space 10 GB free disk space Windows XP, Windows Vista or Windows 7 (32/64 bit) Windows 7 or 8 (64-bit) USB 2.0 port USB 2.0 port DCC API 9.00 DCC API 10.09 or newer Page | 4 CheXpress® CX30 User Manual Rev 041715 CheXpress CX30 Included Equipment The CheXpress CX30 includes the following equipment in the box: CheXpress CX30 check scanner 100V-240V 50/60Hz voltage sensing external power supply USB 2.0 cable with mini B connector Ink cartridge - MS0083 Note: Ink cartridges are included only with ‘Inkjet’ models Franker roller Note: Franker rollers are included only with ‘Franker’ models Page | 5 CheXpress® CX30 User Manual Rev 041715 CheXpress CX30 Features External View of the CheXpress CX30 Bottom View of the CheXpress CX30 Page | 6 CheXpress® CX30 User Manual Rev 041715 Exit Door Positions of the CheXpress CX30 Located at the rear of the scanner is an exit door that can be opened to enable the ‘Pass Through’. See the ‘Exit Door Function and Optional Scan Modes’ section for details about how the exit door can be used to enable additional scanning modes. Page | 7 CheXpress® CX30 User Manual Rev 041715 CheXpress CX30 Initial Setup New User Notice PLEASE NOTE: Do not connect the ‘USB’ cable from the scanner to your PC before installing the ‘drivers’ or the ‘scanning application / software’. Digital Check does not provide scanning software. Please contact your bank or other solution provider for further assistance with installing the driver or getting the scanning software set up or installed. Digital Check provides only an optional driver installation utility and a separate demonstration program. See the ‘Installing the Optional USB Driver’ section or the ‘Installing ScanLite2’ section for additional information. Unboxing the CheXpress CX30 Lay the box on its side and slide out the packaging and scanner. Lift off the top plastic insert (the ‘USB’ cable is inside), then lift the scanner from the bottom insert. Page | 8 CheXpress® CX30 User Manual Rev 041715 Cable Connections and Scanner Placement Note: Do not connect the ‘USB’ cable from the scanner to your PC before installing the ‘drivers’ or the ‘scanning application / software’. Place the unit on a flat surface near the PC and away from direct light sources such as spotlights or underneath desk lamps. Place the scanner in a position that is at least 6 inches away from its ‘Power Supply’ or others. Connect the external ‘Power Supply’ by plugging the connector into the bottom access port. Connect the ‘USB’ cable by plugging it into the bottom access port. Route the two cords through any of the three cable channels to provide the best routing for your environment. Disconnecting the USB and Power Supply Cables When removing or disconnecting the ‘USB’ or ‘Power Supply’ cables from the CheXpress CX30, be sure to pull straight back on the cable and remove as shown below. Do not remove the cable by pulling up, vertically or at an angle. Doing so can damage the connector. The cables must be removed by gently pulling straight back on the cable from the connector. Page | 9 CheXpress® CX30 User Manual Rev 041715 Installing the Ink Cartridge Note: This step only applies to CheXpress CX30s that have the optional inkjet configuration. Follow these instructions when installing the ink cartridge for the first time, or when replacing an empty cartridge. Inkjet platform style might vary based on production. The cartridges are installed the same way for all CX30 platform styles. Step 1: Gently pull out the tabs on both sides of the scanner cover. Lift up on the cover to remove it and provide access to the inkjet platform. Step 2: Open the ink cartridge pouch and remove the protective tape covering the ink nozzles. Be careful not to touch the ink nozzle with your fingers or allow it to come in contact with anything else. Page | 10 CheXpress® CX30 User Manual Rev 041715 Installing the Ink Cartridge (continued) Step 3: Insert the nozzle end of the cartridge into the platform first, while keeping the reservoir end of the cartridge tilted slightly upward. Push the cartridge downward until it snaps into position. The cartridge should be level with the baseplate when it is fully seated. Step 4: Replace the center cover by setting it back on the unit vertically. Make sure that both sides of the ‘Locking Tabs’ are fully latched. If replacing an existing cartridge, remove the ink cartridge by grasping the small tab at the rear end and gently pulling upward. Replace the ink cartridge using the steps above. Note: If the scanner has to be transported by common carrier from one place to another or will experience extended periods of inactivity, it is advisable to remove the ink cartridge from the scanner and seal it in an airtight bag. If the cartridge has not been used for an extended period of time, it might be necessary to clean the inkjet nozzles by blotting them with a towel dampened with water. Page | 11 CheXpress® CX30 User Manual Rev 041715 Installing the Franker Roller Note: This step only applies to CheXpress CX30s that have the optional franker configuration. Follow these instructions when installing the franker roller for the first time, or when replacing an empty franking roller. Step 1: Remove the Main Scanner Cover. Open the Exit Door located at the rear of the scanner. Step 2: Swing out and hold the Spring Loaded Arm open (as shown). Locate the Spring Loaded Arm. The Franker Roller will slide onto a Post that is part of the Spring Loaded Arm. Step 3: Holding the Franker Roller (as shown), slide the Roller onto the Post. Step 4: Confirm that the Franker Roller is fully seated onto the Post. The top of the Post should be level with the Franker Roller (as shown). The Tab on the Spring Loaded Arm should be touching the metal Plunger (as shown). Close the Exit Door and replace the Main Scanner Cover. Page | 12 CheXpress® CX30 User Manual Rev 041715 Testing the Scanner Installing the Optional USB Driver PLEASE NOTE: Do not connect the ‘USB’ cable from the scanner to your PC before installing the ‘drivers’ or the ‘scanning application / software’. Digital Check does not provide scanning software. Please contact your bank or other solution provider for further assistance with installing the driver or getting the scanning software set up or installed. Digital Check provides only an optional driver installation utility and a separate demonstration program. Step 1: Download or Run the ‘TellerScan USB Driver’ installation file from www.digitalcheck.com Step 2: If the scanner is currently connected to the PC, disconnect the ‘USB’ cable from the PC. Turn the power off on any locally attached USB devices, such as printers, scanners or multifunction devices. This will help eliminate any possible conflicts between the various USB devices connected to the PC during the driver installation. Step 3: If downloaded / saved to a local drive, double-click on the TellerScanDriver.exe file to start the installation sequence. Follow the on-screen steps to complete the installation. Step 4: With the ‘USB’ and ‘Power Supply’ cables connected to the PC, the status LED on the scanner should now be active. Windows should now detect a new hardware device. The scanner is ready to be used with a ‘scanning application’ or a Digital Check demo program. Installing ScanLite2 The Digital Check demo program (ScanLite2) is a basic utility that allows you to scan and view images and test the various scanner functions. ‘ScanLite2’ is also useful for cleaning the scanner. See the ‘Cleaning the CX30 Drive Rollers’ section for additional information. Step 1: Download or Run the ‘ScanLite2’ installation file from www.digitalcheck.com Step 2: If downloaded / saved to a local drive, double-click on the ‘ScanLite2.exe’ file to start the installation sequence. Follow the on-screen steps to complete the installation. Step 3: ‘ScanLite2’ will launch automatically after installation, or it can be started from a shortcut that is placed on the Desktop during the installation process. Note: ‘ScanLite2’ does not save any image or MICR data to the PC. Once the scanned item disappears from the screen or the utility is shutdown, the data is removed / cleared. Page | 13 CheXpress® CX30 User Manual Rev 041715 Getting Started with the CheXpress CX30 LED Status Indicator Off or No LED: The ‘USB’ cable is not connected and/or no power to the scanner. Red LED: Scanner ‘USB’ and ‘Power Supply’ cables are properly connected. This is the default state when an application is not controlling the scanner or has not yet acquired the scanner. Note: Both ends of the ‘USB’ cable must be plugged in for the LED light to turn ‘Red’. If the LED does not turn ‘Red’, check and reseat the end of the ‘USB’ cable going into the PC and into the scanner and that the PC is turned on. Then, check that the ‘Power Supply’ cables are connected properly and the source is live. Page | 14 CheXpress® CX30 User Manual Rev 041715 LED Status Indicator (continued) Green LED: The scanning application has successfully acquired the scanner and it is ready to be used. Additional LED Information: After the CheXpress CX30 is synchronized with the application; the LED is used to detect the presence of documents in the entry pocket and will turn ‘Orange’ when a document has been loaded. After a document is scanned using the ‘Scan & Return’ mode, the check will stop in the entry pocket and show a flashing ‘Orange’ light. This indicates the document has been scanned and it can be removed. A flashing ‘Red’ LED indicates an error. Select an eject option within the application, if available, or look for a document in the path and press and release the ‘Reset Button’ on the side of the scanner. Exit Door Function and Optional Scan Modes The various scan modes depend upon the scan mode selected by the application and the open or closed position of the exit door before the scanning application is started. Scan & Return: This is the default and most commonly used mode. The ‘Exit Door’ is in the closed position. The document will feed into the scanner and then return to the ‘Entry Tray’ area after it has been scanned. Pass Through: To enable this mode, you will need to manually open the exit door prior to launching your scanning application or demo software (e.g. ScanLite2). With the exit door in the open position, the documents will feed straight through the scanner and stack in the exit door. Up to five items can stack in the exit door. To return back to ‘Scan & Return’ mode, you will need to close the exit door and restart the scanning application. Page | 15 CheXpress® CX30 User Manual Rev 041715 Inserting an Item into the Scanner The manual “drop and slide” style feeder takes just one item at a time. Use the following directions: Step 1: Remove all rubber bands, staples, paper clips, pins, etc. Step 2: Load the item by sliding it into the ‘Entry Tray’ with the front of the item facing out and away from the scanner. Step 3: Items must be inserted flat into the ‘Entry Tray’ and slide forward until they stop or are pulled into the scanner. The status LED should momentarily turn ‘Orange’ just before the item is pulled into the scanner. Note: Depending upon the scan mode selected by the application and the open or closed position of the exit door, the document will either scan through the unit and stop in the exit door or scan and return back to the ‘Entry Tray’ for easy removal. Page | 16 CheXpress® CX30 User Manual Rev 041715 Accessing the CheXpress CX30 Removing the Cover The CheXpress CX30 has a removable cover. Gently pull up on the ‘Locking Tabs’ located at the base of the scanner to provide access to the interior of the scanner. Page | 17 CheXpress® CX30 User Manual Rev 041715 Accessing the Cameras The cameras can be easily cleaned by opening the outer camera door. The cameras are recessed to minimize dirt and debris accumulation, but the CheXpress CX30 has been designed to make it easy to access and clean both cameras. Accessing the Internal Document Path The document path of the CheXpress CX30 offers a straight-through or ‘U’ path that can be accessed by opening the swing-out style, hinged doors located near the cameras and at the rear of the scanner. To open the track, locate the tab and pinch it together to unlock the door. When you close the door, the tab will click back into place and into a locked position. Page | 18 CheXpress® CX30 User Manual Rev 041715 CheXpress CX30 Routine Maintenance CheXpress CX30 Maintenance Overview Over time, ink, dirt and dust particles will collect on the scanner rollers and in the document track. Therefore, it is necessary to clean these areas to ensure reliable performance. Perform a periodic inspection of the document track and use a Digital Check cleaning card to clean the scanner rollers. Using a can of compressed air will help keep the document track clean. Inspect the quality of the captured images on a regular basis. If the image quality drops off, clean the camera glass by following the procedure below. Inspect the CX30 Document Track In addition to routine drive roller cleaning, a periodic inspection of the entire document track area is also recommended. The use of s flashlight will enhance the visual inspection in the camera section and throughout the document track. Remove any staples, paperclips, debris etc. that might have accumulated during use. Have a can of compressed air available to blow out the document track on a regular basis. See the ‘Accessing the CheXpress CX30’ section for additional information on removing the scanner cover to provide access to the document track. Cleaning the CX30 Cameras To clean the cameras, use a Digital Check cleaning swab or a clean cloth to wipe the camera glass. Be careful not to scratch the glass when cleaning or accessing the camera for any reason. See the ‘Accessing the Cameras’ section for additional information on opening the assembly prior to cleaning. Cleaning the CX30 Drive Rollers Use the Digital Check scanner cleaning cards (PN: IS0028 - available at www.digitalcheck.com) for regular cleaning maintenance. Note: Use a scanning application or Digital Check’s ‘ScanLite2’ utility to allow the CX30 to feed the cleaning card. Scanning in ‘Pass Through’ mode is also recommended. ‘Pass Through’ mode can be enabled by opening the rear door of the CX30 prior to running the scanning application or ‘ScanLite2’. See the ‘Exit Door Function and Optional Scan Modes’ section for more information. Page | 19 CheXpress® CX30 User Manual Rev 041715 Cleaning the CX30 Drive Rollers (continued) Note: The cleaning card is only effective for 1-2 minutes after being removed from the pouch. Insert a cleaning card and feed the card through around 6-8 times. Allow the card to scan all of the way through, flipping the card between cycles, top to bottom or to a clean side after each pass though the scanner. Discard the cleaning card(s) after use. Page | 20 CheXpress® CX30 User Manual Rev 041715 CheXpress CX30 Troubleshooting Document Feeding Problems If you notice feeding problems, straighten any bent or folded edges on the item and make sure that only one item at a time is being inserted into the scanner. Look for debris in the scanner document track if the item starts to scan, but stops in the path instead of exiting normally. If feeding problems are still experienced, try cleaning the drive rollers. See the ‘Cleaning the CX30 Drive Rollers’ section for additional information. Note: Items that jam in ‘Scan & Return’ mode might be caused by folded or damaged edges (especially the trailing edges) on the items. Clearing Jams If a jam occurs, the paper path must be cleared. If the document does not exit the track, grab the document with both hands and carefully wiggle the document back and forth while lifting up. See the ‘Accessing the CheXpress CX30’ section for additional information on how to open up and access the scanner. Image Quality If you notice either streaking or fading on the images, the camera glass might require cleaning. See the ‘Cleaning the CX30 Cameras’ section for additional information. MICR Errors Confirm that the document has known working MICR ink/toner. If MICR errors are still occurring, verify that the CX30 power supply or another device’s power supply is 6 or more inches away from the scanner. Next, inspect the MICR assembly for debris, particularly metal objects. If no debris is found, inspect the assembly itself for damage or incorrect position or wiring. Using the Diagnostic Pop-up The ‘Diagnostics’ will show a variety of PC and scanner information. This information can be copied and pasted into an email to send to support. Note: To enable the diagnostic pop-up the ‘scanning application’ has to be active and fully connected with the scanner. Step 1: Press and hold the Shift key. Step 2: Power cycle the scanner by disconnecting and then reconnecting the ‘Power Supply’ cable, or press and hold the ‘Reset Button. Step 3: Release the Shift key. The scanner diagnostics pop-up should now be showing on the PC. Page | 21 CheXpress® CX30 User Manual Rev 041715 CheXpress CX30 Frequently Asked Questions How Many Checks Per Minute Should My CX30 Scan? The CX30 is a manual feed scanner and its performance is dependent upon the operator. The CX30 has a rated speed of approximately 30 documents per minute (DPM) in scan and return mode. Actual throughput will vary depending on the PC configuration, physical size of the items scanned, mode of operation etc. Why Am I Getting Skewed or Short Images? If you notice that the images are skewing or coming up short, pay attention to inserting the documents flat into the ‘Entry Tray’ and sliding them into the path. Documents inserted with a tilt or skew can be pulled into the scanner tilted and can cause image quality issues. What is the LED Status Light Sequence? The proper LED sequence is for the LED to turn ‘Red’ when the ‘Power Supply’ and ‘USB’ cables are connected to the scanner and to an outlet and the PC. This is followed by the LED turning ‘Green’ once the application or scanning software is running and detects the scanner. If the LED does not turn ‘Red’, check the ‘USB’ and ‘Power Supply’ cable connection and the power source. What About Avoiding MICR Read Head Interference? Keep the CX30 ‘Power Supply’ and others, small desk fans or similar devices at least 6-12 inches away from the scanner to keep them from interfering with the magnetic read head. When Should the CX30 Be Cleaned? The recommended cleaning cycle is only as needed. A typical cycle is every few months. See the ‘CheXpress CX30 Routine Maintenance’ section for specific instructions on how to properly clean the CX30. How Long Does the Ink Cartridge Last? Once opened, the practical life of the ink cartridge is six to twelve months depending on usage and environment. However, the rated character yield on the inkjet cartridge is between 5-7 million characters. Do not shake or drop the cartridge which can cause the printing to fail. Digital Check recommends keeping a spare cartridge on hand in case the current cartridge cannot be used. Page | 22 CheXpress® CX30 User Manual Rev 041715 CheXpress CX30 Specifications Unit Size: Height: 7.47” (18.97 cm) Width: 3.92” (9.96 cm) Length: 9.38” (23.83 cm) Weight: 3.95 lbs. (1.8 kg) Paper Size: Document Height: 2.12” - 4.25” (54 - 108 mm) Image Capture Height: Up to 4.17” (106 mm) Document Length: 3.19” - 8.98” (121 - 228 mm) Document Weight: Scan & Return Mode: 16 - 28 lb. bond (60 - 105 gsm) Pass Through Mode: 16 - 54 lb. bond (60 - 203 gsm) Document Thickness: Scan & Return Mode: 0.0032” - 0.0058” (0.081 0.147 mm) Pass Through: 0.0032” - 0.0090” (0.081 - 0.229 mm) Printer: Programmable, single line inkjet printer with user replaceable cartridge In-Line MICR Recognition: (Magnetic Ink Character Recognition) for E13B (North America) and CMC7 (Europe) Optical Character Recognition to enhance MICR Read, further enhanced using DCC’s Best Read™ API function Transport Speed: 19.69 inches per second (50 cm) Throughput: Scan & Return Mode: Up to DPM Pass Through Mode: Up to 30 DPM Standard Interface: Standard USB 2.0 with mini B Scan Modes: Scan & Return, Pass Through Scanning Method: Concurrent Two-Sided Duplex (2 Scan Modules) Scan Module: Contact Image Sensor (CIS) Resolution: 300 dpi (1276 Pixel Linear Array) Light Source: Tri-Color LEDs Image Resolution Optical: 300 x 300 dpi - 8 bit grayscale 300 x 300 dpi - 24 bit color Image Resolution by Software Scaling: 240 x 240 (Scan at 300 dpi and scaling down to 240) 200 x 200 (Scan at 300 dpi and scaling down to 200) 120 x 120 (Scan at 300 dpi and scaling down to 120) 100 x 100 (Scan at 300 dpi and scaling down to 100) Supported Compression: JPEG (24 bit color, 8 bit grayscale) BMP (24 bit color, 4 or 8 bit grayscale) TIFF Group 4 B/W DCC API Requirements: DCC API Version 9.00 minimum DCC API Version 10.09 or newer recommended Supported Operating Systems: Windows® XP, Windows Vista® (32 / 64 bit), Windows 7® (32 / 64 bit), Windows 8® (32 / 64 bit), Mac OS X® (10.6 or newer) Ubuntu® 7.05 (or newer), Red Hat AS, OpenSuse Electrical: Power consumption: 24 Watts Input Voltage: 100 to 240 VAC, 50/60 Hz Separate Standard Power Supply: Auto sensing for voltage Product Warranty: 1 year warranty Mean Time To Repair (MTTR): 15 minutes Environmental: Operating Temperature: 60° - 90° F (15° - 32° C) Operating Humidity: 35 - 85% non-condensing Certifications: Safety: UL, cUL, CE FCC: Class B EMC: IEC CE Efficiency: CEC V 115V - Power Supply RoHS Compliant Page | 23 CheXpress® CX30 User Manual Rev 041715 Digital Check Contact Information Digital Check Corp. Corporate Headquarters Digital Check Corp. 630 Dundee Road Suite 210 Northbrook, IL 60062 Phone: (847) 446-2286 Fax: (847) 441-5507 Design and Manufacturing Digital Check Corp. 10231 Trademark Street Rancho Cucamonga, CA 91730 Phone: (909) 945-5106 Fax: (909) 948-3788 Visit us at www.digitalcheck.com Purchase Consumables Additional Product Information Technical Support and More CheXpress is a trademark of Digital Check Corp. All other trademarks are the property of their respective owners. Page | 24