1
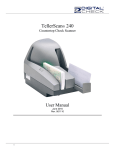
BranchXpress® BX7200 User Manual December 2014_Rev 122214 OM0085 Rev B BranchXpress® BX7200 User Manual Rev 122214 – OM0085B Table of Contents About the BranchXpress BX7200 ................................................................................................................... 4 FCC - Class A ................................................................................................................................................ 4 Industry Canada - Class A ............................................................................................................................. 4 BranchXpress BX7200 System Requirements ............................................................................................... 4 BranchXpress BX7200 Included Equipment .................................................................................................. 5 Packing or Shipping the BX7200 .................................................................................................................... 5 BranchXpress BX7200 Features ..................................................................................................................... 6 External View of the BranchXpress BX7200 .................................................................................................. 6 Rear View of the BranchXpress BX7200 ........................................................................................................ 6 BranchXpress BX7200 Initial Setup ............................................................................................................... 7 New User Notice ............................................................................................................................................ 7 Unpacking, Cable Connections and Scanner Placement ............................................................................... 7 Installing the Ink Cartridge.............................................................................................................................. 8 Installing the Ink Cartridge (continued) ........................................................................................................... 9 Adjusting the Height of the Inkjet Platform ................................................................................................. 10 Testing the Scanner ...................................................................................................................................... 11 Installing the Optional USB Driver ................................................................................................................ 11 Installing ScanLite2 ...................................................................................................................................... 11 BranchXpress BX7200 Display Panel .......................................................................................................... 12 Controls Overview ........................................................................................................................................ 12 Display Panel Status .................................................................................................................................... 12 Display Panel Status (continued) ................................................................................................................. 13 BranchXpress BX7200 Normal Display Message Sequences .................................................................... 13 BranchXpress BX7200 Display Panel Options ............................................................................................ 14 Envelope Sort Mode and Plunger Settings ................................................................................................... 14 BranchXpress BX7200 Status Display Messages ....................................................................................... 15 BX7200 Status Display Messages (continued) ............................................................................................. 16 Clearing an Error Message or Jam............................................................................................................... 16 Inserting Items into the Scanner .................................................................................................................. 17 Accessing the BranchXpress BX7200 ......................................................................................................... 18 Accessing the Internal Document Path – Entry Tray .................................................................................... 18 Accessing the Internal Document Path – Rear Door .................................................................................... 18 Page | 2 BranchXpress® BX7200 User Manual Rev 122214 – OM0085B Accessing the Camera Section – Camera 1 (Front) ..................................................................................... 19 Accessing the Camera Section – Camera 2 (Rear) ...................................................................................... 20 Accessing the BranchXpress BX7200 MICR Read Head ............................................................................ 21 Adjusting the BranchXpress BX7200 Discriminator Roller Tension .......................................................... 22 Advanced Adjustment (Return to Factory Setting)........................................................................................ 23 Adjusting the Discriminator Roller Tension (continued) ................................................................................ 24 Replacing the BX7200 Drive Rollers ............................................................................................................ 25 BranchXpress BX7200 Routine Maintenance .............................................................................................. 26 BranchXpress BX7200 Maintenance Overview ............................................................................................ 26 Cleaning the BX7200 Document Track ........................................................................................................ 26 Cleaning the BX7200 Cameras .................................................................................................................... 27 Cleaning the BX7200 Drive Rollers .............................................................................................................. 27 Cleaning the BX7200 Drive Rollers (continued) ........................................................................................... 28 BranchXpress BX7200 Troubleshooting...................................................................................................... 29 Document Feeding Problems ....................................................................................................................... 29 Troubleshooting (continued)......................................................................................................................... 30 Clearing Jams .............................................................................................................................................. 30 Image Quality ............................................................................................................................................... 30 MICR Errors ................................................................................................................................................. 30 Errors Showing on Display Panel Related to Documents and Sensor Timing .............................................. 31 BranchXpress BX7200 Frequently Asked Questions.................................................................................. 32 Is Using a Check Jogger Recommended? ................................................................................................... 32 What is the Typical Cleaning Interval? ......................................................................................................... 32 What is the Typical Ink Cartridge Yield? ....................................................................................................... 32 What Exactly is the Cascading Exit Pocket(s) Feature? ............................................................................... 32 Can the Blue Plunger / Entry Tray Bar be Adjusted? .................................................................................... 32 What is the Entry Tray Capacity? ................................................................................................................. 32 What is the Exit Pocket(s) Capacity? ........................................................................................................... 32 BranchXpress BX7200 Specifications ......................................................................................................... 33 User Replaceable Parts List.......................................................................................................................... 34 Consumables List.......................................................................................................................................... 35 Digital Check Contact Information ............................................................................................................... 36 Page | 3 BranchXpress® BX7200 User Manual Rev 122214 – OM0085B About the BranchXpress BX7200 The BranchXpress BX7200 is an easy-to-use, high-volume check scanner that automatically scans the front and/or back side of checks and reads the MICR (Magnetic Ink Character Recognition) code line. The images and data are then transmitted through a USB (Universal Serial Bus) interface to the PC. The BX7200 has an auto feeder that handles up to 300 items and two (2) 300-item exit pockets, which can be set to automatically cascade between pockets. The BX7200 is rated at up to 200 documents per minute (DPM) scanning speed. Speeds can vary based on the length of the documents being scanned, the application settings and the PC performance or configuration. The BX7200 has an ‘On / Off Switch’, but will only become fully activated when the ‘USB’ cable is connected to a powered-on PC. The BX7200 is automatically powered off when the PC powers down, as it senses the loss of power to the ‘USB’ port. FCC - Class A This equipment has been tested and found to comply with the limits for a Class A digital device, pursuant to part 15 of the FCC Rules. These limits are designed to provide reasonable protection against harmful interference when the equipment is operated in a commercial environment. This equipment generates, uses, and can radiate radio frequency energy and, if not installed and used in accordance with the instruction manual, may cause harmful interference to radio communications. Operation of this equipment in a residential area is likely to cause harmful interference in which case the user will be required to correct the interference at his own expense. Industry Canada - Class A This digital apparatus does not exceed the Class A limits for radio noise emissions from digital apparatus as set out in the interference-causing equipment standard entitled “Digital Apparatus,” ICES-003 of the Department of Communications. BranchXpress BX7200 System Requirements Minimum Recommended 2.4 GHz Dual Core Processor 2 GB RAM 2.8 GHz Quad Core Processor or faster 4 GB RAM or more 20 GB free disk space 40 GB free disk space Windows XP, Windows Vista, Windows 7 or 8 Windows 7 or 8 (64-bit) USB 2.0 port USB 2.0 port DCC API 12.11 (firmware 2014.08.13.0 or newer) DCC API 11.07 (older firmware, basic support only) DCC API 12.11 or newer Page | 4 BranchXpress® BX7200 User Manual Rev 122214 – OM0085B BranchXpress BX7200 Included Equipment The BranchXpress BX7200 includes the following equipment in the box: BranchXpress BX7200 check scanner USB 2.0 cable 100V-240V 50/60Hz voltage sensing, external power supply and cord Ink cartridge Packing or Shipping the BX7200 Note: The foam pieces are designed to fit around the scanner securely and are uniquely shaped to fit the specific sides of the scanner. There are two separate pieces that fit the bottom front and rear, and two separate top pieces that fit the top front and rear sides. The accessories rest inside of the top foam pieces. Step 1: Place the BX7200 on the bottom foam pieces with the front insert aligned with the front side of the scanner. The rear foam piece secures the rear side of the scanner. Step 2: The larger top foam insert should be placed on the top and front side of the scanner. The top rear insert secures the top rear side of the scanner. Page | 5 BranchXpress® BX7200 User Manual Rev 122214 – OM0085B BranchXpress BX7200 Features External View of the BranchXpress BX7200 Rear View of the BranchXpress BX7200 Page | 6 BranchXpress® BX7200 User Manual Rev 122214 – OM0085B BranchXpress BX7200 Initial Setup New User Notice PLEASE NOTE: Do not connect the ‘USB’ cable from the scanner to your PC before installing the ‘drivers’ or the ‘scanning application / software’. Digital Check does not provide scanning software. Please contact your bank or other solution provider for further assistance with installing the driver or getting the scanning software set up or installed. Digital Check provides only an optional driver installation utility and a separate demonstration program. See the ‘Installing the Optional USB Driver’ section or the ‘Testing the Scanner’ section for additional information. Unpacking, Cable Connections and Scanner Placement Note: Do not connect the ‘USB’ cable from the scanner to your PC before installing the ‘drivers’ or the ‘scanning application / software’. Remove the packing tape located on the outside of scanner from the following locations. There are no internal strips of packing tape. Do not remove any tape, cables, connections or secured parts on the inside of the scanner. Place the unit on a flat surface near the PC and away from direct light sources such as spot lights or desk lamps. Place the scanner in a position that is at least 6 inches away from any power supply to avoid magnetic interference with the MICR read head. Connect the ‘Power Cord’ for the external ‘Power Supply’ to the ‘Power Supply’ and then plug the connector into the rear access port. Connect the ‘USB’ cable by plugging it into the rear access port. Turn the scanner on using the ‘On / Off Switch’. Page | 7 BranchXpress® BX7200 User Manual Rev 122214 – OM0085B Installing the Ink Cartridge Follow these instructions when installing the ink cartridge for the first time, or when replacing an empty cartridge. Step 1: Lift up on the ‘Camera 1 Cover’ to remove it and provide access to the ‘Ink Cartridge Platform’. Step 2: Open the ink cartridge pouch and remove the protective tape covering the ink nozzles. Be careful not to touch the ink nozzle with your fingers or allow it to come in contact with anything else. Note: If the scanner has to be transported by common carrier from one place to another or will experience extended periods of inactivity, it is advisable to remove the ink cartridge from the scanner and seal it in an airtight bag. If the cartridge has not been used for an extended period of time, it might be necessary to clean the inkjet nozzles by gently blotting them with a towel dampened with water or using Digital Check’s Inkjet Cleaning Swabs (PN: IS0032 – available at www.digitalcheck.com). Page | 8 BranchXpress® BX7200 User Manual Rev 122214 – OM0085B Installing the Ink Cartridge (continued) Step 3: Insert the nozzle end of the cartridge into the platform while keeping the end of the cartridge tilted slightly upward. Push down on the rear of the cartridge until it clicks twice and snaps into position. Step 4: Verify that the cartridge is properly installed. The cartridge should appear tilted at a slight angle when fully seated. Replace the ‘Camera 1 Cover’ by setting it back on the unit vertically. Note: If replacing an existing cartridge, remove the ink cartridge by first pulling back on the blue locking tab, then lifting the cartridge upward. Replace the ink cartridge using the steps above. Page | 9 BranchXpress® BX7200 User Manual Rev 122214 – OM0085B Adjusting the Height of the Inkjet Platform The BX7200’s ink cartridge platform height is adjustable and can be raised or lowered manually. The printing height selection might benefit certain styles of endorsement and/or documents. Step 1: Locate the ‘Adjustment Arm’ near the cartridge platform. The outside or right side of the arm can be pushed to the left or towards the inside of the scanner. When the ‘Adjustment Arm’ is pushed in, it will free up the platform to be adjusted into the higher or lower position. Page | 10 BranchXpress® BX7200 User Manual Rev 122214 – OM0085B Testing the Scanner Installing the Optional USB Driver PLEASE NOTE: Do not connect the ‘USB’ cable from the scanner to your PC before installing the ‘drivers’ or the ‘scanning application / software’. Digital Check does not provide scanning software. Please contact your bank or other solution provider for further assistance with installing the driver or getting the scanning software set up or installed. Digital Check provides only an optional driver installation utility and a separate demonstration program. Step 1: Download or Run the ‘TellerScan USB Driver’ installation file from www.digitalcheck.com Step 2: If the scanner is currently connected to the PC, disconnect the ‘USB’ cable from the PC. Turn the power off on any locally attached USB devices, such as printers, scanners or multifunction devices. This will help eliminate any possible conflicts between the various USB devices connected to the PC during the driver installation. Step 3: If downloaded / saved to a local drive, double-click on the TellerScanDriver.exe file to start the installation sequence. Follow the on-screen steps to complete the installation. Step 4: With the ‘USB’ and ‘Power Supply’ cables connected to the PC, the display panel on the scanner should now be active. Windows should now detect a new hardware device. The scanner is ready to be used with a ‘scanning application’ or a Digital Check demo program. Installing ScanLite2 The Digital Check demo program (ScanLite2) is a basic utility that allows you to scan and view images and test the various scanner functions. ‘ScanLite2’ is also useful for cleaning the scanner. See the ‘Cleaning the BX7200 Drive Rollers’ section for additional information. Step 1: Download or Run the ‘ScanLite2’ installation file from www.digitalcheck.com Step 2: If downloaded / saved to a local drive, double-click on the ‘ScanLite2.exe’ file to start the installation sequence. Follow the on-screen steps to complete the installation. Step 3: ‘ScanLite2’ will launch automatically after installation, or it can be started from a shortcut that is placed on the Desktop during the installation process. Note: ‘ScanLite2’ does not save any image or MICR data to the PC. Once the scanned item disappears from the screen or the utility is shut down, the data is removed / cleared. Page | 11 BranchXpress® BX7200 User Manual Rev 122214 – OM0085B BranchXpress BX7200 Display Panel Controls Overview OK: Cancel: Eject: Info: Up/Down: Display Panel Status Note: The display panel will cycle through a series of status messages and end with one of the following messages displayed based on the scanner’s connection with the PC or scanning application. Off or No Display Showing: The ‘USB’ cable is not connected to the scanner and a powered-on PC and/or the BX7200 ‘On / Off Switch’ is not set to the ‘On’ position. Scanner Fully Connected with No Application Active: When the BX7200 is connected to a powered-on PC with no scanner application active, the display panel will illuminate and show the serial number and a ‘Host offline’ message. Page | 12 BranchXpress® BX7200 User Manual Rev 122214 – OM0085B Display Panel Status (continued) Scanner Fully Connected and Application Active: When the BX7200 is connected to a powered-on PC and the scanner application is active, the display panel will illuminate and show the serial number and a ‘Waiting for Host’ message. BranchXpress BX7200 Normal Display Message Sequences BX7200 with No Application Active on the PC: Displays current version of onboard firmware Displayed when ink cartridge is not detected BX7200 with Application Active on the PC: Displayed when ink cartridge is not detected BX7200 after Scanning All Items: Display will show ‘Stopped’ after scanning all items Page | 13 BranchXpress® BX7200 User Manual Rev 122214 – OM0085B BranchXpress BX7200 Display Panel Options Envelope Sort Mode and Plunger Settings Note: ‘Envelope Mode’ is turned ‘Off’ by default. BX7200 firmware version 2014.10.17.0 or newer is required to make this adjustment. The front display panel can be used to change the ‘Envelope Mode’ settings, ‘Sort’ settings and the static ‘Plunger’ opening after scanning settings. It is also used to reset the envelope mode and the plunger back to the ‘Factory Default’ settings of ‘Off’ and a plunger opening value of 40. Note: Power cycling the BX7200 resets ‘Envelope Mode’ and the ‘Sort’ option back to the ‘Factory Default’ of ‘Off’. Envelope mode explanation: The BX7200 can be set to allow envelopes to scan and be ignored by the double-feed sensor. This option would normally be disabled, but allows for processing ATM envelopes approximately 9” in length. A special utility is needed to change the envelope length. Check with Digital Check support for additional information. With ‘Sort’ set to ‘Off’, only exceptions go into ‘Exit Pocket II’ (inner pocket). With ‘Sort’ set to ‘On’, envelopes go into ‘Exit Pocket I’ (outer pocket) and the other items go into ‘Exit Pocket II’. Use the front display panel controls to display and select the settings. Press the Up Button Press the Down Button Press the OK Button Press the Cancel Button Press the Info Button – To scroll through the options – To scroll through the options – To select the option – To cancel the screen delay – To show the status Turning Envelope Mode ON: Press the Up Button Press the OK Button, two times Press the Info Button to show the mode status Turning Sort Mode ON: (Envelope Mode must be ON) Press the Up Button Press the OK Button Press the Down Button, two times Press the OK Button, two times Press the Info Button to show the mode status Setting Plunger Opening (Default value is set to 40) Press the Up Button, two times Press the OK Button Scroll up or down using the Up/Down buttons to select the desired setting Press the OK Button Factory Default Setting for Envelope Mode, Sort and Plunger Setting Press the Up Button, three times Press the OK Button Page | 14 BranchXpress® BX7200 User Manual Rev 122214 – OM0085B BranchXpress BX7200 Status Display Messages Note: The error message on the ‘Display Panel’ might have cleared. Run the scanner again and observe the error message right after the scanner stops. Host Offline Scanner is not connected with scanning application Waiting for Host Scanner is connected to host application and waiting for data or command Waiting for Docs A scan command has been issued, but no documents are in the feeder No Ink Cart Displayed when the ink cartridge is not detected Scanning Generic scanning indication Stopped Display will show Stopped after scanning all items Feeding Delay Documents in feeder taking longer than normal (Feeder plunger will move backwards and forwards to jog stack and help with the feeding) Feed Error Feeding problem in entry area Eject Eject document Resume, Press OK Generic message Length Error Document length is shorter or longer than allowed Dbl Feed Double feed triggered Jam #1 Jam between the ‘Entry Tray’ and ‘Camera 1’ (After the ‘Pre-Sync’ sensor, but before the second ‘Sync’ sensor) Jam #3 Jam between ‘Camera 1’ and the ‘Ink Cartridge Platform’ (Between ‘Sync’ sensor and the ‘Mid’ sensor) Page | 15 BranchXpress® BX7200 User Manual Rev 122214 – OM0085B BX7200 Status Display Messages (continued) Jam #5 Jam between the ‘Ink Cartridge Platform’ and ‘Camera 2’ (Between the ‘Mid’ sensor and ‘Sort’ sensor) Jam PktI Jam at or near the first exit pocket – numbers and letters are on scanner covers Jam PktII Jam at or near the second exit pocket – numbers and letters are on scanner covers Pocket Full, I Exit Pocket 1 (I) is full Pocket Full, II Exit Pocket 2 (II) is full Blocked Sensor Scanner enabled, but one or more of the sensors are blocked (Possible Exit Pocket full) Note: The specific sensor can be identified by using the ScanLite2 testing utility. With ScanLite2 running, go to the ‘Help’ menu and select ‘BX7200 Sensors’ to determine which sensor is listed as ‘blocked’. See the ‘Testing the Scanner’ section for additional information on installing ScanLite2. Waiting for Sort Waiting for sort decision from application Interlock Open ‘Entry Tray’ door is open Voltage Fault XX Voltage fault will show at boot time if incorrect ‘Power Supply’ voltage is detected Verify that the Digital Check ‘Power Supply’ part number: 154021-01 is being used Clearing an Error Message or Jam Press the Eject Button: to start the ‘Eject’ process. Remove any items from the path that did not ‘Eject’ and press the ‘Eject Button’ again to clear the error message. See the ‘Clearing Jams’ section and/or the ‘Accessing the BranchXpress BX7200’ section for additional information on how to open up and access the scanner. Page | 16 BranchXpress® BX7200 User Manual Rev 122214 – OM0085B Inserting Items into the Scanner The BX7200’s automatic feeder can handle up to 300 items at a time. Please follow the steps below to ensure proper feeding. Step 1: Slide out the ‘Exit Tray’ to expand the length of the tray to accommodate larger or business size checks. Remove all rubber bands, staples, paper clips, etc. Straighten any bent corners or excessively wrinkled documents. Step 2: Align (jog) the items to prepare them for scanning. Step 3: The leading and bottom edges of items should be aligned. Place the item(s) by sliding them into the ‘Entry Tray’ with the front of the item facing out and away from the scanner. The ‘Blue Plunger Bar’ can be pushed back manually, if needed. Step 4: Aligned items must be inserted flat into the ‘Entry Tray’ and slid forward until they stop or are pulled into the scanner. The ‘Blue Plunger Bar’ will return to its default position after the scan cycle is complete. Note: Digital Check recommends using our MJ1000 Check Jogger (PN: 130600 – available at www.digitalcheck.com) to help align the edges the items for optimum feeding. Note: The ‘Blue Plunger Bar’ is motorized. If pushed back, when the scanner starts its scanning, the ‘Blue Plunger Bar’ will automatically close onto the stack of items with the proper pressure. Once the scanning is finished, the ‘Blue Plunger Bar’ will open back up. Page | 17 BranchXpress® BX7200 User Manual Rev 122214 – OM0085B Accessing the BranchXpress BX7200 Accessing the Internal Document Path – Entry Tray To access the ‘Entry Tray’ area of the scanner, release the latch on the ‘Entry Tray’. The ‘Entry Tray’ door will open up to reveal the feed rollers and document path. To close the ‘Entry Tray’ door, push the assembly back towards the scanner until it clicks firmly back into place. Accessing the Internal Document Path – Rear Door To access the main path or ‘Rear Door’ area of the scanner, release the latch and open both doors. The doors will open up to reveal the two main corner rollers and the ‘Mid-path’ roller. To close the doors, push both doors together until they click firmly back into place. Page | 18 BranchXpress® BX7200 User Manual Rev 122214 – OM0085B Accessing the Camera Section – Camera 1 (Front) The front or ‘Camera 1’ can be accessed by lifting off the top cover. To access the camera itself, lift up on the ‘Black Tab’ to unlock and swing open the camera door. When closing the camera door, make sure that the ‘Black Tab’ clicks back into place. Note: Look for the white strip behind the glass, which is the camera. Be careful not to scratch the glass when cleaning or accessing the camera for any reason. Note: Place the scanner covers back into position vertically and straight down. Do not tilt or angle the covers when returning them to the original location. Page | 19 BranchXpress® BX7200 User Manual Rev 122214 – OM0085B Accessing the Camera Section – Camera 2 (Rear) The rear camera or ‘Camera 2’ can be accessed by lifting off the top cover. To access the camera itself, press down on the ‘Blue Tab’ to unlock and open up the camera door. When closing the camera door, make sure that the ‘Blue Tab’ clicks back into place. Note: Place the scanner covers back into position vertically and straight down. Do not tilt or angle the covers when returning them to the original location. Page | 20 BranchXpress® BX7200 User Manual Rev 122214 – OM0085B Accessing the BranchXpress BX7200 MICR Read Head Step 1: Turn the BX7200 off using the ‘On / Off’ switch on the scanner. Step 2: Locate the MICR read head by opening the ‘Entry Tray’ section of the scanner and removing ‘Camera 1 Cover’. See the ‘Accessing the BranchXpress BX7200’ section for additional information. Step 3: Remove the ‘MICR Assembly’ by lifting up on and “popping” it loose, making sure the wires that are connected to the assembly remain intact. The wired connector can be disconnected if replacing the ‘MICR Assembly’. Carefully rotate the assembly backwards after loosening it. Step 4: Inspect the MICR read head surface for any scratches or buildup of dirt. If the read head appears damaged or worn, replace the ‘MICR Assembly’. (PN: 154108 – available at www.digitalcheck.com) Step 5: Slide the ‘MICR Assembly’ back until it clicks into place after cleaning, inspecting or replacement. Reconnect the 3-pin wire connector if it was disconnected during assembly replacement. Do not force the assembly back into place. It needs to be fully seated to operate properly. Page | 21 BranchXpress® BX7200 User Manual Rev 122214 – OM0085B Adjusting the BranchXpress BX7200 Discriminator Roller Tension Simple Adjustment Note: If you are experiencing document feeding problems, the ‘Discriminator Roller’ might need an adjustment. This is not a permanent adjustment and the tension setting can be tightened or loosened as needed. If documents are not feeding, check for debris in the path and then verify that the tension setting is not too tight. Loosen the adjustment 1 “click” by turning the ‘Adjustment Wheel’ clockwise. It might take another 2-3 adjustment “clicks” to resolve the problem, but do not exceed 4 “clicks” without retrying or scanning again. Tighten the ‘Discriminator Roller’ tension if double or multiple documents are being fed into the scanner path. Step 1: Clean the scanner rollers before adjusting. Cleaning is important, even with new rollers. See the ‘Cleaning the BX7200 Drive Rollers’ section for additional information. Step 2: Locate the ‘Adjustment Wheel’ that is on the side of the scanner and near the ‘Entry Tray’. Step 3: Tighten the current adjustment 1 “click” by turning the ‘Adjustment Wheel’ counter-clockwise. Do not tighten more than 1 or 2 steps at a time. Too much tension can prevent documents from feeding properly. Note: If the ‘Discriminator Roller’ tension has been tightened properly or frequently but document feeding problems are still occurring, the ‘Discriminator Roller’ might need to be replaced. See the ‘Replacing the Drive Rollers’ section for additional information. Page | 22 BranchXpress® BX7200 User Manual Rev 122214 – OM0085B Advanced Adjustment (Return to Factory Setting) Note: This is a procedure to return the roller tension to the factory settings. This procedure can also be used after replacing the ‘Feed’ and ‘Discriminator’ rollers when performing maintenance. Step 1: Clean the scanner rollers before adjusting. Cleaning is important, even with new rollers. See the ‘Cleaning the BX7200 Drive Rollers’ section for additional information. Step 2: Locate the ‘Adjustment wheel that is on the side of the scanner and near the ‘Entry Tray’. Step 3: Open the ‘Entry Tray’ door and remove the ‘Camera 1 Cover’. Note: Older models of the BX7200 have a white ‘Nylon Tension Screw’ near the ‘Adjustment Wheel’. Loosen the ‘Nylon Tension Screw’ by turning it counter-clockwise after completing the following steps. Do not tighten the ‘Nylon Tension Screw’ after it is loosened. Newer models do not have the ‘Nylon Tension Screw’ – skip this step. Step 4: Loosen the current adjustment about 6-8 “clicks” by turning the ‘Adjustment Wheel’ counter-clockwise. The purpose of this step is to prepare the tension setting to be tightened and optimized in the steps below. Page | 23 BranchXpress® BX7200 User Manual Rev 122214 – OM0085B Adjusting the Discriminator Roller Tension (continued) Step 5: Slide a typical check back and forth between the rollers as shown. Tighten the ‘Adjustment Wheel’ clockwise 1 “click” at a time until you observe the inside ‘Discriminator Roller’ turning when the check is pulled back as the adjustment becomes tighter. Step 6: Remove the check and tighten the wheel an additional 3-4 “clicks” clockwise. This will tighten the adjustment a little bit more than in Step 5 and should now be the optimum setting from which to start scanning. Step 7: Close the ‘Entry Tray’ door and secure the ‘Camera 1 Cover’. Step 8: Scan a batch of several hundred items. If you encounter more than 1 jam or double-feed jam within the first 100-500 items, tighten the adjustment wheel 1 more “click” clockwise. Note: This adjustment should now only need an occasional “click” or two to tighten going forward to maintain the proper performance or to compensate for normal roller wear. Page | 24 BranchXpress® BX7200 User Manual Rev 122214 – OM0085B Replacing the BX7200 Feed Rollers The BX7200 has a set of user-replaceable rollers. Follow the steps below to replace the ‘Feed’, ‘Discriminator’ and ‘Exit’ rollers. Digital Check offers a ‘Roller Refresh Kit’ (PN: 154170-02 – available at www.digitalcheck.com), containing all the user-replaceable rollers. The rollers are replaced with the same technique and there are no tools required. Simply lift up on the roller to remove and then slide the replacement roller back onto the shaft to replace. Push down until the roller comes to a stop and verify that the roller is fully seated in place again. Note: The ‘Discriminator’ and ‘Second Feed’ rollers have a blue tab nearby that is labeled ‘Push’. When pushed, the ‘Push’ tab will create separation between the rollers so that they can slide off and on more easily. Page | 25 BranchXpress® BX7200 User Manual Rev 122214 – OM0085B BranchXpress BX7200 Routine Maintenance BranchXpress BX7200 Maintenance Overview Over time, ink, dirt and dust particles will collect on the scanner rollers and in the document track. Therefore, it is necessary to clean these areas to ensure reliable performance. Note: Digital Check recommends cleaning the BX7200 drive rollers daily when used in environments that frequently scan more than 10,000 items each day. Inspect the quality of the captured images on a regular basis. If the image quality drops off, clean the camera glass. See the ‘Cleaning the BX7200 Cameras’ section for additional information. For high-volume environments, the MICR head assembly can be removed for cleaning, to inspect the assembly for wear or replaced if necessary. See the ‘Accessing the BranchXpress BX7200 MICR Read Head’ section for additional information. Cleaning the BX7200 Document Track In addition to routine drive roller cleaning, a periodic inspection of the entire document track area is also recommended. The use of a flashlight will enhance the visual inspection in the camera sections and throughout the document track. Remove any staples, paperclips, debris etc. that might have accumulated during use. Digital Check recommends having a can of compressed air available to blow out the document track on a regular basis. Step 1: Start from the middle or rear of the scanner near the ‘Ink Cartridge Platform’ and blow the dust towards ‘Camera 1’ and then into and out of the ‘Entry Tray’. Step 2: Continue from the middle or rear of the scanner and blow the dust towards ‘Camera 2’ and then into both ‘Exit Pockets’. Blow out the inner and outer paths that lead to the exit pockets. Page | 26 BranchXpress® BX7200 User Manual Rev 122214 – OM0085B Cleaning the BX7200 Cameras There are 2 camera assemblies built into the BX7200, the first camera captures the front image of documents, the second camera located before the exit trays captures the rear side of documents. Both of these camera assemblies can be opened up for cleaning. See the ‘Accessing the Camera Section – Camera 1 (Front)’ for the front camera and the ‘Accessing the Camera Section – Camera 2 (Rear)’ sections for additional information on opening the assembly prior to cleaning. To clean the cameras, use a Digital Check cleaning swab or a clean cloth to wipe the camera glass. Be careful not to scratch the glass when cleaning or accessing the camera for any reason. Cleaning the BX7200 Drive Rollers Use the Digital Check scanner cleaning cards (PN: IS0028 - available at www.digitalcheck.com) for regular cleaning maintenance. Cleaning swabs (PN: IS0030) are also available for additional periodic maintenance. Note: Use a scanning application or Digital Check’s ‘ScanLite2’ utility to start the scanner motors so that the rollers are turning during the cleaning process. Use a cleaning card to scrub the 2 ‘Feed Rollers’, ‘Discriminator Roller’, 2 ‘Large Corner’ rollers and the ‘Midpath’ roller. See the ‘Accessing the BranchXpress BX7200’ section for additional information on how to open up and access the scanner. Discard the cleaning card(s) and/or swab(s) after use. Step 1: Insert a cleaning card with the motors running, while holding onto the card as it scrubs the first set of feed rollers (the first, second and discriminator rollers). Repeat this step 2-3 more times using different corners of the cleaning card each time. Note: The below images in Step 1 are for illustration purposes only. The ‘Entry Door’ needs to be closed in order for the scanner to function properly. The 2 ‘Feed Rollers’ and the ‘Discriminator Roller’ are shown with the cleaning card being used to clean them. Page | 27 BranchXpress® BX7200 User Manual Rev 122214 – OM0085B Cleaning the BX7200 Drive Rollers (continued) Step 2: Open the ‘Rear Door’ and locate the ‘Mid-path’ roller. The scanner motors will run and the rollers will turn normally with the ‘Rear Door’ open. Press the cleaning card or cleaning swab against the ‘Mid-path’ roller for 3 seconds to scrub the roller clean. Step 3: Locate the two ‘Large Corner’ rollers. With the scanner rollers still turning, press the cleaning card or cleaning swab against the 2 ‘Large Corner’ rollers for 3 seconds to scrub the rollers clean. Step 4: Close the ‘Rear Door’ assembly, but keep the scanner running so that it is able to feed the cleaning card through as if it is a normal type of item. Step 5: Feed the cleaning card through around 6-8 times. Allow the card to scan all of the way through, flipping the card between cycles, top to bottom or to a clean side after each pass though the scanner. Discard the cleaning card(s) after use. Page | 28 BranchXpress® BX7200 User Manual Rev 122214 – OM0085B BranchXpress BX7200 Troubleshooting Document Feeding Problems Note: If scanning bowed, tall or thick documents/envelopes, Digital Check recommends replacing the ‘First Feed’ roller with the ‘Tall First Feed’ roller. The ‘Tall First Feed’ is an optional roller and is designed to feed troublesome documents. The ‘Tall First Feed’ roller is sold separately. (PN: 154102 – available at www.digitalcheck.com) If you notice feeding problems, check the documents for bent or folded edges, debris in the scanner document track and that all items have been properly jogged / aligned and inserted correctly. If feeding problems are still experienced, try cleaning the drive rollers. See the ‘Cleaning the BX7200 Drive Rollers’ section for additional information. The ‘Blue Plunger Bar’ is motorized and will automatically close onto the stack of items and retry or re-engage the stack of items several times in an attempt to feed the first item. A bent corner on the lower leading edge of the item might be catching and preventing the item from feeding normally. Verify that the corner edges on the items are not bent and try the scanning process again. It might also be necessary to adjust the discriminator roller and retest. See the ‘Adjusting the BranchXpress BX7200 Discriminator Roller Tension’ section for additional information. Additionally, verify that the ‘Blue Gate’ that is a part of the ‘Blue Plunger Bar’ assembly, is pushed all of the way forward. It should be extended slightly over the ‘Discriminator’ roller. Page | 29 BranchXpress® BX7200 User Manual Rev 122214 – OM0085B Troubleshooting (continued) Clearing Jams If a jam occurs, the paper path must be cleared. To do this, try to advance the jammed document by pressing the ‘Eject’ button on the scanner. If the document does not exit the track, grab the document with both hands and carefully wiggle the document back and forth while lifting up. See the ‘Accessing the BranchXpress BX7200’ section for additional information on how to open up and access the scanner. Inspect the document track for debris and ensure that both of the camera doors are closed properly. See the ‘Accessing the Camera Section – Camera 1 (Front)’ and ‘Accessing the Camera Section – Camera 2 (Rear)’ for additional information on opening and closing the camera doors. Image Quality If you notice either streaking or fading on the images, the camera glass might require cleaning. See the ‘Cleaning the BX7200 Cameras’ section for additional information. MICR Errors Confirm that the document has known working MICR ink/toner. If MICR errors are still occurring, verify that the BX7200 ‘Power Supply’ or another device’s ‘Power Supply’ is 6 or more inches away from the scanner to avoid interference. Interference can also be caused by other electrical device such as a small desk fan. This is especially important near the ‘Entry Tray’ and ‘Display Panel’ areas of the scanner. Next, inspect the MICR assembly for debris, particularly metal objects. If no debris is found, inspect the assembly itself for damage or incorrect position or wiring. See the ‘Accessing the BranchXpress BX7200 MICR Read Head’ section for additional information. Page | 30 BranchXpress® BX7200 User Manual Rev 122214 – OM0085B Errors Showing on Display Panel Related to Documents and Sensor Timing The ‘Display Panel’ will show the following messages if a feed, jam or other error occur. This list can be used to resolve some of the common errors that might be encountered. Contact support for additional information or tips if frequent problems or other unlisted errors occur. Feed Error – Document late to ‘Pre-Sync’ sensor (-216 error code). Clean the scanner rollers and check the ‘Discriminator Roller’ tension setting. Jam #1 – Document late to ‘Sync’ sensor (-220 error code). Clean the scanner rollers and look for debris in the path. Check the ‘Discriminator Roller’ tension setting. Jam #3 – Document late to or leaving ‘Mid’ sensor (-220 error code). Clean the scanner rollers and look for debris in the path. Jam #5 – Document late to or leaving ‘Sort’ sensor (-220 error code). Clean the scanner rollers and look for debris in the path. Jam PktI – Document late to or leaving ‘Exit 1’ sensor (-220 error code). Clean the scanner rollers and look for debris in the path. Verify that the cable for ‘Camera 2’ is connected. Jam PktII – Document late to or leaving ‘Exit 2’ sensor (-220 error code). Clean the scanner rollers and look for debris in the path. Verify that the cable for ‘Camera 2’ is connected. Note: ‘Blocked Sensor’ display message might indicate an ‘Exit Pocket’ full condition, but can also be a sensor that is blocked by debris. Page | 31 BranchXpress® BX7200 User Manual Rev 122214 – OM0085B BranchXpress BX7200 Frequently Asked Questions Is Using a Check Jogger Recommended? Yes, to provide consistent alignment of documents, increase productivity and to reduce operator fatigue. Digital Check recommends using our MJ1000 Check Jogger (PN: 130600 – available at www.digitalcheck.com) What is the Typical Cleaning Interval? The recommended cleaning interval for the BX7200 is approximately every 10,000 scans. Use a combination of the Digital Check Cleaning Swabs and Cleaning Cards to clean the drive rollers. See the ‘Cleaning the BX7200 Drive Rollers’ section for additional information. Digital Check recommends having a can of compressed air available to blow out the document track on a regular basis. See the ‘Cleaning the BX7200 Document Track’ section for additional information. What is the Typical Ink Cartridge Yield? This will vary depending on the amount of data and the font type being used, but up to 7,000,000 characters of information can be printed before a replacement cartridge is needed. (PN: MS0083 – available at www.digitalcheck.com) What Exactly is the Cascading Exit Pocket(s) Feature? The BX7200 has pocket full sensors which enable the scanner to cascade items to the empty pocket when the current pocket becomes full. Note: The ‘scanning application’ must support this feature. The application controls this feature. Can the Blue Plunger / Entry Tray Bar be Adjusted? The blue ‘Plunger’ located in the ‘Entry Tray’ can be adjusted to accommodate specific or frequent sized batches of documents. The resting position for the blue ‘Plunger’ is set within the scanner’s internal configuration. This allows the opening after the scan cycle has finished to stop at a pre-determined gap. The default setting is approximately a ¼” gap. See the ‘Adjusting the Blue Plunger Bar Opening’ section for additional information or contact Technical Support for additional information on adjusting the ‘Plunger’. What is the Entry Tray Capacity? The entry tray can accept up to 300 standard checks in good condition at a time. What is the Exit Pocket(s) Capacity? Up to 300 standard checks in good condition at a time can be stacked in either of the exit pockets. Page | 32 BranchXpress® BX7200 User Manual Rev 122214 – OM0085B BranchXpress BX7200 Specifications Unit Size: Height: 8.00” (20.32 cm) Width: 15.00” (38.10 cm) Length: 18.50” (46.99 cm) Weight: 17.00 lbs. (7.71 kg) Paper Size: Document Height: 2.50” - 4.52” (64 - 115 mm) Image Capture Height: Up to 4.17” (106 mm) Document Length: 4.76” - 8.97” (121 - 228 mm) Document Weight: 16 - 28 lb. bond (60 - 105 gsm) Document Thickness: 0.0032” - 0.0058” (0.081 - 0.147 mm) Document Capacity: Entry Tray (Check Feeder): Up to 300 items Exit Pocket 1: Up to 300 items Exit Pocket 2: Up to 300 items Printer: Two position, programmable, single line inkjet printer with user replaceable cartridge In-Line MICR Recognition: (Magnetic Ink Character Recognition) for E13B (North America) and CMC7 (Europe) Optical Character Recognition to enhance MICR Read, further enhanced using DCC’s Best Read™ API function Transport Speed: 28.60 inches per second (73 cm) Throughput: Up to 200 documents per minute User Interface: 2 line, 16 character display screen Standard Interface: Standard USB 2.0, Optional Ethernet Interface Scan Modes: Batch Capture Mode and Single Item Hand Drop Mode Scanning Method: Concurrent Two-Sided Duplex (2 Scan Modules) Scan Module: Contact Image Sensor (CIS) Resolution: 300 dpi (1276 Pixel Linear Array) Light Source: Tri-Color LEDs Image Resolution Optical: 300 x 300 dpi - 8 bit grayscale 300 x 300 dpi - 24 bit color Image Resolution by Software Scaling: 240 x 240 (Scan at 300 dpi and scaling down to 240) 200 x 200 (Scan at 300 dpi and scaling down to 200) 120 x 120 (Scan at 300 dpi and scaling down to 120) 100 x 100 (Scan at 300 dpi and scaling down to 100) Supported Compression: JPEG (24 bit color, 8 bit grayscale) BMP (24 bit color, 4 or 8 bit grayscale) TIFF Group 4 B/W DCC API Requirements: DCC API Version 11.07 minimum DCC API Version 12.05 or newer recommended Supported Operating Systems: Windows® XP, Windows Vista® (32 / 64 bit) Windows 7® (32 / 64 bit), Windows 8® (32 / 64 bit) Electrical: Power consumption: 60 Watts Input Voltage: 100 to 240 VAC, 50/60 Hz Separate Standard Power Supply: Auto sensing for voltage Product Warranty: 1 year or 4 million item scans, whichever occurs first Mean Time To Repair (MTTR): 15 minutes Environmental: Operating Temperature: 60° - 90° F (15° - 32° C) Operating Humidity: 35 - 85% non-condensing Certifications: Safety: UL, cUL, CE FCC: Class A Industry Canada: Class A EMC: IEC CE Efficiency: CEC IV 115V - Power Supply RoHS Compliant, WEEE Compliant Page | 33 BranchXpress® BX7200 User Manual Rev 122214 – OM0085B User Replaceable Parts List Digital Check highly recommends implementation of periodic cleaning and preventative maintenance, common on ATM and proof machines, to ensure the BX7200 is always running at optimum performance. To assist in preventing costly down time, Digital Check offers a ‘Roller Refresh Kit’ (PN: 154170-02 – available at www.digitalcheck.com), containing all the user replaceable rollers. DESCRIPTION PART NUMBER First Feed Roller 154189 Tall First Feed Roller Optional roller designed to help feed taller or thicker items and envelopes 154102 Second Feed Roller 154166 Discriminator Roller 154167 Exit Roller Includes (1) Exit Roller Purchase quantity of 2 154117 Roller Refresh Kit Includes (1) First Feed Roller, (1) Second Feed Roller, (1) Discriminator Roller and (2) Exit Rollers 154170-02 MICR Read Head Assembly 154108 Ink Absorption Pad 154211 Page | 34 BranchXpress® BX7200 User Manual Rev 122214 – OM0085B Consumables List DESCRIPTION PART NUMBER Cleaning Kit Includes (6) Cleaning Swabs, (25) Cleaning Cards 130007-03 Ink Cartridge MS0083 Page | 35 BranchXpress® BX7200 User Manual Rev 122214 – OM0085B Digital Check Contact Information Digital Check Corp. Corporate Headquarters Digital Check Corp. 630 Dundee Road Suite 210 Northbrook, IL 60062 Phone: (847) 446-2286 Fax: (847) 441-5507 Design and Manufacturing Digital Check Corp. 10231 Trademark Street Rancho Cucamonga, CA 91730 Phone: (909) 945-5106 Fax: (909) 948-3788 Visit us at www.digitalcheck.com Purchase Consumables Additional Product Information Technical Support and More BranchXpress is a trademark of Digital Check Corp. All other trademarks are the property of their respective owners. Page | 36