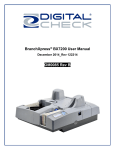
Download Driver Install Guide
Transcript
Digital Check Scanner Driver Installation Guide
Use the instructions on this Guide in conjunction with those found in the scanner’s User Guide to set up your Digital
Check scanner for use with the Remote Deposit Capture utility. Instructions are also included for installing the driver
once it has been downloaded. Basic instructions for setup and scanning checks are included at the end of the guide.
Overview
To install the scanner:
1. Unpack the scanner, comparing the included components to the packing list.
2. If available, install the ink cartridge into the scanner.
3. Connect the scanner’s power cables and plug it in. You may attach the included USB cable to the scanner’s USB
port at this time, but do not attach the USB cable to the computer until directed by the instructions.
4. Make sure the scanner is turned off. Verify that the red power indicator on the Control Panel is not lit.
5. Ready the setup files on your hard drive. See instructions below for Installing Scanner Driver Software.
6. Install the scanner software. If a setup CD was included in your packaging, do not use the setup CD; use the files
provided to you by the financial institution.
7. Connect the scanner to your computer’s USB port when directed.
8. Set the system Web address as a trusted site.
9. Turn the scanner on.
10. Log on and set scanner preferences.
11. Scan a deposit.
Unpacking the Scanner
Once you unpack the scanner, check the contents against the packing list. Included should be:
• Scanner
• Power cable and power supply
• USB 2.0 cable
• Inkjet cartridge (Optional feature)
Installing the Ink Cartridge
If an ink cartridge is available, install stall it. See the User Manual for illustrated instructions on installing the ink
cartridge. As of this document’s creation, the User Manual is available from the manufacturer at:
http://www.digitalcheck.com/media/downloads/pdf/manuals/TS215_TS230_User_Manual_Rev_050609.pdf
Plugging In the Scanner
The scanner should be plugged in to the power supply only. Do not connect the USB cable to your computer at
this time. Make sure the scanner is located:
• Out of direct light. (Direct light may interfere with the scanner’s ability to read check data.)
• As far from the monitor as possible, if you are using a CRT monitor. (The monitor’s electromagnetic emissions may
impede the scanner’s ability to scan checks’ magnetic characters.)
• On a level surface. (An uneven surface may impede the scanner’s ability to scan checks’ magnetic characters.)
Additionally, make sure the external power supply is placed in a ventilated area several feet away from the scanner.
Installing the Scanner Software
Important:
•
•
•
If a setup CD was included in the scanner packaging, DO NOT USE the included setup CD; use the files
provided to you by the financial institution.
Make sure the USB cable is DISCONNECTED from your computer.
Actual steps may vary slightly depending on your configuration and security settings
1. Log onto Treasury Solution https://www.hwtreasurysolution.com/COLB/
2. On the left side of the welcome page, on the Resource Library button
3. Scroll down to the bottom of the page and click on the Digital Check Scanner Driver Install Guide (fourth line
from the bottom)
4. Print the document (use as your guide for the rest of setup process)
1
Version 3-18-12
5. Close the Digital Check Scanner Driver Install Guide
6. Go back to the welcome page of Treasury Solution
7. Click on the Resource Library button
8. Scroll down to the bottom of the page to the Driver Software (bottom of the page).
9. Double-Click on the Digital_Check_Driver.exe file.
10. The Ranger Setup Wizard will appear
11. Click on Next
12. Review the License agreement and Click on I Agree button
13. Click on the Install button
14. Wait for the install to occur
15. Click on Finish button
16. Close the Digital Check Driver screen
17. The software has now been installed
Setting the System Web Address as a Trusted Site
Users may wish to set the system web address as a Trusted Site if they are experiencing problems displaying all
system features.
To set the system Web address as a Trusted Site:
1. Log off from the system.
2. From the Internet Explorer Tools menu or button, select Internet Options. A pop-up window is displayed.
3. Click the Security tab.
4. Click the Trusted Sites icon.
5. Click the Sites button.
6. Enter the site address:
https://www.hwtreasurysolution.com/COLB/
https://www.hancockbank.netsolution.blilk.com
7. Click the Add button
8. Click OK. The window is refreshed.
9. Close the browser window and re-open it.
System Administrator Setup Process
1. Log on to Treasury Solution: https://www.hwtreasurysolution.com/COLB/
2. From the Welcome page, click on the RDC tab on the horizontal menu at the top of the screen.
3. On the upper right side of the screen click on Administration.
4. Click on User Setup tab
5. Create or modify users as needed and click update at the bottom of the screen
6. Click on Account Permission
7. Click on the user from the User dropdown list box
8. Select Remote Deposit from the Application dropdown list box
9. Check the boxes for the accounts into which the user will be allowed to make deposits.
10. Click the submit button at the bottom of the screen.
11. If your company was granted Location ID access, click on Miscellaneous Setup tab; otherwise, skip to step 16.
12. Enter the location ID and Location codes for each location from which users will scan deposits and click on Add
13. Click on User Setup Tab and Location Permission Tab
14. Select the user from the list and check the Location IDs from which this user will scan checks.
15. Click on update at the bottom of the screen.
16. Click on the User Setup Tab and Remote Deposit Tab.
17. Select the user and enter the deposit limits for the user. Click on the Default button if the user will be granted the
company limit; otherwise, enter the limit.
18. For the option of View the scanned items of others, check the box if this user will be allowed to view items
others scan; otherwise, leave the box unchecked.
19. For the option of No approval required, check the box if the user can submit his/her own deposits without any
approval; otherwise, leave the box unchecked.
20. For the option of Approve Own, check the box is the user can approve his/her own deposits; otherwise, leave
the box unchecked.
Setting Scanner Preferences
Important:
Every user will need to identify a scanner under Preferences
2
Version 3-18-12
Once the scanner driver has been installed, you must set your scanner preferences to scan checks.
To set scanner preferences:
1. Log on to Treasury Solution: https://www.hwtreasurysolution.com/COLB/
2. From the Welcome page, click on the RDC tab on the horizontal menu at the top of the screen.
3. On the upper right side of the screen click on Preferences (may have to maximize your screen)
4. Select the Remote Deposit tab.
5. From the Scanner Type drop-down list, select Ranger.
6. Check the Show check references checkbox to enable display of the Check Reference column, or uncheck the
checkbox to hide the column.
7. Click the Submit button to save your changes.
Download the Active X Scanner Control Software
1. Click on the Checks And Deposits tab on the horizontal menu
2. Click on Remote Deposit
3. Click on the Check Scan tab
4. Read disclaimer and click on the OK (may have to scroll down to see message)
5. Watch for a message to appear:
Note: Depending on your configuration and security settings, a message may pop up in the upper portion of your
screen asking if you want to download the Active X. If so please allow it to occur. If presented with an option to
install the Active X, click on Install Button – this option may appear more than once. If you do not have permission to
install software on your PC, an IT person may have to assist with this task.
6. After the Active X successfully installs, a message will display indicating the scanner is not responding:
Connecting the Scanner
1. When the error message displays “Device Not Responding”
2. Connect the USB cable to your computer and turn the scanner power switch to the ON position.
3. Stand by for a moment. Two separate messages should appear in the lower right side of your screen
3
Version 3-18-12
4. Click on the SIGNOFF button. You will be returned to Treasury Solution Welcome page.
5. Click on the RDC button on the horizontal menu across the top portion of the screen.
6. Click on Check Scan tab.
7. Read the disclosure and click on OK (may have to scroll down to see disclosure)
8. Standby for a few moments and wait for the computer to recognize your scanner.
9. Wait for a moment, the Start Scan and Cancel button should be the same color.
10. Congratulations!!! You are setup and ready to scan checks.
Scanning Checks for Deposit
1. Click on Checks and Deposits Tab and Remote Deposit
2. Click on Scan Checks tab
3. Read the Disclaimer message and Click on the OK (may have to scroll down to see message)
Note: On your first access to RDC, an Active X program will download (see Download the Active X
Scanner Control Software above)
4. Select the account number from the dropdown list box into which you wish to deposit funds.
5. If Location ID appears, select the location ID; otherwise, proceed to the next box.
6. Enter the number of checks included in your deposit.
7. Enter the total dollar amount of your deposit.
8. Enter a description of your deposit (optional).
Depending on your scanner model, next steps may vary:
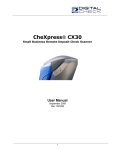
CX30 SCANNER
1. Click Start Scan
2. Place one check in the scanner. Scanner should pick up the check from you and feed it twice through
the scanner. Remove the check from the scanner. Repeat this step until all checks have been
deposited.
TS215 SCANNER
1. Click Start Scan
2. Extend the check receiving tray on the scanner so that the checks are not jammed.
3. Place one check in the scanner. Scanner should pick up the check from you and feed it through the
scanner. Repeat this step until all checks have been deposited.
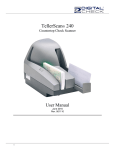
TS 230 or TS240 SCANNER
4
Version 3-18-12
1. Separate checks by size. Fan through checks to make sure they are not sticking to each other.
2. Place checks in the feeder tray with the front of the checks facing outward.
3. Extend the check receiving tray on the scanner so that the checks are not jammed.
4. Click on Start Scan. The checks should automatically feed through the scanner one after the other.
Reviewing and submitting deposits
Once all checks in the deposit have scanned, you will see the Deposit screen.
DIFFERENCES:
Look on the right hand side of the screen. If the Difference row has 0 and $0.00, every check has
scanned correctly. Click Save.
If the Difference row has a number under count, then one or more of your checks did not scan correctly.
On the left hand side of the screen, in Display Filter, click on the drop down box and select each reason,
one at a time.
Any checks that did not scan will be listed at the bottom of your screen. Click on the line, make
corrections to the MICR line or amount and click Save. Continue this until you have 0’s in the Difference
row.
Approving and Submitting
Dual Control:
1. If you have designated for your user to have the ability to only Create Deposits, the Deposit will be in
the WAITING APPROVAL status in Pending Items.
2. Assigned Approver should log into Treasury Solutions and access RDC.
3. From the Pending Items, approve and submit the deposit.
4. The Bank will capture the deposit at the next scheduled file capture time.
5
Version 3-18-12
Single Control:
1. If you do not have any dual control security levels in place, the deposit will automatically move to a
“Waiting for Submission” status in Pending Items.
2. Click on the deposit and “Submit.”
3. The Bank will capture the deposit at the next scheduled file capture time.
6
Version 3-18-12


