1
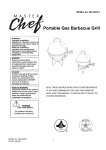
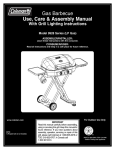
Assembly Instructions
And User’s Manual
Gas Barbeque Grill
Model GPC2618J
FOR YOUR SAFETY
If you smell gas:
1. Shut off gas to the appliance.
2. Extinguish any open flame.
3. Open lid.
4. If odor continues, immediately
call your gas supplier or your
filer department.
FOR YOUR SAFETY
1. Do not store or use gasoline or
other flammable vapors and
liquids in the vicinity of this or
any other appliance.
2. An LP cylinder not connected
for use shall not be stored in
the vicinity of this or any other
appliance.
• Always read and understand the WARNINGS and
SAFETY INSTRUCTIONS that are contained in this
manual before attempting to use this gas
barbecue grill, to prevent possible bodily injury
or property damage.
Always keep this Manual in or near the Grill, for
convenient future reference.
1
Table of Contents
For Your Safety…………………………………………………………………………………
1
Table of Contents……………………………………………………………………………….. 2
Welcome Letter…………………………………………………………………………………… 3
Illustrated Parts List…………………………………………………………………………….. 4
Warnings & Safety
Signal Words……………………………………… ………
Safe Locations Clearance Requirements……….…….
Safe Use of LP(Propane) Gas……………………………
Prevention of Burns……………………………………….
Electrical Safety……………………………………………
5
5
6
8
9
Assembly Instructions…………………………………………………………………………. 10
Gas Hookup
Connecting Gas Cylinder……………………………….. 21
Check for Leaks…………………………………………… 21
Operation
Control Functions………………………………………… 22
Lighting the Main Burners………………………………
Flare-ups……………………………………………………
Turning Burners off………………………………………
Match Lighting the Main Burner………………………..
Lighting the Side Burner…………………………………
22
23
23
24
24
Shutting Off the Side Burner…………………………… 24
Care & Maintenance
Cleaning & Care…………………………………………… 25
Recommended Cleaning Materials……………………. 25
Burners……………………………………………………… 25
Cooking Grids………………………………………………
Heat Plate……………………………………………………
Grease Cup…………………………………………………
Interior Grill Bottom………………………………………
Outside Surface……………………………………………
26
26
26
26
27
Maintenance……………………………………………….. 27
Burner Adjustment……………………………………….. 27
Trouble Shooting Guide………………………………………………………………………… 28
Cooking
Methods of Cooking……………………………………
Preparing Food for Grill……………………………….
Grilling Tips……………………………………………...
Warranty………………………………………………………………………………………
2
30
30
31
32
Gas Barbeque Grill
Model GPC2618J
Dear Valued Customer,
Thank you for choosing the Life@ Home Barbeque Grill. In this manual, you will find assembly
instructions, guidelines for the safe operation, proper care of and use of your grill, as well as grilling
suggestions. We strive to provide you with an easy to assemble product. However, in the
unfortunate event that a part is missing or defective, please call our customer service department
9 :00AM to 5 :00PM local time Monday through Friday. Phone No. :1-877-885-8227 . We will
respond to your request promptly.
Please contact us if you have suggestions or comments regarding this product, as we welcome and
appreciate customer feedback. Enjoy your new purchase!
Best regards
Jorin Pook, Bsc.
Category Manager
General Merchandise Imports
Loblaw Companies Limited
3
Illustrated Parts List
2
3
4
5
GRILL BODY(1)
LEFT SIDE SHELF(1)
RIGHT SIDE SHELF(1)
LEFT CART LEG(1)
RIGHT CART LEG(1)
6
7
8
9
10
WHEEL CAP(2)
WHEEL (2)
WHEEL AXLE (1)
BACK PANEL (1)
FRAME SUPPORT BARS(1)
11
12
13
14
15
BOTTOM SHELF (1)
TOP TANK BRACKET (1)
BOTTOM TANK BRACKET (1)
CUP SUPPORT (1)
GREASE CUP (1)
16
17
18
19
20
KNOB-SB(1)
COOKING GRID (1)
HEAT PLATE (1)
DOOR (2)
WARMING GRID (1)
A
B
C
D
E
M6 X 65--------(4)
M6 X 16-----------(13)
M10-------------(2)
Ф18 X 26----------(21)
M6 X 45------------(4)
F
G
H
I
J
M4 X 10-----------(2)
WASHER---------(2)
SCREWDRIVER---(1)
WRENCH----------(2)
1
LOCKABLE WASHER (4)
4
Warnings and Safety
Signal Words:
The Signal Words used in this Manual and their intended meanings are as follows:
DANGER: Indicates that a failure to observe the safety instructions could result in death or catastrophic
bodily injury.
WARNING: Indicates that a failure to observe the safety instructions could result in serious bodily
injury.
CAUTION: Indicates that a failure to observe the safety instructions could result in property injury or
minor bodily injury.
NOTE: Designates important information relating to the safe use of the Grill.
Important Warnings:
Since this outdoor cooking appliance is movable, is fueled by propane gas, generates very high
temperatures and emits carbon monoxide as a bi-product of combustion, prudent precautions must be
taken to ensure its safe use.
Safe Locations for Use of This Outdoor Grill
DANGER:
• Never use this outdoor Grill inside any building, garage, shed or breezeway, or inside any boat, trailer
or recreational vehicle, to prevent a possible fire and to prevent the possibility of carbon monoxide
poisoning or asphyxiation.
WARNINGS:
• Do not use this appliance under overhead combustible surface or covered areas (e.g.,
awnings, umbrellas , porches or gazeboes ).
• Always confirm that this Grill is not positioned under the overhang of a house, a garage or
other structure before lighting it. An overhang will serve to deflect flare-ups and radiated heat into
the structure itself, which could result in a fire.
• Always confirm that this Grill is positioned more than
36’’(1m) away from any combustible materials or
surfaces before lighting it, and that no gasoline or other
volatile substances are stored in the vicinity of this Grill.
(See Fig.1), The temperature of a grease fire or of the radiated heat
might otherwise be sufficient to ignite nearby combustibles or
volatile substances.
• Always locate this Grill where there will be ample combustion and ventilation air, but never position it
in the direct path of a strong wind.
• Never allow the Grill to operate while unattended, to prevent uncontrolled grease fires from erupting.
• Never attempt to move this grill while it is in operation or while it is still hot, to prevent possible
personal injury.
• Never store or use gasoline or other flammable or volatile substances in the vicinity of this Grill or in
the vicinity of any other heat-generating appliance, because of the danger of starting a fire.
• Always confirm that the installation of this Grill conforms with the requirements of all local Codes or, in
the absence of applicable local Codes, with either the National Fuel Gas Code, ANSI Z223.1NFPA 54
or CAN/CGA-B149.2, Propane Installation Code.
5
Warnings and Safety
•Always place Grill on a hard, level surface far away from combustibles. An asphalt or blacktop
surface may not be acceptable for this purpose.
•Do not place this Grill on any type of tabletop surface. It is not a tabletop Grill.
Safe Use of LP (Propane) GAS
Liquid Propane (LP) is flammable and hazardous if handled improperly. Become aware of its
characteristics before using any LP product.
LP Characteristics:
•Flammable, explosive under pressure, heavier than air, and settles and pools in low areas.
•In its natural state propane has no odor. For your safety, an odorant is added that smells like rotten
cabbage.
•Contact with LP can cause freeze burns to the skin.
DANGER:
•Never install a propane cylinder that is more than 80% full, as the contents may lack adequate
room for expansion when exposed to heat. Propane vapor may then be vented through the
pressure release valve, which could accumulate and later result in a fire or explosion in
which death or serious injury may occur. Always instruct your certified propane fuel supplier to
confirm by weight that your cylinder is not more than 80% full. An empty cylinder will weight about
18 lbs, while a properly filled cylinder should weigh no more than 38lbs.
•Never store a spare Propane Cylinder in the cylinder compartment of this Grill. Exposing a
disconnected cylinder to heat could result in the venting of propane vapor through the pressure
release valve, and the pooled vapor could result in a violent fire in which death or serious injury
may occur. (No hazard is posed by the connected cylinder if it is not overfilled, however, as it
tends to refrigerate itself while being used.)
•Always confirm that all openings in the cylinder compartment of this Grill are free of any
obstructions hat would restrict the circulation of ventilation air. Good ventilation will prevent the
pooling of leaked propane vapor, which is heavier than air, and which could explore if ignited.
NOTE: Always have a certified propane gas supplier inspect and re-qualify your refillable propane gas
cylinder prior to each refilling, in accordance with DOT or TC requirements for propane cylinders
6
Warnings and Safety
WARNINGS:
Propane Cylinder Specification Warnings:
• Always consult the Rating Label on the back of the Grill to confirm which fuel must be used with the
Grill. Never operate the Grill with Natural Gas if it has been configured for use with Propane Gas.
NOTE: Your Gas Grill has been specifically equipped at the factory to burn Propane Gas (LP).
• Use only the pressure regulator propane gas supply
coupling and hose that is originally provided with this appliance
or as specified,(see Fig.2).
• Always install a 20lb. Propane cylinder that is equipped with a
Type I valve outlet (see Fig.3), and that has a 12” diameter and
18” height. Always use a propane cylinder that has been constructed
and marked in conformance with either the specifications for LP
Gas Cylinders of the U.S. Department of Translation or the
specifications in the National Standard of Canada, CAN/CSA-B339,
Cylinders, Spheres and Tube for Transportation of Dangerous Goods, as applicable.
•Always confirm that your propane cylinder is equipped with a shut – off
valve terminating in a Type I propane cylinder valve outlet connection,
and that it has been provided with a collar to protect the cylinder
valve(Fig.3)
•Never install a propane cylinder in this Grill unless it is equipped with a
listed Overfill protection Device (OPD), and marked “propane”
•Always have a new propane cylinder properly purged of air by your
certified propane gas dealer. Since a new cylinder is initially filled with
air, the air must first be purged before it is filled with propane.
•Never use an LP cylinder with a damaged body, valve, collar or footing.
•Dented or rusted LP cylinder may be hazardous and should be checked
by your LP gas supplier.
Gas Line Inspection Warnings:
•Always confirm that there are no gas leaks before lighting this Grill. Apply a 50/50 solution of liquid soap
and water to the gas supply line connectors with a brush or spray bottle, and watch for bubbles.
NEVER USE A MATCH OR OPEN FLAME TO TEST FOR GAS LEAKS.
•Always visually inspect the gas supply line for fraying, cracking or rodent damage before each use of
this Grill. If damage is evident, the hose must be replaced prior to the Grill being put into operation.
The replacement hose assembly can be obtained by calling 1-877-885-8227
Propane Cylinder Storage & Handling Warnings:
•Always store your spare Propane Gas Cylinders in an outdoor area that is well ventilated, shady, cool,
and removed from any heat source. Always store those cylinders in an upright position. Never store a
spare cylinder within 10 feet (3m) of this Grill, or in the vicinity of another heat –generating appliance.
•Always handle propane cylinders with great care, as the contents are under high pressure.
7
Warnings and Safety
•
•
•
•
•
•
•
•
•
•
•
•
•
Always store propane cylinders indoors, in an upright, secure position, out of direct
sunlight, away from living quarters and in a well ventilated, cool dry area. NEVER STORE
A CYLINDER IN A BUILDING, GARAGE, OR OTHER STRUCTURE OR ENCLOSED
AREA.
Always keep cylinders out of reach of children.
Always confirm that a valve dust cap has been tightly installed and that the valve itself is
fully closed, whenever a propane cylinder has been disconnected.
Always transport a propane cylinder in an upright, secure position, after confirming that
its valve is closed.
Always stabilize a cylinder so that is cannot move, when it is being transported in a car
trunk.
Never transport a propane cylinder in the passenger compartment of a car or truck.
Never keep a filled propane cylinder in a hot car or car trunk. Heat will cause the gas
pressure to increase, which may open the relief valve and allow gas the escape.
Never store a propane cylinder where temperatures reach over 125°F
Never store a Gas Grill indoors, unless the propane cylinder has first been disconnected
and removed from the Grill.
Never expose a propane cylinder to any heat source, never apply heat directly to a
cylinder and never store a spare cylinder in the vicinity of this Grill.
Never paint a propane cylinder a dark color, as this can cause the cylinder and its contents
to overheat.
The LP cylinder must be arranged for vapor withdrawal.
Always close the propane cylinder valve promptly after each use of the Grill.
Prevention of Burns
•
•
•
•
•
Always keep children and pets under close supervision when using this Grill, and
never permit them to come near the Grill when it is in use, as the exterior is very hot.
Do not touch metal parts of this Grill until is has completely (about 45 minutes) to avoid
burns, unless wearing insulated protective mitts.
Always wear insulated protective mitts when working at the Grill, or when attempting to
close a gas supply valve after cooking has been completed, to prevent possible burns.
Always use insulated potholders when handling containers of hot food.
Never store or use gasoline or other flammable or volatile substances in the vicinity of
this Grill, or in the vicinity of any other heat-generating appliance.
8
Warnings and Safety
ADDITIONAL WARNINGS:
•
•
This Grill is for use with Propane Gas only(propane gas cylinder not included).
Never attempt to attach this Grill to the self-contained propane system of a camper trailer,
motor home or house.
•
Never use charcoal or lighter fluid. Do not use gasoline, kerosene or alcohol for
lighting.
•
Do not store or use gasoline or other flammable liquids or vapors within 25 feet(8m)
of this Grill.
•
When cooking with oil or grease, do not allow the oil or grease to exceed 350°F,(177°C).
•
•
•
Do not leave oil and grease unattended.
Move gas hoses as far away as possible from hot surfaces and dripping grease.
The use of alcohol, or prescription or non-prescription drugs may impair the consumer’s
ability to properly assemble or safely operate the appliance.
•
Always open Grill lid carefully and slowly as heat and steam trapped within Grill can result
in serious burns.
•
•
Do not use Grill in high winds.
Do not use Grill unless it is completely assembled and all parts are securely fastened and
tightened.
•
It is essential to keep the Grill’s valve compartment, burners and circulating air passages
clean. Inspect Grill before each use.
•
Do not alter Grill in any manner.
9
Assembly Instructions
Step 1: Unpack Carton
Remove and unwrap the enclosed parts, checking
Against the Illustrated Parts List one the inside front
Gatefold of the manual to ensure that no parts are
missing.
Step 2: Attach Wheels
Insert flat screwdriver between Wheel Cap and Wheel and
pop it off to expose the wheel axle hole.
Insert Wheel Axle through holes in the bottom of the
Right Cart Leg Assembly, as shown. Fit the Wheel Spacers
over the end of the Axle as shown. Fit the wheel s onto
each side of the axle. Secure the wheels in place on the
axle with Wheel Nuts, and tighten wheel nuts with the
Wheel Nut Wrenches supplied. Reinstall the Wheel Caps
on the wheels. See Figure 2.
Figure 2.
10
Assembly Instructions
Step 3: Install Bottom Shelf
Hook Bottom Shelf Support into place on the lower cross beam of the Left Cart Leg Support and the
Assembled Right Cart Leg Support. Slide the Grid and Shelf into place on top of the Bottom Shelf
Support.
Bolt Bottom Grid & Shelf in place using Flat Washers and Large Bolts. See Figure 3.
Figure 3.
11
Assembly Instructions
Step 4: Install Back Panel and Frame Support Bars
Put back panel into place, as shown. See Figure 4a.
Bolt Frame Support Bars in place using Flat, Lockable Washers and Large Bolts.
See Figure 4b.
Figure 4a.
Figure 4b.
12
Assembly Instructions
Step 5: Install Tank Brackets
Attach the Top Tank Brackets (wide) to the middle crossbeam on the Right Cart Leg, and bolt in place
using Flat, Lockable Washer and Small Bolt, as shown. Next, attach the Bottom Tank Bracket (narrow)
to the Bottom Shelf Support on the Right Cart Leg and bolt in place using Flat, Lockable Washer and
Small Bolt. See Figure 5.
Figure 5.
Step 6: Install Front Doors
Put Front doors in place onto the front of the cart, Adjust and hold the front door flush with the Top
Frame Support Bar. See Figure 6.
Figure 6.
13
Assembly Instructions
Step 7: Install Left Side Shelf and Pre-Assembled Side Burner Shelf
Install Left Side Shelf and Right Burner Side Shelf by sliding feet into hollow legs of Cart Frame.
Bolt in place with Flat Washers and Medium Bolts. See Figure 7.
Figure 7.
14
Assembly Instructions
Step 8: Install Pre-Assembled Grill Body
Set Pre-assembled Grill Body on cart, and bolt in place with Flat Washers and Small Bolts.
See Figure 8.
Figure 8.
Step 9: Place Heat Plate, Warming and cooking Grid
Place the Heat Plate inside the Grill Body.
Place the Warming Grid inside the Grill Body.
Place the Cooking Grid inside the Grill Body. See Figure 9.
Figure 9.
15
Assembly Instructions
Step 10: Attach Gas Valve to Side Burner Assembly
Insert the gas valve stem top into the valve bracket on the Side Burner Shelf. Swing gas valve orifice
into end of burner wenturi tube (See inset Figure 10a.). Bolt the valve in place from the top side of the
side burner using the Gas Valve Bolts. See Figure 10.
Figure 10a.
Figure 10.
16
Assembly Instructions
Step 11: Complete the Side Burner Assembly
Push igniter Wire onto igniter Electrode.
Bolt Mounting Bracket onto the Right Cart Leg using a Small Bolt and Flat Washer. See Figure 11.
Figure 11.
17
Assembly Instructions
Step 12: Install Control Knob for Side Burner and Place Grate
Push Control Knob onto valve from top. Place Grate on top of Burner.
See Figure 12.
Figure 12.
18
Assembly Instructions
Step 13: Install Grease Cup Support and Grease Cup
Hook the Grease Cup Support into the holes on the underside of the Grill body; then set the
Grease Cup into the Grease Cup Support.
See Figure 13.
Figure 13.
19
Assembly Instructions
Step 14: Install Propane (LP) Tank ( sold separately)
Attach the gas regulator valve to a full 20-pound (LP) propane cylinder (sold separately). Then secure
the tank to the Tank Support Brackets.
See Figure 14.
Figure 14.
20
Gas Hookup
DANGER: A fire causing death or serious injury may occur if the following is
not followed exactly:
• Never store or use gasoline or any other volatile substance in the vicinity of this Grill.
• Never store or a space propane cylinder in the vicinity of this Grill, or in the vicinity of another
potential heat source.
• Never fill the propane cylinder beyond 80% full.
Connecting the Gas Cylinder
READ “SAFE USE OF LP ( PROPANE ) ” IN THE WARNINGS & SAFETY SECTION
OF THIS MANUAL PRIOR TO CONNECTING THE PROPANE CYLINDER.
LP ( Propane ) Gas Supply Connection
1.
Always place the propane cylinder on the tank brackets located on the right side of the cart.
2.
Always confirm that all burner control knobs are in the OFF position before activating the gas supply.
3.
Before connection, be sure that there is no debris caught in the head of the gas cylinder, head of the
regulator Valve, or in the head of the burner and burner ports.
4.
Always connect the gas supply regulators as follows:
• Insert the nipple of the valve coupling into the tank valve and
tighten the connection collar by turning it clockwise with one
hand while holding the regulator with the other (see Fig.4 ).
5.
Disconnect the propane cylinder from the regulator valve when the
Grill is not in use.
6.
Do not obstruct the flow of combustion air and ventilation air to the Grill.
Checking for Leaks
WARNING: Always conduct a leak test before lighting the Grill, to prevent
possible fire or explosion ( see Fig. 5 )
To Check for Leaks:
1. Make 2-3 oz. of leak solution by mixing one part liquid
dish washing soap with three parts water.
2. Spoon or spray several drops of the solution on the
tank valve to regulator connection.
3. Inspect the solution for bubbles. If no bubbles appear,
the connection is secure.
4. IF BUBBLES APPEAR, there is a leak. Disconnect
regulator from tank and reconnect, making sure the
connection is secure.
5. Retest with solution. If bubbles continue to appear,
replace the cylinder.
21
Operation
Control Functions
Propane Tank Valve
WARNING: Never open the Tank Valve unless the Grill is being prepared for use,
to prevent the pooling of propane vapor.
• Always open the Valve immediately before lighting the Grill, and always close it immediately
after cooking has completed.
Burner Control Valves
• Two valves independently control gas flow to each burner,
as indicated on the front of the Control Panel. ( See Fig. 6 ).
• The OFF position is indicated by the dot above each knob.
A full range of flame adjustment is available from
High to Low. ( by turning a knob counterclockwise ).
Ignition System
• When the igniter Button is pushed, you will hear a click as the igniter module generates an
ignition spark to the burner. The burner should light within four seconds.
Lighting the Main Burner
NOTE: When lighting the Grill for the first time, burn both burners on HIGH for at least 30 minutes to
burn off any manufacturing residues.
WARNING: Never stand with your head directly over the Grill when preparing to
light the main burners, to prevent possible bodily injury.
1. Always open the Hood completely and always inspect the Grill and burners to confirm that all
components are properly positioned before lighting main burners.
2. Always confirm that all of the burner control knobs are in the
OFF position before opening the gas supply.
3. Turn on the propane gas supply valve at the tank, 1 to 2 turns ( see Fig.7 ).
4. Turn the Left Burner Control Knob to the HIGH position by pushing.
down on the knob and turning it counterclockwise.
5. Immediately push ignitor Button. The selected burner should light within
four seconds.
WARNING: IF THE SELECTED BURNER DOES NOT LIGHT, or goes out during
operation, immediately turn the burner control knob to the OFF position, to
prevent gas buildup.
Wait five minutes for the gas to clear and then repeat the preceding starting
procedure.
If the burner will not light when the ignitor, follow the match lighting
instructions (see Page 15 ).
22
Operation
6. Confirm that the burner is properly lit and that the flame pattern is as desired, (see Fig.8a, 8b,
and 8c for the proper flame patterns). If the flame pattern is other than normal, consult the
Troubleshooting guide on (Page 21) for corrective action.
7. Always preheat the Grill before starting cooking. Light both burners and adjust them to the HIGH
position for 5 to 10 minutes. Before placing any food on the Grill, clean the cooking grids with a
brass wire brush.
8. Adjust the Controls to a medium setting for most cooking requirements. Applying a light coating
of cooking oil on the cooking grid before heating the Grill will prevent foods from sticking.
Flare-ups
“Flare-ups” sometimes occur when food drippings fall onto the hot heat distribution plate or burners and
ignite. Some flaring is normal and desirable, as it helps impart the unique flavors associated with grilled
foods. Controlling the intensity of the flare-ups is necessary, however, in order to avoid burned or
unevenly cooked foods and to prevent the possibility of accidental fire.
WARNING: Always monitor the Grill closely when cooking and turn the flame
level down (LOW) of OFF, if flare-ups intensify.
Turning Burners Off
1. Always turn the burner control knob(s) to the OFF position when cooking has been completed.
2. Promptly turn OFF the gas supply valve at the propane cylinder.
3. Close the Hood of the Grill.
23
Operation
Match Lighting the Main Burners
WARNING: Never stand with your head directly over the Grill when preparing to
light the main burners, to prevent possible bodily injury.
1. Always open the Hood completely and always inspect the Grill and
burners to confirm that all components are properly positioned
before lighting main burners.
2. Always confirm that all of the burner control knobs are in the OFF
position before opening the gas supply.
3. Turn on the propane gas supply valve at the tank, (1 to 2 turns).
4. Insert a lit match attached to the end of the Lighting Stick or butane
lighter into the match lighting hole located on the underside of the
grill body.(see Fig.9)
5. Turn the LEFT Burner Control Knob to the HIGH position by pushing
down the knob and turning it counter clockwise.
Lighting the Side Burner
WARNING: Never stand with your head directly over the
Grill when preparing to light the side burners, to prevent
possible bodily injury.
1. Turn the side burner control knob to HIGH (see Fig. 10).
2. Push the Ignitor on the front control panel until the burner ignites.
NOTE: Observe the flame pattern. Soft blue flames are normal,
hard blue flames or wavy yellow flames are not (see Figs 8a, 8b
and 8c, on page 16). If abnormal flames persist, refer to the
Troubleshooting Guide, page 21.
Shutting Off the Side Burner
Turn the Control Knob counter clockwise to the HIGH position, then depress it and turn it to OFF.
NEVER force the knob without depressing it, as that can damage the valve.
24
Care and Maintenance
Cleaning and Care
WARNING: Always allow sufficient time for the Grill to cool fully before handling
or cleaning any of its parts, to prevent bodily injury and to assure that your Grill
will operate properly.
NOTE: DO NOT clean any parts of the Grill in a self-cleaning oven, as the extreme heat will damage
the finish.
NOTE: Burning off the Grill after every use ( approx. 15 minutes ) will keep excessive food residue from
building up.
Recommended Cleaning Materials
• Mild dish washing liquid detergent
• Nylon cleaning pad
• Paper clip or toothpick
• Compressed Air
• Hot Water
• Brush
• Putty knife, scraper
NOTE: DO NOT use any cleaners that contain acid, mineral spirits or xylene.
Burners
NOTE: All of the burners should be inspected frequently and cleaned as often as necessary.
Main Burners
NOTE: Remove the cooking grids and the heat distribution plate at least once per year to inspect the
burner, or more frequently if desired.
1. Turn off gas at the Control Knobs and LP Tank.
2. Remove cooking grid and heat distribution plate.
3. Remove grease cup.
4. Disconnect wire from spark electrode.
5. Remove burner by removing the three fasteners securing the burner to the Grill bottom.
6. Lift burner up and away from gas valve orifice.
7. Clean inlet (venturi) with small brush bottle or compressed air. Be careful not to damage the
electrode ceramics.
8. Remove all food residue and dirt on burner surface.
25
Care and Maintenance
9. Clean any clogged pores with a stiff wire (paper clip or toothpick) (see Fig.11).
It is normal for some surface rust to appear on the burner. However, severe
rusting can enlarge the gas ports, which could cause changes in the Grill’s
performance.
10. Inspect burner for any damage (cracks or holes). If damage is found, replace
with new burner.
11. Reinstall burner, check to insure that gas valve orifices are correctly
positioned inside burner inlet (venturi). Also check the position of
the spark plug.
Side Burner
The Ignition electrode delivers a spark to ignite gas at the burner. Always keep it clear of any buildup of
any foreign material, as that can act as an insulator and prevent the burner from lighting.
Cooking Grids
The cooking grids have been porcelain enameled for durability and ease of cleansing. These grids may
be cleaned with any non-abrasive-cleaning agent formulated for kitchen use, or a brass wire brush.
Rinse with water.
NOTE: Always handle cooking grids with care, as porcelain enamel is susceptible to chipping.
Heat Distribution Plate
The porcelain finish has a glass-like composition that should be handled with care so as not to chip.
Clean residue with wire brush and wash with soapy water, then rinse with water.
Grease Cup
The grease cup, located under the burner pan in the bottom of the Grill body, is provided to catch
excess cooking fats and juices. Check for accumulations in the Grease Cup after each use of the Grill,
and clean as necessary.
Interior Grill Bottom
Remove residue using brush, scraper and /or cleaning pad, and then wash with dish washing detergent
and hot water solution.
Rinse with water and let dry thoroughly.
26
Care and Maintenance
Outside Surfaces
CAUTION: NEVER USE ABRASIVE CLEANING AGENTS OR ABRSIVE MATERIALS
TO CLEAN THE PORCELAIN ENAMEL CASTINGS, AS THEY WILL PERMANENTLY
SCRATCH THE PORCELAIN ENAMEL SURFACE.
The porcelain finish of the Grill lid had a glass-like composition that should be handled with care so as
not to chip. Use mild dish washing detergent or baking soda and hot water solution. Non-abrasive
scouring powder can be used on stubborn stains, then rinse with water.
If the inside surface of the Grill lid has the appearance of peeling paint, baked on grease buildup has
turned to carbon and is flaking off. Clean thoroughly with strong solution of detergent and hot water.
Rinse with water and drying completely. NEVER USE OVEN CLEANER.
Plastic Surfaces
Wash with soft cloth and dish detergent and hot water solution. Rinse with water. Do not use
abrasive cleaners, degreasers or a connected grill cleaner on plastic parts.
Maintenance
Burner Adjustment
Use a screwdriver to loosen the locking screws. Open the shutter just enough to achieve the
desired soft, blue flames.
Make adjustment in small increments and allow the burner to come up to operating temperature
(10 minutes) before making further adjustments.
If burners are removed for cleaning or adjustment, always confirm that they have been reinstalled
correctly over the valve outlets (see Fig.12). The valves extend into the burner venturis
approximately 1/4”.
27
Troubleshooting Guide
PROBLEM
POTENTIAL CAUSE
ACTION REQUIRED
Burner will not light using ignitor
Wires or electrode with cooking residue.
Clean wire and /or electrode with
rubbing alcohol.
Electrode and burner are wet.
Wipe dry with cloth
Electrode cracked or broken –sparks at crack.
Replace electrode.
Wire loose or disconnected.
Reconnect wire or replace electrode
/wire assembly.
Burner will not light using match
Wire is shorting (sparking) between ignitor
Replace ignitor wire /electrode
and electrode
assembly.
Bad ignitor.
Replace ignitor.
No gas flow.
Check if LP tank is empty. If LP tank
is not empty, prefer to “Sudden drop
in gas flow or reduced flame height”.
If empty, replace or refill.
Coupling nut and regulator not connected
Turn the coupling nub about one-half
to three quarters additional turn until
solid stop. Tighten by hand only –DO
NOT use tools.
Obstruction of gas flow.
Clear burner tubes. Check for bent or
kinked hose.
Disengagement of burner to valve.
Reengage burner and valve.
Spider webs or insect nests in venturi.
Clean venturi.
Burner ports clogged or blocked.
Clean burner ports.
Sudden drop in gas flow or
Out of gas .
Check for gas in LP tank.
reduced flame height
Excess flow safety device
Turn off knobs, wait 30 seconds and light
may have been activated.
Grill.If flames are still too low, reset
the excessive flow safety device. Turn off
knobs on LP tank valve. Disconnect
regulator. Turn burner control knobs to
HIGH. Wait 1 minute. Turn burner
control knobs off. Reconnect regulator
and leak check connections. Turn LP tank
valve on slowly, wait 30 seconds and then
light Grill.
Irregular flame pattern, flame
Burner ports are clogged or blocked.
does not run the full length of
the burner.
28
Clean burner ports.
Troubleshooting Guide
PROBLEM
POTENTIAL CAUSE
ACTION REQUIRED
Flame is yellow or orange.
New burner may have residual
manufacturing oils.
Spider webs or insect nest in venturi.
Burn Grill for 15 minutes with the lid
closed.
The Grill should burn with predominantly blue
flame. If flame is yellow, check venturi tubes
for obstruction and clean as Shown on page 19.
Clean burner.
Flame blow out/Unit won’t stay lit.
Food residue, grease or seasoning
salt on burner.
Poor alignment of valve to burner
engaged venturi.
Wind
Low on LP gas
Excess flow valve tripped
Flare-up
Assure burner venturi is properly with valve
Always shelter Grill from strong winds.
Confirm the flow of gas by smell, or by
listening for the hiss of gas being emitted.
Weigh your propane cylinder. A standard
20 lb. Cylinder will weigh about 18 lbs when
it is empty and 38 lbs. When it is 80%full.
(WARNING: Never take a propane cylinder
indoors for any purpose).
Refer to “Sudden drop in gas flow or
reduced flame height.”
Excessively fatty foods
Trim excess fat from meat before grilling.
Grease build-up.
Confirm that the heat distribution plate is
clean and properly installed. Remove excess
grease from the burn chamber.
Excessive cooking temperature.
Persistent Grease fire.
Adjust (lower) temperature accordingly.
Grease trapped by food buildup around
Turn knobs to OFF: Turn gas off at LP tank.
burner system
Leave lid in closed position and let fire burn
out. After grill cools, remove and clean all parts
Uneven burn pattern or.
Flashback fire
Blockage in the burner or gas system
Corroded burner
Inside of lid is peeling –like
The lid is porcelain coated, not painted.
paint peeling
Confirm that the venturi tubes are not
blocked by insects or other debris. Use a special
venturi brush to clean (see Fig.13).
Use a pin or needle to probe the orifice in the
gas valve. Never enlarge the orifice
Use a toothpick or straightened paper clip to
clean the burner ports (Fig.11).
Corrosion of a gas burner can cause the solid
material between the gas ports to deteriorate,
resulting in uneven burning. See your
retail for the appropriate replacement burner.
Baked on grease buildup has turned to
carbon and is flaking off. Clean thoroughly.
(see page 20)
29
Cooking
Methods of Cooking
One of the keys to extending your range of grilling capabilities is a fundamental understanding of the
two common methods of cooking. Direct and Indirect cooking.
In the Direct cooking method foods are placed directly above the heat source. For example, this method
is used in searing, where high heat and immediate heat is required to quickly brown the outside layer of
meat and seal in juices to enhance flavor. On this Grill this is accomplished by placing the food on the
porcelain cooking grids directly over one or both of the main burners. This may be done with the Grill hood either
open or closed.
In the Indirect cooking method, foods are placed on the placed on the Grill offset from the heat source.
With the Grill lid closed reflected heat surrounds the food, cooking it more evenly and gently. This
approximates the action of a convection oven where heat is circulated by the use of a fan to achieve a
similar result. This method is perfect for cooking roasts of any kind, and is also useful for slow cooking or
baking a wide variety of other foods. Indirect cooking on your Grill is accomplished using one of the main
burners and placing the food on the porcelain cooking grid on above the opposite burner, or on the
warming rack burner. The Grill hood should always be closed when employing the indirect cooking method.
·The powerful Main Burners deliver the middle and high range of temperatures desired for traditional
barbequing. This includes searing and finishing steaks, hamburgers, pork chops and the like, or
grilling chicken parts, sausages, or kebabs with more moderate heat.
·The Side Burner boils, sautés, stir fries or warms. Plus its high power is more than adequate for
deep frying seafood, vegetables and meats or hard boiling soups, lobsters or corn on the cob.
Preparing food for the Grill
WARNING: Always observe safe food handling and safe food-preparation
practices when using this Grill to prevent food-borne illnesses.
•
Always cook foods adequately. Undercooked foods can retain bacteria, especially if thawed or exposed to
warm conditions prior to cooking
•
Always use a meat thermometer to confirm that foods have been fully cooked.
•
Always use separate plates and utensils for the handling of raw food. Never place raw food and cooked
food on the same plate, and never place cooked food on a plate that was used for handling raw food.
•
Always carefully wash all plates and utensils used to handle raw food before using them to handle cooked
food.
•
Always wash all vegetables, seafood and poultry before cooking.
•
Always leave uncooked foods in the refrigerator until you are ready to start cooking.
•
Always marinate meat in the refrigerator. Always dispose of the excess marinade, and never reuse it.
•
Always preheat the Grill for 5 to 10 minutes before cooking, and clean off all grease and food residue
before using the cooking grids.
30
Cooking
Grilling Tips
A few helpful hints will ensure that your grilling results are perfect every time.
•
Apply a light coating of cooking oil to your cooking grids before grilling, to prevent foods from sticking.
•
Cook similar portion size together, so that they all cook evenly.
•
Use tongs to turn food on the Grill.
•
Never pierce foods while they are cooking on the Grill, as this will dry them out.
•
On foods such as pork chops and steak, slit the fat strip to prevent the meat from curling during cooking.
•
Turn foods infrequently. Some chefs say that a good steak should never be turned more than once.
•
Apply sugar-based sauces such as commercial barbeque sauces only during the latter stages of cooking,
to prevent charring.
•
Soak the wooden skewers that you intend to use for kebabs for several minutes before using them for
cooking.
•
Use a disposable aluminum tray filled with water, fruit juice, wine or marinade to add extra flavor and
moisture to slow –cooked foods such as roasts, whole chickens, turkeys or ducks. Place the tray on the top of
the sear plates below the Grill surface and immediately under the foods being cooked. This will buffer the
heat from below, thereby slowing the cooking process and protecting the bottom of the food from over
–cooking. Check the tray periodically during cooking and Keep it filled with liquid.
WARNING: Never let the tray boil dry. That could be hazardous, as grease from
fatty foods that has collected in the tray could ignite and possibly cause bodily
injury or property damage.
NOTE: Always trim excess fat from your foods to reduce the occurrence of flare –ups during cooking.
31
Warranty Program
The Life at Home Gas Grill Warranty Program
3 Year Warranty
·Stainless Steel Burners
1 Year Warranty
•
Porcelain Lid, Side Shelves, Porcelain Enamel Heat Distribution Plate, Porcelain Enamel Cooking
Grids, Ignitor, All other parts.
The warranty is nontransferable.
•
It does not cover failures due to misuse or improper installation or maintenance.
•
The warranty is for replacement or repair of defective parts only. Products will not be responsible for
incidental or consequential damages or any labor costs.
•
This limited warranty does not cover damage due to chipping and scratching of porcelain or painted surfaces
nor does it cover corrosion or discoloring due to misuse, lack of maintenance, hostile environment, accidents,
alterations, abuse or neglect.
•
This limited warranty does not cover any scratches, dents, corrosion or discoloring by heat, abrasive and
chemical cleaners nor chipping on porcelain enamel parts, nor any components used in the installation of the
gas grill.
If you have any questions related to the product, please call our service
centre @ 1-877-885-8227.
32