1
User’s Guide
© 1999-Present Kryptronic, Inc. All rights reserved worldwide. Kryptronic, the Kryptronic logo and all Kryptronic
software names and logos are trademarks of Kryptronic, Inc. All Kryptronic software is copyrighted and the intellectual
property of Kryptronic, Inc. All Kryptronic software is developed and distributed under license by Kryptronic, Inc.
Application Information is available online at http://www.kryptronic.com/.
Users Guide
Table of Contents
Welcome To ClickCartPro/EuropaCart ............................................................................................................................. 17
Advanced Features........................................................................................................................................................ 17
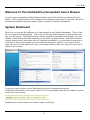
Welcome To The ClickCartPro/EuropaCart User’s Manual ............................................................................................ 18
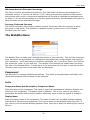
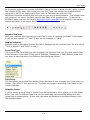
System Dashboard.............................................................................................................................................................. 18
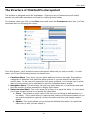
The Structure of ClickCartPro/EuropaCart....................................................................................................................... 19
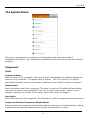
The System Menu................................................................................................................................................................ 21
Component ........................................................................................................................................................................ 21
Profile ............................................................................................................................................................................. 21
Component Name ...................................................................................................................................................... 21
Display Name ............................................................................................................................................................. 21
Description ................................................................................................................................................................. 21
Component Defaults/Component Default Status ....................................................................................................... 21
Component Default Namespace ................................................................................................................................ 22
Settings .......................................................................................................................................................................... 22
Cron Settings ................................................................................................................................................................. 22
Last Daily Cron Run ................................................................................................................................................... 22
Last Weekly Cron Run ............................................................................................................................................... 22
Public Download File Storage Time ........................................................................................................................... 22
Public Uploaded File Storage Time............................................................................................................................ 22
Unmodified Temp File Storage Time ......................................................................................................................... 22
Unused Session Storage Time .................................................................................................................................. 23
Currency, Weight and Dimensional Settings ................................................................................................................. 23
Activate Currency Conversion System....................................................................................................................... 24
Dimensional Unit ........................................................................................................................................................ 24
System Base Currency............................................................................................................................................... 24
Weight Unit ................................................................................................................................................................. 24
Display Skins ................................................................................................................................................................. 24
Active Skin: FrontEnd Interface.................................................................................................................................. 24
Default Skin: Logo ...................................................................................................................................................... 24
Mobile Skin: Logo....................................................................................................................................................... 25
Default Skin: Color Scheme ....................................................................................................................................... 25
Mail Skin: Logo........................................................................................................................................................... 25
Print Skin: Logo .......................................................................................................................................................... 25
Frontend Meta Information............................................................................................................................................. 25
Meta Description ........................................................................................................................................................ 25
Meta Keywords........................................................................................................................................................... 26
Meta Title.................................................................................................................................................................... 26
Language Strings........................................................................................................................................................... 26
Management Interface Settings ..................................................................................................................................... 26
Default DB Results Per Page ..................................................................................................................................... 26
Last News Download.................................................................................................................................................. 26
Default Skin: BackEnd Interface ................................................................................................................................ 26
Software Brand........................................................................................................................................................... 26
Postal Code Lookup Settings ........................................................................................................................................ 26
Activate Postal Code Lookup ..................................................................................................................................... 26
PostCode Anywhere License Code ........................................................................................................................... 26
PostCode Anywhere Account Code........................................................................................................................... 27
PostCode Anywhere URL .......................................................................................................................................... 27
Security Settings ............................................................................................................................................................ 27
Banned IP Addresses................................................................................................................................................. 27
Upload File Size Maximum......................................................................................................................................... 27
Upload File Types Allowed......................................................................................................................................... 27
Site Information.............................................................................................................................................................. 27
Common Site Name ................................................................................................................................................... 27
Site Owner Address ................................................................................................................................................... 27
2
Users Guide
Site Owner Country .................................................................................................................................................... 27
Site Owner Telephone Number.................................................................................................................................. 27
Show Delivery Address Book ..................................................................................................................................... 27
Site Owner City .......................................................................................................................................................... 27
Site Owner State/Province ......................................................................................................................................... 28
Site Owner Zip/Postal Code ....................................................................................................................................... 28
Social Media .................................................................................................................................................................. 28
Facebook Page Link................................................................................................................................................... 28
Google Plus Page Link............................................................................................................................................... 28
Twitter Page Link........................................................................................................................................................ 28
Tax Settings ................................................................................................................................................................... 28
Country Tax: European Union VAT Rules - Company Affiliations ............................................................................. 28
Country Tax: European Union VAT Rules - Display Tax ........................................................................................... 28
Country Tax: European Union VAT Rules - Display Zero Tax................................................................................... 29
Country Tax: European Union VAT Rules - Tax Excluded Text ................................................................................ 29
Country Tax: European Union VAT Rules - Tax Name ............................................................................................. 29
Country Tax: European Union VAT Rules - Validate Tax Exemption Numbers ........................................................ 29
Country Tax: Standard Rules - Tax Name ................................................................................................................. 29
Country Tax: Standard Rules - Taxable Locations .................................................................................................... 29
State and Province Tax: Taxable Locations............................................................................................................... 30
Country Tax: European Union VAT Rules - Catalog Price Tax Entry ........................................................................ 31
Country Tax: European Union VAT Rules - Company Registration Number ............................................................ 31
Country Tax: European Union VAT Rules - Display Tax Summary In Orders........................................................... 31
Country Tax: European Union VAT Rules - Home Country....................................................................................... 31
Country Tax: European Union VAT Rules - Tax Included Text ................................................................................. 32
Country Tax: European Union VAT Rules - Tax Zero Text........................................................................................ 32
Country Tax: European Union VAT Rules - VAT Registration Number ..................................................................... 32
Currency Settings: Conversions and Symbols .............................................................................................................. 32
Date and Time Settings ................................................................................................................................................. 32
DateTime Display Format........................................................................................................................................... 32
DateTime Offset In Seconds ...................................................................................................................................... 32
DateTime Offset Increase/Decrease.......................................................................................................................... 32
Download Directory Settings ......................................................................................................................................... 32
Download User Name ................................................................................................................................................ 32
Download User Password .......................................................................................................................................... 32
Joomla! Connector Settings........................................................................................................................................... 33
Activate Joomla! Single-Sign-On ............................................................................................................................... 33
Activate Joomla! Skin Widget Export ......................................................................................................................... 33
Joomla! Location (URL).............................................................................................................................................. 33
Joomla! Skin Cache Status ........................................................................................................................................ 33
Activate Joomla! Skin Importer .................................................................................................................................. 33
Joomla! Connector Password .................................................................................................................................... 33
Joomla! Online Store Menu ItemID ............................................................................................................................ 33
Joomla! Skin Cache Time To Live ............................................................................................................................. 34
Mail Settings .................................................................................................................................................................. 34
Guest Subscription Opt Out Link Text........................................................................................................................ 34
Site Owner Email Address ......................................................................................................................................... 34
User Account Subscription Opt Out Link Text............................................................................................................ 34
Mobile Support............................................................................................................................................................... 34
Mobile Support Status ................................................................................................................................................ 34
Search Engine Optimization Settings ............................................................................................................................ 34
Google Analytics Account .......................................................................................................................................... 34
SEO Status................................................................................................................................................................. 34
Suppress SID in URLs ............................................................................................................................................... 34
Session and Cookie Settings ......................................................................................................................................... 35
Days Until Cookie Expiration...................................................................................................................................... 35
Minutes of Inactivity Before User Logout (FrontEnd) ................................................................................................. 35
3
Users Guide
Days Until Cookie Refresh ......................................................................................................................................... 35
Minutes of Inactivity Before User Logout (Management Interface)............................................................................ 35
Sitemap .......................................................................................................................................................................... 35
Accessing the XML SiteMap ...................................................................................................................................... 35
Accessing the HTML SiteMap .................................................................................................................................... 35
Activate SiteMap ........................................................................................................................................................ 35
Show Categories in SiteMap ...................................................................................................................................... 36
Show News Articles in SiteMap ................................................................................................................................. 36
Automate SiteMap Submission to Search Engines ................................................................................................... 36
Show HTML Pages in SiteMap .................................................................................................................................. 36
Show Products in SiteMap ......................................................................................................................................... 36
Statistical Settings.......................................................................................................................................................... 36
Enable Statistical Logging .......................................................................................................................................... 36
Wholesale and Affiliate Account Settings ...................................................................................................................... 36
Affiliate System Status ............................................................................................................................................... 36
Track Affiliates Across Sessions ................................................................................................................................ 36
Maximum Order Commission..................................................................................................................................... 36
Wholesale System Status .......................................................................................................................................... 37
Database ........................................................................................................................................................................... 37
Alternate Connections.................................................................................................................................................... 37
Backup and Restore ...................................................................................................................................................... 37
Raw Database Admin .................................................................................................................................................... 38
SQL Statement: Submit a Raw SQL Statement ....................................................................................................... 38
SQL Statement........................................................................................................................................................... 38
Output Type (Select Statements) ............................................................................................................................... 39
Change Active Connection: Use a different database connection............................................................................. 39
Available Database Connections ............................................................................................................................... 39
Create A New Table: Create a new table within this database.................................................................................. 39
Table Information ....................................................................................................................................................... 39
Table Name ................................................................................................................................................................ 39
Table Display Name ................................................................................................................................................... 39
Table Description ....................................................................................................................................................... 39
Primary Key Column .................................................................................................................................................. 39
Column Name ............................................................................................................................................................ 39
Display Name ............................................................................................................................................................. 39
Column Type .............................................................................................................................................................. 39
Column Numeric......................................................................................................................................................... 40
Column Section Name ............................................................................................................................................... 40
Column Description .................................................................................................................................................... 40
Database Overview .................................................................................................................................................... 40
Displays ............................................................................................................................................................................. 40
Display Includes ............................................................................................................................................................. 40
Display Name ............................................................................................................................................................. 40
Component ................................................................................................................................................................. 41
Include Content .......................................................................................................................................................... 41
Description ................................................................................................................................................................. 41
Display Skins ................................................................................................................................................................. 41
Install New Display Skin................................................................................................................................................. 41
Skin Installation File ................................................................................................................................................... 41
Skin Widgets .................................................................................................................................................................. 41
Component ................................................................................................................................................................. 41
Namespace ................................................................................................................................................................ 41
Name .......................................................................................................................................................................... 41
Status ......................................................................................................................................................................... 42
Desktop Display ......................................................................................................................................................... 42
Desktop Display Status .............................................................................................................................................. 42
Desktop Display Group .............................................................................................................................................. 42
4
Users Guide
Desktop Display Class ............................................................................................................................................... 42
Desktop Display Order ............................................................................................................................................... 42
Mobile Display ............................................................................................................................................................ 42
Mobile Display Status................................................................................................................................................. 42
Mobile Display Group ................................................................................................................................................. 42
Mobile Display Class .................................................................................................................................................. 42
Mobile Display Order.................................................................................................................................................. 42
System Messages.......................................................................................................................................................... 43
Component ................................................................................................................................................................. 43
Message Identifier ...................................................................................................................................................... 43
Message Type............................................................................................................................................................ 43
Message Text............................................................................................................................................................. 43
File Manager...................................................................................................................................................................... 43
Download Files .............................................................................................................................................................. 43
Download Files: Public Directory ............................................................................................................................... 43
Download Files: Private Directory .............................................................................................................................. 43
Media Files..................................................................................................................................................................... 43
Media Directory .......................................................................................................................................................... 43
Upload Download Files .................................................................................................................................................. 44
Download File............................................................................................................................................................. 44
Download Directory (Public or Private) ...................................................................................................................... 44
Upload Media Files ........................................................................................................................................................ 44
Media File ................................................................................................................................................................... 44
Media Directory Selection .......................................................................................................................................... 44
Uploaded Files ............................................................................................................................................................... 44
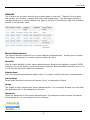
Locations ........................................................................................................................................................................... 44
Countries........................................................................................................................................................................ 44
Full Country Name ..................................................................................................................................................... 44
Country ISO Code ...................................................................................................................................................... 44
HSBC Country Code .................................................................................................................................................. 44
Sort Order................................................................................................................................................................... 45
European Union Status .............................................................................................................................................. 45
Tax Information .......................................................................................................................................................... 45
Shipping Tax Rate (Percentage) ................................................................................................................................ 45
Item Reduced Low Tax Rate (Percentage)................................................................................................................ 45
Item Reduced Mid Low Tax Rate (Percentage) ......................................................................................................... 45
Item Reduced Mid High Tax Rate (Percentage)*....................................................................................................... 45
Item Reduced High Tax Rate (Percentage)*.............................................................................................................. 45
Item Standard Tax Rate (Percentage)*...................................................................................................................... 45
Display/Display in Contact Forms .............................................................................................................................. 45
Display in Delivery Forms........................................................................................................................................... 45
Shipping Zones .......................................................................................................................................................... 45
Parcelforce Shipping Zone ......................................................................................................................................... 45
Royal Mail Shipping Zone .......................................................................................................................................... 46
States And Provinces..................................................................................................................................................... 46
Full State Province Name........................................................................................................................................... 46
State/Province ISO Code ........................................................................................................................................... 46
Country ....................................................................................................................................................................... 46
Sort Order................................................................................................................................................................... 46
European Union Status .............................................................................................................................................. 46
Item Tax Rate (Percentage) ....................................................................................................................................... 46
Shipping Tax Rate (Percentage) ................................................................................................................................ 47
Display........................................................................................................................................................................ 47
Display in Contact Forms ........................................................................................................................................... 47
Mail................................................................................................................................................................................. 47
Guest Subscribers...................................................................................................................................................... 47
Mail Messages ........................................................................................................................................................... 47
5
Users Guide
Component ................................................................................................................................................................. 47
Display Name ............................................................................................................................................................. 47
Text Message ............................................................................................................................................................. 47
Default Subject ........................................................................................................................................................... 48
XHTML Message Include ........................................................................................................................................... 48
Sender and Recipients ............................................................................................................................................... 48
Default Message Sender (From) ................................................................................................................................ 48
Default Message Recipient (To)................................................................................................................................. 48
Additional Message Recipients (TO).......................................................................................................................... 48
Additional Message Recipients (CC) ......................................................................................................................... 48
Additional Message Recipients (BCC) ....................................................................................................................... 48
Message Subject Options .......................................................................................................................................... 48
Subject Prepend String .............................................................................................................................................. 48
Subject Append String................................................................................................................................................ 48
Send Mail Message ....................................................................................................................................................... 48
Send Mail Message.................................................................................................................................................... 49
From Email Address................................................................................................................................................... 49
Message Subject........................................................................................................................................................ 49
Text Message ............................................................................................................................................................. 49
Recipients/To Email Addresses ................................................................................................................................. 49
Cc Email Addresses ................................................................................................................................................... 49
Bcc Email Addresses ................................................................................................................................................. 49
XHTML Message Information .................................................................................................................................... 49
Send XHTML Message (In Addition To Text) ............................................................................................................ 49
XHTML Message........................................................................................................................................................ 49
Subscriptions ................................................................................................................................................................. 49
Display Name ............................................................................................................................................................. 49
Namespaces...................................................................................................................................................................... 50
Component ................................................................................................................................................................. 50
Namespace Region.................................................................................................................................................... 50
Display Name ............................................................................................................................................................. 50
Active Status Indicator................................................................................................................................................ 50
Permissions ................................................................................................................................................................ 50
Allowed Groups .......................................................................................................................................................... 50
Denied Groups ........................................................................................................................................................... 51
Reports .............................................................................................................................................................................. 51
Advanced Reports ......................................................................................................................................................... 51
System Reports ............................................................................................................................................................. 51
Daily Activity ............................................................................................................................................................... 51
Management Activity .................................................................................................................................................. 52
Monthly Activity .......................................................................................................................................................... 52
Page Access Totals.................................................................................................................................................... 52
Yearly Activity ............................................................................................................................................................. 52
Software............................................................................................................................................................................. 52
Install Software .............................................................................................................................................................. 52
Installed Software .......................................................................................................................................................... 52
Purchase Software......................................................................................................................................................... 52
Server News .................................................................................................................................................................. 53
User Accounts ................................................................................................................................................................... 53
Affiliate Payments .......................................................................................................................................................... 53
Generate Affiliate Payments .......................................................................................................................................... 53
User Accounts................................................................................................................................................................ 53
Email Address ............................................................................................................................................................ 53
Username ................................................................................................................................................................... 53
Password.................................................................................................................................................................... 53
User Group ................................................................................................................................................................. 53
Contact Information .................................................................................................................................................... 53
6
Users Guide
Last Access Time ....................................................................................................................................................... 53
Billing Address............................................................................................................................................................ 54
Residential/Commercial Status .................................................................................................................................. 54
Subscriptions .............................................................................................................................................................. 54
Affiliate Information..................................................................................................................................................... 54
Affiliate ID ................................................................................................................................................................... 54
Affiliate Commission Percentage ............................................................................................................................... 54
Affiliate Sales (Total) .................................................................................................................................................. 54
Affiliate Commission Earned (Total)........................................................................................................................... 54
Affiliate Commission Owed (Current)......................................................................................................................... 54
Affiliate Commission Paid (Total) ............................................................................................................................... 54
Wholesale Account Discount Percentage .................................................................................................................. 55
Currency/Preferred Currency ..................................................................................................................................... 55
The WebSite Menu .............................................................................................................................................................. 55
Component ........................................................................................................................................................................ 55
Profile ............................................................................................................................................................................. 55
Component Name And Description/ Component Name ............................................................................................ 55
Display Name ............................................................................................................................................................. 55
Description ................................................................................................................................................................. 56
Component Default Status ......................................................................................................................................... 56
Component Default Namespace ................................................................................................................................ 56
Settings .......................................................................................................................................................................... 56
Banner Advertisements.................................................................................................................................................. 56
Content Section: Banner Image Width....................................................................................................................... 56
Skin Widget: Banner Image Width ............................................................................................................................. 56
Content Section: Transition Delay.............................................................................................................................. 56
Skin Widget: Transition Delay .................................................................................................................................... 56
Cron Settings ................................................................................................................................................................. 56
Content .............................................................................................................................................................................. 57
Banner Advertisements.................................................................................................................................................. 57
Identifier...................................................................................................................................................................... 57
Display Name ............................................................................................................................................................. 57
Active Status .............................................................................................................................................................. 57
Image.......................................................................................................................................................................... 57
Placement .................................................................................................................................................................. 57
Group.......................................................................................................................................................................... 58
Sort Order................................................................................................................................................................... 58
Link ............................................................................................................................................................................. 58
Link Type .................................................................................................................................................................... 58
Link Reference Identifier or External URL.................................................................................................................. 58
Web Pages .................................................................................................................................................................... 58
Identifier...................................................................................................................................................................... 58
HTML Content ............................................................................................................................................................ 58
Date/Time Stamp ....................................................................................................................................................... 59
Display/Menu Order ................................................................................................................................................... 59
Top Level Menu Display............................................................................................................................................. 59
Page Title Display ...................................................................................................................................................... 59
Search Engine Optimization .......................................................................................................................................... 59
Meta Title.................................................................................................................................................................... 59
Meta Keywords........................................................................................................................................................... 60
Meta Description ........................................................................................................................................................ 60
Search Engine Optimized URL Identifier ................................................................................................................... 60
Visibility/Page Visibility Selection ............................................................................................................................... 60
Page Visibility Groups ................................................................................................................................................ 60
Related Pages ............................................................................................................................................................ 60
Related Web Pages Menu Display ............................................................................................................................ 60
Banner Advertisements .............................................................................................................................................. 61
7
Users Guide
Dynamic Forms.................................................................................................................................................................. 61
Dynamic Form Fields ..................................................................................................................................................... 61
Form Field/Identifier ................................................................................................................................................... 61
Controlling Dynamic Form.......................................................................................................................................... 61
Display Name ............................................................................................................................................................. 61
Form Section .............................................................................................................................................................. 61
Display Description..................................................................................................................................................... 61
Field Order ................................................................................................................................................................. 61
Field Settings/Default Value ....................................................................................................................................... 61
Email Field Indicator................................................................................................................................................... 61
Required Indicator ...................................................................................................................................................... 61
Form Field Type ......................................................................................................................................................... 61
Selection Items (List Fields) ....................................................................................................................................... 62
Dynamic Forms.............................................................................................................................................................. 62
Form/Identifier ............................................................................................................................................................ 62
Display Name ............................................................................................................................................................. 62
Form Description Header ........................................................................................................................................... 62
Mail Message/Default From Email Address ............................................................................................................... 62
Message Subject........................................................................................................................................................ 63
Message Header Text ................................................................................................................................................ 63
Send XHTML Message (In Addition to Text).............................................................................................................. 63
To Email Addresses ................................................................................................................................................... 63
Cc Email Addresses ................................................................................................................................................... 63
Bcc Email Addresses ................................................................................................................................................. 63
Search Engine Optimization For Dynamic Form........................................................................................................ 63
Meta Title.................................................................................................................................................................... 63
Meta Keywords........................................................................................................................................................... 63
Meta Description ........................................................................................................................................................ 63
Search Engine Optimized URL Identifier ................................................................................................................... 63
The Store Menu ................................................................................................................................................................... 64
Component ........................................................................................................................................................................ 64
Profile ............................................................................................................................................................................. 64
Component Name And Description............................................................................................................................ 64
Settings .......................................................................................................................................................................... 65
Ajax Product Search ...................................................................................................................................................... 65
Activate Ajax Product Search..................................................................................................................................... 65
Image Width: Ajax Product Search Product Images .................................................................................................. 65
Checkout ........................................................................................................................................................................ 65
Allow Guest Checkout ................................................................................................................................................ 66
Custom Sale Method Status ...................................................................................................................................... 66
Custom Surcharge Method Status ............................................................................................................................. 66
Low Inventory Level Alert ........................................................................................................................................... 66
Order Number Prefix .................................................................................................................................................. 66
Custom Sale Method.................................................................................................................................................. 66
Custom Surcharge Method ........................................................................................................................................ 66
Display Progress Indicator ......................................................................................................................................... 66
Minimum Order Amount ............................................................................................................................................. 67
Order Number Type ................................................................................................................................................... 67
Display Controls: Featured Product List ........................................................................................................................ 67
Slot 1: Activate Slider ................................................................................................................................................. 67
Slot 1: Heading Name ................................................................................................................................................ 67
Slot 1: Product Display Type ...................................................................................................................................... 67
Slot 1: Products Per Row ........................................................................................................................................... 67
Slot 2: Activate Slider ................................................................................................................................................. 67
Slot 2: Heading Name ................................................................................................................................................ 68
Slot 2: Product Display Type ...................................................................................................................................... 68
Slot 2: Products Per Row ........................................................................................................................................... 68
8
Users Guide
Slot 3: Activate Slider ................................................................................................................................................. 68
Slot 3: Heading Name ................................................................................................................................................ 68
Slot 3: Product Display Type ...................................................................................................................................... 68
Slot 3: Products Per Row ........................................................................................................................................... 68
Slot 4: Activate Slider ................................................................................................................................................. 68
Slot 4: Heading Name ................................................................................................................................................ 69
Slot 4: Product Display Type ...................................................................................................................................... 69
Slot 4: Products Per Row ........................................................................................................................................... 69
Slot 5: Activate Slider ................................................................................................................................................. 69
Slot 5: Heading Name ................................................................................................................................................ 69
Slot 5: Product Display Type ...................................................................................................................................... 69
Slot 5: Products Per Row ........................................................................................................................................... 69
Display Controls: Store Splash Page List ...................................................................................................................... 70
Category List: Categories Per Row............................................................................................................................ 70
Category List: Category Display Type........................................................................................................................ 70
Product List: Activate Slider ....................................................................................................................................... 70
Product List: Heading Name ...................................................................................................................................... 70
Product List: Product Display Type ........................................................................................................................... 70
Product List: Products Per Row ................................................................................................................................. 70
General Store Settings................................................................................................................................................... 70
Disable Online Store .................................................................................................................................................. 71
Display In Stock Level ................................................................................................................................................ 71
Display Product Numbers........................................................................................................................................... 71
Enable Stock Notifications.......................................................................................................................................... 71
Intershipper Settings ...................................................................................................................................................... 71
Settings/Active Carriers.............................................................................................................................................. 71
Linkpoint API Keyfile Contents ...................................................................................................................................... 71
Peachtree Export Settings ............................................................................................................................................. 72
Product Listings ............................................................................................................................................................. 73
Image Width: Small Product Images.......................................................................................................................... 73
Products To Display Per Page ................................................................................................................................... 73
Show Sort Options ..................................................................................................................................................... 73
Remote E-Commerce Settings ...................................................................................................................................... 73
Allow Remote Product Page POSTs.......................................................................................................................... 74
Allowed Remote Product Page URLs ........................................................................................................................ 74
Sage Exports Settings ................................................................................................................................................... 74
Default Customer Account ......................................................................................................................................... 74
Department Number................................................................................................................................................... 74
European Union VAT Tax Code: Normal ................................................................................................................... 74
European Union Vat Tax Code: Zero......................................................................................................................... 74
Nominal Code............................................................................................................................................................. 74
Shipping Settings ........................................................................................................................................................... 74
Add Handling Charge To Free Shipping Methods ..................................................................................................... 74
Allowed Shipping Addresses...................................................................................................................................... 74
Free Shipping Threshold ............................................................................................................................................ 75
Handling Charge ........................................................................................................................................................ 75
Image Width: Shipping Carrier Images ...................................................................................................................... 75
Maximum Combined Package Weight ....................................................................................................................... 75
Realtime: Minimum Box Height .................................................................................................................................. 75
Realtime: Minimum Box Length ................................................................................................................................. 75
Realtime: Minimum Box Weight ................................................................................................................................. 75
Realtime: Minimum Box Width ................................................................................................................................... 75
Realtime: Present Dimensional Error Notices............................................................................................................ 75
Realtime: Present Weight Error Notices .................................................................................................................... 76
Return Currency: FedEx............................................................................................................................................. 76
Return Currency: USPS ............................................................................................................................................. 76
Shipping Error: Amount .............................................................................................................................................. 76
9
Users Guide
Shipping Error: Carrier Name..................................................................................................................................... 76
UPS Online Tools Settings ............................................................................................................................................ 76
UPS Account Number.................................................................................................................................................... 76
Use UPS Negotiated Rates........................................................................................................................................ 76
Categories...................................................................................................................................................................... 76
Image Width: Category Images.................................................................................................................................. 76
Cron Settings/Settings ................................................................................................................................................... 76
Last Daily Cron Run ................................................................................................................................................... 77
Last Weekly Cron Run ............................................................................................................................................... 77
Online Order Storage Time ........................................................................................................................................ 77
Pending/Cancelled ..................................................................................................................................................... 77
Shopping Cart/Wish List Storage Time ...................................................................................................................... 77
Display Controls: Related Product List .......................................................................................................................... 78
Product List Activate Slider ........................................................................................................................................ 78
Product List: Heading Name ...................................................................................................................................... 78
Product List: Product Display Type ............................................................................................................................ 78
Product List: Products Per Row ................................................................................................................................. 78
Display Controls: System Generated Lists .................................................................................................................... 78
All Products: Product Display Type............................................................................................................................ 78
All Products: Products per Row ................................................................................................................................. 81
Best Sellers: Product Display Type............................................................................................................................ 81
Best Sellers: Products per Row ................................................................................................................................. 81
New Items: Product Display Type .............................................................................................................................. 81
New Items: Products per Row.................................................................................................................................... 81
Product Index: Product Display Type......................................................................................................................... 81
Product Index: Products per Row .............................................................................................................................. 81
Search Results: Product Display Type....................................................................................................................... 81
Search Results: Products per Row ............................................................................................................................ 82
Specials: Product Display Type ................................................................................................................................. 82
Specials: Products per Row ....................................................................................................................................... 82
Google Checkout Settings ............................................................................................................................................. 82
Activate Google Checkout.......................................................................................................................................... 82
Allow Discounts Codes in Google Checkout.............................................................................................................. 82
Enable Callback Authentication ................................................................................................................................. 82
Google Checkout API URL......................................................................................................................................... 82
Google Checkout Button Language ........................................................................................................................... 82
Google Checkout Button Size .................................................................................................................................... 83
Google Checkout Button Style ................................................................................................................................... 83
Google Checkout Button URL Non-SSL .................................................................................................................... 83
Google Checkout Button URL SSL ............................................................................................................................ 83
Merchant Calculated Shipping Display Name............................................................................................................ 83
Merchant ID ................................................................................................................................................................ 83
Merchant Key ............................................................................................................................................................. 83
Language Strings........................................................................................................................................................... 83
PayPal Website Payments Pro Settings........................................................................................................................ 84
API Login: User Name................................................................................................................................................ 84
API Login: User Password ......................................................................................................................................... 84
API URL...................................................................................................................................................................... 84
Currency Code ........................................................................................................................................................... 84
Enable PayPal Website Payments Pro Express Checkout Link ................................................................................ 84
Keyfile Contents (API Keyfile) .................................................................................................................................... 84
PayPal Express Checkout Email................................................................................................................................ 84
Product Detail Pages ..................................................................................................................................................... 84
Display Email a Friend Link........................................................................................................................................ 84
Display Facebook Like Button.................................................................................................................................... 84
Display Google Plus Button ....................................................................................................................................... 85
Display Related Products ........................................................................................................................................... 85
10
Users Guide
Display Twitter Tweet Button...................................................................................................................................... 85
Image Width: Large Product Images.......................................................................................................................... 85
Use PopUp/Modal Functionality For Images.............................................................................................................. 85
Use Zoom Functionality For Images .......................................................................................................................... 85
Quickbooks Export Settings........................................................................................................................................... 86
Settings/Account Name: Accounts Receivable (A/R) ................................................................................................ 86
Account Name: Bank Account (Bank)........................................................................................................................ 86
Account Name: Country Tax Amount (Income) ......................................................................................................... 86
Account Name: Country Tax Refund Total (Expense) ............................................................................................... 86
Account Name: Discount Amount (Expense)............................................................................................................. 86
Account Name: Item Subtotal (Income) ..................................................................................................................... 86
Account Name: Sale Amount (Expense).................................................................................................................... 86
Account Name: Shipping Amount (Income) ............................................................................................................... 86
Account Name: State/Province Tax Amount (Income) .............................................................................................. 86
Account Name: Surcharge Amount (Income) ............................................................................................................ 86
Invoice Display Name: Country Tax Amount ............................................................................................................. 86
Invoice Display Name: Country Tax Refund Total ..................................................................................................... 86
Invoice Display Name: Discount Amount ................................................................................................................... 86
Invoice Display Name: Sale Amount.......................................................................................................................... 86
Invoice Display Name: Shipping Amount ................................................................................................................... 87
Invoice Display Name: State/Province Tax Amount .................................................................................................. 87
Invoice Display Name: Surcharge Amount ................................................................................................................ 87
Reviews.......................................................................................................................................................................... 87
Activate Reviews ........................................................................................................................................................ 87
Activate Slider For Reviews Display .......................................................................................................................... 87
Number of Current Reviews to Display ...................................................................................................................... 87
Require Account to Post Review................................................................................................................................ 88
Require Activation for Reviews .................................................................................................................................. 88
Shipping Estimator......................................................................................................................................................... 88
It provides a location form and shipping rate information on the shopping cart page of the ClickCartPro/EuropaCart
online store. ................................................................................................................................................................... 88
Activate Shipping Estimates....................................................................................................................................... 88
Shopping Cart ................................................................................................................................................................ 89
Allow Fractional Quantities......................................................................................................................................... 89
Continue Shopping: Target ........................................................................................................................................ 89
Disable Wish List........................................................................................................................................................ 89
Display Images ........................................................................................................................................................... 89
Display Product Options With Line Breaks ................................................................................................................ 89
Image Width: Cart Product Images ............................................................................................................................ 89
Catalog .............................................................................................................................................................................. 89
Categories...................................................................................................................................................................... 90
Category ..................................................................................................................................................................... 90
Identifier...................................................................................................................................................................... 90
Display Name ............................................................................................................................................................. 91
Description ................................................................................................................................................................. 91
Category Image.......................................................................................................................................................... 92
Main Category Indicator ............................................................................................................................................. 93
Sort Order................................................................................................................................................................... 93
Date/Time Stamp ....................................................................................................................................................... 93
Search Engine Optimization....................................................................................................................................... 93
Meta Title.................................................................................................................................................................... 93
Meta Description ........................................................................................................................................................ 93
Search Engine Optimized URL Identifier ................................................................................................................... 93
Display........................................................................................................................................................................ 94
Sub-Categories To Display per Row.......................................................................................................................... 94
Sub Category Display Type........................................................................................................................................ 94
Products to Display Per Row...................................................................................................................................... 94
11
Users Guide
Product Display Type ................................................................................................................................................. 94
Product Multi-Add Indicator ........................................................................................................................................ 95
Related Categories..................................................................................................................................................... 96
Visibility....................................................................................................................................................................... 97
Visibility Selection....................................................................................................................................................... 97
Category Visibility Groups .......................................................................................................................................... 97
Option Selection Items................................................................................................................................................... 97
Option Selection Item ................................................................................................................................................. 98
Identifier and Name/Identifier ..................................................................................................................................... 98
Display Name ............................................................................................................................................................. 98
Inventory Level ........................................................................................................................................................... 98
Item Sort Order........................................................................................................................................................... 99
Price Adjustments ...................................................................................................................................................... 99
Base Price Change .................................................................................................................................................... 99
Recurring Price Change ............................................................................................................................................. 99
Wholesale Price Change............................................................................................................................................ 99
Affiliate Commission Change ..................................................................................................................................... 99
Weight Adjustments ................................................................................................................................................. 100
Digital Download ...................................................................................................................................................... 100
Taxes........................................................................................................................................................................ 100
Apply State and Province Tax .................................................................................................................................. 100
Apply Country Tax.................................................................................................................................................... 100
Product Options ........................................................................................................................................................... 100
Product Option ......................................................................................................................................................... 101
Identifier.................................................................................................................................................................... 101
Display Name ........................................................................................................................................................... 101
Description ............................................................................................................................................................... 101
Form Field Type ....................................................................................................................................................... 101
Products ....................................................................................................................................................................... 104
Product ..................................................................................................................................................................... 105
Identifier.................................................................................................................................................................... 105
Display Name ........................................................................................................................................................... 105
Product Number ....................................................................................................................................................... 105
Short Product Description ........................................................................................................................................ 105
Long Product Description ......................................................................................................................................... 106
Confirmation Email Text ........................................................................................................................................... 106
Product Sort Order ................................................................................................................................................... 106
Product Index Selection ........................................................................................................................................... 106
Pricing....................................................................................................................................................................... 106
Pricing Type Selection.............................................................................................................................................. 106
Regular Price............................................................................................................................................................ 107
Sale Price ................................................................................................................................................................. 107
Volume Price Schema.............................................................................................................................................. 107
Volume Price XHTML Description............................................................................................................................ 107
Recurring Price......................................................................................................................................................... 108
Wholesale Price ....................................................................................................................................................... 108
Display...................................................................................................................................................................... 108
Product Display Type ............................................................................................................................................... 108
Related Product Multi-Add Indicator ........................................................................................................................ 109
Display on Store Splash Page ................................................................................................................................. 109
Display on New Products Page................................................................................................................................ 109
Display On Specials Page........................................................................................................................................ 109
Display On Best Sellers Page .................................................................................................................................. 109
Display in Featured Products Slot 1......................................................................................................................... 109
Indicate whether to display this product in slot 1 of the featured products function. ............................................... 109
Display in Featured Products Slot 2......................................................................................................................... 109
Display in Featured Products Slot 3......................................................................................................................... 109
12
Users Guide
Display in Featured Products Slot 4......................................................................................................................... 109
Display in Featured Products Slot 5......................................................................................................................... 109
Images...................................................................................................................................................................... 109
Small Product Image ................................................................................................................................................ 109
Large Product Image................................................................................................................................................ 110
Extra Large Product Image ...................................................................................................................................... 110
Taxes........................................................................................................................................................................ 111
Apply State and Province Tax .................................................................................................................................. 111
Apply Country Tax.................................................................................................................................................... 111
Tax Classification ..................................................................................................................................................... 111
Inventory................................................................................................................................................................... 111
Use Declining Balance Inventory ............................................................................................................................. 111
Inventory Level ......................................................................................................................................................... 111
Minimum Quantity Allowed....................................................................................................................................... 111
Maximum Quantity Allowed...................................................................................................................................... 112
Stock Notification Email List ..................................................................................................................................... 112
Delivery..................................................................................................................................................................... 112
Delivery Method ....................................................................................................................................................... 112
Custom Shipping: Method ........................................................................................................................................ 112
Product Based: Method Screens ............................................................................................................................. 112
Realtime Local Delivery Carrier ............................................................................................................................... 113
Realtime International Delivery Carrier .................................................................................................................... 113
Realtime and Custom: Item Length.......................................................................................................................... 113
Realtime and Custom: Item Width ........................................................................................................................... 113
Realtime and Custom: Item Height .......................................................................................................................... 113
Realtime and Custom: Item Weight ......................................................................................................................... 114
Realtime and Custom: Number of Boxes................................................................................................................. 114
Realtime and Custom: Origin State.......................................................................................................................... 114
Realtime and Custom: Origin Country ..................................................................................................................... 114
Realtime and Custom: Origin Zip/Postal Code ........................................................................................................ 114
Dropshipper Email Addresses.................................................................................................................................. 114
Digital Download ...................................................................................................................................................... 114
Download: File.......................................................................................................................................................... 114
Related Categories................................................................................................................................................... 115
Related Products...................................................................................................................................................... 115
Related Product Options .......................................................................................................................................... 115
Visibility..................................................................................................................................................................... 116
Product Visibility/Product Visibility Selection............................................................................................................ 116
Commerce ....................................................................................................................................................................... 117
Checkout Form Fields.................................................................................................................................................. 117
Display Name ........................................................................................................................................................... 117
Form Section ............................................................................................................................................................ 117
Display Description................................................................................................................................................... 117
Selection Items ......................................................................................................................................................... 118
Custom Sale Methods.................................................................................................................................................. 119
Identifier.................................................................................................................................................................... 119
Display Name ........................................................................................................................................................... 119
Sale Method PHP Content ....................................................................................................................................... 119
Custom Surcharge Methods ........................................................................................................................................ 119
Custom Surcharge Method/Identifier ....................................................................................................................... 119
Display Name ........................................................................................................................................................... 119
Surcharge Method PHP Content.............................................................................................................................. 120
Discount Codes............................................................................................................................................................ 120
Discount Code Identifier ........................................................................................................................................... 120
Discount Code Type................................................................................................................................................. 120
Discount Code Value................................................................................................................................................ 120
Active Status ............................................................................................................................................................ 120
13
Users Guide
Discount Delivery Charges....................................................................................................................................... 120
Product Limitations................................................................................................................................................... 120
Product Limitation Type............................................................................................................................................ 120
Processing Gateways .................................................................................................................................................. 121
Payment Gateway/Identifier ..................................................................................................................................... 121
Gateway Name......................................................................................................................................................... 121
Active Status ............................................................................................................................................................ 121
Gateway URL Type .................................................................................................................................................. 121
Field Display Text..................................................................................................................................................... 122
Field Display Order................................................................................................................................................... 122
Perform Post-Order Updates ................................................................................................................................... 122
Supports Recurring Billing........................................................................................................................................ 122
Fields/Response Field Name: Response Code ....................................................................................................... 122
Response Field Name: Order Number..................................................................................................................... 122
Request Field Name: Order Total ............................................................................................................................ 123
Security/Response Codes........................................................................................................................................ 123
Security/Referring URL String .................................................................................................................................. 123
Transaction Key/Password....................................................................................................................................... 123
Gateway User/Store ID ............................................................................................................................................ 123
Form Display Code................................................................................................................................................... 123
Supported Payment Methods and Instructions For Installation....................................................................................... 123
PayPal Website Payments Pro Management .......................................................................................................... 123
Recurring Billing ....................................................................................................................................................... 125
Online Processing Setup.......................................................................................................................................... 125
Offline Processing (Credit Card & Switch/Solo Cards) ............................................................................................ 125
Accept Checks or Purchase Orders......................................................................................................................... 126
Process Payments Through PayPal ........................................................................................................................ 126
Process With A Payment Gateway .......................................................................................................................... 126
Setting Up Specific Online Processors .................................................................................................................... 127
Authorize.Net AIM & Wells Fargo (Authnet Interface) ............................................................................................. 127
Authorize.Net SIM .................................................................................................................................................... 132
2CheckOut ............................................................................................................................................................... 137
WorldPay .................................................................................................................................................................. 137
Cardservice Linkpoint (API Only) ............................................................................................................................. 137
Cardservice Linkpoint HTML .................................................................................................................................... 138
Wells Fargo (BoA Interface) ..................................................................................................................................... 138
Verisign Payflow Link ............................................................................................................................................... 139
ECHOnline Credit Card ............................................................................................................................................ 139
Planet Payment & RTware ....................................................................................................................................... 140
SkipJack ................................................................................................................................................................... 141
PSiGate .................................................................................................................................................................... 141
NetBilling .................................................................................................................................................................. 141
CyberSource ............................................................................................................................................................ 142
Recurring Billing ....................................................................................................................................................... 144
ProTX/Sagepay Form............................................................................................................................................... 145
HSBC Payment Form............................................................................................................................................... 145
ePDQ Payment Form ............................................................................................................................................... 146
Quick Processing Setup............................................................................................................................................... 146
Exports............................................................................................................................................................................. 146
Peachtree Accounting Export ...................................................................................................................................... 147
Customers File ......................................................................................................................................................... 147
Items File .................................................................................................................................................................. 147
Orders File................................................................................................................................................................ 147
Quickbooks Accounting ............................................................................................................................................... 147
Export File Name...................................................................................................................................................... 147
Sage Accounting.......................................................................................................................................................... 147
Export File Name/Customers File ............................................................................................................................ 147
14
Users Guide
Export File Name/Orders File................................................................................................................................... 147
Orders .......................................................................................................................................................................... 148
Completed ................................................................................................................................................................ 148
Order/Order Number ................................................................................................................................................ 148
Order Date................................................................................................................................................................ 148
User Session ID ....................................................................................................................................................... 148
Payment Method ...................................................................................................................................................... 148
Referring URL or Affiliate Code................................................................................................................................ 148
Customer IP Address ............................................................................................................................................... 148
Guest Order Status .................................................................................................................................................. 148
Totals/Order Total .................................................................................................................................................... 148
Recurring Charge Total ............................................................................................................................................ 148
Item Subtotal ............................................................................................................................................................ 148
State/Province Tax Total .......................................................................................................................................... 148
Country Tax Total..................................................................................................................................................... 148
Country Tax Refund Total ........................................................................................................................................ 149
Custom Sale Total.................................................................................................................................................... 149
Custom Surcharge Total .......................................................................................................................................... 149
Package Tracking/UPS Tracking Information .......................................................................................................... 150
USPS Tracking Information...................................................................................................................................... 150
FedEx Tracking Information ..................................................................................................................................... 151
Delete ....................................................................................................................................................................... 151
Manage Items........................................................................................................................................................... 151
Summary/Invoice...................................................................................................................................................... 151
Post Order Updates.................................................................................................................................................. 152
Decrypt Offline Order Data .......................................................................................................................................... 152
Encrypted Data......................................................................................................................................................... 152
Orders (Pending and Cancelled) ................................................................................................................................. 152
Order/Order Number ................................................................................................................................................ 152
Order Date................................................................................................................................................................ 152
User Session ID ....................................................................................................................................................... 152
Order Status ............................................................................................................................................................. 153
Payment Method ...................................................................................................................................................... 153
Referring URL or Affiliate Code................................................................................................................................ 153
Customer IP Address ............................................................................................................................................... 153
Guest Order Status .................................................................................................................................................. 153
Delete ....................................................................................................................................................................... 155
Manage Items........................................................................................................................................................... 155
Summary/Invoice...................................................................................................................................................... 156
Post Order Updates.................................................................................................................................................. 156
Processing................................................................................................................................................................ 157
Shipping........................................................................................................................................................................... 157
Custom Shipping Methods........................................................................................................................................... 157
FedEx DirectConnect................................................................................................................................................... 158
Configure Intershipper Connection .............................................................................................................................. 158
Realtime Carriers ......................................................................................................................................................... 158
Identifier.................................................................................................................................................................... 158
Display Name ........................................................................................................................................................... 158
Rate Display Text ..................................................................................................................................................... 158
Tracking Display Text............................................................................................................................................... 158
Connection Active Status ......................................................................................................................................... 158
Carrier Supplies Rates ............................................................................................................................................. 159
Carrier Supplies Tracking......................................................................................................................................... 159
Connection URLs/Connection Rate URL ................................................................................................................. 159
Connection Tracking URL ........................................................................................................................................ 159
Trademarks/Trademark Image................................................................................................................................. 159
Trademark Notice..................................................................................................................................................... 159
15
Users Guide
Disclaimers/Tracking Disclaimers ............................................................................................................................ 159
Handling Disclaimer ................................................................................................................................................. 159
Notices/Weight Error Notice ..................................................................................................................................... 159
Dimensional Error Notice ......................................................................................................................................... 159
Realtime Services ........................................................................................................................................................ 159
UPS Online Tools Connection ..................................................................................................................................... 160
USPS WebTools .......................................................................................................................................................... 160
Store Displays.................................................................................................................................................................. 160
Category Displays ........................................................................................................................................................ 160
Product Detail Displays................................................................................................................................................ 161
Product List Displays ................................................................................................................................................... 161
Store Menu .................................................................................................................................................................. 162
Kryptronic Software End User License Agreement (EULA) ......................................................................................... 163
Program Credits ................................................................................................................................................................ 168
16
Users Guide
Welcome To ClickCartPro/EuropaCart
You have purchased an incredibly powerful tool. You will have infinite power to control virtually
every aspect of your customer’s online experience. You should visit this manual after at least
completing the Installation Guide and Getting Started Guide. It provides complete details on
your ClickCartPro/EuropaCart Web Commerce software.
•
•
•
Installation: Installing on your server
Quick Getting Started Guide: Easy to use first steps…create a fully working store
quickly and painlessly. We’ll walk you through the setup of your software as well as help
you create your first categories, products, etc. We’ll even show you how to make basic
adjustments to the look and feel of your site. We’ll also help you get your products
loaded in, set up your shipping, billing and other customer interaction and have a fully
working backbone that you could put online. Also, through this guide, you’ll start to get
an idea how we do things in ClickCartPro/EuropaCart. Eventually, you’ll understand that
most of the tables in the product work in a very similar manner.
ClickCartPro/EuropaCart User’s Guide: This handy reference guide covers every
aspect of this software. Each screen and menu item is examined and explained. After
you’ve learned the basics, learn the details behind them.
Advanced Features
ClickCartPro/EuropaCart is an advanced Shopping Cart product. It is designed to create a fully
working store…whether you’re an 80 Billion dollar nationwide chain or a one-man band. Because
of this power, there are certain features in the interface that are designed for a developer with
an advanced knowledge of web site programming. We will mark these sections with the
following logo:
When you see this logo, you know that you probably shouldn’t fiddle with this tool unless you’re
an advanced user. Also, this probably isn’t necessary for 95% of the people who purchase the
product. This should save you confusion and time.
17
Users Guide
Welcome To The ClickCartPro/EuropaCart User’s Manual
If you’ve just completed the Getting Started Guide, most of this will be provided to fill in the
blanks. You’re already familiar with navigating the software and setting up your site. But we’ve
provided this detailed reference guide so that no question remains unanswered.
System Dashboard
Each time you log into the software, you’ll be greeted by our System Dashboard. Think of this
as your Kryptronic Morning News. This is one of the ways that Kryptronic communicates with
you on a daily basis. This bulletin board contains important news about the software you own,
updates, maintenance fixes and anything else we think you should know. And while it doesn’t
contain sports scores, Hollywood news or a political roundtable, it is a good idea to glance at it
from time to time to get caught up on this powerful Kryptronic product. You’ll get all of the
news you need to know about your site in one handy location, while you drink your first cup of
coffee in the morning.
If you ever need to return to the Dashboard once you’ve started working with
ClickCartPro/EuropaCart, you simply locate it’s link in the breadcrumbs section located in yellow
at the top of your screen.
Dashboard can be launched in an instant…eager to help you.
18
Users Guide
The Structure of ClickCartPro/EuropaCart
This product is designed much like a database. Clicking on any of theses items will usually
present you with table selections and tools for modifying those tables.
For instance, when you click on the Store menu and select the Commerce menu item, you’ll be
presented with the following sub menu:
From this selector, you’ll be able to launch the specific table that you wish to modify. In most
cases, you’ll have the following menus to choose from:
1. Functions Menu- From here, you can either add new items to the table, like products,
categories or whatever that particular table controls or you can search the table for a
specific item. In the case of a large store with many products, you’ll simply type in a few
letters of the product you’re interested in just like a standard search engine.
2. Navigation Menu- This will simply tell you how many items are in a particular table and
also the number of pages necessary to display those items.
3. Data Overview Menu- This is the actual list of items in a particular table. In most cases
you’ll have several choices for accessing the data listed.
a. Clone - This makes an exact copy of the item you’re looking at and launches it in
the editor. This is ideal when you have several versions of the same product so you
can quickly duplicate a majority of the information and then just change certain
details.
b. Update- This simply allows you to access the detailed information of a particular
table item so that you can modify it.
19
Users Guide
c. Delete- Just like the sign says…this allows you to delete an item from the table.
There is a confirmation window that pops up during Delete, so if you make a
mistake, you have a chance to reverse it.
4. Database Information- This displays the database SQL coding that tells the database
what you’re requesting in this table.
20
Users Guide
The System Menu
This menu is the gateway to controlling all of the lightning fast background tasks of
ClickCartPro/EuropaCart. We’ll explain each individual menu item as well as each item that lies
beneath it.
Component
Profile
Component Name
Enter the name of the component. This name is used in all management interface displays and
menus for this component. The default name is System. This is only useful if you want to
personalize the Admin section of the product…otherwise, there’s really no reason to change it.
Display Name
Enter the display name of the component. This name is used in all FrontEnd interface displays
and menus to reference the component. This is your name for the system. Again, you can
change to whatever you choose, but in reality, there’s little reason to change it.
Description
Enter a description for this component. This description is used in management interface menus.
Component Defaults/Component Default Status
Choose whether this component should be the default component for FrontEnd displays. Setting
a default here will cause the default status for other components to be unset.
21
Users Guide
Component Default Namespace
Choose the namespace that should be displayed for this component as the default for front end
displays. This namespace will be used in the event that a request is received for the component
without a namespace referenced.
Settings
Cron Settings
Last Daily Cron Run
This is the time daily cron tasks were last run for this application.
Last Weekly Cron Run
This is the time weekly cron tasks were last run for this application.
Public Download File Storage Time
Select the number of days to store public download files on the server. You can choose from:
• One Day
• Two Days
• Three Days
• Four Days
• Five Days
• Ten Days
• Fifteen Days
• Twenty Days
• Twenty Five Days
• Thirty Days
• Forever
Public Uploaded File Storage Time
Select the number of days to store public uploaded files on the server. You can choose from:
• One Day
• Two Days
• Three Days
• Four Days
• Five Days
• Ten Days
• Fifteen Days
• Twenty Days
• Twenty Five Days
• Thirty Days
• Forever
Unmodified Temp File Storage Time
Select the number of days to store temp files on the server. Temp files are used for a variety of
purposes including storing debug information. You can choose from:
22
Users Guide
•
•
•
•
•
•
•
•
•
•
•
One Day
Two Days
Three Days
Four Days
Five Days
Ten Days
Fifteen Days
Twenty Days
Twenty Five Days
Thirty Days
Forever
Unused Session Storage Time
Select the number of months to store session information in the database. Sessions are updated
on each access so as long as users have been active within the time period specified, their
session information will remain stored. You can choose from:
•
•
•
•
•
•
•
One Month
Two Months
Three Months
Six Months
Nine Months
Twelve Months
Forever
Unused User Account Storage Time
Select the number of years to store unused user accounts in the database. User accounts are
updated on each access so as long as users have been active within the time period specified,
their user account information will remain stored. You can choose from:
•
•
•
•
•
•
One Year
Two Years
Three Years
Four Years
Five Years
Forever
Currency, Weight and Dimensional Settings
The core currently supports 7 different currencies and their symbols. You can choose US
Dollars, Australian Dollars, Canadian Dollars, Euros, Great Britain Pounds, Japanese Yen, and
Swiss Francs. This sections contains the current currency Conversion Rate and Currency Symbol
for the various currencies supported.
Important Note:
This process is not updated automatically. If you depend on accurate currency conversions, it is
important that you update this section daily to reflect the constantly changing values.
23
Users Guide
Activate Currency Conversion System
Select this to activate the currency conversion system. A true value activates the system and a
false value deactivates it. When the currency conversion system is active, customers have the
choice to view amounts in their currency. If you activate this system, ensure the conversion
rates used by the software are kept up to date. See the Important Note directly above.
Dimensional Unit
Select the dimensional unit used by this software. All dimensions (length, width and height)
entered should be made in this dimensional unit. Dimensional conversions are done based on
this unit selection to accurately retrieve realtime shipping rate quotes.
System Base Currency
Select the system base currency to be used by this software to perform currency conversions.
This system base currency is used as the default entry currency for all currency amounts. You
can choose:
•
•
•
•
•
•
•
US Dollars
Great Britain Pounds
Canadian Dollars
Euros
Japanese Yen
Australian Dollars
Swiss Francs
Weight Unit
Select the weight unit used by this software. All weights entered should be made in this weight
unit. Weight conversions are done based on this unit selection to accurately retrieve realtime
shipping rate quotes. You can choose between:
•
•
Pounds (US)
Kilograms (Non-US)
Display Skins
This area of the program covers basic skin changes that can be accomplished without being an
expert in CSS or PHP. It allows you to drop in your logo, change menu colors or select the
default skin for your shopping cart.
Active Skin: FrontEnd Interface
Here you can choose the default skin to be used throughout your cart wherever a skin is not
defined or the basic skin is not overwritten. This is the default skin for the front end interface.
This skin is used when a skin is not defined.
Default Skin: Logo
Here, you can select the logo that you’ll use on your default skin.
Important Note:
24
Users Guide
This is the logo presented at the top of the Default skin. Do not exceed 675px in width, unless
you have modified the Default skin.
Like any standard selection, you simply click on the magnifying glass to search your local hard
drive to select the logo you’ve created.
Mobile Skin: Logo
Here, you can select the logo that is presented to your mobile customers. Please do not exceed
300 px in width. Like all of the logos on this page, you simply browse your local hard disk to
select the appropriate logo for each different task.
Default Skin: Color Scheme
Quickly and easily adjust your menu colors to fit your mood. Select from a Custom color set as
well as the following presets.
Mail Skin: Logo
This is the logo presented at the top of the Mail skin. Do not exceed 760px in width, unless you
have modified the Mail skin. Like all of the logos on this page, you simply browse your local hard
disk to select the appropriate logo for each different task.
Print Skin: Logo
This is the logo presented at the top of the Print skin. Do not exceed 550px in width, unless you
have modified the Print skin. All printed materials generated by ClickCartPro/EuropaCart will
present these logos at the top of page 1.
Frontend Meta Information
Meta Description
Enter a description to be used in the Meta description tag in XHTML displays for pages. This
meta tag specification may be overridden on the page level.
25
Users Guide
Meta Keywords
Enter keywords to be used in the Meta keywords tag in XHTML displays for pages. This meta tag
specification may be overridden on the page level.
Meta Title
Enter a page title to be used in the Meta title tag in XHTML displays for pages. This meta tag
specification may be overridden on the page level.
Language Strings
This section contains text printed by the program internals and advanced users may want to
modify. Changes would also have to occur in php class code to do so.
Management Interface Settings
This section contains a few settings that affect the ClickCartPro/EuropaCart management
interface.
Default DB Results Per Page
This is the default number of database results to display per page for management interface
data displays. Users can select to view more or less results per page when using database
search functions. You can choose from 50-250 results per page.
Last News Download
This is the time news was last downloaded from the central server for this component.
Default Skin: BackEnd Interface
The default skin for the management interface.
Software Brand
The brand of the software installed.
Postal Code Lookup Settings
This area is designed to easily setup postal code lookup for our European customers. You must
enter accurate PostCode Anywhere account information if you activate this function.
Activate Postal Code Lookup
Select true to activate postal code lookups for users.
PostCode Anywhere License Code
This is the license code for your PostCode Anywhere account used to do postal code lookups.
26
Users Guide
PostCode Anywhere Account Code
This is the account code for your PostCode Anywhere account used to do postal code lookups.
PostCode Anywhere URL
This is the URL to be used for your PostCode Anywhere account used to do postal code lookups.
Security Settings
Banned IP Addresses
If you would like to ban IP addresses from accessing resources and applications controlled by
this software, enter a single or comma delimited list of IP addresses below. You can ban a single
IP address or all IP addresses in a domain. To ban a single IP address, enter the full address
(Example: 192.168.1.1 would ban the address 192.168.1.1). To ban all IP addresses in a
domain, enter a partial address (Example: 192.168. would ban all IP addresses matching
192.168.x.x).
Upload File Size Maximum
Enter the maximum file size, in bytes, that may be uploaded when a file is uploaded by a user.
Please note that the actual limit on the size may be further restricted by web server settings.
Upload File Types Allowed
This checklist allows you to define the types of files you will allow to be uploaded by users.
Site Information
Common Site Name
This is the common name to be used for your Internet site. This common name is used
throughout the software to display the name of your site.
Site Owner Address
Enter the address where the site owner resides below.
Site Owner Country
Select the country where the site owner resides below. This selection will be used as the default
for e-commerce realtime shipping quotes when an item does not have location information
present.
Site Owner Telephone Number
Enter the telephone number for the site owner below.
Show Delivery Address Book
Select true to display the delivery address book for users. Sites that do not ship any items
should not display the delivery address book.
Site Owner City
Enter the city where the site owner resides below.
27
Users Guide
Site Owner State/Province
Select the state/province where the site owner resides below. This selection will be used as the
default for e-commerce realtime shipping quotes when an item does not have location
information present.
Site Owner Zip/Postal Code
Enter the zip/postal code where the site owner resides below. This entry will be used as the
default for e-commerce realtime shipping quotes when an item does not have location
information present.
Social Media
Communications plays a major part in today ecommerce experience. Social media is a huge and
popular conduit to the public. This area houses our supported social media outlets.
Facebook Page Link
Enter your Facebook URL to display a Facebook link in the Social Media skin widget. If you do
not enter a URL, a link will not be printed for Facebook.
Google Plus Page Link
Enter your Google Plus URL to display a Google Plus link in the Social Media skin widget. If you
do not enter a URL, a link will not be printed for Google Plus.
Twitter Page Link
Enter your Twitter URL to display a Twitter link in the Social Media skin widget. If you do not
enter a URL, a link will not be printed for Twitter.
Tax Settings
This form is used to update the various tax settings in CCP.
Country Tax: Active Rules
Here, you can select the active country tax rules to use for calculating country taxes. When
using Standard Country Tax Rules, country taxes are calculated for all countries selected in
Standard Country Tax Rules Taxable Countries. When using European Union VAT Country Tax
Rules, EU VAT rules apply to all EU countries.
Country Tax: European Union VAT Rules - Company Affiliations
For European Union VAT Country Tax Rules, enter any affiliations your company may have with
trade or professional associations. Include membership details and registration numbers for
each.
Country Tax: European Union VAT Rules - Display Tax
For European Union VAT Tax Rules, select whether to display catalog prices including tax,
excluding tax or both.
28
Users Guide
Country Tax: European Union VAT Rules - Display Zero Tax
For European Union VAT Tax Rules, select true to display zero tax information for catalog prices
where zero tax is calculated
Country Tax: European Union VAT Rules - Tax Excluded Text
For European Union VAT Tax Rules, enter the text to be used to denote a price excluding tax.
Default: Exc VAT
Country Tax: European Union VAT Rules - Tax Name
For European Union VAT Country Tax Rules, enter the name to be used for the tax. Default: EU
VAT.
Country Tax: European Union VAT Rules - Validate Tax Exemption Numbers
For European Union VAT Country Tax Rules, select true to validate European Union VAT tax
exemption numbers when entered by users. Select false to skip validation and accept all entries.
Country Tax: Standard Rules - Tax Name
For Standard Country Tax Rules, enter the name to be used for the tax. Default: Country Tax.
Country Tax: Standard Rules - Taxable Locations
Here, you can select all of the countries in which a country tax should be charged.
29
Users Guide
State and Province Tax: Taxable Locations
Here you can select all of the states and provinces where state and province taxes should be
charged.
30
Users Guide
Country Tax: European Union VAT Rules - Catalog Price Tax Entry
For European Union VAT Tax Rules, select whether catalog prices are entered including or
excluding tax.
Country Tax: European Union VAT Rules - Company Registration Number
For European Union VAT Country Tax Rules, enter the tax registration number for your company.
If you enter a tax registration number in this field, it will be displayed on the Company
Information page.
Country Tax: European Union VAT Rules - Display Tax Summary In Orders
For European Union VAT Country Tax Rules, select True to display a tax summary for orders.
Select False to suppress this display.
Country Tax: European Union VAT Rules - Home Country
For European Union VAT Country Tax Rules, select the home country for calculating tax.
31
Users Guide
Country Tax: European Union VAT Rules - Tax Included Text
For European Union VAT Tax Rules, enter the text to be used to denote a price including tax.
Default: Inc VAT
Country Tax: European Union VAT Rules - Tax Zero Text
For European Union VAT Tax Rules, enter the text to be used to denote a price with zero tax.
Default: Zero VAT
Country Tax: European Union VAT Rules - VAT Registration Number
For European Union VAT Country Tax Rules, enter the VAT registration number for your
company. If you enter a VAT registration number in this field, it will be displayed on the
Company Information page.
Currency Settings: Conversions and Symbols
This area handles both conversion rates and symbols used for currency.
Date and Time Settings
DateTime Display Format
This is the format which is used to display dates within the software. You can choose between:
•
•
•
•
US Format <m/d/Y h:i:s A>
International Format <d/m/y H:i:s>
RFC 2822 <Internet Message Format>
Unix-Style <Seconds Since Epoch>
DateTime Offset In Seconds
If the server clock does not match the actual time you can adjust the time here. This offset is to
be entered in seconds.
DateTime Offset Increase/Decrease
If you have a positive 'DateTime Offset In Seconds', choose whether this offset is positive or
negative. You can choose:
•
•
•
Do Not Adjust Server Time
Add To Server Time
Subtract From Server Time
Download Directory Settings
Download User Name
This is the username for the public downloads directory.
Download User Password
This is the password for the public downloads directory.
32
Users Guide
Joomla! Connector Settings
Joomla is an award-winning content management system (CMS), which enables you to build
Web sites and powerful online applications. Many aspects, including its ease-of-use and
extensibility, have made Joomla the most popular Web site software available. Best of all,
Joomla is an open source solution that is freely available to everyone. In the past, folks have
been underwhelmed by the choices available for compatible shopping carts…no longer…CCP can
make your Joomla site a major e-commerce player.
Activate Joomla! Single-Sign-On
This status indicator allows you to activate (true) or deactivate (false) Joomla! Single-Sign-On. If
you activate Joomla! Single-Sign-On, user information between this software and Joomla! will be
synchronized and users will be given access to all resources when logging into either system.
Activate Joomla! Skin Widget Export
This status indicator allows you to activate (true) or deactivate (false) Joomla! Skin Widget
Exports. If you activate Joomla! Skin Widget Exports, skin widgets will be available to modules
for inclusion in the Joomla! template.
Joomla! Location (URL)
Enter the full URL to the Joomla! installation you wish to connect to. This installation of Joomla!
must have the ClickCartPro/EuropaCart Connector component, the ClickCartPro/EuropaCart
system, user and authorization plugins, and the ClickCartPro/EuropaCart display modules
installed, configured and activated. Example: 'http://www.yourdomain.com/joomla/index.php'.
Joomla! Skin Cache Status
This status indicator allows you to activate (true) or deactivate (false) using an anonymous
cached copy of the Joomla! skin. If activated, an anonymous version of the Joomla! skin will be
loaded and stored in cache memory. The cached version is updated when it's time to live
expires.
Activate Joomla! Skin Importer
This status indicator allows you to activate (true) or deactivate (false) the Joomla! Skin
Importer. If you activate the Joomla! Skin Importer, this software will import the template from
Joomla! and use that template as a skin for all displays.
Joomla! Connector Password
Enter the password used for the ClickCartPro/EuropaCart Connector component. This password
is used to prevent unauthorized access to system resources. This password should be entered in
the ClickCartPro/EuropaCart Connector component in your Joomla! installation exactly as it's
entered here.
Joomla! Online Store Menu ItemID
This is the numeric ItemID for the online store menu item you've created in Joomla!. If you have
not created an online store menu item, do so using your Joomla! administrator interface by
accessing the Menu Manager and choosing to manage the menu items for the main menu. On
the following page, add a new menu item as an external link to the URL used by this software.
Make note of the numeric ItemID used by the new menu item.
33
Users Guide
Joomla! Skin Cache Time To Live
The Joomla! skin cache time to live specifies the number of minutes anonymous cached copies of
the Joomla! skin are stored. This setting only applies when Joomla! Skin Cache Status is active.
Adjust this time based on how frequently you would like the cached Joomla! skin updated.
Mail Settings
Guest Subscription Opt Out Link Text
This text is used to pre-populate guest subscription messages. The purpose of this text is to
provide an opt-out notice for email subscribers as may be required by law.
Site Owner Email Address
This email address is used as a default address for the site owner.
User Account Subscription Opt Out Link Text
This text is used to pre-populate user account subscription messages. The purpose of this text is
to provide an opt-out notice for email subscribers as may be required by law.
Mobile Support
Mobile Support Status
Select true (1) to activate mobile support and present content, and a customized display, to
users with mobile devices detected by this software. Select false (0) to present a display
customized for desktops to all users. Mobile devices supported include mobile phones (including
iPhone, Blackberry and Droid devices), and tablets (including iPad, Galaxy and Kindle devices).
Search Engine Optimization Settings
Google Analytics Account
Enter your Google Analytics account number to automatically track all URLs generated by this
software through Google Analytics. Leave this field blank to disable Google Analytics usage.
SEO Status
Enable Search Engine Optimization (SEO) here. If you choose to enable SEO you will need to set
up URL rewrite rules within your server configuration or server account. Information can be
found in the manual on how to do this. Turning this feature on will produce search engine
friendly URLs for FrontEnd application pages. A full tutorial of this setup is included in your
Getting Started Guide.
Suppress SID in URLs
SIDs are used in URLs by default to track users when the system cannot determine whether a
cookie has been set. Select true to suppress SIDs from URLs and false to include them. If you
choose to suppress SIDs, cookies will be required to maintain login status.
34
Users Guide
Session and Cookie Settings
Days Until Cookie Expiration
Enter the number of days that must elapse before a cookies are deleted from a user's computer
due to inactivity.
Minutes of Inactivity Before User Logout (FrontEnd)
Enter the number of minutes that must elapse before a user is logged out automatically due to
inactivity. This applies to frontend interfaces.
Days Until Cookie Refresh
Enter the number of days that must elapse before a cookie is refreshed on a user's computer to
prevent deletion due to expiration.
Minutes of Inactivity Before User Logout (Management Interface)
Enter the number of minutes that must elapse before a user is logged out automatically due to
inactivity. This applies to the management interface.
Sitemap
This section allows you to manage your system’s Sitemap application. Now you can quickly and
easily submit your site nightly to several major search engines. This is an advanced feature
which creates a sitemaps.org compliant sitemap.xml file and automatically submits it to search
engines. The module also creates a custom page, which includes an HTML formatted sitemap.
•
This feature runs daily and creates a sitemap.xml file based on the sitemaps.org
specification and automatically submits it to your choice of the following search engines:
Google, MSN, Yahoo! and Ask.
•
This feature contains a page, which includes an HTML formatted sitemap for end users.
•
You have a full range of control over which elements are included in the sitemap. By
default the module will include all online store products and categories and CMS
webpages.
Accessing the XML SiteMap
To access the XML SiteMap, browse to a URL similar to:
http://www.yourdomain.com/index.php?app=core&ns=xmodsitemap
Accessing the HTML SiteMap
To access the HTML SiteMap, browse to a URL similar to:
http://www.yourdomain.com/sitemap.xml
Activate SiteMap
Set your system to “True” to turn on your sitemap and “False” to disable your sitemap.
35
Users Guide
Show Categories in SiteMap
This activates category listings in the sitemap as well.
Show News Articles in SiteMap
This will allow you to include your various news articles in the sitemap.
Automate SiteMap Submission to Search Engines
You can select the search engines to which you submit your sitemap on a daily basis.
Show HTML Pages in SiteMap
If you have a content management system component installed: Select true to display HTML
pages in the SiteMap.
Show Products in SiteMap
If you have an ecommerce component installed: Select true to display products in the SiteMap.
Statistical Settings
Enable Statistical Logging
Statistical logging can be turned on or off here. Logging should be enabled unless your server is
under heavy load and you want to conserve resources.
Wholesale and Affiliate Account Settings
Affiliate System Status
Select below to activate the affiliate system. A true value activates the system and a false value
deactivates the system. If active, customers with basic accounts will have the option to request
an account upgrade to make their account an affiliate account. If you activate the affiliate
system, be sure to add commissions to e-commerce application products and product options.
Track Affiliates Across Sessions
Select below to track affiliates across sessions. If set to true, when a customer clicks an
affiliate's link, that customer is assigned to that affiliate for the lifetime of their session and all
future orders under that session will be attributed to the originating affiliate. If set to false,
returning customer orders will not be assigned to the affiliate unless the affiliate's link is used to
access the store again.
Maximum Order Commission
The maximum per-order commission setting for affiliates sets the maximum commission amount
that will be paid to an affiliate for orders they generate. Enter '0.00' to use no maximum.
36
Users Guide
Wholesale System Status
Select below to activate the wholesale system. A true value activates the system and a false
value deactivates the system. If active, customers with basic accounts will have the option to
request an account upgrade to make their account a wholesale account. If you activate the
wholesale system, be sure to add wholesale prices to e-commerce application products and
product options.
Database
Your ClickCartPro/EuropaCart software uses a standard MySql database to store just about
everything that is in your store. You have a table for products, a separate table for categories,
your customers are in a table, the orders are in a table, etc. The Admin Interface is just a
graphical way of inputting data into this database. Any of the tables can be exported and edited
using a standard spreadsheet and inputting data into the shopping cart via a spreadsheet can
make setting up large stores much easier than single input entry using the
ClickCartPro/EuropaCart Admin. Details of these large imports are handled in the Getting
Started Guide.
Alternate Connections
Use this interface to manage alternate database connections. Alternate database connections are
used within this software to provide access to database accounts other than the primary account
configured during installation. Alternate connections allow for data management and are
required by some import and upgrade modules. If you would like to change the settings for the
primary database connection used by this software, access the installer script you used to install
the software on this webserver account. There are no alternate connections provided on a new
install.
Backup and Restore
Use the interface below to backup and restore the database tables associated with the Primary
Connection. Clicking here allows you to quickly make a backup of your entire database structure.
It is probably a good idea to visit this area from time to time and backup your system. Like all
backups, they only become important when your world comes crashing down. This is a multistep process which moves rather quickly and looks like the screen below:
37
Users Guide
Once you’ve made a backup, you’ll notice a new file appears that you can access to restore your
entire table system in the event of an emergency.
Raw Database Admin
This is your archive of active databases that are being used by your Frontend product like
ClickCartPro/EuropaCart. Here you can upload, download, browse, maintain and control your
products, categories, discounts, gateways and the other databases which control the data of the
Frontend product. This area is reviewed in great detail in our Getting Started Guide. If you
haven’t gone through it, you haven’t been following directions…give yourself 2 demerits and a
firm slap on the wrist.
SQL Statement: Submit a Raw SQL Statement
Here, you will enter an SQL statement to execute against any database table or tables. This is a
raw statement that is unguided and unmanaged. All types of statements are allowed. When
issuing statements that return result sets, use a LIMIT clause to control the size of the result
set. It is possible here to return all rows from a database table or tables, so be careful with the
amount of data you choose to return.
SQL Statement
Enter an SQL statement to submit against the database. Read the note above about limiting
result sets for statements that select data.
38
Users Guide
Output Type (Select Statements)
Select the output type for SELECT statements or statements that produce results. You’ll have
the choice of:
•
•
•
•
XHTML Table
XML Data Structure (Normal)
XML Data Structure (System)
CSV (Comma Separated Value) Text
Change Active Connection: Use a different database connection.
Available Database Connections
Select the connection you would like to use while working in Raw Database Admin.
This dropdown box only contains the Primary Connection.
Create A New Table: Create a new table within this database.
Table Information
Table Name
Enter the name of the table you would like to create. The table name should be entered in
lowercase letters using characters a-z and the underscore character (_) only.
Table Display Name
Enter a display name for this table.
Table Description
Enter a description for this table.
Primary Key Column
Column Name
Enter the name of primary key column for this table. The primary key column name should be
entered in lowercase letters using characters a-z and the underscore character (_) only.
Display Name
Enter a display name for this column.
Column Type
Select the column type for the primary key column. Most relational database management
systems do not support CLOB type columns as a primary key column. Using a VARCHAR type is
recommended if this column will hold text. You can choose from:
•
•
•
•
Text (VARCHAR)
Character Large Object (CLOB)
Floating Point Integer (FLOAT)
Integer (INT)
39
Users Guide
Column Numeric
Enter the numeric length for the primary key column. This numeric is not needed for CLOB type
columns. Most relational database management systems set the maximum length for columns as
follows: VARCHAR: 255, INT: 4, FLOAT: 8.
Column Section Name
The column section name is used for backend interface displays to separate columns in XHTML
forms. Enter a section name for this column.
Column Description
Enter a description for this column.
Database Overview
This is your master database control center. You can Browse, Maintain, Import, Export and
Manipulate the tables that control your site here. Again, this is covered in much more detail in
the Getting Started Guide.
Displays
Display Includes
Display Name
Include display name as displayed in management interfaces.
40
Users Guide
Component
The component with which this include is associated.
Include Content
This content should be written in standards compliant XHTML and should contain PHP code.
Description
Description of the include.
Display Skins
Currently installed skins are presented here. To update a skin, click the Update link. To delete a
skin, click the Delete link. If you would like to create a new skin based on an existing skin, use
the Clone option. Here you will find files controlled by a particular skin. Options are available to
view and/or update these files as well as delete the skin controlled files. The main skin layout file
is located in the Base Directory and is named 'skin.php'. The CSS control files are also found
here…they include all.css as well as the color schemes that have been added to the
System/Settings/Display Skins directory.
Important Note:
If you are not an experienced user, but want to experiment with your display skin, please make
sure you copy the entire file you’re working on and paste it into a word processor like Notepad.
That way, if you make a mistake, you can always go back to your known starting point.
Install New Display Skin
If you’ve purchased your skin from Kryptronic, there is a full tutorial of Skin installation in your
Getting Started Guide.
Skin Installation File
Browse your local hard drive and select the skin installation file for the skin you wish to install.
This file will be used to install a new skin.
Skin Widgets
Skin widgets are ‘prepackaged’ elements of your store. This management area allows you to
manipulate and move these ‘packages’ en masse. Each Widget has both a standard desktop
reference as well as a Mobile reference…depending on the type of system viewing the shopping
cart. To edit your Skin Widgets, like all things Kryptronic, simply click on Update and you’ll be
presented with that Widget’s details.
Component
The application with which this widget is associated.
Namespace
The namespace with which this widget is associated.
Name
The name used to identify this widget.
41
Users Guide
Status
This indicator controls whether this widget is active. Select true to display the widget or false not
to display it.
Desktop Display
This handles the display for desktop machines
Desktop Display Status
This indicator controls whether this widget is active. Select true to display the widget or false not
to display it.
Desktop Display Group
The display group indicator is used in conjunction with the display skin to control where this
widget is presented. The default skin uses several groups: HEADER, NAVMENU, SIDEMENU and
FOOTER.
Desktop Display Class
The display class value is used in conjunction with the display skin to control the CSS class when
the widget is presented. The default skin uses several classes: skin_widgetclass_HEADER,
skin_widgetclass_NAVMENU, skin_widgetclass_SIDEMENU and skin_widgetclass_FOOTER.
Desktop Display Order
The display order numeric allows display of widgets in a particular order. The widgets are sorted
in ascending order based on this numeric indicator.
Mobile Display
This handles the display for mobile devices
Mobile Display Status
This indicator controls whether this widget is active. Select true to display the widget or false not
to display it.
Mobile Display Group
The display group indicator is used in conjunction with the display skin to control where this
widget is presented. The default skin uses two groups: MOBILENAVMENU and MOBILEFOOTER.
Mobile Display Class
The display class value is used in conjunction with the display skin to control the CSS class when
the widget is presented. The mobile skin uses two classes: skin_widgetclass_MOBILENAVMENU
and skin_widgetclass_MOBILEFOOTER.
Mobile Display Order
The display order numeric allows display of widgets in a particular order. The widgets are sorted
in ascending order based on this numeric indicator.
42
Users Guide
System Messages
Component
The component with which this message is associated.
Message Identifier
The message string is used to identify this message within the software.
Message Type
The message type. You can choose from:
Message Text
The actual text displayed for this message.
File Manager
Download Files
Presented here are public and private download files that are available to save and delete. To
save a file, right click on the Save link and choose to save the file to your local hard drive. To
delete a file, click the Delete link.
During the installation of this software, the public download directory should have been
password protected for security purposes. If this installation step was done, the username and
password used for that directory are listed below.
Username: Username
Password: uM”‡3†
Download Files: Public Directory
This is your list of public files available for download.
Download Files: Private Directory
This will be a list of those files that can only be downloaded with a password.
Media Files
Media Directory
Select the media directory to manage.
43
Users Guide
Upload Download Files
Download File
Browse your local hard drive and select the download file you wish to upload.
Download Directory (Public or Private)
Select the directory to which you would like this file uploaded. If you select to upload to the
public downloads directory, the file you upload will be available for immediate download. If you
select to upload to the private directory, the file will be available for software functions to copy
to the public directory at a later time. You’ll have your choice of:
•
•
Public Directory
Private Directory
Upload Media Files
Media File
Browse your local hard drive and select the media file you wish to upload.
Media Directory Selection
Select the media directory to which you would like to upload a file. Again, you’ll have a choice
of:
•
•
Public Directory
Private Directory
Uploaded Files
Presented in this space are public and private uploaded files that are available to save and
delete. To save a file, right click on the Save link and choose to save the file to your local hard
drive. To delete a file, click the Delete link.
Locations
Countries
Full Country Name
The country's full name.
Country ISO Code
The country's two letter ISO code or abbreviation.
HSBC Country Code
This is the numeric country code used by HSBC.
44
Users Guide
Sort Order
This sort order numeric allows display of countries in a particular order. Countries are sorted in
displays in ascending order based on this numeric indicator.
European Union Status
Indicates whether this country is located in the European Union. If this country is located in the
EU and European Union VAT Country Tax Rules are active, this country will be taxable under
European Union VAT Country Tax Rules.
Tax Information
Shipping Tax Rate (Percentage)
Enter 0.000 for no shipping tax.
Item Reduced Low Tax Rate (Percentage)
Enter 0.000 for no tax on items.
Item Reduced Mid Low Tax Rate (Percentage)
Enter 0.000 for no tax on items.
Item Reduced Mid High Tax Rate (Percentage)*
Enter 0.000 for no tax on items.
Item Reduced High Tax Rate (Percentage)*
Enter 0.000 for no tax on items.
Item Standard Tax Rate (Percentage)*
Enter 0.000 for no tax on items.
Display/Display in Contact Forms
Indicates whether this country will be available in the contact information section of forms.
Display in Delivery Forms
Indicates whether this country will be available in the delivery information section of forms.
Shipping Zones
Parcelforce Shipping Zone
Indicates the zone this country is assigned to for Parcelforce shipping.
45
Users Guide
Royal Mail Shipping Zone
Indicates the zone this country is assigned to for Royal Mail shipping.
States And Provinces
Full State Province Name
Primary key. The state/province name should be entered here.
State/Province ISO Code
The state/province's two-letter ISO code or abbreviation.
Country
Country in which this state/province is located. Blank entries are allowed.
Sort Order
This sort order numeric allows display of states/provinces in a particular order. States/Provinces
are sorted in displays in ascending order based on this numeric indicator.
European Union Status
Indicates whether this state/province is located in the European Union. If this state/province is
located in the EU and European Union VAT Country Tax Rules are active, this state/province will
be taxable under European Union VAT Country Tax Rules.
Tax Information
Item Tax Rate (Percentage)
State/Province tax rate. Enter 0.000 for no tax.
46
Users Guide
Shipping Tax Rate (Percentage)
State/Province shipping tax rate. Enter 0.000 for no tax on shipping.
Display
Display in Contact Forms
Indicates whether this state/province will be available in the contact information section of
forms.
Display In Delivery Forms
Indicates whether this state/province will be available in the delivery information section of
forms.
Mail
Guest Subscribers
This will be a listing of emails for those guests who have signed into your site.
Mail Messages
This is where you’ll manage every ‘canned’ message that originates in the system. Each
message can be changed and default recipients can also be adjusted. You can choose from the
following messages:
•
•
•
•
•
•
•
•
•
•
•
•
Account Upgrade Request
Contact Message
Send Password Message
Email A Friend Message
Encrypted Card Information Message
Low Inventory Alert
Order Complete
Order Confirmation Message (Customer)
Order Confirmation Message (Internal)
Order Confirmation Message (Shipper)
Order Incomplete
Order Partially Shipped
Component
The component with which this mail message is associated.
Display Name
The display name for this mail message.
Text Message
Enter the text content for this message here. This message content can contain PHP code. If you
choose to use PHP code in the message content, base your PHP code on the includes used by
this software.
47
Users Guide
Default Subject
If a subject is not specified by the calling the component, this subject is used as a default rather
than producing an error.
XHTML Message
Send XHTML Message (In Addition To Text)
Indicator used to control whether an XHTML message will be sent in addition to a text message
for this mail message.
XHTML Message Include
Enter the XHTML content for this page below. If you choose to use PHP code in the page content,
base your PHP code on the includes used by this software.
Sender and Recipients
Default Message Sender (From)
If a sender is not specified by the calling application, this sender is used as a default rather than
producing an error.
Default Message Recipient (To)
If a recipient is not specified by the calling application, this recipient is used as a default rather
than producing an error.
Additional Message Recipients (TO)
Enter a comma-delimited list of recipients to be added to the TO message header.
Additional Message Recipients (CC)
Enter a comma-delimited list of recipients to be added to the CC message header.
Additional Message Recipients (BCC)
Enter a comma-delimited list of recipients to be added to the BCC message header.
Message Subject Options
Subject Prepend String
This string is prepended to the mail message subject if specified. (Added to the beginning of the
subject).
Subject Append String
This string is appended to the mail message subject if specified. (Added to the end of the
subject).
Send Mail Message
You can send a mail message directly from ClickCartPro/EuropaCart. This is a great way to test
your mail system if you have issues reported. If you can send yourself an email, that means that
the mail send system is working correctly.
48
Users Guide
Send Mail Message
From Email Address
Enter the email address which should be used as the from email address for the mail message.
Message Subject
Enter the message subject for the mail message.
Text Message
Enter the plain text message below. This text should be plain ASCII text.
Recipients/To Email Addresses
Enter the email addresses for the mail (To) recipients of the mail message. You can enter a
single address or a comma-delimited list of addresses.
Cc Email Addresses
Enter the email addresses for the carbon copied (Cc) recipients of the mail message. You can
enter a single address or a comma-delimited list of addresses.
Bcc Email Addresses
Enter the email addresses for the blind carbon copied (Bcc) recipients of the mail message. You
can enter a single address or a comma-delimited list of addresses.
XHTML Message Information
Send XHTML Message (In Addition To Text)
Indicates whether an XHTML message will be sent in addition to a text message for this mail
message.
XHTML Message
Enter the text for the XHTML message below. This text should be properly formatted XHTML. You
must complete this field in order to send an XHTML message. If this field is not completed, only
a plain text message will be sent.
Subscriptions
Display Name
Enter a display name for this subscription. Changing the name of this subscription does not
affect user subscription status.
49
Users Guide
Namespaces
Use this interface to manage System Namespaces. System Namespaces are pointers to different
functions within the software that control the operation of the software. Every request made
executes a namespace - whether the namespace is included in the request URL, or the default
namespace for a particular application is executed. Namespaces allow for different modules and
functions to take control of various tasks performed by the software. Namespaces use
permissions to control security for those tasks.
Component
The component with which this namespace is associated.
Namespace Region
This is the namespace region to which this namespace belongs. Multiple namespaces can belong
to the same region, however only one namespace can be active per region.
Display Name
The display name for this namespace. This display name is used for page titles and statistical
logging.
Active Status Indicator
The active status for this namespace. If you select to make this namespace active, all other
namespaces that belong to the same namespace region will become inactive.
HREF Link Type
Select the type of link to use for this namespace. A selection of SSL here will force all links
printed by the software to point to https URLs. A selection of Non-SSL here will force all links
printed by the software to point to http URLs.
Search Engine Optimized URL
The search engine optimized URL for this namespace. This URL, if present, will be used for
printing links to this namespace, and for recognizing links pointed to this namespace.
/Form/{SEOURL:cms_dynforms}- example
Permissions
Allowed Groups
This is a comma-delimited list of user groups that are allowed access to this namespace. If all
groups are allowed access to this namespace by default, enter an asterisk here. Edit this field in
conjunction with the Denied Groups field. If you choose to allow access to this namespace for all
50
Users Guide
user groups (enter an asterisk here), the Denied Groups field must be completed with a commadelimited list of denied user groups (allow all but those denied) or must be left empty (everyone
is allowed access to this namespace).
Denied Groups
This is a comma-delimited list of user groups that are denied access to this namespace. If all
groups are denied access to this namespace by default, enter an asterisk here. Edit this field in
conjunction with the Allowed Groups field. If you choose to allow deny to this namespace for all
user groups (enter an asterisk here), the Allowed Groups field must be completed with a
comma-delimited list of allowed user groups (deny all but those allowed) or must be left empty
(everyone is denied access to this namespace).
Reports
Advanced Reports
Now you can compile and print a series of ‘pre-canned’ reports.
•
•
•
•
•
•
•
•
•
•
•
•
•
•
•
•
•
•
•
•
•
These include:
Accessed HTML Pages: Top 20
Accessed Website Namespaces: Top 20
Accessed System Namespaces: Top 20
Component Usage
Dashboard Statistics
Pageview Totals: Last 24 Months
Pageview Totals: Last 30 Days
Pageview Totals: Recent
Pageview Totals: Yearly
Accessed Products: Top 20
Accessed Store Namespaces: Top 20
Customers by Order Total: Top 20
Customers by Orders Placed: Top 20
Order Totals: Last 24 Months
Order Totals: Last 30 Days
Order Totals: Recent
Order Totals: Yearly
Orders Placed: Last 24 Months
Orders Placed: Last 30 Days
Orders Placed: Recent
Orders Placed: Yearly
System Reports
The Core automatically generates a series of reports which you may find useful for both
marketing and administration.
Daily Activity
Daily activity simply provides a basic report of numbers of entries to the Frontend of the site.
51
Users Guide
Management Activity
This is a report that spells out management activity on your site and the IP address of those
individuals who accessed the Management Interface of the site.
Monthly Activity
Again, this is a simple report that tells you the activity on the front end of the site for the month.
Page Access Totals
Simple report that provides page names in hit count.
Yearly Activity
Activity on the front end of the site broken down by year.
Software
This area tracks your software installations, mods, etc. and keeps you posted on updates and
options available to you from Kryptronic. It is a good idea to check this area regularly as well as
you Admin news page to make sure you’re running the latest and greatest version of your
Kryptronic product.
Install Software
This software is updated using the installer script you used to initially install the software. If you
have purchased software upgrades or new software and would like to install that software,
access the installer script.
Each time updates are released, you will be notified via email as well as post a news article that
will be downloaded and viewable in the Server News function within this management interface.
It is recommended that you check for software updates regularly using the installer script.
Software updates are released regularly to maintain the security, stability and functionality of
the system.
Installed Software
This installed software display provides information on all Kryptronic software. Information for all
software modules is listed on this page.
Purchase Software
This software is an advanced web application framework which allows you to install multiple
applications and modules for those applications in order to customize your Internet site and
management experience.
Different applications and application modules, as well as upgrades for those applications and
modules, are available for purchase. If you would like to purchase new software applications
and/or modules for your installed applications, you can follow the link below to review what is
available and make purchases.
52
Users Guide
Each time upgrades and new software is released, you will be notified via email as well as post a
news article that will be downloaded and viewable in the Server News function within this
management interface.
Server News
This is an access point to the Server News. It is important to check this regularly to make sure
you are keeping your Kryptronic products up to date.
User Accounts
Affiliate Payments
This will be a listing of your current affiliate payments.
Generate Affiliate Payments
The Generate Affiliate Payments function is used to generate commissions for any affiliate
account holders who are currently owed commissions. All amounts in this area are shown, stored
and must be entered in the system base currency (USD).
User Accounts
This area houses all of the various accounts that you or your customers have set up. Here,
you’ll have access to all of the information on those accounts.
Email Address
Unique User ID, created by the user when signing up for an account.
Username
You can insert a unique user name in this field.
Password
User password. This password is stored as an MD5 hash.
User Group
Group the user belongs to. You can choose from:
•
•
•
•
•
•
Admin-Backend Admin
Affiliate-Affiliate Account
Reports- Backend Reports
Superuser-Backend Superuser
Users-Basic Account
Wholesale- Wholesale Account
Contact Information
This is basic name, company, telephone number.
Last Access Time
When was the last time that this user accessed the site?
53
Users Guide
Billing Address
These are just standard billing address fields for your customers. It is similar to your standard
contact info address information except that it also includes and additional field:
Residential/Commercial Status
Address listed at residential <R> or commercial <C> status
Subscriptions
What active subscriptions does this account holder have?
•
•
•
General email subscription list
Internet site news and updates
Product news and updates
Affiliate Information
Affiliate ID
This field is used for affiliate accounts only. Enter a unique affiliate ID here that will be used in
affiliate links to associate orders with an affiliate. Be sure this ID has not been used by another
affiliate to avoid crossing commissions and data.
Affiliate Commission Percentage
This field is used for affiliate accounts only. This field holds the commission percentage for an
affiliate account. If you set this field to '0.000', static price amounts entered on the product and
product option level in ecommerce applications will be used to calculate commissions. If you set
this percentage to a number greater than zero, the affiliate will earn commission based on the
entered percentage.
Affiliate Sales (Total)
This field is used for affiliate accounts only. This field holds the total amount of sales generated
by this affiliate to date. Initially this field should be set to '0.00'. This amount is stored in the
system base currency.
Affiliate Commission Earned (Total)
This field is used for affiliate accounts only. This field holds the total amount of commission
earned by this affiliate to date. Initially this field should be set to '0.00'. This amount is stored in
the system base currency.
Affiliate Commission Owed (Current)
This field is used for affiliate accounts only. This field holds the total amount of commission owed
to this affiliate currently. Initially this field should be set to '0.00'. This amount is stored in the
system base currency.
Affiliate Commission Paid (Total)
This field is used for affiliate accounts only. This field holds the total amount of commission paid
to this affiliate to date. Initially this field should be set to '0.00'. This amount is stored in the
system base currency.
54
Users Guide
Wholesale Account Discount Percentage
This field is used for wholesale accounts only. This field holds the discount percentage for a
wholesale account. If you set this field to '0.000', static price amounts entered on the product
and product option level in ecommerce applications will be used to calculate the wholesale price
for items. If you set this percentage to a number greater than zero, the wholesaler will receive a
discount based on the entered percentage.
Currency/Preferred Currency
This field is used when the currency system is active. Users can select the currency in which
they wish to view prices. This selection is updated via the Currency form in the FrontEnd
interface main skin menu.
The WebSite Menu
The Website Menu is where you’ll manage the content of your web site. This isn’t the commerce
area, but rather the area where you manage the web pages that provide content that supports
your commerce. You’ll deal with your products, categories, etc. in the Store Menu…this is where
you create the “meat” of your web site. This section of the manual will explain each and every
line item of the Website Menu. It is set up as if you clicked on the first item on the left and then
clicked on each menu item in the order they are displayed.
Component
Use this option to manage defaults and settings. This refers to the application itself and how it
names the categories and functions it uses internally.
Profile
Component Name And Description/ Component Name
Enter the name of the component. This name is used in all management interface displays and
menus for this component. The default name is Website. This is only useful if you want to
personalize the Admin section of the product…otherwise, there’s really no reason to change it.
Display Name
Enter the display name of the component. This name is used in all FrontEnd interface displays
and menus to reference the component. This is your name for the Website within your site. If
you refer to your site as the Wizbang Hammer Store, then this is what you would type in here to
refer to.
55
Users Guide
Description
Enter a description for this component. This description is used in management interface menus.
Component Default Status
Choose whether this component should be the default component for FrontEnd displays. Setting
a default here will cause the default status for other components to be unset.
Component Default Namespace
Choose the namespace that should be displayed for this application as the default in the event
that a request is received for the application without a namespace referenced. You can choose:
•
•
•
Web Page
Dynamic Form
Dynamic Form- Process
Settings
Banner Advertisements
This section controls the workings of the banner advertisements in both the splash page and the
left and right margins.
Content Section: Banner Image Width
This controls the width of the banner on the main page. If you’re not an expert in CSS or PHP,
your best bet here is to match the width of the current banner and just feed that existing
system.
Skin Widget: Banner Image Width
This controls the width of the smaller banners in the left and right menus. If you’re not an
expert in CSS or PHP, your best bet here is to match the width of the current banner and just
feed that existing system.
Content Section: Transition Delay
This is the delay in miliseconds between banner transitions for the Splash page banner
advertisements displayed in the content section. 1000 miliseconds is equal to 1 second. Season
to taste.
Skin Widget: Transition Delay
This is the delay in miliseconds between banner transitions for smaller left or right menu banner
advertisements displayed as skin widgets. 1000 miliseconds is equal to 1 second.
Cron Settings
Last Daily Cron Run
This is the time daily cron tasks were last run for this application.
Last Weekly Cron Run
This is the time weekly cron tasks were last run for this application.
56
Users Guide
Content
This is where you will store and edit any content pages on your site. These will be the pages
that support your product, category and other sales-based pages. This Web page repository
now also allows you to quickly audition any page by clicking on the Audition Page Link located to
the left of the identifier name.
Banner Advertisements
This area houses the artwork for your various Banner Advertisements. It allows you to upload
the artwork, and assign it to various positions within the store.
Identifier
Enter a unique identifier for this banner advertisement. Because this identifier is used in XHTML
elements, do not use spaces, periods or special characters. Recommended characters are 0-9, az, A-Z and the dash and underscore characters.
Display Name
This is the banner advertisement display name. It is used to identify the banner advertisement.
Active Status
Select below whether to activate this banner (true), or deactivate it (false).
Image
This image is used to display this banner advertisement. You can simply browse your local hard
disk and assign this to be uploaded into the cart.
Placement
Select the placement fo this banner advertisement. The placement controls where this banner
will be displayed. You can choose from the following:
57
Users Guide
Content section is the Splash page main banner and if you select Skin Widget, you’re choosing
the left or right menu ads.
Group
This group is used to group banner advertisements for presentation in different areas.
Sort Order
The sort order numeric allows display of banner advertisements in a particular order. Banner
advertisements are sorted in ascending order based on this numeric indicator.
Link
Do you want your customers to be sent to a special area of the store when clicking on a
particular slide in a banner? Here is where you’ll choose that link.
Link Type
Select the link type for this banner advertisement. If you do not specify a link type, a link will
not be used for this banner. You can choose from one of at least 4…depending on existing
XMODs.
Link Reference Identifier or External URL
If you have selected a link type, enter the reference identifier for the item you wish to target for
your link. For example, if you have selected to target an HTML page, enter the reference
identifier for that HTML page here. If you have selected an external URL link type, enter a full
external URL in this field.
Web Pages
Identifier
Enter a unique identifier for this page. This identifier will be used in URLs to link to this page.
Page Display Name
This is the page display name. It is used in menus and recent actions to identify the page.
HTML Content
Enter the content for this page below. This content should be written in standards compliant
XHTML and can contain PHP code. If you choose to use PHP code in the page content, base your
PHP code on the includes used by this software. You will have use of a WYSIWYG editor that will
help you craft standards compliant HTML code if you choose.
58
Users Guide
The WYSIWYG Editor
Important Note:
All Kryptronic products contain a WYSIWYG (What You See Is What You Get) editor on fields that
contain XHTML code. Why is this, you may ask? Now, text entries can be automatically
converted to XHTML by simply typing them into this field and then clicking on the
Bold/Italic/Underline and other text tools just like you do in a word processor. The software now
just converts it for you so you don’t have to learn basic HTML programming. To launch the
WYSIWYG editor just click on the blue WYSIWYG Editor: Load Editor link located in the various
appropriate fields. It will launch the WYSIWYG toolbar that looks like this:
Date/Time Stamp
This displays the last time this page was updated.
Display/Menu Order
The menu order numeric allows display of pages in menus in a particular order. Menu options
are sorted in ascending order based on this numeric indicator.
Top Level Menu Display
Select whether to include this page in top level menu displays. Select true to display, false to
suppress.
Page Title Display
Select whether to show a page title in the XHTML display for this page.
Search Engine Optimization
Enter a page title to be used in the Meta title tag in XHTML displays for this page.
Meta Title
Enter a title for this page to be used in the Meta Title tag in XHTML displays for this page.
page display name will be used for the Meta Title tag if a title isn’t entered in this space.
59
The
Users Guide
Meta Keywords
Enter keywords for this page to be used in the Meta keywords tag in XHTML displays for this
page. The default for this application will be used if no keywords are entered.
Meta Description
Enter a description of this page to be used in the Meta description tag in XHTML displays for this
page. The default for this application will be used if a description is not entered.
Search Engine Optimized URL Identifier
What URL do you want displayed to represent this page? This high def SEO entry field only asks
that you provide the name you want…ClickCartPro/EuropaCart will do the rest.
Visibility/Page Visibility Selection
This field allows you to control which users can view this page. You can set this page up to be
viewed by anyone, only users belonging to the groups you specify using the Page Visibility
Groups field, or to be hidden from everyone.
Page Visibility Groups
If you selected to allow only certain user groups to access this page under the Page Visibility
Selection field, select the groups for which this page should be made visible.
You can select from several choices…
Related Pages
Select the web pages which are to be displayed as sub-pages of this web page.
Related Web Pages Menu Display
Select whether to include this page in related web pages menu displays. Select true to display,
false to suppress.
60
Users Guide
Banner Advertisements
Would you like to display a banner ad at the top of this page? Enter a banner advertisement
group name to display banner advertisements at the top of this page. Leave blank to suppress
banner advertisements on this page. If a group name is entered, a banner advertisement placed
in the content section must have this group name in order to display a banner advertisement.
Dynamic Forms
Dynamic Form Fields
Form Field/Identifier
This is the unique id for this dynamic form field.
Controlling Dynamic Form
The form that controls the form field.
Display Name
The display name for the field used in XHTML output and in mail messages.
Form Section
The name of the section of the form this field should be printed in. To create a new section,
simply enter in a section that has not yet been used.
Display Description
The description to be displayed for the form field in XHTML output.
Field Order
The field order numeric allows display of the fields in the form in a particular order. The fields
are sorted in ascending order based on this numeric indicator.
Field Settings/Default Value
Enter the default value to be used to pre-populate this field.
Email Field Indicator
Set this field to true if this field is an email address field and it should be used to populate the
from email address in the dynamic form mail message.
Required Indicator
Indicator used to determine whether an entry for the form field is required.
Form Field Type
This is the XHTML form field type used to display the dynamic form field. If you select a field
type of Selection, Checkboxes or Radio Buttons, be sure to enter at least one Selection Item
below. You can choose from:
•
•
Textbox
TextArea Regular
61
Users Guide
•
•
•
•
•
•
TextArea Small
Selection List (List)
Checkboxes (List)
Radio Buttons (List)
Hidden Field
Captcha (Image Verification) Field
Selection Items (List Fields)
Dynamic Forms
Form/Identifier
This is the unique id for this dynamic form. It is used as a reference string in URLs to identify
this form.
Display Name
The display name of this dynamic form.
Form Description Header
The description containing form instructions used during XHTML output.
Important Note:
All Kryptronic products now contain a WYSIWYG (What You See Is What You Get) editor on fields
that contain XHTML code. Why is this, you may ask? Now, text entries can be automatically
converted to XHTML by simply typing them into this field and then clicking on the
Bold/Italic/Underline and other text tools just like you do in a word processor. The software now
just converts it for you so you don’t have to learn basic HTML programming. To launch the
WYSIWYG editor just click on the blue WYSIWYG Editor: Load Editor link located in the various
appropriate fields. It will launch the WYSIWYG toolbar that looks like this:
Mail Message/Default From Email Address
Enter the email address which should be used as the from email address for the mail message in
the event that no form fields are marked as the from email address field.
62
Users Guide
Message Subject
Enter the subject for mail messages sent for this dynamic form.
Message Header Text
Enter text to be presented at the top of the mail message sent for this dynamic form. Do not
include XHTML tags in this text. XHTML tags will be added automatically if an XHTML message is
to be sent.
Send XHTML Message (In Addition to Text)
Indicator used to control whether an XHTML message will be sent in addition to a text message
for this mail message.
To Email Addresses
Enter the email addresses for the mail (To) recipients of the mail message. You can enter a
single address or a comma-delimited list of addresses.
Cc Email Addresses
Enter the email addresses for the carbon copied (Cc) recipients of the mail message. You can
enter a single address or a comma-delimited list of addresses.
Bcc Email Addresses
Enter the email addresses for the blind carbon copied (Bcc) recipients of the mail message. You
can enter a single address or a comma-delimited list of addresses.
Search Engine Optimization For Dynamic Form
Meta Title
Enter a title to be used in the meta title tag for this dynamic form. The Display Name will be
used for the meta title tag if a title isn't entered here.
Meta Keywords
Enter keywords to be used in the meta keywords tag for this dynamic form. The default meta
keywords for this software will be used if none are entered here.
Meta Description
Enter a description to be used in the meta description tag for this dynamic form. The default
meta description for this software will be used if one isn't entered here.
Search Engine Optimized URL Identifier
Enter a search engine optimized URL identifier for this dynamic form. If you do not enter a
engine optimized URL identifier, the identifier for this dynamic form will be used by default.
63
Users Guide
The Store Menu
Welcome to the “money” section of ClickCartPro/EuropaCart. It is here that you’ll design your
Product and Category pages, collect and ship your orders and make your money. As with each
section of this manual, we’ll proceed as if you’re clicking on each menu item starting in the
upper left and working your way down.
Component
Profile
Component Name And Description
Component Name
Enter the name of the component. This name is used in all management interface displays and
menus for this component. The default name is Store.
Display Name
Enter the display name of the component. This name is used in all FrontEnd displays and menus
for this component. This is your name for the application within your site. If you refer to your
site as the Wizbang Hammer Store, then this is what you would type in here to refer to. The
default name is Online Store.
Description
Enter a description for this component. This description is used in management interface menus.
This description shows up on the landing page in the Admin section that is just above the
Application menu link.
Component Defaults/Component Default Status
Choose whether this component should be the default component for FrontEnd displays. Setting
a default here will cause the default status for other components to be unset.
Component Default Namespace
64
Users Guide
Choose the namespace that should be displayed for this component as the default in the event
that a request is received for the component without a namespace referenced.
Settings
This menu handles basic settings for your site. All of the little nuts and bolts that define your
site are handled by the various categories within this menu. Here you can define the web site
and make it your own.
Ajax Product Search
This controls the new Ajax Product Search that is part of your ClickCartPro/Europacart. If you
audition your new search, you’ll notice that once a customer types in 3 letters of the word they
are search for, the software begins to post realtime listings that narrow as they type.
Activate Ajax Product Search
Set this to True to activate your Ajax Product Search and False to have it behave as a standard
search. Rather than automatically adjusting on the fly, a standard search requires the customer
to type in the full name and click on “Go”.
Image Width: Ajax Product Search Product Images
Here you can adjust the width of the thumbnail images that appear on the product search. The
system defaults to 40 pixels.
Checkout
Configure the checkout and help streamline your customer’s experience.
65
Users Guide
Allow Guest Checkout
Select true to allow checkout for guest users. If checkout for guest users is allowed, an account
will not be required to checkout.
Custom Sale Method Status
Select true to activate a custom sale method during checkout. If you select to activate a custom
sale method during checkout, the Custom Sale Method specified on this page will be executed.
Custom Surcharge Method Status
Select true to activate a custom surcharge method during checkout. If you select to activate a
custom surcharge method during checkout, the Custom Surcharge Method specified on this page
will be executed.
Low Inventory Level Alert
If an inventoried product or product selection item is ordered, this in triggers an email which
alerts you that inventory has reached the alert level. Set to zero (0) to turn this feature off.
Order Number Prefix
If you select a prefixed Order Number Type, enter an order number prefix here. This prefix will
be appended to all order numbers. Default is ORD.
Custom Sale Method
If you have selected to activate the Custom Sale Method Status, select the custom sale method
to execute during checkout. Choose from the following:
Custom Surcharge Method
If you have selected to activate the Custom Surcharge Method Status, select the custom
surcharge method to execute during checkout. Choose from the following:
Display Progress Indicator
Select true to display a progress indicator in checkout.
66
Users Guide
Minimum Order Amount
Enter a minimum order amount. If you enter an amount greater than zero, users attempting to
checkout with a total of items in their shopping cart less than the amount specified will be
presented with a message indicating they need to add more items to their cart to checkout. Set
to '0.00' to turn off.
Order Number Type
Select the type of order number generated by this software for orders. You can choose from the
following:
Display Controls: Featured Product List
Slot 1: Activate Slider
If there are products to display on the featured products function in slot 1, choose true (1) to
activate a slider control for those products, or false (0) to suppress the slider.
Slot 1: Heading Name
If there are products to display on the featured products function in slot 1, the name below is
used to present a heading.
Slot 1: Product Display Type
If there are products to display on the featured products function in slot 1, the designation below
controls which display type is used for products when displaying that function.
Slot 1: Products Per Row
If there are products to display in the featured products function in slot 1, the designation below
controls how many products are displayed horizontally when viewing featured products. You can
choose 1-4 units per row.
Slot 2: Activate Slider
If there are products to display on the featured products function in slot 2, choose true (1) to
activate a slider control for those products, or false (0) to suppress the slider.
67
Users Guide
Slot 2: Heading Name
If there are products to display on the featured products function in slot 2, the name below is
used to present a heading.
Slot 2: Product Display Type
If there are products to display on the featured products function in slot 2, the designation below
controls which display type is used for products when displaying that function.
Slot 2: Products Per Row
If there are products to display in the featured products function in slot 3, the designation below
controls how many products are displayed horizontally when viewing featured products. You can
choose 1-4 units per row.
Slot 3: Activate Slider
If there are products to display on the featured products function in slot 3, choose true (1) to
activate a slider control for those products, or false (0) to suppress the slider.
Slot 3: Heading Name
If there are products to display on the featured products function in slot 3, the name below is
used to present a heading.
Slot 3: Product Display Type
If there are products to display on the featured products function in slot 3, the designation below
controls which display type is used for products when displaying that function.
Slot 3: Products Per Row
If there are products to display in the featured products function in slot 3, the designation below
controls how many products are displayed horizontally when viewing featured products. You can
choose 1-4 units per row.
Slot 4: Activate Slider
If there are products to display on the featured products function in slot 4, choose true (1) to
activate a slider control for those products, or false (0) to suppress the slider.
68
Users Guide
Slot 4: Heading Name
If there are products to display on the featured products function in slot 4, the name below is
used to present a heading.
Slot 4: Product Display Type
If there are products to display on the featured products function in slot 4, the designation below
controls which display type is used for products when displaying that function.
Slot 4: Products Per Row
If there are products to display in the featured products function in slot 4, the designation below
controls how many products are displayed horizontally when viewing featured products. You can
choose 1-4 units per row.
Slot 5: Activate Slider
If there are products to display on the featured products function in slot 5, choose true (1) to
activate a slider control for those products, or false (0) to suppress the slider.
Slot 5: Heading Name
If there are products to display on the featured products function in slot 5, the name below is
used to present a heading.
Slot 5: Product Display Type
If there are products to display on the featured products function in slot 5, the designation below
controls which display type is used for products when displaying that function.
Slot 5: Products Per Row
If there are products to display in the featured products function in slot 5, the designation below
controls how many products are displayed horizontally when viewing featured products. You can
choose 1-4 units per row.
69
Users Guide
Display Controls: Store Splash Page List
Category List: Categories Per Row
If there are categories to display on the store splash page, the designation below controls how
many categories are displayed horizontally when viewing the splash page.
Category List: Category Display Type
If there are categories to display on the store splash page, the designation below controls which
display type is used for categories when viewing the splash page.
Product List: Activate Slider
If there are products to display on the store splash page, choose true (1) to activate a slider
control for those products, or false (0) to suppress the slider.
Product List: Heading Name
If there are products to display on the store splash page, the name below is used to present a
heading.
Product List: Product Display Type
If there are products to display on the store splash page, the designation below controls which
display type is used for products when viewing the splash page.
Product List: Products Per Row
If there are products to display on the store splash page, the designation below controls how
many products are displayed horizontally when viewing the splash page. You can select
between 1 and 4 units per row.
General Store Settings
This menu controls your customers’ checkout experience.
70
Users Guide
Disable Online Store
Select true to disable the online store for maintenance, or false to open the store for business.
Display In Stock Info
Select true display in stock information for products. Selecting false will only display out of stock
products with an out of stock message.
Display In Stock Level
Display In Stock Info must be set to true for this setting to take effect. Select true display the
invetory level when displaying in stock information for products. Selecting false will display only
an in stock message for in stock products.
Display Product Numbers
Select true to display product numbers for items, or false to not display product numbers.
Enable Stock Notifications
Select true to enable stock notifications for products. If stock notifications are enabled, users can
sign up to receive a notification when an item which is out of stock is made available.
Hide Out Of Stock Products
Select true to hide out of stock products. Selecting false will display out of stock products with
an out of stock message.
Intershipper Settings
Intershipper is a shipping company which helps your customers find the best pricing for a
particular shipment. They claim to reduce the number of abandoned shopping carts that plague
most web stores by searching your particular shipping options and finding the best carrier for a
particular shipment. There is some sort of fee associated with the service. If you’re interested
in reading more, check out www.intershipper.com.
Settings/Active Carriers
Select which carriers should be used for Intershipper rate requests. All available carriers are
listed in this box. At least one must be active. Currently, you can make the choice of UPS, USPS
or FedEx.
Linkpoint API Keyfile Contents
The contents of the API key file you downloaded from Linkpoint need to be entered into the field
below. This key file should be associated with your Linkpoint API-enabled account.
71
Users Guide
Peachtree Export Settings
This menu manages all of your company’s account information so that you can accurately export
your files directly into your Peachtree accounting software.
Account Number: Accounts Receivable
Enter the account number for the accounts receivable account.
Account Number: Country Tax Amount (Income)
Enter the account number for the income account associated with the country tax total.
Account Number: Discount Amount (Expense)
Enter the account number for the expense account associated with the discount total.
Account Number: Item Subtotal (Income)
Enter the account number for the income account associated with the order subtotal.
Account Number: Payment (Bank or A/R)
Enter the account number for the bank or accounts receivable account.
Account Number: Sale Amount (Expense)
Enter the account number for the expense account associated with the sale total.
Account Number: Shipping Amount (Income)
Enter the account number for the income account associated with the shipping total.
Account Number: State/ Province Tax Amount (Income)
Enter the account number for the income account associated with the state/province tax total.
Invoice Display Name: Country Tax Amount
Enter the invoice display name for the country tax total.
Invoice Display Name: Discount Amount
Enter the invoice display name for the discount total.
Invoice Display Name: Payment
Enter the invoice display name for the payment.
Invoice Display Name: Sale Amount
Enter the invoice display name for the sale total.
Invoice Display Name: Shipping Amount
Enter the invoice display name for the shipping total.
Invoice Display Name: State/Province Tax Amount
Enter the invoice display name for the state/province tax total.
Invoice Display Name: Surcharge Amount
Enter the invoice display name for the surcharge total.
72
Users Guide
Tax Type: Country Tax Amount
Enter the tax type for the country tax total.
Tax Type: Country Tax Refund Amount
Enter the tax type for the country tax refund total.
Tax Type: Discount Amount
Enter the tax type for the discount total.
Tax Type: Item Subtotal
Enter the tax type for the item subtotal.
Tax Type: Payment
Enter the tax type for the payment.
Tax Type: Sale Amount
Enter the tax type for the sale total.
Tax Type: Shipping Amount
Enter the tax type for the shipping total.
Tax Type: State/Province Tax Amount
Enter the tax type for the state/province tax total.
Tax Type: Surcharge Amount
Enter the tax type for the surcharge total.
Product Listings
Image Width: Small Product Images
Enter a width in pixels to use to control the size of small product images displayed by this
software.
Products To Display Per Page
Select how many products should be displayed per page by default.
Show Sort Options
Select true to display product sort options to users who are browsing the online store.
Remote E-Commerce Settings
Perhaps you have an existing site and don’t want to convert it all to a database format? You can
activate this feature and simply add “Add To Cart” buttons that link your shopping cart to your
current site. Here you would outline the additional sites that would be using your shopping cart.
73
Users Guide
Allow Remote Product Page POSTs
Select below to allow remote product page POSTs. When set to true, product pages from remote
URLs will be allowed to post product information into the e-commerce shopping cart. When set
to false, this functionality is disabled.
Allowed Remote Product Page URLs
Enter a single or comma separated list of URLs for remote product pages allowed to POST into
the e-commerce shopping cart. These URLs can be entered as partial URLs or fully qualified
URLs. Pattern matching is performed on referrer information based on the URLs entered here to
determine whether a remote product page is allowed to post into the e-commerce shopping cart.
If this field is empty and you have selected to Allow Remote Product Page POSTs, no remote
product pages will be allowed to POST into the e-commerce shopping cart.
Sage Exports Settings
Default Customer Account
Enter the customer account to be used if the customer data is not exported.
Department Number
The department number used for the invoice.
European Union VAT Tax Code: Normal
The tax code used for normal European Union VAT.
European Union Vat Tax Code: Zero
The tax code used for zero European Union VAT.
Nominal Code
The nominal code used for the invoice.
Shipping Settings
This menu handles all things shipping. Here you can customize your customer’s shopping and
shipping experience.
Add Handling Charge To Free Shipping Methods
Set this field to true to add handling charges to free shipping methods. Set this field to false to
prevent handling charges from being added to free shipping methods.
Allowed Shipping Addresses
This software can allow a customer to ship their order to multiple addresses, a single address or
to their billing address only. Select the appropriate option to control the type and number of
addresses allowed for shipping.
74
Users Guide
Free Shipping Threshold
Want to offer free shipping on all orders over $100? Enter a free shipping threshold below. If
you enter an amount greater than zero, the lowest value for all shipping methods will be free of
charge, and the amount for that lowest value will be subtracted from all other shipping options
presented. Set to '0.00' to turn off.
Handling Charge
Enter a handling charge below. If you enter an amount greater than zero, the handling charge
specified will be added to the cost for each shipment. Set to '0.00' to turn off.
Image Width: Shipping Carrier Images
Enter a width in pixels to use to control the size of shipping carrier images displayed by this
software.
Maximum Combined Package Weight
Enter a maximum combined package weight below. If a shipment is requested which contains
items that can be combined with other items for shipping, this maximum combined package
weight limits the size of the combined packages. This weight should be entered in pounds (LB)
or kilograms (KG) depending on the global weight setting selected in Shipping Settings.
Realtime: Minimum Box Height
Enter a minimum height for boxes to be shipped via realtime carriers. If a box is presented to
the shipping module with a height below this minimum, the minimum specified here will be
used.
Realtime: Minimum Box Length
Enter a minimum length for boxes to be shipped via realtime carriers. If a box is presented to
the shipping module with a length below this minimum, the minimum specified here will be
used.
Realtime: Minimum Box Weight
Enter a minimum weight for boxes to be shipped via realtime carriers. If a box is presented to
the shipping module with a weight below this minimum, the minimum specified here will be
used.
Realtime: Minimum Box Width
Enter a minimum width for boxes to be shipped via realtime carriers. If a box is presented to the
shipping module with a width below this minimum, the minimum specified here will be used.
Realtime: Present Dimensional Error Notices
If the dimensions of a shipment are above the maximum dimensions allowed by a realtime
carrier and an error is produced as a result, in addition to using the Shipping Error Carrier Name
and Amount for the rate, a notice can be presented by this software. If you set this to “True”
this notice will be presented. “False” will suppress this notice.
75
Users Guide
Realtime: Present Weight Error Notices
If the weight of a shipment is above the maximum weight allowed by a realtime carrier and an
error is produced as a result, in addition to using the Shipping Error Carrier Name and Amount
for the rate, this software can present a notice. If you set this to “True” this notice will be
presented. “False” will suppress this notice.
Return Currency: FedEx
Select the currency used by FedEx to return shipping rates for your FedEx account.
Return Currency: USPS
Select the currency used by USPS to return shipping rates for your USPS account.
Shipping Error: Amount
Enter a shipping error amount below. In the event of an error calculating shipping, this charge
will be displayed to the customer.
Shipping Error: Carrier Name
Enter a shipping error carrier name below. In the event of an error calculating shipping, this
carrier name will be displayed to the customer.
UPS Online Tools Settings
UPS Account Number
Enter your UPS account number. This number is required if you would like to receive negotiated
rates.
Use UPS Negotiated Rates
Set this field to true to use negotiated rates from UPS. Set this field to false to use UPS counter
rates.
Categories
Image Width: Category Images
Enter a width in pixels to use to control the size of category images displayed by this software.
Cron Settings/Settings
“Cron”; from the Greek “chronos” meaning time, is a time-based scheduling device that specifies
shell commands to run periodically on a given schedule.
76
Users Guide
Last Daily Cron Run
This is the time daily cron tasks were last run for this application.
Last Weekly Cron Run
This is the time weekly cron tasks were last run for this application.
Online Order Storage Time
Completed/Processing
Select the number of years to store online orders. This defaults to 1 year, but is selectable
between choose from:
• 1 Year
• 2 Years
• 3 Years
• 4 Years
• 5 Years
• Forever
Pending/Cancelled
Select the number os days to store online orders that are pending or cancelled. Choose from:
• 1 Day
• 2 Days
• 3 Days
• 4 Days
• 5 Days
• 10 Days
• 15 Days
• 20 Days
• 25 Days
• 30 Days
• Forever
Shopping Cart/Wish List Storage Time
Select the number of months to store unmodified store shopping carts and wish lists in the
database. Shopping carts and wish lists are modified each time a user adds, updates or removes
an item in their shopping cart and/or wish list. This defaults to 6 months but is selectable from:
•
•
•
•
•
•
1 Month
2 Months
3 Months
6 Months
12 Months
Forever
77
Users Guide
Display Controls: Related Product List
Product List Activate Slider
If there are related products to display, choose true (1) to activate a slider control for those
products, or false (0) to suppress the slider. The slider presents an easy way to quickly scroll
through a list.
Product List: Heading Name
If there are related products to display, the name below is used to present a heading.
Product List: Product Display Type
If there are related products to display, the designation below controls which display type is
used for products when viewing the splash page.
Product List: Products Per Row
If there are related products to display, the designation below controls how many products are
displayed horizontally when viewing the splash page. Select 1 to 4 units per row.
Display Controls: System Generated Lists
This area helps you control how list of products are displayed throughout the program.
All Products: Product Display Type
If there are products to display on the store view all products page, the designation below
controls which display type is used for products when viewing all products.
78
Users Guide
Here are your various choices.
Default :
Display Add Button:
79
Users Guide
Display Description
Display Description And Add Button
Mobile
80
Users Guide
All Products: Products per Row
If there are products to display on the store view all products page, the designation below
controls how many products are displayed horizontally when viewing all products. Choose from
1-4 units per row.
Best Sellers: Product Display Type
If there are products to display on the best sellers page, the designation below controls which
display type is used for products when viewing the best sellers page.
See Various Choices Listed Previously under All Products: Product Display Type.
Best Sellers: Products per Row
If there are products to display on the Best Sellers page, the designation below controls how
many products are displayed horizontally when viewing the best sellers page. Choose from 1-4
units per row.
New Items: Product Display Type
If there are products to display on the new items page, the designation below controls which
display type is used for products when viewing the new items page.
See Various Choices Listed Previously under All Products: Product Display Type.
New Items: Products per Row
If there are products to display on the New Items page, the designation below controls how
many products are displayed horizontally when viewing the best sellers page. Choose from 1-4
units per row.
Product Index: Product Display Type
If there are products to display on the Product Index page, the designation below controls which
display type is used for products when viewing the new items page.
See Various Choices Listed Previously under All Products: Product Display Type.
Product Index: Products per Row
If there are products to display on the Product Index page, the designation below controls how
many products are displayed horizontally when viewing the best sellers page. Choose from 1-4
units per row.
Search Results: Product Display Type
If there are products to display on the Search Results page, the designation below controls
which display type is used for products when viewing the new items page.
See Various Choices Listed Previously under All Products: Product Display Type.
81
Users Guide
Search Results: Products per Row
If there are products to display on the Search Results page, the designation below controls how
many products are displayed horizontally when viewing the best sellers page. Choose from 1-4
units per row.
Specials: Product Display Type
If there are products to display on the Specials page, the designation below controls which
display type is used for products when viewing the new items page.
See Various Choices Listed Previously under All Products: Product Display Type.
Specials: Products per Row
If there are products to display on the Specials page, the designation below controls how many
products are displayed horizontally when viewing the best sellers page. Choose from 1-4 units
per row.
Google Checkout Settings
This section controls the setup of Google Checkout in your cart.
Activate Google Checkout
Select true to enable Google Checkout, and false to deactivate it. Enabling Google Checkout will
present Google Checkout buttons, in addition to regular checkout buttons, within the online
store.
Allow Discounts Codes in Google Checkout
Select true to allow Google Checkout to accept discount codes, and false to suppress them.
Enabling discount codes in Google Checkout will present a coupon entry box within Google
Checkout for discount code entry.
Enable Callback Authentication
Select true to enable callback authentication for requests received from Google. This requires the
webserver on which this software is installed to support use of the PHP_AUTH_PW and
PHP_AUTH_USER variables. Support for these PHP variables is enabled on most servers by
default.
Google Checkout API URL
Enter the URL to which Google Checkout API requests should be submitted. Both production and
sandbox URLs are allowed here. Do not modify this URL unless you have been instructed to.
Your merchant ID will be appended to this URL automatically by this software. To use the Google
Sandbox, replace 'checkout.google.com' with 'sandbox.google.com/checkout'.
Google Checkout Button Language
Select the language to use for the Google Checkout button. Choose from:
82
Users Guide
Google Checkout Button Size
Select the size of the Google Checkout button you would like to use. The sizes shown are in
pixels. Choose from:
Google Checkout Button Style
Select the style of the Google Checkout button you would like to use. The styles shown change
the background color of the button. Choose from:
Google Checkout Button URL Non-SSL
Enter the URL to use for the Google Checkout Button on Non-SSL pages. Both production and
sandbox URLs are allowed here. Do not modify this URL unless you have been instructed to.
Your merchant ID will be appended to this URL automatically by this software. To use the Google
Sandbox, replace 'checkout.google.com' with 'sandbox.google.com/checkout'.
Google Checkout Button URL SSL
Enter the URL to use for the Google Checkout Button on SSL pages. Both production and
sandbox URLs are allowed here. Do not modify this URL unless you have been instructed to.
Your merchant ID will be appended to this URL automatically by this software. To use the Google
Sandbox, replace 'checkout.google.com' with 'sandbox.google.com/checkout'.
Merchant Calculated Shipping Display Name
Enter the display name to use for the shipping option presented in Google Checkout. During
Google Checkout, the lowest calculated shipping costs are used to determine the order shipping
cost.
Merchant ID
Enter your Google Merchant ID. To locate your ID, login to your Google Checkout account and
access the Integration section under the Settings menu.
Merchant Key
Enter your Google Merchant Key. To locate your key, login to your Google Checkout account and
access the Integration section under the Settings menu.
Language Strings
This menu controls the various language strings as well as their text components used
throughout ClickCartPro/EuropaCart. From here you can identify and augment the text
components of any string.
83
Users Guide
PayPal Website Payments Pro Settings
API Login: User Name
Enter your PayPal Website Payments Pro API username that was provided to you by PayPal.
API Login: User Password
Enter your PayPal Website Payments Pro API password that you selected for your API username.
API URL
This is the API URL used by this software to connect to the PayPal Website Payments Pro SOAP
server.
Currency Code
Enter the three-letter currency code of the currency you wish to use for PayPal Website
Payments Pro payments. This currency code should be the same as the the currency you've used
to enter your products in the Catalog Manager. Examples: USD, GBP, CAD, JPY, etc.
Enable PayPal Website Payments Pro Express Checkout Link
Select true to activate the PayPal Website Payments Pro Express Checkout Link. If you choose to
display this link, the 'PayPal (Pro Express Method) - Payment Form' payment method must also
be activated for the link to be shown. PayPal requires the use of the Express method if you also
choose to use the Direct method.
Keyfile Contents (API Keyfile)
The contents of the API key file you downloaded from PayPal (cert_key_pem.txt) need to be
entered into the field below. This key file should be associated with the API Password you enter
on this page.
PayPal Express Checkout Email
If an API username, password and their associated keyfile contents are not entered, this email
address is used with this software's API username to faciliate PayPal Website Payments Pro
Express Checkout.
Product Detail Pages
What elements do you care about when presenting your product detail pages to your customers?
This is a series of switches that allow you to present the info that matters most and eliminate
things you don’t care about.
Display Email a Friend Link
Select true to display a link on the product detail page to email a friend about the item being
viewed, or false to not display the link.
Display Facebook Like Button
Select true to display a Facebook “Like” button on product detail pages, or false to suppress the
button.
84
Users Guide
Display Google Plus Button
Select true to display a Google Plus button on product detail pages, or false to suppress the
button.
Display Related Products
Select true to display related products on the product detail page, or false to not display related
products.
Display Twitter Tweet Button
Select true to display a Twitter tweet button on product detail pages, or false to suppress the
button.
Image Width: Large Product Images
Enter a width in pixels to use to control the size of large product images displayed by this
software.
Use PopUp/Modal Functionality For Images
Select True to display popup/model functionality for extra large product images, or false to
suppress it.
Use Zoom Functionality For Images
Select true to display zoom functionality for large product images, or false to suppress it.
85
Users Guide
Quickbooks Export Settings
This menu manages all of your company’s account information so that you can accurately export
your files directly into your Quickbooks accounting software.
Settings/Account Name: Accounts Receivable (A/R)
Enter the account name for the accounts receivable account.
Account Name: Bank Account (Bank)
Enter the account name for the bank account to which amounts should be posted.
Account Name: Country Tax Amount (Income)
Enter the account name for the income account associated with country tax charges.
Account Name: Country Tax Refund Total (Expense)
Enter the account name for the expense account associated with the country tax refund total.
Account Name: Discount Amount (Expense)
Enter the account name for the expense account associated with the order discount amount.
Account Name: Item Subtotal (Income)
Enter the account name for the income account associated with the item subtotal.
Account Name: Sale Amount (Expense)
Enter the account name for the expense account associated with the order sale amount.
Account Name: Shipping Amount (Income)
Enter the account name for the income account associated with shipping charges.
Account Name: State/Province Tax Amount (Income)
Enter the account name for the income account associated with state/province tax charges.
Account Name: Surcharge Amount (Income)
Enter the account name for the income account associated with the surcharge total.
Invoice Display Name: Country Tax Amount
Enter the invoice display name for the country tax amount.
Invoice Display Name: Country Tax Refund Total
Enter the invoice display name for the country tax refund amount.
Invoice Display Name: Discount Amount
Enter the invoice display name for the discount amount.
Invoice Display Name: Sale Amount
Enter the invoice display name for the sale amount.
86
Users Guide
Invoice Display Name: Shipping Amount
Enter the invoice display name for the shipping amount.
Invoice Display Name: State/Province Tax Amount
Enter the invoice display name for the state/province tax amount.
Invoice Display Name: Surcharge Amount
Enter the invoice display name for the surcharge amount.
Reviews
The ClickCartPro/EuropaCart Review feature is an advanced module, which provides customer
reviews for items in the online store.
•
It provides an advanced item review system, which allows customers to post reviews for
items. Reviews can be posted immediately, or can be reviewed by an administrator prior
to activation. Administrators can control whether guests have access to post reviews.
•
Reviews are presented in a five-star format on the product pages of the online store.
Customers can choose from one to five stars for each of Overall, Quality and Value, and
may write a Review as well as add Pros and Cons. Customers are allowed to submit their
reviews with nicknames and specialized subjects.
Activate Reviews
This status indicator allows you to turn reviews on (true) or off (false)
Activate Slider For Reviews Display
If there are reviews to display, choose true (1) to activate a slider control for those reviews, or
false (0) to suppress the slider.
Number of Current Reviews to Display
Select the number of current reviews to show when displaying reviews. Choose from:
87
Users Guide
Require Account to Post Review
Select whether to require an account in order to post reviews (true), or to allow guests to post
reviews (false) as well.
Require Activation for Reviews
Select whether to require an administrator to manually activate reviews to make them display
(true), or to display reviews immediately when they are submitted (false).
Shipping Estimator
The ShipEstimator feature for ClickCartPro/EuropaCart provides shipping rate quotes on the
shopping cart page of the ClickCartPro/EuropaCart online store.
It provides a location form and shipping rate information on the shopping cart page of
the ClickCartPro/EuropaCart online store.
•
It leverages the ClickCartPro/EuropaCart Shipping module to get the exact rates
calculated during checkout.
Activate Shipping Estimates
This status indicator allows you to turn shipping estimates on (true) or off (false).
88
Users Guide
Shopping Cart
This area handles your shopping cart configuration controls.
Allow Fractional Quantities
Select true to allow for fractional quantities in the shopping cart.
Continue Shopping: Target
Select the location to be targeted by the Continue Shopping button on the shopping cart page.
When history data is available this location will be targeted. Choose from:
Disable Wish List
Select true to disable wish list displays and functions.
Display Images
Select true to display images in the shopping cart. Images will be displayed if at least one item
has a valid image and this setting is true.
Display Product Options With Line Breaks
Select true to display product options with line breaks, or false to display without them.
Image Width: Cart Product Images
Enter a width in pixels to use to control the size of small product images displayed by this
software in the shopping cart.
Catalog
The Getting Started Guide covered the best way to add multiple Categories, Products and
Options en masse when you begin to set up your web site. Once you’ve set up your initial store
using the Getting Started Guide, this interface will be the place where you add these items one
at a time.
As you begin to add new products and categories to your site, you’ll notice that you will need to
enter unique identifiers for each individual product and category. These identifiers reside in the
background and are never seen by your customers. Product identifiers are used in conjunction
with related products and categories when the web site identifies a certain product. Because
there is a set length of 250 characters for each product entry, it is best to abbreviate your
product names and keep this system as simple as possible. This can be especially useful if you
plan on having many sub-categories to reference.
Every item in the Catalog Heading offers you the ability to Add a completely new item, Delete an
unwanted item or Clone an existing item. The menu is designed in a logical order. You first
create a Category, Product Option Items, and Product Options…all before you create a product.
89
Users Guide
Why? Simple, because when you start creating a new product, it will ask you what category you
want it in and what product options you want to include…if you haven’t created these items yet,
this could be difficult.
Categories
This is where you will setup and maintain the main categories of your web site. These
categories will be displayed in the Categories portion of your web site’s main menu and will lead
your customers through the main highlights of your site. You will augment this section to reflect
your web site’s personality and theme.
Important Note:
You can now do a quick audition of any category page by simply clicking on the Audition
Category Link located on the Categories page.
To begin adding categories, simply click on the Create link under the Functions Menu.
The page that comes up contains the following fields, which will help you create a new category:
Category
Identifier
This identifier is used within the software to specify this category. Because this identifier is used
in XHTML form fields, do not use spaces, periods or special characters. Recommended characters
are 0-9, a-z, A-Z and the underscore character.
90
Users Guide
Display Name
This is the display name for this category. This display name is used in meta tags generated by
the software. This is also the name that will appear on the menu in your web site. It should
identify your category clearly so that your customers know what is there.
Description
This description is used in meta tags generated by the software. This is a description for this
category. It can be the text that shows up when a person searches and finds you in a search
engine. Be sure to take the time to best describe and sell your product here. The work you do
here can be cumbersome, but usually yields dividends by increasing traffic to your site. Choose
your words and your descriptions carefully. This helps interested customers locate and learn
about your products before they arrive at your web site. Think of them as “smart” road signs.
If they’re misleading, customers may never find your store. This description will also be used in
the event that you select this category as a sub-category of a larger main category to briefly
summarize the contents.
This description can contain XHTML tags. XHTML is a stricter version of HTML, the code that
most web pages are made from.
If you go to a web page and in your web browser, tell it to View Source, you will see HTML or
XHTML. XHTML tags tell the browser that you might want a word to be bold. In order for the
word “bold” to show up “bold”, the XHTML code would look like this (<b>bold</b>)) If the
description contains XHTML tags, be sure to set the Description Contains XHTML Tags field to
true.
Important Note:
All Kryptronic products now contain a WYSIWYG (What You See Is What You Get) editor on fields
that contain XHTML code. Why is this, you may ask? Now, text entries can be automatically
converted to XHTML by simply typing them into this field and then clicking on the
Bold/Italic/Underline and other text tools just like you do in a word processor. The software now
just converts it for you so you don’t have to learn basic HTML programming. To launch the
91
Users Guide
WYSIWYG editor just click on the blue WYSIWYG Editor: Load Editor link located in the various
appropriate fields. It will launch the WYSIWYG toolbar that looks like this:
Category Image
This image is used in category displays. It is normally situated to the left of the Category title
and description. It is also displayed if you set you category listings to include a picture…both
examples are shown below:
To add a new image, you can either enter the name or browse your hard disk and upload a
specific file.
To associate a file with this item, either enter a file name or use the file upload field to download
a file from your hard disk. Just hit the Browse button and find the file on your disk…when you’re
finished with this category and hit the Submit button at the bottom of the page, the software will
automatically upload this file to the appropriate directory on your web site.
Important Note:
When using the Admin interface to set up your categories, the interface automatically copies
your category images to a directory in the /media/ccp0/cat folder on your server. If you decide
to load your category photos en masse using a spreadsheet, just use your favorite FTP editor to
load the pictures into this folder.
92
Users Guide
Main Category Indicator
This indicator when set to true treats this category as a main category to be displayed on the
online store splash (intro) page. If it is set to false, this category is to be considered a subcategory of another category. This can be assigned via the Related Categories menu that is
covered on the bottom of this page. Related Categories appear within the main page of any
Main Category.
Sort Order
This sort order numeric allows display of categories in a particular order. Categories are sorted
within displays in ascending order based on this numeric indicator.
Date/Time Stamp
The date/time this category was last updated.
Search Engine Optimization
Meta Keywords
Enter a comma-delimited list of keywords below. These keywords are used in both software
searches and meta tags generated by this software. This is one of the major keys to
establishing your site on search engines, so be thorough, specific and choose your words wisely.
Important Note:
When jotting down your keywords, make sure you really focus on different ways to describe
your product. For example, if you sell records, you may also want to use words like LP, 45, 33,
discs, wax pressings, etc. Sometimes, a thesaurus can show you alternative words to describe
your product. Different countries, and even different parts of the same country refer to things
differently. Denoting all of these in your keywords can help you be more easily found when
customers come calling.
Meta Title
Enter a title to be used in the meta title tag for this category. The Display Name will be used for
the meta title tag if a title isn't entered here.
Meta Description
Enter a description to be used in the meta description tag for this category. The Description will
be stripped of XHTML tags and used for the meta description tag if a description isn't entered
here.
Search Engine Optimized URL Identifier
Enter a search engine optimized URL identifier for this category. If you do not enter a engine
optimized URL identifier, the identifier for this category will be used by default.
93
Users Guide
Display
Sub-Categories To Display per Row
If you’ve created sub-categories to be placed within your main categories, you will choose here
how many to display horizontally per row. You have choices ranging from one sub-category per
horizontal row to four sub-categories.
Sub Category Display Type
This entry allows you to select how your sub-categories are displayed. The default display
method shows a thumbnail (small) image and a title. You can either choose to include or not
include the description.
Products to Display Per Row
If there are products within this category, the Products to Display per Row designation below
controls how many products are displayed horizontally when viewing this category. Like the
Category indicator, you can choose between one and four products per horizontal line.
Product Display Type
If there are products within this category, the Product Display Type designation controls which
product category view display to use when presenting those products. Also like the category
display, you can choose from the following:
Default:
Display Add Button:
94
Users Guide
Display Description
Display Description And Add Button
Product Multi-Add Indicator
This field allows you to control whether this category uses a product multi-add display. If this
field is set to true, the product display type and number of products to display per row values for
this category are ignored. Instead of using those values to display products for this category,
this category will present a display list that allows a user to add multiple products to their
shopping cart or wish list from the category page.
95
Users Guide
Related Categories
Related categories are displayed as sub-categories of this category in the main page of each
category. Just check the appropriate sub-categories related to this category.
96
Users Guide
Visibility
Visibility Selection
This field allows you to control the users who can view this category. You can set this category
up to be viewed by everyone, only users belonging to the groups you specify using the Category
Visibility Groups field, or to be hidden from everyone.
Category Visibility Groups
If you select Specific User Groups Only, then this checkbox allows you to specify who those
specific groups should be. Just check the groups you want to include for this category. Here are
your visibility choices:
Option Selection Items
This heading allows you to manage all of the options you may present for particular products. If
you sell computers and each computer allows you to pick certain mice, video cards, DVD ROMS,
and other options, you would list those items here. They would then show up as options after
your customer selects the base item. This section also allows you to assign a positive or
negative adjustment to the overall package so that the price to the customer changes “on the
fly”.
These are the actual Product Option items themselves. This is where you spell out the product;
it’s details and additional cost. Once you have determined the individual items, you will then use
the next field, “Manage Product Options” to categorize the products into groups like “CD ROM
upgrades”, “Hard Disk Upgrades”, etc.
It looks like this:
97
Users Guide
To add a new product option, simply click on the Create link under your Functions menu. You
can also edit your existing Options by clicking on the “Update” link beside the chosen product.
These options can then be added to the Related Product Options field of any included product.
Option Selection Item
Identifier and Name/Identifier
This identifier is used within the software to specify this option selection item. It is entered under
the Product Options function to associate this selection item with a product option. Because this
identifier is used in XHTML form fields, do not use spaces, periods or special characters.
Recommended characters are 0-9, a-z, A-Z and the underscore character. Your customers do
not see it, so it can be abbreviated for your convenience.
Display Name
This is the display name for this product option selection item. It is used in displays to identify
the selection item. Make sure you name this option concisely so customers easily understand
the various options they can add.
Inventory Level
You may also want to track the stock of your product option items. This is similar to the
declining balance of your product inventory. If you want this to track, simply add the number of
products currently in stock. Inventory will be adjusted according to your customer orders. Also
remember to manually adjust the quantity for phone or manual orders. Otherwise, this product
option will not be available for purchase from your customers if it shows a “0” balance. Enter
the inventory level for this product option selection item below. Declining Balance Inventory
98
Users Guide
must be activated for product options this product option selection item is associated with in
order to ensure inventory is declined when this product option selection item is ordered. The
default is zero ('0').
Item Sort Order
The item sort order numeric allows display of all the product option selection items associated
with a product option in a particular order. The product option selection items are sorted in
ascending order based on this numeric indicator. The first product you want will be assigned “0”
and on up throughout your list.
Price Adjustments
Base Price Change
As customers add and delete options, the overall price of the product can flow with their changes
automatically. Enter a base price change for this product option selection item. This base price
change will affect the one-time base price for items added to customer shopping carts with this
product option selection item. You can enter a positive number (Example: Enter '+1.00' or '1.00'
to increase the base price) or a negative number (Example: Enter '-1.00' to decrease the base
price). If you enter '0.00' or a zero-equivalent, this product option selection item will have no
effect on pricing of options or items.
Recurring Price Change
Enter a recurring price change for this product option selection item. This recurring price change
will affect the recurring price for items added to customer shopping carts with this product
option selection item. You can enter a positive number (Example: Enter '+1.00' or '1.00' to
increase the recurring price) or a negative number (Example: Enter '-1.00' to decrease the
recurring price) or nothing at all. If you enter '0.00' or a zero-equivalent, this product option
selection item will have no effect on pricing of options or items.
Wholesale Price Change
Enter a wholesale price change for this product option selection item. This wholesale price
change will affect the wholesale price for items added to customer shopping carts with this
product option selection item. You can enter a positive number (Example: Enter '+1.00' or '1.00'
to increase the wholesale price) or a negative number (Example: Enter '-1.00' to decrease the
wholesale price). If you enter '0.00' or a zero-equivalent, this product option selection item will
have no effect on pricing of options or items.
Affiliate Commission Change
Enter an affiliate commission change for this product option selection item. This affiliate
commission change will affect the affiliate commission for items added to customer shopping
carts with this product option selection item. You can enter a positive number (Example: Enter
'+1.00' or '1.00' to increase the affiliate commission) or a negative number (Example: Enter '1.00' to decrease the affiliate commission). If you enter '0.00' or a zero-equivalent, this product
option selection item will have no effect on affiliate commissions of options or items.
99
Users Guide
Weight Adjustments
Weight Change
Obviously, as you add options to a base product, you also affect the overall weight of your
shipment. This field allows you to adjust the shipping weight of the product as options are
added. Enter a weight change for this product option selection item. This weight change will
affect the overall weight for items added to customer shopping carts with this product option
selection item. You can enter a positive number (Example: Enter '+1.000' or '1.000' to increase
the weight) or a negative number (Example: Enter '-1.000' to decrease the weight). If you enter
'0.000' or a zero-equivalent, this product option selection item will have no effect on overall
weight of options or items.
Digital Download
Download File
A download file can be associated with this product option selection item. If you choose to
associate a file with this item, the file will be made available for download by customers who
place an order for this product option selection item.
To associate a file with this item, either enter a file name or use the file upload field to download
a file from your hard disk. Just hit the Browse button and find the file on your disk…when you’re
finished with this product option and hit the Submit button at the bottom of the page, ClickCart
Pro will automatically upload this file to the appropriate directory on your web site.
Taxes
Apply State and Province Tax
Indicate if state and province taxes are applicable to this product option selection item.
Apply Country Tax
Indicates if country taxes are applicable to this product option selection item.
Tax Classification
Select the classification for tax purposes for this product option selection item. Product option
selection items classified other than Standard may be subject to special tax treatment.
Product Options
Now that you’ve set up your individual product option items in the proceeding fields, it’s time to
group these items into categories and assign them a certain look and feel for their display. As
always, you can choose an existing Product Option Category to edit or add a new category by
clicking on the “Create: Add a new row to this database link” in your Functions Menu.
100
Users Guide
Product Option
Identifier
This identifier is used within the software to specify this product option. It is entered under the
Products function to associate this option with a product. Because this identifier is used in
XHTML form fields, do not use spaces, periods or special characters. Recommended characters
are 0-9, a-z, A-Z and the underscore character.
Display Name
This is the display name for this product option. It is used in displays to identify the option to the
customer.
Description
Enter a description for this product option to be displayed to customers. This description can
give them instructions. This description can contain XHTML tags. If the description contains
XHTML tags, be sure to set the Description Contains XHTML Tags field to true. This is where you
simply describe the option and instruct the customer the various choices available.
Important Note:
All Kryptronic products now contain a WYSIWYG (What You See Is What You Get) editor on fields
that contain XHTML code. Why is this, you may ask? Now, text entries can be automatically
converted to XHTML by simply typing them into this field and then clicking on the
Bold/Italic/Underline and other text tools just like you do in a word processor. The software now
just converts it for you so you don’t have to learn basic HTML programming. To launch the
WYSIWYG editor just click on the blue WYSIWYG Editor: Load Editor link located in the various
appropriate fields. It will launch the WYSIWYG toolbar that looks like this:
Form Field Type
This is the XHTML form field type used to display this product option. If you select a field type of
Selection, Checkboxes or Radio Buttons, be sure to enter the ID for at least one option selection
item in this selection area.
You can choose a Text Box:
101
Users Guide
A Text Area: Regular
A Text Area: Small
A Selection Area:
Note: You must list these items in the Related Product Option Selection Items field that follows.
Checkboxes:
102
Users Guide
Note: You must list these items in the Related Product Option Selection Items field that follows.
Radio Buttons:
Note: You must list these items in the Related Product Option Selection Items field that follows.
Hidden Field:
This simply removes the selection from this page.
File Upload
Field is provided so a customer can choose and upload a file from their local hard disk.
Required Indicator
Must these options be addressed in order for the customer to order the associated product? If
yes, set this indicator to “True”, if no, set this indicator to “False”
Declining Balance Inventory
For field types of Selection, Checkboxes or Radio Buttons you can specify inventory on the
product option selection item level. If you would like to activate a declining balance inventory for
those selection items, set this value to true. To turn off declining balance inventory, set this
value to false. If you use Declining Balance Inventory and the system thinks a product is not in
stock, it will no present it to the customers. This can be a two-edged sword. It is very nice to
present an accurate message about stock to your customers, but in many cases, customers will
103
Users Guide
look elsewhere if they can’t find what they’re looking for. After they’ve placed an order, most
customers will accept a message telling them their order will ship in a few days.
Option Sort Order
This allows you to display all of the product options associated with a product in a particular
order. The product options are sorted in ascending order based on this numeric indicator. Your
first option would be labeled “0” and on up through all of the options.
Option Section
The name of the section of the option display form this option should be printed in. To create a
new section, simply enter in a section that has not yet been used.
Related Option Selection Items
Here you will see a checklist of all of the Product Option Selection Items you created in the
previous section. Just click on the ones you want included in this option. For example, if you
created a Product Option called Upgrade Your Hard Disk, you would simply add all of your
Product Option Selection items that are hard disk upgrades. You must enter at least one
product option selection item ID if the Form Field Type above is set to Selection, Checkboxes or
Radio Buttons.
Products
Here is where you will control the content and visual presentation of your actual products. You
will enter images, descriptions, category listings, prices, costs, related products and virtually any
important product-specific information. When you click on this item in your menu, you will be
presented with the ability to add new products or edit your existing product list.
Important Note:
If you want to quickly audition any product page, simply click on the Audition Product link
located on the Store:Products page.
104
Users Guide
Product
Identifier
This identifier is used within the software to specify this product. Because this identifier is used
in XHTML form fields, do not use spaces, periods or special characters. Recommended characters
are 0-9, a-z, A-Z and the underscore character.
Display Name
This display name is used in Meta tags generated by the software. It can be the text that shows
up when a person searches and finds you in a search engine. Be sure to be careful when adding
the name of the product here. Always be cognizant of the fact that search engines are the judge
of how well you get inside your customer’s head. This extra thought usually yields dividends by
increasing traffic to your site. Choose your words carefully. Even something as simple as a
product name can be thought of as a lighted sign pointing to your store.
Product Number
This is the product number. This number is used in some displays to identify the product. This
product number is also available for searches. It is an easy way to track products with similar or
identical names, much like bar codes do in a retail store.
Short Product Description
Enter a short product description in this field. This short description must not contain XHTML
tags. This description is used in category displays and to generate Meta tags. This description
should sum up your product in a few sentences. It is used in the category lists of products.
105
Users Guide
Long Product Description
This is the long detailed product description. It will be inserted in the product page. This
description can contain XHTML tags. If the description contains XHTML tags, be sure to set the
Description Contains XHTML Tags field to true.
Important Note:
All Kryptronic products now contain a WYSIWYG (What You See Is What You Get) editor on fields
that contain XHTML code. Why is this, you may ask? Now, text entries can be automatically
converted to XHTML by simply typing them into this field and then clicking on the
Bold/Italic/Underline and other text tools just like you do in a word processor. The software now
just converts it for you so you don’t have to learn basic HTML programming. To launch the
WYSIWYG editor just click on the blue WYSIWYG Editor: Load Editor link located in the various
appropriate fields. It will launch the WYSIWYG toolbar that looks like this:
Confirmation Email Text
You can enter text below to be included in order confirmation messages for orders containing
this product. Do not enter XHTML tags in this confirmation email text. You’ll normally have a
standard email address that ships to your customers for every order you ship out of the store.
This message is for products that may require special attention or instructions to deliver your
customers the most useful and up to date information available.
Product Sort Order
This sort order numeric allows display of products in a particular order. Products are sorted
within category and related product displays in ascending order based on this numeric indicator.
Products are listed from 0 and up to determine their placement in a particular category. (what
do you do if you have a product that you want #1 in one category, but #6 in another?…two
products made?)
Product Index Selection
This product index selection controls under which letter in the index this product is displayed in.
Simply match the first letter of the product. This is not done automatically, so make sure you
don’t skip this step when setting up your product. (Apples go under “A”)
Pricing
Pricing Type Selection
This is the pricing type for the product. This product can be priced regularly, on sale, option
based (all prices come from options only), volume based, use only a recurring charge or not be
priced at all (not for sale - display only). After choosing the most appropriate option for this
product, you can then configure the details in the fields that follow.
106
Users Guide
Regular Price
This is the regular base price for the product. This price is used for the 'Regular Price' and 'Sale
Price' pricing types. Enter as '0.00' if you are not using this paradigm.
Sale Price
This is the sale price for the product. This price is used for the 'Sale Price' pricing type. Enter as
'0.00' if not used.
Volume Price Schema
If you have selected Volume Pricing for your Pricing Type above, then this is the formula you will
display to determine volume pricing. Here is an example of how to enter this schema:
1:14.00; 2-5:12.00; 6-9999:10.00
(This basically means “1 unit is $14.00, 2-5 units are $12.00 each and 6-9999 units are $10
each.)
Important Note: Make sure you have Volume Pricing selected above. Remember, you also
need to fill in the next space, which is an html description of the pricing you’ve displayed. This
doesn’t have to be anything fancy. We’ll show you how in the example.
Volume Price XHTML Description
This is the volume pricing XHTML description for the volume pricing schema above. This XHTML
description is used for the 'Volume Based' pricing type. This description should be written in
standards compliant XHTML. This is what is shown to the customer to explain the schema above.
You can enter either literal prices here, or enter prices wrapped in 'price' XML tags to use the
currency conversion system. Example: <price>100.00</price>. Follow these exact guidelines
or your pricing will only show as 0.00.
Your HTML code would look like this:
<p>For one unit, the price would be <price>14.00</price>, 2-5 units would be
<price>12.00</price> and 6-9999 units would be <price>10.00</price></p>
We use the <price> identifier in the HTML code so that if something other than US dollars are
used, it is automatically converted.
107
Users Guide
Recurring Price
If you have a monthly service or subscription, this needs a recurring price for the product. This
price is used for the 'Regular Price', 'Sale Price' and 'Recurring Based (Only)' pricing types. Enter
as '0.00' if not used.
Wholesale Price
This is the wholesale price for the product. This price is used for the 'Regular Price' and 'Sale
Price' pricing types for wholesale account holders. Typically this price is less than the regular and
sale prices.
Important Note About Affiliate and Wholesale Pricing:
If you plan on offering Affiliate and Wholesale pricing in your store, you’ll also need to activate
these systems in the Core.
Just go to the Core and select Settings
Then select the Wholesale and Affiliate Account Settings.
You’ll now be able to activate the various programs you wish to offer and also be able to set
limits for commissions. You should also remember that if you plan to offer both Affiliate and
Wholesale pricing on all of your products and you used our Getting Started Guide to set up the
majority of your products, you’ll need to fill in Affiliate and Wholesale pricing on your
spreadsheet for both the products and product options.
Affiliate Commission Amount
If you have an affiliate dealer who is given a certain amount per product to sell your products,
this is where you would enter that pricing for each product. Enter an amount to pay as
commission to affiliates that generate orders for this product. Enter '0.00' to suppress payment
of affiliate commissions for this product.
Product Sort/Search Price
The product sort/search price controls how this product is displayed in FrontEnd result sets when
sorted by price. It also controls the price used in store searches when a minimum or maximum
price is entered by the user. Enter a price here to use for this sort. This price is not used by
the software for any calculations.
A good price to use here would be the actual price for a quantity of one of this product. This field
is stored as an integer in the database without a decimal to ensure accurate sorting.
Example:
$999.85 would be stored as $999 or $1000
Display
Product Display Type
The Product Detail Display Type designation controls which product detail view display to use
when presenting this product.
108
Users Guide
Related Product Multi-Add Indicator
This field allows you to control whether this product uses a product multi-add display for related
products. If this field is set to true, settings for related product displays are ignored. Instead of
using those settings to display related products for this product, this product will present a
display that allows a user to add multiple related products to their shopping cart or wish list from
the product page.
Display on Store Splash Page
What are the first products you want a customer to see? Setting this dropdown menu to “true”
will display the product you’re working on right on your web site’s front page.
Display on New Products Page
Set the dropdown menu to “true” if you want to display the product you’re working on within the
online store New products page. This is a great category for repeat customers so that they can
quickly peruse only those items new to your store that they may not be familiar with.
Display On Specials Page
There is no better promotion on this planet than the special. Set this dropdown menu to “true”
so the product you’re working on is displayed on your Specials page. Customers are much more
likely to return to a site where they think they have received special pricing and superior service.
Display On Best Sellers Page
Set the dropdown menu to “true” to add this product to your Best Sellers page. This page is
good for customers who are having difficulty making a decision about a certain product. The
“Best Seller” distinction lets them feel like they are making a popular decision. This is based on
the all-important “Lemming Theory”.
Display in Featured Products Slot 1
Indicate whether to display this product in slot 1 of the featured products function.
Display in Featured Products Slot 2
Indicate whether to display this product in slot 2 of the featured products function.
Display in Featured Products Slot 3
Indicate whether to display this product in slot 3 of the featured products function.
Display in Featured Products Slot 4
Indicate whether to display this product in slot 4 of the featured products function.
Display in Featured Products Slot 5
Indicate whether to display this product in slot 5 of the featured products function.
Images
Small Product Image
This image is used in category displays for this product as a thumbnail image.
109
Users Guide
If there is a file shown in this box, it is currently the thumbnail image associated with this item.
If you wish to use a different file, you can either enter a new file name for files that are already
installed on your web site, or use the Browse button to find and upload a file from your hard
disk. Unlike many shopping carts that force you to create your own thumbnail, the software
automatically sizes your images to the perfect size.
Important Note:
When using the Admin interface to set up your products, the interface automatically copies your
small product images to a directory in the /media/ccp0/prodsm folder on your server. If you
decide to load your thumbnail photos en masse using a spreadsheet, just use your favorite FTP
editor to load the pictures into this folder.
Large Product Image
These images are used in detail displays for this product as a large detail images. You can
upload and use a single image, enter a comma-delimited list of multiple images or use the multiadd browser shown here:
If there is a file shown in this box, it is currently the large product image associated with this
item. If you wish to use a different file, you can either enter a new file name for files that are
already installed on your web site, or use the browse button to find and upload a file from your
hard disk.
Important Note:
When using the Admin interface to set up your products, the interface automatically copies your
large product images to a directory in the /media/ccp0/prodlg folder on your server. If you
decide to load your product photos en masse using a spreadsheet, just use your favorite FTP
editor to load the pictures into this folder.
Extra Large Product Image
These images are used in detail displays for this product as extra large product images. You can
upload and use a single image or multiple images. Use the same image name(s) as the Large
Product Image(s) for this product to support popup/modal and zoom functionality. The files
shown below are currently associated with this item. If you wish to add files, either enter new
file names in the box below in a comma-delimited format, or use the file upload field.
Important Note:
When using the Admin interface to set up your products, the interface automatically copies your
extra large product images to a directory in the /media/ccp0/prodxl folder on your server. If
you decide to load your extra large photos en masse using a spreadsheet, just use your favorite
FTP editor to load the pictures into this folder.
110
Users Guide
Taxes
Apply State and Province Tax
Indicate if state and province taxes are applicable to this product. Normally in the United
States, state tax is applicable on products you sell to customers within your state. In most
cases, if you live in Pennsylvania and sell a product to a customer in California, state taxes are
waived. It is always a good idea to check with your local state tax authority if you have a
question.
Apply Country Tax
Indicates if country taxes are applicable to this product. In most cases, country taxes are added
to products when they arrive in the destination country and are included in the Customs process.
If you have a question about such taxes, it is always good to consult with a tax authority for
your country or state.
Tax Classification
Select the classification for tax purposes for this product. Products classified other than Standard
may be subject to special tax treatment. Choose from
•
•
•
Standard
Digital
Disability
Inventory
Use Declining Balance Inventory
Indicate whether to use declining balance inventory for this product. If you choose to use
declining balance inventory, be sure to enter an Inventory Level. Items that use inventory and
have a zero inventory level will be unavailable for purchases. This feature will keep customers
from purchasing products that you don’t currently have in stock. It will also keep you from
charging customers for a product you can’t ship to them and then having to reverse charges at a
later time. Of course, this must be monitored closely, as you also want your customers to be
able to order your products at any time.
Inventory Level
This is the inventory level for the product. This inventory level is declined for each item ordered
until it reaches zero if this product is set up to Use Declining Balance Inventory. Enter as '0' if
not used. This is how the software knows what you have and don’t have. It will simply remove
items as customers order until “O” is reached. ClickCartPro/EuropaCart only knows when
products are purchased via the store. If you also have telephone ordering available, this
quantity must be updated to keep it useful.
Minimum Quantity Allowed
This is the minimum quantity allowed in customer shopping carts for this product. Customers will
be unable to add item quantities less than this level. Set this value to zero to disable this
feature.
111
Users Guide
Maximum Quantity Allowed
This is the maximum quantity allowed in customer shopping carts for this product. Customers
will be unable to add item quantities more than this level. Set this value to zero to disable this
feature.
Stock Notification Email List
The stock notification email list contains a comma-delimited list of customer email addresses
which will be notified when this item is available. Email addresses can be added manually using
this interface, or automatically by users by completing the In Stock Notification form on the
detail page for this product.
Delivery
Delivery Method
This is the delivery method for the product. This product can be a service(not be delivered by a
physical carrier), it can be delivered via realtime shipping carriers, a product specified method, a
custom shipping method or it can be a digital download item.
Custom Shipping: Method
If you’ve chosen a “Custom” shipping method, this field will help you decide which custom
shipping method best suits your product. You can base your shipping charge on your Total Item
Cost, your Total Item Quantity, Your Total Item Weight, a percentage of the total Item Cost, or
define your own calculation.
Product Based: Method Screens
These fields are used for the 'Product Based Shipping' delivery type. Enter a name below for the
various product based shipping methods. You may want to bypass the realtime shippers and
just offer blanket pricing on a product. This is where you would offer such a thing.
Example:
112
Users Guide
Ground Shipping2nd Day ShippingOvernight Shipping-
$10.00
$18.00
$1000.00
Realtime Local Delivery Carrier
Here you can choose the standard realtime local (domestic) deliveries that you use. Just check
all of the delivery services you are connected to and your customers will then receive realtime
quotes for shipping on all of their orders. The following shippers are currently supported in
ClickCartPro/EuropaCart:
•
•
•
•
FedEx DirectConnect
InterShipper
UPS Online Tools
USPS WebTools
Realtime International Delivery Carrier
This field is used for the 'Realtime Carrier' delivery type for international orders. Select one or
all of the carriers that you will use. Their rates and options will be displayed to your customers
after you configure the rest of your site. The following list is currently supported in
ClickCartPro/EuropaCart.
•
•
•
•
FedEx DirectConnect
InterShipper
UPS Online Tools
USPS WebTools
Realtime and Custom: Item Length
This field is used for the 'Realtime Carrier' delivery type. Enter a length for this item. This
dimension should be entered in inches (IN) or centimeters (CM) depending on the global
dimension setting selected in Shipping Settings.
Important Note:
If you plan on using realtime shipping quotes, it is important that you take the time to
accurately reflect the measurements of your products. This information insures that your
customers receive accurate shipping quotes and that you are not over-billed and underpaid by
the customers for their shipments.
Realtime and Custom: Item Width
This field is used for the 'Realtime Carrier' delivery type. Enter a width for this item. This
dimension should be entered in inches (IN) or centimeters (CM) depending on the global
dimension setting selected in Shipping Settings.
Realtime and Custom: Item Height
This field is used for the 'Realtime Carrier' delivery type. Enter a height for this item. This
dimension should be entered in inches (IN) or centimeters (CM) depending on the global
dimension setting selected in Shipping Settings.
113
Users Guide
Realtime and Custom: Item Weight
This field is used for the 'Realtime Carrier' and 'Custom Shipping' delivery types. Enter a weight
for this item. This weight should be entered in pounds (LB) or kilograms (KG) depending on the
global weight setting selected in Shipping Settings.
Realtime and Custom: Number of Boxes
This field is used for the 'Realtime Carrier' delivery type. Select how many boxes this item is
shipped in. You can choose from one to six boxes.
• Group With Other Items
• Multiple Box Selector
Realtime and Custom: Origin State
This field is used for the 'Realtime Carrier' delivery type. Select which state or province this item
is shipped from. If there is nothing special about how you deliver this product, the default values
will be filled in for you with your default address. This simply lets your shipping services know
where the product will ship from to determine the rates.
Realtime and Custom: Origin Country
This field is used for the 'Realtime Carrier' delivery type. Select below which country this item is
shipped from. If there is nothing special about how you deliver this product, the default values
will be filled in for you with your default address. This simply lets your shipping services know
where the product will ship from to determine the rates.
Realtime and Custom: Origin Zip/Postal Code
This field is used for the 'Realtime Carrier' delivery type. Enter below the zip/postal code this
item is shipped from. If there is nothing special about how you deliver this product, the default
values will be filled in for you with your default address. This simply lets your shipping services
know where the product will ship from to determine the rates. You would only need to change
this if you ship from a different location that your business office.
Dropshipper Email Addresses
Enter a single or comma-delimited list of email addresses to which order email messages should
be sent for orders containing this item. Recipients of dropshipper messages will receive product
and delivery information only - not customer account information.
Digital Download
Download: File
If you sell downloadable software products, you can select the file name here and upload to a
secure directory on your server. There is a single user name and password for download
products. When a customer buys a downloadable product they get a link to a specific file in the
public download directory and the user name and password (which are the same for everyone).
The user name and password are set in admin under Core/Settings/Download Directory Settings
Download Directory Settings
114
Users Guide
Important Note:
For security reasons, you should probably change this name and password weekly.
Related Categories
Categories cannot only be selected from this area, but now, can also be created here. To add a
new category to this list, simply click on Create: Add A New Item and then assign that new
category to this product by selecting it from the list.
This checklist includes all of the currently active categories. Simply check the appropriate
related categories for this product. This product will just appear on every category page that
you choose here.
Related Products
This checklist includes all of the currently active products. Simply check the appropriate related
products to this product. If selected, these items will appear at the bottom of each product page
and look like this:
Related Product Options
If you selected the 'Option Based' pricing type, you must relate this product with at least one
product option. For all other types you can relate this product to zero or more product options.
Enter a single ID or a comma-separated list of multiple IDs for product options that are related
to this product. There is a link called Related IDs that you simply click on to see all of the
categories you can choose from.
Here you simply check the Product Option categories that you want to present on this product.
If you sell computers and want to offer hard disk upgrades, you would select the heading where
you offered several different hard disk options. Now you can also create new product Options
from within this Product Category.
115
Users Guide
Simply click on Create: Add a new item and you’ll be able to do all of your relationship work
from within one menu. Once created, just click on the “Relate” radio button on the left.
Visibility
Product Visibility/Product Visibility Selection
This field allows you to control which users can view this product. You can set this product up to
be viewed by anyone (for all of your standard customers), only users belonging to the
groups you specify using the Product Visibility Groups field (see the groups listed below),
or to be hidden from everyone (perfect when you’re working on products for a future release
that you aren’t quite ready for everyone to know about just yet)
Product Visibility Groups
If you selected to allow only certain user groups to access this product under the Product
Visibility Selection field, select the groups for which this product should be made visible.
116
Users Guide
Commerce
The Commerce section deals with everything you need in regards to orders placed on your store
and setting up your store for commerce.
Checkout Form Fields
This field controls the various alternative checkout options that a customer may present. This
will help you set up special forms for Gift Certificates, Discounts, Tax Exempt customers, etc.
This is an example of how this form looks on your checkout:
Display Name
The display name for the field used in XHTML output during checkout and in mail messages. See
the example below:
Form Section
The name of the section of the checkout form this field should be printed in. To create a new
section, simply enter in a section that has not yet been used. See above for an example of
where you text goes in the Form Section.
Display Description
This simply gives more detail to the customer to aid them in filling out this particular section of
the form. It can be displayed for the form field in XHTML output. See example below:
Important Note:
117
Users Guide
All Kryptronic products now contain a WYSIWYG (What You See Is What You Get) editor on fields
that contain XHTML code. Why is this, you may ask? Now, text entries can be automatically
converted to XHTML by simply typing them into this field and then clicking on the
Bold/Italic/Underline and other text tools just like you do in a word processor. The software now
just converts it for you so you don’t have to learn basic HTML programming. To launch the
WYSIWYG editor just click on the blue WYSIWYG Editor: Load Editor link located in the various
appropriate fields. It will launch the WYSIWYG toolbar that looks like this:
Required Indicator
Must your customer select something in this field in order to complete the order? If the answer
is yes, set this indicator to “True”. If not, set this indicator to “False”
Display Indicator
Indicator used to determine whether this field is displayed on the checkout form. Set this field to
“True” to display it and “False” to hide it.
Form Field Type
This is the XHTML form field type used to display the checkout field. Just like other option fields
in the software, if you select a field type of Selection, Checkboxes or Radio Buttons, make sure
you enter at least one item in the Selection Items field that follows.
Field Order
This field allows you to place the checkout form elements of your shopping cart in the order you
choose. Start with “0” and work on up. The fields are sorted in ascending order based on this
numeric indicator.
Selection Items
If you’ve chosen a list of items to choose from during checkout, this is where you would display
them. You have 20 different fields that you can enter data into that will be displayed in the
format you’ve chosen above. In this case, the items are displayed in the Radio Buttons (List).
See example below:
118
Users Guide
Custom Sale Methods
From here you can create custom sale methods that you can offer your customers. Some of the
built in templates include: Buy X Items Save Y Amount, Buy X Items Save X Percent, Total Of X,
Save Y Amount, Total Of X, Save Y Percent. These are just creative templates to help you
encourage your customers to purchase more items on your store.
Identifier
This identifier is used within the software to specify this custom sale method. This is only for the
backend identity of this method, so you can abbreviate it if you choose.
Display Name
This is the name for this custom sale method.
Sale Method PHP Content
Enter the content for this custom sale method below. This content should be written in standards
compliant XHTML and should contain PHP code. The PHP code in this custom sale method should
be based on the XHTML Includes used by this software.
Custom Surcharge Methods
Custom Surcharge Method/Identifier
This identifier is used within the software to specify this custom surcharge method.
Display Name
This is the name for this custom surcharge method.
119
Users Guide
Surcharge Method PHP Content
Enter the content for this custom surcharge method in the space provided. The PHP code in this
custom surcharge method should be based on the includes used by this software.
Discount Codes
This field will allow you to manage any discounts you may offer your customers throughout the
year. You can offer percentage-based pricing, flat discounts on all or selected products, or free
shipping for all or selected products.
Discount Code Identifier
This is the background identity information that the software uses to identify this discount code.
It is never displayed, so feel free to abbreviate it.
Discount Code Type
Select Expiring to disable this discount code when empty. Select a Non-expiring type to keep
the code intact for multiple uses.
Discount Code Value
This is the discount code value. Enter a currency amount using the base currency for this
application or enter a percentage amount. If you enter a percentage, be sure to include the
percent sign (%) after your entry (example: 10.000%). If you enter a currency amount, do not
include a currency symbol - enter only an amount (example: 10.00). To make this code good for
free shipping, enter 'FREESHIPPING' for the value instead of a currency amount or percentage
amount.
Active Status
Set this field to “True” if you are currently offering this discount. Set it to “False” if this discount
is currently not being offered.
Discount Delivery Charges
This indicator when set to true makes this discount code applicable to delivery charges. When
set to false, delivery charges are not discounted.
Product Limitations
Product Limitation Type
Select the product limitation type (if any) for this discount code. You can limit this code to only
related products that you’ll select, to all products or to everything but the products you’ve
excluded in the Related Products Field. This “Apply To All Except Related Products” entry can be
handy if your discount applies to just about everything in your store but a few items.
120
Users Guide
Related Products
Here, you can simply check the products that you want this discount to apply to.
Processing Gateways
This field controls the processing gateways that you use to process credit cards on your web
site. You have many different options to choose from here. If you already have a web store set
up, you probably already have a gateway that is likely supported here. If you are new to setting
up your store, then you have many “canned” options that you can choose from and you can add
as your store grows and more support is required.
Many small businesses do not carry stock of every single product that they advertise on their
web stores. In this case, you probably don’t want your store to process the cards of your
customers automatically. Perhaps you would prefer to process cards manually and only charge
your customers at the time of shipment. ClickCartPro/EuropaCart offers you enough flexibility
that you can configure it to match the exact methods that fit your working style.
If you have experience adding gateways and do not see your particular gateway support, simply
click on the Add button and follow the following steps.
If you do see the various gateways you use all listed, simply scan to the end of this chapter and
each individual gateway is addressed with specific instructions provided so that you can hook
that gateway into your checkout system.
Much of this information is obtained when you sign up for a particular gateway.
Payment Gateway/Identifier
This unique gateway identifier is used to identify this gateway within the software. This identifier
must be unique, but can be abbreviated, as your customers will not see it.
Gateway Name
This name is used within the software to reference this gateway. It is referred to by
administrators on the backend and not displayed for the customers.
Active Status
This field shows the current status of this gateway. If you set it to “True”, this gateway will be
made available for checkout processing.
Gateway URL Type
This is the type of URL used by this software. An internal URL uses this software and embedded
online processing classes for processing. It is capable of approving a credit charge without any
manual intervention. It simply means that the software contacts the payment processing
gateway directly under the covers and requests authorization for the credit charge the customer
121
Users Guide
entered then presents the results to the customer (approved or not) and does the appropriate
post processing if applicable. An external URL uses an external URL with a relay and response
transaction much like old style manual credit card machines that dialed up a secondary company
to obtain an approval.
Field Display Text
This display text is used to present an option for this gateway to the customer during checkout.
It better describes this method so your customers understand which choices they want to make.
Field Display Order
The field order numeric allows display of the gateways in the checkout form in a particular order.
The fields are sorted in ascending order based on this numeric indicator. Start with “0” for the
first option you want to present on up.
Perform Post-Order Updates
Indicate whether orders processed using this gateway should perform post-order updates
automatically. Post-order updates include updating inventory and discount codes as well as
affiliate commissions. Post-order updates should only be performed for gateways that process
transactions in real time.
Supports Recurring Billing
Indicate whether this gateway supports recurring billing.
Fields/Response Field Name: Response Code
This field is marked Advanced because it should never need to be changed by the storeowner.
Every processor integration uses a response code field to transmit a transaction authorization or
failure code back to this software.
Response Field Name: Order Number
Every processor integration uses an order number field to transmit the transaction order number
back to this software with a response code. Enter the order number field used by this gateway
below. Again, this should never be changed by the store owner, as the information should
always be correct.
122
Users Guide
Request Field Name: Order Total
For processor integrations that use internal URLs for processing, this field is used to ensure the
order total has not been tampered with by the customer. The value of field you specify here is
matched against the order total to verify the order total is accurate.
Security/Response Codes
Enter a single or comma delimited list of response codes issued by this gateway. All codes
entered here should be valid codes that represent an accepted transaction. Do not include failed
transaction response codes here. Again, this should never be changed by the store owner, as
the information should always be correct.
Security/Referring URL String
The referring URL string contains text that must be contained in the referring URL for orders to
be accepted using this gateway. Typically this string is set to an application script name or
processor domain name.
Transaction Key/Password
Some gateways require the use of a transaction key, hash or password to process transactions.
If this gateway requires such a key, hash or password, enter it here. Gateways that require a
transaction key include: Authorize.net/Wells Fargo AIM and SIM, ECHOnline, EFSNET, NetBilling
and FirstPay.
Gateway User/Store ID
For gateways that require the use of a user id or store number, enter that here. Any additional
information to be entered for your account (example: Verisign Partner ID) is entered directly in
the Form Display Code field in a few steps.
Form Display Code
The PHP code entered here is used to set up the XHTML form used to process an order for this
gateway. The PHP code in this display should be based on the XHTML Includes used by this
software. Any XHTML content included in this display should be written as standards compliant
XHTML.
Supported Payment Methods and Instructions For Installation
The following customer payment methods are supported within the software. Just locate the
methods that you prefer to use and follow the instructions for their use within your store.
PayPal Website Payments Pro Management
Configuring the PayPal Website Payments Pro payment method is quite easy. All of the controls
are in the Orders and Payment menu. This is how you can quickly set up PayPal Website
Payments Pro:
STEP 1: Getting Your Webserver Ready
123
Users Guide
1. The PayPal Website Payments Pro payment methods require you to use a secure server
for processing credit cards transparently using the 'PayPal (Pro Direct Method) - Secure
Server' method. Make sure your host has set up a secure (SSL) webserver account for
you. If you did not originally configure SSL URLs when you installed the program, access
the installer to do so.
STEP 2: Getting Your PayPal Account Ready
1. Login to your PayPal account at www.paypal.com.
2. Click the 'Profile' tab, then select the 'API Access' link.
3. Click the 'API Certificate Request' link, complete the form on the following page. Make
note of the account name and password you select and then click 'Continue'. On the
following page, review the information submitted, and if it's correct, click the 'Generate
Certificate' link. On the next page, click the 'Download' link and save the file
'cert_key_pem.txt' to your computer.
4. Click the 'Merchant Tools' tab and select the 'Virtual Terminal' link next to the PayPal
Website Payments Pro section.
5. Complete the Virtual Terminal application and wait approximately two days to receive
your approval email.
6. Once you receive your approval email, login to PayPal, select the 'Virtual Terminal' link
again and choose to Accept the Monthly Billing Agreement.
STEP 3: Setting Up ClickCartPro/EuropaCart
1. Access the management interface function | Settings: Application Settings Menu | PayPal
Website Payments Pro Settings.
1. Save your key file. Simply paste the contents of your key file into the Keyfile Contents
field.
2. Set 'Enable PayPal Website Payments Pro Express Checkout Link' to true.
3. In the field 'API Login: User Name', enter in the account name you selected when setting
up your certificate key file on PayPal's site.
4. In the field 'API Login: User Password', enter in the password you selected when setting
up your certificate key file on PayPal's site.
5. None of the other fields on that page need to be modified.
6. In the management interface, select Commerce/Manage Processing Gateways
function.
124
Users Guide
7. If you previously accepted payments using PayPal's Standard method, and the payment
method 'PayPal (Standard Method) - Payment Form' is 'Active', choose to 'Update' that
method and set it to 'Inactive'.
8. Choose to 'Update' the 'PayPal (Pro Express Method) - Payment Form' payment method.
Set that method to 'Active'. You only need to update that single field on this page.
9. Choose to 'Update' the 'PayPal (Pro Direct Method) - Secure Server' payment method. Set
that method to 'Active'. You only need to update that single field on this page.
10.After you have completed these steps, your online store will be ready to accept payments
via PayPal Website Payments Pro.
Recurring Billing
Please note: The PayPal Website Payments Pro API (Application Programming Interface)
available from PayPal does not support recurring billing transactions. If you need to support
recurring billing transactions in real time through your online store, and you would like to use
PayPal, choose to use the 'PayPal (Standard Method) - Payment Form' payment method.
Online Processing Setup
Configuring available payment methods is quite simple. All of the controls are in the
Commerce/Manage Processing Gateways function.
If you plan on using the recurring billing function of the software, please refer to the Recurring
Billing section.
First, you have to decide which type of order process best suits your site. You can choose more
than one of the following methods:
Contact Customer
No payments accepted online. The customer is notified that you will contact them via telephone
to discuss payment options. Though this saves you any online processing and security issues, it
also means that you have to manually call each customer to obtain the correct payment method.
This is the default method used while you are setting up your store before other customer
payment options are added.
Offline Processing (Credit Card & Switch/Solo Cards)
Collect credit card and/or Switch/Solo card information on your own secure server, encrypt the
numbers and then email the primary order email address an encrypted decrypt key. Credit card
numbers can then be decrypted using the Manage Online Orders function. This would be used
for stores that want to run credit cards manually. This can be handy if you have products that
you must order in or ship later than same day…it keeps customers happy when there card isn’t
charged before the product is shipped.
125
Users Guide
Accept Checks or Purchase Orders
You can allow your users to pay by check or purchase order by presenting them with a
printable/faxable version of their order that can be sent in to you for payment. This method can
be particularly appealing to customers who fear identity theft via Internet credit card
transactions.
Process Payments Through PayPal
You can accept payments with your PayPal account. If users don't have their own account, they
will be prompted by PayPal to create one.
Process With A Payment Gateway
This is the application id that is being used in most cases it is ccp0 or gbu0 (British version)
Be sure to remove the {} when making the changes in the processor site and only use ccp0.
Collect credit card information on your own secure server and have an online processing partner
validate and process the order or use an online processing partner's secure order form for credit
card number entry. Both methods are supported and are easily configurable. If you have a large
supply of products that are always in stock, this is the quickest method for processing payment
and shipping orders.
Currently a large listing of payment processors are supported:
1.
2.
3.
4.
5.
6.
7.
8.
9.
10.
11.
12.
13.
14.
15.
16.
17.
18.
19.
20.
21.
22.
23.
24.
25.
26.
27.
Authorize.Net (SIM & AIM)
Cardservice Linkpoint (HTML & API)
Verisign (Payflow Link)
iTransact
WorldPay (WorldDirect)
Planet Payment
RTware
2CheckOut (Authnet)
Wells Fargo (Secure Source & BOA)
PaySystems
ViaKlix
GoRealtime.Com
ECHOnline
EFSNET
InternetSecure
PlugNPay
SurePay
SkipJack
PSiGate
Netbilling
BluePay (API)
FirstPay
Protx
Paypoint.net (SECpay)
NoCHEX
EPDQ
HSBC
126
Users Guide
To configure this software package to work properly with your online processing partner's
methods, every bit of information that is transmitted can be configured. In some cases, namely
the interfaces that do not use a third party payment gateway, it is not necessary to make any
modifications.
If you are using a third party payment gateway, you will need to enter your username /
storename / storeid in the Gateway User/Store ID field. You will need to replace the string
'your_username' with the username your processor assigned to you.
Since all pieces of transmitted information are configurable and this package is an open source
the opportunity is here to configure this package for processors other than those that are
provided in the package. There is an insert function available in the management interface to
allow you to configure a processor that is not currently supported. Just follow a similar
processor's entry as an example if you choose to create a new one.
In addition, it is possible to post information from this program to another secure script, even an
ASP script on an NT web server. The information collected there can be sent, for validation, off
to your online processing partner's site before returning to your non-secure site for order
fulfillment. The possibilities are endless. This program is capable, however, of running securely
on it's own.
If your selection was to use a Secure Server method, edit the list of credit cards in the Form
Display Code field. If you selected to use an online processing partner's payment form this
information will be collected on their site.
Setting Up Specific Online Processors
Several online processors are listed below because their setup requires additional configuration
using the admin functions on their site or require the entry of a key or password in addition to
the username entry required by all. Review the instructions below.
If your processor is not listed below with specific instructions, no configuration on their site using
their admin utility is necessary. The following processors do not require additional setup but do
require that your password be entered in addition to your username. Passwords are entered in
the 'Transaction Key/Password' field and are encrypted for your security.
1.
2.
3.
4.
5.
EFSNET
FirstPay
SurePay
Paypoint.net (SECPay)
NOChex
The remaining processors below require additional configuration using the processor's site admin
utility.
Authorize.Net AIM & Wells Fargo (Authnet Interface)
127
Users Guide
1. Login to your account at the processor's site and choose the Settings function.
2. Under the Settings | Test Mode function, set the system to 'LIVE MODE'.
3. Under the Settings | Transaction Version function, set the Transaction Version to '3.1'.
128
Users Guide
4. Under the Settings | Password-Required Mode function, check the box next to 'Require
Password for ALL Transactions'.
5. Under the Settings | API Login ID and Transaction Key function, provide your 'Secret
Answer' and check the box labeled 'Disable Old Transaction key'. After clicking the Submit
button, you will be presented with your Transaction Key, which you will need to copy. You
will also be given your Gateway User/Store ID*. Make a note of that as well.
129
Users Guide
6. Under the Settings | Payment Form | Form Fields function, uncheck every Required
column checkbox, then check these two: Invoice # - Required and Customer ID Required.
7. Logout of your account at the processor's site and login to the ClickCartPro/EuropaCart
management admin.
8. Click on Store | Commerce | Processing Gateways
130
Users Guide
9. For the Payment Method select the appropriate payment method. Click on Update.
10.Set the Active Status to True.
131
Users Guide
11.Click On Security.
12.Now enter your id in the Gateway User/Store ID field. Replace the string 'your_username'
with your processor login. You made a note of this in step 5.
13.In the 'Transaction Key/Password' field, enter the Transaction Key you created and copied
while using the processor interface. You also made a note of this in step 5.
14.Click 'Submit' and log out of the management interface. You are done.
Authorize.Net SIM
1. Login to your account at the processor's site and choose the Settings function.
132
Users Guide
2. Under the Settings | Test Mode function, set the system to 'LIVE MODE'.
3. Under the Settings | Transaction Version function, set the Transaction Version to '3.1'.
133
Users Guide
4. Under the Settings | Password-Required Mode function, check the box next to 'Require
Password for ALL Transactions'.
5. Under the Settings | API Login ID and Transaction Key function, provide your 'Secret
Answer' and check the box labeled 'Disable Old Transaction key'. After clicking the Submit
button, you will be presented with your Transaction Key, which you will need to copy. You
will also be given your Gateway User/Store ID*. Make a note of that as well.
6. Under the Settings | Payment Form | Form Fields function, uncheck every Required
column checkbox, then check these two: Invoice # - Required and Customer ID Required.
134
Users Guide
7. Logout of your account at the processor's site and login to the ClickCartPro/EuropaCart
management admin.
8. Click on Store | Commerce | Processing Gateways
9. For the Payment Method select the appropriate payment method. Click on Update.
135
Users Guide
10.Set the Active Status to True.
11.Click On Security.
12.Now enter your id in the Gateway User/Store ID field. Replace the string 'your_username'
with your processor login. You made a note of this in step 5.
13.In the 'Transaction Key/Password' field, enter the Transaction Key you created and copied
while using the processor interface. You also made a note of this in step 5.
14.Click 'Submit' and log out of the management interface. You are done.
136
Users Guide
2CheckOut
1. For the Payment Method select the appropriate payment method.
2. In the Update Payment Method function set the Active Status to Active.
3. Now enter your id in the Gateway User/Store ID field. Replace the string 'your_username'
with your processor login.
4. Logout of the management interface and open a browser session with your online
processor. Login to your account and select the Shopping Cart | Cart Details function. Set
the value for the field named "Return to a routine on your site after credit card processed"
to "Yes". For the "Return URL" field, enter in the full path to your script. Example:
http://www.yourdomain.com/core/relay/{APP}.php
5. Log out of processor's admin utility. You are done.
WorldPay
1. For the Payment Method select the appropriate payment method.
2. In the Update Payment Method function set the Active Status to Active.
3. Now enter your id in the Gateway User/Store ID field. Replace the string 'your_username'
with your processor login.
4. Logout of the management interface and open a browser session with your online
processor. Login to your account and select the Settings function.
5. In the Installations section, click the button under Configuration Options for the
Installation ID you want to manage.
6. On the Configuration Options page, enter the full http path to your script (Example:
http://www.yourdomain.com/core/relay/{APP}.php) in the 'Merchant's Shop URL' and
"Callback URL" fields. Then check the boxes next to "Callback enabled?" and "Use callback
response?". Click the "Save Changes" button.
7. Log out of processor's admin utility. You are done.
Cardservice Linkpoint (API Only)
1. When you signed up for your API processing account at linkpoint, you were provided with
a key file. The contents of this key file need to be copied into the Linkpoint API Keyfile
Contents field in the Store/Component/Settings/Linkpoint API Settings function.
137
Users Guide
2. No other configuration is necessary for this method (other than entering your id in the
Gateway User/Store ID field by replacing the string 'your_username' with your processor
login).
Cardservice Linkpoint HTML
1. Using the administrator, click on Store/Commerce/Manage Processing Gateways
function.
2. For the Payment Method, select the appropriate payment method.
3. In the Update Payment Method function, set the Active Status to Active.
4. Now enter your id in the Gateway User/Store ID field. Replace the string 'your_username'
with your processor login.
5. Logout of the management interface and open a browser session with your online
processor. Login to your account.
6. Go to Customization then Payment Form Settings and make the following changes:
Delete any text in the "Recipient's Top" and "Recipient's Bottom" textboxes. For the
"Order Submission Form URL", enter in the full path to your script. Example:
http://www.yourdomain.com/core/relay/{APP}.php For the "Thank You Page URL", enter
in the same URL as above and check the boxes for "Check here if this url is a CGI script."
and "Check if you wish to automatically display specified URL after the LinkPoint HTML
receipt page." Make sure both are checked. For the "Sorry Page URL", enter in the same
URL as above and check the boxes for "Check here if this url is a CGI script." and "Check
if you wish to automatically display specified URL after the LinkPoint HTML receipt page.".
Make sure both are checked. In the "Custom Fields" section, enter in under the column
"Name" for #1: "usrnum" and for #2: "tracknum". There is no need to check the boxes
for "Make Viewable" or enter anything in the field "Caption" for either of these "Name"
entries. In the "Customer's Receipt" section, uncheck the box "Check here if you would
like to receive a copy of each receipt". You don't want CardService sending anything to
your customer as the software does it for you. Click "Submit" at the bottom of the page.
7. Log out of processor's admin utility. You are done.
Wells Fargo (BoA Interface)
1. Using the administrator, click on Store/Commerce/Manage Processing Gateways
function.
2. For the Payment Method, select the appropriate payment method.
3. In the Update Payment Method function, set the Active Status to Active.
138
Users Guide
4. Now enter your id in the Gateway User/Store ID field. Replace the string 'your_username'
with your processor login.
5. Logout of the management interface and open a browser session with your online
processor. Login to your account.
6. Using the processor's admin interface, turn off all notification by email, both to you and
the customer.
7. Change your confirmation pages to custom instead of the default page and make the
address for both pages 'http://www.yourdomain.com/core/relay/{APP}.php' or whatever
location you have the program located. Regardless, make this the address for *BOTH*
your reject and accept confirmation pages in the custom confirmation pages.
8. Log out of processor's admin utility. You are done.
Verisign Payflow Link
1. Using the administrator, click on Store/Commerce/Manage Processing Gateways
function.
2. For the Payment Method, select the appropriate payment method.
3. In the Update Payment Method function, set the Active Status to Active.
4. Now enter your id in the Gateway User/Store ID field. Replace the string 'your_username'
with your processor login.
5. Logout of the management interface and open a browser session with your online
processor. Login to your account. Select the Account Info function.
6. Go to General - Edit Configuration and make the following changes: For Return URL
Method, choose POST. For Return URL, enter the full http path to your script. Example:
http://www.yourdomain.com/core/relay/{APP}.php For Required Fields, check the boxes
for Name, Address, City, State, Zip, Country and Email.
7. Go to Security Options and make the following changes: Add the full http path to your
script as an "Accepted URL". Example:
http://www.yourdomain.com/core/relay/{APP}.php
8. Click the submit button at the bottom of the page to update your settings.
9. Log out of processor's admin utility. You are done.
ECHOnline Credit Card
139
Users Guide
1. There is no configuration needed using the ECHO management interface - just be sure to
have your ECHO merchant id and password that were issued to you.
2. Login to the management interface.
3. For the Payment Method select the appropriate payment method.
4. In the Update Payment Method function set the Active Status to Active.
5. Now enter your id in the Gateway User/Store ID field. Replace the string 'your_username'
with your processor login.
6. In the 'Transaction Key/Password' field, enter the password you have been issued for your
merchant id.
7. Click 'Submit' and log out of the management interface. You are done.
Planet Payment & RTware
1.
Using the administrator click on Store/Commerce/Manage Processing Gateways
function.
2.
For the Payment Method select the appropriate payment method.
3.
In the Update Payment Method function set the Active Status to Active.
4.
Now enter your id in the Gateway User/Store ID field. Replace the string
'your_username' with your processor login.
5.
Logout of the management interface and open a browser session with your online
processor. Login to your account and select the Settings function.
6.
Select the General Connection Setup function, then Response String Version. Ensure
that the response string version is set to 3.1.
7.
Under the General Connection Setup function, select the Referrer URLs function. Choose
to add a URL and on the following page, enter the full http path to your script.
8.
Under the General Connection Setup function, select the Response/Reciept URLs
function. Choose to add a URL and on the following page, enter the full http path to your
script. You do not need to make this a default Recipient Link or Relay Response URL, but
it's acceptable if you choose to do so.
9.
Under the Payment And Receipt Forms function, select the Receipt Method function.
Select to use a POST receipt method. Enter the full http path to your script in the
Recipient Link URLs field.
140
Users Guide
10. Under the Payment And Receipt Forms function, select the Form Fields function. There
uncheck every checkbox, then check these two: Invoice # - Required and Customer ID Required.
11. Under the Automated Direct Connect function, select the ADC Relay Response function.
Enter the full http path to your script in the URL field.
12. Under the Security function, uncheck the Require Password For All Transactions box.
13. Under the Email Receipts function, uncheck the Email Transaction Receipt To Customer
box.
14. For the CVV2 Verification and Address Verification functions, select levels that you feel
comfortable with.
15. Log out of processor's admin utility. You are done.
SkipJack
1. Login to your account at the processor's site and choose the 'Preferences' function.
2. Select the 'Response Files' function.
3. Click the 'Send Customer to the following WebPages/URLs' radio button and in the four
text boxes provided under that button, enter in the full path to your script. Example:
http://www.yourdomain.com/core/relay/{APP}.php. The same entry goes in all four text
boxes.
4. Logout of your account at the processor's site. You are done.
PSiGate
1. Enter your id in the Gateway User/Store ID field. Replace the string 'your_username' with
your processor login.
2. The default PSiGate response method is a GET response. If you have changed this to a
POST response at PSiGate, change back to GET.
3. PSiGate regulations specify that you must inform them whether you will be using their
payment form or your own secure server to collect credit card information. Inform them of
the method you're using and PSiGate will configure your account correctly.
NetBilling
1.
Under the Fraud Controls function, choose the Fraud Defense sub-function. Under the
Enable Fraud Defense heading, make sure that Fraud Defense is Enabled. Under the
141
Users Guide
Order integrity heading, make sure 'Enforce order integrity' is checked. Copy the Order
integrity key as you will need it later. Make any other changes to these settings you
wish. Click the Apply button.
2.
Under the Security function, choose the Access Security sub-function and for Payment
Form Interfaces, make sure that 'Enable Payment Form V2.x (Universal) interface' is
checked. Click the Apply button.
3.
Under the Setup function, choose the Website tools sub-function and click 'Browse
Sites'. Choose to add a new site at the bottom of the list. Enter a Site Tag, Site Name
and URL. Make note of the Site Name you choose. The URL used here is for reference
only, so you can enter your main site URL here (not the full http path to {APP}.php).
4.
On the same page, next to the site you've added, click the 'Config' link. On the following
page, enter your name, phone and email address in the Website Information section.
Then, in the Default payment form settings section, enter the full path to your script for
the Return URL and GiveUp URL fields. Example:
http://www.yourdomain.com/core/relay/{APP}.php. Also, set the Return Method to
POST and the Postback CGI URL to blank. For the Payment options field, make sure
'Accept Credit Card payments for this site' is checked and the Payment Form field is set
to the default for your Site Name. Click the Apply button.
5.
Return to the Setup function, then choose the Website tools sub-function and click
'Browse Sites'. Next to the site you added previously, click the 'Email' link. On the
following page, in the Email templates sent to merchant section, enter your email
address in the 'To' field, and select the any email templates for your site you wish to use
for the Standard receipt and Decline notice emails (if you don't want to use the default
templates). Click the Apply button.
6.
Logout of your account at the processor's site and login to the management interface.
7.
For the Payment Method select the appropriate payment method.
8.
In the Update Payment Method function set the Active Status to Active.
9.
In the Processor Username field, replace the string 'your_accountnum:your_sitename'
with your account number, followed by a colon (:) followed by the Site Name you
created using the NetBilling administrator.
10. In the 'Transaction Key/Password' field, enter the Crypto Hash you copied while using
the processor interface.
11. Click 'Submit' and log out of the management interface. You are done.
CyberSource
1.
Login to your Cybersource account and select the Tools And Settings menu option.
2.
Access the Account Information function in the Settings menu.
142
Users Guide
3.
In the 'Process Payment Transactions' section, select 'Hosted Order Page (HOP)' from
the drop-down menu.
4.
In the 'Duplicate Order Check' section, select 'Decline duplicate orders' by checking the
box next to that option.
5.
In the 'Shopping Cart' section, select 'ClickCartPro/EuropaCart' from the drop-down
menu. If 'ClickCartPro/EuropaCart' is not listed, select 'Other' then enter
'ClickCartPro/EuropaCart' in the text box below the drop-down menu.
6.
Click the 'Update' button at the bottom of the page.
7.
Access the Hosted Order Page Settings function in the Settings menu.
8.
In the 'Simple Order POST' section, select 'Do not show the Hosted Order Page to my
customers' by checking the box next to that option.
9.
In the 'Payment Details' section, de-select 'Display Tax Amount' by un-checking the box
next to that option.
10.
In the 'Payment Types | Credit Cards' section, select all credit cards you wish to accept
by checking the box next to each card name. In addition, check the 'Display' box for
each CVV/CID/CVN option and un-check the 'Require' box for each CVV/CID/CVN option.
11.
In the 'Billing Information' section, check the 'Display' box and un-check the 'Edit' box
for the Billing Fields.
12.
In the 'Shipping Information' section, check the 'Display' box and un-check the 'Edit' box
for the Shipping Fields.
13.
In the 'Appearance | General' section, enter your company name in the 'Company
Display Name' field and select the color scheme you wish to use by choosing it from the
'Color Scheme' drop-down menu.
14.
In the 'Appearance | Order Page' section, enter any HTML you wish to use for the
'Header' and 'Footer'. Leave the 'Background Image URL' field blank.
15.
In the 'Appearance | Receipt Page' section, enter the full http path to your script
(Example: http://www.yourdomain.com/core/relay/{APP}.php) for the 'Receipt
Response URL' field.
16.
In the 'Appearance | Decline Page' section, enter the full http path to your script
(Example: http://www.yourdomain.com/core/relay/{APP}.php) for the 'Decline
Response URL' field.
17.
In the 'Email | Addresses and Options' section, check the box next to the 'Send
Merchant Receipt Email' field and enter your email address in the merchant's 'To
143
Users Guide
Address' field. Un-check the box next to 'Send Customer Receipt Email'. For the
customer email section, you can leave the 'From Address' and 'From Name' fields blank.
18.
In the 'Email | Appearance' section, you can leave the 'Header' and 'Footer' fields blank.
19.
Click the 'Update' button at the bottom of the page.
20.
Access the Security Keys function in the Settings menu.
21.
In the 'Generate HOP Script' section, select the PHP option, and save that script to your
computer's hard disk drive. Make a note of the location of that script. It's named
'HOP.php'.
22.
Access the Smart Authorization function in the Settings menu.
23.
In the 'Smart Authorization' function, there are quite a few options for fraud settings.
Set those authorization fields to whatever level you feel most comfortable with.
24.
Click the 'Update' button at the bottom of the page.
25.
Log out of processor's admin utility and login to the management interface.
26.
For the Payment Method select the appropriate payment method.
27.
In the Update Payment Method function set the Active Status to Active.
28.
In the Form Display Code section, follow the instructions regarding storing the HOP.php
file you created on your server.
Recurring Billing
This software supports recurring billing transactions. For all payment methods that support
recurring billing, the order process is exactly the same for customers.
Manual recurring billing requires that the store owner process the recurring transactions
manually either by charging payment cards or sending invoices to customers on a recurring
basis. The following payment methods support manual recurring billing:
1.
2.
3.
4.
5.
Contact Customer
Offline (Credit Card)
Offline (Switch/Solo)
Check Payment
Purchase Order
Fully automatic recurring billing requires no action by the storeowner to process recurring
transactions. As part of the order process, the recurring transactions are set up with the
processor and automatically set to occur. The following payment methods support fully
automatic recurring billing:
144
Users Guide
1. Cardservice Linkpoint API - Secure Server
2. PayPal (Standard Method) - Payment Form
Semi automatic recurring billing requires initial action by the store owner to process recurring
transactions. As part of the order process, the recurring transactions are set up with the
processor, but need to be activated by the store owner. The following payment methods support
semi automatic recurring billing:
1. Authorize.Net AIM Credit Card - Secure Server
2. Wells Fargo (Authnet) Credit Card - Secure Server
For these semi automatic recurring billing payment methods, follow the instructions below to
activate the recurring billing:
1. Login to your account at the processor's site and choose the Settings function.
2. Once transactions have settled, access the 'Search and Download' function and search for
the transaction you would like to make recurring. All transactions initiated by the software
that should be made recurring have an order number ending with an 'R'.
3. When you choose to view the Transaction Detail page for the order, you will see a link
named 'Create ARB Subscription from Transaction'. Click this link and complete the
'Create New ARB Subscription' form to set the transaction up as recurring.
4. Please note: As part of the order process, the first month's payment is made to set the
order up on the Authorize.net system. You will need to start date to one month in the
future to avoid double billing for the first month.
ProTX/Sagepay Form
1. In admin under Commerce/Manage Processing Gateways click on Update next to the
Gateway Name Sagepay (Protx) - Payment Form
2. Change the Active Status to True
3. Change the Gateway User/Store ID to your Protx Vendor name
4. Change the Transaction Key/Password to you Protx encrypted password
5. Click the submit button
Additional details on this gateway are provided on the Kryptronic Web Site Wiki at
http://wiki.kryptronic.com/AddProtxFormUK
HSBC Payment Form
1. In admin under Commerce/Manage Processing Gateways select Update next to the
HSBC - Payment Form
2. Change Active Status to True.
3. Change Gateway User/Store ID to your HSBC store ID
4. Change Transaction Key/Password to your HSBC Order Hash Key (Provided by HSBC by
Fax or Letter).
145
Users Guide
5. Active Status = True
6. Click Submit.
This enables the HSBC gateway in test mode. When you are ready to go live you will need to
change the following in the Form Display Code.
From:
$tmp[3] = 'T';
$olpform['fields']['HIDDEN'][] = array('name' => 'Mode',
'value' => $tmp[3]);
To:
$tmp[3] = 'P';
$olpform['fields']['HIDDEN'][] = array('name' => 'Mode',
'value' => $tmp[3]);
ePDQ Payment Form
First, you’ll need to password protect the {public_directory}/epdqrelay
In ClickCartPro/EuropaCart:
1. In the admin go to Commerce/Manage Processing Gateways and Update - ePDQ Payment Form
2. Change Active Status to True.
3. Change Gateway User/Store ID to your epdq client ID
4. Change Transaction Key/Password to your epdq pass phrase.
5. Click Submit.
In ePDQ:
1. Click this link then fill in the following: https://cpiadmin.epdq.co.uk/cgibin/CcxBarclaysEpdqAdminTool.exe
2. Passphrase, information type into Transaction Key / Password.
3. Allowed URL, the normal location of the shopping script eg {public URL}/index.php
4. Post Order Results, Yes
Post URL, the location of the epdq script eg {public URL}/epdqrelay/ and post username and
password, the username and password for the epdqrelay directory.
Quick Processing Setup
Some quick instructions provided to get you up and selling as fast as possible. These Paypal
setup instructions can get you up and accepting payments from the processor everyone knows
and trusts. Even if you eventually choose another gateway, Paypal is a great first step.
Exports
For your convenience, this software is equipped to export your customers, orders and items
directly into your accounting system in order to save time and duplicate entry.
146
Users Guide
Peachtree Accounting Export
Use this interface to export your completed orders into Peachtree compatible CSV files. Before
running this data export, ensure that you have updated the account names you use in Peachtree
using the Peachtree Export Settings function under the Application Settings Menu for this
application. This function will only export orders with a 'Completed' status that have not been
previously exported. If you choose to export data to a file that already exists, that file will be
deleted prior to creating a new export file.
Customers File
Enter the name of the file you would like created for the customers export below.
Items File
Enter the name of the file you would like created for the items export below.
Orders File
Enter the name of the file you would like created for the orders export below.
Quickbooks Accounting
Use this interface to export your completed orders into a Quickbooks compatible IIF file. Before
running this data export, ensure that you have updated the account names you use in
Quickbooks using the Quickbooks Export Settings function under the Application Settings Menu
for this application. This function will only export orders with a 'Completed' status that have not
been previously exported. If you choose to export data to a file that already exists, that file will
be deleted prior to creating a new export file.
Export File Name
Enter the name of the file you would like created in this field.
Sage Accounting
Use this area to export your completed orders into a Sage compatible CSV files. Before running
this data export, ensure that you have updated the account names you use in Sage using the
Sage Export Settings function. This function will only export orders with a 'Completed' status
that have not been previously exported. If you choose to export data to a file that already
exists, that file will be deleted prior to creating a new export file.
Export File Name/Customers File
Enter the name of the file you would like created for the customers into this field.
Export File Name/Orders File
Enter the name of the file you would like created for the orders export into this field.
147
Users Guide
Orders
Completed
This is where you will access and work with your Completed orders. These orders have been
paid for by the customer and have been marked as shipped by you.
Order/Order Number
This unique order number is used within the software to identify this order.
Order Date
This is the date and time on which the order was placed.
User Session ID
The user session id tied to this customer and this order.
Payment Method
The payment method used to process this order.
Referring URL or Affiliate Code
This field holds either a referring URL or an affiliate code assigned to the customer. This
information is transmitted to the software via the HTTP_REFERER environment variable or a
'mktsrc' (market source) parameter in a referring URL at the time the customer first visits the
site.
Customer IP Address
The customer's IP address at the time of the order.
Guest Order Status
Indicates whether this order was placed by a user acting as a guest. Guest orders are not
available for order review by account holders.
Totals/Order Total
This is the one-time total amount billed for the order.
Recurring Charge Total
This is the total recurring amount billed for the order.
Item Subtotal
This is the subtotal of all items contained in the order.
State/Province Tax Total
This is the state/province tax for the order.
Country Tax Total
This is the country tax for the order.
148
Users Guide
Country Tax Refund Total
This is the country tax refund for the order.
Custom Sale Total
This is the custom sale total for the order.
Custom Surcharge Total
This is the custom surcharge total for the order.
Discount Total
This is the discount total for the order.
Delivery Total
This is the delivery total for the order.
Affiliate Commission Total
This is the total commission amount payable to an affiliate for this order.
Checkout Fields/Discount Code
This is discount code (if any) used for the order.
Tax Exemption Number
This number, if entered by the customer, is their tax exemption number. This number may be a
EU VAT or Canadian Provincial Sales Tax Vendor Permit number.
Tax Disability Status
If selected by the customer, indicates whether this customer has a disability and is subject to
disability tax treatment.
Custom Sale Text
This is text associated with the custom sale (if any) for this order.
Custom Surcharge Text
This is text associated with the custom surcharge (if any) for this order.
Processor Token
The token used by the online processor. This token is used by a limited number of processors.
Contact Information
This set of fields displays all of the customer contact information. Just standard Name,
Company, Phone, Fax and Email contact information is displayed here.
Billing Address
As the title says, this collection of fields contains all of the billing address information for this
customer. It also flags a commercial or residential address.
Custom Fields
If you created any custom fields in your checkout process…that information would be displayed
here.
149
Users Guide
Post Order Updates/Affiliate Commissions Updated
Indicates whether affiliate commissions have been calculated for this order. Commissions are
updated automatically for orders processed via gateways that have post order updates enabled.
Inventory Levels Updated
Indicates whether inventory levels have been updated for this order. Inventory levels are
updated automatically for orders processed via gateways that have post order updates enabled.
Discount Code Updated
Indicates whether the discount code (if used) has been updated for this order. Discount codes
are updated automatically for orders processed via gateways that have post order updates
enabled.
Exported to QuickBooks
Indicates whether the order has been exported to QuickBooks. This is automatically updated
when a Quickbooks export is done. Only orders with a Completed status can be exported to
QuickBooks.
Exported to Peachtree
Indicates whether the order has been exported to Peachtree. This is automatically updated when
a Peachtree export is done. Only orders with a Completed status can be exported to Peachtree.
Exported To Sage
Indicates whether the order has been exported to Sage. This is automatically updated when a
Sage export is done. Only orders with a Completed status can be exported to Sage.
Exported to T-Hub
Indicates whether the order has been exported to T-Hub. This is automatically updated when a
T-Hub UpdateOrders request is received for an order.
Comments/Internal Comments
Comments to be viewed internally for this order. These comments are only available via this
interface and are not made public.
External Comments
Comments to be viewed externally for this order. These comments will be viewable by the
customer when reviewing their order.
Package Tracking/UPS Tracking Information
This field holds either a single UPS package tracking number or a comma delimited list of UPS
package tracking numbers. Enter any UPS tracking number associated with this order to enable
package tracking for users.
USPS Tracking Information
This field holds either a single USPS package tracking number or a comma delimited list of USPS
package tracking numbers. Enter any USPS tracking number associated with this order to enable
package tracking for users.
150
Users Guide
FedEx Tracking Information
This field holds either a single FedEx package tracking number or a comma delimited list of
FedEx package tracking numbers. Enter any FedEx tracking number associated with this order to
enable package tracking for users.
Delete
This simply deletes the order in question. It will give you a chance to cancel before proceeding.
Manage Items
This feature displays the order number and item detail. From here you can choose to view and
in some cases, adjust the following fields:
Order Item/Order Number
This is the order number this item belongs to.
Order Date
This is the date and time on which the order was placed.
Delivery Status
For items that are shipped, this status defaults immediately after an order is placed to Pending
Shipment. This status is automatically updated when an item is assigned to a shipping package.
For items that are not shipped, this status is set to Not Applicable.
Delivery Method
The delivery method used to send this item.
Item Detail
This collection of fields contains all of the item detail information for the product that was
ordered…Name, number, identifier, quantity ordered and optional items.
Totals
This field shows you either the one time sub total of a particular order, or the recurring total that
was charged for the order.
Delivery Address
Displays the Ship To: details for the order in question. Also displays whether the ship to address
is a Commercial or Residential Address.
Extension Module Information
This field will display any Extension Module info.
Summary/Invoice
This simply displays the invoice which the customer received.
151
Users Guide
Post Order Updates
Here, you can select the types of post-order updates you would like to run on the selected order.
They can be associated with various XMODs you may have installed or as simple as resending
your customer their confirmation message. Just check the updates you want and then click on
the Submit button.
Important Note:
Most post-order update tasks require the order have a 'Completed' status. For orders that were
processed using a gateway that supports post-order updates (most of them), these tasks were
completed when the order was initially processed by the customer.
Decrypt Offline Order Data
This form is used to decrypt information sent to you via email for offline orders. Typically credit
card numbers, switch/solo card numbers and CVV2 data is sent in encrypted format for offline
orders.
Encrypted Data
Enter the encrypted data in this field. This is given when an offline order is emailed to you. You
then need to copy the data from this email into this field for it to be decrypted. Kryptronic now
also has an Offline Decryptor available, just contact [email protected] for more
information on purchasing.
Orders (Pending and Cancelled)
This is where you will access and work with your Pending and Cancelled orders. These orders
have either not been paid for by the customer or have been cancelled. You will have several
choices upon entering this area.
Order/Order Number
This unique order number is used within the software to identify this order.
Order Date
This is the date and time on which the order was placed.
User Session ID
The user session id tied to this customer and this order.
152
Users Guide
Order Status
This is the status of this order. Orders marked as 'Pending Payment' have not been processed
and should not be shipped. If the status for this order is changed to 'Completed', all shipped
items associated with this order will be updated so their status is 'Shipped'.
Payment Method
The payment method used to process this order.
Referring URL or Affiliate Code
This field holds either a referring URL or an affiliate code assigned to the customer. This
information is transmitted to the software via the HTTP_REFERER environment variable or a
'mktsrc' (market source) parameter in a referring URL at the time the customer first visits the
site.
Customer IP Address
The customer's IP address at the time of the order.
Guest Order Status
Indicates whether this order was placed by a user acting as a guest. Guest orders are not
available for order review by account holders.
Totals/Order Total
This is the one-time total amount billed for the order.
Recurring Charge Total
This is the total recurring amount billed for the order.
Item Subtotal
This is the subtotal of all items contained in the order.
State/Province Tax Total
This is the state/province tax for the order.
Country Tax Total
This is the country tax for the order.
Custom Sale Total
This is the custom sale total for the order.
Discount Total
This is the discount total for the order.
153
Users Guide
Delivery Total
This is the delivery total for the order.
Affiliate Commission Total
This is the total commission amount payable to an affiliate for this order.
Checkout Fields/Discount Code
This is discount code (if any) used for the order.
Tax Exemption Number
This number, if entered by the customer, is their tax exemption number. This number may be a
EU VAT or Canadian Provincial Sales Tax Vendor Permit number.
Custom Sale Text
This is text associated with the custom sale (if any) for this order.
Processor Token
The token used by the online processor. This token is used by a limited number of processors.
Contact Information
This set of fields displays all of the customer contact information. Just standard Name,
Company, Phone, Fax and Email contact information is displayed here.
Billing Address
As the title says, this collection of fields contains all of the billing address information for this
customer. It also flags a commercial or residential address.
Custom Fields
If you created any custom fields in your checkout process…that information would be displayed
here.
Post Order Updates/Affiliate Commissions Updated
Indicates whether affiliate commissions have been calculated for this order. Commissions are
updated automatically for orders processed via gateways that have post order updates enabled.
Inventory Levels Updated
Indicates whether inventory levels have been updated for this order. Inventory levels are
updated automatically for orders processed via gateways that have post order updates enabled.
Discount Code Updated
Indicates whether the discount code (if used) has been updated for this order. Discount codes
are updated automatically for orders processed via gateways that have post order updates
enabled.
Exported to QuickBooks
Indicates whether the order has been exported to QuickBooks. This is automatically updated
when a Quickbooks export is done. Only orders with a Completed status can be exported to
QuickBooks.
154
Users Guide
Exported to Peachtree
Indicates whether the order has been exported to Peachtree. This is automatically updated when
a Peachtree export is done. Only orders with a Completed status can be exported to Peachtree.
Exported To Sage
Indicates whether the order has been exported to Sage. This is automatically updated when a
Sage export is done. Only orders with a Completed status can be exported to Sage.
Exported to T-Hub
Indicates whether the order has been exported to T-Hub. This is automatically updated when a
T-Hub UpdateOrders request is received for an order.
Comments/Internal Comments
Comments to be viewed internally for this order. These comments are only available via this
interface and are not made public.
External Comments
Comments to be viewed externally for this order. These comments will be viewable by the
customer when reviewing their order.
Package Tracking/UPS Tracking Information
This field holds either a single UPS package tracking number or a comma delimited list of UPS
package tracking numbers. Enter any UPS tracking number associated with this order to enable
package tracking for users.
USPS Tracking Information
This field holds either a single USPS package tracking number or a comma delimited list of USPS
package tracking numbers. Enter any USPS tracking number associated with this order to enable
package tracking for users.
FedEx Tracking Information
This field holds either a single FedEx package tracking number or a comma delimited list of
FedEx package tracking numbers. Enter any FedEx tracking number associated with this order to
enable package tracking for users.
Delete
This simply deletes the order in question. It will give you a chance to cancel before proceeding.
Manage Items
This feature displays the order number and item detail. From here you can choose to view and
in some cases, adjust the following fields:
Order Item/Order Number
This is the order number this item belongs to.
Order Date
This is the date and time on which the order was placed.
Delivery Status
155
Users Guide
For items that are shipped, this status defaults immediately after an order is placed to Pending
Shipment. This status is automatically updated when an item is assigned to a shipping package.
For items that are not shipped, this status is set to Not Applicable.
Delivery Method
The delivery method used to send this item.
Item Detail
This collection of fields contains all of the item detail information for the product that was
ordered…Name, number, identifier, quantity ordered and optional items.
Totals
This field shows you either the one time sub total of a particular order, or the recurring total that
was charged for the order.
Delivery Address
Displays the Ship To: details for the order in question. Also displays whether the ship to address
is a Commercial or Residential Address.
Followup Information
This field will display whether a Followup message has been sent for this order.
Summary/Invoice
This simply displays the invoice which the customer received.
Post Order Updates
Here, you can select the types of post-order updates you would like to run on the selected order.
They can be associated with various XMODs you may have installed or as simple as resending
your customer their confirmation message. Just check the updates you want and then click on
the Submit button.
Important Note:
156
Users Guide
Most post-order update tasks require the order have a 'Completed' status. For orders that were
processed using a gateway that supports post-order updates (most of them), these tasks were
completed when the order was initially processed by the customer.
Processing
This is a collection of orders that are currently being processed. They've been paid and are
either partial shipments or orders waiting to be shipped. All of your fields match the other order
fields.
Shipping
This menu helps you set up all of the details for your shipping alternatives.
Custom Shipping Methods
Perhaps you want to offer shipping charges based on total item cost, quantity, weight or a
percentage of the item cost? Perhaps you have your own custom shipping method. This is
where you would configure and augment the various custom shipping methods. These items can
all be updated, but only if you understand PHP programming. When you click on Update, you
see the following self-explanatory information:
157
Users Guide
FedEx DirectConnect
Setting up your FedEx DirectConnect connection is a multi-step process. Follow these
instructions to ensure your connection is set up properly.
•
•
If you do not have a FedEx account number, visit http://www.fedex.com/ to set up a
FedEx account online and obtain a FedEx account number.
Using the same information you provided while setting up your FedEx account, complete
the information below and click the 'Submit' button to retrieve a meter number from
FedEx, which will automatically activate your connection.
Contact Information
The online form contains basic contact information that you’ll need to fill out in order to begin
using FedEx DirectConnect.
Configure Intershipper Connection
Setting up your InterShipper connection is a multi-step process. Follow the instructions below to
ensure your connection is set up properly.
• Visit the InterShipper web site at http://www.intershipper.com/ and click the login link
that's presented.
• Complete the information required to register.
• After submitting the form you will receive a username and password. Save the username
and password. Enter it in the provided spaces and press the “Submit” Button to activate
your connection.
• After activating your connection, access the Intershipper Settings function to turn on/off
shipping rates for various shippers.
Realtime Carriers
Identifier
This identifier is used within the software to specify this realtime shipping carrier.
Display Name
This is the realtime shipping carrier display name. It is used in displays to identify the carrier.
Rate Display Text
This text is used in displays where rate information is returned.
Tracking Display Text
This text is used in displays where tracking information is returned.
Connection Active Status
This indicates whether or not the connection is active for this realtime shipping carrier. If the
connection is not active and you would like to activate it, choose to configure a connection for
the carrier.
158
Users Guide
Carrier Supplies Rates
This indicates whether or not the carrier supplies realtime shipping rates via their connection.
Carrier Supplies Tracking
This indicates whether or not the carrier supplies realtime shipment tracking via their
connection.
Connection URLs/Connection Rate URL
This URL is used for rate inquiries.
Connection Tracking URL
This URL is used for tracking inquiries.
Trademarks/Trademark Image
This image is used for both rate and tracking displays. The file shown in this field is currently
associated with this item. If you wish to use a different file, either enter a new file name, or use
the file upload to select the file you wish to use and have it upload automatically when you click
on the Submit button.
Trademark Notice
This text is used to provide a trademark notice in rate and tracking displays. Do not include
XHTML tags in this text.
Disclaimers/Tracking Disclaimers
The text in this box is used to provide a disclaimer in tracking displays. Do not include XHTML
tags in this text.
Handling Disclaimer
The text in this box is used to provide a handling disclaimer in rate displays. Do not include
XHTML tags in this text.
Notices/Weight Error Notice
The text in this box is used to provide a notice when weight errors occur during rate inquiries.
Do not include XHTML tags in this text.
Dimensional Error Notice
The text in this box is used to provide a notice when dimensional errors occur during rate
inquiries. Do not include XHTML tags in this text.
Realtime Services
This is where you manage the various services offered by your shipping partners. By this, we
mean, Ground, 2nd Day, Overnight, etc. Here you can pick and choose which individual services
offered by your shipper that you want to provide to you customers.
The services are basically set up for you, you simply scroll to the bottom of the individual pages
to determine if that service will be available to your customers by choosing True for yes and
False for no.
159
Users Guide
UPS Online Tools Connection
Setting up your UPS OnLine® Tools connection is a multi-step process. Follow the instructions to
ensure your connection is set up properly. This interface will provide a connection to UPS for
registration for UPS OnLine® Tools. Completion of the steps provided by this interface will
ensure correct registration and activation.
• Select your country from the listing below and click the 'Submit' button to continue. UPS
OnLine® Tools are only available in certain countries. A listing of available countries is
available at: http://www.ec.ups.com/ecommerce/solutions/global_redirect.html
• You will then be presented with a license agreement, which you must accept to continue.
Your registration information will also be collected and sent to UPS for validation.
• If your information is validated by UPS, your registration will be complete and your UPS
OnLine® Tools connection will be activated.
• After the selection of your country from the list of available countries below, you will be
presented with a form to complete in order to configure your UPS OnLine® Tools
connection.
USPS WebTools
Setting up your USPS WebTools connection is a multi-step process. Follow the instructions below
to ensure your connection is set up properly.
•
Visit the USPS web site at http://www.uspswebtools.com/ and click the registration
link that's presented.
•
Complete all of the information requested on the registration page, be sure to agree to
the USPS WebTools terms and conditions and submit the form.
•
After submitting the form you will receive a username along with a development URL
via email. Save the username and disregard the development URL.
•
Between 7:00 AM and 11:00 PM Eastern time, call the USPS Internet Customer Care
Center and speak to a representative. Provide the representative with your username,
inform them that you have completed testing your integration, and are ready to have
access to the production server. The representative will send you an email with the
production server URL.
•
Once you receive the production server URL via email from USPS, your account is
production-ready. Enter in your username in the field provided and click the 'Submit'
button to activate your connection.
Store Displays
This area of the product controls the look and feel of your site. It determines how you display
and promote your products, categories, etc. We’ve also added new displays for Mobile support.
Category Displays
This category requires an understanding of PHP and HTML coding. If you do not have this skill
set at your disposal, you may have to contract an outside source to make changes or additions
160
Users Guide
to the contents of this menu. You can also contact [email protected] to receive a quote
for designing a web site that reflects your business attitude.
Identifier and Name/Identifier
This identifier is used within the software to specify this display.
Display Name
This is the name for this display.
Display Content
Enter the content for this display below. This content should be written in standards compliant
XHTML and should contain PHP code. The PHP code in this display should be based on the XHTML
Includes used by this software.
Product Detail Displays
This category requires an understanding of PHP and HTML coding. If you do not have this skill
set at your disposal, you may have to contract an outside source to make changes or additions
to the contents of this menu. You can also contact [email protected] to receive a quote
for designing a web site that reflects your business attitude.
Identifier and Name/Identifier
This identifier is used within the software to specify this display.
Display Name
This is the name for this display.
Display Content
Enter the content for this display below. This content should be written in standards compliant
XHTML and should contain PHP code. The PHP code in this display should be based on the XHTML
Includes used by this software.
Product List Displays
This category requires an understanding of PHP and HTML coding. If you do not have this skill
set at your disposal, you may have to contract an outside source to make changes or additions
to the contents of this menu. You can also contact [email protected] to receive a quote
for designing a web site that reflects your business attitude.
Identifier and Name/Identifier
This identifier is used within the software to specify this display.
Display Name
This is the name for this display.
Display Content
Enter the content for this display below. This content should be written in standards compliant
XHTML and should contain PHP code. The PHP code in this display should be based on the XHTML
Includes used by this software.
161
Users Guide
Store Menu
Menu Item Identifier and Name/Menu ID
This is the unique identifier for this menu.
Display Name
Display name for this menu item used in the menu.
Display Order
The menu display order numeric allows display of menu items in the custom menu in a particular
order. The menu items are sorted in ascending order based on this numeric indicator.
Menu Display Status
This indicator controls whether this menu item is displayed in the custom menu. Select True to
display the menu or False not to display it.
162
Users Guide
Kryptronic Software End User License Agreement (EULA)
END USER LICENSE AGREEMENT FOR THE KRYPTRONIC HYBRID X CORE (CORE) AND COREBASED KRYPTRONIC SOFTWARE PRODUCTS
KRYPTRONIC, INC. LICENSES THE KRYPTRONIC HYBRID X CORE SOFTWARE PRODUCT AND
OTHER CORE-BASED KRYPTRONIC SOFTWARE PRODUCTS TO YOU SUBJECT TO THE TERMS
CONTAINED IN THIS END USER LICENSE AGREEMENT ("EULA"). READ THE TERMS OF THIS
EULA CAREFULLY. BY INSTALLING, COPYING OR OTHERWISE USING THE SOFTWARE (AS
DEFINED BELOW), YOU AGREE TO BE BOUND BY THE TERMS OF THIS EULA. IF YOU DO NOT
AGREE TO THE TERMS OF THIS EULA, DO NOT INSTALL, COPY OR USE THE SOFTWARE.
NOTICE TO CUSTOMER
If you do not agree to the terms of this EULA, do not install, activate, or use this software. This
EULA is a contract between you (either an individual or an entity) and Kryptronic, Inc.
("Kryptronic"), which governs your use of this Kryptronic software product that accompanies this
EULA and related software components, which may include associated media, printed materials,
and online or electronic documentation.
DEFINITIONS
This Kryptronic Hybrix X Core software package includes the Kryptronic Hybrid X Core ("CORE")
software product, related CORE-Based Kryptronic software products designed for use with the
CORE ("CORE-Based Software") and Open Source Software components. The KRYPTRONIC
software product is composed of a proprietary KRYPTRONIC software and management interface
component and other CORE-Based Software. KRYPTRONIC and CORE-Based Software are
referred to collectively herin as ("Software"). This software package may include sample
programs or scripts ("Sample Programs"). You may use and distribute Sample Programs under
the terms set forth in the applicable Sample Programs files. In this EULA, the CORE, COREBased Software products, associated media, printed materials, and online or electronic
documentation are collectively referred to as the "Software."
"Open Source Software" means various open source software components, including, without
limitation, PEAR and the following PEAR packages: Auth_SASL, Archive_Tar, Console_Getopt,
File_Find, Mail, Mail_mime, Net_SMTP and Net_Socket, licensed under the terms of applicable
open source license agreements included in the materials relating to such software.
An "Installation" means a single physical installation of the Software.
A software license key ("Software License Key") issued to you by Kryptronic is required to use
the Software.
WARNING FOR EVALUATION LICENSEES
The Software can be activated with a no-cost evaluation Software License Key. Evaluation
Software License Keys have an expiration date ("Expiration Date"). If you activate the Software
163
Users Guide
with an evaluation Software License Key: (i) you may use the Software until the Expiration Date
only to evaluate the suitability of the Software for licensing on a for-fee basis; and (ii) THE
SOFTWARE IS PROVIDED TO YOU "AS IS" WITHOUT WARRANTY OF ANY KIND, WHETHER
EXPRESS, IMPLIED, STATUTORY, OR OTHERWISE. KRYPTRONIC BEARS NO LIABILITY FOR ANY
DAMAGES RESULTING FROM USE (OR ATTEMPTED USE) OF THE SOFTWARE THROUGH AND
AFTER THE EXPIRATION DATE, AND HAS NO DUTY TO PROVIDE SUPPORT TO YOU.
OPEN SOURCE SOFTWARE
The Open Source Software is composed of individual software components, each of which has its
own copyright and its own applicable license conditions. You must review the licenses within the
individual packages to understand your rights under them. The licenses can be found online at
pear.php.net. Copyrights to the Open Source Software are held by the copyright holders
indicated in the copyright notices found online at pear.php.net.
LICENSE
The Software is licensed, not sold. Subject to the terms and limitations of this EULA, Kryptronic
hereby grants you a nonexclusive, nontransferable license, without rights to sublicense, to (i)
Use the Software License Key to activate the Software to the extent permitted by your payment
of applicable license fees (whether such fees are based on a single installation licensing model or
any other Kryptronic approved licensing model); (ii) Install or have installed a single instance of
the Software for each license fee paid; (iii) Use the Software in accordance with this EULA; (iV)
Use the Software in a legal manner; and (V) Use the documentation accompanying the Software
in connection with permitted uses of the Software.
LICENSE LIMITATIONS
You may not copy the Software except for a reasonable number of machine-readable copies of
the Software for backup or archival purposes and except as expressly permitted in the License
section above. You may not remove any titles, trademarks or trade names, copyright notices,
legends, or other proprietary markings on the Software. You are not granted any rights to any
trademarks or service marks of Kryptronic. Kryptronic retains all rights not expressly granted to
you.
LICENSES REQUIRED FOR THIRD-PARTY SOFTWARE
The Software enables you to install third-party modules and extensions that further enhance it's
functionality. You are responsible for obtaining any licenses necessary to operate any such thirdparty software, and must accept any EULAs required to use the software.
KRYPTRONIC'S RIGHT OF ENTRY
You hereby authorize Kryptronic to access your web server in order to inspect the Software in
any reasonable manner verify your compliance with the terms hereof.
PROPRIETARY RIGHTS RESERVED BY KRYPTRONIC
164
Users Guide
Kryptronic retains all right, title, and interest in and to the Software and the Software License
Key and in all related copyrights, trade secrets, patents, trademarks, and any other intellectual
and industrial property and proprietary rights, including registrations, applications, renewals,
and extensions of such rights.
RESTRICTIONS
You may not (i) Sell, lease, license, sublicense, distribute or otherwise transfer in whole or in
part the Software or the Software License Key; (ii) Provide, disclose, divulge or make available
to, or permit use of the Software in whole or in part by, any third party without Kryptronic's
prior written consent; or (iii) Modify or create derivative works based upon the Software without
Kryptronic's prior written consent. Except to the extent expressly permitted by applicable law,
and to the extent that Kryptronic is not permitted by that applicable law to exclude or limit the
following rights, you may not decompile, disassemble, reverse engineer, or otherwise attempt to
derive source code from the Software, in whole or in part. You may not disclose the results of
any benchmark test of the Software to any third party without Kryptronic's prior written
approval.
SUPPORT AND SUBSCRIPTION SERVICES NOT INCLUDED
Kryptronic will not provide any support services under this EULA. This EULA does not give you
any rights to any updates or upgrades to the Software or to any extensions or enhancements to
the Software developed by Kryptronic at any time in the future. You may purchase support and
subscription services separately. If you have purchased Kryptronic support and subscription
services with the Software, these services are provided to you under the Support Contract Terms
and Conditions posted on Kryptronic's Web site, and by accepting the terms of this EULA you are
accepting these Support Contract Terms and Conditions. Any supplemental software code or
related materials that Kryptronic provides to you as part of any support and subscription
services are to be considered part of the Software and are subject to the terms and conditions of
this EULA. Kryptronic may use any technical information you provide to Kryptronic for any
Kryptronic business purposes without restriction, including for product support and development.
Kryptronic will not use information in a form that personally identifies you.
TERMINATION
Kryptronic may terminate this EULA if you fail to comply with any term of this EULA. In the
event of termination, you must destroy all copies of the Software and Software License Key. In
addition you must remove all copies of the Software from all computers and terminals on which
it is installed.
GOVERNMENT RESTRICTIONS
You may not export or re-export the Software except in compliance with the United States
Export Administration Act and the related rules and regulations and similar non-U.S. government
restrictions, if applicable. The Software and accompanying documentation are deemed to be
"commercial computer software" and "commercial computer software documentation,"
respectively, pursuant to DFAR Section 227.7202 and FAR Section 12.212(b), as applicable. Any
use, modification, reproduction, release, performing, displaying, or disclosing of the Software by
the U.S. Government shall be governed solely by the terms of this EULA.
165
Users Guide
LIMITED WARRANTY
Kryptronic warrants, for your benefit alone, that the Software conforms in all material respects
to the specifications for the current version of the Software. This warranty is expressly
conditioned on your observance of the operating, security, and data-control procedures set forth
in the Software Documentation.
EXCEPT FOR THE PRECEDING EXPRESS LIMITED WARRANTY, TO THE MAXIMUM EXTENT
PERMITTED BY APPLICABLE LAW, KRYPTRONIC PROVIDES THE SOFTWARE WITHOUT ANY
WARRANTIES OF ANY KIND, EXPRESS, IMPLIED, STATUTORY, OR IN ANY OTHER PROVISION OF
THIS EULA OR COMMUNICATION WITH YOU, AND KRYPTRONIC SPECIFICALLY DISCLAIMS ANY
IMPLIED WARRANTIES OF MERCHANTABILITY, FITNESS FOR A PARTICULAR PURPOSE, AND
NON-INFRINGEMENT.
LIMITATION OF LIABILITY
TO THE MAXIMUM EXTENT PERMITTED BY APPLICABLE LAW, IN NO EVENT WILL KRYPTRONIC
BE LIABLE FOR ANY LOST PROFITS OR BUSINESS OPPORTUNITIES, LOSS OF USE, BUSINESS
INTERRUPTION, LOSS OF DATA, OR ANY OTHER INDIRECT, SPECIAL, INCIDENTAL, OR
CONSEQUENTIAL DAMAGES UNDER ANY THEORY OF LIABILITY, WHETHER BASED IN
CONTRACT, TORT, NEGLIGENCE, PRODUCT LIABILITY, OR OTHERWISE. BECAUSE SOME
JURISDICTIONS DO NOT ALLOW THE EXCLUSION OR LIMITATION OF LIABILITY FOR
CONSEQUENTIAL OR INCIDENTAL DAMAGES, THE PRECEDING LIMITATION MAY NOT APPLY TO
YOU.
KRYPTRONIC'S LIABILITY UNDER THIS EULA WILL NOT, IN ANY EVENT, EXCEED THE LICENSE
FEES, IF ANY, PAID BY YOU TO KRYPTRONIC FOR THE SOFTWARE LICENSED BY YOU UNDER
THIS EULA.
THE FOREGOING LIMITATIONS SHALL APPLY TO THE MAXIMUM EXTENT PERMITTED BY
APPLICABLE LAW, REGARDLESS OF WHETHER KRYPTRONIC HAS BEEN ADVISED OF THE
POSSIBILITY OF SUCH DAMAGES AND REGARDLESS OF WHETHER ANY REMEDY FAILS OF ITS
ESSENTIAL PURPOSE.
INJUNCTIVE RELIEF
You acknowledge that, in the event of your breach of any of the foregoing provisions, Kryptronic
will not have an adequate remedy in money or damages. Kryptronic shall therefore be entitled to
obtain an injunction against such breach from any court of competent jurisdiction immediately
upon request. Kryptronic's right to obtain injunctive relief shall not limit its right to seek further
remedies.
GENERAL
This EULA is governed by the laws of the State of Pennsylvania and the United States of
America, without regard to conflict of law principles. The United Nations Convention for the
International Sale of Goods shall not apply. This EULA is the entire agreement between us and
supersedes the terms of any purchase orders and any other communications or advertising with
respect to the Software. If any provision of this EULA is held invalid, the remainder of this EULA
166
Users Guide
shall continue in full force and effect. This EULA may be modified only by written agreement
signed by authorized representatives of you and Kryptronic.
CONTACT INFORMATION
If you have any questions about this EULA, or if you want to contact Kryptronic for any reason,
please direct all correspondence to: Kryptronic, Inc., P.O. Box 7374, York, PA 17404, United
States of America or email [email protected].
Kryptronic, the Kryptronic logo and all Kryptronic software names and logos are trademarks of
Kryptronic, Inc. in the United States and/or various jurisdictions.
167
Users Guide
Program Credits
Codebase Development
Nick Hendler (Kryptronic, Inc.) has been the chief software developer for
ClickCartPro/EuropaCart since it's initial version 1.0, which was developed in June 1999. Since
then, the program has undergone extensive changes, which have resulted in the current version
available today.
The codebase, which includes the library, modules and data architecture, are developed by
solely by Kryptronic, Inc. and is distributed under license. ClickCartPro/EuropaCart is not an
open source (GNU licensed) program, however the source code is delivered with the program
and is editable.
Beta Test Team
Much credit is due to the beta test team for the time spent ensuring that
ClickCartPro/EuropaCart software is both feature rich and fully tested before it is released to the
user community. The beta test team donate their time to both assist the community and have a
hands on experience as the software is created. Their efforts are appreciated and through their
insight and diligence, a superior product is possible.
Nick Hendler (webmaster) - [email protected]
Jeff Klinedinst (jeffk) - [email protected]
Jonathan Yates (dh783) - [email protected]
Steve (sleeper) - [email protected]
Jeremy O'Connell (cyberws) - [email protected]
John (Trey) Piccard (k1802) - [email protected]
Adam Ross Hill (adamrosshill) - [email protected]
Billy Mead (exoticrockets) - [email protected]
Paul Worcester (panmanjon) - [email protected]
James Garrett (jj1987) - [email protected]
David Janosik (david_waveinternet) - [email protected]
Deb Martin (deb) - [email protected]
Toni Novak (tonin) - [email protected]
Piers Glydon (bbac) - [email protected]
Stephen Madison (vbsaltydog) - [email protected]
Philip Ashworth (pcla) - [email protected]
Some of the people making up the beta team own or work for companies providing directly
related services to the user community such as technical support, Internet site design, web
hosting or retail goods.
168