1
3.2 Spindle Adjustment
Now that the spindle, controller and software are configured, it is necessary to make final
adjustments to the spindle prior to engraving. To adjust the spindle:
1. Turn the controller ON
2. Press [Drives On] followed by [Datum] to datum the system. The Z Spindle
should datum FIRST, followed by X and Y-axes. If the Z Spindle does not
datum - STOP! Contact NHI Customer Service for further instructions. The
spindle will not function properly without a functional Z datum sensor. (This may
be due to reverse connection of the Z datum connector.)
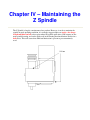
3. With the spindle carriage now positioned in the upper-left corner of the engraving
area, loosen the two hex (mounting) nuts and re-position the Z Spindle as desired
on the carriage T-slot.
4. Tighten the two hex nuts to complete the procedure.
5. Install an appropriate cutting tool (see later sections for details).
6. Install the rotary drive assembly (for details see the JLS manual).
7. Attach the drive belt between the spindle pulley and the rotary drive assembly.
8. Inspect the rotary drive assembly to ensure that the belt(s) will not contact wires
during engraving.