1
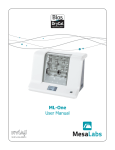
Models 5611 and 5612
User’s Manual
Multipass Cell
Technology licensed from Aerodyne Research, Inc.
(Patent #5,291,265)
Warranty
New Focus, Inc. guarantees its products to be free
of defects for one year from the date of shipment.
This is in lieu of all other guarantees, expressed or
implied, and does not cover incidental or consequential loss.
Contents
561000 Rev. C
2
Warranty
2
Getting Started
3
Introduction
4
Background & Theory
6
Description
11
Safety
17
Operation
18
Alignment
22
Specifications
30
Alignment Data
31
Is a registered trademark of
New Focus Inc.
Getting
Started
Your multipass cell was shipped aligned to the
standard 182-pass configuration (see Fig. 7, pg. 25)
and is ready to use. To familiarize yourself with the
operation of the multipass cell, you should begin
by coupling a visible laser into the cell. A standard
low-power He-Ne laser works well for this.
Couple light into the cell in the horizontal plane
so that the input beam passes through the hole in
the front mirror and hits the back mirror close to
its edge. Light enters and exits the cell through the
front window assembly. The input and output
beams travel in the horizontal plane, cross at the
front mirror surface, and make an angle of 3 to 6
degrees with respect to the cell axis.
It is helpful if the input beam is focused to a waist
at roughly the center of the cell (a 25- to 75-cm
focal length lens should work well). The output
beam will exit the cell in the horizontal plane. If
the output beam does not appear or is clipped,
some slight adjustments to the cell position and
the input beam angle may be necessary.
Note: Aligning the mirrors in the multipass cell is
a complicated and potentially tricky procedure.
This manual contains detailed operation and
alignment instructions. Be sure to read through
the manual before disassembling or realigning the
multipass cell.
3
Introduction
The New Focus multipass cell design employs a
patented technology (Patent #5,291,265, licensed
from Aerodyne Research, Inc.) that causes the
beam to fill the absorption volume more completely than in conventional multipass cells. The heart
of this technology is the use of concave mirrors
with a small amount of astigmatism. These astigmatic mirrors produce beam spots on the mirror
surfaces which form a Lissajous’ pattern. This is in
contrast to the elliptical patterns produced by conventional multipass cells. The astigmatic mirrors
enable more passes in a given volume, resulting in
a smaller cell volume for a given optical path
length.
The multipass cells come in two sizes: the
Model 5611 has a 36-meter optical path length in
a 0.3-liter cell and the Model 5612 has a 100-meter
path length in a 3.2-liter cell. Light enters and
exits the multipass cell through the front window
assembly and, in the standard configuration,
makes 182 passes between the mirrors.
4
The mirrors are made from nickel-plated aluminum substrates with a protected silver coating.
The reflectivity of the mirrors from 3 to 10 µm is
99% or greater. Cell throughput can be estimated
using the expression RN, where R is the mirror
reflectivity and N is the number of mirror reflections. In the standard 182-pass arrangement, the
beam reflects off the mirrors 181 times. So, from 3
to 10 µm the throughput is (0.99)181 = 16%. In the
1 to 3 µm wavelength range, the mirror reflectivity is about 98%, corresponding to a throughput
of 2.6%.
Measurements can be performed from atmospheric
pressure down to 1 torr. The cell is equipped with
one 1/4-inch and two 1/2-inch fittings for flowing
gas through the cell. The cell can also be sealed to
perform static measurements involving a limited
sample size. Note that the multipass cell is not
intended for operation above atmospheric pressure.
The back plate of the cell has a safety relief valve
which will open if the cell pressure rises above
5 psi.
The multipass cell is shipped with the mirrors
aligned to the standard 182-pass configuration. If
necessary, the cell can be dismantled for cleaning
and realignment. The front mirror is fixed in
place, and the back mirror can be tilted, rotated,
and translated for all necessary alignment adjustments. Instructions for operation and alignment of
the multipass cell are given in the sections that follow. Please read through these sections before
adjusting the orientation of the back mirror.
5
Background
& Theory
This section presents a brief background on the
multipass cell and an overview of the theory used in
the cell's design and analysis. For more details
about the design, analysis and use of multipass
cells, refer to J. B. McManus, P. L. Kebabian, and M.
S. Zahniser, “Astigmatic mirror multipass absorption cells for long-path-length spectroscopy,”
Applied Optics, Vol. 34, No. 18, pages 3336-3348,
20 June 1995.
The New Focus multipass cell is a variation on the
Herriot cell which employs two spherical mirrors
separated by nearly their radius of curvature. This
cell produces a circular or elliptical beam spot pattern on the mirrors. A modified Herriot cell that
employs astigmatic mirrors will yield a longer optical path length for a given cell volume. However,
achieving proper alignment of this sort of cell
requires that the astigmatic mirrors be manufactured with extremely high precision.
The New Focus multipass cell employs astigmatic
mirrors along with a technique that eliminates the
need for such high manufacturing tolerances. By
adjusting the twist angle between the front and
back mirrors, one can compensate for variations in
the mirror radii of curvature resulting from the
relaxed mirror tolerances. This innovation was
developed and patented by Aerodyne Research, Inc.
The multipass cell employs astigmatic, or toroidal,
mirrors. That is, along the two orthogonal axes,
the mirrors have radii of curvature that differ by
6
about 10%. In the multipass cell the mirrors are
separated by nearly their radius of curvature, and
an optical beam is coupled into the cell through a
hole in the front mirror. The beam enters the cell
in the horizontal plane at an angle to the axis of
the cell and then bounces back and forth a number of times between the mirrors. If the cell is
aligned correctly, the beam will travel along a
reentrant path which closes upon itself at the coupling hole after a finite number of passes. Then,
the beam exits the cell through the original coupling hole.
The astigmatic mirrors of the multipass cell cause
the beam to travel in a path such that the beam
spots on the mirrors trace out a Lissajous’ pattern.
In other words, the beam spots trace out a pattern
that is sinusoidal in x and y, but has different frequencies in the two directions. For a reentrant
path, the x-y coordinates of the spot pattern on the
mirrors are given by:
( )
x i = X o sin ( iΘ x ) and y i = Y o sin iΘ y ,
where
Θ x =π Mx / N
and
Θ y =π My / N .
X0 and Y0 define the size of the spot pattern on the
mirror. N is the number of passes through the cell,
and N is even so the beam enters and exits the cell
through the same mirror. The i parameter varies
from 1 to N and indicates the order of appearance
of each spot on the mirrors. Mx and My are integers
that determine the shape of the beam spot pattern;
these parameters are related to the mirror radii of
7
curvature and the separation between the mirrors.
The above expression is approximate because it
does not account for the twist angle between the
mirrors or for variations in the mirror radii.
However, the spot patterns resulting from these
expressions are still very useful for analyzing and
aligning the multipass cell.
There are a large number of available spot patterns, as given by the many possible combinations
of {N, Mx , My}. Choosing these parameters and a
base length for the cell defines the spot pattern and
results in design values for the mirror radii. The
spot patterns are all contained within a rectangular boundary, but each spot pattern has its own
unique shape and appearance. In addition, each
spot pattern has a different distance of closest
approach of spots to the coupling hole and a different sensitivity to mirror misalignment.
Choosing a good pattern involves finding a design
with a long path length (large N), a good separation and distribution of the beam spots (to reduce
interference effects), and a relative insensitivity of
the spot pattern to mirror misalignment.
The standard 91-spot pattern for the multipass cell,
which has the parameters {N=182, Mx=80,
My=76}, was chosen to optimize the above considerations. This arrangement gives 182 passes
between the mirrors. The theoretical 91-spot pattern for this arrangement is plotted in Figure 1. In
the figure the diameter of each spot is proportional
to beam intensity to simulate the decreasing intensity of the beam as it reflects off the mirrors.
8
Fig. 1
Theoretical beam spot pattern for the standard
182-pass configuration.
9
Fig. 2
Mechanical drawing of the model 5611 36-meter cell.
Fig. 3
Mechanical drawing of the model 5612 100-meter cell.
10
Description
Fig. 4
Schematic drawing of the
multipass cell.
back housing
glass tube
front housing
O-ring
retainer
end plate
base plate
gas fitting
window
assembly
This section details the parts that make up the
multipass cell and how they fit together. The
Models 5611 and 5612 multipass cells consist of
the same type of parts; the 100-meter cell is just a
scaled-up version of the 36-meter cell. Note that the
multipass cell is put together with an assortment of
cap screws with English threads. A set of ball drivers is provided with each multipass cell to allow
the cell to be dismantled and aligned, if necessary.
The multipass cell is divided into six main parts:
base plate, glass tube, two housings, and two mirrors.
11
Base Plate
The base plate is a piece of anodized aluminum
with three slots for mounting on optical tables with
1-inch or 25-mm hole spacing. At either end of the
base plate is a housing attached to the base plate
by two 1/4-20 cap screws. In addition, two alignment pins fit into holes in the bottom of the housings. The pins allow the housings to be removed
and reattached to the base plate without upsetting
the mirror alignment.
Glass Tube
The glass tube is made of borosilicate glass, and
the tube is sealed to the housings with an O-ring
that is held in place by an anodized aluminum Oring retainer. All the O-rings used in the multipass
cell are made of Viton® fluoroelastomer. The Oring retainer is attached to the housing with eight
screws. When removing the housing from the base
plate, the O-ring retainer screws should first be
loosened to prevent the glass tube from cracking.
(Viton is a registered trademark of DuPont Dow
Elastomers.)
Housings
The two housings are made of nickel-coated
aluminum. Aside from the aluminum mirrors and
the housings, the remaining metal parts inside the
cell are made of stainless steel.
Each housing has a circular end plate attached to
it with 8 screws. An O-ring seated in the housing
forms a seal between the housing and the plate.
12
The front and back plates have a total of three couplings for a variety of uses such as flowing gas
through the cell or monitoring the cell pressure.
The two larger couplings are for 1/2-inch diameter
tubing, and the single smaller coupling is for
1/4-inch diameter tubing. The couplings have
internal O-ring seals which compress on the tube
by finger-tightening the knurled nut. The couplings are equipped with solid plugs to block them
when they are not in use.
The multipass cell is not intended to be operated
above ambient air pressure. The back plate of the
cell is equipped with a safety relief valve to prevent
the cell from being accidentally over-pressurized.
This valve will open if the cell pressure rises above
the outside air pressure by 5 psi. The accessories
shipped with the cell include a hose connector
which can be attached to the relief valve, allowing
the gas in the cell to be safely vented through tubing. This tubing should have an inner diameter of
1/4 inch (6.4 mm).
The window assembly attached to the front plate
consists of two stainless steel pieces and the window, which is a calcium fluoride or a barium
fluoride disk. The window housing piece with the
two screws holds the window in place, and an
O-ring makes a seal between the window and the
second piece of the window housing. Note: Do not
over-tighten the two screws that hold the window
in place. Tighten them just enough so that the
O-ring makes a good seal with the window. Overtightening the two screws could cause the window
to break.
13
Mirrors
The mirrors are made of a nickel-plated aluminum substrate that is polished into the desired
toroidal shape. Then, a protected silver coating is
deposited onto this surface. This silver coating has
optimal reflectivity from 3 to 10 µm and can withstand cw powers up to 1 kW/cm2. The flat surface
on the edge of the mirror is approximately aligned
with one of the mirror's toroidal axes.
The mirrors should be handled and
cleaned with extreme care. Despite the protective dielectric coating, the mirror surface can be
scratched easily. The mirrors should be cleaned by
non-contact methods such as flowing methanol or
acetone and blowing with a stream of filtered air
or nitrogen. Use lens cleaning paper with caution
as it can scratch the mirror surface.
The mirrors are mounted inside the housings and
are accessed by removing the circular plates at
either end of the multipass cell. The front mirror is
fixed in place and has no alignment adjustments.
The hole through the center is for coupling light
into and out of the cell. The diameter of this hole
is 0.10-inch (2.5-mm) for the Model 5611 and
0.17-inch (4.3-mm) for the Model 5612. The front
mirror should be oriented so that the flat surface
faces upward.
The front mirror is mounted to a triangular plate
with three screws. This triangular plate is in turn
mounted to the housing with three more screws.
14
The front mirror can be removed from the cell by
removing the triangular plate to which it is
attached. Be careful not to scratch or touch the
mirror surface when removing or re-installing it.
All adjustments to the multipass cell alignment are
made with the back mirror assembly (see Fig. 5,
page 16). The back mirror assembly can be tilted,
translated and rotated. The mirror is mounted with
three screws to a circular plug that is fitted through
a triangular plate. This triangular plate is held in
place by a triangular spring attached to the housing with three screws. The spring provides tension
to hold the mirror assembly in place. The position
of the triangular plate is set by three set screws that
are seated in grooves in the housing. By turning all
three set screws the same amount, the mirror can
be translated. Note that as the mirror is translated,
the three screws holding the triangular spring
should be adjusted to maintain a light spring tension on the mirror assembly. Later, when the cell is
aligned, these screws can be tightened to lock the
back mirror assembly in place.
Finally, when the three screws that attach the mirror to the circular plug are loosened, the plug can
be rotated. The plug has a hexagonal hole in its
center where a ball driver can be inserted to rotate
the mirror. Rotating the back mirror allows adjustment of the twist angle between the front and back
mirrors.
15
Fig. 5
Back end of multipass cell, shown with back plate
removed.
triangular spring
(after adjusting tilt or translation,
tighten to provide proper tension)
tilt/translation
adjustment screw (3x)
cap screws
(3x)
circular plug
(to adjust mirror twist angle, loosen the 3 cap screws & turn
this plug using a 3/16-inch hex wrench or ball driver)
16
Safety
New Focus does not guarantee the suitability of the
multipass cell for use with specific gases. However,
the cell parts, as detailed in the previous section,
are made of materials that are fairly robust and
resistant to corrosion. Examples of gases that
should be compatible with the multipass cell
include CO, CO2, NO, N2O, NO2, SO2, O2, and O3.
The multipass cell can operate from 1 torr up to
760 torr (1 atm). The cell is not designed for use
above atmospheric pressure.
To prevent the cell from being over-pressurized, the
cell is equipped with a safety relief valve that will
open if the internal cell pressure reaches 5 psi
above the pressure outside the cell. If the gas used
in the cell is corrosive or poisonous, the hose connector supplied with the cell should be attached to
the relief valve, and 1/4-inch (6.4-mm) innerdiameter tubing should be attached to the hose
connector. This tubing should be run to an exhaust
location where the cell contents can be safely vented if the cell is accidentally over-pressurized.
The recommended operating temperature of the
multipass cell is from 10 to 40 °C.
17
Operation
This section covers the basic set up and operation
of the multipass cell. When the cell was shipped,
the mirrors were aligned to the standard 182-pass
configuration (with 91 beam spots on the back
mirror and 90 spots on the front mirror). This section discusses how to align a laser beam into the
cell, assuming that the mirrors in the cell are
already aligned. If the cell requires alignment
from scratch, refer also to the next section.
In general, the laser that is ultimately used with
the multipass cell will not operate in the visible
range. However, a visible laser, such as a 1-mW
He-Ne laser, works best for performing the initial
set up and alignment of the multipass cell. Once
the cell is aligned with the visible beam and you
are familiar with coupling light into the cell, you
can then use the cell with the laser of interest.
Although the multipass cell will work with a collimated beam, it is recommended to use a slightly
focused beam. Focusing the input beam makes it
easier to see the beam spots on the mirrors and
identify the beam spot pattern. The input beam
should be focused to a waist at roughly the center
of the cell. An f/40 or greater focal ratio is recommended, but the choice of lens focal length is not
critical. For a typical He-Ne laser a lens with a
focal length from 25 to 75 cm should work well. As
an optical element, the cell functions as if the
beam were reflected off the imaginary convex surface of the front mirror. Thus, sending a focusing
beam into the cell results in a nearly collimated
output beam.
18
The glass tube can be removed for initial alignment purposes. This eliminates confusing reflections and makes the beam spots easier to see. To
remove the glass tube, the O-ring retainers must be
loosened and then the housings must be momentarily detached from the base plate. (See Fig. 4,
page 11.) Later, once the cell is aligned, the glass
tube can be reinstalled.
For the Model 5611 36-meter multipass cell the
input and output beam height is 2.5 inches
(63.5 mm), and for the Model 5612 100-meter
multipass cell the beam height is 3.5 inches
(88.9 mm). Both input and output beams are in
the horizontal plane and cross at the center of the
coupling hole in the mirror. The input and output
beams enter and exit the cell at an angle from the
center line of the cell. Note that the beam can
enter the cell from the right or from the left. For
the Model 5611 cell the beams are at an angle of
5 to 6 degrees relative to the center line of the cell,
and for the Model 5612 cell the beams are at an
angle of 3 to 4 degrees. The input beam should be
aligned so that the first spot on the back mirror hits
the mirror near its edge and creates a spot pattern
that fills the mirror. If the mirrors of the multipass
cell are aligned correctly, then small adjustments
to the position of the cell and to the pointing of the
input beam should result in the appearance of the
desired output beam.
When the multipass cell is aligned to the standard
182-pass configuration, the spot patterns on the
mirrors should be similar to the patterns shown in
Figure 7 on page 25. The beam can enter the cell
19
from the left or the right, relative to the axis of the
cell. The spot patterns in Figure 7 were generated
assuming the beam enters the cell from the right
(as you face the input window). If the beam enters
from the left, the same patterns will appear, but
they will be reflected about the center of the circle.
Identifying the spot pattern can be somewhat
tricky at first, but it becomes easier with a little
practice.
The spot pattern may not precisely match the patterns shown in Figure 7 due to slight variations in
the mirror radii of curvature. However, the characteristic features of the spot patterns in Figure 7
should still be preserved, and these features are the
key to identifying the correct pattern. One notable
feature is the two sets of three beam spots that
appear above and below the input coupling hole
(spots 24, 49, and 25 above and spots 66, 42, and
67 below). The position of these spots should be
similar to that shown in Figure 7. In addition, the
relative intensity of these spots should correspond
to the numbers that label them (larger numbers
indicate dimmer spots).
Working with a focused visible laser source in a
darkened lab makes it easier to see the beam spots
on the mirrors. Also, removing the back plate allows
access to the tilting adjustments (see Fig. 5, page
16). Turning one of the tilt adjustment set screws
back and forth by about an eighth-turn will cause
the spot pattern to move on the mirror surface,
making some of the dimmer spots easier to see.
If the output beam does not appear or is clipped by
the mirror coupling hole, then the back mirror
20
might require slight alignment adjustments. The
mirror tilt can be adjusted using the tilt/translation set screws to fine-tune the spot pattern. Before
doing this, loosen the three screws that hold the
triangular spring to reduce pressure on the set
screw threads. To translate the mirror, turn each of
the three set screws the same amount (about an
eighth-turn at a time works well) and readjust the
triangular spring tension, if necessary. Note: Do
not turn any set screw more than 1/4-turn or the
cell may become misaligned. For details on aligning the cell from scratch, refer to the next section.
The mirror twist angle can be adjusted by loosening the three cap screws that hold the back mirror
and then rotating the circular plug (no more than
a few degrees at a time). The mirror is designed so
the flat surface on the edge faces approximately
upward. The actual orientation for correct alignment varies from mirror to mirror due to variations in the manufacturing process. When the cell
was aligned at New Focus to the 182-pass configuration, the circular plug and the triangular plate
were scribed. When the cell is aligned properly,
these scribes should be lined up.
Note that small changes to the separation and
twist angle between the mirrors can cause a variety
of nearly reentrant spot patterns to appear. And so,
be careful when adjusting the back mirror orientation because it is easy to misalign the cell. If the
multipass cell needs to be realigned from scratch,
refer to the next section for detailed alignment
instructions.
21
Alignment
The multipass cell is shipped from New Focus
aligned to the standard 182-pass configuration. In
case the cell needs to be aligned from scratch, this
section presents an alignment procedure. Alignment of the cell the first few times can be a tricky
procedure, but with practice alignment becomes
straightforward. Some sort of measuring device
(such as a caliper or a depth gauge) with accuracy
of 0.001 inches (0.025 mm) is required to align
the multipass cell. The glass tube should be removed from the cell before attempting alignment.
All adjustments to the multipass cell alignment are
made with the back mirror assembly. (see Fig. 5,
page 16). The mirror tilt is adjusted by turning the
tilt/translation set screws individually, and the mirror can be translated by turning all three set screws
by the same amount. Clockwise rotation moves the
two mirrors apart, and counterclockwise rotation
moves the two mirrors together. The three set
screws have 80-pitch threads, meaning that one
full rotation of the screw results in a translation of
1/80 inches (0.0125 in, or 0.318 mm). If the back
mirror is translated, the screws that hold the triangular spring should be adjusted to maintain moderate tension on the back mirror. Finally, the back
mirror can be rotated, or twisted, relative to the
stationary front mirror. Rotation of the back mirror is accomplished by loosening the three cap
screws that hold the mirror onto the circular plug.
These three cap screws have spring washers so that
they can be loosened and still maintain tension on
the mirror. The mirror is rotated using a 3/16-inch
hex wrench or ball driver.
22
The important alignment parameters are the mirror separation and the twist angle between the mirrors. The tilt of the back mirror is not a crucial
alignment; it is used to fine-tune the spot pattern.
The flat surface at the edge of the mirrors is roughly aligned with one of the axes of the astigmatic
mirror surface. The mirrors should be oriented so
this surface is facing approximately upward. For
the back mirror the scribe marked on the circular
plug should be lined-up with the scribe on the triangular plate.
Confirming that the multipass cell is correctly
aligned is best accomplished by recognizing the
beam spot pattern on the mirrors. Counting the
spots is generally quite difficult. Instead, one can
identify the correct alignment by matching the
spot pattern to the theoretical spot patterns given
on pages 24 and 25. Within the spot patterns, one
can usually identify characteristic sub-patterns of
spots that help to confirm that the cell is correctly
aligned.
There are two techniques for aligning the multipass cell. The first involves aligning the cell to a
90-pass spot pattern as a starting point. From
there, the back mirror is translated a precise
amount to reach the desired 182-pass configuration. Note that the 90-pass spot pattern is another
arrangement that could also be useful for performing measurements. For the Model 5611 the 90-pass
configuration gives an 18-meter path length, and
for the Model 5612 the 90-pass configuration gives
a 50-meter path length.
23
Fig. 6
Pattern of beam spots for the 90-pass configuration.
(a) front mirror
22
3
26
44
4
41
1
19
2
23
27
(b) back mirror
22
4
3
1
2
42
24
19
24
45
Fig. 7
Pattern of beam spots for the 182-pass configuration.
(a) front mirror
70
49 25
1
24
45
66
2
67
42
21
25
(b) back mirror
71 4
3
1
70
46
22
2
91
88 21
67
25
The second alignment technique involves locating
the 182-pass configuration directly. This second
technique is more difficult because the 182-pass
configuration is a more difficult pattern to find. In
the first technique, we use the 90-pass configuration as a relatively easy reference point to start
from.
Figure 6 (page 24) shows the theoretical 45-beam
spot pattern for the 90-pass configuration, and
Figure 7 (page 25) shows the theoretical 91-beam
spot pattern for the 182-pass configuration. The
dashed circle in the center of the front mirror indicates the input/output coupling hole. The numbers that label some of the spots indicate the order
in which the spots appear on the mirror.
Note that the spot patterns are circularly symmetric. Also, note that the first spot on the back mirror
is always at the extreme edge of the pattern and
sets the overall size of the spot pattern. The position of this first spot is determined by the angle of
the input beam relative to the axis of the cell. The
beam can enter the cell from the left or the right;
the spot patterns in Figures 6 and 7 were made
assuming the beam enters the cell from the right.
If the beam enters from the left, the same patterns
will result but they will be reflected about the center of the circle.
To align the mirrors remove the back plate and
O-ring to access the back mirror tilt and translation adjustments. The alignment procedure
involves measuring the distance from the end surface of the housing to the surface of the triangular
plate. To locate the 90-pass configuration, set
26
this distance to the values written on page 31 by
adjusting the three set screws. For the small multipass cell (Model 5611), the nominal distance is
0.250±0.010 inches (6.35±0.25 mm). For the
large multipass cell (Model 5612), the nominal
distance is 0.320±0.030 inches (8.13±0.76 mm).
The tolerances indicate approximately how much
the mirror position can be off by and still allow the
correct spot pattern to appear.
Next, couple light into the cell. To confirm that the
back mirror is not tilted, shine the beam straight
through the input hole of the front mirror onto the
center of the back mirror. Adjust the back mirror
tilt until the reflected beam is centered on the
input hole. Then, couple the light into the cell at
an angle so that the first spot on the back mirror
hits the back mirror close to its edge.
Loosen the three cap screws on the circular plug
that holds the back mirror in place against the
triangular plate. Rotate the back mirror with a
3/16-inch ball driver until the beam spot pattern
corresponding to the 90-pass configuration
appears (see Fig. 6, page 24).
With some practice and perhaps a few iterations,
the 45-spot pattern corresponding to the 90-pass
configuration should be located and identified,
and the output beam should appear. If the output
beam is clipped by the coupling hole, small translations and rotations of the back mirror will center
the output beam through the coupling hole.
Finally, small adjustments to the tilt and translation of the back mirror, the mirror twist angle, and
27
the pointing of the input beam can be performed
to fine tune the spot pattern.
Once the multipass cell is aligned to the 90-pass
configuration, you are ready to translate the back
mirror to reach the 182-pass configuration. As
with the 90-pass configuration, the distance from
the end of the housing to the triangular plate is
used to locate the 182-pass configuration. Refer to
the distance written on page 31 for your particular
multipass cell. For the small multipass cell
(Model 5611) the nominal distance is 0.395±0.005
inches (10.03±0.13 mm). For the large multipass
cell (Model 5612) the nominal distance is
0.720±0.014 inches (18.29±0.36 mm).
If the cell is aligned to the 90-pass configuration,
you can reach the 182-pass configuration by translating the back mirror toward the front mirror. For
the small multipass cell (Model 5611), the back
mirror should be translated by 0.145 inches (3.68
mm), or about 11.6 counterclockwise rotations of
the three set screws. For the large multipass cell
(Model 5612), the back mirror should be translated by 0.400 inches (10.16 mm), or about 32 counterclockwise rotations of the three set screws. The
twist angle of the back mirror is the same to within
one degree for both the 90- and 182-pass configurations.
Once the back mirror is translated into position,
the 91-spot pattern shown in Fig. 7 (page 25) still
may not appear or the output beam may be partially clipped by the coupling hole. To fine tune the
alignment, the back mirror can be rotated, but not
by more than a few degrees. The back mirror can
also be tilted and translated slightly.
28
Admittedly, locating and identifying the 91-spot
pattern is not trivial, but with practice it becomes
easier. The spot pattern may not precisely match
the patterns shown in Figure 7 due to variations in
the mirror radii of curvature. However, the characteristic features of the spot patterns in Figure 7
should still be preserved. These features are the key
to identifying the correct pattern. One notable feature is the two sets of three beam spots that appear
above (spots 24, 49, and 25) and below (spots 66,
42, and 67) the input coupling hole. Another is
the line of spots that runs from the top to the bottom of the spot pattern, beginning with spot 70
and ending with spot 21. And finally, note the circular clusters of spots on the left and right sides of
the mirror.
29
Specifications
Model #
5611
5612
Path Length
36 m
100 m
182 passes
# of Passes
182 passes
Mirror Separation
20 cm
55 cm
Cell Volume
0.3 liters
3.2 liters
Gas Fittings
two 1/2" dia.
and one 1/4" dia.
two 1/2" dia.
and one 1/4" dia.
Pressure
1–760 Torr
1–760 Torr
Mirrors
30
protected silver coating
Reflectivity (3–10 µm)
>99%
>99%
Reflectivity (1–3 µm)
>98%
>98%
Alignment Data
Model Number: ______________________
Serial Number: ______________________
Back mirror position (distance from the end surface of the housing to the surface of the triangular
plate):
90-Pass Configuration: ________________
182-Pass Configuration: ________________
31
NEW FOCUS, Inc.
2630 Walsh Avenue
Santa Clara, CA 95051-0905
USA
Phone: (408) 980-8088
Fax: (408) 980-8883
Email: [email protected]
32