1
5
Service Parts Replacement
UNPLUG APPLIANCE FROM ANY POWER SOURCE
BEFORE REPLACING ANY COMPONENTS
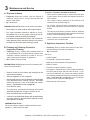
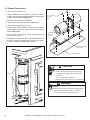
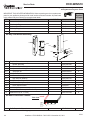
A. Glass Replacement
(Replace with 5mm ceramic glass only)
1. Ensure that the fire is out and the appliance is cool to
the touch.
2.
Protect a table or counter top with padding or towels.
Protect your hands and wear gloves to prevent injury.
3.
Remove the door with the broken glass by lifting the
door up and off of the hinges.
4.
Lay door face down on a table or counter making sure
the handle hangs over the edge so the door lays flat, on
a soft surface.
5.
Remove the screws from each glass retainer and remove
the glass. (If screws are difficult to remove, soak with
penetrating oil first).
6.
Center the glass with edges evenly overlapping the
opening in the door, (i.e. same space top and bottom,
left and right sides).
7.
Replace the glass retainers. Be careful not to cross
thread the screws.
8.
Tighten each retainer just a few turns until each is
secured. Check again for centering of glass in door
frame. Continue to tighten each retainer alternately, a
few turns at a time, until the glass is secure. DO NOT
OVERTIGHTEN - can cause glass to break.
9.
Replace the door on the appliance.
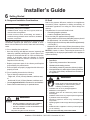
WARNING! Risk of Fire or Injury!
Use only glass that is specified in the manual, DO NOT
replace with any other material. Glass breakage will occur.
CAUTION!
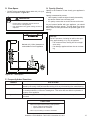
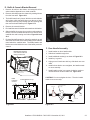
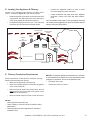
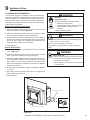
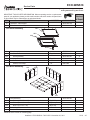
B. Snap Disc Replacement (Cont;d)
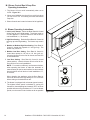
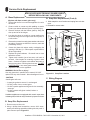
3. Slide snap disc out of bracket and unplug from wire harness.
4. Reinstall in reverse order.
ATTACHMENT
HARDWARE
LEFT SIDE
PANEL
SNAP DISC
Figure 21.1 Snap Disc Location
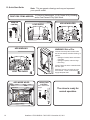
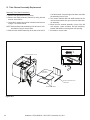
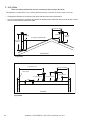
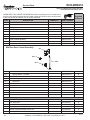
C. Wiring Diagram
Handle glass with care.
• Inspect the gasket to ensure it is undamaged.
• Do NOT strike, slam or scratch glass.
• Do NOT operate appliance with glass & door assembly
removed.
• Do NOT operate with glass cracked, broken or
scratched.
Heatilator appliances are equipped with ceramic super heatresistant glass, which can only be broken by impact or misuse.
Blower
Black
White
White
Snap Disc
Power Cord
Black
White
Black
B. Snap Disc Replacement
1. Remove surround from unit.
2. Using a phillips head screwdriver, remove 8-32 screw,
washer and bushing assemblies holding left side panel in
place. Remove panel. Figure 21.1
Switch
Rheostat
Figure 21.2
Heatilator • ECO-WINS18 • 7065-132D • November 22, 2011
21