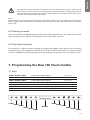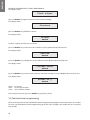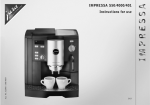
1
english USE AND MAINTENANCE NEW 105 TOUCH SERIES english Index 1. Introduction . . . . . . . . . . . . . . . . . . . . . . . . . . . . . . . . . . . . . . . . . . . . . . . . . . . . . . pag. 1.1 Using the manual . . . . . . . . . . . . . . . . . . . . . . . . . . . . . . . . . . . . . . . . . . . . . . . . pag. 1.2 Warnings . . . . . . . . . . . . . . . . . . . . . . . . . . . . . . . . . . . . . . . . . . . . . . . . . . . . . . . pag. 1.3 Starting the coffee machine . . . . . . . . . . . . . . . . . . . . . . . . . . . . . . . . . . . . . . . . pag. 1.4 Technical characteristics . . . . . . . . . . . . . . . . . . . . . . . . . . . . . . . . . . . . . . . . . . . pag. 3 3 3 4 4 2. Description of the machine . . . . . . . . . . . . . . . . . . . . . . . . . . . . . . . . . . . . . pag. 5 2.1 General water system diagram . . . . . . . . . . . . . . . . . . . . . . . . . . . . . . . . . . . . . . pag. 6 2.2 Water system diagram key: . . . . . . . . . . . . . . . . . . . . . . . . . . . . . . . . . . . . . . . . . pag. 7 3. Installation . . . . . . . . . . . . . . . . . . . . . . . . . . . . . . . . . . . . . . . . . . . . . . . . . . . . . . . . pag. 3.1 Equipment provided . . . . . . . . . . . . . . . . . . . . . . . . . . . . . . . . . . . . . . . . . . . . . . pag. 3.2 Water mains set-up . . . . . . . . . . . . . . . . . . . . . . . . . . . . . . . . . . . . . . . . . . . . . . . pag. 3.3 Water softener (optional) . . . . . . . . . . . . . . . . . . . . . . . . . . . . . . . . . . . . . . . . . . . pag. 3.4 Installation of water system . . . . . . . . . . . . . . . . . . . . . . . . . . . . . . . . . . . . . . . . pag. 3.5 Drain . . . . . . . . . . . . . . . . . . . . . . . . . . . . . . . . . . . . . . . . . . . . . . . . . . . . . . . . . . pag. 3.6 Electrical connection . . . . . . . . . . . . . . . . . . . . . . . . . . . . . . . . . . . . . . . . . . . . . . pag. 8 8 8 8 9 9 9 4. Start-up . . . . . . . . . . . . . . . . . . . . . . . . . . . . . . . . . . . . . . . . . . . . . . . . . . . . . . . . . . pag. 11 4.1 Filling the boiler with water . . . . . . . . . . . . . . . . . . . . . . . . . . . . . . . . . . . . . . . . . pag. 11 5. Adjustments . . . . . . . . . . . . . . . . . . . . . . . . . . . . . . . . . . . . . . . . . . . . . . . . . . . . . . pag. 11 5.1 Adjustment of boiler water level probe . . . . . . . . . . . . . . . . . . . . . . . . . . . . . . . . pag. 5.2 Adjustment of pump dispensing pressure . . . . . . . . . . . . . . . . . . . . . . . . . . . . . pag. 5.3 Adjustment of steam pressure in boiler . . . . . . . . . . . . . . . . . . . . . . . . . . . . . . . pag. 5.4 Temperature adjustment of dispensing units: . . . . . . . . . . . . . . . . . . . . . . . . . . . pag. 5.5 Additional notes for NEW 105 DTC (Dual Temperature Control) models . . . . . . pag. 5.6 Hot water temperature adjustment . . . . . . . . . . . . . . . . . . . . . . . . . . . . . . . . . . . pag. 12 12 12 13 13 14 6. Operating instructions . . . . . . . . . . . . . . . . . . . . . . . . . . . . . . . . . . . . . . . . . . . pag. 14 6.1 Dispensing espresso coffee . . . . . . . . . . . . . . . . . . . . . . . . . . . . . . . . . . . . . . . . pag. 6.2 Drawing steam . . . . . . . . . . . . . . . . . . . . . . . . . . . . . . . . . . . . . . . . . . . . . . . . . . pag. 6.3 Drawing hot water . . . . . . . . . . . . . . . . . . . . . . . . . . . . . . . . . . . . . . . . . . . . . . . . pag. 6.4 Cup heater (optional) . . . . . . . . . . . . . . . . . . . . . . . . . . . . . . . . . . . . . . . . . . . . . . pag. 14 14 15 15 7. Programming the New 105 Touch models . . . . . . . . . . . . . . . . . . . . . pag. 15 7.1 Keys . . . . . . . . . . . . . . . . . . . . . . . . . . . . . . . . . . . . . . . . . . . . . . . . . . . . . . . . . . pag. 7.2 Dispensing . . . . . . . . . . . . . . . . . . . . . . . . . . . . . . . . . . . . . . . . . . . . . . . . . . . . . pag. 7.3 Coffee boiler heating . . . . . . . . . . . . . . . . . . . . . . . . . . . . . . . . . . . . . . . . . . . . . . pag. 7.4 Programming and readings . . . . . . . . . . . . . . . . . . . . . . . . . . . . . . . . . . . . . . . . . pag. 7.5 Technical level programming . . . . . . . . . . . . . . . . . . . . . . . . . . . . . . . . . . . . . . . . pag. 7.6 Alarm signals . . . . . . . . . . . . . . . . . . . . . . . . . . . . . . . . . . . . . . . . . . . . . . . . . . . . pag. 7.7 Default preset data . . . . . . . . . . . . . . . . . . . . . . . . . . . . . . . . . . . . . . . . . . . . . . . pag. 7.8 Procedures in the event of a power failure . . . . . . . . . . . . . . . . . . . . . . . . . . . . . pag. 15 17 21 22 26 31 34 35 8. Routine maintenance . . . . . . . . . . . . . . . . . . . . . . . . . . . . . . . . . . . . . . . . . . . . pag. 36 8.1 Cleaning the dispensing units and the filter cup . . . . . . . . . . . . . . . . . . . . . . . . . pag. 8.2 Cleaning the tray and cup support grille . . . . . . . . . . . . . . . . . . . . . . . . . . . . . . . pag. 8.3 Cleaning the steam spout . . . . . . . . . . . . . . . . . . . . . . . . . . . . . . . . . . . . . . . . . . pag. 8.4 Replacing the boiler water . . . . . . . . . . . . . . . . . . . . . . . . . . . . . . . . . . . . . . . . . pag. 36 36 36 36 9. Idle periods . . . . . . . . . . . . . . . . . . . . . . . . . . . . . . . . . . . . . . . . . . . . . . . . . . . . . . . pag. 37 10. Display of alarms . . . . . . . . . . . . . . . . . . . . . . . . . . . . . . . . . . . . . . . . . . . . . . . pag. 37 10.1 Volumetric meters alarm . . . . . . . . . . . . . . . . . . . . . . . . . . . . . . . . . . . . . . . . . . pag. 37 10.2 Automatic level alarm . . . . . . . . . . . . . . . . . . . . . . . . . . . . . . . . . . . . . . . . . . . . pag. 37 10.3 Maximum water level in boiler alarm . . . . . . . . . . . . . . . . . . . . . . . . . . . . . . . . . pag. 37 11. Safety devices . . . . . . . . . . . . . . . . . . . . . . . . . . . . . . . . . . . . . . . . . . . . . . . . . . pag. 38 11.1 Manual reset safety thermostat . . . . . . . . . . . . . . . . . . . . . . . . . . . . . . . . . . . . . . . pag. 11.2 Safety valve . . . . . . . . . . . . . . . . . . . . . . . . . . . . . . . . . . . . . . . . . . . . . . . . . . . . . . pag. 12. User information . . . . . . . . . . . . . . . . . . . . . . . . . . . . . . . . . . . . . . . . . . . . . . . . . . . . pag. 13. Guarantee . . . . . . . . . . . . . . . . . . . . . . . . . . . . . . . . . . . . . . . . . . . . . . . . . . . . . . . . . pag. 38 38 38 39 14. Declaration of conformity . . . . . . . . . . . . . . . . . . . . . . . . . . . . . . . . . pag. 39 15. Troubleshooting . . . . . . . . . . . . . . . . . . . . . . . . . . . . . . . . . . . . . . . . . . . . . . . . pag. 40 Manual code: 7770.032 Revision 05/2010 2 english 1. Introduction Before using the machine, carefully read all of the instructions contained in this machine. 1.1 Using the manual This manual contains all information required for the installation, use and maintenance of the coffee machine. This manual is an integral part of the machine; always keep it intact together with the appliance. 1.2 Warnings • • • • • • • • • • • • • • • • Do not operate the machine or carry out routine maintenance before reading this manual. • This machine is designed and built for dispensing espresso coffee, hot water (for the preparation of hot beverages and infusions) and steam (used to heat liquids). The use of the machine for any other than its intended purposes is considered to be improper and unauthorised. The manufacturer declines any liability for damage resulting from the improper use of the machine. The user must be a responsible adult, who is expected to comply with local safety rules and accepted common sense procedures. For the correct and safe use of this machine, the operator must observe the accident-prevention rules and any other medical or occupational hygiene requirements applicable in the country where the machine is used. Machine use, along with all routine maintenance and cleaning operations must only be performed by authorised personnel, appointed by the customer under the responsibility of the latter. Do not install the espresso coffee machine in rooms which are cleaned with water jets. Never turn the machine on before it has been connected to the water mains. The water cut-off valve must remain open when the machine is on. The user must make sure of this. Only place empty cups on the purpose-provided cup support grille. Never cover the machine when it is in operation. There must be suitable air recirculation. It is absolutely prohibited to operate the machine with the fixed and/or mobile guards removed or with the safety devices bypassed. The safety devices must absolutely never be removed or tampered with. The panels covering the machine must not be removed, as the machine contains live parts (there is the risk of electric shock). Before performing any routine maintenance or cleaning operations, unplug machine from the socket, if possible, otherwise trip the omnipolar switch upstream of the machine. The safety devices must always be in perfect condition, observing the regular maintenance performed by La San Marco authorised personnel. The hot parts of the machine (dispensing unit, boiler, piping, etc.) could cause burns due to accidental skin contact. Gloves, aprons, etc. should therefore be worn during maintenance or repair work. For cleaning, avoid the use of products such as alcohol, petrol or solvents in general; use water and neutral detergents. To clean the body of the machine, simply wipe it with a damp cloth or sponge; do not use abrasive products which could damage parts of the machine body. To clean the coffee dispensing units, the filter cups, grilles and trays, follow the instructions provided in the chapter entitled Routine Maintenance. For improved machine quality, on starting the machine every day, the water in the boiler must be replaced and that contained in the piping must be emptied and replaced. Should the machine be left idle for several hours over the course of the day, it is advisable to replace the water by allowing it to flow out of the hot water drawing tap and the coffee dispensing units. Strict compliance with the routine maintenance instructions of this manual is required for a safe and efficient operation of the appliance. In the event of faults or breakage of any component of the espresso coffee machine, contact an authorised service centre and insist on original La San Marco S.p.A. spare parts; the use of non-original spare parts will nullify the certification of conformity and the guarantee which accompany the appliance. 3 english • All modifications to the machine and/or failure to perform the scheduled maintenance operations relieve the manufacturer of any liability for any damage ensued and nullifies the declaration of conformity and the guarantee. • Performing operations on the machine which have not been authorised is strictly forbidden; contact the manufacturer for any information or requests for spare parts or accessories. • If the machine is no longer used and requires dismantling, please contact the manufacturer or your local council for the disposal of urban solid waste disposal procedures. Do not discard into the environment. • San Marco S.p.A. reserves the right to make technical modifications to the machine where deemed necessary without notice. 1.3 Starting the coffee machine Ambient temperature: 5 ÷ 45°C (drain the water system in case of frost) Mains water pressure: 80 ÷ 800 kPa (0.8 ÷ 8.0 bar) Water hardness: less than 5° fH Noise level emitted by the machine: The weighted sound pressure level A is below 70 db(A), under normal conditions of use of the machine. 1.4 Technical characteristics Power input (w) Model N° GR. capacity boiler). L 2 12 3 19 2 12 3 19 C Connection mains Monophase Three phase 3500/4500 3500/4500 pump motor Cup heater (Optional) Weight (kg) A  B A (mm) B (mm) C (mm) 275 100 60 790 535 518 5500/7000 275 125 74 1030 535 518 3500/4500 3500/4500 275 100 60 790 535 518 275 125 74 1030 535 518 NEW 105 T 5500 NEW 105 T DTC 5500 5500/7000 Standard: • Automatic level (automatic filling of water in boiler). • Incorporated pump. • Temperature adjustment of dispensing units (not available on NEW 105 DTC models). • Stabilised temperature unit (NEW 105 DTC) • Hot water mixer with temperature adjustment. • Electronic control of boiler temperature. 4 On request: • Electrical cup heater. • Water softener (manual or automatic). • External pump (300 W). • Cappuccino maker. english 2. Description of the machine Note: The terms used in this description will commonly be used throughout the following pages. 12 10 11 8 7 1 6 9 KEY: 1) 2) 3) 4) 5) 6) 7) 8) 9) 10) 11) 12) New 105 Touch 2 3 4 5 Main switch Espresso coffee serving unit Filter cup with handle Double-scale pressure gauge Lower tray + cup support grille Electronic level Steam spout Burn protection sheath for steam spout Hot water spout Steam drawing knob Touch control panel Upper cup support grille 5 New 105 models New 105 DTC models english 2.1 General water system diagram 6 english 2.2 Water system diagram key: 1) 2) 3) 4) 5) 6) 7) 8) 9) 10) 11) 12) 13) 14) 15) 16) 17) 18) 19) 20) 21) 22) 23) 24) 25) 26) 27) 28) 29) 30) 31) 32) 33) 34) 35) 36) 37) 38) 39) 40) 41) Water softener Water softener outflow valve Water softener outflow valve Supply from water mains Electric motor pump Pressure gauge Non-return and safety valve Automatic level control valve Filter Automatic level solenoid valve Automatic level control valve Boiler water filling valve Non-return valve Boiler water drain valve Manifold tap Volumetric meters Exchanger tap Safety thermostat probe Electric heating element Heat exchanger Safety thermostat Temperature probe Steam valve Hot water mixer Pressure gauge (boiler) Vacuum valve Maximum level probe Level probe Safety valve Electronic control unit Electronic level Temperature adjustment of dispensing units (not available on NEW 105 DTC models) Infusion device Dispensing unit Filter cup Dispensing unit solenoid valve Tray and cup support grille Drain tray Drain tube Cooling tube (NEW 105 DTC) 7 english 3. Installation • Installation must be carried out by skilled authorised LA SAN MARCO SPA technical personnel. • The coffee machine is delivered in suitable packaging. The packaging contains the machine and its accessories, the user manual and the conformity declaration. After opening the packaging, make sure the coffee machine and its components are intact. In case of doubt, do not use the appliance, and contact the manufacturer. • All of the packaging must be carefully set aside in case the machine needs to be transported in future. • The machine should be placed on a perfectly horizontal surface, which is sufficiently sturdy to support the weight of the machine, with a sufficient clearance around it to dissipate the heat generated during its operation. • Do not install the espresso coffee machine in places where cleaning is to be carried out with jets of water. Do not immerge the unit in water to clean it. • For safety against hazards related to electrical currents, keep the machine away from sinks, tubs, aquariums, taps, and areas that are wet or where water may splash. • The machine creates heat. Therefore it needs to be placed in a room that is sufficiently ventilated to ensure heat dissipation. Keep the machine away from sources of direct heat. • Make sure that the voltage of the power socket does not differ from that indicated in the technical data and on the identification plate affixed to the machine. If the voltage is different, do not connect the machine. This may be dangerous and may damage the appliance. 3.1 Equipment provided The machine packing contains the equipment kit, which includes the following items: – filter cups with filter restraint ring – filters for filter cups (single and double doses) – blind filter for filter cup – filters for filter cups (single and double doses) – press for ground coffee – rubber tube with stainless steel mesh for water connection (water circuit - water softener) – rubber drain hose with steel coil for water drain – 3/8" nipples for hose connection to water supply tube – cleaning brush for serving units 3.2 Water mains set-up FEEDING LINE Bring the water feeding tube (at least 3/8" in diameter) up to the machine and install an cut-off valve (preferably of 3/8" ball type) that allows a rapid opening and closing operation. The appliance should be connected to the water mains using the tube supplied with it. Do not connect the appliance with used tubes. DRAIN LINE Provide an inspectable drain pit on the floor connected with the sink drain line, suitable for receiving the machine gravity drain tube. The drain tube must be positioned so that the water flows out freely, without it being possible for the pipe to clog up during operation. 3.3 Water softener (optional) 8 The water softener for softening the mains water can be manual or automatic, depending on customer's request. Before connecting the water softener to the coffee machine, the resins contained in it should be washed off as described in the user manual supplied with the appliance. 3.4 Installation of water system INTERNAL PUMP 1) Use the tube a (900 mm, supplied with the appliance) to connect the cut-off valve of the water mains to the tap 1 for water inlet to the water softener (figure 3). 2) Connect the tube b for internal pump suction to the tap 2 of the water softener (figure 4). a 1 figure 3 b 2 figure 4 EXTERNAL PUMP (OPTIONAL) 1) Use the tube a (900 mm, supplied with the appliance) to connect the cut-off valve of the water mains to the tap 1 for water inlet to the water softener (figure 5). 2) Use the tube c (600 mm, supplied with the external pump) to connect the pump suction to the tap 2 of the water softener (figure 6-7). 3) Connect the tube d (of the coffee machine's water system) to the pump delivery (figure 7). b a 1 b Figure 5 c 2 Figure 6 Figure 7 3.5 Drain Connect the drainage tube to the grounds collecting tray and to the water drainage system. 3.6 Electrical connection Instructions for a proper electrical connection of the espresso coffee machine: • Before connecting the appliance to the electrical mains, make sure that the data on the data plate corresponds to the electrical mains. • Connection must be made in compliance with regulations in the country of installation. • The electrical system provided by the customer must comply with the applicable standards in force; the power socket must be equipped with an efficient earth connection. LA SAN MARCO SPA will not in any way be held liable if legal requirements are not met. Improper installation may cause personal injury or property damage for which the manufacturer cannot be held liable. • For the electrical connection, it is necessary to install an omnipolar main switch upstream of the power supply; this switch should be rated according to the electrical characteristics (power and voltage) shown on the appliance data plate. The omnipolar switch must disconnect the power supply with a contact gap of at least 3 mm. 9 english Note: The water softener is considered an essential device to guarantee a proper operation of the espresso coffee machine. A water softening system should be provided in order to guarantee the efficiency, performance and duration of the components in the machine. english • If it is necessary to use adapters, multiple plugs and extensions, only products meeting applicable safety standards must be used. • To avoid any overheating of the power cable, unwind it completely. Connect the power cable to the electrical mains as shown in the attached diagram: 230v-3n mono-phase* new 105 touch Notes: * The power absorbed by the electric heating elements can be reduced to 2/3 by eliminating one of the Black wires. 400v-3n three phase 3 heating elements blue blue blue black black black black black black brown brown brown ye/gr ye/gr ye/gr 230v-3n three phase 3 heating elements blue blue black black black brown brown ye/gr black ye/gr 10 english 4. Start-up • The espresso coffee machine must be started by qualified technical personnel authorised by LA SAN MARCO SPA. • Once the electric and hydraulic connections are completed, the user is advised to start the espresso coffee machine with the following procedure in order to avoid damaging the appliance. 4.1 Filling the boiler with water 1) 2) Check that the main switch of the appliance 1 (figure 1) is set to position 0 (zero). Remove the tray and the cup support grill and make sure that: a) The boiler drain valve a is closed (figure 8). b) The taps of the automatic level valve b-c must be open (figure 8). c) The taps of the volumetric meters d must be turned on (figure 9). d Figure 9 d a b c f 3) Open the water supply on-off valve. 4)Lower the lever of a steam tap in order to allow the release of air while filling the boiler with water. 5) Reinstall the tray and cup support grill in its place. 6) Turn the main switch knob to position 1 so as to carry out the automatic filling of the boiler with water. In the NEW 105 Practical models, when water reaches the level probe, filling stops and the green “MAX” LED of the electronic level control is turned on. In the other models of the NEW 105 series, when water reaches the level probe, filling stops and the blue “OK” LED of the electronic control is turned on. Figure 8 Note: when the boiler is filled with water, it may take longer than 150 seconds, after which the automatic level alarm is triggered (see the chapter on display of alarms). If this happens, turn the main switch to 0 (zero) and then back to 1 in order to perform automatic filling of the boiler again (as described in point 6). To prevent the automatic level alarm from being triggered, just speed up automatic filling of the boiler using the manual filling button f (figure 8). The main switch can be turned to two positions (1 and 2). Position 1 starts the electronic automatic level function to fill the boiler and excludes the operation of the heating elements. Position 2 starts the heating elements to heat the water. Never start the coffee machine by turning the main switch to position 2 (the electrical heating elements must always be submerged in water in order to operate). 5. Adjustments Any adjustments to the coffee machine must be carried out by qualified technical staff authorised by LA SAN MARCO SPA. 11 english 5.1 Adjustment of boiler water level probe The level probe is normally placed in a standard position for all the models in the NEW 105 series. However, if the customer so desires, the amount of water in the boiler can be increased or decreased by adjusting the level probe as shown in the figure. 5.2 Adjustment of pump dispensing pressure In the models in the NEW 105 series, the pump is located inside the coffee machine. Note: An external pump can be installed on the coffee machine upon request. The pump operating pressure is calibrated by LA SAN MARCO SPA at a value of 9 bar. Should you wish to change this value, proceed as follows: 1) The standard location for the pump is the right side of the machine (looking at it from the work zone). To access it, the right side must be removed (figure 11). 2) Press the continuous dispensing button to dispense water from one of the dispensing units. 3) On the lower graduated scale of the gauge, read the pump operating pressure. 4) Adjust the pressure using the adjustment screw of the internal pump (figure 11) or in the event of an external pump (figure 12). To increase the pressure, tighten the screw and read the corresponding value on the lower scale of the gauge. To decrease the pressure, loosen the adjustment screw. Figure 11 Figure 12 5) Once the desired pressure has been set, stop dispensing water and close the side of the machine. Note: The suggested calibration of the pump operating pressure to obtain proper dispensing is 9 bar. 5.3 Adjustment of steam pressure in boiler The steam pressure in the boiler is shown on the upper scale of the pressure gauge B (figure 13). The lower graduated scale indicates the operating pressure of the pump. To change the pressure of the liquid-saturated steam mixture inside the boiler, you will need to vary the temperature as explained in the programming chapter. 12 Figure 13 english 5.4 Temperature adjustment of dispensing units: In the NEW 105 T models (except for the NEW 105 T DTC models), the espresso coffee dispensing temperature can be adjusted without changing the internal pressure of the boiler. A valve (flow variator) is fitted to the tip of the dispensing unit, which controls the flow of hot water from the exchangers; this valve is accessible from the upper tray, after removing the plastic cup support grille (figure 15). Four numbered notches are imprinted on the upper tray (2, 3, 4, 5) for each dispensing unit (figure 16). The valve is normally set to number 3 (this is the default setting factory set by LA SAN MARCO SPA). If you wish to change the dispensing temperature, you will need to use the valve (flow variator) on the dispensing unit. To increase the temperature, turn the valve towards the higher numbers. Contrarily, to decrease it, turn the knob towards lower numbers. 5.5 Additional notes for NEW 105 DTC (Dual Temperature Control) models The cooling system of the NEW 105 DTC models has the purpose of ensuring thermal stability of the water used for dispensing espresso coffee. This system uses a special dispensing unit in which the cold water from the mains passes through a small tube located in a compensation chamber. The hot water from the heat exchanger of the boiler passes through the dispensing unit and comes into contact with the cooling tube. As a result it loses heat. 13 english 5.6 Hot water temperature adjustment The NEW 105 Touch models feature a mixer that makes it possible to adjust the temperature of the hot water for the preparation of infusions. The mixer can be calibrated by turning the adjustment screw, which is accessed from the upper tray (figure 17). The mixer calibration is factory set by LA SAN MARCO SPA. If you want to increase the temperature of the hot water drawn, turn the screw clockwise. On the contrary, if you want to decrease the temperature of the water, turn the screw anti-clockwise. Note: The mixer must be adjusted with the coffee machine running under normal operating conditions. The steam pressure in the boiler is 1.0 bar (standard value set by LA SAN MARCO SPA). if the steam pressure in the boiler is modified (as described in the relevant paragraph), the mixer must be calibrated again. Figure 15 Figure 16 Figure 17 6. Operating instructions During the dispensing of espresso coffee, tea or steam, these can cause burns due to accidental skin contact. 6.1 Dispensing espresso coffee 1) Remove the filter cup from the dispensing unit and fill it with a dose of ground coffee (filter cup with one spout) or with two doses of ground coffee (filter cup with two spouts). Press the ground coffee using the relevant coffee press and then insert the filter cup into the dispensing unit. 2) Place one or two cups under the dispensing spout.  Note: Make sure that the coffee has been dispensed into the cup correctly; if not, see the chapter entitled “TROUBLESHOOTING”. 6.2 Drawing steam A jet of steam, which can be used to foam milk or to heat other liquids, comes out of the steam drawing spout as follows: by raising or lowering the lever you attain the maximum flow (the lever stops in the maximum position. To stop the flow of steam, place the lever back in its original position); if you move the lever sideways you will obtain a reduced steam flow (the lever does not lock in place, and if released, it returns to its original position). 14 The steamer must be used with care: contact of the skin with the steam spout or with the jet of steam itself can cause serious burns. Grip the burn protection sheath to change the position of the steam drawing spout. Never aim the jet of steam at persons or at objects which are not connected to the use described in this manual. Note: Before using the steam drawing spout, drain any condensation which may have formed within it into the tray. After using the spout, wipe it clean with a damp cloth, and if necessary drain any residue remaining inside it into the tray. 6.3 Drawing hot water Hot water is drawn by the appropriate spout and can be used to prepare infusions, tea, camomile tea, to heat cups, to add water to an espresso and to obtain American-style coffee, and so on. 6.4 Cup heater (optional) The cup heater is used to increase the heating of the upper cup support surface (by means of an electrical heating element). Use the appropriate switch to activate or de-activate the cup heater. The cup heater heating element is equipped with an operating thermostat that controls the temperature of the cup support surface. 7. Programming the New 105 Touch models 7.1 Keys K1GR1, K1GR2, K1GR3: 1st coffee dose dispensing key Unit 1, 2, 3 K2GR1, K2GR2, K2GR3: 2 coffee dose dispensing key Unit 1, 2, 3 K3GR1, K3GR2, K3GR3: 3 coffee dose dispensing key Unit 1, 2, 3 K4GR1, K4GR2, K4GR3: 4st coffee dose dispensing key Unit 1, 2, 3 K5GR1, K5GR2, K5GR3: Continuous keys Unit 1, 2, 3 K5GR1 Continuous key and programming input Unit 1 K6GR1, K6GR2, K6GR3: Programmed tea dose dispensing key Unit 1, 2, 3 st st  K1gR1 K2gR1 K1gR1 K3gR1 K4gR1 DisPlAY K5gR1 K6gR1 K2gR1 K3gR1 K4gR1 K5gR1 K6gR1 15 english english As specified in more detail in the relevant paragraph, some keys in the unit 1 push button panel perform specific functions (other than dispensing) when the appliance is in programming mode. KEY ADDITIONAL FUNCTION FUNCTION DESCRIPTION K1GR1 + (PLUS) Function to "increase" the numerical values or to select default options related to the parameter being programmed K2GR1 - (MINUS) Function to "decrease" the numerical values or to select default options related to the parameter being programmed K3GR1 ENTER Function to confirm certain operations during programming K5GR1 MENU Function to select/choose the parameter you wish to program DOSAGE START By powering the dosage function on the main external switch, the function returns to the “OFF” or “IDLE-ON” status it was in before the power was cut off (see “Procedures in the event of a power failure”). When the dosage function is powered, the display briefly indicates the version of the software installed (x.yy). The display shows LA SAN MARCO REV.X.YY Off status (dosage off but powered) With the dosage function off: - all the outputs are deactivated - all the functions are deactivated, except for the TECHNICAL LEVEL programming ones The display shows OFF hh:mm Where hh:mm INDICATE the correct time in hours and minutes N.B. to switch to the OFF status, press the K5GR1 key followed by K3GR1. To switch to the IDLE ON status, press the K3GR1 key only. Idle on (on) status Start-up To start the dosage, press the K3GR1 key. In idle-on status, the dosage detects the status of the level and maximum level probes. If the probe detects that there is not enough water in the boiler, the same is filled automatically by the activation of the filling solenoid valve EVLIV and of the PUMP until the correct level of water is obtained (Filling time-out - see paragraph entitled ALARMS). If the correct levels are detected, or after the topping up of the same, the dosage is set for the activation of the coffee doses selections or for the programming of the same - where required (see subsequent paragraphs). The dispensing activation does not depend on the attainment of the set-point temperature in the boiler. IN IDLE-ON STATUS, ALL THE LEDS ARE ON 16 english The display shows xxx°C hh:mm LA SAN MARCO wherehh = current time in hours (0 ÷ 23) mm = current time in minutes LA SAN MARCO = customer's name as desired Stopping To stop the dosage function, keep the K5GR1 key pressed first, followed immediately by the K3GR1 key.  1° 2° To switch to the IDLE ON status, press the K3GR1 key only. 7.2 Dispensing Coffee cycle Dispensing In the idle-on status, press one of the four doses keys for the unit you wish to use for dispensing (for example, K1GRx). Both the dispensing solenoid valve EVx and the PUMP are energised, starting up the dispensing phase. Both the pump and the solenoid valve will remain activated until the quantity of product programmed previously is achieved (volumetric meter pulses). The LED relating to the chosen dose stays on for the entire duration of coffee dispensing.  K1GRx The display shows Espresso During dispensing, the display shows an indication of the dose dispensed (English version) 1 Espresso 2 Espressos 1 Coffee 2 Coffees Continuous Tea Steam 17 english Note: The dosage permits the contemporary dispensing of coffee from all the units envisaged by dosage. Stop dispensing coffee while in progress It is possible to interrupt dispensing while in progress before the pulses relating to the volumetric meter programmed are achieved. Simply press the key relating to the dispensing in progress. This de-energises with immediate effect both the dispensing solenoid valve EVx and the PUMP, suspending the dispensing and returning the dosage to idle-on status. Prebrewing The 3d5 MAESTRO DELUXE dosage function can be configured so that the dispensing relating to the coffee doses with volumetric control is preceded by prebrewing. When the dosage function is started, after the time t1(on) the unit solenoid valve EVx is turned off and remains turned off for the amount of time t2(off), except for re-energising to complete the dosage function as programmed. This timed on/off does not affect the PUMP actuator. PUMP EVx t1 (on) T2 (off) Programmed dose total duration of dispensing  When one of the dosage keys with volumetric control, the “normal” dispensing cycle is preceded by a brief timed water jet used to moisten the coffee pod before moving on to the actual dispensing. Times t1(on) and t2(off) can be set in TECHNICAL LEVEL programming for all coffee doses. If one or more details are set to zero, this function is not executed despite being active! To activate it see TECHNICAL LEVEL Programming. Dispensing coffee in continuous mode In the idle-on status, release one of the doses keys K5GRx (continuous/programming). Both the dispensing solenoid valve EVx and the PUMP are energised, starting up the dispensing phase. The LED L5GRx relating to the chosen dose key continues to flash for the entire duration of coffee dispensing. K5GRx  The display shows Continuos dose 18 Dispensing in continuous mode stops automatically (if it is not stopped) when the maximum product quantity is achieved; this quantity can be controlled both in volumetric mode on achievement of 6000 pulses, as well as by means of a dispensing Time-out (see paragraph entitled ALARMS). Important: the “continuous” cycle starts when the k5grx key is released (within 5 seconds otherwise the programming phase begins) and not when it is pressed. instead, dosage stops when the key is pressed. Tea cycle Dispensing When the key relating to the Tea dose is pressed (K6GRx), the Tea solenoid valve is activated (EVTEA) and hot water is dispensed. This operation is indicated by the LED (L6GRx) corresponding to the key pressed lighting up. When the cycle starts, a Timer is activated which, once the time value set during the programming phase is achieved, interrupts product dispensing. The dosage function permits the contemporary dispensing of Tea and coffee cycles. K6GRx  The display shows Tea Stop dispensing tea while in progress It is possible to interrupt dispensing while in progress before the programmed amount of time has passed. Simply press the same key used to start dispensing the tea dose. This de-energises with immediate effect the solenoid valve EVTEA and interrupts product dispensing and returning the dosage to idle-on status.  The control unit is designed to manage three different tea doses (one per unit). Tea + pump Tea dispensing can be combined with the pump. See TECHNICAL LEVEL Programming. Autosteam spout dispensing cycle This function and the keyboard dedicated to perform it is activated in TECHNICAL LEVEL Programming (see relevant paragraph) 19 english To interrupt dispensing in continuous mode, stop the dosage by pressing the same key K5GRx . This deenergises the solenoid valve and the pump, and the signal LED is consequently turned off. english Thanks to a temperature probe suitably positioned on the steam spout and connected to the STLVAP input, the temperature of the liquid heated by the steam is measured. So by pressing the AUTOSTEAM key in position K6GRx key the EVVAP is activated until the temperature set in the Programming for Simulation is reached (see paragraph below). The display shows Steam It can nonetheless be interrupted early by pressing the steam key again. Steam can continue to be dispensed when the temperature programmed is reached, by keeping the steam key pressed. If the temperature is not reached within a time-out of 120 seconds, steam dispensing ends automatically. The system permits the contemporary dispensing of coffee, tea and steam. If two or more of these are dispensed concurrently, the display shows the related indications alternately. Level probe When powered, the dosage function detects the status of the level probe situated in the boiler and, if necessary (water shortage), it arranges for the filling phase to be performed by energising the filling solenoid valve EVLIV and the PUMP until the boiler contains the right amount of water. (programmable Time-out envisaged on the filling phase - see TECHNICAL LEVEL Programming) When the system is started, the level check and adjustment is enabled after approximately 6 seconds. Every time the level probe situated in the boiler fails to detect the presence of liquid for 3 seconds, the filling phase is started by energising the filling solenoid valve EVLIV and the PUMP. When the probe detects the presence of water for 3 consecutive seconds again, the filling phase stops by de-energising the filling solenoid valve EVLIV and the PUMP. BOILER LEVEL KO EVLIV + PUMP = ON SLIVMin = operating probe SLIV = operating probe SLIVMin SLIV EVLIV POMPA PUMP  BOILER LEVEL OK EVLIV + PUMP = OFF SLIVMin SLIV EVLIV PUMP POMPA  The filling phase does not affect the possibility of performing both coffee or tea selections and a new programming of the same. Only the triggering of the Time-out combined with the filling phase inhibits the functioning of the keyboard and actuators. 20 7.3 Coffee boiler heating With on/off adjustment with hysteresis of 2°c The temperature is adjusted with a hysteresis of 2°C. The heating element is controlled by the ON/OFF relay, which is de-energised on reaching the programmed temperature T°SET (see TECHNICAL LEVEL Programming) and it re-energises when it drops by 2°C. To avoid vibrations on the trigger threshold, a time-controlled filter is also fitted. To activate this function, you will need to set in TECHNICAL PROGRAMMING all the pid constants to 0 (see relevant paragraph). With pid adjustment (default setting) The temperature is adjusted according to a proportional, integrated and derivative algorithm. (see TECHNICAL LEVEL Programming for parameter settings) The heating control is enabled when the dosage function is IDLE-ON and it uses a temperature probe and a low voltage command RISCAF for triac or solid state relay with PID function. PID T°SET  The temperature is adjusted according to an algorithm which uses 3 constants: - proportional (kp) - integrated (ki) - derivative (kd) The three constants must be adapted to all types of coffee doses according to the power characteristics of the heating element, the size of the boiler, its dissipation, and so on. The "setpoint value or T°SET" is defined as the temperature the boiler needs to be at to operate normally - If during the heating or maintenance phase the temperature oscillates excessively around the T°SET, with peak values which do not attenuate over time, the proportional constant needs to be lowered: Kp - If during the maintenance phase the temperature oscillates excessively around the T°SET, with a prolonged oscillation time and peak values which do not attenuate over time, the integrated constant needs to be lowered: Ki - If during the heating or maintenance phase the temperature oscillates excessively and is often more than the T°SET, but it attenuates over time, the derivative constant needs to be lowered: Kd - If during the heating phase the temperature tends to be below the value of the T°SET, differing from it more and more, the derivative constant needs to be increased: Kd - If during the heating phase the temperature tends to be below the value of the T°SET constantly, the proportional constant needs to be increased: Kp and the integrated constant also needs to be increased slightly: Ki - If during the maintenance phase the temperature tends to be below or above the value of the T°SET constantly, the integrated constant needs to be increased: Ki and the proportional constant also needs to be increased slightly: Kp 21 english On commissioning the water level in the boiler, the system waits for the level probe to be covered before activating the ON/OFF relay. The sensitivity of the level probes can be varied using a parameter in the TECHNICAL LEVEL Programming, in the following cases: -> LOW sensitivity 150kΩ for example in the presence of a water softener -> MEDIUM sensitivity 400KΩ normal water -> HIGH sensitivity 1MΩ for example in the event of mountain water or glass level indicator english 7.4 Programming and readings Programming coffee doses The quantities relating to the volumetric coffee doses can be modified and stored by following the procedure set out below In IDLE-ON status, press the K5GRx (1..3) key and keep pressing it for 5 seconds; make sure that the lighting of the LEDs L5GRx (1..3) switches from fixed to flashing. K5GRx  PRESS KEY > 5 seconds The display shows Doses setting Select within30s Within 30 seconds (time-out to quit the programming phase), press any of the keys combined with the 4 doses which can be programmed (for example K1GRx). The LEDs will always stay on. The LED relating to the key being programmed will flash until the dynamic programming is complete.  K1GRx When the quantity of coffee with which the dose is to be programmed is achieved, press the key being programmed to interrupt product dispensing with the consequent de-energising of EVx + PUMP. The new value of the espresso dose is stored in EEPROM in pulses of the volumetric meter.  K1GRx EVx + PUMP = OFF • To proceed with programming the remaining coffee doses (if the programming time-out of 30 seconds is not exceeded), repeat in sequence points and . • If the time-out (30 seconds) is triggered during the programming phase, to proceed with its performance, you will need to repeat the entire sequence described in points , and . 22 If the “prebrewing” function is active (see dedicated paragraphs), the dosage in programming phase still enables this particular function. therefore wait for it to have ended before stopping the dispensing in progress. Note: During the programming of a unit, the other units remain disabled, along with the tea and steam. If a coffee dose is no longer activated … Possible troubleshooting: if, after programming a volumetric dose, the same is no longer dispensed, it is possible that the dosage function, for some reason, did not receive the pulses from the volumetric meter and thus programmed a dose amounting to 0 pulses. Possible causes to verify: volumetric meter incorrectly connected, volumetric meter mixed up with that of another unit, inoperational water circuit. Programming tea doses The quantities relating to the tea doses can be modified and stored (by timed control) by following the procedure below: In IDLE-ON status, press the K5GRx (1..3) key and keep pressing it for 10 seconds; make sure that the lighting of the LEDs L5GRx (1..3) switches from fixed to flashing. The display shows Doses setting Select within30s Within 30 seconds (time-out to quit the programming phase), press the K6GRx key combined with the tea dose. The LED relating to the K6GRx key will flash. The EVTEA actuator is enabled for the entire duration of tea dose programming. When the quantity of tea with which the dose is to be programmed is achieved, press the K6GRx key used previously to interrupt product dispensing again, with the consequent de-energising of the EVTEA. The new time for the tea dose duration is stored. • To proceed with programming the other tea doses, (if the programming time-out of 30 seconds is not exceeded and you entered the programming environment from unit 1 by pressing the K5GR1 key), repeat in sequence points and . • If the time-out (30 seconds) is triggered during the programming phase, to proceed with its performance, you will need to repeat the entire sequence described in points , and . IMPORTANT: the programming of the tea dose made on the FIRST UNIT is NEVER automatically transferred to all the other units. To program the tea dose on the remaining units, simply repeat the operations described in pints , and . Note: when programming a Tea dose, the units remain disabled, along with the dispensing of other teas. Programming for steam temperature simulation The temperature at which the EVVAP should be deactivated can be modified and stored for simulation by following the procedure below. 23 english IMPORTANT: the programming made on the FIRST UNIT is not automatically transferred to all the other units. To copy the doses onto the other units, press the related continuous keys. This does not however affect the possibility of programming the remaining units independently from the first via the operations described in points , and . english In IDLE-ON status, press the K5GRx (1..3) key and keep pressing it for 10 seconds; make sure that the lighting of the LEDs L5GRx (1..3) switches from fixed to flashing. The display shows Doses setting Select within30s Within 30 seconds (time-out to quit the programming phase), press the K6GRx key combined with the steam. The LED relating to the K5GRx key. The EVVAP actuator is enabled for the entire duration of programming. When the desired temperature is reached (measured with the external probe or in another way not under the responsibility of GICAR), press the K6GRx key used previously to interrupt the steam dispensing again, with the consequent de-energising of EVTEA. The new temperature value for steam (steam spout) is stored • If the time-out (30 seconds) is triggered during the programming phase, to proceed with its performance, you will need to repeat the entire sequence described in points , and . NOTE: During the programming of Steam, the other units remain disabled. N.B. By pressing the tea key of the first unit (K6GR1), the dispensing of steam at a controlled temperature is enabled, provided this function has been activated in the technical menu (the controlled temperature steam function can only be enabled on the tea key of the first unit). If the same key continues to be pressed, the temperature control of the milk will be by-passed and the spout will behave like a normal manual spout. If on the other hand the controlled temperature steam function is not enabled, the tea key of the first unit will only be one of the two keys for timed tea. As for the tea key of the second unit, if it is pressed once only, the appliance will dispense timed tea, but if it is pressed twice in rapid sequence, the appliance will dispense tea continuously PROGRAMMING THE CLOCK In IDLE-ON status, press the K5GRx key and keep pressing it for more than 10 seconds; make sure that lighting of the LEDs L5GRx (1..3) switches from fixed to flashing. Clock adjust Note: when “Doses Setting” is displayed, keep pressing the K5GRx key (1..3) to switch to the “Clock Adjust” phase. Press the K3GR1 key (ENTER) to confirm The display shows Clock adjust hh.mm XXXXXXXXX wherehh = current time in hours (0...23) mm = current time in minutes XXX = day of the week If you wish to modify the parameter, use the K1GR1 (+) or K2GR1 (-) keys, and confirm with K5GR1. Press the K5GR1 key again to move on to setting automatic on/off. 24 english Auto On/Off- automatic starting and stopping Designed to set the automatic starting and stopping times of dosage and the weekly closing day. The display shows Auto ON/OFF aaa : hh.mm The following are programmed in order: - on time in hours (AAA = On) - on time in minutes (AAA = On) - off time in hours (AAA = Off) - off time in minutes (AAA = Off) - day off To move from one to the other, press the K5GR1 key. 1 on time and 1 off time can be set, and they apply to all the days of the week. If you do not wish to have automatic on and off, go to the programming of the corresponding time and press K1GR1 (+) or K2GR1 (-) until the display shows: The display shows Auto On/Off On : --.-- Or The display shows Auto On/Off Off : --.-- (if you press K2GR1 (-) when the display shows the time in hours of 00 or if you press K1GR1 (+) when the time in hours indicated is 23). In this case: - if automatic on time was disabled, then the off time and the day off are also automatically disabled. Press K5GR1 to skip the related settings and go directly to the next parameter. The on and off times can in this case only occur manually through the procedure described in the previous paragraph. - if automatic on time is enabled, press K5GR1 to go to the setting of the off time and then to the day off, if necessary. DAY OFF A weekly day off can be defined, on which the dosage function ignores the automatic on time and can only be turned on manually. The automatic off time is instead active even on the day off. The display shows Closed On xxxxxxxx Use K1GR1 (+) or K2GR1 (-) to select the day (XXX). If you do not wish to set a day off, select "------------". Only one day off can be set. 25 english Reading consumption, litres, maintenance The display shows Clock adjust press the K5GR1 key again to move on to the counters reading: The display shows Counters press the K3GR1 key (ENTER) to confirm The display shows Litres xxxxx the litres used up until that time are shown. press the K5GR1 key to move on to the number of cycles performed up until that time The display shows Service xxxxx press the K5GR1 key to display the total number of coffees dispensed up until that time. The display shows Coffees total xxxxx press the K5GR1 key to review all the counters and show the totals of each individual doses for each unit The display shows zzzzzz Gr:y xxxxx where y is the unit zzzzz = is the type of coffee xxxxx = the number of coffees At the end of the review, press the K5GR1 key to quit this phase 7.5 Technical level programming Enter the environment for the TECHNICAL LEVEL Programming to program certain parameters or functions. To access the TECHNICAL LEVEL Programming, go to OFF status and press the K5GR1 key for 10 consecutive seconds. 26 english PRESS IN OFF STATUS FOR 10 SECONDS  K5GR1 Note: access to TECHNICAL LEVEL Programming and the programming operations can only be done from the push button panel related to unit 1. By accessing the TECHNICAL LEVEL Programming in the method described above, the display shows the first TECHNICAL parameter, i.e. the LANGUAGE set: The display shows Language xxxxxxxxx where xxxxxxxxx = English, Italian, French, German, Spanish If you wish to modify the parameter displayed, use the K1GR1 (+) or K2GR1 (-) keys to select the various options available; to display the next parameter, press K5GR1 (MENU). The words USER NAME are displayed. The display shows Name LA SAN MARCO If you wish to modify the parameter (word), use the K1GR1 (+) or K2GR1 (-), keys to select the letters of the alphabet; when the letter/symbol/number beneath the flashing cursor is the desired one, press the K3GR1 key (ENTER) to confirm the letter/symbol/number and move on to selecting the next letter/symbol/number. Arrangement of the available characters blank 4 H ¥ q ! 5 I ] r “ 6 J ^ s # 7 K _ t $ 8 L ` u % 9 M a v & : N b w ‘ ; O c x ( < P d y ) = Q e z * > R f + ? S g , @ T i A U j . B V k / C W l 0 D X m 1 E Y n 2 F Z o 3 G [ p To move on to the next menu, press the K5GR1 key (MENU). The setting of the telephone number which must be displayed in the event of certain alarms is shown The display shows Service Phone xxxxxxxxxx where xxx are the numbers making up the phone number. Once the type of push button panel has been set, press the K5GR1 key (MENU) to switch to a display which allows you to enable or disable the dose programming 27 english The display shows Doses setting xxxxxxxx where xxx can be either “DISABLE” or “ENABLE” If you wish to modify the parameter, press the K1GR1 (+) or K2GR1 (-) keys. Once the setting has been made, press the K5GR1 key (MENU) to switch to a display which allows you to enable or disable the continuous dose dispensing. The display shows Continuos Key xxxxxxxx where xxx can be either “DISABLE” or “ENABLE” If you wish to modify the parameter, press the K1GR1 (+) or K2GR1 (-) keys. Once you have made the setting to enable or disable the "continuous" dose, press the K5GR1 key (MENU) to switch to a display to choose whether to associate the pump with the tea dispensing The display shows Hot Water + Pump xxx where xxx can be either “NO” or “YES” If you wish to modify the parameter, press the K1GR1 (+) or K2GR1 (-) keys. Once you have made the setting to enable or disable the tea with the pump, press the K5GR1 key (MENU) to switch to a display to choose the function relating to the keyboard setting where the K6Grx key will enable the steam instead of the tea The display shows Steam Boiler Gr. x where x can be either ''0'' or “1” or “2” or ''3'' 0 = disabled If you wish to modify the parameter, press the K1GR1 (+) or K2GR1 (-) keys. Once you have made the setting to choose the keyboard for the steam key, press the K5GR1 key (MENU) to switch to a display to choose the function relating to PREBREWING The display shows PreBrewing xxxxxxx where xxx can be either “DISABLE” or “ENABLE” If you wish to modify the parameter relating to enabling/disabling prebrewing, press the K1GR1 (+) or K2GR1 (-) keys; If you enable the prebrewing function by pressing the K5GR1 key (MENU), you will move on to the setting of the on and off parameters. The first programmable ON time is that relating to keys K1GR1, K1GR2, K1GR3 (in the graphic display example, we refer to type Esp - Cof - 2Es - 2Cof keyboards). 28 PreBrew. yyyyy english The display shows xx sec z.z where: xx = on or off zz = total prebrewing on time yyyyy = espresso, 2 espressos, coffee or 2 coffees Values from 0.1÷5 in 0.1 sec steps If you wish to modify the parameter, press the K1GR1 (+) or K2GR1 (-) keys to increase or decrease the value. Once the prebrewing times have been programmed, press the K5GR1 key (MENU); to switch to a display for setting the level sensitivity: The display shows ProbeSensivity xxx where xxx can be: low sensitivity mid sensitivity high sensitivity 150kΩ 400KΩ 1MΩ (low) (medium) (high) If you wish to modify the parameter, use the K1GR1 (+) or K2GR1 (-) keys. Once the setting has been made, press the K5GR1 key (MENU) to switch to a display to choose the function relating to setting the number of cycles to perform (dispensing allowed) The display shows Service Cycles xxxxx where xxx can be a number between 0000 and 99000 in steps of 1000 when xxx equals 0000, the function is disabled. If you wish to modify the parameter, use the K1GR1 (+) or K2GR1 (-) keys. Once the setting has been made, press the K5GR1 key (MENU) to switch to a display to choose the possibility of displaying the temperature in degrees Centigrade or in degrees Fahrenheit The display shows Temperature °X where °X can either be “°C” or “°F” If you wish to modify the parameter, use the K1GR1 (+) or K2GR1 (-) keys. Once the setting has been made, press the K5GR1 key (MENU) to switch to a display of the boiler setpoint temperature setting T°SET. The display shows Boiler Temperat. xxx°C where xxx is a selectable value of between 80÷125°C in steps of 1°C. 29 english If you wish to modify the parameter, use the K1GR1 (+) or K2GR1 (-) keys. Once the setting has been made, press the K5GR1 key (MENU) to switch to a display of the parameters for PID type thermostating: The display shows kP xx.x kI y.yy kD zz.z where xx.x is the proportional correction constant where y.yy is the integrated correction constant where zz.z is the derivative correction constant each value is selectable between 0.1÷99.9°C in steps of 0.1. The setting is PID by default with the following parameters: The display shows kP 08.0 kI 0.15 kD 10.0 whereas to enable adjustment with hysteresis of 2°C, all the k values need to be 0 The display shows kP 00.0 kI 0.00 kD 00.0 If you wish to modify the parameter, use the K1GR1 (+) or K2GR1 (-) keys. Once the setting has been made, press the K5GR1 key (MENU) to switch to a display of the setting of the adjustment range of the PID with respect to the setpoint temperature. Outside this range, the adjustment is always on/off. The display shows PID adjustment x°C where x is the value in degrees of the range and it is a selectable value between 2÷5°C in steps of 1°C If you wish to modify the parameter, use the K1GR1 (+) or K2GR1 (-) keys. Once the setting has been made, press the K5GR1 key (MENU) to switch to a display of the setting of the boiler water level filling time-out: The display shows Filling Up T-Out xxx Selectable value: between 10 ÷ 250' in steps of 1 minute If you wish to modify the parameter, use the K1GR1 (+) or K2GR1 (-) keys. Once the time-out has been programmed, to move on to the next menu press K5GR1 (MENU); this will take you to the water softener filter litre setting 30 english The display shows Water Filter xxxxx where xxxxx is a selectable value of between 0 ÷ 5000 in steps of 1 litre If you wish to modify the “water filter” parameter relating to the litres counted, use the K1GR1 (+) or K2GR1 (-) keys to increase or decrease the value. Press the K5GR1 key (MENU) again to quit the TECHNICAL LEVEL Programming phase. The display shows OFF hh:mm Note: once you are in the TECHNICAL LEVEL Programming environment, to quit it you will need to scroll through all the menus by pressing the K5GR1 key (MENU) until you return to the OFF status. 7.6 Alarm signals Boiler (filling) level time-out When the display shows Time-Out alarm Boiler Filling Up this means that the boiler water level filling time has been exceeded. Indeed, every time the level probe detects water shortage (probe bare), the filling phase is enabled (EVLIV + PUMP). If EVLIV + PUMP remain energised continuously for longer than the time-out set in the TECHNICAL LEVEL Programming, the dosage of all its main functions is overridden. The keyboards are disabled, and all the actuators for all operations are overridden. All the LEDs on the push button panel will start to flash (½ ON, ½ OFF) to signal visually to the user that the alarm stage has been entered.  GR1 ALL THE LEDS ARE FLASHING TUTTI I LED SONO LAMPEGGIANTI GR2 ALL THE FLASHING TUTTI I LEDLEDS SONOARE LAMPEGGIANTI GR3 ALL THE LEDS ARE FLASHING TUTTI I LED SONO LAMPEGGIANTI To quit the alarm signalling, turn the dosage off and back on again. 31 english Boiler temperature probe short-circuited / overheated If the boiler temperature probe is short-circuited or if the temperature exceeds a given value for 5 seconds consecutively, an alarm is signalled through all the LEDs flashing. The alarm threshold is 140°C. All the main functions of the dosage are overridden. The keyboards are disabled, and all the actuators for all operations are overridden. The flashing display shows: The display shows Alarm Boiler temp.  GR1 ALL THE LEDS ARE FLASHING TUTTI I LED SONO LAMPEGGIANTI GR2 ALL THE FLASHING TUTTI I LEDLEDS SONOARE LAMPEGGIANTI GR3 ALL THE LEDS ARE FLASHING TUTTI I LED SONO LAMPEGGIANTI The alarm disappears when the temperature returns to an acceptable value. The alarm signal is removed by turning the appliance off. Boiler temperature probes disconnected / interrupted If the boiler temperature probe is disconnected or interrupted or determines a temperature of around 0°C, an alarm is signalled within 5 seconds and all the LEDs of the keyboards flash. All the main functions of the dosage are overridden. The keyboards are disabled, and all the actuators for all operations are overridden. The flashing display shows: The display shows T.ProbeUnconnect  GR1 ALL THE LEDS FLASHING TUTTI I LED SONOARE LAMPEGGIANTI GR2 ALL THE LEDS ARE FLASHING TUTTI I LED SONO LAMPEGGIANTI GR3 ALL THE LEDS ARE FLASHING TUTTI I LED SONO LAMPEGGIANTI The alarm disappears when the temperature returns to an acceptable value. The alarm signal is removed by turning the appliance off. 32 english No pulses from volumetric meter (5 seconds) When the display shows Alarm Flow Meter Gr.X this means no pulses are arriving from the volumetric meter corresponding to the activated unit (x). Indeed, after starting up every volumetric dose (EVx + PUMP both in dispensing and in programming mode), the dosage function checks the correct functioning of the volumetric meter by detecting the pulses it has sent to the micro-controller. If no pulses are detected for more than 5 seconds consecutively, the LED relating to the selected dose begins to flash (½ ON ½ OFF). After 1 minute (volumetric meter time-out) of no pulses from the volumetric meter, the dose in progress stops automatically. Filter alarm and resetting This function makes it possible to reset the counting of dispensing when the display shows... ChangeWaterFilt xxxxxxxxx where xxx is the telephone number set as a suggestion …this means that the value of the litres which can be cleaned by the filter set in the TECHNICAL LEVEL Programming has been exceeded To reset this signal, simply power the dosage by pressing the K3GR1 and K4GR1 keys simultaneously.  K3GR1 K4GR1 The display shows Filter Reset Maintenance alarm and resetting When the display shows... Service xxxxxxxx where xxx is the telephone number set as a suggestion, this means that the value set in TECHNICAL LEVEL Programming for the cycles to perform has been exceeded (coffees dispensed). To reset this signal, simply power the dosage by pressing the K1GR1 and K2GR1 keys simultaneously. 33 english  K1GR1 K2GR1 The display shows Service Reset Resetting the total individual doses The counting of individual doses can be reset To reset this signal, go to the TECHNICAL LEVEL Programming in the Total Reading menu and press the K1GR1 and K2GR1 keys simultaneously for 3 seconds The display shows Coffees total  K1GR1 K2GR1 PRESS THE KEYS FOR 3 SECONDS The display shows Coffees total Total Reset the total deriving from the sum of all drinks dispensed for each individual key of each unit cannot be reset. Note: the servings resetting operation DOES NOT RESET the reading of the litres consumed. To reset this value, please refer to the relevant paragraph. 7.7 Default preset data The factory preset completely deletes the data memory and allows you to enter standard values for all stored data. It must be performed under all circumstances, for example, after the microprocessor has been programmed (on board program OBP) if its EEPROM memory is also reset, or when a software upgrade has affected one or more data stored or has added more. 34 english Press - in ON status - the following keys simultaneously: K1GR1 + K3GR1 + K5GR1 ONLY UNIT 1 PUSH BUTTON PANEL  K1GR1 K3GR1 K5GR1 PRESS SIMULTANEOUSLY IN ON STATUS Once preset is complete, the display shows: The display shows Preset of values complete To return to normal operation, turn the appliance off and on again. After a factory preset, you will need to re-check and if necessary reset depending on your requirements all the appliance parameters (bar/technical/factory/coffee roaster), including the relevant passwords (except for the factory one which is fixed). The factory preset also resets all counters, including the total doses dispensed. 7.8 Procedures in the event of a power failure In the event of a power failure, when the power returns the dosage function returns to the status (IDLE-ON or OFF) it was in at the time of the power failure. Any dispensing in progress will be aborted. All the dosage data remains stored. 35 english 8. Routine maintenance • No panel or fixed guard of the appliance body may be removed from the it to carry out the routine maintenance. • Do not use harsh or harmful detergents such as alcohol, petrol or solvents to clean the coffee machine; use water and neutral detergents. Note: Daily cleaning operations must be carried out in order to maintain the efficiency of the appliance and to guarantee the safety of the user and of people. 8.1 Cleaning the dispensing units and the filter cup 1) Detach the filter cup from the serving unit, remove the coffee grounds and replace the filter present with the blind filter (without holes) provided with the machine. Note: The filter is pressed into the cup; to remove it, simply force it on the sides and then extract it. Do not remove the elastic ring on the inside of the filter cup. 2) Using the brush, clean the seat in the unit in which the filter cup is inserted. 3) Insert the cup in the unit and, without latching it completely, press the continuous flow button. 4)Let water overflow from the filter holder. (This will clean the serving group). The continuous flow of water from the unit can cause burns due to accidental skin contact. 5) Stop the water flow and insert the filter cup in the unit. 6) Start the continuous flow and then stop it after a couple of seconds; repeat this operation a few times (this is to clean the drain duct and the solenoid of the unit). 7) Clean the perforated filter and place it back into the cup. Dispense water for a couple of seconds to clean the filter, the filter cup and the spouts. 8) Repeat these operations on all the serving units. Note: Special commercially available detergents can be used to clean the dispensing units effectively 8.2 Cleaning the tray and cup support grille The lower cup support grille must be kept clean at all times; during the normal use of the appliance, simply wipe it clean with a sponge or damp cloth. At the end of the work day, clean the internal parts of the tray and grille too using warm water and neutral detergent. 8.3 Cleaning the steam spout Clean the steam spout with a sponge or a damp cloth at the end of the work day to remove all traces of milk or other substances that inevitably form during the normal operation of the appliance. Open the steam tap, placing the spout in the tray, to remove any residue which may have accumulated in the spout. 8.4 Replacing the boiler water To change the water inside the boiler, proceed as follows: 1) Cut off the power supply to the appliance by turning the main switch to 0 (zero). 2) Remove the tub and the cup support grille and open the boiler drain tap. 36 9. Idle periods If the machine is to remain idle for long periods (weekly closing days, holidays, etc.), take the following precautions: 1) Turn the main switch to 0 (zero) and if necessary unplug the power cable or disconnect the main switch from the electrical mains. 2) Close the cut-off valve of the water mains. 3) if you think the temperature might drop below 5 °C, completely drain the water system of the coffee machine. 4) Wash the components of the coffee machine as described in the paragraph entitled "routine maintenance". 5) Cover the machine if necessary. 10. Display of alarms 10.1 Volumetric meters alarm The button relating to the volumetric meters of all the units lights up. When coffee is dispensed, the LED inside it must flash. If the volumetric meter shuts down for more than two minutes during dispensing, the electronic control unit stops dispensing coffee and signals the alarm by the flashing of button A (short coffee first unit). Note: Make sure that the coffee has been dispensed into the cup correctly; if not, see the chapter entitled “TROUBLESHOOTING”. 10.2 Automatic level alarm If the water level in the boiler is below normal and the pump is not able to restore that level within 150 seconds, the electronic control unit of the appliance will stop the automatic filling and signal the problem via the simultaneous flashing of the double short coffee button of all units plus the large tea key and the first of the three LEDs of the electronic level control. Note: If the boiler was not filled correctly, see the chapter entitled “TROUBLESHOOTING”. 10.3 Maximum water level in boiler alarm If the level of water in the boiler is over the safe level, the electronic control unit will stop automatic filling and signal the problem through simultaneous flashing of the serving buttons plus the three LED's of the electronic level control. Note: If the maximum boiler level alarm trips, see the chapter entitled “TROUBLESHOOTING”. 37 english 3) Open a steam drawing valve to facilitate the draining of the water until the end of the operation. 4) When water no longer comes out of the boiler, close the boiler drain and the steam drawing tap. 5) Fill the coffee machine with water as instructed in the paragraph entitled “Filling the boiler with water”. english 11. Safety devices 11.1 Manual reset safety thermostat The safety thermostat is located next to the control unit and can be accessed by removing the left side panel from the coffee machine. The thermostat probe, placed inside the electric heating elements, cuts the electric power supply any time there is an abnormal rise in temperature. The heating elements no longer heat the water in the boiler and it will not be possible to use the appliance correctly. Call the LA SAN MARCO SPA technical service centre for assistance. The safety thermostat will have to be reset by a technician authorised by LA SAN MARCO SPA, who must first remedy the cause of the coffee machine shutdown. 11.2 Safety valve The safety valve is installed on the upper part of the boiler, in the part corresponding to the area occupied by the steam. The valve is activated if there is a considerable pressure increase inside the boiler. The valve rapidly lowers the pressure by expelling the steam in the atmosphere (the valve trips at 2÷2.5 bar). If the safety valve trips, the steam is held and dissipated inside the machine body, so as to avoid hazards for the persons around the machine. In case of activation of the safety valve, switch off the machine and immediately contact the specialized technician.If the safety valve is set off, switch the machine off and immediately contact the authorized La San Marco SPA technician. 12. User information • • • 38 In accordance with article 13 of the Legislative Decree dated 25 July 2005, no. 151 "Implementation of Directives 2002/95/EC, 2002/96/EC and 2003/108/EC, concerning the use of hazardous substances in electrical and electronic equipment, as well as waste disposal". • The symbol with the crossed-out dustbin on the equipment or on the packaging means that at the end of its life cycle, the appliance must be collected separately from other waste. The differentiated waste disposal of this equipment at the end of its life cycle is organised and managed by the manufacturer. Should the user wish to dispose of this appliance, he or she should therefore contact the manufacturer and follow the procedure implemented by the same for the separate collection of the appliance at the end of its life cycle. Suitable separate collection of the appliance for subsequent recycling, treatment and eco-compatible disposal contributes to preventing possible negative consequences for the environment and health, and favours the recycling of materials that the appliance is made of. Illegal disposal of the appliance by the user will result in the application of administrative fines as set forth in the applicable regulations in force. english 13. Guarantee The guarantee becomes void if: • The instructions in this manual are not complied with. • The scheduled maintenance and repairs are carried out by unauthorised personnel. • The machine is used for any other than its intended purposes. • The original parts are replaced with parts from different manufacturers. • The guarantee does not cover damage caused by neglect, use and installation not in compliance with the recommendations of this manual, improper operation, abuse, lightning and atmospheric phenomena, overload, excessive current, or insufficient or irregular power supply. 14. Declaration of conformity The manufacturer: La San Marco S.p.A. 34072 Gradisca d’Isonzo (GO) Italy – Via Padre e Figlio Venuti, 10 phone (+39) 0481 967111 – fax (+39) 0481 960166 – http://www.lasanmarco.com hereby declares under its own responsibility that the espresso coffee machine described in this manual and identified by the data on the data plate affixed to the appliance conforms to directives: 2006/42/EC, 2006/95/ EC, 89/336/EEC, Regulation (EC) no. 1935/2004. For verification of conformity to said directives, the following harmonised standards have been applied: EN 12100-1, EN 12100-2, EN 60335-1, EN 60335-2-75. AUTHORISED PERSON A COMPILE THE TECHNICAL FILE Mr Roberto Marri Via Padre e Figlio Venuti,10 34072 Gradisca d’Isonzo - ITALY Managing director Mr Roberto Marri Gradisca d’Isonzo, maggio 2010 39 english 15. Troubleshooting PROBLEM CAUSE 1. •The boiler is full of water •One of the outflow lines from and the water flows out the boiler or from a circuit of of the safety valve. the unit has a leak. 2. •The safety valve tips to release steam. 3. 4. 5. 6. 7. 8. 40 SOLUTION •Check the autolevel circuit, the manual charging button, and the boiler heat exchangers. •Replace worn or damaged parts to eliminate the leak. •Check the wiring that feeds the heating element and the pressure switch. •Malfunction of electrical system (the electrical heating element is always connected). •Pressure increase in the boiler (the safety valve trips at 2÷2.5 bar). •The machine was started •The electric heating element is •Check if the heating element is properly but the water in defective or is not connected. connected to the power supply. the boiler does not warm •Main switch turned to position •Check if the heating element safety up. 1. thermostat has tripped in and check its proper operation. •The main switch must be turned to position 2. •There is no water flowing •Coffee ground too fine or •Adjust the grinding coarseness and/ from a serving unit. excessive quantity for type of or the quantity of ground coffee. filter used. •Check that the injector, the upper •Clogged water circuit. circulation pipe, the valve (flow •Defective solenoid. variator) of the group, the water dispenser and the solenoid valve of the group are not clogged. •In the machines with electronic metering, check the displacement meter and its valves. •Check the solenoid of the unit, its wiring and the fuse in the electronic control unit. •The programmed •Abnormal operation of the •Program the serving doses servings of espresso electronic control unit or of the separately on each dispensing unit. coffee are not constant displacement counters. If the problem persists, replace the or vary on the different •Leak from serving unit volumetric meter of the dispensing units. solenoid valve. unit affected. •Water dispensers clogged. •Replace the solenoid valve of the serving group. •Check the water dispenser. •It is not possible to •Abnormal operation or •Check the control unit-displacement program the serving defective displacement meter meters electrical wiring. quantities on unit 1 and of unit 1. •Replace the volumetric counter. to copy them on the other units. •Displacement meters •Displacement meters jammed •Replace the volumetric counter. alarm. or defective. •Check the wiring and its •Defective wiring. connections, the control unit and the fuses. •Autolevel alarm. •Water circuit of automatic level •Check the hydraulic circuit of the without water. autolevel. •Main water supply valve •Check if the on-off valve on the water closed. supply is open. •Faulty autolevel solenoid. •Replace the autolevel solenoid. 9. •Overfill alarm CAUSE •Malfunction in automatic level circuit. •Leak in button for manual water filling. •Leak in heat exchangers. english PROBLEM SOLUTION •Check the hydraulic circuit of the autolevel. 10. •The machine is switched •The electric wiring of the on (the main switch is in electronic control unit is position 1 or 2 and the defective. signal light is lit) but the •The electronic control unit is electronic control is out defective. of order. •Check the electrical wiring, the electronic control unit and its components. •Replace the electronic control unit. 11. •The machine feeds water •Solenoid and/or pump fed from one serving unit continuously. although the serving has not been selected. •Control unit relay powered continuously. •Replace the electronic control unit. 12. •The steamer discharges only small quantities of steam or water droplets. •Tap needs adjustment. •Worn gasket on tap. •Tap needs adjustment. •Replace the gasket. 13. •Small drops flow out of the water tap. •Leak in solenoid valve •Check the solenoid valves (hot and cold water) and replace as necessary. 14. •The unit emits a whistle after serving the coffee. •Faulty operation of expansion valve. •High pump pressure. •Check the expansion valve and if necessary replace it. Calibrate the valve at 12 bar. •Check the pump operating pressure. Calibrate the pump at 9 bar. 15. •The filter cup comes off the serving unit. •Gasket under holder is worn. •Replace the gasket. •Clean the serving unit and the filter cup. 16. •When coffee is being served, some of it drips out of the edge of the filter cup. •Gasket under holder is worn. •Replace the gasket. •Clean the serving unit and the filter cup. 17. •Water leaking from the drain of the serving unit solenoid. •Malfunctioning unit solenoid. •Check the unit solenoid valve. Check •Water leaking from unit cooling the plunger on the solenoid valve system. and clean it. •Replace the automatic level solenoid valve. •Check the small cooling tube and the related seals of the dispensing unit (NEW 105 TOUCH DTC). 18. •Light cream (the coffee flows out of the spout rapidly). •Coarse grinding. •Low pressing pressure. •Small quantity of ground coffee. •Water temperature below 90°C •Pump pressure above 9 bar. •Sprinkler filter on unit clogged. •Filter holes widened (filter cup). •Finer grinding. •Increase the pressure. •Increase the quantity of ground coffee. •Adjust valve (flow variator) of the group to a higher number or increase boiler pressure. •Decrease the pump pressure. •Check and clean with blind filter or replace. •Check and replace filter. 41 english PROBLEM 19. •Dark cream (the coffee drips out of the spout). 20. •Presence of grounds in coffee cup. 21. •Coffee with too little cream in cup (spurts out of spout). 22 •The cream in the cup is too thin (it disappears after a few seconds). CAUSE SOLUTION •Fine grinding. •High pressing pressure. •Large quantity of ground coffee. •Excessive temperature. •Pump pressure below 9 bar. •Sprinkler filter on unit clogged. •Filter holes clogged (filter cup). •Coarser grinding. •Reduce the pressure. •Decrease the quantity of ground coffee. •Adjust valve (flow variator) of the group to a lower number or decrease boiler pressure. •Increase the pump pressure. •Check and clean with blind filter or replace. •Check and replace filter. •Coffee ground too fine. •Coarser grinding. •Worn grinders in grinder•Replace the grinders. dispenser unit. •Decrease the pump pressure. •Pump pressure above 9 bar. •Check and clean with blind filter or •Sprinkler filter on unit clogged. replace. •Filter holes widened (filter cup). •Check and replace filter. •Sprinkler filter on unit clogged. •Check and clean with blind filter or replace. •Coffee extraction takes a long time due to clogged filter. •Coffee extraction too fast due to clogged sprinkler filter. •Water temperature too high. 23. •Presence of depressions •Sprinkler filter partly clogged. in the coffee grounds (looking inside the filter cup). •Clean or replace the filter. •Clean or replace the sprinkler filter. •Lower the temperature in the boiler. •Adjust valve (flow variator) of serving group. •Clean or replace the sprinkler filter. Note: If the problem cannot be solved as described above, or if another malfunction has arisen, contact an authorised LA SAN MARCO SPA service centre for assistance. 42