
1
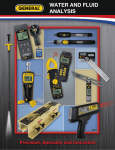
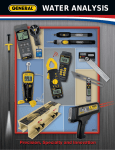
WK7200 Manual-FINAL 8-18-08:Layout 1
8/15/08
11:52 AM
WK7200
USER’S MANUAL
Water
Quality
Test Kit
INTRODUCTION:
Thank you for selecting model WK7200 microprocessor-based waterproof Water Quality Test Kit.
It is used to measure a wide range of pH, ORP, Conductivity, TDS, Salinity and Temperature with a
replaceable electrode. Please read and follow the manual carefully.
Page 1
WK7200 Manual-FINAL 8-18-08:Layout 1
8/15/08
11:52 AM
FEATURES:
• Large LCD displays Temperature along with either pH or ORP or Conductivity or TDS or Salinity
simultaneously
• Waterproof to IP-57 standard
• It floats on water
• Automatic Temperature Compensation (ATC)
• Degree °F/°C switchable
COND
ORP
TDS
Salt and unit pH, mV, µS, mS, ppm, ppt, °F, °C for
• Icon PH
easy recognition while selecting function modes
• Displays MIN/MAX value and Data hold
• Low battery indicator
• Automatically shuts off after 10 minutes of non-useage
• Easy to replace Conductivity cell, pH electrode or ORP electrode module
SPECIFICATIONS:
pH
Range
-2 to 16.00
Accuracy
± 0.01 + 1 digit
Resolution
0.01 pH
ATC
32° to 194°F
(0° to 90°C)
Calibration
4.00, 7.00, 10.01
Range
Accuracy
Resolution
ATC
Calibration
Power Source
Dimensions
Weight
ORP
-1000 to 1000
± 2 + 1 digit
1 mV
Conductivity
TDS
0 to 2000 µS
0 to 1300 ppm
2.00 to 20.00 mS 1.30 to 13.00 ppt
± 0.01 + 1 digit
± 2 + 1 digit
1 µS/0.01ms
1 ppm/0.01ppt
32° to 122°F (0 to 50°C)
0 µS, 1413 µS, 12.88 mS
Temp.
32° to 194°F (0 to 90°C)
± 0.4°F + 1 digit (± 0.2°C + 1 digit)
0.1°F (0.1°C)
Salinity
0 to 1000 ppm
1.00 to 12.00 ppt
± 0.4°F + 1 digit (± 0.2°C + 1 digit)
1ppm/0.01ppt
4”AAA” batteries
Meter: 7.7" x 1.6’" x 1.4" (195 x 40 x 36mm)
Kit: 9.1" x 8.1" x 2’" (230 x 205 x 50mm)
Meter: 4.8 oz (135 g) (with battery)
Kit: 27.5 oz (780 g)
Page 2
WK7200 Manual-FINAL 8-18-08:Layout 1
8/15/08
11:52 AM
DEVICE DESCRIPTION:
Lanyard Connection
Battery Compartment Cap
Main Display
Hold/MIN & MAX Button
Function Mode
Button
pH Electrode
Module
Power/Calibration
Button
Soaking Bottle
Electrode Collar
Protective Cap
Electrode Module
Sensor Tip
Sensor Protective Cap
Page 3
WK7200 Manual-FINAL 8-18-08:Layout 1
8/15/08
11:52 AM
DISPLAY DESCRIPTION:
FUNCTIONS OF KEYBOARD:
POWER/CALIBRATION
1. Press button to switch power On or Off
2. Press and hold button to enter calibration mode
FUNCTION MODE
1. Press button to select the desired measurement mode Conductivity, TDS, or Salinity
during insert Conductivity cell
2. Press and hold button to change degree °F or °C
HOLD/MIN&MAX
1. Press button to enter Hold mode
2. Press and hold down button to enter Minimum/Maximum mode
Press button down lightly to get Minimum/Maximum value
3. Press and hold down button again to exit this mode and return to measurement mode
Page 4
WK7200 Manual-FINAL 8-18-08:Layout 1
8/15/08
11:52 AM
OPERATING PROCEDURE:
ACCESSORIES
Upon receiving the shipment, inspect the container and equipment for any signs of damage.
Verify that you have received all the items listed below:
Meter, Conductivity cell, Buffer Solution pH 4 & 7, Standard Solution 1413 S/cm, Soaking
Solution, Lanyard, Battery (installed), Instruction manual, Carrying case.
Optional: ORP electrode
PREPARATION
1. Remove the protective cap and unscrew soaking bottle #(pH, ORP only) from meter. Rinse the
electrode with clean water and wipe it dry. Don't leak soaking solution from bottle and place
the protective cap back on the bottle at the end of usage.
2. Press
button to turn the meter power on.
Note: Don’t touch or wipe the surface of the inner black sensor of the conductivity cell.
CALIBRATION
<pH>
1. Make sure the sensor is pH electrode or check the icon PH shown on the LCD display.
2. Dip the electrode into the buffer solution pH 7. Stir gently and wait until the display is
stabilized. Press and hold
button to enter calibration mode until the icon CAL appears on
the display, and # flashes 7.00. When the display stops flashing and indicates “SA”. It will be
followed by “End” while calibration is ending, and then will return to measurement mode.
3. Rinse the electrode with clean water and wipe it dry. Dip the electrode into the buffer
solution pH 4. Stir gently and wait until the display stabilizes. Press and hold
button to
enter calibration mode until the icon CAL appears on the display, and flashes 4.00. When the
display stops flashing and indicates “%” (percentage of slope), then “SA”. It will then be
followed by “End” while calibration is ending, and then return to measurement mode.
4. After slope calibration pH 4 or pH 10, the display will indicate percentage of slope (PTS) to
show the status of electrode. If the PTS is below 70% or above 130%, the electrode must be
replaced. A slope of 100% is ideal.
Note: (1) Icon “SA” will not appear if the calibration fails.
(2) When doing a 2 or 3 point calibration, Calibrate with buffer pH 7 first, and then follow
with buffer pH 4 or pH 10.
Page 5
WK7200 Manual-FINAL 8-18-08:Layout 1
8/15/08
11:52 AM
< Conductivity >
1. Make sure the sensor is Conductivity cell, or check that the icon COND , TDS or Salt
appears in the LCD display.
2. Dip the conductivity cell into the standard solution 1413 µS/cm. Stir gently and wait until the
display is stabilized. Press and hold
button to enter calibration mode until the icon CAL
appears in the display, and flashes 1413 µS/cm. When the display stops flashing and
indicates “SA”, it will be followed by “End” while calibration is ending, and then return to
measurement mode.
3. If reading is not 0 µS/cm while the meter is in the air and is not dipped it into any solution,
then calibrate it in the air to make reading becomes 0 µS/cm.
Note: (1) Calibration with a 12.88 mS/cm standard solution would be better for measuring high
conductivity solution.
(2) The icon COND will appear automatically during calibration mode.
(3) “SA” will not appear if the calibration fails.
MEASUREMENT
< pH >
1. After calibration, rinse the electrode with clean water and wipe it dry. Dip the electrode into
sample solution to be measured. Stir gently and wait until a stable reading can be obtained.
< ORP >
1. Insert ORP electrode and the icon ORP will appear in the LCD display automatically.
2. Calibration is not necessary for ORP. But it could be tested with a specific ORP solution to
check if the electrode is good or bad.
3. Rinse the electrode with clean water and wipe it dry. Dip the electrode into sample solution
to be measured. Stir gently and wait until a stable reading can be obtained.
Note: (1) “_ _ _ _” will appear in the display when it is over the measuring range.
(2) After measurement, rinse the electrode with clean water. Place the protective cap and
soaking bottle back on. The soaking bottle should be always kept wet by adding
soaking solution.
< Conductivity >
1. After calibration, rinse the conductivity cell with clean water and wipe it dry. Dip the
conductivity cell into sample solution to be measured. Stir gently and wait until a stable
reading can be obtained.
2. Press
button to select the desired measurement mode Conductivity, TDS or Salinity.
Note: (1) “_ _ _ _” will appear in the display when it is over the measuring range.
(2) The unit will auto-range to µS/cm or mS/cm, ppm or ppt.
(3) After measurement, rinse the electrode with clean water and place the protective cap
back.
Page 6
WK7200 Manual-FINAL 8-18-08:Layout 1
8/15/08
11:52 AM
FUNCTIONS MODE
1. Press
button to enter the Hold function mode. The icon HOLD will appear, and the
reading value shown in the display can be locked. Return to measurement mode by pressing
the button again.
2. Press and hold
button to enter the Maximum and Minimum function mode until the
flash icon of MAX and MIN appears In the display. The value of maximum and minimum will
show in the display while pressing button lightly. To exit this mode, press and hold
button until icon MAX and MIN disappears, and returns to measurement mode.
3. Press
button to select the desired measurement mode Conductivity, TDS or Salinity
during insert Conductivity cell.
4. Press and hold
button to change Degree °F or °C.
Note: (1) The display can not auto shut off under the status of MAX/MIN mode.
(2) Change new batteries when the battery indicator is flashing.
MAINTENANCE:
BATTERY REPLACEMENT
1. Loosen the screw with a screwdriver on the battery compartment cap.
2. Replace with fresh 4 “AAA” batteries, and note polarity.
3. Place the battery compartment cap and tighten the screw.
Note: (1) Be sure the batteries are in correct position by polarity.
(2) Don’t loosen the O-ring which has been mounted on cap.
ELECTRODE REPLACEMENT
1. Unscrew the electrode collar counterclockwise, and remove it completely.
2. Pull the electrode module out from the tester.
3. Plug a new electrode module into the tester socket carefully.
4. Place and tighten the electrode collar to make a good seal.
APPLICATIONS
Agriculture • Anti-freeze recycling • Aquarium • Boiler • Chemical industry • Cooling tower
• Drinking water • Fish farming • Food industry • Garden husbandry • Hydroponic Laboratory
usage • Plating industry • Swimming pool & Spa • Water treatment
Page 7
WK7200 Manual-FINAL 8-18-08:Layout 1
8/15/08
11:52 AM
Calibration Certificate
This certificate guarantees that this product has been
inspected and tested in accordance with the published
specifications.
The instrument has been calibrated by using equipment
which is already calibrated to standards traceable to
International standards.
Model: WK7200
Serial no.: ________________________
Date: ____________________________
GENERAL TOOLS & INSTRUMENTS™
80 White Street, New York, NY 10013-3567
PHONE (212) 431-6100 • FAX (212) 431-6499
TOLL FREE • (800) 697-8665
e-mail: [email protected] • www.generaltools.com
WK7200 User’s Manual
Specifications subject to change without notice
©2008 GENERAL TOOLS & INSTRUMENTS™
NOTICE - WE ARE NOT RESPONSIBLE FOR TYPOGRAPHICAL ERRORS.
MAN# WK7200 8/08
Page 8


![Executive Summary - My[Q]Box Homepage](http://vs1.manualzilla.com/store/data/005689294_1-efed73d1171b025bf94e9512efc2f094-150x150.png)