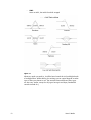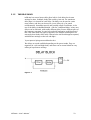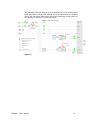
1
USER’S MANUAL
revision 2 | 12.2003
soundskin version 1.0
www.soundart-hot.com
Copyright © 2001-2003 Soundart
www.soundart-hot.com
Soundart makes no warranty of any kind, expressed or implied, with respect to the contents or use of the
material in this document or in the software and hardware it describes, and specifically disclaims any
responsibility for any damages derived from its use. Hardware and Software may contain design defects or
errors known as errata which may cause the product to deviate from published specifications. Soundart
reserves the right to revise and modify the topics covered in this document periodically, which are subject
to change without notice. This document may be reproduced and distributed freely, provided no alterations
of any kind are made. Soundart software is subject to the terms of the Soundart Tools Software license.
Third party software is subject to the terms of their respective owners license. Third party trademarks and
registered trademarks are property of their respective owners.
ii
Preface
This manual was written to help you to become familiar with Infiltrator, the
multifunctional filterbank FX and vocoding machine for the Chameleon. It will
also aid experienced users with routine tasks.
To avoid confusion, the terminology used in this manual is based on the
Infiltrators parameter names.
Acknowledgements
Are Leistad - the brains behind Infiltrator.
The Soundart team: Simon Smith (user interface co-design and manual), Jesus
Villena, Vicente Solsona, Jose Manuel Torrelo, Josep-Oriol Tomas, Sergi Cerni.
We wish to thank also BiTeR mc, Jordi Trujillo, Andreu Jacob, Raul Jordan, Paul
Maddox, Eddy Robinson, Wolfgang Merkle, Thomas Merkle and everybody
else who has helped in making the Chameleon, its soundskins and all related
items (manual, factory sounds, demo songs, etc.), and beta testing the long
list of intermediate versions.
Infiltrator – User’s Manual
iii
Table of Contents
1
Introduction........................................................................................1
1.1 Overview ...................................................................................1
1.1.1
1.2
1.3
Background................................................................................4
About This Manual .....................................................................7
1.3.1
1.3.2
1.3.3
2
LAYOUT..............................................................................................................7
MANUAL CONVENTIONS....................................................................................8
THE FRONT PANEL CONTROLS............................................................................9
How it Works ....................................................................................10
2.1 The Different Processing Blocks ...............................................10
2.1.1
2.1.2
2.1.3
2.1.4
2.1.5
2.1.6
2.2
2.3
THE FILTERING BLOCK ......................................................................................11
THE DYNAMICS BLOCK.....................................................................................16
THE VOCODING BLOCK.....................................................................................18
THE WAVEFORM BLOCK ...................................................................................19
THE DELAY BLOCK............................................................................................23
THE MIXING BLOCK(S) .....................................................................................24
The Different Modes ................................................................25
2.2.1
2.2.2
2.2.3
MULTIBAND MODE ..........................................................................................26
EQ MODE .........................................................................................................27
VOCODER MODE ..............................................................................................29
More General Goodies..............................................................31
3
The Display and Navigation ..............................................................32
3.1 The Different User Interface Modes..........................................32
3.2 Finding The Parameter You Want.............................................33
3.3 The Different UI Mode Button and Knob Functions ..................34
3.4 The Location Memory Feature..................................................35
3.5 Quick and Full Level Editing .....................................................35
3.6 Some Symbols and Their Meanings..........................................36
4
Preset Mode .....................................................................................37
4.1 The Homepage.........................................................................37
4.2 Selecting Different Presets ......................................................38
4.3 Exploring this Mode .................................................................39
4.4 The System Group ....................................................................41
4.4.1
4.4.2
4.4.3
4.4.4
4.4.5
4.4.6
5
iv
THE THINGS IT CAN DO......................................................................................2
USER INTERFACE CONFIGURATION...................................................................41
MIDI CONFIGURATION .....................................................................................43
MIDI DUMP......................................................................................................44
SAVE PRESET....................................................................................................44
SAVE SYSTEM...................................................................................................45
INFO ................................................................................................................46
Some More Things ............................................................................47
5.1 Dynamic Allocation of DSP Resources ......................................47
5.2 Signals and Levels....................................................................48
5.3 Signals and Parameter Groups.................................................49
5.4 Realtime Controller System .....................................................50
5.4.1
5.4.2
5.4.3
5.4.4
6
Before We Move On ..........................................................................54
6.1 How the Manual Splits Up ........................................................54
6.2 Changing Mode ........................................................................55
6.3 Changes to the Front Panel Controls ........................................56
6.3.1
7
7.2
SETUP ..............................................................................................................61
INPUT ..............................................................................................................63
L BAND, R BAND.............................................................................................63
L/R/ LR DYNAMICS ........................................................................................64
DELAYS............................................................................................................65
OUTPUT ...........................................................................................................65
METERS ...........................................................................................................67
REALTIME CONTROLLERS .................................................................................69
MODULATION..................................................................................................71
EQ Mode ...........................................................................................72
8.1 Using the Filters .......................................................................72
8.1.1
8.1.2
8.1.3
8.1.4
8.2
STEREO PARALLEL (GRAPHIC) EQ (par/par) ...................................................72
STEREO SERIAL (PARAMETRIC) EQ (ser/ser)...................................................73
LEFT/RIGHT PARALLEL/SERIAL EQs (par/ser).................................................74
LEFT/RIGHT SERIAL/PARALLEL EQs (ser/par).................................................74
The Mode Groups .....................................................................75
8.2.1
8.2.2
8.2.3
8.2.4
8.2.5
8.2.6
8.2.7
8.2.8
SETUP ..............................................................................................................76
INPUT ..............................................................................................................81
L BANK/R BANK .............................................................................................81
OUTPUT ...........................................................................................................82
METERS ...........................................................................................................84
REALTIME CONTROLLERS .................................................................................86
MODULATION..................................................................................................88
DELAYS............................................................................................................89
Vocoder Mode...................................................................................90
9.1 Using a Vocoder .......................................................................90
9.2 The Mode Groups .....................................................................92
9.2.1
9.2.2
9.2.3
9.2.4
9.2.5
9.2.6
9.2.7
9.2.8
9.2.9
9.2.10
9.2.11
9.2.12
A
DETAILED SCHEMATIC DIAGRAM .....................................................................59
The Mode Groups .....................................................................60
7.2.1
7.2.2
7.2.3
7.2.4
7.2.5
7.2.6
7.2.7
7.2.8
7.2.9
9
THE REALTIME CONTROLLERS ..........................................................................56
Multiband Mode ...............................................................................58
7.1 Working with a Multiband Compressor ....................................58
7.1.1
8
THESE ARE PERFORMANCE CONTROLS NOT EDITING CONTROLS .....................50
RESOLUTION ISSUES ........................................................................................51
PUSHING THE SYSTEM TO THE LIMITS..............................................................51
NAMING..........................................................................................................52
SETUP ..............................................................................................................92
INPUT ..............................................................................................................96
ANALYSIS ........................................................................................................97
THE SILENCE/VOICED/UNVOICED DETECTOR ...................................................97
SYNTHESIS.....................................................................................................100
ANA BANK ....................................................................................................102
SYN BANK .....................................................................................................104
OUTPUT .........................................................................................................105
METERS .........................................................................................................107
REALTIME CONTROLLERS .............................................................................110
MODULATION..............................................................................................112
DELAYS........................................................................................................113
Loading Soundskins ........................................................................114
Infiltrator – User’s Manual
v
vi
B
LFO Waveforms...............................................................................116
C
Factory Presets Explained ...............................................................118
Chapter
11
1.1
Introduction
Overview
Infiltrator is a creative sound-shaping tool for use in the studio and on stage,
essentially based around two banks of powerful filters. It was principally
designed as a powerful vocoding system, but has evolved into something
much more and is capable of working as a wide range of filtering FX and
tools.
It has been designed to provide the user with a very deep level of control. All
of the extensive parameters use physical units where possible, with a high
degree of accuracy, down to units such as the one hundred-thousandth of a
second (0.00001s). Infiltrator is a no-nonsense soundskin that is also very
configurable in its user interface and real-time performance control.
However, although the level of detail and number of subtle parameters
creates quite a monster that can be programmed to a very deep level by
experienced users, we have also designed it to be as accessible as possible to
all.
There is a quick editing mode that only shows the most important
parameters, and extensive sonic control is actually available straight away
using the front panel realtime controls (RTCs), with no need to even enter
any kind of editing mode. You can manipulate presets underlying values to
quite an extreme degree with these performance controls, and then freeze
them in place by saving their positions with the preset.
So if you are unfamiliar with the intricacies of vocoders and filterbanks, don’t
be put off learning this unique soundskin - it’s really worth it and you don’t
need to dive in deeply to create very interesting results. We have gone into
some detail with this manual to help as much as possible. We have also spent
a long time creating an extensive bank of very usable presets that are ready
for use straight away. These are also described in detail in this manual and
are a very good starting point for exploring Infiltrator’s possibilities.
Infiltrator – User’s Manual
1
1.1.1
THE THINGS IT CAN DO
The principal purpose of Infiltrator is for vocoding, using filter banks as in the
classical analogue vocoders. The ‘Vocoder Mode’ allows the emulation of
nearly every kind of classic vocoder architecture, as well as the creation of
brand new vocoder sounds. In addition to the traditional Synthesis and
Analysis filter banks, there is a silence/voiced/unvoiced detector, a noise
generator and a built-in synthesizer with twin oscillators for creating Carrier
signals and waveforms internally. There are also delay FX available on the
inputs and outputs for all sorts of echo-based treatments. More on all this
later.
However, Infiltrator also has other operating modes. The vocoding Analysis
function can be left aside completely and the mixing, multi-band filtering,
waveform generation, dynamics processing and Delay FX elements needed in
the ‘Vocoder Mode’ architecture can also be ‘reordered’ to perform entirely
different studio and live performance functions. This is one of the things that
make Infiltrator unique.
So as well as a ‘Vocoder Mode’, it can operate in four slightly different ‘EQ
Modes’ to create things like:
1. Highly accurate stereo equalizers with up to 24 bands
2. DJ-type performance filters for realtime sound shaping
3. Stereo spectral Analysis meters
4. Complex time based filtering FX such as wah-wahs, sweeping phase
patterns, comb filtering and more
5. Stereo multiband Resonators and filtered ring modulators (ring mod is
available on the inputs)
6. A simple mono synth (the vocoders internal Carrier) with monster
filterbank FX on top!
7. All of the above with multiple delay FX and echoes
There are many variations and possibilities and a host of different presets to
demonstrate the potential...more on these features in chapter X.
The third and most straightforward mode is ‘Multiband Mode’. In Multiband
Mode Infiltrator reorders the processors to provide a flexible 5 band stereo (or
dual mono) multiband compressor/expander and gate, for possible use in
dynamics FX processing and mastering situations. It can also be used for
unconventional creative use, and to this end we have put a delay FX on each
band of the Multiband set-up instead of the inputs and outputs, so that you
can create highly unusual filtering/compression/echo effects that operate on
different frequency bands simultaneously. This is actually the simplest and
most accessible mode and so is the first one that we will cover in the manual,
working our way up to the full-blown vocoder system.
2
Introduction
All this, we hope, makes for quite a unique piece of hardware...
The three REALTIME CONTROLLERS on the front panel can be configured in
loads of different ways to give you hands-on performance control of internal
parameters. They do not change the underlying values, but rather apply
positive or negative percentage multiplications that you can define very
precisely. One controller can be configured to control up to 8 parameters at
the same time, even with completely different amounts and polarities. For
instance you could make a ‘DJ filter’ preset to have all sorts of subtle positive
and negative value changes take place ‘under the hood’ with the turn of one
dial for dramatic filtration effects that take you way beyond the ‘classic 24pole low-pass’ sweeping sound. This is a very powerful tool and many of the
factory presets take full advantage of this system.
What’s more, there are three LFOs that can be assigned to modulate any of
the REALTIME CONTROLLERS like ‘automaton robots’ that grab the knob and
move it for you, which as you can imagine can make the device go wild and
allows you to create all sorts of time-based filtering FX.
To help with editing and making the most of this monster soundskin, there
are extensive metering facilities for tracking almost all internal signal levels.
There is also an audio monitoring facility that can be used to actually listen in
on these internal signals. These are really useful tools to have at hand while
working.
So in the end as well as all sorts of classic and brand new vocoders Infiltrator
can create everything from performance tools such as weird echo
monosynths and sweeping DJ filtration patches to detailed, quality stereo
mastering tools. If you like serious sonic experimentation Infiltrator really
might just find its way into the heart of your studio and live rig.
Infiltrator – User’s Manual
3
1.2
Background
The earliest analogue vocoders were not really made for musical use at all,
but rather for telecommunication purposes such as voice scrambling and
compression, and like many interesting technologies they were developed
during the WWII years. The inventor of the vocoder was Homer Dudley. His
work was presented at the World Fair by Bell Systems in 1939. During WWII a
vocoder was used for scrambled transmissions between Roosevelt and
Churchill. Like so many audio technologies, despite their initial purpose their
sonic properties would soon make them interesting to quite a different
audience.
Initially the musical application was to accompany vocals with additional
harmonic content, and even crude attempts to "correct" off-key
singing.During the "golden years" of analogue synthesizers, several
manufacturers started making vocoders specifically for musical use. Some of
these were high profile products with huge amounts of electronics inside, and
impressive arrays of knobs on the outside, with a price tag close to that of a
car. Some were almost just black boxes with mysterious contents. And they
all sounded outrageously cool in the right hands!
With the capability of transforming one sound by another in a number of
ways never heard before, they became popular with experimental and avantgarde musicians who were pushing the borders of sound. Many known artists
such as Kraftwerk and Herbie Hancock made prominent use of vocoders to
everybody’s delight. Musicians were now able to make the most lyrical
electronic vocal sounds, mystical alien speech, ultra-funky song lines, robot
voices and a whole universe of abstract vocal and musical sounds.
Figure 1-1
These analogue "filter bank", or "channel", vocoders established a classic
sound for vocal and musical performance, and can in many senses be
4
Introduction
regarded as a kind of instrument in itself - an instrument that you play with
other sounds. Old treasures such as the EMS and Sennheiser vocoders now
enjoy Stradivarius-level fame and desirability amongst discerning electro
musicians.
Today, vocoders are an integral part of electronic music, and appear in many
different forms and get used for many purposes. Not only for the traditional
vocal processing, but for use as effects on drums and other instruments and
for just sheer strange sounding stuff. There are still vocoders in production,
both the old analogue kind, as part of general purpose effect processors and
some that are concerned specifically with pitch correction for singers.
At its heart, "Infiltrator" seeks to revive the sound and feel of these classic
sound-twisting machines. Being a digital recreation, it has the benefits of
extensive programmability and storage of the settings, as well as good sound
with a solid dynamic range. And being suckers for cool toys, we’ve made it
capable of so many things it’s silly...
Infiltrator – User’s Manual
5
Main Features
6
-
Highly detailed control with physical units - e.g. 0.00001 seconds
-
Two 24 channel filterbanks with up to 2/4/6/8 pole, with 11 filter
types
-
Re-configurable architecture to create filters, Qs, Multiband
compressors, and Vocoders
-
Multiple compressors/expanders/gates with lookahead
-
Sophisticated silence/voiced/unvoiced detector
-
Built-in MIDI synthesiser with twin oscillators and noise generator
-
Ring modulation and FM synthesis features
-
8 sets of 3 assignable real time controllers for instant control
-
Realtime control of all filterbanks for unheard-of Vocoding FX
-
3 LFOs for controlling the realtime controls to create fantastic FX
-
Quick/full edit modes - different editing levels for speed and
simplicity or deep control
-
Extensive metering and monitoring of internal signals
-
Internal storage of 99 user programs, with over 55 factory setups
-
Dynamic allocation of DSP resources, allowing different configurations
to utilize the hardware fully
-
Delay FX on the inputs, outputs, or in multiple bands for highly
unusual frequency dependent delay FX
Introduction
1.3
About This Manual
IMPORTANT!
Before we go any further, we should point out a few things that make
navigating this manual clearer.
1. Layout
2. Manual conventions
3. The front panel controls
1.3.1
LAYOUT
As there are so many different things this soundskin can do, we have split the
manual up into distinct sections to explain the whole thing piece by piece.
The introduction you have just finished is to present briefly the ‘philosophy’,
features and architecture of the soundskin. The next section will also go into
all this in much more detail. It is seriously advisable to read this material to
get an idea how Infiltrator has been conceived and designed and know what
to look out for before you dive in. It is quite different to many other rack-units
out there.
Chapter 2 then deals with basics on navigation and the display.
Then follows Chapter 3 on Preset Mode - preset selection, the global system
parameters, and how to customise and configure the soundskin to suit your
working methods, how to save, and so on. We’ll cover all these system
parameters first so that you get a feel for the system, and because these
menus and parameters remain the same at all times. (Once you enter the
other mode, Edit Mode, things get more complex as the menus alter
depending on what architecture mode you have selected).
Note that saving is handled differently in Infiltrator than in other Soundart
soundskins, so again it is advisable to read up on how it works, (section 4.4.4
if you can’t wait).
We will also cover some concepts common to the different modes such as the
meters, internal levels and DSP usage. A short chapter then follows on and
the changes in navigation once you enter Edit Mode, and some advice on
changing the configuration mode (vocoder, EQ, Multiband) of a preset.
The last sections, chapters 7 to 9, can be thought of as independent branches,
each following on from the end of chapter 6. They will deal with what you
find in Edit Mode. Each of the configurations that you can choose for a preset
changes the layout and menu options slightly, as touched on in the
introduction.
Infiltrator – User’s Manual
7
So Multiband, EQ and Vocoder Modes will be presented in their own chapter,
as although they share many similar menu systems and parameters, they are
sufficiently different to warrant a separate section of the manual each. You
will of course find much overlap between them and the chapters that
describe them, and as you learn your way round one mode you will
understand more about the others as well.
We will start with Multiband Mode as it has the simplest architecture.
Therefore it is the obvious place to start getting to know Infiltrator. Then we
will cover the others. Of course if you are just interested in the other modes
then just jump straight to that chapter as each one can be read
independently. But if you are new to all this, then it is best to go through
chapter by chapter as the EQ and Vocoder Modes are more flexible and
therefore more complex.
Although the manual often gives examples of "normal" use, feel free to try
anything - there are no rules. In fact, many of the presets and abilities of
Infiltrator have been discovered by us through the ‘improper’ use of its
unusually open architecture...
1.3.2
MANUAL CONVENTIONS
Secondly, you should know about some manual conventions.
LCD display texts are presented like this:
We will also present the menus in tables that show the menu hierarchy along
with a commentary alongside that explains each parameter and its value
ranges. E.g here are the system pages MIDI configuration menus (note that
pressing - for instance - PARAMETER UP will take you ‘down’ the list: Preset
Ch, Thru, SysEx ID...).
Table 1-1
Group
Page
Parameter
Value
Sys
Preset Ch
1..16
Thru
ON
OFF
1..127
any
MIDI
config
SysEx ID
etc
8
etc
etc
etc
Comments
MIDI Program Change messages on
this channel will set the current preset
to the came value.
This will send a copy of the input MIDI
stream directly to the output.
If you have more than one
Chameleon, you can define the SysEx
ID here, so dumps made will only be
‘heard’ on playback by Chameleons
set to the same SysEx ID.
etc
Introduction
1.3.3
THE FRONT PANEL CONTROLS
The following diagram highlights the main buttons and knobs used for
controlling Infiltrator. These are referred to throughout this manual using
uppercase names. The only controller not magnified here is the ENCODER on
the left of the REALTIME CONTROLLERS, in the centre. Their uses change
depending what mode you are in, and this will be explained with diagrams
later on.
Figure 1-1
Finally, the VOLUME knob on the Chameleon front panel is just that, a good
old volume knob!
Infiltrator – User’s Manual
9
Chapter
22
How it Works
2.1
The Different Processing Blocks
Infiltrator puts signals through a handful of processes and depending how
they are configured you can get the different tools and FX described above.
Think of these processes as distinct ‘blocks’ that can be reordered into
different processing chains in the different modes.
Over the next pages we cover these processing and blocks one at a time, and
take you through some of the controls you will find. When editing you will
come across these controls in slightly different places depending on the
operating mode, but they are nearly always the same.
They are:
1. Filtering Block
Full 24 channels Left and 24 channels Right multimode filters
2. Dynamics Block
Feature-packed compressor/expander/gate combos
3. Vocoding Block
Analysis / Synthesis plus sophisticated SVU detecting
4. Waveform Block
Monophonic waveform generator
5. Delay Block
Filterable delay FX
6. Mixing Block
For setting all levels with in the system to within 0.1dB
10
How it Works
2.1.1
THE FILTERING BLOCK
The filters used in Infiltrator are highly accurate multimode 8-pole digital
filters. They are principally used for splitting the Left and Right signals into
different frequency bands - up to 24 each side - but can also operate as
bands of EQ (for EQ is just filtering and then boosting or cutting the volume of
the different frequency bands) or even just as a powerful one-band filter for
sound sculpting and performance fun.
Every band/channel on either side is a fully functioning, totally definable,
independent filter in its own right and can be set to one of the following
types:
-
Lowpass
Filters out frequencies above the cut-off point
-
Highpass
Filters out frequencies below the cut-off point
-
Bandpass
Filters out all sound above and below the filter
-
Bandpass2
A constant peak gain makes bandpass2 less "peaky" than the standard
bandpass filter
-
Notch
This creates a dip in the spectrum around the cut-off point
-
Allpass
Skews the phases of low and high frequencies, no change in the
overall spectrum
-
Peaking EQ
Boost or cut a particular section of the frequency range with varying
accuracy around the cut-off point
-
Low shelving EQ
This boosts or cuts all frequencies below the cut-off point
-
High shelving EQ
This boosts or cuts all frequencies above the cut-off point
-
HPLP
Composite filter with a highpass and a lowpass section for making
frequency "windows". The filter is arranged depending on the filter
order setting:
- 2nd order, only a 2nd order highpass
- 4th order, a 2nd order highpass and lowpass
- 6th order, a 4th order highpass and a 2nd order lowpass
- 8th order, a 4th order highpass and a 4th order lowpass
Infiltrator – User’s Manual
11
-
LPHP
Same as HPLP, but with LP and HP swapped
Figure 2-1
Whatever mode you work in, it will be based around the Left and Right banks
of multiple filters. While editing, the settings you can control depend on what
type of filter you choose to use. The controls between different filter types
are also very similar, except the EQ types have gain and slope/bandwidth
controls instead of q.
12
How it Works
Table 2-1
Parameter
Value
Comments
Level
Filter
-infdB...+24dB
Various
order *
Freq
note *
cents *
2 ,4 ,6 ,8
20...20,000Hz
E-1...D9
-50...+50
fdelta *
0.00...
10.00 octaves
This sets the overall volume level for the filter
Here you can choose the filter type you want. As
you change to an EQ type, the menus change to fit
as shown below.
This sets the steepness of the filter curves
This sets the frequency at which the filter
operates, often known as the cut-off. You can
choose to set its value in Hz or by MIDI note and
cents. (Changing one setting will reflect in the
other - e.g. 445.4 Hz = A1 +21 cents)
This spaces the filter poles out around the centre
frequency for higher order (4,6,8) filters to create
wider and/or multiple peak filters. (See images
below)
nd
th
th
th
With nearly all the different filter types the last control you have is ‘q’...
Table 2-2
Parameter
Value
Comments
Q
0.50...999.00
Sets the resonance, or cut-off point feedback,
creating a ‘sharpening’ of the sound (the dotted
line in the diagrams above) Here you can have
really extreme settings - Normally a value of
around 1.7 would be sufficient for a DJ filter...!
With Bandpass filters this controls the width of the
band.
...however with the filter set to ‘EQ’ type you have these controls instead of
‘q’...
Table 2-3
Parameter
Value
Comments
Bandwidth
0.01...10.00 oct
Gain
-inf...+24dB
This sets how much the EQ affects the surrounding
frequencies
This sets the gain applied to the selected
frequency area
...and with LoShelf and HiShelf filter types you have these controls instead of
‘q’...
Table 2-4
Parameter
Value
Comments
Gain
-inf...+24dB
Slope
0.1...12.0dB/o
This sets the gain applied to the selected
frequency area
This sets the steepness of the shelf EQ from flat up
to the gained area
Infiltrator – User’s Manual
13
With higher order filters (4th,6th,8th), it is really several 2nd order filters
stacked on top of one another. The Fdelta control allows you to space them
around the cut=off point to widen or narrow the filter shape:
Figure 2-2
14
How it Works
In Multiband Mode the filterbanks have been put to specific use and so have
fewer controls. The filter type is locked to combinations of lowpass and
highpass filters to create one large decomposition filter and the banks are set
to a maximum of 5 bands whose low and high frequencies are always
related. Below you can see the effects of q settings on the bands. See section
7.2.3 for more details on setting up the decomposition filter in Multiband
Mode.
Figure 2-3
Infiltrator – User’s Manual
15
2.1.2
THE DYNAMICS BLOCK
The Dynamics Block used here is a feature-loaded
compressor/expander/gate combo that can accurately condition the sounds
as they pass through Infiltrator. Whenever you find a Dynamics Block within
the system, it will always be the same set of features and controls.
It is used to condition a signals volume level. Excessively loud parts can be
brought under control, quieter passages can be made even quieter and
signals below a certain threshold can be cut out completely.
You can use this processor for everything from transparent level conditioning
of signals within the system before and after the main processing, to creative
effects and production techniques using the Dynamics Block as a sonic effect
in its own right.
The three Dynamics Block components are:
-
Compressor
The compressor basically listens to the input signal and when it
reaches a certain point in volume (the threshold) it starts to ‘pull back’
the volume by a certain ratio.
-
Expander
The expander will do the opposite. It listens to the signal, and when it
falls below a certain threshold it will ‘push down’ the volume towards
silence even quicker, again at a certain ratio.
-
Gate
The gate will listen to the signal and simply cut out anything that falls
below a threshold.
Every Block even has ‘lookahead’ capability, a process whereby the system
introduces a delay of up to one second into the whole chain so that the
Dynamics Blocks can have a sneaky look at what is coming up so it can work
even better at catching peaks. In a realtime/live situation a lookahead of a
few milliseconds won’t be noticed while still making a difference, while in a
mastering situation it doesn’t matter if two-track playback is delayed slightly.
Onscreen, single letters are used to identify the sections: "C" for compressor,
"E" for expander and "G" for gate. For some parameters that are common
across the components, the letter "D" for dynamics is used.
There are always options to link the Left and Right Dynamics Blocks for
convenient stereo editing where necessary. With this active, changing the
values on the Left will update the Right and vice versa. When you first turn
ON linking the settings of the Left will be copied to the Right. You will be
prompted for a Y/N confirmation before linking becomes active (hit EDIT to
execute).
These are the controls you have for the three parts of the Dynamics Blocks:
16
How it Works
Table 2-5
Parameter
D mode
C gain *
C att *
Cr*
Value
Comments
OFF
Comp
comp+gte
-infdB...+24dB
0.00000...9.99999s
0.00000...9.99999s
"OFF": the compressor, expander and gate are OFF
"comp": the compressor and expander are enabled
"comp+gte": the gate is enabled too
This sets the level of the signal as it enters.
The compressor has adjustable attack and release
times:Attack sets how quickly the compression kicks
in once the threshold has been reached.Release sets
how quickly the compressor will ‘let go’ again once
the signal has dropped below the threshold again.
Using extremely short release times may lead to
harshness in the sound; for normal compressor
applications the release times are usually no less
than 20ms (0.02000s). The attack times can be set
very low, which may be desirable for quick tracking
of the signal. Also regarding harshness see "C slew".
This serves to soften the transitions between the
linear and compressed/expanded gain. The knee is
adjustable from "hard" to 12.0dB. On the "hard"
setting, the transition from linear gain to the reduced
gain caused by compression/expansion is
immediate. When the knee is set to X dB, a
secondary compression/expansion segment sets in
at X dB below/above the compressor/expander
thresholds. This secondary segment has a softer
compression/expansion ratio.
This sets the volume level at which the compressor
kicks in.
A higher ratio means more severe compression. The
level is attenuated more and more heavily in relation
to the input level.
This sets the volume level at which the expander
kicks in.
A higher ratio means more severe downwards
expansion.
With lookahead the peak detectors get the
opportunity to look at the incoming signal "before is
has arrived" in order to catch peaks earlier.To achieve
this, the signal has to be delayed internally in the
system. Lookahead must be globally enabled for a
preset in the "Preset:Setup" page, and the global
maximum lookahead time is set there (section 7.2.1)
This is the maximum time that any compressor can
"look ahead". Each compressor then has its own
adjustable lookahead time that can be adjusted from
0 seconds up to the maximum. A warning will be
issued on attempts to set any given compressors
lookahead at more than the global maximum time.
The slewing can be used as an overall softener of the
compression/expansion effect. It acts on the reduced
gain after compression/expansion have been applied
The makeup gain adjusts the final output level of the
Dynamics Block to compensate for overall changes in
volume
The gate also has adjustable attack and release
times.The gate opens when the peak detector has
reached the set gate threshold level, and it will
remain open for the set hold time and then the gate
release time will set in.
C Knee *
Hard
0.1dB...12dB
C thr
-48dB..+12dB
C ratio
1.0:1...99.9:1
Inf:1
E thr
-infdB...0.0dB
E ratio
1:1.0...1:99.9
1:Inf
OFF
0.00001...1.00000s
D look *
D slew
0.00000s...9.99999s
D mkup
-24dB...+24dB
G att *
G rel *
G hold *
G thr
0.00000...9.99999s
0.00000...9.99999s
0.00000...10.00000s
-infdB...0.0dB
Infiltrator – User’s Manual
17
2.1.3
THE VOCODING BLOCK
This is the special vocoding process: as two sounds pass through the banks of
filters they are cross Synthesised by the Vocoding Block so that one sound can
alter the spectral ‘shape’ of another. The high flexibility in programming and
routing here allows the emulation of almost all of the classical vocoder
architectures.
The ‘Analysis’ filterbank (Left) is used to split the Exciter signal (Left input)
into narrow frequency bands. The Vocoding Block tracks the strength of the
signal in each band, or "extracts the spectral envelope" as vocoder speak
goes.
Meanwhile the ‘Synthesis’ filterbank (Right) splits the Carrier signal (Right
input) into similar narrow frequency bands. Each band has its volume
controlled by the corresponding amplitude envelopes in the Analysis bank. All
the bands of the Synthesis bank are mixed down to form the output of the
vocoder.
The result of this is that the Exciter signal (Left) imparts its spectral envelope,
or varying harmonic content, onto the Exciter signal (Right). Or in other
words: "one sound is being played by another sound". What happens
technically can be classified as a form of "spectral transformation" or
"convolution", but to us this is just "vocoding"!
The most common use of this is to use vocals for the Exciter and an
instrument for the Carrier, and so the instruments sound can be spoken with
the voice, or the voice can be played by the instrument, depending on how
you see it.
In addition to the Analysis and Synthesis banks, there is a
silent/voiced/unvoiced detector that is primarily used to generate, or
regenerate, consonant sounds by adding noise to the Carrier signal when a
consonant is detected in the Exciter signal. It does this by monitoring the high
frequency content of the Exciter. However the function of the SVU detector is
quite flexible and it can be used in many other ways.
Note that in Infiltrator any channel can be mapped to any frequency window
you like, and you have lots of control over the way the spectral envelope is
applied. Uniquely to Infiltrator, you also have realtime control over the
filterbank parameters. This can create some seriously cool sounds. This will all
be covered in Chapter 9 in detail.
18
How it Works
2.1.4
THE WAVEFORM BLOCK
This is a monophonic waveform generator, featuring:
-
Noise generator with dedicated 2-pole filter
-
Two oscillators with frequency modulation and cross modulation with
sources from within the whole input system
-
Pulse, Saw, Tri, and Sine/Saw/Noise waveforms with shape control to
allow a wide range of waveforms
It also has a MIDI control page for setting up the following:
-
Portamento (Not available version 1.0)
-
MIDI playing modes and base key
-
Amplitude envelopes for shaping the volume over time
-
MIDI cc assignment matrix such as velocity, pitch wheel and so on
It is a very simple synthesiser and is really part of the vocoder, providing a
rich internal sound source for use as a Carrier signal so you need only input
one external signal to get the vocoding going, for example your voice.
The audio parameters for the Waveform Block are found in the Input group
(‘osc1’, ‘osc2’ and ‘noise’ pages), where you can set up the waveforms for
mixing into the signal path. This will generate constant tones that can be
used for vocoding effects and also for test tones. The parameters follow over
the next few pages.
It can, however, also be thought of as a modest monosynth in its own right
that has access to a monster bank of filters! We have made a few presets that
do just that. For instance try out xBassSynth and eVolvSynth...
To activate this MIDI playing and control, you will need to go to the ‘MIDI’ and
‘MIDI osc’ pages of the ‘Setup’ group and configure the MIDI channels and
controllers separately. See section 8.2.1 for more details.
Infiltrator – User’s Manual
19
2.1.4.1 THE NOISE GENERATOR
A noise generator is provided for use as a general signal source. It has
perhaps the most obvious use in Vocoder Mode, as a Carrier/Synthesis
source, possibly in combination with the oscillators. However, it can be used
for anything you want since it is generally available.
There are test-tone and noise presets available for studio maintenance
applications such as TestTone.
The noise generator has its own dedicated multimode 2-pole filter that can
be used to "colour" the noise. It can also be slaved to the OSC for midi
playing.
Page
Noise
Table 2-6
Parameter
Value
Comments
Mode
OFF
ON
Level
-infdB...+24dB
Filter...
Bypass
LP
HP
...
This turns the Noise generator ON. If this is OFF, all
other places where the Noise signal is available for
mixing in will be marked ‘?’ to remind you it is
unused and to turn it ON here.
This sets the basic volume level for the signal
leaving the Noise generator.
You can filter the noise signal with its own
dedicated filter that is more or less the same as
one of the main filterbank filters. It is however
fixed at 2-pole, and has no fdelta control.
Once the filter type is chosen (i.e. not bypass) the
relevant parameters will appear next in the list, as
outlined in section 2.1.1 above.
20
How it Works
2.1.4.2 THE OSCILLATOR
Both oscillators are mixed together to create one signal source referred to as
"osc" elsewhere in the system. As well as for Synthesis and vocoding, they
can be used for test tone generation and studio maintenance. The two
oscillators are identical in features and controls. It is found in the input group
of Vocoder and EQ modes. The complete parameter set for oscillator 1 is:
Page
Osc1
Table 2-7
Parameter
Value
Comments
Mode
OFF
ON
01 level
O1 f *
01 note
01 cents
-infdB...+24dB
0.1...20,000Hz
E1...D9
-50...+50
01 wave
Saw
Tri
Pulse
Sine/Saw
0.0000...
1.0000
This turns the oscillator ON. If this is OFF, all other
places where the OSC signals are available for
mixing in will be marked ‘?’ to remind you to turn
them ON here.
This sets the basic level for the Osc.
Here you set the frequency, going down as far as
0.1 Hz for frequency modulation and ring
modulation purposes. You can choose to set its
value in Hz or by MIDI note and cents. (Changing
one setting will reflect in the other - e.g. 445.4 Hz
= A1 +21 cents)
Here you choose the basic waveform (also
outlined on the following page). With the shape
control you can get a whole range of waveforms:
"Pulse": adjusts the pulse width, shape = 0.5 gives
a square wave
"Saw": adjusts the wave from sawtooth towards
square, shape = 0.0 gives a sawtooth
"Tri": adjusts the wave from triangle towards
square, shape = 0.0 gives a triangle
"Sin/Saw": adjusts the wave from a sine through
a saw and towards noise, 0.0 gives sine, 0.16
gives saw, values above 0.18 goes towards noise
You can modulate the frequency of the oscillator
by choosing one of these other sources within the
system and setting a value between 0 and 1. For
instance: Using the other oscillator, you can get a
vibrato if osc2s frequency is set really low. At
higher settings really wild sounds can be created.
And by frequency modulating Osc2 with Osc1 at
the same time, cross modulation can be achieved.
01 shape *
01 fm src *
01 fm *
Infiltrator – User’s Manual
OFF
Osc 1
Osc 2
Noise
Osc 1+2
L input
R input
0.00000...
1.00000
21
Table 2-8
Waveform
Image
Saw Wave gives a rich, bright tone with both odd and even
harmonics that falls off smoothly. It is useful for full bodied
synthesizer spectra.
Sine wave is the purest and simplest waveform that has no
harmonics and has a very pure, clean sound suitable when
only the fundamental frequency is wanted with no
"leakage" into other parts of the spectrum.
Triangle is made up of odd numbered harmonics that fall
off very rapidly. It has a ‘hollow’ sound, but duller than
Square (below).
Square wave is made up of odd numbered harmonics that
falls of smoothly. The sound is generally hollow and woody.
22
How it Works
2.1.5
THE DELAY BLOCK
Infiltrator has several stereo delay lines built in. Each delay has its own
settings for time, feedback, delay filter and dry/wet mix. The maximum
delay time is 4 seconds for each delay. The delays can be used to create
many effects, and they can be used as "pure" delays (e.g. for sound
reinforcement). Somewhat special, and possibly unique to Infiltrator, is the
use of the delays in Multiband Mode - with the "multiband delay" many new
effects can be achieved, with totally different delay FX over different parts of
the frequency spectrum. So your bass and mid frequencies could be echoed
like a dub track while the upper frequencies are metallic sounding due to a
extremely short delay effect with a filtered echo trail that disappears upward,
with different settings on the Left and Right...
Try out presets Spring room and Band echo1.
The delays are made available depending on the preset mode. They are
organized in a Left and Right bank, and these can be stereo-linked for easy
editing of equal stereo settings.
Figure 2-4
Infiltrator – User’s Manual
23
2.1.6
THE MIXING BLOCK(S)
To balance the signals that come and go through all these processes, you of
course have extensive, detailed stereo mixing controls at the start and at the
end of the chain. This is really a set of various mixing processes, but it is
useful to think of them as ‘blocks’ for the purposes of understanding the
Infiltrator architecture.
At the inputs:
Your options vary depending on what mode you are in, which is described in
detail later on:
Again the simplest is Multiband Mode, where you can simply set the input
level for the audio to be compressed through the multiband compressor. All
other input types are disabled.
Then there is EQ Mode, where as well as the inputs you can add the internal
synth and ring modulate the sounds across each other.
Finally, in Vocoder Mode you have extensive mixing options for setting up the
mix of signals that arrive at the Analysis and Synthesis banks in the Filtering
Block. Like EQ Mode, you can ring modulate the inputs with each other
and/or the Waveform Block . But you can also fine-tune the different mixes
that make up the Silence/Voiced/Unvoiced detector section of the Vocoder
Block. (see section 9.2.4 for more).
At the output
Here you can mix the filterbank outputs with the original, unprocessed inputs
and Waveform Block signals should you wish to do so (not in Multiband Mode
where the Waveform Block is deactivated). In the case of an FX type preset
this can be seen as a dry/wet mix option.
At the output you can also call up a special ‘monitor’ channel, which can tap
its source from just about anywhere in the system so that you can check on
the signals aurally as they pass through the Blocks. This monitor system can
be mixed in or solo’ed for individual auditioning.
24
How it Works
2.2
The Different Modes
So here’s a little more detail about what the modes are actually doing with
these processing blocks. Each preset, or "patch", can be in one of the three
main modes (in order of complexity):
1. Multiband Mode
2. EQ Mode (with four stereo variations - Ser/Ser, Ser/Par, Par/Ser,
Par/Par)
3. Vocoder Mode
The general architectures and their potential are outlined in the following
sections.
Infiltrator – User’s Manual
25
2.2.1
MULTIBAND MODE
This mode is the simplest of the three. The Filtering Block splits the Left and
Right signals into a maximum of 5 frequency bands on each side, using a
decomposition filter system made up of HP and LP filters (see section 2.1.1).
You have control over each bands frequency range, the global resonance (q)
and overlap for the filters. There is no waveform synthesis or ring modulation
options as the Waveform Block has been deactivated.
It then runs the output of each band through its own independent Dynamics
Block, up to five on each side, followed by a Delay Block. You can then
condition accurately the levels of each band of the frequency spectrum
individually and add delay FX. You can stereo link the system, or create a
totally independent dual mono processor.
Figure 2-5
26
How it Works
2.2.2
EQ MODE
EQ Mode is for using the filters as processors in their own right for creating a
wide variety of effects. There are four different EQ Mode configurations:
1. You can choose to run them in series, meaning they take the signal,
filter it, and then pass it on to the next filter for further processing, in
a chain.
Figure 2-6
Infiltrator – User’s Manual
27
2. Alternatively you can choose to run them in parallel, meaning every
filter takes the whole input signal in at the same time, filters it, and
then you mix the results back together again for the output.
Figure 2-7
The other two modes are mixtures of the above - serial on the Left channel
and parallel on the Right, or vice versa.
At the inputs, you have more options than Multiband Mode - You can ring
modulate the inputs with each other or by using the Waveform Block signals,
as well as mix in the Waveform Block to use as an simple monosynth or to
provide test tones, noise signals and so on.
Also at the inputs you have a Dynamics Block over each channel, to control
the signal before it enters the Filtering Block. There is also a Delay Block for
FX.
At the output Mixing Block you can mix the processed sound with the original
unprocessed inputs and Waveform Block sounds, as well as the specific
monitor channel that taps signals from within the system for auditioning
while working.
Finally at the main outputs you have a Dynamics Block and Delay Block over
the Left and Right outputs.
28
How it Works
2.2.3
VOCODER MODE
In this mode the Left and Right inputs are taken separately as mono sources,
and processed through the Filtering Block with its banks of up to 24 filters for
each channel. As described previously, the Vocoding Block sits in the middle
and extracts the spectral envelope from the Left (or ‘Exciter’) and applies it to
the Right (or Carrier), resulting in a "resynthesized" sound coming from the
output of the synthesis bank.
To help condition the sounds at either end, you also have a pair of Dynamics
Blocks over the inputs to the Filtering Block before they are analysed, and a
pair over the main outputs again to keep that under control too. This is
important as the vocoding process can kick out some crazy results. Watch out,
as this can happen even if you adjust certain parameters even slightly using
the REALTIME CONTROLS (But it is a lot of fun...).
Figure 2-8
You can ring modulate the inputs and also mix in the internal ‘Waveform
Block’ to add to the sonic palate of the vocoder, or even to replace the need
for an external Carrier.
Infiltrator – User’s Manual
29
Just like EQ Modes you have stereo linkable Delay Blocks on the inputs and
outputs.
The diagram on the previous page shows the set up for Vocoder Mode clearly.
Note that it is really quite similar to Parallel EQ Mode except for the Vocoding
Block in the middle. While this is essentially true, when you some to use this
mode you will find the user interface changes quite a lot. Much of the
complex detail of the vocoding input mixer system has been left out of these
diagrams for the sake of clarity. (chapter 9 shows the full Vocoder Mode
schematics).
Also, the Left and Right inputs are renamed in the user interface ‘Exciter’ and
‘Carrier’, while the Left and Right filterbanks are renamed ‘Analysis’ and
‘Synthesis’. This is because they are really no longer part of a stereo
Left/Right system, but rather a vocoding system where classically the two
sounds are treated as mono sources and ‘cross-synthesised’ to create a third
new mono source. The output from the synthesis can be spread in the stereo
field by using the synthesis output mixer to pan the different bands in
different directions. The vocoder presets use this technique.
30
How it Works
2.3
More General Goodies
Now that we have introduced the main modes and their features, here are a
few more general goodies you will find:
-
Pop-up level meters
For almost every internal signal you can call up customised popup
meters, that show many different meter types, from spectral-style
filterbank meters to gain reduction and MIDI channel metering. In Edit
Mode just press SHIFT, and use PART UP to cycle through the meter
types and PART DOWN to reset the overload clipping markers (and to
cycle through the graphic analyser modes, which don’t have clipping
indicators). See the meters section of chapters 7,8, or 9 for more
detail.
-
Signal chain with 12dB headroom
Thanks to the Chameleons 24bit signal path, dynamically there is
plenty of room to play with before the outputs. See section 5.2 for
more details.
-
MIDI control
There are extensive playing, control and modulation facilities for
remote performance and sequencing of the synth, filters and
compression controls. The filter banks in Parallel mode can be
controlled from the keyboard with a variety of ducking, gating and
frequency mapping techniques.
Even though the MIDI controller messages only send 128 steps while
many of Infiltrators parameters are vastly more detailed, we have still
come up with a few ways to allow you MIDI control over the guts of
the machine. Note that with certain parameters there may be a slight
stepping effect at times because the MIDI controller resolution is so
much lower.
-
Internal storage of 99 user presets
We have created over 50 presets for you to explore. The rest are for
your creations!
-
Dynamic allocation of DSP resources
Infiltrator allows different configurations to utilize the hardware fully.
While this means you can get the most out of the machine at all
times, you will of course reach a ‘maxed out’ alert if you try to
activate functions that require more power than there is spare. See
section 5.1 for details.
Infiltrator – User’s Manual
31
Chapter
33
The Display and Navigation
Next we’d like to explain how to see what’s going on and get around the
soundskin.
There are six things you should know about before moving on:
1. The different User Interface modes
2. Finding the parameters you want
3. The different UI Mode button and knob functions
4. The location memory feature
5. Quick and Full level editing
6. Some symbols and their meanings
3.1
The Different User Interface Modes
There are two main user interface modes, Preset Mode and Edit Mode (these
are not to be confused with the system architecture modes described above these refer to the way the system is configured, Vocoder, Mulitband etc, and
not the way you actually interact with the soundskin).
So these two user interface modes are:
Preset Mode
This is the default start up mode and is where you choose between the
different presets available. You also have access to the global system options
and parameters - the ones that remain the same regardless of what preset
you have loaded. These include setting up the MIDI essentials, making SYSEX
dumps, screensavers, as well as saving your work. This will all be explained
first, in chapter 4.
Note: the saving mechanisms are slightly different to other Soundart
Soundskins and it is advisable to take a moment to familiarise yourself with
the way it works via this manual. See section 4.4.4 for more details if you
really can’t wait.
32
The Display and Navigation
Edit Mode
This is where you ‘go inside’ a particular preset and make adjustments to its
parameter set up. All of these adjustments are saved with each individual
preset.
As every preset is either in Vocoding, EQ or Multiband Mode, it is here while
editing that you will find the menus and parameter sets morphing to fit the
chosen processor ‘flavour’. This is why the final chapters will each cover the
slightly differing Edit Mode architectures separately.
3.2
Finding The Parameter You Want
Once you enter the Edit Mode or System pages outlined below, you will find a
lot of parameters to control. However navigating them is quite easy, with
parameters grouped together into logical menus, which you can browse
through to access and modify parameters.
The menus always have the following structure:
-
GROUP (GROUP UP and GROUP DOWN keys)
The group buttons move you between the main sections within a
Mode. The name of the current group is shown in the upper left line of
the Display.
-
PAGE (PAGE UP and PAGE DOWN keys)
Within each group outlined above there are usually several ‘pages’ to
navigate through that contain subsets of parameters for dealing with
one particular aspect of the mode. The page name is shown on the
right of the upper line.
-
PARAMETER (PARAM UP and PARAM DOWN keys)
Once you have chosen a group and gone inside a particular page, you
can then select from a list of parameters for adjusting. The name of
the current parameter is shown in the lower line of the display,
aligned to the left.
-
VALUE (VALUE UP and VALUE DOWN keys and/or BIG DIAL)
All the other buttons described above are for navigating around the
soundskin. With VALUE UP/DOWN and/or the BIG DIAL you actually
change the value of a parameter. The current value of the parameter
you have navigated to is shown on the lower line of the Display.
The LCD display tells you where you are as you navigate - the upper line
shows the Group name and the current page (separated with “:”). The lower
line shows the current parameter name and its value.
The familiar display convention described on the previous page is almost
completely constant throughout the soundskin, telling you where you are and
Infiltrator – User’s Manual
33
what you are doing. It is quite intuitive and you can get used to it very
quickly. However, there are four exceptions to this display standard:
-
When using the main ‘Homepage’ that appears when you fire up the
soundskin (this is really a whole Group within Preset Mode that only
has one parameter in it - what preset you want to load. So it does not
show you group and page details in the top line, as there are no other
‘pages’ in this ‘group’ and we wanted to keep it as clean as possible.
The freed space now makes it easier to read (important under stage
conditions etc), and to allow space for MIDI, input and output meters
(see section 4.1).
-
When you access a popup meter in Edit Mode, which can appear on
the upper line while editing to help you see what your signals are
doing.
-
When displaying meters on both lines using the "Meters:Display"
page.
-
When prompts and warnings may temporarily use one or both lines to
let you know something.
In the chapters that follow we have laid out all the groups, pages, parameters
and their possible values in tables that show this hierarchical menu structure
clearly.
3.3
The Different UI Mode Button and Knob Functions
It is important to note that unlike the other Soundart soundskins to date,
many of the Front Panel controls change function completely depending on
which of the two modes you are in. This mainly refers to all the other controls
aside from the GROUP, PAGE, PARAMETER and VALUE navigation and editing
buttons.
For instance, the REALTIME CONTROLLERS are used for performance control
only in Preset Mode. Once you enter Edit Mode they become a trio of data
selection wheels, designed to help you quickly reach the values you want for
the different parameters. With parameter ranges that smoothly run from
0.00001 to 9.99999 this is quite important! You would not want to sit there
scrolling away with the ENCODER all day... (see section 6.3 for more).
There will be more on the exact functions of each control in the two modes,
later.
34
The Display and Navigation
3.4
The Location Memory Feature
Like many rack units, Infiltrator has a page location memory and will always
remember where you have been. So if you leave a particular group, while
displaying a certain parameter within a certain page, as you return to that
group it will show you what parameter you were looking at before. This is
very useful when you are trying to adjust two different parameters in
different groups/pages at the same time. Once you have navigated to them
you will find that you can toggle between them easily.
The downside to this is that you leave a trail of locations that change
dynamically, which can also throw you off balance as you keep track of your
location in your head. The most obvious of these is that as you enter and exit
the two modes, what you see on entering can constantly change. But like all
technology, you just need to spend a little time developing familiarity with
the soundskin to get comfortable with the way it behaves.
(Note that in a way that is impossible in the other Soundart soundskins, you
can toggle between global system and individual preset parameter menus
instantly. This makes things much quicker for experienced users, but can lead
to some momentary confusion as to what mode you are in. A simple guiding
rule for this is to look at the LED next to the EDIT key, which is lit in Edit Mode.
You can also see that the word ‘Sys’ is always on the left of top line in all the
system pages of Preset Mode. As the only other screen in Preset Mode is the
homepage, this ‘sys’ rule of thumb is quite useful to remind you where you
are along with the LED).
3.5
Quick and Full Level Editing
As Infiltrator is a very detailed and somewhat complex soundskin, there are
many esoteric parameters that may only be used by advanced users, and
then only sometimes. So we have set up a QUICK level that only shows the
most common, useful and standard parameters for editing. The others are not
turned off, simply hidden. By default the menus system in Infiltrator is set to
FULL display level, where all parameters are displayed for editing as you scroll
through the groups and pages.
QUICK level only changes the menus you find while editing in Edit Mode.
System pages always remain the same.
Changing to QUICK level will make using Infiltrator much simpler, whether
you are an experienced user who wants rapid access to the basic tools
available, or a relative beginner who is working out how it all works. You can
change level at anytime in the system:config pages where you set up the
user interface. (See section 4.4.1).
Throughout this manual, all parameters are shown in the tables as if working
at FULL level. The parameters that are only available at the FULL level are
marked *.
Infiltrator – User’s Manual
35
So if you are using the QUICK level, and you want to look up a parameter in
this manual, remember to skip over the parameters in the tables that are
marked with * as they are only displayed at FULL level.
3.6
Some Symbols and Their Meanings
Periodically you will see certain symbols appear onscreen alongside values,
parameters and so on.
Here is a table outlining what they stand for:
Table 3-1
Symbol
Meaning
?
Parameters marked with a ‘?’ warn you that the parameter has no effect
because the underlying function block is disabled (set to "OFF").
=
In the preset selection menus this symbol tells you when you have
selected the same preset as you have loaded (e.g. for bulk MIDI dumps or
saving).
*
This shows that the preset or system configuration has been ‘dirtied’ in
some way (i.e. edited or changed from what is stored in memory).
#
This symbol shows when the left and right banks are linked.
!
indicates that a global modifier is in effect (see Chapters 7-9 L/R Bank
sections for more on global modifiers).
$
When choosing Realtime Controllers for instance, this symbol tells you
the target parameter is also being targeted from elsewhere.
Now that we have covered the main navigation concepts, we can get on with
telling you how to work the modes in detail.
36
The Display and Navigation
Chapter
44
4.1
Preset Mode
The Homepage
When Infiltrator is switched on it will spend a few seconds preparing itself for
operation, then it enters "Preset" mode. The first page it displays is what we
call the ‘Homepage’, where you can choose from the different presets
available. You will always be taken back to this page after major operations
such as saving.
So on start up the display will show:
As mentioned, this homepage does not show the group and page names on
the upper line. In reality there are no other pages or parameters in this
‘group’, so we used the space to give you meters instead and make it easy to
read. Here is a detailed list of what you see on screen:
The upper line:
1. A little ‘m’ on the left will flash whenever there is MIDI activity at the
MIDI IN port
2. Next to this, a small ‘b’ will show whenever global bypass is on (SHIFT
in Preset Mode)
3. IN and OUT level meters. These show the input level after it has
passed the input level control and the output shows the final output.
Silence is indicated by ‘.’
The lower line:
1. First you see the number of the currently loaded preset
2. Next to it, you see the name. This can be up to 10 characters long (the
default preset is number ‘1 thru’ which is a bypass preset that sends
Infiltrator – User’s Manual
37
the input directly to the output and all other processes are turned
down).
4.2
Selecting Different Presets
The different presets are selected from the Homepage using VALUE UP/DOWN
and ENCODER to find the one you want, and then by pressing EDIT to confirm
the selection.
If you haven’t done it already, you should take a quick tour through the
different factory presets. They give a good example of what the machine can
do. They are split into sets, for easy navigation. See Appendix C for more info
on the factory bank of presets.
For total flexibility, you can actually choose between four different user
interface modes for selecting the presets, in the "System:Config" page.
The "prst sel" parameter will choose between "OFF","keys","key+enc" and
"browse" modes. The browse mode is the default described above, which
allows you to browse through the options before choosing one. See section
4.4.1 for more details on the other selection modes.
Whatever the selection mode, if you try to change to another preset but have
not yet saved any changes in the current one, you will be asked ‘lose
changes?’. Use the VALUE UP and DOWN buttons to choose Y or N and hit EDIT
to execute. If you choose Y you will change preset as requested and discard
the edits, if you choose N you will remain where you are, and you can go and
save your work if you want to before moving on. See section 4.4.4 for more
details on saving your work.
38
Preset Mode
4.3
Exploring this Mode
So to explore this mode we need first to tell you how the Chameleon front
panel buttons behave.
For Navigation:
There are two groups in Preset Mode. You toggle between these using the
GROUP UP and DOWN keys. These are:
1. The Homepage described above, for selecting presets. You select with
the VALUE UP and DOWN or the ENCODER. The other navigation
buttons are inactive.
2. The global system parameters. This group is browsed using the
standard PAGE/PARAMETER/VALUE architecture.
Meanwhile, the other buttons on the front panel have the functions
shown in the following diagram.
Figure 4-1
EDIT
To enter Edit Mode, where you can edit the currently selected preset. The LED
next to the EDIT button will light to indicate the change of mode.
Note that unlike other Soundart soundskins, Infiltrator will not ask you if you
want to save your edits when you enter and then exit Edit Mode. This is so
that you can easily flip between the two modes adjusting parameters in the
global set and preset-specific set without interruption. When you are ready
you must save manually. For details on saving, see section 4.4.4.
Infiltrator – User’s Manual
39
In Preset Mode the EDIT key is also used to execute Y/N selections or confirm
the selection of a new preset, while using the ‘Browse’ preset selection
method. The LED next to it will flash whenever you need to confirm
something.
SHIFT
Switches ON/OFF Bypass. The LED next to the SHIFT button will light to show
bypass is ON, along with a small ‘b’ on the Homepage upper line. A warning
screen will temporarily show up whenever you change mode to remind you
that Bypass in ON as well.
PART UP and DOWN
These are used to cycle up or down through the REALTIME CONTROLLER sets
available (see below). Note that the lowest ‘set’ in the list is actually the OFF
state, where the REALTIME CONTROLLERS are switched OFF for safety (you
may not want a sudden change of parameters through accidental knocking of
a button in a live situation...).
REALTIME 1-3
The REALTIME CONTROLLER knobs can be set up as performance controls for
manipulating internal parameters. These are highly configurable, with specific
ranges, polarities and multiple parameter control. The exact set up and even
the positions you leave them in can be saved with each preset.
You have up to 8 sets of 3 real time controllers (‘RTCs’), that give you control
of up to 24 parameters. These can be linked together so that up to eight
parameters can be changed with one knob. You cycle through the available
sets using PART UP and DOWN. The system is very flexible and can allow you
to have deep control of your sounds without having to enter any kind of
editing mode once it is set up. Of course, as you browse through multiple sets
of controllers it is always possible that you will return to a set and the
positions of the knobs are nowhere hear the actual underlying values of the
set you have returned to. Because of this, there is a ‘catch-up’ feature that
will show you direction arrows on screen when you first turn the knob,
without adjusting anything, until the value matches. The LED above it will be
lit if it is assigned, and will blink once you have ‘caught up’ and changed its
value. This way it is easy to see what RTCs you have assigned, and also which
ones are ‘in use’. More about RTCs in section 5.4.
40
Preset Mode
4.4
The System Group
By pressing GROUP UP from the Homepage, you enter the system group
(‘Sys’) and can adjust the global settings, save your work and view system
information. Here is a table of the different pages within this group.
Following this, there are sections on each of these Pages.
Table 4-1
Group
Sys
Page
Comments
Config
This is where you set up all the general system
user interface settings, such as Full/Quick editing
level, Menu Wrap...
Here you set the global MIDI settings such as Thru
ON/OFF, program change channel...
Here you can perform MIDI system exclusive
Dumps for storing your presets and system
configurations as a MIDI file using an external
sequencer.
This is where you save your preset. You manually
navigate to this Page and choose the destination
slot before going ahead with the save.
This is where you save your global system settings
such as those found in this section.
System information such as the soundskin version.
MIDI config
MIDI dump
Save Pr To
Save Sys
Info
4.4.1
USER INTERFACE CONFIGURATION
Infiltrator has a highly customisable user interface. It is possible to personalise
it to fit your way of working. These are your options in the ‘Sys:config’ page.
Group
Table 4-2
Page
Parameter
Sys
Config
Tune
Write prot
Infiltrator – User’s Manual
Value
Comments
A4=
444.00Hz...
ON
OFF
Master tune for the whole system, around 440 for
A4...
Stops you making any changes to your saved
presets. Like a global lock. Useful for gigs where
you really don’t want to accidentally lose anything.
In Edit Mode, you can use REALTIME CONTROLLERS
2&3 as coarse/fine tuning controls for quickly
finding the values you want to apply to a
parameter. See section 6.3 for more details.
In Edit Mode, you can use REALTIME CONTROLLER 1
to change the resolution of the ENCODER while
editing values. See section 6.3 for more details.
There are two Edit Mode levels, FULL for the deep
level control and QUICK for accessing only the most
important parameters. The more esoteric
parameters are hidden. This allows users to avoid
paging through too many parameter lists to find
what they need. It is also a good starting point for
beginners.
Coarse/fine
ON
OFF
Enc mult
ON
OFF
Edit Level
Full
Quick
41
Group
Page
Parameter
Value
Comments
Wrap
OFF
Keys
Keys+Enc
With this option activated, parameter values can
wrap around from the highest to lowest values.
This can make you very quick at editing once you
are used to it.
Menu wrap
ON
OFF
Prst Sel
OFF
Browse
Keys
Keys+Enc
WARNING!! WATCH WHAT YOU ARE DOING HERE - A
SINGLE KEYPRESS JUMP FROM -inf dB to +24dB CAN
BE RATHER A SHOCK TO YOUR EARS, SPEAKERS AND
NEIGHBOURHOOD...
This wrapping feature is a bit safer: Once you are
used to the internal menus and parameter lists,
you can activate this option to allow you to scroll
navigate the lists in any direction. Once you get
used to it its hard to go back! (But its
recommended to leave this OFF until you are
familiar with the system as you can scroll forever
thinking ‘I’ve seen that parameter before...’!)
The different methods of preset selection for the
Homepage.
In the "OFF" mode, the preset cannot be changed,
to guard against accidents in a live situation.
In the "keys" (and ‘key+enc’) mode new presets
are loaded immediately using VALUE UP/DOWN
(and the ENCODER).
In the "browse" mode (default) presets are
selected a follows:
Using VALUE UP/DOWN or the ENCODER, you
"browse" through the available presets without
actually selecting one. The EDIT LED and the preset
number will blink to indicate that you are
browsing.
Popup mode
Ctx
sel
The EDIT key will load the preset. If you don’t want
change preset just "forget" about it, because as
you navigate away the browsing will be
automatically cancelled.
The Pop-up meters that you can call up to give you
visual feedback while you are editing have two
modes.
‘ctx’ means they will show you first a context
sensitive meter that is appropriate for the
parameter you are editing (e.g. gain reduction
while editing compressor parameters).
‘sel’ means that the meter will always show you
the meter type you have chosen.
Popup time
42
0.1...10s
See section 7.2.7 for more details.
You can set how long it takes for the popup
meters to appear once you have arrived at a
parameter, which allows you see the text in the
upper LCD line while you navigate with the popup
meters enabled.
Preset Mode
Group
Page
Parameter
Value
Comments
realtime
ON
OFF
Edit
In Preset Mode the REALTIME CONTROLLERS are
configured as performance controllers for
manipulating internal parameters. You can turn
these OFF for on-stage safety, or you can select
from two different modes:
ON means that the controllers will apply their
positive and negative manipulations to the
underlying parameters, but that their positions are
not saved with the preset. Use this when you want
them strictly for performance controls.
Param slew
4.4.2
0...10
EDIT means that their current positions can be
‘frozen’ along with the rest of the preset data, so
that when you return to the preset, the controllers
are left in the exact position they were before. If
you like to ‘feel’ for new sounds and settings, you
can view this as a kind of editing system (with
certain caveats - see section 5.4.1 for more
details).
All parameters except filterbank parameters can
be slewed to allow smoother transitions from one
value to the next. E.g. as the RTCs have a
resolution of 128, if you are using a RTC to control
the Osc Frequency, it will smooth out the signal so
that there are no steps occurring as you sweep
from 20hz to 20,000hz. Here you can set how fast
the slewing is. Lower number = Faster = less
smooth slewing, but there are some instances
where faster slewing is preferable. If you are
changing many parameters simultaneously
Infiltrator will allocate the slewing power to the
most recent change. This parameter may need to
be adjusted if you hear artefacts in the signal. See
5.4.3 below for more details on pushing the DSP
system to its limits.
MIDI CONFIGURATION
This is where you set up the global MIDI parameters. These remain the same
for all presets. Additionally, every preset has its own MIDI configuration
settings.
Group
Table 4-3
Page
Parameter
Value
Comments
Sys
MIDI Config
Preset Ch
1...16
Thru
ON
OFF
1...127
any
MIDI Program Change messages on this channel
will set the current preset to the came value.
This will send a copy of the input MIDI stream
directly to the output.
If you have more than one Chameleon, you can
define the SysEx ID here, so dumps made will only
be ‘heard’ on playback by Chameleons set to the
same SysEx ID.
This allows Infiltrator to listen to bulk SysEx dumps.
You can turn it OFF for safety.
Older computers such as Ataris cannot deal with
faster streams of MIDI SysEx. This option is for
them. A modern computer should have no
problems but if you are experiencing troubles with
SysEx dumps try changing this setting.
SysEx ID
Bulk Rx
Bulk Speed
Infiltrator – User’s Manual
ON
OFF
Fast
Slow
43
4.4.3
MIDI DUMP
Here you can perform MIDI system exclusive Dumps for storing your presets
and system configurations as a MIDI file using a sequencer. You simply
choose the type of data you want to send to the sequencer, put the
sequencer in record, and hit execute. The data will stream over to the
sequencer and once it has stopped you can save this as a backup MIDI file of
your work. At any time you can play this file back to the chameleon with
Infiltrator loaded and your settings will be returned (as long as bulk Rx is set
to ‘ON’).
Note that Infiltrator will happily send the SysEx data ‘in the background’ while
you carry on working, and will flash the LEDs above the RTCs in sequence to
show it is still sending.
Group
Table 4-4
Page
Parameter
Sys
MIDI dump
(select what
you want to
dump)
Value
Comments
All presets
Edit Buffer
1...99
Here you can select what type of data you want to
send.
‘All Presets’ will send everything
‘Edit buffer’ will send the current snapshot state of
the current preset.
Execute dump?
(Stop Dump?)
Y/N
Your other option is to choose from one of the 99
presets in memory and send that.
Use VALUE UP and DOWN to select Yes or No.
Remember you can still navigate away at this
point.
If you choose Yes, pressing EDIT will confirm and
the MIDI dump will start. After choosing Yes or No,
the soundskin will revert back to the Homepage.
(If the dump is already in progress, here you will
see ‘Stop Dump?’ instead and you can choose Y/N
in the same way).
4.4.4
SAVE PRESET
The saving system for Infiltrator is a little bit different to other Soundart
Soundskins - instead of an automatic system asking if you want to save
changes whenever you exit Edit Mode, Infiltrator will leave it up to you. You
find the saving functions within the system pages, amongst the other saving
and storage dialogs - those for saving the System Setup and for MIDI dump
protocols. Of course if you ever try to change preset without saving your
work, it will warn you, but you must still go and save it yourself.
This system is designed so that you get fewer interruptions - while working
you may often need to toggle between the system and Edit Mode pages to
compare and adjust things. Without interruptions this is very quick and easy.
Another change to note is that naming the preset is not part of the saving
protocol. It is something that you can do at any time in Edit Mode (see
section 7.2.1).
44
Preset Mode
Once you are happy with your preset, have set the name and are ready to
think about saving, you can then navigate to the "Sys:Save Pr To" page in
System Mode.
Group
Table 4-5
Page
Parameter
Value
Comments
Sys
Save Pr To
1...99
Here you can browse through the possible
destination slots using VALUE UP/DOWN or the
ENCODER. You will be shown the current slot by
default.
(select
where you
want to save
it to)
Save Preset?
Y/N
At this point you can still easily navigate away as
you have not chosen to save yet. This means that
at any time while working you can browse the
possible locations for the preset without losing
your unsaved work or entering the Y/N save
dialog screens.
Here you have now entered the saving dialog. Use
VALUE UP and DOWN to select Yes or No. Again,
you can still navigate away at this point.
If you choose Yes, pressing EDIT will confirm the
save and the display will briefly indicate that the
preset is being saved to FLASH. After choosing Yes
or No, Infiltrator will revert back to the Homepage.
Display notes:
* means the current preset is "dirty" (edited but not saved)
= means the destination preset is equal to the current preset
Note that the current preset can be saved even if has not been edited. This
can be useful for copying presets between slots.
4.4.5
SAVE SYSTEM
Next in the system pages you will find the dialog for saving your system
preferences. All the global settings are saved here. It is much the same as the
Save Preset Dialog, except that you do not have to choose a destination. You
simply find this page and choose Yes or No and hit EDIT to execute.
Group
Table 4-6
Page
Parameter
Value
Comments
Sys
Save Setup
Y/N
Use VALUE UP and DOWN to select Yes or No.
If you choose Yes, pressing EDIT will confirm the
save and the display will briefly indicate that the
system is being saved to FLASH. After choosing Yes
or No, Infiltrator will revert back to the Homepage.
Infiltrator – User’s Manual
45
Display notes:
* means the current preset is "dirty" (edited but not yet saved)
If you do not want to save the system set up, just navigate away from the
"Sys:Save Setup" page.
4.4.6
INFO
Infiltrator displays information about the Infiltrator Soundskin and the
Chameleon.
46
Group
Table 4-7
Page
Parameter
Sys
Info
Ver
App
Mod
Sno
Value
1.0
Infiltrator
Chameleon 1
Serial no.
Comments
For your information...
Preset Mode
Chapter
55
Some More Things
5.1
Dynamic Allocation of DSP Resources
In each mode, there are features that can be switched ON or OFF. This will
consume more or less DSP resources (i.e. processing power and memory).
Also, each processing channel consumes a certain amount of DSP resources,
such that adding or removing channels will affect the DSP resource usage.
Infiltrator will use this fact to allow you to select the desired functions and
number of processing channels and therefore use the available DSP resources
to the max. The current DSP resource usage can be seen as a percentage of
the available resources on the "Preset:Info" page:
If an attempt to switch on a feature, change a mode, add a channel etc.,
would take you over 100% of the available DSP resources, then a warning
will be displayed to inform about the potential DSP usage. This warning will
flash for 3 seconds or until you manipulate any panel controls:
If you still want to enable the feature that was "too much", some other
resource usage must be reduced. The features that affect the DSP usage are
as follows, more or less in order of ‘hunger’ (the actual situation is more
complex than can be listed as there are of course many possible
permutations but this gives you a general idea):
-
multiband compressor modes OFF/comp/comp+gate
-
input and output compressor mode OFF/comp/comp+gate
-
compressor linking modes OFF/avg/max
-
compressor lookahead OFF/ON
-
SVU detector modes OFF/SVU/SVU++
Infiltrator – User’s Manual
47
-
number of processing channels 1 to 24
-
oscillator 1 and 2 ON/OFF
-
delay modes OFF/ON
-
filter and oscillator playing modes mono/poly/gate/duck
-
analysis mixdown ON/OFF
-
noise generator ON/OFF
-
filter orders 2nd,4th,6th,8th
When the preset mode is changed, from say Vocoder to EQ Mode, Infiltrator
will automatically ensure that the DSP resources are not exhausted by
reducing the number of processing channels as required to stay below 100%
usage.
5.2
Signals and Levels
All signal levels in Infiltrator are referenced using decibel notation. Internally,
the 24-bit signal chain has 12dB headroom. This means that there is some
tolerance for levels going above 0dB, which would normally be clipped. This
makes it easier to maintain a distortion free signal.
A signal that enters the Chameleon input jacks at their maximum level will be
equal to Infiltrators internal 0dB reference level. Thus the 12dB headroom is
introduced at the beginning of the signal chain. And, provided that the output
signal levels are at the 0dB reference level, the output volume can be gained
up to +12dB.
The meters in Infiltrator cover the range up to +12dB, so 0dB is a bit below
the top of the meter ranges.
Using the headroom makes it easier e.g. to use filter with high q settings or
overlapping bands etc., which can lead to transients and sharp resonances.
For this we have also added the Dynamics Block at the outputs of EQ and
Vocoder Mode, which by default are set to behave more like a limiter so that
you don’t blow your speakers with sudden peaks! Be warned, you can kick
out some crazy results...
If you experience distortion, try to reduce the input levels, and then
compensate by applying some gain on the final output. It is usually best to try
and keep the signals around 0dB (use the meters to check), which will give
good use of the dynamic range and protection against clipping transients.
The total internal signal range is from -132dB to +12dB which covers the
144dB range theoretically possible with 24-bit audio. In practice there is
around 100dB of useable dynamic range on the input and output jacks.
48
Some More Things
The lowest level that is represented in the user interface is -96.0dB, which
Infiltrator will interpret as silence (or -infinity dB). This is well below the
useable dynamic range and what you can hear (-108dB). The terminology "inf dB" will be used throughout, and also to indicate infinite attenuation
when the minimum level is higher than -96dB.
Level, or volume, parameters usually have the range -96.0dB to +24.0dB. This
gives the opportunity to substantially attenuate or boost signals. Some levels
have other ranges - e.g. the peaking EQ gain (boost/cut) that has a range of 24.0dB to +24.0dB.
5.3
Signals and Parameter Groups
Throughout the soundskin you have options for selecting signals, for example
for the meters or internal monitoring function. To keep things in a tidy
working order, the signals are divided into three groups, and so to select a
source you select the group it is in first and then pick the signal you want
from that group:
-
‘global’
All signals not inside the processing filter banks
-
‘L bank’ (‘Ana bank’ in Vocoder Mode)
The Left processing (or Analysis) bank signals
-
‘R bank’ (‘Syn bank’ in Vocoder Mode)
The Right processing (or Synthesis) bank signals
The processing bank groups are further divided into up to 24 channels (one
per filter), and each channel has a set of signals that can then be selected for
metering and monitoring, for instance the signal before and after the filter.
This is also the same system for selecting parameters, for example when
assigning a RTC to a particular filter’s cut-off frequency. You need to choose
the filterbank, and then the channel, to find the particular cut-off frequency
parameter you want to assign.
Infiltrator – User’s Manual
49
5.4
Realtime Controller System
Some points about the RTC system.
5.4.1
THESE ARE PERFORMANCE CONTROLS NOT EDITING CONTROLS
It is important to note that the RTCs have been designed to be primarily
performance controls. They do not directly control the underlying parameters
that you assign them in Edit Mode, but rather they multiply the underlying
values by a given percentage, positive or negative. This way you have a lot
of freedom to set up the RTCs to control parameters over very specific ranges,
creating accurate performance tools.
So if a filter frequency is set at 1000Hz and you assign a RTC with a value of
50%, it will span the ranges from 500 to 1500Hz from its leftmost position to
its rightmost position.
The underlying values will NOT be updated internally, although in some cases
the RTC screen that flashes up while you are using it will display the values
you are creating for reference. For example, the frequency in the above
example will show on screen while turning the RTC, but if you go and look at
the underlying value it will remain at 1000Hz.
As a result of this method of RTC implementation (which is very different to
how they work in other Soundart soundskins so far), you should take care not
to get lost when you are using the RTCs to create new sounds rather than
‘performance manipulate’ them. They are fantastic for twisting around a
preset to create new effects and trying out extreme settings, but you must
remember that the underlying values are being multiplied and divided by
various amounts and so the values you go and look at inside may no longer
resemble what you hear.
If this concerns you, you should create presets only using Edit Mode and
reserve the RTCs for performance control, as they were initially designed to
be used. But if this is not so important, just use the RTCs to freak out and
create new sounds and don’t worry about what’s happening under the hood!
With this in mind, you can choose from two RTC modes in the ‘system:config’
pages - ‘ON’ and ‘Edit’.
‘ON’ means that you can alter the preset with the RTCs but it is strictly for
performance control and you will not save these movements when you save
the preset.
‘Edit’ means that you can save the positions you have moved the RTCs to with
the Preset. So you can use the RTCs to alter presets and create new sounds,
but always remembering that they are really performance controls that you
50
Some More Things
are ‘freezing’ in a certain position, rather than knobs that adjust internal
parameters directly.
5.4.2
RESOLUTION ISSUES
Secondly, another important thing to note is that the physical resolution of
the knobs on the Chameleon is lower than the extremely high-resolution
parameters used throughout Infiltrator. As a result, the RTCs (and also MIDI
controllers) often give an approximate control over wide parameter ranges.
This would result in a stepping effect, and would be most noticeable if you
set up an RTC or a MIDI cc to control an oscillator freq from 20 to 20,000Hz. It
would take 128 steps to go from bottom to top...
Because of this, there is a slewing parameter in the global system controls
that will actively track the parameters you modify and smooth out the
transitions. More straightforward designs of synths and filters, or systems that
only use one or two complex filters, can afford to apply plenty of smoothing
all over to get round these issues, but Infiltrator has to be able to do so much
work across so many bands for the vocoding work that it is simply not
possible the smooth everything out all the time. So here the
slewing/smoothing works on the same principal as note stealing on
polyphonic synths. The last element to need smoothing will steal it form the
oldest. This can lead again to subtle artefacts, but in many practical uses this
is not noticeable. But it is important to know what Infiltrator is up to...!
5.4.3
PUSHING THE SYSTEM TO THE LIMITS
A third aspect of the RTCs implementation to note is that with Infiltrator you
have realtime control over parameters that in reality can take some time to
update, depending on the configuration. In the case of filterbank global
controls, you could theoretically assign one knob to raise the cut-off
frequency of 48 powerful filters at the same time while lowering the q
simultaneously along with the fdelta, all by different amounts. This amount of
processing can tax the system and cause delays and artefacts. Alternatively
you could find latency on the oscillator while playing over MIDI at the same
time. Once you add the LFO automatic control of the RTCs and set it to move
quickly, well...
However, rather than remove the ability to change things like this using the
RTCs, which is a rather cool feature and unique to Infiltrator in many ways,
we have left these options open to you, to use in reasonable situations or
within lower parameter ranges if it gets too much. The system is open for
such ‘outrageous’ operations, but their application should be considered with
respect to the delays implied. You can explore and find out what sounds are
acceptable to you - of course, the artefacts and delayed effect of all this can
be seen as a sound effect in itself! There is no nasty digital clipping as
everything is evened out as best as possible.
In the end total freedom has been allowed so you can control many
parameters using MIDI and the RTCs. The cost is that you can create
‘unwanted’ artefacts such as these at extreme settings and while
Infiltrator – User’s Manual
51
implementing continuous moving control. You should just be aware of how
hard the Chameleon is working to do these amazing feats - as far as we
know this is the only channel vocoder around with full filterbanks that can be
adjusted like this in realtime!
5.4.4
NAMING
Firstly, the naming convention for the RTCs is as follows: ‘RTC x/y’ where ‘x’ is
the number in the set and ‘y’ is the set itself - so RTC 1/4 means the first RTC
in the fourth set.
The RTC sets
There are up to 8 sets of 3 RTCs that can be assigned to control parameters.
You cycle through the RTC sets using PART UP and DOWN once you are back in
Preset Mode (where the RTCs return to being performance controls and not
the trio of data selection wheels they are in Edit Mode).
You can choose to operate all the RTCs independently, or create multis where
two, four or eight RTCs are operated at once by one knob. So you could create
a complex DJ filter that controls 4 parameters - maybe two filter types at the
same time, with varying degrees of cut-off, resonance, EQ peak and fdelta
changes. You can even name your multis specifically (see section 7.2.8).
Here are the modes laid out visually:
Single mode - each RTC controls its own parameter:
52
RTC 1/1
RTC 2/1
RTC 3/1
RTC 1/2
RTC 2/2
RTC 3/2
RTC 1/3
RTC 2/3
RTC 3/3
RTC 1/4
RTC 2/4
RTC 3/4
RTC 1/5
RTC 2/5
RTC 3/5
RTC 1/6
RTC 2/6
RTC 3/6
RTC 1/7
RTC 2/7
RTC 3/7
RTC 1/8
RTC 2/8
RTC 3/8
Some More Things
Multi2 - the RTCs are set up in pairs of parameters like this, where the
upper RTC has the control:
RTC 1/1
RTC 2/1
RTC 3/1
RTC 1/2
RTC 2/2
RTC 3/2
RTC 1/3
RTC 2/3
RTC 3/3
RTC 1/4
RTC 2/4
RTC 3/4
RTC 1/5
RTC 2/5
RTC 3/5
RTC 1/6
RTC 2/6
RTC 3/6
RTC 1/7
RTC 2/7
RTC 3/7
RTC 1/8
RTC 2/8
RTC 3/8
Multi4 - the RTCs are now in sets of four, again with the upper one having
control:
RTC 1/1
RTC 2/1
RTC 3/1
RTC 1/2
RTC 2/2
RTC 3/2
RTC 1/3
RTC 2/3
RTC 3/3
RTC 1/4
RTC 2/4
RTC 3/4
RTC 1/5
RTC 2/5
RTC 3/5
RTC 1/6
RTC 2/6
RTC 3/6
RTC 1/7
RTC 2/7
RTC 3/7
RTC 1/8
RTC 2/8
RTC 3/8
Multi8 - one knob can turn eight parameters simultaneously, controlling
them all from the first RTC:
RTC 1/1
RTC 2/1
RTC 3/1
RTC 1/2
RTC 2/2
RTC 3/2
RTC 1/3
RTC 2/3
RTC 3/3
RTC 1/4
RTC 2/4
RTC 3/4
RTC 1/5
RTC 2/5
RTC 3/5
RTC 1/6
RTC 2/6
RTC 3/6
RTC 1/7
RTC 2/7
RTC 3/7
RTC 1/8
RTC 2/8
RTC 3/8
You will read more about how to set up these sets later.
Infiltrator – User’s Manual
53
Chapter
66
6.1
Before We Move On
How the Manual Splits Up
Now that we have covered Preset Mode and other important common
concepts, we can move on the Edit Mode, where you can (finally!) set up
your presets. This is where the Manual will soon split into three paths:
1. Chapter 7 will take you through the options for setting up a preset in
Multiband Mode
2. Chapter 8 will take you through the four different ways to use a
preset in the EQ Modes
3. Chapter 9 will take you through the options for setting up a preset in
Vocoder Mode
Each of these chapters can be read as if it starts after this one. As there are
many overlapping features between the modes, they have simply been
repeated in each chapter, to stop you jumping backwards and forwards too
much throughout the manual.
For those of you who are new to some of these concepts, it would be
advisable to start with the Multiband Mode to get a feel for the way things
work as the other modes just add more and more features. But for those who
want to dive straight into Vocoder Mode and EQ Mode, go straight to those
chapters after reading the next bits on mode changes and how the buttons
work while editing in Edit Mode.
54
Before We Move On
6.2
Changing Mode
As outlined in the general introduction, Infiltrator can operate in several
different modes, each covered in their own chapter. They each represent a
certain configuration of the processing blocks. But once you enter Edit Mode
to work with a preset, you can change its mode at any time. However, this
should be done with caution.
Users may want to do "planned" modes changes like e.g. carry over filter
bank settings from the Vocoder Mode to an equalizer mode, which is really
what the mode changing protocol is useful for. But beware that under certain
circumstances (which are too varied to sum up here) changing preset modes
could cause extreme variations in the output signal, in some cases there may
be very loud noises. Therefore it is advisable not to make mode changes until
you are more used to the architecture. It is easiest to start with a preset that
already is in the desired mode if you want to create a new patch.
In any case, the VOLUME should be turned down when changing preset
modes.
When you change preset mode (setup:common - see section 7.2.1), you can
browse the list of modes without selecting, so that you can jump directly to
another mode, carrying over some of your settings. Instead of changing right
away, the mode name will flash instead. Once you find the mode you want
to enter, press EDIT to confirm the change. This is the same as the preset
selection ‘browse’ mode on the homepage.
Note that on a mode change Infiltrator has to reconfigure its architecture and
this requires that some parameters automatically change - e.g. the number of
channels will have to be reduced for some modes, and some parameters in
the unused channels will be automatically be reset, etc.. This is necessary to
maintain integrity of operation. However, Infiltrator will always work to
preserve as many parameters as possible between modes.
Infiltrator – User’s Manual
55
6.3
Changes to the Front Panel Controls
In Edit Mode some of the functions of the front panel buttons have changed:
Figure 6-1
6.3.1
THE REALTIME CONTROLLERS
In Edit Mode these knobs become a trio of data selection wheels, designed to
help you quickly reach the values you want to set up for the different
parameters. With parameter ranges that smoothly run from 0.00001 to
9.99999 this is quite important! You would not want to sit there scrolling
away with the ENCODER all day...Do spend a moment getting used to how
these three controls work together with the ENCODER and VALUE buttons, as
they allow you to very rapidly edit your presets with total ease.
REALTIME 1
This sets a multiplier to be used by the ENCODER to speed up editing of
high-resolution parameters. This means if you use a multiplier of say 4,
the numbers will increase 4x as fast. A parameter with values of 1...128
would go 1,4,8,12,16...and so on. The highest multiplier you have is 100.
Set to this you can travel through long parameter ranges quickly. Useful
numbers like 10 and 50 are also made easier to pick out from the list.
WARNING! If the multiplier is set to a high value, sudden jumps in volume
can occur if you are changing a gain parameter. Be careful and keep an
eye on what you are doing! (If in doubt, run RTC1 all the way to the left to
set the encoder multiplier to 1)
56
Before We Move On
REALTIME 2/3
These two knobs can be used to zone in very quickly on the value you
want.
REALTIME 2 is for coarse control and covers the entire range of values
turning from left to right. So if you know that you want a value that is in
the middle of a vast parameter range, simply move this knob to the
middle.
REALTIME 3 is a fine tune control. Its control is relative - whatever position
it is in, turning it to the right will increase the values and to the left will
decrease them.
(It is possible that you will want to lower a value with this knob and find
that it is all the way to the left, but you can easily use the coarse tune to
‘bump’ the value a bit lower so that you can use the fine tune to raise the
value instead, turning it to the right).
Next, these buttons have changed their function too:
SHIFT
Switches the popup meters ON and OFF as indicated by the SHIFT LED.
PART UP
Cycles popup meter types.
PART DOWN
Resets popup meters peak indicators or cycles popup analyser modes
Remember that the behaviour of some of these controls and functions
depends on how they are configured in the "Sys:Config" page. (see section
4.4.1) - they can be turned OFF for safety.
Infiltrator – User’s Manual
57
Chapter
77
Multiband Mode
All the menus and lists below reflect what you will find in Multiband Mode.
As soon as you change mode you should refer to the relevant chapter...
Multiband Mode has been set up specifically for stereo or dual mono
dynamics processing applications. The classic use of multiband compression is
in mastering situations where you work with the final two-track master to
tighten up the mix. Compression can also, however, be used for creative
sound FX and also using the delay FX with Multiband Mode you can get some
very interesting results using extreme settings. It is in this vein that Multiband
Mode in Infiltrator has been created although you can use it for accurate
mastering applications with great results.
7.1
Working with a Multiband Compressor
A word of warning for those of you inexperienced with mastering techniques:
conventional wisdom has it that using a multiband compressor wisely in a
mastering context is an art, and you could end up doing more damage to
your track than good. If you are planning to have your tracks mastered
professionally you would be wise to keep an uncompressed version for the
mastering house and a self-compressed version for your own reference
mixes. The engineer can then choose to work with either. Your own
compressed version can also be used as a style reference for the mastering
engineer who will have (hopefully!) equipment dedicated to the mastering
process and a very accurate listening environment that may highlight other
aspects of the mix for working on that you may not have dealt with yet.
Of course if you like the results you are getting with Infiltrator then go for it rules are there to be broken - but many mastering engineers complain about
having to fix a mix that has been passed through one of the many ‘DIY
mastering tools’ available on the market. Used wisely, this kind of tool is very
useful, but used carelessly it could harm your track rather than help it.
There are many books on the subject that are very useful for knowing how
mastering techniques are applied and what to look out for. Understanding
this process can also be very useful in letting you prepare your music for
mastering and distribution. It is simply best to be aware of these things
before it is too late. Keeping alternative mixes is a simple way to safeguard
things if you normally ‘home master’ with acceptable results and then one of
your mixes turns out to be a hit that needs to be taken to the next level!
58
Multiband Mode
That said, playing with a multiband compressor you can learn a lot about
these techniques, used prudently you can tighten a mix nicely for burning to
CD, and it can of course be used in totally unorthodox ways to create things
that sound completely nuts.
7.1.1
DETAILED SCHEMATIC DIAGRAM
The following diagram is a schematic of the signal paths in Multiband Mode.
This is the detailed version of the general schematic in section 2.2.1. Note
that the lines running along the top are the feeds that take the unprocessed
input signals directly to the outputs. You can see the input mixers, sending
the signal to the parallel filters in the centre, that then mix the results
together before sending it to the main outputs.
Figure 7-1
Infiltrator – User’s Manual
59
7.2
The Mode Groups
The rest of the chapter will go over the different pages and parameters you
find in Multiband Mode, group by group.
A short description of each group is in the next table. In order, they generally
cover the process from start to finish.
You start with general SETUP, go on to the INPUTS, then the FILTERS, the
DYNAMICS control of each band, the DELAY FX parameters and finally the
OUPTUT mix. Following this group you find the METERS section, followed by
the REALTIME CONTROLLER set-up and finally the settings for the LFO
MODULATION robots...
Table 7-1
Group
Setup
Input
L Band
R Band
L Dynamics
R Dynamics
(or L/R
Dynamics)
Delays
Output
Meters
Realtime
Modulation
60
Comments
This is where you set up the modes basics. You can name the preset,
change to another architecture mode if you wish, determine the number
of channels and the general settings for the multiband compressors, link
the stereo and look at the DSP usage readout.
Here you set the overall levels for the Left and Right inputs. In Multiband
Mode there are no other options here.
Here you set up the bands that the signals are split into. You can
determine the level, pan, phase and frequencies of the bands, as well as
activate and deactivate a monitoring system unique to this mode, for
listening to one band at a time.
Depending on whether you have linked the compressors, you will either
be able to deal with each one separately or their settings will be united
under one set of parameters (L/R Dynamics). Here you have total control
over the extensive parameters for each of the compressors.
Here you can set up the delay FX for each band
Here you can mix together the levels coming from the two filterbanks,
the two original inputs and the monitor channel that taps signals from
throughout the chain.
You can use this group to call up meters that fill the whole screen. You
can cycle between many different meter types.
Here you set up the front panel REALTIME CONTROLLERS for hands on
control.
Here is where you can activate the LFO ‘robots’ to automatically move
the REALTIME CONTROLLERS for you. You can probably get some rather
strange results using these with a multiband compressor!
Multiband Mode
7.2.1
SETUP
7.2.1.1 SETUP:Common
This is where you set up the fundamental parameters for the mode such as its
name.
Group
Page
Setup
Common
Table 7-2
Parameter Value
n:
(name)
Select
character to
edit
Mode
Vocoder
EQ ser/ser
EQ par/par
EQ ser/par
EQ par/ser
Multiband
1...5
Channels
F link
ON
OFF
C link
OFF
L+R ctl
L+R avg
L+R max
Comments
Here you set up the presets name. You use VALUE UP/DOWN to
choose which of the 10 characters to edit, and the ENCODER to
select the letter, number or symbol you want. PART DOWN will add
a space.
Here you can change the mode that the preset is in. Once you
change this, all the menus and parameters in Edit Mode will
change to reflect the new mode. It is advisable to use this function
only once you have become used to the system. See section 6.2
for details about mode changes.
In Multiband Mode you have a maximum of 5 bands you can split
the signal up into.
Here you link together the frequency selectors of the two
filterbanks. The Left settings will be copied to the Right, and once
it is ON changing either side will affect the other simultaneously.
Compressor linking:
"L+R ctl" : the Left/Right pairs use the same settings. Note that a
stereo image that is being compressed will lose its stereo
definition with this setting (as well as ‘OFF’)
"L+R avg" :the gain reduction is based on the average peak
envelope for the Left and Right channels. This gives the smoothest
sounding stereo linking.
"L+R max" :the gain reduction is based on the peak envelope for
the loudest of the Left and Right channels. This ensures that the
loudest channel is always fully compressed.
C look
MB Mode
Infiltrator – User’s Manual
OFF
0.00001...
1.00000s
OFF
comp
Gte+cmp
In all modes except "OFF", the Left and Right channels are
controlled simultaneously. Both channels are available, but is
doesn’t matter which one gets adjusted.
This sets the maximum lookahead time for the compressors. The
whole signal will be delayed, and then the individual Dynamic
Blocks can each listen in on the signal early.
This sets up the general mode for the Dynamics Blocks.
61
Group
Page
Parameter
Value
Comments
MB olap
-9.99...
+9.99 oct
The frequency bands of the multiband decomposition filter have
adjustable crossover overlap. When set to +ve values the filters
will overlap at the crossover points. When set to -ve values the
filters will underlap at the crossover points. Normally this might be
around
-0.25.
MB q
0.50...10.00
In normal multiband applications, values of q may range from 0.5 0.7.
7.2.1.2 SETUP:Info
62
Group
Table 7-3
Page
Parameter
Value
Comments
Setup
Info
0...100%
Here you can see how much DSP is being used by
this configuration. See page 62 for more info on
DSP usage.
DSP usage
Multiband Mode
7.2.2
INPUT
Since Infiltrator is a sound-shaping tool, the inputs are naturally where it all
actually starts.
In Multiband Mode, the input section is very simple. There is a level control
for each input and that’s it. All the waveform synthesis, ring modulation
capabilities and so on have been deactivated to make this a straightforward
mastering/dynamics FX tool.
Unlike the other modes there are no compressors across the inputs, because
you are obviously going to compress the signal later on!
These levels are not stereo linked and so care must be taken to make them
equal when necessary.
Group
Input
7.2.3
Table 7-4
Page
Left
Right
Parameter
Value
Level *
Level *
-infdB...+24dB
-infdB...+24dB
L BAND, R BAND
The next two groups are where you set up the bands that the signals are split
up into.
With Frequency linking ON in the ‘setup:common’ menu (above), you can
adjust the settings for the Left channel and the Right will automatically match
it, and vice versa. If it is OFF, the processor can be used as two mono devices.
Remember you can turn ON and OFF linking between the compressor settings
too, with various different linking methods.
Group
Table 7-5
Page
Parameter
L Band
1...5
Value
Comments
Lo f
Hi f
-...20,000Hz
20...20,000Hz
Monitor
Normal
Mute
Solo
Mix vol
-infdB...+24dB
Mix pan *
L100%...R100%
Phase *
+L+R
+L-R
-L+R
-L-R
Here you set each bands frequency range. They
are interactive, in that they will never cross - if you
raise the ‘hi f’ for band 1, the ‘lo f’ of band 2 will
raise with it as they are locked together. The
symbol ‘-’ and the top or the bottom means that
the filterband is open ended.
you can use this parameter to quickly solo or mute
each band.
If any of the bands are in solo mode, an "S" is
shown in the display after the ":" to indicate this.
Sets the mix down level for the output from each
band.
In a normal stereo application the pan controls are
usually set to hard left for the Left bank and to
hard right for the Right bank but you have the
choice here. This is part of the output mixer
mentioned above.
This is for changing the bands phase. If in doubt,
leave them in opposites:
1= +L+R
2= -L -R
3= +L+R... and so on
Infiltrator – User’s Manual
63
7.2.4
L/R/ LR DYNAMICS
This group is where you actually set up the Dynamics Blocks for each band as
described on page 24. Each one can be configured independently. You use
PAGE UP and DOWN to cycle through the 5 bands.
As well as the individual controls, you also have global controls for adjusting
parameters across all the bands at the same time in proportion to each other.
You will either add an amount of gain or dB setting, or multiply the individual
settings of each band (such as ratio) by a percentage value.
Note that like the REALTIME CONTROLLERS this will not change the underlying
value of a particular setting - if the global setting is in effect, you will simply
see a ‘!’ next to the values of individual blocks to remind you. Although it
depends how you want to work, it is probably best to use the global settings
at the end of the process once you are happy with the set up of each band to
‘nip and tuck’ the overall settings shown below, such as ratio or makeup gain.
They can also be used to just "check out" the effect of broad changes.
Table 7-6
Group
Page
Parameter
Value
L Dynamics
R Dynamics
or
L/R Dynamics
Gbl
C gain
-24.0dB...
+24.0dB
0...1000.0%
0...1000.0%
-12.0dB...
+12.0dB
-60dB...
+60dB
0...1000.0%
-60dB...
+60dB
0...1000.0%
0...1000.0%
0...1000.0%
-60dB...
+60dB
0...1000.0%
0...1000.0%
0...1000.0%
-60dB...
+60dB
C att *
C rel *
C Knee *
C thr
C ratio
E thr
E ratio
C look *
C slew *
C mkup
G att *
G rel *
G hold *
G thr
64
Multiband Mode
7.2.5
DELAYS
Infiltrators delay FX blocks all act in essentially the same way, as outlined on
page 31. In Multiband Mode, there are up to 5 delay FX on each side, each
one adding echo effects to the output a particular band. You can use the
delay for chorus effects, dub echoes, metallic reverb-like spaces and more.
Group
Page
Table 7-7
Parameter
Delays
Setup
Mode
Link
Gbl t
Left1,
Right1,
Left2,
Right2,
Gbl fb
Gbl f
Gbl d/w
time
feedbk
Value
Comments
ON
OFF
OFF
L+R ctl
-4.00000...
+4.00000 s
This activates the multiband Delay Blocks
-96.0...+96.0dB
-9.99...+9.99 Oct
-200%...+200%
0.00000...
4.00000 s
-inf...0.00dB
Etc
Filter
7.2.6
Bypass
LP med
HP med
LP light
HP light
Freq
50...20,000Hz
dry/wet
d100%...w100%
This links the stereo FX together
These are global modifiers for adjusting all the
delays simultaneously. The underlying delay
values for delay time, feedback, filter frequency
and dry/wet mix will be adjusted by these
amounts.
Sets the delay time. Really short delays can create
chorus and comb filtering effects.
This feeds a portion of the delay output into itself
again. The closer to zero the feedback, the longer
the echoes last and you approach a guitar-like
feedback loop.
These simple filters can be used to brighten or
darken the sound as it is echoed. The filter types
are:
"Bypass" - the filter is not active
"LP med’ - smooth roll-off low pass
"HP med" - smooth roll-off high pass
"LP light" - shallow low pass
"HP light" - shallow high pass
This sets the point above or below which the
sound is filtered (depending on the filter chosen).
Dry=no effect Wet=effect only.
OUTPUT
7.2.6.1 OUTPUT:Mixing
Once you are happy with the filtering and dynamics settings the output mixer
is used to create the final stereo mix of the processing banks and any other
available elements. The usual level and pan controls are provided for each
source.
In this mode, all you can do is simply mix the results of the processing with
the original unprocessed sound from the inputs and mix in the monitor
channel for selective auditioning of signals within the processing banks.
Infiltrator – User’s Manual
65
Normally with mastering you would not mix back in the original, but you can
see this option as a kind of ‘dry/wet’ control for the more FX oriented
settings you create using the delay FX.
Group
Page
Output
Mix
Pan
Master
Table 7-8
Parameter
Value
Comments
L bank
-infdB...+24dB
Sets the final output level for the output of the
two filterbanks
R bank
L input
-infdB...+24dB
-infdB...+24dB
R input
Monitor
-infdB...+24dB
-infdB...+24dB
L bank
R bank
L input
R input
Monitor
Volume
L100%...R100%
L100%...R100%
L100%...R100%
L100%...R100%
L100%...R100%
-infdB...+24dB
Mixes into the output the original unprocessed
input signals
For setting the level of the monitor feed from
within the system
Same as above but for Left/Right panning control
The MASTER VOLUME CONTROL.
7.2.6.2 OUTPUT:Monitor
The monitor controls follow on from the list of output parameters above. This
is for tapping a signal from within the processor for auditioning while
working. You can use this for all sorts of things - to listen to a band before
and after it passes through a particular Dynamics Block, or for checking what
the original input sounds like without disturbing any of your mix settings.
You can choose to mix the monitor in with the output or to solo it for
individual auditioning.
The schematic above shows all the points where the signals can be tapped
for monitoring
Group
Table 7-9
Page
Parameter
Output
Monitor
Mode *
Volume *
Group *
Channel *
Signal *
(global)
Signal
(L/Rbank)
Value
Comments
OFF
Mix
Solo
-infdB...+24dB
Global
L bank
R bank
1...5
You can either mix in the signal to the main output
or solo the monitor for listening in isolation.
L input/R input
L mix L/L mix R
R mix L/R mix R
L output/R
output
Filter
Comp
This sets the monitors volume.
To select the signal you want, first you choose the
group it is in (see section 5.3).
If you choose L bank or R bank you need to then
choose a channel. (If you choose global this will
show a ‘?’ to remind you this is not used)
These are the global group monitoring options.
These are monitoring options within a specific
bank and channel.
66
Multiband Mode
7.2.7
METERS
7.2.7.1 FULL SCREEN METERS
You can use this group to call up accurate meters that fill the whole screen.
You can cycle between many different meter types to show clearly what is
happening in the system. Again, the schematic for Multiband Mode in section
7.1.1 shows all the signals available for metering.
First you can set up the meters in the config page.
Group
Table 7-10
Page
Parameter
Value
Comments
Meters
Config
Decay
0.00...10.0s
Mode
Log dB
Linear
Group1
Global
L bank
R bank
Channel1/2
1...5
Sig1/2
L input
R input
L mix L
L mix R
R mix L
R mix R
L output
R output
Filt
Comp
This sets how ‘responsive’ the meters are by
controlling the ‘jumpiness’
Set the meter scaling method. If you are working
with extremely subtle settings switching to linear
will help see the peaks more clearly
You can set up two custom meters that track a
signal of your choosing. The corresponding custom
meters are available both as popup meters and on
the "Meters" pages with the legends "1" and "2".
To select, first you choose the group it is in.
If you choose L bank or R bank you need to then
choose a channel
These are the global group signal options in
Multiband Mode.
(global)
(L bank /
R bank)
These are options within a specific bank and
channel.
If you then press PART UP you will see the meters taking up the whole
screen. You press PARAMETER UP and DOWN to cycle between the three main
meter types:
1. Full screen left-to-right meters showing signal 1 and 2 (default as the
inputs).
2. MIDI monitoring (including channel) and vertical IN/OUT meters.
3. ‘Graphic’ analyser vertical channel meters with 4 different types for
each channel. The meters show an abbreviated name telling you what
you are looking at. Unfortunately they are very small to allow for lots
of meter space! The "1" means the channel 1 and upwards is showing,
up to five in Mulitband Mode.
Infiltrator – User’s Manual
67
Here are the names:
Table 7-11
Legend
Meter
Lf 1
Left channel filter output
Lgr1
Left channel gain reduction
Lgt1
Left channel gate level
Lc 1
Left channel compressor output
Rf 1
Right channel filter output
Rgr1
Right channel gain reduction
Rgt1
Right channel gate level
Rc 1
Right channel compressor output
Comment
What goes into the Dynamics Block
shows the gain reduction happening
Shows the gates opening and closing
what comes out of the Dynamics Blocks
See above...
7.2.7.2 POPUP METERS
Meanwhile, pop-up meters are also available outside this group, by pressing
at any time SHIFT while in Edit Mode. While browsing around the parameters,
they can show you context sensitive meters for quickly seeing what is
happening. For instance, while browsing compressor parameters the
contextual meters will show the gain reduction.
By pressing PART UP you can cycle through the meters outlined above as
well, using PART DOWN to reset any peak overload indications or to cycle
through the graphic analyser mode types when you reach them.
The contextual meters you see will vary with the current group, page and
parameter. When compressor linking is enabled, they will usually be a pair of
popup meters, showing the Left and Right signals in context.
For the global compressor controls, the analyser mode is used in context to
show all bands together. Here is a description of the meters you will come
across.
Table 7-12
Legend
Meter
In l
input level, Left
In r
input level, Right
Fl
filter output, Left
Fr
filter output, Right
/l
Dynamics Block gain reduction, Left
/r
Dynamics Block gain reduction, Right
]l
Dynamics Block gate level, Left
]r
Dynamics Block gate level, Right
Cl
Dynamics Block output, Left
Cr
Dynamics Block output, Right
Ol
final output, Left
Or
final output, Right
68
Comment
Main input levels
What goes into the Dynamics Block
Gain reduction across all five banks.
The gates opening and closing
What comes out of the Dynamics
Blocks
Master output
Multiband Mode
7.2.8
REALTIME CONTROLLERS
(Global modifiers not available with V1.0 release)
Here you set up the front panel REALTIME CONTROLLERS (RTCs) for hands on
control.
When editing the RTC assignments, you can quickly test them by pressing
EDIT to go to system mode where they will immediately work as they are
programmed to. Then a single press of EDIT have you right back into editing
mode for further tweaking - i.e. there’s no need to save the preset for this.
Note you can also view and edit the current/last RTC "knob positions".
Group
Table 7-13
Page
Parameter
Realtime
Setup
Mode
Multi1...12
Set1...8
rtc1...3 g
Value
Comments
OFF
Single
Multi2
Multi4
Multi8
(Set the name)
Here you choose from modes described above.
You can turn this ON at anytime and it will link the
RTCs together as outlined. You can also name the
sets for ease of use.
rtc1...3 ch
Global
L bank
R bank
1...24
Rtc
various
rtc1...3 amt
-1000%...
+1000%
-63...+63
rtc1...3 value
Infiltrator – User’s Manual
Using the same method as naming a preset you
can name your multi set ups here in order. Since
there is a possible maximum of 12 multisets (3
RTCs x 4 multisets), there are 12 multiset names
available. The first three multinames are for
RTC 1-3 in the first multiset, the next three are for
RTC 1-3 in multiset 2. You only need to name as
many muiltisets as you actually have in use.
Here you select the parameter to be controlled.
First you must choose the signal group it is in...
If you choose L bank or R bank you need to then
choose a channel. (It will show ‘?’ if you have
chosen the global group and therefore don’t need
to choose a channel)...
Then you choose the parameter.
(See table below for all the options)
Here you set the +ve or -ve amount that the RTC
will adjust the underlying parameter value by.
This is the "memory" of the position of the front
panel knob - it is made available for inspection
and direct editing (you can hear the effect as you
edit it). This is the "stored RTC" proper as used by
the global ‘RTC=edit’ mode chosen in the global
system menus (see section 4.4.1)
69
There are extensive options for RTC target assignments, depending on what
group you have chosen. You can control global parameters such as Input
levels and Oscillator frequencies, or parameters that belong to individual
filters within a bank such as Q and fdelta. Global parameters also include the
list ‘global modifiers’ that allow you to alter parameters across all filterbanks
simultaneously, such as filter frequency.
Table 7-14
Signal Group
GLOBAL:
RTC global group possible
assignments from within the
system in Multiband Mode
Targets
(global)
OFF, In level, In L lvl, In R lvl, Out level
**There are several new features coming in the next
update, which will be assignable here. For now, you see
a list of TBI 1-44 (to be implemented)
(Delays)
Dly Time, Dly Feed, Dly Fcut, Dly d/w
L bank/R Bank:
RTC possible assignments
from within a specific
filterbank and channel
(Settings for individual dynamics blocks and filters)
OFF D gai, D att, D rel, D kne, C thr, C rat, E thr, E rat, D
lok, D slw, D mup, G att, G rel, Ghld, G thr, F flo, F fhi
The RTC screen that pops up while you use then will display info about the
parameter being modified, and if there is an LFO applied to control it.
70
Multiband Mode
7.2.9
MODULATION
Once you have your RTCs set up to control internal parameters, you can attach
one of these LFOs to control them automatically. Think of these as ‘robots’
that come and grab the knob and move it for you! They cannot be applied
directly to internal parameters, and can only control RTCs. As a compliment,
the RTCs can be assigned to control the speed and depth of the LFOs, so that
you can use the RTCs to tweak the LFOs that are tweaking the RTCs...as you
can imagine it can get seriously cool sounds once you apply this to the
internal parameters...
Group
Table 7-15
Page
Parameter
Modulation
LFO 1
Value
Comments
LFO mode
ON
OFF
Freq
Phase
Wave
0.01Hz...25Hz
0...359Deg
Saw
Tri
Square
Sine
S&H
Rtc1/1
Rtc2/1
Rtc3/1
Rtc1/2
Rtc2/2
Rtc3/2
...
Rtc1/8
Rtc2/8
Rtc3/8
-100%...+100%
It is advisable to set up everything else first before
turning the LFO ON, because if you cycle through
the targets with the LFO ON it will adjust those
parameters as it passes (although it will put them
back where it found them...)
The speed of the LFO cycle
You can set the phase
Here you choose the waveform that the LFO will
create. See Appendix B for more details about the
wave types and how they work.
Target
LFO 2
LFO 3
Amount
See above...
See above...
Infiltrator – User’s Manual
Here you set the RTC to be controlled by the LFO.
This sets how much the LFO moves the RTC by.
71
Chapter
88
8.1
EQ Mode
Using the Filters
EQ Mode is for using the filterbanks as sound-shaping tools in their own right.
You have many different options for configuring the 48 filters. Each filter can
do its own thing - it’s totally up to you. Once you add REALTIME CONTROL with
LFO modulation, you can get some really nice effects going...
Remember, like Vocoder Mode, you have Dynamics Blocks and Delay Blocks
at the Left and Right inputs and outputs, and you can also mix in at the inputs
the internal ‘Waveform Block’ to create monosynths, ring modulation sources,
noise effects and so on to put through the filters.
As outlined previously, there are four ways you can configure the filter banks:
1. Stereo Parallel (graphic) EQ (par/par)
2. Stereo Serial (parametric) EQ (ser/ser)
3. Left/Right parallel/serial EQs (par/ser)
4. Left/Right serial/parallel Eqs (ser/par)
8.1.1
STEREO PARALLEL (GRAPHIC) EQ (par/par)
For each input, up to 24 filters can operate in parallel, meaning they can each
simultaneously take the whole signal input, process it, and then mix it back in
with the others.
For instance, if you set the filter type to ‘BP’ you get the classic ‘graphic’ EQ,
the kind with all the vertical sliders side by side on a row. Each band is
usually static and you use a high number of bands to allow you control over
the whole hearing range. Each band slices out a narrow strip of frequencies,
then boosts or cuts the volume of that slice. Then all the slices are mixed
together again. It is useful to picture it working like this in your head as you
are editing in par/par mode - all the filters working side-by-side, each one
acting upon the whole input signal.
The following schematic diagram is a more accurate version of what we have
seen in section 2.2.2 previously. All metering and monitoring points are
72
EQ Mode
indicated, along with all routing options. You can see the filters operating in
parallel clearly.
Figure 8-1
8.1.2
STEREO SERIAL (PARAMETRIC) EQ (ser/ser)
This allows you to set up the filters in a chain. This is the opposite of what is
happening above, and is exactly how a ‘Parametric EQ’ works.
The filters are set up in series, meaning the entire signal passes from one
band into the next, one at a time. In an EQ set up like this, each band boosts
or cuts a particular part of the signal as it goes. This is what is usually found
on a mixing desk (the EQ knobs in a line one above the other). You can
sweep each EQ band up and down the frequency range to locate the sound
you want to boost or cut within the signal, before passing it the next band. It
is useful to picture it working like this in your head as you are editing - the
whole signal passing from one filter to the next.
Infiltrator – User’s Manual
73
The following schematic diagram is a more accurate version of what we have
seen in section 2.2.2 previously. All metering and monitoring points are
indicated, along with all routing options. You can see the signals passing
through the filters in a chain.
Figure 8-2
8.1.3
LEFT/RIGHT PARALLEL/SERIAL EQs (par/ser)
This mixes the two modes above, with a parallel / graphic type EQ on the
Left channel and a serial / parametric EQ on the Right channel. This is useful
for dual mono processing applications and more odd stuff too.
8.1.4
LEFT/RIGHT SERIAL/PARALLEL EQs (ser/par)
Again this mixes the above modes, with a serial / parametric type EQ on the
Left channel and a parallel / graphic type EQ on the Right channel.
Of course, these ‘EQ’ modes simply define the routing, as each band can be
any type of filter you choose, from a light EQ adding sizzle to a heavy 6-pole
Lowpass filter. This is how these modes can create so many different types of
processes and effects, often simultaneously.
For instance: if you used just two bands, one as a high pass (HP) and one as a
low pass (LP) and then set it up so you can control them with the front panel
REALTIME CONTROLLERS, you would get a hands-on classic sounding DJ filter.
With a simple turn of the CONTROLLERS you could sculpt the input signal
manually to an extreme degree from ‘through a concrete wall’ sub-bass
rumbling to the tinny ‘down a telephone’ effect.
74
EQ Mode
If you then added LFO control to the REALTIME CONTROLLERS you would then
have an Auto-WahWah type FX. And if you then activated the internal
waveform generator at the inputs and added MIDI control, then fed it through
this filter set up, you have a simple monosynth for WahWah evolving
basslines and leads with extensive filtering options...as you can see it can go
in many directions...!
8.2
The Mode Groups
The rest of this chapter will go over the different pages and parameters you
find in EQ Mode, group by group.
A short description of each group is in the next table. In order, they generally
cover the process from start to finish:
You start with general settings, go on to set up the mix of INPUT signals
(including the internal synthesiser), then the FILTER controls, and finally the
OUTPUT mix. Following this group you find the METERS section, followed by
the REALTIME CONTROLLER set-up the settings for the LFO MODULATION robots
and finally the DELAY FX...
Table 8-1
Group
Setup
Input
L bank
R bank
Output
Meters
Realtime
Modulation
Delays
Infiltrator – User’s Manual
Comments
This is where you set up the mode basics parameters such as name,
number of filters and so on.
Here you set the overall levels for all the signals input into the system.
This is where you set up all the filters, choosing their type, level,
frequencies, q and so on. You also have global modifiers that can adjust
all filters simultaneously.
Here you can mix together the levels coming from the two filterbanks,
the two original inputs and the monitor channel that draw signals from
throughout the chain.
You can use this group to call up meters that fill the whole screen for
accurate reference. You can cycle between many different meter types.
Here you set up the front panel REALTIME CONTROLLERS for hands on
control.
Here is where you can activate the LFO ‘robots’ to automatically move
the REALTIME CONTROLLERS for you.
Here you set up the delay FX for the inputs and outputs.
75
8.2.1
SETUP
This is where you start to set things up. You can name the preset, change to
another architecture mode if you wish, determine the number of filterbands,
the general settings for the compressors, set stereo linking and look at the
DSP usage readout. You can also set up all the MIDI control for the preset
here.
8.2.1.1 SETUP:Common
Here you set up the basics for the Preset, such as its name, mode, number of
channels, stereo linking and so on.
Table 8-2
Parameter
Group
Page
Setup
Common
Value
Comments
n:
(name)
Select character
to edit
Mode
Vocoder
EQ ser/ser
EQ par/par
EQ ser/par
EQ par/ser
Multiband
1...24
Here you set up the presets name. You use VALUE
UP/DOWN to choose which of the 10 characters to
edit, and the ENCODER to select the letter, number
or symbol you want. PART DOWN will add a space.
Here you can change the mode that the preset is
in. Once you change this, all the menus and
parameters in Edit Mode will change to reflect the
new mode. It is advisable to use this function only
once you have become used to the system. See
page x for advice on mode changes.
In EQ Mode you can set up to 24 bands on each
side.
Here you link together the frequency selectors of
the two filterbanks. The Left settings will be copied
to the Right, and once it is ON changing either side
will affect the other simultaneously.
"L+R ctl": the Left/Right pairs use the same
settings. Note that a stereo image that is being
compressed will lose its stereo definition with this
setting (as well as ‘OFF’)
Channels
F link
ON
OFF
C link
OFF
L+R ctl
L+R avg
L+R max
"L+R avg" :the gain reduction is based on the
average peak envelope for the Left and Right
channels. This gives the smoothest sounding
stereo linking.
"L+R max" :the gain reduction is based on the
peak envelope for the loudest of the Left and Right
channels. This ensures that the loudest channel is
always fully compressed.
C look
76
OFF
0.00001...
1.00000s
In all modes except "OFF", the Left and Right
channels will be controlled simultaneously by the
editor.
This sets the maximum lookahead time for the
compressors. The whole signal will be delayed for
all bands, and then the individual Dynamic Blocks
can each listen in on the signal early using their
own lookahead time.
EQ Mode
8.2.1.2 SETUP:MIDI
Now you have extensive MIDI set up parameters. You can determine what
channel each of the filtering and Waveform Blocks listens to, as well as
different MIDI control modes.
Group
Page
Setup
MIDI
Table 8-3
Parameter
Base rx ch
Base tx ch
Value
Comments
OFF
1...16
OFF
1...16
These parameters set up a base receive and
transmit channel for the preset that other
parameters can reference (base), making
switching MIDI channel for the many parameters
in a preset easy.
This resets the LFOs on every MIDI keypress.
This sets how the MIDI controller messages are
interpreted. Abs means it will assume absolute
control of parameter ranges, and REL means that it
will change the values relative to where it is now
(above 64=more, below 63=less).
The Global bypass control can be assigned to a
controller for performance and sequencing control.
LFO reset
Ctrl mode
OFF, Keyon
OFF
Abs
Rel
Bypass src
OFF
Cc0...127
(with names)
8.2.1.3 SETUP:MIDI Osc
Here you determine how the oscillator responds to MIDI. Once you have set
up a constant tone and mixed it into the system at the inputs, these controls
will allow you to play it like a regular MIDI synth.
Group
Table 8-4
Page
Parameter
Setup
MIDI Osc
Value
Comments
Osc mode
OFF
Mod
Mono
Mono/c
Osc ch
OFF
1...16
E-1...D9
Here you turn ON the OSCs MIDI control MOD means controller modulation messages are
responded to
MONO means note messages are responded to
(normal synth operation)
MONO/C means it will play like a monosynth but
always play the last note as if there was no ‘note
OFF’ message.
This sets the channel that the oscillator responds
to.
This sets the key on your keyboard that will play
back the OSC at the pitch you have assigned it.
This ties the noise generator to the osc for MIDI
playing
This glides between notes
This sets up a simple amplitude envelope for
controlling the shape of the synths sound.
Root key
Noise
Osc Porta*
Env att
Env sus
Env rel
Vel>att
Vel>Vol
Vel>Shp1
Vel>Shp2
Key>att *
Infiltrator – User’s Manual
OFF
Osc Slave
TBI
0.0000...
9.9999s
-inf...0.0dB
0.0000...
9.9999s
-100%...
+100%
-100%...
+100%
-100%...
+100%
-100%...
+100%
-100%...
+100%
MIDI velocity is used to control the attack time,
OSC volume, OSC 1 and 2 shape settings
Keyscaling across the MIDI keyboard is used to
control the attack time, OSC volume, OSC 1 and 2
77
Group
Page
Parameter
Value
Comments
Key>Vol *
-100%...
+100%
-100%...
+100%
-100%...
+100%
-100n...
+100n
OFF
Cc0...127
(with names)
-100%...
+100%
OFF
Cc0...127
(with names)
-100%...
+100%
OFF
Cc0...127
(with names)
-100%...
+100%
shape settings
Key>Shp1*
Key>shp2 *
PWheel>f
Fmod src
Fmod amt
Smod1 src
Smod1amt
Smod2 src
Smod2 amt
MIDI Pitchbend is used to control the OSC tuning in
spans of semitones (notes)
You can choose the source MIDI controller message
number for adjusting the OSC frequency
modulation control
The amount this controller will change the
frequency modulation control
You can choose the source MIDI controller message
number for adjusting the OSC 1 Shape control
The amount this controller will change the OSC 1
Shape control
You can choose the source MIDI controller message
number for adjusting the OSC 2 Shape control
The amount this controller will change the OSC 2
Shape control
8.2.1.4 SETUP:MIDI Filt
These MIDI settings allow you to control the Filterbanks via MIDI (only while
in Parallel mode). You can map the bands across the keyboard for ducking
and muting performance control, and apply controllers such as pitch wheel
and velocity to parameters. You can create some great performance filters
with this that respond to touch...
Group
Page
Setup
MIDI Flt
Table 8-5
Parameter
Value
Comments
Lf mode
OFF
Mod
Mono
Poly
Gate
Duck
Rf mode
OFF
Mod
Mono
Poly
Gate
Duck
OFF
1...16
base
OFF
1...16
base
This sets the filters MIDI control mode:
MOD responds to controller messages.
MONO mutes all filters except number 1, and maps
its cut-off frequency over your keyboard,
monophonically.
POLY does the same as MONO, but you can play it
polyphonically.
GATE means each filter is assigned a key and all
are muted. as you press it the filter opens.
DUCK means the opposite - all the filters are open,
and as you press a key the corresponding filter is
muted.
See above.
Lf ch
Rf ch
78
This sets the channel that the Right filterbank
responds to
This sets the channel that the Right filterbank
responds to
EQ Mode
Group
Page
Parameter
Value
Comments
Lf lo key
E-1...D9
Rf lo key
Env att
E-1...D9
0.0000...
10.0000s
Env sus
Env rel
-infdB...+24dB
0.0000...
10.0000s
-100%...
+100%
-100%...
+100%
-100%...
+100%
-100%...
+100%
-100%...
+100%
-100%...
+100%
-100%...
+100%
-100%...
+100%
-100%...
+100%
-100%...
+100%
This sets the range of keys the filters are assigned
to in the Gate and Duck modes by setting which
key filter 1 is assigned to. Then, the other filters
follow sequentially up the keyboard.
See above
The filters can have an envelope to control the
way the filter responds to MIDI playing. This
controls the Attack time (the start when the key is
pressed)
Envelope sustain level (or hold level)
Envelope release time (movement once you let go
of the key)
MIDI velocity is used to control the filters envelope
attack, volume level and q settings.
Vel>att
Vel>vol
Vel>q
Key>att*
Key>vol*
Key>q*
Lf vel>vol*
Rf vel>vol*
Lf pw>f
Rf pw>f
Infiltrator – User’s Manual
Keyscaling across the MIDI keyboard is used to
control the filters envelope attack, volume level
and q settings.
This sets MIDI velocity to the filter band volume
This sets MIDI velocity to the filter band volume
This lets MIDI pitch bend alter the Left filterbank
frequencies
This lets MIDI pitch bend alter the Left filterbank
frequencies
79
8.2.1.5 SETUP:MIDI Mod
These parameters control how incoming MIDI messages are sent to different
controls for the filters. This gives you in-depth control of filter parameters
from your sequencer. (Listed here are the parameters for the Left filters (Lf).
The Right filters (Rf) parameters are identical).
Group
Table 8-6
Page
Parameter
Setup
MIDI Mod
Lf att src
Lf att amt
Lf dec src
Lf dec amt
Lf vol src
LF vol amt
Lf f src
Lf f amt
Lf q src
Lf q amt
Lf bw src
Lf bw amt
Lf g src
LF g amt
Value
Comments
OFF
Cc0...127
(with names)
-100...
+100%
OFF
Cc0...127
(with names)
-100...
+100%
OFF
Cc0...127
(with names)
-100...
+100%
OFF
Cc0...127
(with names)
-100...
+100%
OFF
Cc0...127
(with names)
-100...
+100%
OFF
Cc0...127
(with names)
-100...
+100%
OFF
Cc0...127
(with names)
-100...
+100%
Sets the MIDI controller message number assigned
to Filter attack
How much the MIDI controller adjusts the filter
attack
Sets the MIDI controller message number assigned
to filter decay
How much the MIDI controller adjusts the filter
decay
Sets the MIDI controller message number assigned
to filterband volume
How much the MIDI controller adjusts the
filterband volume
Sets the MIDI controller message number assigned
to frequency
How much the MIDI controller adjusts the
frequency
Sets the MIDI controller message number assigned
to ‘q’
How much the MIDI controller adjusts the’q’
Sets the MIDI controller message number assigned
to bandwidth
How much the MIDI controller adjusts the
bandwidth
Sets the MIDI controller message number assigned
to Gain
How much the MIDI controller adjusts the Gain
8.2.1.6 SETUP:Info
This page displays the system DSP power taken up by the current preset.
80
Group
Table 8-7
Page
Parameter
Value
Comments
Setup
Info
0...100%
Here you can see how much DSP is being used by
this configuration. See page 62 for more info on
DSP usage.
DSP usage
EQ Mode
8.2.2
INPUT
Since Infiltrator is a sound-shaping tool, the inputs are naturally where it all
starts. In EQ Mode you can also mix in at the inputs the internal ‘Waveform
Block’ to create monosynth tones, ring modulation sources, noise effects and
so on to put through the filters.
Group
Table 8-8
Page
Parameter
Value
Comments
Input
Left
Level
-infdB...+24dB
Rmod
OFF
Noise
Osc
Right in
0...100%
-infdB...+24dB
Here you set the main level coming from the
physical input
You can ring modulate the input using these
sources to create metallic and percussive tones.
Rmod amt
Noise
Osc
D mode
-infdB...+24dB
OFF
comp
Gte+cmp
Ring modulation amount setting
These controls mix in the noise and Osc waveform
generators with the Left input, that you have set
up (see below)...
Here you turn ON the Dynamics Block for the Left
input.
Continuation of Left input Dynamics Block. Menus as outlined in section 2.1.2
...
Right
Noise
Osc 1
Osc 2
8.2.3
Same as Left (except that rmod source is ‘Left in’ instead of ‘Right in’.)
In this page you find the Noise set up parameters outlined in section 2.1.4
In this page you find the Osc 1 set up parameters outlined in section 2.1.4
In this page you find the Osc 2 set up parameters outlined in section 2.1.4
L BANK/R BANK
This is the group where you actually set up the way each filter behaves. With
PAGE UP and DOWN you can cycle through the list of filter channels. Each one
is a filter in its own Right and can be completely configured independently, in
the manner outlined in section 2.1.1.
However, if you want to make global changes to a particular value across all
channels you will find the ‘global’ page (gbl) at the start of the list where
changes like this can be made to all filters simultaneously. So if you want to
turn up the level of every channel in the whole filterbank you only need to
turn up the global level. This is useful once you have set up all the filters and
you want to just make fine-tuning adjustments.
Remember that when you go and look at parameters within the specific
channels again, those that have been adjusted using a global modifier show a
‘!’ sign to indicate that the underlying value has been modified. The number
itself will not update (this is similar to what happens when using the RTCs).
So first in the list you find the global modifiers, below, and then you will find
each filter on its own channel.
Infiltrator – User’s Manual
81
Here is a table of the global modifiers you will find:
Group
Table 8-9
Page
Parameter
Value
Comments
L/R bank
Gbl
Level
-60...+60dB
Modifies all filter level settings
Notes
Cents
Fdelta
Q
Bw
Peak
-100...+100
-50...+50
0.0%...1000.0%
0.0%...1000.0%
0.0%...1000.0%
-24...+24dB
Modifies all filter notes settings
Modifies all filter cents settings
Modifies all filter fdelta settings
Modifies all filter Q settings
Modifies all filter bandwidth settings
Modifies all filter peak settings
8.2.4
OUTPUT
8.2.4.1 OUTPUT:Mixing
The output mixer is used to create the final stereo mix of the processing
banks and any other available elements. The usual level and pan controls are
provided for each source. If the Osc, Noise or Monitor sources are marked by
a "?", this means that the corresponding signal source is switched OFF and
needs to be activated before you will hear it.
Group
Page
Output
Mix
Table 8-10
Parameter
Value
Comments
L bank
-infdB...+24dB
Sets the final output level for the output of the
two filterbanks
R bank
L input
-infdB...+24dB
-infdB...+24dB
R input
Osc
-infdB...+24dB
-infdB...+24dB
Noise
Monitor *
-infdB...+24dB
-infdB...+24dB
DynamicsL
L bank
R bank
L input
R input
Osc
Noise
Monitor *
Mode *
Master
...
Volume
L100%...R100%
L100%...R100%
L100%...R100%
L100%...R100%
L100%...R100%
L100%...R100%
L100%...R100%
OFF
comp
Gte+cmp
...
-infdB...+24dB
Pan
Mixes into the outputs the unprocessed inputs
(post delay)
Mixes into the output directly the internal
waveform sources
For setting the level of the monitor feed from
within the system
Same as above but for Left/Right panning control
Output Dynamics Blocks.
See section 2.1.2 for more details about their
controls
The final MASTER OUTPUT
8.2.4.2 OUTPUT:Monitor
The monitor controls follow on from the list of output parameters above. It is
another signal that can be mixed into the final output. This is for tapping a
signal from within the processor for auditioning while working. You can use
this for all sorts of things - to listen to a signal before and after it passes
through a particular filter, or for checking what the original input sounds like
without disturbing any of your mix settings.
82
EQ Mode
You can choose to mix the monitor in with the output or to solo it for
individual auditioning.
The diagrams in section 8.1 above show clearly the different signals that can
be tapped into in the EQ Modes. Monitoring sources are marked with green
dots.
Here are the monitor controls you find in the output section:
Table 8-11
Parameter
Group
Page
Output
Monitor
Mode *
Volume*
Group *
Channel*
Signal*
(global)
(L bank /
R bank) *
Infiltrator – User’s Manual
Value
Comments
OFF
Mix
Solo
-infdB...+24dB
Global
L bank
R bank
1...5
You can either mix in the signal to the main output
or solo the monitor for listening in isolation.
L input
R input
Comp L
Comp R
Osc
Noise
L mix L
L mix R
R mix L
R mix R
L output
R output
Filter
Amp
This sets the monitors volume.
To select the signal you want, first you choose the
group it is in. See section 5.3.
If you choose L bank or R bank you need to then
choose a channel. (If you choose global this will
show a ‘?’ to remind you this is not used)
These are the global group monitoring options.
These are monitoring options within a specific
bank and channel.
83
8.2.5
METERS
8.2.5.1 FULL SCREEN METERS
You can use this group to call up accurate meters that fill the whole screen.
You can cycle between many different meter types to show clearly what is
happening in the system (see diagrams in section 8.1 above for metering
signals available in the EQ Modes).
First you can set up the meters here:
Group
Table 8-12
Page
Parameter
Value
Comments
Meters
Config
Decay
0.00...10.0s
Mode
Group1
Log dB
Linear
Global
L bank
R bank
This sets how ‘responsive’ the meters are by
controlling the ‘jumpiness’
Set the meter scaling method
Channel1
1...5
Sig1
L input
R input
Comp L
Comp R
Osc
Noise
L mix L
L mix R
R mix L
R mix R
L output
R output
Filt
Amp
(global)
(L bank /
R bank)
Group2
You can set up two custom meters that track a
signal of your choosing. The corresponding custom
meters are available both as popup meters and on
the "Meters" pages with the legends "1" and "2".
To select, first you choose the group it is in.
If you choose L bank or R bank you need to then
choose a channel
These are the global group signal options in
Multiband Mode.
These are options within a specific bank and
channel.
Same as group 1
If you then press PART UP you will see the meters taking up the whole
screen. You press PARAMETER UP and DOWN to cycle between the three main
meter types:
1. Full screen Left-to-right meters showing signal 1 and 2 (default as the
inputs).
2. MIDI monitoring (including channel) and vertical IN/OUT meters.
3. ‘Graphic’ analyser vertical channel meters with 4 different types for
each channel. The meters show an abbreviated name telling you what
you are looking at. Unfortunately they are very small to allow for lots
of meter space! The "1" means the channel 1 and upwards is showing,
up to five in Mulitband Mode.
84
EQ Mode
Here are the names:
Table 8-13
Legend
Meter
Lf 1
Left channel filter output
Lgr1
Left channel gain reduction
Lgt1
Left channel gate level
Lc 1
Left channel compressor output
Rf 1
Right channel filter output
Rgr1
Right channel gain reduction
Rgt1
Right channel gate level
Rc 1
Right channel compressor output
Al
Amplifier Left
Ar
Amplifier Right
Comment
What goes into the Dynamics Block
shows the gain reduction happening
Shows the gates opening and closing
what comes out of the Dynamics Blocks
See above...
These are the channel output amplifiers
in the serial EQ
8.2.5.2 POPUP METERS
Of course, pop-up meters are also available outside this group, by pressing at
any time SHIFT while in Edit Mode. While browsing around the parameters,
they can show you context sensitive meters for quickly seeing what is
happening. By pressing PART UP you can cycle through the meters outlined
above as well, using PART DOWN to reset any peak overload indications or to
cycle through the graphic analyser mode types when you reach them.
The contextual meters you see will vary with the current group, page and
parameter. When compressor linking is enabled, they will usually be a pair of
popup meters, showing the Left and Right signals in context.
For the global compressor controls, the analyser mode is used in context to
show all bands together. Here is a description of the meters you will come
across:
Table 8-14
Legend
Meter
In l
input level, Left
In r
input level, Right
Fl
filter output, Left
Fr
filter output, Right
/l
Dynamics Block gain reduction, Left
/r
Dynamics Block gain reduction, Right
]l
Dynamics Block gate level, Left
]r
Dynamics Block gate level, Right
Cl
Dynamics Block output, Left
Cr
Dynamics Block output, Right
Ol
final output, Left
Or
final output, Right
Al
Amplifier Left
Ar
Amplifier Right
Infiltrator – User’s Manual
Comment
Main input levels
What goes into the Dynamics Block
Gain reduction across all five banks.
The gates opening and closing
What comes out of the Dynamics
Blocks
Master output
These are the channel output
amplifiers in the serial EQ
85
8.2.6
REALTIME CONTROLLERS
Here you set up the front panel REALTIME CONTROLLERS (RTCs) for hands on
control.
When editing the RTC assignments, you can quickly test them by pressing
EDIT to go to system mode where they will immediately work as they are
programmed to. Then a single press of EDIT have you right back into editing
mode for further tweaking - i.e. there’s no need to save the preset for this.
Note you can also view and edit the current/last RTC "knob positions".
So here are the parameters for setting all this up:
Group
Table 8-15
Page
Parameter
Realtime
Setup
Mode
Multi1...12
Set1...8
rtc1...3 g
Comments
OFF
Single
Multi2
Multi4
Multi8
(Set the name)
Here you choose from modes described above.
You can turn this ON at anytime and it will link the
RTCs together as outlined. You can also name the
sets for ease of use.
rtc1...3 ch
Global
L bank
R bank
1...24
Rtc
various
rtc1...3 amt
-1000%...
+1000%
-63...+63
rtc1...3 value
86
Value
Using the same method as naming a preset you
can name your multi set ups here in order. Since
there is a possible maximum of 12 multisets (3
RTCs x 4 multisets), there are 12 multiset names
available. The first three multinames are for
RTC 1-3 in the first multiset, the next three are for
RTC 1-3 in multiset 2. You only need to name as
many muiltisets as you actually have in use.
Here you select the parameter to be controlled.
First you must choose the signal group it is in...
If you choose L bank or R bank you need to then
choose a channel. (It will show ‘?’ if you have
chosen the global group and therefore don’t need
to choose a channel)...
Then you choose the parameter.
(See table below for all the options)
Here you set the +ve or -ve amount that the RTC
will adjust the underlying parameter value by.
This is the "memory" of the position of the front
panel knob - it is made available for inspection
and direct editing (you can hear the effect as you
edit it). This is the "stored RTC" proper as used by
the global ‘RTC=edit’ mode chosen in the global
system menus (see section 4.4.1)
EQ Mode
There are extensive options for RTC target assignments, depending on what
group you have chosen. You can control global parameters such as Input
levels and Oscillator frequencies, or parameters that belong to individual
filters within a bank such as Q and fdelta. Global parameters also include the
list ‘global modifiers’ that allow you to alter parameters across all filterbanks
simultaneously, such as filter frequency.
Table 8-16
Signal Group
GLOBAL:
RTC global group possible
assignments from within the
system in EQ Mode
Targets
(general + filters)
OFF, In level, In L lvl, In R lvl, L level, L freq, L notes, L
cents, L fd, L q, L bw, L gain, L stereo, R level, R freq, R
notes, R cents, R fd, R q, R bw, R gain, R stereo,
(oscillators and LFO controls)
Osc Vol, Osc1 Vol, Osc2 Vol, Osc note, Osc cent, Osc1 f,
Osc2 f, Osc 1 shp, Osc 2 shp, Osc 1 fm, Osc 2 fm, Nois
Vol, LFO1 f, LFO2 f, LFO3 f, LFO1 amt, LFO2 amt, LFO3
amt
(dynamics blocks - only input left shown here but list
will also show same for input Right dynamics block and
the output L+R blocks too)
IL D gai, IL D att, IL D rel, IL D knee, IL C thr, IL C rat, IL E
thr, IL E rat, IL D Lok, IL D slew, IL D mku, IL G att, IL G
rel, IL G hld, IL G thr
L bank/R Bank:
RTC possible assignments
from within a specific
filterbank and channel
(delays)
DI time, DI feed, DI fcut, DI d/w, DO time, DO feed, DO
fcut, DO d/w
Depending on what channel and side you choose,
parameter will show as L1 vol ,R4 vol etc.
OFF, Vol, freq, note cents fd q bw gain slope
The RTC screen that pops up while you use then will display info about the
parameter being modified, and if there is an LFO applied to control it.
Infiltrator – User’s Manual
87
8.2.7
MODULATION
Once you have your RTCs set up to control internal parameters, you can attach
one of these LFOs to control them automatically. Think of these as ‘robots’
that come and grab the knob and move it for you! They cannot be applied
directly to internal parameters, and can only control RTCs.
As a compliment, the RTCs can be assigned to control the speed and depth of
the LFOs, so that you can use the RTCs to tweak the LFOs that are tweaking
the RTCs... as you can imagine it can get seriously cool sounds once you apply
this to the internal parameters...
Group
Table 8-17
Page
Parameter
Modulation
LFO 1
Value
Comments
LFO mode
ON
OFF
Freq
phase
wave
0.01Hz...25Hz
0...359Deg
Saw
Tri
Square
Sine
S&H
Rtc1/1
Rtc2/1
Rtc3/1
Rtc1/2
Rtc2/2
Rtc3/2
...
Rtc1/8
Rtc2/8
Rtc3/8
-100%...+100%
It is advisable to set up everything else first before
turning the LFO ON, because if you cycle through
the targets with the LFO ON it will adjust those
parameters as it passes (although it will put them
back where it found them...).
The speed of the LFO cycle
You can set the phase
Here you choose the waveform that the LFO will
create. See Appendix B for more details about the
wave types and how they work.
target
LFO 2
LFO 3
88
amount
See above...
See above...
Here you set the RTC to be controlled by the LFO.
This sets how much the LFO moves the RTC by.
EQ Mode
8.2.8
DELAYS
Infiltrators delay FX blocks all act in exactly the same way. In EQ Mode, there
are two pairs of delay FX - one on the inputs, and one on the outputs.
However, all the controls are put here in one group for convenience. You can
use the delay for chorus effects, dub echoes, metallic reverb-like spaces and
more.
Group
Table 8-18
Page
Parameter
Delay
Setup
In L Mode
In R Mode
out L mode
Out R mode
In Link
Out link
Gbl t
Left in,
Right in,
Left out,
Right out
Gbl fb
Gbl f
Gbl d/w
time
feedbk
Value
Comments
ON
OFF
ON
OFF
ON
OFF
ON
OFF
OFF
L+R ctl
OFF
L+R ctl
-4.00000...
+4.00000 s
-96.0...+96.0dB
-9.99...+9.99 Oct
-200%...+200%
0.00000...
4.00000 s
-inf...0.00dB
These activate the in and out Delay Blocks.
Filter
Bypass
LP med
HP med
LP light
HP light
Freq
50...20,000Hz
dry/wet
d100%...w100%
Infiltrator – User’s Manual
These link the stereo FX together.
These are global modifiers for adjusting all the
delays simultaneously. The underlying delay
values for delay time, feedback, filter frequency
and dry/wet mix will be adjusted by these
amounts.
Sets the delay time. Really short delays can create
chorus and comb filtering effects.
This feeds a portion of the delay output into itself
again. The closer to zero the feedback, the longer
the echoes last and you approach a guitar-like
feedback loop.
These simple filters can be used to brighten or
darken the sound as it is echoed. The filter types
are:
"Bypass" - the filter is not active
"LP med’ - smooth roll-off low pass
"HP med" - smooth roll-off high pass
"LP light" - shallow low pass
"HP light" - shallow high pass
This sets the point above or below which the
sound is filtered (depending on the filter chosen)
Dry=no effect, Wet=effect only
89
Chapter
99
9.1
Vocoder Mode
Using a Vocoder
The basic outline of the function of the vocoder has been discussed in
sections 2.1.3 and 2.2.3. The vocoder consists of the two processing banks,
one "Analysis" bank (Left) and one "Synthesis" bank (Right). The input to the
Analysis bank is called "Exciter" (L), and the input to the Synthesis bank is
called "Carrier" (R).
The Exciter and Carrier inputs each have a ring modulator and a
compressor/expander/gate available, for effects and signal conditioning.
There are lots of things that can be done by using various sound sources for
the Exciter and Carrier. The possibilities in setting up different sounding filter
banks are endless. So are the routing and mixing opportunities that enable
the vocoder to emulate the architectures of nearly every classic channel
vocoder.
Every filter in each bank is fully stand-alone and separately programmable in
detail. All of the input, oscillator and noise signals as well as the
Silence/Voiced/Unvoiced generated signals are available for use in any of the
internal source mixers. This allows uses beyond normal vocoding, and opens
up territories of undiscovered sounds.
For the technically minded: Infiltrator does not use an FFT method. Only huge
banks of "real" filters can give the sound, the realtime response and the
programmability that is Infiltrator’s mission to provide.
90
Vocoder Mode
The following schematic diagram gives a detailed look at the architecture of
Infiltrators Vocoder Mode, also showing the signal monitoring and metering
points. The SVU modes when active add to the complexity of this system, as
the diagrams in section 9.2.5 will soon show.
Figure 9-1
Infiltrator – User’s Manual
91
9.2
The Mode Groups
The rest of this chapter will go over the different options you have in Vocoder
Mode, group by group. In the next table you can see an outline of each of
these groups. In order, they cover the process from start to finish.
You start with general settings, go on to set up the mix of INPUT signals
(including the internal synthesiser), then the ANALYSIS and SYNTHESIS set up,
the Analysis and Synthesis FILTERBANKS, and finally the OUTPUT mix.
Following this group you find the METERS section, followed by the REALTIME
CONTROLLER set-up, the settings for the LFO MODULATION robots and finally
the DELAYS for echoes and chorus effects...
Table 9-1
Group
Setup
Input
Ana
Syn
Ana bank
Syn bank
Output
Meters
Realtime
Modulation
Delays
9.2.1
Comments
This is where you set up the mode basics, such as name, number of
filters, MIDI control and so on.
Here you set up the levels of the Exciter (L) and Carrier (R) inputs. You
can ring modulate them, and they each have their own Dynamics Block
which is also set up here.
If you want to use the oscillator and noise generator you set their
waveforms and so on here too. You will then need to mix them in to the
filterbank inputs in the next groups.
This is where you mix the signal that enters the Analysis bank, and turn
ON the SVU detector.
This is where you mix the signal that enters the Analysis bank, and if the
SVU detector is ON you can define the three different mixes used for the
vocoding with consonant resynthesis.
This is where you set up the bank of analysis filters.
This is where you set up the bank of synthesis filters.
Here you can mix together the signals coming from the Analysis and
Synthesis filterbanks, the two original inputs and the original waveform
generator signals. You can also mix in the monitor channel that taps
signals from throughout the vocoder for referencing while working.
You can use this group to call up meters that fill the whole screen. You
can cycle between many different meter types.
Here you set up the front panel REALTIME CONTROLLERS for hands on
control.
Here is where you can activate the LFO ‘robots’ to automatically move
the REALTIME CONTROLLERS for you.
Where you set up the input and output delay FX.
SETUP
This is where you set-up the Vocoder Mode basics. You can name the preset,
change to another architecture mode if you wish, determine the number of
filterbank channels, the general mode settings for the input and output
compressors, set stereo-linking and look at the DSP usage readout. You can
also set up all the MIDI control for the preset here, including all the MIDI
control for the oscillator.
92
Vocoder Mode
9.2.1.1 SETUP:Common
The basic elements of the preset - name, mode type, number of channels...
Table 9-2
Parameter
Group
Page
Setup
Common
Value
Comments
n:
(name)
Select character
to edit
Mode
Vocoder
EQ ser/ser
EQ par/par
EQ ser/par
EQ par/ser
Multiband
1...24
Here you set up the presets name. You use VALUE
UP/DOWN to choose which of the 10 characters to
edit, and the ENCODER to select the letter, number
or symbol you want. PART DOWN will add a space.
Here you can change the mode that the preset is
in. Once you change this, all the menus and
parameters in Edit Mode will change to reflect the
new mode. It is advisable to use this function only
once you have become used to the system. See
section 6.2 for details about mode changes.
In Vocoder Mode you can use up to 24 bands or
channels.
Here you link together the frequency selectors of
the two filterbanks. The Left settings will be copied
to the Right, and once it is ON changing either side
will affect the other simultaneously.
"L+R ctl": the Left/Right pairs use the same
settings
Channels
F link
ON
OFF
C link
OFF
L+R ctl
L+R avg
L+R max
"L+R avg": the gain reduction is based on the
average peak envelope for the Left and Right
channels. This gives the smoothest sounding
stereo linking.
"L+R max": the gain reduction is based on the peak
envelope for the loudest of the Left and Right
channels. This ensures that the loudest channel is
always fully compressed.
C look
Infiltrator – User’s Manual
OFF
0.00001...
1.00000s
In all modes except "OFF", the Left and Right
channels will be edited simultaneously by
changing either one.
This sets the maximum lookahead time for the
compressors. The whole signal will be delayed,
and then the individual dynamic blocks can each
listen in on the signal early.
93
9.2.1.2 SETUP:MIDI
Just like in EQ Mode, now you have extensive MIDI set up parameters.
Group
Table 9-3
Page
Parameter
Setup
MIDI
Base rx ch
Base tx ch
Value
Comments
OFF
1...16
OFF
1...16
These parameters set up a base receive and
transmit channel for the preset that other
parameters can reference (base), making
switching MIDI channel for the many parameters
in a preset easy.
This resets the LFOs on every MIDI keypress.
This sets how the MIDI controller messages are
interpreted. Abs means it will assume absolute
control of parameter ranges, and REL means that it
will change the values relative to where it is now
(above 64=more, below 63=less).
The Global bypass control can be assigned to a
controller for performance and sequencing control.
LFO reset
Ctrl mode
OFF, Keyon
OFF
Abs
Rel
Bypass src
OFF
Cc0...127
(with names)
OFF
Cc0...127
(with names)
Freeze src
The analysis bank envelope followers can be
frozen for classic vocoder FX. The control can be
assigned to a MIDI controller for performance and
sequencing control.
9.2.1.3 SETUP:MIDI Osc
Here you determine how the oscillator responds to MIDI. Once you have set
up a constant tone and mixed it into the system at the Carrier inputs, these
controls will allow you to use it as a source for vocoding (you can of course
use it in the Exciter if you wish...).
For vocoding you mix the osc into e.g. the "Syn:Voiced Mix" - this is how all
the presets does it. This is more flexible, allowing use of SVU etc.. The osc is
not available on the Input pages.
Table 9-4
Parameter
Group
Page
Setup
MIDI Osc
Value
Comments
Osc mode
OFF
Mod
Mono
Mono/c
Osc ch
OFF
1...16
E-1...D9
Here you turn ON the OSCs MIDI control MOD means controller modulation messages are
responded to MONO means note messages are
responded to (normal synth operation).
MONO/C means it will play like a monosynth but
always play the last note as if there was no ‘note
OFF’ message.
This sets the channel that the oscillator responds
to.
This sets the key on your keyboard that will play
back the OSC at the pitch you have assigned it.
This ties the noise generator to the osc for MIDI
playing.
This glides between notes.
This sets up a simple amplitude envelope for
controlling the shape of the synths sound.
Root key
Noise
Osc Porta *
Env att
Env sus
Env rel
Vel>att
94
OFF
Osc Slave
TBI
0.0000...
9.9999s
-inf...0.0dB
0.0000...
9.9999s
-100%...
+100%
MIDI velocity is used to control the attack time,
OSC volume, OSC 1 and 2 shape settings
Vocoder Mode
Group
Page
Parameter
Value
Vel>Vol
-100%...
+100%
-100%...
+100%
-100%...
+100%
-100%...
+100%
-100%...
+100%
-100%...
+100%
-100%...
+100%
-100n...
+100n
OFF
Cc0...127
(with names)
-100%...
+100%
OFF
Cc0...127
(with names)
-100%...
+100%
OFF
Cc0...127
(with names)
-100%...
+100%
Vel>Shp1
Vel>Shp2
Key>att*
Key>Vol*
Key>Shp1*
Key>shp2*
PWheel>f
Fmod src
Fmod amt
Smod1 src
Smod1 amt
Smod2 src
Smod2 amt
Comments
Keyscaling across the MIDI keyboard is used to
control the attack time, OSC volume, OSC 1 and 2
shape settings. (NOT ACTIVE IN VERSION 1)
MIDI Pitchbend is used to control the OSC tuning in
spans of semitones (notes)
You can choose the source MIDI controller message
number for adjusting the OSC frequency
modulation control
The amount this controller will change the
frequency modulation control
You can choose the source MIDI controller message
number for adjusting the OSC 1 Shape control
The amount this controller will change the OSC 1
Shape control
You can choose the source MIDI controller message
number for adjusting the OSC 2 Shape control
The amount this controller will change the OSC 2
Shape control
9.2.1.4 SETUP:Info
This page displays the system DSP power taken up by the current preset.
Group
Table 9-5
Page
Parameter
Value
Comments
Setup
Info
0...100%
Here you can see how much DSP is being used by
this configuration. See section 5.1 for more info
on DSP usage.
Infiltrator – User’s Manual
DSP usage
95
9.2.2
INPUT
For the Vocoder Mode, the Left and Right inputs are known as the "Exciter"
and "Carrier" inputs (and the Left and Right processing banks are known as
the "Analysis" bank and "Synthesis" bank). You can see them as separate,
mono processors and inputs that combine to create a third new sound.
In Vocoder Mode the overall input controls are more complex than Multiband
Mode. Unlike EQ Mode, you do not set up the mix of signals such as those
coming from the Waveform Block in this Input Group. Here you just set the
physical input levels and set up the input Dynamics Blocks. The mixing takes
place in the next two groups Analysis and Synthesis where there are far more
options to explore.
Here are the settings for the Exciter input (Left) and Carrier (Right).
Group
Table 9-6
Page
Parameter
Value
Comments
Input
Exciter
Level
-infdB...+24dB
Rmod
OFF
Noise
Osc
Carrier
0...100%
OFF
comp
Gte+cmp
This sets the input level of the Exciter, which
would classically be your voice.
This allows you to create metallic and percussive
sounds by ring modulating the inputs using various
sources.
Rmod amt
C mode
Carrier
Rest of Dynamics Block menu
...
Level
-infdB...+24dB
Rmod
Rmod amt
C mode
OFF
Noise
Osc
Exciter
0...100%
OFF
comp
Gte+cmp
Ring modulation amount setting
Here you can turn ON the Exciter input Dynamics
Block, whose menu continues from here...
This sets the input level of the Carrier, which
would classically be a keyboard.
This allows you to create metallic and percussive
sounds by ring modulating the inputs using various
sources.
Ring modulation amount setting
Here you can turn ON the Carrier input Dynamics
Block, whose menu continues from here...
Rest of Dynamics Block menu
...
96
Vocoder Mode
9.2.3
ANALYSIS
Now here is where you actually start the vocoding process - the analyser
needs a signal to analyse and this is where you define it. In this group you
can set up the exact mix of signals that make up the signal that is fed into
the Analysis filterbank. You can also turn ON the SVU detector for spotting
consonants in the signal input (assuming it to be a voice) so they can be
artificially generated by the vocoder.
For "normal" vocoding applications this signal for analysis will probably be the
Exciter input, which is the Left input on the Chameleon. The table below
shows the mix options.
Group
Table 9-7
Page
Parameter
Ana
Input Mix
Exciter
Carrier
Silent
Noise
Osc
Value
Comments
-infdB...+24dB
-infdB...+24dB
-infdB...+24dB
-infdB...+24dB
-infdB...+24dB
Here you set the mix levels of all the components
that go up to make the input to the Analysis bank.
Note, the "silent" signal is only ever present when
the silent/voiced/unvoiced detector is in "SVU++"
mode (the silent mix is itself set up in the
Synthesis group, next).
As you can see you can use any signal you like, including the Carrier, for the
source. This flexibility is what makes infiltrator a monster!
9.2.4
THE SILENCE/VOICED/UNVOICED DETECTOR
What is it for?
When vocoding in the traditional manner, the consonants of the vocals can be
lost or suppressed if the Carrier signal lacks high frequency content. To
compensate for this, various schemes have been used in analogue vocoders.
The basic principle is to detect consonants in the Exciter (vocal) signal, and
when one is detected some noise is sent to the Synthesis bank to make up
for the lack of high frequency content in the Carrier.
This is often called a voiced/unvoiced detector. The "voiced" state is when no
consonants are detected and the "unvoiced" state is when a consonant is
detected. The detection schemes are usually based on the fact that a
consonant tend to be transients with much high frequency content, which
stands out of the vowel "flow" of speech. This is most often achieved by
using filters to split the Exciter into a low frequency and a high frequency
band. Then the energy in each band is measured, and if the high frequency
band has the most energy then a consonant is assumed and the detector is in
the unvoiced state. In practice, the "rate of energy change" is sometimes
measured to establish whether the high frequency energy has the
characteristics of a transient or not. Some vocoders also had a "silent" state,
which is when there is no energy in either the low or high frequency bands.
The silent state is used to switch in a "silence fill in" signal if desired.
Infiltrator – User’s Manual
97
The following illustration shows how the low and high band amplitude
envelopes might look for the spoken word VOCODER. Note the transient in the
high band where the consonant C is spoken:
Figure 9-2
The detector in Infiltrator supports the silent, voiced and unvoiced states, and
is implemented in a way such that it can mimic several types of analogue
voiced/unvoiced detectors. There are two modes of operation, a simple and a
more advanced detector. These are called "SVU" and SVU++" respectively.
In SVU mode, the Exciter is split into a high and low band by a selectable
frequency. The amplitudes of the low and high bands are smoothed according
to the "slew" parameter for each. The two bands have a level "trim" control
and a "threshold" level setting each. If both the low and high-band signal
levels are below their set thresholds, or both bands are silent, the detector
assumes the silent state and feeds the "silent mix" to the output mixer.
Unless silent, based on the instantaneous energy in each of the two bands,
the detector decides on one of the voiced or unvoiced states. The derived
state activates the corresponding Synthesis source mixer, and the activated
mix is fed to the Synthesis bank.
The same thing happens in SVU++ mode, but with some added features to
give more precise detection. The amplitudes of the low and high bands are
smoothed according to the "slew" parameter for each. The two smoothed
bands are then used to derive an estimate of the current mean frequency.
This mean frequency estimate is subjected to a hysteresis window, to
stabilize the detected state. When the mean frequency is below or above the
set low/high division frequency (subject to the hysteresis) the voiced and
unvoiced states are detected. If both the low and high band are below their
set "threshold" levels, or if both bands are silent, then the silent state is
detected.
Furthermore, the SVU++ detector drives the Synthesis "automixer". That is, as
opposed to the simple SVU detector that just switches the source signals in
and out, the automixer performs smooth in/out fades of the sources instead.
The fade rates are programmable for each state. The automixer also offers
some alternative mixing paths for the silent, voiced and unvoiced signals as
well as an AGC (Automatic Gain Control) for the unvoiced signal.
98
Vocoder Mode
Figure 9-3
The unvoiced AGC can be used to control the level of the unvoiced signal. The
"unv bias" is the steady state level of the unvoiced signal. When "unv agc" is
above 0dB, the unvoiced signal will start to follow the energy level of the
high band, i.e. the synthesized consonant follows the level of the consonant
in the Exciter signal (AGCs are normally used to reduce a signals strength, but
in the Infiltrator SVU we need the opposite gain control, i.e. it is a simple
expander).
SVU caveats
Adjusting the SVU detector can be a bit like adjusting a carburettor, for those
of you who have tried that. In other words it may be fiddly and it may not
work quite like you hoped. This is a natural heritage from the analogue
circuits that it mimics, and it must be said that this method of consonant
Synthesis is not necessarily optimal - but the old analogue vocoders had it
and so Infiltrator has it! In many cases, the filter banks will respond well to
consonants without using the SVU detector, maintaining good intelligibility
and more "natural" sound.
However, note that the SVU detector can also be used for other purposes, e.g.
it can be set up to work like a "ducker". Preset VCducker does exactly that.
The filters are not working, only the SVU detector. The carrier (R) signal
passes straight through to the outputs. But if there is any input at the exciter
(L), then the carrier signal is cut and the exciter passes instead...
Infiltrator – User’s Manual
99
Here are the parameters for the SVU detector...
Group
Ana
Table 9-8
Page
Parameter
SVU
detector
SVU Mode
Freq
Deviation *
Hyster*
Lo Slew*
Lo Trim*
Lo Thr*
Hi Slew*
Hi Trim*
Hi Thr*
9.2.5
Value
Comments
OFF
SVU
SVU++
16...10,000Hz
This sets the mode for the
Silence/Voiced/Unvoiced detector
0.000...1.000
0.00...
10.00 Oct
0.00000...
9.99999s
-inf...+24dB
-inf...+24dB
0.00000...
9.99999s
-inf...+24dB
-inf...+24dB
The frequency point at which the signal is split to
be monitored for hi frequency and low frequency
content
The "nervousness" of the detector.
The "stability" of the detector.
How fast the low band is tracked.
General trim level for the low band.
Threshold level for low band detector.
How fast the high band is tracked.
General trim level for the high band.
Threshold level for high band detector.
SYNTHESIS
Just as the analyser needs a signal to analyse, the synthesizer needs a signal
for the Synthesis (or resynthesis) process. For the synthesizer, there are in
fact three source mixers because when the SVU detector is activated, you can
set up three distinct mixes of Carriers that are triggered by the
silence/voiced/unvoiced states, to be fed into the Synthesis bank for total
sonic control of the consonant Synthesis.... If the SVU detector is not in use,
only the "Voiced Mix" is active, and for "normal" vocoding applications this
will probably use the Carrier input, which is the Right input on the
Chameleon.
Figure 9-4
100
Vocoder Mode
Here are the source mix options you will find when SVU is off (i.e. only the
Voiced mix):
Group
Table 9-9
Page
Parameter
Syn
Voiced Mix
Exciter
Carrier
Noise
Osc
Value
Comments
-infdB...+24dB
-infdB...+24dB
-infdB...+24dB
-infdB...+24dB
Here you set the mix levels of all the components
that go up to make the input to the Synthesis
bank.
The two other source mixers are only active when the SVU detector is in the
"SVU" or "SVU++" modes. In addition there is a special "automatic" mixer page
that is only active in the "SVU++" mode.
Figure 9-5
Here are their mix controls:
Group
Syn
Table 9-10
Page
Parameter
Unvoiced
Mix
Silent Mix
Infiltrator – User’s Manual
Exciter
Carrier
Noise
Osc
Exciter
Carrier
Noise
Osc
Value
Comments
-infdB...+24dB
-infdB...+24dB
-infdB...+24dB
-infdB...+24dB
-infdB...+24dB
-infdB...+24dB
-infdB...+24dB
-infdB...+24dB
With SVU ON you can set up a unique mix for the
unvoiced state and the Silent state, with very
accurate control
101
Finally, these are the controls for tuning the automix that cross mixes these
three source mixes together depending on the detected state:
Group
Table 9-11
Page
Parameter
Ana
Automix
Value
Comments
Voc>syn
Unv>syn
Unv>dir
Unv>bias
-inf...+24dB
-inf...+24dB
-inf...+24dB
-inf...+24dB
Unv>agc
0.1...96.0dB
Sln>dir
V time
-inf...+24dB
0.0000...
1.0000s
0.0000...
1.0000s
0.0000...
1.0000s
Voiced mix to synthesis bank
Unvoiced mix to synthesis bank
Unvoiced mix direct to output of synthesis bank
The bias level of the unvoiced mix before AGC is
applied
How much the high band energy will affect the
(AGC) level of the unvoiced mix
Silent mix direct to output of synthesis bank
Time for voiced mix to fade in/out
U time
S time
9.2.6
Time for unvoiced mix to fade in/out
Time for silence mix to fade in/out
ANA BANK
The Analysis bank filter settings are accessed in this group. For this group, the
PAGE UP/DOWN buttons will change the channel number that is being edited.
In other words, each page represents one channel. The channels number runs
from 1 to the number of channels selected in the "Setup:Common" page
(section 9.2.1). Editing the filters parameters is more or less identical to how
it is laid out in section 2.1.1.
The major additions are attack and decay parameters that adjust the times of
each channels envelope detector.
There is again also one special page, "gbl", which is the page for the global
modifiers that acts on all Analysis channels at once. This makes it possible to
perform subtle or drastic changes relative to the programmed parameter
values across the vocoding process without having to reprogram each
channel.
The global controls are accessed using the special page number "gbl". The
parameters names correspond to those in the individual channels. The
modifier values show above are all in their neutral states, where they have
no effect on the channels parameters. For levels the change is in +/- dB, for
times and bandwidths the modifier is a percentage, and for tuning the
modifiers are semitones and cents.
When editing a specific parameter for a single channel, a "!" will be shown if
a global modifier is in effect for that parameter. This means that the value
shown is only the base value, and the value that will be in effect is be
modified as set by the corresponding global modifier.
When using extreme settings for the global modifiers, the results may also be
extreme. E.g. setting the notes modifier to near the minimum or maximum
values will usually cause the filters to "bunch up" at the lowest or highest
frequencies.
102
Vocoder Mode
These global modifiers are laid out in the following table, followed by the
individual filter (1...24) parameters:
Group
Table 9-12
Page
Parameter
Ana bank
Gbl
1...24
Mixdown
Level
Attack
Decay
Notes
Cents
Fdelta
Q
Bw
Peak
Stereo
Level
Attack
Decay
Filter
etc
Infiltrator – User’s Manual
Value
Comments
OFF
ON
-60...+60dB
0.0%...1000.0%
0.0%...1000.0%
-100...+100
-50...+50
0.0%...1000.0%
0.0%...1000.0%
0.0%...1000.0%
-24...+24dB
0.0%...1000.0%
-infdB...+24dB
0.00000...
9.99999s
0.00000...
9.99999s
LP, HP etc etc
Allows the filter to be sent to the Ana bank output
mix
Modifies all filter level settings at the input
Modifies all filter envelope attack settings
Modifies all filter envelope decay settings
Modifies all filter notes settings
Modifies all filter cents settings
Modifies all filter fdelta settings
Modifies all filter Q settings
Modifies all filter bandwidth settings
Modifies all filter peak settings
Modifies all filter stereo width settings
Sets the volume of the filter for use at the output
Sets the attack time for the envelope detector
etc
Sets the release time for the envelope detector
(Filter controls continue from here as outlined in
section 2.1.1)
etc
103
9.2.7
SYN BANK
The Synthesis bank filter settings are accessed in this group. The editing
process is essentially very similar to the Ana bank above (and in similar pages
in the Multiband and EQ Modes). You access each individual filter using the
PAGE UP and DOWN buttons, and using the Global modifiers can make
changes across the entire range of filters.
The global modifiers look like this, followed by the individual filters (1...24)
parameters:
Group
Table 9-13
Page
Parameter
Syn bank
Gbl
1...24
104
Value
Comments
Level
Notes
Cents
Fdelta
Q
Bw
Peak
Stereo
Level
-60...+60dB
-100...+100
-50...+50
0.0%...1000.0%
0.0%...1000.0%
0.0%...1000.0%
-24...+24dB
0.0%...1000.0%
-infdB...+24dB
Mix vol*
-infdB...+24dB
Mix pan*
Phase *
L100%...R100%
+L+R
+L-R
-L+R
-L-R
Filter
LP, HP etc etc
etc
etc
Modifies all filter level settings
Modifies all filter notes settings
Modifies all filter cents settings
Modifies all filter fdelta settings
Modifies all filter Q settings
Modifies all filter bandwidth settings
Modifies all filter peak settings
Modifies all filter stereo width settings
Adjusts the incoming control signal from the
analysis bank for this band.
Sets the level of each band before they are all
mixed back together for the output.
Stereo imaging.
This is for changing the bands phase. If in doubt,
leave them in opposites:
1= +L+R
2= -L -R
3= +L+R... and so on.
(Filter controls continue from here as outlined in
section 2.1.1).
etc
Vocoder Mode
9.2.8
OUTPUT
9.2.8.1 OUTPUT:Mixing
The output mixer is used to create the final mix of the processing banks and
any other available elements. The usual level and pan controls are provided
for each source. If the Osc, Noise or Monitor sources are marked by a "?", this
means that the corresponding signal source is switched OFF and needs to be
activated before you will hear it.
Commonly the vocoder output would be just the Synthesis bank, but you can
use the system how you please. If you are using the vocoding process for a
kind of straight FX, mix back in the unprocessed Exciter and Carrier signals to
create a ‘dry/wet’ mix.
Table 9-14
Parameter
Group
Page
Value
Comments
Output
Mix
Ana bank
Syn bank
Exciter
Carrier
Osc
Noise
Monitor
-infdB...+24dB
-infdB...+24dB
-infdB...+24dB
-infdB...+24dB
-infdB...+24dB
-infdB...+24dB
-infdB...+24dB
Pan
DynamicsL
Ana bank
Syn bank
Exciter
Carrier
Osc
Noise
Monitor
Mode*
Master
...
Volume
L100%...R100%
L100%...R100%
L100%...R100%
L100%...R100%
L100%...R100%
L100%...R100%
L100%...R100%
OFF
comp
Gte+cmp
...
-infdB...+24dB
final output level for Analysis bank.
final output level for Synthesis bank.
Mixes into the original Exciter and Carrier sources
from the inputs.
Mixes into the main output the internal waveform
sources directly.
For setting the level of the monitor feed from
within the system.
Same as above but for Left/Right panning control.
Infiltrator – User’s Manual
Dynamics Block controls.
See section 2.1.2 for more details.
The final MASTER OUTPUT.
105
9.2.8.2 OUTPUT:Monitor
The monitor controls follow on from the list of output parameters above. It is
another signal that can be mixed into the final output. This is for tapping a
signal from within the processor for auditioning while working. You can use
this for all sorts of things - to listen to a signal before and after it passes
through a particular filter, or for checking what the original input sounds like
without disturbing any of your mix settings.
You can choose to mix the monitor in with the output or to solo it for
individual auditioning.
Refer again to the diagrams on page x and x to see the monitoring points
available - the green dots show that you can tap a signal from anywhere for
checking what is going on.
Here are the monitor controls you find in the output section:
Table 9-15
Parameter
Group
Page
Output
Monitor
Mode
Volume
Group
Channel
Signal
(global)
(ana bank
syn bank)
106
Value
Comments
OFF
Mix
Solo
-infdB...+24dB
Global
Ana bank
syn bank
1...24
You can either mix in the signal to the main output
or solo the monitor for listening in isolation.
L input, R input,
Exciter, Carrier,
Noise, Osc , Ana
src, Syn src, L ana,
R ana, L Syn, R
Syn, L output, R
output, V mix, U
mix , S mix, Svu
lo, Svu hi, Silent,
Voiced, Unvoiced,
Direct
Filter
Amp
This sets the monitors volume.
To select the signal you want, first you choose the
group it is in. See section 5.2.
If you choose ana bank or syn bank you need to
then choose a channel (i you choose global this
will show a ‘?’ to remind you this is not used).
These are the global group monitoring options.
These are monitoring options within a specific
bank and channel.
Vocoder Mode
9.2.9
METERS
9.2.9.1 FULL SCREEN METERS
You can use this group to call up accurate meters that fill the whole screen.
You can cycle between many different meter types to show clearly what is
happening in the system. (See schematics in sections 9.1 and 9.2.5 above for
metering signals available in Vocoder Mode)
First you can set up the meters here:
Group
Meters
Table 9-16
Page
Parameter
Config
Config
(cont...)
Value
Comments
Decay
0.00...10.0s
Mode
Group
Log dB
Linear
Global
Ana bank
Syn bank
This sets how ‘responsive’ the meters are by
controlling the ‘jumpiness’
Set the meter scaling method
Channel
1...24
Signal
L input
R input
Exciter
Carrier
Noise
Osc
Ana src
Syn src
L ana
R ana
L Syn
R Syn
L output
R output
V mix
U mix
S mix
Svu lo
Svu hi
Svu lenv
Svu henv
Svu lref
Svu href
Silent
Voiced
Unvoiced
Direct
Filter
Amp/envelope
(global)
(ana bank
syn bank)
Group2
Infiltrator – User’s Manual
You can set up two custom meters that track a
signal of your choosing. The corresponding custom
meters are available both as popup meters and on
the "Meters" pages with the legends "1" and "2".
To select, first you choose the group it is in.
If you choose Ana bank or Syn bank you need to
then choose a channel. (If you choose global this
will show a ‘?’ to remind you this is not used)
These are the global group monitoring options
These are the specific signals that pass through the
complex vocoding architecture and the SVU
module. You can choose to monitor every single
one!
These are monitoring options within a specific
bank and channel.
Same as group 1
107
If you then press PART UP you will see the meters taking up the whole
screen. You press PARAMETER UP and DOWN to cycle between the three main
meter types:
1. Full screen left-to-right meters showing signal 1 and 2 (default as the
inputs).
2. MIDI monitoring (including channel) and vertical IN/OUT meters.
3. ‘Graphic’ analyser vertical channel meters with 4 different types for
each channel. The meters show an abbreviated name telling you what
you are looking at. Unfortunately they are very small to allow for lots
of meter space! The ‘1’ means the channels 1 to 12 is showing, the
next screen showing channels 13 to 24.
Here are the names you will find:
Table 9-17
Legend
Af 1
Af 13
Ae 1
Ae 13
Sf 1
Sf 13
Sa 1
Sa 13
108
Meter
Analysis filter 1-12
Analysis filter 13-24
Analysis envelope 1-12
Analysis envelope 13-24
Synthesis filter 1-12
Synthesis filter 13-24
Synthesis envelope 1-12
Synthesis envelope 13-24
Vocoder Mode
9.2.9.2 POPUP METERS
Meanwhile, pop-up meters are also available outside this group, by pressing
at any time SHIFT while in Edit Mode. While browsing around the parameters,
they can show you context sensitive meters for quickly seeing what is
happening. For instance, while browsing compressor parameters the
contextual meters will show the gain reduction.
By pressing PART UP you can cycle through the meters outlined above as
well, using PART DOWN to reset any peak overload indications or to cycle
through the graphic analyser mode types when you reach them.
The contextual meters you see will vary with the current group, page and
parameter. When compressor linking is enabled, they will usually be a pair of
popup meters, showing the Left and Right signals in context.
For the global compressor controls, the analyser mode is used in context to
show all bands together. Here is a description of the meters you will come
across:
Table 9-18
Legend
Meter
In l
Input level, Left
In r
input level, Right
Fl
filter output, Left
Fr
filter output, Right
/l
Dynamics Block gain reduction, Left
/r
Dynamics Block gain reduction, Right
]l
Dynamics Block gate level, Left
]r
Dynamics Block gate level, Right
Cl
Dynamics Block output, Left
Cr
Dynamics Block output, Right
Ol
final output, Left
Or
final output, Right
Infiltrator – User’s Manual
Comment
Main input levels
What goes into the Dynamics Block
Gain reduction across all five banks.
The gates opening and closing
What comes out of the Dynamics
Blocks
Master output
109
9.2.10
REALTIME CONTROLLERS
Here you set up the front panel REALTIME CONTROLLERS (RTCs) for hands on
control.
When editing the RTC assignments, you can quickly test them by pressing
EDIT to go to system mode where they will immediately work as they are
programmed to. Then a single press of EDIT have you right back into editing
mode for further tweaking - i.e. there’s no need to save the preset for this.
Note you can also view and edit the current/last RTC ‘knob positions’.
So here are the parameters for setting all this up:
Group
Table 9-19
Page
Parameter
Realtime
Setup
Mode
Multi1...12
Set1...8
rtc1...3 g
Value
Comments
OFF
Single
Multi2
Multi4
Multi8
(Set the name)
Here you choose from modes described above.
You can turn this on at anytime and it will link the
RTCs together as outlined. You can also name the
sets for ease of use.
rtc1...3 ch
Global
Ana bank
Syn bank
1...24
Rtc
various
rtc1...3 amt
-1000%...
+1000%
-63...+63
rtc1...3 value
Using the same method as naming a preset you
can name your multi set ups here in order. Since
there is a possible maximum of 12 multisets (3
RTCs x 4 multisets), there are 12 multiset names
available. The first three multinames are for
RTC 1-3 in the first multiset, the next three are for
RTC 1-3 in multiset 2. You only need to name as
many muiltisets as you actually have in use.
Here you select the parameter to be controlled.
First you must choose the signal group it is in...
If you choose Ana bank or Syn bank you need to
then choose a channel. (It will show ‘?’ if you have
chosen the global group and therefore don’t need
to choose a channel)...
Then you choose the parameter
(se table below for all the options).
Here you set the +ve or -ve amount that the RTC
will adjust the underlying parameter value by.
This is the ‘memory’ of the position of the front
panel knob - it is made available for inspection
and direct editing (you can hear the effect as you
edit it). This is the ‘stored RTC’ proper as used by
the global ‘RTC=edit’ mode chosen in the global
system menus (see section 5.4.1).
There are extensive options for RTC target assignments, depending on what
group you have chosen. You can control global parameters such as Input
levels and Oscillator frequencies, or parameters that belong to individual
filters within a bank such as Q and fdelta. Global parameters also include the
list ‘global modifiers’ that allow you to alter parameters across all filterbanks
simultaneously, such as filter frequency.
110
Vocoder Mode
Table 9-20
Signal Group
GLOBAL:
RTC global group possible
assignments from within the
system in Vocoder Mode
Targets
(general + filters)
OFF, In level, In E lvl, In C lvl, A level, A freeze, A att, A
dec, A freq, A notes, A cents, A fd, A q, A bw, A gain, A
stereo, S level, S freq, S notes, S cents, S fd, S q, S bw, S
gain, S stereo
(oscillator and LFO controls)
Osc Vol, Osc1 Vol, Osc2 Vol, Osc note, Osc cent, Osc1 f,
Osc2 f, Osc1 shp, Osc2 shp, Osc1 fm, Osc2 fm, Nois Vol,
LFO1 f, LFO2 f, LFO3 f, LFO1 amt, LFO2 amt, LFO3 amt
(dynamics blocks - only input left shown here but list
will also show same for input Right dynamics block and
the output L+R blocks too)
IL D gai, IL D att, IL D rel, IL D knee, IL C thr, IL C rat, IL E
thr, IL E rat, IL D Lok, IL D slew, IL D mku, IL G att, IL G
rel, IL G hld, IL G thr
(delays)
DI time, DI feed, DI fcut, DI d/w, DO time, DO feed, DO
fcut, DO d/w
Ana bank/Syn Bank:
RTC possible assignments
from within a specific
filterbank and channel
OFF A Vol, A freq, A note, A cents, A fd, A q, A bw, A
gain, A slope, S Vol, S freq, S note, S cents, S fd, S q, S
bw, S gain, S slope.
The RTC screen that pops up while you use then will display info about the
parameter being modified, and if there is an LFO applied to control it.
Infiltrator – User’s Manual
111
9.2.11 MODULATION
Once you have your RTCs set up to control internal parameters, you can attach
one of these LFOs to control them automatically. Think of these as ‘robots’
that come and grab the knob and move it for you! They cannot be applied
directly to internal parameters, and can only control RTCs. As a compliment,
the RTCs can be assigned to control the speed and depth of the LFOs, so that
you can use the RTCs to tweak the LFOs that are tweaking the RTCs... as you
can imagine it can get seriously cool sounds once you apply this to the
internal parameters....
Group
Table 9-21
Page
Parameter
Modulation
LFO 1
Value
Comments
LFO mode
ON
OFF
Freq
phase
wave
0.01Hz...25Hz
0...359Deg
Saw
Tri
Square
Sine
S&H
Rtc1/1
Rtc2/1
Rtc3/1
Rtc1/2
Rtc2/2
Rtc3/2
...
Rtc1/8
Rtc2/8
Rtc3/8
-100%...+100%
It is advisable to set up everything first before
turning the LFO ON, because if you cycle through
the targets with the LFO ON it will adjust those
parameters as it passes (although it will put them
back where it found them...)
The speed of the LFO cycle
You can set the phase
Here you choose the waveform that the LFO will
create. See appendix B for more details.
target
LFO 2
LFO 3
112
amount
See above...
See above...
Here you set the RTC to be controlled by the LFO.
This sets how much the LFO moves the RTC by.
Vocoder Mode
9.2.12 DELAYS
Infiltrators delay FX blocks all act in exactly the same way. In Vocoder Mode,
there are two pairs of delay FX - one on the inputs (Exciter and Carrier), and
one on the outputs. However, all the controls are put here in one group for
convenience. You can use the delay for chorus effects, dub echoes, metallic
reverb-like spaces and more.
Group
Table 9-22
Page
Parameter
Delay
Setup
In L Mode
In R Mode
out L mode
Out R mode
In Link
Out link
Gbl t
Left in
Right in
Left out
Right out
Gbl fb
Gbl f
Gbl d/w
time
feedbk
Value
Comments
ON
OFF
ON
OFF
ON
OFF
ON
OFF
OFF
L+R ctl
OFF
L+R ctl
-4.00000...
+4.00000 s
-96.0...+96.0dB
-9.99...+9.99 Oct
-200%...+200%
0.00000...
4.00000 s
-inf...0.00dB
These activate the in and out Delay Blocks
Filter
Bypass
LP med
HP med
LP light
HP light
Freq
50...20,000Hz
dry/wet
d100%...w100%
Infiltrator – User’s Manual
These link the stereo FX together
These are global modifiers for adjusting all the
delays simultaneously. The underlying delay
values for delay time, feedback, filter frequency
and dry/wet mix will be adjusted by these
amounts.
Sets the delay time. Really short delays can create
chorus and comb filtering effects.
This feeds a portion of the delay output into itself
again. The closer to zero the feedback, the longer
the echoes last and you approach a guitar-like
feedback loop.
These simple filters can be used to brighten or
darken the sound as it is echoed. The filter types
are:
‘Bypass’ - the filter is not active
‘LP med’ - smooth roll-off low pass
‘HP med’ - smooth roll-off high pass
‘LP light’ - shallow low pass
‘HP light’ - shallow high pass
This sets the point above or below which the
sound is filtered (depending on the filter chosen).
Dry=no effect, Wet=effect only.
113
Appendix
AA
Loading Soundskins
To load a new application or version update into the Chameleon, follow the
instructions below:
MIDI OUT
MIDI IN
Chameleon
SHIFT
MIDI Sequencer/ Player
Figure 9-6
-
Power up the Chameleon with the Shift Key held down, to put it in
ready mode to accept the new application. It will show this message:
-
Connect the MIDI OUT of your MIDI Sequencer/Player machine (for
example, a computer with a MIDI interface) to the MIDI IN of the
Chameleon and Play the Application MIDI File containing the new
application or version update. It’s recommended to disable the MIDI
clock in the MIDI Sequencer/Player. If everything is connected
properly, the following screen will be displayed showing an increasing
block counter.
-
When the counter arrives at the last block the Chameleon will ask you
to store the application in the internal Flash memory: this must be
confirmed by pressing the SHIFT key within 20 seconds in order to
accept the received data. If you don’t press SHIFT the Chameleon will
simply return to the “Waiting” state. If you do press the SHIFT key to
accept, the application will be burned in the internal FLASH memory.
If any problem happens during the downloading process, the display
114
Loading Soundskins
will show “**BAD DATA**” or “**TIME OUT**”. To solve this,
try setting a lower tempo in the sequencer (e.g. 90 BPM).
-
After the process has been successfully completed, the Chameleon
will power-up automatically, loading the new application, which will
need a few seconds to be fully operative after reconfiguring all the
internal resources to it’s needs. It is at this stage that all the old
presets of the previous application are wiped out.
It is therefore vital that you save all your precious work by doing a MIDI dump
BEFORE you load a new application, even if it is just a version update.
NOTE: There’s no risk of damaging the Chameleon with wrong or corrupted
data, as the Chameleon just won’t accept it. In case of error, the old
application will remain unharmed.
Infiltrator – User’s Manual
115
Appendix
BB
LFO Waveforms
Here is a rough guide to the different waveforms you can use for the three
LFOs.
The simplest way to think about how an LFO can be used to control
parameters is to picture it controlling the Left/Right panning control on a
mixing desk. The physical movement of the signal left and right is being
controlled by the LFO, with the wave type determining the movement
pattern, the LFO speed determining the speed, and the amount controlling
how extreme the changes are. So when you apply an LFO to other
parameters, similar cyclic movement patterns occur for those parameters too.
A saw wave-controlled LFO would mean that the panned sound would jump
rapidly to one side, and slowly move towards the other side where it will
jump rapidly again to the start (using a negative LFO amount will give you
access to the reverse waveform pattern).
Triangle generates a simple pattern that moves from one extreme to the
other in straight lines. The panned sound would travel evenly from left to
right, and then back again.
116
LFO Waveforms
A square wave is a stepped wave that jumps directly from one value to the
other with no transition. The panned sound would jump directly from a
position on the left to a position on the right, evenly.
A sine wave is the simplest waveform that smoothly oscillates between the
two sides. The panner would seem to gently move from left to right. It is
more ‘natural’ than the triangle wave because of its more gently sloping
nature.
Sample and Hold is like a square wave, in that it moves in discreet steps, but
moves around with a randomly generated depth. The panned sound would
appear to jump around all over the stereo field randomly at the chosen
speed.
Infiltrator – User’s Manual
117
Appendix
C
C
Factory Presets Explained
The sounds and FX that come ready loaded with Infiltrator are designed to
show you what the device can do. It really is just a starting point for you to
explore and see what you can come up with. The device has such an unusual
architecture and interface that it will lead you into all sorts of unexpected
places...We had a lot of fun creating these presets, so here is a brief run down
on each one to give you some idea how they were made.
The tables show the RealTime Controller assignment where available, and the
RTC names in italics mean that a multiplier is in use - that changes multiple
parameters at the same time - and we have named it ourselves.
Remember that as you change preset you will need to turn ON the Realtime
controller sets by pressing PART UP.
1 – Thru
Ch
Mode
5
EQ par/par
Description
bypass preset where the input signals
appear directly at the output mixer and the
filterbanks are turned down.
Set
1
2
3
4
5
6
7
8
RTC1
Set
1
2
3
4
5
6
7
8
RTC1
Osc 2 f
RTC 2
RTC 3
Disabled
2 – eVolvSynth
Ch
Mode
1
EQ ser/ser
Description
Strange evolving monosynth that has a life
of its own! Here the three LFOs are each
using a Sample and Hold (S/H) wave to
adjust RTCs that control internal parameters
such as Osc 2 frequency, which is frequency
modulating Osc 1. it all gets quite weird at
times...
118
RTC 2
LFO 1 amt
RTC 3
LFO1 f
Factory Presets Explained
3 – Boss Synth
Ch
Mode
1
EQ ser/ser
Description
Simple synth with adjustable osc1
frequency for creating a beating effect
Set
1
2
3
4
5
6
7
8
RTC1
Osc 1 f
Osc 1 shp
RTC 2
1 freq
RTC 3
1q
Set
1
2
3
4
5
6
7
8
RTC1
Osc 2 f
Osc 1 shp
RTC 2
LFO 1 amt
1 freq
RTC 3
LFO 1 f
Set
1
2
3
4
5
6
7
8
RTC1
LP bias
DI time
DO time
LFO1 f
RTC 2
LP f pan
DI feed
DO feed
LFO2 f
RTC 3
LP q
DI d/w
DO d/w
LFO amount
Set
1
2
3
4
5
6
7
8
RTC1
LP bias
DI time
DO time
Osc1 PW
RTC 2
LP f pan
DI feed
DO feed
Osc2 PW
RTC 3
LP q
DI d/w
DO d/w
LFO amount
4 – xBass Synth
Ch
Mode
1
EQ ser/ser
Description
Fat bass sound with subtle, complex LFO
movement to create life in the sound – the
same controls as eVolvSynth above but this
time using sine waves at more subtle lower
settings.
5 – RezoPad
Ch
Mode
1
EQ par/par
Description
Monophonic synthesizer with a resonant
quality. Uses a separate 24dB/oct LPF for
left and right.
6 - DarkPad
Ch
Mode
1
EQ par/par
Description
Monophonic synthesizer with PWM and
slight S&H stereo filter modulation. Uses a
separate 36dB/oct LPF for left and right.
Check out the bass end with the Modulation
wheel..
Infiltrator – User’s Manual
119
7 - Tekoid Vox
Ch
Mode
1
EQ ser/ser
Description
Complex delay FX where Input Delay and
volume and controlled by a sinewave LFO,
while filter freq is controlled by another sine
LFO. The inputs are ring modulated with the
Osc too. Alien voice!
Set
1
2
3
4
5
6
7
8
RTC1
Feedback
RTC 2
Colour LR
RTC 3
Q
Set
1
2
3
4
5
6
7
8
RTC1
DI time
DO time
RTC 2
DI feed
DO feed
RTC 3
DI fcut
DO fcut
Set
1
2
3
4
5
6
7
8
RTC1
Volume
Del Time
RTC 2
Colour
Del Feed
RTC 3
Pitch
Del filt
Set
1
2
3
4
5
6
7
8
RTC1
F Bias
DI time
DO time
LFO 1 F
RTC 2
BP f pan
DI feed
DO feed
LFO 2 f
RTC 3
Reso
DI d/w
DO d/w
LFO amt
8 - Springroom
Ch
Mode
2
EQ ser/ser
Description
Special effect using the input and output
delays to create low and high delays with
short times. Each has a different filter and
time to create stereo space. Try using the
RTCs to change the shape completely..
9 - Granulator
Ch
Mode
2
EQ ser/ser
Description
Heavily ring modulated and filtered FX to
create very dirty and nasty sound.
10 - EchoSwirl 1
Ch
Mode
1
EQ ser/ser
Description
Swirling stereo effect where the left and
right filters are modulated separately by
two interacting Sine LFOs. Noise is added to
the input signal to accentuate the swirls.
120
Factory Presets Explained
11 - EchoSwirl 2
Ch
Mode
2
EQ ser/ser
Description
Variation of the above, less noise, different
movement and simpler delays.
Set
1
2
3
4
5
6
7
8
RTC1
F Bias
DI time
DO time
LFO 1 F
RTC 2
BP f pan
DI feed
DO feed
LFO 2 f
RTC 3
Reso
DI d/w
DO d/w
LFO amt
Set
1
2
3
4
5
6
7
8
RTC1
Dly Time
In level
RTC 2
Dly Feed
Dly Fcut
RTC 3
Dly d/w
Set
1
2
3
4
5
6
7
8
RTC1
Dly Time
In level
RTC 2
Dly Feed
Dly Fcut
RTC 3
Dly d/w
Set
1
2
3
4
5
6
7
8
RTC1
In Level
CI gain
CO gain
Dly Time
RTC 2
RTC 3
Reso
CI ratio
CO ratio
Dly d/w
12 - BandEcho 1
13 - BandEcho 2
14 - BandEcho 3
Ch
Mode
5
Multiband
Description
By using the multiband mode to split the
sound up into bands, and then the
individual delays on each band to create
different delay effects, complex filtered
delays can be created.
15 - MetalRoom
Ch
Mode
5
Multiband
Description
Another Multiband delay FX, this time with
short enough delay times that it creates a
spatial effect.
16 - SteRezo
Ch
Mode
20
EQ par/par
Description
20 parallel filters set to resonate with high
Q at different intervals – here they are set to
major thirds all the say up the spectrum.
Infiltrator – User’s Manual
CO thr
Dly Feed
121
17 - Rezo 12 m
Ch
Mode
8
EQ par/par
Description
Resonator that can be played by MIDI. The
first filter cut-off point is taken and spread
across the keyboard.
Set
1
2
3
4
5
6
7
8
RTC1
In Level
CI gain
CO gain
Dly Time
RTC 2
Set
1
2
3
4
5
6
7
8
RTC1
In Level
CI gain
CO gain
Dly Time
RTC 2
Set
1
2
3
4
5
6
7
8
RTC1
In Level
CI gain
CO gain
Dly Time
RTC 2
CO thr
Dly Feed
RTC 3
Reso
CI ratio
CO ratio
Dly d/w
Set
1
2
3
4
5
6
7
8
RTC1
A level
Osc note
In C lvl
S stereo
Osc cent
Osc cent
RTC 2
Aq
A notes
Osc vol
Osc2 vol
Osc1 shp
Osc1 shp
RTC 3
Sq
S notes
Nois vol
A freeze
Osc2 f
Osc2 f
CO thr
Dly Feed
RTC 3
Reso
CI ratio
CO ratio
Dly d/w
18 - Rezo 24 m
Ch
Mode
8
EQ par/par
Description
Another resonator that can be played by
MIDI. The first filter cut-off point is taken
and spread across the keyboard. This one
has a steeper filter order and so a more
resonant quality
CO thr
Dly Feed
RTC 3
Reso
CI ratio
CO ratio
Dly d/w
19 - Rezo 24 c m
Ch
Mode
24
Multiband
Description
Similar to above but with more gentle
envelope settings for the MIDI filter playing
20 - RoboVox1
21 - RoboVox2 m (MIDI)
Ch
Mode
17
Vocoder
Description
We are the robots!
Vocoders with internal carrier using 2
oscillators and noise. The RTCs gives
opportunities to bend this vocoder quite a
lot.
122
Factory Presets Explained
22 - X form Vox
23 - Robot 1
23 - Robot 2 m (MIDI)
Ch
Mode
18
Robot1
Description
Vocoder using a single square wave
oscillator, as was common on many old
vocoders.
Robot2 is for playing by MIDI.
Set
1
2
3
4
5
6
7
8
RTC1
A level
Osc note
In C lvl
S stereo
Osc cent
A att
RTC 2
Aq
A notes
Osc vol
Osc2 vol
Osc1 shp
A dec
RTC 3
Sq
S notes
Nois vol
A freeze
Osc2 f
Set
1
2
3
4
5
6
7
8
RTC1
A level
Osc note
In C lvl
S stereo
Osc cent
A att
RTC 2
Aq
A notes
Osc vol
Osc2 vol
Osc1 shp
A dec
RTC 3
Sq
S notes
Nois vol
A freeze
Osc2 f
Set
1
2
3
4
5
6
7
8
RTC1
A level
Osc note
In C lvl
S stereo
Osc cent
A att
RTC 2
Aq
A notes
Osc vol
Osc2 vol
Osc1 shp
A dec
RTC 3
Sq
S notes
Nois vol
A freeze
Osc2 f
Set
1
2
3
4
5
6
7
8
RTC1
A level
Osc note
In C lvl
S stereo
Osc cent
A att
RTC 2
Aq
A notes
Osc vol
Osc2 vol
Osc1 shp
A dec
RTC 3
Sq
S notes
Nois vol
A freeze
Osc2 f
25 - Whisper 1
26 - Whisper 2
Ch
Mode
24
Vocoder
Description
Whispers in the wind or demonic voices...
it's up to you. You can use the RTCs to shape
this vocoding based stereo patch quite a lot
27 - Vocoder 1
28 - Vocoder 2
Ch
Mode
18
Vocoder
Description
18 band vocoders for external carrier.
Vocoder 2 uses the SVU++ detector for
noise-on-consonants.
29 - MoogVC 1
Ch
Mode
16
Vocoder
Description
Vocoder with a configuration similar to one
of the good old ones. Osc, noise and SVU
can be enabled using the editor.
Infiltrator – User’s Manual
123
30 - VC norm 17
31 - VC wide 17
32 - VC narrow 17
33 - VC invert 17
Ch
Mode
17
Vocoder
Description
Vocoders for external carrier (oscillators and
noise can be used too). The spectrum is
normal, widened, narrowed or inverted as
indicated by the names.
Set
1
2
3
4
5
6
7
8
RTC1
A level
Osc note
In C lvl
S stereo
Osc cent
A att
RTC 2
Aq
A notes
Osc vol
Osc2 vol
Osc1 shp
A dec
RTC 3
Sq
S notes
Nois vol
A freeze
Osc2 f
Set
1
2
3
4
5
6
7
8
RTC1
A level
Osc note
In C lvl
S stereo
Osc cent
A att
RTC 2
Aq
A notes
Osc vol
Osc2 vol
Osc1 shp
A dec
RTC 3
Sq
S notes
Nois vol
A freeze
Osc2 f
Set
1
2
3
4
5
6
7
8
RTC1
In level
In level
RTC 2
1 Freq
In L level
RTC 3
1q
In R Level
34 - VCbridge17
Ch
Mode
1
EQ ser/ser
Description
Vocoder for external carrier (oscs and noise
can be used) using the SVU++ detector to
create "silence bridging" consisting of the
clan carrier. As long as the exciter input is
not silent, the output will be vocoded. If the
exciter becomes silent the carrier will be fed
directly to the output.
35 - LPF 12dB
36 - LPF 24 dB
37 - LPF 36 dB
Ch
Mode
1
EQ par/par
Description
DJ type filter for performance fun or sound
sculpting duties in the studio. Put audio
through this preset and manipulate RTC 2
and 3. Various strengths of filter order are
available.
124
Factory Presets Explained
38 - BPF 12dB
39 - BPF2 12dB
Ch
Mode
1
EQ par/par
Description
Different type of performance filter - this
time a Band Pass filter with q settings to
determine how wide the band is. . This is a
Light 2-pole filter (12 db/Oct). Put audio
through this preset and manipulate RTC 2
and 3. BP2 has a slightly less peaky quality.
Set
1
2
3
4
5
6
7
8
RTC1
In level
In level
RTC 2
1 Freq
In L level
RTC 3
1q
In R Level
Set
1
2
3
4
5
6
7
8
RTC1
F bias
LFO 1 f
RTC 2
BP f pan
LFO2 f
RTC 3
Reso
LFO amt
Set
1
2
3
4
5
6
7
8
RTC1
F bias
LFO 1 f
RTC 2
BP f pan
LFO2 f
RTC 3
Reso
LFO amt
Set
1
2
3
4
5
6
7
8
RTC1
In level
In level
In level
In level
RTC 2
1 freq
1 freq
2 freq
In L level
RTC 3
2 freq
1q
2q
In R level
40 - BP pan 12
Ch
Mode
1
EQ par/par
Description
A band pass filter with panning modulation.
Here a multi RTC set is being used to
simultaneously lower the left 2-pole filter
while raising the right and vice versa. Put
audio through this preset and manipulate
RTC 2 and 3. If you turn on the LFOs...then...
41 - BP pan/mod
Ch
Mode
1
EQ par/par
Description
Same as above but the panning modulation
is now automated by the LFOs. Here a multi
RTC set is being used to simultaneously
lower the left filter while raising the right
and vice versa. Put audio through this
preset and sit back!
42 - HP/LP 24dB
43 - HP/LP 48dB
Ch
Mode
2
EQ ser/ser
Description
A band pass filter made o=up of a low pass
and a high pass that you control
independently. You can adjust the Q and
freq for each band.
Infiltrator – User’s Manual
125
44 - Notch 24dB
Ch
Mode
1
EQ par/par
Description
A notch, or band-reject, filter at 24dB/oct.
Removes a narrow band of frequencuies.
Set
1
2
3
4
5
6
7
8
RTC1
In level
In level
RTC 2
1 freq
In L level
RTC 3
1q
In R level
Set
1
2
3
4
5
6
7
8
RTC1
F bias
In level
RTC 2
In L lvl
RTC 3
Reso
In R lvl
Set
1
2
3
4
5
6
7
8
RTC1
RTC 2
RTC 3
Set
1
2
3
4
5
6
7
8
RTC1
45 - 3xnotch 12
Ch
Mode
3
EQ par/par
Description
3 notch filters in series are used to remove
3 frequency bands: 220Hz, 880Hz, 1760Hz.
The RTCs can adjust all 3 bands, and will
keep them 2 octaves apart.
46 - BP Gate 12 m
Ch
Mode
12
EQ par/par
Description
Here the filters are arranged so that you can
play them on your keyboard. From A4 - A5
on MIDI channel 1 you can open the
24dB/oct filters individually as a gating
system has been applied.
Disabled
47 - BP Duck 12 m
Ch
Mode
12
EQ par/par
Description
Here the filters are arranged so that you can
play them on your keyboard the opposite
way to above. From A4 - A5 on MIDI
channel 1 you can close the filters
individually as a ducking system has been
applied.
126
RTC 2
RTC 3
Disabled
Factory Presets Explained
48 - PEQ st 3b
Ch
Mode
3
EQ ser/ser
Description
Three band parametric EQ for sound
shaping.
Set
1
2
3
4
5
6
7
8
RTC1
#1 freq
#2 freq
#3 freq
In level
RTC 2
#1 slope
#2 width
#3 slope
In L lvl
RTC 3
#1 gain
#2 gain
#3 gain
In R lvl
Set
1
2
3
4
5
6
7
8
RTC1
#1 freq
#2 freq
#3 freq
#4 freq
#5 freq
In level
RTC 2
#1 slope
#2 width
#3 width
#4 width
#5 slope
In L lvl
RTC 3
#1 gain
#2 gain
#3 gain
#4 gain
#5 gain
In R lvl
Set
1
2
3
4
5
6
7
8
RTC1
I# D gain
I# D mku
#1 freq
#2 freq
#3 freq
In level
RTC 2
I# D thr
I# G thr
#1 slope
#2 width
#3 slope
In L lvl
RTC 3
I# D rat
I# D slw
#1 gain
#2 gain
#3 gain
In R lvl
Set
1
2
3
4
5
6
7
8
RTC1
I# D gain
I# D mku
#1 freq
#2 freq
#3 freq
In level
DI time
RTC 2
I# D thr
I# G thr
#1 slope
#2 width
#3 slope
In L lvl
DI feed
RTC 3
I# D rat
I# D slw
#1 gain
#2 gain
#3 gain
In R lvl
DI d/w
49 - PEQ st 5b
Ch
Mode
3
EQ ser/ser
Description
Five band parametric EQ for sound shaping.
50 - Cmp>Gat>EQ
Ch
Mode
3
EQ ser/ser
Description
Compressor, gate and 3 band parametric EQ.
You can use this as a voice channel or
elsewhere that needs its own dynamics and
EQ treatment
51 - Cmp>Dly>EQ
Ch
Mode
3
EQ ser/ser
Description
Compressor, gate, delay and 3 band
parametric EQ. Like above, but this time
with delays added.
Infiltrator – User’s Manual
127
52 - MB 5 medium
53 - MB 5 Hard
Ch
Mode
5
Multiband
Description
Five band Multiband compressor. Use on a
stereo mix to individually compress
different frequencies. Medium and hard
default flavours.
Set
1
2
3
4
5
6
7
8
RTC1
RTC 2
RTC 3
Set
1
2
3
4
5
6
7
8
RTC1
Osc Freq
RTC 2
Osc Vol
RTC 3
Noise Vol
Set
1
2
3
4
5
6
7
8
RTC1
A level
Osc note
In C lvl
S stereo
Osc cent
A att
RTC 2
Aq
A notes
Osc vol
Osc2 vol
Osc1 shp
A dec
RTC 3
Sq
S notes
Nois vol
A freeze
Osc2 f
Disabled
54 - Test tone
Ch
Mode
1
EQ ser/ser
Description
Test tone preset for your maintenance uses.
You can bring in a noise source too.
(if you add delays and use the Osc volume
and pitch to bring the sound in and out you
can get some pretty funky dub echo synth
sounds too!)
55 – Vcducker
Ch
Mode
17
Vocoder
Description
A mono "ducker". The left channel will duck
(silenece) the right channel. When there is
no sound at the exciter (L) input, the carrier
(R)
will be heard at the output. When a sound
is fed to the exciter, the carrier will become
silent and the exciter will be heard at the
output instead. This "trick" is possible by
using the silent/voiced/unvoiced detector
of the analysis section and the synthesis
source mixers and automixer.
The filter banks are left unused in this
preset and only the clean signals are passed
through. The RTCs are set up as for a
vocoder, in case you want make it into one!
128
Factory Presets Explained
56 - SpecAna 12
Ch
Mode
12
EQ par/par
Description
Does nothing to the sound, but if you go to
the meters page you have a 12band
spectrum analyzer.
Infiltrator – User’s Manual
Set
1
2
3
4
5
6
7
8
RTC1
RTC 2
RTC 3
Disabled
129