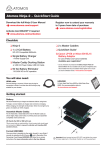
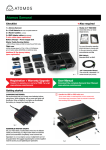
Download Ninja Blade Bare bones ~ QuickStart Guide Ninja Blade
Transcript
Ninja Blade Bare bones ~ QuickStart Guide
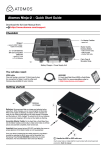
Connect & Edit
Master Caddy Docking Station (optional)
To access and edit your recorded material:
Connect the Master Caddy Docking Station to a Mac®
or Windows® computer via USB 2.0 and/or USB 3.0
compatible port/s.
Ninja Blade Bare bones ~ QuickStart Guide
Next, eject the Master Caddy from the Ninja Blade and insert it
into the Docking Station. After a short wait your recorded video
will become accessible as a standard external disk (Native exFAT
/ FAT32 formatted drive(s) also supported).
When using USB 2.0, you may need to connect the second
USB power cable on the dock to a second USB 2.0 port. This will
ensure enough power for the drive when using USB 2.0.
Download the full Ninja Blade User Manual
www.atomos.com/support
Activate Avid DNxHD®
www.atomos.com/activation
Register now to extend your warranty
to 3 years from date of purchase
www.atomos.com/registration
Checklist:
Ready toFor
edit:more
detailed instructions and important up-to-date information regarding
the Ninja Blade please download the complete Ninja Blade User Manual
www.atomos.com/support
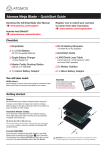
❏ Ninja Blade
❏ QuickStart Guide
❏ Soft carry case
❏ 1 x Master Caddies
❏ 9V AC Battery
Eliminator
110-240V AC for AC operation
Warranty & Conditions
Notice
Copyright © 2013 ATOMOS Global Pty Ltd (‘referred to as ATOMOS’). All rights reserved. All
information in this document is subject to change without notice. No part of the document may
be reproduced or transmitted in any form, or by any means, electronic or mechanical, including
photocopying or recording, without the express written permission of ATOMOS. A reference to
ATOMOS includes its related entities, subsidiaries and parent company.
Trademarks
Ninja Blade / ATOMOS are registered trademarks of ATOMOS Pty Ltd. Apple, the Apple logo,
AppleShare, AppleTalk, FireWire, iPod, iPod Touch, Mac, and Macintosh are registered trademarks
of Apple Inc. Final Cut Pro, QuickTime and the QuickTime Logo are trademarks of Apple Inc. All
other trademarks are the property of their respective holders.
International Hardware Limited Warranty (1 Year Standard/3 Years if registered)
ATOMOS warrants that:
• the main product, not including the IPS screen, or any external accessories, will be free from
defects in materials and workmanship for a period of 1 year from the date of purchase; or 3 years
upon completion of product registration at www.atomos.com
• the TFT/LCD, batteries, battery charger, HDD/SSD docking station, case and master caddies will
be free from defects in materials and workmanship for a period of 1 year from the date of purchase
regardless of registration.
This warranty is exclusively for the benefit of the original purchaser and is not assignable or
transferable.
If during the warranty period the product is shown to be defective ATOMOS may at its option:
a) replace the goods or supply equivalent ones, b) repair the goods, c) pay the cost of replacing the
goods or of acquiring equivalent ones and d)paying the cost of having the goods repaired;
The customer must notify ATOMOS of any defect in the goods in writing prior to the expiry of the
warranty periods set out above. The customer will be solely responsible for returning the goods to
ATOMOS or its authorized distributor. Upon acceptance of a warranty claim by ATOMOS, where
ATOMOS repairs or replaces the goods, it will be responsible for reasonable shipping costs incurred
in sending the goods to the Customer, provided that customer is located in a country in which
ATOMOS has an authorized distributor or repair centre or agent.
Warranty Exclusions
This warranty applies only to defects in workmanship and does not cover defects caused by:
• A failure to comply with the then current operating instructions issued by ATOMOS;
• Neglect;
• Improper or negligent acts or omissions;
• Unauthorised repairs or attempted repairs;
• Tampering with or modification of the goods;
• Connection to incompatible equipment or power sources;
• Exposure to water or weather;
• Exposure to magnetic fields or corrosive liquids or substances;
Software License Agreement
IMPORTANT, PLEASE READ CAREFULLY. THIS IS A LICENSE AGREEMENT.
This ATOMOS software, related documentation, any included sample images and other files (the
“Software”), is protected by copyright laws and international copyright treaties, as well as other
intellectual property laws and treaties. The Software is licensed, not sold.
This End User License Agreement (“EULA”) is a legal agreement between you (either an individual
or a single entity) and ATOMOS with regard to the copyrighted Software provided with this EULA.
Use of the Software provided to you by ATOMOS in whatever form or media, will constitute your
acceptance of these terms, unless separate terms are provided by the software supplier, in which
case certain additional or different terms may apply. If you do not agree with the terms of this EULA,
do not download, install copy or use the Software. By installing, copying or otherwise using the
Software, you agree to be bound to the terms of this EULA. If you do not agree to the terms of this
EULA, ATOMOS is unwilling to license the Software to you.
1.Eligible licensees. This Software is available for license solely to purchasers of the ATOMOS
Ninja Blade, who have purchased a unit manufactured by ATOMOS Ninja Blade and purchased
through an ATOMOS authorized reseller, with no right of duplication or further distribution,
licensing or sub-licensing.
2.License Grant. ATOMOS grants you a personal, non-transferable and non-exclusive right to use
the copy of the Software provided with this EULA. You agree you will not copy the Software
except as necessary to use it with the ATOMOS Ninja Blade. You agree that you may not copy
the written materials accompanying the Software. Modifying, reverse engineering, translating,
renting, copying, transferring or assigning all or part of the Software or any rights granted
hereunder, to any other persons or reverse engineering the hardware on which the Software
runs, is strictly prohibited. The software is license, not sold. You acknowledge that no title to
intellectual property in the Software is transferable to you. You further acknowledge that title and
full ownership rights to the Software will remain the exclusive property of ATOMOS and/or its
suppliers, and you will not acquire any rights to the Software, except as expressly set forth above.
All copies of the software will contain the same proprietary notices as contained in or on the
Software. All title and copyrights in and to the Software (including but not limited to any images,
animations, video, audio, text incorporated), the accompanying printed materials, and any copies of
the Software are owned by ATOMOS or its suppliers.
3. Reverse engineering. You agree that you will not attempt, and if you are a corporation, you will use
your best efforts to prevent your employees and contractors from attempting to reverse compile,
derive circuits, modify, translate or disassemble the Software and/or the ATOMOS Ninja Blade in
whole or in part. Any failure to comply with the above or any other terms and conditions contained
herein will result in the automatic termination of this license and the reversion of the rights granted
hereunder by ATOMOS.
ATOMOS reserves the right to terminate this license without prejudice to any additional recourse
ATOMOS may have against you if you violate any of its terms and conditions.
EXCEPT AS STATED IN THIS WARRANTY, ATOMOS, IT’S VENDORS, AGENTS, RESELLERS AND DISTRIBUTORS
DISCLAIM IN THEIR ENTIRETY ALL OTHER WARRANTIES, EXPRESS OR IMPLIED, INCLUDING WITHOUT LIMITATION
ALL WARRANTIES OF MERCHANTABILITY OR FITNESS FOR A PARTICULAR PURPOSE. THE REMEDIES OUTLINED
IN THIS WARRANTY ARE THE EXCLUSIVE REMEDY A CUSTOMER HAS ARISING FROM DEFECTIVE GOODS WHICH
ARE SUBJECT TO THE WARRANTY.
You will also need:
HDMI Cable/s
One end having a common 13.9mm type A plug for connection to Ninja
Blade, and the other end having a plug suitable for your camera.
HDD/SSD
2.5 inch Hard Disk Drive [HDD]
or Solid State Drive [SSD].
For recommendations refer to:
> www.atomos.com/drives
Getting started:
Battery:
We recommend that you use the provided power supply or charge new
batteries before using them.
To begin, connect optional battery to charger and commence
charging. While charging, the red light will illuminate. When the red
light turns green, the battery is 100% charged.
1
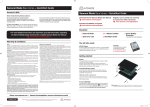
Assemble Master Caddy:
Fix the Hard Disk or Solid State Drive into the Master Caddy as
shown (right). Align screw holes on all three pieces and assemble
completely. Insert screws last.
Handle the HDD or SSD with care
Touch screw holes or metal shell first. Avoid contact with circuit board
and connectors. Refer to manual if unfamiliar with handling ESD
sensitive devices.
Format HDD/SSD:
Once your drive is inserted into the caddy, format it in your Ninja
Blade recorder by selecting the BLUE arrow
next to Recording
Time Remaining, Press Format HDD/SSD and follow the on-screen
instructions. For more information refer to the User Manual.
2
Important: Insert screws last and DO NOT over-tighten the screws
or proper alignment of the Master Caddy can not be guaranteed.
ATOMOS DOES NOT WARRANT THAT THE GOODS WILL OPERATE IN A MANNER WHICH IS ERROR FREE, OR
UNINTERRUPTED. THE GOODS ARE NOT INTENDED TO BE THE PRIMARY OR ONLY DATA STORAGE DEVICE FOR
DATA – CUSTOMERS ARE SOLELY RESPONSIBLE FOR BACK UP AND PROTECTION OF DATA.
Online: www.atomos.com | Atomos KnowledgeBase: atomos.activehosted.com/kb
AT OMOS.COM
Ninja Blade Barebones QSG.indd 1
© ATOMOS Global Pty. Ltd. trading as ATOMOS under license. All trademarks are the property of their respective owners.
Atomos reserves the right to change or alter any product specifications without notice.
21/05/2015 5:02 pm
Ninja Blade Bare bones ~ QuickStart Guide
Ninja Blade Bare bones ~ QuickStart Guide
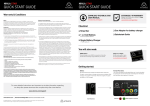
Connect & power-up
Record
Power:
Main Interface:
Battery number 1
Attach the optional battery to the Ninja Blade.
Make sure to use the battery slot marked with
the number “1” as this is the primary battery. If
you purchase an additional battery, it should be
connected to the other, secondary slot.
Record: Press to start/stop
recording (requires video input)
Gently slide down into battery
slot(s) and lock into position.
Push latch to release battery
The Ninja Blade utilises only one battery at a
time. This way a battery can be removed, charged
and replaced during operation. Refer to the User
Manual for more information.
MENU
Power up using
battery slot 1 ONLY
OR
04:08:01:23
Play: Enter playback mode
Waveform Monitoring
Audio Level
Menu: Device settings / options
Monitor Assist
Audio Metering
Cut and Tag
IMPORTANT Ninja Blade can only power up /
turn on from the primary battery position.
[Battery Slot #1]
Waveform & Monitor Assist Functions
Video Input
Tally Light
Connect to a camera using a HDMI cable
Flashes red when recording.
Waveform Monitoring Menu:
Touch the Waveform Monitoring
icon to reveal WFM functions
Video Output
Connect external device via the
HDMI cable
Battery Latch
LANC Remote
On/Off & Screen lock
Optionally control the Ninja Blade
using LANC remote control connected
here (use a 2.5mm TRS / 3-pin plug )
Briefly press the circular button on
the side of the Ninja Blade to powerup the unit. To shut down, depress
button for at least 4 seconds (until
unit turns off)
Share remote control with other devices
(loop thru) by connecting them to the
second LANC connector cable
When in operation, a single press of
the power on / off button will lock the
display and controls. A second press
will enable the display and controls
again.
Audio
Stereo Line In or Headphones
TIP: Touch the centre of the screen
to remove all overlays
Monitor Assist Menu:
Touch the Monitor Assist icon
to reveal the Monistor Assist
functions
CAUTION: The Ninja Blade is constructed from aluminium which acts as the unit’s heat sink. In high or extreme temperatures / climates, the metal
chassis may feel slightly warm / hot to touch. This is completely normal and does not in any way effect the overall functionality of the Ninja Blade.
TIP: Each touch of an icon toggles
the controls on/off
Touchscreen / User Interface
The Ninja Blade is controlled by a simple
user-friendly touchscreen interface.
Pictured left are the main controls seen
when the Ninja Blade is first powered up and
there is a video input connection.
Video Input Format and
Pulldown Status
Recording
Format
Recording
Quality
Time
Remaining
Continuous Power
Battery Indicator
Edit
For example, touching the
Video Input Format or blue
arrow at right will cycle
through all available input
formats.
Waveform Monitoring Settings:
Touch to reveal Position/Dynamic
Range/Opacity controls
RGB Parade
Return to main page
Vectorscope
While waveforms or vectorscopes are
active, touch the bottom right hand
side to toggle between 1/4 view, 1/3
view and full screen mode.
Vectorscope Zoom
Focus Assist
Monitor Assist Settings: Touch to
reveal Focus Assist Options (Color/
Mono/Outline) and Zebra (%)
Zebra Pattern
Return to main page
False Color
Note: Tagging available while
recording and monitoring
Blue Only Exposure
Safe Areas/Grid Lines
Playback Interface:
Waveform Monitoring
Play: Press to play clip
Loop: Loop playback
Jump to beginning / end
Set Loop In / Out point
Frame by frame RWD/FFWD
Previous / Next Clip
Super RWD/Super FFWD
Clear Tagging
Favorite
Tag for Favorite: Touch once
to set the IN point. Touch
again to set OUT point.
Reject
Tag for Reject: Touch once to
set the IN point. Touch again to
set OUT point.
Monitor Assist Functions
Cut and Tag
Favorite/Reject
Headphone
Line Out Volume
Ninja Blade Barebones QSG.indd 2
Luma Parade
Playback & Edit: One-touch Review
Pay special attention to any
items on screen which are
marked by a small blue arrow.
Touch these items to access
or cycle through the available
options.
Record Trigger: Set by supported
camera/or rolling timecode trigger
Audio Channels
and Levels
Rec / Play / Menu
Timecode and
Record Trigger
Vectorscope
Use transport controls or touch anywhere on the
timeline to scrub to a section for review. Check
recorded shots during playback using WFM and
Monitor Assist tools.
Move frame by frame to select cut and tag In and Out
Points, marking them as favorite or reject. Once cut
and tag is complete, export an XML project for instant
timeline assembly and editing.
Playback & Review on large monitor/s:
Recorded footage can also be played from the Ninja
Blade’s HDMI Out. This is ideal for large screen client
viewing, feedback and editing on location.
Timeline / scrub bar
Timeline showing tagged footage
TIP: Touch the center of the Ninja Blade screen to remove all
overlays. Touch the screen again to restore previous screen/
overlays and playback controls.
21/05/2015 5:02 pm


