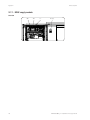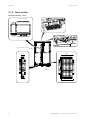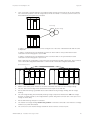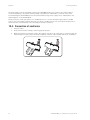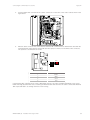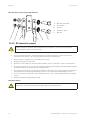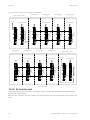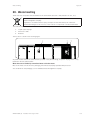
1
INGECON SUN PowerMax
X DCAC Indoor
Installation and usage manual
AAV2015IQE01_B
05/2015
Ingeteam Power Technology, S.A. - Energy
Avda. Ciudad de la Innovación, 13
31621 SARRIGUREN (Navarra) - Spain
Tel.: +34 948 28 80 00
Fax.: +34 948 28 80 01
e-mail: [email protected]
Service Call Center: +34 948 698 715
Ingeteam GmbH
DE-153762639
Herzog-Heinrich-Str. 10
80336 MUNICH - Germany
Tel.: +49 89 99 65 38 0
Fax.: +49 89 99 65 38 99
e-mail: [email protected]
Service Call Center: +49 899 965 3825
Ingeteam SAS
Le Naurouze B - 140 Rue Carmin
31676 Toulouse Labège cedex - France
Tel: +33 (0)5 61 25 00 00
Fax: +33 (0)5 61 25 00 11
email: [email protected]
Service Call Center: +33 (0) 820 363 749
Ingeteam S.r.l.
Via Emilia Ponente, 232
48014 CASTEL BOLOGNESE (RA) - Italy
Tel.: +39 0546 651 490
Fax: +39 054 665 5391
e-mail: [email protected]
Service Call Center: +39 0546 651 524
Ingeteam
INGECON SUN PowerMax
X DCAC Indoor
Installation and usage manual
AAV2015IQE01_B - Installation and usage manual
iii
Ingeteam
The copy, distribution or use of this document or of its content requires written authorisation. Any breach thereof will be reported for
damages. All rights reserved including those of patent rights or design registration.
The conformity of the document content with the hardware described has been checked. However, discrepancies may exist. Liability
will not be assumed for total concordance. The information contained in this document is regularly reviewed and it is possible that
there may be changes in subsequent editions. Other functions may be available which are not covered by this document.
This document may be changed.
iv
AAV2015IQE01_B - Installation and usage manual
Contents
Ingeteam
Contents
Contents .................................................................................................................................................... 5
1. About this manual................................................................................................................................... 8
1.1. Scope of application....................................................................................................................... 8
1.2. Recipients...................................................................................................................................... 8
1.3. Nomenclature................................................................................................................................. 8
1.4. Symbols......................................................................................................................................... 9
2. Unit description.................................................................................................................................... 10
2.1. Overview...................................................................................................................................... 10
2.2. Electrical characteristics of the unit................................................................................................ 10
2.3. Structure of the unit..................................................................................................................... 11
2.4. Models........................................................................................................................................ 12
2.5. Available kits................................................................................................................................ 13
2.6. Options........................................................................................................................................ 15
2.6.1. Monitoring components external to the unit............................................................................. 15
2.6.2. DC isolating switch remote control.......................................................................................... 15
2.6.3. Insulation fault /grid connection............................................................................................. 15
2.6.4. Remote AC circuit breaker tripping......................................................................................... 15
2.7. Location of components................................................................................................................ 15
2.7.1. DCAC supply module ........................................................................................................... 16
2.7.2. Power modules..................................................................................................................... 20
2.8. Compliance with regulations.......................................................................................................... 24
2.8.1. CE marking.......................................................................................................................... 24
2.9. EMC requirements........................................................................................................................ 25
2.10. Protection class.......................................................................................................................... 25
2.11. Contamination class.................................................................................................................... 25
2.12. Acoustic contamination............................................................................................................... 25
2.13. Characteristics of the electrical installation................................................................................... 25
2.14. Electrical diagram of the unit....................................................................................................... 26
2.15. Electrical diagram of the system................................................................................................... 26
2.16. Cooling system........................................................................................................................... 26
2.17. Description of cable inlets........................................................................................................... 28
3. Safety.................................................................................................................................................. 29
3.1. Safety conditions.......................................................................................................................... 29
3.2. Personal Protective Equipment....................................................................................................... 32
3.3. Symbols on the inverters............................................................................................................... 32
4. Equipment reception............................................................................................................................. 33
4.1. Packaging symbols........................................................................................................................ 33
4.2. Equipment identification............................................................................................................... 33
4.3. Transport damage......................................................................................................................... 33
5. Storage................................................................................................................................................ 34
5.1. Conservation................................................................................................................................ 34
5.2. Unpacking................................................................................................................................... 34
6. Equipment transport............................................................................................................................. 35
6.1. Centre of gravity........................................................................................................................... 35
6.2. Transport using a forklift truck....................................................................................................... 36
6.3. Transport using a crane................................................................................................................. 37
7. Preparation for installing the unit........................................................................................................... 38
7.1. General requirements for installation.............................................................................................. 38
7.2. Environment................................................................................................................................. 38
7.3. Environmental conditions.............................................................................................................. 38
7.4. Fixing surface area........................................................................................................................ 38
7.5. Cooling........................................................................................................................................ 41
7.6. Requirements for DC feed fuses..................................................................................................... 43
7.7. Requirements for transformers....................................................................................................... 44
7.7.1. Grid connection transformer.................................................................................................. 44
7.7.2. Auxiliary transformer............................................................................................................. 47
AAV2015IQE01_B - Installation and usage manual
5
Ingeteam
Contents
7.8. Measuring equipment connected to the power grid........................................................................... 48
8. Installing the unit................................................................................................................................. 49
8.1. Fixing the unit to the floor............................................................................................................. 49
9. Ground connection................................................................................................................................ 50
9.1. Safety instructions for the ground connection.................................................................................. 50
9.2. Wiring requirements for the ground connection................................................................................ 51
9.3. Connection area............................................................................................................................ 51
9.4. Ground connection via a terminal................................................................................................... 51
9.4.1. Requirements for the ground connection via a terminal............................................................ 51
9.4.2. Making the ground connections via a terminal......................................................................... 52
10. Connecting auxiliaries......................................................................................................................... 53
10.1. Safety instructions for connecting auxiliary equipment................................................................... 53
10.2. Wiring requirements for connecting auxiliary equipment................................................................. 53
10.3. Connection area.......................................................................................................................... 53
10.4. Connection of auxiliaries.............................................................................................................. 54
11. Connecting the communication accessories........................................................................................... 55
11.1. Safety instructions for connecting the communications accessories................................................. 55
11.2. Description of the XCOM terminal strip......................................................................................... 56
11.3. Communication via RS-485......................................................................................................... 56
11.4. Ethernet TCP communication....................................................................................................... 57
11.5. Communication via GSM/GPRS.................................................................................................... 60
11.6. Ethernet RDCom communication.................................................................................................. 62
12. Connection options............................................................................................................................. 65
12.1. Safety instructions for connecting optional equipment.................................................................... 65
12.2. Wiring requirements for connecting optional equipment.................................................................. 65
12.3. Connection process for monitoring components external to the unit................................................. 66
12.4. DC isolating switch remote control connection process................................................................... 67
12.5. AC switch remote control trip connection process........................................................................... 68
12.6. Insulation fault /grid connection connection process...................................................................... 69
13. DC connection.................................................................................................................................... 71
13.1. Safety instructions for the DC connection...................................................................................... 71
13.2. Wiring requirements for connecting DC connection......................................................................... 72
13.3. Connection area.......................................................................................................................... 72
13.4. DC connection via a terminal....................................................................................................... 72
13.4.1. Requirements for DC connection via a terminal..................................................................... 72
13.4.2. DC connection process........................................................................................................ 74
13.5. Connection/disconnection of the DC fuses..................................................................................... 77
14. AC connection.................................................................................................................................... 79
14.1. Safety instructions for the AC connection...................................................................................... 79
14.2. Wiring requirements for connecting AC connection......................................................................... 80
14.3. Connection area.......................................................................................................................... 80
14.4. AC connection via a terminal........................................................................................................ 82
14.4.1. Requirements for AC connection via a terminal...................................................................... 82
14.4.2. AC connection process via a terminal.................................................................................... 83
14.4.3. Connecting the AC neutral................................................................................................... 83
15. Commissioning................................................................................................................................... 84
15.1. Equipment inspection................................................................................................................. 84
15.1.1. Inspection.......................................................................................................................... 84
15.1.2. Shutting down.................................................................................................................... 85
15.2. Equipment configuration............................................................................................................. 85
15.2.1. Configuring the Modbus Node of an electronics block............................................................. 85
15.3. Start-up..................................................................................................................................... 85
15.3.1. Start-up............................................................................................................................. 85
15.3.2. Checking and measurement................................................................................................. 86
16. Display control.................................................................................................................................... 87
16.1. Keypad and LEDs....................................................................................................................... 87
16.2. Display...................................................................................................................................... 88
6
AAV2015IQE01_B - Installation and usage manual
Contents
Ingeteam
16.3. Menu structure........................................................................................................................... 89
16.4. Start/Stop.................................................................................................................................. 90
16.5. Main menu................................................................................................................................. 90
16.5.1. Monitoring......................................................................................................................... 90
16.5.2. Reasons for shutdown......................................................................................................... 92
16.5.3. Settings............................................................................................................................. 93
16.5.4. Inverter data...................................................................................................................... 93
16.5.5. Change inv. no................................................................................................................... 94
17. Shutting down the unit........................................................................................................................ 95
17.1. Process of disconnecting the unit................................................................................................. 95
17.2. Shutting down the inverter from the display................................................................................... 97
17.3. Inverter shutdown from the emergency stop button........................................................................ 97
17.4. Inverter shutdown by opening a door............................................................................................. 97
18. Preventive maintenance....................................................................................................................... 98
18.1. Safety conditions........................................................................................................................ 98
18.2. General review............................................................................................................................ 98
18.3. Status of the housing.................................................................................................................. 98
18.4. Status of cables and terminals..................................................................................................... 98
18.5. Tightness of strip fasteners and power cables................................................................................. 98
18.6. Plates........................................................................................................................................ 99
18.7. Cooling system........................................................................................................................... 99
18.7.1. Status of unit fans.............................................................................................................. 99
18.7.2. Replacement of fans......................................................................................................... 100
18.7.3. Cleaning grids and cooling filters........................................................................................ 101
18.8. Relay status............................................................................................................................. 103
18.9. Status of the fuses.................................................................................................................... 103
19. Troubleshooting................................................................................................................................ 104
19.1. LED messages.......................................................................................................................... 104
19.1.1. Green LED....................................................................................................................... 104
19.1.2. Orange LED..................................................................................................................... 105
19.1.3. Red LED.......................................................................................................................... 105
19.2. List of alarms and reasons for shutdown...................................................................................... 106
19.3. Inverter alarms due to protections.............................................................................................. 107
19.4. Action protocol for responding to incidents.................................................................................. 108
19.4.1. Voltage and/or frequency out of range................................................................................. 109
19.4.2. Temperature..................................................................................................................... 110
19.4.3. AC circuit protection......................................................................................................... 111
19.4.4. Reason for contactor shutdown.......................................................................................... 111
19.4.5. DC circuit protection......................................................................................................... 112
19.4.6. DC insulation fault............................................................................................................ 112
19.4.7. Manual shutdown............................................................................................................. 112
19.4.8. AC insulation fault............................................................................................................ 114
19.4.9. AC arrester faults.............................................................................................................. 115
19.4.10. Faults in the synchronisation of units connected to the same transformer............................. 115
19.4.11. Thermomagnetic circuit breaker Q2n................................................................................ 115
19.4.12. Fatal error...................................................................................................................... 115
19.5. Replacing the electronics block.................................................................................................. 115
19.5.1. CAN number setting of an electronics block........................................................................ 117
19.6. Replacing varistors in the intake board........................................................................................ 117
20. Waste handling................................................................................................................................. 119
AAV2015IQE01_B - Installation and usage manual
7
About this manual
Ingeteam
1. About this manual
The purpose of this manual is to describe the INGECON SUN PowerMax TL X DCAC Indoor units and to provide
appropriate information for their correct reception, installation, start-up, operation and maintenance.
1.1. Scope of application
This manual is applicable to the following units:
Complete name
Abbreviation
INGECON SUN 275TL X220 DCAC Indoor
275TL X220 DCAC Indoor
INGECON SUN 350TL X275 DCAC Indoor
350TL X275 DCAC Indoor
INGECON SUN 380TL X300 DCAC Indoor
380TL X300 DCAC Indoor
INGECON SUN 400TL X320 DCAC Indoor
400TL X320 DCAC Indoor
INGECON SUN 440TL X345 DCAC Indoor
440TL X345 DCAC Indoor
INGECON SUN 460TL X360 DCAC Indoor
460TL X360 DCAC Indoor
INGECON SUN 500TL X400 DCAC Indoor
500TL X400 DCAC Indoor
INGECON SUN 535TL X420 DCAC Indoor
535TL X420 DCAC Indoor
INGECON SUN 410TL X220 DCAC Indoor
410TL X220 DCAC Indoor
INGECON SUN 520TL X275 DCAC Indoor
520TL X275 DCAC Indoor
INGECON SUN 570TL X300 DCAC Indoor
570TL X300 DCAC Indoor
INGECON SUN 605TL X320 DCAC Indoor
605TL X320 DCAC Indoor
INGECON SUN 660TL X345 DCAC Indoor
660TL X345 DCAC Indoor
INGECON SUN 690TL X360 DCAC Indoor
690TL X360 DCAC Indoor
INGECON SUN 750TL X400 DCAC Indoor
750TL X400 DCAC Indoor
INGECON SUN 805TL X420 DCAC Indoor
805TL X420 DCAC Indoor
INGECON SUN 550TL X220 DCAC Indoor
550TL X220 DCAC Indoor
INGECON SUN 695TL X275 DCAC Indoor
695TL X275 DCAC Indoor
INGECON SUN 760TL X300 DCAC Indoor
760TL X300 DCAC Indoor
INGECON SUN 800TL X320 DCAC Indoor
800TL X320 DCAC Indoor
INGECON SUN 880TL X345 DCAC Indoor
880TL X345 DCAC Indoor
INGECON SUN 920TL X360 DCAC Indoor
920TL X360 DCAC Indoor
INGECON SUN 1000TL X400 DCAC Indoor
1000TL X400 DCAC Indoor
INGECON SUN 1070TL X420 DCAC Indoor
1070TL X420 DCAC Indoor
1.2. Recipients
This document is intended for qualified personnel.
The status of qualified personnel referred to in this manual will be, as a minimum, that which meets all the
standards, regulations and laws regarding safety applicable to the tasks of installing and operating this unit.
The responsibility for designating qualified personnel will always fall to the company to which the personnel
belong. It is necessary to decide which workers are suitable or not for carrying out specific work to preserve their
safety at the same time as complying with occupational safety legislation.
These companies are responsible for providing appropriate training in electrical equipment to their personnel and
for familiarising them with the contents of this manual.
1.3. Nomenclature
This document will refer to the various models of inverter of the INGECON SUN PowerMax family by both their full
name and their abbreviation. They will also be referred to generically as inverter or unit.
In this manual, the letter n refers to the power module number (from 1 to 4) and U1n to the electronics block
number.
Q2n refers to the Q2 circuit breaker protection on power module n. For example, Q23 refers to the Q2
circuit breaker protection on power module 3.
8
AAV2015IQE01_B - Installation and usage manual
About this manual
Ingeteam
U1nXAC.2 will refer to terminal XAC.2 on electronics block n. For example, U14XAC.2 refers to terminal
XAC.2 on electronics block 4.
1.4. Symbols
This manual uses various symbols to emphasise and highlight certain texts. The general meanings are explained
below.
General warning.
General information.
Electrical danger.
Read the section indicated in this manual.
Hot surface.
Prohibition.
AAV2015IQE01_B - Installation and usage manual
9
Unit description
Ingeteam
2. Unit description
2.1. Overview
An inverter is an electronic unit used to convert direct current to alternating current. The function of these units is
to convert the direct current generated by photovoltaic solar panels to alternating current and so enable it to be fed
to the electricity grid.
These devices are designed for use in an enclosed electric area.
2.2. Electrical characteristics of the unit
The units in this manual have been designed in accordance to the standards IEC62109-1 and IEC62109-2. They
particularly respond to the following characteristics.
•
They are designed to follow at least Overcurrent Category 2 in the continuous current cycle and
Overcurrent Category 3 in the alternating current cycle.
•
This is a Class I protection device.
•
The power factor range is 0 ~ 1.
•
The maximum start-up current is 121 A and with a duration of 0.6 ms.
Maximum short circuit current
10
Number of power modules
Maximum admitted short circuit current
2 power modules
1104 A
3 power modules
1656 A
4 power modules
2208 A
AAV2015IQE01_B - Installation and usage manual
Unit description
Ingeteam
2.3. Structure of the unit
These units feature an DCAC supply module and may have 2, 3 or 4 power modules.
DCAC supply module
Power modules
1
2
3
4
DCAC supply module
This module groups together the PA array feed (DC part), the grid connection feed (AC part) as well as various
options and kits.
Power module
These units are modular in structure. Each of the individual modules making up the unit is called a power module.
Electronics block
Each power module has an electronics block. This block groups together the power
module parts which require more physical protection, such as the control card,
uptake card, IGBTs, etc..
AAV2015IQE01_B - Installation and usage manual
11
Unit description
Ingeteam
2.4. Models
Depending on the number of power modules and module types, the models of this family are differentiated as
shown in the following table:
Number of modules
Type of module
Model
2 power modules
140 kW - 220 VAC
275TL X220 DCAC Indoor
175 kW - 275 VAC
350TL X275 DCAC Indoor
190 kW - 300 VAC
380TL X300 DCAC Indoor
200 kW - 320 VAC
400TL X320 DCAC Indoor
220 kW - 345 VAC
440TL X345 DCAC Indoor
230 kW - 360 VAC
460TL X360 DCAC Indoor
250 kW - 400 VAC
500TL X400 DCAC Indoor
270 kW - 420 VAC
535TL X420 DCAC Indoor
140 kW - 220 VAC
410TL X220 DCAC Indoor
175 kW - 275 VAC
520TL X275 DCAC Indoor
190 kW - 300 VAC
570TL X300 DCAC Indoor
200 kW - 320 VAC
605TL X320 DCAC Indoor
220 kW - 345 VAC
660TL X345 DCAC Indoor
230 kW - 360 VAC
690TL X360 DCAC Indoor
250 kW - 400 VAC
750TL X400 DCAC Indoor
270 kW - 400 VAC
805TL X420 DCAC Indoor
140 kW - 220 VAC
550TL X220 DCAC Indoor
175 kW - 275 VAC
695TL X275 DCAC Indoor
190 kW - 300 VAC
760TL X300 DCAC Indoor
200 kW - 320 VAC
800TL X320 DCAC Indoor
220 kW - 345 VAC
880TL X345 DCAC Indoor
230 kW - 360 VAC
920TL X360 DCAC Indoor
250 kW - 400 VAC
1000TL X400 DCAC Indoor
270 kW - 420 VAC
1070TL X420 DCAC Indoor
3 power modules
4 power modules
Models with 2 power modules
These units include:
12
•
2 electronics blocks.
•
1 MPPT tracker.
•
1 motorised DC isolating switch.
•
1 overvoltage protection element on the DC side.
•
1 overvoltage protection element on the AC side.
•
1 AC isolating switch.
AAV2015IQE01_B - Installation and usage manual
Unit description
Ingeteam
Models with 3 power modules
These units include:
•
3 electronics blocks.
•
1 MPPT tracker.
•
1 motorised DC isolating switch.
•
1 overvoltage protection element on the DC side.
•
1 overvoltage protection element on the AC side.
•
1 AC isolating switch.
Models with 4 power modules
These units include:
•
4 electronics blocks.
•
1 MPPT tracker.
•
1 motorised DC isolating switch.
•
1 overvoltage protection element on the DC side.
•
1 overvoltage protection element on the AC side.
•
1 AC isolating switch.
2.5. Available kits
These units may include the following kits:
•
LVRT kit.
•
Kit for motorization of AC circuit breaker.
•
Kit for reading DC input string current.
•
Kit for reactive power regulation with no PV array power.
•
AC wattmeter kit.
AAV2015IQE01_B - Installation and usage manual
13
Unit description
Ingeteam
•
AC Insulation monitor kit.
•
PV array grounding kit.
LVRT kit
This kit is supplied for cases where regulations require that the inverter be capable of withstanding grid voltage
drop outs.
Including additional hardware (UPS) enabling the inverter to remain connected to the grid during these types of
events.
LVRT kit must be specified in the inverter configuration before delivery.
Enables adaptation and governance to all existing medium voltage regulations.
Kit for motorization of AC circuit breaker
As standard, the AC circuit breaker allows remote tripping, but not automatic resetting. The circuit breaker
installed is motorized using this kit to enable remote tripping or closing operation.
Kit for reading DC input string current
The kit for reading DC input string currents is available as an option for monitoring the current of each of the unit's
input strings. This device implements the following functions:
•
Detection of anomalous currents by string or by fault.
•
Detection of blown PV input fuses.
•
Storage of data strings.
Kit for reactive power regulation with no PV array power
This kit enables reactive power to be generated during the night in order to increase voltage stability and reduce
loading on power grids.
AC wattmeter kit
The AC wattmeter kit consists fitting a wattmeter to the investor in order to measure the voltage, current and power
levels at the output of the unit.
A single measurement is made for all outputs.
Monitoring of this item can be accessed through the unit’s RS485 serial communications.
The main monitored parameters permitted by this kit are:
•
Voltage. Mean and maximum values.
•
Active, reactive and apparent power, by total and by phase.
•
Power factor.
•
Current and voltage harmonics (up to the 51st).
AC Insulation monitor kit
A dedicated AC insulation monitor needs to be installed depending on the requirements of the country’s
regulations. This monitors the insulation of the AC part of the inverter between the unit output and the connection
to the medium voltage transformer.
This kit has a volt-free output which serves to monitor insulation failure.
The user is responsible for wiring and monitoring this kit.
The kit does not direct affect inverter operation (it does not show an alarm or any reason for shutdown).
PV array grounding kit
This kit makes it possible to ground the negative or positive pole of the DC input. The PV array is grounded by a
thermomagnetic circuit breaker that connects one pole of the PV array, negative or positive, to ground. The polarity
of the ground connection depends on the type of panel technology.
The thermomagnetic protection opens the PV array connection to ground when an insulation fault in the PV array
generates a current through the connection which is greater than the protection's tripping current.
14
AAV2015IQE01_B - Installation and usage manual
Unit description
Ingeteam
The protection will be monitored by the inverter control, and when the thermomagnetic circuit breaker opens the
connection of the PV array to ground, the control will shut down the unit, triggering the 0x0200 DC Protection
alarm.
2.6. Options
The standard units provide the ability to set various standard options. The installer can decide to use them or not
depending on the requirements of each installation.
See Section “12. Connection options”.
2.6.1. Monitoring components external to the unit
This option allows the unit to monitor the proper functioning of components which are external to it.
This monitoring is done by using normally closed voltage-free contacts. Should one of the contacts be open (due to
a fault in the monitored item) the inverter will generate an alarm and shut down.
2.6.2. DC isolating switch remote control
This option allows remote control (opening and closing) of the DC isolating switch of the unit using a Normally
Closed contact.
When the contact is closed the isolating switch is in the On position and if the contact is open the switch changes
to the Off position.
2.6.3. Insulation fault /grid connection
The inverter incorporates a normally open volt-free auxiliary contact, that can carry out one of these two functions:
Detecting an insulation fault in the DC circuit
•
Open contact: there is no insulation fault in the DC circuit.
•
Closed contact: there is an insulation fault in the DC circuit.
Indicator showing that the unit is connected to the mains via its internal contactor
•
Open contact: internal contactor for connecting to the grid is open; the inverter is not connected to the
grid.
•
Closed contact: internal contactor for connecting to the grid is closed; the inverter is connected to the
grid.
Regardless of the setting of this contact the unit continues to measure the insulation of the DC part.
2.6.4. Remote AC circuit breaker tripping
This option is included as standard in equipment incorporating an AC circuit breaker.
It enables remote tripping (opening) of the AC circuit breaker using an external 220 VAC signal. Since remote
tripping is not allowed, the circuit breaker must be reset manually.
2.7. Location of components
This section describes graphically the location of the main components of the unit. Throughout the document
reference is made to this section repeatedly in order to facilitate the location of these elements.
AAV2015IQE01_B - Installation and usage manual
15
Unit description
Ingeteam
2.7.1. DCAC supply module
Overview
QDC
16
QAC
LS
Display
AAV2015IQE01_B - Installation and usage manual
Unit description
Ingeteam
Upper front mounting plate
RVAC
XN
XQAC XQDC
12
12
XAUX
X7DC
1 ... 8
1 ... 5
AC Insulation monitor kit*
AC wattmeter kit*
Wattmeter kit*
FN
X220M
QM
RTM
KM
AC wattmeter kit*
12
AAV2015IQE01_B - Installation and usage manual
17
Unit description
Ingeteam
XCPV
XFC
XIQ
XFDC
XMDC XVENT.DC XMON.DC XMS
1
12
1 ... 3
1 ... 3
1 ... 6
2
12
12
1
RVDC
Power supply for kit to read
DC input string current*
QDC
18
AAV2015IQE01_B - Installation and usage manual
Unit description
Ingeteam
Lower front mounting plate
Kit for reading DC input string current*
DC feed
* optional.
AAV2015IQE01_B - Installation and usage manual
19
Unit description
Ingeteam
2.7.2. Power modules
Overview of modules 1 and 2
15 V power supply
XVENTn
KAUX
LS
Synchronization board
XCOM
X220
QAUX
12
20
1 ... 8
AAV2015IQE01_B - Installation and usage manual
Unit description
Ingeteam
L1n
LDCn
L2n
RDCn
Fans
AAV2015IQE01_B - Installation and usage manual
21
Unit description
Ingeteam
Mounting plate
Q4.n
Q2.n
XKP
XDIS.n
0 .. 7
X7.n
1 .. 4
X8.n
12
AAS0190
R1n, R2n, R3n
1 .. 8
K2n, K3n, K4n
FSAC*
LVRT kit*
Kit for reactive power regulation with no PV
array power (optional)
C1n, C2n, C3n
22
AAV2015IQE01_B - Installation and usage manual
Unit description
Ingeteam
XVDC
XMON
Nocturnal power supply
1 ... 5
1 ... 10
Heating element kit*
FDC
KAC
FAC
* optional.
AAV2015IQE01_B - Installation and usage manual
23
Unit description
Ingeteam
Electronics block
Intake board
J12
Control board
J18
RV1
J15
RV2
J6
J7
J17
RV3
U31
J16
U37
U39
U40
U46
J19
J27
DC+
DC–
U43
J28
L1, L2, L3
XBUS−
FPV
J8
F1
12
12
1 ... 16
1 ... 12
0 ... 4
X1
XFN
X2
X3
XAC
XBUS+
XPV−
XPV+
2.8. Compliance with regulations
These units can incorporate kits making it adaptable to the regulations for all European countries and countries in
other continents, complying with each country’s medium voltage regulations.
For projects in the United States or Canada, Ingeteam has the INGECON SUN U families, which have their own
manual.
2.8.1. CE marking
CE marking is mandatory for the sale of any product within the European Union, without prejudice to standards or
laws. These units have the CE marking by reason of their compliance with the following directives:
•
Low Voltage Directive 2006/95/EC.
•
Electromagnetic Compatibility Directive 2004/108/EC.
To comply with each directive, compliance with the parts applicable to our units of the appropriate harmonised
standards is sufficient.
24
AAV2015IQE01_B - Installation and usage manual
Unit description
Ingeteam
Low Voltage Directive
These units comply with this directive by means of compliance with the applicable parts of harmonised standard
EN 50178 Electronic equipment for use in power installations.
Electromagnetic Compatibility Directive
These units comply with this directive by means of compliance with the applicable parts of harmonised standards:
•
EN 61000-6-2 Electromagnetic Compatibility. Part 6-2: Generic standards - Immunity for industrial
environments.
•
EN 61000-6-4 Electromagnetic Compatibility. Part 6-4: Generic standards - Emission for industrial
environments.
Compliance with these standards calls for compliance with limits and procedures in other standards of the same
series.
2.9. EMC requirements
These units are equipped with the necessary filtering elements to comply with EMC requirements for industrial
applications in order to prevent disturbances in other equipment outside the installation.
All of these units are connected to the grid through a low to medium voltage transformer. This transformer gives
the unit galvanic isolation that affects its good performance in terms of noise emission (see Section “7.7.1. Grid
connection transformer”). This is why:
Any auxiliary element must be connected to the low voltage network powering the units via a galvanic
isolation transformer (see Section “7.7.2. Auxiliary transformer”).
2.10. Protection class
These units meet IP20 degree of protection against external agents, and must not be installed outdoors.
2.11. Contamination class
The pollution class for which the units have been designed is grade 3.
Suitable measures should be taken to provide dust-free air of sufficient quality in the vicinity of the inverter.
2.12. Acoustic contamination
When on, the inverter generates a buzzing sound.
Do not place it in an occupied room, or on light supports which might amplify this buzz. The mounting surface
must be firm and appropriate for the weight of the unit.
2.13. Characteristics of the electrical installation
These units are designed for connection to a dedicated network with an IT-type neutral connection scheme. The IT
system neutral must be connected as a reference point.
An IT scheme has no directly grounded feed point.
In this system, the resulting intensity of a first phase against mass or phase against ground fault is sufficiently low
as to not cause the appearance of dangerous contact voltages.
The photovoltaic park must be installed, insulated from the earth in a configuration called floating to assure
protection against direct and indirect contacts. If requiring grounding for any part of the installation´s DC circuit,
the equipment must be equipped with the grounding Kit. If selecting this kit, see the installation and operating
manual.
AAV2015IQE01_B - Installation and usage manual
25
Unit description
Ingeteam
Power module 4 PV input
Power module 1 PV input
2.14. Electrical diagram of the unit
+16
...
Filter
+3
+2
+1
Optional
-1
-2
-3
L1
L2
L3
M
AC output for
connection to
MV grid
...
-16
Filter
Optional
2.15. Electrical diagram of the system
The configuration of the high voltage winding of the grid connection transformer does not affect the behaviour of
the unit.
INGECON SUN PowerMax
3
Ingeteam recommends using a transformer with Dyn11 connection.
Whenever a transformer is used with star connection on the Low Voltage side, it will be necessary to connect the
neutral as intake reference, as specified in Section “7.7. Requirements for transformers”.
2.16. Cooling system
These units have cooling fans on top of each power module. These fans start up for a few seconds each time the
inverter is connected to the mains and is about to inject power. This procedure makes it possible to easily check
proper operation.
The fans require different air flow for cooling the electronics, depending on the number of power modules in the
unit.
The cooling requirements and necessary flow rate are specified in Section “7.5. Cooling”.
26
AAV2015IQE01_B - Installation and usage manual
Unit description
Ingeteam
The useful life of the fans is 8 years, so they must be replaced after this time even if they seem to be
functioning normally.
Refer to Section “18.7. Cooling system” that explains the replacement of fans.
These units include monitoring of the correct operation of the fans. The malfunctioning of one or
more fans will cause the unit to stop and go into fatal error status. For further information consult
Section “19. Troubleshooting”.
AAV2015IQE01_B - Installation and usage manual
27
Unit description
Ingeteam
2.17. Description of cable inlets
All cables needed for operating and grounding the unit must be entered via the bottom and top of the DCAC supply
module.
A
B
C
D
E
F
A. Access to DC +.
B. Access to DC –.
C. Access to auxiliaries.
D. Access to XCOM.
E. Access to communications, intake and auxiliary neutral.
F.
28
AC output.
AAV2015IQE01_B - Installation and usage manual
Safety
Ingeteam
3. Safety
This section describes the safety warnings and the Personal Protective Equipment and symbols used in the unit.
3.1. Safety conditions
General warnings
The operations described in the manual may be performed only by qualified personnel.
The status of qualified personnel referred to in this manual will be, as a minimum, that which meets
all the standards, regulations and laws regarding safety applicable to the tasks of installing and
operating this unit.
The responsibility for designating qualified personnel will always fall to the company to which the
personnel belong. It is necessary to decide which workers are suitable or not for carrying out specific
work to preserve their safety at the same time as complying with occupational safety legislation.
These companies are responsible for providing appropriate training in electrical equipment to their
personnel and for familiarising them with the contents of this manual.
All applicable safety-related legislation for electrical work must be complied with. Danger of electric
shock.
Compliance with the safety instructions set out in this manual or in the suggested legislation does
not imply exemption from other specific standards for the installation, place, country or other
circumstances that affect the inverter.
The set of conditions listed throughout this document should be considered as minimum
requirements. It is always preferable to shut off the main power supply. There may be faults in the
installation that cause the unwanted return of voltage. Danger of electric shock.
Opening the door of the housing does not imply there is no voltage inside.
The risk of electric shock exists even after disconnecting from the grid, the PV array and the auxiliary
supply.
Only qualified personnel may open it, following the instructions in this manual.
According to basic safety standards, all the equipment must be suitable to protect exposed workers
against the risk of direct and indirect contact. In any case the electrical parts of the work equipment
must comply with the provisions of the corresponding specific regulations.
According to basic safety standards, the electrical installation shall not entail a fire or explosion risk.
Workers must be duly protected against the risk of accidents caused by direct or indirect contact.
The electrical installation and protection devices must take into account the voltage, the external
conditions and the competence of persons who have access to parts of the installation.
Class III - 1000-Volt measuring instruments must be used for checking for the absence of voltage.
AAV2015IQE01_B - Installation and usage manual
29
Safety
Ingeteam
Carry out all control and handling without voltage.
As a minimum security measure in this operation, you should always follow the so-called 5 golden
rules:
1. Disconnect
2. Prevent any possible resupply
3. Check there is no voltage
4. Ground and short circuit the equipment
5. Protect from live elements, if any, and put up safety signs around the work zone.
Until these five steps are completed, the work area cannot be considered voltage-free and any work
performed will be considered to be work on live equipment.
Ingeteam accepts no liability for any damages caused by improper use of the equipment. Any work
carried out on any equipment which implies a modification of the original electrical arrangements
must be proposed in advance to Ingeteam. These must be studied and approved by Ingeteam.
It is obligatory to provide the necessary measures to prevent any person from outside the installation
from approaching or handling the equipment.
It is strictly forbidden to gain access to the inside of the electrical panel through any other point than
the access cover provided for the purpose. Always access when the unit is voltage-free.
These instructions must be easily accessible close to the unit and located within reach of all users.
Before installation and start-up, please read these safety instructions and warnings carefully as well
as all the warning notices located on the unit. Ensure that all the notices are perfectly legible and
that those which are damaged or have disappeared are restored.
Protection against direct contact is by means of the housing.
The unit has been tested according to the applicable regulations to comply with the safety
requirements, the values for insulation clearances and leakage paths for the voltages used.
Potential hazards for people
DANGER: Electric Shock.
The equipment may remain charged after disconnecting the PV array, mains power and auxiliary
power.
Carefully follow the mandatory steps in the manual for removing the voltage.
DANGER: explosion.
There is a very low risk of explosion in very specific cases of malfunction.
The casing will protect people and property from the explosion only if it is correctly closed.
30
AAV2015IQE01_B - Installation and usage manual
Safety
Ingeteam
DANGER: Crushing and joint injuries.
Always follow the indications in the manual on moving and placing the unit.
The weight of this unit can cause serious injury and even death if not handled correctly.
DANGER: High temperature.
The flow of outlet air can reach high temperatures which can cause injury to anybody exposed to it.
Potential hazards for the equipment
CAUTION: Cooling.
The unit requires particle-free air flow while it is operating.
Keeping the unit in the upright position and the inlets free of obstacles is essential for this air flow to
reach the inside.
CAUTION: connections.
After all duly authorised handling, check that the equipment is ready to start operation. Only after
this can you connect it following the instructions in the manual.
Do not touch boards or electronic components. The more sensitive components can be damaged or
destroyed by static electricity.
Do not disconnect or connect any of the terminals while the unit is operating. Disconnect and check
for absence of voltage first.
AAV2015IQE01_B - Installation and usage manual
31
Safety
Ingeteam
3.2. Personal Protective Equipment
When working on the unit, use the following safety equipment recommended by Ingeteam as a minimum.
Name
Explanation
Safety shoes
In compliance with standard UNE-EN-ISO 20345:2012
Helmet
In compliance with standard EN 397:1995
Helmet with face shield
In compliance with standard UNE-EN 166:2002, provided there are elements
with directly accessible voltage.
Working clothes
Close-fitting, non-flammable, 100% cotton
Dielectric gloves
In compliance with standard EN 60903:2005
Anti-impact glasses
Use of anti-impact glasses when accessing the fan area.
Tools and/or equipment used in live work must have at least class III-1000 Volts insulation.
Should the country’s regulations demand another kind of personal protection, the equipment recommended by
Ingeteam should be appropriately supplemented.
3.3. Symbols on the inverters
Ø 1
Ø 2
Ø 3
Connection from cable and phase 1 terminal.
Connection from cable and phase 2 terminal.
Connection from cable and phase 3 terminal.
DC outlet.
AC outlet.
Ground terminal.
Grounded points.
On
Off
32
AAV2015IQE01_B - Installation and usage manual
Equipment reception
Ingeteam
4. Equipment reception
4.1. Packaging symbols
Bear in mind the following symbols present on the packaging of the unit:
Move transport packaging with this side up.
Do not use sharp tools to open the shipping packaging.
Prevent the unit from becoming wet.
Do not place anything on top of the shipping packaging.
The contents of the shipping container are fragile.
Keep the unit in its packaging until immediately before installation. Maintain the unit upright at all times.
4.2. Equipment identification
The serial number of the equipment is its unique identifier. You must quote this number in any communication
with Ingeteam.
In addition to the unit serial number, each electronics block has its own serial number.
The ratings plate of the electronics blocks can be found on a prominent place inside the module.
4.3. Transport damage
If the unit has been damaged during transport, proceed as follows:
1. Do not proceed with the installation.
2. Notify the distributor immediately within 5 days of receipt of the unit.
If ultimately the unit has to be returned to the manufacturer, the original packaging must be used.
AAV2015IQE01_B - Installation and usage manual
33
Storage
Ingeteam
5. Storage
Failure to follow the instructions provided in this section may lead to damage to the unit.
Ingeteam accepts no liability for damage resulting from the failure to follow these instructions.
If the unit is not installed immediately after reception, the following points should be taken into account in order to
avoid damage:
•
The package must be stored in the vertical position.
•
Keep the unit free of dirt (dust, shavings, grease, etc.) and away from rodents.
•
Keep it away from water splashes, welding sparks, etc.
•
Cover the unit with a breathable protective material in order to prevent condensation due to ambient
humidity.
•
Units in storage must not be subjected to weather conditions other than those indicated in Section “7.3.
Environmental conditions”.
•
It is very important to protect the unit from chemical products which can cause corrosion, as well as from
salty atmospheres.
•
Do not store the unit outdoors.
5.1. Conservation
In order to permit correct conservation of the units, you must not remove them from their original packaging until it
is time to install them.
In case of prolonged storage, the use of dry places avoiding, as far as possible, sharp changes in temperature is
recommended.
Deterioration of the packaging (tears, holes, etc.) prevents the units from being kept in optimum conditions before
installation. Ingeteam accepts no liability in the case of failing to observe this condition.
5.2. Unpacking
Correct handling of the units is vitally important in order to:
•
Prevent damage to the packaging which enables them to be kept in optimum condition from shipping
until they are installed.
•
Avoid knocks and / or falls which may harm the mechanical characteristics of the units, e.g. cause
incorrect closure of doors, loss of protection rating, etc.
•
Avoid, as far as possible, vibrations which may cause subsequent malfunction.
If you observe any anomaly, please contact Ingeteam immediately.
Separating the packaging
You can deliver all the packaging to a non-hazardous waste management company.
In any event, each part of the packaging may be recycled as follows:
34
•
Plastic (polystyrene, bag and bubble wrap): the appropriate container.
•
Cardboard: the appropriate container.
AAV2015IQE01_B - Installation and usage manual
Equipment transport
Ingeteam
6. Equipment transport
The unit must be protected, during transport, from mechanical knocks, vibrations, water splashes (rain) and any
other product or situation which may damage it or alter its behaviour.
Failure to observe these instructions may lead to loss of warranty on the product, for which Ingeteam is not
responsible.
Ingeteam recommends transporting the unpacked equipment using a crane wherever possible.
6.1. Centre of gravity
Bear in mind the centre of gravity of the unit whenever it is moved. Then specify the approximate location of the
centre of gravity depending on the number of power modules.
Centre of gravity for units with 2 power modules
Centre of gravity for units with 3 power modules
Centre of gravity for units with 4 power modules
AAV2015IQE01_B - Installation and usage manual
35
Equipment transport
Ingeteam
6.2. Transport using a forklift truck
Transporting the packed equipment
It is recommended to move the unit while in its packaging.
At least the following requirements should be observed:
1. Place the packed unit bearing in mind the centre of gravity of the unit whenever it is moved.
2. Try to locate it as close as possible to the connection between the forks and the chassis.
3. Ensure that the forks are perfectly level to avoid overturning the unit.
4. Transport the unit to the location where you wish to install it and unload it using the reverse process.
5. In any case, observe the instructions in the forklift truck's user manual.
Transporting the unpacked equipment
When moving the unpacked unit at least follow the following requirements:
1. Remove the front and rear protective covers designed to block the holes for the forks of the forklift truck.
905
36
170
55
2. Insert the forks into the holes provided. The forks should be completely horizontal throughout the
transportation process. Special care must be taken to keep the unit completely vertical during
transportation in order to avoid damaging the protruding parts of the unit with the forklift truck lifting
frame.
AAV2015IQE01_B - Installation and usage manual
Equipment transport
Ingeteam
3. Try to place the unit as close as possible to the connection between the forks and the chassis without
damaging the protruding parts of the units with the forklift truck lifting frame.
4. Ensure that the forks are perfectly level to avoid overturning the unit.
5. Slowly transport the unit to the location where you wish to install it and unload it using the reverse
process. Beware of uneven terrain to prevent the unit from falling over.
6. In any case, observe the instructions in the forklift truck's user manual.
6.3. Transport using a crane
When lifting by crane, the lifting beams fitted to the top of the unit should be used, as shown below.
Ensure that the load is distributed evenly between the holes on
the lifting beam.
Ensure that the load is distributed evenly along the lifting
beam.
Tie individual cables, chains or ropes to each of the holes,
making sure the angle is less than or equal to 45° to vertical
and ensuring that the cables are as vertical as possible.
It is always advisable to use a load frame as in the adjoining
figure for a proper distribution of the loads, bearing in mind
that the angle φ should be equal to 90°.
AAV2015IQE01_B - Installation and usage manual
37
Preparation for installing the unit
Ingeteam
7. Preparation for installing the unit
When deciding the location of the unit and planning your installation, you must follow a set of guidelines based on
the specifications of the unit.
This chapter summarises the guidelines and details the external elements needed for correct operation of the unit.
7.1. General requirements for installation
•
The work space must be suitable for maintenance tasks according to current regulations. There must be
1.5 m of free space around the unit.
•
The external connection devices must be suitable and sufficiently close as set forth in current regulations.
•
The feed cables must be of the appropriate gauge for the maximum current.
•
Special care must be taken to ensure that there are no external elements near the air inlets and outlets
that obstruct proper cooling of the unit.
•
This manual is not intended to supersede any laws, regulations or codes applicable to the installation or
the use of the unit, whether local, state or national, including electrical safety codes.
•
Installations must be in accordance with laws, regulations, codes and standards applicable in the
jurisdiction of the location. Ingeteam accepts no liability for the compliance or non-compliance with these
laws, regulations, codes and standards.
•
The unit contains no user-serviceable parts.
•
Before installing or using the unit, read all the instructions and warnings in this manual.
•
Before connecting the unit to the grid, contact the power company. This connection can only be made by
qualified personnel.
•
The wiring of the unit may only be executed by qualified personnel.
7.2. Environment
•
Place the units in a place which is accessible for installation and maintenance work and which permits
use of the keyboard and the reading of the front indicator LEDs.
•
The air vents and part of the module close to them can reach high temperatures. Do not place any
material nearby which is sensitive to high air temperatures.
•
Avoid corrosive environments that may affect the proper operation of the inverter.
•
Never place any object on top of the unit.
•
Do not install the unit outdoors.
•
Ingeteam recommends that the wind direction should favour, as far as possible, the cooling of the unit.
7.3. Environmental conditions
Environmental conditions must be taken into account when choosing the location of the unit.
Environmental conditions
Minimum temperature
−20 ºC
Minimum surrounding air temperature
−20 ºC
Maximum surrounding air temperature
60 ºC
Maximum relative humidity without condensation
95%
It should be borne in mind that moderate condensation may occasionally occur as a consequence of temperature
variations. For this reason, apart from the unit's own protection, it is necessary to monitor these units once they
have been started up on sites where the conditions described above are not expected to be present.
In the event of condensation, never apply voltage to the unit. To remove condensation apply a flow of hot air at a
maximum temperature of 60 °C.
7.4. Fixing surface area
Due to the units’ heavy weight, the ground on which it rests should be firm and completely horizontal and level.
38
AAV2015IQE01_B - Installation and usage manual
Preparation for installing the unit
Ingeteam
The minimum supports for each unit are specified below.
Units with 2 power modules
450
527
627
550
205
205
205
1008
72
205
300
205
2413
Units with 3 power modules
450
527
602
602
550
205
1008
72
205
205
205
300
300
205
3018
AAV2015IQE01_B - Installation and usage manual
39
Preparation for installing the unit
Ingeteam
Units with 4 power modules
450
527
602
602
627
550
205
1008
72
205
205
205
300
205
300
205
3602
The following stipulations must be followed when choosing the place where the unit is to be bolted in:
•
Minimum distance from the centre of the bore to the edge of the concrete pad: 72 mm.
•
Diameter of the hole drilled in the concrete pad: 8 mm.
•
Minimum depth of the hole drilled in the concrete pad: 65 mm.
•
Minimum thickness of the concrete pad: 100 mm.
•
Minimum depth of anchoring bolt: 45 mm.
≥ 100 mm
≥ 65 mm
≥ 45 mm
A-A
≥ 8 mm
≥ 72 mm
A
A
≥ 72 mm
40
AAV2015IQE01_B - Installation and usage manual
Preparation for installing the unit
Ingeteam
7.5. Cooling
These units are designed to be installed in a cabin or enclosed location. Adequate ventilation must be provided
and the following requirements met to guarantee proper operation within the whole range of temperatures for which
the equipment was designed:
•
Ensure the total flow for all the inverter fans. The following table shows the flow rate required by each
inverter as a function of the number of power modules.
Number of modules
Air flow rate
2 power modules
2670 m3/h
3 power modules
4640 m3/h
4 power modules
5340 m3/h
If there is more than one unit inside the cabin or enclosed location, multiply the corresponding value in
the table by the number of inverters.
•
These inverters have IP20 protection. Therefore, it must be ensured that the air intakes and outlets are
protected against water and dust. These units have filters in their intakes, hence the use is recommended
in the cabin air intake of a class G3 filter (according to standard EN 779.
•
For correct cooling appropriate to the filters installed in the unit, air quality must be guaranteed to
environmental class 3S2, in accordance with standard EN 60721-3-3.
•
The entry of air to the cabin or enclosed location must be dimensioned such that the speed to of the air
intake is less than 3 m/s.
•
Total permissible pressure loss in the cabin ventilation system (inlet grille and filter, air outlet duct, outlet
grille and outlet hood) for the total required flow rate will be 100 Pa.
•
Ingeteam recommends installing an air outlet duct (plenum) to facilitate the extraction of the hot air
generated by unit operation to the outside of the cabin or enclosed location. This plenum must be
thermally insulated. If the indicated plenum is installed, it will not be necessary to use additional
extractor fans inside the cabin or enclosed location. In the event that there are other heat-generating
components in the cabin, consider whether the use of additional fans is necessary. In such a case you
must take into account the increase of pressure loss due to the increase in air speed through the intake
grids.
•
The ventilation duct (plenum) must group all the power modules the unit has, or at least two of them. The
plenum for units with two or three power modules must group all the power modules. In four-module units
two plenums will be installed, which will group two power modules each. Individual ducts must not be
installed for each power module.
AAV2015IQE01_B - Installation and usage manual
41
Preparation for installing the unit
Ingeteam
When putting the plenum in place, the installer must make sure that none of the holes made or the
fastening bolts used damages the fans located at the top of the inverter, since they can become
irreparably damaged and useless. It is also important to make sure that no dirt or dust falls in the
roof or fan areas. You are recommended to cover this area with a plastic tarpaulin when making the
holes and use a vacuum cleaner to clean the area before putting the plenum in place. Ingeteam
shall not be held responsible for damage caused due to perforation of these with a drill or the
accumulation of dirt and dust during the installation.
•
Install outside outlet grids that prevent the entry of water and dirt.
•
The option of installing a hood in the air outlet is suggested to prevent water entry. Similarly, a grille
needs to be positioned to prevent animals and other objects from entering. The construction of a plenum
with a slight slope towards the outside is recommended to prevent accumulation and entry of water to the
unit.
•
The maximum temperature rise inside the cabin or enclosed location with respect to the outside
temperature must be less than 5 ºC.
•
The speed and temperature of the intake air at the power module inlets must be as homogeneous as
possible.
•
To ensure correct cooling of the unit, the cabin and unit filters must be maintained properly and at the
indicated frequency, as specified in Section “18.7. Cooling system” in the section on maintenance.
Install the unit so that the air entering for cooling does not come from air expelled by other units or
any other heat source.
42
AAV2015IQE01_B - Installation and usage manual
Preparation for installing the unit
Ingeteam
Do not place any object on top of the unit.
Avoid dropping particles that could enter the unit through the cooling grids.
Facilitate the flow of air entering through the cooling grids.
For more information request document AAV0000IMC03 from Ingeteam.
If you have any queries or suggestions, contact Ingeteam.
7.6. Requirements for DC feed fuses
These inverters can be equipped with fuse holders for DC or not, depending on the client’s needs. Inverters with
fuse holders have between 8 and 32 fuse holders according to the number of modules and the unit configuration.
The fuses to be installed in the bases provided must meet the following specifications.
Electrical specifications
•
Rated voltage greater than or equal to 1000 VDC.
•
gPV class.
•
Rated current of 50 A - 400 A, depending on the features of the unit.
Mechanical specifications
max 73 mm
max 6 mm
max 130 mm
max 61 mm
max 205 mm
min 174 mm
min 134 mm
These inverters can be equipped with fuse holders from different manufacturers, that is why in the previous figure
they indicate as reference the minimum measures of the fuse holders used.
AAV2015IQE01_B - Installation and usage manual
43
Preparation for installing the unit
Ingeteam
Approval references
The following fuse references meet the required electrical and mechanical specifications.
Bussmann
Size
PV-63A-01XL
Rated current
Rated voltage
63 A
PV-80A-01XL
80 A
PV-100A-01XL
01
100 A
PV-125A-01XL
125 A
PV-160A-01XL
160 A
PV-200A-1XL
1
PV-200A-2XL
200 A
1000 VDC
200 A
PV-250A-2XL
2
PV-315A-2XL
250 A
315 A
PV-350A-3L-B
Siba
3
350 A
Size
Rated current
Without an indicator
With indicator and
microswitch adapter
20 028 28.50
20 028 29.50
50 A
20 028 28.63
20 028 29.63
63 A
20 028 28.80
20 028 29.80
80 A
20 028 28,100
20 028 29,100
100 A
20 028 28,125
20 028 29,125
20 028 28,150
20 028 29,150
150 A
20 028 28,160
20 028 29,160
160 A
20 028 28,175
20 028 29,175
175 A
20 028 28,200
20 028 29,200
200 A
20 031 28,200
20 031 29,200
200 A
20 031 28,250
20 031 29,250
250 A
20 031 28,315
20 031 29,315
20 031 28,350
20 031 29,350
350 A
20 031 28,400
20 031 29,400
400 A
NH1XL
NH3L
Rated voltage
125 A
1100 VDC
315 A
7.7. Requirements for transformers
7.7.1. Grid connection transformer
These units must be connected to a transformer with the neutral of the low voltage isolated, thus
generating an IT grid.
This section lists the technical specifications of the grid connection transformer which converts the medium or
high supply voltage to the operating voltage of the unit.
1. The transformer’s power must be greater than the sum of the power ratings of the connected inverters.
Take into account the environmental conditions of the site.
44
AAV2015IQE01_B - Installation and usage manual
Preparation for installing the unit
Ingeteam
2. Units connected to the transformer’s low voltage winding must be synchronised. If two or more inverters
are connected in parallel to the low voltage side to which the inverter is connected, each will have to be
wired individually and galvanically insulated.
Low voltage
Medium voltage
In order to synchronise both units, you must configure one of the units in Generator mode and the other
as Repeater.
In order to configure the unit as Generator you must set switch SW1 on the synchronization board
indicated in the following figure to position 09.
In order to configure the unit as Repeater you must set switch SW1 on the synchronization board
indicated in the following figure to position 18.
After completing the configuration, interconnect the synchronization boards of both units, from connector
U13 of the board configured as Generator to connector U9 of the board configured as Repeater.
Synchronization board
3. MPPTs connected by these inverters to the same transformer must have the same voltage settings.
4. The Ucc short circuit voltage of the transformer must be equal or less than 6%.
5. We recommend inserting a grounded metal screen between the high voltage winding and low voltage
winding.
6. The low voltage winding must withstand pulsating voltage components with dU/dt of 500 V/uS voltage.
Because of inverter operation, the voltage between a phase and ground can reach 3/2 of the open circuit
voltage of the PV array.
7. We recommend using the Dyn11 connection.
8. The neutral low voltage winding should not be grounded. It should be connected to the inverter as a voltage
reference (no power transmitted).
9. The connection to the medium voltage network will be the nominal connection point.
AAV2015IQE01_B - Installation and usage manual
45
Preparation for installing the unit
Ingeteam
10. We advise using transformers equipped with five-point voltage regulators, with the possibility of selecting
the following options:
5%
2.5%
0%
-2.5%
-5%
No electronic equipment may be connected to the power grid. All auxiliary loads must be isolated from the power
grid via a galvanically isolated transformer, as shown in the section “7.7.2. Auxiliary transformer”.
Depending on the type of transformer connection (star or delta), the following points should be borne in mind.
To find the different components listed below, consult Section “2.7. Location of components”.
Star electrical connection
In this case the neutral of the transformer will be connected to dedicated
terminal XN of the DCAC supply module. Ensure that the link between
terminals U1nXAC.0 and U1nXAC.1 of the electronics block is fitted.
L1
U1nXAC.0
U1nXAC.1
L2
N
L3
Link installed
If it is not possible to connect the neutral, the link connecting these terminals must
be removed.
Delta electrical connection
L1
In this case no cables will be connected to terminal XN of the DCAC supply
module.
Remove the link between terminals U1nXAC.0 and U1nXAC.1 in the
electronics block. This link comes installed as standard.
L2
U1nXAC.0
U1nXAC.1
L3
Remove link
Take into account section”14.4.3. Connecting the AC neutral”.
46
AAV2015IQE01_B - Installation and usage manual
Preparation for installing the unit
Ingeteam
7.7.2. Auxiliary transformer
Some unit components such as fans, contactors or power supplies, require auxiliary power to operate. No electronic
equipment may be connected to the power grid. All auxiliary loads must be isolated from the power grid via a
galvanically isolated transformer.
This is why it is essential to install an auxiliary services transformer with galvanic isolation, suitable for the grid
with a single phase voltage of 220 V 50/60 Hz.
The Auxiliary service transformer must have galvanic insulation. It is forbidden to use autotransformers
or other devices without galvanic isolation to match the grid voltage to the single phase voltage
required for the proper operation of the unit.
Ingeteam accepts no liability for any consequences arising from non-compliance with these
instructions.
The auxiliary transformer transforms the voltage from the power part of the unit to its control and current part.
Medium voltage transformer
L1
L2
L3
N
Inverter
Auxiliary transformer
Auxiliary loads
The primary circuit is connected to the power input. We recommend installing protection and switching
components to protect this transformer.
In the event of using a residual current device between the transformer secondary connected to ground and the
auxiliary loads of the unit, said device shall be 300 mA, of industrial use, a selective version and super immune.
The technical requirements of the auxiliary transformer are:
•
The transformer’s power should be suitable for the loads connected to it, taking the site environmental
conditions into account. The minimum values will be as follows:
Number of power modules
Power
2
1500 VA
AAV2015IQE01_B - Installation and usage manual
47
Preparation for installing the unit
Ingeteam
Number of power modules
Power
3
1800 VA
4
2000 VA
•
The power winding must withstand pulsating voltage components with dU/dt of 500 V/uS. Because of
inverter operation, the voltage between a phase and ground can reach 3/2 of the open circuit voltage of
the PV array.
•
Delta connection is advised in the power part and star connection in auxiliary loads.
•
The neutral of the auxiliary loads must be connected to ground.
7.8. Measuring equipment connected to the power grid
All measuring devices connected to the power grid (wattmeters, meters, etc.) should be isolated from the grid by
voltage transformers, current transformers, etc.
48
AAV2015IQE01_B - Installation and usage manual
Installing the unit
Ingeteam
8. Installing the unit
Before installing the unit, the packaging must be removed, taking special care not to damage the housing.
Check that there is no moisture inside the packaging. If there are signs of moisture, the unit must not be installed
until you are sure it is completely dry.
All installation operations must comply with current regulations.
8.1. Fixing the unit to the floor
These units feature an optional anchoring system.
The system comprises some plates that bolt the four corners of the base to the concrete pad where the inverter
sits.
In order to keep the nuts and bolts of the unit in good condition it is important to make sure there is
no dirt or shavings in the threads when screwing them in and apply a suitable lubricant.
Once it has been corrected selected, follow these steps:
1. Mark the fixing points for the plates on the floor.
2. Drill the floor with a recommended drill for the fixture supplied with the fastening plate.
3. Anchor the sheet metal fixing points to the floor.
4. Screw the sheet metal fixing points to the unit.
5. Check that the unit is properly secured.
Once the unit has been mounted in its final position and has been solidly secured, make the electrical connections
to it. The order is as follows:
1. Ground connection.
2. Connecting auxiliaries.
3. Connecting the communication accessories.
4. Connection options.
5. DC connection.
6. AC connection.
AAV2015IQE01_B - Installation and usage manual
49
Ground connection
Ingeteam
9. Ground connection
This chapter explains the requirements and process for connecting the ground wiring to the unit.
Read carefully before starting the connection process.
To ensure the safety of persons, the unit must be connected to the ground of the installation.
All unit grounds must be electrically interconnected.
To find the different components listed below, consult Section “2.7. Location of components”.
9.1. Safety instructions for the ground connection
Refer to Section “3. Safety” and the safety paragraph in this section before operating the equipment.
Make sure there is no voltage present on the unit before carrying out any connections. Once the
inverter is switched off, wait at least 10 minutes until internal capabilities are fully discharged.
Ingeteam accepts no liability for any damages caused by incorrect connection.
Failing to apply the correct tightening torques to the connection terminals causes a risk of
overheating and fire.
In order to keep the nuts and bolts of the unit in good condition it is important to make sure there is
no dirt or shavings in the threads when screwing them in and apply a suitable lubricant.
After connecting the ground wiring, do not switch on the power until you have made all other
connections and the unit has been closed.
Use the Personal Protective Equipment specified in the section “3.2. Personal Protective
Equipment”.
50
AAV2015IQE01_B - Installation and usage manual
Ground connection
Ingeteam
9.2. Wiring requirements for the ground connection
•
The correct dimensioning of the grounding conductor is the installer’s responsibility, depending on the
plant specifications and inverter characteristics. The recommended minimum cable size is16 mm2.
•
Only copper and aluminium cables will be used, dimensioned based on inverter and PV plant
characteristics.
•
The breaking capacity of the circuit breaker installed in the inverter is 50 kA.
•
Ingeteam accepts no responsibility for the installation of the inverter in installations with a higher than
specified short-circuit current.
•
The short-circuit current delivered by the inverter is considerably lower than the specified circuit breaker
breaking capacity.
9.3. Connection area
The metal parts of the inverter (equipment ground) are electrically connected to the grounding bar on the front of
each cubicle containing the unit electronics. All ground connections must be made to the bar located in the DCAC
supply module.
Ground
9.4. Ground connection via a terminal
9.4.1. Requirements for the ground connection via a terminal
•
For the ground connection, the terminals must be compression terminals with one 6 mm diameter hole.
•
Only use the screws and washers provided by Ingeteam upon delivery of the unit.
•
Use only tinned copper terminals.
•
The torque should be 8 Nm.
A. Torx T30 M6 screws.
B. Washer M6.
C. Terminal.
D. Threaded connection plate.
D
C
AAV2015IQE01_B - Installation and usage manual
B
A
51
Ground connection
Ingeteam
9.4.2. Making the ground connections via a terminal
1. Strip the cable according to the size of terminal to be used.
2. Crimping the terminal on the cable.
3. Clean the contact surfaces on both the terminal and the connection bar with a clean cloth and ethanol.
4. Connect the terminal to the connection bar using the (previously lubricated) screws and washers supplied
by Ingeteam with the unit, respecting the torque specified.
5. Ensure the correct connection of the cable and terminal.
52
AAV2015IQE01_B - Installation and usage manual
Connecting auxiliaries
Ingeteam
10. Connecting auxiliaries
These units have two AC outlets for supplying certain parts of the unit itself, such as the fans or the 15 V power
supply or the motorised DC isolating switch.
This auxiliary voltage must be 230 V between phase and neutral.
This chapter explains the requirements and process for wiring the auxiliary cabling in the unit.
Read carefully before starting the connection process.
To find the different components listed below, consult Section “2.7. Location of components”.
10.1. Safety instructions for connecting auxiliary equipment
Refer to Section “3. Safety” and the safety paragraph in this section before operating the equipment.
Make sure there is no voltage present on the unit before carrying out any connections. Once the
inverter is switched off, wait at least 10 minutes until internal capabilities are fully discharged.
Ingeteam accepts no liability for any damages caused by incorrect connection.
After connecting the auxiliary cable, do not switch the power on until you have made all other
connections and the unit has been closed.
Use the Personal Protective Equipment specified in the section “3.2. Personal Protective
Equipment”.
10.2. Wiring requirements for connecting auxiliary equipment
•
The correct dimensioning of the conductor for auxiliary equipment is the responsibility of the installer.
The cable size is 2.5 mm2.
•
Only copper and aluminium cables will be used, dimensioned based on inverter and PV plant
characteristics.
10.3. Connection area
Unit general auxiliary voltage
The terminal block for making auxiliary AC connections is X220.OUT located in the rear of the supply module.
The thermomagnetic breaker QAUX protects the auxiliary AC connection.
During connection, make sure that the thermomagnetic circuit breaker is in the OFF position. To check correct
operation, return to the ON position. On doing this, the display will light up and the 15 V power supply and
electronics of each module will switch on. It is now possible to communicate with the inverter.
Specific auxiliary voltage for the motorised isolating switch
The motorised DC isolating switch has a terminal block with a different supply to the auxiliary voltage terminal
block. The connection terminal block for said supply is X220.M, located in the front part of the supply module.
AAV2015IQE01_B - Installation and usage manual
53
Ingeteam
Connecting auxiliaries
The power supply to the motorised DC isolating switch (X220M) needs to be connected. This power supply is
connected separately to the general auxiliary supply to guarantee the independence of the two connections.
The thermomagnetic breaker QM protects the motorised DC isolating switch supply circuit, independent to the
thermomagnetic circuit breaker QAUX.
During connection, make sure that this is in the OFF position. To connect the power supply, return to the ON
position. The motorised DC isolating switch will not switch to the ON position until all the power modules are on,
all the doors are closed and there is also AC supply to the main connection.
10.4. Connection of auxiliaries
1. Strip the cables.
2. Crimp the wire ends according to the wire gauge being used.
3. Open the terminal. The terminals used in this terminal strip are of the clamp type. To insert the cable into
the desired position press with a flat head screwdriver, insert the cable and then remove the screwdriver.
54
AAV2015IQE01_B - Installation and usage manual
Connecting the communication accessories
Ingeteam
11. Connecting the communication accessories
This chapter explains the process for wiring the communications accessories to the unit.
There are several ways to achieve this communication with these units:
•
RS-485 (in series).
•
Ethernet TCP.
•
GSM/GPRS.
•
Ethernet RDCom.
To find the different components listed below, consult Section “2.7. Location of components”.
See the corresponding communications accessories manual for further information.
Read carefully before starting the connection process.
11.1. Safety instructions for connecting the communications
accessories
Refer to Section “3. Safety” and the safety paragraph in this section before operating the equipment.
Make sure there is no voltage present on the unit before carrying out any connections. Once the
inverter is switched off, wait at least 10 minutes until internal capabilities are fully discharged.
Ingeteam accepts no liability for any damages caused by incorrect connection.
After connecting the communications accessories, do not switch the power on until you have made all
other connections and the unit has been closed.
Use the Personal Protective Equipment specified in the section “3.2. Personal Protective
Equipment”.
AAV2015IQE01_B - Installation and usage manual
55
Connecting the communication accessories
Ingeteam
11.2. Description of the XCOM terminal strip
These units have a communications terminal block located in power module No. 2. It is described in detail below.
XCOM
XCOM
Input
Output
1
RS-485 B (+)
2
RS-485 A (–)
3
GND
4
Ground
5
RS-485 B (+)
6
RS-485 A (–)
7
GND
8
Ground
1 ... 8
The unit is provided with a > 211 Ohm ferrite rod. It must be connected to the external cable
connected to the output from the XCOM terminal block, as close as possible to the latter, turning it
around the centre hole twice.
11.3. Communication via RS-485
These units incorporate factory-supplied hardware for communicating via an RS-485 serial line. This hardware is
made up of an RS-485 communications board for each power module, already fitted to the control card of each
electronics block and connected to communications terminal strip XCOM.
The following diagram shows the connection of one or more units to a computer via RS-485.
Wattmeter kit*
Power modules
XCOM
Kit for reading DC input string
current*
RS-485 communication for one inverter
56
AAV2015IQE01_B - Installation and usage manual
Connecting the communication accessories
Wattmeter kit*
Ingeteam
Power modules
XCOM
XCOM
Kit for reading DC input string
current*
RS-485 communication for several inverters
* optional.
Thanks to this pre-installation, the installer will only need to make the connection via the XCOM communications
terminal located in power module 2.
To access this terminal, use the cable openings for power module 2. It is essential for the cable entries to have the
same degree of protection as the unit itself.
If the unit has the Wattmeter kit or the Kit for reading DC input string current installed, these will be found in the
existing communications network using a different node number to that assigned to the unit.
11.4. Ethernet TCP communication
At the request of the installer, inverters may optionally incorporate hardware for communicating via Ethernet TCP.
The following diagram shows the connection of one or more units to a computer via Ethernet TCP.
Wattmeter kit*
Power modules
XCOM
Kit for reading DC input string
current*
Ethernet TCP communication for one inverter
AAV2015IQE01_B - Installation and usage manual
57
Connecting the communication accessories
Ingeteam
Wattmeter kit*
Power modules
XCOM
XCOM
Kit for reading DC input string
current*
Ethernet TCP communication for several inverters
* optional.
Conversion from Ethernet TCP to the communications ring installed in the inverter is made using the Ethernet TCP
card, via the RS-485 RTU serial connection.
The module connections and possible optional kits installations are made as explained in Section “11.3.
Communication via RS-485”.
If this communications card is ordered once the unit has been installed, carry out the following steps to install the
electronics block of power module number 1:
1. Disconnect the RS-485 communications card installed as standard in the unit and disconnect the
communications cable from positions 1, 2, 5 and 6 of the aerial connector.
58
AAV2015IQE01_B - Installation and usage manual
Connecting the communication accessories
Ingeteam
2. Fit the Ethernet TCP communications card to connectors J11 and J12 of the control card as shown in the
figure below.
3. Wire the aerial connector that comes with the Ethernet TCP communications card with the cable with the
red mark and the cable with the black mark (two wires per pin connector on the wire-to-wire connector).
The positions to be wired are as follows:
Red
1
2
3
4
Black
Pin
Cable colour
1
Brown
2
White
3
Green
4
Grid
If the Ethernet TCP communications card is ordered with the unit, the card is provided assembled on the control
board and a bag (attached with a tie) containing the Ethernet TCP cable. Connect the cable to the board’s Ethernet
TCP output and feed it out through the holes in the housing.
AAV2015IQE01_B - Installation and usage manual
59
Connecting the communication accessories
Ingeteam
11.5. Communication via GSM/GPRS
At the request of the installer, inverters may optionally incorporate hardware for communicating via GSM/GPRS.
The following electrical diagram shows the connection of one or more units to a computer via GSM/GPRS.
Wattmeter kit*
Power modules
XCOM
Kit for reading DC input string
current*
GSM/GPRS communication for one inverter
Wattmeter kit*
Power modules
XCOM
XCOM
Kit for reading DC input string
current*
GSM/GPRS communication for several inverters
* optional.
Signal conversion to the communications ring installed in the inverter is made using the GSM/GPRS
communications card, via the RS-485 RTU serial connection.
The module connections and possible optional kits installations are made as explained in Section “11.3.
Communication via RS-485”.
If this communications card is ordered once the unit has been installed, carry out the following steps to install the
electronics block of power module number 1:
60
AAV2015IQE01_B - Installation and usage manual
Connecting the communication accessories
Ingeteam
1. Disconnect the RS-485 communications card installed as standard in the unit and disconnect the
communications cable from positions 1, 2, 5 and 6 of the aerial connector.
2. Fit the GSM/GPRS communications card to connectors J11 and J12 of the control card and insert the
SIM card as shown in the figures below.
SIM
AAV2015IQE01_B - Installation and usage manual
61
Connecting the communication accessories
Ingeteam
3. Wiring the aerial connector that comes with the GSM/GPRS communications card to the cable with the
red mark and the cable with the black mark. The positions to be wired are as follows:
1
2
3
4
Black
1
2
3
4
Red
Pin
Cable colour
1
Brown
2
White
3
Green
4
Grid
4. Connect the antenna cable to the antenna output on the card and feed it out through the cable entries on
the bottom of the housing. Connect the end that goes outside to the antenna and attach it via its magnet
to the unit’s housing.
If the GSM/GPRS communications card is ordered with the unit, the card is provided assembled on the control
board and a bag (attached with a tie) containing the antenna cable. Connect the antenna cable to the antenna
output on the card and feed it out through the cable entries on the bottom of the housing. Connect the end that
goes outside to the antenna and attach it via its magnet to the unit’s housing.
11.6. Ethernet RDCom communication
At the request of the installer, inverters may optionally incorporate Ethernet RDCom (Read Data Communication)
hardware for communicating via Ethernet. Its installation divides the data bus in two and incorporates a new
Ethernet TCP/RS-485 converter. The new data bus is used to read data both from the inverter and from possible
optional kits.
This communications hardware complements the various communications options seen previously, with the use of
Ethernet TCP communications recommended. These will be used as a bus to write data to the inverters.
Depending on installation requirements, it will be necessary to incorporate these additional communications to
enable plant control. The inclusion of this communications option will need to be studied with Ingeteam when
designing the PV installation.
Installing this option results in the modification of the XCOM terminal strip. The new configuration of this terminal
strip is shown below.
XCOM
XCOM
Reading
(Ethernet
RDCom
connection)
Writing (power
module
connection)
1
RS-485 B (+)
2
RS-485 A (–)
3
GND
4
Ground
5
RS-485 B (+)
6
RS-485 A (–)
7
GND
8
Ground
1 ... 8
The connection with Ethernet RDCom communications for data reading is made at the TCP/RS-485 converter
located between power modules 1 and 2.
62
AAV2015IQE01_B - Installation and usage manual
Connecting the communication accessories
Ingeteam
The following diagram shows the electrical diagram for one or more units.
Ethernet TCP/RS-485 conversion
card
Wattmeter kit*
Ethernet
RDCom
connection
inverter no. 1
XCOM
Kit for reading DC input string
current*
Display
Ethernet RDC communication for one inverter
XCOM
Ethernet RDCom connection, inverter
no. 1
XCOM
Ethernet RDCom connection, inverter
no. 2
Ethernet RDC communication for several inverters
* optional.
The following figure details the location of the Ethernet RDCom converter between power modules 1 and 2.
AAV2015IQE01_B - Installation and usage manual
63
Connecting the communication accessories
Ingeteam
Ethernet RDCom converter
64
RJ45 connection ports
AAV2015IQE01_B - Installation and usage manual
Connection options
Ingeteam
12. Connection options
These units offer the possibility as standard of connecting various options for unit control and/or monitoring. The
installer can decide to use them or not depending on the requirements of each installation.
To find the different components listed below, consult Section “2.7. Location of components”.
12.1. Safety instructions for connecting optional equipment
Refer to Section “3. Safety” and the safety paragraph in this section before operating the equipment.
Make sure there is no voltage present on the unit before carrying out any connections. Once the
inverter is switched off, wait at least 10 minutes until internal capabilities are fully discharged.
Ingeteam accepts no liability for any damages caused by incorrect connection.
After connecting the options, do not switch the power on until you have made all other connections
and the unit has been closed.
Use the Personal Protective Equipment specified in the section “3.2. Personal Protective
Equipment”.
12.2. Wiring requirements for connecting optional equipment
•
The wiring for connecting the options needs to be carried out by the client.
•
Use only copper and aluminium cables.
•
The minimum section is 0.75 mm2 and the maximum 2.5 mm2.
•
This cable must be no longer than 20 m.
•
The normally closed contact must be capable of working at 230 VAC 50/60 Hz and a power of 40 VA.
AAV2015IQE01_B - Installation and usage manual
65
Connection options
Ingeteam
12.3. Connection process for monitoring components external to the
unit
The inverter enables the monitoring of an element outside the unit (temperature sensor, sensor detecting the
opening or closing of external junction boxes, main external AC breaker, etc.).
In the case of a fault in a monitored element, the inverter goes into shutdown status and will not operate until the
element returns to its normal condition.
To connect the external monitoring components to the unit, the XFDC terminal block is provided in the DCAC
supply module.
Normally closed volt-free contacts should be fitted for monitoring between terminals XFDC.1 and XFDC.2 by
removing the triple horizontal link short-circuiting them, as shown in the following figure, and installing a double
link between XFDC.1 and XFDC.2.
If the equipment has the earth start-up kit, these contacts must be installed in a double link to between XFDC.2
and XFDC.3, which must be removed.
XFDC.1 XFDC.2 XFDC.3
Remove triple link
NC Contacts
•
Open contact: fault in the monitored component.
•
Closed contact: no fault at monitored component.
To make the connection, follow the following steps:
1. Strip the cables.
2. Crimp the wire ends according to the wire gauge being used.
3. Open the terminal. The terminals used in this terminal strip are of the clamp type. To insert the cable into
the desired position press with a flat head screwdriver, insert the cable and then remove the screwdriver.
66
AAV2015IQE01_B - Installation and usage manual
Connection options
Ingeteam
4. Remove the triple horizontal link.
5. Insert a new two-position horizontal link between terminals XFDC.2 and XFDC.3.
If the PV array grounding kit is installed in this unit, this monitoring will be in series with the
grounding, using terminals XFDC.2 and XFDC.3. It will not be necessary to use any links in this case.
12.4. DC isolating switch remote control connection process
It is not possible to use the same contact to open the DC isolating switch of several units.
The inverter enables an emergency shutdown to be performed externally. This remote actions is equivalent to
pressing the emergency stop button. The inverter enters a shutdown conditions, safely disconnecting itself from the
grid and opening the motorised isolating switch.
This operation enables complete disconnection of the PV array, ensuring the removal of all DC voltage from the
inverter input.
To connect the remote control for the DC isolating switch, terminal block XQDC is provided in the DCAC supply
module.
A normally closed volt-free contact should be fitted between terminals XQDC.1 and XQDC.2 by removing the
horizontal link short-circuiting them, as shown in the following figure.
XQDC.1
XQDC.2
Remove link
NC Contact
•
Open contact: inverter switches to the shutdown condition and DC isolating switch to Off.
•
Closed contact: inverter switches to the run condition and DC isolating switch to On.
To make the connection, follow the following steps:
1. Strip the cables.
2. Crimp the wire ends according to the wire gauge being used.
AAV2015IQE01_B - Installation and usage manual
67
Connection options
Ingeteam
3. Open the terminal. The terminals used in this terminal strip are of the clamp type. To insert the cable into
the desired position press with a flat head screwdriver, insert the cable and then remove the screwdriver.
4. Remove the horizontal link.
The motorised DC isolating switch has a limited number of operating cycles, so excessive use may
lead to premature wear.
12.5. AC switch remote control trip connection process
It is not possible to put the QAC circuit breakers in parallel.
In units incorporating an AC circuit breaker, remote control tripping can be carried out. Opening this circuit breaker
causes the complete disconnection of the AC power connection. After the disconnection of the AC part, the inverter
will disconnect automatically. Once the AC circuit breaker has been tripped, it needs to be reset manually.
In units fitted with an AC switch, to connect the remote control trip for the this switch, terminal block XQAC is
provided in the DCAC supply module.
Install a Normally open volt-free contact between the terminal block XQAC.1 and XQAC.2.
XQAC.1
XQAC.2
NO contact
•
Open contact: AC switch On.
•
Closed contact: AC switch Off (tripped).
After tripping the switch it must be reset manually.
To make the connection, follow the following steps:
1. Strip the cables.
68
AAV2015IQE01_B - Installation and usage manual
Connection options
Ingeteam
2. Crimp the wire ends according to the wire gauge being used.
3. Open the terminal. The terminals used in this terminal strip are of the clamp type. To insert the cable into
the desired position press with a flat head screwdriver, insert the cable and then remove the screwdriver.
The AC circuit breaker has a limited number of operating cycles, so excessive use may lead to
premature wear.
Opening the AC circuit breaker causes disconnection of the equipment due to the lack of grid
connection. This disconnection is safe, but Ingeteam does not recommend the use of this procedure
as a regular disconnection method. Excessive use may lead to anomalies in inverter use.
12.6. Insulation fault /grid connection connection process
The configuration of the equipment to make the contact perform one or another function is factory
set and must be specifically requested from Ingeteam at the time of ordering.
To connect the insulation fault/grid connection, terminals U1nX2.5 and U1nX2.6 are provided in each electronics
block.
This normally open contact withstands a voltage of 230 VAC and a maximum current of 10 A.
Each electronics block is assigned its own contact, which detects the isolation operation or failure of the
electronics block in question. Only the electronics block contact operating as “master” will work. For this reason,
all contacts must be connected in parallel.
It can be used for one of two functions:
Detecting an insulation fault in the DC circuit
•
Open contact: there is no insulation fault in the DC circuit.
•
Closed contact: there is an insulation fault in the DC circuit.
Indicator showing that the unit is connected to the mains via its internal contactor
•
Open contact: internal contactor for connecting to the grid is open; the inverter is not connected to the
grid.
•
Closed contact: internal contactor for connecting to the grid is closed; the inverter is connected to the
grid.
Regardless of the setting of this contact the unit continues to measure the insulation of the DC part.
To make the connection, follow the following steps:
1. Strip the cables.
2. Crimp the wire ends according to the wire gauge being used.
AAV2015IQE01_B - Installation and usage manual
69
Ingeteam
Connection options
3. Open the terminal. The terminals used in this terminal strip are of the clamp type. To insert the cable into
the desired position press with a flat head screwdriver, insert the cable and then remove the screwdriver.
70
AAV2015IQE01_B - Installation and usage manual
DC connection
Ingeteam
13. DC connection
This chapter explains the requirements and process for wiring the DC cabling to the unit.
Read carefully before starting the connection process.
To find the different components listed below, consult Section “2.7. Location of components”.
In the sketches showing the various DC connection processes, the mounting plate is shown open at
both ends at 45° in order to give a clearer idea of the various configurations. The mounting plate
forms a right angle at its ends inside the unit.
13.1. Safety instructions for the DC connection
Refer to Section “3. Safety” and the safety paragraph in this section before operating the equipment.
DC cables connected to photovoltaic modules exposed to sunlight may be at a dangerously high
voltage which could cause serious injury and even death.
Before connecting DC cables to the inverter verify the absence of voltage.
Make sure there is no voltage present on the unit before carrying out any connections. Once the
inverter is switched off, wait at least 10 minutes until internal capabilities are fully discharged.
The polarities indicated in the following figure must be followed. Ingeteam accepts no liability for any
damages caused by incorrect connection.
Before connecting the wires, ensure that the DC fuses are not fitted in the bases. Install fuses once
you have connected the wiring and checked that the polarity is correct.
Ingeteam accepts no liability for the consequences of non-compliance with these instructions.
There is a risk of fire when using wiring gauges with a lower permissible current than the maximum
possible from the photovoltaic modules.
Failing to apply the correct tightening torques to the connection terminals causes a risk of
overheating and fire.
In order to keep the nuts and bolts of the unit in good condition it is important to make sure there is
no dirt or shavings in the threads when screwing them in and apply a suitable lubricant.
After connecting the DC wiring, do not switch the power on until you have made all other connections
and the unit has been closed.
AAV2015IQE01_B - Installation and usage manual
71
DC connection
Ingeteam
Use the Personal Protective Equipment specified in the section “3.2. Personal Protective
Equipment”.
After working on the terminals the polycarbonate guard must be put back into place.
13.2. Wiring requirements for connecting DC connection
•
Use only copper and aluminium cables.
•
The DC connection cables must withstand at least 1000 V between poles and between each pole and
ground.
13.3. Connection area
The PV array connections are made in the part of the DCAC supply module shown in the following figure.
The DC supply configuration will be different depending on the number of modules.
13.4. DC connection via a terminal
13.4.1. Requirements for DC connection via a terminal
72
•
For DC connection, compression terminals must be used. The terminals used may have either one or two
13 mm diameter holes. Where there are 2 holes, these will be 44.5 mm apart.
•
The inverter connection plates are made of copper. You are recommended to use only tinned copper
terminals. If you use aluminium cables, you must use bimetallic terminals or other components that
eliminate the galvanic couple of the joint.
•
No more than two cables should be connected to each DC connection plate hole. Each connection plate
has 8 holes, so the maximum number per pole will be 16.
•
Only use the screws and washers provided by Ingeteam upon delivery of the unit.
•
All torques indicated must be respected and maintained.
AAV2015IQE01_B - Installation and usage manual
DC connection
Ingeteam
Tightening torque. M12 st. st. screws
(unlubricated)
Wire gauge
Minimum
In accordance with the current
circulating through the conductors
Maximum
300 mm2
65 Nm
DC connection via a terminal with one hole
A. M12 hex head screw.
B. M12 washer.
C. Terminal.
D. Connection plate.
E. M12 nut.
E
B
D
C
B
A
DC connection via two terminals with one hole
A. M12 hex head screw.
B. M12 washer.
C. Terminal.
D. Connection plate.
E. M12 nut.
E
B
C
D
C
B
A
DC connection via a terminal with two holes
A. M12 hex head screw.
B. M12 washer.
C. Terminal.
D. Connection plate.
E. M12 nut.
E
B
D
C
AAV2015IQE01_B - Installation and usage manual
B
A
73
DC connection
Ingeteam
DC connection via two terminals with two holes
A. M12 hex head screw.
B. M12 washer.
C. Terminal.
D. Connection plate.
E. M12 nut.
E
B
C
D
C
B
A
13.4.2. DC connection process
Reverse connection of the PV array would have fatal consequences on the unit and could cause
serious damage to persons close to the unit.
1. Remove the protective polycarbonate sheet.
2. If the unit has DC feed fuses, ensure that these are not fitted in their bases. If this is not the case,
remove them (see Section “13.5. Connection/disconnection of the DC fuses”).
3. Strip the cable according to the size of terminal to be used.
4. Crimping the terminal on the cable.
5. Clean the contact surfaces on both the terminal and the connection bar with a clean cloth and ethanol.
6. Connect the terminal to the connection bar using the (previously lubricated) screws and washers supplied
by Ingeteam with the unit, respecting the torque specified.
7. Check polarity of the strings connected to the inverter. If the polarity is incorrect, change it. Connecting a
string with the incorrect polarity and starting up the unit can cause irreversible damage to the unit.
8. If the unit has fuses, install them in their bases (see Section “13.5. Connection/disconnection of the DC
fuses”).
9. Reinstall the protective polycarbonate sheet.
Units with 16 fuses
Respect the connections indicated in the figure bearing in mind the polarity.
74
AAV2015IQE01_B - Installation and usage manual
DC connection
Ingeteam
See the figure below before connecting the positive pole:
Positive pole connection
See the figure below before connecting the negative pole:
Negative pole connection
Ensure the correct connection of the cable and terminal.
AAV2015IQE01_B - Installation and usage manual
75
DC connection
Ingeteam
Units with 24 fuses
Respect the connections indicated in the figure bearing in mind the polarity.
See the figure below before connecting the positive pole:
Positive pole connection
See the figure below before connecting the negative pole:
Negative pole connection
Ensure the correct connection of the cable and terminal.
76
AAV2015IQE01_B - Installation and usage manual
DC connection
Ingeteam
Units with 32 fuses
Respect the connections indicated in the figure bearing in mind the polarity.
See the figure below before connecting the positive pole:
Positive pole connection
See the figure below before connecting the negative pole:
Negative pole connection
Ensure the correct connection of the cable and terminal.
13.5. Connection/disconnection of the DC fuses
After connecting the cables, the DC fuses should be fitted.
To install fuses in their holders the unit comes with a tool to facilitate this, as also for removing them. This tool is
located in the DCAC supply module as shown in the following diagram.
AAV2015IQE01_B - Installation and usage manual
77
Ingeteam
DC connection
1. To install the fuse insert the guides on the fuse into the guides on the tool and insert the fuse into its
holder, making sure that the fuse is completely inserted.
2. When it has been installed, remove the tool.
The process for removing the fuses is the reverse of the above.
78
AAV2015IQE01_B - Installation and usage manual
AC connection
Ingeteam
14. AC connection
This chapter explains the requirements and process for wiring the AC cabling to the unit.
Read carefully before starting the connection process.
To find the different components listed below, consult Section “2.7. Location of components”.
14.1. Safety instructions for the AC connection
Refer to Section “3. Safety” and the safety paragraph in this section before operating the equipment.
Before connecting AC cables to the inverter verify the absence of voltage.
Make sure there is no voltage present on the unit before carrying out any connections. Once the
inverter is switched off, wait at least 10 minutes until internal capabilities are fully discharged.
Ingeteam accepts no liability for any damages caused by incorrect connection.
There is a risk of fire when using wiring gauges with a lower permissible current than the maximum
possible current.
Failing to apply the correct tightening torques to the connection terminals causes a risk of
overheating and fire.
In order to keep the nuts and bolts of the unit in good condition it is important to make sure there is
no dirt or shavings in the threads when screwing them in and apply a suitable lubricant.
After connecting the AC wiring, do not switch the power on until you have made all other connections
and the unit has been closed.
Use the Personal Protective Equipment specified in the section “3.2. Personal Protective
Equipment”.
After working on the terminals the polycarbonate guard must be put back into place.
AAV2015IQE01_B - Installation and usage manual
79
AC connection
Ingeteam
14.2. Wiring requirements for connecting AC connection
•
The correct dimensioning of the AC wiring is the installer’s responsibility, depending on the plant
specifications and inverter characteristics.
•
The wire gauge must be based on each unit’s continuous currents. Incorrect dimensioning can lead to
overheating and fires.
•
Use only copper and aluminium cables.
•
The cables for connection to the unit grid must withstand at least the phase voltage and 1000 V between
a phase and ground.
•
If the inverter and the grid connection point are far enough apart to require the use of longer cables, an
external distribution box must be used close to the investor to make this connection.
14.3. Connection area
The AC supply is located in the DCAC supply module. Remove the protective cover to gain access to the plates.
L3
L2
L1
The neutral connection is made to the XN terminal and is protected by means of the 4 Amp FN fuse located in the
DCAC supply module.
80
AAV2015IQE01_B - Installation and usage manual
AC connection
Ingeteam
XN
FN
Optionally, it can be requested that the connection plates for the AC supply are located on the top of the unit, as
shown in the following figure.
L1
AAV2015IQE01_B - Installation and usage manual
L2
L3
81
AC connection
Ingeteam
14.4. AC connection via a terminal
14.4.1. Requirements for AC connection via a terminal
•
For AC connection, compression terminals must be used. The terminal used must have a 13 mm diameter
hole.
•
Use only tinned copper terminals.
•
For AC connection, no more than two cables should be connected to each connection plate hole. Each
phase has two holes per plate, hence the maximum number of cables per phase is four.
•
Only use the screws and washers provided by Ingeteam upon delivery of the unit.
•
All torques indicated must be respected and maintained.
Wire gauge
Tightening torque
Phases
Maximum of four cables per phase
Minimum
Units with 2 power modules: 2 x 95
mm2 per phase
Units with 3 power modules: 3 x 95
mm2 per phase
Units with 2 power modules: 4 x 95
mm2 per phase
Maximum
300 mm2
65 Nm, M12 st. st. screws
(unlubricated)
Neutral
Maximum
8 Nm, M6 terminal
35 mm2
AC connection via a terminal with one hole
A. M12 hex head screw.
B. M12 washer.
C. Terminal.
D. Connection plate.
E. M12 nut.
E
B
D
C
B
A
AC connection via two terminals with one hole
A. M12 hex head screw.
B. M12 washer.
C. Terminal.
D. Connection plate.
E. M12 nut.
E
82
B
C
D
C
B
A
AAV2015IQE01_B - Installation and usage manual
AC connection
Ingeteam
14.4.2. AC connection process via a terminal
1. Remove the protective polycarbonate sheet.
2. Strip the cable according to the size of terminal to be used.
3. Crimping the terminal on the cable.
4. Clean the contact surfaces on both the terminal and the connection bar with a clean cloth and ethanol.
5. Connect the terminal to the connection bar using the (previously lubricated) screws and washers supplied
by Ingeteam with the unit, respecting the torque specified.
6. Reinstall the protective polycarbonate sheet.
7. Ensure the correct connection of the cable and terminal.
14.4.3. Connecting the AC neutral
1. Strip the cable according to the size of terminal to be used.
2. Crimp the wire ends according to the wire gauge being used.
3. Connect the terminal to the XN terminal, respecting the torque specified.
4. Ensure the correct connection of the cable.
After connecting the neutral, ensure correct configuration of the U1nXAC.0 and U1nXAC.1 terminal strip for each
power module as explained in Section “7.7. Requirements for transformers”.
AAV2015IQE01_B - Installation and usage manual
83
Commissioning
Ingeteam
15. Commissioning
This chapter details the process for the commissioning of the unit.
See Section “3. Safety” before operating the equipment.
To find the different components listed below, consult Section “2.7. Location of components”.
15.1. Equipment inspection
These models are equipped with a series of thermomagnetic switches to protect their various components. These
should be closed prior to unit start-up.
Before working on the thermomagnetic circuit breakers, check that there are no electrical hazards
inside the unit.
When checking that there is no voltage, wearing dielectric gloves and safety goggles approved for
electrical hazards is required.
15.1.1. Inspection
Before inverter start-up, a general inspection of the units must be carried out involving mainly:
Wiring
•
Check that there are no loose wires. The insulation clearance is 20 mm between cables.
•
Check that the cables are correctly connected.
•
Check that these cables are in a good condition and that there are no hazards in their environment which
damage them, such as sources of intense heat, objects which could cut them or arrangements which put
them at risk of impacts or pulls.
Removing the polycarbonate type protections for performing this inspection is strictly forbidden.
DCAC supply module
•
Check that the DC arresters are properly inserted into the base and that their "status window" is not red.
•
Turn thermomagnetic circuit breaker QM to On.
•
Check that the DC isolating switch is in automatic mode (AUTO).
Exceptionally, and only for maintenance or servicing tasks, the DC isolating switch can be operated
manually. To perform this operation, push the latch on the yellow plunger so that the latter slides towards
the left, providing access to the housing for the rotary knob.
The rotary knob is on the left door of the DCAC supply module.
Check that the AC arresters are properly inserted into their bases and that their “status window” is not
red.
•
Set thermomagnetic circuit breaker Q4 to On.
Power modules
84
•
Turn thermomagnetic circuit breaker QAUX to On.
•
Set thermomagnetic circuit breaker Q2 to On.
•
Check the status of fuses FACn1, FACn2 and FACn3.
AAV2015IQE01_B - Installation and usage manual
Commissioning
Ingeteam
15.1.2. Shutting down
Ensure during installation operations that the unit's level of sealing has not been altered during connection of the
unit.
In all connections, give cabling enough length inside the unit so they don't pull on the internal electrical
connections.
Check that the cables used have the same degree of protection as the unit itself.
Doors
If the unit doors have opened at some point, close them and check they are properly closed.
The guarantee does not cover damage caused by inadequate sealing of the unit.
Safety measures
Opening any of the doors on the unit causes the unit to be disconnected from the grid and opens the
corresponding motorised DC isolating switch.
15.2. Equipment configuration
Once the unit has been mounted in its final position and has been solidly secured, ensure that the inverter is
properly set up.
The units always come with factory settings, but when one of the electronics blocks of the units are replaced or
repositioned, the electronics block in question must be set up.
Make sure there is no voltage present on the unit before carrying out any connections. Once the
inverter is switched off, wait at least 10 minutes until internal capabilities are fully discharged.
15.2.1. Configuring the Modbus Node of an electronics block
Each power module has a factory-assigned ModBus Node number. By default, the nodes assigned will correlate
with the power module number (1, 2, 3 and 4).
It may be necessary to adapt the ModBus Node numbers to the desired plant communications configuration.
To be able to carry out this configuration, the unit’s auxiliary power supply needs to be connected to supply
each module’s electronics block. The CAN Nodes must be correctly configured. If an electronics block has been
replaced, it will need to be configured before use as explained in Section “19.5.1. CAN number setting of an
electronics block”.
Follow this procedure:
1. Check that the communication elements are in proper working order.
2. In the “SETTINGS” menu. Select “Change inverter number” and introduce the right one.
3. Check that the communication also works with the new node number.
15.3. Start-up
First carry out a general visual inspection and wiring check, then proceed to connect the unit to the grid by
following the guidelines in this document.
The tasks outlined for this step must be carried out with all the doors of the unit closed, thus avoiding possible
contact with live components.
15.3.1. Start-up
Once the wiring has been completed and all components of the inverter have been checked, start up the unit.
Follow the following steps in the order they appear:
AAV2015IQE01_B - Installation and usage manual
85
Commissioning
Ingeteam
1. Perform the checks indicated in Section “15.1.1. Inspection”.
2. Verify that the FN intake neutral fuse is correctly installed. Said fuse is located in the upper part of the
supply module.
3. Make the connection and switch the power on to the inverter’s main AC supply. In units with no
thermomagnetic breaker for AC protection built into the inverter, it is necessary to place an external
shut-off element with protection and switching power.
4. Close the AC thermomagnetic breaker if the unit has one.
5. The motorised DC isolating switch must then be closed automatically, supplying power to the DC part of
each power module.
6. Close all unit’s doors and check that the unit is in manual shutdown. If not, switch it to this condition as
per Section “16.4. Start/Stop”.
7. Check that the variables on the monitoring menu are consistent; in particular the VAC and VDC levels (see
Section “16.5.1. Monitoring”).
8. Check the alarms on each node display. If everything is in order, only alarm 1000H (manual shutdown
alarm) should be displayed.
9. After checking the points above, start the inverter via display (see Section”16.4. Start/Stop”).
Failure to comply with the verification tasks described above releases Ingeteam from any liability for
possible damage to the system or the inverter itself caused by such failure.
15.3.2. Checking and measurement
Once connected to the unit network, the green LED is still lit, verify that no error LED display is on. If any power
module does not connect to the grid even though there is no alarm, this will be because the power from the PV
array is not sufficient at this time. This procedure is normal for these units.
Check that the monitoring menu parameters are consistent:
•
The voltage of the PV array should be between 350 and 1000 VDC.
•
VAC voltage shown on the display must fall within operating ranges.
•
The RMS value of currents Iac1, Iac2 and Iac3 displayed should be similar.
•
There are no alarms in the inverter (0000H).
Ingeteam recommends checking the waveform of the current generated in the three phases using an
ammeter clamp. Use the PPE listed in the “3.2. Personal Protective Equipment” section to get this
reading.
During initial connection to the grid, Ingeteam recommends monitoring the temperatures inside the
unit to check correct operation of the cooling system.
86
AAV2015IQE01_B - Installation and usage manual
Display control
Ingeteam
16. Display control
These inverters incorporate a Display + Keypad unit to interface with the installer
and the user.
This interface allows the display of the main internal parameters and the
configuration of the entire system during installation.
Parameters, variables and commands are organised as menus and submenus.
16.1. Keypad and LEDs
The keypad has four keys:
Esc. To exit a parameter, leave a menu and return to the next level up in the structure, to not
confirm a change or not accept a suggestion.
Up. With this key you can scroll up the list of parameters or folders within the same level or
increase the value of an editable parameter by one base unit.
Down. With this key you can scroll down the list of parameters or folders within the same level
or decrease the value of an editable parameter by one base unit.
OK. Serves to accept a parameter as valid, to enter a lower level menu in the structure, to
confirm a change or accept a suggestion.
The front panel has three LEDs:
Green LED
•
Slow flashing: Standby due to low irradiance. Not all power modules are connected.
•
Fast flashing: Start-up process.
•
On: Inverter connected to the grid.
Orange LED
Fast flashing: Alarm set off which does not shut down the inverter.
Red LED
On: Alarm set off which shuts down the inverter.
Special combinations
Rapid flashing of all three LEDs: Fatal error status.
AAV2015IQE01_B - Installation and usage manual
87
Display control
Ingeteam
16.2. Display
The current date and time on the top line. The internal clock
automatically changes the time from summer to winter and
vice versa.
11:23
03/08/2014
The node number for which data is being viewed appears
beneath the top line on the left.
The top right shows the number of the power module that is
acting as master (in this example it is module 2).
The central section provides instantaneous PV array voltage,
power fed in by the inverter and output voltages.
The bottom line displays the functions for each of the keys.
If the inverter is manually shut down, the display will read "STOPPED" instead of displaying the power fed in by the
inverter.
In the initial screen, in normal operation, the keypad functions are as follows:
Manual shutdown or start, depending on the current status of the inverter.
Main menu access.
Change node.
If there are any active alarms in the inverter, the bottom,
empty box will flash "ALRM". By pressing the ESC key:
11:23
03/08/2014
You can see all the active alarms by pressing it.
For example:
11:23
To exit this screen, press
88
03/08/2014
again.
AAV2015IQE01_B - Installation and usage manual
Display control
Ingeteam
16.3. Menu structure
Main menu
Monitoring
Pac
Pdc
Etot
Epar
Conn.N
ParConn.N
ConnT
Par.ConnT
*
1000 V Kit
Pac
Qac
Cos Ph Tan Ph
Pdc
Vdc
Vac1
Vac2
Vac3
Tan Phi Ref
Tan Phi Real
Pac
Qac
Vdc
Vpos
Vneg
Alarms
Hist. Alarms
Int Temp
Pcb Temp
Rpv
Rpv+
Rpv-
Idc
Iac1
Iac2
Iac3
Frec 1
Frec 2
Frec 3
TEST
stop reasons
RESET
SETTINGS
Date and hour
Inverter number
Lenguage
Castellano
Deutsch
Français
Italiano
Vin Mode
Power Adjustment
Vin Mode Reset
INVERTER DATA
Config Adjustments
CAN Num Change
Total Reset
Other Adjustments
Ns
Firm.
CRC
FirmDis
BootDis
* optional.
AAV2015IQE01_B - Installation and usage manual
89
Display control
Ingeteam
16.4. Start/Stop
Manual shutdown or start-up of the inverter is carried out
from the main menu display.
Pressing the
11:23
03/08/2014
11:23
03/08/2014
key changes the operating status to stop and
vice versa.
16.5. Main menu
The main menu contains the following submenus:
Monitoring. This displays the main internal parameters and
variables that indicate the operation status of the unit.
Reasons for shutdown. This option shows the reasons why the
inverter was shut down the last five times.
Settings. This menu displays all the settings that affect the
inverter.
Inverter data. This option offers inverter-specific data.
16.5.1. Monitoring
Press
on the Main menu > Monitoring option.
See below for the structure and interpretation of the variables in this menu:
Screen 1
Pac
Power inverter is delivering into the grid, in kW.
Pdc
Power supplied by solar panels, in kW.
Etot
Total energy in kWh delivered by the inverter to the grid from the date it was manufactured.
Recording the serial number of the equipment marks the start of this power log.
ParE.
Total energy in kWh delivered by the inverter to the grid since the last time the counter was reset.
Screen 2
Vdc
Voltage supplied by solar panels to the inverter.
Vac1
Inverter output voltage in phase one of the grid.
Vac2
Inverter output voltage in phase two of the grid.
Vac3
Inverter output voltage in phase three of the grid.
Screen 3
Idc
Current supplied by solar panels to the inverter.
Iac1
Inverter output current in phase one.
Iac2
Inverter output current in phase two.
Iac3
Inverter output current in phase three.
Screen 4
Frec1
Phase one frequency.
Frec2
Phase two frequency.
Frec3
Phase three frequency.
Cos.Phi
Cosine of Phi. Cosine of the phase shift angle between grid voltage and current supplied by the
inverter.
90
AAV2015IQE01_B - Installation and usage manual
Display control
Ingeteam
Screen 5
Rpv
Impedance of the entire PV array to ground.
Rpv+
Impedance of the positive pole of the PV array to ground.
Rpv-
Impedance of the negative pole of the PV array to ground.
Screen 6
Alarms
Status of inverter alarms.
0000H
No alarms.
0001H
Grid frequency out of range.
0002H
Grid voltage out of range.
0004H
PI current saturation.
0008H
Reset.
0010H
RMS overload at output.
0020H
Temperature alarm in the power electronics.
0040H
Hardware fault. Synchronization fault.
0080H
Instantaneous overload at output.
0100H
AC short-circuit protection.
0200H
DC circuit protection.
0240H
Fault in the DC isolating switch control.
0400H
Insulation fault.
0800H
Power electronics fault.
1000H
Manual shutdown alarm.
2000H
Configuration change alarm.
4000H
Panel input overvoltage
8000H
Low voltage in the PV array.
Alarms Hist
Alarms since the last connection. This value is reset each time the inverter is connected to the grid.
It has the same code as the "alarms" variable.
TempInt
Inverter power electronics temperature.
PCBTemp
Inverter control electronics temperature.
Screen 7
Conn.N
Number of grid connections made during all hours of operation.
ParConn.N
Number of grid connections since counter was last reset.
ConnT
Number of hours the inverter has been connected to the grid.
Par.ConnT
Number of hours the inverter has been connected to the grid since the counter was
last reset.
Screen 8
System status
This parameter can have three states:
Initial status
In start-up status.
Operational status
Error status
MPPT Power
Power injected by the power module configured as master.
Slave Power
Power injected by the power module of the node being measured.
Total Power
Power injected by all the power modules configured in this master-slave system.
AAV2015IQE01_B - Installation and usage manual
91
Display control
Ingeteam
Screen 9
This screen displays a histogram of the power output from each of the electronics blocks configured in the masterslave system.
16.5.2. Reasons for shutdown
This menu shows the last five inverter shutdowns, with reasons and corresponding date and time.
11:23
03/08/2014
Meaning of reasons for shutdown:
VDC
High input voltage from the panels.
FREC
Incorrect grid frequency.
VAC
Incorrect grid voltage.
VARISTORS
Varistor fault.
INS.FAILURE
DC insulation fault.
RMS CURRENT
Continuous overvoltage on AC output.
TEMPERATURE
Excess temperature in the power electronics.
CONFIG
Shutdown for configuration change.
MANUAL STOP
Manual shutdown.
MIN VPV
Low panel input voltage.
HW_DESCX
Shutdown due to a failure in the master.
PEAK.CURR
Voltage surge on AC output.
FIRMWARE.CH
Shutdown due to firmware change.
ADC READING
AD converter (internal) reading fault.
LOW POWER
Insufficient solar radiation. Does not trigger alarm.
DC.PROT
Input fuse fault.
AUX.TEMP
Redundant temperature sensor fault.
AC.PROT
AC Protection.
AC.MAG.PROT
AC thermomagnetic circuit breaker error.
CONTACTOR
Contactor failed to close.
WD.RESET
Stopped for Watch Dog reset (internal).
ADC LAT
Converter (internal) fault.
FATAL ERROR
Power electronics fault.
FAULT(1)
Power electronics fault.
FAULT(2)
Power electronics fault.
FAULT(3)
Power electronics fault.
CURR.PI.SAT
PI current saturation (internal).
RED
The redundant system has caused a shutdown.
92
AAV2015IQE01_B - Installation and usage manual
Display control
Ingeteam
16.5.3. Settings
Date and Time
From this menu you can change the date and time. The internal clock automatically changes the time from
summer to winter and vice versa.
Inverter number change
From this menu you can assign the node number to the inverter. This is required for configuring communications.
Language
With this option, you can select the display language.
In the main screen, press the "down" key (an arrow pointing downwards). Main menu access.
Press
on the Main menu > Settings > Language option.
Press the
button to scroll through the various languages
Grid quality
In this menu, you can change the grid quality parameters. This menu is only active after the security code has
been input.
Ground connection
Through this option, you can change the type of grounding for the PV array. This menu is only active after the
security code has been input.
Connection time
This menu allows you to modify the delay before the inverter connects to the grid. This menu is only active after
the security code has been input.
Total reset
With this option, the user can reset all inverter counters. This menu is only active after the security code has been
input.
11:23
03/08/2014
Other adjustments
Internal adjustments are only accessible after the security code has been entered.
Change NumCAN
From this menu you can change the electronics blocks' node number. This is needed for configuring the electronics
blocks. Because this action involves hardware-altering operations, instructions for changing the node number are
given at the unit’s set point.
See Section “19.5.1. CAN number setting of an electronics block”.
16.5.4. Inverter data
This window displays inverter-specific data:
Serial Number (SN)
Number that identifies the inverter.
Firmware Version (Firm)
Shows the name and version of the inverter firmware.
AAV2015IQE01_B - Installation and usage manual
93
Display control
Ingeteam
Display firmware version (FirmDis)
Shows the name and version of the inverter display.
Boot version of the display (BootDis)
Shows the name and version of the display Boot.
16.5.5. Change inv. no.
From this menu you can assign the inverter a number. This is required for configuring communications.
Use the
94
and
keys to change the inverter number. Press
to confirm the number selected.
AAV2015IQE01_B - Installation and usage manual
Shutting down the unit
Ingeteam
17. Shutting down the unit
This section describes the procedure to shut down the unit. If you wish to work on the modules, these instructions
must obligatorily be carried out in the order shown here to remove power.
It also explains the different actions which cause the unit to shut down and their scope.
See Section “3. Safety” before operating the equipment.
The inverter’s electro-mechanical elements have a limited number of operating cycles for on-load
disconnection. A large number of disconnections or instantaneous trips leads to higher wear in them,
which can lead to undesirable, early deterioration.
Following the steps below gives safe, no-load disconnection, maximising the life of any electromechanical components in the inverter.
17.1. Process of disconnecting the unit
To carry out any maintenance task on the unit involving access to the inside, it is necessary yo disconnect the unit
and isolate any source of voltage. Proceed in the following order to disconnect voltage sources safely:
1. Stop inverter on the display (see Section “16.4. Start/Stop”). All power modules must be disconnected,
cutting off the supply of AC power.
2. If the unit has an AC disconnection control on the outside of the DCAC supply module, switch it to Off
and lock it using a consignment lock. Open thermomagnetic circuit breaker Q4. A sign reading “Do not
touch. Personnel at work” will be posted. Disconnect the voltage at the main inverter AC supply, located
in the DCAC supply module. This action will need to be carried out by means of an element external to
the unit. If it is not possible to disconnect the main AC supply from outside the unit, bear in mind that
the AC connection plates will be live and work must be carried out using the appropriate PPE (dielectric
gloves suitable for the working voltage, face shield, safety boots, working clothes, recommended fireproof
clothes, etc.).
3. Press the emergency stop button. Pressing the emergency stop button causes the motorised DC isolating
switch to open. Check that the DC isolating switch changes to the Off position after two seconds. If the
isolating switch has not moved automatically to the Off position, operate it manually.
AAV2015IQE01_B - Installation and usage manual
95
Shutting down the unit
Ingeteam
b.
Insert the key to turn it to OFF
ON
AUT
Press the tab for manual operation
BLC
MAN
O
a.
OFF
MAN
O
To operate the DC isolating switch, push the latch on the yellow plunger so that the latter slides towards
the left, providing access to the housing for the rotary knob.
The rotary knob is on the left door of the DCAC supply module. Once the isolating switch is in the Off
position push the plunger to the locking position (BLC) and insert the padlock. Personnel at work” will be
posted.
4. Isolate the PV array powering the DCAC supply module from the outside.
If the PV array powering the DCAC supply module cannot be isolated from the outside. It should be taken
into account that the feed of the DC circuit breakers will be live and work must be carried out with the
appropriate PPE (i.e., dielectric gloves appropriate for the operating voltage, face shield, safety boots,
work clothes, fire-retardant clothing recommended).
5. Open the FN intake neutral fuse located in the upper part of the supply module.
6. Open thermomagnetic circuit breakers QM and QAUX.
7. Check that there is no voltage by using an appropriate multimeter. Use the PPE listed in the PPE section.
Verify the absence of voltage before performing any operation. Once the inverter is switched off, wait
at least 10 minutes until internal capabilities are fully discharged.
96
AAV2015IQE01_B - Installation and usage manual
Shutting down the unit
Ingeteam
17.2. Shutting down the inverter from the display
It may be necessary on occasions to carry out an isolated unit shutdown without following the protocol explained
under point “17.1. Process of disconnecting the unit”. This must only be carried out when you do not wish to gain
access to the inside of the inverter and you wish to switch the inverter to shutdown status, stopping delivering
power to the grid.
To do this from the display, switch the inverter to shutdown status. The inverter will stop switching and disconnect
the AC grid connection contactor in each power module.
This shutdown procedure does not guarantee complete disconnection of all sources of voltage
connected to the unit, hence accessing the inside of the unit after performing this shutdown is
prohibited. If you wish to gain access to the inside of the inverter, follow the procedure in Section
“17.1. Process of disconnecting the unit”.
17.3. Inverter shutdown from the emergency stop button
For the case of an unexpected situation, these units have an emergency stop button. When pressed, the following
actions are performed:
1. If the unit is connected to the grid, the inverter will stop switching and disconnect the AC grid connection
contactor in each power module.
2. Opening of the motorised DC isolating switch. Any PV array input voltage will be disconnected.
It will not be possible to start inverter operation again until the emergency stop button has been returned to its
original position.
The inverter’s electro-mechanical elements have a limited number of operating cycles for on-load
disconnection. A large number of disconnections or instantaneous trips leads to higher wear in them,
which can lead to undesirable, early deterioration.
This shutdown procedure does not guarantee complete disconnection of all sources of voltage
connected to the unit, hence accessing the inside of the unit after performing this shutdown is
prohibited. If you wish to gain access to the inside of the inverter, follow the procedure in Section
“17.1. Process of disconnecting the unit”.
17.4. Inverter shutdown by opening a door
These units have a safety system whereby, using a limit switch, the unit switches to shutdown status and the PV
array is disconnected automatically when a door is opened in the operating unit.
Until it has been ensured that all the unit’s doors have been closed correctly, it cannot be returned to the operating
condition again.
Ingeteam accepts no liability for the consequences of tampering with the safety system.
This shutdown procedure does not guarantee complete disconnection of all sources of voltage
connected to the unit, hence accessing the inside of the unit after performing this shutdown is
prohibited. If you wish to gain access to the inside of the inverter, follow the procedure in Section
“17.1. Process of disconnecting the unit”.
AAV2015IQE01_B - Installation and usage manual
97
Preventive maintenance
Ingeteam
18. Preventive maintenance
The recommended preventive maintenance tasks must be carried out at least annually, except for general
inspection and checking the fans and filters and housing condition, which must be done monthly.
See Section “3. Safety” before operating the equipment.
18.1. Safety conditions
All maintenance work will be carried out with the unit disconnected from the supply.
Verify the absence of voltage before performing any operation. Once the inverter is switched off, wait
at least 10 minutes until internal capabilities are fully discharged.
To disconnect the unit, follow the instructions in Section “17. Shutting down the unit”.
To connect the unit, follow the instructions in Section “15.3. Start-up”.
The various maintenance tasks must be performed by qualified personnel.
18.2. General review
Make a visual inspection of the interior state of the individual modules.
Check for parts that are damaged or in poor condition, having suffered any of premature degradation due to
overheating, rust or other external aggressions.
Check inside the unit is free from dust and other elements. If there is any dirt inside clean it with a vacuum
cleaner.
18.3. Status of the housing
A visual check of the status of the housing must be performed, verifying the condition of locks, doors and
handles and the unit fixings at both lower and, if any, upper anchorage points. In addition, the condition of the
housing must be checked for dents, scratches or rust that might degrade the unit or cause it to lose its protection
classification. If this type of defects are noticed, the parts affected must be substituted.
Check the condition of the cables entries and ensure they have the same degree of protection as the unit itself.
Check that there is no moisture inside the unit. If moisture exists, dry before making electrical connections or
starting up the unit.
18.4. Status of cables and terminals
Check the correct path of the cables so they do not come into contact with live parts.
Check for insulation faults and hot spots by checking the colour of the insulation and terminals.
18.5. Tightness of strip fasteners and power cables
The correct tightness of the unit power cables needs to be checked annually. Unit transport and operation produce
vibrations which can lead to variations in the indicated tightening torques.
The following table shows torque as a function of bolt size:
Thread size
98
Tightening torque
M6
8 Nm
M8
19 Nm
M10
39 Nm
AAV2015IQE01_B - Installation and usage manual
Preventive maintenance
Ingeteam
Thread size
Tightening torque
M12
65 Nm
As per DIN 13.
Check the following bolts using a correctly calibrated torque measurement tool:
•
DC input and AC output connections from the unit (M12).
•
Connections between plates and DC isolating switches and/or AC thermomagnetic circuit breakers (M10).
•
Connections inside the power module (see the figure below).
M10
M10
M6
M10
M6
Power module
18.6. Plates
Visually check that the AC and DC feed connection plates, as well as the plates in each power module, meet safety
clearances and maintain their initial electrical properties and are free of rust and humidity.
18.7. Cooling system
18.7.1. Status of unit fans
Checking the status of exhaust fans, cleaning and replacing them if necessary.
The useful life of the fans is 8 years, so they must be replaced after this time even if they seem to be
functioning normally.
AAV2015IQE01_B - Installation and usage manual
99
Preventive maintenance
Ingeteam
18.7.2. Replacement of fans
At least two people are needed to replace a fan.
In order to keep the nuts and bolts of the unit in good condition it is important to make sure there is
no dirt or shavings in the threads when screwing them in and apply a suitable lubricant.
If the fan has come to the end of its life or is malfunctioning, it should be replaced. To do this, follow the following
steps.
Disassembly
1. With the unit powered down, remove the fixing screws from the fan protection cover.
2. Disconnect the aerial connector of the fan to be replaced.
100
AAV2015IQE01_B - Installation and usage manual
Preventive maintenance
Ingeteam
3. Remove the four screws fixing the fan to the roof and remove the fan to be replaced.
Assembly
1. Place the new fan in its housing, bearing in mind that the fan cable should be as close as possible to the
cable entry into the inside of the unit.
2. Connect the aerial connector of the fan to be replaced.
3. Secure the fan to the ceiling with the four fixing nuts.
4. Install the fan cover and tighten the four screws.
5. Check that the fan is correctly positioned and there are no air leaks.
18.7.3. Cleaning grids and cooling filters
Check the state of the ventilation grids and filters. Accumulated dust and dirt may adversely affect the cooling
ability of the fans and result in overheating of the equipment.
At regular one month intervals accumulated dust and dirt must be removed from the outside of the front and rear
grids using a vacuum cleaner.
These points will apply to the inlet filters in the cabin or enclosed location where the unit is installed.
Air inlet grids and filters
To gain access to the ventilation filters located in the front of each door, proceed as shown in the following figures.
AAV2015IQE01_B - Installation and usage manual
101
Preventive maintenance
Ingeteam
With a moderately dirty, dry filter, lightly tap until the dirt has been removed.
If the dirt does not disappear, wash in water at 40 °C.
If the filter is soiled with grease or oil, replace it with a new one.
Air outlet grids
Vacuum and clean the air outlet grilles at the top of the unit.
If any of them are damaged or worn, replace them.
102
AAV2015IQE01_B - Installation and usage manual
Preventive maintenance
Ingeteam
18.8. Relay status
To find the different components listed below, consult Section “2.7. Location of components”.
The unit contains several relays which must be checked annually. Check visually, always with no voltage on the
unit, that there is no darkening of the housing caused by heating and that the stand-by position is correct.
They must be replaced if any anomaly is observed.
The relays described below refer to the basic configuration of these units. If the unit incorporates optional kits
these may incorporate additional relays, which must also be checked.
Power modules
K2n, K3n and K4n.
Electronics block
U31, U37, U39, U40 and U46.
18.9. Status of the fuses
To find the different components listed below, consult Section “2.7. Location of components”.
Perform an annual inspection of the state of the various fuses protecting the equipment. The fuses described
below refer to the basic configuration of these units. If the unit incorporates optional kits these may incorporate
additional fuses, which must also be checked.
DCAC supply module
Fuses for the common mode condenser filter (F9 and F10).
Ground connection fuse, only in grounded units (F17).
DC supply fuses (the number of fuses depends on the number of power modules and the type of grounding of the
unit).
Power modules
AC fuses (FACn1, FACn2 and FACn3).
AAV2015IQE01_B - Installation and usage manual
103
Troubleshooting
Ingeteam
19. Troubleshooting
This is a troubleshooting guide for the installation of the inverter.
It also explains how to perform simple operations such as component replacement and unit configuration.
Troubleshooting for the inverter must be performed by qualified personnel in compliance with the
general safety instructions in this manual.
See Section “3. Safety” before operating the equipment.
To find the different components listed below, consult Section “2.7. Location of components”.
19.1. LED messages
Some of the LEDs indicate some kind of problem in the PV installation.
Display
19.1.1. Green LED
This is the LED that should light up in normal start-up and operating conditions, while the others remain off. It has
three modes:
Slow flashing
Standby due to low solar radiation. Flashing every 3 seconds. This alarm is triggered when the PV array does not
receive enough solar radiation to supply the minimum voltage required by the inverter to inject power. This occurs
commonly between sunset and sunrise, or at times when rain, clouds or other atmospheric phenomena produce
overcast conditions above the PV array.
It will also flash if one of the power modules network is not connected to the grid due to non-availability of power
at the PV array.
If this situation occurs on a day which is not particularly dark, check that the panels are clean and properly
installed.
Fast flashing
This type of flashing indicates that the PV array is feeding the right amount of voltage to the inverter and it is about
to start up. In this state, the inverter checks the grid parameters to feed current into the grid at the latter's precise
voltage and frequency. This process takes about 5 minutes (configurable).
104
AAV2015IQE01_B - Installation and usage manual
Troubleshooting
Ingeteam
Steady light
Inverter connected to the grid. All power modules are connected to the grid.
19.1.2. Orange LED
This LED indicates that alarms have been set off in the inverter. It does not involve unit shutdown.
Fast flashing
This flashing indicates that an alarm has occurred in the inverter, but the anomaly in the operation does not require
stopping the inverter. An alarm of this type is the power limitation alarm. It may be that the inverter is in selflimiting mode because it has reached the maximum permissible temperature.
In this situation, check that the fans are running, that the air inlets and vents are free from obstacles, that the
grids and filters are not unduly dirty and that there are no sources of intense heat near the inverter. If the problem
persists, contact Ingeteam.
19.1.3. Red LED
This LED indicates that alarms have been set off in the inverter. It involves a unit shutdown. If the unit is not
connected to the grid, it will not be possible to start it up until the alarm has been eliminated.
Steady light
The inverter shuts down. This flashing indicates that an alarm has occurred in the inverter which requires it to shut
down.
The alarm or combination of alarms affecting the unit can be identified from the display. To do this, press the
on the main menu when ALRM appears above the key. By choosing the various nodes, you can identify the alarms
affecting each power module.
The alarm code shown by the display is the hexadecimal sum of the existing alarms. Example:
Code
Alarm
0001H
Grid frequency
0002H
Voltage
0003H
Grid frequency + voltage
The alarm codes are listed in Section “19.2. List of alarms and reasons for shutdown”.
1000H
Manual shutdown. The unit has been stopped manually. Check that the unit is not in manual
shutdown via the display and that all doors are properly closed.
0001H
Grid frequency out of range.
0002H
Grid voltage out of range.
The most likely cause is a network power failure. When power returns, the inverter will restart. If after
10 minutes have passed this does not occur, check the connections to the grid.
If the grid has the appropriate grid quality parameters, check the grid connections.
If the problem persists, contact Ingeteam.
0400H
Insulation fault in DC circuit.
There are three possible causes:
0020H
•
There is an insulation fault on the panel circuit.
•
The ground connection fuse has blown.
•
One of the unit arresters has tripped.
Temperature alarm in the power electronics.
The temperature of the unit is too high and has stopped feeding current to the grid. When the
temperature drops, the unit will reconnect.
AAV2015IQE01_B - Installation and usage manual
105
Troubleshooting
Ingeteam
An insulation fault can pose a hazard to personnel.
The repair of an insulation fault must be carried out by qualified personnel.
19.2. List of alarms and reasons for shutdown
The following table details the possible reasons for shutdown related to each alarm.
Code
Alarm
Reason for shutdown
Description
0001H
Grid frequency out of
range
Grid frequency out of range
The measured grid frequency is outside the specified
limits
0002H
Grid voltage out of range
Grid voltage out of range
The measured grid voltage is outside the specified
limits
0004H
Control current saturation
Control current saturation
Unit control current saturation
0008H
Reset
Reset
Indicates that the inverter has reset, inverter firmware
fault
0010H
Effective grid current
Effective grid current
RMS current exceeds maximum allowed
0020H
Temperature
Power electronics temperature
The temperature of power electronics exceeds 80 ºC.
Auxiliary temperature sensor
The auxiliary temperature sensor has triggered an
alarm
Error reading ADC
A higher than normal reading of the top ADC has been
detected on an unexpected input. Synchronism or
auxiliary power supply has been lost.
ADC latency
Internal error of the analogue to digital converter
0040H
Hardware fault
Master-slave
Error on master-slave system or optical fibre
Motorised DC isolating switch
The status of the motorised DC isolating switch is not
correct for the current inverter status
Fault in LVRT kit
Error in the optional hardware necessary to comply
with the regulations on withstanding grid voltage drop
outs
0080H
Instantaneous grid current
Instantaneous grid current
Instantaneous current value out of range
0100H
AC protection
Varistors
Error in AC varistors
Contactor
The state of the contactor is not correct for the current
inverter status.
AC protection
Error in some of the AC protectors, arresters, fuses,
etc.
0200H
DC protection
DC protection
Blown DC input fuses or DC arresters
0400H
AC insulation
AC insulation
Insulation fault in the PV array on inside the inverter
0800H
Branch fault alarm
Fault in branch no. 1
Fault in branch no. 1 of the power electronics
Fault in branch no. 2
Fault in branch no. 2 of the power electronics
Fault in branch no. 3
Fault in branch no. 3 of the power electronics
1000H
Manual shutdown
Manual shutdown
Manual shutdown due to the emergency push-button,
the display or communications or a badly closed door
on the unit.
2000H
Configuration
Configuration
Shutdown due to a change in firmware
Firmware
Shutdown due to firmware load
4000H
High input voltage
High input voltage
High DC input voltage
8000H
Panel voltage
Low input voltage
Shutdown due to low input voltage
Hardware fault
Reason for internal shutdown, hardware fault
Low power
Shutdown due to low power, (typical at nightfall)
Fatal error
Due to five consecutive branch fault errors,
consecutive contactor shutdowns, an error in any of
the fans or high temperature fault
7FFFH
106
Fatal error
AAV2015IQE01_B - Installation and usage manual
Troubleshooting
Ingeteam
19.3. Inverter alarms due to protections
Code
Description
Temperature alarm in the power electronics.
0020H
The temperature of the unit is too high and has stopped feeding current to the grid. When the temperature drops, the
unit will reconnect.
AC circuit protection.
This alarm goes off when an AC protection element is triggered.
The items monitored are:
QAC, QM, QAUX, Q4, Q2n*, RVAC, K1n*
Which correspond to the monitoring of the protections for the filters and AC intakes and AC arresters and contactors.
* n refers to the power module number (from 1 to 4).
In normal operation, all contacts should be closed, except for the contactor circuit. Check the signalling circuit to
see where it is broken. The causes may be broken cables in the circuit, a triggered protection, fused arresters or a
connector out of its base. There are three monitoring circuits which need to be checked.
Circuit 1
K1n
13
XDISn.2
14
U1n.X3.2
Circuit 2
IRVAC
11
X7DC.3
0100H
12
X7n.4
X7n.4
X7n+1.4
X7n.4
U1n.X3.3
Circuit 3
IQ2
X7DC.1
XIQ.1
X7n.2
11
14
X7n.3
**
IQAC
XIQ.1
1
IQ4
4
XIQ.2
X7n.3
XIQ.3
X7n.3
11
14
X7n.3
IQM
XIQ.2
11
14
IKAUX
XIQ.3
15
18
X1n.X3.4
IQAUX
13
14
X7n.2
** optional, depending on the configuration of the unit.
AAV2015IQE01_B - Installation and usage manual
107
Troubleshooting
Ingeteam
Code
Description
DC circuit protections.
This alarm goes off when a DC protection element is triggered.
The element being monitored are the DC arresters (RVDC).
Depending on unit configuration, the PV array grounding kit is also monitored.
In normal operation all contacts must be closed. Check the signalling circuit to see where it is broken. The causes may
be broken cables in the circuit, a triggered protection, fused arresters or a connector out of its base.
XDIS1.1
XFDC.1
FDC*
XFDC.1
XMDC.3
XMON1.1
XMDC.4
XMON1.2
XMDC.5
XMON1.3
XMDC.6
XMON1.4
XFDC.2
FDC*
XFDC.3
XFDC.2
0200H
XFDC.3
XMDC.1
XMDC.1
12
RVDC
11
XMDC.3
XMONn.1
XMONn+1.1
XMONn.2
XMONn+1.2
XMONn.3
XMONn+1.3
XMONn.4
XMONn+1.4
XMONn.n
U1n.X3.1
* optional, see Section “12. Connection options”.
Overvoltages in the panel inputs.
4000H
This alarms indicates an out-of-range voltage at the PV input.
A voltage greater than 1000 VDC will cause the equipment to shut down. Voltages greater than 1000 VDC will damage
the equipment.
Very low voltage on the input from the panels.
8000H
This alarms indicates an out-of-range voltage at the PV input.
The equipment will be on standby until the panel voltage reaches the necessary value for a connection.
19.4. Action protocol for responding to incidents
If the unit should stop interacting with the network due to the emergence of issues relating to the installation and/
or the inverter, the fastest way to resolve the issue is as follows:
1. Check on the display the alarm and the reason for shutdown reported by the unit.
Search in this guide’s index to see if the alarm or reason for shutdown is indicated. If it is covered,
proceed to step 2; if on the contrary it is not covered, take note of the unit’s serial number and contact
Ingeteam’s telephonic technical service, the number of which is listed on a sticker on the document
pocket behind the door of the module in which the display is fitted.
108
AAV2015IQE01_B - Installation and usage manual
Troubleshooting
Ingeteam
2. Disconnect the unit from the supply. See Section “17. Shutting down the unit”.
3. Open the unit and find the section in this guide that deals with the alarm or reason for shutdown recorded
in the first step.
4. Use a category III, 1000 volt multimeter capable of measuring continuity, resistance and capacitance,
and carry out the checks listed here.
5. If unable to solve the problem using this guide, take note of the unit's serial number and contact
technical service.
Below is a list of possible reasons for shutdown, their associated alarms and troubleshooting guidelines. If more
than one alarm takes place, the alarm on the display will be the sum of all active alarms.
Example:
Code
Alarm
0001H
Grid frequency
0002H
Voltage
0003H
Grid frequency + voltage
19.4.1. Voltage and/or frequency out of range
One reason for shutdown associated with out-of-range voltage and/or frequency features the alarm codes listed
below:
Code
0001H
Alarm
Grid frequency
Reason for shutdown
Grid frequency
Description
Grid frequency out of range
0002H
Voltage
Voltage
Voltage out of range
0003H
Grid frequency + voltage
Grid frequency + voltage
Grid frequency out of range + Voltage out of range
In the event of an 0001H and/or 0002H alarm, you must check the status of the Q4 thermomagnetic protection
and all the wiring associated with it.
This check requires verifying the correct status of the following areas of the unit:
1. Check that intake thermomagnetic circuit breaker (Q4) is in the ON position.
2. If Q4 is ON, the next step is to verify that there are no errors in the wiring (loose or broken cables, etc.).
3. Check that the Q4 thermomagnetic circuit breaker is not damaged. With Q4 switched ON, measure the
flow resistance offered by Q4 for each phase. The resistance for each of the phases must be within the 60
to 70 Ohm range. The following figure details the test to be performed.
N
L3
L2
L1
Q4
60~70 Ω
N
L3
L2
L1
The figure has verified the resistance of phase 1, L1. It will also be necessary to check L2, L3 and
neutral.
4. Check for continuity in the VAC intake circuit between contactor K1n and electronics block U1n.
•
K1n.2 – Q4.1
•
K1n.4 – Q4.3
AAV2015IQE01_B - Installation and usage manual
109
Troubleshooting
Ingeteam
•
K1n.3 – Q4.5
•
Q4.2 – U1nXAC.4
•
Q4.4 – U1nXAC.3
•
Q4.6 – U1nXAC.2
•
XDISn.7 – U1nXAC.0
5. Check for continuity between the terminal on the electronics block and the intake board in each power
module:
•
J8.2 – U1nXAC.1
•
J8.1 – U1nXAC.2
•
J7.1 – U1nXAC.3
•
J6.1 – U1nXAC.4
6. Visually check varistors RV1, RV2 and RV3 of the intake board. Check that the thermal fuse is not
damaged.
The intake board varistors comprise a thermal fuse (FU) and a varistor (VA). The way to check that the varistor is
operating correctly is to perform the checks listed below:
•
Between pins 1 and 2, you must get a high impedance reading in the kOhm range.
•
You should have an impedance of approximately 0 Ohms between pins 2 and 3.
VA
FU
3
1
2
1
3
2
7. If all the above checks are correct and a 0002H alarm persists when the unit is powered on again (see
Section “15.3. Start-up”), check that the impedance of each phase at the output of each power module
and electronics block is high with respect to ground. To perform this check, measured between each of
the phases of unit and grounding plate of the power module in question, with no voltage on the unit.
If the alarm persists, consult Ingeteam.
19.4.2. Temperature
Code
0002H
Alarm
Temperature
Reason for shutdown
Description
Power electronics temperature
The power electronics exceeds 80 ºC
Auxiliary temperature sensor
The auxiliary temperature sensor has triggered an
alarm
In the event of a shutdown due to Temperature, the first step is to check if 0020H alarm is still active. If so, check
the temperature of the unit’s radiator via the display menu (see Section “16.5.1. Monitoring”):
MONITORING
TempRad
If the temperature displayed is close to or above 80 °C, the unit has failed to inject power as a precaution against
a potentially damaging radiator temperature for the unit. The inverter will remain in this state until the radiator has
cooled, and then it will reconnect to the network.
If the problem occurs frequently, you should check the cooling system (see Section “18.7. Cooling system”) of the
inverter.
If the temperature shown is less than 60 °C and the alarm persists, the problem could be in one of the thermal
switches built into the inverter in the radiator of the electronics block.
If the displayed temperature is abnormally low (compared to room temperature), the root of the problem could be
with the NTC built into the inverter.
110
AAV2015IQE01_B - Installation and usage manual
Troubleshooting
Ingeteam
Checking the thermal switches
Each electronics block has 3 thermal switches to prevent overheating in the unit.
To check the correct status of the thermal switches, measure continuity between terminal U1nX3.8 on the terminal
strip of the electronics block and terminal J19.2 on the intake board.
If you do not have continuity, you should contact technical support.
Checking the NTC
To check the correct status of the NTC of the electronics block you will need to access the J18 terminal of the
intake board. This terminal is located underneath the control card.
The procedure to check the correct status of the NTC is as follows:
1. With no voltage on the unit, disconnect the cables from J18.1 and J18.2.
2. Measure the impedance between these wires with the aid of a multimeter. The resistance measured
should be approximately 5 kOhm at 25 °C ambient temperature.
3. Reconnect cables J18.1 and J18.2 and measure the impedance in the connector. The resistance
measured should be approximately 1 kOhm at 25 °C ambient temperature.
Should any anomaly be found in the inverter’s NTC, contact technical support.
19.4.3. AC circuit protection
Code
0100H
Alarm
AC protection
Reason for shutdown
AC protection
Description
Error in some of the AC protectors, arresters or in the
auxilliary relay.
In the event of an AC Protection reason for shutdown, check the status and monitoring of the unit’s AC circuit
protections.
Check that all protections (QAC, QAUX, QM, Q4 and Q2n) are On.
If the AC circuit protection status is correct, proceed to verify their monitoring. To do this, you will need to check
the monitoring branches in accordance with the diagram in Section “19.3. Inverter alarms due to protections” for
the 0100H alarm.
After checking the status and monitoring of the AC circuit protections check the status of the AC arrestors.
If the alarm persists, consult Ingeteam.
19.4.4. Reason for contactor shutdown
Code
0100H
Alarm
AC protection
Reason for shutdown
Contactor
Description
The state of the contactor is not correct for the current
inverter status.
One of the FACn1, FACn2 or FACn3 fuses has been
triggered.
The “contactor” reason for shutdown is associated to alarm 0100H. This reason for shutdown requires checking
the following points:
1. Check that the value of the auxiliary power supply voltage reaching the equipment is correct.
2. Check the condition of fuses FACn1, FACn2 and FACn3.
3. Check continuity between relay K2n.24 and contactor K1n.A1 and between K1n.A2 and X8n.8.
4. Check continuity between K2n.21 and X8n.4.
5. Check continuity between U1nX2.4 and K2n.A1 and between K2n.2 and XDISn.4.
6. Check continuity between U1nX2.3 and XDISn.2.
7. Check the signalling status. Measure the impedance between terminals XMON.n3 and U1nX3.2. The
obtained value must be greater than 2 kOhm.
If the alarm persists, consult Ingeteam.
AAV2015IQE01_B - Installation and usage manual
111
Troubleshooting
Ingeteam
19.4.5. DC circuit protection
Code
0200H
Alarm
DC protection
Reason for shutdown
DC protection
Description
Blown DC input fuses or DC arresters
The reason for DC protection is associated to alarm 0200H. This reason for shutdown requires checking the
following points by following the process described in Section “19.3. Inverter alarms due to protections”.
If the alarm persists, consult Ingeteam.
19.4.6. DC insulation fault
Code
0400H
Alarm
DC insulation
Reason for shutdown
DC insulation
Description
Insulation fault in the PV array on inside the inverter
The reason for AC insulation is associated to alarm 0400H. This reason for shutdown requires checking the
following points:
1. Follow the disconnection order of the unit specified in Section “17. Shutting down the unit”.
2. Measure the voltage between each of the poles of the PV array and ground. Depending on what type of
grounding the unit has, you should get the following values, where VPV is the open circuit voltage of the
PV array:
Voltage between +ve pole and -ve
pole
Voltage between +ve pole and ground
Voltage between –ve pole and ground
VPV
0.5 · VPV
0.5 · VPV
If these values are not obtained, the insulation fault is in the PV array. Pinpoint the fault and correct it.
Once the insulation fault has been eliminated, reconnect the inverter (see Section “15.3. Start-up”).
3. If the insulation fault persists, the fault is inside the unit. Open the inverter and check the status of the
DC (RVDC) arresters, as well as all the unit’s internal wiring.
Each of these arresters has an visual indicator. If any of the arresters has been triggered it will need to be
replaced.
4. If the insulation fault only occurs when the unit is connected to the grid, check to see whether the
insulation fault is in the unit’s AC part.
Check that the impedance of the AC part of the inverter between each of the electronics block outputs
(L1, L2, L3) and ground are in the MOhm range. If these values are not obtained, locate the fault and
correct it.
Check that the insulation fault is not in the harmonics filter. To do this open thermomagnetic protection
Q2n in each power module and check again that the impedance between each of the outputs of the
electronic block (L1, L2, L3) and ground are in the MOhm range.
Check that the impedance between each of the harmonic filter capacitors (C1n, C2n, C3N) is in the
MOhm range. If these values are not obtained, the fault is in the harmonics filter.
5. Check that the insulation fault is not in the fans or other components. To do this open protection QAUX
located in the power module No. 1 and measure the impedance between XAUX3.1 and ground and
between XAUX3.5 and ground. This should be in the MOhm range. If these values are not obtained, the
fault is in the auxiliary services.
6. Verify the condition of the fuses protecting the common mode filter.
7. Close the inverter, reconnect the unit to the grid and to the PV array (see Section “15.3. Start-up”).
If the alarm persists, consult Ingeteam.
19.4.7. Manual shutdown
Code
1000H
112
Alarm
Manual shutdown
Reason for shutdown
Manual shutdown
Description
Manual shutdown due to the opening of a
door, emergency push-button, via display or
communications.
AAV2015IQE01_B - Installation and usage manual
Troubleshooting
Ingeteam
Within the PV array and depending on the number of power modules, the limit switches are installed at the
following locations.
Units with 2 power modules
•
1 in the power DCAC supply module.
•
1 in power module No. 2.
Units with 3 power modules
•
1 in the power DCAC supply module.
•
1 in power module No. 2.
•
1 in power module No. 3.
Units with 4 power modules
•
1 in the power DCAC supply module.
•
1 in power module No. 2.
•
1 in power module No. 4.
If there is an undesired manual shutdown alarm, check the monitoring circuit corresponding to the emergency stop
button, XQDC and limit switches.
AAV2015IQE01_B - Installation and usage manual
113
Troubleshooting
Ingeteam
The layout of the circuit to be checked is shown below.
Power module
1
XMONn
Power module
2
XMONn
Power module
3
XMONn
XMONn
6 7
XMONn
6 7
XMONn
Power module
4
LS Limit switch
U13.X3.6
6 7
U12.X3.6
U11.X3.6
LS Limit switch
6 7
6 7
6 7
XMONn
U14.X3.6
XFC
6 7
U13.X3.6
XQDC
6 7
LS Limit switch
U14.X3.6
1 2
U11.X3.6
1 2
Power module
4
LS Limit switch
Emergency push-button
LS Limit switch
Power module
3
U12.X3.6
+15 VDC
Power module
2
XMONn
DCAC supply module
+15 VDC
1 2
XQDC
LS Limit switch
1 2
Emergency push-button
Power module
1
DCAC supply module
XFC
Symmetrical units
19.4.8. AC insulation fault
If the optional AC Insulation monitor kit is installed in the unit, an alarm will be triggered (controlled externally to
the unit) indicating said fault.
Once the fault is resolved, verify the condition of the fuses protecting the common mode filter of the unit (F11 and
F12).
114
AAV2015IQE01_B - Installation and usage manual
Troubleshooting
Ingeteam
19.4.9. AC arrester faults
Code
0100H
Alarm
AC protection
Reason for shutdown
AC protection
Description
Error in some of the AC protectors, arresters, fuses,
etc.
Once the fault is resolved, verify the condition of the fuses protecting the common mode filter of the unit (F11 and
F12).
19.4.10. Faults in the synchronisation of units connected to the same
transformer
If there was a synchronisation fault, once the fault is resolved, verify the condition of the fuses protecting the
common mode filter of the unit (F11 and F12).
19.4.11. Thermomagnetic circuit breaker Q2n
Thermomagnetic circuit breaker Q2n protects the switching filter. Follow these steps to determine the reason for
the breaker thermomagnetic circuit breaker Q2n tripping:
1. Use a multimeter to check that the capacitances of capacitors C1n, C2n and C3N are equal and
approximately 90 uF. Replace the condenser if its capacitance decreases by more than 10%.
2. Check that there is continuity between L1, L2 and L3 downstream of Q2n. An easy way to perform
this check is to set Q2n to Off and check that there is no continuity between R1n-R2n, R1n-R3n and
R2n-R3n.
If the problem persists, contact Ingeteam.
19.4.12. Fatal error
A fatal error status will not allow the unit to be reconnected until it has been reset. This unit status occurs in the
following cases:
•
Excess temperature of the NTC in any electronics block.
•
Excess temperature of the thermal switch in any electronics block.
•
Error in one of the cooling system fans.
•
Power electronics fault.
•
Fault in the K1n contactor control.
The appearance of the fatal error alarm is a result of a relevant error for unit operation. Contact
Ingeteam to resolve and reset the error.
Ingeteam accepts no liability for any consequences arising from overlooking this error status.
19.5. Replacing the electronics block
In case of equipment damage requiring the replacement of the electronics block, proceed as follows.
Verify the absence of voltage before performing any operation. Once the inverter is switched off, wait
at least 10 minutes until internal capabilities are fully discharged.
To disconnect the unit, follow the instructions in Section “17. Shutting down the unit”.
To connect the unit, follow the instructions in Section “15.3. Start-up”.
The substitution of the electronics block must be performed by qualified personnel in compliance
with the general safety instructions in this manual.
AAV2015IQE01_B - Installation and usage manual
115
Troubleshooting
Ingeteam
The electronics block is a heavy element. We suggest that it be carried by two people or with
mechanical assistance.
The tools needed to replace the electronics block are:
•
Flat screwdriver for terminal strip connections and disconnections.
•
Ratchet and spanner 17 (M10) for AC and DC connections.
•
Ratchet 13 (M8) for fixing the electronics block.
•
Ratchet 7 (M4) for removing the top cover.
Once the unit has been disconnected and the internal capacitances have been discharged, proceed in the following
order:
1. Check that there is no voltage inside the unit.
2. Disconnect optical fibre cable from the U43 connector.
3. Unscrew the top cover.
4. Disconnect the five power cables at the base of the block (DC+, DC-, L1, L2, L3).
5. Disconnect all the aerial connector entering the terminal (X1, XFN, X2, X3, XAC, XBUS+, XBUS–, XPV+
and XPV–).
6. Disconnect communications board.
7. Disconnect the display cable.
8. Unscrew the four anchor points of the unit in accordance with the diagram. Depending on the position of
the electronics block, follow the instructions in the corresponding figure.
Electronics block on the left
Electronics block on the right
9. Remove the electronics block.
For reassembly, perform the same steps in reverse order and then finally configure the electronics blocks:
1. Insert the electronics block in the housing provided.
116
AAV2015IQE01_B - Installation and usage manual
Troubleshooting
Ingeteam
2. Tighten the four anchor points.
3. Connect the display cable.
4. Connect communication boards or analogue inputs.
5. Insert aerial connectors (X1, XFN, X2, X3, XAC, XBUS +, XBUS–, XPV+ and XPV–) in the terminals on the
electronics block.
6. Connect the five power cables (DC+, DC-, L1, L2, L3).
7. Screw on the top cover.
8. Connect the optical fibre cable in the U43 connector.
9. Connecting the unit to the PV array.
10. Configure the can number (see Section “19.5.1. CAN number setting of an electronics block”).
11. Configure the node number (see Section “15.2.1. Configuring the Modbus Node of an electronics block”).
19.5.1. CAN number setting of an electronics block
Whenever an electronics block is replaced, it will be necessary to check that the CAN number of the new block is
the same as the number of the one replaced.
If this is a spare electronics block, it will be factory-configured with the CAN number 1.
This operation will be carried out once the electronics block has been wired correctly, before connecting the AC
grid part and the DC PV array part. An auxiliary power supply will need to be connected.
The steps to be followed to modify the CAN number are as follows:
1. Shut down the unit via the display (see Section “16. Display control”).
2. Open the door of the corresponding power module. With the unit powered up, opening the door causes a
manual shutdown and opens the motorised DC isolating switch.
3. Disconnect the optical fibre cable in the U43 connector of the electronics block to be configured.
4. Open thermomagnetic circuit breaker Q2n on the power module containing the electronics block to
configure it.
5. Connect DC and AC supply. The DC supply will only connect when all unit doors are closed correctly. The
display will show the 1143 alarm on the node to be configured (node = electronics block).
6. Check that alarm 1143 is active in the electronic block to be configured and that it does not appear in
any other block in the unit.
7. In the display (see Chapter “16. Display control” for more information), find the "SETTINGS” menu.
Select “Change NumCAN”. Press OK. When prompted by the display, enter the installer code (3725) and
press OK. Input the electronics block node. Repeat steps 1 to 6 for each node to be configured. Once the
configuration of all the nodes has been finalized, go to step 8.
8. Reset the alarms. To do so, close the Q2n thermomagnetic circuit breaker located in the power module
and connect the optical fibre cables. Alarm 1000 will be displayed.
9. Once all units are properly configured and connected by fibre optic communication cable, connect the
unit. See Section “15.3. Start-up”.
19.6. Replacing varistors in the intake board
The varistor is connected to pins 1 and 2 on the 3-pin connector on the intake board. Pin 3 is for connecting the
thermal fuse.
The varistor must be connected as follows:
•
Check continuity of the fuse with the varistor outside the board using the tester.
•
Place the varistor on the intake board between pins 1 and 2. The fuse will be placed between pins
2 and 3.
AAV2015IQE01_B - Installation and usage manual
117
Troubleshooting
Ingeteam
3
2
1
VA
FU
3
1
2
1
3
2
Inserting the varistor back-to-front will destroy it.
118
AAV2015IQE01_B - Installation and usage manual
Waste handling
Ingeteam
20. Waste handling
These units use components that are harmful to the environment (electronic cards, batteries or cells, etc.).
At the end of the unit's life, the waste must be correctly processed by an authorised hazardous
waste management company.
Ingeteam, in accordance with its policy of respect for the environment, will inform the
authorised manager, via this Section, of the location of components to be decontaminated.
The elements within the unit that must be handled individually are:
1. Liquid crystal displays.
2. Electronics cards.
3. Batteries.
Their location is shown in the following figure.
1
2
3
All power modules feature the same elements pictured in the previous image, except the display, which is only
featured on the first power module.
Waste that can be handled by conventional waste collection means
Most of this waste is from the unit’s packaging, which must be properly separated and processed.
You can deliver all the packaging to a non-hazardous waste management company.
AAV2015IQE01_B - Installation and usage manual
119
Notes
Notes
Notes
Europe
America
Asia
Ingeteam Power Technology, S.A.
Energy
Avda. Ciudad de la Innovación, 13
31621 SARRIGUREN (Navarra) - Spain
Tel: +34 948 28 80 00
Fax: +34 948 28 80 01
email: [email protected]
Ingeteam INC.
5201 Great American Parkway, Suite 320
SANTA CLARA, CA 95054 - USA
Tel: +1 (415) 450 1869
+1 (415) 450 1870
Fax: +1 (408) 824 1327
email: [email protected]
Ingeteam Shanghai, Co. Ltd.
Shanghai Trade Square, 1105
188 Si Ping Road
200086 SHANGHAI - P.R. China
Tel: +86 21 65 07 76 36
Fax: +86 21 65 07 76 38
email: [email protected]
Ingeteam GmbH
Herzog-Heinrich-Str. 10
80336 MÜNCHEN - Germany
Tel: +49 89 99 65 38 0
Fax: +49 89 99 65 38 99
email: [email protected]
Ingeteam INC.
3550 W. Canal St.
Milwaukee, WI 53208 - USA
Tel: +1 (414) 934 4100
Fax: +1 (414) 342 0736
email: [email protected]
Ingeteam SAS
Le Naurouze B - 140 Rue Carmin
31676 Toulouse Labège cedex - France
Tel: +33 (0)5 61 25 00 00
Fax: +33 (0)5 61 25 00 11
email: [email protected]
Ingeteam, S.A. de C.V.
Ave. Revolución, nº 643, Local 9
Colonia Jardín Español - MONTERREY
64820 - NUEVO LEÓN - México
Tel: +52 81 8311 4858
Fax: +52 81 8311 4859
email: [email protected]
Ingeteam Power Technology India Pvt. Ltd.
2nd floor, 431
Udyog Vihar, Phase III
122016 Gurgaon (Haryana) - India
Tel: +91 124 420 6491-5
Fax: +91 124 420 6493
email: [email protected]
Ingeteam S.r.l.
Via Emilia Ponente, 232
48014 CASTEL BOLOGNESE (RA) - Italy
Tel: +39 0546 651 490
Fax: +39 054 665 5391
email: [email protected]
Ingeteam, a.s.
Technologická 371/1
70800 OSTRAVA - PUSTKOVEC
Czech Republic
Tel: +420 59 732 6800
Fax: +420 59 732 6899
email: [email protected]
Ingeteam Sp. z o.o.
Ul. Koszykowa 60/62 m 39
00-673 Warszawa - Poland
Tel: +48 22 821 9930
Fax: +48 22 821 9931
email: [email protected]
Ingeteam Ltda.
Estrada Duílio Beltramini, 6975
Chácara Sao Bento
13278-074 VALINHOS SP - Brazil
Tel: +55 19 3037 3773
Fax: +55 19 3037 3774
email: [email protected]
Ingeteam SpA
Bandera , 883 Piso 211
8340743 Santiago de Chile - Chile
Tel: +56 2 738 01 44
email: [email protected]
Africa
Ingeteam Pty Ltd.
Unit 2 Alphen Square South
16th Road, Randjiespark,
Midrand 1682 - South Africa
Tel: +2711 314 3190
Fax: +2711 314 2420
email: [email protected]
Australia
Ingeteam Australia Pty Ltd.
Suite 5, Ground Floor, Enterprise 1
Innovation Campus, Squires Way
NORTH WOLLONGONG, NSW 2500 - Australia
email: [email protected]
AAV2015IQE01_B
05/2015
Ingeteam Power Technology, S.A.
www.ingeteam.com