1
3.3 OPERATIng Procedures
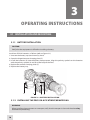
3.3.1 Operating the Zeus
WARNING:
When installing the equipment on a weapon, verify that the weapon is clear and that the safety
is on before proceeding.
CAUTION:
DO NOT force the equipment controls past their stopping points.
CAUTION:
To prevent thermal damage to the equipment, never point it, either powered or not, directly
at the sun or any other source of high intensity light that the unprotected human eye cannot
tolerate (such as a welding arc). To prevent inadvertent exposure to these sources, never leave
the equipment without the objective lens cap secured.
NOTE:
Zero the weapon prior to installing and bore sighting the Zeus.
Operating procedures are as follows:
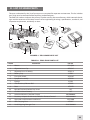
1. Remove the Zeus from the carrying case.
2. Install the Zeus on the weapon’s Picatinny/Weaver rail.
3. Verify that the Zeus is securely mounted to the weapon.
4. Remove the objective lens cap.
5. Point the equipment at an object.
6. Activate the Zeus by turning the turn-pull switch to the ON position. After approximately 3 sec, video
of the thermal scene should appear.
7. Adjust the Zeus for your eyesight by turning the eyepiece focus ring CW up to the stop, and then
CCW until the display and symbols (such as the reticle) are as clear as possible. Bring the object into
focus by turning the objective focus ring (CW for far focus, CCW for near focus).
NOTE:
The total diopter adjustment range is covered with 2 turns of the eyepiece focus ring.
The total focus range is covered with 3/4 turn of the objective focus ring.
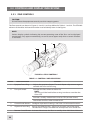
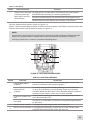
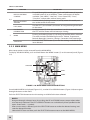
8. Using the buttons on the control panel (Figure 3-21), configure the Zeus to adapt it to your situation.
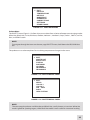
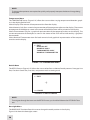
For more information on operational setting procedures, see Part 3.2 (Controls and Display Indications).
A. Adjust the brightness of the display for your comfort.
Momentarily push the brightness adjustment buttons to increase/decrease the display brightness
by one level at a time until you reach your desired brightness level.
B.
Use FFC (Flat Field Correction) to improve image quality.
Push the two brightness control buttons at the same time to induce a manual Flat Field Correction.
29