1
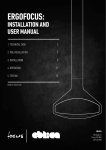
PAxFocus
Installation and
User Manual
1. Technical Data
2
2. PRE-Installation
3
3. INSTALLATION
5
4. Operation
13
5. TestING
14
Keep for future use
Oblica
200 Argyle St
Fitzroy VIC 3065
03 9416 0400
1. Technical Data
Weight and dimensions:
Firebox diameter
Firebox weight
Flue diameter
Flue weight
External flue kit
W950mm x D650mm
66Kg
219mm
16Kg/meter
Triple skin 200/250/300mm
Determined under test conditions:
Nominal thermal output
Efficiency
5kW
46,1%
PAXFOCUS ATTACHED TO
NON COMBUSTABLE WALL
FLUE
ø219 mm
FIREBOX
oblica | paxfocus Installation and User Manual
360 mm
ø950 mm
page 2
2. Pre-INSTALLATION
Congratulations on your purchase of the PaxFocus. This appliance should be installed and checked by a qualified
professional. Ensure you have read the operation guidelines thoroughly prior to first use. For any questions or concerns
please contact Oblica on 03 9416 0400.
The installation process is outlined below:
– Determine position of firebox and flue carefully observing the clearances described within this section
– Install the suspension bracket
– Install the external flue
– Install the internal flue and engage the firebox
– Ensure the floor has adequate protection
Caution:
Using components or parts other than those provided by the manufacturer or modifying the specification of components
may result in inferior or unsafe operation. If such action is necessary, consult the manufacturer in the first instance.
Warning:
• The appliance and flue-system must be installed in accordance with AS/NZS 2918 and the
relevant building code or codes.
• Any modification of the appliance that has not been approved in writing by the testing authority
will be in breach of the approval granted for compliance with AS/NZS 4013.
• Once the flue has been installed and approved by a professional installer, the flue must not be
modified in any way.
oblica | paxfocus Installation and User Manual
page 3
2. Pre-INSTALLATION (CONTINUED)
MINIMUM CLEARANCE – INTERNAL
2.1 Clearance from non-combustible surfaces
(eg masonry)
2.3 Clearance from combustible surfaces
(eg timber joist & plasterboard)
There is no© minimum
clearance
required
atelier dominique
imbert,
2013. from fully
non-combustible surfaces.
700mm minimum clearance is required on
07the sides.
paxfocus
Distances
de sécurité
Non Combustible
– Masonry
Wall par
rapport
aux matériaux
Non
Combustible
– Masonry Wall
RRF - 1625
29 07 1313
Non Combustible – Masonry Wall
Non Combustible – Masonry Wall
combustibles.
700
Mindestabstand hinsichtlich der
brennbaren Materialien.
Distanze di sicurezza da ogni materiale
combustibile.
distancias de seguridad con relación a
los materiales combustibles
Veilige afstand tot brandbaar materiaal.
2.2 Clearance
Sikkerheds from
afstandglass
til braendbart
materiale.
KAUGUS
350mmOHUTU
clearance is required from normal
LEVMATERJALIDEST.
Pminimum
Suojaetäisyydet palava-aineiseen
non-combustible
glass.
materiaalin.
150mm minimum
clearance is required from
.
Biztonsági
toughened
glass.távolság gyúlékony
Õ
anyagoktól.
Dro a distance no viegli uzliesmojo iem
materi liem.
Non Combustible
Combustible
Clearances may be reduced with the application of
heat shielding to walls in accordance to the Australian
Building Code.
For information on heat shielding please contact our
office on 03 9416 0400 or email [email protected].
Leistinas saugus atstumas nuo degi
med iag . Combustible
1200
150
150
Cement sheet
Cement sheet
350
ci bezpiecze stwa od
Distanzi li jridu jithallew minn kull
1200
materjal li jista jaqbad.
Minimalne odleg o
materia ów palnych.
Bezpe nostná vzdialenos od hor av ch
materiálov.
Glass
Distâncias de segurança em relação aos
materiais combustíveis.
Varnostna razdalja glede na vnetljive
materiale.
Säkerhetsavstånd från brännbart
material.
Bezpe nostní vzdálenost od ho lav ch
materiál .
IMPORTANT:
Frames must also be considered. Timber window
frames must be treated as combustible surfaces
(see 2.3). Aluminium frames can be treated as
non-combustible surfaces (see 2.2).
700
Ventilation Grill
0
15
≥13
50
oblica | paxfocus Installation and User Manual
page 4
Combustible Wall
700
Combustible Wall
Safety clearance distances from
combustible materials.
3. InstallATION
3.1 Installing the suspension bracket
• You must leave a 25mm clearance gap between the flue and the ceiling. This gap will be covered by the
ceiling Flange.
• 25mm minimum clearance from the triple skin flue to any combustible material within the roof space
• 40mm minimum overlap of the stainless steel 8” flue into the connector
Typical Flat ROOF INSTALLATION
CHINAMAN HAT
(Anti-Down-Draft device)
TRIPLE SKIN FLUE
200 X 250 X 300
(8’ x 10’ x 12’)
RUBBER FLASHING
PLASTER CEILING MINIMUM GAP
150mm
25mm
CEILING FLANGE
CONNECTOR
LOWER FLUE ø219mm.
oblica | paxfocus Installation and User Manual
page 5
3. InstallATION (CONTINUED)
PITCHED ROOF INSTALLATION (Custom Made flange)
CHINAMAN HAT
(Anti-Down-Draft device)
TRIPLE SKIN FLUE
200 X 250 X 300
(8’ x 10’ x 12’)
RUBBER FLASHING
PLASTER CEILING
MINIMUM GAP
150mm
25mm
CEILING FLANGE
CONNECTOR
LOWER FLUE ø219mm.
oblica | paxfocus Installation and User Manual
page 6
3. InstallATION (CONTINUED)
3.2 Installing the external flue
1.Place the connection piece inside the suspension bracket. This will join the single skin flue below the
bracket and the triple skin flue above the bracket which have different diameters.
2.Ensure the triple skin flue is installed as per Australian standards (see diagrams below).
Pitched roof installation
The top of the flue must be 400mm higher than the highest point of the roof. Alternatively, there must be a
minimum distance of 8 meters from any higher section of roof.
–> 40 cm
–> 40 cm
>
–8m
> 40
– cm
–> 40 cm
>
–8m
> 40
– cm
–> 40 cm
cm
–> 120
Flat roof installation (less than 5˚
pitch)
–> 120 cm
>
–8m
>
– 120 cm
The top of the flue must be 1200mm above the roofline. Alternatively, there must be a minimum distance of
8 meters from any higher section of roof.
–> 120 cm
–> 120 cm
oblica | paxfocus Installation and User Manual
>
–8m
>
– 120 cm
page 7
paxfocus
paxfocus
imbert,
2013. imbert, 2013.
1© atelier dominique
© atelier
dominique
3
3
3. 1InstallATION (CONTINUED)
1
RRF - 1625 R
2
07
2
29 07 1313
07
2
2
44
3
3
4
4
4
page 8
oblica | paxfocus Installation and User Manual
- 2--2 -
5
paxfocus
3.paxfocus
InstallATION
6
6
(CONTINUED)
RRF - 1625
07
atelier
dominique
imbert,
©©
atelier
dominique
imbert,
2013. 2013.
5
66
55
07
29 07 1313
6
Needs more ventilation
at rear of heater.
7
7
7
8
88
7
8
8
-3oblica | paxfocus Installation and User Manual
page 9
RR
3. InstallATION (CONTINUED)
3.4 Protecting the floor
• Floor protector MUST EXTEND 300mm in front of fire and 200mm on sides.
•If installed directly on combustible material, the floor protector must be made of a minimum 6mm thick cement
sheet. Non-combustible finishes can be applied to the floor protector (tiles, steel sheet, light concrete, etc).
• If the combustible floor is installed on concrete, you can replace the combustible material with noncombustible material laid directly onto the concrete.
Floor protector laID on timber floor
Combustible
Combustible
floor
floor (eg.
(eg. timber)
timber)
200mm
200mm
Insulative board
board (6mm)
(6mm)
Insulative
+
+ non
non combustible
combustible finish
finish
Combustible
Combustible
floor
floor (eg.
(eg. timber)
timber)
200mm
200mm
Joist
Joist
N
N
((
Concrete
Concrete
Floor protector laId on Joist
WALL
WALL
200
200
FIREBOX
FIREBOX
Combustible
Combustible
floor
floor (eg.
(eg. timber)
timber)
200mm
200mm
Insulative
Insulative board
board (6mm)
(6mm)
+
+ non
non combustible
combustible finish
finish
300
300
Joist
Joist
oblica | paxfocus Installation and User Manual
page 10
3. InstallATION (CONTINUED)
Floor protector lAID on CONCRETE
200mm
Combustible
Combustible
floor (eg. timber)
200mm
Non combustible finish
(eg.tiles)
Non combustible finish
floor (eg. timber)
(eg.tiles)
Concrete
Concrete
TOP VIEW
WALL
WALL
200
200
FIREBOX
Floor protector /
non combustible finish
IMPORTANT:
Cement sheet section must be ventilated
(Opening on both sides)
FIREBOX
300
Floor protector /
non combustible finish
Combustible floor (eg. timber)
300
Combustible floor (eg. timber)
oblica | paxfocus Installation and User Manual
page 11
4. OPERATION
4.1 What you should burn
• Untreated, air dried hardwood
•Split logs with a humidity content of less than 20%
4.2 Do not burn
• Trash
• Painted plastic
• Coated or preservative treated wood
• Waste or black coal
•Inflammable liquids
• Fire gels
• Moist wood with a residual humidity content of more than 20% (this may cause soothing of the chimney).
IMPORTANT:
• Misuse may lead to unhealthy and environmentally harmful emissions and will void any warranty or guarantee.
• The maximum load capacity for the PaxFocus is 20kg of wood.
• Burning only seasoned hardwood helps to protect the environment and lower emissions.
For details of a wood supplier in your area please call our office on 03 9416 0400 or email [email protected].
Warning:
• Do not use flammable liquids or aerosols to start or rekindle the fire.
• Do not use flammable liquids or aerosols in the vicinity of the fireplace when operating.
• Do not store fuel within prescribed installation clearance distances.
• The use of some types of preservative-treated woods as a fuel can be hazardous.
oblica | paxfocus Installation and User Manual
page 12
5. Testing
Test report Nº ATL17-10
Testing Laboratory: AHHA Testing Laboratory
6/26 Stirling st
Thebarton, SA 5031
08 8351 8056
Manufacturer:
Focus – Atelier Dominique Imbert
Model:
PaxFocus open style fireplace
Extended to PaxFocus by Vipac Laboratory
Work requested:
Measure CO2 levels as outlined in AS/NZS 4013:1999
to determine if appliance is excluded from full testing
to this standard.
Test Dates:
09/06/2010
Results:
The maximum carbon dioxide output by the appliance during the high burn rate prescribed in AS/NZS 4013:1999 was 3.75%.
Conclusion:
This appliance meets the requirements of AS/NZS 4013:1999 section 1.2.3 (f) and is classified as an
excluded appliance.
oblica | paxfocus Installation and User Manual
page 13