1
SWITCH Library Consortium
Milwaukee, Wisconsin
RESERVE MAINTENANCE
CREATING A RESERVE RECORD (#100280 and #100270)
1.1
EDITING AND DELETING A RESERVE RECORD
1.2
TAKING ITEMS OFF OF RESERVE (#100258)
1.3
LISTING RECORDS WHOSE STATUS SHOULD CHANGE
(#100260)
1.4
CHANGING THE STATUS ON ITEMS ATTACHED TO A
RESERVE RECORD (#100261)
1.5
Millennium
Course Reserves Manual
(#105292)
RESERVES FROM THE LIBRARY
COLLECTION
ATTACHING ITEMS FROM THE COLLECTION TO A RESERVE
RECORD
1.6
HANDLING PERSONAL COPIES &
PHOTOCOPIES
To access the Course
Reserves mode, you must be
authorized for functions 48
("Course reserves") and 171
("View course records"). To
edit course records, you must
be authorized for function 174
("Update course records").
The Course Reserves mode
will not be available (grayed
out) if there are no course
records in your database.
ATTACHING A BIB & ITEM TO A RESERVE RECORD (#100256)
1.7
E-RESERVES INSTRUCTIONS
ATTACHING A BIB & ITEM TO A RESERVE RECORD (#100256)
1.7
CREATING PDFs FOR E-RESERVE ITEMS USING ADOBE
ACROBAT
IMPORTING PDFs INTO A RESERVE RECORD
1.8
1.9
DELETING PDFs AND DELETING BIB/ITEMS FROM A RESERVE
RECORD
1.10
Follow these instructions to remove PDFs from our TOPCAT server.
Delete the PDF FIRST before deleting the bib/item.
RESERVE STATISTICS
DOWNLOADING E-RESERVE STATS FROM WEB
MANAGEMENT REPORTS
1.11
TWO WAYS TO GET DATA FROM WMR INTO EXCEL
1.12
EXCEL MACROS HELP
1.13
jls
Millennium Reserves – CREATING RESERVE RECORDS
#100280 and #100270
Accessing Millennium Circulation
1.
2.
3.
Start | Programs | Millennium (or click on the
Millennium icon on your desktop)
The Java script box appears & runs; This
ALWAYS need to be on (minimized) for
MilCirc to work!!!
Enter your username and password.
Millennium Circulation will then come up:
TOOLBAR features ‘commonlyused’ commands.
MAIN MENU
NAVIGATION
BAR
1. Make sure you are in the COURSE RESERVES mode.
2. Search for an existing reserves record in TOPCAT (by p for professor’s name or r for course name).
3. If you locate a record, highlight the record and begin attaching items to it. If there is NO course
reserve record:
a) Click on the NEW button from the toolbar and create a new course reserves record.
b) Depending on the settings for YOUR login (Admin | Settings), the system will either prompt you
to select a reserves record template (from which you will create a new reserves record), or the
system will bring up a pre-selected reserves template (within which you will fill in information in the
appropriate fields).
System prompts user to select
a template
System goes directly into a
pre-selected template.
1.1.1
CONTROLLING TEMPLATES
To pre-select a specific reserves record template, go to Admin | Settings | New Records tab |
New Records Templates. To create a new template or edit an existing template, go to Admin |
Settings | Templates. For more information, see Managing Templates for New Records, #
105825 of the Innovative user manual, or ask the SWITCH office.
OPTIONAL WIZARD TO CREATE NEW RECORDS
Each login can be set to use a WIZARD to create new records. A wizard is a series of dialog boxes
that display as you fill in information to create a new record. In other words, for each field of a
given record template, the system will prompt you with a dialog box to fill in the data needed. For
example,
You then choose Next to go to the next dialog box representing the next field. At the end, you
save. Contact the SWITCH office if you’d like to change this setting to not use a wizard. In that
case, you will be presented with the new record template to edit the fields. No dialog boxes will
display. This is set on a login by login basis.
4. Be sure to fill in the necessary field information for a reserve record, likely:
•
•
•
•
•
•
BEGIN DATE
END DATE
LIB (your library code)
PROFESSOR (Last name, First name)
COURSE RESERVE NAME (you can put in more than one name to help students find the course)
NOTE or another field
Keep in mind if you are using a wizard and want to ADD VARIABLE FIELDS to a new record, you
need to wait until all dialog boxes finished displaying and Save the record. Then choose the Insert
button on the toolbar to choose and insert the variable field you want to add.
5. Save the record using Ctrl+S or the Save button on the toolbar. Click on the Summary button to go
back to the previous screen.
6. Once the reserve record has been created you may attach items to the record. Follow the
appropriate set of instructions (see SWITCH Reserves web page) depending on if you are
attaching an item from your library’s collection (Attaching Items From Your Collection), OR if you’re
attaching a bib & item for any personal copies; photocopied items; or for electronic items, typically in
the form of PDF’s (Attaching Bib & Items to a Reserve Record).
1.1.2
Millennium Reserves – EDITING AND DELETING A RESERVE RECORD
#105541 and #105543
Accessing Millennium Circulation
1.
2.
3.
Start | Programs | Millennium (or click on the
Millennium icon on your desktop)
The Java script box appears & runs; This
ALWAYS need to be on (minimized) for
MilCirc to work!!!
Enter your username and password.
Millennium Circulation will then come up:
TOOLBAR features ‘commonlyused’ commands.
MAIN MENU
NAVIGATION
BAR
1. Make sure you are in the COURSE RESERVES mode.
2. Search for an existing reserves record in TOPCAT (by p for professor’s name or r for course name).
3. Highlight & select the correct reserve record to bring it up. It will then display at the top of the
Millennium main window.
1.2.1
TO EDIT A RESERVE RECORD
4. Click the Edit button on the toolbar to go into the Edit mode of the reserve record.
5. Edit any fixed or variable fields as needed. Then save using the Save button or Ctrl+S.
6. Close the record using the Close button on the toolbar.
TO DELETE A RESERVE RECORD
4. Click the Edit button on the toolbar to go into the Edit mode of the reserve record.
5. Choose File | Delete Course Record on the main menu.
6. The system will prompt you to delete the course record. It will let you know if you still have items
attached to the reserve record. There cannot be any items attached to a reserve record when you want to
delete the record.
7. After deleting the record, the system will take you back to the search screen for the Reserves mode.
1.2.2
Millennium Reserves – TAKING ITEMS OFF OF RESERVE
#100258
Accessing Millennium Circulation
1.
2.
3.
Start | Programs | Millennium (or click on the
Millennium icon on your desktop)
The Java script box appears & runs; This
ALWAYS need to be on (minimized) for
MilCirc to work!!!
Enter your username and password.
Millennium Circulation will then come up:
TOOLBAR features ‘commonlyused’ commands.
MAIN MENU
NAVIGATION
BAR
1. Go to the COURSE RESERVES mode.
2. Search for an existing reserves record in TOPCAT (by p for professor’s name or r for course name).
3. Highlight & select the correct reserve record. (It will then display at the top of the Millennium main
window).
TO REMOVE OR TAKE ITEMS OFF OF A RESERVE RECORD
4. Highlight the item or items you want to take off reserve. Then choose the Remove Items button.
WAYS TO SELECT MULTIPLE ITEMS IN A LIST:
a.
Checkmark the small check boxes to the left of each item you need.
b.
To highlight several items sequentially next to each other in a list, highlight the first item
you need, then go to the last item you need, hold down the SHIFT key and select the last
item (while the first is still selected). It will select all the items in between along with the
first and last items.
or
c.
To highlight several items NOT sequentially next to each other in a list, highlight the first
item you need, then hold down the CTRL key as you select the other items in the list you
need.
1.3.1
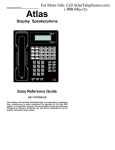
5. The system should then display a small confirmation dialog box. (see above). It will indicate
the number of errors vs. successes. The item or items are now removed from the reserve record.
IMPORTANT: Whenever you remove an item from reserve, Mil Circ automatically uses the
data in the SAVE ITEM field to restore the values of the LOC, ITYPE and TOT
CHKOUT fields. It also adds a RESERVE NOTE to the record indicating the date the
item was placed ON or OFF reserves and for what course.
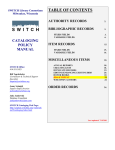
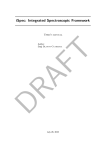
6. If you remove all of the items attached to a given reserve record, the system will ask you if you want
to DELETE the course reserve record. The message will look like this:
7. Choose the Close button on the toolbar to return back to the main Course Reserves mode display.
IMPORTANT: If you need to actually DELETE the BIB & ITEM for a particular work.
1. Go to the Search/Holds mode of Millennium Circulation and search for the given item
(by title or barcode.).
2. Bring up the correct item (make sure it’s from your library). If there are other ITEMS from
other libraries, do not delete the bib as it is in use. Delete the ITEM ONLY:
a. Go into the ITEM record TAB for the correct item record.
b. Choose File | Delete Item record from the main menu.
3. If you can safely delete the bib (and the item):
a. Choose the Edit button on the toolbar to go into the Edit mode of the BIB
record.
b. Choose File | Delete Bibliographic record from the main menu
c. The system will ask if you want to delete any attached items. You may do so,
so long as the items attached belong only to your library.
1.3.2
Millennium Reserves – LISTING RECORDS WHOSE STATUS SHOULD
CHANGE #100260
Accessing Millennium Circulation
1.
2.
3.
Start | Programs | Millennium (or click on the
Millennium icon on your desktop)
The Java script box appears & runs; This
ALWAYS need to be on (minimized) for
MilCirc to work!!!
Enter your username and password.
Millennium Circulation will then come up:
TOOLBAR features ‘commonlyused’ commands.
MAIN MENU
NAVIGATION
BAR
1. Go to the COURSE RESERVES mode.
2. Go up to the main menu and choose Options | Records whose status should change.
3. Millennium Circulation will then display that looks like the one below:
1.4.1
4. From this screen, you’ll want to search for records using a BOOLEAN REVIEW FILE (list of reserve
records) you’ve already created (of your library’s reserve records). If you need to create a list of
reserve records, go to the Create Lists mode of Millennium Circulation and then come back at another
time.
5. Under the Current Item Status option, choose to view records whose status is currently Active or
Inactive.
6. Under the Records whose status should change area, use the After and Before boxes to specify
the date(s) during which the status of the records should change. You can specify a singe day by
entering the same day in both boxes.
7. Choose Search to initiate the request.
8. The system will bring up any matching bib & item records listing them at the bottom of the screen.
9. From here, you can:
•
•
•
View either the bib or item record for any record listed. To do so, select the line, and RIGHTCLICK ONCE, then choose either the View this Bib command or the View this Item
command.
Print the list of records by choosing the Print button on the toolbar or File | Print Table
(Standard Printer).
Change the status of one or more items in the list by selecting the items by line and then
choosing the Change Status button.
1.4.2
Millennium Reserves – CHANGING THE STATUS ON ITEMS ATTACHED TO
A RESERVE RECORD #100261
NOTE: A reserve record is considered ACTIVE if at least one active record is attached to the
reserve record. A reserve record is consider INACTIVE if all of its attached records are inactive or
if no records are attached to the reserve record.
Accessing Millennium Circulation
1.
2.
3.
Start | Programs | Millennium (or click on the
Millennium icon on your desktop)
The Java script box appears & runs; This
ALWAYS need to be on (minimized) for
MilCirc to work!!!
Enter your username and password.
Millennium Circulation will then come up:
TOOLBAR features ‘commonlyused’ commands.
MAIN MENU
NAVIGATION
BAR
To change the active/inactive status of a bib/item attached to a course, you can either follow the
instructions to LIST RECORDS WHOSE STATUS SHOULD CHANGE, or manually bring up a
specific reserve record and change the status on one or more attached records. These
instructions will cover the later choice.
CHANGING THE STATUS ON INDIVIDUAL RECORDS ATTACHED TO A RESERVE RECORD
1. Go to the COURSE RESERVES mode.
2. Search for an existing reserves record in TOPCAT (by p for professor’s name or r for course name).
3. Highlight & select the correct reserve record. (It will then display at the top of the Millennium main
window). See the image below:
1.5.1
4. Select one or more of the attached records whose status you want to change.
5. Choose the Change Status button. Millennium Circulation will prompt you to change the Course
Reserve Settings for the highlighted records. You now need to make changes based on whether the
status is changing from Active to Inactive or vice versa. The fields to change include: the LOC and
ITYPE fields (ignore the ITYPE field unless you have set up something with the SWITCH Office), the
ITEM STATUS. (Active or Inactive). You can also set whether or not you want the course name to
display as the call number. See the image below:
6. Make the necessary changes depending on whether you are changing the record(s) to be ACTIVE or
INACTIVE. Then choose OK.
7. Millennium Circ will display a confirmation dialog box letting you know the number of records whose
status changed successfully as well as how many errors there were.
8. If you need to print the table you can do so by choosing Print button on the toolbar or File | Print
Table (Standard Printer) from the main menu.
9. Choose the Close button to return to the main Reserves mode (or File | Close from the main menu).
1.5.2
Millennium Reserves - ATTACHING ITEMS FROM THE LIBRARY
COLLECTION TO A RESERVE RECORD
These instructions assume you have already created a reserve record. If you have not, please see the
instructions for Creating a New Reserve Record on the SWITCH Staff Support web page.
Accessing Millennium Circulation
1.
2.
3.
Start | Programs | Millennium (or click on the
Millennium icon on your desktop)
The Java script box appears & runs; This
ALWAYS need to be on (minimized) for MilCirc to
work!!!
Enter your username and password for Mil Circ.
Millennium Circulation will then come up:
TOOLBAR features ‘commonlyused’ commands.
NAVIGATION
BAR
4. Make sure you are in the COURSE RESERVES mode.
5. Search for an existing course reserve [r] record (by professor’s last name or by course
name). If there is no reserve record, follow the instructions for Creating a New Reserve Record.
6. Highlight & select the correct reserve record to bring it up. It will then display at the top of the
Millennium main window.
7. Click on the ADD ITEMS button in the middle of the screen to search for items in your library’s
collection that are in TOPCAT.
1.6.1
8. The system will bring up a new window “Place item/bib on Reserve”. From here, you will search
for a specific bib/item and then add it to the reserve record you have up. Search for the desired
item using whichever index you prefer. In the example below we are using the Title index to
search for a work titled “Staff Training.”
9. Select the correct record you need. Double-click on the desired line to bring up the bib with all
of its attached records. If you select the wrong record and need to go back, click the Browse
button on the toolbar.
10. In the middle and the left of the screen, locate the Summary tab. Be sure the View area is
displaying ITEM records. When viewing the attached item records, please check the LOC code
to make sure the record begins with your school’s abbreviation/your record!
11. When you locate the correct item record, click on the Add Selected Item button to attach the
item record to your course reserve record.
1.6.2
12. If, by chance, you are under the Item record tab, then choose the Add Item button (which will
also attach the record to the reserve record).
13. Fill in the Course Reserve Settings box that pops up.
•
•
•
•
The LOC code represents your school’s reserve
location (e.g., sfres). Use the pull down arrow to locate
the correct code or type it in.
I TYPE (leave at 0, unless your library has a code set
up….CSU does)
DISPLAY COURSE NAME AS THE CALL NUMBER
(optional, depending on your school’s needs)
ACTIVE UNTIL DATE (highlight this radio button and
enter in a date that the reserve item will be active until.
This date will help you retrieve reserve items later to put
into a list (review file). You may want to use the same
Active Until Date for all reserve records each
semester).
14. The system will return you to the reserve record and display the item(s) you have attached.
15. Continue to add items from your library’s collection to a reserve record (Course List) using the
Add Items button.
16. Use the Close button to close out of the reserve record when you are done adding items.
VIEWING A RESERVE RECORD IN TOPCAT:
a)
b)
c)
d)
Go to TOPCAT, the online catalog (http://topcat.switchinc.org)
Search for your reserve record either by professor’s last name or by course name
View the reserve record and the attached items
Make changes in Millennium Circulation | Course Reserves mode accordingly.
1.6.3
Millennium Reserves – ATTACHING A BIB & ITEM TO A RESERVE RECORD
#100256
IMPORTANT: Follow these instructions for reserve items that are
Personal Copies, Photocopied Items, &/or PDF’s/E-Reserves
For personal copies of materials, photocopied articles and e-reserve items, there must be a bib & item
attached to a reserve record. Follow these steps to create a new brief bib & item record. IMPT: If you
already have a bib/item created & attached to a reserve record and you simply want to IMPORT A PDF
into a reserve record, see the instructions under Importing PDF’s into a Reserve record.
Accessing Millennium Circulation
1.
2.
3.
Start | Programs | Millennium (or click on the
Millennium icon on your desktop)
The Java script box appears & runs; This ALWAYS
need to be on (minimized) for MilCirc to work!!!
Enter your username and password to login to
Mil Circ.
Millennium Circulation will then come up:
TOOLBAR features ‘commonlyused’ commands.
MAIN MENU
NAVIGATION
BAR
4. Make sure you are in the COURSE RESERVES mode.
5. Search for an existing course reserve [r] record (by professor’s last name or by course name). If
there is no reserve record, follow the instructions for Creating a New Reserve Record.
6. Highlight & select the correct reserve record to bring it up. It will then display at the top of the
Millennium main window.
For personal copies, photocopied articles and e-reserve items, there must be a bib & item attached to
a reserve record. Follow these steps to create a new brief bib & item record. IMPT: If you already
have a bib/item created & attached to a reserve record and you simply want to IMPORT A PDF into a reserve
record, see the instructions under Importing PDF’s into a Reserve record.
1.7.1
7. To create a new bib & item, go to the main menu and select Options | Key a New Bib/Item Record.
8. The system will bring up a new window “Key a Bibliographic-Item Record”. From here, you can search
for an existing bib & item if they are created, or click the New button to create new bib & item records.
Again a brief bib and item record is necessary for any personal copies, photocopies and PDF’s.
9. To create a new bib & item, click on the NEW button from the toolbar.
10. The system will prompt you to select a bib (and then an item( record template from which you will
create the new record. It will look something like the example below. Select the appropriate Reserve
template for your library.
System prompts user to select a
template
1.7.2
11. Fill in the necessary field information for the new bib record. Be sure the following fields are filled and
do NOT use MARC tags:
•
•
•
•
•
•
•
LIB (your school code)
BIB LVL (monograph)
MAT TYPE (a for book)
SUPPRESS (y for yes)
AUTHOR (last name, first name)
TITLE (Title)
Any other fields needed. [Complete the template, then click the Insert button & choose a field].
OPTIONAL WIZARD TO CREATE NEW RECORDS
Each login can be set to use a WIZARD to create new records. A wizard is a series of dialog boxes
that display as you fill in information to create a new record. In other words, for each field of a
given record template, the system will prompt you with a dialog box to fill in the data needed. For
example,
You then choose Next to go to the next dialog box representing the next field. At the end, you
save. Contact the SWITCH office if you’d like to change this setting to not use a wizard. In that
case, you will be presented with the new record template to edit the fields. No dialog boxes will
display. This is set on a login by login basis.
A FEW POINTS
• When creating a new bib or item, the DUPLICATE RECORD FOUND screen may pop up,
choose the CLOSE button to continue creating your new records.
•
You will not save the record until you are finished creating both the new bib & new item records.
•
You may click the Cancel button or Alt+S to close out and cancel creating the new bib record.
12. After creating a new bib, the system prompts you to select the correct item record template from
which you will create the new record. Select the appropriate Reserve template for your library.
1.7.3
CREATING & EDITING TEMPLATES
To create a new template or edit an existing template, go to Admin | Settings | Templates. For
more information, see Managing Templates for New Records, # 105825 of the Innovative user
manual, or contact the SWITCH office.
13. Fill in the NEW ITEM RECORD template. Be sure that the following fields are filled:
a.
b.
c.
d.
e.
f.
g.
LOC (use a code that indicate the item is on reserves…i.e., sfres)
ITYPE (should be 0, unless you have connected with the SWITCH office to set up)
COPY No.
BARCODE
VOLUME (insert call number information here! It will display where the call no. info goes)
AGENCY (optional for these records)
NOTE (i.e., Personal Copy or other notes. When the item is removed from a reserve record, the system
automatically inserts a note into the item record including a date when it was removed.)
h. Any other fields you need. [press Enter in the variable field area or click the Insert button on the toolbar
to insert a new variable field.].
14. When you finish filling in data for each required field of the item record template, save the record by
selecting the Save button on the toolbar, or Ctrl+S.
15. Click the Close button on the toolbar and you will return back to the reserve record.
16. Now click the Add Items button.
17. The system will bring up a new window “Place item/bib on reserve”. From here, you will search for the
new bib & item you just created and add them to the reserve record. Search for the bib & item using
whichever index you prefer. Typically searching by title or barcode is the best way to retrieve specific
items quickly.
18. Select the correct record you need. Double-click on the desired line to bring up the bib with all of its
attached records. If you select the wrong record and need to go back, click the Browse button on the
toolbar.
19. In the middle and the left of the screen, locate the Summary tab. Be sure the View area is displaying
ITEM records. When viewing the attached item records, please check the LOC code to make sure
the record begins with your school’s abbreviation/your record!
1.7.4
20. When you locate the correct item record, click on the Add Selected Item button to attach the item
record to your course reserve record. If, by chance, you are under the Item record tab, then choose
the Add Item button (which will also attach the record to the reserve record).
21. Fill in the Course Reserve Settings box that pops up.
•
•
•
•
The LOC code represents your school’s reserve
location (e.g., sfres). Use the pull down arrow to locate
the correct code or type it in.
I TYPE (leave at 0, unless your library has a code set
up….CSU does)
DISPLAY COURSE NAME AS THE CALL NUMBER
(optional, depending on your school’s needs)
ACTIVE UNTIL DATE (highlight this radio button and
enter in a date that the reserve item will be active until.
This date will help you retrieve reserve items later to put
into a list (review file). You may want to use the same
Active Until Date for all reserve records each
semester).
22. The system will return you to the reserve record and display the item(s) you have attached.
23. If you are creating the bib & item for HARDCOPIES ONLY (of personal materials or photocopied
articles/chapters) you are done. Hooray!
If you need to also include ELECTRONIC FILES. You will need to import and attach each one to the
corresponding item record (you just created) and then attach to the reserve record. See the
instructions for Importing a PDF into a Reserve Record to complete this task.
If you have multiple bib & items to create for a course, you may want to do them all at once
using the Options | Key a Bibliographic-Item record command. Then end this task by adding
them as a batch to the given reserve record.
1.7.5
Millennium Reserves – CREATING PDF’S USING ADOBE ACROBAT
These instructions assume that you have already created reserve records, created a new bib & item for the work (See
Attaching a Bib & Item to a Reserve Record) and scanned the document(s) you need. Following the creation of PDFs
you will need to import the PDFs into TOPCAT using the Millennium Media Manager found in MilCirc.
Creating PDF files
Your originals should be single-sided and be in good condition. If they are not, it is recommended that you
make new single-sided copies on a photocopier before attempting to scan them using the ADF
(Automatic Document Feeder).
1. Begin by inserting the document into the ADF of the scanner. Make sure the purple lever is at the
forward or #1 position. Insert the documents face-up, and then move the lever back to the #3 position.
2. Open Adobe Acrobat software.
3. With the mouse, go to the main menu at top & choose: File > Create PDF > From Scanner
4. Click on the Scan button
[STEPS 5-6 Don’t Apply to SFS’ scanner]
5. This will now open HP Precision Scan Pro to do the actual scanning. Click on the Load Settings
button. (NOTE: It may take a little while for this to come up!)
6. Make sure ADF Letter Scan appears in the window and select Load. (If you get lost look on the main
menu under Scan | Load Settings, but again, it might just be slow.)
7. Click the Scan button. The scanner will now scan the documents you placed in the ADF.
8. When it finishes scanning all the documents in the ADF it will ask you if you are Done, or if there are
more pages to scan. At this point if you are done simple click the Done button. If you have more
pages to add, click the Next button. You will then need to go back to Step #5 and Load Settings
again. (If you get lost look on the main menu under Scan | Load Settings, but again, it might just be
slow.)
9. When you click Done, Acrobat will show you the scanned documents. Make sure the scans look good
and that all the pages are there.
10. Use the mouse to go to File:Save As and save the document in a place that you have created on
your hard drive for saving Electronic reserve documents.
11. At this point, if you have more documents to scan you can go to File:Close to close the current
document, and then go back to Step #1 to scan additional documents.
12. Now follow the instructions for Importing a PDF File into a Reserve Record.
1.8.1
Millennium Reserves – IMPORTING PDFs INTO A RESERVE RECORD
IMPORTANT: Follow these instructions for PDFs to be put on reserve as electronic
reserve items.
To import PDF’s, there must be a bib & item attached to a reserve record. If you have not done so already follow the
instructions above for Attaching a Bib & Item to a Reserve Record. This is needed for any e-reserve item.
Accessing Millennium Circulation
1.
Start | Programs | Millennium (or click on the
Millennium icon on your desktop)
The Java script box appears & runs; This ALWAYS
need to be on (minimized) for MilCirc to work!!!
Enter your username and password to login to
Mil Circ.
2.
3.
Millennium Circulation will then come up:
TOOLBAR features ‘commonly-used’ commands.
MAIN MENU
NAVIGATION
BAR
4. Make sure you are in the COURSE RESERVES mode.
5. Search for an existing course reserve [r] record (by professor’s last name or by course name). If
there is no reserve record, follow the instructions for Creating a New Reserve Record.
6. Highlight & select the correct reserve record to bring it up. When you retrieve the record you will see
all attached items at the bottom of the Millennium window. To import PDF’s, there must be a bib &
item attached to a reserve record. If there are NO items attached (for personal copies, photocopied
articles and e-reserve items), follow the instructions for Attaching a Bib & Item to a Reserve Record. If
you already have a bib/item created & attached to a reserve record you are ready for the next step!
7. With your reserve record at the top and attached items at the bottom of the Millennium window, select
the correct item record that corresponds with (MATCHES) the PDF file.
8.
Highlight the line item you want to attach the PDF to and RIGHT CLICK once.
1.9.1
9. Choose the View bib & item command from the menu.
10. With the bib & item displaying, click on the MEDIA button
on the toolbar. (See below)
11. Click on the Add Media Set button.
MEDIA MANAGER WINDOW
12. The system asks you to complete a new Media Set Description by filling out the form in the Millennium
Media Manager window.
1.9.2
Media Manager Window
IMPORTANT:
The system requires
separate folders for
each type of media
(e.g., web sites vs.
PDF files vs. sound
files, etc.) AND there
can only be ONE
PDF PER FOLDER.
In other words, each
folder represents
13. Fill in the first 2 fields of the Media Set Description box (below):
TITLE :
You’ll likely want to use the name of the article/chapter
for the title. Whatever you fill in for the title will display at the left of the Media
Manager window as a folder.
PUBLISHER CODE :
The publisher code must begin with your school’s abbreviations and
can’t
include spaces or non-alphanumeric characters. This code allows you to view
statistics using Mil Web Management Reports (User Access | E-Reserves).
14. UNCHECK the Use Image Viewer box (enables use of Adobe’s viewing software).
15. Click the Import File button at the bottom of the Media Manager window.
16. Navigate & find your PDF (as with any file manager), click Open. The system will load your PDF
under the media set folder.
17. Click the Save button [or CTRL s].
1.9.3
18. To add another folder and another PDF to the same ITEM record, click ONCE on the Media Manager
(at the top of the hierarchy or ‘tree’) and click on the Add New Media set button.
Click once on the Media
Manager folder (top of the
hierarchy to the left), and
then on the Add Media Set
button above.
19. Follow the steps above to fill in the Media Set Description box for each new PDF. For an example,
of a record that has multiple PDF’s attached to one item record, see CUW MSN 551/851 in TOPCAT.
20. The article is now attached to the bib/item record and will appear in TOPCAT when you do a search
by the course or instructor name.
IMPT NOTES TO READ:
If you wanted to Link to a URL, choose the Link URL button within the Media Manager window
and insert the web address including the http://….. (for more information on this, please see
#105236 of the manual).
You need to have separate folders for each different types of media (e.g., web sites, PDF’s, etc.).
the Media Manager click on the MEDIA button found on the main toolbar. AND there can only be
ONE PDF PER FOLDER. In other words, each folder represents one PDF file.
You are in charge of removing PDFs. See Deleting Electronic Reserve Articles & Bibs.
Basically, what you do is RIGHT CLICK to view the bib & item; click on the Media button to bring
up the Media Manager window; highlight the correct media folder/PDF you want to delete, then
RIGHT CLICK again and choose the REMOVE command! This removes it from our server. You
will then need to CLOSE out of the Media Manager and either change the status or remove the
corresponding ITEM record(s)!
1.9.4
Millennium Reserves – DELETING PDFs and DELETING BIB/ITEMs
FROM A RESERVE RECORD
IMPORTANT: Use these instructions to remove the PDF from our TOPCAT server. You must delete the
PDF FIRST before deleting the bib/item if you are going to do so. Afterwards, don't forget to either remove
or change the status of the associated item record as it applies to the reserve record.
Accessing Millennium Circulation
1.
2.
3.
4.
Start | Programs | Millennium (or click on the
Millennium icon on your desktop)
The Java script box appears & runs; This ALWAYS
need to be on (minimized) for MilCirc to work!!!
Enter your username and password to login to
Mil Circ.
Go to the Search/Holds mode of Mil Circ. Contact the SWITCH office if this mode does not currently
display in Millennium with your given login.
5. Search for the PDF using the Title or Barcode index (the barcode index can help insure that the item is
specifically from your school).
6. Evaluate the record (including LOC code) to confirm it’s the right one and select the correct one. Bring
up the bib with its attached items.
TO DELETE JUST ELECTRONIC ITEMS (BUT NOT THE BIB/ITEM)
7. Click on the Media button found on the top toolbar.
Once the Millennium Media Manager
window is up, click once to highlight the media set (folder) you want to delete.
NOTE: To view or delete items within a media set folder, click once on the key (or magnify glass)
symbol
to turn and expand the folder. (You can then highlight individual items within the folder, right
click and choose Remove at this level). There is only one PDF per folder.
1.10.1
8. Now right click once on the folder you have selected and choose the Remove option. NOTE: When
you delete a media set/folder from the Millennium Media Manager it will delete the file (PDF or
other) here and off the TOPCAT server.
9. Delete any other PDF’s you need to from the Media Manager window. Save when you are done by
pressing the Save button.
TO DELETE ALL ELECTRONIC ARTICLES & THE BIB/ITEM
1. Follow the steps above to delete any and all remaining media sets/folders in the item record.
2. Save the record and click on the Summary button on the toolbar. (The Close button will close out of
the record in which case you have to run the search for the correct bib/item again.).
3. From the Summary screen which looks like the one below, choose the Edit button from the toolbar to
go into the edit mode of the bibliographic record.
1.10.2
4. Once you are within the Edit Bib screen, go under the File menu and choose the Delete
Bibliographic Record option.
5. The system will then bring up a dialog box asking if you want to delete the bib as well as all attached
records. Choose YES to delete the bib as well as your attached item record(s).
6. After deleting the bib you will be taken back to the search screen of the Search/Holds mode.
1.10.3
Millennium Reserves – DOWNLOADING E-RESERVES STATS FROM WEB
MANAGEMENT REPORTS
Start by Accessing Web Management Reports
1.
2.
Go to: http://topcat.switchinc.org/manage/.
Web Management Reports will come up.
Steps to Locate and Download E-Reserves Statistics
3. Locate the User Access category
4. Select the E-Reserves button. Enter in your initials and password to access the report.
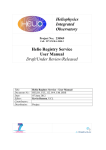
5. Look at the far left, then select the report you need such as Summary Statistics by Pub or
Publisher Code. Select the Date Range you need.
1.11.1
User Spec stands for
User Specifies. This
should be used
when you want to
select multiple
months for the
timeframe needed.
7. Click Submit to run the report.
8. If you chose the User Spec option, enter the beginning and ending dates
and click Go.
9. Your report will now display. Here’s one example:
9. To download the report and bring into Excel. Click on the download button found on the toolbar
10. You will receive a File Download box asking if you'd like to Open or Save the file.
11. Choose the Save option and save to the desktop. The file will default to the name, 'download_1x1'.
You may keep or change this.
12. Open Microsoft Excel.
13. Choose the Open File command under File on the main menu (or the
icon).
14. Navigate to the desktop to find the saved file (named download_1x1 or something else).
Make sure you are displaying TEXT files since this is the type of file you are downloading. If you don't see
this file make sure to change 'Files of Type' to All Files or Text Files within the Open File dialog box.].
1.11.2
15. Select the file and click Open.
16. A Text Import Wizard will come up. Use this to import the data in user-delimited file format.
17. Choose the 'Delimited' format and click on the button.
18. Under the 'Delimiters' area, check 'Other' and use the | key (pipe or vertical bar) to delimit cells.
(Depending on the report, you may need to play around with the other delimiter options). Then click
the Next button
Note: if you cancel out of the Import Wizard, the file will automatically be dumped as is into the opened
software program as a new file.
1.11.3
19. The final step of the Text Import Wizard allows you to preview the data and set how the date will be
displayed. Under 'Advanced' you can control how numeric data will be presented (with commas or decimal
points). At this point, simply end by clicking on the Finish button.
20. The report will now dump into Excel as in the below example:
21. You now need to format and manipulate the data to control the report's appearance. Remember to go
to File | Save As to save the new document as an Excel spreadsheet, or .xls file.
IMPT: Whenever
you see pound
symbols within
Excel, ####### as
they display above
that indicates that
there is not enough
room in the column
to display the data.
Drag over the
col mn b going p
22. For other help, see Two Ways to Get Data from WMR into Excel.
1.11.4
Two Ways to Get Data from WMR into Microsoft Excel
Copying & Paste Option for Web Management Reports
Download Report into Excel & Use a Macro
1.
Create a report using Web Management Reports (WMR)
http://topcat.switchinc.org/manage/
1. Create a report using Web Management Reports (WMR)
http://topcat.switchinc.org/manage/
2.
Highlight parts or all of a report. Then copy and paste the data
into a new Microsoft Excel document. When first pasting data
into the Excel file, be sure your cursor is in the first cell at the
top left (A1).
2. Use the DOWNLOAD button within WMR to save the report as a text
If you copied over the entire report and would like to sort by
PUBLISHER CODE in order to remove the records from other
libraries, select that column:
3. Open MS Excel and choose File | Open from the main menu
3.
a. Go to the top of the Excel worksheet where the columns
are lettered and in gray cells.
b. With the mouse, go to the column you want to highlight
and click once on the gray cell
c. The whole column should now be highlighted.
Now SORT the column alphabetically by going up on the main
menu and selecting Data | Sort.
4.
Delete any unneeded columns by highlighting the column and
then choosing Edit | Delete from the main menu.
5.
Resize columns as needed:
a. Go to the very top of the Excel sheet where each column is
lettered and in gray cells.
b. Locate the column you want to resize. Hover over the left
or right vertical line for that column until the mouse
changes to a double-arrow.
c. Drag to the left and right as needed.
6.
Continue to format the report in Excel as needed.
file to your desktop. Feel free to rename the file if you’d like
4. Open the file you downloaded to the desktop. Make sure the bottom of
the Open File dialog box is set so that the “Files of Types" pull down
displays "All Files." This insures you can see all text (.txt) files. Locate
the file you downloaded to your desktop.
5. Use the Text Import Wizard and the delimited format to bring in the
text file data. Use the pipe symbol or (|). Then hit "Finish."
6. Once the report data is in Excel, you create a macro to do basic
formatting for future reports.
a. From the main menu, choose Tools | Macros | Record New Macro.
b. Give the macro a name and store it in "Personal Macro
Workbook." Choose a letter for this macro shortcut.
c. Hit OK to start recording.
d. Perform those commands you would like to include in the macro.
Some suggestions are on the back
7. Hit the Stop button to end recording the macro.
Please see this page on the SWITCH Staff Web Site
for more information:
http://caspian.switchinc.org/~tutorials/staff/circres/pubc.html
1.12.1
A FEW SUGGESTIONS FOR FORMATTING COMMANDS YOU
COULD INCLUDE IN A MACRO.
•
•
•
•
•
•
Highlight the first row and delete it.
Sort the Publisher Code column. (This will help you identify
records from other libraries that you can remove later). To do this,
first select the column (To highlight a column, go to the top of the
worksheet where the columns are lettered and in gray cells. Find
the column you need and click once on the gray, lettered cell for
that column. The column should now be selected.). Afterwards,
choose Data | Sort to sort the column in ascending or descending
order.
Insert a row at the very top of the sheet. (Click once on Cell 1, then
choose Insert | Row from the main menu).
Merge this first row and insert a report heading. (To merge cells,
highlight the row and choose the Merge button from the
Formatting toolbar.
).
Delete any unneeded columns To do so, highlight the column and
choose Edit | Delete from the main menu.
Insert gridlines into your report. To do so, select all cells (click
once on the very top left cell in between cells A and 1). Then pull
down the Borders button
•
from the Formatting toolbar, and
.
choose all lines,
Format all cells so that report data will reside at the top left of each
cell. To do so, select all cells, then choose Format | Cells |
Alignment from the main menu. For the Horizontal Text
Alignment, choose Left; for the Vertical Text Alignment, choose
Top. You may or may not want to wrap text or make other
formatting changes here. Then click OK.
Perform any other basic formatting you would like to be applied to
future reports.
1.12.2