1
- Table of contents -
1. What’s in the Box? .................................................... 1
2. Configuration ............................................................ 2
3. Inserting/removing the battery .................................. 4
4. Charging the battery ................................................. 6
5. Power on/off.............................................................. 6
6. Key lock/unlock ......................................................... 6
7. Select and execute a program .................................. 7
8. Connecting to a PC................................................... 7
9. Opening and reading files ......................................... 8
10. Volume control ........................................................ 9
11. Set date and time.................................................... 9
12. Recording ............................................................. 10
13. Using Help ............................................................ 11
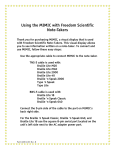
2 Quick Start Guide - Braille Sense PLUS QWERTY
Thank you for purchasing the Braille Sense PLUS QWERTY!
The Braille Sense PLUS QWERTY allows you to access and
use all the functions of a Notetaker using Braille and/or
Voice. This Quick Start guide will get you started learning all
the basic functions of the unit. If you need further information,
please refer to the User Manual.
1. What’s in the Box?
The following items are included in the packing box:
1) Braille Sense PLUS QWERTY
2) Battery
3) AC adapter
4) USB cable
5) Serial cable
6) USB to Parallel cable
7) Earbuds
8) Carrying case
9) User Manual (CD)
10) Braille Commands Summary)
11) Quick Start Guide
1 Quick Start Guide - Braille Sense PLUS QWERTY
2. Configuration
8 9 7 6 5 4 3 2 1 11 10 13 12 1) Power switch
7) Braille display
2) Audio button
8) Qwerty keyboard
3) Audio mode switch
9) Speaker
4) Earphone jack
10) DC-jack
5) Microphone jack
11) USB port
6) Key lock switch
12) USB OTG port
13) Scroll buttons
2 Quick Start Guide - Braille Sense PLUS QWERTY
14 15 16 17 18 21 22 14) Battery
18) Reset button
15) VGA pot
19) SD slot
16) Serial port
20) CF slot
17) LAN port
3 Quick Start Guide - Braille Sense PLUS QWERTY
3. Inserting/removing the battery
To insert the battery, please follow these steps.
1) Place the Braille Sense face down with the media buttons
pointed nearest you. Locate the empty compartment at the
top left of the Braille Sense PLUS QWERTY.
2) Insert the battery in to the unit so that the ridged rectangular
protrusion is in the lower right corner of the compartment.
When the battery is inserted, you should hear and feel it click
in to place.
To remove the battery, please follow these steps.
1) Place the Braille Sense PLUS QWERTY face down.
2) Slide the battery away while pressing the spring-loaded
catch just below the battery compartment to the left.
4 Quick Start Guide - Braille Sense PLUS QWERTY
5 Quick Start Guide - Braille Sense PLUS QWERTY
4. Charging the battery
1) Connect adapter to DC-jack.
2) A full charge takes about 6 hours.
* Note: Before initial usage of the device, it needs to be
charged for more than 6 hours.
* Note: You can use the device while charging.
* Note: To check battery status, press Fn-B.
5. Power on/off
1) Push the power switch to the right to turn on.
2) While it is on, push the power switch to the left to turn off.
6. Key lock/unlock
There are 3 types of lock modes corresponding to the 3 positions
of the Lock Switch.
1) All keys locked: Click the key lock switch to the left most
position. In this mode, no keys are operational.
2) Top panel locked: Place the key lock switch in the center.
In this mode, only the audio buttons and switches from the
6 Quick Start Guide - Braille Sense PLUS QWERTY
front panel are operational.
3) Unlocked: Click the key lock switch to the right most
position. In this mode, all keys are operational.
* Note: Even when the lock switch is on, the reset button
works normally.
7. Select and execute a program
You can locate and execute a program by using the
keystrokes listed below.
1) Move to the next program: Down Arrow key or Down scroll key
2) Move to the previous program: Up Arrow key or Up scroll key
3) Execute a program: Enter
4) Exit a program: Alt F4
8. Connecting to a PC
To copy files from the PC to the Braille Sense PLUS
QWERTY, please follow these steps.
1) Connect the smaller end of the USB cable to the USB port
of the Braille Sense PLUS QWERTY and the larger end to
the USB port of the PC.
7 Quick Start Guide - Braille Sense PLUS QWERTY
2) After connecting, click the “my computer” icon on the PC.
The Flashdisk of the Braille Sense PLUS QWERTY should
appear as a removable disk.
3) Copy the files from the PC and paste into the proper
folders in the removable disk.
* Note: Do not use the Braille Sense PLUS QWERTY while
it is connected.
9. Opening and reading files on the Braille Sense PLUS
QWERTY
To open the files in the Flash disk, please follow these steps.
1) Navigate to the File Manager and press Enter.
2) When you enter the file manager, “flash disk” is the first
item you see. Press Enter on the “flash disk”, once you get
into the flash disk you will see a list of the available folders,
beginning with the “database” folder.
3) Navigate among folders and files using the keys listed below.
-
Move to the next item: Down Arrow
-
Move to the previous item: Up Arrow
-
Enter a folder or subfolder: Enter
8 Quick Start Guide - Braille Sense PLUS QWERTY
-
Move back a level in the folder structure: Backspace
4) Open a file: navigate to it and Press Enter.
5) To read contents, use the keystrokes listed below.
-
Move to the next line: Down Arrow or Down scroll key
-
Move to the previous line: Up Arrow or Up scroll key
-
Read from Cursor to End: Fn-Enter
-
Stop reading: Control
* Note: If you use scroll button to read, there is no voice output.
10. Volume control
1) Increase the voice volume: F6
2) Decrease the voice volume: Shift-F6
3) Increase the voice rate: F7
4) Decrease the voice rate: Shift-F7
5) Increase the voice pitch: F8
6) Decrease the voice pitch: Shift-F8
11. Set date and time
To set date and time on your Braille Sense PLUS QWERTY,
please follow these steps:
1) Press F1 to bring up the Main Menu and press “u” to bring
up the Utilities Menu.
2) From the Utilities Menu, Press “t”.
3) You are placed on the “Time zone” list box with the first
choice being “Pacific Time (US & Canada); Tijuana
(GMPT -08:00)”, you can adjust the time zone by pressing
the Up and Down Arrows. Once you select a time zone,
press Tab to move to the next section.
9 Quick Start Guide - Braille Sense PLUS QWERTY
4) If appropriate for the time zone, the next option you
encounter is a checkbox indicating whether or not you
want to use daylight savings time. . To toggle selection of
this box on or off, press Space.
5) Press tab to move to the “time format”. Press Up and
Down Arrow to toggle between 12 and 24-hour mode.
Press Tab to move to ‘time’.
6) When “time: HH:MM” is displayed, enter numbers on the
time edit combo box, using 2 digits for the hour, and 2
digits for the minute, placing a space between the hour
and the minute. Press Tab to move to ‘date’.
7) When “date: day of the week, MM, DD, YYYY” is
displayed, enter the date using 2 digits for the day, 2 digits
for the month and 4 digits for the year. Pressing Space
between the month, day, and year. Press Enter to save
date and time settings.
* Note: After setting the date and time, press Fn-t to check
the current time. And press tap to check the date.
12. Recording
To record, please follow these steps.
1) Slide the Audio mode switch to the right most position:
MP3 mode.
2) Press the Record button. This opens the “record” dialog box.
3) To start recording, press the Record button again.
4) To stop recording, press the Stop button.
5) After you have completed the recording, press the Play
10 Quick Start Guide - Braille Sense PLUS QWERTY
button to play the recorded file.
6) To close the “record” dialog box, press Alt F4.
* Note: If you connect to headphones while recording, you can
monitor the recording as you create it.
13. Using Help
Press F1, to access context specific help. You can move among
the various help items using the Up and Down Arrow keys.
Press control-ESC to turn on keyboard help. When keyboard
help is on, you can press any key and its function is announced.
11