1
Manual layout_kb
2/22/05
quality
3:48 PM
Page 21
products
Triangle Score Unit
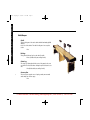
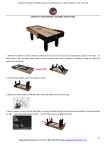
1. The scoring head is attached to the center leg, which was originally attached to the cradle in the Setup Procedures section.
2. Under each side of the cradle attach the button harnesses to the appropriate connection on the center leg. There are two
button harnesses to connect.
3. Plug in the power cord and turn the score unit on. Use the black ON/OFF switch located on the side of the center leg.
4. Check all buttons to ensure proper connection. Press the reset button or insert coins to start the game. Now, press all the
buttons to check the connections. If you have any problems, refer to the Troubleshooting section.
5. Score unit installation is complete. Return to playfield installation.
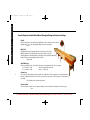
JBar/Rail Mount/Small Wood JBar Score Units
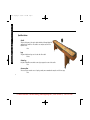
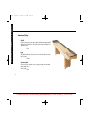
1. These score units include two parts: scoring head and mounting arm.
2. Begin installation by feeding the wire harness from the scoring head through the mounting arm - top to bottom.
3. Once the harness is through the arm, attach the scoring head to the arm using the matching screws.
NOTE: Make sure the buttons are facing away from the arm on the JBar and Small Wood Score Units.
4. Next, attach the mounting arm and score unit to the cradle using the bracket on the bottom of the scoring arm. It's
normally located in the middle of the game.
5. After mounting the score unit, connect the AC adaptor to the wire harness and plug it in. The score unit should turn on.
6. Check all buttons then unplug the score unit and continue to the playfield installation.
For More Information, Visit BMI Gaming | www.bmigaming.com | 1-800-746-2255 | + 1-561-391-7200
21