Download Lesson 1 - MediaLab
Transcript
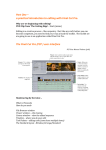
Part One – a practical introduction to editing with Final Cut Pro. Why are we beginning with editing? DVD Clip from ‘The Cutting Edge’ Start (6mins) Editing is a creative process – like carpentry. But, like any craft, before you can become competent, you need to find your way around the toolkit. The toolkit we are going to use is an application called Final Cut Pro. The Final Cut Pro (FCP ) user interface FCP User Manual Volume (p44) Handwaving by the tutor… What is Timecode How do you undo File Browser window Viewer window – clip viewing Canvas window – view the edited sequence Timeline – where you do your edit Tool Palette – editing tools (some have multiple items) The Standard layout –Window/Arrange/Standard BUT Before we even begin editing If you are setting up for a new edit derived from web page http://www.maclife.com/article/howtos/ten_things_every_final_cut_pro_user_should_know Create a new folder where your project is going to be (right click/New Folder, or File menu/New Folder, or shiftcommandN [shiftappleN]) Start FCP (use dock or double clik on Macintosh HD, and navigate to Applications) 1. Close any open projects 2. File/New Project 3. File/Save Project As … put project into folder you made above, giving it a helpful name 4. Final Cut Pro/System settings – look at Scratch Disks tab Check: Video Capture, Audio Capture, Video Render, Audio Render Click Set… button – navigate to same place as you just saved your new project, click Choose Why did you just do this? • To make sure that any files FCP creates as you are editing will be placed in your own folder. • For the same reason you must take care that any other files you want to use in your project – eg other video clips, music, still images, are also placed somewhere within the same folder. • This way if you need to relocate, backup or delete this whole project you can do so safely knowing that you have all the required parts together, and – if other editors have done the same – no parts of somebody else’s edit. If you are resuming your work on a shared computer: NB When you come to a Mac (especially a shared Mac) to resume working on a project always begin by: 1. closing any open projects 2. opening your project (which should be in the folder you made) 3. choose Final Cut Pro/System and looking at the scratch disks tab, and checking (click Set… again if you need to) that this is pointing to the folder where your project file is. So before you carry on now… 1. Close your temporary project File/Close Project 2. Click on the desktop, then open the folder called Training, and double click on the project called Training Resources 3. The project will open in FCP. Choose Final Cut Pro/System and look at the scratch disks tab, click Set… and navigate into the desktop folder called Training (where Training Resources is stored) then click Choose. EDITING HANDS ON 1 Example: Editing an interview, using a cut away (continuity cutting) Placing clips on the timeline – insert overwrite and superimpose Setting in and out points [buttons and hot keys I and O] Splitting a clip with the razor blade tool Open the project training resources in the training folder In FCP’s Browser double click on sequence 1 so that you see a new blank sequence in the Timeline. In FCP’s Browser, open the bin (folder) called training vincent and find the clip called vincent talking 2 – bottlenose1 double click on this to open it in the viewer window. Watch and listen to the whole clip Working in the viewer window, drag the scrub bar to the start of the clip, and listen to the beginning again. At the start of the clip there is sound of the crew talking, but when Vincent begins saying “My main focus…” the sound is clear. Tip: The speaker’s lips can form a valuable visual cue to locate when speech begins, while rolling the clip backwards and forwards using the jog control… Move the playhead to the start of “My main focus…” avoiding Vincent’s intake of breath before he speaks, then mark this as the inpoint by either pressing I on the keyboard, or clicking the Mark_In button in the viewer Note that if you want to clear the in‐point and try again you can click the Mark Clip button, or press keyboard shortcut X. see FCP manual p75 onwards You can check your in‐point by playing from your in‐point by pressing the play‐ in‐to‐out button – When you are happy with your in‐point, drag the scrub bar towards the end of the clip and locate the point at which Vincent stops speaking. Mark this as your outpoint by either pressing O on the keyboard, or clicking the Mark_Out button in the viewer window. Now place this clip information on the Timeline by clicking and dragging from the Viewer to the Timeline track V1. Drag the clip so that the start of the clip is at the left hand side of the Timeline. Note that canvas time in a new sequence starts at timecode 01:00:00:00 by default. Note that your drag operation has placed both sound (A1 A2) and video (V1) tracks, and that if you click and drag again in the timeline, this will make both audio and video move together – for now they are linked. OK – let’s carry on editing from there…. There is an “..ehm...” at about 26 seconds on the timeline through that we are going to remove. Drag the playhead on the timeline to near 24 seconds and play (note you can always use the spacebar to play and pause video in the active window. Find the start of the “..ehm...” (before the intake of breath), and position the playhead there (with playback paused). Select the razor blade from the tool palette… …then move over to where the playhead is over track V1 the timeline (it will bold up as you mouse over it), and click on it. Video and audio tracks are cut, and you now have two separate clips on the timeline. Note that this does not cut the original clip – that is still safe and intact in the Browser. Now use the play control and or the jog control of the Canvas window to find the end of the “..ehm...” just before Vincent says “Why do these animals…” With the playhead paused at this point, again where the playhead crosses track V1 click with the razorblade tool. You now have three clips on the timeline. Now get the selection tool back by clicking the arrow at the top of the tool palette In the timeline click on track V1 to select the short segment with the “..ehm...”, then press the delete key. Click and drag to pull the last part of clip so that there is no gap between it and the first – it will snap into place. Take the timeline playhead back to about 24 seconds again, and play over the edit. Don’t worry if there is a slight ‘pop’ on the sound as the cut goes through – this is just a rough cut and we could fix that later by fine tuning the edit points. More importantly of course, there is a jump in the picture (a jump cut). Cutaways We are going to cover this up now, by placing other material over some of the pictures of Vincent. Shots used in this way are often called cutaways. We’re going to use a few clips from the Browser to cover Vincent. When you get here ask the tutor about a quick way to get to a specific timecode location. Locate the clip dolphins social double click on it, and in the viewer window set in and out points at 01:05:01:04 and 01:05:05:20, then drag from the viewer to V2 on the timeline, dropping this clip so that the end of the clip falls at the end of the first clip of Vincent talking. This alone could cover the jump cut. Drag the playhead back to about 18 seconds on the timeline, then play over what you’ve just done. The audio levels might need sorting out, but there is no longer a jump. However, let’s keep going with more cut‐away shots to build up a short sequence of dolphin action. We still want to hear what Vincent is saying, of course, but seeing dolphins while he is talking (about something related, but slightly different) makes for more a interesting video. Add more cut‐aways: Locate the clip dolphins large group double click on it, and in the viewer window mark in and out points at 01:02:43:02 and 01:02:54:08 (note – you can type these timecode values directly into the viewer window if you wish), drag from the viewer to V2 on the timeline, dropping this clip so that its end falls at the start of the dolphins social clip you placed a minute ago. locate the clip dolphin social more double click on it, and in the viewer window mark in and out points at 01:06:17:06 and 01:06:31:14 (you can type these timecode values directly into the viewer window if you wish), then drag from the viewer to V2 on the timeline, dropping this clip so that its start falls it begins at the end of the dolphins social clip you placed a minute ago. This has covered the video ok, but now the audio is a bit muddled up. Let’s do something about that. Click the toggle clip overlays button at the bottom of the timeline window… …you’ll now see a set of lines overlayed on all the audio and video tracks of all the clips in the timeline. In the timeline drag the pink audio level line (track A3) of clip dolphins large group down to about ‐33dB, then do the same for dolphins social (about ‐33db) and dolphin social more (about ‐18dB). Towards the end of the final clip (dolphin social more) the sound of the people in the boat talking is a little distracting, so we’re going to replace some of the sound from dolphin social more with something else. Move the playhead in the timeline to the end of the final clip of Vincent talking. Now you are going to ‘unlink’ the video and audio channels so that you can edit the audio of dolphin social more without affecting the video. To do this press the linked‐selection button at the top right of the timeline window… Then choose the razor blade tool on the tool palette, then, on the timeline, click on channel A3 of dolphin social more. You should see a cut made on the audio tracks, but not the video. Choose the selection tool (arrowhead) from the tool palette, and click on the last piece of the audio, and press the delete key to remove it. In the Browser, find the clip water sound and double click to view it. This clip is an ambient sound recording made during the same shoot – sometime material like this is called ‘atmos’ (atmosphere). Mark an in point at 01:10:24:08, then drag from the viewer to track V3 (ie an empty video track) in the timeline, positioning this clip so that the start of it lines up with the end of the remaining audio of dolphin social more. When you have done this click on clip water sound on track V3, to select the video only, then press the delete key. Then mouse to the end of the audio clip water sound and click and drag it back so that it falls at the same place as the end of the video of dolphin social more. Take the playhead back to about 30 seconds and play the video to review what you have done. Fleshing out the video with sound Finally we are going to ‘colour’ the sequence some more with sound recordings of dolphin communication. In the Browser locate the clip dolphinsample.wav this is a sound file passed to the editor by Vincent from one of his own recordings. This time, drag directly from the clip’s “speaker” icon in the Browser to the timeline, dropping it on track A1, to the right of any other content. If you then double click on the clip in the timeline, you can edit it’s properties in the Viewer window. Do this, and in the Viewer window mark in at 00:00:43:06. Back in the timeline, drag to the clip so that it is placed just after the end of Vincent talking, then click on the end of the clip, and drag it so that it falls at the same place as the end of the video of clip dolphin social more Because dolphinsample.wav was only a mono track, it is only on one track of audio. To make it be on both, click once to select it, then do edit copy, then edit paste, then move the new copy of the clip to track A2 beneath the original copy. If you are finished early – ask the tutor about how to add a simple title DVD EXCERPT: The Cutting Edge: Invisible Editing (4.5m) SHORT BREAK – coffee? DVD EXCERPT: FCP DVD: Introduction to the interface (revision) Editing Hands on 2: Editing a sequence This time we are going to isolate some speech, put it to one side, then build a a simple visual sequence to accompany the speech. The idea in this instance is not to have images which show every spoken point in a slavish way, but to illustrate an associated activity in such a way that the pictures expand on what is said. In FCP you will: a) Create a new blank sequence to work in b) Locate and prepare required speech clips c) Locate and edit clips for the illustrative sequence d) Edit together speech and illustrative sequence In addition you will learn about an alternative another way of placing clips on the timeline sometimes called Three‐point editing. a) Create a new blank sequence to work in Continuing to work in the Training Resources project in the In FCP, in the file browser panel (top left) right click (or click while holding down the ctrl key if you don’t have a mouse). Choose ‘new sequence’ from the menu displayed, and name this sequence ‘dolphin spotting’. Double click on the sequence you have just made to open it in the timeline window. b) Locate and prepare required speech clips Clip 1 Still in the file browser, find the clip called vincent talking 2 – introduces field site, double click to open it in the viewer window. Set an in point at 01:16:23:03 and an out point at 01:16:30:17. You could drop this on the timeline by dragging it straight there, but this time we are going to place it using an alternative FCP method. Instead of dragging to the timeline, drag to the canvas video window (right of your screen). You will see the Edit Overlay appear with a number of editing options. The ones we are interested in are mainly insert and overwrite. To use these panels you just drag the clip over the action you wish to take, and let go. Drag your clip from the (left) viewer video window to the (right) canvas window then over the area called insert, then let go. This will drop the clip into the timeline at the current position of the playhead. Insert means that if there was any material to the right of the playhead it would be pushed further to the right to make room for the new clip. Clip 2 In the file browser, find the clip called vincent talking 2 – recognition and hydrophones, double click to open it in the viewer window. Set an in point at 01:17:01:15 and an out point at 01:17:08:09. Glance down at the timeline and make sure that the playhead is at the (right hand) end of the last clip. Then drag from the viewer video window to the canvas video window and drop the clip on the insert panel. Clip 3 In the file browser, find the clip called valentina and dolphin pictures wide, double click to open it in the viewer window. Set an in point at 01:40:48:23 and an out point at 01:40:53:18. Glance down at the timeline and make sure that the playhead is at the (right hand) end of the last clip. Then, as you did before, drag from the viewer video window to the canvas video window and drop the clip on the insert panel. That’s the three clips of people talking we need. Now you are going to build up a short illustrative sequence. In the timeline drag the playhead several seconds to the right of the last of the three clips you have just edited. For now you’ll start placing clips to build the illustrative sequence here, and then later you’ll move the sequence to where it needs to be. c) locate and edit clips for the illustrative sequence In the file browser, find the clip called dolphins camera clicks, double click to open it in the viewer window. Set an in point at 00:29:10:11 and an out point at 00:29:23:10. Still in the viewer window, play this clip from the in point. Notice that towards the out point nothing much is happening – you’re actually not going to use all of the video from this clip, but you will use all of the sound. Move the viewer playhead to timecode 00:29:17:08 – this is where the dolphin has just submerged. Add a marker by pressing the Add Marker button: We can use this marker in various ways later on. You can add lots of markers to a video clip if you wish – they are a little like bookmarks, and handy when editing to help you find places later (without having to shuttle and jog through the clip again). Quickly glance at the main timeline, and ensure that the main timeline playhead is resting somewhere to the right of the clips you have already placed there. Remember that the next thing you are going to do will add a clip at the playhead position. Now drag from the viewer video window to the canvas video window – this time drop the clip on the insert panel. Look at the timeline and notice that the clip has been placed and that the marker you added to it is visible in the timeline as a small pink pointer. In the timeline, drag the playhead so that it snaps to the marker position and leave it there. Next, in the file browser, find the clip called boat clipboard and talking, double click to open it in the viewer window. Set an in point at 00:35:05:11 and an out point at 00:35:09:04. Drag this clip from the viewer directly to the timeline and to the video track above V1, such that the start of the new clip snaps to the playhead (which should be resting above the marker you made). As you drag to the timeline, you may notice that the cursor changes… …if you hover over the region in the top third of the track, the cursor is an arrow pointing right, and if you let go the clip will be inserted and existing content will be shifted right to make room for it. …but if you hover over the region in the bottom two thirds of the track, the cursor is an arrow pointing down, and if you let go the clip will be placed so that it overwrites existing content. Place the new clip so that it falls on track V2 (above V1) and overwrites dolphins camera clicks. You should end up with something like this: ask the tutor if you need a hand. Drag the playhead back to the start of dolphins camera clicks and press space to play in the canvas video window. Now you are going to add some more clips on track V2, following immediately after boat clipboard and talking. These are: Clip title in out boat water sound – look at photo book 00:47:48:15 00:47:52:20 dolphins spotting 01:03:28:00 01:03:31:01 dolphins camera clicks (again *) 00:29:39:24 00:29:43:10 * note – if you want to use a clip a second time with new in and out points, open the clip from the File Browser, then select the menu option Mark/Clear In and Out place these so that you have: Now drag the playhead back to the start of dolphins camera clicks again, and press space to play in the canvas video window. There are some things you might notice as you watch this… The cut from boat clipboard and talking to boat water sound – look at photo book is a sort of editing trick – cutting to a object which largely fills the view (in this case a folder) and then moves to reveal different action. Here it is used as a trick to take us from one part of a small space (the boat) to another. The action at the end of dolphins spotting is weakened as the woman in shot points, then pulls her arm back. A better cut would be at the point at which her arm is fully extended. We’ll look at this again shortly. We’ll need to sort out the sound levels – at one point the boat radio is particularly loud. Fine tuning: In the timeline drag the playhead so that it is sitting just at the point of maximum extension of the woman’s hand in dolphins spotting. In the canvas window (on the right) press the Add Marker button – this will make a marker on the timeline itself. Then, in the timeline window, click and drag the clip dolphins camera clicks to the position shown on track V3 Now drag the playhead back to the start of boat water sound – look at photo book, and press space to play in the canvas video window. You should see a more convincing edit which conveys an impression of the woman pointing at the action (dolphins swimming). This is a tiny example of editing like the man and the plate of soup – the woman is really pointing at something that happened at different place and a different time, but the illusion works. d) Edit together speech and illustrative sequence Now you can edit the speech clips and the illustrative sequence together. Working in the timeline begin by dragging Vincent talking 2 – introduces field site and drop it on track V1 so that it ends at the start of the first occurrence of dolphins camera clicks (ie ends at the start of the illustrative sequence). Still in the timeline, drag valentina with dolphin pictures and drop it on track V1 so that it starts at the end of the entire illustrative sequence. You’ll adjust this more in a minute. Before positioning the third speech clip in the timeline, you are going to turn off ‘snapping’ so that you have fine control of positioning. Do this by clicking the Snapping button once… …now, still in the timeline drag vincent talking 2 – recognition and hydrophones to this approximate position on track V3… This edit isn’t quite finished yet ‐ drag the playhead on the timeline back to the start of the video and play the whole thing, there are a few things which need to be done… …obviously we need to get rid of the shot of Vincent talking (in vision) in the middle of the sequence, and sound levels need to be adjusted. To remove the video of Vincent talking in the middle of the sequence, but leave the audio alone, click the Linked Selection button once… …Then click once on the video of vincent talking 2 – recognition and hydrophones on video track V3 and press delete or do edit/cut or command‐X (apple‐X). Before we look at sound levels, here is one more piece of ‘fine tuning’… In the main Timeline window double‐click on the clip valentina with dolphin pictures to make it open in the Viewer window. Then, working in the Viewer window… …Play the clip from the start and try to pause it just on the word “do” of “What we do” – about 01:40:49:13. Press the Add Marker button of the viewer window to make a marker there. Now go back to looking at the timeline. Check the snapping and linked selection buttons and make sure both are down (on). Then drag the playhead so that it is at the end of the last occurrence of the clip dolphins camera clicks. Now, still in the timeline, click and drag the clip valentina with dolphin pictures so that the marker lines up with the playhead and the end of the clip dolphins camera clicks ‐ like this… …Finally drag the playhead back to near the end of of boat water sound – look at photo book then press spacebar to play and watch as the change you have just made plays through. The sound of Valentina talking has been layered beneath the preceding video. This kind of editing can: • make for a more continuous transition to the next sequence in a new location (in this case from the boat to the lab…) • raise the interest level a little by pushing the pace slightly, and • leverage more information into less time.


