1
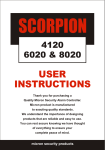
SCORPION
Z4120C, Z6020C & Z8020C
Alarm Controllers
User Instructions
Thank you for choosing to purchase this micron security alarm controller. Micron product is manufactured to
exacting quality standards. We understand the importance of designing products that are reliable and easy to
use. You can rest secure knowing we have thought of everything to ensure your complete peace of mind.
The Keypad.......................................................................................................................................................................3
The ‘Status’ Lamp.........................................................................................................................................................3
The ‘Mains’ Lamp.........................................................................................................................................................3
The ‘Armed’ Lamp........................................................................................................................................................3
Two Key Panic..............................................................................................................................................................4
Medical Alert.................................................................................................................................................................4
Fire Alert.......................................................................................................................................................................4
User Codes........................................................................................................................................................................4
Adding, Changing or Deleting a User Code..................................................................................................................5
Arming the System........................................................................................................................................................5
To Arm the System and Exclude a Zone(s)..................................................................................................................6
Partitioning (Scorpion Z8020C only)................................................................................................................................7
Remote Arming and Disarming........................................................................................................................................8
Arming ..........................................................................................................................................................................8
Answer Phone Defeat....................................................................................................................................................9
Nitewatch (if connected)...................................................................................................................................................9
Hold Down Commands...................................................................................................................................................10
Setting the Real Time Clock Time..............................................................................................................................10
Setting the Auto Arming Time....................................................................................................................................11
Follow Me Mode.........................................................................................................................................................11
Smoke Sensor Reset........................................................................................................................................................12
Chime Mode....................................................................................................................................................................13
24 Hour Zones.................................................................................................................................................................13
Icon LCD Keypad (if supplied).......................................................................................................................................13
Using the Scorpion Z4120C, Z6020C and Z8020C alarm controllers
2
The Keypad
The Scorpion Z4120C, Z6020C and Z8020C communicate system status through the keypad beeper. During
an arming cycle the beeper will sound for the entire exit time. This is a ‘leave now’ warning. Scorpion will
arm at the expiry of this period. On entry, the beeper sounds for the programmed entry period. If a valid user
code is entered to disarm the system, the beeper emits two short tones. An incorrect entry is signalled by one
long tone.
The ‘Status’ Lamp
The yellow status lamp is used to indicate several conditions.
Yellow lamp on:
Yellow lamp off:
Yellow lamp flashing:
the system is armed or arming
the system is disarmed
an alarm has occurred, a system fault exists or
the panic function has been activated
The ‘Mains’ Lamp
The ‘Mains’ lamp is on when mains power is applied. In the event of a mains failure the ‘Mains’ light flashes
until mains power is restored, and an arm/disarm cycle is completed. The ‘Mains’ lamp also flashes to indicate
a low battery condition. When the battery is restored to full charge and an arm/disarm cycle is completed, the
‘Mains’ lamp stops flashing.
The ‘Armed’ Lamp
The ‘Armed’ lamp illuminates when the system is armed. The ‘Armed’ lamp also flashes to indicate when an
alarm condition has occurred.
3
Two Key Panic
If this function has been programmed in Scorpion by your installer it may be activated by pressing the keypad
* and # keys simultaneously. All internal and external alarms will activate. A panic activation may be
cancelled by entering any valid user code then #.
+
In panic situations press
#
Medical Alert
If this function has been programmed in Scorpion by your installer it may be activated by pressing keys 4 and
6 simultaneously on the keypad. A medical activation may be cancelled by entering any valid user code then
#.
For medical alert press
4
+
6
Fire Alert
If this function has been programmed in Scorpion by your installer it may be activated by pressing keys 1 and
3 simultaneously on the keypad. A fire activation may be cancelled by entering any valid user code then #.
For fire alert press
1
+
3
User Codes
Scorpion controllers are capable of storing up to twenty-four user codes. Each user code may be two to four
digits in length.
User code 1 is factory set as a master user code 1234 and should be changed to your own selection. This user
code can also be used to program the remaining user codes. Your installer will need to assign the functions of
each additional user code when your system is installed. For example you may require user code 18 to be used
by a domestic helper to arm but not disarm the system. This restriction on code 18 will need to be pre-set by
4
the installer. The code may be entered at a later time using the master code. Use the user code attributes table
in the rear of this user manual to record the functions for each code.
User code 15 is reserved as a ‘disarm all areas’ code for a partitioned Z8020C system and as a night-lock code
for a Z4120C and Z6020C system. If the Z4120C and Z6020C are armed with user code 15, only this user
code can disarm the system.
Adding, Changing or Deleting a User Code
Enter a valid master user code, press keys 1+3 together then enter a new user code then enter # then the user
identifier (1 to 15). Repeat the procedure for adding other new user codes. To delete user codes, follow the
same procedure, but omit the ‘new user code’ step. Finish by entering a #.
Example. To change the master user code from 1234 to 1912 press the following sequence:
1
2
3
4
then
1
+
3
then
1
9
1
2
#
then
1
Arming the System
Using Quickarm
If your installer has programmed the quickarm option you can arm the system by entering 1 then #. For
partitioned systems (Z8020C only) entering 1 # will arm Area A and entering 2 # will arm Area B.
Quick arming Scorpion
Using a User Code
1
#
Enter a valid two, three or four digit user code then #.
5
1
2
4
3
#
then
If all zones are clear, the keypad sounds a repeating sequence of three short beeps for the duration of the exit
delay and the yellow status lamp turns on. The zone lamps for all zones that are arming are also turned on. At
the end of the exit delay the zone lamps extinguish and the system is now armed.
If a zone fault or potential alarm condition exists and the user attempts to arm the system, the lamp(s) for those
zone(s) flash and are accompanied by a repeating sequence of two long beeps. This indicates that one or more
of the zones are faulty or not secured. The panel should be disarmed, the problem located (possible open door
or window) and the system re-armed.
To Arm the System and Exclude a Zone(s)
Enter a valid user code then * (all zone led’s light) followed by the zone number(s) to be excluded (those
zone led’s turn off), then press #.
Example: to arm the system with zones 4 and 5 excluded press:
the System
1
2
3
4
then
then
4
5
then
#
Disarming
Follow the same sequence as for arming, enter a valid two, three or four digit user code then #. To send a
duress signal to a monitoring station while disarming, hold the # key down until a second beep is heard.
1
2
3
4
then
#
The keypad will beep
twice and the yellow status light will
turn off. A flashing yellow status lamp indicates that one or more zones have been alarmed. The zone lamps
6
for any zones, which have alarmed will flash until the next arming cycle. Note the zone number(s) and notify
your installer, or security monitoring company.
If the yellow status lamp is flashing and no zone lamps are flashing the alarm condition may have been caused
by a system fault, press 8 9 then # on your keypad. The following table indicates the type of alarm condition
that has occurred:
Zone 1 lamp flashes
Zone 2 lamp flashes
Zone 3 lamp flashes
Zone 4 lamp flashes
Zone 5 lamp flashes
Zone 6 lamp flashes
Alarm caused by a nitewatch, two key, medical or fire panic
The battery has discharged or is faulty
Mains power to the alarm has failed
A dialler communications error has occurred
Phone line is faulty or is disconnected
Siren output or auxiliary power supply overloaded or open circuit
Partitioning (Scorpion Z8020C only)
You will need to discuss your requirements for alarm partitioning with your installer, as this is an installer
selectable option. Alarm partitioning enables Scorpion Z8020C to be split logically into two discrete alarm
systems. For example, you may have a sub-dwelling or work shed attached to a main dwelling, partitioned as
a separate alarm system. Partitioned systems offer all the functionality of a non-partitioned system.
Night Arming Options
You will need to discuss with your installer the configuration of your system’s night arming zones, as this is an
installer selectable option. It is important that your installer completely familiarises you with how Scorpion
arms and alarms in the two ‘Night Arming’ modes.
Scorpion has two night arming options. Night arming offers the user perimeter protection with the freedom to
move freely within the areas that would normally be protected by the alarm control.
The system can be night armed with either instant zones, that is zones that arm instantly and alarm instantly, or
with delayed zones, zones that arm with a delay or alarm with a delay on entry. This method of night arming
7
with delay is used where the system is to be armed at night with the occupants at home, but a member of the
family is yet to arrive home and must be able to enter and disarm the alarm system before re-arming in Instant
Mode.
To night arm a non-partitioned system with instant arming and alarming enter 8 1 #.
To night arm a non-partitioned system with delayed arming and alarming enter 9 1 #.
The second area of a partitioned system may be night armed using 8 2 # and 9 2 #.
To instant night arm press
8
1
#
for delayed arming press
9
1
#
If night arming with delayed arming and alarming (9 1 # or 9 2 #) is selected, the alarm control allows an exit
period before arming, however the keypad beeper exit alert is NOT sounded, except where a zone is not secure
(possible door/window open or sensor activated). At the end of the exit period the keypad beeps three times.
Violating a night arm zone starts the entry pre-alert keypad beeper before sounding an alarm. To deactivate the
system during the pre-alert, enter a valid user code then #.
Remote Arming and Disarming
Scorpion may be armed (and disarmed if programmed) by any touch tone phone using a valid user code. This
feature must be pre-enabled by the installer.
Arming
From a touch tone phone call the system phone number. The installer will have programmed the alarm system
to answer after 2 to 15 rings. When the system answers the incoming call there is a short delay while Scorpion
listens for a remote computer modem. The user then hears 2 short beeps, enter a valid remote arming user
code at the telephone keypad, then the # key. If the access has been successful the user hears the ‘leave now’
warning beeper indicating that the system has been successfully armed. Hang up the phone.
Disarming
8
If programmed, Scorpion can disarm the system remotely by using the same method as in arming. If the
system has been successfully disarmed the user hears 3 beeps.
Answer Phone Defeat
If the alarm system phone line is shared with an answer phone or fax and it is proposed to use the ‘Remote’
arm/disarm feature it will be necessary to advise your installer so that Scorpion may be programmed for
answer phone defeat.
To defeat the answer phone, call the system phone number. When the answer phone or fax answers the call
hang up and call again within 60 seconds. Scorpion will answer the call on the first ring thus defeating other
devices. Wait for the 2 beep acknowledge and arm/disarm the system as detailed above.
Nitewatch (if connected)
To night arm the system, simply press the ‘ARM’ key on the Nitewatch
station. To disarm the system, press the ‘ARM’ key again. Note: If
activation occurs and the sirens are activated, the system can NOT be
disarmed from the Nitewatch station. Once activated and alarmed the
system can only be disarmed by entering a valid user code then # at the
keypad.
If the ‘UNSAFE’ lamp is illuminated, this indicates an unsecured zone.
This should be secured before arming the system safely in Night mode.
The ‘ARMED’ lamp illuminates when the system is armed.
Night arming from Nitewatch may be either delayed perimeter arming with prealerts or instant perimeter arming with instant alarms. To arm the system in
‘delayed’ mode, press the ARM button momentarily. Nitewatch beeps once and
the ARMED led starts flashing.
9
ARM
UNSAFE
ARMED
NITEWATCH
EMERGENCY
At the end of the programmed exit delay, Nitewatch beeps three times and the ARMED led locks on. The
control is now armed and all night arming zones will sound a pre-alert for the programmed entry delay before
activation.
To arm the system in ‘instant’ mode, press the ARM key for 2 seconds. Nitewatch beeps and the ARMED led
lights. The control is now armed and will activate instantly if any night arming zone is violated.
The Nitewatch emergency panic key may be activated at any time by using two fingers to press both ends of
the EMERGENCY key simultaneously. The back light intensity of these keys may be adjusted up and down
by pressing the right side of the emergency key to increase the brightness and the left side to decrease
brightness. The Nitewatch ‘Auto Dim’ feature will automatically dim the ‘Unsafe’ and ‘Armed’ lamps 60
seconds after the ARM key is pressed.
Hold Down Commands
To use a ‘hold down’ command the function key (keypad digit) must be pressed and held down until a second
key-beep is heard. Note that hold down commands will ONLY function when the alarm control is fully
disarmed. The following hold-down commands are available:
Setting the Real Time Clock Time
It is advisable but not mandatory to set the system real time clock. Check with your installer if the clock has
been set. The clock MUST be set if the auto-arming feature is used. Clock time is in 24 hour format. To set
the clock proceed as follows: Press and hold down key 6 until a second key-beep is heard then enter a master
user code then # then the time in 24 hour format then #.
Example: Setting the alarm system clock to 2:45 pm.
BEEP
HOLD
DOWN
6
BEEP
then
1
2
3
4
10
#
then
1
4
4
5
#
Setting the Auto Arming Time
Scorpion may be programmed to auto arm at a pre-set time each day. To access this feature an auto arming
time must be programmed using the [Hold Down] 7 command. Press and hold down key 7 until a second keybeep is heard then enter a master user code then # then the time to arm in 24 hour format then #.
Example: Setting the auto arming time to 5:30 pm
BEEP
HOLD
DOWN
BEEP
7
then
1
2
3
4
#
then
1
7
3
0
#
If a valid auto arming time has been entered, the keypad will sound three beeps every six seconds for the
installer programmed pre-alert time before auto arming. At the end of the pre-alert time the panel starts
counting down the exit delay and sounds the ‘leave now’ warning beeper, then arms all zones. During the prealert, entering any key at the keypad will abort the auto arming cycle. Once the alarm has started the exit timer
and warning beeper, a valid user code is required to abort the arming cycle.
Entering an invalid auto arm time (eg. 2500) disables this function. This is the factory default setting.
Note: To enable auto arming it is also necessary to program the correct time into Scorpion’s real time clock.
Follow Me Mode
This feature must be enabled by the installer during installation. Scorpion may be programmed by the end user
to call one or more phone numbers and report alarms. The called number(s) may be changed at will by entering
the following sequence at the keypad:
11
Press and hold down key 8 until a second key-beep is heard then enter a master user code then # then the
follow me telephone number(s) then * (star). Use the # key between numbers if more than one number is to
be called. Note that the ‘star’ key ends this sequence.
Example: Programming the alarm system to call 8197654 then 8256631 then 5292048
BEEP
BEEP
8
HOLD
DOWN
then
If only one number is called, terminate here with the 'STAR' key
1
then
8
2
5
2
6
4
3
6
3
#
1
then
#
then
8
1
5
9
2
7
9
6
2
4
5
0
4
#
8
Selecting this option forces all dialler transmissions to be signalled in the ‘home warble’ format. The alarm
will call each number in turn and transmit a siren warble sound followed by a sequence of beeps and a short
pause after which the entire sequence is repeated. The number of beeps sent correspond to the zone number
that has been activated. If the called party presses the * (Star) key on the telephone keypad during the pause,
the call is terminated and no further calls are made. If the ‘Star’ key is not heard by the dialler within 60
seconds, the call is terminated and Scorpion dials the next programmed number.
Smoke Sensor Reset
Some latching style smoke sensors connected to alarm controls, once activated, must be reset through the
alarm keypad. Check with your installer if this type of sensor is used in your system. To reset a latching style
smoke sensor enter 7 # at the keypad. Reset all smoke alarm activations by entering a valid user code.
12
Chime Mode
Your installer must program zones, which will be active in chime mode. If this feature is programmed, each
time a chime mode sensor is activated while the system is disarmed, and chime mode is turned on, the keypad
beeps for approximately five seconds. In this mode, Scorpion can act as a door or area minder when the alarm
system is disarmed. Chime mode is temporarily disabled each time the alarm system is armed. To turn chime
mode on and off press 7 1 then #. For Scorpion Z8020C, where the system has been partitioned, press 7 1 #
for Area A and 7 2 # for Area B.
24 Hour Zones
If your installer has fitted a smoke detector(s) to your system it will be connected to a 24 hour zone, thus
ensuring that this device is always active. In the event of an activation or detector malfunction your alarm
system will activate. Enter a valid user code at the keypad and all sirens will be silenced. If the activation or
malfunction is repeated, Scorpion will count the number of activations until the ‘shutdown’ count has been
reached and then shut down the zone, thus preventing further activations. The user should immediately contact
their alarm service or installation company and report the fault. The system should NOT be armed as this will
re-set the ‘shutdown’ counter and allow further activations.
Icon LCD Keypad (if supplied)
The LCD keypad gives full visual indication of the status of your alarm. The keypad has five graphic symbols,
an area identifier and up to 8 zone indicators depending on the model installed.
‘Power Lead’ Symbol
The ‘power lead’ symbol is on when mains power is present and flashes, together with the ‘system fault’
symbol, when there has been a mains power failure.
13
‘System Fault’ Symbol
The ‘system fault’ symbol flashes when there has been a system fault condition or system panic activated as
described in the table on page 7.
‘Bell’ Symbol
The ‘bell’ symbol is on when an alarm condition has occurred or a system panic activated.
‘Moon’ Symbol
The ‘moon’ symbol is displayed when the system is night armed
‘Padlock’ Symbol
The ‘padlock’ symbol is unlocked when the system is disarmed and locked when away armed or night armed.
‘Area Identifier’ Symbol
The ‘area identifier’ symbol is the four segment box at the lower right hand side of the LCD display. This
symbol shows the area(s) that is armed or night armed. In non-partitioned systems, Area A only is displayed.
‘Zone Indicators’
The ‘zone indicators’ are shown as numbers 1 through 4, 6 or 8 on the top line of the LCD display. These zone
numbers show zones that are arming, alarmed zones and also identify the system fault conditions described in
the table on page 7.
When the system is arming, the LCD will display all programmed zones, the padlock in locked mode and the
area identifier showing the area(s) that is arming. The keypad will sound the ‘leave now’ warning. If any zone
is not secure, that zone number will flash and the keypad will sound a slower beep. The alarm should be
disarmed, the problem identified and the system re-armed.
14
When an alarm condition occurs, the LCD will display the flashing zone numbers that generated the alarm
condition, the area identifier flashing the area of the alarmed zones (eg. A), the padlock oscillating between
locked and unlocked and the bell symbol in ringing mode. After disarming the system the alarmed zones will
continue to flash until the next arming cycle.
If the ‘system fault’ icon is flashing, the alarm condition may have been caused by a miscellaneous alarm
condition. Press 89 then # on the LCD keypad. The zone numbers displayed, as one or more of those shown
in the table on page 7, identifies the type of alarm condition(s) that has occurred.
Your installer can program the F1, F2 and F3 custom keys on the LCD keypad for a number of single key
functions such as medical, fire or alarm panic.
User
Number
User
Initials
Master
Code
Arm
Only
Phone
Arm
1
2
3
4
5
6
7
8
9
10
11
12
15
Arm area
A or B
Report to
Station
Can Exclude
Zones
13
14
15
16
17
18
19
20
21
22
23
24
Disarm all areas code (Z8020C)
Night-Lock code (Z4120C & Z6020C)
TELECOM WAIVER
The grant of a Telepermit for any item of terminal equipment indicates only that Telecom has accepted that the
item complies with the minimum conditions for connection to its network. It indicates no endorsement of the
product by Telecom, not does it provide any sort of warranty. Above all, it provides no assurance that any
item will work correctly in all respects with another item of Telepermitted equipment of a different make or
model, nor does it imply that any product is compatible with all of Telecom’s network services.
This equipment is set up to carry out test calls at pre-determined times. Such test calls will interrrupt any other
calls that may be set up on the line at the same time. The timing set for such test calls should be discussed with
the installer. The timing set for test calls from this equipment may be subject to ‘drift’. If this proves to be
inconvenient and your calls are interrupted, then the problem of timing should be discussed with the equipment
installer. The matter should NOT be reported as a fault to Telecom Faults Service.
16
IMPORTANT: This alarm system must be tested weekly to maintain system integrity.
17
GUARANTEE
1.
Subject to clause 2 below, Micron guarantees this product against defects in materials and workmanship for a period
of 24 months from the date of delivery to the purchaser as follows:
(a) Micron will repair or replace free of charge any goods or part thereof found to be defective by reason of faulty
material or workmanship.
(b) The purchaser must give Micron notice of the alleged defect within 14 days of it becoming apparent and must
return the defective goods or part thereof to Micron.
2.
This guarantee does not apply or extend to:
(a) Any product altered or repaired by any person other than Micron so as in Micron’s sole judgement to adversely
affect the product.
(b) Damage, malfunction or failure arising from accident, misuse or misapplication, neglect, modifications, use of
unauthorised replacement parts or accessories, exceeding the specific ratings, improper voltage or connection of
any wire to any part of the circuit board other than the terminal block.
(c) Any product where the rating label or serial number is removed or altered.
(d) Any consequential or indirect loss.
designed and manufactured by:
Micron Security Products Ltd
P O Box 78-006, Grey Lynn
Auckland, New Zealand
Phone: 64 9 378 6098
Fax: 64 9 378 6454
e-mail: [email protected]
www.micronsecurity.com
18