1
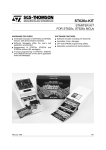
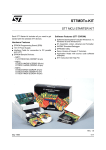
UM0002
User manual
Starter kit for ST625x and ST626x MCUs
Hardware features
■
Immediate evaluation of all ST625x and ST626x devices, with demonstration examples.
■
Software debugging within the user’s real application environment.
■
Programming of ST62T5x, ST62T6x and ST62E6x sales types (DIL packages).
■
In-circuit programming of ST62T5x, ST62T6x and ST62E6x sales types on the user’s
application board (all packages).
Software features
■
Software simulator including I/O read/write.
■
Assembler, linker, debugger.
■
OTP and EPROM programming utilities.
■
Application examples and demonstrations.
Figure 1.
February 2013
Starter kit for ST625x, ST626x MCUs
Doc ID 5112 Rev 2
1/45
www.st.com
Contents
UM0002
Contents
1
Introduction . . . . . . . . . . . . . . . . . . . . . . . . . . . . . . . . . . . . . . . . . . . . . . . . 6
1.1
2
3
4
The starter kit hardware . . . . . . . . . . . . . . . . . . . . . . . . . . . . . . . . . . . . . 10
2.1
The ST6 microcontrollers . . . . . . . . . . . . . . . . . . . . . . . . . . . . . . . . . . . . . 10
2.2
The starter kit board . . . . . . . . . . . . . . . . . . . . . . . . . . . . . . . . . . . . . . . . . 10
2.3
Oscillator . . . . . . . . . . . . . . . . . . . . . . . . . . . . . . . . . . . . . . . . . . . . . . . . . 14
2.4
Reset button . . . . . . . . . . . . . . . . . . . . . . . . . . . . . . . . . . . . . . . . . . . . . . . 14
2.5
Audio transducer . . . . . . . . . . . . . . . . . . . . . . . . . . . . . . . . . . . . . . . . . . . 14
2.6
Digital to analog conversion . . . . . . . . . . . . . . . . . . . . . . . . . . . . . . . . . . . 15
2.7
+ and - buttons . . . . . . . . . . . . . . . . . . . . . . . . . . . . . . . . . . . . . . . . . . . . . 15
2.8
LED indicators . . . . . . . . . . . . . . . . . . . . . . . . . . . . . . . . . . . . . . . . . . . . . 16
2.9
Resistance trimmer . . . . . . . . . . . . . . . . . . . . . . . . . . . . . . . . . . . . . . . . . 16
2.10
Thermistor bridge - Temperature control . . . . . . . . . . . . . . . . . . . . . . . . . 17
2.11
RS-232 interface . . . . . . . . . . . . . . . . . . . . . . . . . . . . . . . . . . . . . . . . . . . 17
2.12
Demonstration selector jumpers . . . . . . . . . . . . . . . . . . . . . . . . . . . . . . . . 18
Installing the starter kit . . . . . . . . . . . . . . . . . . . . . . . . . . . . . . . . . . . . . . 20
3.1
Hardware and software requirements . . . . . . . . . . . . . . . . . . . . . . . . . . . 20
3.2
Installing the software . . . . . . . . . . . . . . . . . . . . . . . . . . . . . . . . . . . . . . . . 20
3.3
Connecting the power supply . . . . . . . . . . . . . . . . . . . . . . . . . . . . . . . . . . 20
Running the demos . . . . . . . . . . . . . . . . . . . . . . . . . . . . . . . . . . . . . . . . . 21
4.1
4.2
5
2/45
Where to go from here... . . . . . . . . . . . . . . . . . . . . . . . . . . . . . . . . . . . . . . 9
What the demos do . . . . . . . . . . . . . . . . . . . . . . . . . . . . . . . . . . . . . . . . . 21
4.1.1
Demo 1 - Sound generation . . . . . . . . . . . . . . . . . . . . . . . . . . . . . . . . . . 21
4.1.2
Demo 2 - Music box . . . . . . . . . . . . . . . . . . . . . . . . . . . . . . . . . . . . . . . . 21
4.1.3
Demo 3 - Voltage trimming and LED level indication . . . . . . . . . . . . . . . 22
4.1.4
Demo 4 - Temperature control . . . . . . . . . . . . . . . . . . . . . . . . . . . . . . . . 22
4.1.5
Demo 5 - Digital to analog conversion . . . . . . . . . . . . . . . . . . . . . . . . . . 23
4.1.6
Demo 6 - RS-232 communications . . . . . . . . . . . . . . . . . . . . . . . . . . . . 23
Running the demonstration programs . . . . . . . . . . . . . . . . . . . . . . . . . . . 24
Connecting external resources to the starter kit board . . . . . . . . . . . 26
Doc ID 5112 Rev 2
UM0002
6
7
Contents
Using the starter kit board as a hardware simulator . . . . . . . . . . . . . . 28
6.1
The data transmission driver . . . . . . . . . . . . . . . . . . . . . . . . . . . . . . . . . . 29
6.2
Technical limitations . . . . . . . . . . . . . . . . . . . . . . . . . . . . . . . . . . . . . . . . . 29
6.3
Error messages . . . . . . . . . . . . . . . . . . . . . . . . . . . . . . . . . . . . . . . . . . . . 31
6.4
Troubleshooting . . . . . . . . . . . . . . . . . . . . . . . . . . . . . . . . . . . . . . . . . . . . 31
Programming ST6 microcontrollers . . . . . . . . . . . . . . . . . . . . . . . . . . . 32
7.1
Programming signals . . . . . . . . . . . . . . . . . . . . . . . . . . . . . . . . . . . . . . . . 32
7.2
Setting up the starter kit board . . . . . . . . . . . . . . . . . . . . . . . . . . . . . . . . . 33
7.3
In-circuit programming . . . . . . . . . . . . . . . . . . . . . . . . . . . . . . . . . . . . . . . 36
7.3.1
7.4
Application board connections . . . . . . . . . . . . . . . . . . . . . . . . . . . . . . . . 36
Setting up the starter kit board for in-circuit programming . . . . . . . . . . . . 38
8
Running your own program on the starter kit board . . . . . . . . . . . . . . 39
9
Hardware information . . . . . . . . . . . . . . . . . . . . . . . . . . . . . . . . . . . . . . . 41
10
9.1
Parts list . . . . . . . . . . . . . . . . . . . . . . . . . . . . . . . . . . . . . . . . . . . . . . . . . . 41
9.2
Starter kit board Schematic . . . . . . . . . . . . . . . . . . . . . . . . . . . . . . . . . . . 42
Revision history . . . . . . . . . . . . . . . . . . . . . . . . . . . . . . . . . . . . . . . . . . . 44
Doc ID 5112 Rev 2
3/45
List of figures
UM0002
List of figures
Figure 1.
Figure 2.
Figure 3.
Figure 4.
Figure 5.
Figure 6.
Figure 7.
Figure 8.
Figure 9.
Figure 10.
Figure 11.
Figure 12.
Figure 13.
Figure 14.
Figure 15.
Figure 16.
Figure 17.
Figure 18.
Figure 19.
Figure 20.
Figure 21.
Figure 22.
Figure 23.
Figure 24.
Figure 25.
Figure 26.
Figure 27.
Figure 28.
Figure 29.
4/45
Starter kit for ST625x, ST626x MCUs . . . . . . . . . . . . . . . . . . . . . . . . . . . . . . . . . . . . . . . . . 1
Possible uses and hardware setup . . . . . . . . . . . . . . . . . . . . . . . . . . . . . . . . . . . . . . . . . . . . 8
Starter kit board block diagram . . . . . . . . . . . . . . . . . . . . . . . . . . . . . . . . . . . . . . . . . . . . . . 11
Starter kit board . . . . . . . . . . . . . . . . . . . . . . . . . . . . . . . . . . . . . . . . . . . . . . . . . . . . . . . . . 12
Starter kit board diagram . . . . . . . . . . . . . . . . . . . . . . . . . . . . . . . . . . . . . . . . . . . . . . . . . . 13
Oscillator . . . . . . . . . . . . . . . . . . . . . . . . . . . . . . . . . . . . . . . . . . . . . . . . . . . . . . . . . . . . . . . 14
Audio transducer. . . . . . . . . . . . . . . . . . . . . . . . . . . . . . . . . . . . . . . . . . . . . . . . . . . . . . . . . 14
Digital to analog conversion . . . . . . . . . . . . . . . . . . . . . . . . . . . . . . . . . . . . . . . . . . . . . . . . 15
+ and - buttons . . . . . . . . . . . . . . . . . . . . . . . . . . . . . . . . . . . . . . . . . . . . . . . . . . . . . . . . . . 15
LED indicators . . . . . . . . . . . . . . . . . . . . . . . . . . . . . . . . . . . . . . . . . . . . . . . . . . . . . . . . . . 16
Resistance trimmer . . . . . . . . . . . . . . . . . . . . . . . . . . . . . . . . . . . . . . . . . . . . . . . . . . . . . . . 16
Thermistor bridge . . . . . . . . . . . . . . . . . . . . . . . . . . . . . . . . . . . . . . . . . . . . . . . . . . . . . . . . 17
RS-232 connections . . . . . . . . . . . . . . . . . . . . . . . . . . . . . . . . . . . . . . . . . . . . . . . . . . . . . . 18
Demonstration selector jumpers . . . . . . . . . . . . . . . . . . . . . . . . . . . . . . . . . . . . . . . . . . . . . 19
Power supply plug . . . . . . . . . . . . . . . . . . . . . . . . . . . . . . . . . . . . . . . . . . . . . . . . . . . . . . . 20
Device jumpers setup . . . . . . . . . . . . . . . . . . . . . . . . . . . . . . . . . . . . . . . . . . . . . . . . . . . . . 24
User mode selection . . . . . . . . . . . . . . . . . . . . . . . . . . . . . . . . . . . . . . . . . . . . . . . . . . . . . . 24
Demonstration program jumper setup . . . . . . . . . . . . . . . . . . . . . . . . . . . . . . . . . . . . . . . . 25
Demo selection . . . . . . . . . . . . . . . . . . . . . . . . . . . . . . . . . . . . . . . . . . . . . . . . . . . . . . . . . . 25
Device jumpers setup . . . . . . . . . . . . . . . . . . . . . . . . . . . . . . . . . . . . . . . . . . . . . . . . . . . . . 30
User mode selection . . . . . . . . . . . . . . . . . . . . . . . . . . . . . . . . . . . . . . . . . . . . . . . . . . . . . . 30
DIL-18 socket setup . . . . . . . . . . . . . . . . . . . . . . . . . . . . . . . . . . . . . . . . . . . . . . . . . . . . . . 33
Device selection . . . . . . . . . . . . . . . . . . . . . . . . . . . . . . . . . . . . . . . . . . . . . . . . . . . . . . . . . 34
Prog mode selection . . . . . . . . . . . . . . . . . . . . . . . . . . . . . . . . . . . . . . . . . . . . . . . . . . . . . . 35
Device jumpers setup . . . . . . . . . . . . . . . . . . . . . . . . . . . . . . . . . . . . . . . . . . . . . . . . . . . . . 38
User mode selection . . . . . . . . . . . . . . . . . . . . . . . . . . . . . . . . . . . . . . . . . . . . . . . . . . . . . . 38
Device jumpers setup . . . . . . . . . . . . . . . . . . . . . . . . . . . . . . . . . . . . . . . . . . . . . . . . . . . . . 39
User mode selection . . . . . . . . . . . . . . . . . . . . . . . . . . . . . . . . . . . . . . . . . . . . . . . . . . . . . . 40
Starter kit board schematic . . . . . . . . . . . . . . . . . . . . . . . . . . . . . . . . . . . . . . . . . . . . . . . . . 43
Doc ID 5112 Rev 2
UM0002
List of tables
List of tables
Table 1.
Table 2.
Table 3.
Table 4.
Table 5.
Table 6.
Table 7.
Table 8.
Table 9.
Table 10.
Table 11.
Table 12.
ST6 starter kit references . . . . . . . . . . . . . . . . . . . . . . . . . . . . . . . . . . . . . . . . . . . . . . . . . . . 9
Legend . . . . . . . . . . . . . . . . . . . . . . . . . . . . . . . . . . . . . . . . . . . . . . . . . . . . . . . . . . . . . . . . 13
RS-232/ST-6 pin connections . . . . . . . . . . . . . . . . . . . . . . . . . . . . . . . . . . . . . . . . . . . . . . . 17
Resistor and voltage values . . . . . . . . . . . . . . . . . . . . . . . . . . . . . . . . . . . . . . . . . . . . . . . . 18
Board resources and connections . . . . . . . . . . . . . . . . . . . . . . . . . . . . . . . . . . . . . . . . . . . 26
Data transmission . . . . . . . . . . . . . . . . . . . . . . . . . . . . . . . . . . . . . . . . . . . . . . . . . . . . . . . . 29
Error messages . . . . . . . . . . . . . . . . . . . . . . . . . . . . . . . . . . . . . . . . . . . . . . . . . . . . . . . . . 31
Programming signals . . . . . . . . . . . . . . . . . . . . . . . . . . . . . . . . . . . . . . . . . . . . . . . . . . . . . 32
Setting the device jumpers W10 to W13. . . . . . . . . . . . . . . . . . . . . . . . . . . . . . . . . . . . . . . 34
Pin connections . . . . . . . . . . . . . . . . . . . . . . . . . . . . . . . . . . . . . . . . . . . . . . . . . . . . . . . . . 36
Board resources and connections . . . . . . . . . . . . . . . . . . . . . . . . . . . . . . . . . . . . . . . . . . . 41
Document revision history . . . . . . . . . . . . . . . . . . . . . . . . . . . . . . . . . . . . . . . . . . . . . . . . . 44
Doc ID 5112 Rev 2
5/45
Introduction
UM0002
1 Introduction
The ST626x starter kit provides you with all you need to start designing, developing and
evaluating programs for ST6253x, ST6255x, ST6260x, ST6263x and ST6265x
microcontrollers immediately.
The ST626x starter kit includes:
●
The ST6 assembler and linker, AST6 and LST6.
●
The ST6 Windows debugger, WGDB6.
●
The Windows ST6 microcontroller programmer, Epromer.
●
●
The ST6 starter kit board, which serves as a demonstration board and low-cost
debugging tool.
Some demonstration programs that show how ST6 microcontrollers use the starter kit
board resources.
●
Some example programs.
●
One ST62E60BF1, two ST62E62BF1 and two ST62E65BF1 sales types.
●
A complete set of paper documentation and online help.
The demonstration programs, that come pre-loaded on an ST62E65, show how the
powerful features of ST6 microcontrollers operate in a real environment. The demonstration
programs use the hardware resources provided on the starter kit board, which include reset
and data control buttons, LED indicators, a resistance trimmer, temperature control circuit
and an RS-232 interface.
Using the ST6 assembler and linker, AST6 and LST6, you can assemble and link ST6
programs. The "ST6 Family Software development tools AST6, LST6, WGDB6" User
Manual will guide you through the steps of developing, assembling and linking programs for
the ST6. The starter kit software includes a set of example programs of typical ST6
applications. These are installed in the directory C:\st6tools\sk626Xi1\examples.
For a fast-track solution for developing bug-free programs for the ST6, without the hassle of
writing assembler code, try out the ST6-Realizer program.
Once you have developed your ST6 program, you can use the Windows-based ST6
program debugger, WGDB6/SIMULATOR, together with the starter kit board, as a low-cost
but powerful debugging tool. WGDB6 includes an ST6 simulator, that simulates the
execution of your program, and uses the ST6 that is plugged into the starter kit board to
emulate all transactions that are performed with the data space. Thus, using the starter kit
board with WGDB6, you can view how the microcontroller peripherals behave when your
program is executed. WGDB6 includes powerful debugging features, such as source-level
debugging, instruction and conditional memory access breakpoints and selective trace
recording. The "ST6 Family Software development tools AST6, LST6, WGDB6" User
Manual and online help will lead you through the debugging process using WGDB6.
When your program is ready, Epromer provides you with an easy-to-use Windows interface,
which lets you prepare executable code, then write it to the ST6 microcontroller that is
plugged into either one of the DIL sockets on the starter kit board, or your own in-circuit
application board that is connected to the starter kit board.
To observe and evaluate the consequences of your program on the resources it controls,
you can run it on an ST6 microcontroller that is plugged into the starter kit board. If it
6/45
Doc ID 5112 Rev 2
UM0002
Introduction
controls a resource that is not included on the starter kit board, you can connect your own
resource to the board.
Instructions for use - Warning
This product conforms with the 89/336/EEC directive; it also complies with the EN55022
emissions standard for ITE, as well as with generic 50082-1 immunity standards.
The product is a Class A apparatus. In a residential environment this device may cause
radioelectrical disturbances which may require that the user adopt appropriate precautions.
The product is not contained in an outer casing, and cannot therefore be immune against
electrostatic discharge (ESD): it should therefore only be handled at static safe work
stations.
Doc ID 5112 Rev 2
7/45
Introduction
UM0002
The following diagram summarises the possible uses of the starter kit board and the
hardware setup required for each one.
Figure 2.
Possible uses and hardware setup
To program ST6s on your own in-circuit programming board:
PC running
Epromer
In-circuit
programming board
Starter kit
board
Parallel port
connected to P1
J1 connector
To program ST6s using the starter kit board :
PC running
Epromer
ST6 to be
programmed
Starter kit board
Parallel port
connected to P1
To run the demonstrations:
To run your own program:
ST6265x Programmed with
DEMOK65.HEX
Starter kit board
ST6 programmed
with program to run
To use the starter kit board as a software simulator:
PC running
WGDB6 Simulator
ST6265x Programmed with
DEMOK65.HEX
Parallel port
connected to P1
MS31601V1
8/45
Doc ID 5112 Rev 2
UM0002
1.1
Introduction
Where to go from here...
The following table directs you to where you should look for further information about using
the ST6 starter kit.
Table 1.
ST6 starter kit references
To:
Refer to:
Find out about the starter kit board and ST6
microcontrollers provided with the kit.
The starter kit board on page 10 of this book.
Install the starter kit software, and connect the
power supply to the board.
Installing the starter kit on page 20 of this book.
Find out what the demonstration applications do,
Running the demos on page 21 of this book.
and run them.
Learn how to develop source code for AST6 and
LST6.
"ST6 Family Software development tools AST6,
LST6, WGDB6" User Manual.
Prepare the starter kit board for use as an ST6
hardware simulator with WGDB6.
Using the starter kit board as a hardware
simulator on page 28 of this book.
Learn how to use WGDB6 for debugging your
programs.
"ST6 Family Software development tools AST6,
LST6, WGDB6" User Manual.
Prepare the starter kit board for programming
ST6 microcontrollers using Epromer.
Programming ST6 microcontrollers on page 32 of
this book.
Prepare the starter kit board for connecting your
own in-circuit programming board.
In-circuit programming on page 36 of this book.
Learn how to use Eprommer for programming
ST6 microcontrollers
The Epromer online help.
Connect your own hardware resource to the
starter kit board.
Connecting external resources to the starter kit
board on page 26 of this book.
Run your own program on an ST6 using the
starter kit board.
Running your own program on the starter kit
board on page 39
Doc ID 5112 Rev 2
9/45
The starter kit hardware
2
UM0002
The starter kit hardware
This section describes the ST6 microcontrollers and the starter kit board that come with the
ST6 starter kit. A full schematic of the starter kit board is provided in Hardware information
on page 41.
2.1
The ST6 microcontrollers
The starter kit includes the following sales types:
●
Two ST62E65BF1
●
One ST62E60BF1
●
Two ST62E62BF1
The ST6265x microcontroller labelled DEMOK65 is pre-loaded with the code
DEMOK65.HEX, which includes the demonstration programs (see Running the demos on
page 21), as well as the communications protocol program, that enables you to use the
starter kit board as a simulator (see Using the starter kit board as a hardware simulator on
page 28). The other ST6 microcontrollers are blank.
The file Demok65.hex is in the directory C:\st6tools\sk626Xi1, so that if you erase it from the
ST6265x, you can re-program it following the instructions given in Programming ST6
microcontrollers on page 32.
2.2
The starter kit board
The starter kit board includes the following resources:
●
Reset and data control buttons
●
LED indicators
●
Resistance trimmer
●
Analog to digital converter
●
Audio transducer circuit
●
RS-232 interface
●
Demonstration program selector jumpers
It comes with its own power supply unit that can be plugged into an AC mains source, or a
DC source with the following characteristics:
10/45
●
Voltage: 16V min./20 V max.
●
Current: 100 mA min.
Doc ID 5112 Rev 2
UM0002
The starter kit hardware
It includes the following connectors:
●
●
●
●
A parallel port connector (P1) for connection to the host PC when it is used as a
hardware simulator or for programming.
A remote resource I/O interface connector (J2) to which you can connect your own
hardware resource.
An RS-232 connector, which you can use for observing RS-232 communication control
using an ST6.
A connector for your own in-circuit ST6 programming board. See Application board
connections on page 36 for further details.
Below is a block diagram of the starter kit board:
Figure 3.
Starter kit board block diagram
POWER
DAC
SUPPLY
UNIT
TRANSDUCER LEDs
THERMISTOR
TRIMMER
RS232
P2
J3
J4
ST62E65
EPROM
PROGRAMMER
IN-CIRCUIT
PROGRAMMING
J1
PARALLEL CONNECTION
TO PC AND
SOFTWARE SIMULATOR
P1
ST626x I/O CONNECTION
J2
USER APPLICATION
Doc ID 5112 Rev 2
MS31602V1
11/45
The starter kit hardware
Figure 4.
12/45
UM0002
Starter kit board
Doc ID 5112 Rev 2
UM0002
The starter kit hardware
The following diagram shows the layout of the starter kit board.
Figure 5.
Starter kit board diagram
20
1
W1
2
W2
19
W4
3
18
17
4
W
13
W
10
5
16
W15
6
15
W17
14
7
W18
8
9
+
-
W22 W23
W21
W25 W26
13
W24
12
W31
10
11
MS31604V1
Table 2.
Legend
1
In-circuit programming connector (J1)
20
DIL-16 ZIF MCU socket
2
8 Mhz Oscillator
19
Digital to analog conversion circuit
3
“ST6260x/62x” or “ST6265x” device
selection jumpers W10 to W13
18
“Programming” or “User” operating mode
selection jumpers W1 and W2
4
PC connector P1
17
Five LED level indicators including
jumpers W4 to W8
5
Audio Transducer circuit
16
DIL 20-28 ZIF MCU socket
6
10 KΩ trimmer
15
Remote resource I/O interface connector
J2
7
Power supply JACK connector J3
14
RS232 interface circuit and connector
8
Power supply connector J4
13
Demonstration routine selector
9
Power supply LED indicator LD6
12
Thermistor including jumper W24
10
“+” and “-” buttons
11
RESET button
Doc ID 5112 Rev 2
13/45
The starter kit hardware
2.3
UM0002
Oscillator
An oscillator feeds the ST6265x OSCIN input with an 8 MHz clock signal. You can
disconnect the oscillator by removing the jumper W2 (marked 18 on the Starter kit board
diagram on page 13).
Figure 6.
Oscillator
8MHz
OSCILLATOR
ST6265x
USER
PROG
OSCin
JUMPER W2
GND
PROGRAMMING CLOCK FROM P1
(only when programming microcontrollers)
MS31605V1
2.4
Reset button
This activates the ST6265x RESET input when pressed. A power-on reset circuit is also
provided.
2.5
Audio transducer
A piezoelectric audio transducer is connected to the ST6265x Audio Reload Timer (PB7
pin). It is provided to demonstrate and evaluate the sound generation capabilities.
The transducer can be disconnected from PB7 pin by removing the W15-PB7 jumper.
Figure 7.
Audio transducer
ST6265x
W15-PB7
AUDIO
TRANSDUCER
PB7
JUMPER
ARTIMOUT
MS31606V1
14/45
Doc ID 5112 Rev 2
UM0002
2.6
The starter kit hardware
Digital to analog conversion
Digital to analog conversion is performed using an RC integrator circuit connected to the
ST6265x auto reload timer output (PB7).
A PWM signal is generated by the ARTimer at PB7 output. The voltage value at the output
of the RC integrator circuit is controlled by the PWM duty cycle.
The RC circuit input can be disconnected from PB7 output by removing the W15-PB7
jumper.
Figure 8.
Digital to analog conversion
ST6265x
TEST PIN (ANALOG VOLTAGE)
W15-PB7
C
R
PB7
(ARTIMOUT)
MS31607V1
2.7
+ and - buttons
These are connected to PB5 and PB6 pins on the microcontroller respectively. They drive
the PB5 and PB6 inputs down to GND when pressed.
You can disconnect PB5 or PB6 by removing the appropriate W22 or W23 jumper.
Figure 9.
+ and - buttons
W22-PB5
PB5
ST6265x
W23-PB6
PB6
JUMPERS
MS31608V1
Doc ID 5112 Rev 2
15/45
The starter kit hardware
2.8
UM0002
LED indicators
Five LEDs are used for level indication in the demonstration routines. They are connected to
the ST6265x pins: PB0 to PB4 (when programmed as outputs) to demonstrate direct LEDdriving capability.
The five LEDs can be disconnected by removing the W4 to W8 (PB4 to PB0) jumpers.
Figure 10. LED indicators
VDD
W4 to W8
JUMPERS
RESISTORS
ARRAY
ST6265x
PB4
PB3
PB2
PB1
PB0
MS31609V1
2.9
Resistance trimmer
A 10 KΩ resistance trimmer feeds the ST6265x PA4 I/O pin (when programmed as an A/D
Converter input) with a variable voltage (0 to 5V DC). It is used for A/D conversion
demonstration/evaluation.
The trimmer can be disconnected from the I/O pin by removing the W18-PA4 jumper.
Figure 11. Resistance trimmer
VDD
W18
PA4
TRIMMER
JUMPER
GND
MS31610V1
16/45
Doc ID 5112 Rev 2
UM0002
2.10
The starter kit hardware
Thermistor bridge - Temperature control
A thermistor bridge (with a negative coefficient) is connected to the ST6265x I/O pin PA5,
which is defined as an analog to digital converter (ADC) input. The voltage value at the ADC
input decreases when the temperature is increased. Demonstration 4 shows how the
thermistor is used to indicate temperature levels on the five LEDs (see Running the demos
on page 21)
The thermistor bridge can be disconnected from the pin PA5 by removing the W24-PA5
jumper.
Figure 12. Thermistor bridge
VDD
R
W24-PA5
ST6265x
PA5
JUMPER
THERMISTOR
GND
2.11
MS31611V1
RS-232 interface
The RS-232 interface enables you to communicate with the pre-programmed ST6265x
microcontroller provided with the starter kit. It includes an RS-232 buffer circuit that is
connected to a standard PC-compatible RS-232 SUBD-9 connector.
The following table lists the RS-232/ST6 pin connections:
Table 3.
RS-232/ST-6 pin connections
Signal name
SUBD-9 Pin
ST6 Pin
Data Transmission (TX)
2
PC3
Data Reception (RX)
3
PC2
Request to Send (RTS)
8
PC1
Clear to Send (CTS)
7
PC0
You can disconnect these by removing the corresponding jumpers from W17 to W21.
Doc ID 5112 Rev 2
17/45
The starter kit hardware
UM0002
The following diagram shows the RS-232 connections and line allocations:
Figure 13. RS-232 connections
ST6265x
10K
+12V
1
W19
TX
6
2
7
PC3
CTS
RS232
LINE
BUFFER
RX
3
W21
PC0
W17
PC2
W20
RTS
PC1
8
4
9
SUBD - 9 POINTS
CONNECTOR
5
MS31612V1
TX, RX, CTS and RTS are defined so that the board is used as a slave. To use the board as
a master, swap both the RX and TX and the CTS and RTS pin connections on the cable.
2.12
Demonstration selector jumpers
The demonstration selector is made up of 6 jumpers W26 to W31 (marked 13 on the Starter
kit board diagram on page 13), with each jumper connected to a resistor. Each resistor
generates a different voltage.
After reset, the voltage value generated by the resistor whose jumper is installed is sent to
PA3 on the ST6265x. PA3 is programmed as an A/D converter. The program installed on the
ST6265x uses the input from PA3 to select the appropriate demo. The following table lists
the voltage values generated by each resistor:
Table 4.
Resistor and voltage values
Resistor value
Theoretical voltage value
R14: 10 KΩ
No JUMPER: 5 V
R15: 680 Ω
JUMPER-D1: 0 V
R16: 750 Ω
JUMPER-D2: 333 mV
R17: 820 Ω
JUMPER-D3: 666 mV
R19: 1 KΩ
JUMPER-D4: 999 mV
R20: 1.2 KΩ
JUMPER-D5: 1.332 V
The same principle can be used for keyboard decoding. For a complete example of this,
refer to the application note: “AN431: Using ST6 Analog Inputs for Multiple Key Decoding”.
18/45
Doc ID 5112 Rev 2
UM0002
The starter kit hardware
You can disconnect the demonstration selector from PA3 by removing the PA3 jumper from
W25.
Figure 14. Demonstration selector jumpers
JUMPER
GND
D6
D5
D4
D3
D2
ST6265x
D1
W25-PA3
PA3
R20
R19
R17
R16
R15
JUMPER
R14
VCC
Doc ID 5112 Rev 2
MS31613V1
19/45
Installing the starter kit
UM0002
3
Installing the starter kit
3.1
Hardware and software requirements
To be able to install and run the ST6 starter kit, you need a PC with:
3.2
●
A 3 1/2” Floppy Disk Drive
●
A CDROM Disk Drive
●
1.5 Mbytes free memory space
●
A free Centronics compatible parallel port connector
●
MS-WindowsTM 3.11, NT or 95.
Installing the software
If diskettes are provided, you must install the software with them in order to have the latest
release:
1.
Place the SK626XI1 diskette into your floppy disk drive.
2.
In Windows Explorer or File Manager, view the contents of the diskette, then doubleclick the Setup file or icon.
3.
Follow the instructions as they appear on screen.
If only the ST62 CDROM is provided, then:Place the ST62 CDROM provided into your
CDROM disk drive.
3.3
1.
In Windows Explorer or File Manager, view the contents of the CDROM, browse to
st62oncd\ftools\sk626Xi1 and double-click the Setup file or icon.
2.
Follow the instructions as they appear on screen.
Connecting the power supply
If you have AC mains supply, connect the Jack plug on the power supply cable provided to
the J3 input socket, then connect the mains plug to a mains source.
If you have DC mains supply, connect the male plug on the power supply cable provided to
the J3 input socket, then connect the mains plug to a mains source with the following
characteristics:
Note:
●
Voltage: 16 V min./20 V max.
●
Current: 100 mA min.
To avoid a short circuit, always connect the power input cable to the starter kit board before
connecting it to a mains power supply.
If you use your own 3.5 mm power supply plug, its polarity must be as follows:
Figure 15. Power supply plug
JACK PLUG
-
+
MS31614V1
20/45
Doc ID 5112 Rev 2
UM0002
4
Running the demos
Running the demos
This section describes the demonstration programs that are provided with the starter kit and
explains how to run them.
4.1
What the demos do
The following paragraphs describe the demos that come pre-loaded with the ST6 starter kit
demos. See Running the demonstration programs on page 24 below for details on how to
select and run a demo.
The source files of these demos are provided with the starter kit software in the file
C:\st6tools\sk626Xi1\sk626Xli\DEMOK65.ASM.
4.1.1
Demo 1 - Sound generation
After RESET, this program generates a PWM signal at the output of the AUTO RELOAD
TIMER peripheral (PB7), which is connected to the Audio Transducer.
The frequency of the PWM signal can be adjusted by pressing the + (increase) or the (decrease) pushbuttons.
An oscilloscope probe can be positioned on the W15-PB7 jumper to observe the PWM
signal.
4.1.2
Demo 2 - Music box
After RESET, this program produces 5 tunes that are played by the Audio Transducer. The
sound frequencies are generated at the AUTO RELOAD TIMER output peripheral (PB7),
used in PWM mode.
The LED that is turned on indicates the tune to be played (1 through 5). To select the tune to
play, press the + button.
The music starts playing when the - button is pressed.
The tempo of the music can be modified using the voltage trimmer (marked 6 on the Starter
kit board diagram on page 13). This is connected to PA4 I/O programmed as Analog input.
Once the music has finished playing, another tune can be selected and played the same
way.
Doc ID 5112 Rev 2
21/45
Running the demos
4.1.3
UM0002
Demo 3 - Voltage trimming and LED level indication
1.
Initialises the pins as follows:
This pin:
Is initialised as:
PA4
Analog input. Connected to the trimmer.
PB0 to PB4
Push-pull outputs. Connected to the five LEDs (as marked on board).
2.
Reads the A/D converter data register, and turns on a LED according to the Voltage
value input by the trimmer:
This voltage:
Turns this LED on:
0 to 1V
LD5
1 to 2V
LD4
2 to 3V
LD3
3 to 4V
LD2
4 to 5V
LD1
Adjusting the voltage trimmer (marked 6 on the Starter kit board diagram on page 13) turns
on the appropriate LED.
4.1.4
Demo 4 - Temperature control
1.
Initialises the pins as follows:
This pin:
Is initialised as:
PA5
Analog input. Connected to the thermistor circuit.
PB0 to PB4
Push-pull outputs. Connected to the five LEDs (as marked on board).
2.
Reads and stores the A/D converter data register value. This value indicates the
temperature at reset.
3.
Reads and stores the A/D converter data register value at regular intervals. If this value
exceeds the value that was stored at reset, a LED is turned on indicating the difference
between the two values. The higher the difference is between the stored value and the
read value, the higher LED number is turned on (roughly in steps of LD(n+1) for each
additional degree difference).
You can increase the temperature by touching the thermistor (marked 12 on the Starter kit
board diagram on page 13).
22/45
Doc ID 5112 Rev 2
UM0002
4.1.5
Running the demos
Demo 5 - Digital to analog conversion
Digital to Analog Conversion (DAC) is performed using an RC integrator circuit connected to
the ST6265x Auto Reload Timer output (PB7).
A PWM signal is generated by the ARTimer at PB7 output. The voltage value at the output
of the RC integrator circuit is controlled by the PWM duty cycle.
After RESET, the program:
●
●
Generates a 64 KHz frequency PWM signal at the Auto Reload Timer output. The duty
cycle is initialized at 50%.
Decreases/increases the duty cycle value each time the - or + button is pressed (2%
steps). This modifies the analog voltage at the integrator circuit output.
For more precise observation, position an oscilloscope probe on the ANA test point, located
in the Digital to Analog circuit (marked 19 on the Starter kit board diagram on page 13).
4.1.6
Demo 6 - RS-232 communications
This demonstration shows how an RS-232 communication line buffer can be managed
using an ST6265x microcontroller.
To run this demonstration:
1.
Connect the RS-232 connector on the starter kit board to a serial port on your PC using
the RS-232 cable provided.
2.
On the host PC, in MS-DOS, execute the program: ST6K232.EXE which is in the
st6tools\sk626Xi1 directory.
3.
Follow the instructions as they appear on screen.
Doc ID 5112 Rev 2
23/45
Running the demos
4.2
UM0002
Running the demonstration programs
The ST6265x microcontroller labelled DEMOK65 is programmed with the demonstration
software.
If this software has been erased from the microcontroller, you can reprogram it from the file
DEMOK65.HEX (the file is in the st6tools\sk626Xi1 directory). For details of how to program
microcontrollers refer to Programming ST6 microcontrollers on page 32.
To run the demonstrations:
1.
Power down the starter kit board.
2.
Make sure that the pre-programmed ST62E65 is plugged into the DIL connector, and
that the DEVICE jumpers W10 to W13 (marked 3 on the Starter kit board diagram on
page 13) are set to ST6265x as shown in the following diagram:
Figure 16. Device jumpers setup
ST6265x
D
E
V W
W
I 10
13
C
E
ST6260/62
3.
MS31615V1
Select the USER mode using the jumpers marked W1 and W2 (marked 18 on the
Starter kit board diagram on page 13), as shown in the diagram below:
Figure 17. User mode selection
USER
M
O W
W
1
2
D
E
PROG
24/45
MS31616V1
4.
Disconnect the cable from the parallel port (P1) connection, if it is connected.
5.
Power up the starter kit board.
Doc ID 5112 Rev 2
UM0002
Running the demos
6.
Install the demonstration program jumper marked PA3, as shown in the diagram below:
Figure 18. Demonstration program jumper setup
W26
PA3
D1
D2
D3
DEMO SELECTION
D4
D5
D6
W31
7.
MS31617V1
Select the demo you want to run, by installing the appropriate jumper W26 to W31
(marked 13 on the Starter kit board diagram on page 13), as indicated on the diagram
below:
Figure 19. Demo selection
W26
D1
Selects demo 1 - Sound Generation
D2
Selects demo 2 - Music Box
D3
Selects demo 3 - Voltage trimming and LED level indication
D4
Selects demo 4 - Temperature Control
D5
Selects demo 5 -Digital to Analog Conversion (DAC)
D6
Selects demo 6 -RS-232 Communications
W31
DEMO SELECTION
MS31618V1
For example, in the above diagram demo 3 is selected.
8.
Press the reset button.
The selected demo is now ran.
To run a different demo, repeat steps 7 and 8.
Doc ID 5112 Rev 2
25/45
Connecting external resources to the starter kit board
5
UM0002
Connecting external resources to the starter kit
board
You can connect your own external resources to the pre-programmed ST6265x to debug or
evaluate your programs, using the connector J2 (marked 15 on the Starter kit board diagram
on page 13). To be able to connect your own resources to the starter kit board, you must
disconnect the resources that are already connected to the ST6265x, to avoid external
resource/ starter kit board resource conflicts. The following table lists the starter kit board
resources and the corresponding J2 connections, and indicates the jumper that disconnects
each resource.
Table 5.
Board resources and connections
On-board
resource
JP
ST6265x
Connector
PIN
PIN
ST6265x
Connector
JP
On-board
resource
LED level
indicator
W8
PB0
PB0
1
28
PC0
W21
PC0
RS232
CTS
LED level
indicator
W7
PB1
PB1
2
27
PC1
W20
PC1
RS232
RTS
–
–
nc
3
26
PC2
W17
PC2
RS232
RX
LED level
indicator
W6
PB2
PB2
4
25
PC3
W19
PC3
RS232
TX
LED level
indicator
W5
PB3
PB3
5
24
PC4
W16
PC4
Not used
LED level
indicator
W4
PB4
PB4
6
23
NMI(1)
–
System
Tasks
Pushbutton
+
W22
PB5
PB5
7
22
RESET/(1)
–
Reset push.
Power-on
Pushbutton
-
W23
PB6
PB6
8
21
OSCOUT
–
System
Tasks
Audio
Transducer
W15
PB7
PB7
9
20
OSCIN
–
8MHz Osc.
System
Tasks
–
PA0(1)
10
19
PA7
–
–
nc
11
18
PA6
–
Not used
–
–
GND
12
17
PA5
W24
PA5
Thermistor
System
Tasks
–
PA1(1)
13
16
PA4
W18
PA4
Trimmer
System
Tasks
–
PA2(1)
14
15
PA3
W25
PA3
Demonstrati
on Selector
1. This is not available if the starter kit board is connected to a host PC.
26/45
Doc ID 5112 Rev 2
None
UM0002
Note:
Connecting external resources to the starter kit board
Some of the signals on the J2 connector are used during ST6 programming, thus you must
disconnect any external resource that is conencted to J2 before using the starter kit board
for programming.
Doc ID 5112 Rev 2
27/45
Using the starter kit board as a hardware simulator
6
UM0002
Using the starter kit board as a hardware simulator
WGDB6, the ST6 debugger that runs under Windows, lets you test your programs without
having to program the EPROM of your target ST6. Depending how much information you
want, and how close to real life you want your test environment to be, you can use WGDB6
in one of three ways:
●
●
●
As a software simulator. If you use WGDB6 as a simulator, you need not attach any
additional hardware to your PC. The ST6 simulator program, that comes with WGDB6
and is run when you run WGDB6/Simulator, simulates the execution of your program,
letting you step through the code and see what happens as the program runs. WGDB6
simulator includes Wave Form Editor, which simulates the output of the pins on your
target ST6 in relation to inputs that you define, enabling you to see how its peripherals
react to the inputs they receive.
With an ST6 hardware emulator. Emulators are hardware systems that act as your
target microcontroller, at the same time capturing detailed information, such as which
areas of memory are accessed by the program and what happens when they are
accessed. In this case, WGDB6/Emulator provides an interface between the emulator
and your PC, displaying data captured by the emulator and letting you implement the
WGDB6 features in the emulator, such as software or hardware breakpoints.
With the starter kit board as a hardware simulator. This is a cross between the above
two. The WGDB6 software simulator simulates the execution of your program, but
each time the data space is accessed, it accesses that of the ST6 that is plugged into
your starter kit board. Thus, using the starter kit board with WGDB6, you can view how
the real microcontroller peripherals behave when your program is executed.
This section describes the third option, how to use the starter kit board as a hardware
simulator.
You can use the starter kit board to emulate any ST6252x, ST6253x, ST6255x, ST6260x,
ST6262x, ST6263x or ST6265x microcontroller. Note, however that you must use the preprogrammed ST6265x microcontroller, labelled DEMOK65 supplied with the kit for hardware
simulation. Thus, when simulating programs designed for other microcontrollers, make sure
that you do not use resources that are not available on the microcontroller your application
is designed for.
28/45
Doc ID 5112 Rev 2
UM0002
6.1
Using the starter kit board as a hardware simulator
The data transmission driver
Data is transferred between the simulated peripheral registers and the ST626x registers via
the host PC’s parallel port. The DEMOK65.HEX program, with which the ST6265x
microcontroller that is plugged into the starter kit board must be loaded includes the
transmission driver.
The data transfer driver uses the following bits:
Table 6.
Data transmission
PC
parallel port
ST6265x
MCU
WGDB6 Use
D2
PA2
Synchronisation
D3
PA1
Write data to MCU
D4
RESET
Hardware reset of peripherals
D6
NMI
Initiates data transfer
SDOP
PA0
Read data from MCU
Note:
Do not connect any external resources to the corresponding J2 connector pins when using
the starter kit board as a peripheral emulator.
6.2
Technical limitations
The starter kit board has the following limitations when used with WGDB6 as a hardware
simulator:
●
●
●
●
●
Real-time program execution is not supported.
Resetting the ST6265x by power on, pressing the Reset button or external reset does
not reset the simulated ST6 core. To perform a complete simulated reset, use the
WGDB6 reset command instead.
Interrupts sent by the ST6265x microcontroller are not supported by the WGDB6
simulator.
The pins: NMI, PA0, PA1 and PA2 on the ST6265x microcontroller are used for
communications with the host PC, and are thus not available for simulation.
You cannot modify the D0, D1 and D2 bits of the DDRA, ORA and DRA registers.
Doc ID 5112 Rev 2
29/45
Using the starter kit board as a hardware simulator
UM0002
To use the starter kit board as a hardware simulator:
1.
Power down the starter kit board.
2.
Make sure that the pre-programmed ST6265x is plugged into the DIL socket U3, and
that the DEVICE jumpers W10 to W13 (marked 3 on the Starter kit board diagram on
page 13) are set to ST6265x as shown in the following diagram:
Figure 20. Device jumpers setup
ST6265x
D
E
W
W
I 10
13
V
C
E
ST6260x/62x
3.
MS31619V1
Select the USER mode using the jumpers marked W1 and W2 (marked 18 on the
Starter kit board diagram on page 13), as shown in the diagram below:
Figure 21. User mode selection
USER
M
O W
W
D 1
2
E
PROG
30/45
MS31620V1
4.
Connect the Parallel port P1 on the starter kit board to a spare parallel port on your PC
using the cable provided with the starter kit.
5.
Power up the starter kit board.
Doc ID 5112 Rev 2
UM0002
Using the starter kit board as a hardware simulator
To run WGDB6:
• If you are using Windows 95, click the Start button, point to Programs, then ST6 Tools,
then click WGDB6/Simulator.
• If you are using Windows 3.x, double-click the appropriate WGDB6/Simulator icon in the
ST6 Tools program group.
Refer to "WGDB6 User Guide" in the "ST6 Family Software Development Tools AST6,
LST6, WGDB6" User Manual for full instructions on how to use WGDB6.
6.3
Error messages
The following table lists the error messages you may encounter when using WGDB6 with
the starter kit board:
Table 7.
Error messages
Error message
6.4
Description
Error 116 Port A protected when using board.
This means that WGDB6 tried to access the
PORT A registers. These are used for
communications with the board.
Error 117 Communication error with ST626x
board.
This means that a problem occurred during
communcations between the host PC and the
board. Perform the checks listed below.
Troubleshooting
If there is a communications problem between WGDB6 and the Starter kit board, the title
“WGDB6 Simulator” appears in the WGDB6 title bar. In this case, you shoud check the
following:
●
That the starter kit board is correctly powered up.
●
That the parallel port cable is correctly connected.
●
That the device jumpers W1and W2 are in the USER position.
●
That the device type selection jumpers W10 to W13 are in the ST6265x position.
●
That an ST6265x is plugged into the starter kit board, and it is programmed with
DEMOK65.HEX.
Doc ID 5112 Rev 2
31/45
Programming ST6 microcontrollers
7
UM0002
Programming ST6 microcontrollers
You can use the starter kit board, in conjunction with the program Epromer, to program
ST6252x, ST6253x, ST6255x, ST6260x, ST6262x, ST6263x or ST6265x microcontrollers.
You can also perform in-circuit programming of ST6252x, ST6253x, ST6255x, ST6260x,
ST6262x, ST6263x or ST6265x OTP/EPROM microcontrollers using your own board,
connected to the starter kit board via the connector J1 (marked 1 on the Starter kit board
diagram on page 13).
7.1
Programming signals
The following table shows the programming signals and states and their corresponding pin
numbers.
Table 8.
Programming signals
ST62x65 MCU
Programming Programming
signals
states
MCU pin
J2
connector
ST62x60 MCU
MCU pin
J2
connector
ST62x62 MCU
MCU pin
J2
connector
PB0
High
Pin 1
Pin 1
Pin 1
Pin 5
Pin 1
Pin 5
PB2
High/Low
Pin 4
Pin 4
Pin 4
Pin 8
Pin 3
Pin 8
PB3
High/Low
Pin 5
Pin 5
Pin 5
Pin 9
Pin 4
Pin 9
TEST
5V/12V
Pin 3
n/c
Pin 3
Pin 7
Pin 2
Pin 7
OSCIN
High/Low
Pin 20
Pin 20
Pin 14
Pin 18
Pin 11
Pin 18
OSCOUT
High
Pin 21
Pin 21
Pin 15
Pin 19
Pin 12
Pin 19
RESET
High/Low
Pin 22
Pin 22
Pin 16
Pin 20
Pin 13
Pin 20
Note:
32/45
The PB2, PB3, OSCIN and RESET signals on the J2 connector are used during ST6
programming, thus if you have connected an external resource to J2, you must disconnect
these signals before using the starter kit board for programming.
The PB2, PB3, OSCIN and RESET pins are used by the system during programming. The
programming signals are therefore switched to different pins of the DIL-28 socket.
Doc ID 5112 Rev 2
UM0002
7.2
Programming ST6 microcontrollers
Setting up the starter kit board
1.
Power down the starter kit board.
2.
Plug the ST6 microcontroller you want to program into the DIL-28 socket (U3) or the
DIL-16 socket (U4). The DIL-16 socket (U4) is only used to program ST6252x and
ST6262x devices. Use the DIL-28 socket (U3) according to the following diagram:
Figure 22. DIL-18 socket setup
28
1
2
27
ST62x65
ST62x55
3
26
25
4
5
1
20
24
6
2
19
23
7
3
18
22
8
4
17
21
9
5
16
20
10
6
15
19
11
7
14
18
12
8
13
17
13
9
12
16
10
11
15
14
ST62x53
ST62x60
ST62x63
MS31621V1
3.
Set the DEVICE jumpers W10 to W13 (marked 3 on the Starter kit board diagram on
page 13) for the microcontroller that you want to program according to the following
table:
Doc ID 5112 Rev 2
33/45
Programming ST6 microcontrollers
Table 9.
4.
UM0002
Setting the device jumpers W10 to W13
Device Type
W10 to W13 Position
ST6252x
ST6260x/62x
ST6253x
ST6260x/62x
ST6255x
ST6265x
ST6260x
ST6260x/62x
ST6262x
ST6260x/62x
ST6263x
ST6260x/62x
ST6265x
ST6265x
As shown in the following diagram:
Figure 23. Device selection
To select ST6265x:
To select ST6260x/62x:
ST6265x
ST6265x
D
D
E
E
V W
W
I 10
13
V
I
C
C
E
E
ST6260x/62x
W
W
10
13
ST6260x/62x
MS31622V1
5.
34/45
Select the PROG mode using the jumpers marked W1 and W2 (marked 18 on the
Starter kit board diagram on page 13), as shown in the diagram below:
Doc ID 5112 Rev 2
UM0002
Programming ST6 microcontrollers
Figure 24. Prog mode selection
USER
M
O W
W
D 1
2
E
PROG
MS31623V1
6.
Connect the Parallel port P1 on the starter kit board to a spare parallel port on your PC
using the cable provided with the starter kit.
7.
Power up the starter kit board.
You can now use Epromer to program the microcontroller that is plugged into the starter kit
board.
Note:
Epromer does not work under Windows NT.
To run Epromer from Windows 3.x, double-click the Epromer icon in the ST6 Tools group.
To run Epromer from Windows 95, click Start, Programs, ST6 Tools, then Epromer.
For instructions on how to operate Epromer, click Help in the Epromer main window.
Doc ID 5112 Rev 2
35/45
Programming ST6 microcontrollers
7.3
UM0002
In-circuit programming
You can perform in-circuit programming of ST6252x, ST6253x, ST6255x, ST6260x,
ST6262x, ST6263x or ST6265x OTP/EPROM microcontrollers using your own board,
connected to the starter kit board via the connector J1 (marked 1 on the Starter kit board
diagram on page 13).
7.3.1
Application board connections
The following paragraphs specify the connection requirements between your application
board and the starter kit board.
The application board must have a suitable 16-way connector (8x2 header HE10) to be
connected via a 16-way cable to connector J1 (marked 1 on the Starter kit board diagram on
page 13) on the starter kit board.
The following table shows the required pin connections:
Table 10.
Pin connections
ST626x/5x
Connector
PB3
Connected to P1 Pin 7
OSCin
PB2
RESET
VPP/TM
VDD
VSS
Pin 1
Pin 3
Pin 5
Pin 7
Pin 9
Pin 13
Pin 14, 16
Pin 2, 4, 6, 8, 10
VDD
Use of the VDD connection is optional, depending on whether the application board supply
can or cannot be disconnected. If the application board supply is disconnected, you can
supply it through pins 14 an 16 of the connector, as long as the total load current does not
exceed 100 mA, and the capacitive load is less than 50 mF.
If the application board has its own power supply, its voltage must be set to 5V, so that logic
levels are compatible with those of the starter kit board.
OSCin
Synchronises the programming operations using a clock generated by the programming
tool. OSCin is located on the application board, and must be directly connected to Pin 5 on
the 16- way connector. No isolation is needed as long as a quartz crystal or ceramic
resonator is used in the application. If an external clock generator is used in the application,
it must be disconnected during in-circuit programming.
RESET
Controls the programming mode entry. To prevent signal level contention, RESET must be
directly connected to Pin 9 on the 16-way connector, and must be isolated from other nodes
on the application board. Any direct connection to VDD, VSS or an output must be avoided.
36/45
Doc ID 5112 Rev 2
UM0002
Programming ST6 microcontrollers
This pin can be connected to a CMOS input, a 2 KΩ pull-up, a 10 KOhm pull-down or left
open (Internal pull-up). The capacitive load of the RESET pin should not exceed 1 mF.
Pins 1 and 7 on the 16-way connector are used to establish communications between the
programming tool and the microcontroller.
To prevent signal-level contention, Pins 1 and 7 must be directly connected to PB3 and PB2
on the 16-way connector, and must be isolated from other nodes on the application board.
Any direct connection to VDD, GND or an output must be avoided. These pins may be
connected to a CMOS input, a 2 KΩ pull-up, a 10 KOhm pull-down or left open (Internal pullup).
If pin 3 on the 16-pin connector is connected to the target device, the same applies.
Connection to pin 3 is not necessary if a high voltage level is guaranteed by the board
design.
Some I/O pins are not connected to the 16-way connector and must be set to a high level
during programming. This is normally achieved by the RESET signal sent by the
programming tool through the 16-way cable, setting the I/O pins as inputs with an internal
300 KΩ pull-up. To keep these I/O lines high, direct connection of these pins to GND or to
any other signal at low level (even temporarily) must be avoided. Only connections to
another CMOS input, to an external pull-up or a 10 MΩ pull-down is allowed.
The signals on PB3 and PB5 (if not directly biased through pin 3 of the 16-way connector)
must be kept at a high voltage level.
The Vpp/TM pin must not be directly connected to GND/VSS on the application board, to
avoid any conflict with the programming voltage provided by the programming tool via pin 13
on the connector. This pin should be pulled down by a resistor with minimum value of 10
KΩ. You must add a 100 nF ceramic capacitor between Vpp/Test and VSS.
Doc ID 5112 Rev 2
37/45
Programming ST6 microcontrollers
7.4
UM0002
Setting up the starter kit board for in-circuit programming
1.
Power down the starter kit board.
2.
Set the DEVICE jumpers W10 to W13 (marked 3 on the Starter kit board diagram on
page 13) to ST6265x, as shown in the following diagram:
Figure 25. Device jumpers setup
ST6265x
D
E
V
I
W
W
10
13
C
E
ST6260/62
3.
MS31624V1
Select the PROG mode using the jumpers marked W1 and W2 (marked 18 on the
Starter kit board diagram on page 13), as shown in the diagram below:
Figure 26. User mode selection
USER
M
O
D
W
W
1
2
E
PROG
MS31625V1
4.
Connect the Parallel port P1 on the starter kit board to a spare parallel port on your PC
using the cable provided with the starter kit.
5.
Connect your application board to the connector J1 (marked 1 on the Starter kit board
diagram on page 13) on the starter kit board.
6.
Power up your starter kit board.
You can now use Epromer to program the microcontroller that is on your own board.
Note:
38/45
Epromer does not work under Windows NT.
To run Epromer from Windows 3.x, double-click the Epromer icon in the ST6 Tools group.
To run Epromer from Windows 95, click Start, Programs, ST6 Tools, then Epromer.
For instructions on how to operate Epromer, click Help in the Epromer main window.
If your application board is not powered by the starter kit, you must connect it to a 5V DC
power supply before you start programming.
Doc ID 5112 Rev 2
UM0002
8
Running your own program on the starter kit board
Running your own program on the starter kit board
You can run your own programs on the starter kit board, using any of the starter kit
resources:
Note:
●
8 Mhz oscillator
●
10 Kohm trimmer
●
Audio Transducer
●
+ and - buttons
●
Thermistor bridge
●
Heater resistor control circuit
●
Five LED level indicator
You can only run applications on the starter kit board using ST6265x microcontrollers. If
your application is designed for another microcontroller, you must change its port definitions
to match those of the ST6265x.
You can also use your own hardware resource by connecting it to the connector J2 (see
Connecting external resources to the starter kit board on page 26).
To run your own program on the starter kit board:
1.
Power down the starter kit board.
2.
Program the ST6265x with the application you want to run following the instructions
given in Programming ST6 microcontrollers on page 32.
3.
Set the DEVICE jumpers W10 to W13 (marked 3 on the Starter kit board diagram on
page 13) to ST6265x, as shown in the following diagram:
Figure 27. Device jumpers setup
ST6265x
D
E
V W
W
10
13
I
C
E
ST6260/62
MS31626V1
4.
Select USER mode using the jumpers marked W1 and W2 (marked 19 on the Starter
kit board diagram on page 13), as shown in the diagram below:
Doc ID 5112 Rev 2
39/45
Running your own program on the starter kit board
UM0002
Figure 28. User mode selection
USER
M
O W
W
1
2
D
E
PROG
40/45
MS31627V1
5.
Disconnect the cable from the parallel port (P1) connection, if it is connected
6.
Disconnect the demonstration program selector by removing the jumper marked PA3 in
the Demonstration Selector circuit (marked 12 in the Starter kit board diagram on
page 13)
7.
If you are using your own hardware resources connected to J2 (marked 17 on the
Starter kit board diagram on page 13), disconnect any starter kit board resources that
use the same pins, following the instructions given in Connecting external resources to
the starter kit board on page 26.
8.
Power up the starter kit board.
Doc ID 5112 Rev 2
UM0002
Hardware information
9
Hardware information
9.1
Parts list
Table 11.
Board resources and connections
Part
Device
Part
Device
BZ1
BUZZER
R15
680Ω
C1,C2,C4,C5,C6,C7, C8, C9,
C10
100pF
R16
750Ω
C3
4.7MF
R17
820Ω
C11,C12,C13,C16,
C17,C18,C22
10MF
R18
CTN 4,7K
C14,C26
1.0nF
RS1, RS4
150Ω SIL8 4R
C15,C19,C20,C21, C24, C27,
C28, CD21,CD22,CD23,
CD24, CD25, CD26, CD27,
CD28, CD37
100nF
RS2
100KΩ SIL10 9R
C23
22MF-25V
RS3
390Ω SIL10 9R
C25
1.0MF
RS5
3.3KΩ SIL8 4R
D1
BYV 10-20 SCHO
RS6
10KΩ SIL10 9R
D2
1N4004
RV1
10KΩ Trimmer
D3,D4,D5
1N4148
SW1,SW2,SW3
SW-PUSH
F1
Not connected
T1,T2
BC547B-NPN-45V
G1
SOLDER BRIDGE
T3
BC557B-PNP-45V
J1
HE10-16DM
T4
BD236-PNP-60V
J3
JACK
TP1,TP3
MW1X1C
J4
2nd Supply conn.
U1,U6
74LS244
L1
2,2?H
U2
4LS125
LD1,LD2,LD3,LD4, LD5
LED-RED-RECT
U3
ST6265x
LD6
LED-RED-5MM
U4
DIL-16 ZIF
P1
SUBD25
U5
74LS04
P2
SUBD9
U7, U10
78L05
R1
47Ω
U8
LM7805
R2,R5,R8,R12
4.7KΩ
U9
MAX232
R3,R4,R7,R14
10KΩ
W1,W2,W10,W11,W12,W13
MW3X1C
560Ω
W4,W5,W6,W7,W8,W15,
W16, W17, W18, W19, W20,
W21,W22,W23, W24, W25, MW2X1C
W26,W27,W28,W29, W30,
W31
R6
Doc ID 5112 Rev 2
41/45
Hardware information
Table 11.
UM0002
Board resources and connections (continued)
Part
Device
Part
Device
R9,R20
1.2KΩ
W9
MW2X14C
R10
3.3Ω
XT1
8MHZ-OSC
R11
Not connected
Z1
DZ 8.2V
R13,R19
1KΩ
9.2
Starter kit board Schematic
See next page
42/45
Doc ID 5112 Rev 2
2
1
2
1
1.0NF
3
1
SELF_MC_0
C14
L1
1N4004
22MF-EA-25V
C23 +
GND
GND
4
2
GND
C26
1.0NF
1
1
1
U5A
74LS04
10K
R3
2
2 1
3.3
R10
1N4148
D3
1N4148
D4
1
VDD
RS5B
4 D0
2 D1
2
PROG
MW3X1C
1
1
2
2
GND
2
T1
1N4148
D5
GND
R5
4.7K
T4
BD236-PNP-60V
2 1
2
U7 78L05
1
3
I
O
GND
C19
( TO92)
100NF
GND
U8 LM7805
3
1
I
O
GND
C20
( TO220)
100NF
C27
GND
100NF 1
4.7K
Z1
GND
U10 78L05
1
3
I
O
GND
( TO92)
R11
2
SIM/
1
19
GND
100NF
GND
100NF
CD22
23
GND
GND
GND
100NF
CD26
GND
2. 54
100NF
CD25
j u mp e r s
100NF
CD24
F e ma l e
100NF
CD23
GND
100NF
CD27
GND
100NF
CD28
GND
100NF
CD37
VDD
VCC
VCC
VDD
VDD
VDD
VDD
VDD
VDD
CD21
( ST6262B)
( LS04)
SW3
D1
R8
4.7K
SDOP
SOC23 ( NMI - 65B)
SOC14 ( PA2- 65B)
SOC13 ( PA1- 65B)
VDD
GND
10K-SIL10-9R-B
HE10-16DM
1
3
5
7
9
11
13
15
2
4
6
8
10
12
14
16
SOC22
( RESET/ - 65B)
VDD
J1
3
2
1
USER
GND
PROG
VPP
13
U5F
74LS04
12
11
Not Used
I N- SI TU PROGRAMMI NG CONNECTOR
GND
VPP
SOC5
TM2
SOC20
SOC4
SOC22
RS6
1
2
3
1
2
3
SOC13
( VDD- 60B)
W11
MW3X1C
SOC14
( GND- 60B)
SOC11
( VDD- 65B)
W13
MW3X1C
SOC12
( GND- 65B)
GND
4
SOC1
SOC2
74LS04
U5E
10
VDD
SOC13
SOC14
1
2
4
6
8
10
12
14
16
18
20
22
24
26
28
2
W3
2
MW2X14C
1
3
5
7
9
11
13
15
17
19
21
23
25
27
W9
W14
USER/
2
9
U5D
74LS04
GND
8
VDD
SOC28
SOC27
SOC26
SOC25
SOC24
SOC23
SOC22
SOC21
SOC20
SOC19
SOC18
SOC17
SOC16
SOC15
GND
C2
100PF
47
R1
SOC20
W12
MW3X1C
SOC3
( VPP- 65B)
3
2
1
USER' S I/ Os CONNECTOR
J2
1
XT1
8MHZ-OSC
8MHZ OSCI LLATOR
GND
1
1
EMC_F
31
F1
G1
3
2
1
SOC28
SOC27
SOC26
SOC25
SOC24
SOC23
SOC22
SOC21
SOC20
SOC19
SOC18
SOC17
SOC16
SOC15
1
SOC9
( ARTI MOUT- 65B)
SOC28
SOC26
SOC27
SOC25
+
LD3
W22
W21
W17
W20
W19
GND
TP1
MW1X1C
1
1
1
1
2
2
2
2
2
C3
2
1
A
1
5
2
GND
TP3
MW1X1C
2
2
2
2
1
1
1
1
1
W4
W5
W6
W7
W8
GND
2
2
SOC8
( PB6- 65B)
2
C16
2
4
SW2
1
10MF
C18
10MF
1
1
-
2
2
2
2
2
GND
TP2
W23
VDD
12
9
11
10
4
5
1
3
GND
1
5
2
1
MAX232
RD1
RD2
TD1
TD2
C2+
C2-
C1+
C1-
2
INP1
INP2
OUT1
OUT2
V-
V+
2
C12
13
8
14
7
6
2
1
1
+
1
RV1
GND
SOC15
( PA3- 65B)
1
6
2
7
3
8
4
9
5
1
P2
GND
RS232 SUBD- 9 CONNECTOR
R4
10K
2
2
2
2
2
2
2
VOLTAGE ADJUST
W31
W30
W29
W28
W27
W26
W25
10K-RV
TX
CTS
RX
RTS
GND
GND
VDD
C22
10MF
1
1.2K 2
R20 1
3
1
1
2
1
1
1
1K
W18
VDD
R19 1
SOC16
( PA4- 65B)
SOC17
( PA5- 65B)
VDD
DEMO ROUTI NES SELECTOR
750
2
2
THERMI STOR CI RCUI T
820
2
2
2
W24
R18
THERMISTOR_0
1
4.7K
R12
SOC20 ( RESET 60B- 62B)
SOC19 ( OSCOUT 60B- 62B)
SOC18 ( OSCI N 60B- 62B)
R17 1
680
R15 1
2
GND
1
16
15
14
13
12
11
10
9
S OC K E T
R16 1
10K
R14 1
GND
10MF
C17
C28
100NF
10MF
U9
2
SOC6
( PB4- 65B)
SOC5
( PB3- 65B)
SOC4
( PB2- 65B)
SOC2
( PB1- 65B)
SOC1
( PB0- 65B)
MC U
PB0
PC2/Ain
Vpp/TEST
PC3/Ain
PB2
NMI
PB3
RESET
PB6/ARTIMin OSCout
PB7/ARTIMout OSCin
VDD
PA5/Ain
VSS
PA4/Ain
ST62E62B-DIL16
MW1X1C
B
4.7MF-CT-35V
1
4.7K
R2
BUZZER
BZ1
SOC9
GND
PUSH- BUTTONS
LED-RED-RECT
LD1
LD2
" +" and " - "
2 1
3 1
5 1
6 1
LD4
LD5
RS232 I NTERFACE
CI RCU
IT
2
4
SW1
1
GND
2
2
C13
+
VDD
1
2
3
4
5
6
7
8
U4
S T 6 2 x 6 2 B
( Pul l up 60B- 62B) SOC5
( VPP/ TM 60B- 62B) SOC7
( SDOP- 60B- 62B)
SOC8
( TROMI N- 60B- 62B) SOC9
LEDs BAR- GRAPH I NDI CATOR
8 1
390-SIL10-9R
1 RS3A
1 RS3B
1 RS3D
1 RS3E
1 RS3G
SOC7
( PB5- 65B)
VDD
GND
W15
W16
RCI NTEGRATOR CI RCU
IT
D/ A CONVERTI ON
1
SOC24
( SCK- 65B)
AUDI O TRANSDUC
ER CI RCUI T
28
27
26
25
24
23
22
21
20
19
18
17
16
15
S O C K E T
PC0/Ain
PC1/Ain
PC2/Sin/Ain
PC3/Sout/Ain
PC4/SCK/Ain
NMI
RESET
OSCout
OSCin
PA7/Ain
PA6/Ain
PA5/Ain
PA4/Ain
PA3/Ain
MC U
ST62E65B-DIL28
U3
PB0
PB1
Vpp/TEST
PB2
PB3
PB4
PB5
PB6/ARTIMin
PB7/ARTIMout
PA0
VDD
VSS
PA1/Ain
PA2/Ain
SOC7
( VPP- 60B- 62B)
1
2
3
4
5
6
7
8
9
10
11
12
13
14
S T 6 2 x 6 0 B / x 6 5 B
SOC1
SOC2
SOC3
SOC4
SOC5
SOC6
SOC7
SOC8
SOC9
SOC10
SOC11
SOC12
SOC13
SOC14
74LS125
3
U2B
SOC4
SOC5
SOC6
SOC7
SOC8
SOC9
SOC10
GND
3
2
1
' 60B- 62B/ ' 65B PROGRAMMI NG
VOLTAGE SELECTOR
W1
18
16
14
12
9
7
5
3
R13
1K
1
2
3
1
2
3
' 60B/ ' 65B
SUPPLI ES SELECTOR
OSCIN ( OSCI N- 65B)
SOC22 ( RESET/ - 65B)
SOC5 ( TROMI N- 65B)
SDOP
SOC9 ( TROMI N- 60B- 62B)
SDOP
SOC18 ( OSCI N- 60B- 62B)
OSCIN ( RESET/ - 60B- 62B)
GND
10MF-CT-16V
18
16
14
12
9
7
5
3
2 2
T2
100NF
1MF-ER-63V
1
74LS244
2
VDD
C11
GND
VCC
BC557B-PNP-45V
1
3
T3
C24
560
100NF
R6
1
GND
1Y1
1Y2
1Y3
1Y4
2Y1
2Y2
2Y3
2Y4
100NF
C15
VCC
VDD
C21
4
2
SW-PUSH
Reset Push
( XT1)
5
1
C25
2
1G
2G
( DEMOS)
SOC5 ( PB0- 60B- 62B)
SOC1 ( PB0- 65B)
SOC19 ( OSCOUT- 60B- 62B)
SOC21 ( OSCOUT- 65B)
GND
GND
1A1
1A2
1A3
1A4
2A1
2A2
2A3
2A4
U1
( J3)
U2C
74LS125
8
74LS04
2
4
6
8
11
13
15
17
( J2)
U2D
74LS125
11
9
3
( PA0- 65B) SOC10
PPINT
OSCPI
U5B
TROMIN
4
RESETP/
( LS125)
12
3
RESETP
2
1
1
2
( LS244)
( Di s. VPP)
( Di s. RESET/ )
( En. VDD)
U2A
10
74LS125
9
8
SIM/
PG60B/_PG62B/
7
6
PG65B/
5
4
3
SOC22
2
( Reset - 65B)
1
2
3
2
( LS244)
3.3K-SIL8-4R
1 RS5A
5 RS5C 6 D4
3
2
1
2
3
100K-SIL10-9R-B
RS2
REM/
USER/
USER
W2
1
2
1
W10
2
MW3X1C
3
PG60B/_PG62B/
1
2
3
13
GND
10
SUBD25C-F-COUDE
C7
150-SIL8-4R
DZ 8.2V
1
P1
100PF
14
C8
2
1 RS4A 2
U5C
GND
ENVDD
D0
74LS04
100PF
15
R7
ENVPP
3
3 RS4B 4
5
6
1
D1
16
10K
OSCPI
4
5 RS4C 6
D2
17
C9
TROMIN
5
7 RS4D 8
D3
18
100PF
C10
6
1 RS1A 2
RESETP
D4
100PF
19
C1
7
3 RS1B 4
GND
TM2
D5
U6
100PF
2
20
OSCPI
1Y1
C4
8
7 RS1D 8
GND
4 1A1
D6
RESETP/
PPINT
1Y2
6 1A2
21
TROMIN
100PF
1Y3
C6
9
GND
8 1A3
( SDOP- 65B) SOC4
1Y4
100PF
22
11 1A4
REM/
TROMIN
2Y1
13 2A1
10
GND
( SDOP- 60B- 62B) SOC8
2Y2
15 2A2
23
GND
OSCPI
2Y3
SDOP
11
5 RS1C 6
RESETP/ 17 2A3
2Y4
2A4
24
C5
PG65B/
1
12
150-SIL8-4R
1G
100PF
PG60B/_PG62B/ 19
25
2G
13
PG65B/
74LS244
PC- AT I NTERFACE
CONNECTOR
POWER SUPPLY
ED102
J4
JACK
2
3
1
D2
2
1
J3
LED-RED-5MM
LD6
1
1
1
1
2
1
1
1
2
1
2
1
2
2
2
1.2K
2 2
1
3
1
3 2
1
2
2
2
1
1
2
1
2
R9
1
BC547B-NPN-45V
1
1
2
20
VDD
GND
10
20
VDD
GND
10
BC547B-NPN-45V
2 2
1
3
1 2
2
3
1
1
2
2
2
1
1
2
1
2
1
1
2
2
BYV 10-20 SCHO
2
3
4
5
6
7
8
9
10
6
5
3
FOUT
1
2
10MF-CT-16V
GND
1
2
3
1
2
2
1
2
1
2
1
2
2
2
1
2
1
2
1
+
2
+
1
1
3
1
2
+
2
2
+
Doc ID 5112 Rev 2
+
1
+
+
2
UM0002
Hardware information
Figure 29. Starter kit board schematic
43/45
Revision history
10
UM0002
Revision history
Table 12.
44/45
Document revision history
Date
Revision
Changes
Feb-1998
1
Initial release.
19-Feb-2013
2
Reformatted the entire document.
Updated some part number names.
Doc ID 5112 Rev 2
UM0002
Please Read Carefully:
Information in this document is provided solely in connection with ST products. STMicroelectronics NV and its subsidiaries (“ST”) reserve the
right to make changes, corrections, modifications or improvements, to this document, and the products and services described herein at any
time, without notice.
All ST products are sold pursuant to ST’s terms and conditions of sale.
Purchasers are solely responsible for the choice, selection and use of the ST products and services described herein, and ST assumes no
liability whatsoever relating to the choice, selection or use of the ST products and services described herein.
No license, express or implied, by estoppel or otherwise, to any intellectual property rights is granted under this document. If any part of this
document refers to any third party products or services it shall not be deemed a license grant by ST for the use of such third party products
or services, or any intellectual property contained therein or considered as a warranty covering the use in any manner whatsoever of such
third party products or services or any intellectual property contained therein.
UNLESS OTHERWISE SET FORTH IN ST’S TERMS AND CONDITIONS OF SALE ST DISCLAIMS ANY EXPRESS OR IMPLIED
WARRANTY WITH RESPECT TO THE USE AND/OR SALE OF ST PRODUCTS INCLUDING WITHOUT LIMITATION IMPLIED
WARRANTIES OF MERCHANTABILITY, FITNESS FOR A PARTICULAR PURPOSE (AND THEIR EQUIVALENTS UNDER THE LAWS
OF ANY JURISDICTION), OR INFRINGEMENT OF ANY PATENT, COPYRIGHT OR OTHER INTELLECTUAL PROPERTY RIGHT.
UNLESS EXPRESSLY APPROVED IN WRITING BY TWO AUTHORIZED ST REPRESENTATIVES, ST PRODUCTS ARE NOT
RECOMMENDED, AUTHORIZED OR WARRANTED FOR USE IN MILITARY, AIR CRAFT, SPACE, LIFE SAVING, OR LIFE SUSTAINING
APPLICATIONS, NOR IN PRODUCTS OR SYSTEMS WHERE FAILURE OR MALFUNCTION MAY RESULT IN PERSONAL INJURY,
DEATH, OR SEVERE PROPERTY OR ENVIRONMENTAL DAMAGE. ST PRODUCTS WHICH ARE NOT SPECIFIED AS "AUTOMOTIVE
GRADE" MAY ONLY BE USED IN AUTOMOTIVE APPLICATIONS AT USER’S OWN RISK.
Resale of ST products with provisions different from the statements and/or technical features set forth in this document shall immediately void
any warranty granted by ST for the ST product or service described herein and shall not create or extend in any manner whatsoever, any
liability of ST.
ST and the ST logo are trademarks or registered trademarks of ST in various countries.
Information in this document supersedes and replaces all information previously supplied.
The ST logo is a registered trademark of STMicroelectronics. All other names are the property of their respective owners.
© 2013 STMicroelectronics - All rights reserved
STMicroelectronics group of companies
Australia - Belgium - Brazil - Canada - China - Czech Republic - Finland - France - Germany - Hong Kong - India - Israel - Italy - Japan Malaysia - Malta - Morocco - Philippines - Singapore - Spain - Sweden - Switzerland - United Kingdom - United States of America
www.st.com
Doc ID 5112 Rev 2
45/45