1
REMOTE HOME SURVEILLANCE USING ANDROID – PLATFORM PHONE
THROUGH TCP / IP
MUHAMMAD AFFANDY BIN AZMAN
UNIVERSITI TEKNOLOGI MALAYSIA
PSZ 19:16 (Pind. 1/07)
UNIVERSITI TEKNOLOGI MALAYSIA
DECLARATION OF THESIS / UNDERGRADUATE PROJECT PAPER AND COPYRIGHT
\
Author’s full name :
Muhammad Affandy Bin Azman
Date of birth
:
24 May 1987
Title
:
Remote Home Surveillance Using Android - Platform
Phone Through TCP / IP
Academic Session:
2010/2011
I declare that this thesis is classified as :
√
CONFIDENTIAL
(Contains confidential information under the Official Secret
Act 1972)*
RESTRICTED
(Contains restricted information as specified by the
organisation where research was done)*
OPEN ACCESS
I agree that my thesis to be published as online open access
(full text)
I acknowledged that Universiti Teknologi Malaysia reserves the right as follows :
1. The thesis is the property of Universiti Teknologi Malaysia.
2. The Library of Universiti Teknologi Malaysia has the right to make copies for the purpose
of research only.
3. The Library has the right to make copies of the thesis for academic exchange.
Certified by :
SIGNATURE
870524-01-5457
Dr. Azli Yahya
(NEW IC NO. /PASSPORT NO.)
NAME OF SUPERVISOR
Date :
NOTES :
SIGNATURE OF SUPERVISOR
May 2011
*
Date :
May2011
If the thesis is CONFIDENTIAL or RESTRICTED, please attach with the letter from
the organisation with period and reasons for confidentiality or restriction.
i
REMOTE HOME SURVEILLANCE USING ANDROID – PLATFORM PHONE
THROUGH TCP/IP
MUHAMMAD AFFANDY BIN AZMAN
Submitted to the Faculty of Electrical Engineering
In partial fulfillment of the requirement for the degree of
Bachelor in Engineering (Computer)
Faculty of Electrical Engineering
Universiti Teknologi Malaysia
May 2011
ii
“I declare that this work as the product of my own effort with the exception of excerpts
cited from other works of which the sources were duly noted.”
Signature : …………………………….
Name of Author : Muhammad Affandy Bin Azman
Date : ………………………………….
iii
For my parent, teachers, and friends.
And for the readers, may you gain inspirations as I did in seeking knowledge…
iv
ACKNOWLEDGEMENT
My greatest gratitude to ALLAH, which by the god’ permission I could
complete my Projek Sarjana Muda (PSM) in the time planned. My highest thanks and
appreciation to my supervisor, Dr. Azli Yahya for the guidance given throughout the
progress of this project. Also to my parent, Azman bin Abdul Aziz and Wedanengsi
Bte. Hj. Bisan, and my brothers that had been so understanding and gave me their
support.
Without exception, I also want to express my appreciation and thanks to all my
fellow friends that had helped me during the project. Nur Zatul Akmar, Raja Izhsan,
Mohd Husaini, Muhammad Nur Akmal, all other SEC students and all other friends and
everyone that have helped me in the project directly or indirectly. Your ideas,
suggestion, comments and critics had helped me during this project.
Last but not least, I also want to express my thanks to Universiti Teknologi
Malaysia especially Faculty of Electrical Engineering that accepted me as a student and
give me a chance to show myself by doing the PSM. Also you that been reading this
thesis, your interest to read my thesis is my greatest pleasure.
May ALLAH blesses you all.
v
ABSTRACT
The safety of our home and our family should be a priority nowadays. With all
the crime and accidents around us, it is important to equip ourselves with home security
to ensure the safety of our home. However, security system alone isn’t enough to ease
our mind. Being able to monitor our home remotely from anywhere is a must feature to
relieve the curiosity and worry regarding our home. This project is concerned for this
kind of situation and creating this program is easy by just purchasing an IP camera and
the rich features of open source Android –platform phone. Just by using open source
tools like JSF programming and Android client programming, one can create a software
with ease with only sufficient knowledge about networking.
vi
ABSTRAK
Dewasa ini, keselamatan kediaman dan keluarga tersayang haruslah diutamakan.
Dengan segala jenis jenayah dan kemalangan yang sering berlaku di sana - sini, kita
haruslah melengkapkan diri dengan sistem yang dapat memastikan keselamatan
kediaman kita. Walaubagaimanapun, sistem keselamatan sahaja tidak memadai untuk
membuatkan fikiran kita tenang. Dengan kebolehan untuk mengawasi/melihat
kediaman kita dari mana – mana merupakan satu ciri yang perlu ada untuk
menghilangkan rasa gelisah dan risau berkenaan kediaman kita. Projek ini adalah
berkaitan dengan situasi yg diterangkan dan membina program ini amat mudah dengan
hanya membeli sebuah kamera IP bersama dengan telefon bimbit Android yang serba
boleh. Hanya dengan menggunakan peralatan dari sumber yang terbuka seperti
pengaturcaraan JSF dan pengaturcaraan klien Android, seseorang mampu membina
perisian ini dengan mudah, dengan hanya memiliki sedikit ilmu berkaitan rangkaian.
vii
TABLE OF CONTENTS
CHAPTER
TITLE
PAGE
DECLARATION
ii
DEDICATION
iii
ACKNOWLEDGEMENT
iv
ABSTRACT
v
ABSTRAK
vi
TABLE OF CONTENTS
vii
LIST OF FIGURES
viii
LIST OF APPENDICES
ix
1
INTRODUCTION
1.1
Background
1.2
Objective
1.3
Scope
1.4
Outline of thesis
1.5
Summary of work
1
1
2
2
3
3
2
THEORY AND LITERATURE REVIEW
2.1
Introduction
2.2
Android
2.2.1 Android Architecture
2.2.2 Android Applications
2.2.3 Android Libraries
2.3
IP camera
2.3.1 IP camera HTTP command
2.4
DDNS
5
5
5
6
6
7
8
9
9
3
METHODOLOGY
3.1
Introduction
3.1.1 Conceptual Architecture
3.1.2 System Architecture
3.1.3 Software Architecture
3.2
NetBeans
3.2.1 Java web application (JSF) using NetBeans
3.3
Eclipse
3.3.1 Android Programming using Eclipse
11
11
11
12
12
13
13
19
19
viii
3.4
3.5
Server – Router Port-Forwarding
Using DDNS for Dynamic IP
20
20
4
RESULT AND DISCUSSION
4.1
Introduction
4.2
Display
4.2.1 Main Client Interface (Login)
4.2.2 Home Screen
4.2.3 Live View
4.3
Image Captures
4.4
Target Deployment
21
21
21
21
22
23
24
25
5
CONCLUSION AND RECOMMENDATION
5.1
Conclusion
5.2
Problems
5.3
Recommendation
27
27
28
28
REFERENCES
30
APPENDICES
Appendix A: PSM 1 Gantt Chart
32
Appendix B: PSM 2 Gantt Chart
34
Appendix C: JSF Codes
36
Appendix D: Android Programming
42
Appendix E: Sample IP Camera Command
44
Appendix F: User Manual
51
Appendix G: Video Demonstration
57
Appendix H: Technical Report
58
ix
LIST OF FIGURES
Figures no.
Title
Page
1.5
Project Flow Chart
4
2.2.1
Android Architecture
6
3.1.1.1
Conceptual Architecture
11
3.1.2.1
System Architecture
12
3.1.3.1
Software Architecture
12
3.2.2.1
Server Flowchart
18
4.2.1.1
Main Client Interface (Login)
21
4.2.1.2
Main Client Interface (Login) Mobile
21
4.2.2.1
Home Screen
22
4.2.2.2
Home Screen Mobile
23
4.2.3.1
Live View
23
4.2.3.2
Live View Mobile
24
4.3.1
Image Interval
25
4.4.1
House Overview
25
4.4.2
House (Indoor)
26
x
LIST OF ABBREVIATION
TCP/IP
Transmission Control Protocol/Internet Protocol
JSF
Java Server Faces
HTTP
Hypertext Transfer Protocol
DDNS
Dynamic Domain Name System
SMS
Short Messaging Service
IDE
Integrated Development Environment
ADB
Android Debug Bridge
BSD
Berkeley Software Distribution
USB
Universal Serial Bus
JSP
Java Server Pages
RHS
Remote Home Surveillance
3G
Third Generation Mobile Telecommunications
DSL
Digital Subscriber Line
SDK
Software Development Kit
UI
User Interface
ISP
Internet Service Provider
GPRS
General Packet Radio Service
xi
LIST OF APPENDICES
APPENDICES
TITLE
PAGE
A
PSM 1Gantt Chart
32
B
PSM 2 Gantt Chart
34
C
JSF Codes
36
D
Android Programming
42
E
Sample IP Camera Command
44
F
User Manual
51
G
Video Demonstration
57
H
Technical Report
58
1
CHAPTER 1
INTRODUCTION
1.1
Background
Nowadays, our neighborhood isn’t as safe as it was before. Crime and accidents
happen almost all the time. The safety of our family and homes should be prioritized.
One of the most reliable ways in protecting ourselves and our family is to equip our
home with a surveillance system that will allow us to monitor the situation of certain
key places. By equipping our home with a surveillance system we can prevent any
burglary, accidents, injury that may happen which is very essential in making our home
safe.
In order to use the surveillance system more effectively, the placement and the
position of the camera is very vital. The cameras should be placed in strategic locations
around the perimeters of our house. It is also important to be able to view our home
remotely wherever we are. Whether we are taking a family trip to somewhere far, going
back to our hometown or even in the office, we can have the calm of heart by assuring
there is nothing wrong.
2
Android is an open-source operating system for a mobile phone which have rich
features in term of applications. By creating a remote home surveillance system by
using Android-platform phone, it can be assured that every features needed in the home
surveillance is possible.
A computer in our home will acts as a server and also to communicate with the
camera. The server and camera which are connected in a Local Area Network through a
router can be accessed remotely from outside using TCP/IP.
1.2
Objective
The objective that had been stated in finishing this project is:
To design a system where users are able to view their homes remotely from an
Android – platform phone through a TCP / IP network.
1.3
Scope
The scope of work for this project was to research and study on Android app
programming, Java Web Application Server (JSF), and the IP camera protocol (HTTP).
The Surveillance camera type used is an IP camera connected to a router. The
surveillance client is Android-Platform Phone where the application is running on
JAVA. The surveillance system was deployed in a home.
3
1.4
Outline of Thesis
This thesis is divided into five chapters. The first chapter provides an overview
of the project, such as the introduction of the project itself, problem statements as well
as the main objective.
Chapter 2 discusses more on literature reviews and theories research that had
been done and a quick review on Android Operating System by Google, the JAVA Web
Application Server (JSF), and the importance of surveillance camera to monitor our
home.
Methodology and analysis are explained and elaborated in Chapter 3. The
preparation to develop the server and the client along with the network connection
between those two are described in this chapter. The flow charts and certain portion of
the codes and the descriptions were drawn and provided also in this chapter.
Chapter 4 is filled with result and discussions. Screenshots of the interface from
the Android Phone itself will be provided along with the actual snapshot of the picture
generated from the camera.
Last but not least, Chapter 5 discusses the conclusion of this project and other
future works that can be done to tremendously improve this project along with the
references
1.5
Summary of Work
The overall project works were graphically summarized in the flow chart shown
in Figure 1.5.
START
4
Preliminary Investigation
Researching
Obtaining Components
Server Coding
Error?
YES
Debug
NO
App Coding
Error?
YES
Debug
NO
Integrating S/W & H/W
Error?
YES
Debug
NO
Report Writing
END
Figure 1.5: Project Flow Chart
5
CHAPTER 2
THEORY AND LITERATURE REVIEW
2.1
Introduction
This chapter discusses on the terms that are not familiar and the resources used
in this project. Unfamiliar terms such as Android, DDNS, IP Camera and JSF and for
the resources that were used is JAVA language and Glassfish server.
2.2
Android
Android is an open-source operating system for mobile phone which is
developed by Google and is based upon Linux kernel and GNU software. Google
provides developers an open development platform, which allows the developers the
ability to create extremely rich and innovative applications. Developers are free to gain
access to the device hardware, location information, run background services/multitasking, set alarms, adds notifications to the status bar and much more. [1]
6
2.2.1
Android Architecture
Figure 2.2.1: Android Architecture [1]
2.2.2
Applications
The Android system itself includes several applications such as SMS, Call,
Browser, Calendars, and others. Android applications are written using JAVA. There
are several IDE which integrates with Android programming such as Eclipse with ADB
features. The feature enables the developer to connect with their Android phone (which
debugging mode is enabled) to instantly debug and run the application on the phone. [1]
7
The services and system that is underlying all the applications in Android
includes: [1]
1. Views – a large resource used to build an application which includes lists,
buttons, text boxes and embeddable web browser.
2. Content Providers – enabling application to access data from other
applications in the phone such as Contacts.
3. Resource Manager – provides access to non-code resources.
4. Notification Manager – provides notifications and alerts in the status bar.
5. Activity Manager – manages the lifecycle of applications such ad multitasking.
2.2.3
Android Libraries
Android system uses a set of C/C++ libraries. These enable developers to
indulge more on the Android application framework. Several core libraries are listed
below: [1]
1. System C library – BSD-derived implementation of standard C
system library or also known as libc, which is specifically tuned for
embedded Linux devices.
2. Media Libraries – PacketVideo’OpenCore – based; which support
playback and recording of many general audio and video formats
such as MPEG4, H.264, MP3, AAC, AMR. It can also view static
image files such as JPG and PNG.
3. Surface Manager – access to display subsystem of Android devices
and composites 2D and 3D graphic layer perfectly from multiple
applications.
4. LivWebCore – a web browser engine which powers the Android’s
browser and an embeddable web view.
8
5. SGL – 2D graphics engine
6. 3D libraries – and implementation based on OpenGL ES 1.0 APIs;
which use either hardware 3D acceleration if the devices is available
or the included highly optimized 3D software rasterizer.
7. FreeType – vector font and bitmap rendering
8. SQLite – a relational database engine available to all applications.
2.3
IP camera
IP camera or also known as Internet Protocol camera is a digital video camera
which is commonly used for surveillance. The camera send and receive data via
network unlike a closed circuit television (CCTV) camera that transfer data via cables.
This is different from webcam which use the USB connection to the computer which
restrains in terms of placement for surveillance purposes. There are wired and wireless
IP cameras, both with the same functionality but the wireless win in terms of portability
to place the cameras in strategic locations. [2]
There are two types of IP cameras: [2]
1. Centralized IP cameras – which require a central Network Video
Recorder to handle recording, video and alarm management.
2. Decentralized IP cameras – doesn’t require a central Network Video
Recorder.
9
2.3.1
IP camera HTTP command
The IP camera uses several network protocols in order to send or receive data.
Each IP camera is assigned with its own IP address. A certain HTTP command for the
IP camera is needed to send or receive a specific data. [3]
Sample command:
Get brand Info
Example:
http://<servername>/cgi-bin/view/param?action=list&group=General.Brand
Return:
root.General.Brand.Brand=XXXX
root.General.Brand.ProdFullName=XXXX CMOS Network Camera
root.General.Brand.ProdNbr=F12345
root.General.Brand.ProdShortName=F12345 CMOS Network Camera
root.General.Brand.ProdType=Network Camera
root.General.Brand.WebURL=www.xxxxx.com
2.4
DDNS
DDNS or dynamic DNS is a network service that provides a network device
such as a router which is using the Internet Protocol Suite to notify a previously
assigned Host name to change in real time the current IP of the router. [4]
10
This service is used for a network which is dynamic IP is assigned . Only by
connecting to the Host name specified, the user can connect to the current IP of the
network. One of the companies provides this service is Dyndns.com by Dynamic
Network Services Inc. [5]
2.5
GlassFish
The server used in this project is GlassFish. It is an open source development to
build a Java application server. By using GlassFish, user will able to develop a high
quality server with new features that available faster. It is also designed to encouraged
developers to participate more in the application server development process. [6]
The reason GlassFish is favored by most is because it is an Open Source,
Community Based implementation of Java EE5 where it is a huge improvement over
earlier version. The server produced has a very good performance quality. The
administrative console and security support is also in production quality. The web
services stack of GlassFish is currently good and is improving more and more. It
supports AJAX and scripting. [6]
2.6
Java
Java is one of the programming languages in developing software. It was first
released by Sun Microsystems in 1995. Currently most of the utilities, games and
business application were powered by Java. It doesn’t only run on the computer, but
handheld devices such as mobile phone and tablets application is also powered by Java.
[7]
11
CHAPTER 3
METHODOLOGY
3.1
Introduction
For the project, Windows 7 is used as the operating system for the server. The
web application server (JSP) is built using Netbeans IDE 6.9.1,where Eclipse Classic
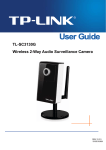
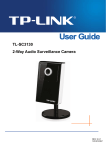
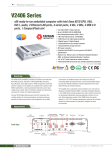
with Android ADB is used to build the application client. The camera used is TP-Link
SC3130G and the Android device used as the client is HTC Legend.
3.1.1
Conceptual Architecture
Internet
User with Android Phone
Door
Figure 3.1.1.1: Conceptual Architecture
Baby
12
3.1.2
System Architecture
RHS
Server
Android
Phone
3G
Internet
DSL
Modem/Wifi
Figure 3.1.2.1: System Architecture
3.1.3
Software Architecture
Remote Home Surveillance
Server
Glassfish
Internet
Application
Remote
Server
Home
Surveillance
Application
IP Cam
Figure 3.1.3.1: Software Architecture
IP
Cam
13
3.2
NetBeans
The latest version of NetBeans could be downloaded from
http://netbeans.org/downloads/. For this project, NetBeans IDE 6.9.1 was used.
JAVA SDK is needed to be installed in the computer. It can be obtained from
http://www.oracle.com/technetwork/java/javase/downloads/index.html. It is needed for
JAVA programming.
3.2.1
Java Web Application (JSF) using NetBeans
Firstly, a new JAVA web application project is created. From there, a JSP file is
created that act as the interface for the application. For the login page, two classes are
needed. One is the login action form, this is the form that will pass the value input from
the user, and pass it to the other class, which is the login action class. This class will
check the relevant of the credential input from the user and direct the user to other page.
The login action form class:
public ActionErrors validate(ActionMapping mapping,
HttpServletRequest request) {
ActionErrors errors = new ActionErrors();
if (getUsername() == null || getPassword().length() < 1) {
errors.add("name", new
ActionMessage("error.name.required"));
// TODO: add 'error.name.required' key to your resources
}
return errors;
14
The login action form class will get the username and password and pass it to
login action class.
Login Action Class
public ActionForward execute(ActionMapping mapping,
ActionForm form,
HttpServletRequest request, HttpServletResponse response)
throws Exception {
LoginActionForm loginActionForm = (LoginActionForm)
form;
System.out.print(loginActionForm.getUsername());
System.out.print(loginActionForm.getPassword());
if (loginActionForm.getUsername().equals("test") &&
loginActionForm.getPassword().equals("test") ) {
return mapping.findForward(SUCCESS);
} else {
return mapping.findForward(FAIL);
}
After the class is created the User Interface for the login page can then be
created using JSP.
JSP for Login Page:
<body>
<h1>Remote Home Surveillance</h1>
<br/>
<html:errors/>
15
<html:form action="/login">
Username:<html:text property="username"/>
<br>
Password:<html:password property="password"/>
<br>
<html:submit value="Login"/>
</html:form>
</body>
After the login page is created, the home page for the application is built. The
interface for the home page uses jQuery Mobile framework. It is a template framework
which is suitable for mobile applications to improve the UI with its touch-optimized
layouts and UI widgets.
To use the framework, a certain libraries must first be added:
<link rel="stylesheet" href="http://code.jquery.com/mobile/1.0a2/jquery.mobile1.0a2.min.css" />
<script type="text/javascript" src="http://code.jquery.com/jquery1.4.3.min.js"></script>
<script type="text/javascript"
src="http://code.jquery.com/mobile/1.0a2/jquery.mobile-1.0a2.min.js">
Then the UI can be fully manipulated by adding the links to complete the home
page:
16
<a href="./main.jsp" rel="external" data-icon="delete">signout</a>
<h1>RHS</h1>
</div><!-- /header -->
<ul data-role="listview" data-inset="true" data-theme="c"
data-dividertheme="b">
<li data-role="list-divider">Camera</li>
<li><a href="./liveView.jsp" rel="external">Live
View</a></li>
</ul>
For the Live View function, a new JSP page is created. This is for the interface
and the viewing of the image for the IP camera. The command for retrieving the image
from the camera was used which is:
http://<IpAdress>/jpg/image.jpg
To view the image continuously in a stream the image is refreshed every 1.5
second using java script:
<script language=javascript>
var refreshrate=2;
var image="http://<IPaddress>/jpg/image.jpg";
17
var imgwidth=300;
var imgheight=290;
function refresh(){document.images["pic"].src=image+"?"+new
Date();setTimeout('refresh()', refreshrate*1250);}
document.write('<img src="'+image+'"
height="'+imgheight+'"width="'+imgwidth+'" name="pic">');
if(document.images) window.onload=refresh;
</script>
The page will then allow the user to view the image in a continuous motion.
18
Idle Mode
No
Connection
Received
Yes
Display Login Screen
(Main)
No
Correct Login
Yes
Display Home Screen
Display Live View
Figure 3.2.2.1: Server Flowchart
19
3.3
Eclipse
The latest version of Eclipse could be downloaded from
http://www.eclipse.org/downloads/. For this project, Eclipse Classic was used. Android
SDK is needed to be installed in the computer. It can be obtained from
http://developer.android.com/sdk/. It is needed for Android programming.
3.3.1
Android Programming using Eclipse
Since the Java Web Application Server (JSF) was created by using NetBeans
IDE, to create the Android application, Eclipse is used. The Web application is
encapsulated into an Android application using the code:
WebView mWebView;
/** Called when the activity is first created. */
@Override
public void onCreate(Bundle savedInstanceState) {
super.onCreate(savedInstanceState);
setContentView(R.layout.main);
mWebView = (WebView) findViewById(R.id.webview);
mWebView.getSettings().setJavaScriptEnabled(true);
mWebView.loadUrl("http://<IP>/rhsfb/");
mWebView.setWebViewClient(new RHSFBWebViewClient());
}
The project is then exported into APK to be installed using any Android Phone.
20
3.4
Server – Router Port-forwarding
The server will be located at home connected through a router. In order for the
server to be connected from outside address, the router must first be set up to be able to
port forwarded to the IP of the server in the enclosed network. This can be done by
opening the router settings and add the IP of the server along with a certain port
number. A user outside of the Local Area Network can then reach the server by:
http:// <IP address given by ISP to the router>:<the port number assign to the
server>
However, the IP address given by the ISP is dynamic, it will keep on changing.
3.5
Using DDNS for Dynamic IP
Because of the ever-changing IP address given by the ISP, it will cause problem
on the client to connect to the server and the IP camera which are both connected
through a router. The solution is by using DDNS. Some of the company which provides
the service of DDNS is Dyndns.org.
To assign a DDNS, firstly register a hostname with Dyndns.org, a username
and a password are required. After the registration is completed, the hostname will
automatically assigned to your current IP. To resolve the problem of the ever-changing
IP address given by the ISP. The host name, username and password can be inserted to
the router settings so that whenever the router is restarted (change IP), the router will
inform dyndns.org the current IP. But by only using the host name registered, the
current IP can be obtained.
21
CHAPTER 4
RESULT AND DISCUSSION
4.1
Introduction
The image from the IP camera is obtained by requesting the image itself. This is
done by the server to connect to the IP camera through TCP/IP. The user/client will then
connect to the server using the Android Phone to gain access to the camera and enable
the features of viewing their home remotely through TCP/IP.
4.2
Display
4.2.1
Main Client Interface (Login)
Figure 4.2.1.1: Main Client Interface (Login)
22
Figure 4.2.1.2: Main Client Interface (Login) Mobile
When the Android application is opened, the client will connect to the server, if
the connection is successful, the user will be shown a login screen. The user must then
input the correct credential for the login. Only then the user will be forwarded to the
home screen.
4.2.2
Home Screen
Figure 4.2.2.1: Home Screen
23
Figure 4.2.2.2: Home Screen Mobile
If the user entered the correct username and password from the login screen, the
user will then be shown the home screen. From the home screen, the user can then
choose to sign out which will be brought to the login screen, or to use the live view
features. If the user chose live view, they will then brought to the live view page.
4.2.3
Live View
Figure 4.2.3.1: Live View
24
Figure 4.2.3.2: Live View Mobile
In this mode, the user can live view their home. The image interval is 1.5s
between previous image and the next one. The user can then press the Home button on
the Android phone to let the application run in the background so they can multitask
with other things, and they can quickly switch to this application for quick viewing. The
user can then click ‘Home’ to return to the home screen.
4.3
Image Captures
The image interval between each picture is 1.5 seconds, this is the minimal
preferences for smooth viewing for a client that is outside of the Local Area Network
from the router and IP camera.
25
1.5 seconds
Figure 4.3.1: Image Interval
4.4
Target Deployment
Figure 4.4.1: House Overview
26
IP Camera
View Zone
Figure 4.4.2: House (Indoor)
27
CHAPTER 5
CONCLUSION AND RECOMMENDATION
5.1
Conclusion
The ability to view our home remotely is essential to keep our home save from
any unwanted activities such as burglary or other emergency situations. To view
remotely a handheld device is needed such as an Android –platform phone. With the
help of this program, the user can prevent any accidents, misfits, injury and many other
things from occurring. The safety of our home and loved ones should be a number one
priority.
The goal of this project is to create a home surveillance program for the open
source system which is Android phone. The feature included is to view homes remotely
using Android phone through TCP/IP. As the conclusion, the objectives of this project
are successfully achieved.
28
5.2
Problems
Although the objectives of the project is met, there are several limitations on this
project that would waste battery power of the phone or would make the live view
unusable and those limitations are described as follows:
1. Sometimes the client haves problem locating the Dynamic IP for the server.
This is because of the ever-changing IP address given by the Internet Service
Provider (ISP) which needed to restart the router if this problem occurs.
2. The need to connect to the internet remotely while live-viewing and multitasking may consume the phone battery.
3. There are several locations where we can’t get access to the internet
(WIFI,3G,GPRS), hence the phone can’t connect to the server.
4. If the electricity or the internet connection at home (server) is down, the
client can’t connect to the server. However, if the internet connection is
down, the system can still be used locally.
5.3
Recommendation
There are several recommendations I would like to propose, and they are:
1. A motion detection features should be added to notify the user in case of a
motion is triggered, so the user doesn’t need to turn the applications all the
time to view.
2. Include a timer to save the image to the database so the user can view a
snapshot of the image from previous time.
3. Use a server with low running power on idle mode such as Mac from Apple.
So the server can be on 24 hours with low energy consumptions.
29
4. Include a home automation service in the application which can control the
appliance in the house, where in this case the light from the room where the
IP camera is pointing, so when the room is at night and dark, the user can
switch on the light for brighter view.
30
References
1
What is Android? | Android Developers
a.
http://developer.android.com/guide/basics/what-is-android.html
(last access = 22/4/2011)
2
IP Camera - Wikipedia
a.
3
http://en.wikipedia.org/wiki/IP_camera (last access 29/4/2011)
IP Camera Protocol | eHow.com
a.
http://www.ehow.com/facts_7516945_ip-camera-protocol.html
(last access = 22/4/2011)
4
Dynamic DNS - Wikipedia
a.
http://en.wikipedia.org/wiki/Dynamic_DNS (last access =
22/4/2011)
5
Dynamic DNS: Free DNS Service
a.
http://www.dyndns.com/services/dns/dyndns/ (last access =
22/4/2011)
6
About Glassfish – JAVA.net
a.
http://glassfish.java.net/public/faq/GF_FAQ_2.html (last access
29/4/2011)
7
Java (Programming Language) - Wikipedia
a.
http://en.wikipedia.org/wiki/Java_%28programming_language%29
(last access 29/4/2011)
8
jQuery Mobile
a.
http://jquerymobile.com/ (last access = 22/4/2011)
31
9
Protect Your Home and Family With a Home Surveillance System
a.
http://ezinearticles.com/?Protecting-Your-Home-and-FamilyWith-a-Home-Surveillance-System&id=4398973 (last access =
22/4/2011)
10
Android (Operating System) - Wikipedia
a.
http://en.wikipedia.org/wiki/Android_%28operating_system%29
(last access = 22/4/2011)
11
Android XDA Developer
a.
http://forum.xda-developers.com/wiki/index.php?title=Android
(last access 29/4/2011)
32
APPENDIX A
Project 1 Gantt Chart
33
34
APPENDIX B
Project 2 Gantt Chart
35
36
APPENDIX C
JSF Code
37
Login Action Form Class
package my.utm.fke.rhs.loginactionform;
import javax.servlet.http.HttpServletRequest;
import org.apache.struts.action.ActionErrors;
import org.apache.struts.action.ActionMapping;
import org.apache.struts.action.ActionMessage;
public class LoginActionForm extends org.apache.struts.action.ActionForm {
private String username;
private String password;
public LoginActionForm() {
super();
}
public ActionErrors validate(ActionMapping mapping, HttpServletRequest request) {
ActionErrors errors = new ActionErrors();
if (getUsername() == null || getPassword().length() < 1) {
errors.add("name", new ActionMessage("error.name.required"));
}
return errors;
}
public String getUsername() {
return username;
}
public void setUsername(String username) {
this.username = username;
}
public String getPassword() {
return password;
}
public void setPassword(String password) {
this.password = password;
}
}
This is the source code for the Login Action Form Class which passes the value
of username and password to Login Action Class.
38
Login Action Class
package my.utm.fke.rhs.loginaction;
import javax.servlet.http.HttpServletRequest;
import javax.servlet.http.HttpServletResponse;
import my.utm.fke.rhs.loginactionform.LoginActionForm;
import org.apache.struts.action.ActionForm;
import org.apache.struts.action.ActionForward;
import org.apache.struts.action.ActionMapping;
public class LoginAction extends org.apache.struts.action.Action {
private static final String SUCCESS = "success";
private static final String FAIL = "fail";
@Override
public ActionForward execute(ActionMapping mapping, ActionForm form,
HttpServletRequest request, HttpServletResponse response)
throws Exception {
LoginActionForm loginActionForm = (LoginActionForm) form;
System.out.print(loginActionForm.getUsername());
System.out.print(loginActionForm.getPassword());
if (loginActionForm.getUsername().equals("test") && loginActionForm.getPassword().equals("test") ) {
return mapping.findForward(SUCCESS);
} else {
return mapping.findForward(FAIL);
}
}
}
This is the source code for the Login Action Class which receives the values
from Login Action Form class and verifies it and then does the action needed.
39
Login JSP
<%@ taglib uri="http://struts.apache.org/tags-html" prefix="html" %>
<%@page contentType="text/html" pageEncoding="UTF-8"%>
<html>
<head>
<meta http-equiv="Content-Type" content="text/html; charset=UTF-8">
<title>RHS</title>
</head>
<body>
<h1>Remote Home Surveillance</h1>
<br/>
<html:errors/>
<html:form action="/login">
Username:<html:text property="username"/>
<br>
Password:<html:password property="password"/>
<br>
<html:submit value="Login"/>
</html:form>
</body>
</html>
This is the code for the Login Page is JSP. The page creates an interface with a form
which prompt user to input the username and password.
40
Home JSP
<%@ taglib uri="http://struts.apache.org/tags-html" prefix="html" %>
<%@page contentType="text/html" pageEncoding="UTF-8"%>
<html>
<head>
<title>RHS</title>
<link rel="stylesheet" href="http://code.jquery.com/mobile/1.0a2/jquery.mobile-1.0a2.min.css" />
<script type="text/javascript" src="http://code.jquery.com/jquery-1.4.3.min.js"></script>
<script type="text/javascript" src="http://code.jquery.com/mobile/1.0a2/jquery.mobile1.0a2.min.js"></script>
</head>
<body>
<div data-role="header" data-position="inline">
<div data-role="page" data-theme="b" id="jqm-home">
<div data-role="content">
<div data-role="header">
<a href="./main.jsp" rel="external" data-icon="delete">signout</a>
<h1>RHS</h1>
</div><!-- /header -->
<ul data-role="listview" data-inset="true" data-theme="c" data-dividertheme="b">
<li data-role="list-divider">Camera</li>
<li><a href="./liveView.jsp" rel="external">Live View</a></li>
</ul>
<div data-role="footer">
<div data-role="navbar">
<ul>
</ul>
</div><!-- /navbar -->
</div><!-- /footer -->
</body>
</html>
This is the source code for the home page which is using jQuery Mobile Framework.
From this page, user can go to the Live View page or sign out.
41
Live View JSP
<%@ taglib uri="http://struts.apache.org/tags-html" prefix="html" %>
<%@page contentType="text/html" pageEncoding="UTF-8"%>
<html>
<meta http-equiv="Content-Type" content="text/html; charset=UTF-8">
<title>RHS</title>
</head>
<body>
<div>
<html:link action="/home">Home</html:link>
<br/>
<h1>>>>>>LiveView<<<<<</h1>
<br/>
<div>
<script language=javascript>
var refreshrate=2;
var image="http://<ip>/jpg/image.jpg";
var imgwidth=300;
var imgheight=290;
function refresh(){document.images["pic"].src=image+"?"+new Date();setTimeout('refresh()',
refreshrate*1250);}
document.write('<img src="'+image+'" height="'+imgheight+'"width="'+imgwidth+'"
name="pic">');
if(document.images) window.onload=refresh;
</script>
</div>
</div>
</body>
</body>
</html>
This is the source code for the live view page, where every 1.5 seconds, the image will
refresh creating a continuous stream of image.
42
APPENDIX D
Android Programming
43
Android Application Creation
package com.utm.fke.rhsfbl;
import android.app.Activity;
import android.os.Bundle;
import android.view.KeyEvent;
import android.webkit.WebView;
import android.webkit.WebViewClient;
public class RHSFBL extends Activity {
@Override
public boolean onKeyDown(int keyCode, KeyEvent event) {
if ((keyCode == KeyEvent.KEYCODE_BACK) && mWebView.canGoBack()) {
mWebView.goBack();
return true;
}
return super.onKeyDown(keyCode, event);
}
private class RHSFBWebViewClient extends WebViewClient {
@Override
public boolean shouldOverrideUrlLoading(WebView view, String url) {
view.loadUrl(url);
return true;
}
}
WebView mWebView;
@Override
public void onCreate(Bundle savedInstanceState) {
super.onCreate(savedInstanceState);
setContentView(R.layout.main);
mWebView = (WebView) findViewById(R.id.webview);
mWebView.getSettings().setJavaScriptEnabled(true);
mWebView.loadUrl("http://192.168.43.227:8080/rhsfb/");
mWebView.setWebViewClient(new RHSFBWebViewClient());
}
}
This is the code for Eclipse to encapsulate the web server in an android application.
44
APPENDIX E
SAMPLE IP CAMERA COMMAND
45
SAMPLE IP CAMERA COMMAND
System Category
Get brand Info
Example:
http://<servername>/cgi-bin/view/param?action=list&group=General.Brand
Return:
root.General.Brand.Brand=XXXX
root.General.Brand.ProdFullName=XXXX CMOS Network Camera
root.General.Brand.ProdNbr=F12345
root.General.Brand.ProdShortName=F12345 CMOS Network Camera
root.General.Brand.ProdType=Network Camera
root.General.Brand.WebURL=www.xxxxx.com
Get/Set account Info
Example: Get account information
http://<servername>/cgi-bin/view/param?action=list&group=General.UserID
Return:
root.General.UserID.ViewerAuthen=on
root.General.UserID.ViewerModeDefault=000007ff
root.General.UserID.Admin=YWRtaW46YWRtaW4=
root.General.UserID.User1=MTExMToxMTEx,0000003f
root.General.UserID.User2=MjIyMjoyMjIy,0000063f
root.General.UserID.User3=MzMzMzozMzMz,000007ff
root.General.UserID.User4=Og==,000007ff
root.General.UserID.User5=Og==,000007ff
root.General.UserID.User6=Og==,000007ff
root.General.UserID.User7=Og==,000007ff
root.General.UserID.User8=Og==,000007ff
root.General.UserID.User9=Og==,000007ff
46
Example: Set account information
http://<servername>/cgibin/admin/param?action=update&General.UserID.ViewerAuthen=off&Gener
al.UserID.User1= MzMzMzozMzMz,000007ff
Return:
OK
Get Firmware info
Example:
http://<servername>/cgi-bin/view/param?action=list&group=Properties.Firmware
Return:
root.Properties.Firmware.BuildDate=Tue Mar 20 22:26:10 CST 2007
root.Properties.Firmware.Version=LM.0.3.14
Get hardware version
Example:
http://<servername>/cgi-bin/view/param?action=list&group=Properties.Hardware
Return:
4
root.Properties.Hardware.Version=00
Get/Set Network Interface info
Example: Get Network interface information
http://<servername>/cgi-bin/view/param?action=list&group=General.Network.eth0
Return:
root.General.Network.eth0.Broadcast=192.168.1.255
root.General.Network.eth0.DNSAuto=192.168.1.255
root.General.Network.eth0.DNSServer1=192.168.1.255
root.General.Network.eth0.DNSServer2=192.168.1.255
root.General.Network.eth0.BootProto=192.168.1.255
root.General.Network.eth0.IPAddress=192.168.1.255
root.General.Network.eth0.MACAddress=192.168.1.255
root.General.Network.eth0.SubnetMask=192.168.1.255
root.General.Network.eth0.DefaultRouter=192.168.1.255
root.General.Network.eth0.IPAddressRange=192.168.1.255
47
Example: Set Network interface information
http://<servername>/cgibin/admin/param?action=update&General.Network.eth0.BootProto=off&Gen
eral.Network.eth0.IPAddress=192.168.1.99
Return:
OK
Get/Set UPNP info
Example: Get UPnP information
http://<servername>/cgi-bin/view/param?action=list&group=General.Network.UPnP
Return:
root.General.Network.UPnP.Enabled=yes
root.General.Network.UPnP.NATTraversal.Enabled=no
root.General.Network.UPnP.NATTraversal.HTTPPort=80
root.General.Network.UPnP.NATTraversal.HTTPSPort=443
root.General.Network.UPnP.NATTraversal.HTTPViewerPort=8090
root.General.Network.UPnP.NATTraversal.HTTPViewerPortSSL=8091
root.General.Network.UPnP.NATTraversal.HTTPViewerPort2=8070
root.General.Network.UPnP.NATTraversal.HTTPViewerPort2SSL=8071
root.General.Network.UPnP.NATTraversal.HTTPViewerPort3=8050
root.General.Network.UPnP.NATTraversal.HTTPViewerPort4=8030
Example: Set UPnP information
http://<servername>/cgibin/admin/param?action=update&General.Network.UPnP.Enabled=yes&Gen
eral.Network.UPnP.NATTraversal.Enabled=no
Return:
OK
Get/Set PPPoE info
Example: Get PPPoE information
http://<servername>/cgi-bin/view/param?action=list&group=General.Network.PPPoE
Return:
48
root.General.Network.PPPoE.Enabled=no
root.General.Network.PPPoE.IPAddress =67.34.251.69
root.General.Network.PPPoE.UserID=none
root.General.Network.PPPoE.Password=none
root.General.Network.PPPoE.DNSAuto=on
root.General.Network.PPPoE.DNSServer1=0.0.0.0
root.General.Network.PPPoE.DNSServer2=0.0.0.0
Example: Set PPPoE information
http://<servername>/cgibin/admin/param?action=update&General.Network.PPPoE.Enabled=yes&Ge
[email protected]&General.Network.PPPoE.Password=12345
678&
General.Network.PPPoE.DNSAuto=on
Return:
OK
Get/Set DDNS info
Example: Get DDNS information
http://<servername>/cgi-bin/view/param?action=list&group=General.Network.DDNS
Return:
root.General.Network.DDNS.Enabled=no
root.General.Network.DDNS.DDNSServer=www.dyndns.org
root.General.Network.DDNS.UserName=none
root.General.Network.DDNS.Password=none
9
root.General.Network.DDNS.HostName=none
Example: Set DDNS information
http://<servername>/cgibin/admin/param?action=update&General.Network.DDNS.Enable=yes&Gen
eral.Network.DDNS.DDNSServer=www.dyndns.org&General.Network.DDNS.UserName=exam
ple&G
eneral.Network.DDNS.Password=12345678&General.Network.DDNS.HostName=www.exampl
e.dyn
dns.org
49
Return:
OK
Get/Set Time info
Example: Get Time information
http://<servername>/cgi-bin/view/param?action=list&group=General.Time
Return:
root.General.Time.ServerDate=1970-01-01
root.General.Time.ServerTime=02:30:14
root.General.Time.DateFormat=ymd
root.General.Time.SyncSource=NTP
root.General.Time.TimeZone=GMT 08:00/Asia/Taipei
1
root.General.Time.UTCOffset=00:00:00
Example: Set Time information
http://<servername>/cgi-bin/admin/param?action=update&General.Time.ObtainFromDHCP
=no&General.Time.ServerDate=2007-0918&General.Time.ServerTime=18:20:24&General.Time.Dat
eFormat=ymd&General.Time.SyncSource=NTP&General.Time.TimeZone=GMT
08:00/Asia/Taipei&General.Time.UTCOffset=00:00:00
Return:
OK
Example: Set MJPEG video frame rate
http://<servername>/cgi-bin/admin/param?action=update&Image.I0.MJPEG.FPS=25
Return:
OK
Get JPEG still image
2
Example:
http://<servername>/ jpg/image
50
Return:
Ok
http://<servername>/ jpg/image.jpg
Return:
HTTP/1.0 200 OK\r\n
Content-Type: image/jpeg\r\n
Content-Length: <image size>\r\n
\r\n
<JPEG image data>\r\n
51
APPENDIX F
User Manual
52
USER MANUAL
1.1
Introduction
This user manual is intended to be used by the user to setup the physical network
connection, configure the machines, and run the system. This user manual is divided
into three sections;
1. Pre-installation
2. Configuration
3. Running the system
1.2
System Requirements
Server
A PC running on Windows, preferably Windows 7 with NetBeans installed.
Client
An Android phone running on firmware 2.2 and above with Internet Connection (non –
local).
53
1.2.1
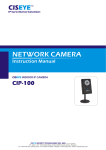
Camera
Requirement
i.
TP-Link SC3130G IP camera or any TP-Link camera with same
API.
1.2.2
1.3
Router
i.
Router with port-forwarding features available.
ii.
Router with DDNS available.
Pre-Installation
The pre-installation section refers to the setting up of the main components before they
are joined together.
1.3.1
Preparing the DDNS
Visit dyndns.org, and register a host name. Jot down the username, hostname and
password for the DDNS.
Open the router settings at home and input the username, hostname and password on the
DDNS field.
54
After the username, password and hostname is input, save the settings.
1.3.2
Port – forwarding
Open your router settings again and insert the static IP address of your current PC and
the IP of your IP camera into the port forward.
55
1.3.3
Deploy Server
Open netbeans and deploy the server. After that all is set. The application can be run
using the Android phone.
1.4
Running the System
After all the main components have been setup and configured, using the Android
Phone, open the application Remote Home Surveillance application.
56
Input the username and password for the system, after the correct credentials is
inputted, you will be forwarded to the home screen.
In the home screen, just click the Live View to view remotely.
And that is all. The user can multitask, press home and sign out to close the application.
57
APPENDIX G
Video Demonstration
For the video demonstration of the application, the video file is available in the
CD rom provided.
58
APPENDIX H
TECHNICAL REPORT
REMOTE HOME SURVEILLANCE USING ANDROID – PLATFORM
PHONE THROUGH TCP / IP
Nowadays, our neighborhood isn’t as safe as it was before. Crime and accidents happen
almost all the time. The safety of our family and homes should be prioritized. One of the
most reliable ways in protecting ourselves and our family is to equip our home with a
surveillance system that will allow us to monitor the situation of certain key places. By
equipping our home with a surveillance system we can prevent any burglary, accidents,
injury that may happen which is very essential in making our home safe.
1.0
Android
Android is an open-source operating system for mobile phone which is developed by
Google and is based upon Linux kernel and GNU software. Google provides developers an
open development platform, which allows the developers the ability to create extremely
rich and innovative applications. Developers are free to gain access to the device hardware,
location information, run background services/multi-tasking, set alarms, adds notifications
to the status bar and much more..
1.1 IP Camera
IP camera or also known as Internet Protocol camera is a digital video camera which is
commonly used for surveillance. The camera send and receive data via network unlike a
closed circuit television (CCTV) camera that transfer data via cables. This is different from
webcam which use the USB connection to the computer which restrains in terms of
placement for surveillance purposes. There are wired and wireless IP cameras, both with
the same functionality but the wireless win in terms of portability to place the cameras in
strategic locations.
____________________________________________________________________________________
1
1.2
DDNS
DDNS or dynamic DNS is a network service that provides a network device such as a
router which is using the Internet Protocol Suite to notify a previously assigned Host name
to change in real time the current IP of the router.
This service is used for a network which is dynamic IP is assigned . Only by connecting to
the Host name specified, the user can connect to the current IP of the network. One of the
companies provides this service is Dyndns.com by Dynamic Network Services Inc.
1.3
GlassFish
The reason GlassFish is favored by most is because it is an Open Source, Community
Based implementation of Java EE5 where it is a huge improvement over earlier version.
The server produced has a very good performance quality. The administrative console and
security support is also in production quality. The web services stack of GlassFish is
currently good and is improving more and more. It supports AJAX and scripting.
Internet
User with Android Phone
Door
Baby
Figure 1.1: Conceptual Architecture
____________________________________________________________________________________
2
RHS
Server
Android
Phone
3G
Internet
DSL
Modem/Wifi
IP
Cam
Figure 1.2: System Architecture
Remote Home Surveillance
Server
Glassfish
Internet
Application
Server
Remote
Home
Surveillance
Application
IP Cam
Figure 1.3: Software Architecture
____________________________________________________________________________________
3
1.4
Java Web Application (JSF) using NetBeans
A JSP file is created that act as the interface for the application. For the login page, two
classes are needed. One is the login action form, this is the form that will pass the value
input from the user, and pass it to the other class, which is the login action class. This class
will check the relevant of the credential input from the user and direct the user to other
page. The login action form class will get the username and password and pass it to login
action class. After the class is created the User Interface for the login page can then be
created using JSP. After the login page is created, the home page for the application is built.
The interface for the home page uses jQuery Mobile framework. It is a template framework
which is suitable for mobile applications to improve the UI with its touch-optimized layouts
and UI widgets. For the Live View function, a new JSP page is created. This is for the
interface and the viewing of the image for the IP camera.
Idle Mode
No
Connection
Received
Yes
Display Login Screen (Main)
No
Correct Login
Yes
Display Home Screen
Display Live View
Figure 1.4: Server Flowchart
____________________________________________________________________________________
4
1.5 Android Programming using Eclipse
Since the Java Web Application Server (JSF) was created by using NetBeans IDE, to create
the Android application, Eclipse is used. The Web application is encapsulated into an
Android application. The project is then exported into APK to be installed using any
Android Phone.
1.6
Server – Router Port-forwarding
The server will be located at home connected through a router. In order for the server to be
connected from outside address, the router must first be set up to be able to port forwarded
to the IP of the server in the enclosed network. This can be done by opening the router
settings and add the IP of the server along with a certain port number. However, the IP
address given by the ISP is dynamic, it will keep on changing.
1.7
Using DDNS for Dynamic IP
To assign a DDNS, firstly register a hostname with Dyndns.org,
a
username
and
a
password are required. After the registration is completed, the hostname will automatically
assigned to your current IP. To resolve the problem of the ever-changing IP address given
by the ISP. The host name, username and password can be inserted to the router settings so
that whenever the router is restarted (change IP), the router will inform dyndns.org the
current IP. But by only using the host name registered, the current IP can be obtained.
1.8
Display
The image from the IP camera is obtained by requesting the image itself. This is done by
the server to connect to the IP camera through TCP/IP. The user/client will then connect to
the server using the Android Phone to gain access to the camera and enable the features of
viewing their home remotely through TCP/IP.
____________________________________________________________________________________
5
1.8.1 Main Client Interface (Login)
Figure 1.5: Main Client Interface (Login)
1.8.2 Home Screen
Figure 1.6: Home Screen
1.8.3 Live View
Figure 1.7: Live V
____________________________________________________________________________________
6
CONCLUSION
The ability to view our home remotely is essential to keep our home save from any
unwanted activities such as burglary or other emergency situations. To view remotely a
handheld device is needed such as an Android –platform phone. With the help of this
program, the user can prevent any accidents, misfits, injury and many other things from
occurring. The safety of our home and loved ones should be a number one priority.
References
1
What is Android? | Android Developers
a.
http://developer.android.com/guide/basics/what-is-android.html (last
access = 22/4/2011)
2
IP Camera - Wikipedia
a.
3
http://en.wikipedia.org/wiki/IP_camera (last access 29/4/2011)
IP Camera Protocol | eHow.com
a.
http://www.ehow.com/facts_7516945_ip-camera-protocol.html (last
access = 22/4/2011)
4
Dynamic DNS - Wikipedia
a.
5
http://en.wikipedia.org/wiki/Dynamic_DNS (last access = 22/4/2011)
Dynamic DNS: Free DNS Service
a.
http://www.dyndns.com/services/dns/dyndns/ (last access =
22/4/2011)
6
About Glassfish – JAVA.net
a.
http://glassfish.java.net/public/faq/GF_FAQ_2.html (last access
29/4/2011)
7
Java (Programming Language) - Wikipedia
a.
8
(last access 29/4/2011)
jQuery Mobile
a.
9
http://en.wikipedia.org/wiki/Java_%28programming_language%29
http://jquerymobile.com/ (last access = 22/4/2011)
Protect Your Home and Family With a Home Surveillance System
____________________________________________________________________________________
7
a.
http://ezinearticles.com/?Protecting-Your-Home-and-Family-With-aHome-Surveillance-System&id=4398973 (last access = 22/4/2011)
10
Android (Operating System) - Wikipedia
a.
http://en.wikipedia.org/wiki/Android_%28operating_system%29
(last access = 22/4/2011)
11
Android XDA Developer
a.
http://forum.xda-developers.com/wiki/index.php?title=Android (last
access 29/4/2011)
____________________________________________________________________________________
8