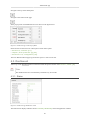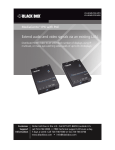
1
SavaPage User Manual
Version 0.9.10
Rijk Ravestein
SavaPage User Manual : Version 0.9.10
SavaPage User Manual by Rijk Ravestein is licensed under a Creative Commons Attribution-ShareAlike 4.0 International License1. SavaPage Software by Datraverse is licensed under GNU Affero General Public License
(AGPL)2 version 3, in compliance with Third Party Software Licenses3.
1
http://creativecommons.org/licenses/by-sa/4.0/
https://www.gnu.org/licenses/agpl.html
3
http://savapage.org/docs/licenses/
2
Table of Contents
Preface ...................................................................................................................................... xiv
1. About this Manual ........................................................................................................... xiv
2. Expectations and Prerequisites ........................................................................................... xiv
3. Conventions used in this Document .................................................................................... xiv
3.1. Typographical Conventions .................................................................................... xiv
3.2. Notes ................................................................................................................... xv
4. Notice ........................................................................................................................... xvi
5. Your Feedback ................................................................................................................ xvi
6. Acknowledgements .......................................................................................................... xvi
7. About the Author ........................................................................................................... xvii
1. Introduction .............................................................................................................................. 1
1.1. What is SavaPage? .......................................................................................................... 1
1.1.1. Libre Software ...................................................................................................... 1
1.1.2. Benefits ............................................................................................................... 1
1.1.3. Key Features ........................................................................................................ 2
1.2. System Requirements ....................................................................................................... 2
1.2.1. Server ................................................................................................................. 2
1.2.2. Clients ................................................................................................................ 4
1.3. How does SavaPage work? ............................................................................................... 5
1.3.1. Key Concepts ....................................................................................................... 5
1.3.2. The SavaPage Work Flow ...................................................................................... 6
1.3.3. Architecture Overview ........................................................................................... 7
2. Server Installation ...................................................................................................................... 9
2.1. Step 1 - System Requirements ........................................................................................... 9
2.2. Step 2 - Create System Account ........................................................................................ 9
2.3. Step 3 - Configure CUPS and Samba ................................................................................ 10
2.3.1. CUPS Job History ............................................................................................... 11
2.3.2. CUPS Web Interface ............................................................................................ 11
2.3.3. Restart CUPS ..................................................................................................... 11
2.4. Step 4 - Check firewall settings ........................................................................................ 12
2.5. Step 5 - Download and Install .......................................................................................... 12
2.6. Step 6 - Save Encryption Keys ........................................................................................ 12
2.7. Step 7 - Configure ......................................................................................................... 13
2.7.1. Step 1 - Login .................................................................................................... 13
2.7.2. Step 2 - Change Admin Password .......................................................................... 13
2.7.3. Step 3 - Set Locale .............................................................................................. 13
2.7.4. Step 4 - Set Currency Code .................................................................................. 13
2.7.5. Step 5 - Set User Source ...................................................................................... 14
2.7.6. Step 6 - User Synchronization ............................................................................... 14
2.7.7. Step 7 - Set Mail Options ..................................................................................... 14
2.7.8. Step 8 - Driverless Printing ................................................................................... 14
2.8. Step 8 - Share SavaPage Client Files ................................................................................ 15
2.9. Step 9 - Testing ............................................................................................................. 15
2.10. What's next? ................................................................................................................ 15
3. User Web App ......................................................................................................................... 17
3.1. Login ........................................................................................................................... 17
3.1.1. Select Language .................................................................................................. 18
3.1.2. Single Web App Session ...................................................................................... 18
3.1.3. Login Alternatives ............................................................................................... 18
3.1.4. Card Self Association Dialog ................................................................................ 19
3.2. SafePages ..................................................................................................................... 20
3.2.1. Footer ................................................................................................................ 22
3.2.2. Rotation ............................................................................................................. 24
3.2.3. Browser ............................................................................................................. 26
3.3. PDF ............................................................................................................................. 27
iii
SavaPage User Manual
3.3.1. PDF Filters ........................................................................................................
3.3.2. Scope ................................................................................................................
3.3.3. Description .........................................................................................................
3.3.4. Security .............................................................................................................
3.3.5. Passwords ..........................................................................................................
3.3.6. Letterhead ..........................................................................................................
3.3.7. Download ..........................................................................................................
3.3.8. Send ..................................................................................................................
3.4. Print ............................................................................................................................
3.4.1. Printer Selection ..................................................................................................
3.4.2. Printer Settings ...................................................................................................
3.4.3. Print Job Settings ................................................................................................
3.4.4. Direct Print Release .............................................................................................
3.4.5. Full Print Scope and Jobs .....................................................................................
3.5. Letterheads ...................................................................................................................
3.6. Delete ..........................................................................................................................
3.7. Log .............................................................................................................................
3.7.1. Documents .........................................................................................................
3.7.2. Transactions .......................................................................................................
3.8. Sort .............................................................................................................................
3.9. User Details ..................................................................................................................
3.9.1. Internet Printer ....................................................................................................
3.9.2. Pagometers .........................................................................................................
3.9.3. Financial ............................................................................................................
3.9.4. Redeem Voucher .................................................................................................
3.9.5. Transfer Credit ...................................................................................................
3.9.6. Transfer Money ..................................................................................................
3.9.7. Send Bitcoins .....................................................................................................
3.10. Upload .......................................................................................................................
4. Admin Web App ......................................................................................................................
4.1. Login ...........................................................................................................................
4.2. Menu ...........................................................................................................................
4.3. Dashboard ....................................................................................................................
4.3.1. Status ................................................................................................................
4.3.2. Services .............................................................................................................
4.3.3. Pagometers .........................................................................................................
4.3.4. Environmental Impact ..........................................................................................
4.3.5. Financial Summary ..............................................................................................
4.3.6. Activity .............................................................................................................
4.4. Users ...........................................................................................................................
4.4.1. User List ............................................................................................................
4.4.2. Edit User ...........................................................................................................
4.4.3. Create Internal User .............................................................................................
4.4.4. Deleted Users .....................................................................................................
4.4.5. Administrator Role ..............................................................................................
4.5. Queues .........................................................................................................................
4.5.1. Queues List ........................................................................................................
4.5.2. Edit Queue .........................................................................................................
4.6. Proxy Printers ...............................................................................................................
4.6.1. Proxy Printer List ................................................................................................
4.6.2. Edit Proxy Printer ...............................................................................................
4.6.3. Printer Groups ....................................................................................................
4.6.4. Rename Proxy Printer ..........................................................................................
4.7. Devices ........................................................................................................................
4.7.1. Network Card Reader ..........................................................................................
4.7.2. Proxy Print Authentication ....................................................................................
4.7.3. Terminal ............................................................................................................
4.8. Options ........................................................................................................................
iv
28
28
29
29
30
31
31
31
31
32
33
34
35
36
36
38
39
39
39
42
43
43
44
44
45
45
45
46
46
48
48
48
50
50
51
52
52
53
53
54
54
55
58
59
59
59
59
61
62
62
65
67
68
68
71
71
74
75
SavaPage User Manual
5.
6.
7.
8.
9.
4.8.1. User Source ........................................................................................................ 76
4.8.2. User Creation ..................................................................................................... 79
4.8.3. User Authentication ............................................................................................. 81
4.8.4. Mail .................................................................................................................. 84
4.8.5. Google Cloud Printer ........................................................................................... 86
4.8.6. Mail Print .......................................................................................................... 90
4.8.7. Web Print .......................................................................................................... 92
4.8.8. Internet Print ...................................................................................................... 93
4.8.9. Proxy Print ......................................................................................................... 94
4.8.10. Eco Print .......................................................................................................... 95
4.8.11. Financial .......................................................................................................... 96
4.8.12. Backups ........................................................................................................... 98
4.8.13. Advanced ....................................................................................................... 100
4.9. Log ............................................................................................................................ 106
4.10. Documents ................................................................................................................ 108
4.11. About ....................................................................................................................... 113
4.11.1. Version .......................................................................................................... 114
4.11.2. License ........................................................................................................... 114
4.11.3. Community ..................................................................................................... 114
4.11.4. Support .......................................................................................................... 116
4.11.5. Java ............................................................................................................... 116
4.11.6. Host System .................................................................................................... 116
4.11.7. Host Packages ................................................................................................. 116
4.12. Vouchers ................................................................................................................... 117
4.12.1. Voucher Actions .............................................................................................. 119
4.12.2. Create Vouchers .............................................................................................. 120
4.12.3. Voucher Usage ................................................................................................ 120
Point-of-Sale Web App ............................................................................................................ 122
5.1. Deposit ....................................................................................................................... 122
5.2. Receipts ...................................................................................................................... 123
User Client ............................................................................................................................ 125
6.1. User Client Options ...................................................................................................... 125
6.2. User Client Deployment ................................................................................................ 126
6.2.1. Deployment on Windows .................................................................................... 126
6.2.2. Deployment on Mac OS X .................................................................................. 126
6.2.3. Deployment on GNU/Linux ................................................................................. 126
SavaPage Financial ................................................................................................................. 127
SavaPage on GNU/Linux ......................................................................................................... 128
8.1. The Installation Process ................................................................................................. 128
8.1.1. Manual extraction .............................................................................................. 128
8.1.2. The install process ............................................................................................. 128
8.2. Advanced Configuration and Logs .................................................................................. 130
8.3. Removing SavaPage from a GNU/Linux server ................................................................. 130
SavaPage as Printer ................................................................................................................ 131
9.1. Printing with a Driver ................................................................................................... 131
9.1.1. SavaPage Printer Driver ...................................................................................... 131
9.1.2. SavaPage Printer Installation ............................................................................... 131
9.2. Printing with AirPrint ................................................................................................... 134
9.2.1. Step 1: Enable IPv4 in Avahi .............................................................................. 135
9.2.2. Step 2: Create AirPrint Queue ............................................................................. 135
9.2.3. Step 3: Create Avahi Service File ......................................................................... 135
9.3. Printing from iOS ........................................................................................................ 135
9.3.1. Step 1: Install iOS Web Clip ............................................................................... 136
9.3.2. Step 2: Test ...................................................................................................... 136
9.4. Printing from Android and Chrome OS ............................................................................ 137
9.4.1. SavaPage Google Cloud Ready Printer .................................................................. 137
9.4.2. PrinterShare™ Mobile Print ................................................................................ 138
9.5. Driverless Printing ........................................................................................................ 138
v
SavaPage User Manual
10.
11.
12.
13.
9.6. IP Restricted Printing ....................................................................................................
9.6.1. CIDR Notation ..................................................................................................
9.6.2. CIDR Set .........................................................................................................
9.7. Printing Encrypted PDF ................................................................................................
Authenticated Printing ...........................................................................................................
10.1. Key Concepts ............................................................................................................
10.1.1. User ...............................................................................................................
10.1.2. Person ............................................................................................................
10.1.3. Abstract User ..................................................................................................
10.1.4. Domain User ...................................................................................................
10.1.5. Synchronized User ...........................................................................................
10.1.6. Synchronized Person ........................................................................................
10.1.7. Internal Person ................................................................................................
10.1.8. Authenticated User ...........................................................................................
10.1.9. Authenticated Abstract User ...............................................................................
10.1.10. Authenticated Person ......................................................................................
10.1.11. Trusted SavaPage Queue .................................................................................
10.1.12. Public SavaPage Queue ...................................................................................
10.1.13. IP Based Authentication ..................................................................................
10.1.14. Mail Print Authentication .................................................................................
10.1.15. Local User ....................................................................................................
10.1.16. Local Abstract User ........................................................................................
10.1.17. Local Person .................................................................................................
10.1.18. User Alias .....................................................................................................
10.2. Single Sign-On Domains .............................................................................................
10.2.1. Authentication Loopholes ..................................................................................
10.2.2. Unauthenticated Users ......................................................................................
10.3. Peer to Peer Networks .................................................................................................
10.4. User Name Aliases .....................................................................................................
Printing Impact .....................................................................................................................
11.1. Financial Impact .........................................................................................................
11.2. Environmental Impact .................................................................................................
11.2.1. Printed Sheet Units ..........................................................................................
11.2.2. Trees .............................................................................................................
11.2.3. Energy ...........................................................................................................
11.2.4. Carbon ...........................................................................................................
Security ...............................................................................................................................
12.1. User Authentication ....................................................................................................
12.1.1. Login Passwords ..............................................................................................
12.1.2. PIN Codes ......................................................................................................
12.1.3. Authentication Tokens ......................................................................................
12.1.4. User Dialog ....................................................................................................
12.2. Access over Internet ...................................................................................................
12.3. Web Session Timeout .................................................................................................
12.4. SSL Passwords ..........................................................................................................
12.5. Secured JMX Connection ............................................................................................
12.6. Encrypted Secrets .......................................................................................................
12.7. Document Signature ....................................................................................................
12.8. User Client ................................................................................................................
12.9. Server Commands ......................................................................................................
12.10. Network Card Reader ................................................................................................
12.11. External Services ......................................................................................................
12.11.1. Google Cloud Print Service ..............................................................................
12.12. Vouchers .................................................................................................................
Internationalization ................................................................................................................
13.1. Localization ...............................................................................................................
13.2. Internal Fonts ............................................................................................................
13.2.1. Default Font ....................................................................................................
vi
138
139
139
139
141
141
141
141
141
141
141
141
141
141
142
142
142
142
142
143
143
143
143
143
143
144
145
146
147
149
149
149
149
150
150
150
151
151
151
151
151
152
152
152
152
153
153
153
154
154
154
155
155
155
157
157
157
158
SavaPage User Manual
13.2.2. CJK Font ........................................................................................................ 158
13.2.3. Unifont ........................................................................................................... 158
14. Customization ...................................................................................................................... 159
14.1. Web App .................................................................................................................. 159
14.1.1. Look-and-feel .................................................................................................. 159
15. Using an External Database .................................................................................................... 161
15.1. Supported Databases ................................................................................................... 161
15.2. Migrating to an External Database ................................................................................. 161
15.2.1. Step 1 - Stop SavaPage ..................................................................................... 161
15.2.2. Step 2 - Create a Backup .................................................................................. 161
15.2.3. Step 3 - Create new Database in External DBMS ................................................... 161
15.2.4. Step 4 - Change SavaPage Connection Parameters ................................................. 162
15.2.5. Step 5 - Initialize new Database ......................................................................... 162
15.2.6. Step 6 - Restore Backup into new Database .......................................................... 162
15.2.7. Step 7 - Restart SavaPage ................................................................................. 162
16. Performance Tuning .............................................................................................................. 163
16.1. Linux Kernel Parameters ............................................................................................. 163
16.1.1. IP Ports .......................................................................................................... 163
16.1.2. TCP Buffer Sizes ............................................................................................. 164
16.1.3. Queue Sizes .................................................................................................... 164
16.1.4. Congestion Control .......................................................................................... 164
16.1.5. Setting Linux kernel parameters with sysctl .......................................................... 165
16.2. Linux User Limits ...................................................................................................... 165
16.3. JVM Tuning .............................................................................................................. 166
16.3.1. JVM Memory Allocation ................................................................................... 166
16.3.2. JVM Garbage Collection ................................................................................... 166
17. SavaPage Community ............................................................................................................ 168
17.1. Visitor Period ............................................................................................................ 168
17.2. Registered Fellow ....................................................................................................... 168
17.3. Importing the Member Card ......................................................................................... 169
A. NFC Authentication ............................................................................................................... 170
A.1. Card Number Format ................................................................................................... 170
A.2. Local Card Reader ....................................................................................................... 170
A.3. Network Card Reader Service ........................................................................................ 171
B. Tools ................................................................................................................................... 172
B.1. Server Commands ........................................................................................................ 172
B.1.1. Common Options .............................................................................................. 173
B.1.2. addInternalUser ................................................................................................. 174
B.1.3. addUserGroup .................................................................................................. 175
B.1.4. changeBaseCurrency .......................................................................................... 176
B.1.5. deleteUser ........................................................................................................ 176
B.1.6. deleteUserGroup ............................................................................................... 176
B.1.7. listUsers .......................................................................................................... 177
B.1.8. listUserGroups .................................................................................................. 177
B.1.9. listUserGroupMembers ....................................................................................... 177
B.1.10. listUserGroupMemberships ............................................................................... 178
B.1.11. listUserSourceGroups ....................................................................................... 178
B.1.12. listUserSourceGroupMembers ............................................................................ 178
B.1.13. listUserSourceGroupNesting .............................................................................. 178
B.1.14. printerAccessControl ........................................................................................ 179
B.1.15. printerSnmp .................................................................................................... 179
B.1.16. setUserProperties ............................................................................................. 180
B.1.17. setUserGroupProperties .................................................................................... 181
B.1.18. syncUserGroup ............................................................................................... 181
B.2. Database Commands .................................................................................................... 181
B.2.1. db-delete-logs ................................................................................................... 182
B.2.2. db-export and db-export-to ................................................................................. 182
B.2.3. db-import ......................................................................................................... 183
vii
SavaPage User Manual
B.2.4. db-init .............................................................................................................
B.3. Stopping and Starting the Server ....................................................................................
B.4. SSL Key Generation ....................................................................................................
B.4.1. Re-Create the Self-Signed Certificate ....................................................................
B.4.2. Importing an Existing SSL Certificate ...................................................................
B.4.3. Installing the Keystore .......................................................................................
C. Capacity Planning ..................................................................................................................
C.1. Database Sizing and Growth ..........................................................................................
C.2. SafePages Sizing and Growth ........................................................................................
C.3. Network Bandwidth Planning ........................................................................................
D. URL Cheat Sheet ...................................................................................................................
E. Printable File Types ................................................................................................................
E.1. Standard File Types .....................................................................................................
E.1.1. XPS to PDF Installation Instructions .....................................................................
E.2. Advanced File Types ....................................................................................................
F. Upgrading from a Previous Version ...........................................................................................
F.1. Upgrading the Server ....................................................................................................
F.2. Upgrading Client Printer Drivers ....................................................................................
F.3. Testing the Upgrade .....................................................................................................
G. Migrating to a New Server ......................................................................................................
G.1. Upgrade Old Server .....................................................................................................
G.2. Install New Server .......................................................................................................
G.3. Migrate Data to New Server ..........................................................................................
G.4. Rename Printers ..........................................................................................................
G.5. Update SavaPage Printers .............................................................................................
H. Advanced LDAP Configuration ................................................................................................
H.1. LDAP Server Default Configuration ...............................................................................
H.1.1. OpenLDAP ......................................................................................................
H.1.2. Apple Open Directory ........................................................................................
H.1.3. Novell eDirectory Defaults .................................................................................
H.1.4. Microsoft Active Directory Defaults .....................................................................
I. SavaPage Plug-ins ...................................................................................................................
I.1. Web API Callback Plug-in .............................................................................................
I.1.1. Payment Gateway Plug-in ....................................................................................
J. Smartschool Print Module ........................................................................................................
J.1. Smartschool Afdrukcentrum ...........................................................................................
J.2. Smartschool Print Options ..............................................................................................
J.3. Smartschool Print Processing ..........................................................................................
J.4. Smartschool PaperCut Integration ....................................................................................
J.4.1. PaperCut Configuration .......................................................................................
J.4.2. PaperCut Smartschool Accounting ........................................................................
J.4.3. PaperCut Queries and Reports ..............................................................................
J.4.4. Integration Pitfalls ..............................................................................................
K. GNU Affero General Public License (AGPL) .............................................................................
viii
183
183
184
184
184
186
187
187
188
188
189
191
191
191
192
193
193
193
193
194
194
194
194
195
195
196
196
197
197
197
198
200
200
200
203
203
203
206
207
207
207
209
209
211
List of Figures
1.1. SavaPage High-Level Architecture ............................................................................................. 7
3.1. Web App: Login Dialog ......................................................................................................... 17
3.2. Web App: Select Language Dialog ........................................................................................... 18
3.3. Web App session detected ....................................................................................................... 18
3.4. Web App: Login Dialog - ID Number ....................................................................................... 19
3.5. Web App: Login Dialog - Local NFC Card ................................................................................ 19
3.6. Web App: Login Dialog - Network NFC Card ............................................................................ 19
3.7. Web App: Login Dialog - Card Self Association ......................................................................... 20
3.8. User Web App: Main View ..................................................................................................... 20
3.9. User Web App: 3 SafePages .................................................................................................... 21
3.10. User Web App: 8 SafePages .................................................................................................. 22
3.11. User Web App: Footer Base .................................................................................................. 22
3.12. User Web App: Hold Print Jobs Dialog ................................................................................... 24
3.13. User Web App: Landscape Job ............................................................................................... 24
3.14. User Web App: Rotate Pages ................................................................................................. 25
3.15. User Web App: Rotated Pages ............................................................................................... 25
3.16. User Web App: SafePage Browser (8 pages) ............................................................................ 26
3.17. User Web App: SafePage Browser - Detailed View (4 of 8) ........................................................ 26
3.18. User Web App: PDF - Overview ............................................................................................ 27
3.19. User Web App: PDF - Scope ................................................................................................. 28
3.20. User Web App: PDF - Description .......................................................................................... 29
3.21. User Web App: PDF - Security .............................................................................................. 29
3.22. User Web App: PDF - Passwords ........................................................................................... 30
3.23. User Web App: PDF - Letterhead ........................................................................................... 31
3.24. User Web App: PDF - Send .................................................................................................. 31
3.25. User Web App: Print - Select Printer ....................................................................................... 32
3.26. User Web App: Printer - Settings ........................................................................................... 33
3.27. User Web App: Print - Page Scaling (Crop) .............................................................................. 33
3.28. User Web App: Print - Page Scaling (Shrink) ........................................................................... 34
3.29. User Web App: Print - Page Scaling (Expand) .......................................................................... 34
3.30. User Web App: Print - Selected Printer .................................................................................... 34
3.31. User Web App: Print - Job Settings ........................................................................................ 35
3.32. User Web App: Printer - Direct Print Release ........................................................................... 36
3.33. User Web App: Letterheads ................................................................................................... 36
3.34. User Web App: Letterhead - New ........................................................................................... 37
3.35. User Web App: Letterhead - Detail ......................................................................................... 38
3.36. User Web App: Delete SafePages ........................................................................................... 38
3.37. User Web App: Log - Documents ........................................................................................... 39
3.38. User Web App: Log - Transactions ......................................................................................... 40
3.39. User Web App: Log - Transactions ......................................................................................... 41
3.40. User Web App: Sort ............................................................................................................. 42
3.41. User Web App: User Details - Internet Printer Device URI .......................................................... 43
3.42. User Web App: User Details - pagometer ................................................................................. 44
3.43. User Web App: User Details - Environmental Impact ................................................................. 44
3.44. User Web App: User Details - Financial .................................................................................. 44
3.45. User Web App: Redeem Voucher ........................................................................................... 45
3.46. User Web App: Transfer Credit .............................................................................................. 45
3.47. User Web App: Transfer Money from Credit Card ..................................................................... 46
3.48. User Web App: Send Bitcoins ................................................................................................ 46
3.49. Web Print: Upload File ......................................................................................................... 47
4.1. Admin Web App: Login ......................................................................................................... 48
4.2. Admin Web App: Menu ......................................................................................................... 49
4.3. Admin Web App: Action Pop-up Menu ..................................................................................... 50
4.4. Admin Web App: Dashboard - Status ....................................................................................... 50
4.5. Admin Web App: Dashboard - Services .................................................................................... 51
ix
SavaPage User Manual
4.6. Admin Web App: Dashboard - Pagometer ................................................................................. 52
4.7. Admin Web App: Dashboard - Pagometer Trend ......................................................................... 52
4.8. Admin Web App: Dashboard - Environmental Impact .................................................................. 52
4.9. Admin Web App: Dashboard - Financial Summary ...................................................................... 53
4.10. Admin Web App: Dashboard - Activity ................................................................................... 53
4.11. Admin Web App: User - List ................................................................................................. 54
4.12. Admin Web App: User - Select and Sort .................................................................................. 55
4.13. Admin Web App: Edit External User - Identity ......................................................................... 56
4.14. Admin Web App: Edit User - Email ........................................................................................ 56
4.15. Admin Web App: Edit User - Card ......................................................................................... 57
4.16. Admin Web App: Edit User - UUID ....................................................................................... 57
4.17. Admin Web App: Edit User - Financial ................................................................................... 57
4.18. Admin Web App: Internal User - Password Reset ...................................................................... 58
4.19. Admin Web App: Edit User - Delete ....................................................................................... 58
4.20. Admin Web App: Queue - List .............................................................................................. 60
4.21. Admin Web App: Queue - Select and Sort ............................................................................... 61
4.22. Admin Web App: Queue - Edit .............................................................................................. 61
4.23. Admin Web App: Proxy Printer - List ..................................................................................... 63
4.24. Admin Web App: Proxy Printer - Select and Sort ...................................................................... 64
4.25. Admin Web App: Proxy Printer - Edit - Identity ........................................................................ 65
4.26. Admin Web App: Proxy Printer - Edit - Media Source ............................................................... 66
4.27. Admin Web App: Proxy Printer - Edit - Manual Media Source .................................................... 66
4.28. Admin Web App: Proxy Printer - Edit - Manual Media Size (Simple) ............................................ 67
4.29. Admin Web App: Proxy Printer - Edit - Manual Media Size (Advanced) ........................................ 67
4.30. Admin Web App: Proxy Printer - Rename ................................................................................ 68
4.31. Admin Web App: Device - List .............................................................................................. 69
4.32. Admin Web App: Device - Select and Sort .............................................................................. 70
4.33. Admin Web App: Devices - Network Card Reader - Custom User Login ........................................ 71
4.34. Admin Web App: Devices - Network Card Reader - Proxy Print Authentication .............................. 72
4.35. Admin Web App: Devices - Terminal - Custom Proxy Print ........................................................ 74
4.36. Admin Web App: Devices - Terminal - Custom User Login ........................................................ 75
4.37. Admin Web App: Options - User Source ................................................................................. 76
4.38. Admin Web App: Options - User Source - LDAP ...................................................................... 77
4.39. Admin Web App: Options - User Source - LDAP ...................................................................... 78
4.40. Admin Web App: Options - Internal Users ............................................................................... 79
4.41. Admin Web App: Options - User Creation - Import ................................................................... 79
4.42. Admin Web App: Options - User Creation - From Group ............................................................ 80
4.43. Admin Web App: Options - User Creation - Synchronize ............................................................ 80
4.44. Admin Web App: Options - User Creation - On Demand ............................................................ 81
4.45. Admin Web App: Options - User Authentication ....................................................................... 82
4.46. Admin Web App: Options - User Authentication - Username Login .............................................. 83
4.47. Admin Web App: Options - User Authentication - ID Number Login ............................................ 83
4.48. Admin Web App: Options - User Authentication - Local NFC Card Login ..................................... 84
4.49. Admin Web App: Options - User Authentication - Default Login ................................................. 84
4.50. Admin Web App: Options - Mail - SMTP ................................................................................ 85
4.51. Admin Web App: Options - Mail - Messages ............................................................................ 85
4.52. Admin Web App: Options - Mail - Test ................................................................................... 86
4.53. Admin Web App: Options - Google Cloud Print - Status ............................................................. 87
4.54. Admin Web App: Options - Google Cloud Print - OAuth ............................................................ 88
4.55. Admin Web App: Options - Google Cloud Print - Notifications .................................................... 90
4.56. Admin Web App: Options - Mail Print (IMAP) ......................................................................... 91
4.57. Admin Web App: Options - Mail Print (Attachments) ................................................................ 92
4.58. Admin Web App: Options - Web Print .................................................................................... 93
4.59. Admin Web App: Options - Internet Print ................................................................................ 93
4.60. Admin Web App: Options - Proxy Print .................................................................................. 94
4.61. Admin Web App: Options - Eco Print ..................................................................................... 96
4.62. Admin Web App: Options - Financial - Currency ...................................................................... 96
4.63. Admin Web App: Options - Financial - General ........................................................................ 97
x
SavaPage User Manual
4.64. Admin Web App: Options - Financial - POS ............................................................................ 97
4.65. Admin Web App: Options - Financial - Vouchers ...................................................................... 98
4.66. Admin Web App: Options - Financial - Transfer funds ............................................................... 98
4.67. Admin Web App: Options - Backups ...................................................................................... 99
4.68. Admin Web App: Options - Automatic Backups ........................................................................ 99
4.69. Admin Web App: Options - Advanced - User Client ................................................................ 100
4.70. Admin Web App: Options - Advanced - Reset Admin Password ................................................. 100
4.71. Admin Web App: Options - Advanced - JMX Agent ................................................................ 101
4.72. Add JMX Connection with Java VisualVM ............................................................................. 102
4.73. Connecting to Remote Process with JConsole .......................................................................... 102
4.74. Admin Web App: Options - Advanced - Locale ....................................................................... 103
4.75. Admin Web App: Options - Default Paper Size ....................................................................... 103
4.76. Admin Web App: Options - Default Paper Size ....................................................................... 103
4.77. Admin Web App: Options - Converters .................................................................................. 104
4.78. Admin Web App: Options - Advanced - Proxy Printing ............................................................ 104
4.79. Admin Web App: Options - Advanced - Pagometers ................................................................ 105
4.80. Admin Web App: Configuration Editor - List .......................................................................... 106
4.81. Admin Web App: Configuration Editor - Edit ......................................................................... 106
4.82. Admin Web App: Log - List ................................................................................................ 107
4.83. Admin Web App: Log - Select and Sort ................................................................................. 107
4.84. Admin Web App: Log - Select Date ...................................................................................... 108
4.85. Admin Web App: Documents - List ...................................................................................... 108
4.86. Admin Web App: Documents - Select and Sort - All ................................................................ 110
4.87. Admin Web App: Documents - Select and Sort - In ................................................................. 111
4.88. Admin Web App: Documents - Select and Sort - Out ............................................................... 112
4.89. Admin Web App: Documents - Select and Sort - PDF .............................................................. 112
4.90. Admin Web App: Documents - Select and Sort - Print .............................................................. 113
4.91. Admin Web App: About ...................................................................................................... 113
4.92. Admin Web App: About - Version ........................................................................................ 114
4.93. Admin Web App: About - License ........................................................................................ 114
4.94. Admin Web App: About - Community ................................................................................... 115
4.95. Admin Web App: About - Import Member Card ...................................................................... 115
4.96. Admin Web App: About - Support ........................................................................................ 116
4.97. Admin Web App: About - Host Packages ............................................................................... 117
4.98. Admin Web App: Voucher List ............................................................................................ 118
4.99. Admin Web App: Vouchers - Select and Sort .......................................................................... 118
4.100. Admin Web App: Voucher Actions ..................................................................................... 119
4.101. Admin Web App: Create Vouchers ...................................................................................... 120
5.1. Point-of-Sale: Deposit Start .................................................................................................... 122
5.2. Point-of-Sale: Deposit Completed ........................................................................................... 123
5.3. Point-of-Sale: Receipts .......................................................................................................... 124
9.1. SavaPage Printer on Ubuntu: Choose Driver ............................................................................. 131
9.2. SavaPage Printer on Ubuntu: Printer Properties ......................................................................... 132
9.3. SavaPage Printer on Mac OS X: Add Printer ............................................................................ 132
9.4. SavaPage Printer on Mac OS X: Select PPD ............................................................................. 133
9.5. SavaPage Printer on Mac OS X: Print & Fax ............................................................................ 133
9.6. SavaPage Local Printer on Windows ....................................................................................... 133
9.7. SavaPage Shared Local Printer on Windows ............................................................................. 134
9.8. SavaPage Network Printer on Windows ................................................................................... 134
9.9. iPad App Sharing Options ..................................................................................................... 136
9.10. SavaPage Printer Options on iPad ......................................................................................... 137
9.11. Select SavaPage Printer on iPad ............................................................................................ 137
10.1. SavaPage in a Single Sign-On Domain ................................................................................... 144
10.2. IP Based Authentication for Abstract User .............................................................................. 145
10.3. IP Based Authentication for Unauthenticated User ................................................................... 146
10.4. IP Based Authentication in Peer-to-Peer Network ..................................................................... 147
14.1. User Web App: Custom CSS - Sample #1 .............................................................................. 160
14.2. User Web App: Custom CSS - Sample #2 .............................................................................. 160
xi
SavaPage User Manual
J.1. Admin Web App: Options - Smartschool Print - Accounts ...........................................................
J.2. Admin Web App: Options - Smartschool Print - Actions .............................................................
J.3. Admin Web App: Options - Smartschool Print - PaperCut Integration ............................................
J.4. Admin Web App: Options - Smartschool Print - PaperCut Server ..................................................
J.5. Admin Web App: Options - Smartschool Print - PaperCut Database ..............................................
J.6. Admin Web App: Options - Smartschool Print - PaperCut Export .................................................
xii
204
204
205
205
206
206
List of Tables
1. Typographical conventions ........................................................................................................ xiv
8.1. Secured Application Areas ..................................................................................................... 129
8.2. Advanced Configuration ........................................................................................................ 130
12.1. Default Web Session Timeout Values .................................................................................... 152
12.2. Web Session Timeout Configuration Items ............................................................................. 152
C.1. Database size increase metrics per document flow. .................................................................... 187
D.1. SavaPage URL Cheat Sheet .................................................................................................. 189
E.1. Standard Printable File Types ................................................................................................ 191
E.2. Advanced Printable File Types ............................................................................................... 192
H.1. LDAP Configuration items .................................................................................................... 196
H.2. OpenLDAP Default Settings .................................................................................................. 197
H.3. Apple Open Directory Default Settings ................................................................................... 197
H.4. Novell eDirectory Default Settings ......................................................................................... 198
H.5. Microsoft Active Directory Default Settings ............................................................................. 198
H.6. Microsoft Active Directory Custom Settings ............................................................................ 198
I.1. Web API Callback Configuration Item ..................................................................................... 200
I.2. Payment Gateway Configuration Item ...................................................................................... 200
xiii
Preface
1. About this Manual
The SavaPage User Manual covers the setup, management and configuration of SavaPage Print Server. Please
take a few moments prior to installing the application to read the key sections of this manual. The latest version
of this manual in HTML, PDF and EPUB format are available from the SavaPage website1.
2. Expectations and Prerequisites
SavaPage is a network based application. Experience with basic network concepts, such as server administration
and network connectivity is expected. Prior to installing or evaluating SavaPage you should be familiar with the
concepts of:
•
•
•
•
•
Client/Server computing.
Internet Printing Protocol (IPP).
IP Printing (JetDirect/RAW)2 .
Common Unix Printing System (CUPS).
Lightweight Directory Access Protocol (LDAP).
3. Conventions used in this Document
3.1. Typographical Conventions
This is a list with examples of the typographical conventions used in this manual.
Convention
Example
Executable program with options.
Enter ls --reverse to get a directory listing in reverse order.
A character or string indicating
the start of an input field.
Enter you name after the Username: prompt.
User input.
John entered john as his login name.
A button.
Press the Cancel button.
A text prompt.
Enter your full name after the Name prompt.
Content that may or must be replaced by the user.
Please enter filename to save the content to.
Filename.
Please open the file server.properties in your favorite editor.
Directory.
/opt/savapage
A question-and-answer set.
Q:
To be, or not to be?
1
http://savapage.org/
JetDirect is the most common Socket API, and a de facto standard, introduced by Hewlett-Packard. It allows a TCP/IP connection via port
9100 to a printer attached to a Local Area Network similar to a connection to its serial or parallel port. Windows supports this protocol as
Standard TCP/IP port monitor for print server attached print devices.
2
xiv
Preface
Convention
Example
A:
That is the question.
Key on a keyboard
Press F1 for help.
A combination of input actions.
Press CTRL+C to abort the program.
A selection or series of selections from a menu.
Select Print → Settings to open the dialog.
An inline code fragment.
Text in this format is used to show code examples, the contents of files, and console output,
as well as the names of variables, commands, and other code excerpts in the text.
Code (listing).
Line A Inline annotation on A
Line B
Inline annotation on B
Line C
Comment for Line B.
Comment for Line C.
Link (external).
A link to an URI is formatted like this: http://savapage.org and mailto:[email protected]
Or as an alternative: Visit our website3 or write an email4
Link (internal).
See Chapter 2, Server Installation [9] of this manual.
Name of a variable.
In Perl, @ARGV contains the command line parameters used when the script was run.
Inline text that is some literal
value.
When debug is activated more detailed logging is produced.
Table 1. Typographical conventions
3.2. Notes
You should pay special attention to notes set apart from the text with the following icons:
Important
Important notes are marked like this.
Note
Notes provide extra background information.
Tip
Tips provide useful advice to make your life easier.
Caution
Indicate situations where you have to be careful what you are doing.
Warning
Where extreme care has to be taken.
3
4
http://savapage.org
mailto:[email protected]
xv
Preface
4. Notice
While every effort has been taken to ensure the accuracy and usefulness of this manual, we cannot be held responsible for occasional inaccuracy or typographical errors. If you find an inaccuracy or error, please let us know.
Information in this document is subject to change without notice. The names of companies, products, people,
characters, and data mentioned in the examples are fictitious and are in no way intended to represent any real
individual, company, product, or event, unless otherwise noted.
5. Your Feedback
This manual isn't “done”. In fact, this manual will probably never be completely “done”. The subject it covers is
expected to change and expand over time, and we consider this work a reflection of our ongoing conversation with
the SavaPage Community5. Publication of this manual highlights the openness of the product, and that you, as a
user, can play a pivotal role in helping to maintain and improve the product. If you see anything in this manual
that can be improved: spelling, examples, explanations, then you should tell us, and send us an email6. Also, if
you have ideas about improving the product in general, please let us know. All feedback will be rewarded with
a gracious response.
6. Acknowledgements
In the year 2000 I worked as contractor for a Dutch airline company. Being a software engineer I regularly prepared
code review sessions where my colleagues and I discussed the source code we produced. Since the code needed
to be printed, it annoyed me that I did not have a program that could get the code neatly on paper. With Notepad
you could indeed make a printout, but it produced sheets where our precious code floated disjointed in a big sea
of white. In addition to the cluttered layout, which obscured our intentions, I was immediately struck by the large
amount of wasted paper. I soon became to realize that I was not the only one abusing paper this way. Almost all
employees had the same habit, as I could tell by the numerous sheets scattered around the printers begging to be
picked up by their originator.
The code review solution came from a program called TextPrint written by Örjan Råberg. TextPrint is a small
Windows application designed for just one purpose: printing text files. It has many settings to control the layout
with. For example, you can print multiple pages on one sheet of paper and add line numbers. This was indeed the
program I needed. Örjan was not actively maintaining the program anymore and allowed me to take the project
further. At this moment TextPrint is still freeware and can be downloaded here7. I want to thank Örjan for setting
me on track of what eventually became my professional mission: supporting organisations in their commitment
to sustainability and cost saving when producing and printing electronic documents.
One thing led to the other. In the same year 2000 my search for other paper saving software led me to FinePrint
Software8. FinePrint, their first product, is a Windows printer driver that offers advanced features like print preview, editing and formatting. I instantly became a fan, and am reselling and supporting FinePrint Software ever
since. A year later they released pdfFactory, the much acclaimed PDF creator. I want to thank FinePrint founders
Jonathan Weiner and Mark O’Brien for being an inspiration as innovators and designers of products that, to put
it in their own words, are “as simple as we can make them while providing sophisticated and unique features that
make them a pleasure to use”.
Last but not least, in 2008 my longtime search for a top quality print management solution came to an end when
I found PaperCut9, and I am proud to say I became a value-added reseller of this superb product.
Being involved with printing software for more than 10 years now it would be strange not to have developed some
ideas of my own. Enter SavaPage, the product this manual is about.
It is no coincidence that the technical setup of SavaPage is highly inspired by PaperCut, since it has a proven
architecture and an excellent track record. PaperCut users will notice similarities in concepts and interfaces. How5
http://savapage.org/
mailto:[email protected]
7
http://www.datraverse.com/textprint/
8
http://www.fineprint.com/
9
http://www.papercut.com/
6
xvi
Preface
ever, SavaPage solves things differently within a somewhat smaller scope. Please read on to find out what SavaPage is about.
The server editions of FinePrint and pdfFactory are hard to beat in a pure Windows environment. However, since it
is Windows-only software, organisations cannot use it for Mac OS and GNU/Linux clients. For these organisations
SavaPage is an alternative worth looking at.
Looking back on my career so far, what stands out is my strong bias towards small innovative engineering companies. By nature these companies are passionate about what they create and very open to their customers. It is
real fun to communicate with them.
Representing a small software engineering company myself, it is my sincere ambition that SavaPage will mature
in the same way as the products that inspired me.
Going public with software has important legal, ethical and social implications. This confronted me with my own
values and beliefs to take a stand. The Free Software movement has been a great inspiration in my quest for a fair
and sustainable business model. Therefore SavaPage is licensed under the GNU Affero General Public License
(AGPL)10 and the SavaPage Community is founded for users and partners to further develop the solution.
-- Rijk Ravestein, SavaPage Community Manager, owner of Datraverse.
7. About the Author
Rijk Ravestein graduated cum laude from Utrecht University in 1980 as M.Sc. in Cognitive Psychology. After
some years of practice as behavioral scientist, Rijk started working as software developer in 1985.
Till 1987 he worked on a project automating the core administration of a health insurance company. From 1987 till
1990 Rijk acted as coordinator producing several multi-user applications on LAN and midrange-systems as fixed
priced projects. His responsibilities included planning, analysis and design, quality assurance, and deployment.
In 1990 his career took a definite technical direction when working as a consultant for Vleermuis Software Research in joint operation with IBM Netherlands. Here he evaluated several development tools concerning ClientServer technology and Object Oriented Programming by building proof-of-concept prototypes.
Since 1991 Rijk is engaged as architect and developer of distributed applications using Object Technology. Besides
some large projects counting several man-months, Rijk participated in many smaller projects using Agile Software
Development.
Rijk worked for some of the major IT companies in The Netherlands including IBM, Capgemini and Logica. In
1998 he started his own company Datraverse.
Rijk's professional passion is developing and distributing high quality business solutions using state-of-the-art
Information- and Communication Technology. As distributor he sells and supports third-party software to business
users. As developer he worked as contractor for large and middle-sized organisations. Since 2015 he is full-time
committed to the SavaPage Community.
Rijk lives in the city of Almere (The Netherlands) with his wife and two sons. In his private time he enjoys his
family, sports, theater and music.
10
https://www.gnu.org/licenses/agpl.html
xvii
Chapter 1. Introduction
1.1. What is SavaPage?
SavaPage is a Libre Print Management Solution that uses Open Standards and Commodity Hardware for Secure
Pull-Printing, Pay-Per-Print, Tracking and Tracing and PDF Creation.
SavaPage is a Print Server deployed on a central GNU/Linux system. Any workstation or device that supports the
Internet Printing Protocol (IPP) or IP Printing (JetDirect), like Windows, Mac and GNU/Linux workstations, can
use SavaPage printers. Mac OS X and iOS devices can use AirPrint® 1. Android and Chrome OS devices can use
Google Cloud Print to print to SavaPage. As a backdoor any device can use Web Print and Mail Print to print.
When a user prints to SavaPage the printed pages are immediately shown in the SavaPage Web Application that
runs in any modern web browser. SavaPage accumulates print jobs per user in a single personal preview where it
can be manipulated and pruned before storing or routing it as PDF document.
And yes, you can even route to a “real” printer. The SavaPage Web App offers a Common Printing Dialog for
printing to printers installed at the server side (proxy printing). This makes SavaPage the only printer you need
on your desktop.
The SavaPage Web App is optimized for desktop clients as well as mobile devices. This opens up useful scenario's.
Like, a user walking up to the printer of his choice and releasing a print job by pushing a button on his smartphone.
Administrators on the go can easily monitor the system on their tablet.
SavaPage turns printing into a user experience where soft copies are likely to be more attractive than hard copies,
and where precious paper, trees and money is saved along the way. And, if printing is needed after all, SavaPage
is the logical stopover where, on second thought, n-up, gray-scale and duplex proxy-printing can be applied to
reduce the costs of printing to a minimum.
So, why print when you can SavaPage?
1.1.1. Libre Software
SavaPage is Libre Software2 licensed under the GNU Affero General Public License (AGPL)3 version 3 as published by the Free Software Foundation4.
1.1.2. Benefits
The key benefits of SavaPage are:
• Less administration. SavaPage is the one printer you need to print to any printer in your organization.
• Zero install. A generic PostScript driver and web browser is all you need to print from Windows, Mac and
GNU/Linux and preview the result.
• Multi-platform. Corporate printers are sandboxed in the Web App Preview and thus available on all mobile and
desktop platforms for pass-through (proxy) printing.
• Easy follow-me printing. Users can use their own mobile device as print release terminal.
• Mobile printing. Google Cloud Print, iOS AirPrint®, Web Print and Mail Print is supported out of the box.
• Think before you print. SavaPage Web App shows a print preview that makes you think twice. Do you really
need to print all these pages?
1
AirPrint is a registered trademark of Apple Inc.
http://en.wikipedia.org/wiki/Free_software
3
https://www.gnu.org/licenses/agpl.html
4
http://www.fsf.org/
2
1
Introduction
• Create environmental awareness. Draw end user attention to the cost of printing, and save precious paper, trees
and money along the way.
• Reduce overall printing costs. Remove unnecessary pages and graphics. Save as PDF, or route to a "real" printer
with n-up, gray-scale and duplex to reduce printing costs.
• Eliminate cost of pre-printed paper. Create virtual letterheads and apply them to any print job.
• Libre Software above Proprietary Software.
• Commodity Hardware above expensive Proprietary Devices.
• A SavaPage Community based on Peer-To-Peer Cooperation above Centralized Corporation.
1.1.3. Key Features
The key features of SavaPage are:
• Print to SavaPage with a Generic PostScript Driver from Windows, Mac OS X and GNU/Linux.
• Internet Print for driver printing over Internet.
• SavaPage can be the only printer on your desktop.
• Use Google Cloud Print to print from Android, Chrome OS or any Google Cloud Print enabled Web App.
• Use AirPrint® to print from Mac OS X and iOS (iPad, iPod, iPhone).
• Use Web Print and Mail Print to print from any device.
• User Web App and Admin Web App for desktops and mobile devices.
• Pass-through server-side Proxy Printing from the User Web App. No local drivers needed.
• Use existing LDAP (Active Directory) user accounts for authentication.
• Username/Password, ID/PIN and NFC Card authentication.
• SavaPage Financial with pay-per-print, vouchers and point-of-sale.
• Command-Line Interface to server methods.
• Printed pages are shown real-time in the User Web App. Browse, sort and delete to optimize the result.
• Download or send accumulated print jobs as PDF document.
• Optionally remove graphics from PDF and print output.
• Innovative Eco Print to reduce ink and toner cost.
• Follow-me Printing with Terminals and Network Card Readers.
• Raspberry Pi as Network Card Reader.
• Multi-page letterheads.
• Third party Database support.
• Command-Line Interface.
• Customizable Web Interface.
• Online Payments (credit cards, bank accounts, Bitcoin).
• Enterprise level security and encryption based on SSL.
• Multi-language support.
• Comprehensive User Manual in PDF, EPUB and HTML format.
1.2. System Requirements
1.2.1. Server
SavaPage Print Server can be installed on any modern GNU/Linux system that supports systemd service manager
like distributions based on Debian and Red Hat Enterprise Linux (RHEL), and openSUSE. Debian based distributions that use SysV init scripts are also supported.
Note
Throughout this manual GNU/Linux command and file examples are given for Debian based systems.
Commands and files might differ for other distributions, but not in function. For example, the Debian
apt-get command has a RHEL yum and openSUSE yast equivalent. It is trusted that system administrators can translate the examples to their own environment. If applicable, functional differences between
distributions will be explained.
2
Introduction
1.2.1.1. Java
SavaPage is a Java program and needs JDK 7 (or higher) to be installed. Check the installation by executing both
the java and javac commands: they should echo usage information.
On Debian based systems you can install the package with this command:
sudo apt-get install openjdk-7-jdk
1.2.1.2. CUPS
SavaPage uses local CUPS printer queues for Proxy Printing. CUPS 1.4 or higher must be installed 5.
Important
SavaPage will automatically add any local CUPS printer as proxy printer. So, for proxy printing to work,
first add each proxy printer as CUPS printer.
Tip
Modern GNU/Linux distributions have everything prepared for using most printers. For USB printers it
is often enough to simply plug them in. For network printers you simply start the distribution's printer
setup tool out of the system administration menu or out of a system administration application, click on
a button for adding a new printer and then follow the screen instructions. If this does not work, usually
there is no suitable driver installed on your system. Verify in the OpenPrinting database6 whether your
printer is supposed to work and whether there is a driver or PPD file available. See the OpenPrinting
CUPS Quick Start7 for more details.
1.2.1.3. Poppler
SavaPage needs the PDF utilities based on Poppler to function properly.
Poppler8 is a PDF rendering library based on Xpdf PDF viewer. The command line utilities are used to get information of PDF documents, convert them to other formats, or manipulate them. SavaPage uses pdftoppm to
convert PDF pages to images.
Check if the package is installed by entering the following command:
pdftoppm -v
On Debian based systems you can install the package with this command:
sudo apt-get install poppler-utils
1.2.1.4. ImageMagick
SavaPage needs the convert command of the ImageMagick software suite to manipulate images.
ImageMagick is a software suite to create, edit, compose and convert bitmap images in a variety of formats (over
100) .
Check by entering the following command:
convert --version
5
CUPS 1.4 or higher provides the Job Template attribute “fit-to-page” that is used by SavaPage proxy printing to scale documents to fit the
size of selected media. See http://www.cups.org/documentation.php/spec-ipp.html
6
http://www.openprinting.org/printers
7
http://www.linuxfoundation.org/collaborate/workgroups/openprinting/database/cupsdocumentation
8
http://poppler.freedesktop.org/
3
Introduction
On Debian based systems you can install the package with this command:
sudo apt-get install imagemagick
1.2.1.5. Avahi
Avahi is needed if you want to print to SavaPage from iOS devices (iPad, iPod, iPhone). See Section 9.3, “Printing
from iOS” [135].
Avahi9 is a system which facilitates service discovery on a local network via the mDNS/DNS-SD 10 protocol
suite. Any modern GNU/Linux system has Avahi installed, but to be sure you can check by entering the following
command:
avahi-browse --version
On Debian based systems you can install the package with this command:
apt-get install avahi-daemon avahi-discover libnss-mdns
1.2.1.6. Hardware
The SavaPage server process requires a minimum of 2 CPU cores, 2GB of RAM and 1 GB of free disk space.
Note
Depending on the expected print quota you should reserve extra disk-space for each SavaPage user. See
Appendix C, Capacity Planning [187].
1.2.2. Clients
On desktop and mobile clients you need:
• An HTML5 compatible browser.
For printing to SavaPage on GNU/Linux and Mac clients you need:
• IPP printer support.
For printing to SavaPage from Windows you can choose between:
• A Local Printer on a Standard TCP/IP Port, when you want to share a SavaPage printer (e.g. on a Windows
Print Server).
• A Network Printer using Internet Printing Protocol (IPP).
To AirPrint to SavaPage on devices like iPad, iPhone and iPod Touch you need:
• iOS 4.2 or higher.
To AirPrint to SavaPage from Mac OS you need:
• Mac OS X 10.7 Lion or higher.
Note
The SavaPage WebApps use jQuery Mobile11 which offers broad support for the vast majority of all
modern desktop, smartphone, tablet, and e-reader platforms.
9
http://avahi.org/
mDNS/DNS-SD enables you to plug your laptop or computer into a network and instantly be able to view other people who you can
chat with, find printers to print to or find files being shared. Compatible technology is found in Apple MacOS X (branded Bonjour [http://
www.apple.com/support/bonjour/] and sometimes Zeroconf).
11
http://jquerymobile.com/
10
4
Introduction
1.3. How does SavaPage work?
To explain how SavaPage works we first introduce the key concepts for the usage scenarios. After that we will
describe a typical work flow, and end with a high-level overview of the application's architecture.
1.3.1. Key Concepts
Each concept is described in an abstract definition and its SavaPage implementation.
1.3.1.1. Print Server
A print server is a system responsible for hosting print queues and sharing printer resources to client workstations.
Client users submit print jobs to a print server rather then directly to the printer itself. A print server may be a
dedicated server. However, on many networks this server may also perform other tasks such as file serving.
SavaPage is a regular Print Server in the technical sense, but is special in the sense that it shares multiple print
queues of the one SavaPage virtual printer. The GNU/Linux host where SavaPage is deployed on may offer file
services on its own account.
1.3.1.2. Print Queue
A print queue is first-in-first-out queue holding all jobs pending on a given printer.
SavaPage virtual queues redirect print jobs to the originating user's personal queue called “SafePages”. The
SavaPage Web App is the viewport on these SafePages.
1.3.1.3. User ID/Username
In a multi-user environment, users login to a network or computer using a username and password. Often these
are managed by services like Active Directory or LDAP. The username is known as the user's identity.
SavaPage uses this identity for authentication and tracking purposes.
Note
User authentication is a topic of its own. Please see Chapter 10, Authenticated Printing [141] for more
elaboration on the User concept.
1.3.1.4. Client/Server Model
Client software is a small application that runs on each workstation and communicates with a central server. The
printing process on most networks works according to a client/server model with clients (workstations) submitting
jobs to a server.
SavaPage utilizes the client/server model with standard components on the workstation, i.e. an IPP or JetDirect
printing client and a Web browser.
1.3.1.5. Application Server
An application server is a server program responsible for centrally processing “business logic” and providing
services to end-users.
SavaPage is an application server since it provides “business logic” for showing, editing and routing printed
documents.
1.3.1.6. Information Provider
A provider is a software component or program responsible for providing information to an Application Server.
5
Introduction
SavaPage uses an integrated IPP and JetDirect Server to capture Driver Print jobs from client workstations and
devices. It communicates with IMAP to capture Mail Print jobs and uses HTTP upload to capture Web Print
jobs. The generic information provider for capturing print jobs is called the “Print Provider”. Other important
providers are “User Directory Provider”, “Authentication Provider” and “CUPS Information Provider”.
1.3.1.7. Web Application Interface
A Web Application, or Web App for short, is a software program that interacts with end-users via a web browser.
A Web App gives flexibility because it allows access from any location on the network and avoid the need for
installation of separate software.
SavaPage provides a web-based interface for end-users and system administrators. Since it is optimized for desktops and mobile devices an even greater flexibility is achieved.
1.3.1.8. SafePages
SafePages is the SavaPage term for the personal user space with accumulated jobs from SavaPage printer queues.
See Section 1.3.1.2, “Print Queue” [5].
1.3.1.9. Proxy Printer
Proxy Printer, or ProxyPrinter, is the SavaPage term for a printer that is available in the SavaPage Web App for
printing selected SafePages.
Important
It is important to understand that using a Proxy Printer does not require its printer driver on the client
workstation. Proxy Printer queues are CUPS queues located on the GNU/Linux SavaPage host and are
not shared on the local network, hence not visible for client workstations. Proxy Printer queues can only
be selected and used in the SavaPage Web App sandbox for pass-through printing.
1.3.2. The SavaPage Work Flow
To illustrate what SavaPage is about and how it works we'll start with a simple use case.
1.3.2.1. End-user perspective
1. John opens a web browser, clicks on the SavaPage bookmark and logs into SavaPage with his regular Active
Directory credentials.
2. John prints a document from his favourite editor to his SavaPage Network Printer.
3. John sees the printed pages appear as thumbnails in his web browser.
4. John browses through the thumbnails and zooms in on page 15 and 16 to see more detail.
5. Things look good, apart from two void pages at the end. So, John deletes these pages using the Delete dialog.
6. After selecting the company letterhead as standard background, John selects the Brand-X Multi-functional
Proxy Printer located down the hall, checks the settings (duplex and grayscale), and presses the Print button.
7. Since John also wants to save a PDF document of the result, he sets the PDF properties (title, author, subject,
keywords, encryption) and presses the Download button.
Note
John could also have opened a web browser on his smartphone and do exactly the same things.
6
Introduction
1.3.2.2. Technical perspective
This is what happens behind the scenes.
1. When John prints to SavaPage from his editor, his workstation transfers the print job to the SavaPage Print
Server.
2. The SavaPage Print Provider handles the print job, analyzes the information and retrieves:
a. The identity of the user who printed the document.
b. The identity of the queue the job was printed to.
3. The Print Provider submits the information about the job to the Application Server to process the business logic.
4. The Application Server approves the print request, transfers the job to the user's SafePages, and signals John's
browser session that a new job has arrived.
5. The Web Application in John's browser picks up the signal, handles the information and displays the newly
printed pages.
6. The Web Application transfers each of John's editing actions (delete, letterhead) to the Application Server
where the state of the SafePages is saved.
7. When Johns selects the Brand-X Multi-functional Proxy Printer, the Web App asks the Application Server for
the printer options, so it can display the Printer Settings dialog for this specific printer.
8. When Johns presses the Print button, the print action plus the selected printer options are passed to the Application Server. The server composes the print job (applying editing actions and selected letterhead) and sends
the result to the Proxy Printer, using the printer options John selected.
9. John's download request is fulfilled by the Application Server with a PDF document holding the edited
SafePages, including the letterhead, and the chosen PDF settings.
1.3.3. Architecture Overview
Figure 1.1, “SavaPage High-Level Architecture” [7] shows a high level view of the components and communication involved.
Figure 1.1. SavaPage High-Level Architecture
• The SavaPage Print Server synchronizes users from the LDAP/NIS source to its own SQL Database.
7
Introduction
• The Client Web Application on desktops, laptops and mobile devices communicates with the Application Server
using HTTP.
• Desktop and laptops users can be forced by their OS to login and be authenticated at the LDAP/NIS source.
• SavaPage Web App users on desktops, laptops and mobile devices are authenticated by the SavaPage Print
Server at the LDAP/NIS source.
• Desktop and laptop users print to SavaPage with the SavaPage printer driver using IPP or JetDirect protocol.
• Mac OS X and iOS users can print to SavaPage with AirPrint®.
• Every user can use SMTP to Mail Print to SavaPage.
• SavaPage uses IMAP to monitor the Web Print Inbox.
•
•
•
•
Every user can use HTTP to Web Print to SavaPage.
Every user can print to the Google Cloud Ready SavaPage Printer.
The Content Repository holds letterhead documents.
A print command in the Web App to a Proxy Printer is executed by SavaPage with an IPP operation to local
CUPS.
8
Chapter 2. Server Installation
This chapter covers the initial installation and configuration of SavaPage in your network environment.
• If you are installing a new version over an existing installation please consult Appendix F, Upgrading from a
Previous Version [193].
• If this installation is part of a migration from an old server please consult Appendix G, Migrating to a New
Server [194] before going on.
Initial installation takes only a few minutes on a prepared server. This guide will walk you through installation
and configuration step-by-step. The process is summarized below:
1.
2.
3.
System requirements check.
Downloading and installing SavaPage.
Completing the configuration.
4.
Testing the software.
Tip
If you would like to know the technical details behind the SavaPage installer, take a look at Section 8.1,
“The Installation Process” [128].
Important
By installing the program, you are accepting and agreeing to the terms of the GNU Affero General Public
License (AGPL). Please review Appendix K, GNU Affero General Public License (AGPL) [211] before
continuing.
2.1. Step 1 - System Requirements
Before proceeding with the installation you should take a few moments to verify system requirements. Is the
operating system version supported and are patches up-to-date? Take a few minutes to verify the system is current
and supported (see Section 1.2, “System Requirements” [2]).
The SavaPage installation program needs the commands which, strings, gunzip and perl. So, make sure the
binutils, debianutils (for Debian based systems), perl and gzip packages are installed.
2.2. Step 2 - Create System Account
SavaPage runs and installs under a system user account called savapage. This account is fixed, you cannot
choose another name. Your free though to pick a location for the application. However, GNU/Linux Filesystem
Hierarchy Standard (FHS) dictates that the application is installed in the /opt/savapage directory.
Create the system user account at the command prompt by entering:
sudo useradd -r savapage
The syntax for useradd may differ slightly on different versions of GNU/Linux. It may also be called adduser.
Next, create the install directory and set the ownership to the savapage account:
9
Server Installation
sudo mkdir /opt/savapage
... and set the ownership to the savapage account. For Debian and RHEL based systems:
sudo chown savapage:savapage /opt/savapage
... and for openSUSE:
sudo chown savapage:users /opt/savapage
Some GNU/Linux distributions impose strict resource usage limits on user accounts (ulimit). The savapage
account is a dedicated account used for hosting the SavaPage application and hence should be granted sufficient
resource limits such as the ability to open many files. Please consult Section 16.2, “Linux User Limits” [165]
on how to change these limits.
2.3. Step 3 - Configure CUPS and Samba
Make sure to not publish shared printers in CUPS and Samba. Publishing shared printers creates a loophole by
which users can access a printer directly from their workstation and print outside the control of SavaPage.
For Samba, just edit the /etc/samba/smb.conf file and disable the [printers] share definition.
In CUPS, do not enable the “Publish shared printers connected to this system” option as offered in the Print Server
Settings dialog. When no such dialog is available you can make the adaption in the CUPS Administrator Web
interface (“Share printers connected to this system”), or manually in the cupsd.conf 1file by changing this
content snippet, that publishes local printers and allows access from all machine on the local network...
# Allow remote access
Port 631
# Share local printers on the local network.
Browsing On
<Location />
# Allow access to the server...
Order allow,deny
Allow @LOCAL
</Location>
... to this snippet that restricts CUPS access from localhost only ...
# Only listen for connections from the local machine.
Listen localhost:631
# Disable printer sharing.
Browsing Off
<Location />
Order allow,deny
</Location>
... and leave all other content as it is.
Important
Each individual proxy candidate CUPS printer must be shared locally so the savapage system account
can access it. Enabling the shared option can be done in a printer GUI dialog, in the CUPS Administrator
Web interface, or directly in the printers.conf 2 file by setting the Shared Yes option for a printer.
1
2
On Debian, RHEL and openSUSE systems cupsd.conf is located in the /etc/cups/ directory.
On Debian, RHEL and openSUSE systems printers.conf is located in the /etc/cups/ directory.
10
Server Installation
2.3.1. CUPS Job History
An active SavaPage server captures print job statuses real-time, but when the server is restarted it needs CUPS job
history to catch up with the latest statuses. To avoid lost job statuses, CUPS must be told to “Preserve job history”.
You can set the Job History option in the Print Server Settings dialog (“Preserve job history but not files”, or optionally “Preserve job history (allow reprinting)”), in the CUPS Administrator Web Interface (Advanced settings,
“Retain Metadata : Yes”, and optionally “Retain Documents : Yes”) , or manually by changing the cupsd.conf
file as follows:
MaxJobs 0
PreserveJobHistory Yes
PreserveJobFiles No
MaxJobs specifies the maximum number of simultaneous jobs that are allowed. Set to 0 to allow an unlimited number of jobs.
PreserveJobHistory specifies whether metadata is preserved after a job is printed. A value of Yes
will preserve history, a value of No will not. If a numeric value is specified, history is preserved for the
indicated number of seconds after printing. Set to Yes.
PreserveJobFiles specifies whether job files (documents) are preserved after printing. A value of Yes
will preserve files, a value of No will not. If a numeric value is specified, files are preserved for the indicated
number of seconds after printing. Set this option as you wish, but remember that (spool) files can get big.
If you run SavaPage on a host system with limited storage (for instance on a virtual machine) you better
set this value to No.
2.3.2. CUPS Web Interface
If you want to use the CUPS Web Interface for administration from all machines on the local network you should
adapt cupsd.conf as follows:
# Allow remote access
Port 631
# Disable printer sharing.
Browsing Off
WebInterface Yes
<Location />
# Allow shared printing...
Order allow,deny
Allow @LOCAL
</Location>
<Location /admin>
Order allow,deny
Allow @LOCAL
</Location>
<Location /admin/conf>
AuthType Default
Require user @SYSTEM
Order allow,deny
Allow @LOCAL
</Location>
2.3.3. Restart CUPS
Restart CUPS to activate the changes:
$ sudo service cups restart
Finally, test that the CUPS print queues to be used as Proxy Printer work as expected.
11
Server Installation
2.4. Step 4 - Check firewall settings
SavaPage uses TCP/IP port 8631 (for HTTP), port 8632 (for HTTPS/SSL) and port 9100 (for JetDirect/RAW
printing) by default.
Note
You can change the TCP/IP port defaults in the /opt/savapage/server/server.properties
file after installation.
For Proxy Printer access the standard IPP port 631 of local CUPS is used.
For iOS printing (AirPrint) UDP port 5353 is used.
Depending on the Mail settings common SMTP ports are 25, 465 and 587.
Common IMAP ports used for Mail Print are 143 and 993.
The Secure JMX Connection uses port 8639.
SavaPage Google Cloud Printer uses XMPP port 5222 .
Many GNU/Linux distributions have strict default firewall policies, so take some time now to ensure that these
ports are open. Consult your distribution documentation for details on how to open firewall TCP and UDP ports.
2.5. Step 5 - Download and Install
Please make sure you download the version that match the architecture of your distribution. i686 is for 32-bit
operating systems. x64 is for 64-bit systems (also known as x86_64 or amd64).
SavaPage is supplied as a self-extracting and self-installing archive. The installation must be performed as the
newly created savapage user in the /opt/savapage directory. Some parts of the installation need to be
executed as root. When you choose to do so during the main install, please have the root password or sudo
password handy. You can also choose to execute the root tasks after the main install. In that case you can simply
sudo execute a post-install script. For more detail about the install process please see Chapter 8, SavaPage on
GNU/Linux [128].
Change to the newly created savapage user, download and execute the installer in /opt/savapage, and
follow the instructions.
sudo su savapage
cd /opt/savapage
wget URL
sh ./savapage-setup-*-linux-*.bin
Use the URL from the SavaPage Community website.
For example savapage-setup-0.9.10-linux-x64.bin
The installation process will take between one and two minutes depending on the speed of the system. A system
restart is not required. When installing on a live production system, administrators are advised to choose a period
of low activity - for example, not during backup operations or other administration activities.
2.6. Step 6 - Save Encryption Keys
SavaPage creates the /opt/savapage/server/data/encryption.properties file at first installation. The encryption keys held in this file are used to store Encrypted Secrets and Document Signatures in the
database.
12
Server Installation
Make a backup of this file now, and store it at a secure place, so you can restore it when you need to migrate
to a new server.
Warning
The encryption.properties file is crucial for decrypting secret data in the database and verifying
the authenticity of document signatures. When you lose this file you won't be able to use any database
copy which was based on its encryption keys ever.
2.7. Step 7 - Configure
After installation, you will be prompted to open a web browser at http://savapage:8631/admin to complete the configuration. The configuration steps are explained below.
2.7.1. Step 1 - Login
Login with username admin. This is the built-in administration account. Enter admin as password. This is the
standard password as set by the installer.
After login the Dashboard is shown where you will notice the system status “Setup is needed”. The next steps
guide you in configuring the system so that the status will change to “Ready to use”.
Note
As long as system setup is needed login attempts at the User Web App are blocked with a message saying
“Application setup is required”.
2.7.2. Step 2 - Change Admin Password
As a first security measure change the master password for the built-in admin account. This account is independent and not related to the operating system or domain. The password needs to meet minimum strength requirements, and must contain at least six characters. Select Options → Advanced → Reset internal admin password,
enter and confirm the new password and press the Apply button.
Caution
Make sure that this password is kept at a secure place since it is the key to your system.
More information about the admin password can be found in Section 12.1.1.3, “Internal Admin Password” [151].
2.7.3. Step 3 - Set Locale
Set the system's locale; ensure that these are correct before proceeding. Select Options → Advanced → Locale,
and enter the locale string. Some examples are: en, en-GB, en-US, nl, nl-NL, nl-BE. You can leave the
locale empty to accept the system default. The locale is applied to all system messages which are logged in the
system log or send by email. See Section 13.1, “Localization” [157].
2.7.4. Step 4 - Set Currency Code
Set the system's currency code; ensure that these are correct before proceeding. Select Options → Financial, and
enter the ISO 4217 Currency code. Some examples are: USD, EUR, GBP. The currency symbol is determined in
the context of the user or system locale. See Section 13.1, “Localization” [157].
13
Server Installation
2.7.5. Step 5 - Set User Source
SavaPage optionally imports user information from a Unix (PAM, NIS, etc.) or LDAP source.
Select Options → User Source.
Select Unix if the user accounts are setup and defined on the local system as standard Unix accounts or mapped
into the system from a central directory service such as LDAP via nsswitch.conf and PAM. Most large
established networks will use this option.
Note
For administrators wishing to customize the PAM authentication method at the application level, SavaPage reports itself as “savapage”.
The LDAP option is appropriate for large networks with existing LDAP domains. This includes networks running
OpenLDAP, Apple Open Directory, Novell eDirectory and Microsoft Active Directory.
More information on LDAP is available in Section 4.8.1.2, “LDAP” [76].
After selecting the source, enter the necessary parameters (LDAP only) and press the Apply button.
2.7.6. Step 6 - User Synchronization
Skip this step if you did not set an external User Source in the previous step. Otherwise, select Options → User
Creation → Synchronization → Synchronize now to import users.
Important
An option exists to import a subset of users from the source by selecting a group. This option is relevant
if only a subset of users will ever use SavaPage. Select Options → User Creation → Change Group to
select the group.
Tip
Test the import first by pushing the Test button. A simulated import will start, with each step echoed
below the button, so you can verify the effect of your action.
2.7.7. Step 7 - Set Mail Options
Select Options → Mail, enter the SMTP and Message options and press the Apply button. Data from the Messages
section is used for system generated mail messages.
You can send a test mail message to a recipient of your choice by pressing the Test button after you applied
the changes.
2.7.8. Step 8 - Driverless Printing
Mail Print and Web Print are disabled by default. You can enable and configure these options at Options → Mail
Print and Options → Web Print.
If you enabled one of the driverless printing options, decide which PDF converters you want to enable at Options
→ Advanced → Converters. Beware that you might need to install the converter software on the SavaPage host.
14
Server Installation
2.8. Step 8 - Share SavaPage Client Files
SavaPage client files are located in directory /opt/savapage/client. This includes the SavaPage Printer
Driver and JMX related files. It is useful to share this directory over the network so users can use, copy or install
the files they need on their workstation. Common sharing methods include:
• Samba - used to share files to Windows based workstations. GUI tools are available on GNU/Linux to help you
with sharing the client directory via Samba. However, some system administrators may be more comfortable
creating the share by hand-editing the /etc/samba/smb.conf file. The following configuration will share
the directory in read-only form:
[savapage-client]
path = /opt/savapage/client
comment = SavaPage Client
public = yes
only guest = yes
read only = yes
• NFS - a popular sharing method used for GNU/Linux and Unix based workstations.
Note
The /opt/savapage/client directory is standard shared via the client/ URL. See Appendix D,
URL Cheat Sheet [189].
2.9. Step 9 - Testing
Now the installation is complete, it is time to do a basic test to check if the system is ready-to-use.
• Pick a workstation and login as a user that is part of the user source as configured in Section 2.7.5, “Step 5 Set User Source” [14].
• Install the SavaPage Printer Driver. See the instructions at Section 9.1, “Printing with a Driver” [131].
• Open a Web Browser and go to the User Web App at http://savapage:8631/
• Login to the Web App with the same credentials as used in the workstation login.
• Print a test document such as a web page or basic document to the SavaPage printer.
• Thumbnail images of the printed pages should appear in the Web App.
2.10. What's next?
Congratulations! At this point you have a ready-to-use SavaPage system. This concludes the Install Guide.
If you like, take some time to further explore the features of SavaPage in a more extensive free-format test drive.
Or continue reading about the user interface details at Chapter 3, User Web App [17], Chapter 4, Admin Web
App [48] and Chapter 5, Point-of-Sale Web App [122].
At this point you can also proceed with the configuration of Google Cloud Print, AirPrint, Mail Print and Web Print.
Chapter 6, User Client [125] explains how to use a system tray notifier of SavaPage print events for desktops
and notebooks.
Chapter 7, SavaPage Financial [127] introduces the main pay-per-print concepts with references to more detailed parts of the manual.
Chapter 8, SavaPage on GNU/Linux [128] offers an in-depth explanation of the GNU/Linux installation process,
the directory layout and tools involved.
Chapter 9, SavaPage as Printer [131] explains how for print from different platforms.
Chapter 10, Authenticated Printing [141] describes how SavaPage determines the digital identity of users in
different settings like Single Sign-On (SSO) Domains and Peer to Peer Networks.
15
Server Installation
Chapter 11, Printing Impact [149] explains the metrics used when giving users feedback about the costs and
environmental impact of their printing habits.
Chapter 12, Security [151] discussed security issues and precautions.
Chapter 13, Internationalization [157] explains how SavaPage is adapted to various languages and regions.
Chapter 14, Customization [159] explains how SavaPage can be customized to fit your corporate identity.
Chapter 15, Using an External Database [161] explains how to use an alternative external relational database.
Chapter 16, Performance Tuning [163] discusses measures to optimize performance.
Chapter 17, SavaPage Community [168] describes the SavaPage Community and explains how to use the Member Card.
Appendix A, NFC Authentication [170] explains how SavaPage supports RFID as authentication method.
Appendix B, Tools [172] explains the command-line interface for calling server methods, manipulate the database, stop and start the server, and for applying SSL certificates for secure HHTP connections.
Appendix C, Capacity Planning [187] discusses how SavaPage uses disk space and network resources.
Appendix D, URL Cheat Sheet [189] offers a Quick Reference Card of the available Web Interface URLs.
Appendix E, Printable File Types [191] gives a summary of the file formats supported by Driverless Printing.
Appendix F, Upgrading from a Previous Version [193] describes the procedure to install a new version.
Appendix G, Migrating to a New Server [194] describes the procedure to move your current SavaPage installation to a new server.
Appendix H, Advanced LDAP Configuration [196] gives an in depth explanation of the LDAP configuration
options.
Appendix I, SavaPage Plug-ins [200] explains how to deploy software components that add specific features
to SavaPage.
Appendix J, Smartschool Print Module [203] describes the optional Smartschool module.
Appendix H, Advanced LDAP Configuration [196] contains the full text of the AGPL.
16
Chapter 3. User Web App
The User Web App can be reached at http://savapage:8631/. For all URL options see Appendix D, URL
Cheat Sheet [189].
Important
When using the User Web App concurrently with the User Client and Proxy Print Authentication you
are strongly advised to use an external database like PostgreSQL. See Chapter 15, Using an External
Database [161].
3.1. Login
Figure 3.1. Web App: Login Dialog
Note
When a user opens the Web App the login dialog is skipped when an authentication token is present in
local storage of the browser. The login dialog is also skipped when the Web App is opened from a trusted
and authenticated User Client. See Section 12.1.3, “Authentication Tokens” [151] and Section 4.8.3,
“User Authentication” [81].
• The language of the dialog defaults to the language setting of the browser.
• You can overrule the default language and country or preselect a user by using the URL parameters. See Appendix D, URL Cheat Sheet [189]
• You can choose an alternative language by pressing the Language button. See Section 3.1.1, “Select Language” [18].
• Version and copyright information is shown when you press the About button.
Some invariants:
• Only Persons can login.
• Disabled users are not allowed to log in.
17
User Web App
• The internal "admin" user is not allowed to log in as user.
• As long as system setup is needed user login attempts are blocked with a message saying “Application setup
is required”.
Tip
You can use an alias as User Name. See Section 10.4, “User Name Aliases” [147].
3.1.1. Select Language
Figure 3.2. Web App: Select Language Dialog
• At the moment English and Dutch are fully supported. Press the language of your choice. This will reload the
login dialog in the newly selected language.
• Press Cancel to return to the login dialog.
3.1.2. Single Web App Session
A warning message is shown when a desktop 1 user tries to open a second Web App session in a browser instance.
Figure 3.3. Web App session detected
Either close the browser tab and continue with the active Web App session or press Login to login again. This
will invalidate any other SavaPage session in the same browser instance.
3.1.3. Login Alternatives
The appearance of the Login dialog on a device depends on the following settings:
1
The Single Web App Session check is solely done for certain desktop browser sessions. Sessions on Mac OS X and mobile devices are
not checked.
18
User Web App
• The globally activated Login Methods. See Section 4.8.3, “User Authentication” [81].
• The Terminal settings for the device. See Section 4.7.3.2, “Custom User Login” [75].
• The login URL parameter with the preferred login method. See Appendix D, URL Cheat Sheet [189].
Terminal settings overrule global settings, and the URL parameter overrules the defined default.
When available, alternative login methods can be selected by tapping the method button at the bottom of the dialog.
Figure 3.4. Web App: Login Dialog - ID Number
Figure 3.5. Web App: Login Dialog - Local NFC Card
Figure 3.6. Web App: Login Dialog - Network NFC Card
3.1.4. Card Self Association Dialog
When an unknown card is swiped, and Card Self Association is enabled, the user is presented this dialog to
associate the new card.
19
User Web App
Figure 3.7. Web App: Login Dialog - Card Self Association
There is a time limit to enter the Username and Password. The remaining seconds are shown and when counted down to zero the dialog is automatically closed. The time limit (seconds) is contained in configuration key
webapp.card-assoc.dialog-max-secs. See Section 4.8.13.10, “Config Editor” [105] on how to
change this value.
3.2. SafePages
Figure 3.8. User Web App: Main View
This is the main view with the acquired SafePages since the last login. When no SafePages are present the SavaPage
logo is shown, and irrelevant buttons are disabled (these buttons are described at Figure 3.9, “User Web App: 3
SafePages” [21]).
The Letterhead button brings you to a dialog where you can create, browse and select letterheads See Section 3.5,
“Letterheads” [36].
Press the Log button to get a list of the See Section 3.7, “Log” [39].
The Logout button brings you back to the login screen.
20
User Web App
Press the Refresh button when, due to whatever reason, the automatic detection of SavaPage changes fails. This
will update the view with the latest state.
Note
Each print to SavaPage is logged as Document. SafePages that do not match a logged Document are
removed. This can happen when a database is restored, or when old documents are deleted after a Database
Backup, or Database Command.
Figure 3.9. User Web App: 3 SafePages
This screen shows the result of a user who printed 3 pages to the SavaPage printer. The following actions on
thumbnails are defined:
• You can scroll through the thumbnails by dragging them horizontally.
• A tap on the transparent area "<" or ">" in the top corner of the thumbnail view port scrolls the view a single
page to the left or right. A taphold brings the start or the end of the page range in view.
• A tap (click) opens up a detailed view of the page in the Page Browser: Figure 3.16, “User Web App: SafePage
Browser (8 pages)” [26].
• A tap on the page number underneath the thumbnail or a taphold on the thumbnail itself, opens the Job Rotation
dialog: Section 3.2.2, “Rotation” [24].
The following sections describe the actions for the newly enabled buttons:
Section 3.3, “PDF” [27].
Section 3.4, “Print” [31].
Section 3.6, “Delete” [38].
Section 3.8, “Sort” [42].
21
User Web App
Figure 3.10. User Web App: 8 SafePages
This screen shows the result of a user printing 8 pages to the SavaPage printer, and illustrates thumbnail aggregation.
• Note that only 6 thumbnails are displayed, and that the first thumbnail tells by its numbering that it is the first
of a (3) page aggregation.
• A tap on the first thumbnail will bring the (3) aggregated thumbnails in view. As a side-effect an aggregate will
appear at another location in the thumbnail sequence.
• Thumbnail aggregation is a protection against information (and resource) overload. Imagine what would happen
if you printed a 500 page document to the SavaPage printer and ended up with 500 thumbnails. Aggregation
gives you the high-level means to easily zoom in and out.
• As always, a tap on a single thumbnail will bring you to the Page Browser, where you can navigate to any page,
sequentially or directly. See Figure 3.16, “User Web App: SafePage Browser (8 pages)” [26].
3.2.1. Footer
The footer is positioned at the bottom of the main user panel. The base items are depicted in the figure below.
From left to right:
Figure 3.11. User Web App: Footer Base
• When you press the About button version and copyright information is shown. The dialog also offers download
links for the SAVAPAGE.ppd file and the zipped Windows Printer Driver.
• Left of the About button a check-mark icon is shown, which is an indication that the Web App is connected
to the SavaPage server. Other icons are shown when the connection is being (re) established or lost. When the
server is not down this usually is a temporary condition due to a network hiccup. Don't worry, SavaPage will
automatically restore the connection when the network permits.
• The next button shows an inline pagometer Pie-Chart followed by the account balance and the id of the logged
in user. The blue color in the chart represents the number of pages the user printed to SavaPage. The green
color represents the number of pages exported to PDF. The red color depicts the pages printed to Proxy Printers.
When you press the button a dialog with more detailed Pagometers is shown.
• A tap on the arrow-up button shows the Upload File dialog.
• The last button shows the Community Member name . Also see Section 4.11.3, “Community” [114].
Depending on the selected options additional icons are shown:
User opted to Eco Print.
22
User Web App
User opted to remove graphics.
User opted for PDF security.
User opted for PDF passwords.
User opted for color printing.
User opted for black and white printing.
User opted for duplex printing.
User opted to print two or more pages on one sheet.
3.2.1.1. Paper Size Indicator
When SafePages are present the unique paper sizes of the jobs are depicted in the footer. The text color indicates
if a paper size is supported by the selected printer or not. The examples below illustrate how this works.
A4 and A3 jobs are present: a printer is selected that supports both paper sizes.
A4 and A3 jobs are present: a printer is selected that supports solely the A4 paper size. The A3 page is cropped
to A4.
A4 and A3 jobs are present: a printer is selected that supports solely the A4 paper size. The A3 page is shrinked
to A4.
A4 and A3 jobs are present: a printer is selected that supports none of the paper sizes (or no printer is selected yet).
3.2.1.2. Hold Print Jobs
A summary of Hold Print jobs is shown in the footer. The example below explains the layout.
From left to right:
• The shortest remaining time to release the jobs before one or more are removed.
• The total of hold jobs.
• The total number of sheets to be printed.
23
User Web App
• The total cost charged for printing.
A tap on the summary show a dialog where each hold job in shown in detail with a options to remove a job or
to extend the expiry time.
Figure 3.12. User Web App: Hold Print Jobs Dialog
More information about Hold Print can be found at:
• Section 3.4.3, “Print Job Settings” [34].
• Section 4.7.2.2, “Hold Print Mode” [73].
3.2.2. Rotation
When a user prints to a printer and selects landscape orientation, the print manager of the originating application
will translate and rotate the printed content to fit the dimensions of the hard copy target page.
When doing so, it makes assumptions about the (0,0) origin of the logical space on this page. The SavaPage printer
driver provides a hint to the print manager about the origin, so it can rotate and translate the pages in a way that
is compatible with the SavaPage printer.
Contrary to real printers, where hard copies can easily be rotated by hand, pages produced by the virtual SavaPage
printer need special attention, since landscape oriented prints will display rotated in portrait oriented images and
PDF pages. Probably this is not what you want, so you can ad-hoc rotate job pages in SavaPage to landscape
display orientation.
Figure 3.13. User Web App: Landscape Job
24
User Web App
• This what you might see when you print a job in landscape orientation.
• Tap the page numbering below the image to get the Rotation dialog. See: Figure 3.14, “User Web App: Rotate
Pages” [25].
Figure 3.14. User Web App: Rotate Pages
• Select the Rotate option and press the Apply button to rotate the page and all sibling pages belonging to the
same job.
• The result after rotation is shown in Figure 3.15, “User Web App: Rotated Pages” [25].
Note
Although the Rotate dialog is triggered from a single SafePage, the rotation affects all SafePages within
the same print job.
Tip
As you noticed, you can also use the Delete button in this dialog to delete all SafePages of a print job.
Figure 3.15. User Web App: Rotated Pages
• The SafePages after rotation.
Warning
When two WebApps are opened for the same user, the result of a page rotation performed in one Web
App will not automatically be shown in the other. The user should do a manual refresh to update the
SafePages preview.
25
User Web App
3.2.3. Browser
A tap on a non-aggregated SafePage thumbnail image will show the page detail in the Browser.
Figure 3.16. User Web App: SafePage Browser (8 pages)
• A tap on the page image zooms in, extending the image width to the available screen width. See Figure 3.17,
“User Web App: SafePage Browser - Detailed View (4 of 8)” [26].
• There are several ways to browse the pages:
• Swipe the page image to the left or right to view the next or previous page. A swipe-left on the last page brings
you back to the first page. Vice versa, a swipe-right on the first page brings the last page into view.
• The arrow-right and arrow-left buttons in the navigation bar below are an alternative for swiping to a next
or previous page.
• Use the slider control to directly jump to the page of your choice.
• The delete button shows the delete dialog: Section 3.6, “Delete” [38].
• The leftmost return button brings you back to the main SafePages screen: Section 3.2, “SafePages” [20].
Figure 3.17. User Web App: SafePage Browser - Detailed View (4 of 8)
26
User Web App
• This screen shows a zoomed-in detailed page view. The image width is extended to the available screen width.
Use the standard page scrolling of your browser to scroll the image up and down.
• A tap on the page image zooms out again, adjusting the image height to the available screen height. See Figure 3.16, “User Web App: SafePage Browser (8 pages)” [26].
Tip
The detailed view automatically adjusts itself when the available screen width changes, either by tilting
your mobile device from portrait to landscape orientation (vice versa) or by resizing your desktop browser
window.
3.3. PDF
A tap on the PDF button in the main SafePages view shows a dialog with PDF properties and export actions.
See Section 3.2, “SafePages” [20].
Note
PDF properties are preserved when the dialog is closed or a PDF is generated, and are re-used when
needed in current or future sessions.
Figure 3.18. User Web App: PDF - Overview
• This screen shows the full PDF dialog.
• The Author defaults to the name of the authenticated user at login, and can be edited.
• Details are discussed at:
• Section 3.3.1, “PDF Filters” [28]
• Section 3.3.2, “Scope” [28].
27
User Web App
• Section 3.3.3, “Description” [29].
• Section 3.3.4, “Security” [29].
• Section 3.3.5, “Passwords” [30].
• Section 3.3.6, “Letterhead” [31].
• Section 3.3.7, “Download” [31].
• Section 3.3.8, “Send” [31].
• A selection of SafePages to incorporate into the PDF output can be entered as a range of Pages. For example:
1-4,6,8-10. The value can be a single page, a range of pages, or a collection of page numbers and ranges
separated by commas. The pages will always be exported in ascending order, regardless of the order of the
pages in the page-ranges option. The page range is automatically emptied after printing. Be aware that the page
ordinals are related to the Scope.
• Check one of the PDF Filters Eco Print or Remove graphics .
• You can activate a Description , Security and Passwords setting by toggling the corresponding button in the
so-called Apply section. A toggle button is disabled when no setting is specified.
Note
SavaPage tries to translate URL formatted text like “www.example.com” and “[email protected]” to
PDF links. Implicit URLs in the source document, such as those contained in text like “click here”, are
not sent to the SavaPage printer, and therefore not preserved in the PDF document.
3.3.1. PDF Filters
Activate either the Eco Print or Remove graphics filter option. The last option removes all graphic images from
the PDF. When choosing Eco Print the selected SafePages will be ad-hoc converted in the background. While
conversion is busy a message box will tell you to wait a while and retry later. Take about 3 seconds per page
waiting time into consideration. Automatic filtering may help to diminish waiting times: see Section 4.8.10.2,
“Eco Print Settings” [96].
Note
At the moment a single filter can be selected. If needed filter chains will be supported in a future SavaPage
version.
3.3.2. Scope
Figure 3.19. User Web App: PDF - Scope
• When pressing the Scope button you get a selection pop-up with titles of acquired SavaPage print jobs. Tap a
job title to restrict the scope of the PDF output to that job. Select the top item dash to activate full scope.
• When full scope is selected the Pages ordinals are related to the SafePages total. When a job is selected as scope,
the page ordinals are related to the page total of the job.
• Selecting a scope initializes the Title text with the job name, or clears it when you choose full scope. You can
edit the Title if you wish.
Note
When a user rearranged or deleted any SafePages the scope is confined to full scope.
28
User Web App
3.3.3. Description
Figure 3.20. User Web App: PDF - Description
• Press the Description button to expand the section.
• Enter the Subject and (space separated) Keywords of the PDF document.
Note
When a Subject or Keywords are entered, the Description toggle in the Apply section will be enabled.
Use this toggle to apply (or deny) the Description to the generated PDF.
3.3.4. Security
Figure 3.21. User Web App: PDF - Security
• Press the Security button to expand the section.
• Select the Encryption option to select the allowed actions on the generated PDF.
• Use the Allow all or Allow none buttons to select the actions in one go. Or select each allowed action separately.
• This is a list with the allowed actions, each with a short description:
• Printing: Printing the document.
• Degraded Printing: same as Printing, but with a lower quality.
• Page Extraction: Modifying the contents. For example, changing the contents of a page, or inserting or removing a page.
• Commenting: Adding or modifying text annotations.
• Document Assembly: Inserting, removing, rotating and bookmarking pages. The content can't be changed,
unless Page Extraction is also selected.
29
User Web App
• Content Copying: Copying or otherwise extracting text and graphics from the document, This also applies
for screen readers or other accessibility devices.
• Content Copying for Accessibility: Extracting text and graphics for use by accessibility devices.
Note
SavaPage uses 128-bit PDF encryption.
Note
When Encryption is selected, the Security toggle in the Apply section will be enabled. Use this toggle
to apply (or deny) the security settings to the generated PDF.
3.3.5. Passwords
Figure 3.22. User Web App: PDF - Passwords
• The User password (also known as the open password) locks the PDF file for anyone who doesn't know the
password.
• The Owner password (also known as the permissions password) is needed to read the PDF file in order to
change the permissions.
• The maximum password length is 32 characters.
• If you don't enter a user password, all users will be able to open the PDF document without being prompted for
a password. However, the security settings will remain in place.
• When both PDF user and owner password are entered they must be different.
Important
When a User password is set or Security settings are active, and the Owner password is not set, SavaPage
will replace it by a random string.
Warning
Security settings without a User password aren't really secure, since the encryption key is derived from
the User password. When the User password is omitted, the content is encrypted as described in the public
PDF reference, so decryption is also known in this case (although illegal to practice).
Note
When a User or Owner password is entered, the Passwords toggle in the Apply section will be enabled.
Use this toggle to apply (or deny) the passwords to the generated PDF.
30
User Web App
3.3.6. Letterhead
Figure 3.23. User Web App: PDF - Letterhead
• Press the button in the Letterhead section to get a selection pop-up with available Letterheads.
• Tap on a letterhead title to select it, or select the top item dash to deselect a letterhead.
Note
Letterheads are not subjected to PDF Filters but are applied to the filtered result.
3.3.7. Download
• Press the Download button to download the SafePages as PDF file, with the properties set in this dialog.
• Your browser will present a Save dialog so you can save the PDF file in the location of your choice.
• The default PDF file name will be identical to the Title you entered as PDF property.
3.3.8. Send
A tap on the Send button in the PDF dialog, shows this Send dialog. See Section 3.3, “PDF” [27].
Figure 3.24. User Web App: PDF - Send
• Enter the Email address of the recipient.
• The last used Email address is shown. Press the Default button to reset the address to the one that belongs to
the logged in user.
• Press the Send button to generate the PDF document and send it as attachment to the recipient.
3.4. Print
A tap on the Print button in the main SafePages view shows the Print dialog. See Section 3.2,
“SafePages” [20].
Note
The Print dialog enables users to set custom printer and job options. When a single copy with default
printer options is required, users can apply Fast Print Mode (when this mode is configured for a printer).
31
User Web App
3.4.1. Printer Selection
When a printer was not yet selected a Select Printer dialog is displayed.
Figure 3.25. User Web App: Print - Select Printer
• A maximum of 5 printers is shown in a list.
• Printers marked with an icon are secured with Hold Print Release. An icon means the printer is secured
with Direct Print Release. Printers marked with a Fast label are (additionally) enabled for Fast Print Release.
• Printers can be selected by entering part of the printer name or location. In the figure above the text “floor”
was entered, resulting in 3 hits.
• You select a printer from the list by tapping (clicking) it. This brings the settings dialog of the selected printer
into view. See: Figure 3.26, “User Web App: Printer - Settings” [33].
• The Fast Print Closing Time button shows the expiration time of Fast Print Release. The time is reset when
the Print Dialog opens or the button is pushed. This button is shown when the user is granted access to at least
one proxy printer with Fast Print Release enabled.
32
User Web App
3.4.2. Printer Settings
Figure 3.26. User Web App: Printer - Settings
• Set one or more printing options by pushing the pick-list buttons. The options are initialized with the CUPS
printer defaults at the start of a user session. Changes made in this dialog are held during the user session.
• Options are printer specific, and are automatically identified by SavaPage.
• When all paper sizes of SafePages jobs are supported by the printer, each paper size is indicated in green at the
top of the dialog, and the Media Source defaults to Automatic . In this example A4 and A3 are supported.
• When you choose a specific Media Source (holding a specific paper size) that does not match all paper sizes
of SafePages jobs, a Page Scaling option will appear with an extra page size indicator (with light orange background) at the top of the dialog.
Figure 3.27. User Web App: Print - Page Scaling (Crop)
• As the orange A3 indicator shows, the selection of the A4 media source does not fit available A3 page sizes.
The Crop option (indicated as solid white square) will preserve page dimensions of the deviant pages: no page
scaling is performed.
33
User Web App
Figure 3.28. User Web App: Print - Page Scaling (Shrink)
• As the orange A3 indicator shows, the selection of the A4 media source does not fit available A3 page sizes.
The Shrink option (indicated as dotted square) will print whole A3 pages by reducing them to fit the selected
A4 printer paper.
Figure 3.29. User Web App: Print - Page Scaling (Expand)
• As the orange A4 indicator shows, the selection of the A3 media source does not fit available A4 page sizes.
The Expand option (indicated as solid square) will print whole A4 pages by enlarging it to fit the printable
area of the selected A3 printer paper.
The selected Printer is shown at the top section of the dialog.
Figure 3.30. User Web App: Print - Selected Printer
• The selected printer is shown as button at the bottom of the Printer section. Settings of the selected printer can
be changed by pushing the button.
• The top of the section shows the page size indicators, and symbols for the main printer options.
• Another printer can be selected by reentering the search text (you can clear the quick search first my pushing
the “cross” button at the right).
3.4.3. Print Job Settings
Print job settings can be entered in the Job section.
34
User Web App
Figure 3.31. User Web App: Print - Job Settings
• Selecting a Scope and Title for your print job is identical as in Section 3.3.2, “Scope” [28].
• The number of Copies can be entered via the slider control, and is currently maximized to 10 copies. The number
is automatically reset to one (1) after printing.
• A selection of SafePages to print can be entered as a range of Pages. For example: 1-4,6,8-10. The value
can be a single page, a range of pages, or a collection of page numbers and ranges separated by commas. The
pages will always be printed in ascending order, regardless of the order of the pages in the page-ranges option.
The page range is automatically emptied after printing. Be aware that the page ordinals are related to the Scope.
• Selecting a Letterhead for your print job is identical as in Figure 3.23, “User Web App: PDF - Letterhead” [31].
• Check one of the PDF Filters Eco Print or Remove graphics . Note the Eco Print discount percentage as
described in Section 4.8.10.2, “Eco Print Settings” [96].
• The Collate option is shown when you print multiple copies and describes how printed material will be organized. For example, if you have a five page document and are printing multiple copies with collate enabled,
SavaPage prints pages 1,2,3,4 and 5 in that order and then repeats. However, if collate is disabled and you print
three copies of those same five pages, SavaPage prints pages in this order: 111, 222, 333, 444, and then 555.
The icons in the checkbox are a mnemonic of the output when the collate option is enabled or disabled.
• When the option Delete all pages after printing is checked, all SavaPage jobs are removed after the printing
command is issued. The option is automatically reset after printing.
Press the Print & Close button to print and close the dialog. The job is printed right away, unless NFC Authentication is configured for the printer. In that case the user must authenticate with an NFC card swipe to release
the print job.
In the Hold Release scenario the job is held so it can be released by the user at a later time without using the
User Web App. Hold Print Jobs can be inspected and removed when needed: see Section 3.2.1.2, “Hold Print
Jobs” [23]. In the Direct Print Release scenario described below the user is prompted to authenticate immediately.
3.4.4. Direct Print Release
When a print job is issued for a printer secured with Direct Print Release, a dialog is shown prompting the user
to swipe his card to release the print job.
35
User Web App
Figure 3.32. User Web App: Printer - Direct Print Release
• The cost of the print job is shown in orange.
• A countdown of the remaining seconds for the card swipe is shown in the top right corner of the pop-up.
The time limit (seconds) is contained in configuration key proxy-print.direct-expiry-secs. See
Section 4.8.13.10, “Config Editor” [105] on how to change this value.
Note
Since the card reader will be mounted near the printer this implements a secure pull-print scenario.
3.4.5. Full Print Scope and Jobs
When a user did not rearrange or delete any SafePages and full scope is selected without a range of Pages, each
input job is printed as a separate job when duplex printing is selected. As a result the first page of new input job
will always start on a new sheet. When the Title is left empty the titles of the print jobs will correspond to the
titles of the input jobs. When a Title is specified it will be used for all print jobs.
When a user did rearrange or delete any SafePages the scope is confined to full scope and SafePages will always be
printed as a single job. When the Title is left empty the print job title will be generated according to the timestamp
format SavaPage-CCYY-MM-DDTHH:MM:SS.
3.5. Letterheads
A tap on the Letterhead button in the main SafePages view shows the Letterhead dialog. See Section 3.2,
“SafePages” [20].
Figure 3.33. User Web App: Letterheads
• Press the top button to get a pop-up list of letterheads. When a letterhead is selected from the list it can be
previewed and edited. The selected letterhead acts as default in the Print and PDF dialog: see Figure 3.23, “User
Web App: PDF - Letterhead” [31] and Figure 3.25, “User Web App: Print - Select Printer” [32].
• Press the Refresh button to rebuild the list if you suspect public letterheads were added or removed.
• Press the New button to create a new letterhead from the current SafePages. All the SafePages are used for the
letterhead. Figure 3.34, “User Web App: Letterhead - New” [37] is an example of a fresh created letterhead.
36
User Web App
Note
If the SafePages contain DRM-restricted content the New button is not visible.
Figure 3.34. User Web App: Letterhead - New
• If the letterhead document consists of one page, this page is applied to every page of the document. The letterhead
page is scaled and rotated as needed to fit the input page.
• If the letterhead document has more than one page, each page of the letterhead is applied to the corresponding
page of the output document. If the output document has more pages than the letterhead, then the final letterhead
page is repeated across these remaining pages of the output document.
• Letterheads can be applied as foreground or background.
• Users who are administrator can mark letterheads as public by ticking the "Public" checkbox. Public letterheads
are available for all users, but can be edited and deleted by administrators only.
• The title of a private letterhead can be edited. The title of a public letterhead can be edited by an administrator
only.
• Tap on a letterhead thumbnail to get a detailed pop-up image. See Figure 3.35, “User Web App: Letterhead
- Detail” [38].
• Press the Apply button to commit changes or push the Delete button to remove the letterhead.
Note
For a background letterhead to be effective, SafePages should be transparent. HTML pages printed from
browsers like Internet Explorer and Firefox might pose a problem here. The white background on HTML
pages might act as a solid background.
37
User Web App
Figure 3.35. User Web App: Letterhead - Detail
• Press the x button in the upper right corner, or tap outside the pop-up, to close the pop-up image.
3.6. Delete
A tap on the Delete button in the main SafePages view shows the Delete dialog. See Section 3.2,
“SafePages” [20].
Figure 3.36. User Web App: Delete SafePages
• Select a range of SafePages to delete. Press the All button to select all pages. Or, push the Custom button
to enter a custom range of SafePages: the value can be a single page, a range of pages, or a collection of page
numbers and ranges separated by commas.
• Tap the Delete button to perform the delete action.
Tip
You can delete all SafePages of a SavaPage print job in the Job Dialog, as described in Figure 3.14, “User
Web App: Rotate Pages” [25].
38
User Web App
3.7. Log
A tap on the Log button in the main SafePages view shows the Document Log. See Section 3.2,
“SafePages” [20].
3.7.1. Documents
The Document Log shows all documents the user printed to SavaPage, and which were subsequently exported
or Proxy-Printed. For a detailed description of this screen see Section 4.10, “Documents” [108] in the Admin
Web App chapter.
Figure 3.37. User Web App: Log - Documents
Push the Transactions button in the footer bar to view the Transaction List.
3.7.2. Transactions
The Transaction Log shows the financial transactions on the user's account.
39
User Web App
Figure 3.38. User Web App: Log - Transactions
Each entry in the list has the following lines.
•
•
•
•
A header with the transaction type.
The resulting account balance with the transaction amount.
Extra information is added depending on the transaction type.
A Manual Transaction denotes the Receipt Number in the header and has a Receipt button to download the
receipt as PDF.
Some samples of other entries...
40
User Web App
Bitcoin Payment entries show a hyperlink with a shortened transaction hash. The hyperlink opens the transaction
details in a new browser tab. The hyperlink URL is held in configuration item financial.bitcoin.userpage.url-pattern.trx and can be changed with the Configuration Editor. The value must contain the {0}
placeholder for the transaction hash. Sample values are https://blockchain.info/tx-index/{0} and
https://blockexplorer.com/tx/{0} .
Push the Documents button in the footer bar to view the Document List.
Figure 3.39. User Web App: Log - Transactions
41
User Web App
Transactions can be filtered and sorted as follows:
• Comment containing text: selects transactions with comments containing a text snippet.
• Type: selects – (all) or a single one of the transaction types...
• Initial: Balance allocated when account was created.
• Adjustment: Manual adjustment by an administrator. See Section 4.4.2.5, “Financial” [57].
• Deposit: Adjustment of balance at a Point-of-Sale.
• External: Increment of balance by transferring funds from an external account. See Section 3.9.6, “Transfer
Money” [45].
• Transfer: Increment or decrement of balance by transferring credit to another user. See Section 3.9.5, “Transfer Credit” [45].
• Voucher: Increment of balance by redeeming a voucher.
• Printer: Decrement of balance for proxy printing. See Section 4.6.2.2, “Printer Costs” [65].
• Select a creation Period by entering a From and To date. Tap the x button after a date to clear it. See this
example Data Selection Dialog.
• Transactions can be sorted Ascending or Descending by creation Date or Type .
• The list is refreshed, and the selection applied, after you push the Apply button.
• The Default button resets the selection items to their default values.
• The Report button downloads a Transaction Report in PDF using the selection item values.
3.8. Sort
A tap on the Sort button in the main SafePages view switches to Sort mode. See Section 3.2, “SafePages” [20].
In sort mode pages can be rearranged and deleted.
Figure 3.40. User Web App: Sort
•
•
•
•
This screen shows the result after some editing.
One cut page is shown with a red border.
Notice the mini scissor icon at the bottom of the screen, showing the page number of the cut page.
One selected page is shown with an orange border.
• The footer bar shows a scissor icon with page number of the cut page.
These are the actions that can be performed on page images:
• A tap on a single page will (un)select it.
• A tap on an aggregated page will expand it. Aggregated pages are described at Figure 3.10, “User Web App:
8 SafePages” [22].
Here is a summary of the buttons and their function:
42
User Web App
Select all : selects all single (non-aggregated) pages. Selected pages are shown with an orange border.
Unselect all : unselects all selected pages.
Cut : cuts the selected pages into the clipboard. Cut pages remain in view and are marked with a red border. The
mini scissor icon at the bottom of the screen, shows the page ranges in the clipboard.
Undo : reverts all cut actions and empties the clipboard.
Left Paste : pastes the cut pages before the first selected page.
Right Paste : pastes the cut pages after the first selected page.
Delete : deletes the selected pages.
Inbox : returns to the Main view.
3.9. User Details
This dialog shows the Pagometers and Financial status of the user, and is shown after a tap on the User button
in the footer of the main panel.
• For an Internal User a Password ... button is shown. A tap on the button will show the Password Reset Dialog.
• When users are allowed to change their PIN a PIN button is shown. A tap on the button will show a PIN Reset
Dialog. See Section 4.8.3, “User Authentication” [81].
• When an Internet Print protocol://authority is present the Internet Printer button is shown. A tap on
the button will show the Internet Printer Device URI.
3.9.1. Internet Printer
Users can copy/paste their private Internet Print Device URI from this dialog.
Figure 3.41. User Web App: User Details - Internet Printer Device URI
43
User Web App
3.9.2. Pagometers
This section shows the personal Pagometers of the user, and are analogous to the ones in the Admin Dashboard
as shown in Figure 4.6, “Admin Web App: Dashboard - Pagometer” [52] and Figure 4.8, “Admin Web App:
Dashboard - Environmental Impact” [52].
Figure 3.42. User Web App: User Details - pagometer
Figure 3.43. User Web App: User Details - Environmental Impact
3.9.3. Financial
This section shows the financial status of the user account and ways to increment the account balance from an
external account.
• Balance: the user's account balance.
• Credit limit: see Section 4.4.2.5, “Financial” [57].
• A push on the Voucher button opens the Redeem Voucher dialog. The visibility of this button is dependent
on an application setting.
• A push on the Transfer button opens the Transfer Credit dialog. The visibility of this button is dependent on
an application setting.
When a Generic and/or Bitcoin Payment Gateway Plug-in is enabled, an icon is shown for each active payment
method. Pushing (clicking) the payment method icon will pop-up the dialog to Transfer Money or to Transfer
Bitcoins.
Figure 3.44. User Web App: User Details - Financial
44
User Web App
3.9.4. Redeem Voucher
Figure 3.45. User Web App: Redeem Voucher
• Enter the voucher Number in the dialog box and press Redeem . Make sure to enter the number exactly as
listed on the voucher including any dashes (-).
• If you entered the number correctly, the value as shown on the voucher will be transferred to your account and
a new entry will list in your transaction log.
3.9.5. Transfer Credit
This dialog is used to transfer funds to another user.
Figure 3.46. User Web App: Transfer Credit
• Enter the Amount in currency units and cents. The available amount is shown in green at the top.
• Enter the To user id and an optional Comment.
• When you press the Transfer button the amount will be transferred from your account to the account of the
target user. New entries will list in your transaction log and the log of the target user.
To configure this dialog see Section 4.8.11.5, “Transfer Funds” [98].
3.9.6. Transfer Money
This dialog is used to transfer money from an external account. The figure below shows a dialog in preparation for
a credit card transaction. Other payment methods are available as defined by the active Generic Payment Gateway
Plug-in. See for example Section I.1.1.1.1, “Mollie Payment Plug-in” [201].
45
User Web App
Figure 3.47. User Web App: Transfer Money from Credit Card
• Enter the Amount in currency units and cents.
• Press the Start button to start the payment transaction.
3.9.7. Send Bitcoins
This dialog is used as a start to send Bitcoins to the account balance.
Note: the Bitcoin address in the screenshot is intentionally made invalid.
Figure 3.48. User Web App: Send Bitcoins
Start sending Bitcoins by performing one of the following actions:
• Press the Start button to automatically open a send transaction in the default Bitcoin wallet on your system.
• Open a send transaction manually in a Bitcoin wallet application on your computer or device (Android, iOS, ...)
and either scan the QR code or copy/paste the Bitcoin address (below the QR code).
... and enter the amount to send from your Bitcoin wallet.
Note
The BTC amount is converted to the system currency according to the exchange rate of the Bitcoin service
back-end of the Bitcoin Payment Plug-in.
3.10. Upload
This dialog implement the SavaPage Web Print function, and is shown after a tap on the Upload button in the
footer of the main panel.
46
User Web App
Figure 3.49. Web Print: Upload File
• Font for plain text: change the font when you upload a plain text file (TXT) that contains characters not
supported by the Default font, like CJK. Use Unifont when the source text has a real broad Unicode coverage.
• Choose the file to be uploaded. Beware that the actual file selection button differs from browser to browser.
• Press the Upload button to start the upload.
• The status of the upload will be displayed above the selected file name.
• The Back button brings you back to the previous panel.
• The Clear button clears the status messages and selected file.
Note
For uploaded file types that do not have a page size defined (HTML, TXT) the default paper size is used.
Note
For image files the graphic involved is a best fit on the default paper size.
47
Chapter 4. Admin Web App
The Admin Web App can be reached at http://savapage:8631/admin. See Appendix D, URL Cheat
Sheet [189].
4.1. Login
Figure 4.1. Admin Web App: Login
This login screen is a variant of the User Login screen described at Section 3.1, “Login” [17], with the following
exception:
• The internal admin user and Persons with admin rights are allowed to log in. See Section 4.4.2, “Edit
User” [55] how to assign admin rights to users.
• After a successful login Figure 4.2, “Admin Web App: Menu” [49] is shown.
Note
Initially, just after installation, only the internal admin user can login. See Section 4.4.5, “Administrator
Role” [59].
4.2. Menu
After a successful login this main Admin screen is shown. If this is a first time login, a message will show, telling
you that SavaPage needs to be set up and is not ready to use yet. The message will prompt you to go to the Options
section and to check the settings. A long as setup is not completed this message will keep appearing after login.
When setup is completed, a similar message will appear when the password of the internal admin account still
has the default value.
48
Admin Web App
Figure 4.2. Admin Web App: Menu
A tap on a the Logout button brings you back to the Login screen. A tap on any other menu option brings a
detailed screen into view. Please see the sections below for a description of each menu option:
•
•
•
•
•
•
•
•
•
Section 4.3, “Dashboard” [50].
Section 4.4, “Users” [54].
Section 4.5, “Queues” [59].
Section 4.6, “Proxy Printers” [62].
Section 4.7, “Devices” [68].
Section 4.8, “Options” [75].
Section 4.9, “Log” [106].
Section 4.10, “Documents” [108].
Section 4.11, “About” [113].
These are the buttons in the footer and their function:
Navigate to the top of the page.
Navigate to the top of the menu.
49
Admin Web App
Navigate to the top of the detail panel.
Navigate to the bottom of the page.
Show pop-up menu with additional actions as shown in the figure below.
Figure 4.3. Admin Web App: Action Pop-up Menu
Please see the sections below for a description of each menu option:
• Section 4.12, “Vouchers” [117].
• Chapter 5, Point-of-Sale Web App [122].
• Section 4.8.13.10, “Config Editor” [105].
The User Manual and savapage.org menu items open in a new browser tab.
4.3. Dashboard
After a tap on the Dashboard button in the main menu this panel is shown. See Section 4.2, “Menu” [48].
Note
The Dashboard section is automatically refreshed every 60 seconds.
4.3.1. Status
Figure 4.4. Admin Web App: Dashboard - Status
The head section displays indicators about Community Membership status and application runtime:
50
Admin Web App
• Community member: The name of the community member organization (empty when no Member Card was
imported).
• Membership :
• Fellow : a community Fellow.
• Visitor : a visitor of the community.
• Exceeded : the number of users in the database exceeds the number of Member Card participants.
• Expired : the Member Card reached end-date.
• Visitor Expired : the visitor period expired.
• Visitor Edition : a permanent visitor with 5 users or less in the database.
• Invalid version : the Member Card is incompatible with this SavaPage version.
• Invalid : the Member Card is incompatible with this community.
• Participants : the number of community participants.
• System Status
• Ready to use : SavaPage can be used without impediments.
• Setup is needed : there are one or more options that need to be set up. Access to the User Web App is denied
till setup is finished.
• Restricted access : access to administration functions is restricted, because Community Membership is needed after the visitor period, or because an existing Member Card became void. See Chapter 17, SavaPage
Community [168] for details.
• System uptime : the time the system is up and running.
• Users : the number of users in the database. Deleted users are not part of the total: see Section 4.4.4, “Deleted
Users” [59].
• Client sessions : the number of active User Client sessions.
• Web sessions : the number of active User Web App sessions. Multiple sessions on one IP address are counted
as one.
• Recent errors : the number of errors that occurred in the Application Log during the last hour.
• Recent warnings : the number of warnings that occurred in the Application Log during the last hour.
Note
Technical information about the server process can be added to or removed from the Dashboard by setting the value of configuration key webapp.admin.dashboard.show-tech-info to Y or N. See
Section 4.8.13.10, “Config Editor” [105] on how to change this value.
4.3.2. Services
Figure 4.5. Admin Web App: Dashboard - Services
This section lists the status of services.
• Core services like Google Cloud Print, Mail Print or Smartschool Print must be enabled to be on the list.
51
Admin Web App
• Web Print and Internet Print services are standard part of the list.
• Plug-in services like Mollie and Blockchain.info Payment Gateways are part of the list if they are enabled in
their property file.
You can turn a service On or Off by flipping the status switch.
When the SavaPage server restarts enabled core services are turned On by default. The initial state of enabled plugin services is governed by the online setting in their property file. The on/off state of Internet Print translates
to the enabled/disabled state of the reserved /internet Queue.
4.3.3. Pagometers
The Pagometers1 counting the pages printed-out with Proxy Printers, printed-in from SavaPage Queues, and exported as PDF are displayed in a Pie-Chart. Pagometers are explained at Section 4.8.13.9, “Pagometers” [104].
Figure 4.6. Admin Web App: Dashboard - Pagometer
A Line-Graph shows the day pagometers for the three sources over the last 30 days.
Figure 4.7. Admin Web App: Dashboard - Pagometer Trend
4.3.4. Environmental Impact
The Environmental Impact for the Proxy Printer pagometer are displayed in a separate section. The metrics and
units used are discussed at Section 11.2, “Environmental Impact” [149].
Figure 4.8. Admin Web App: Dashboard - Environmental Impact
1
In analogy with the term Odometer, the term Pagometer is introduced as an instrument to count the number of processed pages.
52
Admin Web App
4.3.5. Financial Summary
A Financial Summary of User Accounts and Bitcoin Wallet is displayed in a separate section.
Figure 4.9. Admin Web App: Dashboard - Financial Summary
The User Accounts total and statistics like Min, Max and Avg are shown as Debit or Credit amount over Count
number of accounts.
When a Bitcoin Payment Gateway is enabled the Bitcoin Wallet balance (Debit) is shown in the system currency
and BTC. The Total number of Bitcoin Addresses in the wallet are split into addresses that received Payments,
and Open addresses waiting for payments. Note that other addresses, not created by our Bitcoin Payment Plugin, may be part of the wallet (in our example there is one such address).
The Bitcoin Wallet hyperlink opens the Web Wallet in a new browser tab.
The Accounts summary is updated as the dashboard is (auto) refreshed. However, the Bitcoin Wallet summary is
cached by SavaPage and lazy refreshed after a configurable time period (defaulting to 3600 seconds).2 The date/
time of the last refresh is shown in the Date column. Press the Refresh button to force a refresh of the cache.
4.3.6. Activity
Figure 4.10. Admin Web App: Dashboard - Activity
Relevant system events are real-time displayed in this section. A maximum of 20 event messages remain in view,
with the most recent one at the top.
System events are persisted in the rotating log file:
/opt/savapage/server/logs/adminpublisher.log
This file has a tab separated value (TSV) format for easy import and manipulation into spreadsheet programs.
2
Edit the webapp.admin.bitcoin.wallet.cache-expiry-secs configuration item with the Configuration Editor to set the number of seconds after which the cached Bitcoin Wallet summary is refreshed.
53
Admin Web App
4.4. Users
4.4.1. User List
After a tap on the Users button in the main menu this panel is shown. See Section 4.2, “Menu” [48].
Figure 4.11. Admin Web App: User - List
• All non-deleted users are listed alphabetically by default. A different selection and sorting can be entered: see
Figure 4.12, “Admin Web App: User - Select and Sort” [55].
• Press the New button to create and edit a new Internal User.
• The list can be traversed by tapping one of the buttons at the pager at the top or bottom of the page.
• An entry is displayed for each user, with identifying data and some usage statistics. From top to bottom:
• The user's role or status (at the top right corner).
• An inline pagometer Pie-Chart followed by the user id. The blue color in the chart represents the number of
pages printed to SavaPage. The green color represents the number of pages exported to PDF. The red color
depicts the pages printed to Proxy Printers.
• The user id of an Internal User is shown with an orange color.
• The full name and email address.
• The period in which user activity was accumulated on the pagometer.
• The account balance and the pagometer including the number of jobs and bytes printed to any SavaPage
printer.
• The size of the user's SafePages home.
• Tap the Edit button to change or delete the user. See Section 4.4.2, “Edit User” [55].
Note
Deleted Users cannot be edited.
• The Documents button brings you to the list of documents the user processed. See Figure 4.85, “Admin Web
App: Documents - List” [108]
• The Transactions button brings you to the list of financial transactions on the user's account. For a detailed
description of this list see Section 3.7.2, “Transactions” [39] in the User Web App chapter.
Tip
The pagometers of all users can be reset at Options → Advanced → Reset Pagometers
54
Admin Web App
Figure 4.12. Admin Web App: User - Select and Sort
• Users can be selected by entering a part (fragment) of their ID or Email. So entering "son" as ID will select
both "jason" and "sonja".
• Select the User Source, Type, Role and (Deleted) Status. The - button will select both.
• The list can be sorted Ascending or Descending on ID or Email.
• Tap the Apply button to (re)display the list.
• A tap on the Default button resets the selection and sort fields to their default values.
• The Report button downloads a User List in PDF using the selection item values.
4.4.2. Edit User
This chapter describes the editable sections of the User entity.
Caution
Some data you edit, like the Name, Primary email, Card Number and ID Number might be overwritten by values from the user source during synchronization. See Section 4.8.1.2, “LDAP” [76] and
Section 4.8.2, “User Creation” [79].
Note
Users can also be edited and deleted with the Server Command Tool. See Section B.1.16, “setUserProperties” [180] and Section B.1.5, “deleteUser” [176].
55
Admin Web App
4.4.2.1. Identity
Figure 4.13. Admin Web App: Edit External User - Identity
• The user's full Name can be edited. Remember this name can be overwritten for an external User as a result of
user synchronisation. See Section 4.8.2, “User Creation” [79].
• Assign the Administrator role by ticking the checkbox.
• Users are regarded as Person by default. Un-tick the Person checkbox if this user represents a generic functional
account [144]. This will make the user Abstract.
• Tick the Disabled checkbox to deny the user access to the SavaPage application.
Warning
When a User becomes Abstract its SafePages are removed.
4.4.2.2. Email
Figure 4.14. Admin Web App: Edit User - Email
• The Primary email and Other emails addresses are editable and must each be unique: they can be associated
to just one User. Multiple emails must be separated by any of the characters space, comma, semicolon, or by
carriage return or line feed.
56
Admin Web App
4.4.2.3. Card and ID
Figure 4.15. Admin Web App: Edit User - Card
• The Card Number and ID Number are editable and must each be unique: they can be associated to just one
User.
• The ID Number is used as authentication token for Internet Print.
• The Card Number must be entered in HEX/LSB format. See Section A.1, “Card Number Format” [170].
• The PIN must be digits only.
• The minimum length of ID Number is contained in configuration key user.id-number-length-min.
The minimum and maximum length of a PIN are contained in the configuration keys user.pin-lengthmin and user.pin-length-max. A maximum value 0 (zero) indicates the maximum is unspecified. See
Section 4.8.13.10, “Config Editor” [105] on how to change these values.
• Press the OK button to commit the changes and return to the User List.
• The Cancel button brings you back to the User List without changing anything.
4.4.2.4. UUID
Figure 4.16. Admin Web App: Edit User - UUID
The UUID3 is used as authentication token for Internet Print. It is automatically created when a user successfully
logs in for the first time. A new UUID can be created by pushing the Generate button.
4.4.2.5. Financial
Figure 4.17. Admin Web App: Edit User - Financial
3
A universally unique identifier (UUID) is an identifier standard used in software construction. See https://en.wikipedia.org/wiki/Universally_unique_identifier
57
Admin Web App
• A new value for the user's account Balance results in a financial transaction that corrects the previous account
balance. See Section 3.7.2, “Transactions” [39].
• Set the Credit limit with one of these buttons:
• None : user has no credit limit, and is not restricted.
• Default : user has default credit limit. See Section 4.8.11.2, “General Financial Options” [97].
• Individual : when selected a custom credit limit can be entered.
4.4.2.6. Password Reset
The edit dialog for an Internal User has an extra Password ... button. A tap on this button shows the Password
Reset Dialog.
Figure 4.18. Admin Web App: Internal User - Password Reset
4.4.2.7. User Delete
Figure 4.19. Admin Web App: Edit User - Delete
• Press the Delete button to delete the user and return to the User List. The next section describes the effect of
this action.
• The Cancel button bring you back to the User List without changing anything.
4.4.3. Create Internal User
A tap on the New ... button at the top of the User List gives this dialog to create a new Internal User. Apart from
the regular User data, the attributes ID and Password can be entered.
• The prefix of ID is contained in the configuration key internal-users.username-prefix.
58
Admin Web App
• The minimum length of the Password is contained in the configuration key internal-users.passwordlength-min.
• See Section 4.8.13.10, “Config Editor” [105] on how to change these configuration values.
Tip
Internal Users can also be added with the Server Command Tool. See Section B.1.2, “addInternalUser” [174].
4.4.4. Deleted Users
Deleting a User makes sense if he is not part of the user source anymore and was not deleted as part of a bulk
delete during a manual synchronization. As long as job history for a User is present SavaPage applies a logical
delete. Any logical deleted User will be physically deleted from the database when no related job history is present
anymore. This situation will automatically occur when you enabled automatic backup in combination with the
delete of old document logs.
Important
If SavaPage synchronizes a new User from the user source, a new user instance will be created in the
database, despite the fact that a logical deleted User exists with the same identifying name, i.e. the logical
delete status of the "identical" user will remain as it is.
4.4.5. Administrator Role
SavaPage sets up a dedicated account called admin. This is the master administrator account, with access to all
features, whose password is assigned during configuration. In large organizations it is likely that the administrator
role needs to be granted to more than one person. One solution is to give all those persons the master password;
however a better approach is to assign the administrator role to the network user accounts of these individual's.
The advantages of this approach are:
• Administrators can access the Admin Web App with their own username and password.
• Since most administrative activity is logged in an audit trace, changes can easily be tracked back to an individual.
Tip
Administrative users should login via http://savapage:8631/admin rather than
http://savapage:8631/ or http://savapage:8631/user so that they are directed to the
correct interface.
4.5. Queues
4.5.1. Queues List
After a tap on the Queues button in the main menu this panel is shown. See Section 4.2, “Menu” [48].
59
Admin Web App
Figure 4.20. Admin Web App: Queue - List
Important
Dedicated queues are reserved and pre-installed for the default IPP "/" queue, the Raw IP Printer Port
(which defaults to 9100), Google Cloud Print, AirPrint, Mail Print and Web Print.
• All non-deleted queues are listed alphabetically by default. A different selection and sorting can be entered: see
Figure 4.21, “Admin Web App: Queue - Select and Sort” [61].
• Press the New button to create and edit a new queue.
• The list can be traversed by tapping one of the buttons at the pager at the top or bottom of the page.
• An entry is displayed for each queue, with identifying data and some usage statistics. From top to bottom:
• The queue's trust or status (at the top right corner).
• The URL Path of the queue. The path is relative to the /printers URL base.
• An inline Line-Graph showing the day pagometers of the printed pages over the last 30 days.
• The full IPPS URL variant of the queue.
• Optionally, the allowed client IPv4 addresses as a CIDR Set.
• The period in which activity was accumulated on the pagometer.
• The pagometer of the queue including the number of jobs and bytes printed.
• Tap the Edit button to change or delete the queue. See Section 4.5.2, “Edit Queue” [61]
• The Log button brings you to the list of documents printed to the queue. See Figure 4.85, “Admin Web App:
Documents - List” [108]
Tip
The pagometers of all queues can be reset at Options → Advanced → Reset Pagometers
60
Admin Web App
Figure 4.21. Admin Web App: Queue - Select and Sort
• Queues can be selected by entering the containing text (fragment) of their URL Path. So, entering "guest" will
select both "guest-teacher" and "student-guest".
• Select the queue's Trust and (Deleted) Status. The - button will select both.
• The list can be sorted Ascending or Descending on URL Path.
• Tap the Apply button to (re)display the list.
• A tap on the Default button resets the selection and sort fields to their default values.
4.5.2. Edit Queue
Figure 4.22. Admin Web App: Queue - Edit
61
Admin Web App
• The URL Path is editable. Renaming the URL path name will permanently overwrite the old name in all related
job history records with the new name.
• Enter IPv4 address ranges as a CIDR Set at IP addresses allowed to restrict access to the queue based on
requesting IP address. If the field is empty all requesting IP addresses are allowed to print to the queue.
• Tick the Trusted checkbox to make this a Trusted Queue. When this option is not selected the queue will be
a Public Queue.
• Tick the Disabled checkbox to disable access to the queue for all users.
• Press the OK button to commit the changes and return to the Queue List.
• Tick the Delete button to delete the queue and return to the Queue List. Deleting a Queue will be a logical
delete, as long as related job history is present. Any logical deleted Queue will be physically deleted from the
database when no related job history is present anymore. This situation will automatically occur when you
enabled automatic backup in combination with the delete of old document logs. Deleting a Queue makes sense
if you want to preserve its job history with the original name.
• The Cancel button brings you back to the Queue List without changing anything.
Important
Some reserved queues like Google Cloud Print, Web Print and Mail Print can not be edited. Other reserved
queues like AirPrint and Internet Print are untrusted by nature, hence the field Trusted cannot be edited.
4.6. Proxy Printers
4.6.1. Proxy Printer List
After a tap on the Proxy Printers button in the main menu this panel is shown. See Section 4.2, “Menu” [48].
SavaPage automatically detects CUPS printer queues, and uses their unique name to replicate corresponding Proxy
Printers in its database. When a printer queue is deleted in CUPS it is real-time detected by SavaPage, and as a
result the corresponding Proxy Printer is marked as not present. Proxy Printers which are not present are hidden
in the User Web App, so they cannot be used for printing. When a printer queue is renamed in CUPS, two events
occur in SavaPage. First, the new name is detected as a new Proxy Printer, and second, the Proxy Printer with
the old name is detected as a deleted CUPS queue. Proxy Printers which are not present anymore can either be
deleted or renamed.
SavaPage selects local CUPS printer queues by default. This is a sensible policy since local CUPS queues are
able to connect to locally attached printers (USB, LPT) or network enabled printers. However, in some odd cases
you might want to proxy print to a remote CUPS queue, i.e. a queue shared by another machine. In that case
you can set the value of the cups.ipp.remote-enabled config item to Y. See Section 4.8.13.10, “Config
Editor” [105] on how to change this value.
62
Admin Web App
Figure 4.23. Admin Web App: Proxy Printer - List
• All non-deleted Proxy Printers are listed alphabetically by default. A different selection and sorting can be
entered: see Figure 4.24, “Admin Web App: Proxy Printer - Select and Sort” [64].
• Click the CUPS button to open the CUPS Administration web page in a new browser tab.
• Click the Synchronize button to synchronize all CUPS printer options to SavaPage. Since SavaPage does not
automatically detect changed printer defaults (yet), you need to perform this action after you change CUPS
printer properties, so users will see the right defaults in the Common Printer Dialog of their Web App.
• The list can be traversed by tapping one of the buttons at the pager at the top or bottom of the page.
• An entry is displayed for each Proxy Printer, with identifying data and some usage statistics. From top to bottom:
• The Proxy Printer status (at the top right corner).
• The display name (alias) of the printer as shown to the user.
• An inline pagometer Pie-Chart followed by the CUPS Name of the printer. The red color in the chart represents the number of pages printed. The orange color represents the number of printed sheets.
• An inline Line-Graph showing the day pagometers of the printed pages over the last 30 days.
• The make and model of the printer.
• The period in which activity was accumulated on the pagometer.
• The pagometer of the Proxy Printer including the number of jobs, sheets and bytes printed.
• The Printer Groups this Proxy Printer is member of.
Tap the Edit button to edit the entry. Proxy Printers which are present in CUPS can be edited: see Figure 4.25,
“Admin Web App: Proxy Printer - Edit - Identity” [65]. Proxy Printers which are not present in CUPS can
also be deleted or renamed: see Figure 4.30, “Admin Web App: Proxy Printer - Rename” [68]
63
Admin Web App
The Log button brings you to the list of documents printed to the Proxy Printer. See Figure 4.85, “Admin Web
App: Documents - List” [108]
Click the Home button to open the CUPS Administration web page for the printer in a new browser tab.
Important
The CUPS Administration web page must be accessible as explained in Section 2.3, “Step 3 - Configure
CUPS and Samba” [10]. When CUPS authentication is required you can log in with user name root or
with a user name that belongs to the admin group.
Tip
The pagometers of all Proxy Printers can be reset at Options → Advanced → Reset Pagometers
Each Proxy Printer in the list is marked with an icon:
A non-secure Proxy Printer which can be used by any device.
• See Section 4.8.9, “Proxy Print” [94].
A non-secure Proxy Printer which can not be used by any device.
• See Section 4.8.9, “Proxy Print” [94].
A secured Proxy Printer whose jobs needs to be authorized with a NFC Card swipe on a Network Card Reader.
• See Section 4.7.2, “Proxy Print Authentication” [71].
• A referral to the Reader and the enabled release functions are shown in the list item.
A Proxy Printer which can only be used from certain Terminals.
• See Section 4.7.3.1, “Custom Proxy Print” [74].
A Proxy Printer which can only be used from certain Terminals and whose jobs needs to be authorized with a
NFC Card swipe on a Network Card Reader on other Terminals.
Figure 4.24. Admin Web App: Proxy Printer - Select and Sort
64
Admin Web App
• Proxy Printers can be selected by entering the containing text (fragment) of their display name. So, entering
"HL-" will select both "HL-1430-SERIES" and "HL-2030-SERIES".
•
•
•
•
Select the (Deleted) Status. The - button will select both.
The list can be sorted Ascending or Descending on display name.
Tap the Apply button to (re)display the list.
A tap on the Default button resets the selection and sort fields to their default values.
4.6.2. Edit Proxy Printer
4.6.2.1. Identity
Figure 4.25. Admin Web App: Proxy Printer - Edit - Identity
•
•
•
•
•
The Display name and Location are editable.
Multiple Proxy Printer Groups can be entered separated by comma.
Tick the Disabled checkbox to disable access to the Proxy Printer for all users.
Press the Apply button to commit the changes and return to the Proxy Printer List.
The Cancel button brings you back to the Proxy Printer List without changing anything.
4.6.2.2. Printer Costs
Printer costs are specified per media side and can be set for One-sided and Two-sided prints and differentiated
for B/W (Black and White) and Color printing.
When SavaPage calculates the cost of a Proxy Print job, the two-sided (duplex) page cost is only applied to pages
that are part of a sheet that is printed on both sides. So, for a document with an odd number of pages, the twosided cost is not applied to the last page. For example, when a 7 page document is printed as two-sided, the twosided cost is applied to the first 6 pages, and the one-sided cost to the last.
Costs are displayed, and can be entered, with a precision (number of decimals) as defined in Section 4.8.11.2,
“General Financial Options” [97].
4.6.2.3. Media Sources
In this section you can assign Media Size and Costs to Media Sources.
65
Admin Web App
Figure 4.26. Admin Web App: Proxy Printer - Edit - Media Source
• CUPS printer defaults are indicated in the header with an asterisk (*). In some odd cases the CUPS printer color
mode default “grayscale” is not correctly transferred as IPP attribute. You can correct this behavior by setting
the Use B/W as default option at the top of the Media Source section.
• Each entry in the list has a checkbox with the IPP attribute keyword of the Media Source.
• Tick the checkbox to enable the media source, and enter a user-friendly name as will show up in the Media
Source picklist of the Printer Settings dialog.
• Select the Media Size that is present in the Media Source.
• Specify the costs. Notice that only those cost cells are enabled that are applicable for the printer.
Warning
Depending on the PPD file used for the CUPS printer, some media sources might not be applicable. You
are advised to do some tests to make sure that media sizes are indeed applicable to the media sources
as you intended.
Figure 4.27. Admin Web App: Proxy Printer - Edit - Manual Media Source
• Costs for the manual media source can not be entered here, but must be specified as described in the next section.
4.6.2.4. Manual Media Sizes
In this section you can specify the Proxy Printer media costs for the manual media source. You can either use a
Simple or Advanced definition.
66
Admin Web App
Figure 4.28. Admin Web App: Proxy Printer - Edit - Manual Media Size (Simple)
The Simple definition allows for a single cost per media side. This is appropriate for a non-duplex monochrome
Proxy Printer that can handle a single media size (Letter or A4) only.
Figure 4.29. Admin Web App: Proxy Printer - Edit - Manual Media Size (Advanced)
Advanced mode is best suited for a duplex color Proxy Printer that can handle multiple media sizes.
• The list of supported media sizes is dependent on the Proxy Printer type.
• Use the check-box at a media size to enable its custom cost specification.
• Costs for unspecified (disabled) media sizes fall back to the Default specification.
4.6.3. Printer Groups
Printer Groups allow administrators to combine Proxy Printer instances so they can be addressed as group by a
single tag. A Proxy Printer can have one or more groups tags. See Section 4.6.2, “Edit Proxy Printer” [65].
Printer Groups are used to customize access to Proxy Printers. See:
67
Admin Web App
• Section 4.7.2, “Proxy Print Authentication” [71]
• Section 4.7.3.1, “Custom Proxy Print” [74]
• Section 4.8.9, “Proxy Print” [94]
Note
Printer Group tags are added to the database on first use. Tags without Proxy Printer members are removed
from the database at the start of the application and thereafter at a daily schedule.
4.6.4. Rename Proxy Printer
When a Proxy Printer is removed from the host system it is marked in the list as not present. When editing new
options appear, as is shown in the screenshot below.
Figure 4.30. Admin Web App: Proxy Printer - Rename
• See Figure 4.25, “Admin Web App: Proxy Printer - Edit - Identity” [65] for a description of the basic edit
options.
• Tick the Delete when job history is cleaned button to logically delete the Proxy Printer. It will be physically
deleted from the database when no related job history is present anymore. This situation will automatically
occur when you enabled automatic backup in combination with the delete of old document logs. Deleting makes
sense if the queue is permanently removed from CUPS, and you don't want the Proxy Printer list in the Admin
Web App to be cluttered with out-of-date "not present" Proxy Printers.
• Press the OK button to commit the changes and return to the Proxy Printer List.
• You can change the associated CUPS printer by entering a New name. Renaming makes sense as a mirroring
action of renaming a CUPS queue. After renaming a printer in CUPS, the Proxy Printer associated with the
old CUPS name will be identified by SavaPage as "not present", and a new Proxy Printer for the new CUPS
queue will be created. At this point you can re-associate (rename) the old CUPS name of the Proxy Printer to
the new one. This will work as long as no job history is already accumulated on the Proxy Printer associated
with this new CUPS name. To overrule this constraint you can tick the Replace (delete) existing printer with
identical name checkbox, so an existing Proxy Printer associated with the same (new) CUPS name will be
deleted and replaced.
• Press the Rename button to commit the renaming action and return to the Proxy Printer List.
• Both Cancel buttons bring you back to the Proxy Printer List without changing anything.
Caution
If SavaPage detects a CUPS queue whose name is identical to a logical deleted Proxy Printer, the logical
delete mark will be removed and the Proxy Printer will be re-activated.
4.7. Devices
A Device is a hardware component with a dedicated function.
68
Admin Web App
SavaPage defines devices of type Terminal and Network Card Reader. They are identified by IP address and, in
case of the reader, a port number. The combination of IP-address and Type must be unique.
Note
Although most of the time an IP address will harbor one device type, this constraint does allow that
Terminal and Network Card Reader are combined on a single physical device.
• A Network Card Reader acts as User Authenticator, either at Login or Proxy Print time.
• A Terminal device runs customized SavaPage Web App Sessions overriding global User Authentication and
Proxy Print defaults.
After a tap on the Devices button in the main menu this panel is shown. See Section 4.2, “Menu” [48].
Figure 4.31. Admin Web App: Device - List
All Devices are listed alphabetically by default. A different selection and sorting can be entered: see Figure 4.32,
“Admin Web App: Device - Select and Sort” [70]. Press the New Terminal... or New Card Reader... button
to create a new Device.
Devices are marked with an icon and hold the following items:
69
Admin Web App
A Network Card Reader used for NFC Card Login at a Terminal.
•
•
•
•
The name of the Reader.
A referral to the Terminal.
The IP address, port, and location of the Reader.
A time-stamp of the last connection attempt with the status connected (green) or disconnected (orange).
A Network Card Reader used for NFC Card Proxy Print Authentication.
• The name, IP address, port, and location of the Reader.
• A time-stamp of the last connection attempt with the status connected (green) or disconnected (orange).
• The Proxy Printer or Proxy Printer Group for which this reader acts as authenticator.
• The Print Mode of the proxy printer(s): Fast, Hold, Direct.
A Terminal with custom settings.
• The name, IP address and location of the Terminal.
• The Proxy Print or Proxy Printer Group for which this Terminal is entitled to print to.
A Terminal with custom settings and a Network Card Reader used for NFC Card Login.
•
•
•
•
The name of the Terminal.
A referral to the Reader.
The IP address and location of the Terminal.
The Proxy Printer or Proxy Printer Group for which this Terminal is entitled to print to.
Figure 4.32. Admin Web App: Device - Select and Sort
• Devices can be selected by entering the containing text (fragment) of their display name. So, entering "CARD-"
will select both "CARD-READER-PAMPUS" and "CARD-READER-RPI".
• Select the Status. The - button will select both Enabled and Disabled devices.
• Select the Type. The - button will select both Reader and Terminal devices.
• The list can be sorted Ascending or Descending on device name.
• Tap the Apply button to (re)display the list.
70
Admin Web App
• A tap on the Default button resets the selection and sort fields to their default values.
4.7.1. Network Card Reader
A Network Card Reader device runs the SavaPage Network Card Reader Service .
4.7.1.1. Custom User Login
Figure 4.33. Admin Web App: Devices - Network Card Reader - Custom User Login
• A reader is associated to a Terminal in the Terminal dialog. See Section 4.7.3.2, “Custom User Login” [75].
The associated Terminal is shown here with icon and name.
• Tick Disabled to disable the Device definition.
• The format of the NFC Card Number must be specified. See Section A.1, “Card Number Format” [170].
Note
A Network Card Reader can be used as NFC Card Login authenticator by just one Terminal.
4.7.2. Proxy Print Authentication
A Network Card Reader can act as print job authenticator for a single Proxy Printer or a Proxy Printer Group.
When the reader device is placed next to the printer device this setup implements Pull Printing4.
4
http://en.wikipedia.org/wiki/Follow_Me_(printing)
71
Admin Web App
Figure 4.34. Admin Web App: Devices - Network Card Reader - Proxy Print Authentication
Checking the Proxy Print Authentication option shows all the detail options. The Print Mode determines the
authentication scenario. Basically there are three modi: Fast, Hold and Direct. Fast Mode can be combined with
Hold and Direct Mode.
72
Admin Web App
• When selecting Single Printer, enter the name of a Proxy Printer.
• When selecting Printer Group, enter the name of a Proxy Printer Group.
• The format of the NFC Card Number must be specified. See Section A.1, “Card Number Format” [170].
Important
When using Proxy Print Authentication concurrently with the User Web App and User Client you are
strongly advised to use an external database like PostgreSQL. See Chapter 15, Using an External Database [161].
4.7.2.1. Fast Print Mode
Fast Print Mode applies to a Single Printer and supports the following scenario:
1.
2.
3.
4.
User prints one or more jobs to SavaPage. See Chapter 9, SavaPage as Printer [131].
User walks to the printer.
User swipes his NFC token along the reader.
As a result he gets one (1) printed copy of all SafePages jobs according to the default printer settings.
Expired SafePages jobs are skipped and cleared. The expiry period is set in Section 4.8.9, “Proxy Print” [94].
A user can extend his fast job expiry in the User Web App. See Section 3.4.1, “Printer Selection” [32].
• A Fast Print clears all SafePages after printing.
• This scenario does not need any action in the User Web App. Therefore, it is the shortest way to proxy print
with SavaPage.
Important
When Fast Mode is combined with Hold or Direct Mode, and a Printer Group is specified, one of the
printers from the group must be specified as Single Printer.
4.7.2.2. Hold Print Mode
Hold Print Mode applies to a Single Printer or Printer Group and supports the following scenario:
1. User prints one or more jobs to SavaPage. See Chapter 9, SavaPage as Printer [131].
2. User opens the User Web App en proxy prints to either the Single Printer or one of the printers from the Printer
Group.
3. As a result the proxy print job is held.
4. User walks to the chosen printer.
5. User swipes his NFC token along the reader.
6. As a result all hold jobs for the printer are printed.
Expired hold jobs are skipped and cleared. The expiry period is set in Section 4.8.9, “Proxy Print” [94]. A
user can delete hold jobs or extend expiry in the User Web App. See Section 3.2.1.2, “Hold Print Jobs” [23].
4.7.2.3. Direct Print Mode
Direct Print Mode applies to a Single Printer or Printer Group and supports the following scenario:
1. User prints one or more jobs to SavaPage. See Chapter 9, SavaPage as Printer [131].
2. User opens the User Web App in his mobile device.
3. User selects either the Single Printer or one of the printers from the Printer Group. See Section 3.4.1, “Printer
Selection” [32].
73
Admin Web App
4. User selects printer and job settings.
5. User walks to the chosen printer.
6. User presses the Print button in the Web App.
7. As a result a dialog pops up prompting the user to swipe his NFC Card for authentication. See Section 3.4.4,
“Direct Print Release” [35]. User has a 10 second time limit to swipe his card. The time limit is set in Section 4.8.9, “Proxy Print” [94].
8. User swipes his NFC token along the reader.
9. As a result the job is printed.
4.7.3. Terminal
A Terminal runs customized SavaPage Web App Sessions on a specific device.
4.7.3.1. Custom Proxy Print
A Terminal can allow printing to a single Proxy Printer or Proxy Printer Group. This is usually done for printers
that need to be secured according to global Proxy Print defaults.
When the Terminal device is placed next to the printer this setup implements Pull Printing5.
Figure 4.35. Admin Web App: Devices - Terminal - Custom Proxy Print
5
http://en.wikipedia.org/wiki/Follow_Me_(printing)
74
Admin Web App
• The Idle Seconds before auto logout is targeted at public Terminals and is meant to protect users who forget
to logout when done. Enter a number of seconds: the Web App will automatically logout after this period of
inactivity. Enter 0 (zero) when no auto logout is desirable.
• Check the Custom Proxy Print option.
• When selecting Single Printer, enter the name of a Proxy Printer.
• When selecting Printer Group, enter the name of a Proxy Printer Group.
4.7.3.2. Custom User Login
Check the Custom User Login option to override global User Authentication defaults just for this Terminal.
Figure 4.36. Admin Web App: Devices - Terminal - Custom User Login
• The options in this section are identical to the ones in Section 4.8.3, “User Authentication” [81] with the
addition of the Network NFC Card option.
• Enter the name of the Network Card Reader below the Network NFC Card Reader label.
4.8. Options
A tap on the Options button in the main menu shows a panel options organized in sections. A tap on one of the
sections expands (or collapsed) the underlying detais. Please see the sections below for a detailed description:
• Section 4.8.1, “User Source” [76].
75
Admin Web App
• Section 4.8.2, “User Creation” [79].
• Section 4.8.4, “Mail” [84].
•
•
•
•
•
•
Section 4.8.5, “Google Cloud Printer” [86].
Section 4.8.6, “Mail Print” [90].
Section 4.8.7, “Web Print” [92].
Section 4.8.8, “Internet Print” [93].
Section 4.8.9, “Proxy Print” [94].
Section 4.8.10, “Eco Print” [95].
• Section 4.8.11, “Financial” [96].
• Section 4.8.12, “Backups” [98].
• Section 4.8.13, “Advanced” [100].
4.8.1. User Source
This section is about the configuration of external and internal user sources.
Figure 4.37. Admin Web App: Options - User Source
• Tap the - button if you do not want to import users from an external source. Remember to enable the Internal
Users feature if you want to acquire any user into the system.
• Tap the Unix button if you want to import Unix user accounts defined on the SavaPage host.
• Tap the LDAP button to import users from an existing LDAP domain. This includes OpenLDAP, Apple Open
Directory, Novell eDirectory and Microsoft Active Directory. When this option is selected the LDAP connection
data are shown.
• Press the Apply button to commit the changes.
4.8.1.1. Unix
This option imports user accounts that are setup and defined on the local system as standard Unix accounts or
mapped into the system from a central directory service such as LDAP via nsswitch.conf and PAM. Most
large established Unix networks will support this option.
4.8.1.2. LDAP
LDAP (Lightweight Directory Access Protocol) directories usually store information about user and groups in an
organization. One of the most common uses of LDAP is to provide single sign-on on a network that comprises
multiple platforms and applications. When a network consists of Windows computers only, then an Active Directory domain can be used. But when there is a mix of Windows, Apple and GNU/Linux machines then LDAP
can provided the single source of user, group and authentication information. (It is worth noting that both Active
Directory and Novell eDirectory implement the LDAP protocol).
SavaPage can use an LDAP directory for user authentication and as a source of user and group information. LDAP
can either be enabled at installation time, or by changing the user source at this point. When enabling LDAP, a
76
Admin Web App
number of configuration settings must be specified to allow the application to connect to the LDAP server. Please
ask your LDAP administrator what values to use for the various options.
Figure 4.38. Admin Web App: Options - User Source - LDAP
• The Server Type determines which LDAP fields are used to get user and group information. Select one of the
following server types that SavaPage supports out-of-the-box:
• OpenLDAP : OpenLDAP.
• Apple : Apple Open Directory.
• Novell : Novell eDirectory.
• Windows : Microsoft Active Directory.
However, it is easy to support other server types by adjusting the fields SavaPage uses for LDAP searches. This
is discussed in Appendix H, Advanced LDAP Configuration [196]
• Enter the hostname or IP address of the LDAP server at the Host prompt.
• Enter the IP port of the LDAP server at the Port prompt. The value defaults to 389.
• Tick the Use SSL checkbox to use encrypted SSL connection to connect to the LDAP server. The LDAP server
requires SSL support to be enabled and should accept connections on the standard LDAPS port 636.
• Enter the Base DN of the LDAP server at the Base DN prompt. This is the equivalent of the “suffix” config
setting of the OpenLDAP server. For example, if the domain hosted by the LDAP server is “domain.com” then
the Base DN might be: DC=domain,DC=com
The format of the Base DN can differ significantly depending on the configuration. Some older Novell eDirectory installations may require a blank Base DN to operate. Some examples:
DC=myorganization,DC=com
DC=mycompany,DC=co,DC=uk
OU=OrgUnit,DC=domain,DC=com
DC=local
• The Admin DN is the DN of the user who has permission to connect to and query the LDAP server. This
is typically an administrative user, although it can be a user that only has read-only access to the LDAP server. An example of the DN of the Administrator user on a Windows AD domain "domain.com", would be
CN=Administrator,CN=Users,DC=domain,DC=com. The exact format of the DN depends on the
LDAP server. Some examples:
77
Admin Web App
• Microsoft Active Directory (in organizational unit)
CN=administrator,OU=OrgUnit,DC=domain,DC=com
• Apple Open Directory
uid=diradmin,CN=users,DC=domain,DC=com
• OpenLDAP
uid=root,DC=domain,DC=com
uid=ldapadmin,DC=domain,DC=com
• Microsoft Active Directory
CN=Administrator,CN=Users,DC=domain,DC=com
• Novell eDirectory
CN=root,DC=domain,DC=com
CN=ldapadmin,OU=users,DC=domain,DC=com
• The Admin password is the password for the administrator specified in the Admin DN above.
Tip
Some LDAP servers are configured to allow “anonymous” LDAP query access. In these situations, the
Admin DN and Admin password may be left blank.
Figure 4.39. Admin Web App: Options - User Source - LDAP
At the LDAP fields for alternative authentication section LDAP field names can be entered for the two alternative user authentication methods ID Number and Card Number, as described in Section 4.8.3, “User Authentication” [81]. Field names are optional and can be left empty. The Card Format is relevant when the Card
Number is specified. See Section A.1, “Card Number Format” [170].
Important
The ID and Card Number must each uniquely identify a user, so make sure that no two users have the
same number. This means that the numbers defined in LDAP should be unique. If SavaPage encounters
a non-unique ID or Card Number that user will not be updated.
4.8.1.3. Internal Users
With the internal users feature you can directly manage users inside SavaPage. Enabling this feature removes the
obligation to define an external User Source to create and manage Users. Of course you can enable this feature
as an addition to an external source.
78
Admin Web App
Figure 4.40. Admin Web App: Options - Internal Users
When Internal Users is selected an extra option appears where you can allow internal users to change their
password. See Section 3.9, “User Details” [43].
Tip
Use the Server Command Tool to batch import internal users. See Section B.1.2, “addInternalUser” [174]
4.8.2. User Creation
This section is about the creation and synchronization of external users. Internal Users are created in the User
Web App or with the Server Command Tool. See Section 4.4.3, “Create Internal User” [58] and Section B.1.2,
“addInternalUser” [174].
Figure 4.41. Admin Web App: Options - User Creation - Import
The Import users from group section holds an option to import a subset of users from the source by selecting a
group. This option is relevant if you want to restrict access to SavaPage for a subset of external users.
• A tap on the Change group button shows a list of available groups as seen in Figure 4.42, “Admin Web App:
Options - User Creation - From Group” [80].
• Select a group from the list and press the Apply button to commit the change, or press the Cancel button to
roll it back.
• Use the [All Users] button to cancel the group restriction.
79
Admin Web App
Figure 4.42. Admin Web App: Options - User Creation - From Group
Caution
In Active Directory, user group membership comes in two flavors. It can either explicitly be assigned,
or be implied by the user's Primary Group ID, i.e. the RID of the primary group the user is member of.
Because primary group membership is implicit, the Active Directory API will return an empty member
attribute for this group. When users are explicitly assigned as member to groups the API will return group
members as expected.
For example, because Active Directory sets the Primary Group ID of all users to the built-in “Domain
Users” group, the Active Directory API will not report any members for the “Domain Users” group.
This issue is discussed in the following Microsoft Knowledge Base article: http://support.microsoft.com/
kb/275523
Note
Active Directory supports an advanced feature called “Nested Groups”. This allows a group to have other
groups as member. Since a sub-group can again have sub-group members, nesting can be several levels
deep. When importing users from a group, SavaPage traverses the nested group tree to collect all containing users.
Figure 4.43. Admin Web App: Options - User Creation - Synchronize
The Synchronization section holds options for the external user synchronization process.
• Tick the Update user details checkbox if you want to overwrite user details in the database with details from
the source.
Caution
An external User will overwrite an internal User with the same user id: as a result the User will become
external.
• Select Import new users overnight to automatically synchronize daily at 10 minutes past midnight6.
6
Overnight user synchronization takes place according to the default CRON expression "0 10 0 * * ?" contained in configuration key
schedule.daily. See Section 4.8.13.10, “Config Editor” [105] on how to change this value.
80
Admin Web App
• Press the Apply button to commit the changes.
Press the Synchronize now button to manually start a synchronization.
• Tick the Delete users that do not exist in the selected source checkbox to (logically) delete users in the database
that were removed from the source. Note that this checkbox is deselected again after each synchronization.
• Feedback messages from the synchronization process are real-time displayed in the Messages section. Press
the Clear button to remove them.
• Use the Test button to check the effect of the synchronization without updating the database. Messages are
shown with a "test" prefix.
Note
Disabled Active Directory users will not be imported by default. If you want to change this behavior you
can set the value of configuration key ldap.disabled-users.allow to Y. See Section 4.8.13.10,
“Config Editor” [105] on how to change this value.
Tip
To delete all external users, select - as User Source and use Synchronize now with the Delete users
option.
Caution
The SafePages of external users not present in the source are deleted.
Figure 4.44. Admin Web App: Options - User Creation - On Demand
On demand user creation specifies which events, apart from regular user synchronization, will ad-hoc create
new external users in the database.
• If the user associated with these events is not in the database, SavaPage will check if the user is part of the
User Source and thereby a sure Synchronized User candidate. If so, it will ad-hoc synchronize the user into
the database.
• Select At first login to ad-hoc create a user when he successfully passed the SavaPage Login for the first time.
• Select At first print to ad-hoc create a user when he prints to a SavaPage queue for the first time.
• Press the Apply button to commit the selection.
4.8.3. User Authentication
This sections describes the global defaults for User Authentication.
81
Admin Web App
Figure 4.45. Admin Web App: Options - User Authentication
The Persistence section holds a options to persist authentication in Browser Local Storage . When enabled, a
successful login to the SavaPage Web App will store an authentication token in the “Local Storage”7 of the browser.
When the user closes the browser after a successful login and opens it again, login will be automatic, without the
need to authenticate again. Separate authentication tokens are held for the User and Admin Web App context. See
Section 12.1.3, “Authentication Tokens” [151].
Note
The presence of an authentication token is essential for the iOS Web Clip to function, and is pure convenience in other environments.
When Browser Local Storage is disabled, authentication persistence is implemented with Web Sessions.
The PIN section holds the defaults for PIN usage.
• When User can change their PIN is enabled users are granted the option to change their PIN. See Section 3.9,
“User Details” [43].
When Trust User Client is enabled User Web App authentication is automatic when:
7
Local Storage is a W3C standard and stores data in the browser with no expiration date. The data will not be deleted when the browser is
closed, and will be available the next day, week, or year.
82
Admin Web App
• An authenticated User Client session is present at the same IP address.
• The User Web App is opened with an URL parameter identifying the user from the User Client session. See
Appendix D, URL Cheat Sheet [189].
The NFC Card section holds the defaults for card swipe logins using a Local Card Reader or Network Card Reader.
• With Require PIN enabled the user must also provide their associated PIN. This provides additional security
for swipe card logins.
• When the Self Association option is selected, users are allowed to swipe cards previously not used or registered.
When swiping such an unregistered card, SavaPage will ask the user if he wants to associate the new card to his
account. When the user agrees SavaPage will switch to User Name authentication. After successful authentication the new card will be registered, thereby replacing any previously associated card. This feature is available
for User Web App Login only. See Section 3.1.4, “Card Self Association Dialog” [19].
In the last section different Login Methods can be activated. When a method is activated a detailed section is
shown. Detailed sections are explained in:
• Section 4.8.3.1, “Username Login” [83]
• Section 4.8.3.2, “ID Number Login” [83]
• Section 4.8.3.3, “Local NFC Card Login” [84]
• Section 4.8.3.4, “Default Login” [84]
Note
The globally active Login Methods can be overridden for a specific Terminal by defining Custom User
Login settings.
Note
ID Numbers and NFC Card Numbers can be synchronized with an external source like LDAP, or imported
from file.
4.8.3.1. Username Login
The Username login method allows a Person to use his regular username and password to login.
Figure 4.46. Admin Web App: Options - User Authentication - Username Login
• If the Show in Dialog option is selected, the Username login method is part of the Login dialog. When this
option is disabled this login can only be achieved by use of the login URL parameter. See Appendix D, URL
Cheat Sheet [189].
4.8.3.2. ID Number Login
The ID Number login method allows a Person to use his identity number. Identity numbers are convenient
when usernames are too long or cumbersome to enter. For example, rather than entering a username like
“steven.brown-002”, it is more convenient to enter the employee or student ID Number “3624”.
Figure 4.47. Admin Web App: Options - User Authentication - ID Number Login
83
Admin Web App
• If the Show in Dialog option is selected, the ID Number login method is part of the Login dialog. When this
option is disabled this login can only be achieved by use of the login URL parameter. See Appendix D, URL
Cheat Sheet [189].
• When Mask input is set the ID Number will be masked when entered (like a password).
• With Require PIN set the user must also provide their associated PIN. This provides additional security for
ID Number logins.
4.8.3.3. Local NFC Card Login
The Local NFC Card login method allows a Person to login by swiping an NFC Card across a Local Card Reader.
Figure 4.48. Admin Web App: Options - User Authentication - Local NFC Card Login
• If the Show in Dialog option is selected, the Local NFC Card login method is part of the Login dialog. When
this option is disabled this login can only be achieved by use of the login URL parameter. See Appendix D,
URL Cheat Sheet [189].
• The Format of the card number must be specified. See Section A.1, “Card Number Format” [170].
Warning
This setting applies to any Local Card Reader hooked up to any device. If a card reader is used that
produces a different format a Terminal definition with a Custom User Login needs to be created for
the device the reader is hooked up to.
4.8.3.4. Default Login
Figure 4.49. Admin Web App: Options - User Authentication - Default Login
• Select the Login method that is displayed as default in the Login dialog.
4.8.4. Mail
This section holds the settings for outgoing mail.
84
Admin Web App
Figure 4.50. Admin Web App: Options - Mail - SMTP
Enter the SMTP connection parameters:
• The host name or IP address of the Host.
• The IP port at Port. The standard SMTP ports are: 25 (insecure), 465 (SSL/TLS) and 587 (STARTTLS). The
value defaults to 465 (SSL/TLS).
• Select the connection security: - for an insecure connection, and STARTTLS8 or SSL/TLS9 for a secure connection.
• Enter the User Name and Password if authentication is required.
Figure 4.51. Admin Web App: Options - Mail - Messages
The Messages section holds the sender and reply parameters used for email messages send by the system:
• Sender address : enter a valid email address representing the sender of the message.
• Sender name : the name default to SavaPage.
• Reply address : enter a valid email address the recipient can reply to.
8
STARTTLS is a way to take an existing insecure connection, and upgrade it to a secure connection using SSL/TLS.
SSL and TLS both provide a way to encrypt the communication between a client and a server computer. TLS is the successor to SSL and
the terms SSL and TLS are used interchangeably.
9
85
Admin Web App
• Reply to name : the name to reply to.
Press the Apply button to commit the changes.
Figure 4.52. Admin Web App: Options - Mail - Test
Check if all mail parameters are valid by sending a test email.
• Enter a valid email address to send a message To and press Test . Check the mailbox of the recipient to see
if the message arrived.
4.8.5. Google Cloud Printer
Google Cloud Print10 ™ (GCP) is a Google service by which any Cloud Print aware application (web, desktop,
mobile), on any device connected to the cloud, can print to any remote printer connected to that cloud.
The service is agnostic about the abundant combinations of client devices and target printers, and clients do not
need to install device drivers to get things going. However, documents need to be fully transmitted to the Google
cloud first, before they can be printed.
GCP is part of Android and Chrome OS and is, apart from that, available on all mobile devices and desktops via
Google Cloud Print enabled Web Apps11.
Several hardware vendors have already integrated their solution with Google Cloud Print services so their printers
can receive jobs from the Google cloud.
SavaPage closes the ranks with its own GCP integration so it truly qualifies as Google Cloud Ready Printer.
Note
Google Cloud Print maps to the reserved Queue /gcp.
4.8.5.1. Google Cloud Printer Registration
This section describes how to register the Google Gloud Printer just after you installed SavaPage.
Tip
During registration additional browser tabs and windows are opened. Therefore, it is more convenient to
use a desktop browser during registration.
10
11
http://www.google.com/cloudprint/learn/
A list of Web Apps that work with Google Cloud Print can be found at http://www.google.com/cloudprint/learn/apps.html.
86
Admin Web App
Figure 4.53. Admin Web App: Options - Google Cloud Print - Status
The top panel in this section shows the printer status with the following items:
•
•
•
•
Enable. A check-box indicating whether the Cloud Printer is enabled or not.
Printer. The name of the Cloud Printer.
Owner. The Google User acting as owner of the printer.
State. The state of the printer.
Initially the Printer name defaults to SavaPage, the Owner is unspecified and the State is Disabled.
Tap the name “SavaPage” to set the authenticated Google account.
A new browser tab opens with the Google Cloud Print home page for the authenticated Google User of the current
browser session.
Make sure you are authenticated with the Google account meant for the Owner of the SavaPage Cloud Printer.
When not authenticated Google invites you to Sign in to continue to Google Cloud Print. When already authenticated, logout from an existing Google account different from the intended owner, and tap the SavaPage name again.
Note
Although any Google account can be used as owner, we recommend to create a dedicated account to
administer the Google Cloud Printer. A personal account is not convenient since it may be deleted or
become out-of-date.
Go back to the SavaPage Admin Web App and press the Enable check-box to enable Google Cloud Printing.
A panel is shown for entering the Google OAuth credentials and Printer name. The credentials are needed by
SavaPage to create and monitor the printer belonging to the owner. Although credentials from any Google account
other than the one from the printer owner could be used, it is advised to use one and the same account. This track
will assume this is the case.
Note
Cloud Ready Printer manufacturers normally use their own OAuth credentials for all printer registrations.
For reasons of security and independence SavaPage let you use your own credentials.
Press the Apply button to save the Enable setting.
Tap the link called “Web Application Credentials” to get the OAuth credentials.
This opens a new browser tab with the Google Developers Console of the Google account acting as printer owner
(as authenticated in the previous step).
87
Admin Web App
If this is a brand new account, follow Google's instructions to get started. When no API project is present, which
will be the case for a new account, follow Google's suggestion to create a project. At the newly created project:
• Select the APIs & auth → Credentials option from the (left hand side) menu.
• Select Create new Client ID in the OAuth section.
• Select Web application as Application type (the other entry fields are irrelevant).
• Press the Configure consent screen button.
Figure 4.54. Admin Web App: Options - Google Cloud Print - OAuth
Now that the Client ID for web application is created, copy the Client ID and Client secret from the Google
console to the corresponding fields in the SavaPage panel.
Press the Register button.
A Google Cloud Printer confirmation window will pop-up.
Press the Finish printer registration button in the pop-up.
Registration is now complete, and you can close the pop-up window.
Press the Refresh button in the SavaPage status panel.
Notice that the Printer name and Owner have changed according to your registration, and that a new Online
button has appeared. Press this button to make the printer available for printing (pressing the Offline button makes
the printer unavailable again).
This finishes the registration of the Google Cloud Ready Printer.
Important
The Google Cloud Print Service parameters are stored in the file /opt/savapage/server/gcp.properties. Make a backup of this file now, and store it at a secure place, so you can restore it in case of a server crash or when you need to migrate to a new server.
4.8.5.2. Edit Google Cloud Printer
The Cloud Printer can be edited and consulted in the Google Cloud Print page, which can simply be accessed
by tapping the Printer name in the Status panel. Several actions can be performed here like sharing, renaming or
deleting the printer.
88
Admin Web App
After a Rename of the Cloud Printer, you need to press the Offline and Online button if you want to see the
new name in the Status panel.
A Delete of the printer will result in State “Not found” in the Status panel (press Refresh to update the panel if
it does not show). At this point you need to Register again if you want to use Google Cloud Print.
You can Share the printer by inviting other Google users to use it.
4.8.5.3. Google Cloud Print User Registration
For a Person to use Google Cloud Print he must have a Google account. This account may be acquired privately,
or provided via the Google Apps environment already present in your organization.
The Owner of the Cloud Printer must share the printer by inviting Google users. See Section 4.8.5.2, “Edit Google
Cloud Printer” [88].
Tip
You may share the Cloud Printer with individual users by entering a list of Google email addresses. But
you may also share printers with a Google Group. For example, you could set up a dedicated Google
Group and share the printer to this group. A Google Group can be set up for users to self-register, but
you may chose need to moderate these registrations. Google provides mechanisms for users to request
membership to a Google Group and for a moderator to accept or reject those requests.
A SavaPage Administrator must associate the Google account with the right SavaPage User. This is done in the
User Edit dialog by making sure that the Google account is present as primary or secondary address. For example,
John Brown may be known by his primary email address “[email protected]” while one of other email
addresses matches his Google account “[email protected]”.
Note that the primary email address of external users is synchronized from the User Source, and can be overwritten.
So, take care of using the primary email for a Google account, unless you know for sure that the Google account
is part of the user source.
Tip
User email addresses can also be edited with the Server Command Tool. See Section B.1.16, “setUserProperties” [180].
4.8.5.4. User Notifications
In case the associated Google account (email address) of a Google Print Job cannot be matched with a SavaPage
user the job is canceled. You can opt to send an email to the user explaining the situation with instructions how
to proceed.
89
Admin Web App
Figure 4.55. Admin Web App: Options - Google Cloud Print - Notifications
4.8.6. Mail Print
Mail Print is an implementation of Driverless Printing which allows users to print documents by mailing them
to SavaPage. The email address from the sender is used to find the corresponding Person. See Section 10.1.14,
“Mail Print Authentication” [143].
Note
Mail Print maps to the reserved Queue /mailprint.
90
Admin Web App
Figure 4.56. Admin Web App: Options - Mail Print (IMAP)
Check the Allow user to mail documents to enable the Mail Print function. Then enter the IMAP connection
parameters:
• The host name or IP address of the Host.
• The IP port at Port. The standard IMAP ports are: 143 (insecure), 993 (SSL/TLS) and 143 (STARTTLS).
The value defaults to 993 (SSL/TLS).
• Select the connection security: - for an insecure connection, and STARTTLS or SSL/TLS for a secure connection.
• Enter the User Name and Password for the required authentication.
Important
The IMAP host must support the IDLE Command, which is a widely implemented standard extension to
the core IMAP protocol. See RFC217712.
Print jobs are read from the Inbox and moved to the Trash folder after processing. Enter the name of both folders:
• Inbox : the name of the Inbox folder.
• Trash : the name of the Trash folder.
12
http://tools.ietf.org/html/rfc2177
91
Admin Web App
Figure 4.57. Admin Web App: Options - Mail Print (Attachments)
Limit the print job size per email message by setting the Maximum attachment size (MB) and Maximum attachments. Use integers as value. Leave empty to allow unlimited size.
• Press the Apply button to commit the changes.
• Press the Test button to test the connection. A feedback message will be displayed with the result.
• Use the flip-switch to turn the Mail Print service On and Off . Note that after disabling the service it is automatically turned Off .
Note
Because Mail Print is an open channel SavaPage does not reply to unknown users. This is unlike Google
Cloud Print notifications, since incoming GCP jobs are from authorized users whose Gmail address is
not yet known in SavaPage.
For uploaded file types that do not have a page size defined (HTML, TXT) the default paper size is used.
The Report Font is used for plain text files (TXT).
4.8.7. Web Print
Web Print is an implementation of Driverless Printing which allows users to print documents to SavaPage by
simply uploading them from their User Web App. See Section 3.10, “Upload” [46].
Note
Web Print maps to the default Queue /webprint.
92
Admin Web App
Figure 4.58. Admin Web App: Options - Web Print
Check the Allow user to upload documents to enable the Web Print function. Then enter the restriction parameters:
• Limit the print job size by setting the Maximum document size (MB). Use an integer as value. Leave empty
to allow unlimited size.
• Enter IPv4 address ranges as a CIDR Set at IP addresses allowed to restrict upload based on the requesting IP
address. If the field is empty all requesting IP addresses are allowed to upload.
4.8.8. Internet Print
Secure Driver Printing to SavaPage over public Internet is activated when port 443 of a public IP address is
forwarded to port 8632 of the private intranet IP address of the SavaPage server. To authenticate the requesting
user a special Printer URI format is used:
ipps://[host]/printers/internet/user/[number]/uuid/[uuid]
… where [host] is the public DNS name or IP address, and [number] and [uuid] are the ID Number and
UUID of the user. See Section 4.4.2.3, “Card and ID” [57], Section 4.4.2.4, “UUID” [57] and Appendix D,
URL Cheat Sheet [189].
Figure 4.59. Admin Web App: Options - Internet Print
Enter the protocol://authority of the Internet Printer Device URI as shown to users and press the Apply
button to commit. When the value is left blank users won't be able to see their private Internet Printer Device URI.
See Section 3.9.1, “Internet Printer” [43].
Important
Internet Print maps to the default Queue /internet. All print requests over public Internet will have
the same remote IP address. To exclusively accept prints from Internet you should set the “IP addresses
allowed” to this remote address. See Section 4.5.2, “Edit Queue” [61].
93
Admin Web App
Caution
Beware that by enabling Internet Print the SavaPage Web Apps are also accessible over public Internet,
so take extra care to protect access to these Apps. See Section 12.2, “Access over Internet” [152].
4.8.9. Proxy Print
Figure 4.60. Admin Web App: Options - Proxy Print
With Maximum number of copies per job you can restrict the number of copies for proxy print jobs. Leave
empty to aloow unrestricted printing.
To enforce that all SafePages are cleared after a proxy print enable Always remove SafePages after printing.
Check the Allow Non-Secure Proxy Print option if you want to allow users to print to any enabled Proxy Printer
from any device. You can optionally restrict non-secure printer access by entering a Proxy Printer Group.
Non-Secure means that users are able to initiate print jobs from locations (desktop, mobile device) remote from
the actual printer. This implies that jobs will sit uncollected at the printer, at least for a while. In the mean time,
prints containing sensitive information may be read by unauthorized eyes. Or jobs may be forgotten at all, adding
up to paper and toner waste.
94
Admin Web App
Any printer that falls beside the non-secure printer pool must be secured by Terminal or Network Card Reader
Devices that have a fixed position at the target printer . See Section 4.7.2, “Proxy Print Authentication” [71]
and Section 4.7.3.1, “Custom Proxy Print” [74].
The expiration period for each Print Mode can be entered. See:
• Section 4.7.2.1, “Fast Print Mode” [73],
• Section 4.7.2.2, “Hold Print Mode” [73]
• Section 4.7.2.3, “Direct Print Mode” [73]
4.8.10. Eco Print
Eco Print is a filter that converts PDF pages to images for eco-friendly proxy printing. The result, including ink
and toner savings, is comparable to Ecofont13. There is a difference though. While Ecofont uses True Type Font
technology at the start of the print chain (document editing), SavaPage Eco Print uses bitmap technology at the
end of the chain. Eco Print intelligently punches holes in all non-white areas of the PDF version of a document,
just before proxy printing, downloading or emailing it.
Since Eco Print processes bitmap patterns it is font agnostic and therefore can handle all font types. And, as an
extra, it punches graphics along the way. Contrary to Ecofont, which is a non-free Windows only solution, Eco
Print works is a Libre solution that works for all client platforms since filtering is performed server side.
Warning
The downside of ad-hoc filtering is performance. Eco Print takes about 3 seconds per page (i5 processor,
300 DPI), but is done unobtrusive in the background and need only be done once per PDF document,
since the result is cached. Anyhow, Eco Print is not suitable for very large documents.
4.8.10.1. Eco Print Examples
A few Eco Print examples are depicted below.
Plain Print:
Eco Print:
Eco Print magnified:
Eco Print Graphics:
13
http://www.ecofont.com/
95
Admin Web App
4.8.10.2. Eco Print Settings
Figure 4.61. Admin Web App: Options - Eco Print
Check the Allow users to Eco Print to enable the Eco Print function. Then specify:
• A Proxy Printing Discount Percentage (integer) to be applied to proxy printing costs as specified for any
Proxy Printer. See Section 4.6.2, “Edit Proxy Printer” [65].
• The Maximum document size (pages) for automatic filtering. In this example the value of “1” means that
any document printed to SavaPage with 1 page is automatically filtered in the background. A value of “3” will
automatically filter incoming documents of 3 pages or less. A value of “0” disables this automatism.
• The Resolution DPI of the Eco Print page image.
4.8.11. Financial
This section holds the options for SavaPage Financial.
4.8.11.1. Currency Code
Figure 4.62. Admin Web App: Options - Financial - Currency
The ISO 421714 currency code of the financial subsystem can be entered here during installation. When the application status is “ready-to-use” the code can only be changed by using a Server Command. See Section B.1.4,
“changeBaseCurrency” [176].
14
http://www.iso.org/iso/home/standards/currency_codes.htm
96
Admin Web App
4.8.11.2. General Financial Options
Figure 4.63. Admin Web App: Options - Financial - General
General options are:
• Default credit limit: this is the default value referenced in Section 4.4.2.5, “Financial” [57]. The value
must be zero or greater.
• Printer cost decimals: the number of decimals (max 6) used to specify and display printer costs. See Section 4.6.2.3, “Media Sources” [65] and Section 4.6.2.4, “Manual Media Sizes” [66].
• Decimals used elsewhere: the number of decimals (max 6) used to specify financial amounts other than printer
costs (e.g. for displaying user account balance).
Note
SavaPage stores financial amounts with a precision of 6 decimals.
4.8.11.3. Point-of-Sale
Figure 4.64. Admin Web App: Options - Financial - POS
These are the options for the Point-of-Sale:
• Payment methods: see Section 5.1, “Deposit” [122].
• Receipt header text: this typically contains a legal text placed in the Receipt header.
97
Admin Web App
4.8.11.4. Vouchers
Figure 4.65. Admin Web App: Options - Financial - Vouchers
These are the options for the Voucher System:
•
•
•
•
Header: the header text of the voucher card.
Footer: the footer text of the voucher card.
Font: the font used for the PDF Document with vouchers. See Section 13.2, “Internal Fonts” [157].
You need to explicitly Allow users to redeem vouchers.
4.8.11.5. Transfer Funds
Figure 4.66. Admin Web App: Options - Financial - Transfer funds
These settings apply to Transfer Credit dialog in the User Web App. Check the options to Allow users to transfer
funds to other users and to Allow users to add comments to manual transfers.
The minimum and maximum amount to transfer are held in the configuration items
financial.user.transfers.amount-min and financial.user.transfers.amount-max.
They can be changed with the Configuration Editor.
4.8.12. Backups
The Backups section shows the backup location and time of the last backup.
98
Admin Web App
Figure 4.67. Admin Web App: Options - Backups
• Press the Backup now button to launch the backup process in the background. The progress and result of the
process is not echoed real-time in this section, but can be monitored in the Real-time Activity section of the
Dashboard.
Figure 4.68. Admin Web App: Options - Automatic Backups
The Automatic Backups section holds options for creating weekly snapshots of the database.
• Tick the Enable automatic weekly backups checkbox to enable the process15.
• The number of days a backup should be kept, must be entered at Keep backups for.
15
Default weekly backups take place at 20 minutes past midnight on Sunday morning, as in the CRON expression "0 20 0 ? * 1"
contained in configuration key schedule.weekly. See Section 4.8.13.10, “Config Editor” [105] on how to change this value.
99
Admin Web App
• A purge of old log data, executed after the backup, can be activated by selecting the Delete older than checkboxed for Application Logs, Document Logs and Transaction Logs. Please enter the number of days the logs
should be held.
• Press the Apply button to commit the changes.
4.8.13. Advanced
4.8.13.1. User Client Authentication
The User Client uses the system account name of the user to identify itself to the SavaPage server. In a strict
Single Sign-On (SSO) environment, where a user is already logged in and authenticated as domain user, the system
account name can be trusted by default. In environments where non-domain systems are allowed, local accounts
are not authenticated by domain services, and therefore can not be trusted.
Figure 4.69. Admin Web App: Options - Advanced - User Client
User Client uses the system account name as user identification (unless overridden by a command line option).
• When Trust system user is enabled the User Client will trust the system account name.
• When Trust system user is disabled the User Client will pop-up a login dialog to authenticate the user, unless
the following trust sources are available:
• When Trust User Web App is enabled and the user is already authenticated in a User Web App on the same
IP address, User Client will trust the Web App user as user identification.
• When an administrator uses the secret Admin passkey in the start-up script it will enforce trust of the offered
user identification. See Chapter 6, User Client [125].
• Press the Apply button to commit the change.
4.8.13.2. Admin Password
The Reset internal admin password section is the place to change the master password for the built-in admin
account.
Figure 4.70. Admin Web App: Options - Advanced - Reset Admin Password
100
Admin Web App
• Enter the new password twice at New password and Confirm password.
• The password must contain the same minimum number of characters as defined for Internal Users. See Section 4.4.3, “Create Internal User” [58].
• Press the Apply button to commit the change.
Caution
Keep the new password at a secure place, since it is the master key to your system.
4.8.13.3. JMX Agent
SavaPage runs in a Java Virtual Machine, which has built-in instrumentation that enables client applications to
monitor and manage it with the help of Java Management Extensions (JMX). SavaPage configures the built-in
JMX agent for remote monitoring, so it can be securely accessed by remote client management applications, such
as Java VisualVM or JConsole.
This section shows the JMX remote process connection string, and enables you to reset the admin connection
password.
Figure 4.71. Admin Web App: Options - Advanced - JMX Agent
Java VisualVM is the standard Java JMX client that was first bundled with the Java Development Kit (JDK) version
6, update 7. It can be found in JDK_HOME/bin, where JDK_HOME is the directory where the JDK is installed.
If JDK_HOME/bin is in your system path, you can start Java VisualVM by simply typing jvisualvm in a command
(shell) prompt. Otherwise, you have to type the full path to the executable file.
Since SavaPage enforces SSL for remote JMX communication, jvisualvm needs to be started with two special
parameters referring to the Java truststore, holding the trusted SSL certificate, and the truststore password.
The shared client directory /opt/savapage/client/jmx contains the JMX server certificate
jmxremote.crt, a ready to use jmxremote.ts truststore, and a sample GNU/Linux and Mac shell script
jmxremote.sh and Windows command file jmxremote.cmd to start jvisualvm with the right parameters.
Note
The password of the provided jmxremote.ts truststore is: savapage. Of course you are free to
import jmxremote.crt into your own truststore and use it with your own password.
101
Admin Web App
Figure 4.72. Add JMX Connection with Java VisualVM
Add a new JMX Connection and enter the IP address and port number of the Connection and as shown in the
JMX Agent section, in our case this would be 192.168.1.35:8639.
Enter the Username admin and the Password as set in the JMX Agent section above. Press the OK button to
save the connection and start it from the Java VisualVM Applications pane.
Older JDK versions have JConsole as standard JMX client. If you want to use JConsole copy and edit the scripts
in /opt/savapage/client/jmx so jconsole is used instead of the default jvisualvm.
Figure 4.73. Connecting to Remote Process with JConsole
When starting JConsole it prompts you to enter the parameters for the New Connection. Select the Remote Process
option and enter the IP address and port number as shown in the JMX Agent section, in our case this would be
192.168.1.35:8639.
Enter the Username admin and the Password as set in the JMX Agent section above. Press the Connect button
to open the connection.
More information about the JMX configuration can be found in Section 12.5, “Secured JMX Connection” [153].
4.8.13.4. Locale
Enter the System Locale string at the Locale section.
102
Admin Web App
Figure 4.74. Admin Web App: Options - Advanced - Locale
•
•
•
•
•
The format of the locale conforms to IETF BCP 4716.
Some examples are: en, en-GB, en-US, nl, nl-NL, nl-BE.
You can leave the locale empty to accept the system default.
The locale is applied to all system messages which are logged in the system log or send by email.
Press the Apply button to commit the change.
Note
This system locale is not used for the language and country default used in the Web App. The Web App
default is picked up from the locale settings of the Web browser, optionally overruled by the language
and country URL parameters. See Appendix D, URL Cheat Sheet [189].
4.8.13.5. Default Paper Size
The Default Paper Size is used as the paper size for the printed document of a Printable File Type which itself
does not have a document structure with a clearly defined page size. These types typically include HTML, TXT
and images offered via Web Print and Mail Print. Choose Letter or A4 , or accept the system default .
Figure 4.75. Admin Web App: Options - Default Paper Size
4.8.13.6. Report Font
The Report Font is used as default font for all PDF reports.
Figure 4.76. Admin Web App: Options - Default Paper Size
16
http://tools.ietf.org/html/bcp47
103
Admin Web App
See Section 13.2, “Internal Fonts” [157].
4.8.13.7. Converters
Converters are used to convert files offered for printing via Web Print or Mail Print to PDF. This is the place to
enable the converters. For installation see:
• Section E.1.1, “XPS to PDF Installation Instructions” [191]
• Section E.2, “Advanced File Types” [192]
Figure 4.77. Admin Web App: Options - Converters
4.8.13.8. Proxy Printing
The Proxy Printing section holds the policy to Allow Encrypted PDF for Proxy Printing as described in Section 9.7, “Printing Encrypted PDF” [139].
• The option is enabled by default. Disable it if you do not endorse the policy: this will ignore every print SavaPage
job request holding an encrypted PDF document.
• Press the Apply button to commit the change.
Figure 4.78. Admin Web App: Options - Advanced - Proxy Printing
4.8.13.9. Pagometers
In analogy with the term Odometer, the term Pagometer is coined as an instrument to count the number of
processed pages of SavaPage input and output documents. Pagometers are used to display usage statistics and
Printing Impact from a global viewpoint as in the Dashboard, or in specialized views for User and Users, Queues
and Proxy Printers. The counters can be reset in the Reset Pagometers section.
104
Admin Web App
Figure 4.79. Admin Web App: Options - Advanced - Pagometers
• Tick the checkboxes of the pagometers to reset.
• Press the Apply button to execute the action.
4.8.13.10. Config Editor
Most of the SavaPage configuration settings can be edited in dedicated sections of the Admin Web App. However,
extra settings are present without an editing interface. Luckily a generic Configuration Editor is present for editing
individual configuration items, so the defaults of "hided" settings can be changed when needed.
Warning
If you use the Config Editor incorrectly, you may cause serious problems which can only be fixed by reinstallation of the application. Use the Config Editor at your own risk.
Tap the Configuration Editor (advanced) button to start the editor. See Figure 4.80, “Admin Web App: Configuration Editor - List” [106] for a detailed description.
105
Admin Web App
Figure 4.80. Admin Web App: Configuration Editor - List
•
•
•
•
•
•
•
•
All configuration items are listed alphabetically by default with their name and value.
Push the Select and Sort button to expand (collapse) the section.
The list can be traversed by tapping one of the buttons at the pager at the top or bottom of the page.
Select items by entering the containing text (fragment) of their name. So, entering "ldap" will select
"auth.ldap.port" and "ldap.schema.group-member-field".
The list can be sorted Ascending or Descending on name.
Tap the Apply button to (re)display the list.
A tap on the Default button resets the selection and sort field to their default values.
Tap the Edit button to edit the item. See Figure 4.81, “Admin Web App: Configuration Editor - Edit” [106].
Figure 4.81. Admin Web App: Configuration Editor - Edit
• The value of the item is shown in the entry field and can be edited.
• Press the OK button to commit the change and return to the list.
• The Cancel button brings you back to List without changing anything.
4.9. Log
After a tap on the Log button in the main menu this panel is shown. See Section 4.2, “Menu” [48].
The Log shows Info, Warning or Error messages for application events.
106
Admin Web App
Tip
The size of the Log can be limited by purging old log data after an automatic database backup. See
Figure 4.68, “Admin Web App: Options - Automatic Backups” [99].
Figure 4.82. Admin Web App: Log - List
• All events are listed by default, ordered by descending date.
• The list can be traversed by tapping one of the buttons at the pager at the top or bottom of the page.
• A different selection and sorting can be entered: see Figure 4.83, “Admin Web App: Log - Select and
Sort” [107].
Figure 4.83. Admin Web App: Log - Select and Sort
107
Admin Web App
• Events can be selected by entering the Containing text (fragment) of the message.
• Select the event Level . The - button will select all levels.
• Select the time Period by pushing the From and To button. See date picker dialog is shown at Figure 4.84,
“Admin Web App: Log - Select Date” [108]. Tap the x button after the date to clear it.
• The list can be sorted Ascending or Descending on Date or Level .
• Tap the Apply button to (re)display the list.
• A tap on the Default button resets the selection and sort fields to their default values.
Figure 4.84. Admin Web App: Log - Select Date
• User the + and - buttons to select the Month, Day and Year.
• Push the Accept button to apply the date.
• Push the Cancel button to ignore the date and return to the original setting.
4.10. Documents
This panel is shown after ...
• A tap on the Documents button in the Main Menu : all processed documents are shown.
• A tap on the Log button in the User List: all documents processed by the selected user are shown. The user's
name is shown in the header and the Select and Sort is within the scope of this user.
• A tap on the Log button in the Queues List: the Select and Sort is initialized with, and applied for the selected
Queue.
• A tap on the Log button in the Proxy Printers List: the Select and Sort is initialized with, and applied for the
selected Proxy Printer.
Figure 4.85. Admin Web App: Documents - List
The list can be traversed by tapping one of the buttons at the pager at the top or bottom of the page.
108
Admin Web App
Each document is displayed with data depending on its input source (SavaPage Print Queue) or output target (PDF
export, Proxy Printer print). From top to bottom:
• The creation date at the top right corner.
• Source or destination, shown in a color depending on its type.
• A SavaPage Queue, like "/printers/", is displayed in blue (when RAW printed to the default Queue the word
“Printer” is displayed, driverless printing shows “WebPrinter” or “MailPrinter”).
• A PDF is shown in green.
• A Proxy Printer, like “Ricoh Aficio MP C7500”, is displayed in red prefixed with an inline pagometer PieChart. The red color in the chart represents the number of pages in the job. The orange color represents the
number of printed sheets.
• User: the user id as creator of the document.
• The document name, with optionally (PDF export) the PDF author name, subject and keywords.
• The number of pages and size (bytes). With optionally...
• The CUPS Job number (Proxy Printer only).
• The CUPS printing status: Pending, Held, Processing, Stopped, Canceled, Aborted, Completed (Proxy Printer
only).
• The paper size, like "ISO-A4" (Queue and Proxy Printer only).
• "LH" indicator in case a letterhead was applied (Proxy Printer and PDF only).
• "Duplex" indicator (Proxy Printer only).
109
Admin Web App
• "DRM" indicator when exported PDF was encrypted (PDF only), or printed document was an encrypted
PDF. (Queue only).
• "Denied" indicator when printed document was an encrypted PDF and such printing is not permitted (Queue
only). See Section 9.7, “Printing Encrypted PDF” [139].
• Owner ("O") and User ("U") password indicators (PDF only).
• Destination (PDF only). The client IP address (PDF Download) or the recipient email address (Send PDF)
Tap the Select and Sort button to expand the section, and select a document Type :
• Option - selects all document types: more...
•
•
•
•
Option
Option
Option
Option
In selects documents printed to a SavaPage Queue: more...
Out selects documents printed to a Proxy Printer or exported to PDF: more...
PDF selects documents exported to PDF: more...
Print selects documents printed to a Proxy Printer: more...
Depending on the selected Type, selection and sort options are shown or hided. However, there are common
selections for all document types as discussed at the screenshot below.
Figure 4.86. Admin Web App: Documents - Select and Sort - All
• Select a Document Name by entering a name part (fragment).
• Select a creation Period by entering a From and To date. Tap the x button after a date to clear it. See this
example Data Selection Dialog.
• Documents can sorted Ascending or Descending by creation Date or Name .
110
Admin Web App
Figure 4.87. Admin Web App: Documents - Select and Sort - In
As an extra to the common options, the In Type offers:
• A selection on Queue.
• A Sort on Queue .
111
Admin Web App
Figure 4.88. Admin Web App: Documents - Select and Sort - Out
As an extra to the common options, the Out Type offers:
• A selection on Destination.
• A selection on Letterhead.
Figure 4.89. Admin Web App: Documents - Select and Sort - PDF
As an extra to the Out options, the PDF Type offers:
• A selection on Author.
• A selection on Subject.
112
Admin Web App
•
•
•
•
A selection on Keywords.
A selection on Encryption.
A selection on User password.
A selection on Owner password.
Figure 4.90. Admin Web App: Documents - Select and Sort - Print
As an extra to the Out options, the Print Type offers:
•
•
•
•
A selection on Printer.
A selection on Job State.
A selection on Layout.
A Sort on Printer .
4.11. About
After a tap on the About button in the main menu this panel is shown. See Section 4.2, “Menu” [48].
Figure 4.91. Admin Web App: About
113
Admin Web App
A tap on one of the options expands (or collapsed) the underlying section. The sections are described in the
paragraphs below.
4.11.1. Version
The Version Info identifies the application and database version. Please include this information when you contact
support.
Figure 4.92. Admin Web App: About - Version
4.11.2. License
This section displays the license information with related links in green.
Figure 4.93. Admin Web App: About - License
4.11.3. Community
The Community section gives all the information about your Community Membership. See Figure 4.4, “Admin
Web App: Dashboard - Status” [50] for a summary of Membership Status values. See Chapter 17, SavaPage
Community [168] for an explanation about SavaPage Membership in general.
114
Admin Web App
Figure 4.94. Admin Web App: About - Community
Press the Import Member Card button to start the Import Dialog.
Figure 4.95. Admin Web App: About - Import Member Card
• Select the Member Card file to be uploaded. The actual file selection trigger differs from browser to browser.
The screenshot above is from the Chromium browser.
• Press the Import button to start the import.
• The progress of the import is displayed at the top of the dialog box.
• The Back button brings you back to the Community section.
• Just in case, the Clear button clears the messages and selected file.
Warning
The Member Card Import dialog is tested with Chromium, Firefox and Internet Explorer. There are some
known issues with other browsers:
• The Opera 12.11 browser does not display the status of the import process. The import is performed
correctly though.
115
Admin Web App
Please contact us when you encounter any problems with your browser.
4.11.4. Support
The Support section shows the addresses for online information and the Help Desk and offers download links for
the SAVAPAGE.ppd file and the zipped Windows Printer Driver.
Figure 4.96. Admin Web App: About - Support
4.11.5. Java
This section displays the Java Runtime version, number of processors and max memory available.
4.11.6. Host System
This section displays name, version and architecture of the host operating system and the GNU/Linux parameters
described in Chapter 16, Performance Tuning [163].
4.11.7. Host Packages
The Host Packages gives version information about the required and optional third-party software installed on
the SavaPage host.
116
Admin Web App
Figure 4.97. Admin Web App: About - Host Packages
Note
Before xptopdf and LibreOffice can be used they must be enabled. See Figure 4.77, “Admin Web App:
Options - Converters” [104].
4.12. Vouchers
Vouchers provide a straightforward and cost effective solution for users to upgrade their account balance. Vouchers
are common value tokens in many applications, like for instance pre-paid mobile phones. Unlike solutions that
use smart cards, micro-payments or vending machines, voucher systems require no hardware investment. While
manual processing is needed to generate, print, distribute and sell the voucher cards, redemption is fully end-user
driven and can be processed automatically.
A voucher system is fully integrated in SavaPage, and includes:
• A Web App dialog for administrators to Create Vouchers.
• A Web App dialog for end-users to Redeem Vouchers.
• A Voucher Security safety net for voucher tracking and fraud prevention.
117
Admin Web App
Figure 4.98. Admin Web App: Voucher List
The list shows the vouchers of a selected Batch-ID and the extra selections shown in the next figure.
• The list is refreshed, and the selection applied, after you push the Apply button.
• The Default button resets the selection items to their default values.
Figure 4.99. Admin Web App: Vouchers - Select and Sort
118
Admin Web App
Select vouchers by entering:
• Part of their Number.
•
•
•
•
Their Valid or Expired status.
Their Remaining or Used status.
Part of the User ID that redeemed any voucher.
The From and To date of their usage period.
4.12.1. Voucher Actions
Figure 4.100. Admin Web App: Voucher Actions
• New : pops up the dialog to Create Vouchers.
• Delete expired : deletes vouchers whose expiry date is before the current date (today).
When a Batch-ID is selected extra buttons appear:
• Expire : Expires all remaining vouchers of the selected Batch-ID by setting the expiry date to today 00:00.
• Delete : Deletes all remaining vouchers of the selected Batch-ID.
• Vouchers : downloads a printable PDF document with remaining (non-redeemed) vouchers of the selected
Batch-ID according to the selected Layout.
119
Admin Web App
4.12.2. Create Vouchers
Figure 4.101. Admin Web App: Create Vouchers
Enter the data for the batch as follows:
• Batch-ID: a user defined ID that will be assigned to all vouchers in a batch. The ID is prefixed to each voucher
number to easily identify its source. A unique ID should be assigned to each batch.
• Number: the number of vouchers in the batch.
• Value: the monetary value of each voucher.
• Expiry Date: the date after which a voucher can no longer be used. This enforces that vouchers are valid for
a limited period of time.
• Layout: the page format of the PDF output with the number of voucher columns and rows. Some fixed variants
are offered.
Press the Vouchers button to create the batch. As a result:
• Each voucher in the batch is assigned a formatted random unique number, for example
B-1404-0021-0661-4775-7916, and is stored in the database.
• A printable PDF document is downloaded with all vouchers from the batch according to the selected Layout.
4.12.3. Voucher Usage
This is what end-users should know about vouchers.
• Purchase a voucher from an authorized person at an assigned location. Vouchers are unique for your organization
and cannot be used elsewhere.
• Use a web browser to open the SavaPage User Web App. After logging in, your current account balance is
shown at the footer bar.
120
Admin Web App
• Push the account balance button to pop-up the User Details dialog, and push the Redeem Voucher button in
the pop-up.
• Enter the voucher Number in the next dialog box and press Redeem . Make sure to enter the number exactly
as listed on the voucher including any dashes (-).
• If you entered the number correctly, the value as shown on the voucher will be transferred to your account and
a new entry will list in your transaction log.
121
Chapter 5. Point-of-Sale Web App
The Point-of-Sale (POS) is a simple Web App used to deposit funds to a user's printing account, usually after
receiving a cash or electronic payment.
The POS Web App can be reached at http://savapage:8631/pos. See Appendix D, URL Cheat
Sheet [189].
5.1. Deposit
The Deposit tab is the place to handle a user's deposit. The figure below shows the initial content when first used
or after the Clear button was pushed.
Figure 5.1. Point-of-Sale: Deposit Start
• User ID: a quick search entry field to select the User. See the figure below for a description.
• Amount: enter the integer and cents of the amount separately. The currency sign is taken from the Financial
settings.
• Payment method: select one of the payment methods as specified in the Financial settings. When no methods
are specified this field will not show.
• Comment: a short comment to denote the deposit.
• Receipt: select the email address if you want to send de receipt as PDF.
122
Point-of-Sale Web App
• User ID is a quick search entry field. By entering part of the user id, a pick-list of matching users is displayed
below. The list is refreshed real-time as characters are entered (or deleted).
• By selecting the user from the list the entry field is replaced by the selection. Also, the current account balance
of the user and his email is shown.
When all required field are entered the Deposit button will show.
Figure 5.2. Point-of-Sale: Deposit Completed
Push the Deposit to make the deposit. As a result:
• When user's email address was selected, the receipt will be emailed to the User.
• The form will be cleared, with the focus on the User ID quick search field.
5.2. Receipts
The Receipts tab is the place to query deposit history. The figure below shows a content sample.
123
Point-of-Sale Web App
Figure 5.3. Point-of-Sale: Receipts
• By entering a date/time offset in the prescribed yyyymmddhhmm format, a pick-list of matching receipts is
displayed, sorted in descending date/time order. The list is refreshed real-time as characters are entered (or
deleted). Note: the date/time defaults to the current yyyymmdd date (today).
• Each entry in the list has buttons to download the Receipt PDF or email it to the User (again).
124
Chapter 6. User Client
The User Client is a Java application for desktops and notebooks that resides in the system tray.
According to the Oracle Java Documentation1:
"The system tray is a specialized area of the desktop where users can access currently running programs. This area
may be referred to differently on various operating systems. On Microsoft Windows, the system tray is referred
to as the Taskbar Status Area, while on the GNU Network Object Model Environment (GNOME) Desktop it is
referred to as the Notification Area. On K Desktop Environment (KDE) this area is referred to as the System Tray.
However, on each system the tray area is shared by all applications running on the desktop."
The SavaPage User Client is provided as a notifier of personal user events like:
• A successful print to SavaPage. See Chapter 9, SavaPage as Printer [131].
• A Proxy Printer started printing one of your jobs. See Section 4.6, “Proxy Printers” [62]
A notification message is typically displayed near the SavaPage tray icon in the form of a balloon (Windows) or
message box (GNU/Linux, Mac OS X).
The User Web App opens for the authenticated user at a double-click on the tray icon, a click in the notification
message or selecting the Open Web App... item from the tray icon context menu. When the User Client is trusted
as authentication source no extra login is needed.
User Client authentication is explained in Section 4.8.13.1, “User Client Authentication” [100].
Important
When using the User Client concurrently with the User Web App and Proxy Print Authentication you
are strongly advised to use an external database like PostgreSQL. See Chapter 15, Using an External
Database [161].
6.1. User Client Options
usage: savapage-client <options>
-d,--debug
Write debug messages to the log file.
-h,--help
Display help text in GUI.
--help-tui
Display help text in TUI.
--log-dir <dir>
Log file directory. Default: /home/rijk
--passkey <key>
The admin passkey (optional).
--properties <file>
File with default command-line options (optional).
Default: /opt/savapage/client/app/config/client.properties
--server-host <arg>
IP address or name of SavaPage server
--server-port <number>
SSL port of SavaPage server (optional). Default: 8632.
--user <name>
A different username than current user "rijk"
(optional).
-x,--hide-exit
Hide the "Exit" menuitem (optional). Default: false.
Note
The
passkey
option
can
also
be
applied
as
environment
variable
SAVAPAGE_CLIAPP_ADMIN_PASSKEY. This is the preferred way to use in generic login scripts, since
the command-line option might be visible in system process viewers.
1
http://docs.oracle.com/javase/tutorial/uiswing/misc/systemtray.html
125
User Client
6.2. User Client Deployment
Since the software is written in Java it can be deployed on any platform where Java SE 7 or higher is installed,
like Microsoft Windows, Mac OS X and GNU/Linux. The User Client software is installed on the server in the
/opt/savapage/client/app directory.
6.2.1. Deployment on Windows
The savapage-client.bat batch file that starts the application is available in the /opt/savapage/client/app directory on the server.
Note
Make sure to enable Balloon Notification in Windows Group Policy to allow users to see notification
messages.
6.2.2. Deployment on Mac OS X
The savapage-client shell script that starts the application is available in the /opt/savapage/client/
app directory on the server.
6.2.3. Deployment on GNU/Linux
The savapage-client shell script that starts the application is available in the /opt/savapage/client/
app directory on the server.
126
Chapter 7. SavaPage Financial
SavaPage Financial captures many aspects of user activity. Obviously, proxy printing is the main trigger for
financial tracking and monitoring, since it consumes tangible resources like paper, ink and toner. This chapter
introduces the main financial concepts with references to more detailed parts of the manual.
• Printing costs are configured per Proxy Printer. Pay-per-Print is active for each Proxy Printer that has costs
greater than zero.
• Section 4.6.2.3, “Media Sources” [65]
• Section 4.6.2.4, “Manual Media Sizes” [66]
• Users have a personal account with a balance and (optional) credit-limit. Proxy printing is restricted for users
who have a credit-limit.
• Section 4.4.2.5, “Financial” [57]
• Users get feedback about the cost of printing and their account balance.
• Section 3.4.4, “Direct Print Release” [35]
• Section 3.2.1, “Footer” [22]
• Section 3.9.3, “Financial” [44]
• Restricted users can upgrade their account balance with vouchers (pre-paid printing cards), by making a deposit
at a point-of-sale, or by transferring money from an external account.
• Section 4.12, “Vouchers” [117]
• Section 3.9.4, “Redeem Voucher” [45]
• Chapter 5, Point-of-Sale Web App [122]
• Section I.1.1, “Payment Gateway Plug-in” [200]
• All financial transactions can be inspected by administrators. Users can inspect their own transactions.
• Section 4.4.1, “User List” [54]
• Section 3.7.2, “Transactions” [39]
• Global financial options can be set by administrators.
• Section 4.8.11, “Financial” [96]
127
Chapter 8. SavaPage on GNU/Linux
This section is a supplement to the Install Guide (see Chapter 2, Server Installation [9]). It provides an in-depth
explanation of the GNU/Linux installation process, the directory layout and tools involved.
Information in this chapter is technical in nature. It is expected that readers have prior experience with:
• The Unix command line environment
• Unix file permissions
8.1. The Installation Process
SavaPage is supplied as a pre-compiled self-installing application. The installation process is designed to work
with all major GNU/Linux distributions. To be sure if your GNU/Linux distro is supported out of the box, please
check Section 1.2, “System Requirements” [2]. Due to the varied nature of some installations and administrator
preferences, often some manual configuration is required. This section describes the installation process in detail
as well as some additional options available to system administrators.
8.1.1. Manual extraction
SavaPage is supplied in a self-extracting, self-installing archive. The archive is simply a tar archive compressed
with gzip, and headed with a shell script to facilitate self-extracting. After extraction is complete, the installation
script named install is executed to begin the install process in the directory where the archive resides (usually
/opt/savapage). Some system administrators may like to inspect the contents of the archive, and possibly the
installation process itself prior to the actual install. The self-extracting installer takes a number of command line
arguments. The -e option will extract the archive into the current working directory ready for inspection. Further
options and documentation is available via the -h switch.
_____________________________________________________________________________
SavaPage Install (c) 2010-2015, Datraverse B.V.
License: GNU AGPL version 3 or later <http://www.gnu.org/licenses/agpl.html>.
This is free software: you are free to change and redistribute it.
There is NO WARRANTY, to the extent permitted by law.
Usage: savapage-setup-0.9.8-linux-x64.bin [-h|-i|-e|-l] [-v] [FILE]...
-h
This help text.
-i
Install after extracting the files (default).
-e
Extract all files or a FILE list and exit without installing.
-l
List the contents of the archive and exit without extracting.
-v
Verbose. Print the names of the files as they are extracted.
8.1.2. The install process
Even though the majority of the installation process is completed under the identity of the system user account
called savapage, most administrators would like to know what the install process does. The main steps are
outlined in the next paragraphs.
8.1.2.1. Extraction
The first stage in the install process extracts the archive to /tmp or a location as defined by an environment
variable TMPDIR. The command-line programs tar and gunzip are used during this phase.
128
SavaPage on GNU/Linux
8.1.2.2. Installation
After extraction is complete the installation script install is called with the current directory path as parameter. The
install script will present the AGPL license text and request acceptance. The script then uses the first command-line
parameter as install location. Files are then copied to the install location. Care is taken not to overwrite any existing
data or configuration files if this is an install-over-the-top upgrade.
8.1.2.3. Permissions
To ensure the default installation is secure by default, permissions are applied to key files. The following area of
the application are restricted to the savapage user only:
Area
Description
/opt/savapage/server/server.properties
Contains server configuration properties.
/opt/savapage/server/admin.properties
Contains the hashed password of the reserved internal admin user.
/opt/savapage/server/gcp.properties
Contains Google Cloud Print configuration properties. See Section 4.8.5, “Google Cloud Printer” [86].
/opt/savapage/server/jmxremote.password
Contains the plain text password of the reserved JMX admin user.
See Section 4.8.13.3, “JMX Agent” [101].
/opt/savapage/server/jmxremote.ks
The private keystore used by the JMX Agent.
/opt/savapage/server/data/
This directory contains application data including database files.
Some of this data may contain sensitive information.
/opt/savapage/server/bin/linux-[x64|i686]/
This directory contains the savapage-pam setuid-root binary.
Even though the binary is no use to an end-user or hacker, good security practice stipulates that we should only allow the savapage
user access to this directory.
Table 8.1. Secured Application Areas
Permissions can be checked and re-applied any time after the installation by running the script:
/opt/savapage/server/bin/linux-*/setperms
8.1.2.4. Firewall
The SavaPage Application Server runs in a Java Virtual Machine (JVM) process and listens on ports 8631 and
8632 (SSL). These ports are used for Web App access, printing and other services. Ensure that any firewall or
local IP filtering software such as iptables is set to allow local network traffic access to this ports.
8.1.2.5. Root Level Tasks
A small part of the install process needs to run as the root account. The tasks conducted as root include:
• Setting the /opt/savapage/server/bin/linux-*/savapage-pam binary as setuid-root. This binary is used for password verification.
• Installing the /opt/savapage/providers/cups/linux-*/savapage-notifier binary as CUPS
event notifier. This binary is used to send CUPS printer and print job status events to the central SavaPage server.
• Setting up a systemd unit for GNU/Linux systems that use the systemd service manager. This is done by creating
a savapage.service file in the systemd unit library. Depending on the distribution the unit will either be
created in the /lib/systemd/system or /usr/lib/systemd/system directory. The unit is started
and enabled.
• Setting up SysV style start scripts for Debian based systems that use the SysV service manager. This is done
by placing symlinks in the:
/etc/init.d/
/etc/rc3.d/
129
SavaPage on GNU/Linux
/etc/rc5.d/
and so on...
If the administrator decides not to run the root-level tasks during the install process, the tasks can be run again
post-install by executing the shell scripts:
/opt/savapage/server/bin/linux-*/roottasks
and ...
/opt/savapage/providers/cups/linux-*/roottasks
Alternatively the administrator can view the script and make the required changes by hand.
8.2. Advanced Configuration and Logs
The majority of SavaPage configuration is conducted in the Administrator Web App. Some additional configuration options are available in the following configuration file:
Configuration File
Description
/opt/savapage/server/server.properties
Contains server configuration including the server's TCP ports and
SSL properties.
Table 8.2. Advanced Configuration
Most important application logging is available via the Application Log section of the Administrator Web App.
Some additional advanced level logging is maintained in standard text files located at:
/opt/savapage/server/logs/*
Administrators may wish to consult these logs when attempting to diagnose or troubleshoot problems.
8.3. Removing SavaPage from a GNU/Linux server
SavaPage can be completely removed from a system with the following procedure:
•
•
•
•
Remove all files from the /opt/savapage install directory.
Remove the savapage system account.
Remove the savapage binary from the CUPS notifier directory.
For systemd installations remove the savapage.service file in the systemd unit library. Depending
on the distribution the unit will either be found in the /lib/systemd/system or /usr/lib/systemd/system directory.
• For SysV style installations remove any matching start script:
/etc/init.d/savapage
/etc/rc*.d/*savapage
Note
Removing SavaPage can also be done by executing the uninstall program like this:
cd /opt/savapage
sudo uninstall
The installation will be reverted including the CUPS notifier installation and the server's systemd
or SysV service scripts.
As a final action the savapage system account and the /opt/savapage install directory should be
removed manually.
130
Chapter 9. SavaPage as Printer
9.1. Printing with a Driver
Any desktop system can print to SavaPage with a PostScript printer driver. The driver can either be generic, or
a mainstream one from a vendor like Apple or IBM (as shipped with the OS), or a dedicated one provided by
SavaPage. When printing from public Internet a private Device URI must be used. See Section 3.9.1, “Internet
Printer” [43].
Caution
Although the SavaPage driver is not required, beware that vendor-specific drivers might offer options that
are irrelevant, or not supported by the SavaPage Print Server.
9.1.1. SavaPage Printer Driver
The SavaPage Printer Driver comes as a PostScript Printer Description (PPD), as captured in the SAVAPAGE.ppd
file located in the shared client directory /opt/savapage/client. The driver is optimized for SavaPage
printing. Irrelevant options, like Duplex Printing are stripped, other options like Paper Size and Resolution, are
narrowed down to the most common choices. If you feel options are missing please let us know. The driver file
can be downloaded from the About section of the User Web App and Admin Web App.
9.1.2. SavaPage Printer Installation
The installation scripts below use the SavaPage printer driver. When you want to use a PostScript driver already
present in the OS, please use the proper selection dialogs.
Caution
The SavaPage JetDirect Server accepts PostScript print jobs only. So do not use the JetDirect protocol
unless you are absolutely sure that the print client uses PostScript as Print Job Format. Windows clients
can safely use JetDirect. However, Mac OS X and modern GNU/Linux systems use PDF as Standard
Print Job Format 1, so JetDirect should be avoided here in favour of IPP.
9.1.2.1. GNU/Linux
Figure 9.1. SavaPage Printer on Ubuntu: Choose Driver
1
On the OSDL Printing Summit in 2006 it was decided to switch the GNU/Linux standard print job transfer format from PostScript to PDF.
See https://wiki.linuxfoundation.org/en/OpenPrinting/PDF_as_Standard_Print_Job_Format
131
SavaPage as Printer
• When choosing a driver for the newly added printer in Ubuntu, make sure to opt for Provide PPD file, and to
select the SAVAPAGE.ppd file.
• Enter ipps://savapage:8632/printers at Device URI for the default queue, or ipps://
savapage:8632/printers/[queue] for any other specific queue. See Appendix D, URL Cheat
Sheet [189].
Figure 9.2. SavaPage Printer on Ubuntu: Printer Properties
• This is what the Printing Properties look like for a ready-to-print SavaPage printer in Ubuntu.
9.1.2.2. Mac OS X
Figure 9.3. SavaPage Printer on Mac OS X: Add Printer
Add a new printer and enter data in the Add Printer dialog as follows:
• Click the IP printer button and select IPP for Protocol.
• At Address, enter the IP address or host name of the SavaPage Print Server including the port number.
• Enter printers at Queue for the default queue, or printers/[queue] for any other specific queue. See
Appendix D, URL Cheat Sheet [189].
• Enter the Name of the queue. SavaPage is the obvious choice here.
• Choose Other... in the Print Using selection box. This will immediately pop up a dialog where you can select
the SAVAPAGE.ppd as shown in Figure 9.4, “SavaPage Printer on Mac OS X: Select PPD” [133].
132
SavaPage as Printer
Figure 9.4. SavaPage Printer on Mac OS X: Select PPD
• This dialog selects the SAVAPAGE.ppd file from the local Documents directory.
Figure 9.5. SavaPage Printer on Mac OS X: Print & Fax
• This is what a ready-to-print SavaPage printer in Mac OS X looks like.
Note
When clicking the Default printer button in the Add Printer dialog, any Bonjour enabled SavaPage printer
will show up, as configured in Section 9.3, “Printing from iOS” [135].
9.1.2.3. Windows
This section covers the installation for Windows (including x64).
The shared client directory /opt/savapage/client/win contains the SAVAPAGE.ppd,
savapage_oemui.inf and other files needed for the installation. A zipped version of this directory can be
downloaded from the About section of the User Web App and Admin Web App.
Note
Make sure copies of the files are present in the same (temporary) directory.
Figure 9.6. SavaPage Local Printer on Windows
To add SavaPage as Local Printer, start the "Add Printer" dialog and choose add a new Local Printer.
133
SavaPage as Printer
1. Create a new printer port of type Standard TCP/IP Port, and click the Next button.
2. Choose device type TCP/IP Device and enter the hostname or IP address of the SavaPage server.
3. When asked for a printer driver, choose "Disk..." and browse to the savapage_oemui.inf file and choose
"install anyway" when prompted.
4. You should now have a printer as shown in Figure 9.6, “SavaPage Local Printer on Windows” [133].
5. Print a test page to see if everything works as expected.
Figure 9.7. SavaPage Shared Local Printer on Windows
Tip
Install SavaPage as shared printer on a Windows Print Server. This makes the printer a member of Active
Directory. See Figure 9.7, “SavaPage Shared Local Printer on Windows” [134].
Queues created on Windows Print Server can easily be deployed on workstations using Windows Domain
Group Policy or using Logon Script. Please consult the Microsoft Windows server documentation for
more information.
Figure 9.8. SavaPage Network Printer on Windows
To add SavaPage as Network Printer, start the "Add Printer" dialog and choose add a new Network Printer.
1. Select "Connect to a printer on the Internet..."
2. Enter the URL for the SavaPage printer queue.
3. Choose "Disk..." and browse to the savapage_oemui.inf file and choose "install anyway" when prompted.
4. You should now have a printer as shown in Figure 9.8, “SavaPage Network Printer on Windows” [134].
5. Print a test page to see if everything works as expected.
9.2. Printing with AirPrint
Devices running Mac OS X 10.7 and higher or iOS 4.2 and higher (like iPad, iPhone and iPod Touch) can use
AirPrint® to print to SavaPage.
Note
AirPrint maps to the reserved Queue /airprint.
134
SavaPage as Printer
Important
Avahi needs to be installed on your GNU/Linux host. See Section 1.2.1.5, “Avahi” [4].
To setup SavaPage AirPrint printing follow the steps described in the sections below.
9.2.1. Step 1: Enable IPv4 in Avahi
Since SavaPage uses IPv4 for IP Based Authentication IPv4 should be enabled in the avahi-daemon. This is
normally the case, but you can check by editing the Avahi configuration file:
sudo vi /etc/avahi/avahi-daemon.conf
Make sure the use-ipv4 settings is as follows:
use-ipv4=yes
When you made changes to the configuration file, restart the daemon as follows:
sudo service avahi-daemon restart
9.2.2. Step 2: Create AirPrint Queue
Create a SavaPage Queue (see Section 4.5, “Queues” [59] ) with a comprehensible URL path mnemonic like
“airprint”. It is important not to check the Trusted option, since the queue should be untrusted to enforce IP
Based Authentication. This is needed because iOS printing is unauthenticated, i.e. all print jobs have “guest” as
originating user. IP Based Authentication finds the “real” user by matching the IP address of the print request with
the authenticated user in the SavaPage Web App Session on the same IP address.
9.2.3. Step 3: Create Avahi Service File
Copy the /opt/savapage/server/examples/linux/avahi/savapage.service file to your personal home directory.
savapage.service is an Avahi service file with annotations explaining how to adapt it to your own situation.
Follow the $Customize$ annotation to insert your settings. Probably, you can just accept the defaults.
Copy your tailored service file to Avahi, with this command (assuming the source file resides in your home directory):
sudo cp ~/savapage.service /etc/avahi/services
Check if Avahi has published the SavaPage printer as intended by typing this command:
avahi-browse -a -t
Assuming your GNU/Linux host is called savapage and you named your Avahi print service SavaPage, you
should find entries in the output like this :
+
eth1 IPv4 SavaPage @ savapage
Internet Printer
local
The mDNS published SavaPage internet printer on host savapage for the IPv4 interface.
9.3. Printing from iOS
Make sure AirPrint is configured as described in Section 9.2, “Printing with AirPrint” [134]. Follow the steps
below to use AirPrint on iOS.
135
SavaPage as Printer
9.3.1. Step 1: Install iOS Web Clip
For your convenience http://savapage:8631/ios/install is available to add a SavaPage icon to the
iOS Home Screen automatically. See Appendix D, URL Cheat Sheet [189]. A click on the icon opens the
SavaPage User Web App full-screen and will therefore be part of the multitasking bar.
This convenience comes with a penalty though, since Apple treats full-screen WebApps in a “special” way, i.e.
when they are selected from the multitasking bar and regain focus the Web App is reloaded.
Luckily, since SavaPage utilizes an authentication token, an automatic login is performed. However, the page
needs to be retrieved from the server again, giving some performance penalty.
Note
Only one SavaPage Web Clip can be present on an iOS device. A new install overwrites the previous one.
Warning
When using the Payment Gateway Plug-in, the redirect URL as forwarded to and applied by the payment
provider does not show in the same User WebApp as where the payment started, but is shown on a new
tab in the default browser.
If you don't care about the full-screen User Web App, and want optimal performance, you can just add any SavaPage Web App to the Home Screen manually by surfing to the URL, then click the Share button and choose Add
to Home Screen . Clicking the home screen icon will not open the Web App full-screen, but as a tabbed instance
in the browser. Also, it will not be reloaded by definition as the browser regains focus.
9.3.2. Step 2: Test
As a start, first login to SavaPage on your iOS device. This is because IP Based Authentication is needed by the
SavaPage printer.
Warning
When printing while not logged in a dialog will pop up saying “You do not have permission to use this
printer”, with Cancel and Retry buttons.
In many iOS apps, tapping the action button displays options for sharing, as well as other actions such as printing
or copying. The options vary depending on the app you’re using. Figure 9.9, “iPad App Sharing Options” [136]
shows the sharing options from the Notes App.
Figure 9.9. iPad App Sharing Options
136
SavaPage as Printer
Tapping the Print icon will bring forward the Printer Options, as shown in Figure 9.10, “SavaPage Printer Options
on iPad” [137].
Figure 9.10. SavaPage Printer Options on iPad
If you are printing for the first time, or the previously selected printer is not available, or if you just want to change
printer, you will need to select the printer first by tapping the Printer button. In this example Figure 9.11, “Select
SavaPage Printer on iPad” [137] shows a list with just a single printer (who needs more :-)
Figure 9.11. Select SavaPage Printer on iPad
Now, after you selected SavaPage as printer and are sure you logged into SavaPage at the same device, tap the
Print button. As a result the printed output should appear in the SavaPage App.
Note
You can check the Print Queue by double-tapping the Home button to show the recently used apps. Then
tap the Print Center. Note that the Print Center is only available while printing is in progress.
9.4. Printing from Android and Chrome OS
9.4.1. SavaPage Google Cloud Ready Printer
The Google Cloud Print2 (GCP) service provides seamless integration with the Google Android and Chrome OS
ecosystems. Print jobs can be triggered by a share action, and take a detour via the cloud to the remote printer.
GCP offers the same user experience as Printing from iOS.
2
https://developers.google.com/cloud-print/
137
SavaPage as Printer
SavaPage can be configured as Google Cloud Printer. See Section 4.8.5, “Google Cloud Printer” [86].
9.4.2. PrinterShare™ Mobile Print
PrinterShare™ Mobile Print3 is a native Android printing solution from Mobile Dynamix.
PrinterShare uses a local printer driver to convert the candidate pages to graphical images. Unfortunately, when
using the generic PostScript driver, this results in a seriously degraded performance at the client side, and nonsearchable PDF in SavaPage.
Note
To actually print beyond a simple test page you need to purchase PrinterShare™ Premium Key4,
which is a separate small application that needs to be present on the device.
Just as in iOS, you need to print to an untrusted SavaPage queue, because PrinterShare printing is unauthenticated,
i.e. print jobs do not hold information about the originating user. It is best to create an AirPrint enabled queue for
that purpose, as described in Section 9.3, “Printing from iOS” [135].
Perform these steps to create the SavaPage printer:
1. Login to the SavaPage User Web App on your Android device. This is because of the IP Based Authentication
needed by the SavaPage printer selected in the next step.
2. Select a Nearby-WiFi printer. PrinterShare will recognize the AirPrint enabled SavaPage printer.
3. When selecting the printer driver do not Use Generic 5, but Select Manually instead.
4. Open the folder named “Generic” and select the “Generic PostScript Level 2” driver.
Warning
When not logged in while printing PrinterShare will pop up an error message saying “Can't print. IPP
error 1025”, meaning SavaPage understood the request, but is refusing to fulfill it.
9.5. Driverless Printing
Driverless Printing is one of the gateways to authenticated printing from devices belonging to unauthenticated
anonymous users, where either native printing support is lacking or where user trust cannot be enforced. This
situation is typical for a BYOD6 context.
Mail Print and Web Print offer casual printing without a hassle, since users are familiar with either file uploading
or email and no printer driver needs to be installed.
Since rendering of the document content is not handled by a know-it-all printer driver, not all document types are
supported. See Appendix E, Printable File Types [191] for a list of supported types.
Note
Mail Print uses 127.0.0.1 (localhost) as the IP address of the requesting user.
9.6. IP Restricted Printing
Beware that printer access may be restricted based on the requesting IP address. See:
3
https://play.google.com/store/apps/details?id=com.dynamixsoftware.printershare
https://play.google.com/store/apps/details?id=com.dynamixsoftware.printershare.premium
5
The generic driver uses UNIRAST as job format, which is not supported by SavaPage. PrinterShare will pop up an HTTP error 500.
6
Bring Your Own Device (BYOD) is the policy of permitting employees to bring personally owned mobile devices (laptops, tablets, and
smart phones) to their workplace, and use those devices to access privileged company information and applications. The term is also used to
describe the same practice applied to students using personally owned devices in an educational setting.
4
138
SavaPage as Printer
• Figure 4.22, “Admin Web App: Queue - Edit” [61]
• Figure 4.58, “Admin Web App: Options - Web Print” [93]
CIDR Notation is used to specify the allowed IP address ranges.
9.6.1. CIDR Notation
Classless Inter-Domain Routing7 (CIDR) is developed in the 1990s as a standard scheme for routing network
traffic across the Internet.
CIDR notation is a syntax for specifying IP addresses and their associated prefix size, the latter being equivalent to
the number of leading 1 bits in the routing prefix mask. The notation starts with an IP address expressed according
to the standards of IPv4 or IPv6. It is followed by a separator character, the slash (/) character, and the prefix size
expressed as a decimal number.
Some examples:
• 172.16.0.0/24 represents the given IPv4 address and its associated routing prefix 172.16.0.0, or
equivalently, its subnet mask 255.255.255.0. This represents the host address range 172.16.0.0 172.16.0.255.
• CIDR 192.168.1.40/32 represents the single IP address 192.168.1.40.
Tip
A CIDR calculator can be found here8.
9.6.2. CIDR Set
For SavaPage use only we define a CIDR Set as a concatenation of single CIDR notations separated by any of
the characters space, comma, colon or semicolon.
9.7. Printing Encrypted PDF
When you print an encrypted PDF document from Adobe Reader to a PostScript printer like SavaPage, it creates
a PostScript file that contains a notice telling the recipient that it is not permitted to convert (re-distill) it to PDF
again. The ps2pdf9 program from the Ghostscript suite respects this notice, and throws an error saying “This
PostScript file was created from an encrypted PDF file. Re-distilling encrypted PDF is not permitted”. If, for
example, an encrypted PDF allows printing only, it should not be re-distilled to a plain PDF equivalent, where
all intended protection is removed.
SavaPage respects this policy. Moreover, on behalf of its users SavaPage would like its own encrypted PDF
documents to be respected in the same way.
When an encrypted document is allowed to be printed, SavaPage would like to be able to receive it as printer, so it
can be previewed and Proxy Printed. However, for that to happen we need to convert it to SafePages, i.e. to PDF
format. That's where we are facing the ps2pdf barrier.
To solve this issue SavaPage offers an optional workaround. The workaround ignores the PostScript notice at the
point where we need the ps2pdf program to create the PDF, so SafePages can be displayed and Proxy Printed
as intended. However, the workaround will protect the encryption of the original document, i.e. its pages are
not allowed to be exported (downloaded or send) as PDF, directly, or as part of a composite document. And,
since every PDF document that SavaPage sends to a Proxy Printer is encrypted with (degraded) printing as only
permission, this will also not violate any copyright.
7
http://tools.ietf.org/html/rfc4632
http://www.subnet-calculator.com/
9
ps2pdf is a work-alike for nearly all the functionality (but not the user interface) of Adobe's Acrobat™ Distiller™ product: it converts
PostScript files to Portable Document Format (PDF) files, and is implemented as a command script that invokes Ghostscript. See: http://
www.ghostscript.com/doc/current/Ps2pdf.htm
8
139
SavaPage as Printer
The re-distilled PDF files are transient, internal use only and not accessible to end-users.
The workaround is enabled by default. If you do not endorse it, please disable it in the Admin Web App at Options
→ Advanced → Proxy Printing. If the workaround is disabled, every print job request holding an encrypted PDF
document is ignored.
140
Chapter 10. Authenticated Printing
Authentication in a printing environment is the act of confirming the digital identity of the person who issued a
print job. Knowledge of this identity is crucial for SavaPage to securely offer its services to the right user. The
next sections discuss authenticated printing in:
• Single Sign-On (SSO) Domains
• Peer to Peer Networks
But first, let us introduce the key authentication concepts where our discussion is based upon.
10.1. Key Concepts
This section lists the main authentication concepts headed with a short term. Each term is defined with a concise
description, optionally followed with more details and a list of invariants.
10.1.1. User
An actor with a unique identity.
10.1.2. Person
A User who represents a real human being, as opposed to an abstract human role, software service or hardware
device.
• Only Persons can login to SavaPage.
• Any User can print to a SavaPage Printer. However, SavaPage assigns a print job to a Person.
10.1.3. Abstract User
A User who is not a Person.
10.1.4. Domain User
A User defined in a SSO domain.
10.1.5. Synchronized User
A SavaPage User synchronized from a User Source.
• SavaPage assumes each Synchronized User is a Person, but Administrators can mark a user as Abstract.
10.1.6. Synchronized Person
A Synchronized User that is a Person.
10.1.7. Internal Person
A Person who is internally defined in SavaPage (opposed to a Synchronized Person).
10.1.8. Authenticated User
A User authenticated on a SSO domain by a workstation login.
141
Authenticated Printing
10.1.9. Authenticated Abstract User
An Abstract User authenticated on a SSO domain by a workstation login.
• Before Authenticated Abstract Users can print to a SavaPage Printer they need to login to the SavaPage Web
App on the same device from which they use the printer.
10.1.10. Authenticated Person
A Synchronized Person authenticated on a SSO domain by a workstation login.
• Authenticated Persons can print to SavaPage without being logged in to the Web App.
10.1.11. Trusted SavaPage Queue
A SavaPage Print Queue whose print jobs are trusted to originate from Authenticated Users.
• Each SavaPage Print Queue is trusted by default. However, administrators can mark SavaPage Print Queues
as untrusted.
• Every job of a Trusted SavaPage Queue is checked for the originating User. When this user is an Abstract User,
SavaPage uses IP Based Authentication to deduce the associated Person. When the Person cannot be deduced
the job is ignored.
• Note that the “trust” qualification is SavaPage internal use only, and not related to network domain trust in
any way.
• SavaPage Print Queues are IPP based and, from a network point of view, are publicly accessible by nature.
• In the Microsoft Active Directory world IPP Printers cannot be encapsulated as native domain resource and
subjected to native domain access control like JetDirect compatible devices. This is why SavaPage does not bet
on native domain trust alone, and accepts public network access as a given fact. But even in this case, SavaPage
Print Queues can still be internally trusted if access is limited to authorized users on a network level. Stated
the other way round: administrators need to prevent that users who connect to the network unauthenticated, e.g.
with their personal laptop, use Trusted SavaPage Queues. SavaPage adds a helping hand here with an option
to restrict print queue usage to a specific range of IP addresses. This makes it possible for instance to deny
trusted queue access for wireless users who get their IP addresses from a distinct DHCP server issuing leases
from a distinct IP range.
Caution
When non-domain users are allowed to print to Trusted SavaPage Printers an accidental match with a
Synchronized Person may lead to undesirable results.
10.1.12. Public SavaPage Queue
A SavaPage Print Queue where print jobs are not trusted to originate from Authenticated Users.
• Since each SavaPage Printer is trusted by default, this queue must be explicitly marked as untrusted in the
SavaPage Admin Web App.
• SavaPage handles every job from a Public SavaPage Printer as originating from an Abstract User.
10.1.13. IP Based Authentication
Deduction of the printing Person by matching the IPv4 address of the originating host of the print job with the
authenticated SavaPage Web App Session on the same host.
• This type of authentication is applied for jobs coming from a Public SavaPage Printer, or from a Trusted SavaPage Queue where the originating User is Abstract.
• When no authenticated Web App session is found the job is ignored.
142
Authenticated Printing
10.1.14. Mail Print Authentication
Deduction of the printing Person using the email address of the sender.
• This type of authentication is applied for print jobs coming in from Mail Print.
• When no unique matching Person is found, or when the Person is disabled, authentication fails. Consult Section 4.4.2, “Edit User” [55] on how to mark a User as (enabled) Person.
10.1.15. Local User
A User defined on a local device.
10.1.16. Local Abstract User
An Abstract User defined on a local device.
10.1.17. Local Person
A Person defined on a local device.
10.1.18. User Alias
An alternative name for a User.
• A single User can have several aliases.
• An alias is applied at the following levels:
• User login to the User and Admin Web App.
• Print jobs arriving in the SavaPage queues under the alias name.
For more information see Section 10.4, “User Name Aliases” [147].
10.2. Single Sign-On Domains
In a Single Sign-On (SSO) network user authentication is achieved in a login dialog where the User supplies his
credentials, usually by entering his user name and password1. SSO networks establish a web-of-trust between
users and domain services. System administrators like SSO domains, because they provide a single interface to
control access of Domain Users to servers and services.
Making SavaPage part of an SSO domain is the most sophisticated setup possible. In this way access to the SavaPage queues can be controlled on a domain defined user and group level, and by doing so we can create authenticated queues.
Authenticated SavaPage IPP Print Queues can exclusively be achieved in a Mac OS or GNU/Linux SSO domain
using LDAP or NIS (Network Information Service) as authentication services2.
In Windows Domains authenticated SavaPage Print Queues can solely be enforced by installing local printers
connected to SavaPage by the JetDirect/RAW protocol. These RAW IP printers are typically installed on a Windows Print Server. To exclusively grant access to the SavaPage printer by the print server, enter the server IPv4
address (as CIDR) as the allowed client IP address in the Default / Queue definition. See Figure 4.22, “Admin
Web App: Queue - Edit” [61].
1
Of course methods like a smartcard and biometric (fingerprint) authentication should be mentioned as alternative.
NIS (Network Information Service) protocol, also known as Sun Yellow Pages (YP) allows the information contained in the files /etc/
passwd, /etc/group and /etc/shadow to be hosted on a central server. Administrators can enter, edit and delete the information on
the NIS server so that it is automatically available on all Unix nodes. Authentication services are usually delegated to a Kerberos server, which
thanks to tickets and authenticators eliminates the need to move passwords over an open and insecure network. NIS operates on "flat" domains
and is therefore unsuitable for large organizations which due to their nature may be organized hierarchically. In such cases, the use of the
LDAP (Lightweight Directory Access Protocol) is the way to go.
2
143
Authenticated Printing
Figure 10.1. SavaPage in a Single Sign-On Domain
Trust is indeed essential to match the print job with the user's SafePages as previewed in his authenticated browser
session. But, as we shall see in the next section, even in trust relations there are some loopholes to consider, and
in networks where access is not fully guarded by SSO, unauthenticated users also need our special attention.
10.2.1. Authentication Loopholes
Although fully closed SSO domains provide unambiguous trust, there are common authentication loopholes that
needs to be addressed. These loopholes are generic in nature and not related to SavaPage.
1. A loophole is introduced when multiple users use the same account (user name) to authenticate to the network.
Because the login is based on the person's role we can not retrieve the unique user identity. If for example, both
John and Mary logged in with the generic student account, there is no way to find out if a SavaPage print
job from this session was issued by John or Mary. By default the print jobs of John or Mary will end up in the
SafePages of the one and only unknown student. In situations where printing content is private this might
pose a problem. In SavaPage this loophole can be solved by marking the generic user account as abstract. See
Section 10.1.13, “IP Based Authentication” [142].
2. A similar loophole is introduced when different users (sequentially) use the same machine, which was started
in auto-login mode. Because the login is based on the machine identity we can not retrieve the unique user
identity. In SavaPage this loophole is solved by the marking the auto-login user account as abstract . See
Section 10.1.13, “IP Based Authentication” [142].
144
Authenticated Printing
Figure 10.2. IP Based Authentication for Abstract User
10.2.2. Unauthenticated Users
In networks where access is not fully guarded by SSO, SavaPage queues introduce a security issue when they
are used by unauthenticated non-domain users. For example, consider a guest user who connects his personal
laptop to the network, and installs and prints to a SavaPage printer. In SavaPage this loophole can be solved
by marking the queue as untrusted, i.e. by creating a Public SavaPage Queue. See Section 10.1.13, “IP Based
Authentication” [142]. In addition the Internal Users feature can be used to offer out of domain Web App
authentication for guest users.
145
Authenticated Printing
Figure 10.3. IP Based Authentication for Unauthenticated User
10.3. Peer to Peer Networks
A peer-to-peer or workgroup environment differs fundamentally from the network domain model. In the domain
model, users authenticate with a unique (password protected) user name, as defined in a central server, while in
a workgroup user identity is validated against a Local User rather than a central authority. The workstations are
either set up to automatically login as a general "user", or user accounts are created locally as required.
Trust can be enforced by creating a Public SavaPage Queue. See Section 10.1.13, “IP Based Authentication” [142], and using the Internal Users feature for Web App authentication.
146
Authenticated Printing
Figure 10.4. IP Based Authentication in Peer-to-Peer Network
10.4. User Name Aliases
A User Alias is a way of mapping a user name in one format to a name in another. It is useful in the following
situations:
• Providing extra convenience for users to log into the system with a user name formatted in a different way. So
Georg Friedrich Händel can have a User Alias of “georg_handel”, “gf_handel”, and “gfhandel”.
• Used as a temporary tool to manage domain or user name format changes. For example, you may have changed
names from j.brown to john.brown. An alias can help forgetful users to log in with their old name.
Name aliases are applied at the following levels:
• User Login to the User and Admin Web App.
• Print jobs arriving under the alias name.
The aliases information is kept in the file,
/opt/savapage/server/data/conf/username-aliases.txt
and can be created based on the provided template file,
/opt/savapage/server/data/conf/username-aliases.txt.tmpl
You can create your own custom alias file as follows:
• Go to the directory /opt/savapage/server/data/conf/
• Open your favorite text editor with the file username-aliases.txt.tmpl
• For example, add the following lines to the end:
j.brown : john.brown
jbrown : john.brown
• Save file as username-aliases.txt
The format of the alias file is:
147
Authenticated Printing
aliasname1: username1
aliasnameA: username2
aliasnameB: username2
where aliasname is mapped to username in the system database. A user may have multiple aliases. In this
example, username2 is known both as aliasnameA and aliasnameB. The separator between aliasname
and username can be “:”, “=“ or tab.
Warning
If an offered user name does not match an alias in the alias file, it is assumed it represents the user's real
name. If this user is new to the system he might be created automatically in SavaPage, according to the
user creation policy defined in the Options → User Creation → On demand user creation section of the
Admin Web App. So please take care that your alias list is valid and up-to-date.
148
Chapter 11. Printing Impact
One of the goals of SavaPage is to reduce hard-copy printing by facilitating the use of soft PDF copies instead.
Above that, if printing is needed after all, SavaPage offers easy n-up, gray-scale and duplex proxy-printing to
reduce printing even more. Giving feedback to users about the costs and environmental impact of their printing
habits is used to arouse awareness and achieve behavioral change.
11.1. Financial Impact
In any organization the costs of unrestricted access to office printers can be substantial. With SavaPage Financial
feedback about the costs from different perspectives (User, ProxyPrinter, Period) is within reach. Future releases
will indeed process log data, and present financial statistics from all possible angles.
11.2. Environmental Impact
Environmental issues like global warming, waste management, paper production and consumption are an area of
debate and interest to many. Highlighting the environmental impact of printing is one of the ways to influence
user behavior.
SavaPage uses the number of printed Sheet Units to calculate three impact metrics: trees and energy consumption,
and carbon production.
Important
The default values SavaPage uses for environmental metrics can be the subject of debate. Of course you
are free to set the metric to any value that works for you. Please inform us about facts and findings you
feel confident about.
11.2.1. Printed Sheet Units
A Sheet Unit (SU) is the size equivalent of an A4 sheet. So,
A4
A3
A2
A1
==
==
==
==
1.00
2.00
4.00
8.00
SU
SU
SU
SU
0.50
0.25
0.12
0.06
SU
SU
SU
SU
and ...
A5
A6
A7
A8
==
==
==
==
Note that SU precision is 2 decimals. As environmental impact is concerned, A4 and US Letter sheets are handled
as equivalent, so ...
US Letter == 1.00 SU
SavaPage uses the media size chosen by the user to calculate the printed Sheet Units of a Proxy Printer print job.
Some print examples:
• 6 pages double-sided on A4 : 3 SU
149
Printing Impact
• 6 pages double-sided on A3 : 6 SU
• 6 pages 2-up on A4 : 3 SU
• 6 pages 2-up double-sided on A4 : 2 SU
Warning
SavaPage is not able to anticipate printer intelligence, for instance, when a printer uses different trays
(with different media sizes) for different page sizes within the job document.
11.2.2. Trees
This metric is the percentage of a tree used to produce the paper of the printed Sheet Units. The metric is adopted
from Conservatree.org1 and is as follows:
• A prototypical tree is 40 feet tall and 6-8 inches in diameter.
• One tree makes 16.67 reams of copy paper or 8,333.3 SU.
The metric 83333 is set as default for the configuration key: environment.sheets-per-tree
11.2.3. Energy
This metric is the energy used to produce the paper of the printed Sheet Units. The metric is adopted from
Paperonline.org2 and is as follows:
• Around 500 kWh of energy are required in Europe to make 200 kg of paper.
• So one A4 or Letter sheet of office paper costs 12.5Wh to manufacture 3.
The metric 12.5 is set as default for the configuration key: environment.watt-hours-per-sheet
11.2.4. Carbon
This metric is the amount of CO2 released for producing the paper of the printed Sheet Units. The metric is adopted
from the Swiss Federal Institute of Technology Zurich4 and is as follows:
• One A4 or Letter sheet costs 5.1g of CO2 to production.
The metric 5.1 is set as default for the configuration key: environment.co2-grams-per-sheet
Note
This metric takes into account the CO2 produced as a byproduct of paper production only. It does not take
into account the CO2 related to the production and operation of the printer and the ink or toner cartridges.
Defining broader system boundaries and tracking down all parameters involved requires a major effort,
and is beyond the scope of this manual. Of course you are free to set the parameter value for this metric
to any value that works for you.
1
http://conservatree.org/learn/EnviroIssues/TreeStats.shtml
http://www.paperonline.org/uploads/AskGuenter/MR_produce%20energy.pdf
3
A sheet of 5g requires (5/200.000) * 500 = 0.0125 kWh = 12.5 Wh.
4
http://www.umwelt.ethz.ch/dokument/factsheets/sustainable_conference_compensation_en.pdf
2
150
Chapter 12. Security
This chapter discusses how SavaPage secures sensitive user and application data, and how it communicates with
external Information Providers.
12.1. User Authentication
This section discusses how user credentials are protected.
12.1.1. Login Passwords
This section is about the passwords and PIN codes entered in the Web App Login Dialog.
Tip
Users can use the HTTPS protocol for connecting to the Web App, so data is encrypted to and from the
server.
12.1.1.1. User Domain Passwords
SavaPage does not store or cache user domain login passwords. These passwords are always checked real-time
at the source.
12.1.1.2. Internal User Passwords
Passwords of Internal Users are stored as SHA1 hash in the database.
12.1.1.3. Internal Admin Password
The SHA1 hashed password of the internal administrator admin is stored in a text file located at /opt/savapage/server/admin.properties. Access to this file is restricted to the savapage user.
SavaPage installs with admin as initial password for user admin.
Tip
If you forgot the internal admin password, you can reset it by editing the admin.password property
in the /opt/savapage/server/admin.properties text file. Ignore the existing HASH value.
SavaPage will hash your password upon first use.
12.1.2. PIN Codes
User PIN codes are stored in the database as encrypted secret.
12.1.3. Authentication Tokens
When Authentication Persistence is enabled for Browser Local Storage, authentication tokens are stored in the
“Local Storage” of the browser. See Section 4.8.3, “User Authentication” [81].
Separate authentication tokens are held for the User and Admin Web App context and the same token is used for
different sessions (on different devices) of a single user. A explicit logout in the Web App destroys the token.
151
Security
Authentication tokens are managed in memory on the SavaPage server. So, when the server restarts all local tokens
are implicitly invalidated.
12.1.4. User Dialog
When authentication fails a neutral "Authentication failed" message is communicated to the user to prevent “Account Enumeration” and “Guessable User Account”.
12.2. Access over Internet
Take extra care when SavaPage is accessible over public Internet as a result of enabled Internet Print. Make sure
that access to the Admin Web App is solidly secured.
Tip
Create a Terminal Device for the public IP address and configure Custom User Login. Two factor authentication with Local NFC Card and PIN (with “Self Association” disabled) is a secure option when users
have an associated NFC Card and Local Card Reader.
12.3. Web Session Timeout
When Authentication Tokens are not used, Web Sessions guard persistent authorized access to SavaPage.
For security reasons all sessions expire (timeout) after a certain period of inactivity. Each interaction with the Web
App that results in a call to the SavaPage Web Server resets the inactivity timer. Closing the browser window will
end the session. The default timeout periods for different login types are described in the table below:
Login type
Default value
Admin Web App
1440 minutes (24 hours)
User Web App
60 minutes (1 hour)
Table 12.1. Default Web Session Timeout Values
The timeout value (in minutes) can be changed using the configuration items below. A value of 0 indicates that
the session will never time out.
Configuration Item
Description
web-login.admin.session-timeout-mins
Inactivity timeout for the Admin Web App
web-login.user.session-timeout-mins
Inactivity timeout for the User Web App
Table 12.2. Web Session Timeout Configuration Items
See Section 4.8.13.10, “Config Editor” [105] for information about changing configuration items.
Changed inactivity timeout values take effect for new sessions. Note that some pages periodically refresh the page
(or data on the page), such as the Dashboard. A session will not time out if a browser is left on these pages, as
it will be considered active.
12.4. SSL Passwords
During the install process, SavaPage generates a self-signed key and certificate issued for the host's machine
name. This key is used by default when the system is accessed via HTTPS on port 8632. The password
of the default-ssl-keystore is generated in /opt/savapage/server/data/default-sslkeystore.pw. Access to this file is restricted to the savapage user.
152
Security
The passwords for the installed keystore created from an imported Existing SSL Certificate are set in the /opt/
savapage/server/server.properties file. Access to this file is restricted to the savapage user.
12.5. Secured JMX Connection
During the install process, SavaPage generates a dedicated self-signed key and certificate for securing JMX connections with SSL. The generated Java keystore is: /opt/savapage/server/jmxremote.ks with password savapage. Access to this file is restricted to the savapage user.
The JMX password for the admin user is held in /opt/savapage/server/jmxremote.password. Java
needs the password to be provided in plain text, so access to this file is restricted to the savapage user.
The initial password is a random string generated by the installation process. It needs to be changed in the Admin
Web App as described in Section 4.8.13.3, “JMX Agent” [101].
Note
The default SavaPage JMX port is 8639. This can be changed by editing the file:
/opt/savapage/server/jmxremote.properties
You need to restart SavaPage for this change to take effect.
12.6. Encrypted Secrets
Data in the database will not contain any explicit secret data. All secret data is stored encrypted with encryption
keys held in file /opt/savapage/server/data/encryption.properties. This file is generated by
SavaPage at initial installation and contains randomized encryption keys unique for this particular installation
instance. Access to this file is restricted to the savapage user.
Important
Make a backup of encryption.properties immediately after installation and store it at a secure
place, so you can restore it in case of a server crash or when you need to migrate to a new server.
Caution
The encryption.properties file is crucial for decrypting secret data in the database and verifying
the authenticity of document signatures. So, when you restore a database backup on a different server,
be sure to also restore this file.
The following secret data is stored encrypted in the database:
•
•
•
•
•
LDAP Admin Password.
SMTP Password.
IMAP Password.
PDF Passwords.
User PIN codes.
12.7. Document Signature
SavaPage generates a digital signature for every document printed-out or downloaded. Digital signatures are generated using a cryptographic technique called Hash-based Message Authentication Code (HMAC)1. The algorithm
1
http://en.wikipedia.org/wiki/HMAC.
153
Security
takes various output job attributes such as job time, user name, document name and UUID, and combines them
with a secret key. The result is then passed through the MD5 digest algorithm. The resulting signature is unique
to the document instance 2. The applied secret key ensures the authenticity of the signature.
The algorithm used is:
• Digest = Hash(date time || user name || document name || document UUID)
• Signature = Hash(Digest || Key)
where
• Key is a random string generated by SavaPage at initial installation. It is stored as hmac.key property in the
/opt/savapage/server/data/encryption.properties file, which is also used for Encrypted
Secrets.
• Hash is the MD5 function.
• date time is formatted in ISO 8601 basic format from year to second (yyyyMMddTHHmmss). The time
is local time (not UTC). E.g. 20120906T151231.
Note
The signature is stored in the database for future use.
12.8. User Client
The User Client is a notifier of personal user events: see Chapter 6, User Client [125]. The following security
measures apply:
• An SSL connection is used to communicate with the server.
• The server only accepts SSL connections.
• An API key is used as client identification.
12.9. Server Commands
The Server Command tool provides a command-line interface to SavaPage Server methods. The following security
measures apply:
• Only users with read access to the /opt/savapage/server/server.properties file have the right
to execute the command.
• An SSL connection is used to communicate with the server.
• An API key is used as client identification.
• The server only accepts SSL connections from local host.
12.10. Network Card Reader
A setup where a public and unattended IP device communicates with a central server is inherently prone to security
breaches. Our Network Card Reader device is no exception to this rule.
Although SavaPage validates the reader's IP address, the reader could be replaced and mimicked. Also, since
communication is non-SSL, the Card Number (UID) of swiped NFC Cards could be hijacked. However, since
the only content transmitted is the Card Number, misuse will be limited to a Card Number being offered from
an unexpected origin at an unexpected time. Since offered Card Numbers are always processed in well defined
transient contexts with short time limits, the risk of unnoticed abuse can be considered minimal.
A security breach of a fundamentally different nature is the rare scenario where it is possible to manipulate the
UID of an NFC Card. A hacker could then use the hijacked card number to make a duplicate authentication token.
2
The SHA1 digest algorithm is a stronger alternative, but MD5 is secure enough for our application and generates shorter signatures, which
are easier to enter as argument to find the matching document.
154
Security
Tip
As an extra security measure two-step authentication can be implemented by requiring an additional PIN
(over an SSL connection) after the initial NFC Card authentication. See Section 4.8.3, “User Authentication” [81] and Section 4.7.3.2, “Custom User Login” [75]
12.11. External Services
Communication with external services can optionally be secured with SSL/TLS. See Section 4.8.1.2, “LDAP” [76],
Section 4.8.4, “Mail” [84] and Section 4.8.6, “Mail Print” [90]
12.11.1. Google Cloud Print Service
The Google Cloud Print connectivity parameters are stored in the file /opt/savapage/server/gcp.properties, so it can easily be moved to another SavaPage implementation. Access to the file is
restricted to the savapage user.
Important
Make a backup of gcp.properties immediately and store it at a secure place, so you can restore it
in case of a server crash or when you need to migrate to a new server.
An example gcp.properties file (with fictitious data) is shown below.
#---------------------------------------------------------# SavaPage Google Cloud Ready Printer
# Keep the content of this file at a secure place.
#---------------------------------------------------------#Tue Jan 07 11:34:58 CET 2014
oauth.client.id=9999999999999.apps.googleusercontent.com
[email protected]
gcp.proxy=99999999-9999-9999-9999-999999999999
gcp.refresh-token=9/1111111111111111_99999999999999999999999-AA
gcp.printer.uuid=99999999-1111-1111-1111-999999999999
oauth.client.secret=999999999999999999999999
• Values for the gcp.proxy and gcp.printer.uuid properties are generated by SavaPage upon first use.
• The oauth.client.id and oauth.client.secret properties are entered by the user in the OAuth
panel.
• The gcp.refresh-token is retrieved by SavaPage after printer registration, and is needed to access to the
Google Cloud Printer.
• The gcp.owner.id is updated by SavaPage after first access of the printer.
12.12. Vouchers
The Voucher System is designed for optimal security. Vouchers are assigned a random 16-digit number which
makes a guess statistically near impossible. Above that, all unsuccessful (potentially fraudulent) voucher redemption attempts are detected and logged.
Like all security systems, the human factor is the most critical. Remember that vouchers represent cash, so take
special care to protect the vouchers from unauthorized use.
• Delete the generated PDF voucher document after the vouchers are printed. You can always regenerate the PDF
document when needed.
• Keep printed vouchers in a secure location.
• Put vouchers in envelopes to prevent exposure of voucher numbers.
• Check the Application Log regularly for unsuccessful (potentially fraudulent) voucher redemption attempts.
155
Security
• Use the Voucher List to monitor successful voucher redemption.
• Delete or Expire a voucher batch immediately when vouchers are reported lost or stolen. See Section 4.12.1,
“Voucher Actions” [119].
Caution
Voucher numbers are not encrypted in the database, so be careful to store database backup files at a save
location.
156
Chapter 13. Internationalization
Internationalization is the process of designing a software application so that it can potentially be adapted to
various languages and regions without engineering changes.
Localization is the process of adapting internationalized software for a specific region or language by adding
locale-specific components and translating text.
SavaPage is internationalized software and can easily be localized to different languages, countries or regions.
13.1. Localization
The following localization rules apply:
• The Web App user interface localizes according to either the locale saved in the browser's local storage during
a previous visit1, or to the country/region code of the browser, or finally to the language chosen at Login.
• Reports generated from the Web App localize according to the language of the Web App, except for Vouchers
and Receipts at the Point-of-Sale and User Web App, which use the System Locale.
• The System Locale is applied to all system messages as broadcasted to the Admin Web App Dashboard, written
to the Application Log, or send by email.
• Text in log and audit files is fixed to the English language. So, when in need for support, these files can easily
be understood by SavaPage Support.
• Dates and numbers are formatted according to the localization context.
• The currency symbol of the localization context is used.
• When localized text is not found the fall-back language will be English. So, in case SavaPage is partially translated for a selected locale, the user experience will be fragmented, as part of the text will fall back to English.
Currently SavaPage is fully localized to English and Dutch.
Tip
If you are interested in localizing the software to your region, please let us know.
SavaPage handles all localized text and user entered data as Unicode. The Web Browser, and therefore the Web
App, natively displays Unicode correctly. However, the correct display of Unicode in PDF reports, needs special
attention. Therefore, Internal Fonts are available to customize PDF generation.
13.2. Internal Fonts
The Unicode range of the displayed text in PDF documents must be covered by the embedded font.
Unfortunately, at present there is no native outline font that can display all Unicode characters. The one exception
is GNU Unifont, which does support the full 65,536 Unicode code point range. However, the glyphs originate
from a bitmap of 16 pixels high and either 8 or 16 pixels wide, which gives the font a coarser look.
SavaPage contains internal fonts covering specific Unicode Scripts2. These fonts can be selected to customize PDF output to the content locale.
1
After login, the locale of the WebApp is saved in the browser's local storage, together with the Authentication Tokens.
http://www.unicode.org/charts/
2
157
Internationalization
13.2.1. Default Font
The default font for PDF output is DejaVu Sans3, which supports a broad set of Unicode scripts:
• Latin (including European and African alphabets, IPA, ...)
•
•
•
•
•
•
•
•
•
•
•
•
Greek (including polytonic)
Cyrillic
Armenian
Georgian
Hebrew
Arabic
N'ko
Lao
Canadian Aboriginal Syllabics
Ogham
Tifinagh
Lisu
Next to that, DejaVu also contains a lot of mathematical and other symbols, arrows, braille patterns, etc.
Tip
Coverage of the default font can be seen in DejaVuSans.pdf4.
13.2.2. CJK Font
Support for Chinese, Japanese and Korean (CJK) is provided by the Droid Sans "fallback" font5.
This font contains over 43,000 glyphs and includes support for Simplified Chinese (GB2312), Traditional Chinese
(Big 5), Japanese (JIS 0208) and Korean (KSC 5601). The font uses the Simplified Chinese ideographs for shared
Unicode code points.
Tip
Coverage of the CJK font can be seen in DroidSansFallbackFull.pdf6.
13.2.3. Unifont
GNU Unifont7 is a Unicode font with a glyph for every visible Unicode Basic Multilingual Plane code point. The
Unicode Basic Multilingual Plane covers the first 65,536 (or 2^16) Unicode code points. GNU Unifont originates
from a bitmap font with glyphs of 16 pixels high and either 8 or 16 pixels wide. Therefore it has a coarser look
than native outline fonts.
3
http://dejavu-fonts.org
http://savapage.org/docs/fonts/DejaVuSans.pdf
5
http://www.droidfonts.com/droidfonts
6
http://savapage.org/docs/fonts/DroidSansFallbackFull.pdf
7
https://savannah.gnu.org/projects/unifont
4
158
Chapter 14. Customization
SavaPage can be customized to fit your corporate identity. By customization end-users will perceive SavaPage as
an integral part of your organization rather than an external tool.
14.1. Web App
Web App customization is controlled in the /opt/savapage/server/custom/web.properties file.
An annotated web.properties.template file is installed for your convenience.
14.1.1. Look-and-feel
The look-and-feel of Web Apps can be customized by theming and CSS tailoring.
14.1.1.1. Theming
SavaPage uses jQuery Mobile1 as user interface system to create responsive Web Apps that are accessible on all
smartphone, tablet and desktop devices. jQuery Mobile supports theming. Themes can be built online with the
ThemeRoller for Mobile2 tools and deployed in SavaPage by downloading the zipped theme file and extracting
the content of the /themes/ folder into the /opt/savapage/server/custom/web/themes directory.
The web.properties file contains entries to specify a separate CSS theme for each Web App, as shown in
the example below:
webapp.theme.admin=admin.min.css
webapp.theme.pos=admin.min.css
webapp.theme.user=user.min.css
CSS theme file name for the Admin Web App.
CSS theme file name for the POS Web App.
CSS theme file name for the User Web App.
SavaPage uses swatch3 “a” for all pages and dialogs. Swatch “b” is used for page and dialog headers, and in some
cases for list dividers.
14.1.1.2. Custom CSS
Advanced tailoring can be done with custom CSS files. They are rendered as last, so they have the final say about
styling.
The web.properties file contains entries to specify a custom CSS file for each Web App, as illustrated in
the example below:
webapp.custom.admin=admin.css
webapp.custom.pos=pos.css
webapp.custom.user=user.css
1
http://jquerymobile.com
http://themeroller.jquerymobile.com
3
A swatch is one of several colour schemes that can be provided by a jQuery Mobile theme. Single-letter designations are used for swatches.
The default theme provides two swatches. The "a" swatch is a neutral, gray swatch, and the "b" swatch has a darker color scheme designed to
contrast with the "a" swatch. Swatch "b" is used to draw special attention to certain elements in a user interface styled with "a".
2
159
Customization
Custom CSS file for the Admin Web App.
Custom CSS file for the POS Web App.
Custom CSS file for the User Web App.
Any content placed in /opt/savapage/server/custom/web/, such as images, can be accessed in
CSS via a URL beginning with /custom/web/. For example if a file named logo.png is placed in /
opt/savapage/server/custom/web/images it can be accessed via the URL /custom/web/images/logo.png.
Figure 14.1. User Web App: Custom CSS - Sample #1
Figure 14.2. User Web App: Custom CSS - Sample #2
160
Chapter 15. Using an External Database
By default SavaPage uses Apache Derby1 as internal database. However, it is possible to use an alternative external
relational database. This chapter describes how to connect and migrate to an external database, and motivates why
an organization would choose to do so.
Apache Derby is a stable and scalable database with an excellent performance. However, when using the User
Web App concurrently with the User Client and Proxy Print Authentication you are strongly advised to use an
external database like PostgreSQL that handles row locking flawlessly.
Other special situations can also be reason to choose an external database, like:
• Organizational policy dictates that all applications must be consolidated on a single database infrastructure.
• You want to take advantage of existing maintenance and backup procedures that are present on your current
database infrastructure.
• You want to use third party reporting tools to view and analyze the SavaPage database.
• You want optimal (tailored) performance, since SavaPage is intensively used by a very large user population.
So, for example, you want to deploy a dedicated database server as a scalable solution.
15.1. Supported Databases
SavaPage is able to support any database that has a JDBC driver available. At this moment PostgreSQL2 is supported out-of-the-box. Please let us know if you require support for other databases.
15.2. Migrating to an External Database
The migration is a simple process and takes about 15-30 minutes. The sections below describe in more detail the
following high-level migration scenario steps:
1. Stop the server.
2. Create a backup of the current internal database.
3. Create and initialize a new external database.
4. Restore the backup into the new external database.
5. Restart the server.
15.2.1. Step 1 - Stop SavaPage
The application server must be stopped in order to make a backup of the current internal database. The command
to stop the server is described in Section B.3, “Stopping and Starting the Server” [183].
15.2.2. Step 2 - Create a Backup
Run the command to backup the current (internal) as described in Section B.2.2, “db-export and db-export-to” [182]. The command echoes the name of the created backup file to stdout. Take a note of this because you will need this in a future step.
15.2.3. Step 3 - Create new Database in External DBMS
Creating a new database is specific to the external Database Management System and is off-topic for this manual.
It is assumed that the database administrator knows how to create a new database. However, the following generic
requirements must be honored:
1
2
http://db.apache.org/derby/
http://www.postgresql.org/
161
Using an External Database
• Create a dedicated database user with a strong password to be used by SavaPage to connect to the database.
• Create the new empty database with a Unicode or UTF8 character encoding to make sure that all possible
characters can be stored.
• Assign the dedicated user full access to the new database, i.e. grant permission to create and drop tables, and
to execute select, insert, update and delete statements in all tables.
15.2.4. Step 4 - Change SavaPage Connection Parameters
Open a terminal session on the SavaPage server as user savapage and edit the /opt/savapage/server/server.properties file.
• Comment out the line database.type=Internal by adding a hash (#) character at the start of the line.
• Uncomment the database. connection parameter lines for the external database (in our case PostgreSQL).
• Set the database.url, which describes the location and connection details of the external database.
The PostgreSQL URL format is: jdbc:postgresql://[server]/[database]
The [server] parameter is the name of the server running the PostgreSQL database, and must be resolvable
from the SavaPage server. If the PostgreSQL instance is running on the same machine then localhost can be
used. The [database] parameter is the name of the PostgreSQL database you created in the previous step.
• Set the database.user and database.password used to connect to the database.
A connection example is shown below:
#-----------------------------------------------------------# Database Settings
#-----------------------------------------------------------# Using the internal database (default)
#database.type=Internal
# PostgreSQL connection
database.type=PostgreSQL
database.driver=org.postgresql.Driver
database.url=jdbc:postgresql://localhost/savapage
database.user=your-db-user
database.password=your-db-user-password
15.2.5. Step 5 - Initialize new Database
This step initializes the new database, it creates the required database tables and initial data.
To initialize the database, open a terminal session on the SavaPage server as user savapage and run the command
as described in Section B.2.4, “db-init” [183].
15.2.6. Step 6 - Restore Backup into new Database
This step restores the backup file exported in the previous step, into the newly initialized database. Open a terminal
session on the SavaPage server as user savapage and run the command as described in Section B.2.3, “dbimport” [183].
15.2.7. Step 7 - Restart SavaPage
At this point the data have been migrated to the new database and the server can be restarted. See Section B.3,
“Stopping and Starting the Server” [183].
Wait a couple of seconds before logging in to the Admin Web App to verify that the migration worked successfully.
162
Chapter 16. Performance Tuning
16.1. Linux Kernel Parameters
GNU/Linux distributions are generally not configured to run more demanding server processes out-of-the-box.
So, running SavaPage with high load on a vanilla GNU/Linux OS can easily result in a degraded performance.
Performance bottlenecks are usually due to OS, TCP stack and network settings meant for desktop user sessions,
and not for server processes that are intensively used by many network clients. Fortunately, it is easy to unleash the
full potential of your GNU/Linux host with a few simple tweaks. The message is that SavaPage scales perfectly
if you apply the right kernel settings.
Relevant kernel parameters and settings are discussed in the next sections. The last section summarizes the suggested settings and describes how to apply them. See Section 16.1.5, “Setting Linux kernel parameters with
sysctl” [165].
Note
Kernel parameters with ipv4 in their names also apply to TCP over IPv6.
16.1.1. IP Ports
As many outgoing connections are concurrently established from SavaPage, we must make sure Linux does not
run low on ephemeral local ports1 and reuse sockets with state TIME_WAIT.
net.ipv4.ip_local_port_range = 1024 65535
net.ipv4.tcp_tw_recycle = 0
net.ipv4.tcp_tw_reuse = 1
Broaden the ephemeral local port range.
Disable recycling of sockets with state TIME_WAIT.
Enable the reuse of sockets with state TIME_WAIT. This is particularly useful in environments where numerous short connections are open and left in TIME_WAIT state, such as in SavaPage.
Note
According to Vincent Bernat in Coping with the TCP TIME-WAIT state on busy Linux servers2:
“On the server side, do not enable net.ipv4.tcp_tw_recycle unless you are pretty sure you will
never have NAT devices in the mix. Enabling net.ipv4.tcp_tw_reuse is useless for incoming
connections.”
“On the client side, enabling net.ipv4.tcp_tw_reuse is another almost-safe solution. Enabling
net.ipv4.tcp_tw_recycle in addition to net.ipv4.tcp_tw_reuse is mostly useless.”
1
An established TCP/IP connection can be regarded as a 4-tuple (server IP, server port, client IP, client port). Three of the four are evident, i.e.
the client uses its own IP address to connect to the server's IP address and service port. However, the connection also needs a port number at
the client side. Unless the client program explicitly requests a port number, this port number is called an ephemeral port number. Ephemeral
ports are temporary issued by the IP stack of the client OS from a dedicated port range.
2
http://vincent.bernat.im/en/blog/2014-tcp-time-wait-state-linux.html
163
Performance Tuning
16.1.2. TCP Buffer Sizes
Linux does a good job of auto-tuning the TCP buffers, but the default maximum sizes are still very small. Here
are sample settings for 1Gb and 10Gb network.
# Settings for 1Gb network (16Mb buffer)
net.core.rmem_max = 16777216
net.core.wmem_max = 16777216
net.ipv4.tcp_rmem = 4096 87380 16777216
net.ipv4.tcp_wmem = 4096 16384 16777216
# Settings for 10Gb
net.core.rmem_max =
net.core.wmem_max =
net.ipv4.tcp_rmem =
net.ipv4.tcp_wmem =
network (32Mb buffer)
33554432
33554432
4096 87380 33554432
4096 16384 33554432
# Settings for 10Gb
net.core.rmem_max =
net.core.wmem_max =
net.ipv4.tcp_rmem =
net.ipv4.tcp_wmem =
network (54Mb buffer)
56623104
56623104
4096 87380 56623104
4096 16384 56623104
Max size (bytes) of the TCP receive buffer as settable with setsockopt.
Max size (bytes) of the TCP send buffer as settable with setsockopt.
Auto-tuning limits (bytes) for TCP receive buffer: min, default, and max number of bytes.
Auto-tuning limits (bytes) for TCP send buffer: min, default, and max number of bytes.
16.1.3. Queue Sizes
While a socket is listening and busy, new connection requests will pile up. The kernel keeps pending connection
requests in a buffer. When the buffer is full new requests will fail. You can increase several buffer sizes.
net.core.somaxconn = 4096
net.core.netdev_max_backlog = 16384
net.ipv4.tcp_max_syn_backlog = 8192
net.ipv4.tcp_syncookies = 1
Max number of queued connections on a socket. The default of 128 is too low: we raise this value substantially to support bursts of request.
Max number of packets, queued on the input side, when the interface receives packets faster than the kernel
can process them.
Max number half open SYN requests to keep in memory.
Enable SYN cookies3 to harden the TCP/IP stack against SYN floods.
16.1.4. Congestion Control
Congestion refers to a network state where a node or link carries so much data that it may deteriorate network
service quality, resulting in queuing delay, frame or data packet loss and the blocking of new connections.
In a congested network, response time slows with reduced network throughput. Congestion occurs when bandwidth
is insufficient and network data traffic exceeds capacity.
Linux supports pluggable congestion control (avoidance) algorithms. To get a list of congestion control algorithms
that are available in your kernel run the command:
sysctl net.ipv4.tcp_available_congestion_control
If cubic and/or htcp are not listed then you will need to research the control algorithms for your kernel. If
available set the control to cubic:
3
http://en.wikipedia.org/wiki/SYN_cookies
164
Performance Tuning
net.ipv4.tcp_congestion_control = cubic
16.1.5. Setting Linux kernel parameters with sysctl
Edit the file /etc/sysctl.conf like this:
sudo vi /etc/sysctl.conf
and add the following lines, that summarize the previously discussed kernel parameters, at the end of the file:
#-----------------------------------------------------# SavaPage Settings for 1Gb network
#-----------------------------------------------------net.core.rmem_max = 16777216
net.core.wmem_max = 16777216
net.ipv4.tcp_rmem = 4096 87380 16777216
net.ipv4.tcp_wmem = 4096 16384 16777216
net.core.somaxconn = 4096
net.core.netdev_max_backlog = 16384
net.ipv4.tcp_max_syn_backlog = 8192
net.ipv4.tcp_syncookies = 1
net.ipv4.ip_local_port_range = 1024 65535
net.ipv4.tcp_tw_recycle = 0
net.ipv4.tcp_tw_reuse = 1
# Only if cubic is available
net.ipv4.tcp_congestion_control = cubic
You can apply the settings without rebooting the server with this command:
sudo sysctl -p
16.2. Linux User Limits
SavaPage server may run out of file descriptors as the system defaults are normally very low. A file descriptor
(FD) is a handle created by a process when a file is opened. Each process can use a limited number of FDs as
specified per user in an OS level user limit.
Beware that apart from “regular” files that are accessed by SavaPage from disk, each incoming request that uses
a TCP socket also consumes one file descriptor from the total available for the process.
On Debian based systems the number of process FDs for the savapage user can be increased as follows.
Edit the file Edit /etc/security/limits.conf like this:
sudo vi /etc/security/limits.conf
and add the following lines at the end of the file:
savapage
savapage
hard
soft
nofile
nofile
65535
65535
Next, open /etc/pam.d/su like this:
sudo vi /etc/pam.d/su
and uncomment the following line:
session
required
pam_limits.so
You also need to edit the /etc/pam.d/common-session and /etc/pam.d/common-session-noninteractive files. Open the files like this:
sudo vi /etc/pam.d/common-session
165
Performance Tuning
sudo vi /etc/pam.d/common-session-noninteractive
and for each file add the following line to the end:
session required pam_limits.so
Finally, check whether the settings are applied with this command:
sudo su - savapage -c "ulimit -n"
This should output the value 65535.
16.3. JVM Tuning
SavaPage runs in the Java Virtual Machine (JVM) using the class libraries and other supporting files provided
in the JRE.
The SavaPage JVM settings work fine, and generally there is no customization needed. However, if needed the
JVM can be tuned by adding extra JVM arguments in the file:
/opt/savapage/server/custom/app-server.conf
Edit this file as savapage user and enter the extra JVM arguments as value of the CUSTOM_JVM_ARGS key.
The example below shows the JVM arguments as explained in the next sections.
# Note: enclose the value with quotes
CUSTOM_JVM_ARGS="-XX:DefaultMaxRAMFraction=2 -XX:+UseConcMarkSweepGC -XX:+CMSIncrementalMode"
Important
Before doing any JVM customizing please consult SavaPage Support to discuss your requirements and
which customization fits best.
16.3.1. JVM Memory Allocation
The JVM allocates a quarter of host system RAM to the SavaPage Server process by default. This ensures that
SavaPage does not consume too many resources and does not get in the way of other applications running on the
same system.
However, if the host system is dedicated to running SavaPage, you can safely allocate more memory to SavaPage.
With more allocated memory SavaPage will have a better performance, particularly with many users and large
printing throughput.
Add one of the following JVM parameters to allocate relative or absolute memory:
-XX:DefaultMaxRAMFraction=3
-XX:DefaultMaxRAMFraction=2
-Xmx864m
Allocate one third of host system RAM.
Allocate one half of host system RAM.
Allocate 864MB of host system RAM.
16.3.2. JVM Garbage Collection
Customizing Java Garbage Collection (GC) depends on the characteristics of the application involved. The JVM
provide proper defaults for SavaPage most of the time.
However, if you consider response time more important than overall throughput and garbage collection pauses
must be kept shorter than approximately one second, then select the concurrent collector with the -XX:+UseC-
166
Performance Tuning
oncMarkSweepGC option. Also, if only one or two processors are available, consider combining this collector
with the -XX:+CMSIncrementalMode option.
Please consult the Java SE 6 HotSpot Oracle documentation4 for an introduction to these tuning options.
4
http://www.oracle.com/technetwork/java/javase/gc-tuning-6-140523.html#cms
167
Chapter 17. SavaPage Community
By joining the Fellowship your organization becomes a donating and sustaining member of the SavaPage Community. Donations are needed to financially compensate Community Development and Deployment Partners for
their efforts and expenses when supporting Fellow users. The suggested donation amount is dependent on the size
(number of Participants) of the Fellow organization. When you join as a Fellow you get a Member Card, which
actually is a digitally signed file emailed to you. This file is your token as resident of the SavaPage Community
and can be used to confirm your status in the SavaPage Software. Fellows have the right to request new features
and are entitled to high-priority Technical Support.
An organization that uses the software and is not a Fellow is called a Visitor. Visitors are allowed to explore the
application to decide if they want to become a donating community Fellow or not.
The community status is shown on the Admin Web App Dashboard and About sections.
17.1. Visitor Period
Without a Community Member Card any user of the software is considered a visitor. After 40 days visitors are
invited to contact SavaPage Support for a Member Card. Without a card SavaPage will continue to run as normal
and will be fully functional, but the missing card will be signaled as system status.
Note
Implementations with 5 active users (or less) in the SavaPage database are welcomed as permanent visitors, and the missing card is not signalled as system status.
17.2. Registered Fellow
The Member Card supplied to you is the digital proof of your Community Fellow or Visitor status and holds
information about:
• The Name of the Member organization.
• The Number of Participants in the Member organization.
• The Application version the Member Card is valid for.
• The Expiration date (end date) of the Membership. A regular Member Card will not have an end date. Only in
special cases an end date is present, e.g. when visitors were granted an extended visitor period.
After you imported your Member Card file into SavaPage, your membership will be validated against your use of
the application. A new Member Card is suggested when one of the following conditions are met:
• The number of users in the SavaPage database exceed the number of participants . This happens when extra
external users were synchronized into the user database or extra internal users were added. You can make a
extra donation for a new Member Card with an increased number of participants, or reduce the number of users
in the database, by deleting internal users or deleting external users which are not present in the synchronization
source, or by importing from a just a single synchronization source group.
• The expiration date of the Member Card is reached. The resolving action is to renew your Member Card.
• The major version of the application does not match the Member Card version. This usually occurs when the
application is upgraded to a higher major version and you stopped your yearly donation in the past. A common
action is to obtain a new Member Card by renewing your membership.
168
SavaPage Community
Important
Whatever your community status is you'll always be able to use the software without restrictions. However, when deemed necessary, we will make an appeal to you to donate for the Member Card that covers
your runtime situation.
17.3. Importing the Member Card
The SavaPage Community Member Card is issued as a digitally signed file. Installing the file into the application
confirms your community status. To install the file supplied by your Community Partner:
1.
2.
3.
4.
5.
Save the Member Card file to your hard disk. Your desktop is a handy location. Files are typically named
SavaPage-[orgname].membercard. The file can be loaded into the system as supplied.
Log into the SavaPage Admin Web App and navigate to the About page.
Scroll down to the Community Membership section and click the Import Member Card button.
Please see Figure 4.95, “Admin Web App: About - Import Member Card” [115] how to proceed in the import
dialog.
Verify that your Membership is correctly listed in the About page.
If you have a question about your Member Card or need assistance please email SavaPage Technical Support and
they will be more than happy to assist you.
Note
The file supplied is simply a digitally signed and zipped text file containing your Membership information.
It's converted to ZIP format to minimize size. If you're interested in viewing the contents of the file,
rename the file to .zip and simply open it in any ZIP extraction utility.
169
Appendix A. NFC Authentication
SavaPage supports Radio Frequency Identification (RFID) as authentication method.
RFID is the technology for uniquely identifying items using radio waves. A basic RFID system comprises a passive
tag1, a reader, and an antenna, where the reader sends an interrogating signal to the tag via the antenna, and the
tag responds with its Unique Identification (UID).
In this way RFID tags are commonly used as authentication token: the RFID reader connected to the authenticator
just passes the UID (Card Number) of the tag. Applications are abundant, ranging from tags embedded into retail
products to help stores keep tabs on inventory, to tags embedded into animals to keep track of life stock. RFID is
also applied in passports and credit cards, as well as identification badges that let employees access secure areas.
Near Field Communication (NFC) is a more recent, finely honed version of RFID with a much broader application.
While RFID is a one-way communication system only, with data flowing from tag to reader, NFC can also be set
up for two-way communication. However, NFC operates at a maximum range of about 4 inches (10 centimeters)
and uses High Frequency ( HF) RFID readers at 13.56 MHz.
Since SavaPage is targeted at the same HF RFID readers and tags, albeit in one-way communication, this manual
uses the more common terms NFC Card and NFC Reader for the tag and reader role. In some contexts the terms
Card and Card Reader will be used as shorthand.
SavaPage supports two Card Reader types.
• A Local Card Reader: a keyboard emulating device that “types” the UID (Card Number) each time a Card is
swiped.
• A Network Card Reader: a software component, implemented on a dedicated device (like a Raspberry Pi®),
that interacts with an NFC Reader after a card swipe and sends the UID to the central SavaPage server.
A.1. Card Number Format
SavaPage stores the Card Number (UID) in lower case HEX format, with Least Significant Byte (LSB) first. So, at
the interfaces where the UID is captured, the output format and byte order must be specified as HEX or DECIMAL
and LSB or MSB (Least or Most Significant Byte) first. This information is used by SavaPage to convert the
captured Card Number to its internal HEX/LSB standard.
A.2. Local Card Reader
A Local Card Reader is an NFC Reader that functions as USB Keyboard Emulator. At each card swipe the reader
must react by “typing” the card's UID (Card Number) appended by a Carriage Return (CR). SavaPage makes use
of this function by capturing2 the keystrokes at Login time in the Web App.
Note
The way a reader formats the UID can deviate from the SavaPage HEX/LSB standard. Therefore you need
to specify the format at the interfaces where the reader's UID is used. Most keyboard emulating readers
can be configured to a specific output format and byte order.
1
RFID tags are either Active or Passive. Active tags have their own power supply by which they can broadcast with a read range of up to 100
meters. Passive tags do not have their own power source. Instead, they are powered by the electromagnetic energy transmitted from the RFID
reader. Because the radio waves must be strong enough to power the tags, passive RFID tags have a read range from near contact to a few meters.
2
SavaPage uses a short time limit to capture the keystrokes from a Local Card Reader. The time limit (milliseconds) is contained in the
configuration key webapp.card-local.keystrokes-max-msecs. Do not change this value, except when requested by the SavaPage
support desk.
170
NFC Authentication
Tip
At the time of this writing StrongLink3 sells a reliable Plug and Play USB Keyboard Emulating Card
Reader (SL040A) for a competitive price. The reader supports UID reads for Mifare Mini, Mifare 1k,
Mifare 4k, Mifare Plus, Ultralight, DesFire and Mifare_ProX cards.
A.3. Network Card Reader Service
SavaPage ships with a Network Card Reader Service to be deployed on a Raspberry Pi®. The service is tested to
work with the popular ACS ACR122U4 reader. The installation instructions can be found in:
/opt/savapage/providers/nfc/linux-armv6/README
Note
Other ACS USB readers mentioned in the README should work as well.
Any deployed service must be entered as SavaPage Device. See Section 4.7.1, “Network Card Reader” [71]. At
each card swipe the UID of the card is read and send to the central SavaPage server, where it is handled in context
of the device definition.
You can link sounds and scrips to various events. Sample files are provided for your own customization, for
example to communicate with PiGlow5, Pibrella6 or PiFace Control & Display7 add-on boards.
3
http://www.stronglink-rfid.com
http://www.acs.com.hk/en/products/3/acr122u-usb-nfc-reader/
5
http://www.pimoroni.com/
6
http://pibrella.com/
7
http://www.piface.org.uk/
4
171
Appendix B. Tools
B.1. Server Commands
The savapage-cmd tool provides a command-line interface to SavaPage Server methods. It can directly be executed on the command-line or be part of more elaborate shell scripts.
For security reasons only users with read access to the /opt/savapage/server/server.properties
file have the right to execute the command. So, the sure way to go is ...
sudo su - savapage
cd server/bin/linux-x64
... and to execute savapage-cmd from here, and ...
./savapage-cmd --help
... will echo all methods available:
________________________________
SavaPage Command Line Interface
Note: use METHOD --help for method details.
usage: [METHOD] [OPTION]...
--add-internal-user
--add-user-group
--change-base-currency
--delete-user
--delete-user-group
--list-users
--list-user-groups
--list-user-group-members
--list-user-group-memberships
--list-user-source-groups
--list-user-source-group-members
--list-user-source-group-nesting
--printer-access-control
--printer-snmp
--set-user-properties
--set-user-group-properties
--sync-user-group
Creates a new or Updates an existing Internal
User.
Adds a user group from the external user
source: synchronized external users belonging
to this group are added as member.
Changes the base currency of the application.
Logically deletes a User.
Deletes a user group.
Lists the names of all the Users in the
system, sorted by user name, one per line.
Lists the names of all the User Groups in the
system, sorted by name, one per line.
Lists the names of the user group members in
the system, sorted by user name, one per line.
Lists the names of the groups a user belongs
to, sorted by name, one per line.
Lists the names of all the groups in the user
source, sorted by name, one per line.
Lists the names of the (nested) user group
members in the user source, sorted by user
name, one per line.
Lists a space indented hierarchy of nested
groups within a group. Nested groups are only
supported by Active Directory, all other user
sources return an empty list.
Controls user groups to either allow or deny
access to a proxy printer.
Reads SNMP info from a printer.
Sets properties for an existing Internal or
External User.
Sets properties of an Internal or External
User Group.
Synchronizes a user group with the external
user source, updating group membership.
172
Tools
-help,--help
--help-all
Displays this help text.
Displays help text of all methods.
Note
The number of available methods will grow according to customer needs. Please contact support if you
need a method that is missing.
B.1.1. Common Options
B.1.1.1. Keep Switches
--keep-* option switches are used to not overwrite existing values.
For example, the --keep-card, --keep-pin and --keep-password switches make their corresponding
--card, --pin and --password options act as defaults in those cases where values have not yet been set.
Some examples:
# Overwrite any PIN set by user.
--add-internal-user --username "guest-john" --pin "1234"
# Preserve any PIN set by user.
--add-internal-user --username "guest-john" --pin "1234" --keep-pin
B.1.1.2. Remove Switches
--remove-* option switches are used to clear values. Since the absence of a command-line option (or an empty
value in batch mode CSV/TSV files) can not be interpreted as no value (null), the --remove switch comes
to help to explicitly nullify values.
This implies that blank values on the command-line and in batch mode input files are ignored. So, this command
has no effect ...
--add-internal-user --username "guest-john" --pin ""
... use this command instead ...
--set-user-properties --username "guest-john" --remove-pin
When an option does not have a --remove-* switch, there is no way to clear the corresponding field. For
example, since --remove-full-name is not available, there is no way to clear the User field “full-name” from
the command-line (see Section B.1.16, “setUserProperties” [180]).
B.1.1.3. Locale Option
Some methods pass numeric values that are formatted according to the locale. In these cases the locale can be
specified with a separate option like this:
-locale <arg>
The IETF BCP 47 Locale used for numeric values.
Example values are: en, en-GB, en-US, nl,
nl-NL, nl-BE. [defaults to system default
en-US].
Note
The actual system default locale depends on your terminal session settings.
173
Tools
B.1.1.4. Batch Mode Options
Some methods have options for passing values in batch mode. Below are the standard batch mode parameters:
-batch
-continue
-input <arg>
-charset <arg>
Enables batch mode: executing from CSV or TSV
input.
Continues batch processing after a batch line
execution error.
Batch input file: optional with stdin as
default.
IANA Charset Name of batch input character
encoding [default: utf-8].
So instead of using these three commands ...
./savapage-cmd --add-internal-user --username john --password rTf4g
./savapage-cmd --add-internal-user --username dave --password 9j6Tw
./savapage-cmd --add-internal-user --username mick --password f75L2
... you can use this single batch command ...
./savapage-cmd --add-internal-user -batch -input /home/rijk/add-internal-user.csv
.. where the file add-internal-user.csv looks like this:
"username","password"
"john","rTf4g"
"dave","9j6Tw"
"mick","f75L2"
Input files must have the extension .csv or .tsv as indication for a comma or tab separated file format.
The first line in the file must be the comma or tab separated list of parameters. The convention is that the parameter
names are identical to their command line counterpart, except for the -- prefix. The next lines simply contain the
comma or tab separated parameter values.
Option switches like applied in the command below ...
--set-user-properties --username "john" --pin 1234 --remove-card --full-name "John Brown"
--set-user-properties --username "carol" --pin 4713 --keep-pin --full-name "Carol Johnson"
... can be applied in a CSV file like this:
"username,"pin","keep-pin","remove-card","full-name"
"john",1234,,"true","John Brown"
"carol",4713,"true",,"Carol Johnson"
Important
By default, batch processing is interrupted after a batch line execution error. With the -continue switch
set, it will instead continue processing. After the batch finishes it will return error code 5 to distinguish
continuation from an immediate termination, which is reported with error return code 1.
Note
In a CSV/TSV file any blank switch value is interpreted as not present (false), any non-blank value
as present (true).
B.1.2. addInternalUser
./savapage-cmd --add-internal-user --help
... gives the options:
174
Tools
________________________________
SavaPage Command Line Interface
Method : addInternalUser
Version : 0.30
Creates a new or updates an existing Internal User.
usage: --add-internal-user [OPTION]...
--username <text(50)>
[required] Unique user name.
--password <text(64)>
[optional] Password.
--full-name <text(255)>
[optional] Full user name.
--email <text(255)>
[optional] Primary Email address.
--email-other <list>
[optional] List of space separated other
(secondary) Email addresses.
--card <text(16)>
[optional] NFC Card Number.
--card-format <HEX|DEC>
[optional] NFC Card Number Format [default:
HEX].
--card-first-byte <LSB|MSB>
[optional] NFC Card Number First Byte [default:
LSB].
--id <text(16)>
[optional] ID Number.
--pin <text(16)>
[optional] PIN for ID and Card.
--uuid <text(36)>
[optional] The user's secret UUID.
--balance <decimal>
[optional] The user's initial account balance.
This value is ignored when a balance is already
assigned.
--balance-comment <text(255)>
[optional] A comment to be associated with the
--balance transaction.
--credit-limit
[optional] Assign default credit limit amount.
--credit-limit-amount <decimal>
[optional] Assign custom credit limit amount.
--credit-limit-none
[optional] no credit limit restriction (opposed
to --credit-limit and --credit-limit-amount).
--keep-card
[optional] Keep existing Card Number, or use
--card value when not present.
--keep-email-other
[optional] Keep existing other (secondary)
Email addresses, or use --email-other value
when not present.
--keep-password
[optional] Keep existing Password, or use
--password value when not present.
--keep-pin
[optional] Keep existing PIN, or use --pin
value when not present.
--keep-uuid
[optional] Keep existing UUID, or use --uuid
value when not present.
-h,--help
Displays this help text.
-batch
Enables batch mode: executing from CSV or TSV
input.
-continue
Continues batch processing after a batch line
execution error.
-input <arg>
Batch input file: optional with stdin as
default.
-charset <arg>
IANA Charset Name of batch input character
encoding [default: utf-8].
-locale <arg>
The IETF BCP 47 Locale used for numeric values.
Example values are: en, en-GB, en-US, nl,
nl-NL, nl-BE. [defaults to system default
en-US].
B.1.3. addUserGroup
./savapage-cmd --add-user-group --help
... gives the options:
SavaPage Command Line Interface
Method : addUserGroup
Version : 0.10
Adds a user group from the external user source: synchronized external users
belonging to this group are added as member.
175
Tools
usage: --add-user-group [OPTION]...
--groupname <text(255)>
-h,--help
[required] Unique group name.
Displays this help text.
B.1.4. changeBaseCurrency
./savapage-cmd --change-base-currency --help
... gives the options:
________________________________
SavaPage Command Line Interface
Method : changeBaseCurrency
Version : 0.10
Changes the base currency of the application.
This action creates financial transactions to align each account to the new
currency: the current account balance is nullified by a debit transaction
and replaced with the new currency according to the exchange rate via a
credit transaction.
Individual credit limits are converted as well, default credit limits are not.
WARNING: Create a database back-up before executing this command!
usage: --change-base-currency [OPTION]...
--from <text(3)>
[required] The current currency code (ISO 4217).
--to <text(3)>
[required] The new currency code (ISO 4217).
--exchange-rate <decimal>
[required] The exchange rate.
--test
[optional] Dry run, changes are not committed.
-h,--help
Displays this help text.
B.1.5. deleteUser
./savapage-cmd --delete-user --help
... gives the options:
________________________________
SavaPage Command Line Interface
Method : deleteUser
Version : 0.10
Logically deletes a User.
usage: --delete-user [OPTION]...
--username <text(50)>
-h,--help
-batch
-continue
-input <arg>
-charset <arg>
[required] Unique user name.
Displays this help text.
Enables batch mode: executing from CSV or TSV input.
Continues batch processing after a batch line
execution error.
Batch input file: optional with stdin as default.
IANA Charset Name of batch input character encoding
[default: utf-8].
B.1.6. deleteUserGroup
./savapage-cmd --delete-user-group --help
... gives the options:
176
Tools
SavaPage Command Line Interface
Method : deleteUserGroup
Version : 0.10
Deletes a user group.
usage: --delete-user-group [OPTION]...
--groupname <text(255)>
-h,--help
[required] Unique group name.
Displays this help text.
B.1.7. listUsers
./savapage-cmd --list-users --help
... gives the options:
________________________________
SavaPage Command Line Interface
Method : listUsers
Version : 0.10
Lists the names of all the Users in the system, sorted by user name, one per line.
usage: --list-users [OPTION]...
-h,--help
Displays this help text.
B.1.8. listUserGroups
./savapage-cmd --list-user-groups --help
... gives the options:
________________________________
SavaPage Command Line Interface
Method : listUserGroups
Version : 0.10
Lists the names of all the User Groups in the system, sorted by name, one per line.
usage: --list-user-groups [OPTION]...
-h,--help
Displays this help text.
B.1.9. listUserGroupMembers
./savapage-cmd --list-user-group-members --help
... gives the options:
________________________________
SavaPage Command Line Interface
Method : listUserGroupMembers
Version : 0.10
Lists the names of the user group members in the system, sorted by user name,
one per line.
usage: --list-user-group-members [OPTION]...
--groupname <text(255)>
[required] Unique group name.
177
Tools
-h,--help
Displays this help text.
B.1.10. listUserGroupMemberships
./savapage-cmd --list-user-group-memberships --help
... gives the options:
________________________________
SavaPage Command Line Interface
Method : listUserGroupMemberships
Version : 0.10
Lists the names of the groups a user belongs to, sorted by name, one per line.
usage: --list-user-group-memberships [OPTION]...
--username <text(50)>
-h,--help
[required] Unique user name.
Displays this help text.
B.1.11. listUserSourceGroups
./savapage-cmd --list-user-source-groups --help
... gives the options:
SavaPage Command Line Interface
Method : listUserSourceGroups
Version : 0.10
Lists the names of all the groups in the user source, sorted by name, one per line.
usage: --list-user-source-groups [OPTION]...
-h,--help
Displays this help text.
B.1.12. listUserSourceGroupMembers
./savapage-cmd --list-user-source-group-members --help
... gives the options:
________________________________
SavaPage Command Line Interface
Method : listUserSourceGroupMembers
Version : 0.10
Lists the names of the (nested) user group members in the user source,
sorted by user name, one per line.
usage: --list-user-source-group-members [OPTION]...
--groupname <text(255)>
--nested
-h,--help
[required] Unique group name.
[optional] Accumulate members from nested groups
(Active Directory only).
Displays this help text.
B.1.13. listUserSourceGroupNesting
./savapage-cmd --list-user-source-group-nesting --help
... gives the options:
178
Tools
________________________________
SavaPage Command Line Interface
Method : listUserSourceGroupNesting
Version : 0.10
Lists a space indented hierarchy of nested groups within a group. Nested groups
are only supported by Active Directory, all other user sources return an empty list.
usage: --list-user-source-group-nesting [OPTION]...
--groupname <text(255)>
-h,--help
[required] Unique group name.
Displays this help text.
B.1.14. printerAccessControl
./savapage-cmd --printer-access-control --help
... gives the options:
________________________________
SavaPage Command Line Interface
Method : printerAccessControl
Version : 0.10
Controls user groups to either allow or deny access to a proxy printer.
usage: --printer-access-control [OPTION]...
--printername <text(255)>
--allow
--deny
[required] CUPS name of the proxy printer.
[optional] Allow access to --groupname (existing
denied user groups are removed).
[optional] Deny access to --groupname (existing
allowed user groups are removed).
[optional] Remove --groupname from the access list.
[optional] Name of the user group to --allow, --deny
or --remove access
[optional] Remove all user groups from the access
list.
[optional] Echoes the access list to stdout in CSV
format.
Displays this help text.
--remove
--groupname <text(255)>
--remove-all
--list
-h,--help
B.1.15. printerSnmp
./savapage-cmd --printer-snmp --help
... gives the options:
________________________________
SavaPage Command Line Interface
Method : printerSnmp
Version : 0.20
Reads SNMP info from a printer.
usage: --printer-snmp [OPTION]...
--printername <text(255)>
[optional] CUPS printer name used to resolve host
name (required when --host is not set).
--host <text>
[optional] Host name or IP address of the printer
(required when --printername is not set).
--port <number>
[optional] SNMP port number (default 161).
--community <text>
[optional] SNMP community (default "public").
--version <1|2c>
[optional] SNMP version (default "1").
-h,--help
Displays this help text.
179
Tools
B.1.16. setUserProperties
./savapage-cmd --set-user-properties --help
... gives the options:
________________________________
SavaPage Command Line Interface
Method : setUserProperties
Version : 0.30
Sets properties for an existing Internal or External User.
usage: --set-user-properties [OPTION]...
--username <text(50)>
[required] Unique user name.
--password <text(64)>
[optional] Password (Internal User only).
--full-name <text(255)>
[optional] Full user name.
--email <text(255)>
[optional] Primary Email address.
--email-other <list>
[optional] List of space separated other
(secondary) Email addresses.
--card <text(16)>
[optional] NFC Card Number.
--card-format <HEX|DEC>
[optional] NFC Card Number Format [default:
HEX].
--card-first-byte <LSB|MSB>
[optional] NFC Card Number First Byte [default:
LSB].
--id <text(16)>
[optional] ID Number.
--pin <text(16)>
[optional] PIN for ID and Card.
--uuid <text(36)>
[optional] The user's secret UUID.
--balance <decimal>
[optional] The user's current account balance.
--balance-comment <text(255)>
[optional] A comment to be associated with the
--balance transaction.
--credit-limit
[optional] Assign default credit limit amount.
--credit-limit-amount <decimal>
[optional] Assign custom credit limit amount.
--credit-limit-none
[optional] No credit limit restriction (opposed
to --credit-limit and --credit-limit-amount).
--keep-card
[optional] Keep existing Card Number, or use
--card value when not present.
--keep-email-other
[optional] Keep existing other (secondary)
Email addresses, or use --email-other value
when not present.
--keep-password
[optional] Keep existing Password, or use
--password value when not present (Internal
User only).
--keep-pin
[optional] Keep existing PIN, or use --pin
value when not present.
--keep-uuid
[optional] Keep existing UUID, or use --uuid
value when not present.
--remove-email
[optional] Remove Primary Email address
(opposed to --email).
--remove-email-other
[optional] Remove other (secondary) Email
addresses (opposed to --email-other).
--remove-card
[optional] Remove NFC Card Number (opposed to
--card).
--remove-id
[optional] Remove ID Number (opposed to --id).
--remove-password
[optional] Remove Password (Internal User
only).
--remove-pin
[optional] Remove PIN (opposed to --pin).
--remove-uuid
[optional] Remove UUID (opposed to --uuid).
-h,--help
Displays this help text.
-batch
Enables batch mode: executing from CSV or TSV
input.
-continue
Continues batch processing after a batch line
execution error.
-input <arg>
Batch input file: optional with stdin as
default.
-charset <arg>
IANA Charset Name of batch input character
encoding [default: utf-8].
-locale <arg>
The IETF BCP 47 Locale used for numeric values.
Example values are: en, en-GB, en-US, nl,
nl-NL, nl-BE. [defaults to system default
180
Tools
en-US].
B.1.17. setUserGroupProperties
./savapage-cmd --set-user-group-properties --help
... gives the options:
________________________________
SavaPage Command Line Interface
Method : setUserGroupProperties
Version : 0.10
Sets properties of an Internal or External User Group.
usage: --set-user-group-properties [OPTION]...
--groupname <text(255)>
--balance <decimal>
--credit-limit
--credit-limit-amount <decimal>
--credit-limit-none
-h,--help
-batch
-continue
-input <arg>
-charset <arg>
-locale <arg>
[required] Unique group name.
[optional] The user's initial account balance.
[optional] Assign default credit limit amount
to new users.
[optional] Assign custom credit limit amount to
new users.
[optional] Assign no credit limit restriction
to new users (opposed to --credit-limit and
--credit-limit-amount).
Displays this help text.
Enables batch mode: executing from CSV or TSV
input.
Continues batch processing after a batch line
execution error.
Batch input file: optional with stdin as
default.
IANA Charset Name of batch input character
encoding [default: utf-8].
The IETF BCP 47 Locale used for numeric values.
Example values are: en, en-GB, en-US, nl,
nl-NL, nl-BE. [defaults to system default
en-US].
B.1.18. syncUserGroup
./savapage-cmd --sync-user-group --help
... gives the options:
________________________________
SavaPage Command Line Interface
Method : syncUserGroup
Version : 0.10
Synchronizes a user group with the external user source, updating group membership.
usage: --sync-user-group [OPTION]...
--groupname <text(255)>
-h,--help
[required] The name of the group to synchronize.
Displays this help text.
B.2. Database Commands
The savapage-db command-line tool provides functions for manipulating the database. The tool is located in
/opt/savapage/server/bin/[platform]/ and needs to be executed from a command prompt. The
syntax of the command is:
181
Tools
usage: [OPTION]
--db-delete-logs <DAYS>
--db-export
--db-export-to <FILE|DIR>
--db-import <FILE>
--db-init
--db-run-script <FILE>
--db-run-sql <STATEMENT>
-h,--help
Deletes application and document log data
older than DAYS. A DAYS value of zero (0)
will remove all log data from the system.
Exports the database to the default backup
location.
Exports the database to the specified file
or directory.
Imports the database from the specified
file. Deletes any existing data before
loading the data.
Re-initializes the database even if it
already exists.
Runs SQL statements from the specified
script file. NOTE: Only if requested by
support.
Runs an SQL statement. NOTE: Only if
requested by support.
Displays this help text.
The command must be run as the savapage user. An example:
sudo su - savapage
cd server/bin/linux-x64
./savapage-db --db-import /home/john/savapage-backup.zip
savapage-db needs exclusive access to the database. It is important that any SavaPage services and processes
are stopped before executing a command. Failure to do so will result in a "database in use" error message. The
savapage-db command is a powerful low-level utility and its use on a production system should be carefully
considered. Details of the available commands are discussed below.
B.2.1. db-delete-logs
This option delete old log data from the system. This command will permanently delete the following data.
• Document logs - Record all document history and statistics
• Transaction logs - Record all financial history and statistics
• Application logs - Record application status and error messages
The DAYS option determines what data will be deleted. If DAYS is 90, then all log data more than 90 days old
will be deleted. A value of zero (0) will remove all historical log data from the system. This is an example:
savapage-db --db-delete-logs 90
B.2.2. db-export and db-export-to
This option exports the data from the database. The application server must be stopped before performing the
export. See Section B.3, “Stopping and Starting the Server” [183].
Tip
If you want to perform an online backup without stopping the application server you can use the backup
function in the Admin Web App.
savapage-db --db-export
savapage-db --db-export-to /home/john
savapage-db --db-export-to /home/john/savapage-backup.zip
The database export file is created in the /opt/savapage/server/data/backups directory and the
file is named savapage-export-[date-time].zip.
This option is used to override the default backup directory. The filename will still be named savapage-export-[date-time].zip.
182
Tools
The full path and filename where the backup is saved is specified.
Note
When executing the command the last line echoed to stdout is the canonical path of the database export
file.
Caution
If the directory or filename parameters contain spaces, then the argument needs to be quoted.
B.2.3. db-import
This option imports the data (from a previous export) into the database. The application server must be stopped
to perform the import. This is an example:
savapage-db --db-import /home/john/savapage-backup.zip
Note
Progress and statistics of the import process are written to stdout.
Warning
Be carefull, existing data in the database are erased.
B.2.4. db-init
This option initializes a database, creating the required tables and initial data. The application server must be
stopped before you initialize the database. This is an example:
savapage-db --db-init
Warning
Be careful, existing data in the database are erased.
B.3. Stopping and Starting the Server
Normally there is no need to stop or start the server. This is only required when:
• Performing an off-line backup.
• Migrating the an external database.
• Upgrading the application.
The SavaPage application server may be stopped or started by executing these GNU/Linux commands:
sudo
sudo
sudo
sudo
service
service
service
service
savapage
savapage
savapage
savapage
start
stop
restart
status
Starts the application server.
Stops the application server.
183
Tools
Stops and starts the application server in one go.
Echoes the run status of the application server.
Important
When you start the application server, wait approximately 10 seconds for the service to initialize before
accessing the Web App interface.
B.4. SSL Key Generation
During the install process, SavaPage generates a self-signed key and certificate issued for the host's machine name.
This key is used by default when the system is accessed via HTTPS on port 8632.
The default SSL certificate provides good security, however there are two downsides to using a self-signed certificate, since users accessing the HTTPS site will encounter warnings from the browser.
1. When users access the HTTPS site using a fully-qualified domain name, the browser will issue a “Domain
mismatch warning”. To avoid this warning, re-create the self-signed certificate with the machine's fully qualified domain name, see Section B.4.1, “Re-Create the Self-Signed Certificate” [184].
2. The browser will also warn the user that the certificate is not signed by a trusted authority. To overcome this
you must obtain a certificate signed by a trusted authority, see Section B.4.2, “Importing an Existing SSL
Certificate” [184].
B.4.1. Re-Create the Self-Signed Certificate
The tool create-ssl-keystore can be used to re-create the key/certificate (stored in a keystore file) for a different
hostname eliminating the browser domain mismatch warning. An example of the command's use:
cd /opt/savapage/server/bin
./create-ssl-keystore -f --default --system-name "savapage.mycompany.com"
More information is available via the --help command line option.
usage: [OPTION]...
--create <FILE>
-d,--default
-f,--force
-h,--help
--system-name <NAME>
Creates a specific keystore file.
Creates the default keystore file
/opt/savapage/server/data/default-ssl-keystore.
Force. Overwrite any existing keystore file.
Displays this help text.
The name of the computer/server used for the
SSL Certificate. If not set the current
computer name is used.
B.4.2. Importing an Existing SSL Certificate
If you have an existing SSL certificate you can import it into a Java keystore to be used by SavaPage. Reasons
for having an existing signed key include:
• You have obtained a dedicated SSL certificate for use with your SavaPage Application Server.
• Your organization's intranet as served by Internet Information Server (Windows), Apache (GNU/Linux) or
another web server uses a certificate that can be re-used for SavaPage.
Note
Unless your intranet server and SavaPage run on the same server (i.e. on different ports), the server
name of your intranet server will be different from your SavaPage Application Server. E.g. the intranet address might be internal.mycompany.com while the SavaPage Application Server can
be reached at savapage.mycompany.com. In this case the certificate can only be re-used if it is a
184
Tools
so-called wild-card certificate that allows arbitrary subdomains under the mycompany.com domain
name that it was issued for.
If the SSL certificate is held in a Windows environment you will have a certificate with an attached private key
in a so-called PCKS #12 file with *.p12 or .pfx extension1.
Note
If the certificate with key exist in the certificates store of Windows or IIS Server, you need to export it
as a .PFX file first.
On GNU/Linux you will typically have separate PEM encoded2 key and certificate files. Use this command to
combine the private key and the certificate into a single .p12 file:
openssl pkcs12 -export -in <PEM encoded certificate> \
-inkey <PEM encoded private key file> \
-out <.p12 file>
Enter pass phrase for <PEM encoded private key file>:
Enter Export Password:
Verifying - Enter Export Password:
The keytool command used in this section is part of the Open JDK package as installed on the host.
Now, use this command to create a new Java keystore and import the .p12 or .pfx file at hand:
keytool -importkeystore -deststorepass <keystore password> \
-destkeystore <keystore file> \
-srckeystore [.p12|.pfx file] -srcstoretype PKCS12 \
-alias 1
Important
The -alias 1 option in the command is required to choose the certificate in the source PKCS12 file,
keytool isn't clever enough to figure out which certificate you want in a store containing just one certificate.
However, we are not quite done yet since we should add the certificate of the Certificate Authority (CA) root and
any intermediate CA to the keystore as well. These certificates should be supplied by your CA or are available for
download on the CA's web site as a file ending on .pem or .crt. Use this command to add them to the keystore:
keytool -keystore <keystore file> -importcert \
-alias <unique alias> \
-file <CA certificate file>
Enter keystore password:
Re-enter new password:
Certificate was added to keystore
Here is an example with a slightly different dialog. As you can see the CA certificate already exists in the system-wide CA keystore, so there is no need to add it to our own keystore.
keytool -keystore my-ssl-keystore \
-importcert -alias usertrust \
-file USERTrustLegacySecureServerCA.crt
Enter keystore password:
Certificate already exists in system-wide CA keystore
under alias <entrustsslca>
Do you still want to add it to your own keystore? [no]:
1
no
PKCS #12 is one of the family of standards called Public-Key Cryptography Standards (PKCS), published by RSA Laboratories. It defines
a (binary) file format commonly used to store X.509 private keys with accompanying public key certificates, protected with a password-based
symmetric key, and is the successor to PFX from Microsoft.
2
PEM or Privacy Enhanced Mail is a Base64 encoded DER certificate. PEM certificates are frequently used for web servers as they can easily
be translated into readable data using a simple text editor. Generally when a PEM encoded file is opened in a text editor, it contains very
distinct headers and footers.
185
Tools
Certificate was not added to keystore
At this point your keystore file is ready to use, so follow the instructions in Section B.4.3, “Installing the Keystore” [186] to install it and start serving up your new SSL certificate.
B.4.3. Installing the Keystore
The previous section described how to create a keystore file from an existing SSL certificate. This section describes
how to install your keystore so that SavaPage can start serving up your new certificate.
To configure the SavaPage Application Server to use the new key/certificate:
1. Copy your signed keystore onto the server running the SavaPage Application Server. The suggested location
is /opt/savapage/server/custom/my-ssl-keystore
2. Open the file /opt/savapage/server/server.properties with a text editor.
3. Locate the section titled SSL/HTTP Configuration.
4. Remove the # (hash) comment marker from all lines starting with "server.ssl".
5. Define the location of your keystore, keystore password and key password as chosen previously. The file should
look something like this:
server.ssl.keystore=custom/my-ssl-keystore
server.ssl.keystore-password=password
server.ssl.key-password=password
6. Restart the SavaPage Application Server and verify all is working. If the server fails to start, error messages
will be recorded in logs located in the server's logs directory.
186
Appendix C. Capacity Planning
This section discusses capacity planning considerations so administrators can plan future infrastructure requirements and make decisions about how to deploy the application. SavaPage is designed to be self-maintaining, however it is important that the administrator understands the disk-space requirements and how this changes overtime.
C.1. Database Sizing and Growth
Special attention is needed to make sure there is enough disk space to hold a growing database. Database growth
is very dependent on the usage patterns and therefore can differ significantly from site to site.
Although, there is some overhead for data like Users, Proxy Printers and Queues, this data is static and does not
grow over-time. The majority of database growth is caused by logging the document flow.
So, the best prediction of database growth is based on the estimated number of documents printed to SavaPage
and Proxy Printers, and exported to PDF.
The table below provides an indication of growth per 10,000 jobs for SavaPage and Proxy Printing and PDF export.
Combining these numbers with your estimate of user activity result in a growth estimate.
Job type
Increase per 10,000 jobs
SavaPage printing
15 MB
Proxy Printer printing
20 MB
SavaPage Financial
5 MB
PDF export
20 MB
Table C.1. Database size increase metrics per document flow.
To demonstrate how to estimate database growth we make a number of assumptions. Please adjust these assumptions to suit your organization. The assumptions are:
• 1 job for each job type per user per day
• 20 working days in a month
• Therefore, 20 jobs for each job type per user per month
Here is a sample database growth calculation based on a 500 user site:
1. Calculate the total number of jobs expected for the month (i.e. the total number of users multiplied by the
number of jobs). So in this example, SavaPage is handling 10,000 jobs for each job type a month.
2. Calculate the monthly growth rate by dividing the jobs per month by 10,000 and then multiplying by the database growth rate:
• SavaPage printing : 10,000/10,000*15=15MB per Month
• Proxy Printer printing: 10,000/10,000*20=20MB per Month
• SavaPage Financial: 10,000/10,000*5=5MB per Month
• PDF export: 10,000/10,000*20=20MB per Month
Therefore in this situation the database will grow by approximately 15+20+5+20=60MB per month.
3. To estimate the growth per year, multiply the above by 12. Therefore in this situation, the database will grow
by 60*12=720MB per year.
187
Capacity Planning
Tip
You can limit database growth by purging old log data after an automatic database backup. In our example,
when you set the number of days document logs are held to 365, database increase will maximize to
720MB. See Figure 4.68, “Admin Web App: Options - Automatic Backups” [99]
C.2. SafePages Sizing and Growth
SafePages are transient. They serve as scratchpad to accumulate and edit SavaPage print jobs. After ProxyPrinting
and PDF exporting is done the user will normally clear the scratchpad for a new session. Of course this does not
hold for personal Letterheads. Take in consideration that SafePages (including Letterheads) from logically deleted
users are removed. This all makes the calculation of required disk space a simple linear function of the number of
active users times the average size of a user's SafePages home. Since an average 10-page print job takes about 1
MB to hold in store, making a reservation of 10 MB per user seems fair enough.
C.3. Network Bandwidth Planning
With modern switched Ethernet networks, bandwidth is rarely a factor when planning SavaPage deployments. The
bandwidth consumed by SavaPage is usually dwarfed by the print document data - e.g. the PostScript and PDF
spool data sent across the network. Bandwidth does however become a consideration when planning deployments
crossing physical site boundaries such as networks linked via a WAN.
SavaPage uses JSON based HTTP Requests for communication between browser-to-server (Ajax)1 and server-tobrowser (Comet)2. This protocol is very bandwidth efficient and designed to work well on low bandwidth and
high latency networks.
1
Ajax (an acronym for Asynchronous JavaScript and XML) is a group of techniques to create asynchronous web applications. With Ajax,
web applications send data to, and retrieve data from, a server asynchronously using an XMLHttpRequest object. Despite the name, the use
of XML is not needed, and JSON is often used instead. Also, requests do not need to be asynchronous.
2
Comet (or “Reverse Ajax”) is a web application model in which a long-held HTTP request allows a web server to push data to a browser,
without the browser explicitly requesting it.
188
Appendix D. URL Cheat Sheet
Path
Description / Parameters / Examples
/
User Web App
http://savapage:8631/
https://savapage:8632/
user/
User Web App
user=[user]
language=[en|fr|de|nl|..]
country=[US|FR|DE|NL|..]
login=[name|id|nfc-local]
http://savapage:8631/user?user=john&language=en&country=US
http://savapage:8631/user?user=john
http://savapage:8631/user?language=en&country=US
Login with Username, ID Number or Local NFC Card:
http://savapage:8631/user?login=name
http://savapage:8631/user?login=id
http://savapage:8631/user?login=nfc-local
admin/
Admin Web App
pos/
Point-of-Sale Web App
user=[user]
language=[en|fr|de|nl|..]
country=[US|FR|DE|NL|..]
login=[name|id|nfc-local]
https://savapage:8632/admin?user=admin&language=nl&country=NL
https://savapage:8632/pos?user=admin&language=nl&country=NL
printers/[queue]
Printer Queue
printers/
Default Printer Queue
ipp://savapage:8631/printers/
ipps://savapage:8632/printers/
http://savapage:8631/printers/
https://savapage:8632/printers/
IPP 1.1 scheme: supported by all major operating systems except Windows.
The SavaPage SSL certificate needs to be trusted by the client workstationa . See
Section B.4.3, “Installing the Keystore” [186].
IPP 1.0 scheme: supported by all major operating systems.
The SavaPage SSL certificate needs to be trusted by the client workstation. See Section B.4.3, “Installing the Keystore” [186]
printers/internet/user/
[number]/uuid/[uuid]
The Printer Device URI path for Internet Print. Parameters are not query parameters but
are part of the path.
• [number] : the User ID Number.
• [uuid] : the User UUID.
ipps://example.com/printers/internet/user/12345
/uuid/b0a2f092-8c5b-11e5-a6fb-406186940c49
189
\
URL Cheat Sheet
Path
Description / Parameters / Examples
ios/install/
iOS Web Clip Install
http://savapage:8631/ios/install
a
docs/manual/
User Manual
docs/licenses/
License Information
callback/
Web API Callback
callback/payment/
Web API Callback for Payment Gateway
client/
Download of shared Client Files. A link to a directory downloads the zipped content.
When the SSL certificate is not trusted a "client-error-not-possible" situation will occur when adding the printer.
Table D.1. SavaPage URL Cheat Sheet
190
Appendix E. Printable File Types
E.1. Standard File Types
SavaPage printer supports a number of common file types out of the box as summarized in Table E.1, “Standard
Printable File Types” [191].
Extension
Type
pdf
Portable Document Format
The PDF must not be encrypted and not password protected.
PostScript
ps
DRM protected PostScript is rendered for ProxyPrinting only. See Section 9.7, “Printing Encrypted PDF” [139].
XML Paper Specification
xps
See Section E.1.1, “XPS to PDF Installation Instructions” [191].
Hypertext Markup Language
html
CSS 2.1 is fully supported.
txt
Text File
bmp
Bitmap
gif
Graphic Interchange Format
For Animated GIF each image is rendered separately.
jpg, jpeg,
jpe
JPEG/JIFF Image
png
Portable (Public) Network Graphic
svg
Scalable Vector Graphics
tiff, tif
Tagged Image Format File
Multi-page tiff is supported.
Table E.1. Standard Printable File Types
Note
The Default Paper Size, as shown in Figure 4.75, “Admin Web App: Options - Default Paper Size” [103],
is used as the paper size for the printed document of a Printable File Type which itself does not have
a document structure with a clearly defined page size. These types typically include HTML, TXT and
images.
E.1.1. XPS to PDF Installation Instructions
XML Paper Specification (XPS) is an XML based electronic paper format originally developed by Microsoft to
serve as a PDF alternative. XPS files are usually created using "Microsoft XPS Document Writer" in a Windows
environment.
191
Printable File Types
SavaPage uses the xpstopdf command from the libgxps1 package to convert XPS documents to PDF format. Check
if this package is installed by entering the command: xpstopdf --help
On Debian based systems you can install the package with the command:
sudo apt-get install libgxps-utils
Note
Before XPS to PDF can be used it must be enabled. See Figure 4.77, “Admin Web App: Options - Converters” [104].
E.2. Advanced File Types
SavaPage printer supports additional file types using the PDF converter of LibreOffice as summarized in Table E.2,
“Advanced Printable File Types” [192]. Check if LibreOffice is installed by entering the command:
libreoffice --version
LibreOffice can easily be installed with the standard installer of the GNU/Linux host.
Extension
Type
rtf
Rich Text Format
doc
Microsoft Word 97/2000/XP/2003
xls
Microsoft Excel 97/2000/XP/2003
ppt
Microsoft PowerPoint 97/2000/XP/2003
docx
Microsoft Word 2007/2010 XML
xlsx
Microsoft Excel 2007/2010 XML
pptx
Microsoft PowerPoint 2007/2010 XML
odt
ODF Text Document
ods
ODF Spreadsheet
odp
ODF Presentation
sxw
OpenOffice.org 1.0 Text Document
sxc
OpenOffice.org 1.0 Spreadsheet
sxi
OpenOffice.org 1.0 Presentation
Table E.2. Advanced Printable File Types
Note
Before LibreOffice can be used it must be enabled. See Figure 4.77, “Admin Web App: Options - Converters” [104].
1
libgxps [https://wiki.gnome.org/libgxps] is a library for handling and rendering XPS documents.
192
Appendix F. Upgrading from a Previous
Version
This appendix describes the SavaPage standard upgrade procedure.
F.1. Upgrading the Server
SavaPage supports upgrades using a simple install-over-the-top procedure. We recommend reviewing all steps
prior to commencing the upgrade procedure.
1. Download the SavaPage installer for your platform. In accordance with best practice we recommend that you
archive your install programs just in case you need to reinstall in the future or roll back to a previous version.
2. Take some time to read the release notes for this version as they may highlight considerations during upgrades.
3. Schedule approximately 10 minutes downtime. It is suggested to choose a time of day with minimal network
activity. If there is a large volume of data in the system (for example if the system has been running for more
than a year, or there are several thousands of users) the upgrade may take longer. With very large installations
it may be appropriate to schedule an hour or more of downtime.
4. Take a point-in-time backup of the data by pressing the Backup Now located under Options → Backups. This
will ensure you have a copy of the important data.
5. As a precaution on very large systems, we recommend backing up the whole SavaPage install directory. Existing
overnight backups may have taken care of this task, however take a few moments to grab an up-to-date backup
now. For example, create a zip archive of the directory /opt/savapage
6. Run the installer downloaded in step 1 and install into the same location as the existing install, like /opt/savapage.
7. After the install has completed allow a few minutes before accessing the system. The system may need to
perform a database upgrade and this will be performed in the background. If you try to access the application
while a database upgrade is in progress a message displaying the upgrade status will be displayed.
Important
Do not shutdown the application while an upgrade is in progress. Wait for the upgrade to complete.
Note
Sometimes a new SavaPage version performs changes on the database schema. In that case a
database backup is performed automatically before the upgrade. The backup file is located at /
opt/savapage/server/data/backups/. The file name is formatted as schema-[nn]-upgrade-backup-[timestamp].zip, where [nn] is the database schema version before the upgrade.
F.2. Upgrading Client Printer Drivers
Although upgrading locally installed SavaPage Printer Drivers is not strictly required, we strongly recommend
doing so. We strive to maintain backwards compatibility between versions, so in most cases these drivers will
continue to function, but to take advantage of new features they must be upgraded.
F.3. Testing the Upgrade
After the install is complete, log into the system and perform some tests to ensure all is working as expected.
193
Appendix G. Migrating to a New Server
Migrating to a new server is a major task. Administrators should block out at a minimum two hours, and should
select a time where downtime will be of minimum disruption to end-users.
This section describes how to migrate SavaPage to a new system so that all data is moved to the new system.
To ensure a smooth migration it is strongly recommended that the versions of SavaPage on both the old and new
servers are the same. The easiest way to achieve this is to upgrade the old server to the latest version, and then
install the latest version on the new server.
Please read the sections below in full before conducting your migration.
G.1. Upgrade Old Server
Upgrade the old server to the latest version:
1.
2.
3.
Download the latest available version available from the SavaPage Website1
Install the upgrade by following the steps in Appendix F, Upgrading from a Previous Version [193].
After the upgrade is complete, check that everything is working as expected.
G.2. Install New Server
Install the latest version of SavaPage on the new server.
1.
2.
3.
4.
Make your CUPS printers on the new server identical as the ones on the old server, and test the CUPS queues
before installing SavaPage. Use exactly the same names for the CUPS queues. If you deviate you might need
to rename Proxy Printers after installation, as explained in Section G.4, “Rename Printers” [195].
Follow the instructions at Chapter 2, Server Installation [9]. Complete the configuration steps, including the
user import. Although importing the users is not strictly required, as this data will be overridden after data
migration, it does confirm that your new server has the correct network connectivity. Of course you are free
to synchronize with a smaller user group to proof the connectivity.
Compare the content of the /opt/savapage/server/server.properties file from the old server
with the one on the new server, and change the file on the new server where needed.
Import your Member Card file into the new server. See Section 4.11.3, “Community” [114].
G.3. Migrate Data to New Server
The simplest way to migrate the data to the new server is to use the backup and restore process.
1.
2.
3.
4.
5.
1
Backup the data from the old system using the Admin Web App, or see the instructions at Section B.2.2, “dbexport and db-export-to” [182] for the command-line variant.
Copy the backup zip file created in the backup step onto the new server.
Stop the SavaPage Server by running the stop script. See Section B.3, “Stopping and Starting the Server” [183].
Restore the data from the old system into SavaPage on the new server by following the Database Import
instructions. The import commands need to be run as the savapage user.
If present, migrate the Google Cloud Print Service parameters by copying the gcp.properties file at
location /opt/savapage/server/ from the old server to the same location on the new server. Make
sure this file is owned by savapage , and restrict access by executing:
http://savapage.org
194
Migrating to a New Server
sudo chown savapage:savapage gcp.properties
sudo chmod 600 gcp.properties
6.
Migrate the database Encryption Keys by copying the encryption.properties file at location /opt/
savapage/server/data/ from the old server to the same location on the new server. Overwrite the
existing file on the new server. Make sure this file is owned by savapage , and restrict access by executing:
sudo chown savapage:savapage encryption.properties
sudo chmod 600 encryption.properties
7.
If present, migrate the User Name Aliases by copying the username-aliases.txt file at location /
opt/savapage/server/data/conf/ from the old server to the same location on the new server. If
the alias file depends on users from a User Source on the local Unix system, be sure that these users also
exist on the new server.
8. If present, migrate any messages in the email outbox by copying the files at location /opt/savapage/server/data/email-outbox/ from the old server to the same location on the new server.
9. Migrate all customization files to the new server. See Chapter 14, Customization [159].
10. Start the SavaPage Server by running the start script. See Section B.3, “Stopping and Starting the Server” [183].
11. Check that all data has been migrated correctly and the system works as expected by comparing Users and
Documents data in the old and new Admin Web App.
G.4. Rename Printers
If you changed the CUPS printer names on the new server, you may want to rename the existing Proxy Printer
entries in SavaPage so that the printing history and settings are maintained. See Figure 4.30, “Admin Web App:
Proxy Printer - Rename” [68] for details about the rename action.
G.5. Update SavaPage Printers
If the server’s name and/or IP address has changed then it is necessary to update the connection details for SavaPage
Printers on user workstations. See Section 9.1.2, “SavaPage Printer Installation” [131] for details.
195
Appendix H. Advanced LDAP Configuration
SavaPage supports the following LDAP server types out-of-the-box:
•
•
•
•
OpenLDAP
Apple Open Directory
Novell eDirectory
Microsoft Active Directory
The basic configuration options for these types are discussed at Section 4.8.1.2, “LDAP” [76]. However, other
server/schema types can be supported by defining the fields to query and the LDAP searches to perform. These
options are configured by adjusting entries in the Config Editor of the Admin Web App. The following configuration items are available:
Configuration item
Description
ldap.schema.user-name-field
The LDAP field that contains the user's username.
ldap.schema.user-full-name-field
The LDAP field that contains the user's full name.
ldap.schema.user-email-field
The LDAP field that contains the user's email address.
ldap.schema.user-department-field
The LDAP field that contains the user's department.
ldap.schema.user-office-field
The LDAP field that contains the user's office location.
ldap.schema.user-name-search
The LDAP search to retrieve the user. The {0} in the search is
replaces with * when listing all users, and [username] when
searching for a specific user.
If no search is defined the default is ([userNameField]={0}).
IMPORTANT: The search must include the {0} value.
ldap.schema.group-name-field
The LDAP field that contains the group's name.
ldap.schema.group-member-field
The LDAP field that contains the group members.
ldap.schema.group-search
The LDAP search to retrieve the group. The {0} in the search is
replaced with * for all group searches.
If no search is defined, the default is ([groupMemberField]={0}), which means get all entries with at least one member.
IMPORTANT: The search must include the {0} value.
ldap.schema.posix-groups
If Y, then the group member field contains the user's username. If
N, then the group member field contains the user's DN.
Table H.1. LDAP Configuration items
H.1. LDAP Server Default Configuration
When a particular LDAP server type is selected (e.g. Novell eDirectory), SavaPage uses the following defaults
to query the LDAP server. These defaults can be used as a starting point for customizing the LDAP searches or
for supporting other server types.
196
Advanced LDAP Configuration
H.1.1. OpenLDAP
If the LDAP server is configured to support OpenLDAP based authentication then this schema type can be used.
The following defaults are used.
Configuration item
Default value
ldap.schema.user-name-field
uid
ldap.schema.user-full-name-field
cn
ldap.schema.user-email-field
mail
ldap.schema.user-department-field
departmentNumber
ldap.schema.user-office-field
This item is not set.
ldap.schema.user-name-search
(uid={0})
ldap.schema.group-name-field
cn
ldap.schema.group-member-field
member
ldap.schema.group-search
(&(cn={0})(objectClass=groupOfNames))
ldap.schema.posix-groups
N
Table H.2. OpenLDAP Default Settings
H.1.2. Apple Open Directory
If the LDAP server is configured to support Apple Open Directory based authentication then this schema type can
be used. The following defaults are used.
Configuration item
Default value
ldap.schema.user-name-field
uid
ldap.schema.user-full-name-field
cn
ldap.schema.user-email-field
mail
ldap.schema.user-department-field
departmentNumber
ldap.schema.user-office-field
This item is not set.
ldap.schema.user-name-search
(uid={0})
ldap.schema.group-name-field
cn
ldap.schema.group-member-field
memberUid
ldap.schema.group-search
(memberUid={0})
ldap.schema.posix-groups
Y
Table H.3. Apple Open Directory Default Settings
H.1.3. Novell eDirectory Defaults
If the LDAP server is a Novell eDirectory then the following defaults are used1.
1
The list of standard Novell eDirectory user fields can be found on NDK: Novell eDirectory Schema Reference [http://
www.novell.com/documentation/developer/ndslib/schm_enu/data/h4q1mn1i.html#h4q1mn1i].
197
Advanced LDAP Configuration
Configuration item
Default value
ldap.schema.user-name-field
cn
ldap.schema.user-full-name-field
fullName
ldap.schema.user-email-field
mail
ldap.schema.user-department-field
OU
ldap.schema.user-office-field
l
ldap.schema.user-name-search
(&(cn={0})(objectClass=person))
ldap.schema.group-name-field
cn
ldap.schema.group-member-field
member
ldap.schema.group-search
(&(member={0})(objectClass=groupOfNames))
ldap.schema.posix-groups
N
Table H.4. Novell eDirectory Default Settings
H.1.4. Microsoft Active Directory Defaults
If the LDAP server is a Microsoft Active Directory then the following defaults are used2.
Configuration item
Default value
ldap.schema.user-name-field
sAMAccountName
ldap.schema.user-full-name-field
displayName
ldap.schema.user-email-field
mail
ldap.schema.user-department-field
department
ldap.schema.user-office-field
physicalDeliveryOfficeName
ldap.schema.user-name-search
(&(sAMAccountName={0})(objectCategory=person)
(objectClass=user)
(sAMAccountType=805306368){1})
The extra {1} in the search is replaced with an optional filter to
fetch enabled users only (see ldap.allow-disabled-users).
ldap.schema.group-name-field
sAMAccountName
ldap.schema.group-member-field
member
ldap.schema.group-search
(&(sAMAccountName={0})(objectCategory=group))
ldap.schema.posix-groups
N
Table H.5. Microsoft Active Directory Default Settings
Configuration item
Default value / Description
ldap.allow-disabled-users
N
If Y, then disabled users are accepted in user name searches. If N,
they are ignored.
ldap.schema.dn-field
distinguishedName
2
The list of standard Active Directory user fields can be found on the Microsoft web site http://msdn2.microsoft.com/en-us/
library/ms683980.aspx.
198
Advanced LDAP Configuration
Configuration item
Default value / Description
The LDAP field that contains the Distinguished Name (DN).
ldap.schema.user-name-group-search
(&(memberOf={0})(objectCategory=person)
(objectClass=user)
(sAMAccountType=805306368){1})
This is the LDAP search to retrieve the users from a group.
The {0} in the search is replaced with the DN of the user.
The {1} in the search is replaced with an optional filter to fetch
enabled users only (see ldap.allow-disabled-users).
IMPORTANT: The search must include the {0} and {1} value.
ldap.schema.nested-group-search
(&(memberOf={0})(objectCategory=group))
This is the LDAP search to retrieve the nested groups from a group.
The {0} in the search is replaced with the DN of the group.
IMPORTANT: The search must include the {0} value.
Table H.6. Microsoft Active Directory Custom Settings
Important
Active Directory field names must be in the Ldap-Display-Name format. For example, if you
want to use the Employee-Number field, then the field name entered should be employeeNumber as
shown on the Employee-Number attribute page http://msdn2.microsoft.com/en-us/library/ms675662.aspx.
199
Appendix I. SavaPage Plug-ins
A plug-in (aka “extension”) is a software component that adds a specific feature to SavaPage. Plug-ins have a
well-defined interface so partner developers can easily create isolated components that extend the application with
new features. Extension interfaces are defined in the savapage-ext1 project.
A plug-in is installed by copying its property file in /opt/savapage/server/ext and its jar files in the
/opt/savapage/server/ext/lib directory. For example, the Mollie Payment Plug-in is installed with
these two files:
/opt/savapage/server/ext/savapage-ext-mollie.properties
/opt/savapage/server/ext/lib/savapage-ext-mollie-<version>.jar
Important
Since property files contain sensitive data make sure they are protected by executing commands like:
sudo chown savapage:savapage savapage-ext-mollie.properties
sudo chmod 600 savapage-ext-mollie.properties
I.1. Web API Callback Plug-in
The Web API Callback method is used by many third-party providers who offer their services via HTTP. SavaPage
supports this method with the /callback URL path. However, URL protocol and authority for the callback
needs to be configured. Configuration is done by using the Config Editor of the Admin Web App. The following
configuration item is available:
Configuration item
Description
ext.webapi.callback.url-base
The publicly accessible base URL, i.e. protocol://authority without the path, of
the Web API callback interface (no trailing slash).
Since SavaPage is typically implemented as an intranet application to be accessed with a
local URL, take care to configure proper port forwarding of the public base URL to the
local SavaPage server host name or IP address in your router or firewall .
Table I.1. Web API Callback Configuration Item
I.1.1. Payment Gateway Plug-in
The Payment Gateway Plug-in is based on the Web API Callback Plug-in and uses the /callback/payment
URL path. The following configuration item can be set by using the Config Editor of the Admin Web App.
Configuration item
Description
ext.webapi.redirect.url-webapp-user
The User Web App URL used by the Web API to redirect to after a remote Web App dialog
is finished.
Configuration is optional. SavaPage uses the local URL from which the remote excursion
started as default.
Table I.2. Payment Gateway Configuration Item
1
https://gitlab.com/savapage/savapage-ext
200
SavaPage Plug-ins
Payment Gateway events are persisted in the rotating log file:
/opt/savapage/server/logs/paymentgateway.log
This file has a tab separated value (TSV) format for easy import and manipulation into spreadsheet programs.
I.1.1.1. Generic Payment Plug-in
A Generic Payment Plug-in implements several payment methods behind a single Web API. Only one generic
plug-in can be active. See Section 3.9.3, “Financial” [44] and Section 3.9.6, “Transfer Money” [45].
I.1.1.1.1. Mollie Payment Plug-in
Mollie2 is a Dutch payment provider that offers a single Web API for the following payment methods:
•
•
•
•
•
•
•
•
•
Creditcard
PayPal
Bitcoin
paysafecard
SOFORT Banking (Europe)
SEPA bank transfers (Europe)
Bancontact/Mister Cash (Belgium)
Belfius Direct Net (Belgium)
IDEAL (Netherlands).
Mollie supports EUR payments only.
See the README.md of the savapage-ext-mollie3 project for more information.
Note
The Mollie Payment Plug-in is shipped with the SavaPage install binary.
I.1.1.1.2. Generic Payment Pitfalls
Callback messages for generic payments return the identity of the user that started the payment in the Transfer
Money dialog. So, when a payment is acknowledged, we can easily add the amount paid to the user's balance. In
some very unlikely cases a user might not be found. For example, when a database export is restored or a user was
deleted, all in the short lifecycle of a payment transaction.
In the rare case a user is not found, a warning message containing the user and transaction identification are written
to the Application Log. With this information the user balance can be updated manually, after the user has been
added again, either in the Admin WebApp or with a Server Command.
I.1.1.2. Bitcoin Payment Plug-in
The Bitcoin Payment Plug-in supports native Bitcoin payments with the advantage of a low native Bitcoin transaction fee. Only one Bitcoin plug-in can be active. See Section 3.9.3, “Financial” [44] and Section 3.9.7, “Send
Bitcoins” [46].
As a privacy and security measure a new Bitcoin address is generated for each payment4. Generated addresses
are held in a Bitcoin wallet. The location and access credentials of the wallet are to be specified in the plug-in
property file.
2
https://www.mollie.com/en/
https://gitlab.com/savapage/savapage-ext-mollie
4
As Satoshi Nakamoto [https://en.wikipedia.org/wiki/Satoshi_Nakamoto], the elusive creator of Bitcoin, states in his Bitcoin whitepaper
[https://en.bitcoin.it/wiki/Bitcoin_whitepaper] : “... a new key pair should be used for each transaction to keep them from being linked to a
common owner”. Also see this article [https://en.bitcoin.it/wiki/Address_reuse] on address reuse.
3
201
SavaPage Plug-ins
Note
When a Bitcoin payment method is active in an enabled Generic Payment Plug-in, it is deactivated in
favour of an enabled Bitcoin Payment Plug-in.
I.1.1.2.1. Blockchain.info Payment Plug-in
With the Blockchain.info plug-in users can send Bitcoin payments to a Blockchain.info web-based wallet. See the
README.md of the savapage-ext-blockchain-info5 project for more information.
Note
The Blockchain.info Payment Plug-in is shipped with the SavaPage install binary.
I.1.1.2.2. Bitcoin Payment Pitfalls
Because of the anonymous nature of Bitcoin payments, a callback message with a payment confirmation only
contains the Bitcoin address and transaction hash as identification.
Fortunately, we can trace the identity of the user who made the payment, either by the one-time Bitcoin address,
that we generated and reserved for the user at the start of the Send Bitcoins dialog, or by the Bitcoin transaction
hash, that we linked to a user payment transaction at the callback of the first confirmed payment.
When a user can not be traced, the payment confirmation is ignored. This can happen when a database export is
restored and either the user, the reserved Bitcoin address or transaction hash is missing from the database. This
case becomes more unlikely as the number of confirmations after which the payment is trusted is set lower, causing
a shorter latency of a trusted payment confirmation.
When a payment confirmation arrives for a Bitcoin address for which a user payment transaction link is present
with a different transaction hash, it is ignored. This can happen when:
• A user, against advice, reused the generated Bitcoin address, as offered in the Send Bitcoins dialog, to make
an extra payment.
• A payment from the Bitcoin Wallet was executed which lead to a transaction with a positive satoshi remainder.
When a payment confirmation is ignored, a warning message with the Bitcoin address and transaction hash is
written to the Application Log. This information can be used to query the transaction history in the Bitcoin Wallet.
Since the Bitcoin address is tagged in the Wallet with the user id, any transaction with a received amount can be
used to trace the user. In case an extra user payment is identified, the user balance can be updated manually, either
in the Admin WebApp or with a Server Command.
5
https://gitlab.com/savapage/savapage-ext-blockchain-info
202
Appendix J. Smartschool Print Module
SavaPage is able to process print jobs from Smartschool1. Smartschool is a digital school platform for secondary
and primary schools and is mainly used in Flanders (Belgium). Started in 2003 as electronic learning environment, Smartschool evolved into a broad platform including tools for administration, reporting and communication. Smartschool is "Software as a Service" and can be used with a browser and with dedicated Apps for iPhone,
iPad and Android devices. The electronic learning component is similar to services like Blackboard2, Dokeos3,
Moodle4 and Sakai5.
This Smartschool Print Module is disabled by default, and can be enabled by editing the /opt/savapage/server/server.properties file like this:
#-----------------------------------------------------------# Is Smartschool Print module active: true | false (default)
#-----------------------------------------------------------smartschool.print=true
A restart of SavaPage is required to activate the change. See Section B.3, “Stopping and Starting the Server” [183]
J.1. Smartschool Afdrukcentrum
Smartschool “Afdrukcentrum” (Printing Center) offers a PDF printing service for users to request printed copies
of PDF documents for one or more persons. Although it is possible to give students access to the Afdrukcentrum,
most of the time this will not be the case, and printing access will be reserved for teaching staff only to print
documents for their classes.
A print job is created by uploading the PDF files from local file system, Dropbox or the Smartschool "My Documents" folder. Print options like media-size (A4, A3), duplex and grayscale can be selected by the requester.
Target persons can be selected either as individuals or by group ("personen" or "klassen").
Smartschool offers a SOAP Web Service to third party Print Management Systems so they can perform the actual
printing, and calculate and charge the costs according to their own accounting rules. The Web Service API can be
used to retrieve pending jobs, to download the PDF documents, and to update the print status.
J.2. Smartschool Print Options
When Smartschool Print Module is enabled a Smartschool Print section will be visible in the SavaPage Options
section.
1
http://www.smartschool.be/
http://www.blackboard.com/
3
http://www.dokeos.com/
4
http://moodle.org/
5
http://www.sakaiproject.org/
2
203
Smartschool Print Module
Figure J.1. Admin Web App: Options - Smartschool Print - Accounts
• There is room for two Smartschool accounts that can each be enabled separately.
• For an enabled account the SOAP endpoint and Password need to be entered.
• The Proxy Printer for all jobs is the printer to which all Smartschool print jobs are automatically printed to.
When empty, the jobs are held as SafePages in SavaPage and the requesting user can release them in a SavaPage
way.
• Dedicated proxy printers can be set for duplex, grayscale and grayscale-duplex jobs can be set. These options
are needed when integrating with PaperCut virtual print queues. Namely, in the process of releasing print jobs
and transferring held spool files to physical queues, original job options are lost and replaced by print queue
defaults.
• When Charge costs to students is enabled, printing costs are charged to individual students. When disabled,
costs are charged to shared accounts only. See Section J.4.2, “PaperCut Smartschool Accounting” [207].
• When the generic On demand user creation At first print is enabled, see Section 4.8.2, “User Creation” [79],
this On demand user creation will create Smartschool users ad-hoc in SavaPage when they do not exist.
Figure J.2. Admin Web App: Options - Smartschool Print - Actions
• Press the Apply button to commit the changes.
204
Smartschool Print Module
• Press the Test button to test the Smartschool connection(s). A feedback message will be displayed with the
result.
• Use the flip-switch to turn the Smartschool Print service On and Off. Note that after disabling the service it
is automatically turned Off.
• Start (simulate) starts the service in simulation mode. A valid connection is still needed, but a simple print job
is generated at the start of the service. The ID's of the users involved are stored in the following configuration
keys. See Section 4.8.13.10, “Config Editor” [105] on how to query and change the key values.
• smartschool.simulation.user : the requesting user.
• smartschool.simulation.student-1 : a student in klas “simulatie.1A1”.
• smartschool.simulation.student-2 : a student in klas “simulatie.1A2”.
Make sure the requesting user exists in SavaPage (and PaperCut) before starting the simulation. The student
users need to be present if Charge costs to students is enabled.
The status of the Smartschool Print connection is displayed on the system Dashboard Services.
When PaperCut Integration is enabled, parameters for using the PaperCut Server (XML-RPC API) and Database
(JDBC) must be entered. Press the Apply button to commit the changes. Press the Test button to test the PaperCut
connectivity: a message confirming the connection status is displayed.
Important
For PaperCut integration to work the Proxy Printer must be managed by PaperCut.
Figure J.3. Admin Web App: Options - Smartschool Print - PaperCut Integration
Figure J.4. Admin Web App: Options - Smartschool Print - PaperCut Server
205
Smartschool Print Module
Figure J.5. Admin Web App: Options - Smartschool Print - PaperCut Database
In the Exports section data from the PaperCut database can be downloaded.
Figure J.6. Admin Web App: Options - Smartschool Print - PaperCut Export
Student Invoicing offers an export of printing costs totals for students from selected classes (klassen) within
a time period export. The result is a CSV file with a line for each student. Lines are ordered by user id and
specify the cost total within the period and extra data like class (klas) and number of transactions per job type,
like duplex/simplex,color/grayscale, page format A4, A3, etc.
J.3. Smartschool Print Processing
Every 2 minutes SavaPage checks Smartschool for pending print jobs. This frequency is enforced by the
Smartschool print service. Errors will be encountered if more than one check is executed within the 2 minute time
window.
Note
The frequency of a Smartschool print job check is determined by the configuration keys
smartschool.soap.print.poll.heartbeat-secs (heartbeat in seconds within a polling session) and smartschool.soap.print.poll.heartbeats (number of heartbeats after which the
check is executed). See Section 4.8.13.10, “Config Editor” [105] on how to change this value.
For each job, the PDF document and print request information is downloaded, and the number of copies is calculated by summing the number of requested copies for each of the individual target persons.
206
Smartschool Print Module
The following constraints are guarded:
• The print job requester must exist as user in SavaPage: when the requester does not exist the job is cancelled.
• If PaperCut integration is enabled, the print job requester must also exist in PaperCut: when the requester does
not exist the job is cancelled.
• A person with role “student” must be assigned to a “class”: when this assignment is missing the student is
skipped and his copies are not added to the copy total.
• All target persons must exist in SavaPage (and PaperCut): when a person does not exist his copies are not added
to the copy total. When the Charge costs to students option is disabled, this check is not performed for persons
with role “student”.
SavaPage assigns the downloaded document to the reserved /smartschool queue, and logs the event for the
Smartschool requester.
J.4. Smartschool PaperCut Integration
When PaperCut integration is enabled, SavaPage reports the job status “in progress” to Smartschool, and automatically redirects the downloaded document to the PaperCut managed proxy printer with the requesting user as
print job owner.
At each Smartschool monitoring cycle, SavaPage checks the print status of the PaperCut redirected jobs. When a
job is expired or cancelled, SavaPage reports the job status “cancelled” to Smartschool.
After the job is printed successfully SavaPage reports the job status “completed” to Smartschool. In addition it
charges the costs, as reported by PaperCut, to the proper accounts, as is explained in the section below.
J.4.1. PaperCut Configuration
J.4.1.1. Step 1 - Create shared account
Create a shared parent account called Smartschool. This top-level account must be present, since several subaccounts will be lazy created by SavaPage. Besides, the PaperCut printer assigned to Smartschool will be configured to charge to this account.
J.4.1.2. Step 2 - Enable Multiple Personal Accounts
Enable the PaperCut “Multiple Personal Accounts” option and add the personal account Smartschool. This
account must be present for it is used by SavaPage to charge printing costs to individual persons.
J.4.1.3. Step 3 - Configure Printers
Take a moment to consider how you want the PaperCut printers that are assigned to Smartschool to act. A likely
scenario is that you want the printers to be virtual hold/release queues so users can enjoy follow-me printing, and
release Smartschool print jobs at a series of physical printers. Consult the PaperCut User Manual on how to make
that happen.
There is one crucial printer configuration item though that must be addressed. Make sure that Override user-level
settings is set and activate Do not show account popups and allocate jobs to: a single shared account . Use the
Shared Account Smartschool (as created in Step 1) and select the Charge shared account option.
J.4.2. PaperCut Smartschool Accounting
When a job is successfully printed by PaperCut, the cost is automatically charged to the shared Smartschool
account. This behavior must be configured in PaperCut at the Printer Details of the SavaPage redirect printer.
SavaPage uses the PaperCut cost total of the printed Smartschool job to adds extra PaperCut account transactions.
The comment of each account transaction holds pipe-separated (|) job parameter fields, with the following meaning:
• requester : the user who printed the job on behalf of the target user.
207
Smartschool Print Module
•
•
•
•
•
•
•
•
•
class : the “klas” of the target user. A value of “-” (minus) means the user has no class, i.e. is not a student.
copies : the number of document copies printed.
pages : number of pages within the document.
size : the page size of the document (A4, A3).
duplex : D for duplex, S for simplex.
color : C for color, G for grayscale.
id : the Smartschool document ID.
document : the document name.
comment : the Smartschool comment entered by the requester.
As a rule SavaPage charges students and non-students individually for print copies. Solely for reporting purposes,
dedicated shared accounts are used to accumulate cost and job information globally (the Smartschool\Jobs account)
and per student class.
Important
No transaction appears in any PaperCut shared account when the cost of a print job is zero. For transactions
to appear you need to specify page cost at the PaperCut printer configuration.
Note
The Smartschool SOAP API does not reveal any information about the groups the requesting user selected
for the print job, it just resolves the selected user groups to their individual members. So, SavaPage can
not distinguish between students who were selected as individuals or were implicitly selected by selecting
a class.
J.4.2.1. PaperCut Smartschool Class Accounting
SavaPage proportionally splits the cost total of the printed Smartschool job over “classes” (students). Class cost
is proportional to the sum of the print copies for students belonging to the class. This cost is charged to a shared
child account of the Smartschool parent account, with format:
[contract].Klas.[class]
The [contract] placeholder stands for the account name in the Smartschool software service contract, and
[class] for the name of the student class. Shared child account are ad-hoc created by SavaPage on first usage.
The comment format of the transaction is:
requester | copies | pages | size | duplex | color | id | document | comment
J.4.2.2. PaperCut Smartschool User Accounting
Printing costs for individual users are charged to their personal Smartschool account. This is a dedicated
account that must be activated in PaperCut by enabling the “Multiple Personal Accounts” option and adding the
personal account Smartschool.
Costs are always charged for non-students (teachers). When the Charge costs to students option is enabled, costs
are also charged for individuals with role “student”. The comment format of the transaction is:
class | requester | copies | pages | size | duplex | color | id | document
| comment
J.4.2.3. PaperCut Smartschool Job Accounting
As an extra, for each Smartschool job, SavaPage adds a transaction to the shared child account “Jobs” of the
Smartschool parent account. The comment format of the transaction is:
208
Smartschool Print Module
requester | copies | pages | size | duplex | color | id | requester@class-1
| copies-1 | ... | requester@class-n | copies-n | document | comment
The requester@class | copies field group shows the printed copies per class and is repeated for each
class that was printed for. Copies for non-students are accumulated in dummy class “-” (minus).
J.4.3. PaperCut Queries and Reports
Use the on-line queries and run the reports in the PaperCut Admin Web App to answer questions about Smartschool
prints and transactions from the following perspectives.
J.4.3.1. User Prints
Smartschool documents printed for a user.
Users → User List → User Details → Transactions gives a quick on-line view of personal account transactions.
Sort and filter to find the Smartschool transactions.
Use Reports → Transaction Reports → Transaction logs to generate a Smartschool transaction report for a user or
user group over a period of time. The report shows the individual transaction details and the total amount charged.
PaperCut does not have a Transaction Report to accumulate transaction totals per user over a period of time. Please
use the Student Invoicing export function in SavaPage for that purpose.
J.4.3.2. Class Prints
Smartschool documents printed for a class.
Select Accounts → Shared Account List → Account Details → Transaction for a Smartschool class account to
get a quick on-line view of account transactions. Sort and filter to find transactions.
The Reports → Shared Account Reports section contains many reports that summarize printing activity charged
to shared accounts. Select the Smartschool class account to get a transaction summary report for a period of time.
J.4.3.3. Requester Prints
Smartschool documents requested and printed by a user.
Users → User List → User Details → Job Log gives a quick on-line view of the documents printed by a user. Sort
and filter to find the print jobs charged to the shared Smartschool account.
J.4.3.4. Requester Class Prints
Smartschool documents requested and printed by a user for a class.
Select Accounts → Shared Account List → Account Details → Transaction for the Smartschool Jobs account to
get a quick on-line view of account transactions. Since the comment contains formatted information about student
classes, you can select transactions with the “Comment containing” filter.
Likewise you can use Reports → Transaction Reports → Transaction logs to generate a Smartschool\Jobs transaction report for over a period of time. The report shows the individual transaction details and the total amount
charged.
J.4.4. Integration Pitfalls
The state of the three systems involved in the Smartschool print chain (Smartschool, SavaPage, PaperCut) is tightly
coupled. Restoring an earlier backup of either SavaPage or PaperCut can break the work-flow for pending jobs
and lead to unwanted results. For instance:
209
Smartschool Print Module
• When a backup of SavaPage is restored, it will not handle jobs that were submitted to PaperCut after the backup
point. In these cases Smartschool will show a print job status that does not reflect the real situation. On the other
side, jobs that were already fully processed, might be re-processed by SavaPage, leading to extra charges on
the shared PaperCut accounts.
• When a backup of PaperCut is restored, SavaPage will not find PaperCut print status information for pending
jobs that were submitted to PaperCut after the backup point. In these cases Smartschool will show a pending
print job status, when in real the job is completed or cancelled.
To avoid integration problems, review your backup and restore strategy carefully.
Make sure you create backups of both SavaPage and PaperCut at the same point in time. Also, be sure that at the
time of backup all pending Smartschool print jobs are fully processed. When you need to restore, use backups of
the same snapshot time, first restore PaperCut and than SavaPage.
210
Appendix K. GNU Affero General Public
License (AGPL)
GNU AFFERO GENERAL PUBLIC LICENSE
Version 3, 19 November 2007
Copyright (C) 2007 Free Software Foundation, Inc. <http://fsf.org/>
Everyone is permitted to copy and distribute verbatim copies
of this license document, but changing it is not allowed.
Preamble
The GNU Affero General Public License is a free, copyleft license for
software and other kinds of works, specifically designed to ensure
cooperation with the community in the case of network server software.
The licenses for most software and other practical works are designed
to take away your freedom to share and change the works. By contrast,
our General Public Licenses are intended to guarantee your freedom to
share and change all versions of a program--to make sure it remains free
software for all its users.
When we speak of free software, we are referring to freedom, not
price. Our General Public Licenses are designed to make sure that you
have the freedom to distribute copies of free software (and charge for
them if you wish), that you receive source code or can get it if you
want it, that you can change the software or use pieces of it in new
free programs, and that you know you can do these things.
Developers that use our General Public Licenses protect your rights
with two steps: (1) assert copyright on the software, and (2) offer
you this License which gives you legal permission to copy, distribute
and/or modify the software.
A secondary benefit of defending all users' freedom is that
improvements made in alternate versions of the program, if they
receive widespread use, become available for other developers to
incorporate. Many developers of free software are heartened and
encouraged by the resulting cooperation. However, in the case of
software used on network servers, this result may fail to come about.
The GNU General Public License permits making a modified version and
letting the public access it on a server without ever releasing its
source code to the public.
The GNU Affero General Public License is designed specifically to
ensure that, in such cases, the modified source code becomes available
to the community. It requires the operator of a network server to
provide the source code of the modified version running there to the
users of that server. Therefore, public use of a modified version, on
a publicly accessible server, gives the public access to the source
code of the modified version.
An older license, called the Affero General Public License and
published by Affero, was designed to accomplish similar goals. This is
a different license, not a version of the Affero GPL, but Affero has
released a new version of the Affero GPL which permits relicensing under
this license.
The precise terms and conditions for copying, distribution and
modification follow.
TERMS AND CONDITIONS
211
GNU Affero General
Public License (AGPL)
0. Definitions.
"This License" refers to version 3 of the GNU Affero General Public License.
"Copyright" also means copyright-like laws that apply to other kinds of
works, such as semiconductor masks.
"The Program" refers to any copyrightable work licensed under this
License. Each licensee is addressed as "you". "Licensees" and
"recipients" may be individuals or organizations.
To "modify" a work means to copy from or adapt all or part of the work
in a fashion requiring copyright permission, other than the making of an
exact copy. The resulting work is called a "modified version" of the
earlier work or a work "based on" the earlier work.
A "covered work" means either the unmodified Program or a work based
on the Program.
To "propagate" a work means to do anything with it that, without
permission, would make you directly or secondarily liable for
infringement under applicable copyright law, except executing it on a
computer or modifying a private copy. Propagation includes copying,
distribution (with or without modification), making available to the
public, and in some countries other activities as well.
To "convey" a work means any kind of propagation that enables other
parties to make or receive copies. Mere interaction with a user through
a computer network, with no transfer of a copy, is not conveying.
An interactive user interface displays "Appropriate Legal Notices"
to the extent that it includes a convenient and prominently visible
feature that (1) displays an appropriate copyright notice, and (2)
tells the user that there is no warranty for the work (except to the
extent that warranties are provided), that licensees may convey the
work under this License, and how to view a copy of this License. If
the interface presents a list of user commands or options, such as a
menu, a prominent item in the list meets this criterion.
1. Source Code.
The "source code" for a work means the preferred form of the work
for making modifications to it. "Object code" means any non-source
form of a work.
A "Standard Interface" means an interface that either is an official
standard defined by a recognized standards body, or, in the case of
interfaces specified for a particular programming language, one that
is widely used among developers working in that language.
The "System Libraries" of an executable work include anything, other
than the work as a whole, that (a) is included in the normal form of
packaging a Major Component, but which is not part of that Major
Component, and (b) serves only to enable use of the work with that
Major Component, or to implement a Standard Interface for which an
implementation is available to the public in source code form. A
"Major Component", in this context, means a major essential component
(kernel, window system, and so on) of the specific operating system
(if any) on which the executable work runs, or a compiler used to
produce the work, or an object code interpreter used to run it.
The "Corresponding Source" for a work in object code form means all
the source code needed to generate, install, and (for an executable
work) run the object code and to modify the work, including scripts to
control those activities. However, it does not include the work's
System Libraries, or general-purpose tools or generally available free
programs which are used unmodified in performing those activities but
which are not part of the work. For example, Corresponding Source
includes interface definition files associated with source files for
the work, and the source code for shared libraries and dynamically
linked subprograms that the work is specifically designed to require,
such as by intimate data communication or control flow between those
212
GNU Affero General
Public License (AGPL)
subprograms and other parts of the work.
The Corresponding Source need not include anything that users
can regenerate automatically from other parts of the Corresponding
Source.
The Corresponding Source for a work in source code form is that
same work.
2. Basic Permissions.
All rights granted under this License are granted for the term of
copyright on the Program, and are irrevocable provided the stated
conditions are met. This License explicitly affirms your unlimited
permission to run the unmodified Program. The output from running a
covered work is covered by this License only if the output, given its
content, constitutes a covered work. This License acknowledges your
rights of fair use or other equivalent, as provided by copyright law.
You may make, run and propagate covered works that you do not
convey, without conditions so long as your license otherwise remains
in force. You may convey covered works to others for the sole purpose
of having them make modifications exclusively for you, or provide you
with facilities for running those works, provided that you comply with
the terms of this License in conveying all material for which you do
not control copyright. Those thus making or running the covered works
for you must do so exclusively on your behalf, under your direction
and control, on terms that prohibit them from making any copies of
your copyrighted material outside their relationship with you.
Conveying under any other circumstances is permitted solely under
the conditions stated below. Sublicensing is not allowed; section 10
makes it unnecessary.
3. Protecting Users' Legal Rights From Anti-Circumvention Law.
No covered work shall be deemed part of an effective technological
measure under any applicable law fulfilling obligations under article
11 of the WIPO copyright treaty adopted on 20 December 1996, or
similar laws prohibiting or restricting circumvention of such
measures.
When you convey a covered work, you waive any legal power to forbid
circumvention of technological measures to the extent such circumvention
is effected by exercising rights under this License with respect to
the covered work, and you disclaim any intention to limit operation or
modification of the work as a means of enforcing, against the work's
users, your or third parties' legal rights to forbid circumvention of
technological measures.
4. Conveying Verbatim Copies.
You may convey verbatim copies of the Program's source code as you
receive it, in any medium, provided that you conspicuously and
appropriately publish on each copy an appropriate copyright notice;
keep intact all notices stating that this License and any
non-permissive terms added in accord with section 7 apply to the code;
keep intact all notices of the absence of any warranty; and give all
recipients a copy of this License along with the Program.
You may charge any price or no price for each copy that you convey,
and you may offer support or warranty protection for a fee.
5. Conveying Modified Source Versions.
You may convey a work based on the Program, or the modifications to
produce it from the Program, in the form of source code under the
terms of section 4, provided that you also meet all of these conditions:
a) The work must carry prominent notices stating that you modified
it, and giving a relevant date.
213
GNU Affero General
Public License (AGPL)
b) The work must carry prominent notices stating that it is
released under this License and any conditions added under section
7. This requirement modifies the requirement in section 4 to
"keep intact all notices".
c) You must license the entire work, as a whole, under this
License to anyone who comes into possession of a copy. This
License will therefore apply, along with any applicable section 7
additional terms, to the whole of the work, and all its parts,
regardless of how they are packaged. This License gives no
permission to license the work in any other way, but it does not
invalidate such permission if you have separately received it.
d) If the work has interactive user interfaces, each must display
Appropriate Legal Notices; however, if the Program has interactive
interfaces that do not display Appropriate Legal Notices, your
work need not make them do so.
A compilation of a covered work with other separate and independent
works, which are not by their nature extensions of the covered work,
and which are not combined with it such as to form a larger program,
in or on a volume of a storage or distribution medium, is called an
"aggregate" if the compilation and its resulting copyright are not
used to limit the access or legal rights of the compilation's users
beyond what the individual works permit. Inclusion of a covered work
in an aggregate does not cause this License to apply to the other
parts of the aggregate.
6. Conveying Non-Source Forms.
You may convey a covered work in object code form under the terms
of sections 4 and 5, provided that you also convey the
machine-readable Corresponding Source under the terms of this License,
in one of these ways:
a) Convey the object code in, or embodied in, a physical product
(including a physical distribution medium), accompanied by the
Corresponding Source fixed on a durable physical medium
customarily used for software interchange.
b) Convey the object code in, or embodied in, a physical product
(including a physical distribution medium), accompanied by a
written offer, valid for at least three years and valid for as
long as you offer spare parts or customer support for that product
model, to give anyone who possesses the object code either (1) a
copy of the Corresponding Source for all the software in the
product that is covered by this License, on a durable physical
medium customarily used for software interchange, for a price no
more than your reasonable cost of physically performing this
conveying of source, or (2) access to copy the
Corresponding Source from a network server at no charge.
c) Convey individual copies of the object code with a copy of the
written offer to provide the Corresponding Source. This
alternative is allowed only occasionally and noncommercially, and
only if you received the object code with such an offer, in accord
with subsection 6b.
d) Convey the object code by offering access from a designated
place (gratis or for a charge), and offer equivalent access to the
Corresponding Source in the same way through the same place at no
further charge. You need not require recipients to copy the
Corresponding Source along with the object code. If the place to
copy the object code is a network server, the Corresponding Source
may be on a different server (operated by you or a third party)
that supports equivalent copying facilities, provided you maintain
clear directions next to the object code saying where to find the
Corresponding Source. Regardless of what server hosts the
Corresponding Source, you remain obligated to ensure that it is
available for as long as needed to satisfy these requirements.
e) Convey the object code using peer-to-peer transmission, provided
214
GNU Affero General
Public License (AGPL)
you inform other peers where the object code and Corresponding
Source of the work are being offered to the general public at no
charge under subsection 6d.
A separable portion of the object code, whose source code is excluded
from the Corresponding Source as a System Library, need not be
included in conveying the object code work.
A "User Product" is either (1) a "consumer product", which means any
tangible personal property which is normally used for personal, family,
or household purposes, or (2) anything designed or sold for incorporation
into a dwelling. In determining whether a product is a consumer product,
doubtful cases shall be resolved in favor of coverage. For a particular
product received by a particular user, "normally used" refers to a
typical or common use of that class of product, regardless of the status
of the particular user or of the way in which the particular user
actually uses, or expects or is expected to use, the product. A product
is a consumer product regardless of whether the product has substantial
commercial, industrial or non-consumer uses, unless such uses represent
the only significant mode of use of the product.
"Installation Information" for a User Product means any methods,
procedures, authorization keys, or other information required to install
and execute modified versions of a covered work in that User Product from
a modified version of its Corresponding Source. The information must
suffice to ensure that the continued functioning of the modified object
code is in no case prevented or interfered with solely because
modification has been made.
If you convey an object code work under this section in, or with, or
specifically for use in, a User Product, and the conveying occurs as
part of a transaction in which the right of possession and use of the
User Product is transferred to the recipient in perpetuity or for a
fixed term (regardless of how the transaction is characterized), the
Corresponding Source conveyed under this section must be accompanied
by the Installation Information. But this requirement does not apply
if neither you nor any third party retains the ability to install
modified object code on the User Product (for example, the work has
been installed in ROM).
The requirement to provide Installation Information does not include a
requirement to continue to provide support service, warranty, or updates
for a work that has been modified or installed by the recipient, or for
the User Product in which it has been modified or installed. Access to a
network may be denied when the modification itself materially and
adversely affects the operation of the network or violates the rules and
protocols for communication across the network.
Corresponding Source conveyed, and Installation Information provided,
in accord with this section must be in a format that is publicly
documented (and with an implementation available to the public in
source code form), and must require no special password or key for
unpacking, reading or copying.
7. Additional Terms.
"Additional permissions" are terms that supplement the terms of this
License by making exceptions from one or more of its conditions.
Additional permissions that are applicable to the entire Program shall
be treated as though they were included in this License, to the extent
that they are valid under applicable law. If additional permissions
apply only to part of the Program, that part may be used separately
under those permissions, but the entire Program remains governed by
this License without regard to the additional permissions.
When you convey a copy of a covered work, you may at your option
remove any additional permissions from that copy, or from any part of
it. (Additional permissions may be written to require their own
removal in certain cases when you modify the work.) You may place
additional permissions on material, added by you to a covered work,
for which you have or can give appropriate copyright permission.
215
GNU Affero General
Public License (AGPL)
Notwithstanding any other provision of this License, for material you
add to a covered work, you may (if authorized by the copyright holders of
that material) supplement the terms of this License with terms:
a) Disclaiming warranty or limiting liability differently from the
terms of sections 15 and 16 of this License; or
b) Requiring preservation of specified reasonable legal notices or
author attributions in that material or in the Appropriate Legal
Notices displayed by works containing it; or
c) Prohibiting misrepresentation of the origin of that material, or
requiring that modified versions of such material be marked in
reasonable ways as different from the original version; or
d) Limiting the use for publicity purposes of names of licensors or
authors of the material; or
e) Declining to grant rights under trademark law for use of some
trade names, trademarks, or service marks; or
f) Requiring indemnification of licensors and authors of that
material by anyone who conveys the material (or modified versions of
it) with contractual assumptions of liability to the recipient, for
any liability that these contractual assumptions directly impose on
those licensors and authors.
All other non-permissive additional terms are considered "further
restrictions" within the meaning of section 10. If the Program as you
received it, or any part of it, contains a notice stating that it is
governed by this License along with a term that is a further
restriction, you may remove that term. If a license document contains
a further restriction but permits relicensing or conveying under this
License, you may add to a covered work material governed by the terms
of that license document, provided that the further restriction does
not survive such relicensing or conveying.
If you add terms to a covered work in accord with this section, you
must place, in the relevant source files, a statement of the
additional terms that apply to those files, or a notice indicating
where to find the applicable terms.
Additional terms, permissive or non-permissive, may be stated in the
form of a separately written license, or stated as exceptions;
the above requirements apply either way.
8. Termination.
You may not propagate or modify a covered work except as expressly
provided under this License. Any attempt otherwise to propagate or
modify it is void, and will automatically terminate your rights under
this License (including any patent licenses granted under the third
paragraph of section 11).
However, if you cease all violation of this License, then your
license from a particular copyright holder is reinstated (a)
provisionally, unless and until the copyright holder explicitly and
finally terminates your license, and (b) permanently, if the copyright
holder fails to notify you of the violation by some reasonable means
prior to 60 days after the cessation.
Moreover, your license from a particular copyright holder is
reinstated permanently if the copyright holder notifies you of the
violation by some reasonable means, this is the first time you have
received notice of violation of this License (for any work) from that
copyright holder, and you cure the violation prior to 30 days after
your receipt of the notice.
Termination of your rights under this section does not terminate the
licenses of parties who have received copies or rights from you under
this License. If your rights have been terminated and not permanently
reinstated, you do not qualify to receive new licenses for the same
216
GNU Affero General
Public License (AGPL)
material under section 10.
9. Acceptance Not Required for Having Copies.
You are not required to accept this License in order to receive or
run a copy of the Program. Ancillary propagation of a covered work
occurring solely as a consequence of using peer-to-peer transmission
to receive a copy likewise does not require acceptance. However,
nothing other than this License grants you permission to propagate or
modify any covered work. These actions infringe copyright if you do
not accept this License. Therefore, by modifying or propagating a
covered work, you indicate your acceptance of this License to do so.
10. Automatic Licensing of Downstream Recipients.
Each time you convey a covered work, the recipient automatically
receives a license from the original licensors, to run, modify and
propagate that work, subject to this License. You are not responsible
for enforcing compliance by third parties with this License.
An "entity transaction" is a transaction transferring control of an
organization, or substantially all assets of one, or subdividing an
organization, or merging organizations. If propagation of a covered
work results from an entity transaction, each party to that
transaction who receives a copy of the work also receives whatever
licenses to the work the party's predecessor in interest had or could
give under the previous paragraph, plus a right to possession of the
Corresponding Source of the work from the predecessor in interest, if
the predecessor has it or can get it with reasonable efforts.
You may not impose any further restrictions on the exercise of the
rights granted or affirmed under this License. For example, you may
not impose a license fee, royalty, or other charge for exercise of
rights granted under this License, and you may not initiate litigation
(including a cross-claim or counterclaim in a lawsuit) alleging that
any patent claim is infringed by making, using, selling, offering for
sale, or importing the Program or any portion of it.
11. Patents.
A "contributor" is a copyright holder who authorizes use under this
License of the Program or a work on which the Program is based. The
work thus licensed is called the contributor's "contributor version".
A contributor's "essential patent claims" are all patent claims
owned or controlled by the contributor, whether already acquired or
hereafter acquired, that would be infringed by some manner, permitted
by this License, of making, using, or selling its contributor version,
but do not include claims that would be infringed only as a
consequence of further modification of the contributor version. For
purposes of this definition, "control" includes the right to grant
patent sublicenses in a manner consistent with the requirements of
this License.
Each contributor grants you a non-exclusive, worldwide, royalty-free
patent license under the contributor's essential patent claims, to
make, use, sell, offer for sale, import and otherwise run, modify and
propagate the contents of its contributor version.
In the following three paragraphs, a "patent license" is any express
agreement or commitment, however denominated, not to enforce a patent
(such as an express permission to practice a patent or covenant not to
sue for patent infringement). To "grant" such a patent license to a
party means to make such an agreement or commitment not to enforce a
patent against the party.
If you convey a covered work, knowingly relying on a patent license,
and the Corresponding Source of the work is not available for anyone
to copy, free of charge and under the terms of this License, through a
publicly available network server or other readily accessible means,
then you must either (1) cause the Corresponding Source to be so
available, or (2) arrange to deprive yourself of the benefit of the
217
GNU Affero General
Public License (AGPL)
patent license for this particular work, or (3) arrange, in a manner
consistent with the requirements of this License, to extend the patent
license to downstream recipients. "Knowingly relying" means you have
actual knowledge that, but for the patent license, your conveying the
covered work in a country, or your recipient's use of the covered work
in a country, would infringe one or more identifiable patents in that
country that you have reason to believe are valid.
If, pursuant to or in connection with a single transaction or
arrangement, you convey, or propagate by procuring conveyance of, a
covered work, and grant a patent license to some of the parties
receiving the covered work authorizing them to use, propagate, modify
or convey a specific copy of the covered work, then the patent license
you grant is automatically extended to all recipients of the covered
work and works based on it.
A patent license is "discriminatory" if it does not include within
the scope of its coverage, prohibits the exercise of, or is
conditioned on the non-exercise of one or more of the rights that are
specifically granted under this License. You may not convey a covered
work if you are a party to an arrangement with a third party that is
in the business of distributing software, under which you make payment
to the third party based on the extent of your activity of conveying
the work, and under which the third party grants, to any of the
parties who would receive the covered work from you, a discriminatory
patent license (a) in connection with copies of the covered work
conveyed by you (or copies made from those copies), or (b) primarily
for and in connection with specific products or compilations that
contain the covered work, unless you entered into that arrangement,
or that patent license was granted, prior to 28 March 2007.
Nothing in this License shall be construed as excluding or limiting
any implied license or other defenses to infringement that may
otherwise be available to you under applicable patent law.
12. No Surrender of Others' Freedom.
If conditions are imposed on you (whether by court order, agreement or
otherwise) that contradict the conditions of this License, they do not
excuse you from the conditions of this License. If you cannot convey a
covered work so as to satisfy simultaneously your obligations under this
License and any other pertinent obligations, then as a consequence you may
not convey it at all. For example, if you agree to terms that obligate you
to collect a royalty for further conveying from those to whom you convey
the Program, the only way you could satisfy both those terms and this
License would be to refrain entirely from conveying the Program.
13. Remote Network Interaction; Use with the GNU General Public License.
Notwithstanding any other provision of this License, if you modify the
Program, your modified version must prominently offer all users
interacting with it remotely through a computer network (if your version
supports such interaction) an opportunity to receive the Corresponding
Source of your version by providing access to the Corresponding Source
from a network server at no charge, through some standard or customary
means of facilitating copying of software. This Corresponding Source
shall include the Corresponding Source for any work covered by version 3
of the GNU General Public License that is incorporated pursuant to the
following paragraph.
Notwithstanding any other provision of this License, you have
permission to link or combine any covered work with a work licensed
under version 3 of the GNU General Public License into a single
combined work, and to convey the resulting work. The terms of this
License will continue to apply to the part which is the covered work,
but the work with which it is combined will remain governed by version
3 of the GNU General Public License.
14. Revised Versions of this License.
The Free Software Foundation may publish revised and/or new versions of
the GNU Affero General Public License from time to time. Such new versions
218
GNU Affero General
Public License (AGPL)
will be similar in spirit to the present version, but may differ in detail to
address new problems or concerns.
Each version is given a distinguishing version number. If the
Program specifies that a certain numbered version of the GNU Affero General
Public License "or any later version" applies to it, you have the
option of following the terms and conditions either of that numbered
version or of any later version published by the Free Software
Foundation. If the Program does not specify a version number of the
GNU Affero General Public License, you may choose any version ever published
by the Free Software Foundation.
If the Program specifies that a proxy can decide which future
versions of the GNU Affero General Public License can be used, that proxy's
public statement of acceptance of a version permanently authorizes you
to choose that version for the Program.
Later license versions may give you additional or different
permissions. However, no additional obligations are imposed on any
author or copyright holder as a result of your choosing to follow a
later version.
15. Disclaimer of Warranty.
THERE IS NO WARRANTY FOR THE PROGRAM, TO THE EXTENT PERMITTED BY
APPLICABLE LAW. EXCEPT WHEN OTHERWISE STATED IN WRITING THE COPYRIGHT
HOLDERS AND/OR OTHER PARTIES PROVIDE THE PROGRAM "AS IS" WITHOUT WARRANTY
OF ANY KIND, EITHER EXPRESSED OR IMPLIED, INCLUDING, BUT NOT LIMITED TO,
THE IMPLIED WARRANTIES OF MERCHANTABILITY AND FITNESS FOR A PARTICULAR
PURPOSE. THE ENTIRE RISK AS TO THE QUALITY AND PERFORMANCE OF THE PROGRAM
IS WITH YOU. SHOULD THE PROGRAM PROVE DEFECTIVE, YOU ASSUME THE COST OF
ALL NECESSARY SERVICING, REPAIR OR CORRECTION.
16. Limitation of Liability.
IN NO EVENT UNLESS REQUIRED BY APPLICABLE LAW OR AGREED TO IN WRITING
WILL ANY COPYRIGHT HOLDER, OR ANY OTHER PARTY WHO MODIFIES AND/OR CONVEYS
THE PROGRAM AS PERMITTED ABOVE, BE LIABLE TO YOU FOR DAMAGES, INCLUDING ANY
GENERAL, SPECIAL, INCIDENTAL OR CONSEQUENTIAL DAMAGES ARISING OUT OF THE
USE OR INABILITY TO USE THE PROGRAM (INCLUDING BUT NOT LIMITED TO LOSS OF
DATA OR DATA BEING RENDERED INACCURATE OR LOSSES SUSTAINED BY YOU OR THIRD
PARTIES OR A FAILURE OF THE PROGRAM TO OPERATE WITH ANY OTHER PROGRAMS),
EVEN IF SUCH HOLDER OR OTHER PARTY HAS BEEN ADVISED OF THE POSSIBILITY OF
SUCH DAMAGES.
17. Interpretation of Sections 15 and 16.
If the disclaimer of warranty and limitation of liability provided
above cannot be given local legal effect according to their terms,
reviewing courts shall apply local law that most closely approximates
an absolute waiver of all civil liability in connection with the
Program, unless a warranty or assumption of liability accompanies a
copy of the Program in return for a fee.
END OF TERMS AND CONDITIONS
219