1
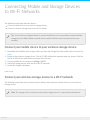
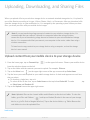
Android User Manual Welcome The media app helps you to manage media and documents that you copy to compatible wireless and network-attached storage devices. It is available as an app for mobile devices or in a web browser. At home or on the go, use the media app whenever you want to enjoy your music, movies, and photos or, review important documents. The media app supports a wide range of storage devices. However, your storage device might not support all the features documented in the Help system. Most storage devices present a Getting Started tutorial the first time you open the media app. We recommend to follow the features tour to learn great tips on how to access and enjoy your content. What's New? Seagate Media release 2.9 includes auto upload and sharing capabilities. For information on software updates, FAQs, how-to videos, and support information, go to Support. Model: Click here to access an up-to-date online version of this document. You will also find the most recent content as well as expandable illustrations, easier navigation, and search capability. Cont ent s 1 Connecting . . . . . . . . . . . Mobile . . . . . . .and . . . .Storage . . . . . . . Devices . . . . . . . .to . . Wi-Fi . . . . . .Networks .......................................5 ....... . . . . . . . . your Connect . . . . .m. .obile . . . . device . . . . . .to . . your . . . . .wireless . . . . . . .storage . . . . . . .device . . . . . . . . . . . . . . . . . . . . . . . . . . . . . . . . . . . . . . . . . . . . . . . . . . . . . . . . . . . . . . . . . . .5. . . . . . . . . . . . . . . . . your Connect . . . . .wireless . . . . . . .storage . . . . . . .device . . . . . to . . a. .Wi-Fi . . . . . network . . . . . . . . . . . . . . . . . . . . . . . . . . . . . . . . . . . . . . . . . . . . . . . . . . . . . . . . . . . . . . . . . . . . . . . .5. . . . . . . . . 2 Uploading, . . . . . . . . . . Downloading, . . . . . . . . . . . . . and . . . . Sharing . . . . . . . Files . . . . . . . . . . . . . . . . . . . . . . . . . . . . . . . . . . . . . . . . . . . . . . . . . .8 ....... . . . . . . . content Upload . . . . . . . from . . . . . your . . . . .m . .obile . . . . device . . . . . .to . . your . . . . .storage . . . . . . .device . . . . . . . . . . . . . . . . . . . . . . . . . . . . . . . . . . . . . . . . . . . . . . . . . . . . . . . . . . . . . . .8. . . . . . . . . . . . . . . . . . .content Download . . . . . . .from . . . . .your . . . . .storage . . . . . . device . . . . . .to . . your . . . . .m. .obile . . . . device . . . . . . . . . . . . . . . . . . . . . . . . . . . . . . . . . . . . . . . . . . . . . . . . . . . . . . . . . . . . .9. . . . . . . . . . . . . . . . .content Sharing . . . . . . . . . . . . . . . . . . . . . . . . . . . . . . . . . . . . . . . . . . . . . . . . . . . . . . . . . . . . . . . . . . . . . . . . . . . . . . . . . . . . . . . . . . . . . . . . . . . . . . . . .9. . . . . . . . . . . . . . . . . . . .file Monitoring . . .transfers . . . . . . . . . . . . . . . . . . . . . . . . . . . . . . . . . . . . . . . . . . . . . . . . . . . . . . . . . . . . . . . . . . . . . . . . . . . . . . . . . . . . . . . . . . . . . . . . . . .9. . . . . . . . . 3 Viewing . . . . . . . . Media . . . . . . Libraries . . . . . . . . . . . . . . . . . . . . . . . . . . . . . . . . . . . . . . . . . . . . . . . . . . . . . . . . . . . . . . . . . . . . . 11 ........ . . . . . . .to Return . . the . . . Hom . . . . .e. page . . . . . . . . . . . . . . . . . . . . . . . . . . . . . . . . . . . . . . . . . . . . . . . . . . . . . . . . . . . . . . . . . . . . . . . . . . . . . . . . . . . . . . . . . . . . . .12 .......... 4 Enjoying . . . . . . . . .Your . . . . Media . . . . . . . . . . . . . . . . . . . . . . . . . . . . . . . . . . . . . . . . . . . . . . . . . . . . . . . . . . . . . . . . . . . . . . 14 ........ . . . . .Videos Play . . . . . . . . . . . . . . . . . . . . . . . . . . . . . . . . . . . . . . . . . . . . . . . . . . . . . . . . . . . . . . . . . . . . . . . . . . . . . . . . . . . . . . . . . . . . . . . . . . . . . . . . . . .14 .......... . . . . . . .a. video Watch . . . . . . . . . . . . . . . . . . . . . . . . . . . . . . . . . . . . . . . . . . . . . . . . . . . . . . . . . . . . . . . . . . . . . . . . . . . . . . . . . . . . . . . . . . . . . . . . . . . . . .14 .......... . . . . . Photos View . . . . . . . . . . . . . . . . . . . . . . . . . . . . . . . . . . . . . . . . . . . . . . . . . . . . . . . . . . . . . . . . . . . . . . . . . . . . . . . . . . . . . . . . . . . . . . . . . . . . . . . . . . .14 .......... . . . . . a. .single View . . . . . .pho . . . to . . . . . . . . . . . . . . . . . . . . . . . . . . . . . . . . . . . . . . . . . . . . . . . . . . . . . . . . . . . . . . . . . . . . . . . . . . . . . . . . . . . . . . . . . . . . . .14 .......... . . . . . . .a. slidesho Watch . . . . . . . .w . . . . . . . . . . . . . . . . . . . . . . . . . . . . . . . . . . . . . . . . . . . . . . . . . . . . . . . . . . . . . . . . . . . . . . . . . . . . . . . . . . . . . . . . . . . . . .15 .......... . . . . . . . and Create . . . .save . . . . .a. slidesho . . . . . . . .w . . . . . . . . . . . . . . . . . . . . . . . . . . . . . . . . . . . . . . . . . . . . . . . . . . . . . . . . . . . . . . . . . . . . . . . . . . . . . . . . . . . . .15 .......... . . . . . .to Listen . . Music . . . . . . . . . . . . . . . . . . . . . . . . . . . . . . . . . . . . . . . . . . . . . . . . . . . . . . . . . . . . . . . . . . . . . . . . . . . . . . . . . . . . . . . . . . . . . . . . . . . . . . . 16 ........... . . . . a. .so Play . . ng . . . . . . . . . . . . . . . . . . . . . . . . . . . . . . . . . . . . . . . . . . . . . . . . . . . . . . . . . . . . . . . . . . . . . . . . . . . . . . . . . . . . . . . . . . . . . . . . . . . . . .16 .......... . . . . multiple Play . . . . . . . .music . . . . . .tracks . . . . . back-to . . . . . . . -back . . . . . . . . . . . . . . . . . . . . . . . . . . . . . . . . . . . . . . . . . . . . . . . . . . . . . . . . . . . . . . . . . . . . . . . . . . . . . . . .16 .......... . . . . . . . a. .music Create . . . . . playlist . . . . . . . . . . . . . . . . . . . . . . . . . . . . . . . . . . . . . . . . . . . . . . . . . . . . . . . . . . . . . . . . . . . . . . . . . . . . . . . . . . . . . . . . . . . . . . . .16 .......... . . . . . Docum View . . . . . . .ents . . . . . . . . . . . . . . . . . . . . . . . . . . . . . . . . . . . . . . . . . . . . . . . . . . . . . . . . . . . . . . . . . . . . . . . . . . . . . . . . . . . . . . . . . . . . . . . . . . . .17 .......... . . . . . a. .do View . . cument . . . . . . . . . . . . . . . . . . . . . . . . . . . . . . . . . . . . . . . . . . . . . . . . . . . . . . . . . . . . . . . . . . . . . . . . . . . . . . . . . . . . . . . . . . . . . . . . . . . . .17 .......... . . . . . . . . a. .do Rename . . cument . . . . . . . . . . . . . . . . . . . . . . . . . . . . . . . . . . . . . . . . . . . . . . . . . . . . . . . . . . . . . . . . . . . . . . . . . . . . . . . . . . . . . . . . . . . . . . . . . .17 .......... . . . . . . . .multiple Manage . . . . . . . do . . .cuments . . . . . . . . . . . . . . . . . . . . . . . . . . . . . . . . . . . . . . . . . . . . . . . . . . . . . . . . . . . . . . . . . . . . . . . . . . . . . . . . . . . . . . . . . . . .18 .......... . . . . . . .Recently Review . . . . . . . Viewed . . . . . . .Item . . . .s. . . . . . . . . . . . . . . . . . . . . . . . . . . . . . . . . . . . . . . . . . . . . . . . . . . . . . . . . . . . . . . . . . . . . . . . . . . . . . . . . . . . . . 18 ........... . . . . .your Cast ....m . . edia . . . . . . . . . . . . . . . . . . . . . . . . . . . . . . . . . . . . . . . . . . . . . . . . . . . . . . . . . . . . . . . . . . . . . . . . . . . . . . . . . . . . . . . . . . . . . . . . . . . . .19 .......... . . . . . . . started Getting . . . . . . .with . . . . Chro . . . . .mecast . . . . . . .o.r. Ro . . .ku . . . . . . . . . . . . . . . . . . . . . . . . . . . . . . . . . . . . . . . . . . . . . . . . . . . . . . . . . . . . . . . . . . . . . . . . . . .19 .......... . . . . . . . started Getting . . . . . . .with . . . . LG . . . TV . . . . . . . . . . . . . . . . . . . . . . . . . . . . . . . . . . . . . . . . . . . . . . . . . . . . . . . . . . . . . . . . . . . . . . . . . . . . . . . . . . . . . . . . .19 .......... 5 Using . . . . . .Seagate . . . . . . . Media . . . . . . Controls . . . . . . . . . . . . . . . . . . . . . . . . . . . . . . . . . . . . . . . . . . . . . . . . . . . . . . . . . . . . . . . . 20 ........ . . . . . . App Media . . . . Views . . . . . . . . . . . . . . . . . . . . . . . . . . . . . . . . . . . . . . . . . . . . . . . . . . . . . . . . . . . . . . . . . . . . . . . . . . . . . . . . . . . . . . . . . . . . . . . . . . . . . .20 .......... . . . nnectivity Co . . . . . . . . . View . . . . . . . . . . . . . . . . . . . . . . . . . . . . . . . . . . . . . . . . . . . . . . . . . . . . . . . . . . . . . . . . . . . . . . . . . . . . . . . . . . . . . . . . . . . . . . . . . .20 .......... . . . . . . View Media . . . . . . . . . . . . . . . . . . . . . . . . . . . . . . . . . . . . . . . . . . . . . . . . . . . . . . . . . . . . . . . . . . . . . . . . . . . . . . . . . . . . . . . . . . . . . . . . . . . . . . . . . .21 .......... . . . . . . . view Library . . . . . . . . . . . . . . . . . . . . . . . . . . . . . . . . . . . . . . . . . . . . . . . . . . . . . . . . . . . . . . . . . . . . . . . . . . . . . . . . . . . . . . . . . . . . . . . . . . . . . . .23 .......... 6 Sorting, . . . . . . . .Viewing, . . . . . . . . and . . . .Filtering . . . . . . . .Content . . . . . . . . . . . . . . . . . . . . . . . . . . . . . . . . . . . . . . . . . . . . . . . . . . . . . . . 24 ........ . . . . . . . . . . . . . . . . . . . . . . . . . . . . . . . . . . . . . . . . . . . . . . . . . . . . . . . . . . . . . . . . . . . . . . . . . . . . . . . . . . . . . . . . . . . . . . . . . . . . . . . . . . . . . . . .24 Sort .......... . . . . . . . . . . . . . . . . . . . . . . . . . . . . . . . . . . . . . . . . . . . . . . . . . . . . . . . . . . . . . . . . . . . . . . . . . . . . . . . . . . . . . . . . . . . . . . . . . . . . . . . . . . . . . . . .24 View .......... . . . . . . . . . . . . . . . . . . . . . . . . . . . . . . . . . . . . . . . . . . . . . . . . . . . . . . . . . . . . . . . . . . . . . . . . . . . . . . . . . . . . . . . . . . . . . . . . . . . . . . . . . . . . . . . .24 Filter .......... 7 Managing . . . . . . . . . Content . . . . . . . . on . . . Your . . . . .Storage . . . . . . . Device . . . . . . . . . . . . . . . . . . . . . . . . . . . . . . . . . . . . . . . . . . . . . . . . . . . 26 ........ . . . . . .content Copy . . . . . . . . . . . . . . . . . . . . . . . . . . . . . . . . . . . . . . . . . . . . . . . . . . . . . . . . . . . . . . . . . . . . . . . . . . . . . . . . . . . . . . . . . . . . . . . . . . . . . . . . . 26 ........... . . . . and Cut . . . .paste . . . . .content . . . . . . . . . . . . . . . . . . . . . . . . . . . . . . . . . . . . . . . . . . . . . . . . . . . . . . . . . . . . . . . . . . . . . . . . . . . . . . . . . . . . . . . . . . . . . . . . . . 26 ........... ......e Renam . .content . . . . . . . . . . . . . . . . . . . . . . . . . . . . . . . . . . . . . . . . . . . . . . . . . . . . . . . . . . . . . . . . . . . . . . . . . . . . . . . . . . . . . . . . . . . . . . . . . . . . . . . .27 .......... . . . . . . content Delete . . . . . . . . . . . . . . . . . . . . . . . . . . . . . . . . . . . . . . . . . . . . . . . . . . . . . . . . . . . . . . . . . . . . . . . . . . . . . . . . . . . . . . . . . . . . . . . . . . . . . . . . . .27 .......... 8 Customizing . . . . . . . . . . . .Your . . . . .Storage . . . . . . . Device . . . . . . . . . . . . . . . . . . . . . . . . . . . . . . . . . . . . . . . . . . . . . . . . . . . . . . . . . . . 29 ........ . . . . . . . . . . . . . . . . . . . . . . . . . . . . . . . . . . . . . . . . . . . . . . . . . . . . . . . . . . . . . . . . . . . . . . . . . . . . . . . . . . . . . . . . . . . . . . . . . . . . . . . . . . . . . . . .29 More .......... . . . . . . . . . . . . . . . . . . . . . . . . . . . . . . . . . . . . . . . . . . . . . . . . . . . . . . . . . . . . . . . . . . . . . . . . . . . . . . . . . . . . . . . . . . . . . . . . . . . . . . . . . . . . . . . .29 Settings .......... 9 Conserving . . . . . . . . . . . Battery . . . . . . . Life . . . . . . . . . . . . . . . . . . . . . . . . . . . . . . . . . . . . . . . . . . . . . . . . . . . . . . . . . . . . . . . . . 31 ........ . . . . . . settings Power . . . . . . . . . . . . . . . . . . . . . . . . . . . . . . . . . . . . . . . . . . . . . . . . . . . . . . . . . . . . . . . . . . . . . . . . . . . . . . . . . . . . . . . . . . . . . . . . . . . . . . . . . .31 .......... . . . . . . settings Power . . . . . . . options . . . . . . . . . . . . . . . . . . . . . . . . . . . . . . . . . . . . . . . . . . . . . . . . . . . . . . . . . . . . . . . . . . . . . . . . . . . . . . . . . . . . . . . . . . . . . . . . . . .31 .......... . . . . . . . perform Battery . . . . . . . .ance . . . . . . . . . . . . . . . . . . . . . . . . . . . . . . . . . . . . . . . . . . . . . . . . . . . . . . . . . . . . . . . . . . . . . . . . . . . . . . . . . . . . . . . . . . . . . . . . .31 .......... 10 .Updating . . . . . . . .the . . . Seagate . . . . . . . .Media . . . . . .App . . . .and . . . .the . . . Storage . . . . . . . Device . . . . . . . . . . . . . . . . . . . . . . . . . . . . . . . . . . . . . . . 33 ........ . . . . . . . the Update . . .m . . edia . . . .app . . . . . . . . . . . . . . . . . . . . . . . . . . . . . . . . . . . . . . . . . . . . . . . . . . . . . . . . . . . . . . . . . . . . . . . . . . . . . . . . . . . . . . . . . . . . . . . .33 .......... . . . . . . .the Review . . .current . . . . . . .version . . . . . . .of . .the . . .m . .edia . . . .app . . . . . . . . . . . . . . . . . . . . . . . . . . . . . . . . . . . . . . . . . . . . . . . . . . . . . . . . . . . . . . . . . . . . . . . . . . . . .33 .......... . . . . . . . the Update . . . storage . . . . . . .device . . . . . . . . . . . . . . . . . . . . . . . . . . . . . . . . . . . . . . . . . . . . . . . . . . . . . . . . . . . . . . . . . . . . . . . . . . . . . . . . . . . . . . . . . . . . . . .33 .......... . . . . . . .the Review . . .current . . . . . . .version . . . . . . .of . .the . . . storage . . . . . . .device's . . . . . . .firm . . . ware . . . . . . . . . . . . . . . . . . . . . . . . . . . . . . . . . . . . . . . . . . . . . . . . . . . . . . . . . . . . . . . . . .33 .......... 11 .Accessing . . . . . . . . . Multiple . . . . . . . . Storage . . . . . . . Devices . . . . . . . . on . . . the . . . Same . . . . . .Network . . . . . . . . . . . . . . . . . . . . . . . . . . . . . . . . . . . . . . 34 ........ . . . . your Add . . . . .devices . . . . . . to . . .your . . . . network . . . . . . . . . . . . . . . . . . . . . . . . . . . . . . . . . . . . . . . . . . . . . . . . . . . . . . . . . . . . . . . . . . . . . . . . . . . . . . . . . . . . . . . . . .34 .......... . . . . . . . the Choose . . . .storage . . . . . . device: . . . . . . . . . . . . . . . . . . . . . . . . . . . . . . . . . . . . . . . . . . . . . . . . . . . . . . . . . . . . . . . . . . . . . . . . . . . . . . . . . . . . . . . . . . . . . . .34 .......... 12 .Accessing . . . . . . . . . Your . . . . . Media . . . . . . Remotely . . . . . . . . . . . . . . . . . . . . . . . . . . . . . . . . . . . . . . . . . . . . . . . . . . . . . . . . . . . . . . 36 ........ 13 .Troubleshooting . . . . . . . . . . . . . . . . . . . . . . . . . . . . . . . . . . . . . . . . . . . . . . . . . . . . . . . . . . . . . . . . . . . . . . . . . . . . . . . . . . 37 ........ . . . . .take Files . . . .awhile . . . . . .to. .appear . . . . . . on . . . the . . . storage . . . . . . . device . . . . . . . . . . . . . . . . . . . . . . . . . . . . . . . . . . . . . . . . . . . . . . . . . . . . . . . . . . . . . . . . . . . . . . . . . . . .37 .......... . . . . . . . connect Cannot . . . . . . . .to. .a. wireless . . . . . . . .device . . . . . or . . .a. network-attached . . . . . . . . . . . . . . . .storage . . . . . . device . . . . . . . . . . . . . . . . . . . . . . . . . . . . . . . . . . . . . . . . . . . . . . . . . . . . . . .37 .......... . . . . . . . . . . .to Connection . . wireless . . . . . . . storage . . . . . . . is . .lost . . . .when . . . . .the . . .m . .obile . . . . device . . . . . .wakes . . . . . .from . . . . .sleep . . . . . . . . . . . . . . . . . . . . . . . . . . . . . . . . . . . . . . . . . . . . . . . 38 ........... . . . . . . song, Video, . . . . . or . . .file . . .does . . . . not . . . .play/open . . . . . . . . . . . . . . . . . . . . . . . . . . . . . . . . . . . . . . . . . . . . . . . . . . . . . . . . . . . . . . . . . . . . . . . . . . . . . . . . . . . . . . 38 ........... . . . . . . .atted Reform . . . . .hard . . . . drive . . . . .for . . .Mac . . . . . . . . . . . . . . . . . . . . . . . . . . . . . . . . . . . . . . . . . . . . . . . . . . . . . . . . . . . . . . . . . . . . . . . . . . . . . . . . . . . . . . . 38 ........... Connec ng Mobile and Storage Devices to Wi-Fi Networks The following instructions describe how to: Connect mobile devices to a wireless storage device Connect a wireless storage device to a Wi-Fi networ Tip: You can also use Seagate Media to connect mobile devices to compatible network-attached storage devices (NAS). Both the mobile device and the NAS must be connected to the same network. Connect your mobile device to your wireless storage device 1. Download and install the free Seagate Media app from the Google Play Store and from the Amazon Play store. 2. Power on the wireless storage device. The Wi-Fi LED will blink for approximately one minute. Wait for the Wi-Fi LED to turn solid before moving to the next step. 3. On your mobile device, browse to Settings > Wi-Fi. 4. Select the storage device from the list of Wi-Fi networks. 5. Launch the Seagate Media app. back to top Connect your wireless storage device to a Wi-Fi network The following instructions assume that you have already connected your mobile device to your wireless storage device. Andro id Note: The storage device consumes more battery charge when it is connected to the Internet. 2/11/15 5 1. From the Home screen, tap on Connect to the Internet. is the name of your compatible wireless storage device (for example, Seagate Wireless or LaCie Fuel). 2. Tap on the network you want to join. If security is enabled on the selected Wi-Fi network, enter the password. 3. Optional. Tap on the checkbox for Connect to this network automatically. 4. Optional. Tap on the checkbox for Secure this network. This option prevents unauthorized users from accessing the network. Note: You may experience a brief interruption in the connection to the wireless storage device. 5. The Home page shows connection to the Wi-Fi network. back to top Andro id 2/11/15 6 Andro id 2/11/15 7 Uploading, Downloading, and Sharing Files When you upload a file to your wireless storage device or network-attached storage device, it is placed in one of the libraries according to its type: Videos, Photos, Music, or Documents. After you download a file from the storage device to your mobile device, it is managed by the operating system. When you share files, you share your files with your mobile device's apps. Note: If you are transferring a large amount of content to your wireless storage device, it is recommended that you connect it directly to a computer rather than using a wireless connection.If you are transferring a large amount of content to your network attached storage device, it is recommended that you connect your computer to the router, rather than using a wireless connection. To learn how to copy content to your storage device using a computer, review the storage device's user manual. Upload content from your mobile device to your storage device 1. From the home page, tap on Connectivity ( ) on the upper left corner. Choose your mobile device from the selection drawer on the left. 2. Tap on the folder with the contents you want to upload. For example, Pictures. 3. Tap on the More icon ( ) on the upper right corner of the app screen and tap Select items. 4. Tap the items you want to upload to your mobile storage device. A check mark appears on each item that you select. To deselect a single item, tap on it. To select all files in the view, tap on Select items on the top left and Select All. To undo , tap on Select items and Deselect All. 5. Tap on the Upload icon on the upper right corner. Note: Uploaded files can be viewed within media libraries or the device's folder. To view the folder, go to Files and Folders ( ) and tap on Product (Product is the name of your storage device, e.g. LaCie Fuel or Seagate Wireless). Tap on the device folder, e.g. Tablet. Browse the sub-folders to view the uploaded files. back to top Andro id 2/11/15 8 Download content from your storage device to your mobile device 1. From the home page, tap on Connectivity ( ) on the upper left corner. Choose your library (e.g. Videos or Photos) from the selection drawer on the left. 2. Tap on the More icon ( ) on the upper right corner of the app screen and tap Select item. 3. Tap the items you want to download to your mobile device. A check mark appears on each item that you select. To deselect a single item, tap on it. To select all files in the view, tap on Select items on the top left and Select All. To undo , tap on Select items and Deselect All. 4. Tap on the Download icon on the upper right corner. back to top Sharing content You can share files and share links. 1. From the home page, tap Connectivity ( ). Choose your library (e.g. Videos or Photos) from the menu. 2. Tap the More icon ( ) and tap Select items. 3. Tap the items you want to share. A check mark appears on each item that you select. To deselect a single item, tap on it. To select all files in the view, tap on Select items on the top left and Select All. To undo , tap on Select items and Deselect All. 4. Tap the Share icon. 5. Tap Share files or Share links: Share files. You might be asked to download the file before you share it. After the files have been downloaded, tap Notifications ( ) and then tap the Share icon. Select the target app to share your content. Share links. Select the target app to share your content. Note: This option might not be available. back to top Monitoring file transfers You can monitor the progress of files that are uploading and downloading in the Tasks screen. 1. From the home page, tap Connectivity ( Andro id ) on the upper left corner. Choose your library (e.g. 2/11/15 9 1. From the home page, tap Connectivity ( ) on the upper left corner. Choose your library (e.g. Videos or Photos) from the selection drawer on the left. 2. Tap the More icon ( ) on the upper right corner of the app screen and tap Select items. 3. Tap the items you want to transfer. A check mark appears on each item that you select. 4. Tap the Download or Upload icon. 5. Tap the Notifications icon ( ). 6. Tap Uploads or Downloads in progress. The Tasks screen displays with a progress of your transfer activities. back to top Andro id 2/11/15 10 Viewing Media Libraries You can view the media libraries and folders stored on your storage device as well as your mobile device. 1. Tap on Connectivity ( ) on the upper left corner. The title changes to . 2. In Files and Folders, select your storage device or mobile device. 3. In Media Libraries, tap a view to explore it contents. Andro id 2/11/15 11 Return to the Home page 1. Tap on the title in the upper left corner. Andro id 2/11/15 12 2. Tap Connectivity ( Andro id ). 2/11/15 13 Enjoying Your Media You can view your media library using the media app or a web browser. The media app is highly recommended when using a tablet or a smartphone. Tip for web access: To access your media library using a browser, connect to your storage device and type the address www.productname.com, substituting the name of your storage device. Examples: and Note: Not all network attached storage devices support web access to your media. Play Videos View Photos Listen to Music View Documents View Recently viewed items Cast Your Media Play Videos Watch a video 1. Enable the selection drawer by tapping on the content menu icon ( ) on the upper left corner and tap Videos. 2. Tap on the video you want to play. Tip: Certain video formats might not be compatible with your mobile device. Visit Seagate Support Supportfor information on third-party players. back to top View Photos View a single photo Andro id 2/11/15 14 1. Enable the selection drawer by tapping on the content menu icon ( ) on the upper left corner and tap Photos. 2. Tap on the photo you want to view. You can see it in full screen by tapping on it a second time. Another tap on the photo exits full screen. Watch a slideshow 1. Enable the selection drawer by tapping on the content menu icon ( ) on the upper left corner and tap Photos. 2. Tap on the More icon ( 3. 4. 5. 6. 7. 8. ) on the upper right corner of the app screen and Select items. You can also apply a long push on a single item to enable the selection window. Tap on the photos you want to view as a slideshow. A check mark appears on the selected photos. To deselect a single item, tap on it. To select all files in the view, tap Select items on the top left and Select All. To undo , tap Select items and Deselect All. Tap on the Play icon on the upper right. Another tap on the photo exits full screen. To review options for your slideshow, tap on a photo to exit full screen and tap Slideshow on the upper right. Select any of these slideshow options: Transitions, Slide Timing, Music, Photo Loop, and Photo Shuffle. Tap Start Slideshow to continue the slideshow with the new settings. To exit the slideshow, tap on the back arrow on the upper left or the Android curved arrow. back to top Create and save a slideshow 1. Enable the selection drawer by tapping on the content menu icon ( ) on the upper left corner and tap Photos. 2. Tap on the More icon ( ) on the upper right corner of the app screen and Select items. You can also apply a long push on a single item to enable the selection window. 3. Tap on the photos you want for a new slideshow or to add to an existing slideshow. To deselect a single items, tap on it. To select all files in the view, tap Select items on the top left and Select All. To undo Select items and Deselect All. 4. Tap on the More icon ( , tap ) on the upper right corner of the app screen and Add to playlist. 5. Choose one of the following: New slideshow: Tap New Playlist and enter a name. Tap OK. Existing slideshow. Add the photos by tapping on the existing slideshow. Andro id 2/11/15 15 You can view your saved slideshows at any time. Go to the Photos library and tap on the filter menu (top left, next to the Seagate icon). Choose Slideshows to review your existing slideshows. back to top Listen to Music Play a song 1. Enable the selection drawer by tapping on the content menu icon ( ) on the upper left corner and tap Music. 2. Tap on the song you want to play. A music playback window automatically appears, providing the time of the music track. 3. The playback window allows you to control how the music plays back: return to the last track; pause/play; and, skip the current track. On the upper right corner, you can choose continuous play (circular arrows) or random play (interconnected arrows). To exit the music playback window, tap on the back arrow on the top left or the Android curved arrow. Music continues to play even when the window is not visible. You can recover the music window, try one of the following: Tap on the song that is playing Tap on another song Access the music player from the Notifications menu Play mul ple music tracks back-to-back 1. Enable the selection drawer by tapping on the content menu icon ( ) on the upper left corner and tap Music. 2. Tap on the More icon ( ) on the upper right corner of the app screen and Select items. You can also apply a long push on a single item to enable the selection window. 3. Tap on the music tracks you want to hear. A check mark appears on the selected tracks. To deselect a single item, tap on it. To select all files in the view, tap Select items on the top left and Select All. To undo Select items and Deselect All. 4. Tap on the Play icon on the upper right. , tap back to top Create a music playlist Andro id 2/11/15 16 1. Enable the selection drawer by tapping on the content menu icon ( ) on the upper left corner and tap Music. 2. Tap on the More icon ( ) on the upper right corner of the app screen and Select items. You can also apply a long push on a single item to enable the selection window. 3. Tap on the music tracks you want to add to the playlist. A check mark appears on the selected tracks. To deselect a single item, tap on it. To select all files in the view, tap Select items on the top left and Select All. To undo , tap Select items and Deselect All. 4. Tap on the More icon ( ) on the upper right corner of the app screen and Add to playlist. 5. Choose from the following: Create a new playlist. Tap New Playlist on the lower left and enter a name. Tap OK. Add to an existing playlist. Tap Existing Playlist then tap on the playlist you want to use for the new music track. Tap on the check mark on the upper right to confirm your selection. You can listen to your saved playlists at any time. Go to the Music library and tap on the filter menu (top left, next to the Seagate icon). Choose Playlists to review your existing playlists. If you do not see a new playlist, tap on the More icon and choose Refresh. back to top View Documents View a document 1. Enable the selection drawer by tapping on the content menu icon ( ) on the upper left corner and tap Documents. 2. Tap on the document you want to view. 3. Choose the app to use with the document. Rename a document 1. Enable the selection drawer by tapping on the content menu icon ( ) on the upper left corner and tap Documents. 2. Tap on the More icon ( ) on the upper right corner of the app screen and Select items. 3. Tap on the document you want to rename. A check mark appears on the item that you select. Andro id 2/11/15 17 Note: You can rename one item at a time. Selecting multiple items removes the option to rename. To deselect a single item, tap on it. 4. Tap on the rename icon (pencil) on the upper right. 5. Type the new name and tap OK. back to top Manage mul ple documents You can: Download Delete Note: (Deleting a file or folder will permanently remove it from your storage device.) 1. Enable the selection drawer by tapping on the content menu icon ( ) on the upper left corner and tap Documents. 2. Tap on the More icon ( ) on the upper right corner of the app screen and Select item. You can also apply a long push on a single item to enable the selection window. 3. Tap on the documents you want to manage. A check mark appears on each document. To deselect a single item, tap on it. To select all files in the view, tap Select items on the top left and Select All. To undo Select items and Deselect All. 4. Tap on the download icon (down arrow) or delete icon (trash can). , tap back to top Review Recently Viewed Items 1. Enable the selection drawer by tapping on the content menu icon ( ) on the upper left corner and tap Recently. 2. By default, your most recently viewed videos appear. You can choose another category (e.g. photos, music, and documents) by tapping on the filter pull-down menu. It is located next to the logo. Andro id 2/11/15 18 back to top Cast your media Cast media from your wireless device to the big screen. Seagate Media is now compatible with Google Chromecast, LG TV 2012 and 2013 models, LG TV with webOS, and Roku. Casting media from your Seagate wireless device to any of these devices allows you to enjoy your content on your TV—movies, TV shows, music, photos, and more. You can multitask on the mobile device without interrupting playback. For example, you can search for a second video while the first one is casting to your TV. Some Cast devices allow you to play, pause, seek, and control volume on your mobile device Ge ng started with Chromecast or Roku 1. 2. 3. 4. Configure the Chromecast/Roku on your TV and Wi-Fi network per the manufacturer’s instructions. Start the Seagate Media app on your mobile device. Connect to your Seagate Media compatible storage. Confirm that the storage device is connected to the same network as the Chromecast/Roku. 5. Tap the Cast icon ( ). 6. Select a cast device (Chromecast or Roku). 7. Choose a video, photo, or music track to start casting. Visit the manufacturers’ websites for further information on Chromecast and Roku. Ge ng started with LG TV 1. 2. 3. 4. 5. Turn on your LG TV. Connect the LG TV to your Wi-Fi network. Start the Seagate Media app on your mobile device. Connect to your Seagate Media compatible storage. Confirm that the storage device is connected to the same network as the LG TV. 6. Tap the Cast icon ( ). 7. Select your LG TV. 8. Choose a video, photo, or music track to start casting. back to top Andro id 2/11/15 19 Using Seagate Media Controls Note: Media app controls are dependent on your mobile device. Mobile devices with smaller displays might place controls in More ( ). Media App Views There are two main views in the media app. Connec vity View Review and make changes to the connections between your mobile device, storage device, and Internet. Andro id 2/11/15 20 Media View Andro id 2/11/15 21 Access your media and folders: Media Libraries: Access your videos, photos, music and documents. Files and Folders: Select the source of your content: your mobile device or your storage device. Library view Andro id 2/11/15 22 Library view When you select a library, the media app displays media-specific icons to help you view and manage contents. 1. Tap( ) to open the left navigation. 2. Displays the media library you are viewing (e.g. Videos, Photos, Music, or Documents). Tap on the name of the media library to filter the contents in the window. For example, filtering options for Photos are: All, Albums, and Date Taken. To change to a different media library, tap the Media app icon. 3. Tap to open Search. 4. Tap to see all notifications. Notifications let you know about new features and help with set up. Warnings appear if there is a problem with the storage device (for example, low battery). 5. Tap to switch between list and thumbnail views. 6. Tap to sort by Title, Date, Size, and Type. Certain sorting options may not apply to all libraries. 7. Tap to view additional options including Refresh, Wi-Fi, Select item, Info, Help, and Settings. back to top Andro id 2/11/15 23 Sor ng, Viewing, and Filtering Content The media app gives you options for sorting, viewing, and filtering your content in a media library window. You can also do custom sorting in photo and music playlists. Sort Tap on the sort icon ( ) to review alternative options. Custom Title A-Z Title Z-A Date Newest Date Oldest Date Smallest Size Largest Type A-Z Type Z-A The Custom view is only available for photo and music playlists. Use it to drag and drop items into a specific order in your playlist. View Tap on the view icon to switch between: : Thumbnails : List Filter Tap on the name of the library on the upper left to change the filter option. Filter options differ by media library: Videos: All, Albums, Years, and Genre Photos: All, Albums, and Date Taken Music: Playlists, Songs, Albums, Artists, and Genre Recently: Videos, Photos,Music, and Documents Andro id Note: Documents are presented in alphabetical order. 2/11/15 24 Andro id 2/11/15 25 Managing Content on Your Storage Device Copy content Cut and paste content Rename content Delete content Copy content 1. Enable the selection drawer by tapping on the content menu icon ( ) on the upper left corner. 2. Under Files and Folders, tap on your storage device. Content on your drive appears in multiple folders. 3. Navigate to the folders or files you want to copy and paste. 4. Tap on the More icon ( ) and tap on Select items. 5. Tap on the items you want to copy. A check mark appears on each item that you select. To deselect a single item, tap on it. To select all files in the view, tap on Select items on the top left and Select All. To undo on Select items and Deselect All. 6. Tap on the copy icon on the upper right (two sheets of paper). 7. Navigate to the destination folder using the Android curved back arrow. 8. Tap Paste on the upper right. , tap back to top Cut and paste content 1. Enable the selection drawer by tapping on the content menu icon ( ) on the upper left corner. 2. Under Files and Folders, tap on your storage device. Contents on your drive appear in multiple folders. 3. Navigate to the folders or files you want to cut and paste. 4. Tap on the More icon ( ) and tap on Select item. 5. Tap on the items you want to cut and paste to another folder. A check mark appears on each item that you select. To deselect a single item, tap on it. To select all files in the view, tap on Select items on the top left and Select All. To undo , tap on Select items and Deselect All. 6. Tap on the cut icon on the upper right (scissors on paper). Andro id 2/11/15 26 Note: Cutting a file or folder will remove the item from its current location. 1. Navigate to the destination folder using the Android curved back arrow. 2. Tap Paste on the upper right. back to top Rename content Note: You can rename one item at a time. Selecting multiple items will remove the option to rename. 1. Enable the selection drawer by tapping on the content menu icon ( ) on the upper left corner. 2. Under Files and Folders, tap on your storage device. Contents on your drive appear in multiple folders. 3. Navigate to the folder or file you want to rename. 4. Tap on the More icon ( ) and tap on Select item. 5. Tap on the item you want to rename. A check mark appears on the item that you select. To deselect a single item, tap on it. 6. Tap on the rename icon on the upper right (pencil). 7. Type the new name and tap OK. back to top Delete content Note: Deleting a file or folder will permanently remove it from your storage device. 1. Enable the selection drawer by tapping on the content menu icon ( ) on the upper left corner. 2. Under Files and Folders, tap on your storage device. Contents on your drive appear in multiple folders. 3. Navigate to the folders or files you want to delete. 4. Tap on the More icon ( ) and tap on Select item. 5. Tap on the items you want to delete. A check mark appears on each item that you select. To deselect a single item, tap on it. To select all files in the view, tap on Select items on the top left and Select All. To undo on Select items and Deselect All. 6. Tap on the delete icon on the upper right (trash can). Andro id 2/11/15 , tap 27 7. Tap Delete to permanently remove the items. back to top Andro id 2/11/15 28 Customizing Your Storage Device Seagate Media provides two levels for customizing your storage device: More and Settings. You can review and change options to suit your needs. Note: Your storage device might not support all features listed below. More The More icon ( ) is available on the top right of the app's screen. Tap on it see the menu. Refresh: Refresh the page. Select item: Select one or more items in a library or folder. Info: See the percentage of battery charge. Tap on Advanced for important network details: Network Name; MAC Address; IP Address; Wi-Fi Channel; and, Security. Help: Tap on Help for tips on how to use your wireless storage. Note: Certain options may not be available in all views. For example, the More menu has fewer options on the Home page. Se ngs Note: Your storage device might not support all features listed below. Settings is an option in the More menu. Tap on the More icon ( ) and tap Settings. Application Settings: Change the language, the location for software downloads, turn streaming on and off, default to the app's player, enable remote video pre-buffer and clear all local cached data. Auto Upload: Turn on and off; customize how you back up photos and videos to your storage device. Cloud Storage: This option will only appear when your storage device is connected to a Wi-Fi network with access to the Internet. You can use this option to sync files with your Dropbox or Google Drive accounts. Your cloud storage login and password are required to link the storage device to the account. Andro id 2/11/15 29 Note: Your storage device might not support either of these cloud storage options. Server Settings: Change the name of your storage device, enable password protection, change password, enable ECO mode, rebuild the database, reset your device's settings, restart and shut down your storage device. Remote Access: Connect remotely to your Seagate network attached storage device. An existing remote access account is required to sign in. If you do not have an account, go to your network attached storage device and create one. Report a problem: Send an email to report a problem with the media app. About: Review versions of the media app and your storage device. You can also review the number of connected users and capacity (used and available). About (Advanced info): Review important network details: Network Name, MAC Address, IP Address, Wi-Fi Channel, Firewall status, and Security. Andro id 2/11/15 30 Conserving Ba ery Life Power se ngs Note: Your storage device might not support all features listed below. You can prolong battery life by enabling ECO mode on your mobile storage. 1. Tap on the More icon ( ) on the top right and Settings. 2. Tap Server Settings and tap ECO mode. 3. Enable ECO mode by tapping on its switch. When playing a video, the storage device uses your mobile device’s memory to temporarily store the video content. By using the mobile device's memory, the storage device can enter sleep mode to conserve its battery. Power se ngs op ons The Energy Conservation gauge reveals your energy status. Your status changes when you turn services or features on or off. By enabling ECO mode, two non-critical services have been turned off: DLNA: Allows DLNA playback devices on the network to view and play media files stored on the wireless storage device. SAMBA: Allows computers on the network to connect to the wireless storage device as a network volume. Turning it off does not prevent access to the storage device using a web browser. Even when ECO mode is enabled, you can manually turn on DLNA and SAMBA. Go to ECO mode and tap on the switch for the respective service. It is recommended that you disable the service as soon as possible for optimal battery performance. Ba ery performance To achieve the best energy conservation: Enable ECO mode. Disable DLNA and SAMBA. Do not connect your storage device to the Internet while it is connected to your mobile device. Confirm that Stream and Download is enabled in Settings > Application Settings. Andro id 2/11/15 31 Andro id 2/11/15 32 Upda ng the Seagate Media App and the Storage Device Update the media app Updates to the app are managed by the operating system. To manually check for updates to Seagate Media, make certain that your mobile device is connected to the Internet. Review the current version of the media app 1. Tap on the More icon ( ) on the upper right corner of the app screen. 2. Tap on Settings. 3. Tap on About and check App version. 4. Go to the Google Play Store to see if a newer version of the media app is available. Update the storage device The media app automatically checks for new firmware and updates your storage device in the background. Review the current version of the storage device's firmware 1. Tap on the More icon ( ) on the upper right corner of the app screen. 2. Tap on Settings. 3. Tap on About and check Firmware version. 4. For information on firmware updates, go to Seagate Support and choose your storage device. Andro id 2/11/15 33 Accessing Mul ple Storage Devices on the Same Network The media app can detect more than one compatible storage device on a network. For example, you connect a wireless storage device and a network-attached storage (NAS) device to your home network. Provided that both are compatible with the media app, you can switch between the two storage devices when you connect your mobile device to the same network. Add your devices to your network All devices, including the mobile device, must be connected to a single network. 1. Use the media app to join the wireless storage device to your home network Wi-Fi. 2. Use the mobile device's Wi-Fi settings to connect it to your home network Wi-Fi. Tip: For access to multiple disks on a network, make certain that your mobile device changes its Wi-Fi connection from the wireless storage device to your home network Wi-Fi. 3. Connect your NAS to your home network via Ethernet. See the NAS's user manual for instructions. Choose the storage device: Go to the home page and tap on the device to select it. Andro id 2/11/15 34 Troubleshooting: For instructions on how to connect a compatible wireless storage device to your network, see the Help section Connecting Mobile and Storage Devices to Wi-Fi Networks. See the NAS's user guide for instructions on how to connect it to the network. Andro id 2/11/15 35 Accessing Your Media Remotely You can use the media app to remotely access content on your network-attached storage (NAS). Before following the instructions below, you must create a remote access account on your compatible NAS. See the user manual for your NAS for further details. 1. Tap on the More icon ( ) on the upper right and tap Settings. 2. Tap on Remote access. 3. Enter your remote access email address and password. Tap Sign in. 4. In the list of storage devices, select your NAS. You can access files on the NAS's folder. To troubleshoot remote access issues: Verify that Remote Access is enabled on your NAS. Verify that your NAS has access to the Internet. Visit Seagate Support Andro id 2/11/15 36 Troubleshoo ng Files take awhile to appear Cannot connect to a wireless device or a network-attached storage device Connection to wireless storage is lost when the mobile device wakes from sleep Video, song, or file does not play/open Reformatted hard drive for Mac Files take awhile to appear on the storage device The media app performs a one–time scan of the content that you copied to your wireless and networkattached storage devices. The scan can take time when the storage device has a good amount of files. If you recently copied content to your storage device and you do not see your files, tap on the More icon ( ) and tap Refresh. back to top Cannot connect to a wireless device or a network-a ached storage device A low battery charge might cause issues with the Wi-Fi connection. If you have an intermittent connection with the wireless device, check its battery charge by tapping on the More icon ( ) and Info. The amount of charge available is listed next to the battery icon. You can tap on the battery icon for further information. Confirm that your storage device is disconnected from your computer and powered on. Make certain that the Wi-Fi LED is solid blue. The Wi-Fi is disabled when the wireless storage device is attached to a computer via USB or another wired connection. On your mobile device, check whether the storage device's wireless network is selected in the network list. If you move out of the storage device's wireless range, your mobile device will disconnect from the Wi-Fi signal. The maximum range is approximately 145 ft./44 m. In addition, obstructions, such as walls and other interference can affect the strength of the signal. Try reconnecting to the Wi-Fi network. You may have exceeded the maximum users. To identify how many users are connected, tap the More icon ( ) and tap Users. Review your storage device's user manual for the number of user's supported by your device. Tap on the More icon ( Andro id ) and tap Refresh. 2/11/15 37 Power off the storage device, wait 10 seconds and then power it on. Relaunch the media app. back to top Connec on to wireless storage is lost when the mobile device wakes from sleep Connection to your wireless device's Wi-Fi network can be lost when a mobile device enters sleep or energy conservation modes. To recover the connection, go to your mobile device's Wi-Fi settings and choose the name of your storage device. Video, song, or file does not play/open You can copy any file to your storage device, however, the device to which you stream your media files can play only the file formats that it supports. Seagate Media does not convert files to other formats. See your mobile device's specifications for a list of supported file types. back to top Reforma ed hard drive for Mac Do not allow Time Machine ® to use your storage device for backups. Doing so will reformat the storage device's hard drive. If you reformatted the storage device by mistake, you can set it back to its original format. Visit your device's support website for further details: Seagate wireless products or LaCie wireless products. back to top Andro id 2/11/15 38