1
SNS COLLEGE OF ENGINEERING
SARAVANAMPATTI, COIMBATORE – 641 035.
ENVIRONMENTAL ENGINEERING LABORATORY
USER MANUAL
Approved By:
Faculty In-charge
HOD / CIVIL
PRINCIPAL
Department of Civil Engineering – SNS College of Engineering
DEPARTMENT OF CIVIL ENGINEERING
BONAFIDE CERTIFICATE
Registration No:
Certified that this is the bonafide record of work done by
Mr / Ms _____________________________________ of _______ semester B.E. Civil
Engineering during the academic year _______________________ in the
Environmental Engineering laboratory.
HEAD OF THE DEPARTMENT
STAFF In-charge
__________________________ at Environmental Engineering laboratory in SNS College of
Engineering, Coimbatore.
Internal Examiner
External Examiner
Date:
Date:
Department of Civil Engineering – SNS College of Engineering
Submitted for the university practical examination held on
Code:
CE2356
L
0
Environmental Engineering Laboratory
T
0
P
3
C
2
Anna University Syllabus / Regulation 2008
OBJECTIVE
This subject includes the list of experiments to be conducted for
characterisation of water and municipal sewage. At the end of the course, the
student is expected to be aware of the procedure for quantifying quality
parameters for water and sewage.
REFERENCES
1. Standard methods for the examination of water and wastewater, APHA, 20th
Edition, Washington, 1998.
2. Garg, S.K., “Environmental Engineering Vol. I & II”, Khanna Publishers, New
Delhi.
3. Modi, P.N., “Environmental Engineering Vol. I & II”, Standard Book House, Delhi6.
Department of Civil Engineering – SNS College of Engineering
TOTAL: 45 PERIODS
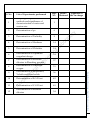
List of Experiments performed
Page
No
1
Sampling and preservation
methods and significance of
characterisation of water and
wastewater.
1
2
Determination of pH
6
3
Determination of Turbidity
9
4
Determination of Hardness
14
5
Determination of Chlorides
19
6
Determination of Optimum
coagulant dosage
24
7
Determination of available
chlorine in Bleaching powder
27
8
Determination of Dissolved
oxygen
31
9
Determination of Suspended,
Volatile and Fixed solids
36
10
Determination of B.O.D test
42
11
Determination of C.O.D test
49
12
Determination of Residual
chlorine
54
Marks
Obtained
Signature of
the In-charge
Department of Civil Engineering – SNS College of Engineering
S. No
Sampling and preservation methods and significance of
characterisation of water and wastewater
Exp No: 1
Date:
Objective:
By this experimental study, proper sampling and preservation techniques are studied in
order to maintain the integrity of the sample. Improper sample handling can invalidate
the results of any analysis that a laboratory performs.
Aim:
To be conversant in sampling and preservation methods and significance of
characterisation of water and wastewater.
Theory:
Introduction
In this lesson we will be considering sampling, which is the process used to select a
small portion of water or wastewater for the purpose of determining the characteristics
of an entire batch of water or wastewater. Sampling is used every day at water and
wastewater treatment plants to determine the characteristics of the water. Sampling
may be used to test the finished water for regulatory purposes - to ensure that the
treatment plant is treating the water in compliance with regulations. Or sampling may
be used to help the operator tweak the chemical feed rates to make the treatment
You will use sampling in every lab exercise completed in this course. For example, in the
pH lab you'll take a small sample of water and analyze the pH of that sample, then
assume that the pH of all of the water at a certain stage in the treatment process has the
same pH value as the sample tested. This is just one of many examples of sampling which
you will be exposed to as a treatment plant operator. Since the value of any laboratory
result depends on the quality of the sample taken, bad sampling can lead to laboratory
results which are misleading and worse than no results at all.
WATER SAMPLING
The significance of a chemical analysis depends to a large extent on the sampling
programme. An ideal sample should be done which is both valid and representative.
These conditions are met by collection of samples through a process of random selection.
This ensures that the composition of the sample is identical to that of the water body
from which it is collected and the sample shares the same physico-chemical
Department of Civil Engineering – SNS College of Engineering
procedure as efficient as possible.
1
characteristics with the sampled water at the time and site of sampling. The relevant
factors for any sampling programme are (a) frequency of sample collection, (b) total
number of samples, (c) size of each sample, (d) sites of sample collection, (e) method of
sample collection, (f) data to be collected with each sample, and (g) transportation and
care of samples.
For analysis of natural and waste water, two principal types of sampling Procedures are
employed:
SPOT OR GRAB SAMPLES
These are discrete portions of water samples taken at a given time. A series of grab
samples, collected from different depths at a given site, reflect variations in constituents
over a period of time. The total number of grab samples should satisfy the requirements
of the sampling programme.
COMPOSITE SAMPLES
These are essentially weighted series of grab samples, the volume of each being
proportional to the rate of flow of the water stream at the time and site of sample
collection. Samples may Composed over anytime period, such as 4, 8 or 24 hours, on the
purpose of analysis. Such composite samples are useful for determining the average
condition which , when correlated with flow, , can be used for computing the material
balance of a stream of water body over a period of time. It may be stated in general, that
times and different locations than to compile and analyse a single representative sample.
Separate samples must be collected for chemical and biological analysis. , since the
sampling and preservation techniques are quite different. For accurate analysis, it is
desirable to allow a short-time interval between sampling and analysis. As matter of fact
temperature, pH and dissolved gases (D.O.) must be determined in the field and as
quickly as possible after sampling. Collection of truly representative sample is as
important as sample preservation. A representative single sample is taken from a
number of different locations over a long period of time. In general, it is more significant
to analyse a large number of separate samples taken at different times and different
locations than it is to compile and analyse a single representative sample. It is essential
to keep accurate records of the location, time and conditions of sample collection.
Department of Civil Engineering – SNS College of Engineering
it is more meaningful to analyse a large number of separate samples taken at different
2
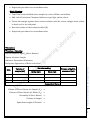
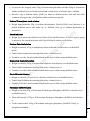
PRESERVATION
It is essential to protect samples from changes in composition and deterioration
with aging due to various interactions. The optimum sample holding time ranges from
zero for parameters, such as pH, temperature and D.O to one week for metals. The
preservation techniques for various parameters are summarized in the following table.
As mentioned above, these are essential for retarding biological action, hydrolysis of
chemical compounds and complexes and reduction of volatility of constituents. It is
desirable for accurate results that analysis must be undertaken within 4 hours for some
parameters and 24 hours for others, from the time of collection and it must be concluded
within a week.
WATER SAMPLE PRESERVATION
Container
type
pH
100
Polythene
DO
100
Polythene
COD
500
Polythene
Nitrogen Ammonia
500
Polythene
Nitrate + Nitrite
500
Polythene
Cyanide
500
Polythene
Sulphide
500
Polythene
Phosphate
500
Phenol
500
Tannin and Lignin
500
Chromium, Arsenic,
Lead, Zinc &
Mercury
500
Parameter
Preservation
Measure within 0-4 hours
Add H2SO4 to pH; refrigerate
Analyse as soon as possible, add 0.8ml
concentration of H2SO4 / L
Add 40 mg HgCl2 / L and refrigerate
Add NaOH to pH 12 and 25 ml of 2%
ascorbic acid and refrigerate
Add 1ml of 2N Zn(CH3COO2) and 2ml
of 1M NaOH stir and refrigerate
Polythene /
Add 40mg HgCl2 / L and refrigerate
Glass
Acidify with H3PO4 to pH 0.4 and add
Polythene /
1g Cu2SO4 5H2O per L to inhibit
Glass
biodegradation
Polythene /
Analyse as soon as possible
Glass
Polythene / Add 5ml Concentration HNO3 / L and
Glass
refrigerate
E.Coli / Total
bacteria /
Actenomycetis
100
Glass bottle
Microplankton /
500
Glass bottle
Sterilize the bottles in auto clave at
121o C at 15 lb/1nch2 pressure for 15
minutes, collect the sample in sterilize
bottle and refrigerate immediately.
Add 5ml formalin per 100ml sample
Department of Civil Engineering – SNS College of Engineering
Min
Sample
(ml)
3
Algae and other
biological organisms
and refrigerate immediately.
Comment:
characterisation of water and wastewater is studied.
Inference:
Department of Civil Engineering – SNS College of Engineering
The detailed report of sampling and preservation methods and significance of
4
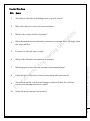
Possible Viva-Voce
Query
1
Define pH and its range in potable water.
2
Explain the types of samples.
3
Define BOD & COD.
4
How the water does turn acidic or basic?
5
What is the pH of rain water?
6
Which types of solids are found in polluted water?
7
Name few micro-organisms present in water sample?
8
What happens when acid is poured in water?
9
Define potable water?
10
List out the characteristics of water?
Department of Civil Engineering – SNS College of Engineering
S.No
5
Exp No: 2
Date:
Determination of pH
Objective:
By this experimental procedure, significance of pH and its effect on water sample is
perceived.
Aim:
To determine the pH of the given sample using pH meter.
Theory:
pH of aqueous solutions can be defined as negative logarithm of hydrogen ion
concentration. pH values ranging from 0 to 7 are acidic, and from 7 to 14 are alkaline.
The effect of pH on the chemical and biological properties of liquids makes its
determination very important. It is used in several calculations in analytical work. The
pH determination is usually done by electrometric method which is the most accurate
method and free of interference. pH is measured by a pH meter using a glass electrode
which generates a potential varying linearly with pH of solution in which it is immersed.
The basic principle of electrometric pH measured is determination of hydrogen ion by a
standard hydrogen electrode and a reference electrode.
Apparatus Required:
2) Water samples
Procedure:
The protective cover of the pH meter is removed and pH meter is turned on by the
switch.
Rinse the electrode thoroughly with distilled water.
Dry electrode by gently blotting with a soft tissue paper and standardize instrument
with electrode immersed in a buffer solution.
Remove the electrode from buffer, rinse thoroughly and blot with a soft tissue paper to
dry the electrode.
Immerse in a second buffer below pH 10, approximately 3 pH units different from the
first, the reading should be within 0.1 unit for the pH of the second buffer.
Rinse the electrode thoroughly, blot and dry and determine the pH of unknown
sample.
Department of Civil Engineering – SNS College of Engineering
1) pH meter
6
Dip the pH meter in the sample solution for about one minute.
The reading is taken after the indicated value remains constant for a minute.
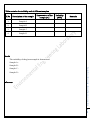
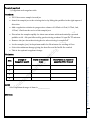
Table contains the pH unit of different samples
S.No
Description of the sample
1
Sample A
2
Sample B
3
Sample C
4
Sample D
Temperature of the
sample (oC)
pH Unit
Remarks
Result:
The permissible pH limit for drinking water is 6.5 – 8.6. The given sample is suitable /
not suitable for drinking purpose.
The pH values of the given samples are
1. Sample A – 0 – Acidic / Basic
3. Sample C – 0 – Acidic / Basic
4. Sample D – 0 – Acidic / Basic
Inference:
Department of Civil Engineering – SNS College of Engineering
2. Sample B – 0 – Acidic / Basic
7
Possible Viva-Voce
Query
1
pH is defined as?
2
pH of neutral water is?
3
The acceptable value of pH of potable water is?
4
The inner solution present in the glass electrode of Ph meter is?
5
Is it possible to store the buffer solution for a minimum period at room
temperature?
6
Define pH scale?
7
Possible reason for a relatively low pH value in a river water sample is due
to?
8
Possible reason for a relatively high pH value in a river water sample is due
to?
9
How to reduce the level of pH?
10
How to increase the level of pH?
Department of Civil Engineering – SNS College of Engineering
S.No
8
Exp No: 3
Date:
Determination of Turbidity
Objective:
By this experimental procedure, the effect of turbidity on water quality and also the
importance of determining the turbidity level in water is examined.
Aim:
To determine the turbidity of the given sample using turbidity meter.
Theory:
Turbidity of water is caused by suspended particles, primarily of clay, silt, organic
matter, and microorganisms. In natural waters, turbidity can range from a few NTU to
about 1,500 NTU. While turbidity is not harmful by itself, excess turbidity hinders the
efficiency of disinfection which can result in unsafe drinking water. As a result, the EPA
Drinking Water Standards limit turbidity to 1 NTU in filtered water. In practice,
coagulation, flocculation, and sedimentation followed by effective filtration should result
in effluent water containing less than 0.2 NTU. The test for turbidity is a physical test
rather than a chemical test. An instrument called a nephelometer is used to measure the
amount of light which is scattered by hitting turbidity particles in the water. In the
treatment plant, operators usually test the turbidity of the finished water at intervals
treated. If the effluent water has an unexpectedly high turbidity, then the chemical feed
rates may need to be adjusted or the filters may need to be backwashed.
Apparatus required:
1) Turbidity meter
2) Sample cells
3) Standard flask
4) Funnel
5) Wash bottle
6) Tissue papers
Chemicals required:
1) Hexamethylenetetramine
2) Hydrazine sulphate
3) Distilled water
Department of Civil Engineering – SNS College of Engineering
throughout the day. This gives the operator an indication of how well the water is being
9
Procedure:
For testing the given sample first the reagents are to be prepared. Then the turbidity
meter is required to be calibrated.
Preparation of Reagents
a) Hydrazine sulphate
Weigh accurately 1g of hydrazine sulphate and dissolve it in turbidity free distilled
water.
Take 100ml standard measuring flask and place a funnel over it.
Transfer it to a 100ml standard flask and make up to 100 ml using turbidity free
distilled water.
b) Hexamethylenetetramine
Weigh accurately 10g of hexamethylenetetramine and dissolve it in turbidity free
distilled water.
Take 100ml standard measuring flask and place a funnel over it.
Transfer it to a 100ml standard flask and make up to 100 ml using turbidity free
distilled water.
c) Standard 4000 NTU Solution
solution in a 100ml standard measuring flask.
Allow the mixture to stand for 24 hours.
After 24 hours, make up the volume to 100ml using turbidity free distilled water.
The standard 4000 NTU solution is ready.
Calibration of Turbidity meter
Using the standard solution calibrate the instrument.
The instrument is having four knobs, out of which the two knobs in the bottom is
the set zero knob, this is for setting the instrument to zero.
The one which is there in the top left hand side is the calibration knob, used for the
calibration.
The other one in the top is the knob for setting the detection range. It is adjusted to
1000 NTU range.
Department of Civil Engineering – SNS College of Engineering
Mix 5ml of hydrazine sulphate solution and 5ml of hexamethylenetetramine
1
0
Step 1
To the sample cell, add turbidity free distilled water up to the horizontal mark,
wipe gently with the soft tissue. Place it in turbidity meter such that the vertical
mark in the sample cell should coincide with the mark in the turbidity meter
and cover the sample cell. Now using the set zero knob, adjust the reading to
zero.
Step 2
According to our need, prepare a standard solution. In this case, a 200 NTU
solution is prepared by diluting the standard 4000 NTU solution and added to
the sample cells, up to the horizontal mark, wipe gently with soft tissue. Place it
in turbidity meter such that the vertical mark in the sample cell should coincide
with the mark in the turbidity meter and cover the sample cell.
If the instrument is not showing 200 NTU, using the calibration knob adjust the
reading to 200 NTU.
Repeat the procedure for two / three times.
Now the instrument is calibrated.
Testing of water sample
wipe gently with the soft tissue. Place it in turbidity meter such that the vertical
mark in the sample cell should coincide with the mark in the turbidity meter and
cover the sample cell.
Check for the reading in the turbidity meter. Wait until you get a stable reading.
Now note down the value displayed as the turbidity of the water sample placed in
the instrument.
Department of Civil Engineering – SNS College of Engineering
To the sample cell, add turbidity free distilled water up to the horizontal mark,
1
1
Table contains the turbidity unit of different samples
S.No
Description of the sample
1
Sample A
2
Sample B
3
Sample C
4
Sample D
Temperature of the
sample (oC)
Turbidity
(NTU)
Remarks
Result:
The turbidity of the given sample is determined.
Sample A –
Sample C –
Sample D –
Inference:
Department of Civil Engineering – SNS College of Engineering
Sample B –
1
2
Possible Viva-Voce
Query
1
Turbidity is caused by?
2
The turbidity is measured based on?
3
Does colour of water sample affects the turbidity?
4
In a nephelo turbidity meter the light detectors are at?
5
What is the unit of turbidity?
6
What is the light source for the nephelo turbidity meter?
7
Does aquatic life affects the turbidity in water?
8
The standard unit of turbidity is considered as that produced by?
9
The material used in the standard solution for nephelometer is?
10
Mixture of hydrazine sulphate and hexamethylenetetramine solution is
allowed to stand for?
Department of Civil Engineering – SNS College of Engineering
S.No
1
3
Exp No: 4
Date:
Determination of Hardness
Objective:
By this experimental procedure, the suitability of water for different purpose is examined
based on the type of hardness.
Aim:
To determine the total hardness of the given sample.
Theory:
Water that has high mineral content is known as Hard water. Hard water contains
bicarbonate, chlorides and sulphates of calcium and magnesium. When treated hard
water with soap, it gets precipitated in the form of insoluble salts of calcium and
magnesium. Hardness of water is a measure of the total concentration of the calcium and
magnesium ions expressed as calcium carbonate. There are two types of hardness,
1) Temporary hardness
2) Permanent hardness
Temporary hardness is due to the presence of bicarbonates of calcium and magnesium. It
can be easily removed by boiling.
magnesium. This type of hardness cannot be removed by boiling.
A water sample is buffered to pH 10.1 and taken into a conical flask. If indicators die like
EBT, when added to a solution containing calcium and magnesium ions, the colour of the
solution turns to wine red. EDTA, the titrant, complexes with magnesium and calcium
ions, removing them from association with the indicator. When all the Mg and Ca are
complexed with EDTA, the indicator will turn blue. This is the end point of titration.
Apparatus Required:
1) Burette with Burette stand and porcelain tile
2) Pipette with elongated tips
3) Pipette bulb
4) Conical flask
5) Measuring jar
6) Wash bottle
7) Beaker
Department of Civil Engineering – SNS College of Engineering
Permanent hardness is due to the presence of chlorides and sulphates of calcium and
1
4
Chemical required:
1) Ammonium chloride
2) Ammonium hydroxide
3) EDTA (Disodium salt of EDTA)
4) Erichrome Black T (EBT)
5) Magnesium sulphate
Procedure:
Preparation of reagents
Buffer solution preparation
Switch on the electronic balance, keep the weighing pan and set the reading to zero.
Measure 50ml of distilled water and transfer it to beaker.
Weigh 1.179g of EDTA, now the weight is 1.179 gms.
Transfer the content to the beaker having 50ml of distilled water and dissolve it
thoroughly.
Weigh 16.9g of Ammonium chloride.
Add it to the contents in the beaker and dissolve it thoroughly.
Weigh 780mg of Magnesium sulphate and transfer it to the beaker.
to the contents in the beaker.
Place the funnel over the 250ml standard flask and transfer the dissolved contents
from beaker.
Make the volume upto 250ml mark by adding distilled water. Transfer the buffer
solution to a clean reagent bottle labelled as buffer solution. This buffer solution is
used to maintain the pH of water sample between 9 and 10.
Erichrome Black T
Weigh 0.5g of EBT.
Transfer it to 100ml standard flask using funnel.
Add distilled water in the standard flask and make the volume exactly upto 100ml
mark.
Put the lid and shake the content well.
Transfer the solution to a clean reagent bottle named EBT.
Department of Civil Engineering – SNS College of Engineering
Measure 143ml of Ammonium hydroxide solution using measuring cylinder and add it
1
5
Standard EDTA solution (0.02M)
Switch on the electronic balance, keep the weighing pan and set the reading to zero.
Weigh 3.723g of EDTA sodium salt.
Transfer the entire content to 1000ml standard flask.
Fill with distilled water up to 1000ml mark.
Put the lid and shake the content well.
For easy handling take the EDTA solution in a 250ml beaker.
Total hardness test
Pipette 20ml of hard water sample and transfer it to a clean 250ml conical flask.
Add 2ml of Ammonia buffer solution to the water sample so that the pH will be
maintained between 9 and 10.
Add few drops of EBT indicator to the conical flask and the sample turns to wine red in
colour.
Before starting the titration rinse the burette with few ml of EDTA. Fill the burette
with EDTA solution and adjust to zero then fix it in burette stand.
Titrate the sample against the EDTA solution in the burette till all calcium and
magnesium ions present in the samples reacts with the EDTA. The appearance of blue
EDTA complex i.e. the end point of the titration.
Note down the burette reading.
Repeat the titration for concordant values.
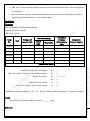
Tabulation:
Burette solution: EDTA
Pipette solution: Sample
Indicator: EBT
End point: Appearance of blue colour
Titration I – Estimation of total hardness
Burette solution: EDTA
Pipette solution: Normal water
Additional solution: 5ml of buffer solution
Indicator: EBT
Department of Civil Engineering – SNS College of Engineering
colour indicates that all Ca & Mg ions are complexed with EDTA and forms a metal
1
6
End point: Appearance of blue colour
Volume of
sample (ml)
S.No
Burette reading
Initial (ml)
Final (ml)
Volume of EDTA
consumed (ml)
1
2
3
Concordant Value
Volume of EDTA =
Normality of EDTA =
Volume of Sample =
Equivalent weight of CaCo3 =
Total hardness =
mg/l as CaCo3 equivalent
Result:
The amount of total hardness present in the given sample is ____________
Inference:
Department of Civil Engineering – SNS College of Engineering
Calcium Hardness as CaCo3 equivalent (mg/l) =
1
7
Possible Viva-Voce
Query
1
The cation that cannot cause hardness is?
2
Addition of complexometrically neutral Mg to buffer is to?
3
The hard water does not lather with soap because soap is precipitated?
4
The buffer can be stored for?
5
The need of buffer in titration is for?
6
Does hard water consumes more soap for cleaning purpose?
7
EDTA means?
8
The hard water is?
9
Buffer solution is the solution which resists change in its?
10
The Erichrome Black T is used as a?
Department of Civil Engineering – SNS College of Engineering
S.No
1
8
Exp No: 5
Date:
Determination of Chlorides
Objective:
By this experimental procedure, the level of chlorine is revealed which is useful in
determining suitable water supply schemes, types of desalting apparatus and to control
pumping of ground water when seawater intrusion is found.
Aim:
To estimate amount of chloride present in the given sample of water.
Theory:
Chlorides are widely distributed as salts of calcium, sodium and potassium in
water and waste water. The major taste producing salts in water are sodium chloride and
calcium chloride. The salty taste is due to chloride anions and association cations in
water. In some water which is having only 250 mg/l of chloride may have a detectable
salty taste if the cat-ion present in the water is sodium. On the other hand, a typical salty
taste may be absent if the water is having very high chloride concentration for example
1000 mg/l. This is because the predominant cation present in the water is not sodium
but either calcium or magnesium may be present. The amount of chloride present in
solution. The silver nitrate reacts with chloride ion according to 1 mole of AgNO 3 reacts
with 1 mole of chloride. The titrant concentration is generally 0.02M. Silver chloride is
precipitated quantitatively, before red silver chromate is formed. The end of titration is
indicated by formation of red silver chromate from excess silver nitrate. The results are
expressed in mg/l of chloride (Cl- with a molecular weight of 35.453 g/mol).
Apparatus Required:
1) Burette with Burette stand and porcelain tile
2) Pipette with elongated tips
3) Pipette bulb
4) Conical flask
5) Wash bottle
6) Beaker
Chemical required:
1) Silver nitrate
Department of Civil Engineering – SNS College of Engineering
water can be easily determined by titrating the given water sample with silver nitrate
1
9
2) Phenolphthalein indicator
3) Sodium chloride
4) Potassium chromate
Procedure:
Preparation of reagents
Standard Sodium Chloride Solution
Switch on the electronic balance, keep the weighing pan and set the reading to zero.
Weigh 1.648g of Sodium Chloride
Transfer the contents to the beaker containing distilled water. Using glass rod,
dissolve the contents thoroughly.
Transfer the contents in the beaker to a 100ml standard flask; fill distilled water up to
100ml mark.
Transfer it to 100ml standard flask using funnel.
Standard Silver Nitrate (0.0282N)
Weigh 4.791g of silver nitrate and transfer it to the beaker with distilled water.
Transfer the contents in the beaker to a 100ml standard flask; fill distilled water up to
100ml mark.
Potassium Chromate indicator
Weigh 25g of Potassium Chromate. Transfer it to the beaker contains distilled water.
Add few drops of Silver Nitrate solution until slight red precipitate is formed.
Allow it to stand for 12 hours. After 12 hours filter the solution using filter paper and
dilute the filtrate to 1000ml using distilled water.
Testing of water sample
Before starting the titration rinse the burette with silver nitrate solution. Fill the
burette with silver nitrate solution of 0.0282N. Adjust to zero and fix the burette in
stand.
Take 20ml of the sample in a clean 250ml conical flask.
Add 1ml of Potassium Chromate indicator to get light yellow colour.
Titrate the sample against silver nitrate solution until the colour changes from yellow
to brick red i.e. the end point.
Note the volume of silver nitrate added (A).
Department of Civil Engineering – SNS College of Engineering
Standardize it against 0.0282N NaCl solution. Store it in a amber bottle.
2
0
Repeat the procedure for concordant value.
Blank Titration
Take 20ml of the distilled water sample in a clean 250ml conical flask.
Add 1ml of Potassium Chromate indicator to get light yellow colour.
Titrate the sample against silver nitrate solution until the colour changes from yellow
to brick red i.e. the end point.
Note the volume of silver nitrate added (B).
Repeat the procedure for concordant value.
Tabulation:
Titration – Chlorides
Burette solution: AgNO3 (Silver Nitrate)
Pipette solution: Sample
Indicator: Potassium dichromate
S.No
Volume of
sample (ml)
Burette reading
Initial (ml)
Final (ml)
1
2
Blank
Concordant Value
Volume of Silver Nitrate for Sample (VS) =
Volume of Silver Nitrate for Blank (VB) =
Normality of Silver Nitrate =
Volume of Sample =
Equivalent weight of Chloride =
Volume of AgNO3
consumed (ml)
Department of Civil Engineering – SNS College of Engineering
End point: Appearance of Brick red colour
2
1
Chlorides (mg/L) =
Chlorides (mg/L) = _____________ mg/L
Result:
Amount of chloride present in the given distilled water sample is __________
Department of Civil Engineering – SNS College of Engineering
Inference:
2
2
Possible Viva-Voce
Query
1
The limit of chlorides in drinking water as per IS code is?
2
Why silver nitrate is stored in a brown bottle?
3
What is the colour of silver chromate?
4
When both hardness and chloride content are very high above 500mg/l, then
the water will be?
5
Presence of chloride can corrode?
6
What is the chloride concentration in sewage?
7
What happens to the chloride consumed by human beings?
8
Chlorides give salty taste to water particularly when present as?
9
The point at which a clear visual change is observed after the reaction
between titrant and titration is called?
10
Name the most common ion in water?
Department of Civil Engineering – SNS College of Engineering
S.No
2
3
Exp No: 6
Date:
Determination of Optimum coagulant dosage
Objective:
By this experimental procedure, the process of coagulation and flocculation using alum
to remove turbidity of water is made clear.
Aim:
To determine the quantity of alum required to coagulate the given sample of raw water.
Theory:
The jar test is a method of measuring the effect of coagulation, flocculation, and
sedimentation on turbidity. Coagulation/flocculation is the process of binding small
particles in the water together into larger, heavier clumps which settle out relatively
quickly. The larger particles are known as floc. Properly formed floc will settle out of
water quickly in the sedimentation basin, removing the majority of the water's
turbidity. In many plants, changing water characteristics require the operator to adjust
coagulant dosages at intervals to achieve optimal coagulation. Different dosages of
coagulants are tested using a jar test, which mimics the conditions found in the treatment
plant. The first step of the jar test involves adding coagulant to the source water and
dissolve the coagulant in the water. Then the water is mixed more slowly for a longer
time period, mimicking the flocculation basin conditions and allowing the forming floc
particles to cluster together. Finally, the mixer is stopped and the floc is allowed to settle
out, as it would in the sedimentation basin. The amount of alum required for coagulant
depends on the turbidity and colour of raw water. The optimum dosage of alum is usually
found to vary from 5 mg/l for relatively clear water to about 85 mg/l for highly turbid
water. The average normal dosage is about 17 mg/l.
Apparatus Required:
1) A stirring machine with paddles capable of variable speeds from 0 to 100 rpm.
2) Analytical balance
3) Beakers
4) Pipette
5) Watch clock
Department of Civil Engineering – SNS College of Engineering
mixing the water rapidly (as it would be mixed in the flash mix chamber) to completely
2
4
Chemical required:
1) Coagulant and coagulant aids.
Procedure:
Fill 1 litre water sample in each jar.
Attach he sample jar to the stirring device by lifting the paddles in the right upward
direction.
Add coagulation solution in progressive volume of 0.25ml to 0.5ml, 0.75ml, 1ml,
1.25ml, 1.5ml into the series of the sample jars.
Flocculate the sample rapidly for about one minute with mechanically operated
paddles at 60 – 80 rpm followed by gentle stirring at about 30 rpm for 15 minutes.
Remove the jars from the stirring device after stirring is completed.
Let the sample (jars) be kept immovable for 30 minutes for settling of flocs.
Select the minimum dosage giving the best floc and the most floc settled.
This is the optimal coagulant dosage.
Tabulation:
S.No
Dosage of
Coagulant (gm/l)
Depth of Sediment
(cm)
Observation in regard to
quantity of floc formed
2
3
4
Result:
Select optimum dosage of alum is ________________
Inference:
Department of Civil Engineering – SNS College of Engineering
1
2
5
Possible Viva-Voce
Query
1
Chemical formula of Alum?
2
Why alum is preferred to other coagulants?
3
What is the difference between coagulation and flocculation?
4
What are coagulant aids?
5
What is the significance of pH in coagulation using alum?
6
What factors affect the sedimentation of a discrete particles settling in a
quiescent liquid?
7
What is NTU?
8
1 PPM is equals to ____mg/l.
9
What are the advantages of using coagulant aids?
10
What is optimum pH value and optimum coagulant dosage of the coagulant
process of your water sample.
Department of Civil Engineering – SNS College of Engineering
S.No
2
6
Exp No: 7
Date:
Determination of available chlorine in Bleaching powder
Objective:
By this experimental study, the level of chlorine in bleaching is examined practically.
Aim:
To determine the percentage of available chlorine in the given sample of bleaching
powder.
Theory:
Bleaching powder is used as a bleaching agent and also as a disinfectant. The main
constituent of bleaching powder is calcium hypochlorite [Ca(OCl)2] which supplies
chlorine [Cl2] with dilute acids.
Ca(OCl)2 + 4HCl
CaCl2 + 2H2O + 2Cl2
So the available chlorine is defined as the percentage of chlorine made available by
bleaching powder when treated with dilute acids. The available chlorine present in
bleaching powder sample is determined iodometricaliy by treating its solution with an
excess of potassium iodide solution in the acidic medium.
ClO- + 2H+ + 2I-
I2 + H2O + Cl-
freshly prepared starch solution as indicator to be added near the end point.
[ Starch + I2
I2 + 2Na2S2O3
Blue coloured complex ]
Na2S4O6 + 2NaI
Apparatus required:
1) Analytical balance
2) Burette with Burette stand and porcelain tile
3) Pipette with elongated tips
4) Pipette bulb
5) Conical flask
6) Measuring flask
7) Funnel
8) Beakers
Department of Civil Engineering – SNS College of Engineering
The liberated iodine (I2) is treated with sodium thiosulphate (Na2S2O3) solution using
2
7
Chemical required:
1) Bleaching powder
2) Standard sodium thiosulphate solution (N/10)
3) 10% Potassium iodide solution (KI)
4) Dilute acetic acid
5) Freshly prepared starch solution as indicator
Procedure:
1g of bleaching powder is accurately weighed in a weighing bottle and it is transferred
to a clean beaker and is ground to a thin paste with water.
The mixture is allowed to settle and the milky supernatant liquid poured into a 100 ml
standard flask.
The residue in the beaker is ground with a little more water and the operation
repeated until the whole of the sample has been quantitatively transferred into the
standard flask.
Then the solution is made up to the volume. The flask is shaken well for uniform
concentration.
10 ml of the bleaching powder solution (use measuring flask) in a state of very fine
Then add 10 ml of 10% potassium iodide (KI) solution and 10 ml of dilute acetic acid.
This solution [which contains liberated iodine (I2)] titrates with standard sodium
thiosulphate solution (taken in the burette) until the dark brown colour changes to
pale yellow.
To this add, 2 ml of freshly prepared starch solution as indicator, so the colour of the
solution turned into blue. Continue the titration till the disappearance of blue colour of
the solution and note down the volume of the titrant used.
The titration is repeated until a concordant volume is obtained.
Tabulation:
Titration
Burette solution: Sodium thiosulphate
Pipette solution: Bleaching powder solution
Indicator: Starch
Department of Civil Engineering – SNS College of Engineering
suspension is taken into a conical flask and add 10 ml of distilled water into it.
2
8
S.No
Volume of bleaching
powder sample
(ml)
Burette reading
Initial (ml)
Final (ml)
Volume of Sodium
thiosulphate
consumed (ml)
1
2
3
Concordant Value (V1)
Normality of Standard Na2S2O3 solution, N1 = 1/10 = 0.1 N
Volume of Standard Na2S2O3 solution, V1 = _______ml
Volume of given bleaching powder solution, V2 = _______ml
Normality of the given water sample, N2
N1 X V1 = N2 X V2
Normality of given bleaching powder solution,
N2 =
= _______N
Amount of available chlorine = N2 x Eq. Wt of Chlorine = N2 x 35.45 g/ L
= _______g / L
= _______g
The percentage of available chlorine present in given sample of bleaching powder,
= (Amount of Chlorine / Weight of bleaching powder) x 100
= _______%
Result:
The percentage of available chlorine present in the given sample of bleaching powder
is_______________%
Inference:
Department of Civil Engineering – SNS College of Engineering
Amount of available chlorine present in 100ml of the solution = _______ x 100 / 1000 g
2
9
Possible Viva-Voce
Query
1
What is disinfection?
2
Why do we prefer chlorination over other methods of disinfection?
3
Discuss the effect of pH of water and organic matter of water on efficiency of
disinfection by chlorine.
4
What is Electro-katadyn process?
5
Why addition of chlorine tends to decrease the pH of water, while
hypochlorite tends to increase the pH.
6
What are the different factors that affect the degree of disinfection?
7
What are different types of chlorine dosage process?
8
The dosage of chlorine should be proper. Why?
9
What is the acceptable limit of chlorine in drinking water?
10
In what form the chlorine is added to water for disinfection process?
Department of Civil Engineering – SNS College of Engineering
S.No
3
0
Exp No: 8
Date:
Determination of Dissolved Oxygen
Objective:
By this experimental procedure, pollution strength of the sample is examined.
Aim:
To determine the dissolved oxygen content in the given water sample.
Theory:
The term Dissolved Oxygen (DO) is used to describe the amount of oxygen
dissolved in a unit volume of water. DO is essential for the maintenance of healthy lakes
and rivers. It is a measure of the ability of water to sustain aquatic life. The DO content of
water is influenced by the source, raw water temperature, treatment and chemical or
biological processes taking place in the distribution system. The presence of oxygen is
good sign. Depletion of DO in water supplies can encourage the microbial reduction of
nitrate to nitrite and sulphate to sulphide. It can also cause an increase in the
concentration of ferrous iron in solution, with subsequent discoloration at the tap when
the water is aerated. Hence, analysis of DO is an important step in water pollution control
and wastewater treatment process control. There are various methods available to
parts per million. The minimum DO level of 4 to 5 mg/l or ppm is desirable for survival of
aquatic life. Beyond certain point, most of the wastes break down. The concentration of
DO rises as the river recovers oxygen from the atmosphere and aquatic plants. Thus DO
test is the basis for BOD test which is an important parameter to evaluate organic
pollution potential of a waste. It is necessary for all aerobic biological wastewater
treatment processes to control the rate of aeration. DO can be measured either by
titrimetric method or electrometric method.
Apparatus Required:
1) Burette with Burette stand and porcelain tile
2) Pipette with elongated tips
3) Pipette bulb
4) 500ml Conical flask
5) 300ml glass stoppered BOD bottles
6) 250ml graduated cylinders
Department of Civil Engineering – SNS College of Engineering
measure DO. In a healthy body of water such as lake, river or stream, the DO is about 8
3
1
7) Wash bottle
Chemical required:
1) Manganous sulphate solution
2) Alkaline iodide-azide solution
3) Concentrated sulphuric acid
4) Starch indicator solution
5) Sodium thiosulphate
6) Distilled or deionized water
7) Potassium Hydroxide
8) Potassium iodide
9) Sodium Azide
Procedure:
Preparation of reagents
Manganous Sulphate Solution
Dissolve Manganese Sulphate (480g of MnSO4.4H2O / 400g of MnSO4.4H2O / 360g of
MnSO4.4H2O) in freshly boiled and cooled distilled water, filter the solution and make
up to 1000ml (1litre). In this experiment, we are using Manganese Sulphate Mono
Take 364g of Manganese Sulphate Mono hydrate (MnSO4.4H2O) and transfer it to the
beaker. To dissolve the content, place it in the magnetic stirrer.
The solution should not give blue colour by addition of acidified potassium iodide
solution and starch.
Alkaline Iodide Sodium Azide Solution
To prepare this reagent we are going to mix three different chemicals, dissolve either
500g of Sodium Hydroxide (or) 700g of Potassium Hydroxide and 135g of Sodium
Iodide (or) 150g of Potassium Iodide.
To prepare the reagent, take 700g of Potassium hydroxide and add 150g of Potassium
iodide and dissolve it in freshly boiled and cooled water, and make up to 1000ml.
Dissolve 10g of Sodium Azide (NaN3) in 40ml of distilled water and add this with
constant stirring to the cool alkaline iodide solution prepared.
Department of Civil Engineering – SNS College of Engineering
hydrate.
3
2
Sodium Thiosulphate stock solution
Weigh approximately 25g of sodium thiosulphate (Na2S2O35H2O) and dissolve it in
boiled distilled water and make up to 1000ml. Add 1g of Sodium Hydroxide to
preserve it.
Starch indicator
Weigh 2g of starch and dissolve in 100ml of hot distilled water In case if you’re going
to preserve the starch indicator add 0.2g of Salicylic acid as preservative.
Testing of sample
Take two 300ml glass stoppered BOD bottle and fill it with water sample to be tested.
Avoid any kind of bubbling and trapping of air bubbles.
Add 2ml of manganese sulphate to the BOD bottle by inserting the calibrated pipette
just below the surface of the liquid.
Add 2ml of akali-iodide-azide reagent in the same manner.
Squeeze the pipette slowly so no bubbles are introduced via the pipette. The pipette
should be dipped inside the sample while adding the above two reagents. If the
reagent is added above the sample surface, you will introduce oxygen into the sample.
If oxygen is present, a brownish-orange cloud of precipitate or floc will appear.
Add 2ml of concentrated sulphuric acid via a pipette held just above the surface of the
sample.
Carefully invert several times to dissolve the floc.
At this point, the sample is “fixed” and can be stored for up to 8 hours if kept in cool,
dark place.
Rinse the burette with sodium thiosulphate and then fill it with sodium thiosulphate.
Fix the burette to the stand.
Measure 203ml of the solution from the bottle and transfer to a conical flask.
Tiration needs to be started immediately after the transfer of the contents to conical
flask.
Titrate it against sodium thiosulphate using starch as indicator. (Add 3 – 4 drops of
starch indicator solution).
End point of the titration is first disappearance of the blue colour to colourless.
Note down the volume of sodium thiosulphate solution added which gives the DO.
Department of Civil Engineering – SNS College of Engineering
Allow it to settle for sufficient time in order to react completely with oxygen.
3
3
Repeat the titration for concordant values.
Tabulation:
Titration
Burette solution: Sodium thiosulphate
Pipette solution: Tap water
Indicator: Starch
S.No
Temp
(oC)
Volume of
sample (ml)
Burette reading
Initial
(ml)
Final (ml)
Volume of
Sodium
thiosulphate
(ml)
Dissolved
Oxygen (mg/l)
1
2
3
Concordant Value
Volume of Sample, =
Volume of Sodium thiosulphate, =
Normality of Sodium thiosulphate, =
Dissolved Oxygen = Volume of Sodium thiosulphate * 0.2 * 1000 / Volume of water sample
=
Result:
The dissolved oxygen in the given water sample is _______mg/l
Inference:
Department of Civil Engineering – SNS College of Engineering
Dissolved Oxygen, = ?
3
4
Possible Viva-Voce
Query
1
Winkler titration method is based on __________ property of Dissolved Oxygen.
2
DO in water mainly depends upon?
3
The ingredients of Alkali are?
4
The precipitate formed after the addition of MnSO4 and Alkali azide is?
5
Does DO depend only on physical properties of water?
6
Along the stream, the increase in DO will be at?
7
The DO in potable water imparts?
8
_____________ and ____________________ interfere in the determination of DO.
9
The sample obtained for testing DO can be preserved by?
10
What is minimum DO for aquatic life survival in water?
Department of Civil Engineering – SNS College of Engineering
S.No
3
5
Exp No: 9
Date:
Determination of Suspended, Volatile and Fixed solids
Objective:
By this experimental procedure, the quality of water sample and an approximate amount
of organic matter present in the solid fraction of water sample is found.
Aim:
To determine the total Suspended, Volatile and fixed solids in the given water sample.
Theory:
The term total Suspended solids can be referred to materials which are not
dissolved in water and are non filterable in nature. It is defined as residue upon
evaporation of non filterable sample on a filter paper. The term Volatile solids refer to
materials that are completely volatilized from water at higher temperature (550 OC). The
solids are often referred to the organic content of the water. The term fixed solids can be
referred to materials which are not volatilised from water at higher temperature
(550OC). These solids are often referred to the inorganic contents of the water. A well
mixed sample is filtered through a weighed standard glass fiber filter and the residue
retained on the filter is dried to a constant weigh at 103 – 105OC. The increase in weight
dish on a steam bath and is dried to a constant mass in an oven at 103 – 105OC. The
reside obtained is ignited to constant weight at 550OC. The remaining solids represent
the total fixed solids and the weight lost during the ignition represents the total volatile
solids.
Apparatus Required:
1) Evaporating Dish
2) Water bath
3) Hot Air Oven
4) Desiccators
5) Analytical balance
6) Measuring jars
7) Dish tongs
8) Crucibles
9) Filter
Department of Civil Engineering – SNS College of Engineering
of the filter represents the total suspended solids. The sample is evaporated in a weighed
3
6
10) Vacuum pump
11) Forceps (Smooth – Tipped)
12) Magnetic stirrer
13) Wash bottle
Chemical required:
1) Water sample
Procedure:
Testing of sample for Total Suspended Solids
Place filtration apparatus with weighed filter in filter flask.
Mix sample well and pour into a graduated cylinder to the selected volume.
Apply suction to filter flask and seat filter with a small amount of distilled water.
Pour selected volume into filtration apparatus.
Draw sample through filter into filter flask.
Rinse measuring jar into filtration apparatus with three successive 10ml portions of
distilled water, allowing complete drainage between each rinsing.
Continue suction for three minutes after filtration of final rinse is completed.
Dry filter in an oven at 103 – 105OC for at least 1 hour.
When cool, weigh the filter and support.
Testing of sample for Total Volatile and fixed Solids
To measure total volatile solids and fixed solids, take a clean silica crucible which has
been washed and dried in a hot air oven at 105OC for one hour and ignited at 550OC to
remove all organic materials present in it.
Now weigh the empty silica crucible in analytical balance Let’s denote the weight
measured as W1.
Using pipette transfer 75ml of unfiltered sample in the porcelain dish.
Switch on the oven and allowed to reach 105OC. Check and regulate oven and furnace
temperature frequently to maintain the desired temperature range.
Place the silica crucible in the hot air oven and care should be taken to prevent
splattering of sample during evaporation or boiling.
Dry the sample to get constant mass. Drying for long duration is done to eliminate
necessity of checking for constant mass.
Department of Civil Engineering – SNS College of Engineering
Cool filter in desiccator to room temperature.
3
7
Cool the container in a desiccator. Desiccators are designed to provide an environment
of standard dryness This is maintained by the desiccant found inside Don’t leave the
lid off for prolonged periods or the desiccant will soon be exhausted.
We should weigh the dish as soon as it has cooled to avoid absorption of moisture due
to its hygroscopic nature.
Samples need to be measured accurately, weighed carefully and dried and cooled
completely.
Note the weight of the residue as W2.
Switch on the furnace and allow it to reach 550OC. Check and regulate the furnace
temperatures frequently to maintain the desired temperature range.
Place the silica crucible in the furnace and care should be taken while
keep
the
crucible inside the furnace since it will be too hot.
Allow it to ignite for 20 minutes to get constant mass.
As above, cool the silica crucible in a desiccator to room temperature.
Weigh the dish as soon as it has cooled to avoid absorption of moisture due to its
hygroscopic nature.
Calculation:
Total Suspended solids
Weight of clean filter paper (g),
W1
=
Weight of clean filter paper and the residue (g),
W2
=
Weight of residue (g),
W
=
Volume of the sample (ml),
V
=
Total Suspended Solids (mg/l), TDS =
Weight of residue (g) = W2 – W1
Weight of residue (Convert g to mg) = W =
Volume of the sample (Convert ml to L) = V =
Department of Civil Engineering – SNS College of Engineering
Note the weight with residue as W3.
3
8
Total Suspended Solids (mg/l) = W / V =
Total Volatile Solids
Weight of the clean silica crucible (g),
W1
=
Weight of the clean silica crucible and residue at 105OC (g),
W2
=
Weight of the residue (g),
W
=
Weight of the clean silica crucible and the ash at 550OC (g),
W3
=
Weight of the ash (g),
W
=
Volume of the sample (ml),
V
=
Total Volatile Solids (mg/l), TVS =
Weight of residue (g), W = W2 – W3
Weight of residue (Convert g to mg), W =
Amount of total volatile solids present in the sample (mg/l) = W / V
Total Fixed Solids
Weight of the clean silica crucible (g),
W1
=
Weight of the clean silica crucible and residue at 105OC (g),
W2
=
Weight of the residue (g),
W
=
Weight of the clean silica crucible and the ash at 550OC (g),
W3
=
Weight of the ash (g),
W
=
Volume of the sample (ml),
V
=
Total Fixed Solids (mg/l), TFS
=
Department of Civil Engineering – SNS College of Engineering
Volume of the sample (Convert ml to L), V =
3
9
Weight of residue (g), W = W3 – W1
Weight of residue (Convert g to mg), W =
Volume of the sample (Convert ml to L), V =
Amount of total fixed solids present in the sample (mg/l) = W / V
Results:
In the given sample of water,
The Total Suspended Solids = ___________ mg/l.
The Total Volatile Solids = ___________ mg/l.
The Total Fixed Solids = ___________ mg/l.
Department of Civil Engineering – SNS College of Engineering
Inference:
4
0
Possible Viva-Voce
Query
1
The pore size of the filter paper used for filtration is?
2
Total suspended solids are mostly responsible for?
3
The chemical substance used in the desiccator is?
4
Always the total suspended solids value will be?
5
Total volatile solids determination is very important in the control of?
6
The crucible with sample, should be placed in the muffled furnace for atleast?
7
The total fixed solids is the measure of?
8
Putrescible solid means?
9
The total volatile solids is the measure of?
10
Why the crucible after ignition should be cooled in a desiccator?
Department of Civil Engineering – SNS College of Engineering
S.No
4
1
Exp No: 10
Date:
Determination of Biochemical Oxygen Demand test
Objective:
By this experimental procedure, an idea on biodegradability of the sample is determined.
Aim:
To determine the biochemical oxygen demand in the given sample.
Theory:
The biochemical oxygen demand determination is a chemical procedure for
determining the amount of dissolved oxygen needed by aerobic organisms in a water
body to break the organic materials present in the given water sample at certain
temperature over a specific period of time. BOD of water or polluted water is the amount
of oxygen required for biological decomposition of dissolved organic matter to occur
under standard condition at a standardized time and temperature. Usually, the time is
taken as 5 days and the temperature is 20oC. The test measures the molecular oxygen
utilized during a specific incubation period for the biochemical degradation of organic
material (carbonaceous demand) and the oxygen used to oxidize inorganic material such
as sulphides and ferrous ion. It also may measure the amount of oxygen used to oxidize
specific temperature for 5 days. The DO content of the sample is determined before and
after five days of incubation at 20oC and the BOD is calculated from the difference
between the initial and final DO. The initial DO is determined shortly after the dilution is
made. All oxygen uptakes occurring after this measurement is included in the BOD
measurement.
Apparatus Required:
1) BOD Incubator
2) Burette with Burette stand and porcelain tile
3) Pipette with elongated tips
4) Pipette bulb
5) 500ml Conical flask
6) 300ml glass stoppered BOD bottles
7) 250ml graduated cylinders
8) Wash bottle
Department of Civil Engineering – SNS College of Engineering
reduced forms of nitrogen. The sample is filled in an airtight bottle and incubator at
4
2
Chemical required:
1) Calcium chloride
2) Magnesium Sulphate
3) Ferric Chloride
4) Di Potassium Hydrogen Phosphate
5) Potassium Di Hydrogen Phosphate
6) Di Sodium Hydrogen Phosphate
7) Ammonium Chloride
8) Manganous Sulphate
9) Potassium hydroxide
10) Potassium iodide
11) Sodium azide
12) Concentrated Sulphuric acid
13) Starch indicator
14) Sodium thiosulphate
15) Distilled or deionized water
Procedure:
Preparation of reagents
Dissolve Manganese Sulphate (480g of MnSO4.4H2O / 400g of MnSO4.4H2O / 360g of
MnSO4.4H2O) in freshly boiled and cooled distilled water, filter the solution and make
up to 1000ml (1litre). In this experiment, we are using Manganese Sulphate Mono
hydrate.
Take 364g of Manganese Sulphate Mono hydrate (MnSO4.4H2O) and transfer it to the
beaker. To dissolve the content, place it in the magnetic stirrer.
The solution should not give blue colour by addition of acidified potassium iodide
solution and starch.
Alkaline Iodide Sodium Azide Solution
To prepare this reagent we are going to mix three different chemicals, dissolve either
500g of Sodium Hydroxide (or) 700g of Potassium Hydroxide and 135g of Sodium
Iodide (or) 150g of Potassium Iodide.
Department of Civil Engineering – SNS College of Engineering
Manganous Sulphate Solution
4
3
To prepare the reagent, take 700g of Potassium hydroxide and add 150g of Potassium
iodide and dissolve it in freshly boiled and cooled water, and make up to 1000ml.
Dissolve 10g of Sodium Azide (NaN3) in 40ml of distilled water and add this with
constant stirring to the cool alkaline iodide solution prepared.
Sodium Thiosulphate stock solution
Weigh approximately 25g of sodium thiosulphate (Na2S2O35H2O) and dissolve it in
boiled distilled water and make up to 1000ml. Add 1g of Sodium Hydroxide to
preserve it.
Starch indicator
Weigh 2g of starch and dissolve in 100ml of hot distilled water In case if you’re going
to preserve the starch indicator add 0.2g of Salicylic acid as preservative.
Calcium Chloride Solution
Weigh accurately 27.5g of anhydrous calcium chloride and dissolve it in distilled
water.
Take 100ml standard measuring flask place a funnel over it.
Transfer it to the 100ml standard flask make up to 100ml using distilled water.
Magnesium Sulphate Solution
Take 100ml standard measuring flask place a funnel over it.
Transfer it to the 100ml standard flask make up to 100ml using distilled water.
Ferric Chloride Solution
Weigh accurately 0.15g of ferric chloride and dissolve it in distilled water.
Take 100ml standard measuring flask place a funnel over it.
Transfer it to the 100ml standard flask make up to 100ml using distilled water.
Phosphate buffer Solution
Weigh accurately 8.5g of Potassium Di Hydrogen Phosphate (KH2PO4) and dissolve it
in distilled water.
Then add exactly 21.75g of Di Potassium Hydrogen Phosphate (K2HPO4) and dissolve
it.
To the same beaker 33.4g of Di sodium hydrogen phosphate (Na2HPO4.7H2O), is
weighed and added.
Department of Civil Engineering – SNS College of Engineering
Weigh accurately 22.5g of magnesium sulphate and dissolve it in distilled water.
4
4
Finally to the beaker containing all the salts, add accurately 1.7g of Ammonium
Chloride (NH4Cl) and dissolve it.
Take 100ml standard measuring flask place a funnel over it.
Transfer it to the 100ml standard flask make up to 100ml using distilled water.
The pH should be 7.2 without further adjustment.
Dilution water
High quality organic free water must be used for dilution.
The required volume of water (5 litres of organic free distilled water) is aerated with a
supply of clean compressed air for at least 12 hours. Allow it to stabilize by incubating
it at 20oC for at least 4 hours.
For the test we have taken 5 litres of organic free aerated distilled water, hence add
5ml each of the nutrients.
Add 5ml of calcium chloride solution
Add 5ml of magnesium sulphate solution
Add 5ml of ferric chloride solution
Add 5ml of phosphate buffer solution
This is the standard dilution water. Prepare dilution water 3 to 5 days before initiating
Testing of Sample
Take four 300ml of glass stoppered BOD bottles (Two for sample & two for blank).
Add 10ml of the sample to each of the two BOD bottles and fill the remaining quantity
with the dilution of water i.e. we have diluted the sample 30 times.
Add dilution water to the other two blank BOD bottles.
After the addition of solutions, close the bottles and number it for identification.
Now preserve one blank solution bottle and one sample solution bottle in the BOD
incubator at 20oC for five days.
The other two bottles need to be analysed immediately.
Avoid any kind of bubbling and trapping of air bubbles.
Add 2ml of manganese sulphate to the BOD bottle by inserting the calibrated pipette
just below the surface of the liquid.
Add 2ml of alkali-iodide-azide reagent in the same manner.
Allow it to settle for sufficient time in order to react completely with oxygen.
Department of Civil Engineering – SNS College of Engineering
BOD test to ensure that the BOD of the dilution water is less than 0.2 mg/l.
4
5
When this floc has settled to the bottom, shake the contents thoroughly by turning it
upside down.
Add 2ml of concentrated sulphuric acid via a pipette held just above the surface of the
sample.
Carefully invert several times to dissolve the floc.
Titration need to be started immediately after the transfer of the contents to conical
flask.
Rinse the burette with sodium thiosulphate and then fill it with sodium thiosulphate.
Fix the burette to the stand.
Measure 203ml of the solution from the bottle and transfer to a conical flask.
Titrate the solution with standard sodium thiosulphate solution until the yellow
colour of liberated iodine is almost faded out.
Add 1ml of starch solution.
Note down the volume of sodium thiosulphate solution added, which gives the DO in
mg/l. Repeat the titration for concordant values.
After five days take out the bottles from the BOD incubator and analyse the samples
and the blank for DO.
just below the surface of the liquid.
Add 2ml of alkali-iodide-azide reagent in the same manner.
If oxygen is present, a brownish-orange cloud of precipitate or floc will appear.
Allow it to settle for sufficient time in order to react completely with oxygen.
Add 2ml of concentrated sulphuric acid via a pipette held just above the surface of the
sample.
Carefully invert several times to dissolve the floc.
Titration need to be started immediately after the transfer of the contents to conical
flask.
Rinse the burette with sodium thiosulphate and then fill it with sodium thiosulphate.
Fix the burette to the stand.
Measure 203ml of the solution from the bottle and transfer to a conical flask.
Titrate the solution with standard sodium thiosulphate solution until the yellow
colour of liberated iodine is almost faded out.
Department of Civil Engineering – SNS College of Engineering
Add 2ml of manganese sulphate to the BOD bottle by inserting the calibrated pipette
4
6
Add 1ml of starch solution and continue the titration until the blue colour disappears
to colourless.
Note down the volume of sodium thiosulphate solution added, which gives the DO in
mg/l. Repeat the titration for concordant values.
Tabulation:
Titration
Burette solution: Sodium thiosulphate
Pipette solution: Sample
Indicator: Starch
Trial
No
Day
Volume of
sample (ml)
Burette reading
Initial
(ml)
Final (ml)
Volume of
Sodium
thiosulphate
(ml)
Dissolved
Oxygen (mg/l)
Blank
1
2
Sample
1
2
Initial DO of the diluted sample,
DO
=
DO at the end of 5 days for the diluted sample,
D5
=
Blank correction,
BC
= Co – C5
BC
=
Initial DO of the blank,
CO
=
DO at the end of 5 days for the blank,
C5
=
Biochemical oxygen demand = ({DO – D5 – BC} x Volume of diluted sample) / Volume of sample
Result:
The BOD of the given sample of water is _________ mg/l.
Inference:
Department of Civil Engineering – SNS College of Engineering
Concordant Value
4
7
Possible Viva-Voce
Query
1
Biochemical Oxygen Demand is an important measure of?
2
In BOD test, the dilution water is aerated for?
3
What is the permissible limit of BOD in potable water?
4
Seeding the process of addition of?
5
What happens to the sample, after incubation period of BOD which is 5 days
at 20OC?
6
In a treatment plant when the influent BOD is 245 mg/l and the effluent BOD
is 22 mg/l, the percentage of BOD removed is?
7
The reaction that occurs between iodine and sodium thiosulphate result in?
8
Manganous hydroxide takes up dissolved oxygen in molecular form to form?
9
Sulphuric acid is added to reduce?
10
The increased level of BOD in water indicates?
Department of Civil Engineering – SNS College of Engineering
S.No
4
8
Exp No: 11
Date:
Determination of Chemical Oxygen Demand test
Objective:
By this experimental procedure, strength of the waste is assessed, which contain toxins
and biologically resistant organic substances.
Aim:
To determine the chemical oxygen demand in the given sample.
Theory:
The chemical oxygen demand test is commonly used to indirectly measure the
amount of organic compounds in water. Most applications of COD determine the amount
of organic pollutants found in surface water, making COD a useful measure of water
quality. It is expressed in milligrams per litre (mg/l), which indicates the mass of oxygen
consumed per litre of solution. COD is the measure of the amount of oxygen in water
consumed for chemical oxidation of pollutants. COD determines the quantity of oxygen
required to oxidize the organic matter in water or waste water sample, under specific
conditions of oxidizing agent, temperature and time. This method covers the
determination of COD in ground and surface waters, domestic and industrial wastewater.
completely by potassium dichromate (K2Cr2O7) in the presence of sulphuric acid (H2SO4),
silver sulphate (AgSO4) and mercury sulphate (HgSO4) to produce CO 2 and H2O. The
sample is refluxed with a known amount of potassium dichromate (K 2Cr2O7) in the
sulphuric acid medium and the excess potassium dichromate (K2Cr2O7) is determined by
titration against ferrous ammonium sulphate, using ferroin as an indicator. The
dichromate consumed by the sample is equivalent to the amount of O 2 required to
oxidize the organic matter.
Apparatus Required:
1) COD Digester
2) COD vials with stand
3) Burette with Burette stand and porcelain tile
4) Pipette with elongated tips
5) Pipette bulb
6) 250ml Conical flask
Department of Civil Engineering – SNS College of Engineering
The applicable range is 3 – 900 mg/l. The organic matter present in sample gets oxidized
4
9
7) Tissue papers
8) Wash bottle
Chemical required:
1) Potassium dichromate
2) Sulphuric acid
3) Ferrous ammonium sulphate
4) Silver sulphate
5) Mercury sulphate
6) Ferroin indicator
7) Organic free distilled water
Procedure:
Preparation of reagents
Standard Potassium Dichromate reagent – Digestion solution
Weigh accurately 4.913g of Potassium dichromate, previously dried at 103 OC for 2 – 4
hours and transfer it to a beaker.
Weigh exactly 33.3g of mercuric sulphate and add to the same beaker. Measure
accurately 167ml of concentrated sulphuric acid using clean dry measuring cylinder
Take 1000ml standard measuring flask and place a funnel over it.
Carefully transfer the contents to the 1000ml standard flask and make up to 1000ml
using distilled water.
This is the standard potassium dichromate solution to be used for digestion.
Sulphuric Acid Reagent – Catalyst solution
Weigh accurately 5.5g silver sulphate crystals to a dry clean 1000ml beaker.
To this carefully add about 500ml of concentration sulphuric acid and allow to stand
for 24 hours.
Standard Ferrous Ammonium Sulphate Solution
Weigh accurately 39.2g of ferrous ammonium sulphate crystals and dissolve it in
distilled water.
Take 1000ml standard measuring flask and place a funnel over it.
Carefully transfer the contents to the 1000ml standard flask and make up to 1000ml
using distilled water.
Department of Civil Engineering – SNS College of Engineering
and transfer it to the beaker. Dissolve the contents and cool to room temperature.
5
0
Testing of sample
Take three COD vials with stopper (Two for sample and two for blank solution).
Add 2.5ml of the sample to each of the two COD vials and the remaining COD vials of
for blank. To this COD vial add distilled water.
Add 1.5ml of potassium dichromate reagent – digestion solution to each of the three
COD vials.
Add 3.5ml of sulphuric acid reagent – catalyst solution in the same manner.
Cap tubes tightly. Switch on the COD digester and fix the temperature at 150 OC and set
time at 2 hours.
Place the COD vials into a block digester at 150OC and heat for 2 hours.
The digester automatically switches off. Then remove the vials and allow it to cool to
the room temperature.
Meanwhile, get ready with the burette for titration.
Fill the burette with the ferrous ammonium sulphate solution, adjust to zero and fix
the burette to the stand.
Transfer the contents of the blank vial to conical flask.
Titrate it with the ferrous ammonium sulphate taken in the burette.
End point of the titration is the appearance of the reddish brown colour.
Note down the volume of ferrous ammonium sulphate solution added for the blank
(A).
Transfer the contents of the blank vial to conical flask.
Add few drops of Ferroin indicator. The solution becomes green in colour.
Titrate it with the ferrous ammonium sulphate taken in the burette.
End point of the titration is the appearance of the reddish brown colour.
Note down the volume of ferrous ammonium sulphate solution added for the sample
(B).
Department of Civil Engineering – SNS College of Engineering
Add few drops of Ferroin indicator. The solution becomes bluish green in colour.
5
1
Tabulation:
Titration
Burette solution: Ferrous Ammonium Sulphate
Pipette solution: Sample
Indicator: Ferroin Indicator
S.No
Sample
1
Blank 1
2
Blank 2
3
Sample 1
4
Sample 2
Volume of
sample (ml)
Burette reading
Initial (ml)
Final (ml)
Volume of 0.1N FAS
(ml)
Concordant Value
Volume of ferrous ammonium sulphate for blank,
(A)
=
Volume of ferrous ammonium sulphate for Sample,
(B)
=
Normality of ferrous ammonium sulphate,
N
=
Volume of sample,
V
=
Result:
The COD of the given sample of water is ________ mg/l.
Inference:
Department of Civil Engineering – SNS College of Engineering
Chemical Oxygen Demand = (A – B * N * 8 * 1000) / Volume of sample
5
2
Possible Viva-Voce
Query
1
Potassium dichromate is considered as the best?
2
Mercury sulphate is added to reduce the interference of?
3
Silver sulphate is added as?
4
Ferroin indicator is?
5
After refluxing, _________________ solution is titrated against FAS.
6
H2SO4 is added to FAS solution for?
7
The product formed after COD analysis is?
8
In industrial waste water, COD value is about _____________ BOD value.
9
Sulphuric acid is added as?
10
A blank solution is?
Department of Civil Engineering – SNS College of Engineering
S.No
5
3
Exp No: 12
Date:
Determination of Residual Chlorine
Objective:
By this experimental procedure, chlorine dosage in domestic and industrial water is
controlled which results in avoiding bad odour and change in the taste of water.
Aim:
To determine residual chlorine in the given water sample.
Theory:
Let us first understand the importance of adding chlorine. Treated or filtered
water is deemed to be fit for consumption only if it is devoid of disease producing
microorganism. Chlorine is primarily adopted to destroy or deactivate disease –
producing microorganisms in the public water supplies and polluted rivers. Chlorine is
usually added to water in gaseous form or as sodium or calcium hypochlorite. It has been
practiced for several years. The word “Residual” means “remainder” or “that which is
left”, and as the name suggests the chlorine residual test is used to measure the amount
of chlorine remaining in the water at the time the test is made. The Starch-Iodide
titration method, one of the oldest methods of determining chlorine, is very non-specific
Chlorine will liberate free iodine from potassium iodide (KI) solutions at pH 8 or less.
The liberated iodide is titrated with a standard solution of sodium thiosulphate
(Na2S2O3) with starch as the indicator. This method is based on the reaction with
thiosulphate solution. The end point of the titration is indicated by the disappearance of
the blue coloured, starch-iodide complex.
Apparatus Required:
1) Burette with Burette stand and porcelain tile
2) Pipette with elongated tips
3) Pipette bulb
4) 500ml Conical flask
5) Measuring jar
6) Wash bottle
Chemical required:
1) Concentrated Acetic acid (glacial)
Department of Civil Engineering – SNS College of Engineering
for oxidants and generally is used for total chlorine testing at levels above 1mg/l Cl2.
5
4
2) Potassium Iodide crystals (KI)
3) Sodium thiosulphate
4) Starch indicator
5) Distilled or Deionized water
Procedure:
Preparation of reagents
Sodium Thiosulphate Solution (0.01N)
Weigh approximately 2.482g of sodium thiosulphate (Na2S2O35H2O)
Transfer to the beaker and dissolve it in boiled distilled water.
Transfer it to the standard flask and make it up to 1000ml.
Testing of sample
Rinse the burette with sodium thiosulphate and then fill the burette with sodium
thiosulphate.
Fix the burette to the stand.
Take 200ml of a given sample in a conical flask.
Add 5ml Acetic acid to acidify the sample. It is used to reduce the pH between 3 and 4
in the conical flask.
thoroughly mixing it with stirring rod.
Perform the titration quickly, since iodine liberated faster.
Titrate the solution with standard Na2S2O3 solution until the yellow colour of
liberated Iodine is almost faded out. (pale yellow colour)
Add 1ml of starch solution and continue the titration until the blue colour disappears.
In many cases residual chlorine is very low and starch needs to be added before
starting up the titration.
Note down the burette reading to know the volume of sodium thiosulphate added.
Department of Civil Engineering – SNS College of Engineering
Add about 1g Potassium Iodide (KI) measured using the spatula and dissolve it by
5
5
Titration
Burette solution: Sodium thiosulphate
Pipette solution: Sample
Indicator: Starch
S.No
Temp
(oC)
Volume of
sample (ml)
Burette reading
Initial
(ml)
Final (ml)
Volume of
Sodium
thiosulphate
(ml)
Residual
Chlorine (mg/l)
1
2
3
Concordant Value
Volume of Sodium thiosulphate, =
Normality of Sodium thiosulphate, = 0.01N
Volume of sample, =
Equivalent weight of chlorine, = 35.45
Residual chlorine = (Volume of Sodium thiosulphate * N * 35.45 * 1000) / Volume of sample
Result:
The amount of residual chlorine in the given sample of water is __________ mg/l.
Inference:
Department of Civil Engineering – SNS College of Engineering
Residual chlorine (mg/l) =
5
6
Possible Viva-Voce
Query
1
Disinfection means?
2
Bleaching powder is mixed in water for?
3
Residual chlorine means?
4
Potable water is?
5
The amount of residual chlorine in water should be?
6
Residual chlorine in water is detected by?
7
Chlorine is often added to wastewater for disinfection before effluent
discharge. A potential problem with this procedure is?
8
Water requires ___________ mg/l of chlorine to destroy the microorganisms
present.
9
Chlorine is effective if the pH is?
10
Titration should be carried out with?
Documented BY:
Mr. M.R. Ezhilkumar – M.E
Assistant Professor
Department of Civil Engineering, SNS College of Engineering, Coimbatore.
Department of Civil Engineering – SNS College of Engineering
S.No
5
7