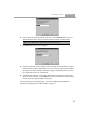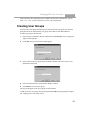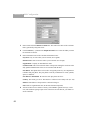
1
Ipswitch
WS_FTP Server
User’s Guide
Software Version 5.0
Ipswitch, Inc
Ipswitch Inc.
Web: http://www.ipswitch.com
10 Maguire Road
Phone: 781.676.5700
Lexington, MA
02421
Fax: 781.676.5710
Copyrights
The information in this document is subject to change without notice and should not be construed as a
commitment by Ipswitch, Inc. While every effort has been made to assure the accuracy of the
information contained herein, Ipswitch, Inc. assumes no responsibility for errors or omissions.
Ipswitch, Inc. assumes no liability for damages resulting from the use of the information contained in
this document.
The software described in this document is furnished under a license and may be used or copied only in
accordance with the terms of that license.
Copyright © 1998-2004 by Ipswitch, Inc. All rights reserved. WS_FTP, the WS_FTP logos, Ipswitch,
and the Ipswitch logo are trademarks of Ipswitch, Inc. Other products or company names are or may be
trademarks or registered trademarks and are the property of their respective companies.
No part of this publication may be reproduced, photocopied, stored on a retrieval system, or transferred
without the expressed prior written consent of Ipswitch, Inc.
Printing History
September 2000
November 2001
May 2002
March 2003
May 2004
First Edition
Second Edition
Third Edition
Fourth Edition
Fifth Edition
CONTENTS
Chapter 1
Introduction
What is Ipswitch WS_FTP Server? ............................................... 1
How FTP Works ...................................................................... 2
How WS_FTP Server Works ................................................... 2
Major Features ......................................................................... 3
WS_FTP Home and Pro Client ................................................ 4
WS_FTP Server Security............................................................... 4
The WS_FTP Server Manager....................................................... 5
Remote Management ............................................................... 6
System Requirements .................................................................... 6
Installing WS_FTP Server and
Notification Server......................................................................... 6
Removing WS_FTP Server and Notification Server ............... 7
Release Notes................................................................................. 7
Getting Updates and Giving Feedback .......................................... 7
Chapter 2
Getting Started
Configuring the FTP Server........................................................... 9
Setting WS_FTP Server Directories ...................................... 10
Setting the FTP Server Port ................................................... 10
Starting and Stopping the FTP Server.................................... 11
Adding the First FTP Host........................................................... 11
Adding the First User Account .................................................... 14
Chapter 3
Configuring FTP Hosts
Setting Up FTP Hosts .................................................................. 15
Adding Additional FTP Hosts ..................................................... 16
Configuring an External User Database ...................................... 18
Configuring an NT User Database............................................... 19
Setting Options for the FTP Host ................................................ 20
Setting Timeouts for FTP Connections ................................ 20
Setting Maximum Users ........................................................ 21
Allowing Anonymous Access .............................................. 21
Hiding Files and Folders ........................................................ 22
Setting Directory Listings to Use Local Time ....................... 22
Using Banner, Welcome, and Exit Messages ........................ 23
Creating Message Files for Folders and Directories .............. 24
Setting Access by IP Address ................................................ 25
Setting an Alias for the FTP Host .......................................... 27
Other Options in General Host Settings................................. 27
Deleting an FTP Host .................................................................. 27
iii
CONTENTS
Renaming an FTP Host................................................................ 28
Add a Virtual Host with the Command Line ............................... 28
Using Firewalls with SSL ............................................................ 29
What Exactly is a NAT Firewall? .......................................... 30
Chapter 4
Managing FTP User Accounts
How User Accounts Work ........................................................... 31
Setting User Logon Options ........................................................ 31
Adding an FTP User Account...................................................... 34
How Permissions Work ............................................................... 35
Setting User Options .................................................................... 36
User Directories and User Password...................................... 36
Setting Logon, Public Directory, and Change
Password Options................................................................... 36
Setting File, Disk Space, and Bandwidth Quotas .................. 37
Setting Administrator Permissions......................................... 38
Deleting a User ............................................................................ 39
Renaming a User.......................................................................... 39
Adding Users with the Command Line Utility ............................ 40
Basic Command Syntax ......................................................... 40
Adding a User ........................................................................ 42
Modifying a User ................................................................... 42
Deleting a User....................................................................... 42
How Users Can Change Their Password ..................................... 42
Creating User Groups .................................................................. 43
Adding Users to the Group .................................................... 44
Deleting a User Group ................................................................. 44
Chapter 5
Managing Folders
Using Folders and Virtual folders................................................ 45
Granting Access to a Folder......................................................... 45
Adding a Virtual Folder ............................................................... 46
Granting Permissions for FTP Folders ........................................ 47
NT Permissions on Windows 2000 and XP................................. 49
Changing Folder Properties ......................................................... 50
Changing Virtual Folder Properties ............................................. 50
Removing a Folder....................................................................... 51
Renaming a Virtual Folder .......................................................... 51
iv
CONTENTS
Chapter 6
Using Rules
About Rules ................................................................................. 53
The Rules List .............................................................................. 53
Configuring Rules........................................................................ 54
Remote Rule Configuration ................................................... 55
Rules Processing .......................................................................... 55
Chapter 7
Using Notifications
About Notifications...................................................................... 57
Notification Types.................................................................. 57
Notification Server Manager ....................................................... 58
Configuring the Servers for Notifications ................................... 58
The Notifications Library ............................................................ 60
Editing a Notification ....................................................... 60
Deleting a Notification ..................................................... 60
Using Notifications- A Simulation .............................................. 61
What’s Next? ............................................................................... 63
SMS Notifications.................................................................. 64
Pager Notifications................................................................. 64
E-mail Notifications ............................................................... 65
Program Notifications ............................................................ 66
Using Variables to Report Event Details ............................... 66
Chapter 8
Configuring SITE Commands
Adding a Site Command.............................................................. 69
Modifying Site Command Properties .......................................... 71
Modifying Site Command Permissions ................................. 72
Chapter 9
Managing FTP Hosts
Copying the Server Manager to a Remote Host .......................... 75
Connecting to the WS_FTP Server.............................................. 75
Monitoring Active FTP Sessions ................................................. 76
Server Statistics...................................................................... 77
Active Sessions ...................................................................... 77
Monitoring FTP Server Statistics ................................................ 78
Chapter 10
SSL Configuration
What is SSL? ............................................................................... 79
How To Get Started ..................................................................... 80
Generating a Certificate ............................................................... 81
v
CONTENTS
Selecting a Certificate .................................................................. 83
SSL Options ........................................................................... 84
Signing a Certificate .................................................................... 84
Trusted Authorities ...................................................................... 86
Adding a Certificate ............................................................... 86
Exporting a Certificate ........................................................... 87
Removing a Certificate .......................................................... 87
Chapter 11
Using the Log Analyzer
What is the Log Analyzer? .......................................................... 89
Using the Log Analyzer ......................................................... 90
Log Analyzer: Connections Dialog ............................................. 90
To Add a Connection to a Server........................................... 90
Analyzing Logs on a Local Server......................................... 91
To Remove a Connection....................................................... 91
Log Analyzer: Tabs ..................................................................... 92
Log Analyzer: Files Tab ........................................................ 92
Log Analyzer: IP Address Tab............................................... 92
Log Analyzer: Times Tab ...................................................... 92
Log Analyzer: Users Tab ....................................................... 93
Log Analyzer: Summary Tab................................................. 93
Log Analyzer: Status Tab ...................................................... 93
Chapter 12
Managing Log Files
Logging FTP Server Events......................................................... 95
Viewing Log Files ....................................................................... 96
Reading Log Files ........................................................................ 96
Chapter 13
Highlights of RFC 959
Basics ........................................................................................... 99
FTP Commands ......................................................................... 100
FTP Replies................................................................................ 107
Positive Preliminary Replies ................................................ 107
Positive Completion Replies ................................................ 107
Positive Intermediate Replies............................................... 108
Transient Negative Completion Replies .............................. 108
Permanent Negative Completion Replies ............................ 108
Index
vi
.......................................................................................................................111
Introduction
This chapter begins with a basic introduction to Ipswitch WS_FTP
Server, a brief description of File Transfer Protocol (FTP) and how
an FTP server works (for newcomers), and a description of the
product’s main features.
Chapter
1
In addition, you’ll find an introduction to the FTP server’s
interface (the WS_FTP Server Manager), system requirements,
and the installation procedure.
What is Ipswitch WS_FTP
Server?
Ipswitch WS_FTP Server is a full-featured FTP server for
Windows NT, Windows 2000 or later, and Windows XP systems.
WS_FTP Server lets you create an FTP site that makes files and
folders on your PC available to other users and customers. Users
can connect (via the Internet) to your site, list folders and files, and
(depending on permissions) download and upload folders and
files. You can control user access to the site itself and to its
individual folders and files. You can create multiple FTP sites on
the WS_FTP Server — each will function as a completely separate
site.
WS_FTP Server complies with the current Internet standards for
the FTP protocol (documented in RFC 959 and 1123). Users can
connect to the server and transfer files by using an FTP client that
complies with this protocol, such as Ipswitch WS_FTP Home or
Pro. The FTP server runs as a Windows NT service.
Note: The Internet Engineering Task Force (IETF) publishes
Requests for Comments (RFCs) for all Internet Standards. Each
RFC defines a standard. You can view RFCs online by
connecting to: http://rs.internic.net.
In this Chapter
What is WS_FTP Server?
WS_FTP Server Security
WS_FTP Server Manager
System Requirements
Installing WS_FTP Server and
Notification Server Manager
Release Notes
Getting Updates and Giving
Feedback
1
CHAPTER 1
Introduction
How FTP Works
FTP is based on the client–server model of communication between computers: one
computer runs a server program “serving up” information to other computers. The other
computers, or systems, run client programs that request information and receive replies from
the server. The system running the server program is an FTP server.
To access an FTP server, users must be able to connect to the Internet, Intranet, or local area
network (via a modem or local area network) with an FTP client program.
An FTP client-server session establishes two connections: a control connection that stays
open for the entire session and a data connection that opens and closes to transfer data such
as folder listings and files to or from the server as requested by the client. Normally, the
control connection occurs on port 21 on the FTP server.
The FTP server runs continuously in the background and listens to port 21 for a connection
request from an FTP client. When an FTP client requests a connection, the FTP server
verifies the logon user ID and password and, if valid, it listens to this channel (control
channel) for the next command.
After a user logs on, their access to the FTP host’s file system is determined by permissions
assigned to directories and folders.
How WS_FTP Server Works
WS_FTP Server is installed as a Windows service that runs continuously. WS_FTP Server
lets you set up one or more FTP hosts, each with its own users, directories, and folders. Each
FTP host functions as a separate FTP site. To set up an FTP host, you use the following
components:
2
•
User accounts — WS_FTP Server can use existing user accounts from a Windows NT,
IMail Server (Ipswitch’s mail server product), or other ODBC external user database.
You can also use the WS_FTP Server Manager to create accounts in an ODBC database,
or its own user database. To log on from an FTP client, users enter their user ID and
password, specified in their user account.
•
Anonymous logon — if enabled, a user can log on to your FTP site without having their
own user account. You can use “anonymous FTP” to make folders and files on your PC
publicly available, without having to create and maintain individual user accounts. To
log on from an FTP client, users enter anonymous or ftp as their user ID. For the password, they should enter their e-mail address or no password.
•
Default public folders — All users on an FTP host have a folder (with the same name as
their User ID) under the FTP host’s top directory. Users can transfer files to and from
their own folders. If a folder named public is created in a user’s folder, all other users
(including anonymous users) can view and download files in this public folder.
Introduction
CHAPTER 1
•
Home folder — for each FTP host, you can set whether you want users to start in their
own folder, or start in the top directory when they log on.
•
FTP folders and permissions — If you want to grant FTP permissions for a folder on
your computer, you can create an FTP folder and have it reference (point to) an existing
folder. You can then grant permissions for any of the FTP users, including anonymous
users.
•
User groups — You can create a user group and add users to it so you can grant appropriate permissions on a group basis.
Major Features
•
(Version 5.0) New Ipswitch Notification Server to handle sending notifications of FTP
Events.
•
(Version 5.0) Supports SMS, e-mail, pager, and program notifications.
•
(Version 5.0) Lets administrators set user’s home folders, which allows home folders to
be shared. Allows the use of virtual folders as user home folders.
•
(Version 5.0) Lets a virtual folder reference a networked directory (UNC paths), provided the user has appropriate permissions to access the networked directory.
•
(Version 5.0) Rules can check login attempts, quota actions, and the ability to attach
multiple notifications to a rule.
•
(Version 5.0) Ability to duplicate users, folder, virtual folders, rules, notifications, and
groups.
•
(Version 5.0) Set bandwidth limits for users, user groups, or FTP host.
•
(Version 5.0) Set disk and file quotas for user groups, and FTP host (in addition to individual users).
•
(Version 5.0) Set up SSL options for virtual hosts.
•
(Version 5.0) Clear Command Channel (CCC) for SSL connections.
•
Supports all FTP clients and Web browsers that comply with the standards in RFC 959
and 1123.
•
Supports multiple FTP hosts (sites) on a single PC.
•
Supports SSL connections. (If the FTP client supports SSL connections as well.)
•
Uses an existing user database for user authorization, or lets you create your own user
database.
•
Supports an unlimited number of user accounts on each FTP host.
•
Supports anonymous logons.
3
CHAPTER 1
Introduction
•
Supports automatic resume of failed transfers - if the client connection is lost before a
file transfer is complete, when the client logs on again, the FTP server resumes the
transfer where it was interrupted. (This feature is supported by the WS_FTP Pro client.)
•
Lets you create custom SITE commands and setup permissions for the use of those
commands.
•
Lets you assign FTP permissions per folder.
•
Lets you set maximum number of users logged on to an FTP host.
•
Logs FTP server events.
•
Includes a Log Analyzer utility.
•
Lets you add users from the DOS command line with the Add User utility.
•
Runs as a Windows service.
WS_FTP Home and Pro Client
If you need an FTP client, we recommend Ipswitch WS_FTP Home or Pro. Both the
WS_FTP clients let you communicate with virtually all types of FTP servers.
If you use WS_FTP Pro with WS_FTP Server, you will get premium performance and
advanced functionality, such as:
•
Encryption of user IDs and passwords sent over the network.
•
Ability to resume a failed transfer.
•
Ability to transfer from one remote FTP server to another (remote-to-remote transfer).
•
Ability to make secure (SSL) connections to the server.
For more information about WS_FTP Home or Pro, visit our web site at: http://
www.ipswitch.com
WS_FTP Server Security
WS_FTP Server provides the following security features:
4
•
Complete SSL capabilities with multiple levels of security that can be configured at the
server level.
•
Logon connections send the user ID and password in an encrypted form, rather than
sending them across the network as text.
•
Users on an FTP client get an administrator-defined number of chances to send the correct user ID and password, after which the connection fails.
Introduction
CHAPTER 1
•
User IDs and passwords are stored in the Windows NT registry when using WS_FTP
Server database.
•
Ability to control access to an FTP host by setting an IP address or range of addresses
for which the FTP host either grants or denies access.
•
Ability to set permissions on all folders.
•
Ability to deny anonymous logins.
•
Ability to lock users to their home folder.
The WS_FTP Server Manager
The WS_FTP Server Manager lets you manage your FTP server configuration, and any FTP
sites you create.
The WS_FTP Server Manager presents a two panel window. In the left panel, click the plus
sign (+) next to an item to display sub-items. When you click an item, its properties appear
in the right panel.
You can have multiple FTP hosts (each functioning as a separate FTP server) on the
WS_FTP Server. In the left panel, under Local System, there is an entry for each FTP host
that you create. Under each FTP host, there are user accounts, groups of users, and folders
(FTP directories) for that host. You can manage all FTP server functions from the WS_FTP
Server Manager.
5
CHAPTER 1
Introduction
Remote Management
Before you can remotely manage WS_FTP Server, you need to install WS_FTP Server
Manager on the computer that will be used to do the remote management (Any Windows
NT, 2000, or XP computer that the server is not running on.)
To install the WS_FTP Server Manager, run the install program (from CD-Rom, or from
your e-commerce download) on the remote PC and select the WS_FTP Server Manager
option. For more information, see “Installing WS_FTP Server and Notification Server” on
page 6.
System Requirements
WS_FTP Server requires the following system resources::
•
Windows® NT 4.0 SP6, Windows® 2000, Windows® XP or Windows® Server 2003
•
200 MHz Pentium® II or higher
•
128 MB RAM
WS_FTP Server must run on a server or workstation with a static IP Address.
Installing WS_FTP Server and
Notification Server
You must log on to the Windows system as a system administrator in order to install the
WS_FTP Server software.
If you purchased WS_FTP Server online, install it by double-clicking the file you
downloaded and following the prompts on your screen.
To install the software from the CD:
Insert the WS_FTP Server disk into a disk drive. If the welcome screen does not appear:
6
1
Click the Start button and select Run.
2
Enter the drive letter of your CD ROM drive followed by autorun.exe. For example,
d:autorun.exe
Introduction
3
CHAPTER 1
Follow the instructions on your screen. The install screens will show the three following
components:
The Ipswitch Notifications Server is required if you want WS_FTP Server to
send a notification message via SMS, e-mail, or pager.
•
Ipswitch WS_FTP Server and Server Manager
•
Ipswitch WS_FTP Server Manager
•
Ipswitch Notification Server (which includes the Notifications Server Manager)
You can install in the following ways:
•
Install the WS_FTP Server and WS_FTP Server Manager, and the Notifications
Server on the same PC.
•
Install the WS_FTP Server and WS_FTP Server Manager on one PC and the
Notifications Server on another PC. This will offload the processing of notifications from the WS_FTP server system.
•
Install just the WS_FTP Server Manager on a remote PC and use it to remotely
manage the WS_FTP Server.
Removing WS_FTP Server and Notification Server
The Remove program function removes all files associated with WS_FTP Server and
Notification Server from your PC.
To remove WS_FTP Server, go to the Add/Remove Programs section of your Windows
Control Panel and select Ipswitch WS_FTP Server.
To remove the Notification Server, go to the Add/Remove Programs section of your
Windows Control Panel and select Ipswitch Notification Server.
Release Notes
Please refer to the file named release.txt for information regarding enhancements or changes
that may have been made to the software since this manual was printed.
Getting Updates and Giving Feedback
If a software patch is created to update the currently shipping version of WS_FTP Server,
Ipswitch will make it available on our FTP and Web sites. You can check our download FTP
directory or the download directory on our web site for current software patches. Note that
to download major product upgrades, you must have a valid service agreement.
7
CHAPTER 1
Introduction
To download software from the Ipswitch FTP Site:
1
From your FTP client, connect to the Ipswitch FTP server by entering:
Hostname: ftp.ipswitch.com
User ID: anonymous
Password: your e-mail address
2
Open the Product_Support folder. Open the WS_FTP_Server folder.
3
Transfer the patch file and place it in your WS_FTP Server directory. Run the patch file
to update WS_FTP Server.
To download software from the Ipswitch web site:
1
In your web browser, go to: http://www.ipswitch.com
2
Click the Services & Support link.
3
Click Patches and Upgrades.
4
Save the patch file in your WS_FTP Server directory. Run the patch file to update
WS_FTP Server.
We welcome your feedback on WS_FTP Server. Please e-mail any comments and
suggestions to [email protected].
8
Getting Started
This chapter describes how to configure the WS_FTP Server and
how to set up your first host and user on the site. You need to
create an FTP host for each FTP site that you will have.
Chapter
2
Configuring the FTP Server
On installation, WS_FTP Server is ready to work. You can use the
default configuration for FTP connections (port 21, no logging, no
access restrictions) or you can set the options described in this
section.
To view and set options for the WS_FTP Server configuration:
1
In the left panel, select Local System. The Local System menu
appears in the right panel.
In this Chapter
2
Select an area, set or change any of the properties in that area,
described in the following sections. These properties apply to
all FTP hosts that you add to the FTP server.
Configuring the FTP Server
Adding the First FTP Host
Adding the First User Account
9
CHAPTER 2
Getting Started
Setting WS_FTP Server Directories
The General System Settings display the main directories for the WS_FTP Server.
Binary directory. The directory in which the FTP service (iftpsvc.exe) is installed. This
directory can only be changed by uninstalling WS_FTP Server and re-installing in a new
directory.
FTP directory. The top directory under which directories for each FTP host will appear.
Security directory. The top directory under which security directories for each FTP host
appear. These directories are created by WS_FTP Server when a host is added. The
directories contain security files used by the hosts.
Setting the FTP Server Port
Any FTP hosts that you create on the WS_FTP Server will use the same FTP port number.
The default port number is 21, which is the standard port for FTP service on an Internet host.
FTP clients assume that the FTP server uses port 21. You can change this to any unused port
number, but you must notify users to set the port in their FTP client.
To change the server’s port number:
10
1
In the left panel, select Local System. The Local System menu appears in the right
panel.
2
Select Modify General System Settings. The General System Settings dialog appears.
3
In the Port box, enter a new port number.
4
Restart the server.
Getting Started
CHAPTER 2
Starting and Stopping the FTP Server
The FTP server starts automatically and runs continuously as a Windows service. If you
need to stop the server:
1
Start the WS_FTP Server Manager.
2
In the left panel, select Local System.
3
Click Stop Service in the right pane.
To restart the service, click Start Service.
You can also start and stop the service by using the Services applet in the Control Panel. In
the Services applet, look for the Ipswitch FTP Service.
Adding the First FTP Host
To manually add the first (or only) FTP host:
1
Make sure your host has a valid Internet hostname and IP address and make sure the
host has an entry on your Domain Name Server (DNS). If you use an Internet Service
Provider (ISP) for connection to the Internet, your host must have an entry in the ISP’s
DNS.
Note: Contact your network admin or your ISP’s Technical Support for more
information about your DNS.
2
Start the WS_FTP Server Manager. In the left panel, select Local System.
3
In the right panel, select New Host. The first screen of the New Host wizard appears.
4
Enter the Internet hostname of the host you are installing on. This can be from 1 to 80
characters and must be in the form host.domain.top.
5
Select the database to use for user authorization:
11
CHAPTER 2
Getting Started
WS_FTP Server. If you want to create your own FTP user accounts (through the Server
Manager or the Add User utility), select this option.
If you want WS_FTP Server to use user accounts from an existing user database, select one
of these options:
Windows NT. All users in the Windows NT user database on your computer have access
(using their Windows NT username and password) to the FTP host.
You may also use WS_FTP Server Manager to authenticate users on an NT domain, even if
the computer WS_FTP Server is installed on is not the domain controller. For more
information, see “Configuring an NT User Database” on page 19.
External User Database. All users in the correctly configured external ODBC database
stored on your computer have access to the FTP host.
For more information on configuring external user databases, refer to the directions that
appear in “Configuring an External User Database” on page 18.
IMail Server. All users in the IMail Server user database on your local system have access
(using their IMail Server username and password) to the FTP host. Each user appears in the
users folder in the top directory of the FTP host.
Important: To use this option, the IMail Server software must be installed on your
computer. Also, note the following:
•
The hostname you enter for the FTP host must be the exact name of the official hostname used by the IMail Server.
•
You cannot use this option if the IMail Server is using the Windows NT user database
for user authorization.
•
The FTP host does not use the IMail Server top directories by default, but you can set
the top directories to be the same, thus allowing FTP users to access their mail folders.
If you use the Windows NT or IMail Server user databases, you can display each user
account and modify FTP settings for an account, but you cannot add or delete user accounts.
You must add or delete user accounts through the user database. You can disable an
account — see the section “Setting Options for the FTP Host” on page 20.
1
12
Click Next. The IP Address screen appears.
Getting Started
2
CHAPTER 2
Enter or select the actual IP Address for this host. (The $virtual IP address is for use
with virtual hosts. Do not select it for the first FTP server that you add to a host.)
Note: The IP address must be bound to the NIC of the server.
3
Click Next. The Directory screen appears.
4
Enter the top directory for this FTP host. All user folders for this FTP host are created
under this directory. We recommend that you create a directory just for this host (this is
the default). If you later add other FTP hosts (using the virtual hosts feature), you can
have separate directories for each FTP host.
5
Click Next. The Summary screen appears and shows the Hostname, IP Address, and
Directory for the FTP server. Click Finish to create the new FTP host. In the left panel,
an entry for the host appears under Local System.
The host menu appears in the right panel — you can set additional host properties as
described in “Setting Options for the FTP Host” on page 20.
13
CHAPTER 2
Getting Started
Adding the First User Account
You can manually add the first user through the WS_FTP Server Manager. To add the first
user to your FTP host:
1
In the left panel, expand the FTP host, and then select Users. The Users list appears.
2
Click the Add button. The first screen of the New User wizard appears.
3
Enter a User ID for the user and click Next to continue. The User ID can be from 2 to
30 characters and must be from the character sets: A-Z, a-z, 0-9.
4
Enter the user’s full name and click Next to continue. The full name can be from 0 to 80
characters.
5
Enter a password and click Next. The password can be from 2 to 30 characters.
6
Click Finish to create the new user.
The user account appears in the list of users for the FTP host.
To set additional properties for the user account, in the user list, select the user and click
Edit. The user properties appear. See “Setting User Options” on page 36.
14
Configuring FTP Hosts
This chapter describes how to set up and configure FTP Hosts and
how to set options for those hosts.
Chapter
3
Setting Up FTP Hosts
To use the WS_FTP Server with a single FTP host, the process is
simple — the FTP host uses the Internet hostname and IP address
of the host on which you are installing. To add additional FTP
hosts to the same system, you can use the virtual host function.
For each FTP host you add, you need to consider the following:
•
•
To create FTP user accounts, choose whether you will create
your own user database, or let the Server Manager use user
accounts from an existing Windows NT, IMail Server user
database on your PC, or external (ODBC) database.
By default, each user on the FTP host will have a folder (with
the same name as their User ID) for uploading and downloading files and folders.
•
You can set an option to determine where the user is placed in
the file system when they log on: either in their own folder or
in the top directory of the FTP host.
•
Whether you want to provide anonymous access to the FTP
host. If you provide anonymous access, any user can log on to
the FTP host with a username of anonymous or ftp and a
password that specifies their e-mail address (or no password).
When a user logs on anonymously, they are placed in the top
directory of the FTP host. Anonymous users can access any
folders for which you have granted permissions to anonymous.
The following sections describe how to add FTP hosts, and how to
set options for a host (such as allowing anonymous access and
setting maximum concurrent users).
In this Chapter
Setting Up FTP Hosts
Adding Additional FTP Hosts
Configuring an External User
Database
Configuring an NT User
Database
Setting Options for the FTP
Host
Deleting an FTP Host
Renaming an FTP Host
Add a Virtual Host with the
Command Line
Using Firewalls with SSL
15
CHAPTER 3
Configuring FTP Hosts
Adding Additional FTP Hosts
You can have multiple FTP hosts on a single system, with each host functioning as a
separate FTP site. The first FTP host you add should use the primary hostname and IP
address of the local host. Subsequent FTP hosts that you add can be "virtual hosts." There
are two kinds of virtual FTP hosts:
•
Virtual host with an IP address — We strongly recommend that each FTP host you create have its own IP address, which requires your computer to have multiple IP addresses
available. Using separate IP addresses ensures that an FTP client (or a browser) can
connect to the FTP host. Make sure your host has a valid Internet hostname and IP
address and make sure the host has an entry on your Domain Name Server (DNS). If
you use an Internet Service Provider (ISP) for connection to the Internet, your host must
have an entry on the ISP’s DNS.
•
Virtual host without an IP address — If no other IP addresses are available on the host,
you can create an FTP host and assign it a virtual IP address ($virtual). However, to log
on to the host, FTP users must include the hostname in their userid; for example, userid@hostname or anonymous@hostname. This may present a problem for some FTP
clients and for browsers.
To add a virtual FTP host:
1
In the left panel, expand Local System. The Local System menu appears in the right
pane.
2
In the right pane, select Add a New Host. The first screen of the New Host wizard
appears.
3
Enter the desired hostname for the FTP host. This can be from 3 to 80 characters and
must be in the form host.domain.top.
4
Select the database to use for user authorization:
WS_FTP Server. To create your own FTP user accounts (using the Server Manager or
the Add User utility), select this option.
If you want WS_FTP Server to automatically use user accounts from an existing user
database, select one of these options:
Windows NT. All users in the Windows NT user database on your computer will have
access (using their Windows NT username and password) to the FTP host. Each user
appears in the users folder in the top directory of the FTP host.
External User Database. All users in the correctly configured external ODBC database
stored on your computer have access to the FTP host. Each user appears in the users
folder in the top directory of the FTP host. (You may also use WS_FTP Server Manager
to create users in this database.)
16
Configuring FTP Hosts
CHAPTER 3
IMail Server. All users in the IMail Server user database on your local system will
have access (using their IMail Server username and password) to the FTP host. Each
user appears in the users folder in the top directory of the FTP host. To use this option,
the IMail Server software must be installed on your computer. Also, note that:
•
The hostname you enter for the FTP host must be the exact name of the official
hostname used by the IMail Server.
•
You cannot use this option if the IMail Server is using the Windows NT user database for user authorization.
•
The FTP host does not use IMail Server top directories, but you can set the top
directories to be the same, thus allowing FTP users to access their mail folders.
If you use the Windows NT or IMail Server user databases, you can display each user
account and modify FTP settings for an account, but you cannot add or delete user
accounts. You must add or delete user accounts through the specific user database.
5
Click Next. The IP Address screen appears.
6
If the virtual host has an IP address, select the IP Address. If the virtual host does not
have an IP address, select $virtual.
Note: If an IP address is marked with an *, it is already used by another FTP
host; if you select it, the application will prevent you from continuing.
7
Click Next. The Directory screen appears.
8
Enter the top directory for this FTP host. All user folders for this FTP host are created
under this directory. We recommend that you create a directory just for this host. If you
later add other FTP hosts, you can have separate directories for each FTP host.
9
Click Next. The Summary screen appears and shows the Hostname, IP Address, and
Directory for the FTP server. Click Finish to create the new FTP host. In the left panel,
an entry for the host appears under Local System.
The host properties menu appears in the right panel — you can set additional host properties.
See “Setting Options for the FTP Host” on page 20.
17
CHAPTER 3
Configuring FTP Hosts
Configuring an External User Database
When you configure an external user database using these directions, WS_FTP Server
creates an ODBC database that holds tables configured with the correct fields. Those fields
are identified in the Table Name section of this chapter. After the database is created and the
ODBC system data source name is established in the ODBC Source Administration tool
(Found in your Windows Control Panel), you can use that database to store your user
authentication information and user properties. This information can still be managed
through the WS_FTP Server Manager, including adding and deleting users.
1
If you are creating a new host, follow the directions in “Setting Up FTP Hosts” on
page 15. While in the New Host wizard, select the External User Database option and
click Configure. If you are setting the user database for an existing host, click the Set
User DB button in the host properties pane after the host has been created.
The External User Database dialog box appears.
2
Enter the correct information in all of the boxes.
External Database Implementation DLL. Enter the full path to the odbcuser.dll
installed on your local server.
ODBC System Data Source Name. Enter the source name created using the ODBC
Source Administration tool described above.
If the database requires you to log in using a username and password, place the
following after the data source name. ;UID=<username>;PWD=<password>
Example: If you were using the source name WS_FTP and the username and password
of AUGUSTA and GEORGIA, the correct format of the ODBC System Data Source
Name box would be:
WS_FTP;UID=AUGUSTA;PWD=GEORGIA
Table Name. Enter the name of the database table that was created with the correct
standard fields.
18
Configuring FTP Hosts
CHAPTER 3
In order for WS_FTP server to use an external database, the information tables will be
created with the following fields in the following format. The names are case sensitive.
Name
3
Type
USERID
VARCHAR
PASSWORD
VARCHAR
FULLNAME
VARCHAR
FTPMAXSPACE
INTEGER
FTPMAXFILES
INTEGER
FTPFLAGS
INTEGER
Click OK to continue creating the host.
Configuring an NT User Database
You may use WS_FTP Server Manager to authenticate users on an NT domain, even if the
computer WS_FTP Server is installed on is not the domain controller.
If the user database is located on the domain, identify the following fields on the NT User
Database Configuration dialog after selecting the Windows NT option on the Hostname
dialog. If the database is local, leave these fields blank.
NT Domain Name. Enter the name of the NT domain.
Machine name of Domain controller. Enter the name of the computer that controls the
domain.
If you want to use the permissions you have set up in the NT User database, you must select
the Use NT user file and directory permissions option.
Once you complete the NT User Database Configuration dialog, click OK to continue
creating the host, making sure you set the top level directory to the directory you want your
users to have access to. For example: C:\wsftp
19
CHAPTER 3
Configuring FTP Hosts
Once the host is completely established, you must do the following to use the NT user
permissions:
1
Set permissions for all of the folders you just added to Everyone - All Permissions.
2
In Windows Explorer, set your desired permissions for each of these directories.
Note: When using Active Directory on Windows 2000, Active directory must
be installed with backward compatibility.
Setting Options for the FTP Host
After creating an FTP host, you can set additional options or change the existing setup for
the host. In the left pane, select the FTP host. The host’s properties appear in the right pane.
Setting Timeouts for FTP Connections
You can set a timeout for FTP client connections to the FTP host. After this number of
seconds, if the FTP server has not received a command from the FTP client, the client is
disconnected.
20
1
In the left panel, select the FTP host. The host’s properties menu appears in the right
panel.
2
Click General Options. The General Host Settings dialog appears.
3
In the Timeout (secs) box, enter a timeout value.
4
Click OK.
Configuring FTP Hosts
CHAPTER 3
Setting Maximum Users
You can use the default settings for maximum number of users logged on to the FTP host, or
you can change the settings as described here.
1
In the left panel, select the FTP host. The host’s properties menu appears in the right
panel.
2
Click User Options. The User Settings dialog appears.
3
In the Maximum concurrent users box, enter the maximum number of users (including anonymous users) that can connect to the FTP host at the same time. The default is
1000 users.
4
In the Maximum Anonymous users box, enter the maximum number of anonymous
users that can connect to the FTP host at the same time. The default is 200 users.
5
Click OK.
Note: If the user limit is exceeded, a System Administrator or Host
Administrator can still log on using the Server Manager. Also, a System
Administrator can always log on using an FTP client.
Entering zero for either option disables new connections. This provides a way to temporarily
“stop” the FTP server, so you can update files. New connections are not allowed, but current
connections will continue until the user logs off or the connection exceeds the timeout value.
Setting Maximum concurrent users to zero disables any new connections, setting
Maximum Anonymous users to zero disables only new anonymous connections.
Allowing Anonymous Access
You can allow anonymous access to an FTP host so that users can access specified folders on
the host without needing a user account. Users can then log on using anonymous or ftp as
the username and their e-mail address for the password (or no password), for example:
Username: anonymous
Password: [email protected]
To enable anonymous access to the FTP host:
1
In the left panel, select the FTP host. The host’s properties menu appears in the right
panel.
2
Click General Options. The General Host Settings dialog appears.
3
Select Allow anonymous access to this host.
When an anonymous user logs on, they are placed in the host’s top directory.
21
CHAPTER 3
Configuring FTP Hosts
4
Optionally, set permissions for anonymous on any FTP folders. For example, you can
use folders or virtual folder to create a download or an upload folder for anonymous
users.
5
Click Apply.
When an anonymous user logs on to the FTP host, they will see the following files and
folders:
•
Any files in the top directory. Anonymous users can list and download these files. You
can put a readme file that describes the contents of any public directories here.
•
Any folders or virtual folders for which you have granted permissions to anonymous.
Virtual folders appear in the host’s top directory and reference a directory on the host.
•
The users folder. If a user on the FTP host has a folder named public in their own folder,
it appears under the users folder. For example, if the users fred and homer have public
folders, an anonymous user will see a listing like the following when they list the users
folder contents:
/fred
/homer
Anonymous users can list and download files in these public folders. You can hide a user’s
public folder by selecting Disable Public Access Directory in the user’s properties or by
selecting the Do not list user folders on the Users Properties page.
Hiding Files and Folders
You can hide a file or folder in any directory by prepending a $ character to the file or folder
name and doing the following:
1
In the left panel, select the FTP host. The host’s properties menu appears in the right
panel.
2
Click General Options. The General Host Settings dialog appears.
3
Select Hide $* files/folders to hide all files and folders whose name begins with a dollar sign ($) character, for example $banner.txt or $Marketing.
Setting Directory Listings to Use Local Time
By default, WS_FTP Server displays directory listings in GMT (Greenwich Mean Time).
You can set the directory listings on the FTP host to use the host’s local time.
22
1
In the left panel, select the FTP host. The host’s properties appear in the right panel.
2
Click General Options. The General Host Settings dialog appears.
3
Select Use local time for directory listings.
Configuring FTP Hosts
CHAPTER 3
Using Banner, Welcome, and Exit Messages
You can create messages to send to an FTP client on successful connection, logon, and
logoff. The FTP client usually displays these messages in the message log.
To create the messages for an FTP host:
1
In the left panel, select the FTP host. The host’s properties menu appears in the right
panel.
2
Click Edit messages. The Edit Messages dialog appears.
3
In the edit boxes, enter text for the messages.
4
Click OK.
Banner Message. The FTP server sends this message to a user upon successful connection,
before the user logs on. You can use this message to tell users about the organization of your
FTP site, any rules, times of operation, mirror sites, or contact information. You can use the
message variables to provide information, for example, that the FTP host has reached the
maximum number of concurrent users.
Note: Please note that a Virtual host without an IP will not display a banner
message. The Banner Message is displayed when a connection is first
established. An IP-less virtual host is not connected to until a user logs in.
Welcome Message. The FTP server sends this message to a user upon successful logon. You
can use the message variables to report information, such as the current number of files and
the maximum for this user.
Exit Message. The FTP server sends this message to the user on logoff. You can use the
message variables to provide statistics for the FTP session, for example, the number of files
received and sent by the user.
23
CHAPTER 3
Configuring FTP Hosts
The messages can also contain the following variables:
Variable
Description
%a
Current number of anonymous users for
this host
%b
Maximum number of anonymous users for
this host
%d
Number of files deleted by user
%f
Maximum number of files the user can
have (or unlimited)
%e
Number of files the user currently has
%h
Hostname
%I
IP address of remote user
%k
Current number of users logged on
%l
Maximum number of users that can log on
%n
Fullname
%q
Maximum disk space the user can have (or
unlimited)
%r
Number of files received by user
%s
Number of files sent by user
%u
User ID
%z
Current disk space used by the user
When these messages are created they are placed in the specified Top Directory of the Host.
If this directory does not exist, the Messages will not be saved. You can either manually
create this directory, or it will be automatically created when a user logs in. (You need write
permission for that directory.)
Creating Message Files for Folders and Directories
You can create a file named $message.txt in any directory or folder and when a user changes
to that directory or folder, WS_FTP Server displays the message. WS_FTP Server sends the
$message.txt in response to the CWD (change working directory) or CDUP (change
directory to up one level) command from the FTP client.
For example, when a user opens a directory or folder, you can display a message that refers
them to a readme file for a description of the folder’s contents.
The message can also contain any of the variables described in the previous section, “Using
Banner, Welcome, and Exit Messages” on page 23.
24
Configuring FTP Hosts
CHAPTER 3
Setting Access by IP Address
You can control access to an FTP host by setting an IP address or range of addresses for
which the FTP host either grants or denies access.
Note: Please note that a Virtual host without an IP cannot restrict access
based on the IP address. The reason being that the address check happens
when the connection is made, and thus before login.
To grant access to a specific computer or group of computers:
1
In the left panel, select the FTP host. The host’s properties menu appears in the right
panel.
2
Click Control Access. The Access Control properties appear.
3
Select Denied Access.
4
Click Add. The Grant Access For dialog box is displayed.
5
In the IP Address box, enter the IP address of the computer to be granted access to the
server.
25
CHAPTER 3
Configuring FTP Hosts
6
To grant access to a group of computers, select Group of Computers. In the IP
Address and Subnet Mask boxes, enter the IP address and subnet mask for the group to
be granted access. For example, if you have a class C address space of 156.21.50.0,
enter a group address of 156.21.50.0 and a subnet mask of 255.255.255.0. This will
grant access to those 254 systems.
7
Click OK to add the IP address(es) to the list. Access will be denied to all computers
except those listed.
8
Click OK to save the changes. Note that you must stop and restart the FTP server for the
changes to take affect.
To deny access to a specific computer or group of computers:
26
1
In the left panel, select the FTP host. The host’s properties menu appears in the right
panel.
2
Click Control Access. The Access Control properties appear.
3
Select Granted Access.
4
Click Add. The Deny Access On dialog box is displayed.
5
In the IP Address box, enter the IP address of the computer to be denied access to the
server.
6
To deny access to a group of computers, select Group of Computers. In the IP
Address and Subnet Mask boxes, enter the IP address and subnet mask for the group to
be denied access. For example, if you have a class C address space of 156.21.50.0, enter
a group address of 156.21.50.0 and a subnet mask of 255.255.255.0. This will deny
access to those 254 systems.
7
Click OK to add the IP address(es) to the list. Access will be granted to all computers
except those listed.
8
Click OK to save the changes. Note that you must stop and restart the FTP server for the
changes to take affect.
Configuring FTP Hosts
CHAPTER 3
Setting an Alias for the FTP Host
Many FTP sites use an alias in their Domain Name Server (DNS) system so they can assign
a familiar name to the site. Rather than connecting to an FTP host using its actual hostname
(for example, gyro.ipswitch.com), it may be easier for users to remember or guess a name
like ftp.ipswitch.com. You can add a record to your DNS system to create such an alias, for
example:
ftp IN CNAME gyro.ipswitch.com
Users could then log on to ftp.ipswitch.com. The alias also allows you to move your FTP
site to another host without changing the hostname.
Other Options in General Host Settings
Disable extensions. When this option is selected, the server will no longer support FTP
server extensions. Those extensions include XAUT and FEAT, as well as any customized
SITE commands. Selecting this option will also disable SSL capabilities.
Enable SSL. Selecting this option allows SSL connections to the server.
Disable SSL. Selecting this option keeps users from connecting to the server through a
secure connection. Once this option is set, you must clear it before users can use SSL
connections.
Force SSL. Select this option to force users to make an SSL connection. While this does not
change the way they are connecting automatically, it will refuse any connection not using
SSL negotiations, and send an error message stating why the connection was refused.
Force SSL on Data Chan. Select this option to force users to make an SSL data connection,
and to refuse any data channel connection attempt that is not SSL encrypted.
Allow 3rd party transfers. Selecting this option will allow users to transfer files from one
server to another if both servers allow it.
Lock Files during upload. Select this option to lock files when they are being uploaded to the
server.
Deleting an FTP Host
To delete an FTP host from the WS_FTP Server:
1
In the left pane, select the FTP Host, and then select Delete from the right-mouse menu.
2
A message box appears, verifying the deletion. If you select Yes from this box, the host
will be deleted. A dialog box appears and asks if you would like to delete the top level
directory (and all folders in it) for this host.
27
CHAPTER 3
3
Configuring FTP Hosts
Click No if you want to save files and folders to move to another directory (the host is
deleted but the directory structure remains). Click Yes to delete all files and folders
associated with the FTP host. Click Cancel if you do not want to delete the FTP host.
Renaming an FTP Host
To rename an FTP host on the WS_FTP Server:
1
In the left panel, select the FTP Host, and then select Rename from the right mouse
menu.
2
Enter a new name for the host. This should be a valid Internet hostname in the form
host.domain.top.
Note that the FTP host’s top directory does not change.
Add a Virtual Host with the Command Line
You can add virtual hosts with the command line utility by following the example below.
iftpaddh -add hostname [options]
iftpaddh -mod hostname [options]
iftpaddh -kill hostname
28
Argument
Description
-add
Use this to create a new virtual host.
-mod
Use to modify a user. Enter this argument
before any other arguments. You must
enter -h hostname.
-kill
Use to delete a host. You must enter -h
hostname.
-d directory
Use to specify the top directory of the host.
If a directory is not specified the server will
use a subfolder to the top folder of the
server with the name of the new host.
-t number
Use to set the server timeout. Default is
600 seconds.
-mu number
Use to set the maximum concurrent users.
1000 is the default.
-i IP Address
Use to set the host IP address.
-ma number
Use to set the maximum concurrent
anonymous users. 200 is the default.
Configuring FTP Hosts
+anon
Use to allow anonymous connections.
-anon
Use to disable anonymous connections.
+hide
Use to hide files and folders beginning with
$.
-hide
Use to show files and folders beginning
with $.
+lt
Use option to use local time.
-lt
Use option to not use local time.
+ext
Use to disable extensions.
-ext
Use to enable extensions.
+tpt
Use to allow third party transfers.
-tpt
Use to disallow third party transfers.
-rd
Use to delete all files and folders
associated with the virtual host. By default,
all files and folders will remain when the
host is removed.
CHAPTER 3
Using Firewalls with SSL
When using a NAT (Network Address Translation) firewall, you may encounter problems
when trying to use SSL encryption. To fix this, you may be able to enter information in the
Firewall Settings dialog to reply to a PASV command by returning the IP Address and port
range of the NAT firewall. In many cases, this will allow you to use SSL through a NAT
firewall.
To change firewall settings:
1
In the left pane of WS_FTP Server, select the host. The host properties menu appears in
the right pane.
2
Click Firewall Options. The firewall settings dialog appears.
29
CHAPTER 3
3
Configuring FTP Hosts
Enter the following information.
IP Address. Enter an IP Address to be used in response to a PASV request. This will be
sent to the client instead of the host IP address. This should be the IP address of the NAT
firewall.
Port Range. Enter a range of port numbers to be used in response to a PASV request.
The port range is specified by #-# or #, #, #. In the first example, all ports between the
two numbers are available for use, and in the second, only the specific ports are
available. You may use a combination of both to specify multiple ranges or ranges and
specific ports.
Note: If you specify an IP address and not a port, then the server will use any
available port above 1024, but will still use the specified IP address in the
response.
Note: If you specify a port range, but not an IP address, the server will use its
own IP address and only the ports specified.
4
Click OK.
What Exactly is a NAT Firewall?
Because of today's need for increased security, many businesses utilize an initial form of
network protection called a firewall to prevent unauthorized access to or from their private
systems. Firewalls can be software or hardware based, or they can be comprised of a
combination of both. Part of this protection can include the use of a device or application
called NAT.
NAT or Network Address Translation is an Internet standard that enables a local-area
network (LAN) to use one set of IP addresses for internal traffic and a second set of
addresses for external traffic. A NAT box located where the LAN meets the Internet makes
all necessary IP address translations. Additionally, NAT provides a type of firewall by hiding
internal IP addresses, and it enables a company to use more internal IP addresses. Since they
are used internally only, there is no possibility of conflict with IP addresses used by other
companies and organizations.
30
Managing FTP User
Accounts
This chapter describes how to set up and manage FTP user
accounts and how to set permissions for users and user groups.
Chapter
4
How User Accounts Work
You can have an unlimited number of users for each FTP host.
When you add an FTP host to the server, you select the user
database for the host: Windows NT, IMail Server, WS_FTP
Server, or external ODBC user database.
If you selected the Windows NT, IMail Server, or external
(ODBC) user databases, you may already have a list of users for
the FTP host. (In the Server Manager, in the left pane, select the
Users item to view the list of users.)
If you selected Windows NT or IMail Server, you cannot use the
Server Manager to add or delete users, but you can set additional
user options in the user properties.
If you selected the WS_FTP Server, or external user database, you
can add users by using the New User wizard. See “Adding an FTP
User Account” on page 34.
In this Chapter
How User Accounts Work
Setting User Logon Options
Adding an FTP Account
How Permissions Work
Setting User Options
Deleting a User
Setting User Logon Options
For each FTP host, you can set whether you want users to start in
their own folder, or start in the top directory when they log on.
Renaming a User
Adding Users with the
Command Line Utility
To set the logon option:
1
In the left pane, select the FTP host. The host properties
appear in the right pane.
2
Click User Options. The User Settings dialog appears.
How Users Can Change Their
Passwords
Creating User Groups
Deleting a User Group
31
CHAPTER 4
3
Managing FTP User Accounts
Select from the following options:
Maximum Concurrent and Anonymous Users. Enter the maximum number of users
(including anonymous users) that can connect to the FTP host at the same time. The
default is 1000 users.
Maximum Anonymous Users. Enter the maximum number of anonymous users that
can connect to the FTP host at the same time. The default is 200 users.
Entering zero for either option disables new connections - this provides a way to
temporarily stop logons to the FTP host, so you can update files.
If either maximum limit is exceeded, a System Administrator or Host
Administrator can still log on using the Server Manager. Also, a System
Administrator can always log on using an FTP client.
User folder under root. When a user account is created, the folder for that account is
created under the top directory of the FTP host.
Do not list user folders. When this option is selected, users will not be able to see other
user folders. Only their own user folder, non-user folders, and files will be listed.
Do not auto create user home folders. If you do not want each user to automatically
have their own folder, select this option.
32
Managing FTP User Accounts
CHAPTER 4
Log on users to:
•
Log on users to home folders. When a user logs on, they are placed in their own
folder (which has the same name as their user ID).
•
Log on users to root. When a user logs on, they are placed in the top directory of
the FTP host.
Note: If the Do not auto create user home folders option is being used,
users will be connected to the root directory even if the Logon users to home
folders option is set. Administrators must manually create a home folder for
the user before they will be able to log on to it. If the users are forced to log
on to the root directory because they have no home folder, AND users are
locked into home folders, the user will not be able to see or do anything once
logged on.
Default User Settings
Note: These settings will not be applied to existing users. They only apply to
those users added after the settings were adjusted.
Disable Public Access Directory. If the user has a folder named public in their folder,
all users (including anonymous users) have List and Read permissions to the folder.
This allows the user to maintain their own public directory for transferring files. When
any other user logs on to the FTP host, this public folder appears in the users folder (in
the host’s top directory) and has the same name as the User ID. If you do not want other
users to have permissions to this user’s public directory, select this option.
Disable Password Change. If you do not want this user to be able to change their
password from an FTP client, select this option.
Lock User to Home Directory. If this option is selected, user will not be able to browse
directories that do not appear in their home directory.
4
Click OK to save the changes.
33
CHAPTER 4
Managing FTP User Accounts
Adding an FTP User Account
Once you have configured a host, you can add users for that host.
To add a new user to an FTP host:
34
1
In the left pane, expand the FTP host. Select Users. The users list appears in the right
pane.
2
Click the Add button. The first screen of the New User wizard appears.
3
Enter a User ID for the user and click Next to continue. The User ID can be from 2 to
30 characters and must be from the character sets: A-Z, a-z, 0-9.
4
Enter the user’s full name and click Next to continue. The full name can be from 0 to 80
characters.
5
Enter a password and click Next to continue. The password can be from 2 to 30
characters.
Managing FTP User Accounts
6
CHAPTER 4
Click Finish to create the new user.
The user account appears in the list of users for the FTP host.
To set additional properties for the user account, in the right pane, select the user and click
Edit. See “Setting User Options” on page 36.
How Permissions Work
By default, users have the following permissions:
•
User accounts — Each user has their own folder (with the same name as the User ID)
where they can upload and download files and folders. They have full permissions to
their folder. If you select Do not auto create user home folders in the User Properties,
the user will have no folder of their own.
•
Anonymous users — If you selected to allow anonymous access (in the FTP host’s
properties), any user can log on to the FTP host with a username of anonymous or ftp
and a password that specifies their e-mail address (or no password).
When a user logs on anonymously, they are placed in the top directory of the FTP host.
Anonymous users can access any folders for which you have granted permissions to the
special user group named anonymous.
•
Public folders — If a user wants to make their folders or files available to other users,
they can create a folder named public in their folder. When another user (or anonymous
user) logs on to the FTP host, in the folder named users, they will see a folder for any
user that has a public folder. For example, if the users fred and homer have public folders, another user will see a listing like the following:
/fred
/homer
You can disable access to a public folder by selecting Disable Public Access in the
user’s properties.
35
CHAPTER 4
Managing FTP User Accounts
Setting User Options
The following sections describe the options you can set for an individual user.
User Directories and User Password
In the user properties, the User directory box shows the full path name to the user’s folder.
This folder has the same name as the User ID and is created under the users folder of the
FTP host. The user can transfer files to and from this directory. When the user logs on, they
are placed in this folder. By default, this is the only folder for which the user has full
permissions. You can grant the user permissions for other folders by using the virtual folders
feature.
The Password box shows the user’s password in an encrypted form. You edit this box to
change the password. The password can be from 2 to 30 characters.
Setting Logon, Public Directory, and Change Password
Options
You can use the following options to set whether the user can access the FTP host, whether
other users can access this user’s public directory, and whether the user can change password
from an FTP client.
36
1
In the left pane, expand the FTP host. Select Users. The users list appears in the right
pane.
2
Select the user and click Edit. The User Options dialog appears.
Managing FTP User Accounts
CHAPTER 4
3
If you do not want this user to be able to log on to the FTP host, select Disable Login.
You can use this option to disable a Windows NT or IMail Server user’s account without having to delete the user account from the Windows NT or IMail Server user databases. (The WS_FTP Server Manager cannot delete user accounts from either of these
user databases.)
4
If you do not want other users to have permissions to this user’s public directory, select
Disable Public Access Directory.
If the user has a folder named public in their folder, all users (including anonymous
users) have List and Read permissions to the folder. This allows the user to maintain
their own public directory for transferring files. When any other user logs on to the FTP
host, this public folder appears in the users folder (in the host’s top directory) and has
the same name as the User ID.
5
If you do not want this user to be able to change their password from an FTP client,
select Disable Password Change.
6
Click Apply to save changes.
Setting File, Disk Space, and Bandwidth Quotas
You can set user global quotas for files, disk space, and bandwidth (the quotas apply to each
user on the FTP host) or per individual user or user group. A user quota setting overrides a
global (or host) quota setting as long as the user quota setting is not zero.
To set a global value for the FTP host, or for a user group:
1
In the left pane, expand the FTP host, then select the appropriate quota type: Quota
Limits (for file quota or disk space quota) or Bandwidth Allocation.
37
CHAPTER 4
Managing FTP User Accounts
To set global Quota Limits:
•
In the Max file count box, enter the maximum number of files a user can keep on
the FTP host. This is the total number of files for each of the user’s folders.
•
In the Max disk space box, enter the maximum number of bytes a user can consume on the FTP host’s drives.
To set Quota Limits for a group:
•
Select the user group and click Edit. Make the entries in the Quota Group Management dialog.
To set global Bandwidth:
•
In the Max bandwidth box, enter the maximum bandwidth to allocate to the user.
The maximum allowable bandwidth is 1,024,000 Kb per second.
To set Bandwidth Allocation for a group:
•
2
Select the user group and click Edit. Make the entry in the Bandwidth Group Management dialog.
Click Apply to save the settings.
To set the maximum number of files, maximum amount of disk space, or maximum
badnwidth on a per user basis:
1
In the left pane, expand the FTP host. Select Users. The users list appears in the right
pane.
2
Select the user and click Edit. The User Options dialog appears.
3
In each user’s properties, set the quotas for the user.
Note: This setting overrides a global quota setting.
Setting Administrator Permissions
You can grant Host Administrator and/or System Administrator permissions to a user. These
permissions determine what the user sees when they log on to the FTP host from an FTP
client or when they log on to the FTP server from the Server Manager (for remote
management) For information on remote management capabilities, see “Setting Up FTP
Hosts” on page 15.
To set administrator permissions:
38
1
In the left pane, expand the FTP host. Select Users. The users list appears in the right
pane.
2
Select the user and click Edit. The User Options dialog appears.
Managing FTP User Accounts
CHAPTER 4
3
Select Host Administrator to grant this user Host Administrator permissions. A Host
Administrator has full permissions for all user folders on the FTP host, and has any permissions granted via virtual folders. In addition, the Host Administrator has remote
management capabilities for the FTP host and all of its users, folders, and groups.
4
Select System Administrator to grant this user System Administrator permissions. A
System Administrator has full permissions for their own folder, and has any permissions
granted via virtual folders (just like a regular user). If you want the System Administrator to have access to all user folders, you need to also select Host Administrator. The
System Administrator has remote management capabilities for all FTP hosts on the
WS_FTP Server.
5
Click OK to save changes.
In the left panel, the user icon indicates the type of access the user has to the FTP Host’s file
system:
•
Normal user — has full permissions to their own folder and any other permissions
assigned by the Host Administrator. User icon has black hair.
•
Host Administrator — User icon has gray hair.
•
System Administrator — User icon has white hair.
•
Disabled User - User icon has red hair.
Deleting a User
To delete a user from an FTP host:
1
In the left pane, expand the FTP host. Select Users. The users list appears in the right
pane.
2
Select the user and click Remove. A dialog box appears and asks if you would like to
delete all files and folders in the user’s folder.
3
Click No if you want to save files and folders to move to another directory (the user is
deleted but the directory structure remains). Select Delete all files and folders in... to
delete all files and folders associated with the user, then click Yes. Click Cancel if you
do not want to delete the user.
Renaming a User
To rename a user on an FTP host:
1
In the user list, select the user, and then select Rename from the right mouse menu.
2
Enter a new name for the user.
39
CHAPTER 4
Managing FTP User Accounts
The name of the user’s top directory is changed, but the old folder and all files and folders
within are left unchanged. You can change the user’s full name in the users options.
Adding Users with the Command Line Utility
The Add User program is a command line utility for WS_FTP Server; you can use it to add,
modify, or delete users on an FTP host.
Note: You cannot use this utility to add users to an FTP host that uses the
Windows NT, or the IMail Server user database.
The Add User utility accepts input from the MS-DOS prompt and returns messages to the
MS_DOS display. You can type Add User commands at the MS-DOS prompt or run them in
a batch file.
To start the Add User utility:
1
Open an MS-DOS window and change directories to the WS_FTP Server directory.
2
For a list of command options, enter: iftpaddu /?
If you invoke the utility with no command line options (by entering only iftpaddu at the
MS-DOS prompt), you can then manually input commands, pressing Enter after each line. If
you do this, press CTRL-Z to exit the utility when you are done.
Basic Command Syntax
iftpaddu -u userid [-h hostname] [-n “full name”] [-p
password] [options]
iftpaddu -modify -u userid [-h hostname] [-n “full name”] [p password] [options]
iftpaddu -kill -u userid [-h hostname
iftpaddu -all [-h hostname] [-x number -s number] [options]
40
Argument
When to use
-u userid
Adds a user ID, where userid is the ID you want to
add. This is the only required argument. Only one
userid can be added in a single command.
-h hostname
Specifies the user’s FTP host, where hostname is
the name of the FTP host. The primary FTP host is
used if no host is specified.
-n “full name”
Specifies the full name of the user in double
quotes.
Managing FTP User Accounts
Argument
When to use
-p password
Specifies a password for the user. If you omit this
argument, the user’s password is “password.”
-s number
Specifies a maximum number of files.
-x number
Specifies a maximum amount of space in bytes.
-modify
Use before entering any other arguments when
you want to modify an existing user.
-kill
Use to delete a user. You must enter -u
userid. If the user is not on the primary FTP host,
you must also enter -h hostname.
+active
Enables the user to log on. (This is the default
setting when adding a new user.)
-active
Disables the user’s ability to log on.
+chgpass
Enables the user to change password from an FTP
client.
-chgpass
Disables the user’s ability to change password
from an FTP client.
+sysadm
Grants the user System Administrator
permissions.
-sysadm
Removes System Administrator permissions from
the user.
+hostadm
Grants the user Host Administrator permissions.
-hostadm
Removes Host Administrator permissions from the
user.
+lockuser
Locks a user to their home directory. May be used
with the –all, -add, and –modify flags.
-lockuser
Unlocks a user from their home directory. May be
used with the –all, -add, and –modify flags.
-all
This flag can be used in conjunction with the
active, chgpass, sysadm, hostadm options to grant
or remove permissions to all users on the system.
It can also be used with the -s number and -x
number arguments to set these parameters on all
user accounts currently on the system.
CHAPTER 4
41
CHAPTER 4
Managing FTP User Accounts
Adding a User
The following examples add a user ID of test01.
iftpaddu -h myhost.com -u test01 -n “ms test”
-p yourpass
iftpaddu -u test01 -n “mr test” -p newpass
iftpaddu -u test01
Modifying a User
The following examples modify a user ID.
iftpaddu -modify -h myhost.com -u test01
-p newpass
iftpaddu -modify -h myhost.com -u test01
-chgpass
iftpaddu -modify -u test01 -active
Deleting a User
The following example deletes a user ID.
iftpaddu -kill -u test01 -h myhost.com
How Users Can Change Their Password
If the FTP client supports sending a SITE or QUOTE command, users can change their
password from the client. If you do not want a user to be able to change their password, in
the user properties, select Disable Password Change.
For example, using the WS_FTP Pro “classic” client, you change the password as follows:
1
Log on to the FTP host.
2
In the Remote Site (right-side) panel, select FTP Commands
->Site from the right mouse menu.
3
In the Input dialog box, enter the following command:
CPWD password
where password is the new password.
Check the Log Window (LogWnd) to see that the command was successful.
4
42
Log off and log back on with your new password.
Managing FTP User Accounts
CHAPTER 4
Some FTP clients also support the Quote command. In the Quote command box, you can
enter SITE CPWD password where password is your new password.
Creating User Groups
You can create a user group and add any users on the FTP host to the group. You can then
grant permissions for FTP folders by user group, rather than for each individual user.
To add a user group to the FTP host:
1
In the left pane, expand the FTP host, and then select User Groups. The user groups list
appears in the right pane.
2
Click Add. The first screen of the wizard appears.
3
Enter a name for the user group and click Next to continue. This can be from 2 to 20
alphanumeric characters.
4
Enter a description for the group and click Next to continue.
5
Click Finish to create the new group.
The user group appears in the list of groups for the FTP host.
To add users to the user group, select the group and click Edit. The group properties appear.
See “Adding Users to the Group” below.
43
CHAPTER 4
Managing FTP User Accounts
Adding Users to the Group
You can add any users on the FTP host to a user group. You can then grant permissions for
FTP folders by user group.
To view or change user group properties:
1
In the left pane, expand the FTP host, and select Users Group. The group list appears in
the right pane.
2
Select the group and click Edit. The Group Management dialog appears.
3
In the Comment box, enter or modify the description for the user group (for example,
doc group).
4
To add a user to the group, select a User ID in the Available Users list and click the left
arrow (<-).
The user appears in the Users in this Group list.
5
To remove a user from the group, select a User ID in the Users in this Group list and
click the right arrow (->).
The user no longer appears in the Users in this Group list.
6
Click OK to save your changes.
Deleting a User Group
To delete a user group from an FTP host:
In the group list, select the group, and then click Remove. The group is deleted.
44
Managing Folders
This chapter describes how to set up and manage folders on an
FTP host, and how to manage permissions on the folder.
Chapter
5
Using Folders and Virtual folders
With WS_FTP Server:
•
You can grant access to any folder on your local system
•
You can create virtual folders that reference or ‘point to’ any
folder on your local system.
You can then grant permissions to a user or a user group for each
folder. If a user has permissions to a virtual folder, when they log
on to the FTP host, the folder appears in the top directory of the
host.
Granting Access to a Folder
In this Chapter
Using Folders and Virtual
Folders
To add a new folder to an FTP host:
Granting Access to a Folder
1
In the left pane, expand the FTP host, and then select Folders.
The folder list appears in the right pane.
Adding a Virtual Folder
2
Click Add. The Folder Permissions dialog appears.
Granting Permissions for FTP
Folders
NT Permissions on Windows
2000 and XP
Changing Folder Properties
Changing Virtual Folder
Properties
Removing a Folder
Renaming a Virtual Folder
45
CHAPTER 5
Managing Folders
3
Enter the full path in the Directory box or click the Browse (...) button to select the
folder on your local system.
4
Click OK to add the folder to the folder list.
All new folders, by default, grant list and read permissions to a special user group called
everyone (which includes all users and anonymous users). To view or change permissions
for the folder, see “Granting Permissions for FTP Folders” on page 47.
Adding a Virtual Folder
A virtual folder name is an alias for the real folder, thus it can have any name — it does not,
and should not have to be the same name as the folder to which it references.
To add a new virtual folder to an FTP host:
46
1
In the left pane, expand the FTP host, and then select Virtual Folders. The virtual
folder list appears in the right pane.
2
Click Add. The first screen of the New Folder wizard appears.
3
Enter a name for this “virtual” folder and click Next to continue.
Managing Folders
CHAPTER 5
4
Enter the local directory for which you are creating a virtual folder and click Next to
continue. The path must contain the drive letter to be a valid path. For example:
E:\WS_FTP\Folder
5
Click Finish to create the new folder.
All new virtual folders, by default, grant list and read permissions to a special user group
called everyone (which includes all users and anonymous users). To view or change
permissions for the virtual folder, see “Granting Permissions for FTP Folders” below.
Granting Permissions for FTP Folders
You can grant permissions for any folder or virtual folder shown in their respective list. If
you want all users on the FTP host to have permission for a folder, you can grant the
permissions to everyone (this includes anonymous users). If you want users who log on
anonymously to have permissions for a folder, you can grant the permissions to anonymous.
To grant permissions for a folder:
1
In the left pane, expand an FTP host, select Folders and select the folder from the list.
2
Click Edit. The folder properties appear.
3
In the User/Group list, select the user or user group for which you want to set or edit
permissions. Click Edit. The Permissions dialog appears.
4
If the user or group is not already in the list, click Add. The Permissions dialog appears.
5
Select the user or user group from the list. The permissions for that item appear.
6
Select the Permissions options:
47
CHAPTER 5
Managing Folders
No Permissions. No access to the folder. When logged on, the user or group will not see
this folder.
All Permissions. Read, Write, Delete, Rename, and List access.
Read. The user can download files from the folder.
Write. The user can upload files to the folder.
Delete. The user can delete files and folders in the folder.
Rename. The user can rename files and folders in the folder.
List. The user can display a listing of the folder contents.
Specified Permissions. The user or user group has the selected permissions.
7
Optionally, select another user or user group and set their
permissions.
8
Click OK to save your changes.
To grant permissions for a virtual folder:
48
1
In the left pane, expand an FTP host, select Virtual Folders and select the virtual
folder from the list.
2
Click Edit. The virtual folder properties appear.
3
In the User/Group list, select the user or user group for which you want to set or edit
permissions. Click Edit. The Permissions dialog appears.
4
If the user or group is not already in the list, click Add. The Permissions dialog appears.
Managing Folders
5
CHAPTER 5
Select the Permissions options:
No Permissions. No access to the folder. When logged on, the user or group will not see
this folder.
All Permissions. Read, Write, Delete, Rename, and List access.
Read. The user can download files from the folder.
Write. The user can upload files to the folder.
Delete. The user can delete files and folders in the folder.
Rename. The user can rename files and folders in the folder.
List. The user can display a listing of the folder contents.
Specified Permissions. The user or user group has the selected permissions.
6
Optionally, select another user or user group and set their
permissions.
7
Click OK to save your changes.
Notes on granting permissions
•
To set up an "upload" folder, you can grant Write permission only — this lets users
upload a file or folder, but they cannot list the contents of the Upload folder and they
cannot upload a file that has the same name as an existing file. You can add Delete permission if you want users to be able to overwrite an existing file.
•
To set up a "download" folder, you can grant List and Read permissions — this lets
users list the contents of the folder and download a file or folder.
NT Permissions on Windows 2000 and XP
NT permissions will work on Windows 2000 and XP computers.
To use this:
1
Set up a virtual folder to the top level folder you want to grant access to, and give rights
to users and groups.
2
Using the NT permissions, set further restrictions on subfolders and files.
Note: WS_FTP Server will use the highest restriction level set, so you can restrict
users from areas that NT would grant permissions with by setting stronger
permissions on the virtual folder.
49
CHAPTER 5
Managing Folders
Changing Folder Properties
To view or change folder properties:
1
In the left pane, expand the FTP host, and select Virtual Folders. The virtual folder list
appears in the right pane.
2
Select the virtual folder and click Edit. The Virtual Folder properties dialog appears.
3
In the Directory box, enter the path of the directory for which you are creating a virtual
folder. Use the Browse button to search your directories for the path.
4
You can increase security by selecting either Viewable only with 40-bit SSL or higher
or Viewable only with 128-bit SSL or higher. Clients that do not have SSL enabled
will not be able to view the folder when this option is selected.
5
Select Propagate these permissions to all sub-folders if you want all folders in this
directory to have the same permissions.
6
Click OK to save your changes.
Changing Virtual Folder Properties
To view or change virtual folder properties:
1
In the left pane, expand the FTP host, and select Virtual Folders. The virtual folder list
appears in the right pane.
2
Select the virtual folder and click Edit. The Virtual Folder properties dialog appears.
3
The Name box shows the folder name. To change the folder name, in the left pane,
right-click the name, select Rename from the right-mouse menu, and enter the new
name.
4
In the Destination box, enter the path of the directory for which you are creating a virtual folder. Use the Browse button to search your directories for the path.
Note: If you want to create a virtual folder that references a folder on the
local network, you must either:
- Run WS_FTP Server under a user account that has Windows NT
permissions for that folder.
- Use the NT User Database with NT file and directory permissions. In this
case, the user must have access to the network path.
5
50
To have virtual folders appear in user’s home folders, select the Include in user home
folder listing option. When this option is selected, Do not include in top-level directory listing will also be enabled.
Managing Folders
CHAPTER 5
6
You can increase security by selecting either Viewable only with 40-bit SSL or higher
or Viewable only with 128-bit SSL or higher. Clients that do not have SSL enabled
will not be able to view the folder when this option is selected.
7
Click OK to save your changes.
Removing a Folder
To remove a folder or virtual folder from an FTP host:
1
In the left pane, select Folders or Virtual Folders.
2
Select the folder or virtual folder in the list and then click Remove. The folder is
removed from the list, but the folder or directory to which it points remains.
Renaming a Virtual Folder
To rename a virtual folder:
1
In the left pane, select Virtual Folders.
2
Select the virtual folder in the virutal folder list, and then select Rename from the rightmouse menu.
3
Enter a new name for the folder.
51
CHAPTER 5
52
Managing Folders
Using Rules
This chapter describes Rules and how to configure them. Rules can
be used to monitor the FTP Server and send you a message, or take
action, when an event occurs.
Rules can trigger a notification to send a message or to run a
program. For information on defining a notification, see “Using
Notifications” on page 57.
Chapter
6
About Rules
With the Rules feature, you can set up WS_FTP Server to prevent
or allow actions (such as a file upload or download) based on user
ID, and/or file types. You can also notify yourself, or another user,
when an event occurs on the server.
You can set permissions for an action (such as file upload) for an
individual user or by user group.
If a rule is set to send a message via e-mail, pager or SMS, the
WS_FTP Server sends the notification using the Ipswitch
Notification Server.
A rule can also launch a program when an event occurs. In this
case, the Notifications server is not used because WS_FTP Server
runs the program locally.
The Rules List
The Rules List is where you add, edit, delete rules and set the
processing order.
The list shows all rules that you have created and the file mask
(which determines which files are affected) applied to the rule. The
rules are processed in the order listed.
In this Chapter
About Rules
The Rules List
Configuring Rules
Rules Processing
53
CHAPTER 6
Using Rules
Click Add to create a new rule by using the New Rule wizard. You can select from the
following rule types:
Rule Type
Description
Directory Created Applied when a user attempts to create a
directory (folder).
File Deleted
Applied when a user attempts to delete a
file or folder.
File Download
Applied when a user attempts to copy a file
from the server (download).
File Rename
Applied when a user attempts to change
the name of a file or folder.
File Upload
Applied when a user attempts to copy a file
to the server (upload).
Failed Login
Applied when the specified user(s)
exceeds a specified number of login
failures.
Quota Exceeded
Applied when the specified user(s)
exceeds the specified disk quota.
Click Edit to edit the selected rule.
Click Duplicate to add a new rule by copying the one selected and editing it.
Click Remove to delete the selected rule.
The server processes the rules by starting at the top of the list and working down. You can
move rules within the list to change the processing order.
Click Move Up to move the selected rule up the list, thus moving it up in processing order.
Click Move Down to move the selected rule down the list, thus moving it down in
processing order.
Configuring Rules
54
1
In the left pane of the WS_FTP Server Manager, select the FTP host, and then select
Rules. The Rules list appears in the right pane.
2
In the Rules list, click Add. The first screen of the Rules wizard appears.
3
Select the rule type you want to set up, then proceed through the screens and enter the
appropriate information to set up the rule, including:
Using Rules
CHAPTER 6
File Mask. Specifies the types of files and folders to which this rule applies. Enter the
file name or extension of the files to monitor. Multiple entries must be separated with a
comma. For example: *.exe, readme.txt, *.gif, *.* (for all)
Notification. (Optional) If you select to use a notification, this tells the rule who to
notify of the event and how to contact them. If there are no notifications to select from,
you may need to create a notification.
Note: The Notification Server must be configured. See “Configuring the Servers for
Notifications” on page 58.
Permissions. Specifies which users this rule will apply to and whether or not to permit
the action.
4
Click OK to add the rule to the list.
Remote Rule Configuration
To give you the ability to remotely configure rules, you must select the Enable remote rule
configuration option on the General System Settings dialog.
Rules Processing
When the selected event occurs (for example, a user uploads a file), WS_FTP Server does
the following:
•
Compares the file name and the user ID with each rule for that event.
•
If WS_FTP Server finds a match, it checks if the user is permitted or not permitted to
perform the action.
•
After permitting or denying the action, WS_FTP Server then sends all notifications that
are assigned to the rule.
•
If there is not a match, WS_FTP Server used the default action for that event and permits or denies based on that setting.
55
CHAPTER 6
56
Using Rules
Using Notifications
This chapter describes how to set up and configure notifications.
Notifications can be used with rules to monitor the Ipswitch
WS_FTP server and send a message, or take an action, when an
event occurs.
Chapter
7
For information about setting up rules, see “Using Rules” on
page 53.
About Notifications
A file transfer event, such as a file upload or a file download, can
trigger a notification that sends a message to a user or that
launches another application. This allows you to automate certain
processes, such as:
•
Inform you (the server administrator) when a disk quota or
failed login limit is exceeded.
•
Inform a user that a file has arrived on the server and is ready
for the user to download
•
When a file is downloaded, send a message
•
When a user exceeds their disk quota, send a message
•
When a file is uploaded, launch an Anti-Virus program to scan
for viruses
Notification Types
There are four types of notifications: a message sent through email, pager, or SMS; or a command to launch an executable
program. For the first three, the notification defines how the
message will be sent and to whom. These notifications are
triggered by a rule, and are processed by the Notifications Server.
E-Mail. Sends a message to an e-mail address.
Pager. Sends a message to a pager via a dial-up account.
In this Chapter
About Notifications
Notification Server Manager
Configuring the Servers for
Notifications
The Notifications Library
Using Notifications - A
Simulation
What’s Next?
57
CHAPTER 7
Using Notifications
SMS. Short Message Service (SMS) is a service for sending messages of up to 160
characters (224 characters if using a 5-bit mode) to mobile phones that use GSM (Global
System for Mobile communication). SMS is similar to paging. However, SMS messages do
not require the mobile phone to be active and within range and will be held for a number of
days until the phone is active and within range. SMS messages are transmitted within the
same cell or to anyone with roaming service capability. They can also be sent to digital
phones from a Web site equipped with PC Link or from one digital phone to another.
The fourth type of notification, a Program notification, is also triggered by a rule, but
instead of sending a message, it launches a program or a batch file. The program or file must
be on the same PC that the Ipswitch WS_FTP Server is running on. Program notifications do
not use the Ipswitch Notifications Server.
Notification Server Manager
During installation of Ipswitch WS_FTP Server, you select to install the Ipswitch
Notifications Server on the same PC, or another PC.
The Ipswitch Notification Server listens (default port 2001) for notification requests from
WS_FTP Server and processes the request to send a message through e-mail, pager, or SMS
service.
The Notification Server processes and handles notification events, leaving WS_FTP Server
resources free to handle file transfers. The Notification Server Manager lets you configure
the logging and account information necessary for the Ipswitch WS_FTP Server to
communicate with it.
Configuring the Servers for Notifications
To use e-mail, SMS, or pager notifications, you must configure both the WS_FTP Server
and the Ipswitch Notification Server to communicate with each other. This section describes
the overall process.
1
58
Use the Notification Server Manager to configure these settings for the Notifications
server. On the PC on which you installed the Ipswitch Notifications Server, select
Programs -> Ipswitch Notification Server -> Notification Server Manager.
•
Create a user account for the WS_FTP server. When WS_FTP Server generates a
notification request, it logs on to the Notification Server using this account. This
account provides security for the Notification Server by limiting the access needed
to send a notification.
•
Set the port where the Notification Server listens for a request. The default is 2001.
•
Configure the logging of notification events
Using Notifications
CHAPTER 7
The table shows the required settings. Click Help on the screen for more information.
Screen / Option: What to enter:
2
System Settings/
Binary Directory
The directory where the notification server is installed. Spool
and log files, by default, are stored in a sub-folder of this
folder.
System Settings/
Port
The port on which the Notification Server listens for
notification requests. The default is 2001. If you modify the
port, you must restart the service. The port defined here must
match the setting for the port in the WS_FTP Server Manager
(in Local System, Notification Settings). Whenever you
change the port, you must change it in both places.
Add user wizard/
User ID
This is the user account’s unique identifier. It must be from 2
to 80 characters and can use the following characters: A-Z,
a-z, 0-9.
Add user wizard/
Password
This password associated with this user account. The
password must be from 2 to 30 characters. For security
purposes, your entry is not displayed in clear text.
Use the WS_FTP Server Manager to configure the settings that tell it how to communicate with the Notifications Server.
To do this, in the WS_FTP Server Manager, in the left pane, select the FTP Server
(usually Local System). Then, select Notification Server Settings and enter the
appropriate settings. The table shows the required settings. Click Help on the screen for
more information.
3
Notification Server
Settings dialog
What to enter:
Notification Server
Address
Enter the hostname or IP address of the Ipswitch
Notification Server.
User ID to log in to
Notification Server
Enter the user ID that you established on the
Notifications Server. When sending a notification, this
FTP server will log on to the Notifications Server using
this user ID.
Password to log in to
Notification Server
Enter he password for the user account on the
Notifications Server.
Port Notification
Server is listening on
The default port for the Notification Server, the port on
which it listens for a request from a WS_FTP Server, is
2001. The port must be the same here as it is in the
Notification Server settings, so if you change the default
on the Notification Server, then enter the same port here.
Use the WS_FTP Server Manager to create notifications and the rules that trigger them.
59
CHAPTER 7
Using Notifications
The Notifications Library
The Notifications Library shows the notifications that you can assign to a rule or multiple
rules. This is where you create a new notification, test it, edit a notification, or remove it
from the library.
Notifications are listed in a tree-branch formation in the left column of the WS_FTP Server.
Each type of notification has its own branch on the tree. When a notification type is selected,
the right pane lists all configured notifications of the selected type.
Editing a Notification
To edit a notification:
1
Select the notification and click Edit, or double-click the notification. The settings for
that notification appear.
2
Make any changes.
3
Select Ok or Apply to save your modifications.
Deleting a Notification
To delete a notification, select the notification and click Remove. The notification is deleted
from every rule in which it is used.
60
Using Notifications
CHAPTER 7
Using Notifications- A Simulation
This section uses the e-mail notification to provide an example of how you can use
notifications and rules to monitor your FTP server.
In the example, suppose you are the FTP Administrator for the Broad Street Printing
company. When a customer has a document to be printed, he uploads the files to your FTP
server. The Print Production Manager has asked you to let her know when files are uploaded
to the PrintReady folder.
To accomplish this, you do the following:
•
Create an e-mail notification that can send a message to the Print Production Manager.
•
Test the notification.
•
Create a rule to monitor uploads and assigns the notification to it.
1
In WS_FTP Server Manager, you expand the tree items in the left pane.
2
You expand the Notification Library, and select Send Email. The e-mail notification list
appears in the right pane.
3
In the right pane, you click Add to start the e-mail notification wizard.
61
CHAPTER 7
Using Notifications
The e-mail notification wizard has six screens. To define this notification, you enter the
following information on each screen:
Option:
You enter:
Notes
Display Name:
“PrintReady message”
This is the display name used in the lists.
You’ll use this name to select the
notification when you create a rule.
E-mail Gateway: 156.21.50.10
This is the IP address of the mail server
on Broad Street’s network.
From Address:
Some mail servers check that the From
address is valid before accepting the
message. You can enter your e-mail
address here.
[email protected]
To Address:
The message is sent to this address.
[email protected]
Subject:
File %simplename is ready
The subject line uses the %simplename
variable to report the file name.
Notification
Message:
%user uploaded %simplename
to %dir for printing at
%timestamp
The message uses notification variables
to tell the Production Manager the
details. For example, the actual message
may say: “Ipswitch uploaded
ftpserver.pdf to C:\iftpsvc\printready for
printing at 11:45 2004 05 05,
4
You review the settings in the Notification Summary, then click Finish.
The E-mail list appears with the new notification displayed.
62
Using Notifications
CHAPTER 7
5
Having completed the notification, you test it. From the Notifications list, select the
PrintReady notification, then click Test. Verify that the Print Production Manager
received the message.
6
Now, you create a File Upload rule for the PrintReady folder and assign the new notification to it.
In the WS_FTP Server Manager, you expand Rules, and select File Upload. The File
Upload rules list appears in the right pane.
In the right pane, you click Add to start the Rules wizard.
The rules wizard has 4 screens. To define the rule, you enter the following information:
Option:
You enter:
Notes
File Mask:
*.pdf, *.ps, *.eps, *.doc,
The file extensions to which this
rule will apply.
Notification
options:
Select the option: Notify upon success
Select the notification: PrintReady
When the file is uploaded
successfully, this rule sends the
PrintReady notification.
User
Permissions:
the FTP user: Ipswitch
Permissions option: All Permissions
You select the user from the list
of users for this FTP server. This
is the user (customer) who will
be uplaoding the print file. You
give them all permissions.
7
You review the settings in the Rule Summary, then click Finish. The File Upload Rules
list appears with the new rule displayed.
8
When your customer, in this case named Ipswitch, uploads a file to the PrintReady
folder, the FTP server sends an e-mail notification to your Print Production Manager.
The e-mail message looks something like this:
What’s Next?
This section introduces the notification types and describes the differences between the
types. Each of the notification types follow a setup process similar to the e-mail notification
(see “Using Notifications- A Simulation” on page 61). For procedures on how to create a
notification of each type, see the Help system.
This section also describes the notification variables that can help you report information
about a WS_FTP Server event.
63
CHAPTER 7
Using Notifications
SMS Notifications
SMS (Short Message Service) is similar to paging. However, SMS messages do not require
the mobile phone to be active and within range and will be held for a number of days until
the phone is active and within range. SMS messages are transmitted within the same cell or
to anyone with roaming service capability.
SMS notification services are provided by a number of different providers in one of two
ways: TAP, the protocol used in common pagers which requires a modem and the phone
number of the provider and recipient, or via e-mail where a specifically formatted e-mail
message is sent to an address.
Because multiple methods can be used to provide SMS service, there are no common
settings for SMS notifications. Each notification is tied to a provider, which may support
either or both of the delivery methods mentioned.
The SMS options have a list of all available countries that have configured providers. When
a new country is selected, the list is re-populated with the providers for the country. Click the
browse button to display a list of all providers organized by country. If your provider is not
listed, you can create an entry for them here.
The following shows an example of the settings for an SMS notification.
See the help system for step-by-step procedures and descriptions of the options.
Pager Notifications
Pager messages are delivered via a terminal service provider. You can define a notification
to send a message to a pager when an FTP event occurs. WS_FTP Server supports PageNet,
TAP (Telocator Alphanumeric Protocol) , SMS-TAP, UCP-SMS (British Telecom), and NTT
(Nippon Telegraph and Telephone) pager services.
64
Using Notifications
CHAPTER 7
The following shows an example of the settings for a Pager notification.
See the help system for step-by-step procedures and descriptions of the options
E-mail Notifications
E-mail messages are delivered via an SMTP gateway, which will probably be the same relay
for all e-mail addresses. However, you can have notifications that use different SMTP
servers.
The following shows an example of the settings for an e-mail notification.
See the help system for step-by-step procedures and descriptions of the options.
65
CHAPTER 7
Using Notifications
Program Notifications
When an FTP event occurs (such as a quota exceeded), you can send a notification that
launches a program. The program must be on the same system as the WS_FTP Server.
Program notifications, depending on the program launched, could require an extensive
amount of processing on the server. For this reason, only system administrators can
configure them remotely.
The following shows an example of the settings for an Program notification.
See the help system for step-by-step procedures and descriptions of the options.
Using Variables to Report Event Details
You can use the following variables to report details about the event that triggers a
notification. These variables can be used in the Message or Subject boxes.
66
Variable
Description
%Event
The event that triggered the notification, which means any of
the rules: Directory Created, File Deleted, File Download, File
Rename, File Upload, Failed Login, Quota Exceeded.
%Dir
Inserts the name of the directory created or attempting to be
created.
%File
Inserts the name of the file the action was attempted on
(available for upload, download, and deletion rules.
%ToFile
Inserts the new name of a file in a file rename attempt (only
available in rename rules.)
%FmFile
Inserts the original name of a file in a file rename attempt (only
available in rename rules
Using Notifications
CHAPTER 7
%User
Inserts the User ID of the user that attempted the action
(available for rules in all categories.
%Status
Inserts whether the attempt was successful or not (available for
rules in all categories).
%SimpleName
The file name, without the path.
%Timestamp
Date and time the notification was triggered.
67
CHAPTER 7
68
Using Notifications
Configuring SITE
Commands
With the Site Command feature, server administrators can use
WS_FTP Server to create customized FTP commands that users
can use to execute applications on the FTP server.
Chapter
8
Adding a Site Command
To add a new Site command
1
In the left pane of the WS_FTP Server Manager, expand the
FTP host and then select Site Commands. The Site Commands list appears.
In this Chapter
2
In the Site Command list, click the Add button. The first window of the Custom Site Command wizard appears.
Adding a Site Command
Modifying Site Command
Properties
69
CHAPTER 8
Configuring SITE Commands
3
Enter the name of the site command in the text box. Click Next. The Host Command
Executable screen appears.
4
Enter the full path for the file that is to be executed when the site command is run, or
select it by clicking the Browse (…) button. Click Next. The Program Arguments
screen appears.
Note: Never use server side applications (such as Notepad or Wordpad) as
the executed program in a site command. Using these will display nothing for
the user, but each time the command is run, a new copy of the program is
opened on the server.
Note: If using a batch file, you must enter CMD.exe in the Host Command
Executable dialog. In the Program Arguments dialog, enter the full path of
the batch file in quotation marks. For example: “c:\iFtpSvc\jump.bat”
70
Configuring SITE Commands
CHAPTER 8
5
Enter %1-%5 for the allowed number of user defined variables, as well as any command
line arguments that are to be used when the command is executed. Spaces are delimiters
for arguments, so a single argument with a space will be treated as two, unless the entire
argument is in quotation marks.
6
Click Next. The Summary window appears.
Note: If you allow user-defined variables, it is suggested to select the Send
Output option on the SITE Command Properties window after you set up the
command. If this is not done, only a general success or failure message will
be returned to the user on the server.
7
Review the information displayed to make sure it is correct. If the information is correct, click Finish to add the command. If the information needs to be changed, click
Back to move to the window that needs to be changed.
After you set up the site command, you can add or change permissions for the command.
Modifying Site Command Properties
To view or change the properties for a SITE command:
1
In the left pane of the WS_FTP Server Manager, expand the FTP host and then select
Site Commands. The Site Commands list appears.
2
Select the site command and click Edit. The Site Command dialog appears.
3
Make changes to any of the properties.
71
CHAPTER 8
Configuring SITE Commands
Command. The name of the SITE command. This is also the command that is used to
execute the program. This property cannot be changed.
Executable. The path and file name of the application that is run when the correct
command is given. This can be changed by typing the full path and file name of the
application, or by clicking the Browse (…) button and selecting the application from a
browse dialog box.
Arguments. Number of available user-defined variables that can be used with the
command (up to 5), as well as command line arguments.
Send Output. When this option is selected, all output generated by the server will be
shown to the user as the command is executed. If the option is cleared, no output will be
returned other than a success or failure message. Command variable errors will not be
returned unless this option is selected.
Permissions. A list that displays which users are able to use the site command. Click
Add to add new permissions. To delete a user’s permission, select it in the list and click
Remove.
4
Click OK to save the changes.
Modifying Site Command Permissions
To control who can use a command:
1
In the left pane of the WS_FTP Server Manager, expand the FTP host and then select
Site Commands. The Site Commands list appears.
2
Select the site command and click Edit. The Site Command dialog appears.
When the command was set up on the WS_FTP Server Manager, it automatically added an
entry to the Permissions box that allows all users to use the command.
72
3
If you want to change the permission, select the default permission value and click
Remove. This will delete the permission.
4
Click Add to view the Permissions properties.
Configuring SITE Commands
CHAPTER 8
5
In the Permissions properties, associate the user or group of users with the appropriate
access to the command. In the case of site commands, permission is either all or none.
6
Click OK to add the user.
Note: Permissions are used in the order in which they appear in the
Permissions list. If a user appears at the top of the list, and that same user is
below it in a group, the permissions set on the user will be used before the
permissions for the group.
73
CHAPTER 8
74
Configuring SITE Commands
Managing FTP Hosts
This chapter describes how you can use the WS_FTP Server
Manager to manage FTP hosts from the local host or from a
remote location.
Chapter
9
Copying the Server Manager to a
Remote Host
You can copy the WS_FTP Server Manager install program (mgrinst.exe) to another Windows NT, or Windows 2000 system and
run it to install the Server Manager which allows you to manage
FTP hosts remotely.
If you installed WS_FTP Server from a CD-Rom, you can use the
CD-Rom to install the Server Manager on another Windows NT or
Windows 2000 system to manage your server remotely.
Note: If using NT User database with Active Directory on
Windows 2000, FTP Administrators must also be a member of
an Admin group (or some other group to give them permission
to write to the NT registry).
Connecting to the WS_FTP
Server
To connect to the FTP server:
In this Chapter
Copying the Server Manager
to a Remote Host
1
Start the WS_FTP Server Manager.
2
In the left pane, select WS_FTP Servers.
3
In the right panel, click Connect. The Logon dialog box
appears.
Monitoring Active FTP
Sessions
4
In the IP Address box, enter the IP address of the host on
which the FTP server is installed. (Note that you can connect
to the server from the same host on which it is installed.)
Monitoring FTP Server
Statistics
Connecting to the WS_FTP
Server
75
CHAPTER 9
Managing FTP Hosts
5
In the Server port box, if your WS_FTP Server is not using port 21, change the port
number to be assigned to the port.
6
Enter your User ID and Password. You must be a Host Administrator to access a particular FTP host, or a System Administrator to access all FTP hosts.
7
Click Use SSL to make a secure connection to the server.
8
Click OK. The Server Manager connects to the FTP server.
In the left pane, you will see the IP Address of the FTP server. Select the IP Address and
expand it to show the FTP hosts on the FTP server. You can make changes to FTP hosts,
users, and folders (your access to FTP hosts and users depends on whether you are the
System Administrator or the Host Administrator — see user properties for more
information).
For the most part, you can use the same Server Manager functions that you can use if you
were on the local system, but note the following differences:
•
You cannot stop or start the server.
•
Any changes you make remotely occur immediately, without stopping and restarting the
server (except the server port).
•
You can change the server port, but it does not take effect until the server is restarted.
•
After making changes remotely, select Refresh from the View menu (or press F5) to
make the changes also appear under the Local System.
Click Disconnect to end the session and close the Server Manager.
Monitoring Active FTP Sessions
When connected to the FTP server from a remote system (or from the host on which it is
installed), you can use the WS_FTP Server Manager to view and monitor active connections
to the FTP server.
To view active sessions:
76
1
In the left pane, select Local Host. The Local Host properties list appears in the right
pane.
2
Click Session Manager. The Session Manager window appears.
Managing FTP Hosts
CHAPTER 9
Server Statistics
The Session Manager window reports the following WS_FTP Server statistics. Connection
and File statistics represent the count since the server was last started, or since the counter
was reset.
Connection statistics: Current number of connections, Maximum number of concurrent
connections, Total number of connections.
File statistics: the number of files Transmitted (downloaded), Received (uploaded), and
Deleted
Transmits in progress: The number of downloads in progress.
Receives in progress: The number of uploads in progress.
Click Reset to zero the counters within the WS_FTP Server. Note that these are the same
values you can view and chart in the Windows NT Performance Manager (for more
information, see “Monitoring FTP Server Statistics” on page 78).
Active Sessions
The Session Manager window shows all active connections from an FTP client (FTP
sessions) or from a WS_FTP Server Manager to the FTP server. For each connection, the
Session Manager shows:
Address. The IP address of the FTP client or remote WS_FTP Server Manager.
Host. The FTP host to which the client is connected. If there is only one FTP host on the
WS_FTP Server, this column does not appear.
User. The User ID used to connect to the host.
Directory. The last directory accessed during this session.
77
CHAPTER 9
Managing FTP Hosts
Last Command. The last FTP command issued by the client or Server Manager.
Idle. The number of seconds the session has not received a command or data from the client
and has not sent a response or data to the client for the reported number of seconds. You can
control the amount of idle time allowed for a session by setting a Timeout value in the host’s
properties.
TA (Transfer Active). Indicates that a data channel is active for a session. If it shows a
value of 1, the RETR or STOR command is currently active, which means data is being
transferred (retrieved or stored). If it shows a value of 0, the data channel is inactive.
To update the list of active connections, click Refresh.
To end a session, select the session’s Address and click Kill. The listing automatically
refreshes, but may take a few seconds.
Monitoring FTP Server Statistics
You can use the Windows NT Performance Manager to monitor statistics reported by the
WS_FTP Server, including the number of concurrent connections, the total number of
connections since the server started (or was reset), and the number of files transferred.
To display WS_FTP Server statistics:
1
From the Start menu, select Programs->Administrative Tools (Common)>Performance Monitor. The Windows NT Performance Monitor appears.
2
From File menu, select New to create a new chart. See the Performance Monitor’s help
system for information on using charts.
3
From the Edit menu, select Add to Chart. The Add to Chart dialog box appears.
In the Computer box, select the Windows NT name of the computer on which the
WS_FTP server is installed. (The default is the local computer, but you can also connect
to another computer on the local network.)
In the Object box, select Ipswitch WS_FTP Server. The WS_FTP server counters
appear in the Counter list.
Select a counter and click Add to add it to the chart.
Click Explain to display a brief description of the counter.
4
78
To save the settings to a file, select Save Chart Settings from the File menu.
SSL Configuration
This chapter describes what SSL is and how you can configure
WS_FTP Server to allow secure (SSL) connections.
Chapter
10
What is SSL?
SSL (Secure Socket Layer) is a protocol for encrypting and
decrypting data sent across direct internet connections. When a
client makes an SSL connection with a server, all data sent to and
from that server is encoded with a complex mathematical
algorithm that makes it extremely difficult to decode anything that
is intercepted.
The following is a step by step illustration of how SSL works.
In this Chapter
What is SSL?
Step 1. The client makes the initial connection with the server and
requests that an SSL connection be made.
Step 2. If the server is properly configured, the server will send to
the client its certificate and public key.
Step 3. The client uses that public key to encrypt a session key and
sends the session key to the server. If the server asks for the
client’s certificate in Step 2, the client must send it at this point.
Step 4. If the server is set up to receive certificates, it compares the
certificate it received with those listed in its trusted authorities
database and either accepts or rejects the connection.
How to Get Started
Generating a Certificate
Selecting a Certificate
Signing a Certificate
Trusted Authorities
79
CHAPTER 10 SSL Configuration
If the connection is rejected, a fail message is sent to the client. If the connection is accepted,
or if the server is not set up to receive certificates, it decodes the session key from the client
with its own private key and sends a success message back to the client, thereby opening a
secure data channel.
The key to understanding how SSL works is in understanding the parts that make SSL itself
work. The following is a list of these parts and the roles each plays.
Client. Any FTP program that is able to make an SSL connection.
Certificate. The Certificate file holds the identification information of the client or server.
This file is used during connection negotiations to identify the parties involved. In some
cases, the client’s certificate must be ‘signed’ by the server’s certificate in order to open an
SSL connection. Certificate files have the .crt ending.
Session Key. The session key is what both the client and the server use to encrypt data. It is
created by the client.
Public Key. The public key is the device with which the client encrypts a session key. It
does not exist as a file, but is a by-product of the creation of a certificate and private key.
Data encrypted with a public key can only be decrypted by the private key that made it.
Private Key. The private key decrypts the client’s session key that is encrypted by a public
key. The private key file has the .key ending. Private keys should NEVER be distributed to
anyone.
Certificate Signing Request. A certificate signing request is generated each time a
certificate is created. This file is used when you need to ‘sign’ a certificate. Once the
Certificate Signing Request file is signed, a new certificate is made and can be used to
replace the unsigned certificate.
How To Get Started
WS_FTP Server can be used without configuring the SSL Utility, but unless you clear the
Enable SSL option in the Host SSL options, anyone can make a secure connection with you.
If you do not want to use the SSL capabilities, select SSL (under the approriate FTP host) in
the left pane, then clear the selection for the Enable SSL option.
80
SSL Configuration CHAPTER 10
To allow users to make secure connections, follow these directions to set up your server.
1
The first step is to replace the default key and certificate installed with WS_FTP by
creating a new certificate. Follow the directions for generating a certificate to
accomplish this.
Note: The default key and certificate included with WS_FTP Server are exact
copies of the files distributed to all users. If you do not generate a new
certificate and set of keys, no data encrypted by your server will be
completely secure.
2
On the Certificate Selection tab, replace the default values with the certificate, private
key, and pass phrase generated with the Certificate Creation tab.
3
Determine what level of security you want for your server. For the highest security,
click the Option tab and select the Certificates are requested and verified upon connection option. When this option is selected, the server requires the FTP client to send
their certificate when attempting to log on.
If the certificate sent from the client to the server was not signed by a certificate on the
host’s Trusted Authorities database, the connection will fail. Read the Trusted
Authorities section for more information on this process.
For the lowest level of security, you can stop after selecting a certificate on the
Certificate Selection tab.
4
If you do want to limit which users can make an SSL connection to your server, add the
certificate you are going to use to sign user certificates to the Trusted Authorities database for the host they have an account on. Read the Signing a Certificate section for
more information on this process.
From here, WS_FTP server is ready to accept SSL connections.
Generating a Certificate
To create an SSL certificate:
1
From WS_FTP Server, in the left pane, expand the FTP host and select SSL. The SSL
Host Options appear in the right pane.
2
Click Certificate Management, then select the Certificate Creation tab.
81
CHAPTER 10 SSL Configuration
3
Enter a name in the Certificate Set Name box. This will be the name of the certificate
that is generated by WS_FTP Server.
4
Click the Browse (…) button in the Output Location box to select the folder you want
the certificate created in.
5
Enter information in all of the Certificate Information boxes:
City/Town. City or town where you are located. (Ex. Augusta)
State/Province. State or Province where you are located. (Ex. Georgia)
Organization. Company or individual user name.
Common Name. This can be either the name of the person creating the certificate or the
fully qualified domain name of the server associated with the host.
Pass Phrase. Pass phrase that is to be used to encrypt the private key. It is important to
remember this pass phrase. The pass phrase can be any combination of words, symbols,
spaces, or numbers.
Pass Phrase Confirmation. Re-enter the same pass phrase as above.
Country. The country you are in. This must be a valid two letter country code. (Ex. US)
Email. E-mail address of the person the certificate belongs to.
Unit. Name of organizational unit. (Ex. Research and Development)
6
82
After all of the boxes are filled in correctly, click Create to generate the keys, certificate, and certificate signing request. If all of the boxes are not filled in, you cannot create the certificate.
SSL Configuration CHAPTER 10
Selecting a Certificate
The Certificate Selection tab is used to choose which private key and certificate you want to
use during SSL connection negotiations. If a new certificate has not been created, follow the
directions for “Generating a Certificate” on page 81.
To select an SSL Certificate:
1
Select the host you want to use the certificate with in the Host box.
2
Click the Browse (…) button next to the Private Key box to select the private key you
want to use during SSL negotiation.
3
Click the Browse (…) button next to the Certificate box to select the certificate you
want to use during SSL negotiation. The certificate you use must have been created
using the key you selected for the Private Key box.
4
Enter the pass phrase associated with that certificate in both the Pass Phrase and the
Pass Phrase Confirmation boxes. A pass phrase can be any combination of words,
symbols, or numbers. It is case sensitive and must be written exactly the same way each
time it is used.
Without the correct pass phrase in both boxes, the certificate and private key cannot be
verified and the selection cannot be saved.
5
Click Apply to save your entries.
Clicking the Reset button erases what you have done since the last time new settings
were applied.
83
CHAPTER 10 SSL Configuration
SSL Options
WS_FTP Server provides options for SSL connections. In the left pane, expand the FTP host
and select SSL. The SSL Host Options appear in the right pane.
Enable. Select this option to use the features on this panel. If this option is not selected, the
server will not accept SSL connections. Note that a virtual host will use the settings for the
IP address that the user connects to.
Force clients to use SSL connections. Select this option to enable the Force SSL data
channel. This option causes the server to generate an error message and disconnect when a
non-SSL connection is detected.
Enable the Force SSL data channel. To use this feature, you must first select the Force
clients to use SSL connections option. (This option is dependent on client settings. Clear
data channels are not permitted.)
Allow Clear Command Channel (CCC) after authentication. Once a user has been
authenticated, the client will permit clear text to be sent. (This option is beneficial when
working with firewall settings.)
Client Certificates are verified upon connection. The server sends a call to the client
asking for its certificate and tries to verify that certificate against the certificates listed for
that host on the Trusted Authorities tab. If the certificate is not listed there, for that host, then
the SSL connection will fail. (The server and client each ask each other for certificate
verification.)
Force clients to use 128-bit or higher SSL connection on this host. Select this option to
only give access to the server to clients who are connecting with 128-bit or higher SSL
encryption. All other connections will be refused. Not checking this allows for any level of
encryption. (Lowest permitted encryption is 40-bit)
Certificate Management. This is used to choose which private key and certificate you want
to use during SSL connection negotiations with the client. Certificate Management is
available only to FTP hosts with an IP address; virtual hosts cannot use it.
Signing a Certificate
The Certificate Signing tab is used to sign requests with the private key and certificate you
define. When a user wants to make an SSL connection with a host they have an account on,
the user creates a certificate of their own and sends the generated request file to the server
administrator. This is usually done through e-mail. Once the administrator has the file, they
can sign the request and create a new certificate that can be sent back to the user. The user
then uses that new certificate to make an SSL connection with the host.
84
SSL Configuration CHAPTER 10
If the Certificates are requested and verified upon connection option found on the SSL
Option tab is selected, the certificate the administrator uses to sign the certificate signing
request must be listed in the Trusted Authorities tab for that host. If not, any SSL connection
that tries to use that certificate will fail.
To sign a certificate:
1
In the Private Key box, select the private key you want to use to sign the request by
clicking on the Browse (…) button and selecting the file.
2
In the Certificate box, select the certificate associated with that private key.
3
Enter the pass phrase associated with that private key/certificate in both the Pass
Phrase box and the Pass Phrase Confirmation box.
4
In the Request File box, select the request file you want to sign by clicking on the
Browse (…) button and selecting the file.
5
In the Active Date box, enter the date the certificate is activated, or use the pull-down
button to select the date from a calendar.
6
In the Expires On box, enter the date the certificate expires on, or use the pull-down
button to select the date from a calendar.
7
In the Output Certificate box, enter the file name and complete path of the certificate
that is to be generated by signing the request. You can click the Browse (…) button to
enter the name and select the folder you want to create the file in.
Note: Usually, the output certificate file uses the same name as the request
file.
Note: Do not use the same path and filename as the signing certificate.
85
CHAPTER 10 SSL Configuration
8
Click the Sign button to sign the request and create the new certificate.
The certificate that was created should now be sent back to the user. If the certificate file
used to sign the request is not listed in the Trusted Authorities tab for that host, you should
add it now.
Trusted Authorities
The Trusted Authorities tab stores a list of certificate names that are recognized by the host
you identify in the Certificate Store box (In WS_FTP Pro, the Certificate Store box does not
appear). If you use the Certificates are requested and verified upon connection option
found on the SSL Option tab, any user that tries to make an SSL connection must have their
certificate signed by a certificate that has been added to this host’s database, or have the
certificate itself in the database.
Certificate Display
Issued To. Who the certificate was issued to.
Issued By. Who the certificate was signed by.
Expires. Date on which the certificate expires.
Adding a Certificate
To add a certificate to the database:
1
86
Click the Import button and select the path and file name for the certificate. The Add
Certificate? dialog box appears.
SSL Configuration CHAPTER 10
2
Review the information and click Yes to add the certificate to the database.
Exporting a Certificate
To export a certificate from the Trusted Authorities database:
1
Select the certificate you want to copy out of your database.
2
Click the Export button.
3
Select the folder you want to copy the certificate to and enter the name you want to save
the certificate file as.
4
Click OK.
Removing a Certificate
To remove a certificate:
1
Select the certificate to be removed.
2
Click Remove.
3
A warning appears advising you to export the certificate before you remove it. Removing the certificate deletes the certificate file.
4
Click OK to remove the certificate.
87
CHAPTER 10 SSL Configuration
88
Using the Log Analyzer
This chapter describes the WS_FTP Server Log Analyzer and how
to use it.
Chapter
11
What is the Log Analyzer?
The WS_FTP Server Log Analyzer parses specified logs created
by WS_FTP Server to provide a comprehensive analysis of
transfer data. This breakdown is presented on the Tabs in the Log
Analyzer dialog, where it is broken down to show specific types of
information.
The following, is a list of items on this dialog:
•
Start Date. This sets the beginning of the range of dates you
want to retrieve logs for.
•
End Date. This is the end of the range of dates you want to
retrieve logs for.
•
Log save dir. Enter the full path of the local directory where
you want to save the retrieved log files.
•
Delete remote log files after transfer. Select this option to
have the files deleted from the server once they are retrieved.
•
Parse Logs. Click this button to start the parsing/analyzing
process.
In this Chapter
What is the Log Analyzer?
Log Analyzer: Connections
Dialog
Log Analyzer: Tabs
89
CHAPTER 11 Using the Log Analyzer
•
Export Logs. Click this button to convert the retrieved logs to W3C Extended Log format.
•
Cancel. Click this button to cancel the current operation.
Using the Log Analyzer
To use the Log Analyzer, you must first identify the FTP server that you want to gather logs
from.
Once the server connection has been configured, and the information on the Log Analyzer
dialog has been entered, click the Parse Logs button to continue. The Log Analyzer will
then make a connection to that server and download the Log found in the specified date
range to the temporary directory identified in the Log save dir directory. From there, it will
analyze the logs and populate the various tabs found on this dialog.
Log Analyzer: Connections Dialog
The Log Analyzer Connections Dialog is used to view, edit, and configure FTP servers that
you want to retrieve log files from.
To Add a Connection to a Server
Enter the proper information in the following boxes:
Note: For directions on how to create an entry for logs that exist on the local
server, see “Analyzing Logs on a Local Server” on page 91.
Hostname. Enter the hostname or IP address for the server you want to retrieve the files
from.
90
Using the Log Analyzer CHAPTER 11
Userid. Enter the Userid you will use to log onto the server with. This user must have at
least read permissions in the folder where the logs are stored.
Password. The password for the user account identified in the Userid box.
Log directory. Enter the complete path to the folder where the logs are stored. This is the
path from the directory the User account logs into. For example, if the user logs into the pub
directory, and the logs are in a folder called logs in the next higher directory, you would
enter ..\logs in this box.
Note: You can create a virtual folder to point to the directory where the logs
are stored, and then identify the path to that folder in the Log Directory box.
For example; If your user logs into the user home directory, and you have
created a virtual directory called logs, and have set the option to have the
virtual folder appear in the user's home directory, you can enter logs in the
Log Directory box.
Port. The port the FTP server uses for connection.
Select the Use SSL option to use SSL when retrieving the logs.
Click the Configure button, after you choose the Use SSL option, to configure the Log
Analyzer to use SSL.
Click the Save button to save the current setting on the selected server. If you are editing the
settings on a server you have already configured, you will be prompted with the Save dialog.
Click OK to close the dialog.
Note: If you are creating additional connections, select New in the
configured connections list before entering the information in the text boxes.
Analyzing Logs on a Local Server
If you want to analyze logs that exist on the local server, you can use a hostname that begins
with LOCAL.
The logs will be copied from the log dir to the save dir instead of connecting and
transferring. No Userid, Password, or Port is necessary for LOCAL host names.
To Remove a Connection
Select the server to be removed.
Click the Remove button to remove the selected server from the configured list.
91
CHAPTER 11 Using the Log Analyzer
Log Analyzer: Tabs
The tabs on the Log Analyzer window show a breakdown of the information found in the
server logs. This section describes each tab and the types of information displayed there.
Log Analyzer: Files Tab
The Files tab breaks down the log by the specific files that have been transferred.
Name. This column shows each file that has been transferred to or from the servers.
Path. This column shows the path of each of the transferred files, either where they were
uploaded to, or downloaded from.
Downloads/Uploads. The total number of times each file has been downloaded or uploaded.
Server name columns. For each server that appears on the Configured list, there will be a
column here showing the total number of times each file has been uploaded to or
downloaded from that server.
Log Analyzer: IP Address Tab
The IP Address tab shows an analysis of each IP address that has downloaded or uploaded
files in the retrieved logs.
Address. Each IP Address that has made an upload or a download is listed in this column.
Downloads/Uploads. The total number of files that have been downloaded or uploaded by
that IP Address.
Server name columns. For each server that appears on the Configured list, there will be a
column here showing the total number of files each IP Address has uploaded to or
downloaded from that server.
Log Analyzer: Times Tab
The Times tab shows an analysis of the total number of transfers in each 1 hour increment.
Hour. Each hour of the day a transfer has been made will be listed in this column. (08:59:59
will appear in hour 08)
Downloads/Uploads. The total number of files that have been downloaded or uploaded
during that hour.
Server name columns. For each server that appears on the Configured list, there will be a
column here showing the total number of files that was uploaded to or downloaded from that
server, during that hour.
92
Using the Log Analyzer CHAPTER 11
Log Analyzer: Users Tab
The Users tab shows an analysis of each user that has downloaded or uploaded files in the
retrieved logs.
Name. Each user that has made an upload or a download is listed in this column.
Downloads/Uploads. The total number of files that have been downloaded or uploaded by
that user.
Server name columns. For each server that appears on the Configured list, there will be a
column here showing the total number of files each user has uploaded to or downloaded
from that server.
Log Analyzer: Summary Tab
The Summary tab shows a performance analysis for each of the servers that have been
configured and logs have been retrieved from.
Name. The Name of the server from which the logs have been retrieved.
Avg Rate Bytes/Sec. The average rate of transfer, in bytes per second, on each server shown
in the log.
Downloads/Uploads. Total number of uploads and downloads on that server shown in the
logs.
Log Analyzer: Status Tab
The Status tab functions like a separate log window. Once the Parse Logs or Export Logs
have been clicked, this tab will display each step of the process as it takes place.
93
CHAPTER 11 Using the Log Analyzer
94
Managing Log Files
This chapter describes the log files created by WS_FTP Server,
and how to use them to view information about the server and
server events.
Chapter
12
Logging FTP Server Events
You can set WS_FTP Server to write FTP events (such as connect,
change directory, get file, put file) to a log file. If you make a
change to the logging options, you must restart the FTP server.
To set the logging options:
1
In the left panel, select Local System. The Local System menu
appears in the right panel.
2
Select Modify Log Settings. The Logging Options dialog
appears.
Server events for all FTP hosts are logged to a file named
FSyyyymmnn.log where yyyy is the year, mm is the month, and
nn is the day. This log is created daily in the Log directory.
See “Viewing Log Files” on page 96 for information
3
Set any of the following options:
Logging Directory. This is the directory where all logs will
be created and stored.
Enable Logging. Select this option to turn on logging, clear it
to disable logging for this server. This controls all hosts on
the server.
Enable Debug Messages. Select this option to have WS_FTP
Server add more information to the log generated.
In this Chapter
Logging FTP Server Events
Viewing Log Files
Reading Log Files
95
CHAPTER 12 Managing Log Files
Use Internal Viewer. When you select a log and click View, it displays in the default
log viewer. If you want to open the log in a different program, select Use External
Viewer, then use the Browse button to locate and enter the viewer program.
Log List. All logs in the Logging Directory are listed here. Select the log and click
View to view the log. Click Remove to delete the selected log.
Viewing Log Files
When you click on a log file in the Logging Options dialog and then click View, the Log
Viewer appears. You can select to view the log in the intrnal viewer, or choose another
viewer program (see “Logging FTP Server Events” on page 95.)
The following are menu items found on the internal log viewer:
File
Save As. Allows you to save the log file to another directory.
Print. Prints the open log.
Close. Closes the open log.
Edit
Copy. Copies selected text in the log.
Select All. Selects all text in the log.
View
Active. If the log is for the current date and local to this server, new entries are added to
the display as they occur.
Color Settings. Allows you to change color codes in the log.
Reading Log Files
This section shows a typical log file and describes the types of entries you will see in a log.
The log file can be a valuable tool for managing your FTP server.
Note: You can also use the Log Analyzer to parse the log files and display the
information in an easier to read format. For more information, see“Using the Log
Analyzer” on page 90.
96
Managing Log Files CHAPTER 12
When you select the log option, a log file (FSyyyymmnn.log) is created daily in the FTP
server directory. Events for all FTP hosts that are running on the server are logged to this
file. The following shows some lines from a log file:
0915 12:17:00 (0000005c) 156.21.50.134:2040 connected to 156.21.50.190:21
0915 12:17:00 (0000005c) ftp4test.ipswitch.com S(0) 156.21.50.134 anonguest@unknown logon success (A1)
0915 12:18:11 (0000005c) ntdoctest.lex.ipswitch.com S(0) 156.21.50.134 anonguest@unknown logoff R:0 D:0 P:0
0915 12:18:11 (0000005c) 156.21.50.134 connection closed
The primary lines in the log file report a specific server event and use the following format:
Example
Description
0915
month (mm) and day (dd)
12:17:00
time of day the event occurred given in
hours (hh), minutes (mm), seconds (ss)
(0000005c)
thread ID
ftp4test.ipswitch.com
name of the FTP host on the server.
S
Line type: U=user error; P=protocol error;
N=network error; O=operating system
error; S=success
156.21.50.134
address of the remote system
anon-guest@unkown user ID of user logged on
Error
Message if error occurs
RECV
the FTP event
The STOR, STOU, APPE, RECV commands append “(nnnn bytes, nnnn ms)” to the end of
the line to indicate how many bytes were received or transmitted and how many
milliseconds it took.
The log file is created daily — you will need to delete old log files to keep the directory from
filling up.
97
CHAPTER 12 Managing Log Files
98
Highlights of RFC 959
Appendix
This appendix includes some highlights of RFC 959, “File
Transfer Protocol.” This information is provided here for those
advanced users who want to know more about how FTP works. It
will also assist those wishing to interpret the messages at the
bottom of the WS_FTP Pro Classic main window or in the log
window. Topics included here are:
•
Basics
•
FTP Commands
•
FTP Replies (three-digit “error codes”)
A
For more detailed information, see the RFC itself.
Basics
FTP (File Transfer Protocol) is a specification for how files can be
transferred over the Internet. FTP is a client-server protocol in
which FTP client software on one system communicates with FTP
server software on another. The communication between the FTP
client and server is an exchange of commands and replies which
are transmitted over a “control connection” between the two
systems; this control connection follows the Telnet model.
Files are transferred between the client and server over a second
connection, a full duplex connection known as the “data
connection.” This connection is between the client’s “data transfer
process” and the server’s data transfer process (or between two
servers’ data transfer processes).
In this Appendix
Basics
FTP Commands
FTP Replies
99
APPENDIX A Highlights of RFC 959
FTP Server
FTP Client
Control connection:
FTP commands and replies
Protocol
interpreter
File
system
Data
Data connection
transfer
process
Protocol
interpreter
Data
transfer
process
File
system
Both the client and the server have a protocol interpreter. The protocol interpreters receive
commands or replies, send commands or replies, and govern the data connection. The
server’s protocol interpreter listens for a connection from a client’s protocol interpreter.
In an “active” transfer, the FTP server’s data transfer process initiates, or establishes, the
data connection to the FTP client, setting up the parameters for data transfer and storage.
In a “passive” transfer, the server’s data transfer process is placed in a passive state to listen
for, rather than initiate, a connection to the data port. In this case, the FTP client initiates the
data connection.
FTP Commands
The standard commands that an FTP client (such as WS_FTP Pro) issues to an FTP server
are listed here with a brief explanation that has been adapted from RFC 959. The command
syntax is presented using BNF (Backus-Naur Form) notation where applicable.
FTP commands may be in any order except that a “rename from” command must be
followed by a “rename to” command and the REST (restart) command must be followed by
the interrupted service command
(e.g., STOR or RETR).
ABOR (ABORT)
ABOR <CRLF>
This command tells the server to abort the previous FTP service command and any
associated transfer of data.
100
Highlights of RFC 959
APPENDIX A
ACCT (ACCOUNT)
ACCT <SP> <account-information> <CRLF>
The argument field is a Telnet string identifying the user's account. The command is not
necessarily related to the USER command, as some sites may require an account for login
and others only for specific access, such as storing files.
ALLO (ALLOCATE)
ALLO <SP> <decimal-integer> [<SP> R <SP> <decimal-integer>]
<CRLF>
This command is required by some servers to reserve sufficient storage to accommodate the
file to be transferred.
APPE (APPEND) (with create)
APPE <SP> <pathname> <CRLF>
This command causes the server’s data transfer process to accept the data transferred and to
store the data in a file at the server site. If the file specified in pathname exists at the server
site, then the data is appended to that file; otherwise the file specified in pathname is created
at the server site.
CDUP (CHANGE TO PARENT DIRECTORY)
CDUP <CRLF>
This command is a special case of CWD which allows the transfer of directory trees between
operating systems having different syntaxes for naming the parent directory.
CWD (CHANGE WORKING DIRECTORY)
CWD <SP> <pathname> <CRLF>
This command allows the user to work with a different directory or dataset without altering
his login or account information.
DELE (DELETE)
DELE <SP> <pathname> <CRLF>
This command causes the file specified in pathname to be deleted at the server site.
FEAT
FEAT <CRLF>
This command causes the FTP server to list all new FTP features that the server supports
beyond those described in RFC 959. A typical example
reply to the FEAT command might be a multi-line reply of the form:
C>
S>
S>
S>
S>
FEAT
211-Extensions supported
SIZE
MDTM
MLST size*;type*;perm*;create*;modify*;
101
APPENDIX A Highlights of RFC 959
S>
S>
S>
S>
S>
LANG EN*
REST STREAM
TVFS
UTF8
211 end
HELP (HELP)
HELP [<SP> <string>] <CRLF>
This command causes the server to send a list of supported commands and other helpful
information.
LIST (LIST)
LIST [<SP> <pathname>] <CRLF>
This command causes a list of file names and file details to be sent from the FTP site to
WS_FTP Pro.
MDTM (MODIFICATION TIME)
MDTM <SP> <pathname> <CRLF>
This command can be used to determine when a file in the server NVFS was last modified.
MKD (MAKE DIRECTORY)
MKD <SP> <pathname> <CRLF>
This command causes the directory specified in pathname to be created as a directory (if
pathname is absolute) or as a subdirectory of the current working directory (if pathname is
relative).
MLSD
MLSD [<SP> <pathname>] <CRLF>
If WS_FTP Pro detects that the server is an MLSD server, this command is sent to the server
instead of the LIST command.
MLST
MLST [<SP> <pathname>] <CRLF>
This command causes the server to provide data about the single object named, whether a
file or directory.
MODE (TRANSFER MODE)
MODE <SP> <mode-code> <CRLF>
102
Highlights of RFC 959
APPENDIX A
The argument is a single Telnet character code specifying the data transfer mode. The
following codes are assigned for transfer modes: S - Stream,
B - Block, C - Compressed. The default transfer mode is Stream.
Note: This “transfer mode” is not equivalent to the “transfer mode” of the WS_FTP
Pro user interface. The “transfer mode” referred to in
WS_FTP Pro and its documentation is handled by the TYPE command.
NLST (NAME LIST)
NLST [<SP> <pathname>] <CRLF>
This command causes a list of file names (with no other information) to be sent from the
FTP site to WS_FTP Pro.
NOOP (NOOP)
NOOP <CRLF>
This command does not affect any parameters or previously entered commands. It specifies
no action other than that the server send an OK reply.
OPTS (OPTIONS)
OPTS <SP> <parameter> <CRLF>
This command allows an FTP client to define a parameter that will be used by a subsequent
command.
PASS (PASSWORD)
PASS <SP> <password> <CRLF>
The argument field is a Telnet string specifying the user's password. This command must be
immediately preceded by the user name command, and, for some sites, completes the user's
identification for access control.
PASV (PASSIVE)
PASV <CRLF>
This command requests the server’s data transfer process to “listen” on a data port (which is
not its default data port) and to wait for a connection rather than initiate one upon receipt of
a transfer command. The response to this command includes the host and port address this
server is listening on.
PORT (DATA PORT)
PORT <SP> <host-port> <CRLF>
This specifies an alternate data port. There are defaults for both the client
and server data ports, and under normal circumstances this command and its reply are not
needed.
103
APPENDIX A Highlights of RFC 959
PWD (PRINT WORKING DIRECTORY)
PWD <CRLF>
This command causes the name of the current working directory to be returned in the reply.
QUIT (LOGOUT)
QUIT <CRLF>
This command terminates a USER and, if file transfer is not in progress,
closes the control connection. If file transfer is in progress, the connection will remain open
for result response and the server will then close it.
QUOTE
QUOTE <string> <CRLF>
The QUOTE command lets you enter any standard FTP command. WS_FTP Pro sends it to
the FTP site, unedited; it is up to you to determine the command syntax depending on the
FTP site you are connected to.
REIN (REINITIALIZE)
REIN <CRLF>
This command terminates a USER, flushing all I/O and account information, except to allow
any transfer in progress to be completed. A USER command may be expected to follow.
REST (RESTART)
REST <SP> <marker> <CRLF>
The argument field represents the server marker at which file transfer is to
be restarted. This command does not cause file transfer but skips over
the file to the specified data checkpoint. This command shall be immediately followed by
the appropriate FTP service command which causes file transfer to resume.
RETR (RETRIEVE)
RETR <SP> <pathname> <CRLF>
This command causes the server to transfer a copy of the file specified in pathname to the
client. The status and contents of the file at the server site are unaffected.
RMD (REMOVE DIRECTORY)
RMD <SP> <pathname> <CRLF>
This command causes the directory specified in pathname to be removed as a directory (if
pathname is absolute) or as a subdirectory of the current working directory (if pathname is
relative).
RNFR (RENAME FROM)
RNFR <SP> <pathname> <CRLF>
104
Highlights of RFC 959
APPENDIX A
This command specifies the old pathname of the file which is to be renamed. This command
must be immediately followed by a “rename to” command specifying the new file
pathname.
RNTO (RENAME TO)
RNTO <SP> <pathname> <CRLF>
This command specifies the new pathname of the file specified in the immediately
preceding “rename from” command. Together the two commands cause a file to be renamed.
SITE (SITE PARAMETERS)
SITE <SP> <string> <CRLF>
This allows you to enter a command that is specific to the current FTP site. WS_FTP Pro
prefixes your entry with the word SITE. WS_FTP Pro sends it to the FTP site, unedited; it is
up to you to determine the command syntax depending on the FTP site you are connected to.
SITE CPWD
SITE CPWD <SP> <string> <CRLF>
This is a special command you can enter using WS_FTP Pro when the FTP server is a
WS_FTP Server from Ipswitch. It changes the user’s password.
SIZE (SIZE OF FILE)
SIZE <SP> <pathname> <CRLF>
This command is used to obtain the transfer size of a file from the server: that is, the exact
number of octets (8 bit bytes) which would be transmitted over the data connection should
that file be transmitted. This value will change depending on the current STRUcture, MODE
and TYPE of the data.
SMNT (STRUCTURE MOUNT)
SMNT <SP> <pathname> <CRLF>
This command allows the user to mount a different file system data structure without
altering his login or accounting information.
STAT (STATUS)
STAT [<SP> <pathname>] <CRLF>
This command causes a status response to be sent over the control connection in the form of
a reply.
STOR (STORE)
STOR <SP> <pathname> <CRLF>
This command causes the FTP server to accept the data transferred via the data connection
and to store the data as a file at the FTP server. If the file specified in pathname exists at the
server site, then its contents shall be replaced by the data being transferred. A new file is
created at the FTP server if the file specified in pathname does not already exist.
105
APPENDIX A Highlights of RFC 959
STOU (STORE UNIQUE)
STOU <CRLF>
This command behaves like STOR except that the resultant file is to be created in the current
directory under a name unique to that directory. The “250 Transfer Started” response must
include the name generated.
STRU (FILE STRUCTURE)
STRU <SP> <structure-code> <CRLF>
The argument is a single Telnet character code specifying the file structure described in RFC
959. The following codes are assigned for structure: F - File (no record structure) R - Record
structure P - Page structure. The default structure is File.
SYST (SYSTEM)
SYST <CRLF>
This command is used to find out the operating system of the server.
TYPE (REPRESENTATION TYPE)
TYPE <SP> <type-code> <CRLF>
The argument specifies the file type. The following codes are assigned:
A = ASCII (text files)
N = Non-print (files that have no vertical format controls such as carriage returns and
line feeds)
T = Telnet format effectors (files that have ASCII or EBCDIC vertical format controls)
E = EBCDIC (files being transferred between systems that use EBCDIC for internal
character representation)
C = Carriage Control (ASA) (files that contain ASA [FORTRAN] vertical format
controls)
I = Image (binary files)
L = Local byte size (files that need to be transferred using specific
non-standard size bytes)
The default representation type is ASCII Non-print.
USER (USER NAME)
USER <SP> <username> <CRLF>
The argument field is a Telnet string identifying the user. The user identification is that
which is required by the server for access to its
file system.
106
Highlights of RFC 959
APPENDIX A
FTP Replies
In the protocol conversation between an FTP client (such as WS_FTP Pro) and an FTP
server, at least one server reply is sent to the FTP client in response to an FTP command. A
reply consists of a three-digit code, followed by one line of text, and terminated by the
Telnet end-of-line code.
Positive Preliminary Replies
These types of replies indicate that the requested action was taken and that another reply is
to follow.
110 Restart marker reply.
120 Service ready in nnn minutes.
125 Data connection already open; transfer starting.
150 File status okay; about to open data connection.
Positive Completion Replies
These type of replies indicate that the requested action was taken and
that the server is awaiting another command.
200 Command okay.
202 Command not implemented, superfluous at this site.
211 System status, or system help reply.
212 Directory status.
213 File status.
214 Help message on how to use the server or the meaning of a particular non-standard
command. This reply is useful only to the human user.
215 NAME system type. Where NAME is an official system name.
220 Service ready for new user.
221 Service closing control connection. Logged out if appropriate.
225 Data connection open; no transfer in progress.
226 Closing data connection. Requested file action successful
(for example, file transfer or file abort).
227 Entering Passive Mode (h1,h2,h3,h4,p1,p2).
107
APPENDIX A Highlights of RFC 959
230 User logged in, proceed.
250 Requested file action okay, completed.
257 “PATHNAME” created.
Positive Intermediate Replies
These types of replies indicate that the requested action was taken and that the server is
awaiting further information to complete the request.
331 User name okay, need password.
332 Need account for login.
350 Requested file action pending further information.
Transient Negative Completion Replies
These types of replies indicate that the command was not accepted; the requested action was
not taken. However, the error is temporary and the action may be requested again.
421 Service not available, closing control connection. This may be a reply to any
command if the service knows it must shut down.
425 Can’t open data connection.
426 Connection closed; transfer aborted.
450 Requested file action not taken. File unavailable (e.g., file busy).
451 Requested action aborted: local error in processing.
452 Requested action not taken. Insufficient storage space in system.
Permanent Negative Completion Replies
These types of replies indicate that the command was not accepted; the requested action was
not taken. The FTP client is “discouraged” from repeating the same exact request.
500 Syntax error, command unrecognized. This may include errors such as command
line too long.
501 Syntax error in parameters or arguments.
502 Command not implemented.
503 Bad sequence of commands.
504 Command not implemented for that parameter.
108
Highlights of RFC 959
APPENDIX A
530 Not logged in.
532 Need account for storing files.
550 Requested action not taken. File unavailable; e.g., file not found,
no access.
551 Requested action aborted: page type unknown.
552 Requested file action aborted. Exceeded storage allocation for current directory or
dataset.
553 Requested action not taken. File name not allowed.
109
APPENDIX A Highlights of RFC 959
110
INDEX
INDEX
Numerics
550 reply 109
A
ABOR (command) 100
access control 25
ACCT (command) 101
active transfers 100
Add User utility 40
adding
user accounts 14, 34
user groups 43
virtual folders 45
Adding Additional FTP Hosts
16
administrator permissions 38
aliases 27
ALLO (command) 101
anonymous logons 2
anonymous users
disabling access 21
enabling access 21
permissions 22
setting maximum 21
APPE (command) 101
ASA (FORTRAN) 106
ASCII files 106
Client 80
configuring
FTP hosts 15, 58
FTP server 9
connections
setting timeouts 20
control connection 99
CPWD command 43
CWD (command) 101
D
B
data connection 99, 100
data transfer process 99
DELE (command) 101
deleting
FTP hosts 27
user groups 44
users 39
virtual folders 51
directories
initial 3
logon 3
disk space
setting user quotas 37
Do not auto create user home
folders 35
domain name server 11
domain name servers
setting FTP alias 27
banner messages 23
binary files 106
E
C
CDUP (command) 101
Certificate 80
Certificate Signing Request 80
changing passwords 43
EBCDIC 106
encryption 4
Event Commands 69
exit messages 23
external user database 18
configuring 14
F
FEAT (command) 101
files
hiding 22
setting user quotas 37
folders 3
deleting virtual folders 51
disable access to public 37
hiding 22
messages 24
renaming virtual folders
51
FTP 1
FTP (File Transfer Protocol) 2,
75
basics of RFC 959 99
client 99
server 99
FTP clients
password change 42
WS_FTP Pro 4, 42
FTP hosts
adding additional 16
adding first host 11
deleting 27
options 20, 27
renaming 28
setting a DNS alias 27
setting maximum users 21
setting timeout 20
setting up 15
with IP address 16
without IP address 16
FTP protocol commands 100
FTP protocol replies 107
FTP Server
log files 96
111
INDEX
FTP server
configuring 9
managing remotely 75
monitoring performance
78
setting access 25
statistics 77, 78
using local time 22
FTP sessions 77
FTP sites
see FTP hosts
G
groups
deleting 44
M
MDTM (command) 102
messages
banner,welcome,exit 23
change directory 24
for files and folders 24
MKD (command) 102
MLSD (command) 102
MLST (command) 102
MODE (command) 102
I
installing the server 6
IP addresses
denying access 25
granting access 25
K
Keys
private 80
public 80
session 80
L
LIST (command) 102
log files
reading 96
logon directories 3
logons
anonymous users 22
disabling 36
setting options 31
112
Q
QUIT (command) 104
QUOTE (command) 104
R
N
non-print files 106
NOOP (command) 103
Notification Server Manager
57
H
HELP (command) 102
hidden files and folders 22
host administrator 39
public directories, setting
access 37
public folders 2, 35
disabling access 36
PWD (command) 104
O
OPTS (command) 103
P
PASS (command) 103
passive transfers 100
passwords
changing from FTP client
42
disabling change 37
encryption 4
PASV (command) 103
perfomance monitoring 78
permissions 3, 47, 49
anonymous users 22
for folders 45
how they work 35
notes 47, 49
options 47, 49
PORT (command) 103
Private Key 80
protocol interpreter 100
protocol stack
see TCP/IP stack
REIN (command) 104
release notes 7
remote management 75
removing the server 7
renaming
FTP hosts 28
users 39
virtual folders 51
Request for Comments
see RFCs
REST command 100
RETR (command) 100, 104
RFC 959 99
RFCs
where to find 1
RMD (command) 104
RNFR (command) 104
S
security 4
Server Manager
see WS_FTP Server
Manager
Session Key 80
Session Manager 76
sessions
viewing active 76, 77
sign-off messages 23
sign-on messages 23
SITE (command) 105
Site Commands 69
INDEX
site commands
adding a site command 69
modifying 71
permissions 72
SITE CPWD (command) 105
SITE CPWD command 43
SIZE (command) 105
SMNT (command) 105
SSL
generating a certificate 81
selecting a certificate 83
signing a certificate 84
trusted authorities 86
adding a certificate 86
exporting a certificate 87
removing a certificate 87
SSL (definition) 79
certificate 80
certificate signing request
80
client 80
private key 80
public key 80
session key 80
STAT (command) 105
statistics
FTP server 77, 78
log files 96
STOR (command) 100, 105
STOU (command) 106
STRU (command) 106
SYST (command) 106
system administrator 39
system requirements 6
T
TCP/IP stack 6
Telnet 99, 106
time
using local time 22
timeouts 20
transfer modes 103
TYPE (command) 103, 106
U
USER (command) 106
user accounts 2
adding 14, 34
how they work 31
user accounts, disabling 37
user authorization 11
user databases
IMail Server 12
user groups 3
adding 43
adding and removing users
44
deleting 44
user icons 39
users
adding groups 43
adding with command line
40
administrator permissions
38
changing passwords 42
deleting 39
directories 36
disabling logon 36
disabling password change
37
Host Administrator 38
passwords 36
renaming 39
setting disk quotas 37
setting file quotas 37
setting logon options 31
setting max anonymous 21
setting max concurrent 21
setting maximum 21
System Aministrator 38
Using 57
V
viewing active sessions 76
virtual folders
adding 45, 46
setting up 45
virtual hosts
see FTP hosts
W
welcome messages 23
Windows NT
Performance Monitor 78
WS_FTP Pro client 4
WS_FTP Server 105
configuring 9
how it works 2
installing 6
removing 7
security 4
session manager 76
setting access 25
system requirements 6
what is? 1
WS_FTP Server Manager 5
using remotely 75
113
INDEX
114