1
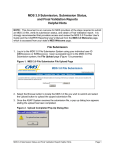
jRAVEN Installation Guide
for Standalone Install
Version 1.1.5
5/01/2012
1
Install, Starting the Application and Initial Setup ......................................................................................... 3
Overview of Initial Set Up ............................................................................................................................ 3
Install / Setup ............................................................................................................................................ 4
System Configuration ............................................................................................................................... 4
Supported systems: ................................................................................................................................... 4
Steps to Install jRAVEN ............................................................................................................................... 5
Starting the jRAVEN Application ................................................................................................................ 9
Log in to jRAVEN the first time after installation.................................................................................. 10
Password Rules ....................................................................................................................................... 10
Initial Setup Notes................................................................................................................................... 12
Add Facility ................................................................................................................................................ 13
Add System Administrator User ................................................................................................................. 14
Initial Login ................................................................................................................................................ 15
Help ............................................................................................................................................................. 16
2
Install, Starting the Application and Initial Setup
The Resident Assessment Instrument (RAI) and the Minimum Data Set (MDS) were developed by the
Centers for Medicare & Medicaid Services (CMS).
jRAVEN (Resident Assessment Validation and Entry) is a free, Java-based application that provides an
option for facilities to collect and maintain Facility, Resident, and MDS Assessment information for
subsequent submission to the appropriate state and/or national data repository.
jRAVEN displays the MDS assessment instrument similar to the paper version of the form.
Once data collection is completed, facilities are able to export their data from the application and submit it
to the appropriate state and/or national data repository.
IMPORTANT: Refer to the jRAVEN User Guide for information regarding using the application.
The jRAVEN User Guide (.pdf) is included with the jRAVEN install, is added to the desktop of the
user’s PC, and is also available on QTSO (https://www.qtso.com/ravendownload.html).
The version of jRAVEN is displayed on several windows in the application. However, in this document
the version number is not displayed on the pictures of the screens, but is documented in the text as 1.X.X.
Overview of Initial Set Up
The following steps must be completed to begin using jRAVEN:
1. Download and install jRAVEN.
NOTE: To install jRAVEN, the user must be logged into the PC as an Administrator. Users of
jRAVEN must have read/write access to the location where the jRAVEN database is installed.
2. Log in utilizing jraven as the user ID and password. NOTE: The User ID and password are
case-sensitive. The initial user signing in is required to setup at least one facility and one user
utilizing the System Administrator user role.
3. Change password for user jraven.
4. Answer security questions for user jraven.
5. Setup the facility.
6. Setup users with the System Administrator role.
NOTE: It is highly recommended to set up more than one System Administrator account as
a back-up, in the event that one of the System Administrator accounts becomes locked.
7. Log out as jraven user, and log in with a System Administrator role.
NOTE: when logging in the first time with a new User ID, the password will be the same as the
User ID. The user will then receive prompts to create a new password for their account.
To complete these steps, follow the details included in this guide.
3
Install / Setup
A workstation System Administrator is required to complete the initial installation.
Required installation files and instructions are located on the QIES Technical Support Office (QTSO)
website ( https://www.qtso.com/ravendownload.html) and/or the Centers for Medicare & Medicaid
Services MDS 3.0 Technical Information page (https://www.cms.gov).
System Configuration
jRAVEN has been designed as a standalone application.
A standalone installation is used on an independent workstation (computer).
Supported systems:
Windows XP with Service Pack 2 or 3
Windows Vista with Service Pack 1 or 2 and all current security patches applied
Windows 7 with 32 bit operating system
Pentium 4 1.4 GHz PC workstation with minimum 1 GB of free RAM
1 GB hard disk space available
Color monitor, display setting at 1024 x 768, with a minimum of 256 colors
32-bit operating system
NOTE: The .NET framework is required for jRAVEN to function correctly.
To verify the computer has .NET framework:
Open an internet connection.
Enter or copy and paste javascript:alert(navigator.userAgent) into the internet
address/search bar.
A message displays with a semicolon-separated value of the Browser Name and version, OS (operating
system) Platform version, .Net CLR (Common Language Runtime), and versions installed in Windows
XP and above. The .NET framework should be listed (amongst other possible items).
If .NET is NOT listed:
Using the internet, navigate to the Microsoft downloads page.
Follow the instructions for downloading the current version of the .NET framework.
NOT supported:
Windows 2000, Windows ME, or Windows 98
64-bit operating system
Any non-Microsoft operating system
All versions of Windows Server
4
Functionality
jRAVEN software provides the following functionality:
• Facility Setup/Maintenance
• User Setup/Maintenance
• Resident Setup/Maintenance
• Assessment
• Reporting
• Importing and Exporting
• Grouper Configuration
Steps to Install jRAVEN
Navigate to the QIES Technical Support Office (https://www.qtso.com/ravendownload.html) website
and/or the Centers for Medicare & Medicaid Services MDS 3.0 Technical Information page
(https://www.cms.gov).
Standalone Install: used for an individual workstation (computer) installation, where the database is on
that same workstation. Standalone installations will NOT have access to a shared or centrally-located
database.
Click on the Standalone Installation of jRAVEN, jRAVENSetup-1.X.X.exe.
On the File Download – Security Warning window:
Click Run, to start the installation, if you would like to install the program now.
Click Save, to save the installation file to the workstation for installation at a later time. You will
be prompted with a browse box asking where you want to save the file to.
NOTE: If Installation files are saved to the workstation, double click the jRAVEN.exe
to start
the installation.
Click Cancel, to cancel the installation process and close the File Download – Security Warning
window.
5
After selecting Run, the Setup is loading message displays:
Once the setup has loaded, and started to run, the Welcome to the jRAVEN 1.X.X Setup Wizard
displays:
Click Next, to continue with the setup.
Click Cancel, to cancel the install/setup and close the window.
6
After clicking Next, on the Welcome to the jRAVEN 1.X.X Setup Wizard, the License Agreement
window displays:
Click I Agree, to continue the setup.
Click Back, to return to the previous window.
Click Cancel, to cancel the set up process and close the window.
After clicking I Agree, the Choose Install Location window displays:
The default location for the installation destination folder is C:\jRAVEN.
To install in a different location, use the Browse button to navigate to the desired location.
Click Install, to start the installation.
Click Back, to return to the previous window.
Click Cancel, to cancel the set up process and close the window.
7
After clicking Install, the Installing window displays:
A progress bar on the Installing window allows the user to monitor the progress.
Once the install is complete, the Completing the jRAVEN 1.X.X Setup Wizard window displays:
The Run jRAVEN 1.X.X checkbox is checked by default and will start jRAVEN after the install is
complete. Uncheck the box to complete the install without automatically starting jRAVEN.
Select Finish, to complete the installation process.
8
Starting the jRAVEN Application
NOTE: Instructions for entering data in jRAVEN can be found in the jRAVEN User Guide.
To access jRAVEN
Select jRAVEN from one of the following methods:
• Start menu, click on the icon
jRAVEN.
.
• On the desktop, double-click the jRAVEN icon,
• Navigate to the jRAVEN directory, double-click the QTC.exe
.
The jRAVEN screen displays:
The Welcome to MDS 3.0 – jRAVEN screen displays.
This screen displays while the program is loading and may take a few minutes, but requires no response
from the user.
9
When jRAVEN is completely loaded the login window displays:
The title bar of the login window displays the application name (jRAVEN) and version number.
(This picture does not display a full version number.)
Selecting the Enable Accessibility Features box at the bottom of the login window will turn on
accessibility features for users requiring assistive technology (e.g.: screen readers).
NOTE: The box is checked by default. Uncheck the box if the accessibility features are not needed.
(This only needs to be done once.) If Accessibility Features are needed at a later date
simply re-check the box.
Log in to jRAVEN the first time after installation
Enter jraven in the User ID field (Case-sensitive).
Enter jraven in the Password field (Case-sensitive).
Click Login.
A Change Password box displays. The password rules are displayed at the top of the screen followed by
the New Password, Confirm New Password fields.
Password Rules
• Use a minimum of eight characters, a maximum of twenty.
• Must contain at least one uppercase, one numeric character, and one special character.
NOTE: The valid special characters are displayed on the Change Password screen.
• Passwords are case-sensitive.
• Passwords cannot begin with a number.
• Passwords cannot contain any space.
• Users cannot set their password to contain their User ID, First Name, Last Name, or E-mail address.
• Must not contain more than three consecutive (like) characters.
• Must wait a minimum of six password changes to reuse a password.
NOTE: To enhance security, users are required to change the password before accessing the jRAVEN
system.
The generic (jraven/jraven) user, while available after the initial login is complete, may not be used
to create assessments.
10
Enter a new password, in the New Password and Confirm New Password fields. The password is casesensitive and must match in both boxes.
[This will change the password for the “jraven” user account.]
Click Continue.
If the user does not change the password and clicks Cancel, the following message displays:
Click OK, to return to the login window.
Click Cancel, to close the message and change the password.
After changing the password, the Security Questions box displays.
Response to six of the ten listed Security Questions is required.
Tab off (press the Tab key on computer keyboard after answering the last of at least (6) questions) to
enable the OK button.
11
Click OK, after completing at least (6) of the (10) questions.
The initial jRAVEN window displays:
Initial Setup Notes
The initial “jraven” user signing into the application is required to:
1. Setup at least one Facility.
2. Setup one User with the System Administrator user type role. (System Administrator is the
highest user level and by default must be the first user that is set up). It is recommended that
two System Administrator accounts be created.
12
Once this is completed, the System Administrator may:
• Setup and maintain Facility information.
• Setup and maintain User accounts, establish User IDs and security settings for all users.
• On the Facility screen, establish the default Submission Requirement (subreq) value (A0410) as:
1. Neither Federal nor State-required submission.
2. State, but not Federal-required submission.
3. Federal-required submission.
Add Facility
The term “Facility” refers to a Nursing Home or Swing Bed.
On the Administration menu, click Facility.
The Facility screen displays:
Enter data in the facility fields. Required fields display on the screen in bold type with an asterisk.
NOTE: A0410 - Submission requirement (subreq) is selected on the Facility screen. The selected value
will be the default for assessments, and applies to all assessments associated with that facility.
A0410 may be modified for an individual assessment when the assessment is added. For assistance with
A0410, refer to the Help section of the jRAVEN User Manual.
Click Save
. Saved facility information will display in the Facility Summary section.
To add additional facilities, click the New icon
, enter data, and click Save
.
13
Add System Administrator User
It is highly recommended to set up more than one System Administrator account, in the event that
one of the System Administrator accounts becomes locked.
On the Administration menu, click User:
The User Information screen displays:
Enter data in User Detail fields. Required fields display on the screen in bold type with an asterisk.
Click Save
. Saved user information will display in the User Summary section.
To add additional users, click the New icon
, enter data, and click Save
.
After successfully adding at least one System Administrator role and at least one facility, the user must
log out of the application and log in with the newly-created System Administrator User ID.
14
To log out, select the Security menu at the top of the screen, then select Logout.
The Welcome to MDS 3.0 – jRAVEN Login screen displays:
Initial Login
1. Enter the new System Administrator User ID created by the default jraven user in the User ID field.
2. Enter that same User ID in the Password field (user id/user id).
NOTE: when logging in for the first time with a new User ID, the password will be the same as the
User ID. The user will then receive prompts to create a new password for their account. (User
ID and password are case-sensitive, and must match what was created for User ID.)
3. Click Login. The Change Password screen displays.
4. Enter a new password in the New Password, and Confirm New Password fields.
5. Click Continue.
6. The Security Questions box displays. Response to six of the ten listed Security Questions is required.
7. Click OK.
8. The jRAVEN window displays.
15
IMPORTANT: Refer to the jRAVEN User Guide for information regarding using the application.
The jRAVEN User Guide (.pdf) is included with the jRAVEN install, added to the desktop of the
user’s PC, and is also available on QTSO (https://www.qtso.com/ravendownload.html).
Help
Additional Information for using jRAVEN can be found in the jRAVEN User Guide (part of tool install),
including information regarding settings, reports functionality, RUGS, Import and Export.
Users are strongly encouraged to read the jRAVEN User Guide carefully to assist with accurate use
of the tool.
The Help Desk is available for technical support and assistance with problems or questions that may arise
regarding the jRAVEN software.
Contact information for the Help Desk:
1-800-339-9313, or [email protected]
16