1
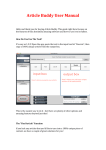
Welcome to Crowd Force PRO User Guide Version: 0_43_0 Table of Contents Introduction .................................................................................................................................................. 4 Using the User Guide..................................................................................................................................... 4 Printing the User Guide ................................................................................................................................. 4 Contact “Crowd Force PRO” Support Desk.................................................................................................... 4 Crowd Force PRO .......................................................................................................................................... 5 What is it? ................................................................................................................................................. 5 System Requirements ............................................................................................................................... 5 Installation ................................................................................................................................................. 5 Getting Started .............................................................................................................................................. 6 Using Crowd Force PRO Tool ......................................................................................................................... 7 Log In ......................................................................................................................................................... 7 Dashboard ................................................................................................................................................. 7 Create / View Project ................................................................................................................................ 9 Create Project............................................................................................................................................ 9 Modules .................................................................................................................................................. 10 Module Assigning ........................................................................................................................................ 12 At The Time of Project Creation .............................................................................................................. 12 At The Time of Project Editing ................................................................................................................. 12 Modules Settings ......................................................................................................................................... 13 Setting a Module Active or Inactive......................................................................................................... 13 Configuration of Modules........................................................................................................................ 14 Facebook: ................................................................................................................................................ 14 YouTube: ................................................................................................................................................. 15 Squidoo: .................................................................................................................................................. 15 Forum: ..................................................................................................................................................... 16 Blogs: ....................................................................................................................................................... 16 Opportunities .............................................................................................................................................. 17 Manual Scheduler ....................................................................................................................................... 17 From Project Screen ................................................................................................................................ 17 From Dashboard ...................................................................................................................................... 18 Run Automatic Scheduler ........................................................................................................................ 19 Opportunities Tab ................................................................................................................................... 19 Projects Tab ............................................................................................................................................. 20 Dashboard ............................................................................................................................................... 20 How to use Opportunities? ......................................................................................................................... 21 Add to do list ........................................................................................................................................... 21 Marked as Viewed ................................................................................................................................... 22 Marked as Processed............................................................................................................................... 22 Add to Blacklist ........................................................................................................................................ 23 Unblocking an Opportunity ......................................................................................................................... 23 Add to Forum Tracker ............................................................................................................................. 24 Forum Tracker Configuration ...................................................................................................................... 24 Search Opportunities................................................................................................................................... 25 Deleting opportunities ................................................................................................................................ 26 To Do List ..................................................................................................................................................... 28 Live Feeds .................................................................................................................................................... 29 Forum Tracker ............................................................................................................................................. 30 Export .......................................................................................................................................................... 30 Import ......................................................................................................................................................... 31 Manage Users.............................................................................................................................................. 31 Using Crowd Force For Non-Us Markets ..................................................................................................... 33 Introduction This user manual includes information that shows you how to use “Crowd Force". You'll learn how to install, access, and use this high profile application. Screenshots of each step and module are also included so that you understand how to get started. Using the User Guide In order to get started you need to follow the steps in the order described in this help guide. You can scroll up and down to navigate this guide like you do in a normal PDF document. Printing the User Guide You can print this user guide by pressing the “Print Icon” at the top of this manual. Contact “Crowd Force PRO” Support Desk We tried to cover the main features and details in this help manual, but if you don’t see something you are looking for, then we suggest you to please contact our technical support desk at https://support.blueprintcentral.com/. Crowd Force PRO What is it? Crowd Force PRO is a powerful desktop application that helps you to drive targeted traffic and create a relationship between your web page and the websites which rank high in search engines like Google, Bing, and Yahoo among others. Using Crowd Force you can send traffic to literally any page... so yeah, it can work well for squeeze pages, web pages, and Amazon listings; although it is slightly easier building links to content rich pages (but both options do work). System Requirements 1. 2. 3. 4. 5. 6. Adobe Air runtime Installed Operating System: Windows XP, Vista or Above MAC: Version 10.8: "Mountain Lion" or Above Processor: Core 2 Duo or Above Else Equivalent Architectures from other Vendors RAM: 600 MB or Above Free RAM 50 MB of Hard Drive Space for Software Installation and on Average 15 – 20 Megabytes of Storage Space Per Project/Workspace Installation Installing the Crowd Force PRO application is quite easy. You will either get the download link inside your email or can you can directly download the latest version from this link: https://s3.amazonaws.com/CrowdForce/CrowdForcePRO_0_43_0.air Download the setup file and just double click the installer icon and the installer will guide you how to proceed with installation. As stated under system requirements above, in order to run and use Crowd Force you must have the latest version of Adobe Air Installed on your system. You can install Adobe Air from http://get.adobe.com/air/. This installation will place an Icon on your desktop that will be clicked to get started with this tool. Getting Started The getting started section of this help manual is a directive for you to learn how to use Crowd Force PRO. For those who are new to the Crowd Force tool, this guide will do a few things such as; How to use the Crowd Force Application. How to use the different Modules. Tips to build quality links and get traffic. If you have never used this tool before then we advise you to go through this manual before starting to use it. The Crowd Force PRO application is a collection of different screens and modules which contain information related to your Projects, Keywords, and Opportunities. You can navigate between different screens by clicking the respective links at the top of each screen. Using Crowd Force PRO Tool Log In When you click the Crowd Force icon from your desktop you will be taken to a log in screen asking for your Login and Password. You will be provided these credentials in an email immediately sent to you after you become entitled to access this application. Enter your details and press the LogIn button. Dashboard Every authorized member of the Crowd Force application has access to a customized Dashboard. Once the Crowd Force application is started, you will first be taken to your Dashboard Screen. Your dashboard provides you quick access to your Projects, Keywords, Opportunities, Modules and other stuff. When you log into the Crowd Force application the first time, it will take some time to reach the Dashboard and you will see the screen below; during this time Crowd Force does a few background configurations. But if you have created any project (s) then you will have different clocks on the dashboard populated as below; But if you have created any project (s) then you will different clocks on dashboard populated as below; If you are on any other screen or using any other module then you can click the Dashboard tab at the top to reach at Dashboard as below; Create / View Project All projects you create in Crowd Force can be seen under the Project Tab which you will see at the top of the menu bar; If you are accessing your project area for the first time or haven’t created any project yet, then you will see this area empty as below; But if you have created any project (s) then you will see all the columns populated as below; Create Project To create a project Click on the Add Project option And a pop up box will open, enter desired values; Assign modules so CF fetches opportunities from those modules and hit save. Modules Modules in Crowd Force are different sources or on which you can create or build backlinks pointing towards your website. All modules you assign to a Project or a website can be seen under the Module Tab which you will see at the top of the menu bar; You will see a number of different modules on the Modules screen. There are certain settings underneath each module which will let you use a module in a specific way. For example if you see the message “Module used in 0 project (s)” then it means you haven’t created a project yet or that module is not assigned to any project yet. And if your see the message “Module used in X project (s)” (where X can be any digit such as 1, 2 3) then it means that module is assigned to any X number of projects. Module Assigning At the Time of Project Creation You can assign modules to a specific project while creating a project as below: To assign module to this project just mark the check box next to a module. You can always remove a module from a project by unchecking this box. At the Time of Project Editing You can always assign a module to a project by editing it. While a project is in edit mode you will see a block of all the modules at the bottom of the Project Edit screen. Just check the box for your required module and save the project as below; Modules Settings Underneath each module you will see two Tabs; Configuration & Active/Inactive. Setting a Module Active or Inactive By default all the modules are in active state, but once you assign them to a project, then the Crowd Force application will be able to fetch results from that module. If you wish your Crowd Force application not to use a module or fetch a result from a module then you can set that module to Inactive. Just click the Active link and status of that module will immediately change to Inactive as below; Note: If you set a module Inactive at the Module screen, then this setting will apply application wise; this means all projects created in Crowd Force by a user won’t be able to fetch results from that module. This action will disable that module in the Module block of the project even if it’s checked and you won’t be able to check or uncheck it unless you re-activate that specific module from the Modules screen. Configuration of Modules The next link underneath each module is “Configuration”. This link allows CF users to use CF modules in certain ways. To configure a module just click on the link as below; A pop up box for each module will open that will let you to adjust the settings for each module such as for: Facebook: To use and configure the Facebook module, CF must have a valid Facebook account. CF Facebook module allows you to fetch only those pages having a specific number of likes such as likes between a certain minimum and maximum. It also lets you decide how many results you would like to display on the CF interface. YouTube: To use the YouTube Module you must have a valid Google account with a workable password. You need to add a custom message here and that message will be sent to the YouTube channel owners. This is technique is known as the “YouTube Link Sniper” tactic. Squidoo: Like YouTube, the Squidoo module also requires a workable email and a customizable message that you will use to contact Squidoo lens owners. Forum: The Forum module can be configured to fetch results over a certain period of time such as forum posts from yesterday, last week, 3 months ago or more. The more recent you select the better. Blogs: Blog modules allows your fetch results either from the main posts or from the homepage of the blog. You can also apply a filter to decide how old the blog posts you would like your application to fetch, such as posts 10 minutes old, a week, a month, a year old, or so on. Opportunities Opportunities in Crowd Force is a list of URLs that this application fetches from different modules assigned to a project. Once a new project is created there will be no opportunities and this area will be blank as below; In order to fetch opportunities you must runs a scraper or a scheduler. This web scraper is a technique that extracts information from different web sources and a 23% increase in traffic in 2013. Your can run Crowd Force Scraper/Scheduler in two ways: Manual Scheduler From Project Screen There is an option to run scraper manually on the projects screen in front of each screen. You will see a settings like “gear” icon in the very last column. If you mouse over that icon you will see a tool tip “run scraper for this project”. Clicking this icon will kick start the scraper tool and you will see a message at the bottom of the application screen that Scraper is running and it runs individually against each keyword separately. Once a scraper runs it cannot be stopped. For Keyword ONE it should say like this: For Keyword TWO it should say like this: From Dashboard Manual scraper can be run from the dashboard as well. The option is “Manually Run Scheduler”. However this scraper is applicable to all the active projects and can be stopped anytime by clicking the same option which now is ““Manually Stop Scheduler”. Run Automatic Scheduler It is very convenient in Crowd Force for you to run scraper at a certain time. In Crowd Force you can set this timing from your dashboard. There is an option “Run Automatic Scheduler after XXX” where XXX is the number of minutes after which scraper will run. For example if you enter 300 there; it means after every 300 minutes scraper will run for all projects. The minimum time is 240 minutes. Once scraper completes its cycle and you go to the opportunities tab you will see a detailed list of opportunities there. There are many ways of reaching the opportunities screen; Opportunities Tab Click on the opportunities tab at the top menu as below; Projects Tab Go to projects tab and at the end column click on the show detail icon; it will take to the opportunities screen and only those opportunities related to that specific project will show up. Dashboard There is an opportunities block on the bottom of the Crowd Force dashboard. Click on the end column show detail icon and it will take you to the opportunities screen and only those opportunities related to that specific project will show up. The opportunities screen contains some specific information such as Project Name, Module Name, Date, Moz Rank, Web Page Link, Action, and a short description of the opportunity. How to use Opportunities? Crowd Force fetches for you some very solid, relevant and focused traffic generation opportunities so one has to be very careful as there is a lot that could be done with Crowd Force opportunities. Always work on high RANK opportunities, but they also must be relevant. To check their relevancy, it must be viewed, and to be viewed they must be opened. Opportunities rank is obtained from the very reliable tool Moz Rank as below and to open them click on “View Webpage”; Clicking view webpage will open this webpage in your default browser. You can then check them to see if they are suitable and relevant enough to leave a comment, send a YouTube message or purchase a lens. Add to do list You can always shortlist good opportunities by adding them to the to do list. Just click “Add to do list” in front of any opportunity and work on it later. Any opportunity added to do later list will vanish from the opportunities list. Marked as Viewed You can always mark those opportunities as viewed which you have opened and analyzed. The options which have been pressed as marked as Viewed will turn grey; this will tell user that he has visited these opportunities earlier. Moreover their status will also change from New to Reviewed. This action cannot be undone. Marked as Processed You can always mark those opportunities as processed which you have utilized means you have left a comment on, built a link, contacted a YouTube Channel owner or Squidoo lens owner. Any opportunity marked as processed will be taken out of opportunities list. Add to Blacklist You can always add those opportunities to the blacklist which you think are of very little value or are not relevant to your project or keyword. Once added to the blacklist, Crowd Force not only removes that opportunity from the current list but it will not fetch any opportunity from that URL in the future as well. Unblocking an Opportunity Use this if you want to unblock an opportunity at a later time. All blacklisted URLs can be unblocked by editing their specific projects. So to unblock an opportunity, Edit a projects and go to the “Competitors and Blacklist URLs” Section; under the blacklist URL list you will see a list of all blocked URLs. Select a URL and press the X sign to unblock it. This will not bring back removed opportunities unless you run the scrapper again. You can manually enter a URL here to list it as a blacklist and then press the Green icon +. Add to Forum Tracker If you love a forum tracker so much and see a long term potential in using it then you can add it to your “Forum Tracker”. Forum Tracker Configuration The Add to forum tracker feature of Crowd Force module allows users to fetch more opportunities from the same forum against a set of keywords in the future as well. All you need to do is to set up an account on that forum and that then enter those credentials into Forum Tracker. You can select the project for which you want to set the Forum Tracker for. Every time scraper will run, forum tracker will pick fetch fresh posts against the provided keywords and will present them as opportunities under the Forum Tracker screen as below; Search Opportunities Crowd Force has a side bar that can always be used to search or filter opportunities fetched from different modules. You can filter opportunities based on modules such as Facebook, Forum, Blogs and statuses such as Archives or New. You can search with dates or even search with URLs. To filter opportunities select the appropriate project, mark the check boxes facing your desired modules and select the desired statues and press filter. This will filter the opportunities and you will see only specific opportunities meeting the specific criteria set on the sidebar. Deleting opportunities Opportunities can be deleted in two ways; Click each opportunity individually by pressing the Delete icon. This action cannot be undone. Deleting all Opportunities at Once If you wish to remove all opportunities for a project then you can delete them at once. Just press the Delete all opportunities button at the top and all opportunities will be removed from the list. Application will however will ask you before doing so. After you delete all opportunities, the opportunities screen will be blank again as below; But this screen will be populated as soon as you run the scheduler or the next automatic scheduler time approaches. But if a project is deleted then this screen won’t be populated. Note: Removing all opportunities will remove opportunities from Forum Tracker screen as well. To Do List All opportunities that you send to “Add to do list” can be seen on this screen. You can get to this screen from the top menu as below; All opportunities that you send to “Add to do list” can be seen on this screen and perform certain operations like you do on normal opportunities such as you can view them in browser, delete them, view their detail, set their status (In progress or processed) or Archived them. Any opportunities in to do list on which no action is performed within 21 days will be Archived. Any opportunities in to do list whose status is set as Processed will be Archived. Any archived opportunity will be taken off from the “to list” and won’t be visible. Live Feeds Crowd Force Facebook Live Feeds help you to stay update on what your friends are up to on this most popular social networking website. You reach to your Facebook live feeds from the top menu; Click on “Fetch Feed” and a pop up box will ask you for your Facebook credentials. Enter credentials and click on Fetch Feeds again and a list of your recently updated Facebook feeds will show up; You can perform certain operations on these live feeds such as; View Feeds View Facebook Users Feeds are coming from. Delete Individual and All Feeds If you want to clear Facebook Credentials and get Live Feeds from another Facebook account then use the “Clear Facebook Credentials” button at the top. Forum Tracker Any opportunity you add to forum tracker show up here. You can also manually add an opportunity here. To manually add an opportunity click on “Add new Tracker” enter required info and hit save. Export Your data is very precious and it’s always good to have a backup copy of it. Crowd Force application allows you to export a copy of its database and save on another computer or on another storage device. To export your CF database click on the Export link at the top: A pop box will ask you to save the file somewhere on your computer/laptop; save it. You can later move it later. The database file name will be emailed to the same email you are signed into the CF with and will end in a “.cf”extension. This file contains all of your projects and opportunities. Import Once you have your all database exported, now you may want to transfer your data to another computer or laptop so you can resume your work without any interruption. First you need to install the latest version of CF on the new device. Log into the CF application; click on the Import at the top; A pop up box will ask you for the file. Select the file and the screen below will show up to confirm the status of the import. Once the import completes you will see all projects and opportunities at the same place as they were on the other device Manage Users Manage users is a great feature if you want to outsource your CF link building work to someone else such to a virtual assistant or a freelancer. You can create a sub-account for them; a sub –account means a CF login access with limited privileges. A sub-account holder can have access to all areas of CF but they cannot create further sub-accounts and cannot change their log in details. To create sub-accounts go to Manage Users at the top; A pop up screen will open showing you two screen Existing user and create user; Click on Create User and add details; Hit Add user. This will send this user an email with a Crowd Force download link and log in credentials. You can remove any user any time from the Existing users by pressing the Deleted icon. Using Crowd Force For Non-Us Markets In the current version of Crowd Force the major portion of opportunities is fetched from the Unites States. But since CF users are from other parts of the globe there is always an another way around. These committed CF users are always keen to know how they can fetch opportunities which mostly come from their geographical locations. The solution is pretty simple; you don’t need to do anything technical except install a Proxy Server. We recommend “Hotspot Shield” which is a free Proxy Server. Click this link to install: http://www.hotspotshield.com/free-proxy. You need to note that using this or any other proxy server will bring location specific opportunities which are from Google, such as Google Blogs, Yahoo Answers, Ask, and YouTube.