1
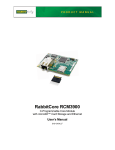
NET MONITORING SYSTEM OF HAND MOTION CAPTURE
THROUGH ACCELEROMETER
Ikraj Singh
B.S., Punjab Technical University, India, 2007
PROJECT
Submitted in partial satisfaction of
the requirements for the degree of
MASTER OF SCIENCE
in
ELECTRICAL AND ELECTRONIC ENGINEERING
at
CALIFORNIA STATE UNIVERSITY, SACRAMENTO
SUMMER
2011
NET MONITORING SYSTEM OF HAND MOTION CAPTURE
THROUGH ACCELEROMETER
A Project
by
Ikraj Singh
Approved by:
_________________________, Committee Chair
Jing Pang, Ph.D.
_________________________, Second Reader
Preetham Kumar, Ph.D.
__________________________
Date
ii
Student: Ikraj Singh
I certify that this student has met the requirements for the format contained in the
University format manual, and that this project is suitable for shelving in the library and
credits is to be awarded for the project.
_________________________, Graduate Coordinator
Preetham Kumar, Ph.D.
Department of Electrical and Electronic Engineering
iii
_____________________
Date
Abstract
of
NET MONITORING SYSTEM OF HAND MOTION CAPTURE
THROUGH ACCELEROMETER
by
Ikraj Singh
Internet plays very important role in our lives. Internet brings the whole world to
our desktop. The next step would be when we will control various applications remotely
through internet. This is where we can see the significance of internet enabled devices.
RabbitR microprocessors are the leading devices for internet enabled applications. In this
project, I am combining the internet enabled abilities of RabbitR 3000 microprocessor
with an accelerometer. In this project, RabbitR microprocessor is used to interface with
ADXL345 accelerometer through I2C serial communication. Three different applications
have been developed for this project: Free fall of objects, hand position detection, remote
accelerometer data monitoring and graph plotting.
I had a good learning experience from this project. RCM 3365 kit is programmed
through Dynamic C which is great environment to develop any internet enabled
application. C# has been used to develop a website on client side to store data and graph
plotting purposes. A PC based logic analyzer LA5400 has been used for analysis.
____________________, Committee Chair
Jing Pang, Ph.D.
_______________________
Date
iv
ACKNOWLEDGEMENTS
Here, I would like to take the opportunity to express my sincere thanks to all
people involved in this project without whom it would have never been possible to
achieve the milestone that I have achieved today.
With great respect, I would like to specially thank my project advisor and first
reader Dr. Jing Pang for her continuous and valuable guidance to the right direction
towards successful completion of my project work. I am very thankful to her as she gave
me the opportunity to work on this project and helped me in enhancing my knowledge of
hardware interface and implementing different protocols of internet.
Also, I would like to thank and express my gratitude to Professor Preetham
Kumar for providing me very crucial suggestions to enhance the project. He has been
supportive to me during the entire project and also during proof reading of the project
report.
Finally, I would like to thank my family and friends for supporting me through
this entire project and also in making this project a successful.
Ikraj Singh
v
TABLE OF CONTENTS
Page
Acknowledgements ................................................................................................................... v
List of tables……………………………………………………………………………………ix
List of Figures ........................................................................................................................... x
Chapter
1. INTRODUCTION ......................................................................................................... …. .1
1.1 Overview.................................................................. …………………………….. 1
1.2 Objective of the Project ........................................................................................ 3
2. WEB SERVER……………………………………………………………………………….4
2.1 Internet……………………………………………………………………………..4
2.1 IP Address………………………………………………………………….5
2.2.1 Dynamic IP Address and Static IP Address……………………6
2.3 Domain Name System (DNS)……………………………………………6
2.4 Dynamic DNS……………………………………………………………..7
2.5 RCM 3365 kit……………………………………………………………...8
2.5.1 RabbitR 3000 Microprocessor…………………………………….9
2.5.2 RCM 3365 Development Kit Ports………………………………9
2.5.3 RCM 3365 Serial Connectivity………………………………….10
3. THREE AXIS ADXL345 ACCELEROMETER……………………………………..11
3.1 Choosing an Accelerometer………………………………………………..11
3.2 ADXL345 Accelerometer………………………………………………….12
3.3 ADXL345 Breakout Board…………………………………………………13
vi
3.4 I2C Interface………………………………………………………………..14
3.4.1
I2C Interface Hardware Description……………………………15
3.4.2
I2C Protocol…………………………………………………….15
3.4.3
I2C Working…………………………………………………….16
3.5 Multiple I2C Write and Read……………………………………………….17
3.6 I2C Hardware Connections between RCM 3365 and ADXL345…………..20
4. SYSTEM DESIGN AND TESTING…………………………………………………23
4.1 Getting the Kit Ready……………………………………………………….23
4.2 Getting the ADXL345 Accelerometer Ready……………………………….24
4.3 Dynamic C…………………………………………………………………...24
4.4 Enabling Read from and Write to ADXL345……………………………….25
4.5 Getting Output from ADXL345……………………………………………..26
4.6 Converting Raw Output from ADXL345 to Useful Data………………….28
4.7 Hand Position Application…………………………………………………...30
4.8 Free Fall Detection…………………………………………………………...36
4.9 Uploading the Results to Internet……………………………………………38
4.10 Setting Up the Router………………………………………………………39
4.11 Saving the Data and Plotting the Graph……………………………………41
4.12 Result Analysis……………………………………………………………..43
4.12.1 Plotting the Graph………………………………………………..43
4.12.2 Using Logic Analyzer…………………………………………….46
5. CONCLUSION AND FUTURE EXPANSION…………………………………..48
vii
5.1 Conclusion…………………………………………………………………..48
5,2 Future Expansion……………………………………………………………49
References………………………………………………………………………………50
viii
LIST OF TABLES
Page
1. Table 3.1 Comparison of different accelerometers……………..………………..12
2. Table 3.2 Single byte write………………………………………………………18
3. Table 3.3 I2C multiple bytes write………………………………………………18
4. Table 3.4 I2C single byte read…………………………………………………...19
5. Table 3.5 I2C multiple bytes read……………..…………………………………20
6. Table 4.1 POWER_CTL register………………………………………………...27
7. Table 4.2 Interrupt enable register……………………………………………….27
8. Table 4.3 Interrupt map register…………………………………………………28
ix
LIST OF FIGURES
Page
1. Figure 2.1 Dynamic DNS software program…..…………………………….……….8
2. Figure 2.2 Rabbit 3000 module………………………………………..……………10
3. Figure 3.1 ADXL345 breakout board pin configuration…………..………………..14
4. Figure 3.2 ADXL345 accelerometer breakout board………………………………14
5. Figure 3.3 I2C interface hardware connections…………………………………….15
6. Figure 3.4 START (left) and STOP (right) sequences…………….………………..16
7. Figure 3.5 Hardware setup…………………………………………………………..21
8. Figure 3.6 Hardware connections between RCM 3365 and ADXL345…………….21
9. Figure 4.1 ADXL345 hardware connections………………………………………..24
10. Figure 4.2 Logic analyzer output for I2C communication…………………………26
11. Figure 4.3 Raw values output by ADXL345………………………………………..28
12. Figure 4.4 Orientation of angle output by ADXL345…………………………...….30
13. Figure 4.5 Orientation of X and Y axis…………………………………………….31
14. Figure 4.6 Conditions applied to X axis……………………………………………32
15. Figure 4.7 Flow chart explaining hand position application………………………..34
16. Figure 4.8 Straight position of hand……………………………………………..…35
17. Figure 4.9 Web page showing hand position……………….………………………35
18. Figure 4.10 Flow chart for free fall application…………………….………………37
19. Figure 4.11 Router connection with RCM 3365 and internet………....……………40
20. Figure 4.12 Port forwarding to RCM 3365(192.168.1.100)………………………..40
21. Figure 4.13 Data provided by RCM 3365……………………………………….…41
x
22. Figure 4.14 Displaying data in grid format………….……………………………..42
23. Figure 4.15 Data saved in excel sheet……………………………………………..43
24. Figure 4.16 Graph showing X axis when ADXL345 is parallel to surface………...44
25. Figure 4.17 Graph showing plot of X axis when ADXL345 is facing left………...44
26. Figure 4.18 Plot showing X axis when ADXL345 is facing down………………...45
27. Figure 4.19 Graph showing plot of X axis when ADXL345 is facing right……….45
28. Figure 4.20 Logic Analyzer output for data and clock signals………………….…46
xi
1
Chapter 1
INTRODUCTION
We are in year 2011 and we can say we are living in age of technology and
internet. Almost 2 billion people use internet and a lot of people use emails. Internet is
essential part of our life now. This makes any application much more powerful if it has
internet accessibility. Rabbit microprocessors are devices which can interact with internet
by their own. Another technology widely used these days is motion sensing technology.
Accelerometers and gyroscopes are used for motion sensing. Accelerometers provide
motion sensing properties by calculating changes in accelerations on the device.
1.1
Overview
An accelerometer is a device used to measure acceleration. From this acceleration
with respect to gravity, the direction at which the accelerometer is held can be calculated.
The accelerometer has a piezoelectric material inside it and pressure applied to the
material changes with movement. This applied pressure is directly proportional to the
current flowing through the material [1]. Thus, we can calculate the acceleration and
motion. There are basically two types of accelerometers which are two axis
accelerometers and three axis accelerometers. We are using three axes accelerometer
because of increased sensitivity due to third axis. Accelerometers have applications in
mobiles, game consoles, aircrafts and vast number of direction analyzing and positioning
applications. The ADXL345 is a small, thin, low power, 3-axis accelerometer with high
resolution. Digital output data is accessible through either a SPI (3- or 4-wire) or I2C
digital interface. From the output of ADXL345, the angle at which chip is held can be
2
calculated and also it can be set to detect free fall, or single tap etc. ADXL345 is a small
low power chip. And it has applications PDAs, phones, game controllers etc, wherever
the motion sensing is required [2].
In order to monitor ADXL345 accelerometer data remotely Rabbit RCM 3365 is
used to serve as web server. Rabbit RCM 3365 kit has special feature of directly
interacting with internet through TCP/IP protocols. Also, it can host its own web pages
and provide nice user interface remotely. The kit can be given any IP address required to
function on the LAN. The LAN can be connected to internet through router. With simple
port forwarding, RCM 3365 kit can be accessed from anywhere on the internet. RCM
3365 contains one powerful RabbitR 3000microprocessor at 44.2 MHz. The RCM 3365
kit is ideal for any network enabled application. This kit is compatible with latest
technology trends such as I2C or SPI serial communication with other devices, which
make it more desirable. By connecting one accelerometer with this kit, user can monitor
the rotation, free fall, and many other features of object to which the accelerometer chip
is attached. This can be done remotely once the kit is programmed. Also, user can use
this system to interact with other devices such as camera and servo motors remotely by
connecting them with RCM 3365 kit [3].
Rabbit core module and the prototyping board are low cost, low power consuming
products. Specially, Rabbit 3000 microprocessors support Dynamic C 9.24 with many
nice features for quick embedded system development. If user wants to build an
application heavy on internet usage, Digi International provides a Rabbit Web module to
3
be used with Dynamic C which can be bought separately. This makes web page
designing much easier. The kit is programmed with USB programming cable.
1.2
Objective of the Project
The main objective of this project is to monitor accelerometer based hand motion
remotely using RCM 3365 prototyping board and also to create a database on client side
to store the output values of the accelerometer.
The specific objectives of overall project can be described as:
• Connect RCM 3365 with LAN as well as internet.
• Create hardware link between RCM 3365 and ADXL345 accelerometer chip
according to I2C protocol.
• Get ADXL345 output values in X, Y and Z-axis directions. And derive the
object position and status.
• Create web pages for hand motion detection application as well as free fall
detection application.
• Store above application data values in excel sheets using C# package provided
by Microsoft .NET and also plot graphs for them.
4
Chapter 2
WEB SERVER
One part of this project is to upload the data to the internet. This is done by using
the TCP/IP protocol support by RCM 3365. The RCM 3365 kit can act as web server by
itself. It can host web pages and input any required data to be shown on the web page.
The RCM 3365 kit can be directly connected to PC, but here it is connected to router so
that it can be connected to the internet. To make it work, user needs to understand some
network terms such as IP Address, DNS, LAN, WAN etc.
2.1
Internet
Internet is short form of internetwork, which means the network of devices
connected with each other. The Internet is global data communication system. It is
infrastructure that provides connectivity among between computers which use standard
Internet Protocol Suite (TCP/IP). The internet consists of billions of private, public,
business, government networks, which can be of local or global scope. These networks
are connected through array of electronics, optical and wireless networking devices
technologies to form internet.
On the basis of the network technology used, there are several kinds of internet
connections. Several internet connections provided to common user are:
• Analog: It gives dial up connection and speed is up to 56K.
• DSL: It uses 2-wire telephone line. There is no need to dial in to ISP because
DSL is always on. There are two types of DSL connections, ADSL and SDSL.
5
ADSL is most commonly used in North America, the data speed for this
connection is 1.9 to 9 Mbps. SDSL is used in Europe and its data speed is up to 3
Mbps.
• Cable: Coaxial cable wires are used for this type of connection. They provide
high bandwidth for the connection. Speed ranges from 512 Kbps to 20 Mbps.
For this project, cable connection has been used.
2.2
IP Address
Whenever there is communication between two or more devices over a network, a
system to identify each device present on the network is needed. An Internet Protocol
Address (IP Address) is an exclusive number all information technology devices use to
identify them over a network and enables them to communicate with other devices. An IP
Address is provided to network device according to standard known as Internet Protocol
Standard (IP Standard). Currently, most network devices use IP version 4 for providing
an IP Address. It has 192.168.111.122 format [4]. It consists of 4 bytes separated by dots,
so it provides 232 possible unique addresses.
Most significant eight bits are called
network number, which is fixed for a network and remaining bits are called host
identifier. The first 3 bytes are called network prefix (192.168.111.0), which serves in
routing of the data packet and last byte is called host part (0.0.0.122) which is unique for
each device. The IP address can be fixed for a device or a port on internet or it may be
dynamic.
6
2.2.1
Dynamic IP Address and Static IP Address
When an IP Address is static and does not change, it is called static IP address. An
IP address which is not static and changes with time is called Dynamic IP Address. When
a network device is connected to the internet, it will be given an IP Address from a pool
of IP Addresses provided by Internet Service Provider (ISP). Internet Service Provider
usually provides Dynamic IP addresses to normal internet subscribers, but static IP
address can be got from ISP and user has to pay more for it. Static IP address is useful
when someone has to host a website on a server and needs to access it through internet.
Dynamic IP address would keep changing and the DNS would point to the old IP address
which is wrong. So, Static IP address is needed.
When a device is connected to local area network (LAN), it connects through
central hub or router. The router has a fixed IP address which can be changed by the user.
For a device or computer log into a network, the IP address of the device should have
same network prefix as router but a unique host number for this network. The advanced
devices such as PC or MAC have ability to pick the IP address with same network prefix
and a random host number. But simpler devices like our RCM 3365 kit do not have this
capability. Thus, the user has to manually set the IP address, which will have same
network prefix as the router and unique host number.
2.3
Domain Name System (DNS)
As an IP address is a series of numbers, remembering an IP address can be
difficult. It is always easy to remember words rather than numbers. DNS allows the IP
address to be translated into words. The Internet Service Provider provides DNS service.
7
Domain name can be any name of user’s choice. Once the domain name is allocated to an
IP address, it is much easier to remember it [5].
2.4
Dynamic DNS
Dynamic DNS is a free service provided by DYNDNS.COM. As discussed
before, to host a website on internet, user needs a static IP address. The static IP address
is paid service provided by ISP. The Dynamic DNS provides cheaper way to handle this
problem. The Dynamic DNS service provides static DNS for dynamic IP Address. If a
static IP address is being used, allocating a DNS to this static IP address is simple. In case
of Dynamic DNS, we have a dynamic IP address. This dynamic IP address is linked to
static DNS provided by DYNDNS.COM.
Most of the routers have in-built feature of Dynamic DNS. User has to enter their
ID provided by DYNDNS.COM to make it usable. If the router does not have any
Dynamic DNS support, then software is provided by DYNDNS.COM which can be
installed on a PC. This PC should be connected to the same router for which Dynamic
DNS is being used. When a user creates an ID on DYNDNS.COM, they are provided
with unique DNS which is linked to their IP address. This DNS and IP address are both
stored at DYNDNS.COM servers. Whenever the IP address changes, the Dynamic DNS
software automatically updates the IP address over DYNDNS server. This means the
DNS always points to the same physical node on internet even when the IP address has
been changed. Figure 2.1 shows the DYNDNS software interface/GUI. It shows the DNS
provided
by
this
service
which
is
“rabbit1.dyndns-ip.com”.
So,
whenever
8
“rabbit1.dyndns-ip.com” is entered in a browser, it always points to the same router even
if the IP Address has been changed.
Figure 2.1 Dynamic DNS software diagram
2.5
RCM 3365 kit
In this project, RCM 3365 kit acts as the server. The hardware components of
RCM 3365 kit are powerful Rabbit 3000 microprocessor running at 44.2 MHz, a 16 MB
NAND flash, a memory card socket, 512K flash and 512K SRAM, 10/100 base-T
Ethernet with RJ-45 port, 52 parallel digital I/O and 6 serial ports. It supports 3.3 V I/O
with 5 V-tolerant I/O.
9
2.5.1
RabbitR 3000 Microprocessor
The power of RabbitR 3000 microprocessor is in its usage flexibility and number
of ports provided. It comes in 128-pin LQFP as well as 128-ball TFBGA package. The
operating voltage levels are 1.8-3.6 V DC and operating current values are 2mA/Mhz at
3.3 V. Maximum operating clock is 55.5 MHz. The high-performance instruction set
offers greater efficiency and high execution speed of compiler generated C code. RabbitR
3000 instructions are single byte opcodes that execute in two cycles per instruction. Also,
hardware supported breakpoints are provided for ease in debugging. RabbitR 3000 has 20bit address bus, 8-bit data bus, three chip select lines, two output enable lines and two
write enable lines. It has built in support which can be used as master or slave in multiprocessor environment. RabbitR 3000 microprocessor is also provided with battery
backup Real-Time clock. It has ten 8-bit counters and one 10-bit counter with 2 match
register counters. It is also provided with watch dog Timer.
2.5.2
RCM 3365 Development Kit Ports
RabbitR 3000 microprocessor has 56 digital I/O ports which are arranged in seven
8-bit ports. RabbitR 3000 microprocessor has six CMOS-compatible serial ports which
are all configurable as asynchronous, four are configurable as clocked serial (SPI) and
two are configurable as SDLC/HDLC.
RCM 3365 is also provided with 10/100Base-T port. It has 3 LEDs to show its
functionality. RJ-45 is used for hardware connection to 10/100Base-T port. One straight
network cable and one crossover network cable are provided to use with PC as well as a
10
router. For programming purpose, RCM 3365 kit is provided with a 2x5 connector. A
dedicated programming cable specifically used for this purpose is also provided.
2.5.3
RCM 3365 Serial Connectivity
Rabbit processors support SPI as well as I2C serial communication. Two special
pins are available for I2C communication which act as clock pin and data pin. Four pins
are assigned for SPI serial communication. For this project, I2C serial interface is used to
communicate with ADXL345 accelerometer.
Figure 2.2 Rabbit 3000 module
11
Chapter 3
THREE AXIS ADXL345 ACCELEROMETER
There are different types of accelerometers available based upon various factors
such as data output type (analog or digital), resolution, price etc. User can choose
between these accelerometers depending upon applications to be developed. In the
current project, the accelerometer is connected with RCM 3365 microprocessor.
Therefore, a digital accelerometer is desired so that there would be no need to convert
analog to digital values later.
3.1
Choosing an Accelerometer
There are various factors involved while choosing an accelerometer. Table 3.1
gives us the comparison of different types of accelerometers available. For this project,
ADXL345 accelerometer by Analog Devices has been chosen for its high resolution and
cheap price. The ADXL345 is also available in breakout board.
12
Table 3.1 Comparison of different accelerometers
Manufacturer
Freescale
VTI
ST
Analog Devices
Name of Accelerator
MMA7455L SCA3100-D03 AIS326DQ
ADXL345
Interface - I2C
Yes
No
No
Yes
Interface - SPI
Yes
Yes
Yes
Yes
Rate
8 MHz
8 MHz
8 MHz
8 MHz
Voltage
2.4-3.6 V
3.3 V
3.3V
1.8-3.6 V
3-axis measurement
Yes
Yes
Yes
Yes
Resolution
12-bit
12-bit
12-bit
12 bit/16 bit
Yes
Yes
Yes
Yes
Yes
Yes
Yes
Yes
SPI
Communication
Free Fall
Detection
Programmable Interrupt
Threshold
3.2
ADXL345 Accelerometer
ADXL345 accelerometer supports both I2C and SPI serial interfaces. In this
project, ADXL345 has been interfaced with RCM 3365 kit through I2C serial interface.
13
An accelerometer is a device which measure acceleration forces. These forces may be
static or dynamic. By measuring static acceleration with respect to gravity, the angle at
which device is tilted with respect to earths surface can be calculated.
In ADXL345, sensor is a polysilicon surface-micro machined structure built on
top of a silicon wafer. Deflection of this structure due to acceleration is measured by
differential capacitors that independent fixed plates and plates attached to the moving
mass. Acceleration deflects the beam and unbalances the differential capacitor, resulting
in a sensor output whose amplitude is directly proportional to the acceleration.
ADXL345 is small, low power, 3-axis accelerometer with high resolution. Its
outputs are the X, Y and Z-axis angles with respect to earth’s surface. Several other
features are also available in ADXL345 accelerometer. These special functions are:
single tap detection, double tap detection, activity detection, inactivity detection and free
fall detection. In this project, an application for free fall detection has also been
developed.
3.3
ADXL345 Breakout Board
For this project, ADXL345 breakout board has been used because of its
convenience to use. The breakout board has only the necessary pins required for SPI and
I2C communication. ADXL345 breakout board has 8 pins. Two pins are reserved for Vcc
and ground. There are two interrupt pins provided for special function assignment. CS is
chip select pin used in SPI serial communication. For I2C communication, CS should be
connected to Vcc. SDO pin is also used for SPI interface and should be connected to Vcc
14
for I2C communication. SCL and SDA are used for both SPI and I2C interface. SCL is
clock pin and SDA is data pin.
Figure 3.1 ADXL345 breakout board pin configuration
Figure 3.2 ADXL345 accelerometer breakout board
3.4
I2C Interface
Serial bus interface is ideal for interfacing two close range devices. There are
many types of serial interfaces being used these days such as RS232, I2C, SPI and JTAG
etc. [7]. ADXL345 supports SPI and I2C serial interface. For this project, I2C serial
interface has been used. I2C is also known as two wire interface because it uses two
wires for serial interface [8]. It was developed by PHILIPS for serial communication
between low speed peripherals.
15
3.4.1
I2C Interface Hardware Description
I2C consist of two serial open drain lines. SDA is serial data line and SCL is
serial clock line. I2C has 100 Kbits/s standard speed mode and 10 Kbit/s slow speed
mode.
Figure 3.3 I2C interface hardware connections
The clock line (SCL) is used to synchronize all the communication. SCL and
SDA are open drain drive, which means the device cannot drive pin high but it can pull it
low. Because of this, both SCL and SDA are needed to be connected to Vcc via resistors.
Recommended values of these resistors are between 1 Kohm to 10 Kohm. There can be
one or more masters and one or more slaves. In normal I2C interfaces, there is one master
and multiple slaves. The master always controls the transfer. The SCL is derived by
master.
3.4.2
I2C Protocol
There are special signal sequences used for I2C protocol while initiating and
stopping the I2C communication. These are called START and STOP sequences. Every
I2C communication starts with START sequence and ends with STOP sequence. Figure
16
3.4 shows START and the STOP sequences. Only at START or STOP sequence SDA is
allowed to change when SCL is high. Otherwise, SDA must remain stable while clock is
high. Data is transferred in sequence of 8 bits. After every 8 bits, the receiving device
will send an acknowledgement bit.
Figure 3.4 START (left) and STOP (right) sequences
If the ACK bit is low, this means the data has been received by slave device and is
ready to receive more data. If ACK is high, this means the receiver cannot receive more
data. In this case, master terminates the transfer by sending the STOP signal.
To address the slave device, I2C uses 7 bit address and 1 bit R/W signal. The first
7 bits are the address bits, so an I2C device can access 0 to 127 addresses. The last bit is
R/W signal. If R/W is low, it means master is writing to the device and if high, master is
reading from the device. So to write, an even address is transferred and to read, an odd
address is transferred. After 8 bits are transferred, the slave device sends the ACK bit.
3.4.3
I2C Working
The I2C serial communication is started by master device by sending START
sequence. All slave devices get ready for communication. There are different steps
followed for read and write from slave device. The steps to be performed to write to the
slave device are:
17
• Send a START sequence.
• Send the I2C Address of slave device with R/W bit low (write sequence).
• Send internal address of the register to be written.
• Send the data byte.
• Send the STOP sequence.
The read process is started the same way as write. The address of the slave device
and the register to be read are transferred first then the reading from the slave starts. The
steps to be followed to read from slave device are:
• Send a start sequence.
• Send the I2C address of the slave device with R/W bit low (write sequence).
• Send the internal address of the register to be read.
• Send the START sequence again.
• Send the address of device with R/W bit high (read sequence).
• Read data from slave device.
• Send the STOP sequence.
3.5
Multiple I2C Write and Read
Multiple I2C read and write means, multiple registers can be read or written in
single transfer cycle. The process for reading and writing multiple bytes is little different
from reading and writing single byte.
18
Table 3.2 Single byte write
Single Byte Write
1
2
MASTER Start
3
4
Slave Add + W
SLAVE
ACK
7
DATA
8
5
6
Register Add.
ACK
9
STOP
ACK
Table 3.2 shows us the process for single byte write. The process is initiated by
Master by sending START signal. The master then sends the slave address plus the write
bit. The slave sends the ACK signal when it identifies its address. Master device then
sends the register address to which the data is to be written, which is again followed by
ACK from the slave device. Then, 8 bits of data is transmitted by master device. After
receiving the data, the slave will send an ACK. The master will send the STOP signal to
finish the transmission.
Table 3.3 I2C multiple bytes write
Multiple Byte Write
1 2
3
4
5
6
MASTER Start
Slave Add + W
Register Add.
SLAVE
ACK
ACK
7
DATA
8
ACK
9
DATA
10
ACK
11
STOP
19
The process for multiple bytes write is shown in Table 3.3. This process is almost
same as single byte write. After the single byte is transmitted and ACK is given by slave,
the next byte is transmitted by master instead of STOP signal. This next byte will be
stored at next memory location in the slave device. After each byte, ACK is send by the
slave device. After all the bytes have been transferred, master sends the STOP signal to
terminate the transfer.
Table 3.4 I2C single byte read
Single Byte Read
1 2
3
4
5
6
7
MASTER Start
Slave Add + W
Register Add.
Start
SLAVE
ACK
ACK
8
9 10
11
12 13
14
Slave Add + R
NACK
STOP
ACK
Data
Table 3.4 explains the single byte read from a slave device using I2C interface. As
usual, master initiates the transfer by sending the START signal. Then as in write
process, address of the slave device and the write bit is transferred. The corresponding
slave responds by sending the ACK. Then, the register address from which data is to be
read is transmitted. Then, master sends START signal again, after which the slave
address and the read bit are transmitted. This tells the slave device that the transmission
in process is a read transmission. The slave sends the ACK signal and also sends the byte
of data. The master captures the data and sends NACK signal followed by STOP to end
transmission.
20
Table 3.5 I2C multiple bytes read
Multiple Byte Read
1
MASTER Start
SLAVE
8
9
Slave Add + R
ACK
2
3
4
5
6
7
Slave Add + W
Register Add.
Start
ACK
ACK
10 11
12
13
14
15
ACK
NACK STOP
Data
DATA
Table 3.5 shows the multiple bytes read from the salve device. This is almost
same as single byte read. After receiving the first byte, the master device sends the ACK
signal which tells the slave that another byte is to be transmitted. This byte will be
transmitted from the next memory location of slave device. When all the bytes are
transmitted, master sends the NACK signal which tells the slave device that no more
bytes need to be transferred. Master device ends this transfer by sending STOP signal.
3.6
I2C Hardware Connections between RCM 3365 and ADXL345
As stated earlier, I2C serial communication has been used to interface between
RCM 3365 and ADXL345. Figure 3.5 shows the wire connections between ADXL345
and RCM3365.
21
Figure 3.5 Hardware setup
Vdd
Rabbit 3000
ADXL345
CS
R
1
R
2
SDO
PD6
SCL
PD7
SDA
IN0
INT1
Figure 3.6 Hardware connections between RCM 3365 and ADXL345
Figure 3.6 shows the connections for I2C interface between ADXL345 and
RCM3365 kit. Two pull up resistors of value 2 Kohm each are required to be attached to
clock and data lines. These resistors are mandatory to pull up the clock value (SCL) and
the data (SDA) value up to Vdd, which is recognizable by both Rabbit 3000 and
22
ADXL345. The PD6 and PD7 pins of Rabbit are connected to SCL and SDA of
ADXL345 respectively. PD6 and PD7 are default pins of Rabbit to be used for I2C
communication. Chip select (CS) of ADXL345 is connected to Vdd. This tells ADXL345
that the chip will be communicated through I2C interface not SPI. SDO pin is used only
for SPI interface and is connected to Vdd for I2C interface. The value of Vdd is 3.3 V as
ADXL345 supports 3.0 V to 3.6 V maximum. And the last signal needed for free fall
detection is interrupt from ADXL345 (INT1), which is connected to IN0 of RCM 3365
kit.
23
Chapter 4
SYSTEM DESIGN AND TESTING
This project based on the idea of accessing a device through internet. Therefore,
one portion of project is on server side of network which consist of ADXL345
accelerometer and RCM 3365 kit which acts as server. The other portion takes place on
other side of network at a client PC. This project can be divided in three main portions,
which are:
• Setting up RCM 3365 kit and getting output from ADXL345 accelerometer.
• Setting up connection with Netgear router and enable the kit to work on
internet.
• Viewing the results on browser on client side and also creating a website using
C# .NET working on MS Visual Studio to store the X, Y and Z axis and plot a
graph.
4.1
Getting the Kit Ready
RCM 3365 kit comes many accessories, which are programming cable, power
cable, prototyping board, RCM 3365 module, a CMOS camera, network cables and two
servo motors. CMOS camera and servo motors are not being used for this project. RCM
3365 kit is assembled by plugging in the RCM 3365 module on the prototyping board.
Then, attaching the power cable and programming cable will enable RCM 3365 kit ready
for programming. Also, the programming cable comes with RS-232 connection. If RS-
24
232 port is not available on laptop or PC, RS-232 to USB convertor is required to be
bought separately.
4.2
Getting the ADXL345 Accelerometer Ready
For this project, ADXL345 breakout board is used in which chip is mounted on a
small board and only necessary pins are output for either I2C communication or SPI.
Also, two pins for interrupts are there.
Figure 4.1 ADXL345 hardware connections
As stated before, I2C communication is used here. For I2C interface, two resistors
R1 and R2 have to be connected to clock as well as data line. Both R1 and R2 are of 10
Kohms. All the pins are connected to assigned pins of RCM 3365 as discussed earlier.
4.3
Dynamic C
Dynamic C software is provided with the RCM 3365 kit. Dynamic C provides
extension to C language that supports real world embedded system development and also
25
supports cooperative and preemptive multitasking. Many enhancements to C language
have been provided to make it work with embedded systems. Main functions of Dynamic
C are editing, compiling, linking, loading and debugging of a program. Compiling,
linking and loading are done in single step. Dynamic C has built in text editor. Dynamic
C also supports assembly language programming. C and assembly language can be mixed
together.
Dynamic C version 9.24 is provided with RCM3365 kit which works efficiently
with RabbitR 3000 microprocessors. User needs to install Dynamic C on the system to be
able to program RCM 3365 kit [9].
4.4
Enabling Read from and Write to ADXL345
After making the hardware connections, Dynamic C programs are written to read
from ADXL345 and to write to ADXL345. Inbuilt libraries in Dynamic C are used to
achieve this. The output data of ADXL345 are X, Y and Z-axis angles. Each of these
angular data is stored in two separate registers. So, six registers are needed to be read.
The addresses of these registers are 0X32 to 0X37. These registers can be read
continuously after sending the address of the first register. But, to keep things simpler and
bug free, each register is read individually in this project. Figure 4.2 shows the output of
PC based logic analyzer LA 5400. This logic analyzer has special feature to detect I2C
and SPI serial communication. The logic analyzer output is showing the communication
between RCM 3365 and ADXL345.
26
Figure 4.2 Logic analyzer output for I2C communication
4.5
Getting Output from ADXL345
To get output from ADXL345 accelerometer, there are various registers inside it
to be set. First register to be set would be POWER_CTL register. The Address of power
control register is 0X2D.
27
Table 4.1 POWER_CTL register
D7 D6
0
0
D5
D4
D3
D2
D1 D0
Link AUTO_SLEEP Measure Sleep Wakeup
To get the X, Y and Z axis values of the register, measure bit has been set to high.
Then, register 0X32 to 0X37 were read in a loop. Register 0X32 - 0X33 contains raw
values for X-axis angle, 0X34 - 0X35 for Y-axis angle and 0X36 - 0X37 for Z-axis.
These are read-only registers. From these raw values, the angle at which ADXL345 chip
is held can be calculated with a simple formula.
For Free Fall detection, special feature for free fall detection provided by
ADXL345 accelerometer has been used. INT 1(interrupt 1) has been assigned for free fall
detection. Whenever the free fall is detected by the ADXL345 accelerometer, the
interrupt goes high. To enable this interrupt, few registers needed to be set.
Table 4.2 Interrupt enable register
D7
D6
D5
Data
Single
Double
ready
tap
tap
D4
D3
D2
Activity Inactivity Free
D1
D0
Watermark Overrun
Fall
Table 4.2 shows the Interrupt Enable register (0X2E). Any two special functions
can be activated at a time. To use Free Fall detection, Free Fall bit is set.
28
Table 4.3 shows Interrupt Map Register (0X2F). As ADXL345 has two interrupt
outputs, these functions can be assigned to any of those two interrupts. If the bit is 0,
function is set to INT 1 and if 1, function is set to INT 2.
Table 4.3 Interrupt map register
D7
D6
D5
Data
Single
Double
ready
tap
tap
D4
D3
D2
Activity Inactivity Free
D1
D0
Watermark Overrun
Fall
D2 bit of Interrupt Map register has been set to 0, which assigns free fall to INT 1.
Also, thresh hold acceleration and thresh hold time at which interrupt will be enabled has
been set. They are set by writing values in THRESH_FF (address 0X28) and TIME_FF
(0X29).
4.6
Converting Raw Output from ADXL345 to Useful Data
ADXL345 outputs raw numbers which is not in form of useful angles.
Figure 4.3 Raw values output by ADXL345
29
Figure 4.3 shows the raw data output by the ADXL345. These values are needs to
be converted to angels which can be used for the development of an application. Simple
equations are used for this purpose.
If x, y, z are outputs from ADXL345, then:
Ax = x 2 …………….(1)
Ay = y 2 ……………(2)
Az = z 2 ……………(3)
Xs =
Ay + Az …..(4)
Ys =
Ax + Az ……(5)
Zs =
Ay + Ax ……(6)
THETA = a tan( x / Xs ) …(7)
PHI = a tan( y / Ys) …….(8)
PSI = a tan( Zs / z ) ………(9)
Where, THETA, PHI and PSI in equation number 7, 8 and 9 are angles with
respect to X, Y and Z axis. But these angles are in radians. Following equations are used
to convert them to degree:
DEG = RAD • (180 / pi ) …(10)
The ADXL345 does not output data in 0 to 360 format, instead the angle varies
from 0 to 90 degree in first quadrant, then 90 to 0 in second quadrant, 0 to -90 for third
and -90 to 0 in fourth quadrant for X and Y axis. For Z axis, 0 to 90 in first quadrant, -90
30
to 0 in second, 0 to -90 in third, 90 to 0 in fourth quadrant. Figure 4.3 explains the
orientation of X axis output by ADXL345.
So, these raw angles have been converted to useful angles which vary from 0 to
360 for each axis by applying several conditions in programming. After being changed to
useful angles, they can be used for developing applications.
Figure 4.4 Orientation of angle output by ADXL345
4.7
Hand Position Application
This application basically tells the position of hand to which the ADXL345
accelerometer is tied with a band. X and Y axis are used in this application.
31
Figure 4.5 Orientation of X and Y axis
As shown in Figure 4.5, the ADXL345 is tied to the hand so that Y-axis is parallel
to arm pointing outwards and X-axis is perpendicular to the arm. So, when the arm is
rotated, angle between ADXL345 and X-axis changes, and when hand is moved
backward or forward angle between Y-axis and ADXL345 changes.
Various conditions on X-axis have been applied which enabled this program to
tell 6 different position of hand, which are:
• Hand is in straight position.
• Hand is tilted left facing upwards.
• Hand is tilted left facing downwards.
• Hand is upside down.
• Hand is tilted right facing downwards.
32
• Hand is tilted right facing upwards.
Figure 4.6 Conditions applied to X axis
Figure 4.6 explains all these conditions applied to X-axis. This figure explains
how 0 to 360 degree angle of X-axis has been divided to display different positions of the
Hand. In this figure, X-axis is shown vertical pointing upwards for ease in understanding.
But in the hand position application, X-axis is horizontal and parallel to earth’s surface.
33
Same way, Y-axis is used for forward and backward tilt:
• Hand is tilted forward.
• Hand is tilted backwards
Figure 4.7 shows the Flow chart which explains the working of hand position
application. To be able to start reading output from ADXL345 accelerometer,
POWER_CTL register is to be set. POWER_CTL register is set through I2C write
operation. After setting up these registers, values of X, Y and Z axis can be read through
I2C read operation. These values are converted to angles using equations 1 to 10. After
reading the raw angles from ADXL345, they are converted to proper angles which vary
from 0 to 360 degrees. Then, the conditions are applied on X-axis and corresponding
output is printed on the web page. The Y-axis conditions are applied at same time and
corresponding output is printed on webpage.
34
Figure 4.7 Flow chart explaining hand position application
35
Figure 4.8 shows actual position of the Hand and figure 4.9 shows the
corresponding output on the web page. On this web page, two separate positions are
shown. One is for rotation of hand and other for forward or backward tilt. This page also
shows the X, Y and Z-axis angles output by ADXL345 accelerometer.
Figure 4.8 Straight position of hand
Figure 4.9 Web page showing hand position
36
4.8
Free Fall Detection
In second application, Free Fall is being detected by detecting the interrupt output
by ADXL345. To detect the interrupt, interrupt routines of RCM 3365 has been used.
Interrupt library is needed to be added in the program to activate interrupts. In the
program, whenever the interrupt is detected, the string is changed from “Scanning for
Free Fall” to “Free Fall Detected”. Figure 4.10 shows the flow chart which explains the
process for free fall application. User needs to setup the power control register to bring
the ADXL345 in measurement order. After this, free fall interrupt is enabled and is
mapped to INT 1 of ADXL345. Then, threshold acceleration and time are set for free fall.
Then, the program keeps scanning the INT 1, which is connected to PE0 of rabbit
microprocessor. If the interrupt is low, the program will continuously output “Scanning
for Free Fall” on web page. When INT 1 goes high, the output will be changed to”Free
Fall detected”.
After the free fall detection, program will wait for 5 seconds. After 5 seconds, the
INT_SOURCE register of ADXL345 will be read to reset the INT 1 interrupt to low.
Once INT 1 is reset to low again, the output will go to “Scanning for Free Fall”. This
process will keep happening in a loop.
37
Figure 4.10 Flow chart for free fall application
38
4.9
Uploading the Results to Internet
RabbitR 3000 microprocessors have built in feature of interacting with the
internet. Dynamic C has built in library for TCP/IP protocols which supports these
features. This library is called in the program and HTTP protocols are initiated. Also,
separate HTML pages have been designed to be imported to the Rabbit processor
memory during compilation. These pages are written in simple HTML, but the special
variables which are to be provided by Rabbit processor must have same names in HTML
page as declared in Dynamic C coding. All file types used in HTML page have been
declared in Dynamic C code. Any kind of variable can be shown on HTML page which
has been declared in Dynamic C code.
For three different applications, three different HTML pages have been designed.
First page is for hand position application. This page shows the different hand positions
as well as the X, Y and Z axis angles. The second page is for Free Fall Detection
application. This page shows whether free fall is detected or no. The third page shows 40
X, Y and Z axis angles. These angles are stored in an array and then transmitted all at
same time. The reason for doing this is because TCP/IP protocols always takes few
second to upload a page. But ADXL345 is outputting 10 angles/sec. So, to overcome this
problem, 40 angles are saved and transmitted to internet so that the time consumed during
TCP/IP communication is compensated. To see these pages on browser on client side, the
router is set up to interact with RCM 3365 kit and transmit the pages to internet. Once the
router is set to receive requests from internet and port forwarding has been enabled, the
RCM 3365 kit is able to host the web page to the client.
39
4.10
Setting-up the Router
The router used for this project is Netgear Wireless-G router. This router is
connected to the modem, which is connected to external internet cable.
A router has two IP addresses, one is external IP address, which is provided by
ISP and other is internal IP address. External IP address is provided by Internet Service
Provider randomly from pool of IP addresses. The Internal IP address is fixed for a router
and can be changed through router settings. Whenever there is communication between
internet network and a device on router LAN, the router changes the internal LAN
address of device to external IP through Network Address Translation (NAT) and vice
versa. RCM 3365 kit is connected to the router through network cable and is available on
its LAN. The IP address of RCM 3365 kit has been set according to the IP address of
router in use, so that they have same network prefix (first three bytes of IP address) and
different host number (last Byte of IP address).
To access the kit through internet, port forwarding is needed. Port forwarding is a
way to forward the request coming to the router from internet to RCM 3365 kit so that
RCM 3365 will serve the request. It can be done through router settings. Router is set to
forward all the requests to IP address of RCM 3365 as shown in figure 4.12.
As external IP address is dynamic, Dynamic DNS service has been used, which
provided a fix address for changing external IP address. The online URL for this project
provided by Dynamic DNS is “rabbit1.dyndns-ip.com”. Whenever this address is entered
in browser, it tries to access the router which forwards this request to the RCM 3365 kit.
If the kit is loaded with the HTML page, it will serve as the default page.
40
Figure 4.11 Router connection with RCM 3365 and internet
Figure 4.12 Port forwarding to RCM 3365(192.168.1.100)
41
4.11
Saving the Data and Plotting the Graph
A website using C# on MS Visual Studio has been created, which takes the data
from the web page served by RCM 3365 and saves it in an excel sheet and also plots a
graph automatically. This process is divided in few steps:
• The data is captured from web page.
• A table is created to store the data.
• A web page is created to show the contents of this table in a grid view.
• A back-up of the target excel sheet is made and excel sheet is updated with new
data. Data is written if no previous data is found.
The data to be stored is available in the body of HTML page. 40 angles are being
displayed at once and are in following format: X,Y,Z;X,Y,Z;X,Y,Z;………..
Figure 4.13 displays the actual web page where the values of X, Y and Z axis are
displayed. The values of X, Y and Z axis are separated by a comma which belongs to
same sample and the values of different samples are separated by semi-colon from the
previous sample values.
Figure 4.13 Data provided by RCM 3365
The C# program reads this data present in the body of the web page. This data is
then separated based upon commas and semi colons. A table is created to store data. The
42
values belonging to same sample are stored in same row of this table. The value of next
sample is stored in next row and so on. Thus, this table contains all the data displayed on
web page. This table is also displayed in browser in form of a grid. Once the number of
samples in this table reaches the number previously allotted, this table is stored in the
excel sheet. The C# does not store the data in form of numbers but in form of integers. So
these integers have been converted to numbers inside excel sheet so that a graph can be
plotted. This graph is automatically update when new data is written inside the excel
sheet.
Figure 4.14: Displaying data in grid format
43
Figure 4.15 Data saved in excel sheet
4.12
Result Analysis
The data can be analyzed by plotting the graph for the angles we get from the
accelerometer. The data rate of I2C connection between RCM 3365 and ADXL345 has
been calculated using LA5400 Logic Analyzer.
4.12.1 Plotting the Graph
X axis data is analyzed and discussed in this report. Other two axis are similar.
Figure 4.16 shows the graph plotted when ADXL345 is facing up, thus X axis is
parallel to surface. For sample number 2, the value is 1.5 which is very close to zero. The
average value of X axis in this position is close to zero. Which means the chip is placed
almost parallel to the surface of earth. The little variation in the angle for each sample is
44
because the ADXL345 is very sensitive instrument. A small change in position also gets
noticed.
Figure 4.16 Graph showing X axis when ADXL345 is parallel to surface
Figure 4.17 Graph showing plot of X axis when ADXL345 is facing left
Figure 4.17 shows the plot of X axis when ADXL345 is held at approximately 90
degree to the surface facing left. Let’s consider sample 25 where the value of X axis is
45
around 96 degree. If the chip were to be held exactly perpendicular to earth’s surface, it
should have been 90 degree instead of 96 degree.
Figure 4.18 Plot showing X axis when ADXL345 is facing down
Figure 4.18 shows the graph plotted for X axis when the ADXL345 is facing
down. The average angle in this graph is 179 degree which is very close to 180 degree,
thus proving the accuracy of ADXL345 accelerometer.
Figure 4.19 Graph showing plot of X axis when ADXL345 is facing right
46
Figure 4.19 shows the plot of X axis when ADXL345 is facing right
perpendicular to surface. Let us consider the sample number 9 where the value of X axis
is 272 degrees. The value at this position should be 270 degree if the accelerometer is
held perfectly still and perpendicular to earth’s surface.
The little variation in angle in all positions is because ADXL345 device cannot be
held perfectly still at certain position. Otherwise, this analysis shows that ADXL345 is
giving perfectly accurate output.
4.12.2 Using Logic Analyzer
To find the data rate at which I2C communication is taking place, LA 5400 PC
based logic analyzer is used.
Figure 4.20 Logic Analyzer output for data and clock signals
47
Data and CLOCK pins are connected to channel 1 and 2 of logic analyzer and
logic analyzer is configured to give waveform output. After getting the waveform, time
between two specific positions of waveform can be measured. From figure 4.20, it can be
seen that time between two rising edges of clock (difference between A and T) is 28
microseconds. This gives us the clock frequency of 36 KHz. This is very less than the
100K ideal data rate of I2C serial communication. Also on data line, length of a wave is
difference between C and D which is 98 microseconds. This time gives us data frequency
of approximately 10 KHz. The reason behind this slower rate can be in the working of
I2C itself. The Master may be generating the clock, but slave have the ability to stretch
the clock if the data is not ready to be delivered. So the slave only sends the data when it
is ready. This means the frequency of the clock in my project is 36 KHz and frequency at
which data is transferred is 10 KHz, in other words bit rate of I2C is 10Kbits/second.
48
Chapter 5
CONCLUSION AND FUTURE EXPANSION
5.1
Conclusion
As it has been stated in start of the report, controlling a device remotely through
internet is cutting edge technology being employed today. RabbitR Microprocessors are
already ahead from all other normal microcontrollers in this area. They are cheap and
easily affordable. The RabbitR Microprocessors can be set at some location to do some
specific work once the program is loaded in them. This project is small display how
powerful these processors are. Multiple devices can be connected to them at a time and
multiple pages can be designed. With the size of memory provided with RCM 3365 kit,
big applications can be created to be controlled by this RabbitR Microprocessors. Creating
an application is very easy through Dynamic C environment. There are some add on
modules also provided to make programming even easier. If a large scale internet
application is needed to be developed, RabbitR Semiconductors provide Rabbit Web add
on module which makes creating web based applications much easier. Accelerometers
are used in almost every smart phone these days. They find application in cell phones,
video game controllers, laptops, etc. The ability to know the direction of a device opens
the doors of creativity. A large number of applications can be created using
accelerometers whether these are in gaming industry, medical research or any field.
Ability to control an accelerometer through internet has very high potential. It can
be set to know the direction of any thing remotely. It can be set to know if the device is in
49
free fall remotely. Another very cutting edge application would be to know the heart beat
rate of a patient remotely through internet.
RCM 3365 and ADXL345 accelerometer are cutting edge technologies. The
applications developing potential for these devices are only limited by the imagination.
5.2
Future Expansion
In future, it can be said we will control our cars remotely and we will be able to
control our houses remotely. RCM 3365 and ADXL345 have many fields of applications
in our daily life. Studies have shown that accelerometers can be used to measure heart
beat of a patient. Other major field can be security systems. Cutting edge technologies
like RCM 3365 and ADXL345 are going to be every where in recent feature. The speed
at which these devices are finding place in our daily life, we can say that feature is
already here.
50
REFERENCES
[1] Neil Barbour and George Schmidt, “Inertial Sensor Technology Trends”, IEEE
Sensors Journal, Vol. 1, No. 4, pp. 332-336, DECEMBER 2001.
[2] Analog Device. “3-axis Digital Accelerometer ADXL345”, 2009.
[3] DIGI International, “Rabbit R 3000 microprocessor Manual”, 2010.
[4] Avaya Labs, “IP Addressing-A simplified tutorial”, 2002.
[5] Hostname for Dynamic IP Address, [ONLINE], Available:
https://www.dyndns.com/account/services/hosts/add.html, July 2011.
[6] Rabbit Semiconductors Inc.”Rabbit 3365 Rabbit Core”, 2005.
[7] D. Johnson, “Implementing Serial Bus Interfaces with General Purpose Digital
Instrumentation”, IEEE Autotestcon, pp. 125 – 129, September 2009.
[8] I2C Tutorial, [ONLINE], Available:
http://www.robot-electronics.co.uk/acatalog/I2C_Tutorial.html, July 2011.
[9] Z-World, “Dynamic C User’s Manual”, 2010.