1
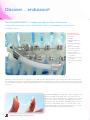
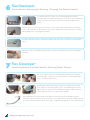
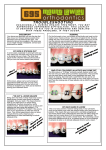
The patient helping himself: In the case of difficulties of any kind (ulceration, locking, claustrophobia), the patient can temporarily de-activate the FD. To do so, the booklet at the anterior module has
to be opened slightly with some cutting-pliers (e.g. nail clippers). The FD can then be disconnected
from the bypass arch and hooked to the upper full arch wire. Convenient for both patient and doctor!
11
Flex Developer™
Elongated Bypass Arch - HG-pin
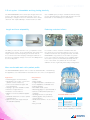
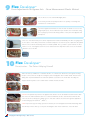
E-bypass arch (like e-longated or extraction): In the case of a short lower dental arch, it is convenient
to obtain quite a long preformed bypass arch, in order to be able to insert a longer FD (better horizontal force deliverance). As an example: For the right treatment side a left bypass arch (‘not redmarked’) is bent as shown in the picture. This way an elongated right bypass arch is created, that will
let the FD slide forward until under¬neath the canine bracket. The smooth curve should be formed in
with fingertips. For remaining installation, see page 6-13.
Remember: A former right bypass arch converts into a left E-bypass arch after remodelling.
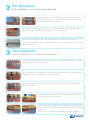
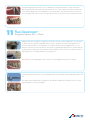
In the starter kit, there are also 2 pieces HG-pins made of .017”x.025” SS wire with ball ready-mounted.
This way, the FD is attached at the auxiliary molar tube and enables the simultaneous use of headgear, lip bumper or reversed headgear.
201554