Download RCForb (Client) User`s Manual - RemoteHams.com
Transcript
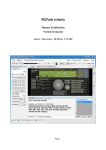
RCForb (Client) User’s Manual
Preliminary documentation.
Table of Contents
Page # - Installation & First Run
Page # - Configuring Your Audio Settings
Page # - Finding a remote
Page # - Transmitting on a Remote
Page # - Using a Remote
Page # - Advanced Features
Installation & First Run (Client)
Download and Install
You may download the latest version of RCForb (Client) from
http://download.remotehams.com/.
Locate the downloaded file and double-click on “RCForb_Client.exe” to start setup.
You should now see a License Agreement dialog, review and accept, and then click on next.
You can then customize the installation location of RCForb (Client). Click on Next.
You can now choose to install a desktop icon or any additional installation options.
Click on Install to begin installation.
If you do not want to start RCForb (Client) at this time,
you may un-check the “Start RCForb (Client)” option.
On First Run
You will be asked for your
RemoteHams Username &
Password, on first run.
If you choose so, you may continue as a
guest by clicking on the button labeled
“Continue as Guest”.
Configuring Your Audio Settings
In RCForb Client, goto Options -> Audio
Settings to configure the default audio settings to be
used when connecting with remotes. Any of the
settings you adjust in this dialog will be saved as a
global setting. You can temporarily change these
settings while connected to a remote. It is
recommended to configure your audio properly here
to avoid manually adjusting all the time. You can
temporarily change audio settings while connected to
a remote.
Audio Settings Dialog
Make sure you select the proper Audio Devices for your Microphone and Speakers. You can test
your selections by clicking on Test Speakers or Test Microphone buttons.
Testing Your Speakers
Click on Test Speakers to check your
speaker volume level.
You can adjust the volume level if
needed. *Note, click Test Speakers to
double check the correct audio device
is selected for “Speakers”.
Testing Your Microphone
Click on the Test Microphone
button to test your microphone
levels. This will record 6 seconds
of audio, then play it back.
You can adjust your microphone
boost. *Note (mic boost) is not
your microphone gain/level
control. It is a software based
amplifier.
Temporarily Changing Your Audio Settings While Connected to a Remote
While connected to a remote you can change your audio device or adjust the volume along
with a software based microphone boost.
Finding a Remote (Connect)
In RCForb Client’s Toolbar
you will find a “Search” field.
Enter an OrbID or any a text string
to search against. If multiple
matches are found, the next
match is selected.
To connect to a remote, select the remote desired, and then click on “Connect” button in the
bottom right of the online list. You may also double click on the remote to establish a
connection.
Identifying TX Capable Remotes
In the screenshot above, you can see the “TX” column for the remotes listed. If there is a check,
this remote supports TX. You will need to contact the radio owner, to obtain TX permission.
*Note, we are working on a “Request TX” feature. This will allow you to upload a copy of your
license, along with easily requesting TX permission on select remotes.
Disconnecting from a Remote
In RCForb Client’s Toolbar you will find
a “Disconnect” button. Click on this
button to disconnect form the current
remote. *If the Online Remotes tab is selected
when this button is clicked, all remote
connections will be disconnected.
Using a Remote
Tuning Around (RX)
Every radio has different features and
options available. In general you can
assume every radio has frequency control
and mode control.
Frequency can be controlled by the
number pad or by clicking on a digit in the
frequency (note the arrows about each
digit). Tuning is also possible with the
tuning knob by dragging with your mouse
or spinning the wheel on your mouse.
Mode control is usually available as a
Dropdown. Just click on the dropdown to
see a list of available options.
*You can find more information about all the controls under Advanced Features
Transmitting on a Remote (TX)
You will need to contact the remote owner, to obtain TX permission.
*Note, we are working on a “Request TX” feature. This will allow you to upload a copy of your
amateur radio license, along with easily requesting TX permission on select remotes.
In the highlighted area you will find all the
available buttons. If the remote supports
TX, you should see a “TX” button.
Operating TX is very simple, just click on
the TX button to “key” the remote radio.
Then click on the TX button again, to “unkey” the remote radio.
As a visual verification, the audio
waveform & frequency display will change to the color red.
Using the Space Bar to Transmit (TX)
TX Operation by pressing the space bar is possible but it must be “bound” to the TX button. The
space bar is not always “bound” to the TX button. To “bind” the space bar to the TX button, you
must first click on the TX button. As long as the TX button is the last item you have clicked on
the Space Bar will be “bound”.
For example, if you click on the chats box, you must click on the TX button again to “bind” the
space bar.
*Note, the space bar can be bound to any of the buttons, not just the TX button. It also can be
bound to other visual items that use it, such as the number pad, chat box, etc.
Advanced Features (Buttons, Dropdowns, Sliders, Messages, Statuses)
Every radio has different features and options available. All the features of a radio have been
organized into 5 categories; Buttons, Dropdowns, Sliders, Messages and Statuses.
Buttons
*Note, this part of the documentation has not been written.
Dropdowns
*Note, this part of the documentation has not been written.
Sliders
*Note, this part of the documentation has not been written.
Messages
Messages available can include; DTMF, CW, DATA, DECODER
Statuses
*Note, this part of the documentation has not been written.


