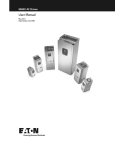
1
700S High Performance
AC Drive
and
700H Adjustable Frequency
AC Drive
Frame 12
450-560kW, 400V
700-900HP, 480V
630-800kW, 690V
700-900HP 600V
Hardware Service Manual
Important User Information
Solid state equipment has operational characteristics differing from those of electromechanical equipment. Safety
Guidelines for the Application, Installation and Maintenance of Solid State Controls (Publication SGI-1.1 available
from your local Rockwell Automation sales office or online at www.rockwellautomation.com/literature) describes
some important differences between solid state equipment and hard-wired electromechanical devices. Because of
this difference, and also because of the wide variety of uses for solid state equipment, all persons responsible for
applying this equipment must satisfy themselves that each intended application of this equipment is acceptable.
In no event will Rockwell Automation, Inc. be responsible or liable for indirect or consequential damages resulting
from the use or application of this equipment.
The examples and diagrams in this manual are included solely for illustrative purposes. Because of the many
variables and requirements associated with any particular installation, Rockwell Automation, Inc. cannot assume
responsibility or liability for actual use based on the examples and diagrams.
No patent liability is assumed by Rockwell Automation, Inc. with respect to use of information, circuits, equipment,
or software described in this manual.
Reproduction of the contents of this manual, in whole or in part, without written permission of Rockwell
Automation, Inc. is prohibited.
Throughout this manual, when necessary we use notes to make you aware of safety considerations.
!
WARNING: Identifies information about practices or
circumstances that can cause an explosion in a hazardous
environment, which may lead to personal injury or death, property
damage, or economic loss.
Important: Identifies information that is critical for successful application and understanding of the product.
!
ATTENTION: Identifies information about practices or
circumstances that can lead to personal injury or death, property
damage, or economic loss. Attentions help you:
• identify a hazard
• avoid the hazard
• recognize the consequences
Shock Hazard labels may be located on or inside the equipment
(e.g., drive or motor) to alert people that dangerous voltage may be
present.
Burn Hazard labels may be located on or inside the equipment
(e.g., drive or motor) to alert people that surfaces may be at
dangerous temperatures.
PowerFlex is a registered trademark of Rockwell Automation, Inc.
DriveExplorer, DriveExecutive, and SCANport are trademarks of Rockwell Automation, Inc.
PLC is a registered trademark of Rockwell Automation, Inc.
Table of Contents
Important User Information . . . . . . . . . . . . . . . . . . . . . . . . . . . . . . . . . . . . . . . . . . . . . . . 1-2
Preface
Who Should Use this Manual? . . . . . . . . . . . . . . . . . . . . . . . . . . . . . . . . . . . . . . . . . . . . .
What is in this Manual . . . . . . . . . . . . . . . . . . . . . . . . . . . . . . . . . . . . . . . . . . . . . . . . . . .
What is Not in this Manual . . . . . . . . . . . . . . . . . . . . . . . . . . . . . . . . . . . . . . . . . . . . . . . .
Reference Materials . . . . . . . . . . . . . . . . . . . . . . . . . . . . . . . . . . . . . . . . . . . . . . . . . . . . .
Understanding Manual Conventions . . . . . . . . . . . . . . . . . . . . . . . . . . . . . . . . . . . . . . . . .
Additional Support Available on Internet . . . . . . . . . . . . . . . . . . . . . . . . . . . . . . . . . . . . .
General Precautions . . . . . . . . . . . . . . . . . . . . . . . . . . . . . . . . . . . . . . . . . . . . . . . . . . . . .
P-1
P-1
P-1
P-2
P-2
P-3
P-4
Chapter 1
Creating Fault Reports . . . . . . . . . . . . . . . . . . . . . . . . . . . . . . . . . . . . . . . . . . . . . . . . . . .
Addressing 700S Hardware Faults . . . . . . . . . . . . . . . . . . . . . . . . . . . . . . . . . . . . . . . . . .
Addressing 700H Hardware Faults . . . . . . . . . . . . . . . . . . . . . . . . . . . . . . . . . . . . . . . . . .
Diagnostic Procedures by Symptom . . . . . . . . . . . . . . . . . . . . . . . . . . . . . . . . . . . . . . . . .
1-2
1-2
1-4
1-5
Chapter 2
Viewing the 700H Diagnostic LED . . . . . . . . . . . . . . . . . . . . . . . . . . . . . . . . . . . . . . . . . 2-1
Viewing the 700S Diagnostic LEDs . . . . . . . . . . . . . . . . . . . . . . . . . . . . . . . . . . . . . . . . . 2-2
Performing Visual Inspections . . . . . . . . . . . . . . . . . . . . . . . . . . . . . . . . . . . . . . . . . . . . . 2-4
Conducting Forward and Reverse Biased Diode Tests for Major Power Components. . . 2-4
Checking Fiber Optic Connections to the Gate Driver Boards . . . . . . . . . . . . . . . . . . . . . 2-8
Conducting Gate Driver Board Measurements . . . . . . . . . . . . . . . . . . . . . . . . . . . . . . . . . 2-8
Checking Rectifying Module (on AC Input Drives Only) . . . . . . . . . . . . . . . . . . . . . . . 2-14
Checking the DC Bus Capacitors . . . . . . . . . . . . . . . . . . . . . . . . . . . . . . . . . . . . . . . . . . 2-17
Checking the Main Fan Inverters and Fans . . . . . . . . . . . . . . . . . . . . . . . . . . . . . . . . . . . 2-18
Chapter 3
Torque Specifications . . . . . . . . . . . . . . . . . . . . . . . . . . . . . . . . . . . . . . . . . . . . . . . . . . . . 3-1
Removing Power from the Drive . . . . . . . . . . . . . . . . . . . . . . . . . . . . . . . . . . . . . . . . . . . 3-3
Removing the DPI / HIM Assembly . . . . . . . . . . . . . . . . . . . . . . . . . . . . . . . . . . . . . . . . . 3-5
Removing the 700S Phase II Control Assembly. . . . . . . . . . . . . . . . . . . . . . . . . . . . . . . . 3-6
Removing the 700S High Power Fiber Optic Interface Circuit Board . . . . . . . . . . . . . . . 3-8
Removing the 700S Control Assembly Mounting Plate . . . . . . . . . . . . . . . . . . . . . . . . . 3-10
Removing the 700H I/O Boards and Control Assembly. . . . . . . . . . . . . . . . . . . . . . . . . 3-11
Removing the 700H Star Coupler Board . . . . . . . . . . . . . . . . . . . . . . . . . . . . . . . . . . . . 3-13
Removing the Covers from the Power Structures . . . . . . . . . . . . . . . . . . . . . . . . . . . . . . 3-15
Removing the 700S Voltage Feedback Circuit Board. . . . . . . . . . . . . . . . . . . . . . . . . . . 3-19
Removing the Gate Driver and Adapter Boards . . . . . . . . . . . . . . . . . . . . . . . . . . . . . . . 3-21
Removing the Power Structures from the Drive Enclosure . . . . . . . . . . . . . . . . . . . . . . 3-25
Removing the Main Fans . . . . . . . . . . . . . . . . . . . . . . . . . . . . . . . . . . . . . . . . . . . . . . . . 3-26
Removing the ASIC Boards . . . . . . . . . . . . . . . . . . . . . . . . . . . . . . . . . . . . . . . . . . . . . . 3-27
Removing the Rectifying Boards . . . . . . . . . . . . . . . . . . . . . . . . . . . . . . . . . . . . . . . . . . 3-29
Removing the Left-Side Output Power Modules . . . . . . . . . . . . . . . . . . . . . . . . . . . . . . 3-30
Removing the Right-Side Output Power Modules and Rectifying Modules . . . . . . . . . 3-33
Removing the Fan Inverters . . . . . . . . . . . . . . . . . . . . . . . . . . . . . . . . . . . . . . . . . . . . . . 3-37
Removing the DC Bus Capacitors . . . . . . . . . . . . . . . . . . . . . . . . . . . . . . . . . . . . . . . . . 3-40
Chapter 4
Before Applying Power to the Drive. . . . . . . . . . . . . . . . . . . . . . . . . . . . . . . . . . . . . . . . .
Testing with the External DC Power Supply Without Load (Optional) . . . . . . . . . . . . . .
Testing Without a Motor . . . . . . . . . . . . . . . . . . . . . . . . . . . . . . . . . . . . . . . . . . . . . . . . . .
Performing the Power Circuit Diagnostic Test on a 700S. . . . . . . . . . . . . . . . . . . . . . . . .
Testing With the Motor . . . . . . . . . . . . . . . . . . . . . . . . . . . . . . . . . . . . . . . . . . . . . . . . . . .
4-1
4-2
4-3
4-3
4-4
2
Appendix A
Software Tools . . . . . . . . . . . . . . . . . . . . . . . . . . . . . . . . . . . . . . . . . . . . . . . . . . . . . . . . . . A-1
Service tools. . . . . . . . . . . . . . . . . . . . . . . . . . . . . . . . . . . . . . . . . . . . . . . . . . . . . . . . . . . . A-2
Appendix B
List of Schematic Diagrams. . . . . . . . . . . . . . . . . . . . . . . . . . . . . . . . . . . . . . . . . . . . . . . . B-1
Appendix C
Circuit Board Connections . . . . . . . . . . . . . . . . . . . . . . . . . . . . . . . . . . . . . . . . . . . . . . . . C-1
Hardware Connections. . . . . . . . . . . . . . . . . . . . . . . . . . . . . . . . . . . . . . . . . . . . . . . . . . . C-10
Appendix D
Disassembly/Assembly Diagrams and Spare Parts Numbers . . . . . . . . . . . . . . . . . . . . . . D-1
Preface
Overview
Who Should Use this
Manual?
This manual is intended for qualified service personnel responsible for
troubleshooting and repairing high power PowerFlex 700H and 700S AC
Drives. You should have previous experience with, and basic understanding
of electrical terminology, procedures, required troubleshooting equipment,
equipment protection procedures and methods, and safety precautions.
What is in this Manual
This manual contains hardware service information for Frame 12
PowerFlex 700H and 700S drives only. Verify that you are working on a
Frame 12 drive by checking the data nameplate on the Control Frame. The
frame number is printed just above the serial number.
Cat No.
20D
500 N 0 NNNBNNNN
J
UL Open Type/IP00
540V
250 kW
Normal Duty Power
200 kW
Heavy Duty Power
Input: DC,
462 - 594
DC Voltage Range
Amps
350
Output: 3 Phase, 0 - 320Hz
AC Voltage Range
0 - 400
50 Hz
Base Hz (default)
Continuous Amps
420/500
630/550
1 Min Overload Amps
840/630
2 Sec Overload Amps
MFD. in 1989 on Nov 9
Cat No.
20D
J
300 N 0 NNNBNNNN
UL Open Type/IP00
540V
650V
Normal Duty Power
160 kW
250 kW
Heavy Duty Power
132 kW
200 kW
Input: DC,
DC Voltage Range
462 - 594 583 - 713
Amps
350
350
Output: 3 Phase, 0 - 320Hz
AC Voltage Range
0 - 400
0 - 460
50 Hz
60 Hz
Base Hz (default)
Continuous Amps
300/245
300/245
1 Min Overload Amps
330/368
330/368
2 Sec Overload Amps
450/490
450/490
Series: A
Standard I/O: NONE
Original Firmware No. 2.04
C
UL
Æ
US
LISTED
IND CONT EQ
MFD. in 2005 on Feb 29
Serial Number: 2622381652
MADE IN THE USA (FAC 1B)
2622381652
MADE IN THE USA (FAC 1B)
What is Not in this Manual
Series: A
650V
450 kW
500 kW
Standard I/O: NONE
Original Firmware No. 2.04
Frame #: 10
C
583 - 713
350
UL
Æ
US
LISTED
IND CONT EQ
9D42
0 - 460
60 Hz
420/500
630/550
840/630
Frame #: 12
Serial Number: 2622381652
2622381652
This manual does not contain in depth fault information for troubleshooting.
That information is available in publications 20C-PM001, Programming
Manual - PowerFlex 700H Adjustable Frequency AC Drive, PFLEX-IN006,
Installation Instructions - PowerFlex 700S and 700H Adjustable Frequency
AC Drive and 20D-UM006, User Manual - PowerFlex 700S with Phase II
Control High Performance AC Drive.
P-2
Overview
Reference Materials
Allen-Bradley publications are available on the internet at
www.rockwellautomation.com/literature.
The following publications provide general drive information.
Title
Wiring and Grounding Guide, (PWM) AC Drives
Safety Guidelines for the Application, Installation and Maintenance of
Solid State Control
A Global Reference Guide for Reading Schematic Diagrams
Guarding Against Electrostatic Damage
Publication
DRIVES-IN001…
SGI-1.1
0100-2.10
8000-4.5.2
The following publications provide specific PowerFlex drive information.
Title
Programming Manual - PowerFlex 700H AC Drive
User Manual - PowerFlex 700S with Phase II Control High
Performance Drive
Installation Instructions - Hi-Resolution Feedback Option Card for
PowerFlex 700S Drives
Installation Instructions - Multi Device Interface Option for PowerFlex
700S Drives
Installation Instructions - Main Control Board PowerFlex 700S Drives
Installation Instructions - Control Assembly Cover for PowerFlex 700S
Drives
Installation Instructions - PowerFlex 700S /700H High Power
Maintenance Stand
Installation Instructions - PowerFlex 700S and 700H Drives
Reference Manual - PowerFlex 700S with Phase II Control Adjustable
Frequency Drives
Publication
20C-PM001…
20D-UM006…
20D-IN001…
20D-IN004…
20D-IN005…
20D-IN006…
20D-IN014…
PFLEX-IN006…
PFLEX-RM003…
The following publications provide information that is necessary when
applying the DriveLogix Controller.
Title
User Manual - DriveLogix System
Installation Instructions - DriveLogix Controller
Installation Instructions - Memory Expansion for DriveLogix Controller
ControlNet Daughtercard Installation Instructions
ControlNet Daughtercard Installation Instructions
Understanding Manual
Conventions
Publication
20D-UM002…
20D-IN002…
20D-IN007…
1788-IN002…
1788-IN005…
Terms
The following words are used throughout the manual to describe an action:
Word
Can
Cannot
May
Must
Shall
Should
Should Not
Meaning
Possible, able to do something
Not possible, not able to do something
Permitted, allowed
Unavoidable, you must do this
Required and necessary
Recommended
Not recommended
Overview
P-3
Cross References
“Figure 2.2 on page 2-6” is a cross reference to figure 2.2 on page 5 of
Chapter 2.
“Figure C.1 on page C-2” is a cross reference to figure C.1 on page 2 of
Appendix C.
Additional Support
Available on Internet
Additional troubleshooting information and software tools are available on
the Allen-Bradley Drives Support Website (http://www.ab.com/support/
abdrives/).
P-4
Overview
General Precautions
Class 1 LED Product
!
ATTENTION: Hazard of permanent eye damage exists when
using optical transmission equipment. This product emits intense
light and invisible radiation. Do not look into module ports or
fiber-optic cable connectors.
!
ATTENTION: The sheet metal cover and mounting screws on
the ASIC Board located on the power structure are energized at
(-) DC bus potential high voltage. Risk of electrical shock, injury,
or death exists if someone comes into contact with the assembly.
!
!
!
!
!
ATTENTION: This drive contains ESD (Electrostatic
Discharge) sensitive parts and assemblies. Static control
precautions are required when installing, testing, servicing or
repairing this assembly. Component damage may result if ESD
control procedures are not followed. If you are not familiar with
static control procedures, reference A-B publication 8000-4.5.2,
“Guarding Against Electrostatic Damage” or any other applicable
ESD protection handbook.
ATTENTION: An incorrectly applied or installed drive can
result in component damage or a reduction in product life. Wiring
or application errors, such as, undersizing the motor, incorrect or
inadequate AC supply, or excessive ambient temperatures may
result in malfunction of the system.
ATTENTION: Only qualified personnel familiar with high
power PowerFlex 700S and 700H Drives and associated
machinery should plan or implement the installation, start-up and
subsequent maintenance of the system. Failure to comply may
result in personal injury and/or equipment damage.
ATTENTION: To avoid an electric shock hazard, verify that the
voltage on the bus capacitors has discharged before performing
any work on the drive. Measure the DC bus voltage at the DC+ &
DC- terminals. The voltage must be zero.
ATTENTION: Potentially fatal voltages may result from
improper usage of an oscilloscope and other test equipment. The
oscilloscope chassis may be at a potentially fatal voltage if not
properly grounded. If an oscilloscope is used to measure high
voltage waveforms, use only a dual channel oscilloscope in the
differential mode with X 100 probes. It is recommended that the
oscilloscope be used in the A minus B Quasi-differential mode
with the oscilloscope chassis correctly grounded to an earth
ground.
Chapter
1
Troubleshooting and Error Codes
!
ATTENTION: To avoid an electric shock hazard, ensure that all
power to the drive has been removed before performing the
following.
!
ATTENTION: To avoid an electric shock hazard, verify that the
voltage on the bus capacitors has discharged before performing
any work on the drive. Measure the DC bus voltage at the DC+ &
DC- terminals. The voltage must be zero.
!
ATTENTION: HOT surfaces can cause severe burns. Do not
touch the heatsink surface during operation of the drive. After
disconnecting power allow time for cooling.
!
ATTENTION: This drive contains ESD (Electrostatic
Discharge) sensitive parts and assemblies. Static control
precautions are required when installing, testing, servicing or
repairing this assembly. Component damage may result if ESD
control procedures are not followed. If you are not familiar with
static control procedures, reference A-B publication 8000-4.5.2,
“Guarding Against Electrostatic Damage” or any other
applicable ESD protection handbook.
1-2
Troubleshooting and Error Codes
Creating Fault Reports
Clear and complete fault reports are critical for analysis and repair of
modules returned to the factory.
At a minimum, perform and record the following:
• Record the contents of the fault queue (faults and times of occurrence)
• Make record of any burn marks on the rectifying module, DC-capacitors,
inverter bridge, charging resistors, balancing/precharging resistors,
printed circuit boards, bus bars, cabling and fiber-optic cabling
• Make record of any liquid and condensation marks on printed circuit
boards, components and mechanical parts
• Make record of the amount of dust and other additional particles on drive
and drive components
• Make record of any mechanical damage to the drive and drive
components
• Record the size and type of main fuses
• Record any other important marks and damage
Addressing 700S Hardware
Faults
Fault
HiHp In PhaseLs
No.
65
HiHp Bus Com Dly
66
HiHp Bus Link LS
67
HiHp Bus CRC Er
68
HiHp Bus WtchDog
69
HiHp Fan Fdbk Ls
70
Description
AC Input Phase Loss - AC voltage is
not present on one or two input
phases.
Action (if appropriate)
1. Check for voltage on each
input phase.
2. Check the status of each
external input fuses.
Bus Communication Time Delay - the Check fiber-optic connections
processor has not received proper
between the Power Interface
periodic feedback information.
Circuit Board and Voltage
Feedback Circuit Board.
Bus Communication Link Loss - bus Check fiber-optic connections
communication between the Power
between the Power Interface
Interface Circuit Board and Voltage
Circuit Board and Voltage
Feedback Circuit Board has halted. Feedback Circuit Board.
Bus Communication CRC Error - too Check fiber-optic connections
many Cycling Ring Checksum (CRC) between the Power Interface
Circuit Board and Voltage
errors have occurred in the
Feedback Circuit Board.
communication bus.
Wait five minutes before
A fast power cycle may cause the
700S Main Control Board to attempt re-energizing the drive.
to communicate with the ASIC Board
before the ASIC Board is energized.
Bus Communication Watchdog Error - 1. Check fiber-optic
connections between the
communication has halted in the
communication bus, causing the
Power Interface Circuit Board
watch dog timer to expire.
and Voltage Feedback Circuit
Board.
2. Check connections between
the Main Control Board and
the Power Interface Circuit
Board.
3. Replace the Voltage
Feedback Circuit Board.
4. Replace the Power Interface
Circuit Board.
5. Replace the Main Control
Board.
Fan Feedback Loss - a fan feedback 1. Check the main cooling fan.
signal has been lost.
2. Check the Main Control
Board cooling fan.
Troubleshooting and Error Codes
Fault
HiHp Drv OvrLoad
No.
71
Description
Drive Overload - the circuit board on
the Power Module has detected an
overload.
HiHp PwrBd PrcEr
72
Power Board Processor Error - a
microprocessor on the Power Board
has detected a communication error.
HiHp PrChrg Cntc
73
HiHp PwrEE Error
74
Precharge Contactor Fault - proper
contactor feedback has not occurred.
The precharge contactor has probably
failed to pick up or the feedback signal
has failed. This fault only applies to
DC input drives.
Power EEPROM Error - the rating of
the drive and data in the Power
EEPROM on the Power Board do not
match.
Power Board Over-Temperature temperature of the Power Board on
has exceeded 85° C.
(High Horse Power Star-coupler board
frame 12 drives only) The left side and
right side inverter units have different
current ratings, or the ASIC on power
board is not functioning.
(High Horse Power Star-coupler board
- frame 12 drives only) The output
current between the left side and right
side inverter units are unbalanced
(20% of current feedback rating, e.g.
184A = 920A * 0.2).
(High Horse Power Star-coupler board
- frame 12 drives only) The bus
voltage for the left and right side
inverter units is unbalanced (6% of
normal bus voltage, e.g. 41Vdc =
675Vdc * 0.06).
HiHP PwrBd OTemp 75
HiHP HardwareVer
76
HiHP CurrUnblnce
77
HiHP VoltUnblnce
78
1-3
Action (if appropriate)
Measure output current of the
drive. If the level is ever greater
than the maximum drive rated
output current level reduce the
load. If the levels are always
well below the drive rated
levels, then replace the power
module.
1. Check fiber-optic
connections between the
Power Interface Circuit Board
and Voltage Feedback Circuit
Board.
2. Check connections between
the Main Control Board and
the Power Interface Circuit
Board.
3. Replace the Voltage
Feedback Circuit Board
4. Replace the Power Interface
Circuit Board.
5. Replace the Main Control
Board.
• Check precharge circuit
wiring.
• Check for loose connections
on X50 terminal block and/or
the X9 and X15 connectors
on the ASIC Board.
Replace output power module
or program a new power board.
Check the main cooling fan and
fan power supply, replace if
necessary.
Check the version of each
inverter (left and right units),
then replace the units in pairs.
Check motor wiring for each
unit.
Check input power and wiring
for each unit.
1-4
Troubleshooting and Error Codes
Addressing 700H Hardware
Faults
Name
Auxiliary In
Power Loss
No.
2
3
UnderVoltage
4
OverVoltage
5
Input Phase
17
OutPhasMissng
21
Ground Fault
13
InverterFault
14
System Fault
10
Load Loss
15
Precharge Error
31
Power Unit
70
Description
Auxiliary input interlock is open.
DC bus voltage remained below
parameter 186 [Power Loss Volts] for
longer than parameter 185 [Power
Loss Time]. Enable/Disable with
parameter 238 [Fault Config 1]. For
more information refer to publication
20C-PM001, Programming Manual PowerFlex 700H.
DC bus voltage fell below the
minimum value of 333V for 400/480V
drives and 461V for 600/ 690V drives.
Enable/Disable with parameter 238
[Fault Config 1]. For more information
refer to publication 20C-PM001,
Programming Manual - PowerFlex
700H.
DC bus voltage exceeded maximum
value.
Action (if appropriate)
Check remote wiring.
Monitor the incoming AC line for
low voltage or line power
interruption.
Monitor the incoming AC line for
low voltage or power
interruption.
Monitor the AC line for high line
voltage or transient conditions.
Bus overvoltage can also be
caused by motor regeneration.
Extend the decel time or install
and external dynamic brake
option.
One input line phase missing.
Check user-supplied fuses
Check AC input line voltage.
Zero current in one output motor
Check motor wiring.
phase.
Check motor for open phase.
A current path to earth ground greater Check the motor and external
than 25% of drive rating. Ground fault wiring to the drive output
level is 50% of the drive's heavy duty terminals for a grounded
condition.
current rating. The current must
appear for 800ms before the drive will
fault.
Hardware problem in the power
Cycle power.
structure.
Replace drive.
Hardware problem exists in the power Cycle power.
structure.
Replace drive.
Do not use this fault in 700H
Check that parameter 238
applications
[Fault Config 1] / bit 0 “Power
Loss” and parameter 259
[Alarm Config 1] / bit 13 “Load
Loss” are set to zero.
The precharge function has failed to Verify the value in parameter
complete within 30 seconds (default) 410 [PreChrg TimeOut]
Verify the bit value in parameter
of the precharge request. The
precharge time out is configurable by 411 [PreChrg Control] / bit 01
“PreChrg Enable”.
Par 410 [PreChrg TimeOut]
A precharge request is initiated when
the DC Bus voltage is above the
Undervoltage Trip level and the
precharge input is high (the
requirement for the precharge being
high can be bypassed by setting Par
411 [PreChrg Control] / bit 01
“PreChrg Enable” to be off.
One or more of the output transistors Clear fault.
were operating in the active region
instead of desaturation. This can be
caused by excessive transistor current
or insufficient base drive voltage.
Troubleshooting and Error Codes
Diagnostic Procedures by
Symptom
1-5
The following charts list drive symptoms, symptom descriptions and
recommended actions.
Blown Input Fuses
Use this procedure when a drive clears any of its external circuit breaker or
power fuses:
Disconnect Motor
Leads
Perform Forward
Diode Tests on
Rectifying Module
Rectifying
Module
OK?
No
Replace
Rectifying
Module
Power
Modules
OK?
No
Replace
Power
Modules
Capacitors
OK?
No
Replace
Capacitors
Motor and
Lead Resistances
> 1 Mohm?
No
Remedy Motor
and Lead
Problems
Are There
Any Line to
Load Shorts?
Yes
Replace
AC
Choke
Yes
Perform Forward
Diode Tests on
Output Power
Modules
Yes
Examine Bus
Capacitors for
Charring and
Damaged Reliefs
Yes
Check Motor and
Lead Resistances
at 1000V
Yes
Disconnect AC
Choke from
Rectifying Module
No
Are There
Any Line to
Line Shorts?
No
Yes
Reconnect
AC
Choke
Reconnect
Motor
Leads
1-6
Troubleshooting and Error Codes
No Output Voltage
Use this procedure when there is no voltage present at the drive output
terminals, even though the drive indicates the motor is running:
DC Bus
Voltage within
Specification?
Measure DC Bus
Voltage
Perform forward
diode tests on
Rectifying Module
No
Rectifying
Module OK?
No
Replace Rectifying
Module
No
Replace
Capacitors
Yes
Examine Bus
Capacitors for
Charring and
Damaged Reliefs
Yes
Capacitors
OK?
Yes
Measure Power
Supply Voltages
Voltages within
Specification?
Replace Power
Supply
No
Yes
Check Board
Connections
Does Drive
Run?
No
Does Drive
Run?
Replace Main
Control Board
No
Replace Power
Interface Board
(on 700S)
Does Drive
Run?
No
Replace Voltage
Feedback Board
(on 700S)
Troubleshooting and Error Codes
1-7
No HIM Display
Use this procedure when the HIM does not function:
Check HIM
Connection
and Seating
Properly
Connected?
No
Reseat or
reconnect
HIM
No
Perform forward
diode tests on
Rectifying Module
Yes
Measure DC Bus
Voltage
DC Bus
Voltage within
Specification?
Rectifying
Module OK?
No
Replace Rectifying
Module
No
Replace
Capacitors
Yes
Examine Bus
Capacitors for
Charring and
Damaged Reliefs
Yes
Capacitors
OK?
Yes
Yes
Measure Power
Supply on X4 of
DPI Circuit Board
Voltage
Equal 12V dc?
Replace Power
Interface Board
(on 700S)
No
Yes
Replace Output
Power Module
(on 700H)
Check DPI and
Power Supply
Connections
Does HIM
Function?
No
Replace HIM
1-8
Troubleshooting and Error Codes
Over-Temperature Faults
Use this procedure to troubleshoot drive over-temperature faults (14 - Inv
Otemp Pend and 15 - Inv Otemp Trip in 700S or 8 - Heatsink OvrTemp and
9 - Trnsistr OvrTemp in 700H):
Check Surrounding
Air Temperature
Temperature
Exceeds
Specification?
Yes
Provide
Additional Airflow
or Air Conditioning
Current
Exceeds
Specification?
Yes
Reduce Load or
Procure a Drive
With a Higher
Rating
Frequency Too
High for Lead Length
and Surrounding
Temp?
Yes
Lower PWM
Frequency
Proper Space
At Inlet?
No
Remedy
Spacing at
Inlet
Yes
Remove
Air Flow
Blockages
No
Check Motor
Current and Load
Levels
No
Check PWM
Frequency
No
Check Fans and
Air Flow
Through the Drive
Yes
Airlflow
Blockages?
No
Fans
Running
Properly?
Yes
Power Voltage
Equals Bus
Voltage?
No
Check Fan Inverter
Fuses (F1 and F2)
Connection
Good?
No
Repair
Connection
Output Equals
50 Hz / 220V rms?
No
Replace
Fan Inverter(s)
Fan Motor has
Open or Short
Circuits?
Yes
Replace
Fan Motor(s)
No
Check Power
Voltage on Fan
Inverters
Yes
Check Connection
Between ASIC
Board and Fan
Inverters
Yes
Check Fan
Inverter Outputs
on X1, X4 and X5
Yes
Check Fan Motors
for Short and
Open Circuits
No
Contact
Allen-Bradley
Drives
Technical
Support
Chapter
2
Component Test Procedures
!
ATTENTION: To avoid an electric shock hazard, ensure that all
power to the drive has been removed before performing the
following.
!
ATTENTION: To avoid an electric shock hazard, verify that the
voltage on the bus capacitors has discharged before performing
any work on the drive. Measure the DC bus voltage at the DC+ &
DC- terminals. The voltage must be zero.
!
ATTENTION: HOT surfaces can cause severe burns. Do not
touch the heatsink surface during operation of the drive. After
disconnecting power allow time for cooling.
!
Viewing the 700H Diagnostic
LED
ATTENTION: This drive contains ESD (Electrostatic
Discharge) sensitive parts and assemblies. Static control
precautions are required when installing, testing, servicing or
repairing this assembly. Component damage may result if ESD
control procedures are not followed. If you are not familiar with
static control procedures, reference A-B publication 8000-4.5.2,
“Guarding Against Electrostatic Damage” or any other
applicable ESD protection handbook.
The Control Assembly on 700H drives contains a diagnostic LED which is
visible through the cover of the Control Assembly. the Control Assembly is
located in the upper, left-hand drive enclosure.
!
ATTENTION: The Control Assembly LED is only operational
when the drive is energized, and only visible with the door of the
drive enclosure is open. Servicing energized equipment can be
hazardous. Severe injury or death can result from electrical
shock, burn or unintended actuation of controlled equipment.
Follow Safety related practices of NFPA 70E, ELECTRICAL
SAFETY FOR EMPLOYEE WORKPLACES. DO NOT work
alone on energized equipment!
2-2
Component Test Procedures
LED visible through
this hole
LED
Steady
Flashing Quickly
Flashing Slowly
Viewing the 700S Diagnostic
LEDs
!
Indication
The drive is operational and has
no faults
• Switching power supply
overload
• Rectifier Board fault
• Fan or fan inverter fault
• Brake Chopper fault
• Fiber Optic Adapter Board Fault
Bad connection between circuit
boards, check all connections
The PowerFlex 700S contains a Run LED, controller LEDs, and SynchLink
LEDs. These LEDs are only operational when the drive is energized and are
only visible when the drive door is open. The status of these LEDs can also
be viewed from the HIM or from an application program (e.g.,
DriveExplorer™) in parameter 554 [LED Status]. This feature is only
available with DriveLogix version 15.03 or later.
ATTENTION: The RUN LED and the controller LEDs are only operational when the drive is energized.
Servicing energized equipment can be hazardous. Severe injury or death can result from electrical shock, burn
or unintended actuation of controlled equipment. Follow Safety related practices of NFPA 70E, ELECTRICAL
SAFETY FOR EMPLOYEE WORKPLACES. DO NOT work alone on energized equipment!
Component Test Procedures
2-3
➊
➋
➌
Table C Drive Status Indicator Descriptions
#
Color
State
Description
➊ PWR
Name
Green
Steady
Illuminates when power is applied to the drive.
➋ STS
Green
Flashing
Steady
Flashing
(Power)
DRIVE
Control Assembly
Communications
Control
Power Structure
(Status)
➌
PORT
MOD
NET A
NET B
(1)
SYNCHLINK Green
ENABLE
(1)
Drive ready, but not running & no faults are present.
Drive running, no faults are present.
Yellow
When running, a type 2 (non-configurable) alarm condition
exists, drive continues to run. When stopped, a start inhibit
exists and the drive cannot be started.
Steady
A type 1 (user configurable) alarm condition exists, but
drive continues to run.
Red
Flashing
A fault has occurred.
Steady
A non-resettable fault has occurred.
Red /
Flashing
The drive is in flash recovery mode. The only operation
Yellow Alternately permitted is flash upgrade.
Refer to the
Status of DPI port internal communications (if present).
Communication
Status of communications module (when installed).
Adapter User Manual Status of network (if connected).
Status of secondary network (if connected).
Steady
Green
Red
Flashing
Flashing
Green
Green
On
Off
The module is configured as the time keeper.
or
The module is configured as a follower and
synchronization is complete.
The follower(s) are not synchronized with the time keeper.
The module is configured as a time master on SynchLink
and has received time information from another time
master on SynchLink.
The drive’s enable input is high.
The drive’s enable input is low.
SynchLink LEDS are located on the SynchLink daughtercard on the main circuit board in the control cassette.
2-4
Component Test Procedures
Performing Visual Inspections Visually inspect the cooling tunnels and power structures before energizing
the drive.
Inspecting the Cooling Tunnels
1. Remove the main cooling fans from the bottom of the power structures.
Refer to Removing the Main Fans on page 3-26.
2. Inspect the tunnels. Clean the heatsinks and tunnels if necessary.
Inspecting the Power Structures
1. Remove the covers from the power structures. Refer to Removing the
Covers from the Power Structures on page 3-15.
2. Check components for burn marks, breakage or foil delamination on
circuit boards. Check all the boards on the power structures, including
those on the Output Power Modules and the Rectifying Modules (if
present).
Replace any of these components without further testing if they show
evidence of burn marks, breakage or foil delamination.
Conducting Forward and
Reverse Biased Diode Tests
for Major Power Components
A forward biased diode test checks the semiconductor junctions between
the terminals and measures the voltage drop across those junctions. To pass
each test, the meter must display a voltage near 0.5V. If the test finds a
short, the meter will display “.000.” If the test finds an open circuit or
reversed polarity, the meter will display “.0L” (zero load).
A reverse biased diode test should find an open circuit, and the meter should
display “.0L” (zero load).
-
+
~.0L
~0.5V
+
Forward biased test
on PN-junction
Reverse biased test
on PN-junction
Component Test Procedures
2-5
1. Remove power from the drive. Refer to Removing Power from the
Drive on page 3-3.
2. Disconnect all motor leads from the drive.
3. Conduct forward and reverse biased diode tests on the Rectifying
Modules (if present).
Figure 2.1 Measurement Points for Forward and Reverse Diode Tests
DC- DC+
DC- DC+
Cat No.
FIELD INSTALLED OPTIONS:
DANGER
DC BUS CONDUCTORS AND CAPACITORS
OPERATE AT HIGH VOLTAGE. REMOVE POWER
AND WAIT 5 MINUTES BEFORE SERVICING
1U/T1
2V/T2
1234567890-*
1V/T2
DANGER
DC BUS CONDUCTORS AND CAPACITORS
OPERATE AT HIGH VOLTAGE. REMOVE POWER
AND WAIT 5 MINUTES BEFORE SERVICING
1W/T3
2U/T1
2W/T3
1L1
1L2
1L3
2L1
2L2
2L3
Power Structure #1
Power Structure #2
Table 2.A Forward Biased Diode Tests on Rectifying Module for Power Structure #1
Meter Leads
+
DC+/R+(1) 1L1
DC+/R+
1L2
DC+/R+
1L3
1L1
DC1L2
DC1L3
DC(1)
Nominal meter reading
Meter should beep once and value
should gradually rise to about 0.5V
If the drive does not contain the brake chopper option, the DC+/R+
terminal will be labeled DC+.
2-6
Component Test Procedures
Table 2.B Forward Biased Diode Tests on Rectifying Module for Power Structure #2
Meter Leads
+
DC+/R+(1) 2L1
DC+/R+
2L2
DC+/R+
2L3
2L1
DC2L2
DC2L3
DC(1)
Nominal meter reading
Meter should beep once and value
should gradually rise to about 0.5V
If the drive does not contain the brake chopper option, the DC+/R+
terminal will be labeled DC+.
Table 2.C Reverse Biased Diode Tests on Rectifying Module for Power Structure #1
Meter Leads
+
1L1
DC1L2
DC1L3
DCDC+/R+(1) 1L1
DC+/R+
1L2
DC+/R+
1L3
(1)
Nominal meter reading
Meter should display “.0L” (zero load)
If the drive does not contain the brake chopper option, the DC+/R+
terminal will be labeled DC+.
Table 2.D Reverse Biased Diode Tests on Rectifying Module for Power Structure #2
Meter Leads
+
2L1
DC2L2
DC2L3
DCDC+/R+(1) 2L1
DC+/R+
2L2
DC+/R+
2L3
(1)
Nominal meter reading
Meter should display “.0L” (zero load)
If the drive does not contain the brake chopper option, the DC+/R+
terminal will be labeled DC+.
If the drive fails any of these measurements, replace the appropriate
Rectifying Module.
4. Conduct forward and reverse biased diode tests on the Output Power
Modules.
Table 2.E Forward Biased Diode Tests on Output Power Modules for Power Structure
#1
Meter Leads
+
Nominal meter reading
DC1U/T1
DC1V/T2
DC1W/T3
Meter should display “.0L” (zero load)
1U/T1
DC+/R+(1)
1V/T2
DC+/R+
1W/T3
DC+/R+
(1)
If the drive does not contain the brake chopper option, the DC+/R+
terminal will be labeled DC+.
Component Test Procedures
2-7
Table 2.F Forward Biased Diode Tests on Output Power Modules for Power Structure
#2
Meter Leads
+
Nominal meter reading
DC2U/T1
DC2V/T2
DC2W/T3
Meter should display “.0L” (zero load)
2U/T1
DC+/R+(1)
2V/T2
DC+/R+
2W/T3
DC+/R+
(1)
If the drive does not contain the brake chopper option, the DC+/R+
terminal will be labeled DC+.
Table 2.G Reverse Biased Diode Tests on Output Power Modules for Power Structure
#1
Meter Leads
+
1U/T1
DC1V/T2
DC1W/T3
DCDC+/R+(1) 1U/T1
DC+/R+
1V/T2
DC+/R+
1W/T3
(1)
Nominal meter reading
Meter should beep once and value
should gradually rise to about 0.5V
If the drive does not contain the brake chopper option, the DC+/R+
terminal will be labeled DC+.
Table 2.H Reverse Biased Diode Tests on Output Power Modules for Power Structure
#2
Meter Leads
+
2U/T1
DC2V/T2
DC2W/T3
DCDC+/R+(1) 2U/T1
DC+/R+
2V/T2
DC+/R+
2W/T3
(1)
Nominal meter reading
Meter should beep once and value
should gradually rise to about 0.5V
If the drive does not contain the brake chopper option, the DC+/R+
terminal will be labeled DC+.
If the drive fails any of these measurements, replace both Output Power
Modules for the appropriate Power Structure.
2-8
Component Test Procedures
Checking Fiber Optic
Connections to the Gate
Driver Boards
Damaged or improperly connected fiber optic cables can cause apparent
Gate Driver Board malfunctions.
1. Remove power from the drive. Refer to Removing Power from the
Drive on page 3-3.
2. Remove the covers from the power structures. Refer to Removing the
Covers from the Power Structures on page 3-15.
3. On Power Structure #1, locate the Gate Driver Board on the front of the
power structure.
H8 H6 H4 H9 H7 H5
X3
X8
X4
X9
X5
X10
X6
X11
X7
X12
X13
X14
X15
X1
Note: There is one Gate Driver Board
for each Power Structure in the drive.
4. Verify the fiber optic cables are properly connected (refer to Figure
B.4 on page B-5, Figure B.5 on page B-6, Figure B.6 on page B-7 or
Figure B.7 on page B-8).
5. Disconnect the cables and inspect them for scratches and cracks.
6. Reconnect the cables, replacing any damaged cables.
7. Repeat steps 3 - 6 for Power Structure #2.
Conducting Gate Driver
Board Measurements
1. Remove power from the drive. Refer to Removing Power from the
Drive on page 3-3.
2. Remove the covers from the power structures. Refer to Removing the
Covers from the Power Structures on page 3-15.
~500 ohms
~500 ohms
~500 ohms
~500 ohms
Gate Interface
for W Low (WL)
in Left Power
Output Module
Gate Interface
for U Low (UL)
in Left Power
Output Module
~500 ohms
~500 ohms
Emitter
Gate Interface for U High (UH)
in Left Power Output Module
~500 ohms
Emitter
Gate Interface for V High (VH)
in Left Power Output Module
~500 ohms
~500 ohms
X5
X6
X4
Emitter
Gate Interface for W High (WH)
in Left Power Output Module
~500 ohms
~500 ohms
X1
X13
Gate Interface
for V Low (VL)
in Left Power
Output Module
~500 ohms
~500 ohms
Gate Interface
for V Low (VL)
in Left Power
Output Module
X15
X14
X6
X12
X11
X5
X7
X9
X10
X4
X8
H8 H6 H4 H9 H7 H5
X8
X3
~500 ohms
X3
X11
X10
X9
~500 ohms
~500 ohms
Gate Interface
for W Low (WL)
in Left Power
Output Module
Gate Interface
for U Low (UL)
in Left Power
Output Module
~500 ohms
~500 ohms
Emitter
~500 ohms
Gate Interface for U High (UH)
in Right Power Output Module
~500 ohms
Emitter
~500 ohms
Gate Interface for V High (VH)
in Right Power Output Module
~500 ohms
Emitter
~500 ohms
Gate Interface for W High (WH)
in Right Power Output Module
~500 ohms
Component Test Procedures
2-9
Gate Interface Resistance
Measure the gate interface resistance for each output power transistor. The
resistance from each gate and collector pin to the branch emitter pin should
be about 500 ohms. If any of the gate interfaces fails this test, replace the
appropriate (left or right) Output Power Module per Power Structure.
2-10
Component Test Procedures
Preparing the Drive for Active Measurements on the Gate Driver Boards
Important: This procedure requires special equipment and training. Only
qualified and trained personnel should perform these
procedures. If you do not have the special equipment, replace
each Gate Driver Board to determine if the boards are
malfunctioning.
1. Remove power from the drive. Refer to Removing Power from the
Drive on page 3-3.
2. Remove the covers from the power structures. Refer to Removing the
Covers from the Power Structures on page 3-15.
3. On Power Structure #1, disconnect the fiber optic cables which connect
the ASIC Board to the Gate Driver Board at the Gate Driver Board
ends.
4. You may want to remove the fuses for the Main Fan Inverters in order to
prevent them from running during these tests.
!
ATTENTION: Running the drive without the Main Fan
Inverters could cause the drive to overheat or fault. Possible
equipment damage could occur. You must replace the fuses
before running the drive.
5. Disconnect the DC+ and DC- wires from the bus bars above the Gate
Driver Board. These wires connect the DC bus to the circuit boards in
the power structure.
!
ATTENTION: Running the drive with the DC bus wires
disconnected will damage the ASIC Boards. You must reconnect
these wires before running the drive.
Component Test Procedures
2-11
6. Connect the minus (-) probe of the multimeter to the DC- wire. Make
sure these DC+ and DC- connections are insulated from all objects.
DC-
DC+
7. Connect the High Voltage DC Test Power Supply to these wires.
!
!
ATTENTION: The sheet metal cover and mounting screws on
the ASIC Boards located on the power structures are energized at
(-) DC bus potential high voltage. Risk of electrical shock,
injury, or death exists if someone comes into contact with the
assembly. Servicing energized equipment can be hazardous.
Severe injury or death can result from electrical shock, burn or
unintended actuation of controlled equipment. Follow Safety
related practices of NFPA 70E, ELECTRICAL SAFETY FOR
EMPLOYEE WORKPLACES. DO NOT work alone on energized
equipment!
ATTENTION: Certain pins in connectors X7 and X12 on the
Gate Driver Boards will be energized at DC bus potential high
voltage. Risk of electrical shock, personal injury or death, property
damage, or economic loss exists if personnel or equipment comes
into contact with these pins.
8. Set the current limit on the High Voltage DC Test Power Supply to less
than or equal to 1A. Energize the Supply and increase its output to the
drive’s nominal DC bus voltage (650V dc for drives with 380-500V ac
input or 775V dc for drives with 600-690V ac input).
2-12
Component Test Procedures
Checking the Opto-Couplers
Class 1 LED Product
!
ATTENTION: Hazard of permanent eye damage exists when
using optical transmission equipment. This product emits intense
light and invisible radiation. Do not look into module ports or
fiber-optic cable connectors.
1. On Power Structure #1, locate the fiber optic receiver which transmits
the signals for W High (WH) gate interface and connector X3 on the
Gate Driver Board. X3 provides the gate interface for the WH output
power transistor in the left-hand Output Power Module.
2. Measure the DC voltage at the WH gate and collector pins on X3 with
respect to DC-. It should be -15V dc.
Should measure -15V dc with respect to DC- with no light in WH cable
Should measure +15V dc with respect to DC- with light in WH cable
X3
Should measure -15V dc with respect to DC- with no light in WH cable
Should measure +15V dc with respect to DC- with light in WH cable
3. While shining an intense light (like a flashlight) into the fiber optic
receiver for the WH cable, measure the DC voltage at the WH gate and
collector pins on X3 with respect to DC-. It should be +15V dc. If the
drive fails any of these tests, replace the fiber optic cable or the Gate
Driver Board.
4. Repeat steps 3 and 4 with connector X4 and the VH cable. X4 provides
the gate interface for the VH output power transistor in the left-hand
Output Power Module. If the drive fails any of these tests, replace the
Gate Driver Board.
5. Repeat steps 3 and 4 with connector X5 and the UH cable. X5 provides
the gate interface for the UH output power transistor in the left-hand
Output Power Module. If the drive fails any of these tests, replace the
Gate Driver Board.
6. Repeat steps 3 and 4 with connector X6 and the cables for WL, VL and
UL. If the drive fails any of these tests, replace the Gate Driver Board.
Should measure -15V dc with respect to DC- with no light in WL cable
Should measure +15V dc with respect to DC- with light in WL cable
Should measure -15V dc with respect to DC- with no light in WL cable
Should measure +15V dc with respect to DC- with light in WL cable
Should measure -15V dc with respect to DC- with no light in UL cable
Should measure +15V dc with respect to DC- with light in UL cable
X6
Should measure -15V dc with respect to DC- with no light in VL cable
Should measure +15V dc with respect to DC- with light in VL cable
Should measure -15V dc with respect to DC- with no light in VL cable
Should measure +15V dc with respect to DC- with light in VL cable
Should measure -15V dc with respect to DC- with no light in UL cable
Should measure +15V dc with respect to DC- with light in UL cable
7. Repeat steps 3 and 4 with connector X8 and the WH cable. X8 provides
the gate interface for the WH output power transistor in the right-hand
Component Test Procedures
2-13
Output Power Module. If the drive fails any of these tests, replace the
Gate Driver Board.
8. Repeat steps 3 and 4 with connector X9 and the VH cable. X9 provides
the gate interface for the VH output power transistor in the right-hand
Output Power Module. If the drive fails any of these tests, replace the
Gate Driver Board.
9. Repeat steps 3 and 4 with connector X10 and the cables for WL, VL
and UL. If the drive fails any of these tests, replace the Gate Driver
Board.
10. Repeat steps 1 - 9 for Power Structure #2.
11. Reconnect the DC+ and DC- wires on the bus bars above the Gate
Driver Board on both Power Structures (Refer to Step 4 on page 2-10).
!
ATTENTION: Running the drive with the DC bus wires
disconnected will damage the ASIC Boards. You must reconnect
these wires before running the drive.
Figure 2.2 Opto-Coupler Checks for Left-Hand Output Power Module
Should measure -15V dc with respect to DC- with no light in WH cable
Should measure +15V dc with respect to DC- with light in WH cable
X3
Should measure -15V dc with respect to DC- with no light in WH cable
Should measure +15V dc with respect to DC- with light in WH cable
Should measure -15V dc with respect to DC- with no light in VH cable
Should measure +15V dc with respect to DC- with light in VH cable
X4
H8 H6 H4 H9 H7 H5
Should measure -15V dc with respect to DC- with no light in VH cable
Should measure +15V dc with respect to DC- with light in VH cable
Should measure -15V dc with respect to DC- with no light in UH cable
Should measure +15V dc with respect to DC- with light in UH cable
X3
X8
X4
X9
X5
X10
X6
X11
X7
X12
X5
Should measure -15V dc with respect to DC- with no light in UH cable
Should measure +15V dc with respect to DC- with light in UH cable
X13
X14
X15
Should measure -15V dc with respect to DC- with no light in WL cable
Should measure +15V dc with respect to DC- with light in WL cable
Should measure -15V dc with respect to DC- with no light in WL cable
Should measure +15V dc with respect to DC- with light in WL cable
Should measure -15V dc with respect to DC- with no light in UL cable
Should measure +15V dc with respect to DC- with light in UL cable
Should measure -15V dc with respect to DC- with no light in UL cable
Should measure +15V dc with respect to DC- with light in UL cable
X1
X6
Should measure -15V dc with respect to DC- with no light in VL cable
Should measure +15V dc with respect to DC- with light in VL cable
Should measure -15V dc with respect to DC- with no light in VL cable
Should measure +15V dc with respect to DC- with light in VL cable
2-14
Component Test Procedures
Figure 2.3 Opto-Coupler Checks for Right-Hand Output Power Module
Should measure -15V dc with respect to DC- with no light in WH cable
Should measure +15V dc with respect to DC- with light in WH cable
X8
Should measure -15V dc with respect to DC- with no light in WH cable
Should measure +15V dc with respect to DC- with light in WH cable
Should measure -15V dc with respect to DC- with no light in VH cable
Should measure +15V dc with respect to DC- with light in VH cable
X9
H8 H6 H4 H9 H7 H5
X3
X8
X4
X9
X5
X10
X6
X11
Should measure -15V dc with respect to DC- with no light in VH cable
Should measure +15V dc with respect to DC- with light in VH cable
Should measure -15V dc with respect to DC- with no light in UH cable
Should measure +15V dc with respect to DC- with light in UH cable
X10
X7
Should measure -15V dc with respect to DC- with no light in UH cable
Should measure +15V dc with respect to DC- with light in UH cable
X12
X13
X14
X15
X1
Should measure -15V dc with respect to DC- with no light in WL cable
Should measure +15V dc with respect to DC- with light in WL cable
X11
Should measure -15V dc with respect to DC- with no light in VL cable
Should measure +15V dc with respect to DC- with light in VL cable
Should measure -15V dc with respect to DC- with no light in WL cable
Should measure +15V dc with respect to DC- with light in WL cable
Should measure -15V dc with respect to DC- with no light in VL cable
Should measure +15V dc with respect to DC- with light in VL cable
Should measure -15V dc with respect to DC- with no light in UL cable
Should measure +15V dc with respect to DC- with light in UL cable
Should measure -15V dc with respect to DC- with no light in UL cable
Should measure +15V dc with respect to DC- with light in UL cable
Checking Rectifying Module Important: This procedure requires special equipment and training. Only
qualified and trained personnel should perform these
(on AC Input Drives Only)
procedures.
1. Remove power from the drive. Refer to Removing Power from the
Drive on page 3-3.
2. Remove the covers from the power structures. Refer to Removing the
Covers from the Power Structures on page 3-15.
3. On Power Structure #1, visually inspect the pre-charging resistors. If
pre-charging resistors are damaged:
A. Replace the Rectifying Module (See Removing the Right-Side
Output Power Modules and Rectifying Modules on page 3-33).
B. Check the capacitors, rectifiers and external connections for
short-circuits. (See Checking the DC Bus Capacitors on page 2-17)
C. Check the Output Power Modules (See Conducting Forward
and Reverse Biased Diode Tests for Major Power Components on
page 2-4).
Component Test Procedures
2-15
4. Verify that the plugs on the cable that connects X13 on the Rectifying
Board to X2 on the ASIC Board are properly seated.
5. Verify that the jumper at X50 on the Rectifying board is in place.
Taking Measurements on the Rectifying Module
6. Disconnect connectors X13, X12, X11 and X10.
7. Perform resistance measurements, using a digital multimeter, on the
points listed in Table 2.I on page 2-15 (on AC Three-Phase drives).
These points are on the back of the X10, X11 and X12 plugs which you
have disconnected from the board. If the Rectifying Module fails any
of these tests, replace it (See Removing the Right-Side Output Power
Modules and Rectifying Modules on page 3-33).
Table 2.I Rectifying Module Resistance Measurements
Measurement points
X10: red to X10: black
X11: red to X11: black
X12: red to X12: black
Resistance
18Ω ± 1Ω
8. Without applying power to X13 verify that there is no resistance
between the following points: J3 and X9, J7 and X9, and J11 and X9.
Refer to Rectifying Board Charge Relay Test Results on page 2-16. If
the Rectifying Module fails any of these tests, replace it (See
Removing the Right-Side Output Power Modules and Rectifying
Modules on page 3-33).
9. Connect the DC Test Power Supply to X13 (positive to pin 5 and
common to pin 1). Raise the output of the DC Test Power Supply to
24V dc.
Important: Power supply polarity is critical during these tests. Reversing
the polarity will damage components on the circuit board.
10. Verify that the voltage and resistance between the following points is
zero: J3 and X10: Pin 1, J7 and X11: Pin 1, and J11 and X12: Pin 1.
Refer to Rectifying Board Charge Relay Test Results on page 2-16. If
the Rectifying Module fails any of these tests, replace it (See
Removing the Right-Side Output Power Modules and Rectifying
Modules on page 3-33).
11. Repeat steps 3 - 10 for Power Structure #2.
2-16
Component Test Procedures
Figure 2.4 Rectifying Board Layout and Measurement Points
Precharging
Resistors
X4
X2
X1
X3
X41
J7
J3
J11
X8
X101
X13
X6
X10
X11
X100
X50
X13: Pin 1
(24V dc Common)
X9
X12
X13: Pin 5
(24V dc Power)
X10: Pin 1
X11: Pin 1
X12: Pin 1
Table 2.J Rectifying Board Charge Relay Test Results
J3
J7
J11
No Power on X13
Meter Leads
+
Results
X9
X9
0Ω
X9
J3
J7
J11
24V dc Power on X13
Meter Leads
+
Results
X10: Pin 1
X11: Pin 1
0Ω / 0V
X12: Pin 1
X9
Component Test Procedures
Checking the DC Bus
Capacitors
2-17
Important: This procedure requires special equipment and training. Only
qualified and trained personnel should perform these
procedures.
These tests require the recommended high voltage DC-power supply.
1. Remove power from the drive. Refer to Removing Power from the
Drive on page 3-3.
2. Remove the covers from the power structures. Refer to Removing the
Covers from the Power Structures on page 3-15.
3. Set the current limit of the DC power supply to less than 50mA.
4. On Power Structure #1, connect the power supply’s DC+ to the drive’s
DC+ terminal and the power supply’s DC- to the drive’s DC- terminal.
5. Set the power supply voltage setting to zero.
6. Switch on the external DC power supply.
7. Slowly increase the external DC power supply output voltage to the
drive’s nominal DC bus voltage (650V dc for drives with 380-500V ac
input or 775V dc for drives with 600-690V ac input).
8. Monitor the current while testing.
9. Leakage current should be less than 3mA when voltage has stabilized.
10. Abort test if current leakage is significantly higher when voltage has
stabilized.
11. Decrease the DC power supply output voltage to zero. Wait until DC
bus voltage has decreased to zero. Switch off the external DC power
supply.
12. As a precaution, use a resistor to discharge each capacitor after testing.
Use a resistor with the proper resistance and power handling capability
for the discharge current.
13. If any capacitor has failed. Replace all the capacitors in the same series
connection (See Removing the DC Bus Capacitors on page 3-40).
14. Repeat steps 3 - 13 for Power Structure #2.
2-18
Component Test Procedures
Checking the Main Fan
Inverters and Fans
Checking Inverter LEDs
A frame 12 drive has four fans and four fan inverters; two fans and two fan
inverters per Power Structure. Each fan inverter has a red and a green
diagnostic LED.
!
LED
Red
Steady
Off
Flashing
ATTENTION: The inverter LEDs are only operational when
the drive is energized, and only visible with the covers removed
from the power structure. Servicing energized equipment can be
hazardous. Severe injury or death can result from electrical
shock, burn or unintended actuation of controlled equipment.
Follow Safety related practices of NFPA 70E, ELECTRICAL
SAFETY FOR EMPLOYEE WORKPLACES. DO NOT work
alone on energized equipment!
Green
Steady
Flashing
Steady
Indication
Inverter Idle
Inverter Running
Inverter Faulted
or
No Control from ASIC Board
Checking Fan Inverter Fuses
A pair of fuses (F1 and F2) feed DC Bus power to both inverters on each
Power Structure. Locate these fuses and, using a multi-meter, verify that
they are not open.
Isolating a Faulty Fan Inverter
The ASIC Board (one on each of the Power Structures) controls a pair of
fan inverters. A cable connects X11 on the ASIC Board to X8 on the
left-hand fan inverter. Another cable connects X3 of the left-hand fan
inverter to X8 on the right-hand fan inverter. A jumper terminates X3 on the
right-hand fan inverter. Refer to Figure B.8 on page B-9. Use the following
procedure to isolate a faulty fan inverter if the fans are not running:
1. On Power Structure #1, disconnect the cable from X3 of the left-hand
inverter.
2. Remove the jumper from X3 of the right-hand inverter, and connect it to
X3 of the left-hand inverter.
3. Energize the drive. If the left-hand fan runs, then the right-hand fan
inverter is faulty.
4. Repeat steps 1 - 3 for Power Structure #2.
Component Test Procedures
2-19
Checking the Main Fan Motors
1. Remove power from the drive. Refer to Removing Power from the
Drive on page 3-3.
2. Remove the covers from the power structures. Refer to Removing the
Covers from the Power Structures on page 3-15.
3. On Power Structure #1, disconnect the left-hand fan motor from its
inverter.
4. Measure the resistance of the fan windings. If the resulting
measurements are not similar to those in Table 2.K below, replace the
fan (See Removing the Main Fans on page 3-26).
Table 2.K Correct Fan Measurements
Connection Wires
Black-Brown
Brown-Blue
Blue-Black
Resistance to ground
Resistance ± 5%
60
26
34
.0L (Zero Load)
5. Reconnect the left-hand fan motor to its inverter.
6. Repeat steps 3 and 4 for the right-hand fan motor.
7. Repeat steps 3 - 6 for Power Structure #2.
2-20
Notes:
Component Test Procedures
Chapter
3
Access Procedures
!
ATTENTION: To avoid an electric shock hazard, ensure that all
power to the drive has been removed before performing the
following.
!
ATTENTION: To avoid an electric shock hazard, verify that the
voltage on the bus capacitors has discharged before performing
any work on the drive. Measure the DC bus voltage at the DC+ &
DC- terminals. The voltage must be zero.
!
!
ATTENTION: HOT surfaces can cause severe burns. Do not
touch the heatsink surface during operation of the drive. After
disconnecting power allow time for cooling.
!
ATTENTION: Hazard of permanent eye damage exists when
using optical transmission equipment. This product emits intense
light and invisible radiation. Do not look into fiber-optic ports or
fiber-optic cable connectors.
!
Torque Specifications
ATTENTION: The sheet metal cover and mounting screws on
the ASIC Board located on the power structure are energized at
(-) DC bus potential high voltage. Risk of electrical shock,
injury, or death exists if someone comes into contact with the
assembly.
ATTENTION: This drive contains ESD (Electrostatic
Discharge) sensitive parts and assemblies. Static control
precautions are required when installing, testing, servicing or
repairing this assembly. Component damage may result if ESD
control procedures are not followed. If you are not familiar with
static control procedures, reference A-B publication 8000-4.5.2,
“Guarding Against Electrostatic Damage” or any other
applicable ESD protection handbook.
The following table lists fastener torque specifications:
Item
DPI / HIM Assembly Door
Screw
M3 x 6 Phillips®
DPI / HIM Assembly (mounting)
M3 x 6 Phillips
700S High Power Fiber
Optic-Interface Circuit Board
(mounting)
700H I/O and Control Assembly
M3 x 6 Phillips
M4 x 8 self-tapping
Final Torque
0.9 N-m
(8 lb.-in.)
0.9 N-m
(8 lb.-in.)
0.9 N-m
(8 lb.-in.)
0.8 N-m
(7 lb.-in.)
3-2
Access Procedures
Item
Screw
700H Star Coupler Board
M4 x 8 POZIDRIV ®
(mounting)
700S Voltage Feedback Circuit
M3 x 6 Phillips
Board (mounting)
AC Input Terminals on Power
M10 nut
Structure
Motor Output Terminals on Power
M8 x 20 hexagonal screw
Structure
Main Fan (Mounting)
M6 x 20 POZIDRIV
Main Fan
M4 x 8 POZIDRIV
Touch Cover (Main Fan)
M5 x 16
ASIC Fan
M4 x 16 POZIDRIV
Rectifier board (Mounting)
M4 x 8 POZIDRIV
Output Power Module Output
Terminals (U,V,W)
Rectifying Module Input
Terminals (L1,L2,L3)
Y-Bus Bar
M8 x 20 hexagonal screw
M10 nut
Capacitor
M4 x 8 self tapping
Capacitor Bus Bar
M6 x 16 POZIDRIV
Capacitor Bus Bar
M6 x 20 POZIDRIV
DC- / DC+ Terminals
M6 x 20 POZIDRIV
Block (Mounting)
M10 x 12 hexagonal screw
700S Voltage Feedback Circuit
Board (mounting)
M3 x 0.5 thread - 37 mm x
37 mm hex standoff
M10 x 20 hexagonal screw
POZIDRIV® is a registered trademark of the Phillips Screw Company
Phillips® is a registered trademark of Phillips Screw Company
Final Torque
0.9 N-m
(8 lb.-in.)
0.9 N-m
(8 lb.-in.)
40 N-m
(354 lb.-in.)
20 N-m
(177 lb.-in.)
3 N-m
(27 lb.-in.)
1.7 N-m
(15 lb.-in.)
3 N-m
(27 lb.-in.)
0.4 N-m
(3.5 lb.-in.)
1 N-m
(9 lb.-in.)
14 N-m
(124 lb.-in.)
12 N-m
(106 lb.-in.)
40 N-m
(354 lb.-in.)
1 N-m
(9 lb.-in.)
4 N-m
(35 lb.-in.)
4 N-m
(35 lb.-in.)
5 N-m
(44 lb.-in.)
20 N-m
(177 lb.-in.)
0.9 N-m
(8 lb.-in.)
Access Procedures
3-3
Understanding the Torque Figures in Assembly Diagrams
Icons and numbers in the assembly diagrams indicate how to tighten
hardware:
Fastener Type
POZIDRIV Screw
Tool Type and Size
PZ indicates POZIDRIV screwdriver bit
P indicates Phillips screwdriver bit
Phillips Screw
Hexagonal Bolt
or Standoff
Hexagonal
Screw
Hexagonal Nut
PZ2
4 N-m
(35 lb.-in.)
Tightening Torque
Torx Head Screw
Removing Power from the
Drive
!
ATTENTION: To avoid an electric shock hazard, verify that the
voltage on the bus capacitors has discharged before performing
any work on the drive. Measure the DC bus voltage at the DC+ &
DC- terminals. The voltage must be zero.
Remove power before making or breaking cable connections.
When you remove or insert a cable connector with power
applied, an electrical arc may occur. An electrical arc can cause
personal injury or property damage by:
• sending an erroneous signal to your system’s field devices,
causing unintended machine motion
• causing an explosion in a hazardous environment
Electrical arcing causes excessive wear to contacts on both the
module and its mating connector. Worn contacts may create
electrical resistance.
3-4
Access Procedures
Removing Power
1. Turn off and lock out input power. Wait five minutes.
2. Verify that there is no voltage at the drive’s input power terminals.
3. Measure the DC bus voltage at the DC+ & DC- terminals on the Power
Terminal Block. The voltage must be zero.
L1
L2
L3
I
O
Access Procedures
Removing the DPI / HIM
Assembly
3-5
Removal
1. Remove power from the drive (Removing Power from the Drive on
page 3-3).
Important: Before removing connections and wires, mark the connections
and wires to avoid incorrect wiring during assembly.
2. Remove the two screws from front of DPI / HIM assembly.
Screws
P1
0.9 N-m
(8 lb.-in.)
3. Open the door, which holds the DPI interface and HIM.
4. Unplug the DPI cable from X2 connector on the DPI Interface Circuit
Board.
X2
X4
Back view of DPI
Circuit Board which
should remain mounted
on the back of
the assembly
5. On 700S drives only, unplug the cable from X4 connector on the circuit
board.
6. Remove the four mounting screws and the assembly from the Control
3-6
Access Procedures
Frame.
Mounting Screws
P1
0.9 N-m
(8 lb.-in.)
Installation
Install the DPI / HIM Assembly in reverse order of removal, while referring
to Torque Specifications on page 3-1.
Removing the 700S Phase II Removal
Control Assembly
1. Remove power from the drive (Removing Power from the Drive on
page 3-3).
Important: Before removing connections and wires, mark the connections
and wires to avoid incorrect wiring during assembly.
2. Unplug any fiber optic ControlNet and SynchLink cables from the
Control Assembly.
!
ATTENTION: Hazard of permanent eye damage exists when
using optical transmission equipment. This product emits intense
light and invisible radiation. Do not look into fiber-optic ports or
fiber-optic cable connectors.
Important: Minimum inside bend radius for SynchLink and ControlNet
fiber-optic cable is 25.4 mm (1 in.). Any bends with a shorter
inside radius can permanently damage the fiber-optic cable.
Signal attenuation increases with decreased inside bend radii.
3. Unplug any remaining I/O and communications cables from the Control
Assembly and set them aside.
Access Procedures
3-7
4. Loosen the captive screw on the Control Assembly mounting plate and
swing the Control Assembly away from drive.
Captive Screw
5. Carefully disconnect the ribbon cables from the sockets on the High
Power Fiber Optic Interface Circuit Board on the back of the control
mounting plate, and carefully set them aside.
Disconnect ribbon cables.
Note: Control mounting plate
not shown for clarity only.
3-8
Access Procedures
6. Loosen the two mounting screws on the front of the Control Assembly
and slide the control cassette off the mounting bracket.
Note: Ribbon cables not shown
for clarity only.
Installation
Install the 700S Phase II Control Assembly in reverse order of removal,
while referring to Torque Specifications on page 3-1.
Removing the 700S High
Power Fiber Optic Interface
Circuit Board
Removal
1. Remove power from the drive (Removing Power from the Drive on
page 3-3).
2. Remove the 700S Control Assembly (Removing the 700S Phase II
Control Assembly on page 3-6).
3. Carefully disconnect the fiber-optic cables from the sockets along the
right side of the High Power Fiber Optic Interface Circuit Board (on the
backside of the Control Assembly), and carefully set them aside.
!
ATTENTION: Hazard of permanent eye damage exists when
using optical transmission equipment. This product emits intense
light and invisible radiation. Do not look into fiber-optic ports or
fiber-optic cable connectors.
Access Procedures
3-9
Important: Minimum inside bend radius for fiber-optic cable is 25.4 mm (1
in.). Any bends with a shorter inside radius can permanently
damage the fiber-optic cable. Signal attenuation increases with
decreased inside bend radii.
4. Disconnect the other cables from the sockets on the High Power Fiber
Optic Interface Circuit Board and set them aside.
5. Remove the five screws which secure the High Power Fiber Optic
Interface Circuit Board to the Control Frame.
Remove five
screws
Disconnect
Fiber-Optic cables
P1
0.9 N-m
(8 lb.-in.)
6. Remove the circuit board from the Control Frame.
Installation
Install the 700S High Power Fiber Optic Interface Circuit Board in reverse
order of removal, while referring to Torque Specifications on page 3-1.
3-10
Access Procedures
Removing the 700S Control
Assembly Mounting Plate
Removal
1. Remove power from the drive. Refer to Removing Power from the
Drive on page 3-3.
2. Remove the 700S Phase II Control Assembly. Refer to Removing the
700S Phase II Control Assembly on page 3-6.
3. Remove the 700S High Power Fiber Optic Interface Circuit Board.
Refer to Removing the 700S High Power Fiber Optic Interface Circuit
Board on page 3-8.
4. Lift the Control Assembly mounting plate up and off the hinge.
Installation
Install the 700S Control Assembly mounting plate in reverse order of
removal.
Access Procedures
Removing the 700H I/O
Boards and Control
Assembly
3-11
Removal
1. Remove power from the drive. Refer to Removing Power from the
Drive on page 3-3.
2. Open the enclosure that contains the Control and I/O Boards and
carefully unplug the DPI cable and any I/O cables.
3. Remove the I/O Boards from the Control Board and enclosure. Note the
order of the boards and the keys which prevent placement of boards in
incorrect slots.
Do not remove enclosure cover.
Enclosure is illustrated without
the cover for clarity.
Keys
4. Unplug the serial connection from X7 of the Control Board.
X7
Serial Port
X2
(Slot A)
X3
(Slot B)
X4
(Slot C)
X5
(Slot D)
X6
(Slot E)
3-12
Access Procedures
5. Remove the three screws which secure the Control Assembly to the
drive.
Do not remove enclosure cover.
Enclosure is illustrated without
the cover for clarity.
PZ2
3 N-m
(27 lb.-in.)
6. Remove the Control Assembly.
Installation
Install the 700H Control and I/O Boards in reverse order of removal, while
referring to Torque Specifications on page 3-1.
Access Procedures
Removing the 700H Star
Coupler Board
3-13
Removal
1. Remove power from the drive. Refer to Removing Power from the
Drive on page 3-3.
2. Referring to Removing the 700H I/O Boards and Control Assembly on
page 3-11, remove the I/O boards and Control Assembly.
3. Move the Control Frame to expose its back, while referring to
Removing the Covers from the Power Structures on page 3-15.
4. Disconnect the control power cable from X2 of the Star Coupler Board.
H8
H7
H6
H5
X1 connects to Main
Control Board
H4
H3
H2
H1
H18
H17
H1 - H23 sockets for
Fiber-Optic cables
H16
H15
H14
X2 connects to
24V dc power
X2
H13
H12
H11
H23
H22
H21
5. Carefully disconnect the fiber-optic cables from right side of the Star
Coupler Board, and carefully set them aside.
!
ATTENTION: Hazard of permanent eye damage exists when
using optical transmission equipment. This product emits intense
light and invisible radiation. Do not look into fiber-optic ports or
fiber-optic cable connectors.
3-14
Access Procedures
Important: Minimum inside bend radius for fiber-optic cable is 25.4 mm (1
in.). Any bends with a shorter inside radius can permanently
damage the fiber-optic cable. Signal attenuation increases with
decreased inside bend radii.
6. Remove the six screws which secure the Star Coupler Board to the
stand-offs on the back of the Control Frame.
PZ2
0.9 N-m
(8 lb.-in.)
7. Remove the Star Coupler Board from the Control Frame.
Installation
Install the 700H Star Coupler Board in reverse order of removal, while
referring to Torque Specifications on page 3-1.
Access Procedures
Removing the Covers from
the Power Structures
3-15
Moving the Control Frame
Removal
1. Remove power from the drive (Removing Power from the Drive on
page 3-3).
2. Loosen the T8 Torx-head screws, which secure the Control Frame to the
drive enclosure.
3. Swing the Control Frame out and away from the power structure.
Screws
Installation
Install the Control Frame in reverse order of removal, while referring to
Torque Specifications on page 3-1.
3-16
Access Procedures
Removing the Airflow Plates
The drive is equipped with metal plates, at the top of both enclosures, that
manage airflow through the drive. You must remove these plates in order to
access the protective covers.
Removal
1. Remove power from the drive (Removing Power from the Drive on
page 3-3).
2. Move the Control Frame away from the power structure in the left-hand
enclosure (Removing the Covers from the Power Structures on
page 3-15).
Screws
3. On Power Structure 1, remove the T8 Torx-head screws (four per plate)
that secure the airflow plate to the drive.
4. Slide the airflow plate off of the drive.
5. Repeat steps 3 and 4 to remove the airflow plate from Power Structure
2.
Access Procedures
3-17
Installation
Install the Airflow Plates in reverse order of removal, while referring to
Torque Specifications on page 3-1.
Removing the Protective Covers from the Power Structures
You must remove the protective covers to gain access to the power
structures.
Removal
1. Remove power from the drive (Removing Power from the Drive on
page 3-3).
2. Move the Control Frame away from the power structure in the left-hand
enclosure (Removing the Covers from the Power Structures on
page 3-15).
3. Remove the Airflow Plates (Removing the Airflow Plates on
page 3-16).
4. On Power Structure 1, remove the four M5 Pozi-drive screws, which
secure the top and bottom protective covers to the main front protective
cover, then remove the top and bottom protective covers.
Note: you only need to remove the top and bottom covers to gain access
to the power terminals. You can remove the other covers without
removing the top and bottom ones
5. Remove the four M5 Pozi-drive screws, which secure the main front
protective cover to the drive, then remove the protective cover.
6. Remove the side protective covers.
3-18
Access Procedures
7. Repeat step 4 - 6 to remove the protective covers from Power Structure
2.
4
6
4
5
5
6
5
5
4
5
4
Installation
Install the Protective Covers in reverse order of removal, while referring to
Torque Specifications on page 3-1.
Access Procedures
Removing the 700S Voltage
Feedback Circuit Board
3-19
Removal
1. Remove power from the drive (Removing Power from the Drive on
page 3-3).
2. Remove the covers from the power structures. Refer to Removing the
Covers from the Power Structures on page 3-15.
3. Carefully disconnect the fiber-optic cables from J4 and J5 sockets along
the top of the Voltage Feedback Circuit Board, and carefully set them
aside.
!
ATTENTION: Hazard of permanent eye damage exists when
using optical transmission equipment. This product emits intense
light and invisible radiation. Do not look into fiber-optic ports or
fiber-optic cable connectors.
Important: Minimum inside bend radius for fiber-optic cable is 25.4 mm (1
in.). Any bends with a shorter inside radius can permanently
damage the fiber-optic cable. Signal attenuation increases with
decreased inside bend radii.
4. Disconnect the cable from J8 socket of the Voltage Feedback Circuit
Board, and set it aside.
J4 J5
J8
5. Remove the five screws which secure the Voltage Feedback Circuit
Board to the drive.
6. Remove the circuit board from the drive.
3-20
Access Procedures
P1
0.9 N-m
(8 lb.-in.)
Remove
five screws
Installation
Install the 700S Voltage Feedback Circuit Board in reverse order of
removal, while referring to Torque Specifications on page 3-1.
Access Procedures
Removing the Gate Driver
and Adapter Boards
3-21
Removal
1. Remove power from the drive (Removing Power from the Drive on
page 3-3).
2. Remove the covers from the power structures. Refer to Removing the
Covers from the Power Structures on page 3-15.
3. On Power Structure 1, disconnect the wires from the fuse block that
holds the fuses for the Fan Inverters. Then remove the fuses.
4. Remove the screws that secure the fuse block to the bracket beneath it,
and remove the fuse block.
5. Carefully disconnect the fiber-optic cables from sockets along the top of
the Gate Driver Board, and carefully set them aside.
!
ATTENTION: Hazard of permanent eye damage exists when
using optical transmission equipment. This product emits intense
light and invisible radiation. Do not look into fiber-optic ports or
fiber-optic cable connectors.
Important: Minimum inside bend radius for fiber-optic cable is 25.4 mm (1
in.). Any bends with a shorter inside radius can permanently
damage the fiber-optic cable. Signal attenuation increases with
decreased inside bend radii.
6. Disconnect the other cables from sockets of the Gate Driver Board, and
set them aside.
3-22
Access Procedures
7. Remove the six screws which secure the brackets to the drive. Then
remove the brackets.
8. Remove eight of the stacker connectors from the Gate Driver Board,
leaving the two connectors that are third from the top.
H8 H6 H4 H9 H7 H5
Do Not remove this
stacker connector
X3
X8
X4
X9
X5
X10
X6
X11
X12
X7
X13
X14
X15
X1
Do Not remove this
stacker connector
Access Procedures
3-23
9. Carefully remove the board and the remaining connectors.
10. Remove the cable ties that secure the Adapter Board to the circuit
boards on the Output Power Modules, and remove the Adapter Board.
11. Repeat steps 3 - 10 to remove the Gate Driver and Adapter Boards from
Power Structure 2.
3-24
Access Procedures
Installation
1. On Power Structure 1, replace the Adapter Board and install the cable
ties, which secure it to the circuit boards on the Output Power Modules.
2. Plug the old stacker connectors into the new Gate Driver Board so the
pins do not protrude through the connectors on the back of the board.
3. Align the Gate Driver Board so that its connectors align with the mating
connectors on the Adapter Board.
4. While supporting the Adapter Board from behind, press the Gate Driver
Board onto it.
5. Verify the proper alignment of the mounting with a mirror. Verify that
none of the pins in the stacker connectors have missed the mating
connectors.
6. Install the brackets, and install and tighten the mounting screws.
7. Connect all of the cables on the new Gate Driver Board.
8. Repeat steps 1 - 7 to install the Gate Driver and Adapter Boards on
Power Structure 2.
Access Procedures
Removing the Power
Structures from the Drive
Enclosure
3-25
Removal
1. Remove power from the drive (Removing Power from the Drive on
page 3-3).
2. Remove the covers from the power structures. Refer to Removing the
Covers from the Power Structures on page 3-15.
3. On Power Structure 1, remove the motor wiring from the power
structure at the front of the power structure.
4. Remove the ground connection from the lower right rear corner of the
power structure.
5. Remove the input (AC or DC) and brake wiring (if equipped) from the
incoming terminals at the top of the power structure.
AC Power Connection
Terminals
Motor Connection
Terminals
Ground
Connection
6. Follow the instructions in publication PFLEX-IN014, Installation
Instructions - PowerFlex 700S /700H High Power Maintenance Stand,
to install the Maintenance Stand. Remove the power structure by sliding
it onto the rails of the Maintenance Stand.
Note: The Maintenance Stand is designed for removing power
structures from drives supplied in Rittal TS8 enclosures. Alternate
means of removal will be necessary for other types of enclosures.
7. Repeat steps 3 - 6 to remove Power Structure 2 from its enclosure.
3-26
Access Procedures
Installation
Install the power structures in reverse order of removal, while referring to
Torque Specifications on page 3-1. Refer to the publication
PFLEX-IN006…, Installation Instructions - PowerFlex 700S and 700H
High Power Drives, for tightening torques of motor terminations.
Removing the Main Fans
Removal
1. Remove power from the drive (Removing Power from the Drive on
page 3-3).
2. Remove the covers from the power structures. Refer to Removing the
Covers from the Power Structures on page 3-15.
3. On Power Structure 1, disconnect the fan cable connectors under the
power structure.
4. Remove the two screws that secure each fan assembly to the drive. Then
remove the fans.
5. Repeat steps 3 and 4 to remove the main fans from Power Structure 2.
Access Procedures
3-27
Installation
Install the fans in reverse order of removal, while referring to Torque
Specifications on page 3-1.
Removing the ASIC Boards
Removal
!
ATTENTION: The sheet metal cover and mounting screws on
the ASIC Boards located on the power structures are energized at
(-) DC bus potential high voltage. Risk of electrical shock,
injury, or death exists if someone comes into contact with the
assembly.
1. Remove power from the drive (Removing Power from the Drive on
page 3-3).
2. Remove the covers from the power structures. Refer to Removing the
Covers from the Power Structures on page 3-15.
3. On Power Structure 1, remove the cover from the ASIC assembly and
the -DC bus connection from the cover.
4. Unplug the fan that mounts on the cover from connector X1 of the
ASIC board.
5. Disconnect the Feedback board that mounts on the ASIC assembly
cover from connector X26 on the ASIC board.
X26 Feedback Board connection
Fiber-Optic
cable
connections
X2
X11
H8
X1 Fan connection
X9
H9
H10
H11
X15
X26
H12
H1
H13
H2
H3
X3
X1
X4
Fiber-Optic
cable
connections
H4
H5
H6
H7
X5
X6
3-28
Access Procedures
6. Carefully disconnect the fiber-optic cables from sockets of the ASIC
Board, and carefully set them aside.
!
ATTENTION: Hazard of permanent eye damage exists when
using optical transmission equipment. This product emits intense
light and invisible radiation. Do not look into fiber-optic ports or
fiber-optic cable connectors.
Important: Minimum inside bend radius for fiber-optic cable is 25.4 mm (1
in.). Any bends with a shorter inside radius can permanently
damage the fiber-optic cable. Signal attenuation increases with
decreased inside bend radii.
7. Disconnect the other cables from sockets on the front of the ASIC
Board, and set them aside.
8. Remove the fan from the ASIC Board.
9. Slide the ASIC Board assembly out of its chassis.
10. Remove the plastic board holder.
11. Repeat steps 3 - 10 to remove the ASIC Board from Power Structure 2.
Installation
Install the ASIC Boards in reverse order of removal, while referring to
Torque Specifications on page 3-1. Reconnect cables to ASIC Boards, while
referring to (refer to Figure B.3 on page B-4).
Access Procedures
Removing the Rectifying
Boards
3-29
Removal
1. Remove power from the drive (Removing Power from the Drive on
page 3-3).
2. Remove the covers from the power structures. Refer to Removing the
Covers from the Power Structures on page 3-15.
3. On Power Structure 1, disconnect all the wiring from the Rectifying
Board and carefully set it aside.
4. Remove the screws that secure the circuit board to the Rectifying
Module, and remove the board.
5. Repeat steps 3 and 4 for the Rectifying Board from Power Structure 2.
X4
X2
X1
X3
X41
J7
J3
J11
X8
X101
X13
X6
X50
X10
X11
X100
X9
X12
Installation
Install the Rectifying Boards in reverse order of removal, while referring to
Torque Specifications on page 3-1.
3-30
Access Procedures
Removing the Left-Side
Output Power Modules
Removal
Important: Do not attempt to disassemble the Output Power Modules.
Important: Always replace the Output Power Modules in pairs (do not
replace just one module).
1. Remove power from the drive (Removing Power from the Drive on
page 3-3).
2. Remove the covers from the power structures. Refer to Removing the
Covers from the Power Structures on page 3-15.
3. Remove the power structures from the drive cabinet (Removing the
Power Structures from the Drive Enclosure on page 3-25).
4. On Power Structure 1, remove the cable-tie which secures the Power
Module Circuit Board to the Adapter Board.
5. Disconnect the output leads from the bottom of the Output Power
Module.
6. Loosen, but do not remove, the screws that secure the Y Bus Bars to the
drive.
Y Bus Bars
Access Procedures
3-31
7. Remove the balancing resistor wires from bus bars.
Balancing Resistors
Balancing Resistor Wires
Snubber Capacitors
Snubber Capacitor
Fastening Screws
8. Remove the screws that secure the Snubber Capacitors, and remove the
Snubber Capacitors.
9. Remove the screws that secure the DC Bus Bars to the left side of the
power structure, and remove the DC Bus Bars.
10. Remove the screws which secure the Output Power Module to the drive.
11. Disconnect the Power Module Circuit Board from the Adapter Board.
3-32
Access Procedures
12. Remove the Output Power Module from the drive.
13. Repeat steps 4 - 12 to remove the left-side Output Power Module from
Power Structure 2.
Installation
Install the Output Power Modules in reverse order of removal, while
referring to Torque Specifications on page 3-1.
Access Procedures
Removing the Right-Side
Output Power Modules and
Rectifying Modules
3-33
Removal
Important: Do not attempt to disassemble the Output Power Modules.
Important: Always replace the Output Power Modules in pairs (do not
replace just one module).
1. Remove power from the drive (Removing Power from the Drive on
page 3-3).
2. Remove the covers from the power structures. Refer to Removing the
Covers from the Power Structures on page 3-15.
3. Remove the power structures from the drive cabinet (Removing the
Power Structures from the Drive Enclosure on page 3-25).
4. On Power Structure 1, carefully disconnect the fiber-optic cables from
the Gate Driver Board, and carefully set them aside.
!
ATTENTION: Hazard of permanent eye damage exists when
using optical transmission equipment. This product emits intense
light and invisible radiation. Do not look into fiber-optic ports or
fiber-optic cable connectors.
Minimum inside bend radius for fiber-optic cable is 25.4 mm (1 in.).
Any bends with a shorter inside radius can permanently
5. Remove the cables from X13, X14 and X15 sockets on the Gate Driver
Board, and carefully set them aside. Also, disconnect DC Bus wiring
from the Gate Driver Board.
6. Remove the cable-tie which secures the Power Module Circuit Board to
the Adapter Board.
7. Disconnect the output leads from the bottom of the Output Power
Module.
3-34
Access Procedures
8. Loosen, but do not remove, the screws that secure the Y Bus Bars to the
drive.
Y Bus Bars
9. Remove the balancing resistor wires from bus bars.
Balancing Resistors
AC Input
Terminals
(L1, L2, L3)
Balancing Resistor Wires
10. Disconnect all wiring from the circuit board on the Rectifying Module.
11. Disconnect the cables from the AC input terminals on the Rectifying
Module.
12. Remove the circuit board from the Rectifying Module (refer to
Removing the Rectifying Boards on page 3-29).
Access Procedures
3-35
13. Remove the screws that secure the Snubber Capacitors, and remove the
Snubber Capacitors.
Snubber Capacitors
Snubber Capacitor
Fastening Screws
14. Remove the screws that secure DC Bus Bars to right side of power
structure, and remove the DC Bus Bars.
3-36
Access Procedures
15. Remove the screws that secure the Rectifying Module to the power
structure, and remove the Rectifying Module.
16. Remove the screws that secure the Output Power Module to the power
structure, and remove the Output Power Module.
17. Repeat steps 4 - 16 to remove the right-side Output Power Module and
Rectifying Module from Power Structure 2.
Installation
Install the Output Power Modules and Rectifying Modules in reverse order
of removal, while referring to Torque Specifications on page 3-1.
Access Procedures
Removing the Fan Inverters
3-37
Removal
1. Remove power from the drive (Removing Power from the Drive on
page 3-3).
2. Remove the covers from the power structures. Refer to Removing the
Covers from the Power Structures on page 3-15.
3. Remove the power structures from the drive cabinet (Removing the
Power Structures from the Drive Enclosure on page 3-25).
4. Prepare Power Structure 1 for Inverter Assembly Removal.
Task
A
Description
Remove the cable-ties that secure the cables with orange insulation
(on both left-hand and right-hand sides). This will allow you to move the
cables while removing the inverter assemblies.
Left-hand
Inverter
Right-hand
Inverter
Left-hand
Side
View
A
A
A
Front View
on Left-hand Side
3-38
Access Procedures
5. Remove the Inverter Assemblies.
Task
Description
Remove the two M5 Pozi-drive screws, which secure the front of the
fan inverter to the drive.
Proper tightening torque for reassembly is 4 N-m (35 lb.-in.).
Disconnect the fan motor cable under the inverter.
A
B
D
Remove the four M5 Pozi-drive screws, which secure the bottom of the
fan inverter to the drive.
Proper tightening torque for reassembly is 4 N-m (35 lb.-in.).
Disconnect the cables at X2, X8 and X3 (on left-hand and center
inverters); and X2 and X8 (on right-hand inverter).
E
Note: This step is not shown.
Carefully remove the inverters by sliding them out towards the front of
the drive.
C
A
A
C
C
B
Bottom View
of Power Structure
C
C
Important: Do not damage the output transformer when removing or
installing the inverter.
Access Procedures
3-39
6. Remove the Inverter from the old Inverter Assembly.
Task
Description
Disconnect the cables at connectors X4 (Blue) and X5 (Black).
A
Right-hand Inverter Shown
=
A
A
Task
B
C
Description
Remove two M5 Pozi-drive screws, which secure the inverter board
and its heatsink to the assembly carriage.
Proper tightening torque for reassembly is 4 N-m (35 lb.-in.).
Carefully remove the inverter board and its heatsink from the assembly
carriage.
B
B
=
7. Repeat steps 4 - 6 to remove the Fan Inverters from Power Structure 2.
Installation
Install the fan inverters in reverse order of removal, while referring to
Torque Specifications on page 3-1.
3-40
Access Procedures
Removing the DC Bus
Capacitors
Removal
1. Remove power from the drive (Removing Power from the Drive on
page 3-3).
2. Remove the covers from the power structures. Refer to Removing the
Covers from the Power Structures on page 3-15.
3. Remove the power structures from the drive cabinet (Removing the
Power Structures from the Drive Enclosure on page 3-25).
4. For Power Structure 1, remove the balancing resistor wires from bus
bars.
Balancing Resistors
AC Input
Terminals
(L1, L2, L3)
Balancing Resistor Wires
Access Procedures
5. Remove the screws that secure DC Bus Bars to right side of power
structure, and remove the DC Bus Bars.
6. Remove the four (4) screws that secure the capacitor to the power
structure, and remove the capacitor.
7. Repeat steps 4 - 6 to remove the DC Bus Capacitors from Power
Structure 2.
3-41
3-42
Access Procedures
Installation
Install the capacitors in reverse order of removal, while referring to Torque
Specifications on page 3-1.
Chapter
4
Start-Up After Repair
!
Phone
ATTENTION: Power must be applied to the drive to perform
the following start-up procedure. Some of the voltages present
are at incoming line potential. To avoid electric shock hazard or
damage to equipment, only qualified service personnel should
perform the following procedure. Thoroughly read and
understand the procedure before beginning. If an event does not
occur while performing this procedure, Do Not Proceed. Remove
Power including user supplied control voltages. User supplied
voltages may exist even when main AC power is not applied to
then drive. Correct the malfunction before continuing.
United States/
Canada
1.262.512.8176 (7 AM - 6 PM CST)
1.440.646.5800 (24 hour support)
Outside United
States/Canada
You can access the phone number for your country via
the Internet:
Go to http://www.ab.com
Click on Support (http://
support.rockwellautomation.com/)
Under Contact Customer Support, click on Phone
Support
Internet
⇒
Go to http://www.ab.com/support/abdrives/
E-mail
⇒
[email protected]
Be prepared to provide the following information when you contact
support:
• Product Catalog Number
• Product Serial Number
• Firmware Revision Level
Before Applying Power to
the Drive
1. Check for zero volts between DC+ and DC-.
2. Perform forward and reverse biased diode tests, using a digital
multimeter. Refer to Conducting Forward and Reverse Biased Diode
Tests for Major Power Components on page 2-4.
4-2
Start-Up After Repair
Testing with the External DC This is a low current - low risk test for the Output Power Module and drive
Power Supply Without Load Control board. It requires the recommended High Voltage DC Test Power
Supply.
(Optional)
1. Verify that the DC Test Power Supply is de-energized.
2. Connect the power supply’s DC+ to the drive’s DC+ terminal and the
power supply’s DC- to the drive’s DC- terminal.
3. Set the power supply voltage setting to zero.
4. Switch on the external DC Test Power Supply.
5. Slowly increase the DC Test Power Supply output voltage to the drive’s
nominal DC bus voltage (650V dc for drives with 380-500V ac input or
775V dc for drives with 600-690V ac input).
6. Measure the DC bus voltage and verify that the value is reflected in:
– parameter 306 [DC Bus Voltage] (700S)
– parameter 012 [DC Bus Voltage] (700H)
7. Make configuration changes which allow the HIM to issue start and
speed commands.
8. Make configuration changes which allow operation without an encoder
and motor.
9. Start the drive, by pressing
(the start button).
10. Increase the speed command from zero to base speed, by pressing
(the up button).
11. Stop the drive, by pressing
(the stop button).
12. Re-configure the drive to suit the application.
13. Decrease the DC Test Power Supply output voltage to zero. Wait until
DC bus voltage has decreased to zero. Switch off the external DC power
supply.
Start-Up After Repair
Testing Without a Motor
4-3
This test allows you to measure several operating parameters and diagnose
problems without connecting the motor.
1. Verify that input power wiring and grounding is connected.
1. Verify that the motor cables are disconnected.
2. Energize the drive.
3. Make configuration changes which allow the HIM to issue start and
speed commands.
4. Make configuration changes which allow operation without an encoder
and motor.
5. Start the drive, by pressing
(the start button).
6. Increase the speed command from zero to base speed, by pressing
(the up button).
7. Measure the output voltage on each phase and verify that it is balanced.
If it is unbalanced troubleshoot the drive.
8. Stop the drive, by pressing
(the stop button).
9. Re-configure the drive to suit the application.
Performing the Power
Circuit Diagnostic Test on a
700S
The Power Circuit Diagnostic Test, on the 700S, allow you to diagnose
problems in the drive’s power structure without applying large amounts of
power.
1. Verify that input power wiring and grounding is connected.
2. Verify that the motor cables are connected.
3. Energize the drive.
4. From the Monitor menu on the HIM press
navigate to the Main menu.
Esc
(the escape button) to
5. Use
(the down button) to move the cursor to the Start-Up
selection, and
to select Start-Up. Then press
again to
verify your intention to continue with the Start-Up menu.
6. Use
(the down button) to move the cursor to Power Circuit
Diagnostics (Pwr Circuit Diag), and
to select Power Circuit
Diagnostics.
7. Press
to begin the Power Circuit Diagnostic routine. Follow
indications and instructions on the HIM.
4-4
Start-Up After Repair
Testing With the Motor
This test allows you to measure several operating parameters and diagnose
problems without connecting the motor to its mechanical load.
1. Verify that input power wiring and grounding is connected.
2. Verify that the motor cables are connected.
3. Verify that the motor load is disconnected.
4. Energize the drive.
5. Start the drive and increase the speed from zero to base speed.
6. Measure drive output current and verify that the value is reflected in:
– parameter 308 [Output Current] (700S)
– parameter 003 [Output Current] (700H)
7. Stop the drive.
Appendix
A
Service Tools and Equipment
Software Tools
DriveTools™ SP, DriveExecutive, DriveExplorer™ and DriveObserver™ are
software tools for uploading, downloading and monitoring system
parameters.
A-2
Service Tools and Equipment
Service tools
This list of basic service tools which will cover needs of tools for repair and
maintenance measurements.
Item
1
2
3
4
Description
Oscilloscope
Current clamp
Soldering station
Adjustable power supply
5
Adjustable power supply
6
Multi meter
7
8
9
10
11
12
13
14
15
16
17
18
19
20
21
22
23
Insulation tester
Torque wrench
Torque wrench
box wrench
socket extension
Wrench
Wire cutter
Nose pliers
Crimping tools
Angle wrench
Screw driver
*Flat nose
*POZIDRIV
*Phillips
*Torx
Hexagonal wrench
ESD-protected place of work
24
25
26
27
Details
Portable, digitizing, dual channel scope, with isolation
1000A(ac, rms), signal output
Soldering / de soldering
0...1300Vdc, 1A, adjustable current limit. Efore LPS
750-HV or equivalent.
0...690Vac (+10%), 10A, three phase, galvanic
isolation
Digital multi meter, capable of ac and dc voltage,
continuity, resistance, capacitance measurements,
and forward diode bias tests. Fluke model 87 III or
equivalent.
1000Vdc
1...12Nm
6...50Nm
7mm, 8mm, 10mm, 13mm, 17mm, 19mm, 22mm
230mm
7mm, 8mm, 10mm, 13mm, 17mm, 19mm, 22mm
For cable terminals 1,5...240
7*2(mm)
1, 2, 3
1, 2, 3
25
4, 5, 6
Working surface, Floor covering, seat and ground
connections
ESD-protective clothing
Wrist wrap, shoes, overall clothing (coat)
Power supply (service)
Capacity of three phase service 400/500/690Vac, 30A
20-MAINSTND maintenance stand Maintenance stand for removing power structure from
drive cabinet
Fiber-optic repair kit
Agilent HFBR-4593 Polishing Kit, consisting of a
Polishing Fixture, 600 grit abrasive paper and 3 mm
pink lapping film (3M Company, OC3-14).
For Agilent HFBR-4532 latching connectors and
HFBR-RL cable. Refer to Agilent publications
5988-9777EN and 5988-3625EN.
Appendix
Schematics
List of Schematic Diagrams
For a Schematic Diagram on…
Circuit Board Connections for 700S Drives with Phase II Control
Circuit Board Connections for 700H Drives
ASIC Circuit Board Connections
Power Circuitry for Drives with AC Input (Power Structure #1)
Power Circuitry for Drives with AC Input (Power Structure #2)
Power Circuitry for Drives with DC Input (Power Structure #1)
Power Circuitry for Drives with DC Input (Power Structure #2)
Fan Power Supply Connections
AC Input Motor Connections
DC Input Motor Connections
See...
page B-2
page B-3
page B-4
page B-5
page B-6
page B-7
page B-8
page B-9
page B-10
page B-11
B
B-2
Schematics
Circuit Board Connections for 700S Drives with
Phase II Control
80
7
RS-232
Port
P3
Synchlink
Option P1
RX
TX
Phase II
Control
Board
with all
Options
120
P10
Compact
I/O Option
16
Compact
Flash Option
50
P2
P4
80
Comm. P1
Option
Fdbk P2
P1 Option
Board P3
Fdbk
Inputs
LEOB
(Optional)
RJ45
Connector
P1
10
P6
P11
P2
P12
P1
P13
P21
P5
34
40
16
P3
P2
30
34
P1
ENet
Option
P9
P7
Second Encoder P2
Safe Off Option
2
P4
Elect.
Battery
Comm. Input
TB2
TB1
To Feedback Board #2 - H903
Fiber Optic Connections
to ASIC Board #2 on
Power Structure #2
Fiber Optic Connections
to ASIC Board #1 on
Power Structure #1
6
2
4
5
3
T
J3
6
7
1
J28
J13
J14
J12
J11
J10
J9
J8
7
2
4
5
3
1
J27
J24
J25
J23
J22
J21
J20
J19
T
+24 V Iso
+12 V
-12 V
+5V
J17
J1
Fan Power
J18
J2
J15
2
DPI
Interface
X4
X1
X3
HIM
BEZEL
J1
DPI
COMM
OPTION
PWR
STS
PORT
MOD
NET A
NET B
2
DOOR
J3
20
9
HIM
J2
9
DPI Assembly
8
9
Example: 20-HIM-A3
HIM
External DPI
FIBER
FIBER
LED
J16
STATUS
External 24V DC
1=24V, 3=Common (75W min)
2
X2
J6 Tx
J7 Rx
DPI J4
HiHP Fiber Optic
Interface Board
9
J5
9
8
J2
80 W
J8
Power -DC+24V Supply -DC+
J1
-U
RxJ4 Voltage
-V
TxJ5 Feedback -W
DCDC+
U/T1
V/T2
W/T3
From Power Structure #1
To Feedback Board #1 - H903
Figure B.1 Circuit Board Connections
for 700S Drives with Phase II Control
Analog I/O Digital
Input
(10)
(8/10)
H7
H8
3
20C-D01
3
H5
24V OR 115V
20C-DA1-A
2OC-DA1-B
H3
Digital Ouput
Option
1
H1
Analog I/O
Plus Digital Input
T
H18
Option
Board
X1
3
4
Option
Board
X5
(slot D)
37
6
7
H17
X1
5
H15
H16
X4
(slot C)
2
H2
3
H13
H14
X3
(slot B)
4
H4
5
23 22 21
1
2
H12
Fiber
Optic
X3
20C-DPI1
3
9
Programming
Port
X7
DPI Option
X1
X6
(slot E)
Star Coupler Board
H21
X2
(slot A)
6
H6
7
T
Fiber
Optic
H11
1 +24VDC
2 GND
X2
Fiber
Optic
H23
H22
Control Board
2
To ASIC Board #1 - X10
Fiber Optic Connections
to ASIC Board #2 on
Power Structure #2
To Feedback Board #2 - H903
Fiber Optic Connections
to ASIC Board #1 on
Power Structure #1
To Feedback Board #1 - H903
X4
20
J3
9
DPI Assembly
PORT
MOD
NET A
NET B
PWR
J2
HIM
BEZEL
J1
Door
HIM
EXTERNAL DPI
HIM
Example: 20-HIM-A3
9
Figure B.2 Circuit Board Connections for
700H Drives
DPI
Comm.
Option
20C-DPI1
X3
X1
20-VB00601
DPI
Interface
X2
To Feedback Board #1
H900, H901, and H902
Schematics
B-3
Circuit Board Connections for 700H Drives
B-4
Schematics
ASIC Circuit Board Connections
To 700S
HiHP Fiber
Optic
Interface
Board J28
Note: External Wiring Shown as
Dashed Lines. For DC Input Only
(Do Not Install on AC Input Drives).
Feedback
Board #1
Or
3
H903
H900
H901
H902
6
X900
1
M
2
To 700H Star
Coupler Board
Fiber Optic
Ports
21 - 23
To 700S
HiHP Fiber Optic
Interface Board
Ports 1 - 7 for
ASIC Board #1
25
To 700H Star
Coupler Board X2
4
CR1
M
CR2
CR1
21
22
23
X50
1
X15
Charge
Relay
X1
2
+24VDC
DC-
M
2
X10 24V Power
H1
H2
H3
H4
H5
H6
H7
1
2
3
Or
4
5
700H Star
Coupler Board
Ports 1 - 7 for
ASIC Board #1
6
7
Fiber Optic
DC+
X6
1
2
3
DC-
0EVA
26
3
External Pre-Charge
Example Circuitry
(See Note).
ASIC
Board
X9 +24V #1
X26
From DC Bus
in Power Circuitry
To Rectifying Board X13
To Gate Driver Board X13
To Gate Driver Board X14
To Gate Driver Board X15
To Gate Driver Board H4
To Gate Driver Board H5
To Gate Driver Board H6
To Gate Driver Board H7
To Gate Driver Board H8
To Gate Driver Board H9
X2
X3
X4
X5
H8
H9
H10
H11
H12
H13
X600
Fan X11
Control
3
On Power Structure #1
700H Star
Coupler
Board H8
To Left Fan X8
Feedback
Board #2
H903
H900
H901
H902
6
X900
1
M
Or
2
X9
25
26
3
700H Star
Coupler Board
H18
4
21
22
23
X50
1
2
To 700S
HiHP Fiber Optic
Interface Board
Ports 1 - 7 for ASIC
Board #2
1
2
3
4
Or
5
DC+
X6
+24V
0EVA
X2
X3
X4
X5
X1
+24VDC
H8
DCH9
X10 24V Power
H10
H11
H12
H1
H13
H2
X600
H3
Fan X11
H4
Control
H5
1
2
3
DC-
From DC Bus
in Power Circuitry
To Rectifying Board X13
To Gate Driver Board X13
To Gate Driver Board X14
To Gate Driver Board X15
To Gate Driver Board H4
To Gate Driver Board H5
To Gate Driver Board H6
To Gate Driver Board H7
To Gate Driver Board H8
To Gate Driver Board H9
X15
Charge
Relay
3
To Left Fan X8
H6
H7
6
700H Star
Coupler Board
Ports 1 - 7 for ASIC
Board #2
ASIC
Board
#2
X26
On Power Structure #2
To 700S
HiHP Fiber
Optic
Interface
Board J27
7
Fiber Optic
Figure B.3 ASIC Circuit Board Connections
X1
X1
L2/S
L3/T
X2
X2
X2
X3
X3
X3
To ASIC Board #1
X3..
X7
X1
X2
X3
X7
X9
X11
X12
X13
X17
X19
See Note
X4
X5
X6
X8
X10
X1. . .
X5
TERM U
6 Fiber Optic Cables
X8..
X12
4
X1. . .
X5
U_LO
U_HI
H4. . . H9
Gate Driver
Board
X1
TB2
2
X4
X5
X6
X8
X10
5
5
I_U
H8..H13
Ribbon Cable
X13. . . X15
Common Mode
Filter Board
TB1
X50
Adapter Board
X3..X5
DC+
X6
X12
5
Right Side Module
5
Left Side Module
I_V
X13
X11
Mains Voltage
Supression
Rectifier Board
X8
X10
K3
W_LO
W_HI
TERM W
X6
DC-
X41
X4
X3
X2
X1
K1
X9
K2
Note:
400V/600V Capacitor Configuration
400V - 2 Caps in series
3 Caps in parallel
600V - 3 Caps in series
2 Caps in parallel
To 700S Control Board J2
5
5
I_W
V_LO
V_HI
TERM V
W_LO
W_HI
TERM W
I_V
V_LO
V_HI
TERM V
I_U
U_LO
U_HI
TERM U
Figure B.4 Power Circuitry for Drives
with AC Input (Power Structure #1)
Power Board #2
U/TI
V/T2
W/T3
To 700S Control Board J1
Power Board #1
I_W
X2
PE
Remove Junper For:
Non-CE Listed Units,
DC Units on Regenerative
Front Ends, or
Grounded Delta
Connected Inputs
X1
LI/R
Line Reactor
DC-
See Note
DC+
Schematics
B-5
Power Circuitry for Drives with AC Input (Power
Structure #1)
X1
X1
L2/S
L3/T
X2
X2
X2
X3
X3
X3
To ASIC Board #2
X3..
X7
X1
X2
X3
X7
X9
X11
X12
X13
X17
X19
See Note
X4
X5
X6
X8
X10
X1. . .
X5
TERM U
6 Fiber Optic Cables
X8..
X12
4
X1. . .
X5
U_LO
U_HI
H4. . . H9
Gate Driver
Board
X1
TB2
2
X4
X5
X6
X8
X10
5
5
I_U
H8..H13
Ribbon Cable
X13. . . X15
Common Mode
Filter Board
TB1
X50
Adapter Board
X3..X5
DC+
X6
X12
5
Right Side Module
5
Left Side Module
I_V
X13
X11
Mains Voltage
Supression
Rectifier Board
X8
X10
K3
W_LO
W_HI
TERM W
X6
DC-
X41
X4
X3
X2
X1
K1
X9
K2
Note:
400V/600V Capacitor Configuration
400V - 2 Caps in series
3 Caps in parallel
600V - 3 Caps in series
2 Caps in parallel
5
5
Power Board #1
I_W
X2
PE
Remove Junper For:
Non-CE Listed Units,
DC Units on Regenerative
Front Ends, or
Grounded Delta
Connected Inputs
X1
LI/R
Line Reactor
DC-
DC+
See Note
I_W
V_LO
V_HI
TERM V
W_LO
W_HI
TERM W
I_V
V_LO
V_HI
TERM V
I_U
U_LO
U_HI
TERM U
Figure B.5 Power Circuitry for Drives with AC
Input (Power Structure #2)
Power Board #2
U/TI
V/T2
W/T3
B-6
Schematics
Power Circuitry for Drives with AC Input (Power
Structure #2)
To ASIC Board #1
X12
X13
X17
X19
X4
X5
X6
X8
X10
X1. .
X5
See Note
5
I_U
X3 . . .
X7
X11
X2
X3
X7
X9
TERM V
H4 . . . H9
X8 . . .
X12
4
5
5
Power Board #1
I_W
W_LO
W_LO
TERM W
W_HI
I_V
V_HI
V_LO
TERM V
V_HI
I_U
U_LO
U_HI
U_LO
TERM U
U_HI
TERM U
Figure B.6 Power Circuitry for Drives
with DC Input (Power Structure #1)
U/TI
V/T2
W/T3
To 700S Control Board J1
Power Board #2
5
I_W
6 Fiber Optic Cables
Gate Driver
Board
X1
Adapter Board
X13 . . . X15
Ribbon Cable
2
Left Side Module
V_LO
TB2
Common Mode
Filter Board
5
I_V
H8..H13
TB1
X1. . .
X5
5
TERM W
DC+
X4
X5
X6
X8
X10
See Note
Right Side Module
W_HI
X3..X5
X6
DC-
PE
DC-
DC+
To 700S Control Board J2
Note:
400V/600V Capacitor Configuration
400V - 2 Caps in series
3 Caps in parallel
600V - 3 Caps in series
2 Caps in parallel
Schematics
B-7
Power Circuitry for Drives with DC Input (Power
Structure #1)
To ASIC Board #2
X12
X13
X17
X19
X4
X5
X6
X8
X10
X1. .
X5
See Note
5
I_U
X3 . . .
X7
X11
X2
X3
X7
X9
TERM V
H4 . . . H9
X8 . . .
X12
4
5
5
Power Board #1
I_W
W_LO
W_LO
TERM W
W_HI
I_V
V_HI
V_LO
TERM V
V_HI
I_U
U_LO
U_HI
U_LO
TERM U
TERM U
U_HI
U/TI
V/T2
W/T3
Figure B.7 Power Circuitry for Drives
with DC Input (Power Structure #2)
Power Board #2
5
I_W
6 Fiber Optic Cables
Gate Driver
Board
X1
Adapter Board
X13 . . . X15
Ribbon Cable
2
Left Side Module
V_LO
TB2
Common Mode
Filter Board
5
I_V
H8..H13
TB1
X1. . .
X5
5
TERM W
DC+
X4
X5
X6
X8
X10
See Note
Right Side Module
W_HI
X3..X5
X6
DC-
PE
DC-
DC+
Note:
400V/600V Capacitor Configuration
400V - 2 Caps in series
3 Caps in parallel
600V - 3 Caps in series
2 Caps in parallel
B-8
Schematics
Power Circuitry for Drives with DC Input (Power
Structure #2)
Schematics
B-9
Fan Power Supply Connections
From DC Bus in Power Structure
DC+
DC-
From ASIC Board #2 - X11
6A
F1
3
F2
X2-3
(+)
X2-1
1
U1
(-)
2
3
X4-1 BLK 2
DC/AC
V1
4
Off Off On Off
Setup Switch
X8
X5-1
BLK 1
Fan Frequency Converter
5
BLK
4
BLK
(+)
X3
X2-1
(-)
1
2
3
Off Off On Off
Setup Switch
X4-1 BLK 2
DC/AC
X5-1
V1
4
BLK 1
Fan Frequency Converter
10Meg
2.2uf
300VAC
10Meg
7uf
4 Y/GRN
3 BLACK
1
2
6
BLK
5
BLK
4
BLK
2.2uf
300VAC
10Meg
2.2uf
300VAC
10Meg
3
BLK
X3
7uf
4
2
BLUE
M1
Main Fan
Left Side
230V AC
50 Hz
BRN
In Power Structure #1 (Left Side)
X8
U1
2.2uf
300VAC
3
BLK
4
X2-3
2
6
BLK
BLUE
4 Y/GRN
3 BLACK
1
BRN
2
BLUE
M2
Main Fan
Right Side
230V AC
50 Hz
Jumper
From DC Bus in Power Structure
DC+
DC-
From ASIC Board #1 - X11
6A
F1
3
F2
X2-3
(+)
X2-1
(-)
1
2
3
X8
4
Off Off On Off
Setup Switch
X4-1 BLK 2
U1
DC/AC
V1
X5-1
BLK 1
Fan Frequency Converter
6
BLK
5
BLK
4
BLK
2.2uf
300VAC
10Meg
2.2uf
300VAC
10Meg
3
BLK
X3
7uf
4
(-)
X2-1
1
2
3
4
Off Off On Off
Setup Switch
X4-1 BLK 2
U1
DC/AC
X5-1
V1
BLK 1
Fan Frequency Converter
1
4
2
6
BLK
5
BLK
4
BLK
3
BLK
X3
2
3 BLACK
M3
Main Fan
Left Side
230V AC
50 Hz
BRN
In Power Structure #2 (Right Side)
X8
(+)
X2-3
4 Y/GRN
2.2uf
300VAC
10Meg
2.2uf
300VAC
10Meg
7uf
BLUE
4 Y/GRN
3 BLACK
1
M4
Main Fan
Right Side
230V AC
50 Hz
BRN
Jumper
Figure B.8 Fan Inverter Connections
L3
L2
L1
DC-
PE
W / T3
L3
U / T1
V / T2
Power Structure #2
DC+
L2
L1
PE
W / T3
L3
U / T1
V / T2
Power Structure #1
DC-
L2
L1
DC+
= Customer Connections
Motor
Figure B.9 AC Input Motor Connections
Cable Length >= 5 M
Symmetrical Layout
B-10
Schematics
AC Input Motor Connections
DC-
DC+
F2 R2CR2
M
F1 R1CR2
M
PE
DC-
DC+
PE
DC-
DC+
Power Structure #2
W / T3
V / T2
U / T1
W / T3
V / T2
Power Structure #1
U / T1
Motor
Figure B.10 DC Input Motor Connections
Customer Supplied
Cable Length >=5M
Symmetrical Layout
Schematics
B-11
DC Input Motor Connections
B-12
Notes:
Schematics
Appendix
C
Connector Descriptions
For a Schematic Diagram on…
ASIC Board on Power Structure #1 to Gate Driver Board on Power
Structure #1 - Phase U Connections
ASIC Board on Power Structure #1 to Gate Driver Board on Power
Structure #1 - Phase V Connections
ASIC Board on Power Structure #1 to Gate Driver Board on Power
Structure #1 - Phase W Connections
ASIC Board on Power Structure #2 to Gate Driver Board on Power
Structure #2 - Phase U Connections
ASIC Board on Power Structure #2 to Gate Driver Board on Power
Structure #2 - Phase V Connections
ASIC Board on Power Structure #2 to Gate Driver Board on Power
Structure #2 - Phase W Connections
ASIC Board on Power Structure #1 to Rectifier/Precharge Circuit
Board on Power Structure #1 Connections
ASIC Board on Power Structure #2 to Rectifier/Precharge Circuit
Board on Power Structure #2 Connections
PowerFlex 700H and 700S Interface Board to ASIC Board on Power
Structure #1 Fiber Optic Connections
PowerFlex 700H and 700S Interface Board to ASIC Board on Power
Structure #2 Fiber Optic Connections
ASIC Feedback Board on Power Structure #1 to ASIC Board on
Power Structure #1 Connections
ASIC Feedback Board on Power Structure #2 to ASIC Board on
Power Structure #2 Connections
ASIC Feedback Board to PowerFlex 700S High Power Star Interface
Board Connections
ASIC Feedback Board to PowerFlex 700H Star Coupler Board
Connections
ASIC Board to Left Side Main Cooling Fan Inverter Connections
Left Side Main Cooling Fan Inverter to Right Side Main Cooling Fan
Inverter Connections
Right Side Main Cooling Fan Inverter Connections
X50 Terminal Block Precharge Circuit Connections
Circuit Board Connections
See...
page C-3
page C-3
page C-4
page C-4
page C-5
page C-5
page C-6
page C-6
page C-8
page C-9
page C-9
page C-9
page C-10
page C-10
page C-10
page C-10
page C-11
page C-11
The following tables detail the connection points for the frame 12
PowerFlex 700S and 700H AC input drives circuit boards and components.
C-2
Connector Descriptions
Figure C.1 ASIC Board Connectors
X2
X11
H8
X9
H9
H10
H11
X15
X26
H12
H1
H13
H2
H3
X3
H4
X1
H5
H6
X4
H7
X6
X5
Figure C.2 Gate Driver Board Connectors
H8 H6 H4 H9 H7 H5
X3
X8
X4
X9
X5
X10
X6
X11
X12
X7
X13
X14
X15
X1
Connector Descriptions
Table C.A ASIC Board on Power Structure #1 to Gate Driver Board on Power
Structure #1 - Phase U Connections
ASIC Board
Connector
X3
Pin Number
1
2
3
4
5
6
7
8
9
10
H8 (fiber optic)
H8
H9 (fiber optic)
H9
to
...
...
...
...
...
...
...
...
...
...
...
...
Gate Driver
Board
Pin Number Connector
1
X13
2
3
4
5
6
7
8
9
10
H4
H4 (fiber optic)
H5
H5 (fiber optic)
Description
U_Feedback
U_Power_OK
U_DTR(1) See Note Below
U_ETR(2)
U_ITR(3)
U_DCUI
U_DC-_I
U_TEMP
U_DC-T
UH or Gate Top
UL or Gate Bottom
Note: See page C-4 for footnotes.
Table C.B ASIC Board on Power Structure #1 to Gate Driver Board on Power
Structure #1 - Phase V Connections
ASIC Board
Connector
X4
Pin Number
1
2
3
4
5
6
7
8
9
10
H10 (fiber optic)
H10
H11 (fiber optic)
H11
to Pin Number
...
1
...
2
...
3
...
4
...
5
...
6
...
7
...
8
...
9
...
10
...
H6
...
H7
Note: See page C-4 for footnotes.
Gate Driver Board
Connector
Description
X14
V_Feedback
V_Power_OK
V_DTR(1)
V_ETR(2)
V_ITR(3)
V_DCVI
V_DC-_I
V_TEMP
V_DC-T
H6 (fiber optic)
VH or Gate Top
H7 (fiber optic)
VL or Gate Bottom
C-3
C-4
Connector Descriptions
Table C.C ASIC Board on Power Structure #1 to Gate Driver Board on Power
Structure #1 - Phase W Connections
ASIC Board
Connector
X5
Pin Number
1
2
3
4
5
6
7
8
9
10
H12 (fiber optic)
H12
H13 (fiber optic)
H13
(1)
DTR = N Desat
(2)
ETR = Phase I2T
(3)
ITR = Phase Overcurrent
to Pin Number
...
1
...
2
...
3
...
4
...
5
...
6
...
7
...
8
...
9
...
10
...
H8
...
H9
Gate Driver Board
Connector
Description
X15
W_Feedback
W_Power_OK
W_DTR(1)
W_ETR(2)
W_ITR(3)
W_DCWI
W_DC-_I
W_TEMP
W_DC-T
H8 (fiber optic)
WH or Gate Top
H9 (fiber optic)
WL or Gate Bottom
Table C.D ASIC Board on Power Structure #2 to Gate Driver Board on Power
Structure #2 - Phase U Connections
ASIC Board
Connector
X3
Pin Number
1
2
3
4
5
6
7
8
9
10
H8 (fiber optic)
H8
H9 (fiber optic)
H9
to
...
...
...
...
...
...
...
...
...
...
...
...
Gate Driver
Board
Pin Number Connector
1
X13
2
3
4
5
6
7
8
9
10
H4
H4 (fiber optic)
H5
H5 (fiber optic)
Note: See page C-5 for footnotes.
Description
U_Feedback
U_Power_OK
U_DTR(1) See Note Below
U_ETR(2)
U_ITR(3)
U_DCUI
U_DC-_I
U_TEMP
U_DC-T
UH or Gate Top
UL or Gate Bottom
Connector Descriptions
Table C.E ASIC Board on Power Structure #2 to Gate Driver Board on Power
Structure #2 - Phase V Connections
ASIC Board
Connector
X4
Pin Number
1
2
3
4
5
6
7
8
9
10
H10 (fiber optic)
H10
H11 (fiber optic)
H11
to Pin Number
...
1
...
2
...
3
...
4
...
5
...
6
...
7
...
8
...
9
...
10
...
H6
...
H7
Gate Driver Board
Connector
Description
X14
V_Feedback
V_Power_OK
V_DTR(1)
V_ETR(2)
V_ITR(3)
V_DCVI
V_DC-_I
V_TEMP
V_DC-T
H6 (fiber optic)
VH or Gate Top
H7 (fiber optic)
VL or Gate Bottom
Note: Refer to footnotes below Table C.F.
Table C.F ASIC Board on Power Structure #2 to Gate Driver Board on Power
Structure #2 - Phase W Connections
ASIC Board
Connector
X5
Pin Number
1
2
3
4
5
6
7
8
9
10
H12 (fiber optic)
H12
H13 (fiber optic)
H13
(1)
DTR = N Desat
(2)
ETR = Phase I2T
(3)
ITR = Phase Overcurrent
to Pin Number
...
1
...
2
...
3
...
4
...
5
...
6
...
7
...
8
...
9
...
10
...
H8
...
H9
Gate Driver Board
Connector
Description
X15
W_Feedback
W_Power_OK
W_DTR(1)
W_ETR(2)
W_ITR(3)
W_DCWI
W_DC-_I
W_TEMP
W_DC-T
H8 (fiber optic)
WH or Gate Top
H9 (fiber optic)
WL or Gate Bottom
C-5
C-6
Connector Descriptions
Figure C.3 Rectifier/Precharge Circuit Board Connectors
X4
X2
X1
X3
X41
J7
J3
J11
X8
X101
X13
X6
X10
X11
X50
X100
X9
X12
Table C.G ASIC Board on Power Structure #1 to Rectifier/Precharge Circuit Board on
Power Structure #1 Connections
ASIC Board
Connector
X2
Pin Number
1
2
3
4
5
to
...
...
...
...
...
Rectifier Board
Pin Number Connector
1
X13
2
3
4
5
Description
SWTS_DRV
SWTS_FB
W_DTR
Mains Fault
+24V
Table C.H ASIC Board on Power Structure #2 to Rectifier/Precharge Circuit Board on
Power Structure #2 Connections
ASIC Board
Connector
X2
Pin Number
1
2
3
4
5
to
...
...
...
...
...
Rectifier Board
Pin Number Connector
1
X13
2
3
4
5
Description
SWTS_DRV
SWTS_FB
W_DTR
Mains Fault
+24V
Connector Descriptions
Figure C.4 PowerFlex 700S High Power Star Interface Circuit Board Connectors
J28
J13
J14
J12
J11
J10
J9
J8
J7
J6
J27
J24
J25
J23
J22
J21
J20
J19
J5
C-7
C-8
Connector Descriptions
Figure C.5 PowerFlex 700H Star Coupler Circuit Board Connectors
H8
H7
H6
H5
H4
H3
H2
H1
H18
H17
H16
H15
H14
X2
H13
H12
H11
H23
H22
H21
Table C.I PowerFlex 700H and 700S Interface Board to ASIC Board on Power
Structure #1 Fiber Optic Connections
Interface Board Fiber
Optic Connector
700H
700S
H1
J8
H2
J9
H3
J10
H4
J11
H5
J12
H6
J14
H7
J13
(1)
ASIC Board
Fiber Connector Description: Reference to ASIC
Type to Type (1)
Board
TX
. . . RX
H1
Gate_Enable
TX
. . . RX
H2
U_Gate
TX
. . . RX
H3
V_Gate
TX
. . . RX
H4
W_Gate
TX
. . . RX
H5
A/D Convert
TX
. . . RX
H6
VBUS_RX
RX . . . TX
H7
VBUS_TX
Refer to Figure C.1 on page C-2 for ASIC board fiber-optic connectors.
Connector Descriptions
C-9
Table C.J PowerFlex 700H and 700S Interface Board to ASIC Board on Power
Structure #2 Fiber Optic Connections
Interface Board Fiber
Optic Connector
700H
700S
H11
J19
H12
J20
H13
J21
H14
J22
H15
J23
H16
J25
H17
J24
(1)
ASIC Board
Fiber Connector Description: Reference to ASIC
Type to Type (1)
Board
TX
. . . RX H1
Gate_Enable
TX
. . . RX H2
U_Gate
TX
. . . RX H3
V_Gate
TX
. . . RX H4
W_Gate
TX
. . . RX H5
A/D Convert
TX
. . . RX H6
VBUS_RX
RX . . . TX
H7
VBUS_TX
Refer to Figure C.1 on page C-2 for ASIC board fiber-optic connectors.
Figure C.6 Termination Points on ASIC Feedback Boards
H900
X900
H901
H902
H903
Table C.K ASIC Feedback Board on Power Structure #1 to ASIC Board on Power
Structure #1 Connections
ASIC Feedback
Board Connector Pin to
X900
1
...
2
...
3
...
4
...
5
...
6
...
ASIC Board
Pin Connector
1
X26
2
3
4
5
6
Description: Reference to ASIC Board
PHU
PHV
PHW
Trip_Out
+5V
+5V
Table C.L ASIC Feedback Board on Power Structure #2 to ASIC Board on Power
Structure #2 Connections
ASIC Feedback
Board Connector Pin to
X900
1
...
2
...
3
...
4
...
5
...
6
...
ASIC Board
Pin Connector
1
X26
2
3
4
5
6
Description: Reference to ASIC Board
PHU
PHV
PHW
Trip_Out
+5V
+5V
C-10
Connector Descriptions
Table C.M ASIC Feedback Board to PowerFlex 700S High Power Star Interface Board
Connections
ASIC Feedback Board
Connector
H903 on Power Structure #1
H903 on Power Structure #2
High Power Star Interface
to Board Connector
. . . J28
. . . J27
Description: Reference to
Star Interface Board
Trip_P1
Trip_P2
Table C.N ASIC Feedback Board to PowerFlex 700H Star Coupler Board Connections
ASIC Feedback Board
Connector
H900 on Power Structure #1
H901 on Power Structure #1
H902 on Power Structure #1
H903 on Power Structure #1
H903 on Power Structure #2
Hardware Connections
to
...
...
...
...
...
Star Coupler Board Connector
H21
H22
H23
H8
H18
Description: Reference to
Star Coupler Board
PHU
PHV
PHW
Trip_P1
Trip_P2
Figure C.7 Fan Inverter Circuit Board Connectors
X3
X8
Note: There is a left and right main cooling fan inverter on both Power
Structures. The connections for each pair of fan inverters are the same.
Table C.O ASIC Board to Left Side Main Cooling Fan Inverter Connections
Description
+15V dc power to
Fan Inverter board
Fan Control
Alarm from Fans
(1)
ASIC Board
Fan Inverter
Connector(1) Pin Number Pin Number Connector Description
X11
2
2
X8
+15V dc power
from ASIC board
3
3
Fan Control
4
7
Fan Alarm to
ASIC board
Refer to Figure C.1 on page C-2 for ASIC board fiber-optic connectors.
Table C.P Left Side Main Cooling Fan Inverter to Right Side Main Cooling Fan Inverter
Connections
Description
+15V dc power
Fan Control
Fan Alarm
Left Side Fan
Inverter
Connector
Pin Number
X11
2
3
4
Right Side
Fan Inverter
Pin Number Connector Description
2
X8
+15V dc power
3
Fan Control
7
Fan Alarm
Connector Descriptions
C-11
Table C.Q Right Side Main Cooling Fan Inverter Connections
Description
+15V dc power
Fan Alarm
Fan Inverter
Connector
X3
Fan Inverter
Pin Number Pin Number Connector Description
2
4
X3
+15V dc power
4
2
Fan Alarm
Figure C.8 X50 Terminal Block Connectors
Terminal Blocks
Customer Connections
Example External Precharge Circuitry
Drive Connections
X50 #1
ASIC Board #1
X9
1
25
+24V DC
2
26
0V DC
3
21
M
4
Charge
Relay
23
X15
CR1
Pilot Relay
CR1
M
Main DC Contactor
M
CR2
Precharge
X50 #2
ASIC Board #2
X9
1
25
+24V DC
2
26
0V DC
3
21
M
4
23
Charge
Relay
X15
For DC Input Only
(Do Not Install on AC Input Drives)
Table C.R X50 Terminal Block Precharge Circuit Connections
ASIC Board
Connector Terminal
X9 on ASIC
25
Board #1
26
X15 on ASIC
21
Board #1
23
X9 on ASIC
25
Board #2
26
X15 on ASIC
21
Board #2
23
to X50 Terminal Block
...
1
...
2
...
3
...
4
...
1
...
2
...
3
...
4
Description
Precharge Complete Signal
Precharge Complete Signal
Charge Relay Contact
Charge Relay Contact
Precharge Complete Signal
Precharge Complete Signal
Charge Relay Contact
Charge Relay Contact
C-12
Notes:
Connector Descriptions
Appendix
D
Disassembly / Assembly Diagrams
For a Diagram on…
Main Power Structure Assembly
Right Side of Power Structure
Left Side of Power Structure
Fan Inverter Assembly
ASIC Assembly
ASIC Assembly
Main Fan Assembly
Disassembly/Assembly
Diagrams and Spare Parts
Numbers
See...
page D-2
page D-4
page D-6
page D-7
page D-8
page D-8
page D-9
Diagrams on the following pages illustrate disassembly and assembly of the
drive and its sub-systems and are followed by a list of spare part numbers
where applicable.
When ordering spare parts, you must provide the serial number of the drive.
The serial number is located on the data nameplate on the Control Frame
just above the bar code.
Cat No.
20D
500 N 0 NNNBNNNN
J
UL Open Type/IP00
540V
250 kW
Normal Duty Power
200 kW
Heavy Duty Power
Input: DC,
462 - 594
DC Voltage Range
Amps
350
Output: 3 Phase, 0 - 320Hz
AC Voltage Range
0 - 400
50 Hz
Base Hz (default)
Continuous Amps
420/500
630/550
1 Min Overload Amps
840/630
2 Sec Overload Amps
MFD. in 1989 on Nov 9
Cat No.
20D
J
300 N 0 NNNBNNNN
UL Open Type/IP00
540V
Normal Duty Power
160 kW
Heavy Duty Power
132 kW
Input: DC,
DC Voltage Range
462 - 594
Amps
350
Output: 3 Phase, 0 - 320Hz
AC Voltage Range
0 - 400
Base Hz (default)
50 Hz
Continuous Amps
300/245
330/368
1 Min Overload Amps
450/490
2 Sec Overload Amps
Series: A
650V
250 kW
200 kW
Standard I/O: NONE
Original Firmware No. 2.04
C
583 - 713
350
UL
Æ
US
LISTED
IND CONT EQ
0 - 460
60 Hz
300/245
330/368
450/490
MFD. in 2005 on Feb 29
Serial Number: 2622381652
MADE IN THE USA (FAC 1B)
2622381652
MADE IN THE USA (FAC 1B)
450 kW
500 kW
Frame #: 10
583 - 713
350
0 - 460
60 Hz
420/500
630/550
840/630
Frame #: 12
Serial Number: 2622381652
26223816
A complete list of spare parts for PowerFlex 700H/S drives is available on
the Allen-Bradley web site at:
http://www.ab.com/support/abdrives/powerflex70/PF7ReleasedParts.pdf
D-2
Disassembly / Assembly Diagrams
Figure D.1 Main Power Structure Assembly
!
ATTENTION: The sheet metal cover and mounting screws on
the ASIC Board located on the power structure are energized at
(-) DC bus potential high voltage. Risk of electrical shock,
injury, or death exists if someone comes into contact with the
assembly.
Main Terminal Covers
Touch Cover, Front
Touch Cover, Side Plates
Input Terminal Cable Insulator
Input Terminal Assembly
Bus Bar
Insulator for Bus Bar
Motor Connector Assembly
Gate Driver Board
DC Fuse Base
Left Side Board Bracket
Right Side Board Bracket
ASIC Assembly
Upgrade Kit
Adapter Board
Plastic Cover
Base, Top Right
Fan Inverter Capacitor
Plastic Cover
Base, Top Left
Fan Inverter Assembly,
Left
Fan Inverter Assembly,
Right
Disassembly / Assembly Diagrams
Table D.A Main Power Structure Assembly Part Numbers
Part Name
Adapter Board
Air Flow Guide Right
ASIC Assembly Upgrade Kit (without ASIC Board)
Bus Bar
Fan Inverter Assembly, Left
Fan Inverter Assembly, Right
Fan Inverter Capacitor 7µf 450V ac
Gate Driver Board
400/480V
600/690V
Input Terminal Assembly
Input Terminal Cable Insulator
Insulator For Bus Bar
Left Side Board Bracket
Main Terminal Cover
Plastic Cover Base, Top Left
Plastic Cover Base, Top Right
Right Side Board Bracket
Touch Cover Front
Touch Cover Side Plate
Part No.
20-VB00330
NA
20-FR10850
NA
20-FR10844
20-FR10845
20-PP00060
SK-H1-GDB1-F10D
SK-H1-GDB1-F10E
NA
NA
NA
NA
NA
NA
NA
NA
NA
NA
D-3
D-4
Disassembly / Assembly Diagrams
Figure D.2 Right Side of Power Structure
Air Flow Guide, Right
Snubber Capacitor Assembly
Rectifying Board
DC Bus Bar
DC Bus Bar Insulator
DC Bus Bar
DC Bus Bar Insulator
DC Bus Bar
Rectifying Module
DC Bus Bar Insulator
Discharging Resistor
Output Power Module
Frame
Electrolytic Capacitor
Table D.B Right Side of Power Structure Part Numbers
Part Name
Air Flow Guide Right
DC Bus Bar
DC Bus Bar Insulator
Discharging Resistor
Electrolytic Capacitor
Frame
2x16k
ELKO 3300µf 420V for 400/480V Drives
ELKO 5600µf 420V for 600/690V Drives
Part No.
NA
20-FR10044
20-FR10052
20-FR10190
20-FR10027
20-FR10028
20-FR10143
20-PP00056
20-PP01005
20-PP01099
NA
Disassembly / Assembly Diagrams
Part Name
Output Power Module
Rectifying Board
Rectifying Module
Snubber Capacitor Assembly
400/480V
600/690V
400/480V
600/690V
400/480V
600/690V
Part No.
NA
NA
20-VB00459
20-VB00460
20-FR10820
20-FR10821
20-PP10019
D-5
D-6
Disassembly / Assembly Diagrams
Figure D.3 Left Side of Power Structure
!
ATTENTION: The sheet metal cover and mounting screws on
the ASIC Board located on the power structure are energized at
(-) DC bus potential high voltage. Risk of electrical shock,
injury, or death exists if someone comes into contact with the
assembly.
ASIC Assembly (without ASIC Board)
DC Bus Bar
DC Bus Bar Insulator
DC Bus Bar
DC Bus Bar Insulator
DC Bus Bar
DC Bus Bar Insulator
Cover Plate
Output Power Module
Insulation Support
Discharging Resistor
Electrolytic Capacitor
Frame
Snubber Capacitor Assembly
Disassembly / Assembly Diagrams
Table D.C Left Side of Power Structure Part Numbers
Part Name
ASIC Assembly (without ASIC Board)
Cover Plate
DC Bus Bar
DC Bus Bar Insulator
Discharging Resistor
Electrolytic Capacitor
2x16k
ELKO 3300µf 420V for 400/480V Drives
ELKO 5600µf 420V for 600/690V Drives
Frame
Insulation Support
Output Power Module
400/480V
600/690V
Snubber Capacitor Assembly
Figure D.4 Fan Inverter Assembly
Fan Inverter Capacitor
Fan Inverter Board
Fan Inverter Assembly, Left and Right
Table D.D Fan Inverter Assembly Part Numbers
Part Name
Fan Inverter Assembly, Left
Fan Inverter Assembly, Right
Fan Inverter Board
Fan Inverter Capacitor 7µf 450V ac
Part No.
20-FR10844
20-FR10845
20VB00299
20-PP00060
Part No.
NA
NA
20-FR10048
20-FR10052
20-FR10191
20-FR10026
20-FR10028
20-FR10143
20-PP00056
20-PP01005
20-PP01099
NA
NA
NA
NA
20-PP10019
D-7
D-8
Disassembly / Assembly Diagrams
Figure D.5 ASIC Assembly
!
ATTENTION: The sheet metal cover and mounting screws on
the ASIC Board located on the power structure are energized at
(-) DC bus potential high voltage. Risk of electrical shock,
injury, or death exists if someone comes into contact with the
assembly.
ASIC Assembly Cover
ASIC Board
ASIC Assembly Bracket
ASIC Assembly Bracket
ASIC Assembly Bracket
ASIC Assembly Bracket
Table D.E ASIC Assembly Part Numbers
Part Name
ASIC Assembly Bracket
ASIC Assembly Bracket
ASIC Assembly Bracket
ASIC Assembly Bracket
ASIC Assembly Cover
ASIC Board for 400/480V Drives
ASIC Board for 600/690V Drives
Part No.
Included in 20-FR10850
SK-H1-ASICBD-D820
SK-H1-ASICBD-D920
SK-H1-ASICBD-D1030
SK-H1-ASICBD-E650
SK-H1-ASICBD-E750
SK-H1-ASICBD-E820
Disassembly / Assembly Diagrams
Figure D.6 Main Fan Assembly
Main Fan
Main Fan Housing, Left and Right
Intake Cone
Table D.F Main Fan Assembly Part Numbers
Part Name
Intake Cone
Main Fan 230W
Main Fan Housing, Left and Right
Part No.
NA
20-PP01080
NA
D-9
D-10
Notes:
Disassembly / Assembly Diagrams
www.rockwellautomation.com
Power, Control and Information Solutions Headquarters
Americas: Rockwell Automation, 1201 South Second Street, Milwaukee, WI 53204-2496 USA,Tel: (1) 414.382.2000, Fax: (1) 414.382.4444
Europe/Middle East/Africa: Rockwell Automation, Vorstlaan/Boulevard du Souverain 36, 1170 Brussels, Belgium,Tel: (32) 2 663 0600, Fax: (32) 2 663 0640
Asia Pacific: Rockwell Automation, Level 14, Core F, Cyberport 3, 100 Cyberport Road, Hong Kong,Tel: (852) 2887 4788, Fax: (852) 2508 1846
Publication PFLEX-TG004A-EN-P – May 2006
Copyright © 2006 Rockwell Automation, Inc. All rights reserved. Printed in USA.