Download COOLECH product series
Transcript
COOLECH product series
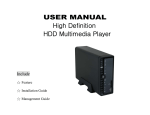
High Definition Multimedia HDD Player
Wifi,Network,Recording,Timeshifiting,High-definition....
Foreword
Dear Customer,
Thanks for you coming to COUPOINT DIGITAL FAMILY.
COOLECH is a product brand name under COUPOINT. COOELCH CP-816R is a brand new
HDD Player, designed by a famous Korean Designer.
Nowadays, products are more similar in the market. As end-users, we are often into troubles how to
make the best purchase choice. Because we are often aware that what we are when what products
we choose. COOLECH is born to be unique. So you will be what you want to be when you choose
COOLECH.
With COOLECH CP-816R, you will enjoy movie and music no matter if they are stored in the hard
drives or streaming from computer, view photos of precious moments, and record your favorite TV or
movie programs.
Scheduled Recording won’t let you miss any favorite programs.
Convenient file operation (editing, copy, delete, etc) without personal computer will save you lots
of precious time.
It’s a good choice to use this product as a portable storage device for its built-in HDD and
high-speed USB 2.0. This player has main functions as follows: Movie Playback – supports DAT
(VCD), VOB (DVD), IFO (DVD), MPG (MPEG-2/1), AVI (MPEG-4 ASP: XviD), and MPEG2 TS files;
resolution up to 1080i; Video Recording – supports one button recording and schedule recording in
MPG format, can easily record programs from TV, DVD player and DV, and save as MPEG-2 (.mpg)
format; also can edit the recorded titles; Music Playback – supports MP3, OGG, and WMA * files,
supports one button playlist music playback; Photo Playback – supports digital camera JPEG, and
BMP files; Card copy – supports memory cards: CF/SD/MMC/MS/MS Pro, supports one button
memory card copy to internal HDD; Data Storage – works as a portable hard disk using USB 2.0 port.
Hopefully the COOLECH CP-816R will make your life more colorful. We are very positive to listen
to your suggestion and then incorporate your ideas into our products of next generation. COUPOINT
will be always together with you. Come on, Join in us.
-1-
Attentions for safety
Attention for COOLECH Product's use
1、Please don’t connect the damaged plug, adapter for avoiding the electronic shock.
2、Please avoid the product’s collision, fallen off and shake.
3、Please don’t operate the appliance with wet hand, or else it will cause the short-circuit
4、Please avoid the water, humidity, grease, mist and dust conditions when you operate the appliance.
5、Please avoid the strong light, stove and heating elements when to operate.
6、For avoiding the data’s damage of the Hard drive or the appliance’s play quality, please separate the
appliance from the loudspeaker or some place with stronger magnatic.
7、Please don’t disassemble or modify the appliance arbitrarily. Or else, it will affect the product’s after sales
service.
8、Please strictly comply with the user manual when to operate.
-2-
Attentions for operation
If you are the new hand for this product, please operate it after reading the use
attentions。
Appliance connection
All of the cables’ connection are feasible under the power off status both of the HDD players and
the TV. If it is a new Hard Drive when to use at the first time, once you can’t find the Hard drive in the
player, please kindly check below two options: 1) confirm the right connection of the adapter and date
wire;
2) Please strictly format the Hard Drive (come into Setup interface-------System HDD Format),
until the appliance reboot automatically, then you will find the inside Hard Drive in the player. Note:
These two options can’t happen at the same time.
Video Ouput and Record
Connect the appliance with TV(TV must be setted up Video mode), press the ‘Program’ button of
the TV remote to switch after the right connection with the HDMI, YPbPr、AV out port of the player to
the the opposite port on the TV. If without the Output signal , please switch the Video Signal System
(such as the 480P, 720P, 1080i). All of the recorded file extension is .mpg which will automatically
set up a new folder in the FAT32 subarea. The recorded file will be saved in “My Recorder”. If the
recorded file has problems, can’t record, less of capability or need long time record, please kindly
change the Hard drive with a larger capability.
USB Host connection to USB or Wireless USB
When connet the USB to the appliance, there is a connect notice on the screen. Note: USB and
Hard drive can’t connect to the appliance at the same time.
Hard drive format, Replace and damage
When installed the new Hard Drive inside HDD player, it will display the format message. The
default format is setted up into two subarea ---NTFS & FAT32. When carrying on the Hard drive
Format, please don’t turn off the power. If need to exchange, please be careful to the cable and data
wire. If it is very hot of the HD, please exchange it after its adequate heat dissipation No responsibility
given to the saved data in the HD because of the HD’s damage. As to the very important data, please
keep a copy.
Wireless Network
Connect Wireless USB to the appliance, because of the hardware’s compatibility, all of the
Wireless USB are not compatible completely , here suggest to refer to the Item which is offered by
COOLECH website or contact with the after sales service directly.
Exchange the battery, signal’s receiving and degrees
Please exchange the new battery on the remote and confirm the two poles’ right connection (+,
-). No responsibility given to the environment pollution which is caused by the Fire because of the
wrong connection of battery. The distance of receiving the signal is within 7—10 Meters and degree’s
use range (Left & right) is 15°.
COOLECH products exterior cleaning
Turn off the power before cleaning. For avoiding the product’s exterior’s scratch, please
use the cotton to clean up.
-3-
**Attention: When the appliance is under the non-use condition or without play,
Please cut off all of the power. **
Contents
Foreword......................................................................................1
Attentions for safety....................................................................2
Attentions for operation..............................................................3
Contents......................................................................................4
1. Product features....................................................................6
1.1 COOLECH Topology structure .............................................6
1.2 Specifications ........................................................................7
2. COOLECH Button and Port....................................................8
2.1 Tips for press button of front panel ....................................8
2.2 Port tip .....................................................................................9
2.3 COOLECH Accessories...............................................9
3. Installation and Connection.............................................10
3.1 I n s ta l l i n g Ha r d Dr i v e s t e ps .............................................10
3.2 C o n n e c t i o n a m o n g a l l c a b l e s a n d s e t t i n g .........................12
3.2.1 Connecting the Video in ..................................................12
3.2.2 Connecting the Video out ................................................13
3.2.3 Connecting the YPbPr ......................................................14
3.2.4 Connecting the HDMI ........................................................14
3.2.5 C o n n e c t i n g t h e A u d i o ................................................15
3.2.6 Connecting the Other device ............................................15
4. Getting Started............................................................17
4.1 The Remote Control ............................................................17
4.2 S e l e c t i n g Vi d e o I n .......................................................22
4.3 S el e ct i n g f i l e C o p y ........................................................22
4.4 Selecting Browser ..............................................................22
4.5 S e l e c t i n g S e t u p ............................................................23
4.6 Selecting Time REC ..........................................................23
5. Setup Menu..................................................................23
5.1 Ch an g i n g Sys t e m Se t t i n g s ..............................................23
5 . 2 C h a n g i n g Vi d e o S e t t i n g s ..............................................25
5.3 Changing Audio Settings ....................................................27
5.4 Changing Record Settings .................................................29
5.5 Changing Photos Settings ...................................................30
-4-
5.6 Changing Netw ork Settings ..............................................31
6. Format Hard disc................................................................33
6.1 T h e f i r s t s t e p ...............................................................34
6.2 The second step ..................................................................34
6.3 Congratulation page ............................................................34
7. The REC List and Timer Recorder Menu...........................35
7.1 The REC List ................................................................35
7.2 Timer Record Menu .............................................................35
7.2.1 Creating a New Schedule ................................................35
7.2.2 Editing Schedules .........................................................36
7.2.3 Deleting Schedules ..........................................................36
7.2.4 View ing Schedule Status View ing Schedule Status. . . . . . 3 7
7.2.5 View ing Recording History .............................................37
8. Browser Menu......................................................................38
8.1 Browsing Music .................................................................39
8.2 Browsing Photos ..............................................................39
8.3 Browsing Movies .................................................................40
8.4 Browsing All ........................................................................41
8.5 File Edit Menu ....................................................................41
9. File Copy Menu......................................................................42
9.1 Step1. Select Source Device ...........................................42
9.2 St e p 2 . S e le c t D e s t in at ion Device ....................................43
9.3 Step3. Sel ect cop y files or folder s ...................................43
9.4 St e p 4 . S e l e c t t h e f ol d e r s o f D e s t i n a t i o n ...........................44
9.5 Step5. Copy Status .........................................................44
10. Firmware Upgrade...............................................................45
10.1 F i r mw ar e U p g r a d e St e ps ...............................................46
10.2 Restart the COOLECH Player automatically..............46
11. Appendices..........................................................................47
-5-
1. Product features
1.1 COOLECH Topology structure
COOLECH Player’s use mainly related to the PC, TV and digital products Which can proceed
the documents’ save, Video, photo and music’s playing and so on.
COOLECH Player can be used as an Hard Drive through the USB cable and the PC’s connection
to save and edit the documents.
COOLECH Player can play the Video, music and photo through the cables of HDMI, YPbPr,AV
out’s connection to TV.
COOLECH Player can access to the PC in LAN and share the Video, music and photos through
the Net’s connection to the Router, PC and so on.
-6-
COOLECH Player also can play the Video, music and photos by through the connection to the
USB or Hard drive. If connect it to the wireless USB which can visit the related files in LAN.
Share high quality audio effect by through the connection both the player and the amplifier.
Record your favourate programs through AV In.
、、、、、、、、、、、、、、、
1.2 Specifications
Model: CP-816R
COOLECH Specifications:
Hardware
* CPU: REALTEK RTD1262
* DDR SDRAM support:32M x 16bit
* NOR Flash Support:8M x 8bit
Video Output
* CVBS (Input +L /R)
* CVBS (Output + L/R)
* HDMI 1.1
* Component (Y/Pb/Pr)
Audio Output
* Stereo
* Optical & coaxial Digital audio output
Networking
* Ethernet interface, 10-baseT/100-baseT
USB
* USB 2.0 host 2 port
* USB Device 1 port
HDD Type
* SATA Ⅰ/Ⅱ HDD
* HDD FORMAT
* NTFS/FAT32
Power
* Adapter AC100~240 V,DC12V/3A
Human Interface Device
* Remote control (standard)
Software
Video [extension(s)]
* MPEG1 [.dat, .mpg]
* MPEG2 [.vob, .MPG, .TS]
* MPEG4 (.avi, .divx, .xvid]
* Up to 1080i output
Audio [extension(s)]
* MP3 [.MP3]
* ADIF, ADTS [.aac]
* O.G.G. [.ogg]
* WMA [.wma]
Subtitle [extension(s)]
* MicroDVD [.sub]
-7-
* SubRip [.srt]
* Sub Station Alpha [.ssa]
* Sami [.smi]
Photo [extension(s)]
*JPG /JPEG /BMP (software decode)
Recording
* One Touch Record: Record to FAT32 HDD
* Recoding Quality Adjustable: HQ/SP/LP/EP/SLP
* Recording on FAT32: HDD & USB selectable
* Time-shift: On FAT32, HDD or USB selectable keeping buffer on HDD or USB
OSD Language
* English (Standard)
* Chinese Simplified (Standard)
* French (Optional)
* Spanish (Optional)
* German (Optional)
* Portuguese (Optional)
* Swedish (Optional)
2. COOLECH Button and Port
You can run the player through press button below without remote controller. Please follow the
instructions below。
2.1 Tips for press button of front panel
-8-
2.2 Port tip
IT will realize perfect video and audio playback through connecting to TV or Stereo.
2.3 COOLECH Accessories
Please confirm if the device matches accessories when you receive COOLECH product.**IF
you need other related accessories, please consult Coupoint customer support ahead of 3 work days.
**
-9-
All the accessories above are offered by COOLECH。
Note: We won’t release newsletter to each user y when we change accessories in order to
offer more qualified accessories. But please keep keen attention on our website about” What’s
new”
**Attention: Please follow the user manual instructions when you run the COOLECH
Player. Please be careful when you install hard drive. We advise that you’d better connect all
cables related to the player, and then connect TV power cord finally. It may cause bad
influence if you connect TV power cord firstly. **
3. Installation and Connection
3.1 Installing Hard Drive steps
Please follow the instructions below when you install hard drive.
Use Tool to open the screw at the bottom.
Fix the device by left hand and push the case remarked “COOLECH” by the Thumb of right hand
till you find out a red edge appearing. Please refer to a, b below.
- 10 -
Please make sure that the circuit side of hard drive will be put slowly into the case. Please refer to
the picture c, d, e below.
**Attention: Please make sure that two cables are connected to the port of hard
drive at the same horizon level when you connect power cord and data cord to hard drive.**
Please fix the hard drive with screw at the place marked red circle and then install panel of the player, fix
the bottom panel with screw too after you finish installing hard drive. (Push the COOLECH panel with your
thumb until inside and outside case are overlapped perfectly. Please refer to f. g. h below.)
- 11 -
3.2 Connection among all cables and setting
There are AV out, YPbPr, HDMI output, AV in, Coaxial, Optical audio output, USB Device, USB host
1/2, etc. Through these ports connected to TV, Computer or other device, COOLECH Player will realize perfect
function based upon menu settings. Please refer to the structured pictures below.
3.2.1 Connecting the Video in
For Recording Function of COOLECH PLAYER, Please refer to the followings below to
connect cables.
- 12 -
Please select cables of same color when connecting TV to COOLECH PLAYER. After turning on
the Player, please press ”TV System” of the Player Remote controller for the favorite TV mode.
COOLECH allows you to watch TV programs while Recording TV Programs
3.2.2 Connecting the Video out
Please refer to the followings below when connect COOLECH PLAYER TO TV
Please select the right color cables to connect TV and COOLECH Player. After COOLECH
player turns on, please select TV mode under TV system of SETUP menu when AV cables are
connected to TV port. Then it will appear Video, Music, and Pictures of good quality through TV
monitor.
- 13 -
3.2.3 Connecting the YPbPr
YPbPr Video cable to COOLECH PLAYER.
Please connect YPbPr cable to TV according to same color matching. After turning on the
Player, please select Video mode through SETUP option under TV System menu like 480P,
720P, 1080i
**Attention: COOLECH won’t offer YPbPr cable and Audio cable. Please select
Optical or L/R Audio cable of AV cable when output audio.**
3.2.4 Connecting the HDMI
Connection HDMI cable to COOLECH PLAYER.
Please connect HDMI cable to TV according to same color matching. After turning on the
Player, please select Video mode through SETUP option under TV System menu like 480P,
720P, 1080i, and so on.
- 14 -
3.2.5 Connecting the Audio
COOLECH player connecting to Amplifier
When connecting COOLECH Player to Amplifier or Audio Receiver, please make sure that
OPTICAL cable and COAXIAL cable are connected per matching port. After COOLECH Optical or
Coaxial output port connected to Optical cable or Coaxial cable with Amplifier, Audio receiver, it will
make you enjoy 5.1CH audio. You have to use Amplifier or Audio Receiver if you want to get DTS and
DOLBY Audio.
**Attention: COOLECH won’t offer optical and coaxial cables in the accessories.
There is no audio input after optical cable and coaxial cable are connected. Please enter
Audio output under SETUP to select Digital signal. **
3.2.6 Connecting the Other device
COOLECH PLAYER Connecting to Computer.
- 15 -
We will use USB cable to connect Computer when COOLECH Player are connected to
Computer , Route in order to keep that there is enough power supply for the Player. At this
moment, COOLECH is like a portable hard disk. You can manager files in the COOLECH Player.
COOLECH PLAYER can also visit files in the computer. IT can play movies, picture, music.
**Attention: This happens when COOLECH and computer are in the same local area
network.**
COOLECH PLAYER Connecting to USB or Portable hard disk.
Within local area network, users can manage files from USB, Portable hard disk and
computer to play movies, pictures, music, etc.
** Attention: Please make sure additional power adapter for the external hard drive
when the external hard drive needs over power adaptor 5V/1A in order to make them work well.
**
- 16 -
4. Getting Started
4.1 The Remote Control
All procedures in this manual can be carried out using the remote control buttons.
Certainfunctions can also be carried out using the front panel at the front of the DVD recorder.
See the following for details on each button and its function:
- 17 -
1. POWER button:
Press to POWER on or off the AVHDD recorder.
2. DISPLAY button:
Press to display current status.
Press during playback and an onscreen display appears, showing track
number and time elapsed/remaining.
Press during recording and an onscreen display appears, showing the recording quality
setting and time elapsed.
3. AUDIO button:
Press to select an audio track on a HDD or USB file.
4. TIMER button:
Press to enter the Timer Menu directly to add, edit and delete recording schedules.
See “Creating a New Schedule” on page 11 for more
details.
5. GOTO button:
Press to jump to a specific point on the disc or title. Specify the point using Title, Chapter
and Time.
6. STOP button:
Press to stop playback.
7. PLAY button:
Press to begin playback of a DVD or HDD title.
8. ZOOM button:
Press to zoom in/out when playing back photos or Video programs.
Photo zoom levels: 2X, 4X, 8X, 16X;
Video zoom levels: 2X, 3X, 4X, 8X
- 18 -
9. COPY button:
Press to copy file from one device to other.
See “FILE COPY MENU” on page 30 for more details.
10. CM SKIP button:
Press to advance 30 seconds when in playback or record mode.
11. REPEAT buttons:
Press REPEAT 1 / ALL to set repeat option - Chapter, Title or Off.
12. TIMESHIFT button:
Press to activate the timeshift function, which allows you to pause live TV and resume the
program from the point you left it. While paused, the program is
recorded to the HDD, as long as space is available.
Press to activate TIME SHIFT function and wait for the
PLAY arrow to appear on the screen.
Press
and the program is paused.
Press
to resume viewing the program.
Timeshift mode remains active until you press the
13. FAST FORWARD / FAST REWIND buttons:
Press to fast forward or fast rewind the current playback.
Press repeatedly to select fast forward or faster rewind speeds.
14. VOL + / - buttons:
Press to increase or decrease the volume.
15. SETUP button:
- 19 -
button.
Press to access the Setup Menu directly to change system settings.
16. ENTER button:
Press to select confirm in menus.
17. BROWSER button:
Press to browse the music, photo, movie, all files on USB,HDD.
18. NUMBER button:
Press to enter channel numbers or numeric input when changing settings
19. SELECT buttons:
Press to select file or folder to rename or delete.
20. GUIDE button:
Press to view the Guide menu. See “The Guide Menu” on page 6 for more details.
21. SUBTITLE button:
Press to activate available subtitles when play the DIVX file.
DivX subtitle supported: SRT, SMI, SUB, SSA format file.
22. MUTE button:
Press to mute audio output, and press again to resume.
23. PAUSE / STEP button:
Press to pause current playback.
Press again to step to the next frame.
Press
to resume playback.
24. SLOW button:
Press to play back in slow motion. Three motion settings are available.
Five slow motion levels (3/4,1/2,1/4,1/8,1/16x) are available.
- 20 -
Press
to resume regular playback.
25. TV SYSTEM button:
Press to switch between NTSC Interlaced, NTSC Progressive,
PAL Interlaced, and PAL Progressive.
26. RECORD button:
Press to begin recording or to resume when recording has been paused.
Press repeatedly to set OTR length (30 mins / 60 mins / 90 mins / 120 mins / 180
mins
/240 mins/Off).
27. REPLAY button.
Press to backward 10 seconds of the current playback, which suitable for sport program.
28. PREVIOUS buttons:
Press to go the prev. on a HDD or USB file when playing music.
Press to page up the file list at Browser.
When play photo, the button is enable; play Movie and Mp3 file, the button is disable.
NEXT buttons:
Press to go the next on a HDD or USB file when playing music.
Press to page down the file list at Browser.
When play photo, the button is enable; play Movie and Mp3 file, the button is disable.
29. OPTION button:
Press to select option bar.
30. Navigational buttons:
Press the arrow buttons to navigate the menus.
31. RETURN button:
Press to return to the previous screen when navigating the menus.
- 21 -
32. CONFIRM button:
Press to select confirm.
Power on the COOLECH system, you can see the star up page.
After a few second, the system will enter a guide menu. To enter this menu, press
remote control too.
on the
4.2 Selecting Video In
To select the a input source, select Video In button on the guide menu page.
4.3 Selecting file Copy
A clip recorded in HDD or USB disc is called a Title.
Select Browser button on the guide menu page to browser the file which under the “My
Recording” folder.
4.4 Selecting Browser
Select Browser button on the guide menu page to browser movie, photo, music filesstored either
on a HDD, USB, Card Reader, NET or a USB device.
- 22 -
4.5 Selecting Setup
To enter the setup menu, select
menu page.
on the remote control or select Setup button on the guide
4.6 Selecting Time REC
To enter the Time REC setup page, select
on the guide menu page.
on the remote control or select Timer REC button
5. Setup Menu
The Setup Menu allows you to configure video, record and system settings.
To enter the menu, select Setup from the Guide menu.
5.1 Changing System Settings
Press
and
on the remote control to select the System tab from the menu.
Menu Language:
Select to choose the OSD (On Screen Display) language.
- 23 -
Press
and
to select the language. Press
to confirm.
Text Encoding:
Select to choose the text encoding language.
Press
and
to select the text encoding language. Press
to confirm.
Time:
Select to set the system time.
Press
and enter Manual setup.
Enter the system menu and press
arrows to adjust each setting.
Press
and
to select each field and the up and down navigation
to confirm.
- 24 -
HDD Format:
Select to HDD Format.
Press
and
button on the remote control to select Cancel or CONFIRM from the menu.
Restore Default:
Select to restore factory defaults.
A confirmation message appears. Select CONFIRM and press RETURN to restore all settings to
defaults.
5.2 Changing Video Settings
Press
and
on the remote control to select the Video tab from the menu bar.
- 25 -
Aspect Ratio:
Select to set aspect ratio.
Press
and
4:3, or 16:9. Press
to select from Pan Scan 4:3, Letter Box
to confirm.
Pan Scan 4:3: Display a wide picture on the entire screen and cuts off the redundant portions. Select
when a standard 4:3 TV is connected.
Letter Box 4:3: Display a wide picture with two black borders on the top and bottom of 4:3 screen
Select when a standard 4:3 TV is connected.
16:9: Compress the image to convert the whole image. Select when a 16:9 TV is
Brightness:
Select to set brightness levels.
Press
Press
and
to adjust brightness. The new setting is previewed onscreen.
to confirm.
Contrast:
Select to set contrast levels.
- 26 -
Press
confirm.
and
to adjust contrast. The new setting is previewed onscreen. Press
to
TV System:
Select to adjust TV system.
When insert HDMI TV, TV System only choose Auto EDID,480P,576P,720P 50HZ,720P 60HZ,1080i
60HZ.
Press
Press
and
to set the HD Resolution, depending on your viewing preferences.
to confirm.
5.3 Changing Audio Settings
Press
and
on the remote control to select the Audio tab from the menu bar.
- 27 -
Night Mode:
Select to toggle Night Mode on and off.
This function reduces the maximum dynamic audio range.
Press
and
to to enable or disable the function. Press
to confirm.
Digital Output:
Select to set Digital output type.
or
to select from HDMI and SPDIF RAW or LPCM.
Press
S/PDIF (Sony/Phillips Digital Interface Format) carries digital audio signals between the DVD recorder
and other component devices, such as a home theater setup with surround sound.
The HDMI (High Definition Multimedia Interface) is a compact audio/video connector interface for
transmitting uncompressed digital streams. It represents a digital alternative to consumer analog
standards such as Radio Frequency (RF) coaxial cable, composite video, S-Video, SCART,
component video, D-Terminal, and VGA.
RAW data is the original bit stream and will provide a better audio output quality.
LPCM is the default setting, and provides 2 channels audio output.
- 28 -
5.4 Changing Record Settings
Press
and
on the remote control to select the Record tab from the menu bar.
Quality:
Select to set the default recording quality setting.
Press
and
to select the quality setting you require.
The highest quality setting is HQ which requires the most storage space. The other settings reduce
recording quality sequentially but also require less storage space. Press
Permanent timeshift:
Select to set the Permanent timeshift on or off.
- 29 -
to confirm.
Press
and
to select. Press
to confirm.
Record Device:
Select to choose the device to which to record .
Press
and
to select to record on either HDD or USB.
Press
to confirm.
5.5 Changing Photos Settings
Press
and
on the remote control to select the Photos tab from the menu.
Slide Show Time:
Select to set slide show time.
- 30 -
Press
Press
and
to select the interval you require.
to confirm.
Transition Effect:
Select to set the transition effect of photos.
Press
and
to select the transform of photo you require:
Cross Fade – fade in and fade out
Left to Right- from left to right
Top to Bottom- from top to bottom
Waterfall like a steep descent of water from a height
Snake – like snake motion
Dissolve – like water dissolve
Strip Left Down – like strip cover from top of left to bottom of right
All Effect Shuffle – shuffle in and out
Press
to confirm.
Background Music:
Select to play the music file under the same folder.
Press
function.
Press
and
to select the position of the background music. Select “off” to close the
to confirm.
5.6 Changing Network Settings
- 31 -
Press
and
on the remote control to select the Network tab from the menu.
Wired Lan Setup:
Select to set the Network Setting. Before use the Network functions, please check following items:
Connect the MKAVHDD to Network first.
Please enable NetBIOS of TCP/IP on computer.
Please turn off your PC’s firewall.
Please share the folders which you wish to browse in your PC.
Press
Press
and
to select DHCP (AUTO) or FIXED IP (MANUAL).
to confirm.
DHCP DNS (AUTO)
Set the DNS server IP address by auto.
- 32 -
Press
to confirm.
FIX IP (MANUAL)
Using Fixed IP, it is required to enter followings. IP address, Subnet Mask, Default Gateway. For
further assistant to above settings, please contact to the network administrator.
Press
Press
to enter the IP address.
to confirm.
Press to confirm.
6. Format Hard disc
When you insert a Hard disc on the system at the first time, System will remain you to enter the
Hard disc format interface. You can also press
Format HDD.
into Setup menu and select HDD Format to
First, the system will jump a warning page.
Press
and
on the remote control to select you wish.
When highlight move the OK button, Press
return.
to enter the next step. Otherwise, select cancel to
- 33 -
6.1 The first step
Step 1: FAT32 & NTFS Partitioning
Please according the screen remain to adjust the capacity.
Use
Press
and
and
to adjust the Fat32 and NTFS partition.
on the remote control to select back or next.
When highlight move the Next button, Press
to return.
to enter the next step. Otherwise, select back button
6.2 The second step
Step 2: Hard disk format
Press
and
on the remote control to select back or format.
When highlight move the Format button, Press
to start. Otherwise, select back button to back.
6.3 Congratulation page
When complete the format, the system will display the congratulation page.
- 34 -
Select OK button and Press
to exit.
7. The REC List and Timer Recorder Menu
7.1 The REC List
The REC List menu allows you to play all saved titles.
REC List Menu
When you press
to begin recode. System will make a “My Recordings” folder at “HDD1” or USB
device automatically for the first time. And your recode movie file will be saved at this folder. The file
name will be rename according system time.
7.2 Timer Record Menu
The Timer Record menu allows you to create, edit and delete recording schedules and view all
schedule status and history. To enter the menu, select Timer Record from the Guide menu .
7.2.1 Creating a New Schedule
Press
and
on the remote control to select the Edit tab from the menu bar.
Select Add a New Schedule and press.
The schedule setting screen appears.
- 35 -
Use
and
each setting.
on the remote control to move between fields and Press
and
to adjust
Start Time: Enter the date and time of the recording.
Length: Enter the length of the recording.
Repeat: Select how often you want the schedule to record.
Choose from once, Everyday, Mon-Fri, Mon-Sat or for an individual day of the week.
Quality: Select the recording quality. Choose from HQ, SLP, EP, LP and SP.
The higher the quality, the more space required on the hard drive.
See HDD/USB Free Space on the left of the screen for details of how long you can record for
using each setting.
Preview: This small preview window will show the current program of the select channel.
7.2.2 Editing Schedules
Press
and
on the remote control to select the Edit tab from the menu bar.
Select the schedule you want to edit from the list and press
.
The schedule setting screen appears.
Modify the schedule as described in “Creating a New Schedule” on page 10.
7.2.3 Deleting Schedules
Press
and
on the remote control to select the Delete tab from the menu bar.
- 36 -
Select the schedule you want to delete and press
. A confirmation message appears.
Select CANCEL, Delete the selected schedule or Delete all schedules. Press
to confirm.
7.2.4 Viewing Schedule Status Viewing Schedule Status
Press
and
on the remote control to select the Schedule tab from the menu bar.
The schedule list is displayed. Select a schedule and press
.
Select Enable VPS, Disable VPS or Pause the selected schedule.
Press
to confirm.
7.2.5 Viewing Recording History
Press the left and right navigation arrows on the remote control to select the History tab from the
menu bar.
Here you can view a complete history of all recordings that were set.
- 37 -
8. Browser Menu
The Browser menu allows you browse and play music, photo and movie files stored on a HDD or an
external USB device, Network. To enter the menu, select Browser from the Guide menu.
Press
and
to select the device on which the media is stored. Choose from HDD, USB
(for media stored on an external flash disk), Card reader, NET and press
.
When data on HDD,USB device or Card reader is connected the system to Network, you can also
browse photos, listen to MP3 files, and watch videos.
My Short Cut
When you are browsing NET, you can choose the PC name from the menu or you can set “Specific
File Server IP” and access it from “My Short Cut” in the menu.
- 38 -
My Neighbors
When you are browsing NET, When you install “Transcode Server” in your PC. you can choose the PC
name from the menu or you can select “My Neighbors” to access .
Note:
If you install the “Transcode Server” in your PC, the system will support the H.264,RMVB
WMV,RM… format playback through the NET.
8.1 Browsing Music
Use the left and right navigation arrows to select the Music tab.
Press
and
to select the folder containing your audio files. A thumbnail strip appears at
the bottom of the screen, along with song information. Press
want to play and press
and
.
This browsing music function supports Mp3, WMA, AAC, OGG format Playback.
8.2 Browsing Photos
Use the left and right navigation arrows to select the Photos tab.
- 39 -
to select the file you
Press
and
and
to select the folder containing your photo files. Enter the folder press
to select the photo you want to view and press
The photo is displayed full
screen.
Note:
1. When the photo is displayed in full screen mode, the slide show starts automatically.
2. While listening to MP3 files, you can browse the photos at the same time.
While browsing a photo, you can press
or
to rotate a photo in any angle. Beside rotating a
photo, you can press
to zoom in/out that photo, three zoom levels are available.
This browsing photos function supports High Definition Photo (JPG, JPEG, BMP) Playback.
8.3 Browsing Movies
Use the left and right navigation arrows to select the Movies tab.
Press
and
to select the folder(s) containing your movie files. Enter the folder
press
screen.
and
to select the movie you want to view and press
. The movie is played full
This browsing movies function supports High Definition Video(720P,1080i) Playback. For example:
1. MPEG1 (DAT, MPG)
2. MPEG2 (VOB, MPG, TS)
3. MPEG4 (AVI, DIVX, XVID)
- 40 -
Note:
When play the HD Video, you can according the movie resolution to adjust HD Video output. See “HD
Output of SETUP menu” on page 18 for more details.
8.4 Browsing All
Use the left and right navigation arrows to select the All tab.
Press
and
to select the folder(s) containing your all files (Beside Music, Photo and
Movie). Enter the folder press
play.
and
to select the file you want to view and press
8.5 File Edit Menu
Press
and
to select the file or folder, press
to display the Edit tab.
Return: Select to return to the main screen.
Rename: To rename a file, do the following:
1. Press
2. Press
and
on the remote control to select the Rename tab from the menu bar.
on the remote control. The name entry screen appears.
- 41 -
to
3. Use the navigation arrows to select letters and numbers. Select CAPS to toggle between uppercase
and lowercase letters. Press <- to delete a letter. Press -> to insert a space. Press
letter or number.
4. Once you have entered the new name, select OK and press
to input each
to confirm all changes.
If you want to cancel the naming during the process, press
Delete: To delete a title, do the following:
1. Press
2. Press
and
on the remote control to select the Delete tab from the menu bar.
to confirm and delete the file.
3. A confirmation message appears. Press
4. Press
or
and select OK.
to delete the selected file. To cancel delete, select Return.
9. File Copy Menu
The Setup Menu allows you to copy files at NET, USB, HDD each other.
To enter the menu, select File Copy from the Guide menu or select
9.1 Step1.
Select Source Device
- 42 -
on the remote control.
When you enter the File copy interface, press
to copy first.
and
Then press
to select Destination Device, press
9.2 Step2.
Select Destination Device
When into Destination sector, press
Then press
to next step, and press
and
to select the device which your want
to return.
to select the device of the Destination.
to return.
9.3 Step3. Select copy files or folders
At Source sector, press
and
to select and press Enter to select file or folders which
you want to copy. When you succeed to select, at the file or folder name right side will display
- 43 -
.
Then press
to next step, and press
to return.
9.4 Step4. Select the folders of Destination
At Destination sector, press
Then press
and
to next step, and press
to select the folders of destination.
to return.
9.5 Step5. Copy Status
At Pop menu, select OK to copy, select No to cancel.
When copy succeed, the system will display “File Copy Completed!”; if failed, the system will display
“File Copy failed!”
- 44 -
When the File Copy completed! You can select “OK” to browser files, or select “No” return Video1.
10. Firmware Upgrade
10.1 Firmware Upgrade Steps
Please press “TV system” to select AV mode with the remote controller of TV before upgrading
the Firmware when COOLECH player is connected to TV. And then connect USB including Firmware
content to the COOLECH player, at this moment make sure that there is enough power supply for the
player, please press” Stop” button by your left hand on the Front Panel of Player until “Start
Installation….”, and then put off your hand. You can check the installation pictures below for your
reference. Please refer to the picture a, b below.
a
b
Please make sure there will be consistent power supply for the COOLECH Player when
upgrading the Firmware. Otherwise, it will affect the COOLECH Player to play. Please refer to the
pictures c, d below:
c
d
- 45 -
**Attention: Don’t please cut of the power when upgrading the firmware. If the
power is cut off, please re-upgrade the COOLECH Player per the instructions above. **
10.2 Restart the COOLECH Player automatically
Restart the Player automatically after upgrading the firmware
It will restart automatically after upgrading the COOLECH Player. Then the e-picture below will
appear for re-settings.
-First step: setting language
-Second step: setting Time
-Third step: setting network
Lastly, f-picture below will appear.
It means that you already upgraded the firmware successfully
e
f
- 46 -
11. Appendices
Specifications
USB UPPORTED (Read Only):
* USB HDD
* USB Card reader
CONTENT FORMAT SUPPORTED:
* HD JPEG/JPG/BMP
* VOB/MPG/DAT
* MP3/WMA
Maximum number of files recognizable: 9999 files
Compression rate: between 32 kbps and 320 kbps
* JPEG
Maximum number of pictures recognizable: 9999 files
RECORDABLE MEDIA SUPPORTED:
* Built in HDD (DVD+VR mode)
* Built in USB HDD
VIDEO RECORDING MODE
*
*
*
*
*
Mode
HQ
SP
LP
EP
SLP
DVD
1hr
2hrs
3hrs
4hrs
6hrs
80 GB HDD
16hrs
32hrs
48hrs
64hrs
96hrs
120 GB HDD
24hrs
48hrs
72hrs
96hrs
144hrs
160 GBHDD
33hrs
66hrs
99hrs
132hrs
198hrs
VIDEO RECORDING FORMAT
* MPEG2: DVD+VR (HQ/SP/LP/EP/S-LP mode)
AUDIO RECORDING FORMAT
* DVD+VR (HQ/SP/LP/EP/SLP mode): MPEG2 2-chanel
VIDEO OUTPUT SPECIFICATION
* HDMI
Output
* Composite
Output
* Components Output
HDMI 1.1
Vpp 75 Ohm
Y:1 Vpp 75 Ohm
Cb:0.7 Vpp 75 Ohm
Cr:0.7 Vpp 75 Ohm
AUDIO PERFORMANCE
*
*
*
*
DA Converter
AD Converter
Signal-Noise (1kHZ)
Dynamic Range
24-bit/192kHZ
24-bit/96kHZ
≥ 95dB
≥90dB
- 47 -
* Total Harmonic
* Distortion (1kHZ)
≤-85dB
REAR PANEL
* Video Output
RCA Connector (yellow)
* Audio L/R
RCA Connector (white/red)
* Video Input
RCA Connector (yellow)
* Audio L/R
RCA Connector (white/red)
* Components Output
Y, Pb, Pr
* HDMI Output
HDMI 1.1
GENERAL
* Power Supply
* Power Approx.
Consumption
* Operating Temperature
* Operating Humidity
AC 100~240V
35 W
50~60Hz
+5°C to +40°C (+36°F to +104°F)
5% to 80% RH
Note: The specifications and design of this product are subject to change without no
- 48 -


