1
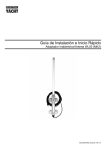
Installation & Quick Start Guide WL60 Wireless Adaptor/Antenna QUICK START WL60- VR1.00 WL60 Quick Start Guide DIGITAL YACHT 1. Introduction Congratulations on the purchase of your WL60 Wireless Adaptor/Antenna. This unit is designed for quick and simple DIY installation on a yacht or power boat. The mounting brackets and suction pads are NOT designed for safe fixing of the antenna whilst a vessel is moving or for extended exposure to the extreme environmental conditions found at sea. It is strongly recommended that your Wireless antenna is removed and placed inside the vessel when in motion or not in use. Before operating the unit you should familiarise yourself with the complete user manual supplied with the product. 2. Before you start The WL60 comes complete with a CD-ROM that includes all necessary drivers for the following operating systems; ® ® Microsoft Windows XP , Windows Vista and Windows 7 Apple Mac OS X 10.4, 10.5, 10.6, 10.7 and 10.8 ® Do not plug in the WL60 to the USB port of your computer until you have inserted the driver CD-ROM. 3. Mounting the WL60 Antenna The WL60 should be mounted outside, with the best possible line of sight of the wireless hotspot antenna that you wish to connect to. There are two methods of mounting the WL60 using the kit of parts included in the box; Sucker Cup Mount Pole Mount Neither of these two mounting methods should be used when the vessel is in motion. Sucker Cup Mounting The most common mounting method is to use the four sucker cups to temporarily stick the WL60 to the outside of the boat. First, feed the USB cable through the two aluminium tube clips and then place one tube clip at the bottom of the WL60 tube body and one tube clip towards the top of the tube body just touching the pan head screw – see photo. Secure the clips by gently tightening the fixing bolts – do not overtighten Insert and secure a sucker cup in each of the four holes in the aluminium tube clips, using the supplied clear plastic thumb nuts. After first ensuring that the surface of the GRP where you wish to mount the WL60 is clean, lightly moisten each sucker cup and then gently push the antenna on to the boat’s side until the sucker cups are flat. This method of mounting is ideal for yachts and power boats and the WL60 can stay mounted in this manner for many days. Removal is quick and simple by gently inserting a finger nail under each sucker cup and levering them off one by one. DIGITAL YACHT WL60 Quick Start Guide Pole Mounting For a more permanent mounting arrangement or when you need to use a pole to get more height, it is possible to mount the WL60 using the U bolts, nuts and washers supplied. The diagram below shows the three steps to mounting the WL60 on a suitable pole (up to 50mm in diameter). Please note that the mounting pole is not supplied. DIGITAL YACHT WL60 Quick Start Guide 4. Installing the WL60 on Windows The WL60 is supplied with Windows compatible drivers that allow it to be used as a second Wireless Network Adaptor on your laptop. You can either; install the drivers and use the normal Windows Wireless Connection function to scan, select and connect to a wireless hotspot or you can use the free Realtek Wireless Lan Utility software which is also supplied on the CD-Rom. It is very important that you do not plug the WL60 in to a USB port on your computer unless you have the WL60 Drivers CD-Rom inserted in your PC. By plugging in the WL60 you will initiate the Windows “Found New Hardware Wizard” which will not be able to complete correctly without the Drivers on the CD-Rom being present. The installation process varies depending upon which Operating System your computer has, so please ensure that you follow the correct procedure. Installation for Windows Vista and Windows 7 (On-Line) By far the easiest method of installation, if your PC is running Windows Vista or Windows 7, is to connect the PC to the internet, as you would normally do, using the internal wireless adaptor and then plug the WL60 in to a spare USB port on the laptop. Figure 1 Windows will detect the new hardware and display the message shown in Figure 1. It will then automatically search the on-line Windows Update server for the correct drivers. Depending upon the speed of your PC and internet connection this should take between 20 seconds and a couple of minutes to complete. You can click on the message and the Window in Figure 2 will be displayed giving you the status of the driver installation. Figure 2 After the correct driver has been found, downloaded and installed the Window in Figure 3 should be displayed. The drivers are now installed correctly and you are ready to use the WL60 to find and connect to a wireless hotspot. Proceed to the “Operating WL60 on Windows Vista and Windows 7” section. Figure 3 Installation for Windows XP, Vista and Windows 7 (Off-Line) If you cannot connect to the internet, you can install the drivers from the supplied Digital Yacht CD-Rom. If you do not have a CD-Rom drive on your computer, you will need to copy the contents of the CD to a USB memory stick. Insert the CD-Rom (or memory stick) in to the PC. The CD should Autorun but if it does not, open the CD and double click on the Menu.Exe file as shown in Fig 4. You should now see the Installation Menu shown in Fig 5. Click the “Install” button and the driver installation should start. Figure 4 WL60 Quick Start Guide DIGITAL YACHT . Figure 5 The drivers are supplied by Realtek who manufacture the wireless chipset that we use in the WL60. The installation is very simple, just click “Next” when prompted and the progress is shown by a green status bar as shown below. Figure 6 Figure 7 When the installation is finished you will be told that the computer now needs a Restart as shown in Fig 8. If you have any other important programs or documents opened, save any work and close them, then click “Finish” and the computer will restart. Once the computer has fully rebooted, plug in the WL60, the new hardware function will start and a pop up window appear saying that it is Installing the drivers as shown in Fig 9. When completed the pop up will change to the one shown in Fig 10, saying that the device software has been installed successfully. The WL60 drivers and Realtek Wireless LAN utility are now installed. Figure 9 Figure 8 Figure 10 WL60 Quick Start Guide DIGITAL YACHT 4. Operating the WL60 on Windows The WL60 can be operated in two ways; 1) 2) Using the standard Windows Wireless Connection Manager – simplest method under Windows Vista and 7 Using the Realtek Wireless LAN Utility – best method for older Windows XP systems (prior to Service Pack The Realtek utility does provide some benefits over the Windows Wireless Manager that Microsoft provided, but in general most people prefer to use the standard Windows Wireless Manager which they know and are familiar with. IMPORTANT NOTE - It is always best to turn off (disable) the internal wireless adaptor on your laptop before using the WL60. The exact method to do this, varies from PC to PC, but some laptops have a dedicated button in or around the keyboard area or a special keyboard combination e.g. pressing the Fn + F8 keys. Operating the WL60 on Windows Vista and Windows 7 Click on the Wireless Networks icon in the task bar (lower right hand side of the screen) and a list of the available wireless networks (hotspots) will be displayed. Your laptops internal wireless adaptor is usually named “Wireless Network Connection” and the WL60 will automatically be named “Wireless Network Connection 2” or possibly another number if other adaptors have been used previously. It is possible to rename this connection to something more meaningful by going in to the “Network and Sharing Center” and renaming the Network Adaptor to “WL60 Wi-Fi Adaptor” or similar, so that you can be certain of which wireless adaptor you are using – as shown in Fig 17. Click on the wireless network you wish to connect to and click the “Connect” button that will appear. You may be asked to enter a password or confirm if the network is a Public, Work or Private network (to set security levels) and then the wireless connection should be made and you will be able to connect to the internet. Figure 17 Operating WL60 on Windows XP - Using the Realtek Utility To connect to a wireless network, you must run the “Realtek USB Wireless LAN Utility” which will now be one of the programs listed in the Start>All Programs menu. The first time you run this program, you will see the window displayed in Figure 18 which shows that you are not connected to a wireless network. Figure 18 Figure 19 WL60 Quick Start Guide DIGITAL YACHT Click on the “Available Network” tab and the window shown in Figure 19 will appear which lists all of the available wireless networks that the WL60 can detect. Select the wireless network that you wish to connect to and click the “Add to Profile” button. You will now be prompted to enter the Network Key (also known as Password, WEP key or Passphrase) for the network that you have selected. Consult the network operator to get the necessary password and enter this in the two boxes at the bottom of the window shown in Figure 20. Click “OK”. Assuming that the password was correct, the WL60 should connect to the network and you will see the window shown in Figure 21. If you click on the “General” tab you should see the window shown in Figure 22 which gives the wireless connection status. . Figure 21 Figure 20 Figure 22 5. Installing and Operating the WL60 on a Mac Insert the WL60 Drivers/Software CD-Rom in to your Apple Mac and using Finder open the folder called MacOS10.4, MacOS10.5, MacOS10.6 or MacOS10.7 depending upon the version of Mac OS X you have. Included in each of these folders is an Installer.pkg package that you can double click on to install. For OSX 10.8 (Mountain Lion) use the Installer in the MacOS10.7 folder which is a 64bit driver and has been successfully tested with Mountain Lion. When you run the Installer.pkg file, the first screen that you see will be the one shown in Fig 23. Click “Continue” for this screen and the next couple of screens that are displayed. You will be asked to enter your Administrator password and then the installation will start and you will see a progress bar as shown in Fig 24. WL60 Quick Start Guide DIGITAL YACHT Figure 23 Figure 24 Once the installation is completed you will see the screen shown in Fig 25. Make sure any important programs or documents are saved and closed properly and then click “Restart”. The Mac will now close down and restart again. Figure 26 Figure 25 Once the Mac has restarted, plug the WL60 in to a free USB port on the Mac and two things will happen. A new Icon will appear in the Dock – as shown in Fig 26. Also a new application will open and a window similar to the one in Fig 27 will be displayed – this is the Realtek Wireless Network Utility. Make sure that your internal Airport wireless adaptor is turned off and then click on the Available Networks tab to display a list of the wireless networks that can be detected, like the one shown in Fig 28. Figure 27 Figure 28 WL60 Quick Start Guide DIGITAL YACHT Select the wireless network that you want to connect to and click “Connect”. You will now see a window like the one shown in Fig 29. Enter the password of the network (if applicable) and click “OK”. The WL60 should now connect to the selected wireless network and display the General Status tab shown in Fig 30. Figure 30 Figure 29 The network details plus the password are stored as a profile which is remembered in case you return to the network again. Click on the “Profiles” tab to display a list of the profiles you have created, as shown in Fig 31. When you return to a network, simply select it in the profile list and click “Apply”. Figure 31