1
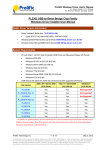
ARMkey Tutorial
Chen-Hanson Ting, 2/20/2008
1.
Install USB-UART Driver
ARMkey uses a PL-2303X chip from Prolific Technology Inc to connect the ARM7
microprocessor LPC2104 to a PC through its USB port. PL-2303 converts the
UART signals from LPC2104 to behave as a USB device to the PC. Then LPC2104
works as a serial peripheral connected to a serial COM port, and the popular
HyperTerminal utility can be used to allow users to interact with LPC2104 through
the eForth system installed in the flash memory of LPC2104.
You should try to remove all the relative USB-UART drivers inside your
PC. Download USB-UART driver for PL-2303X from:
http://www.prolific.com.tw/eng/downloads.asp?ID=31
Unzip the downloaded package and double-click the driver installer:
PL-2303 Driver Installer.exe
Follow the instructions to install USB-UART driver.
2.
Plug In ARMkey
Plug the small USB plug into the USB socket on ARMkey. Then, plug the regular
USB connector into a USB socket on PC. PC beeps to indicate that it recognizes a
USB serial device, and enables its driver.
ARMkey is powered by the 5 volt power supply from the USB socket in PC. No
external power supply is needed, and this make ARMkey very convenient to use for
embedded applications.
3.
Setup HyperTerminal
Click Start/All Program/Accessories/Communication/HyperTerminal to bring up the
HyperTerminal console. Click Disconnect icon in toolbar to disconnect the default
COM port. Click File/Properties to get the setup panel. Select the proper COM
port in the Connecting Using box. Generally the USB COM port is the one with the
highest port number, like COM4.
Click Configure button to get the Port Settings panel. Select 115200 baud, 8 data
bits, no parity, 1 stop bit, and no flow control.
Dismiss all setup panels by clicking the OK button.
Click Call icon in toolbar and you are ready to talk to ARMkey.
Most often ARMkey is powered up in the bootloader mode. Hold down the ‘H’ key,
and you will see ‘H’ is echoed on the HyperTerminal console, with occasional ‘?’
characters. This shows that ARMkey is alive and ready to do serious work.
4.
Reset ARMkey
Pins 16, 17 and 21 on ARMkey are connected to INT0-INT2 when you press the
Reset button. These pins are floating and may cause ARMkey to boot either into
eForth or into the LPC2104 Bootloader. T make sure eForth is activated, connect
Pins 16, 17 and 21 to Pin 17 which pulls the interrupt pins to 3.3 volts and disables
the interrupts. If you want to activate the bootloader, connect one of the interrupt
pins to ground on Pin 20. As it is awkward to make permanent connections on these
pins, it is very convenient to touch these pins with your finger while pressing Reset.
I found the following ‘manual’ booting technique very reliable:
To activate eForth, touch Pins 16, 17 and 18 with the left index finger, and touch Pin
21 with the right index finger, while pressing the Reset button with the right thumb.
To activate Bootloader, touch Pin 21 with the right index finger, and touch Pin 20
with the right middle finger, while pressing the Reset button with the right thumb.
5.
Talk eForth
Once you boot into eForth, a sign-on message
LPC2100 eForth v1.11
Copyright (C) 2004 Egenom Inc.
All rights reserved.
is displayed, and you can type in any eForth commands, such as:
WORDS
HEX 0 100 DUMP
12+.
You can now define new words and execute them, like:
: HELLO CR .” Hello, world!” ;
HELLO
Many examples and exercises are collected in LESSONS.TXT file.
these examples to learn more about eForth.
6.
Go through
GPIO Demo
The most interesting thing about microprocessors is that you can use it to control
other electronic devices. eForth is the best man-machine interface giving you the
interactive control over the microprocessor and the whole world. Here I like to
demonstrate the use of the general purpose input output port GPIO to do some
elementary input and output functions in ARMkey.
LPC2104 has lots of peripheral devices built in the chip. It uses a host of registers
to control these devices. It is not my purpose to teach you all these devices. I just
want to show you how to use GPIO to do simple input and output. However, once
you learn how to use this GPIO device, you can read the LPC2104 manual on the
devices that your are interested and start experimenting with them.
In principle, each device has four registers:
Register
Direction
Function
Status register
In
Read the status bits in device
Control register
Out
Write control bits to device
Input register
In
Read data from device
Output register
Out
Write data to device
Sometimes the Status register and the Control register are mapped to the same address
location. The Input register and the output register may be mapped to the same
address location as well. For a complicated device, there could be many many
registers to challenge your patience. Many bits in these registers do not have any
assigned function. You have to read the manual to learn how to use these registers
to control a device. LPC2104 User Manual is a 223 page document for your
edification.
As you might have known, all the IO pins in PLC2104, hence the IO pins on ARMkey
are multifunctional; i.e., each IO pin can be assigned to several different functions
associated with different devices. PIN CONNECT BLOCK Allows individual pin
configuration, to configure the IO pins to the desired functions.
The Pin Control Module contains 2 registers:
Address
Name
Description
Access
0xE002C000
PINSEL0
Pin function for Ports P0.0-P0.15
Read/Write
0xE002C004
PINSEL1
Pin function for Ports P0.16-P0.31 Read/Write
Every two bits in these registers are used to select one of three functions for each IO
pin. I will not get into the details of these bits and their assignments. Let us
simply read their contents:
HEX
E002C000 ? 5
E002C004 ? 0
5 in PINSEL0 indicates that pin P0.0 is assigned to TxD in UART0 and pin P0.1 is
assigned to RxD in UART0. All other bits in PINSEL0 and PINSEL1 are 0,
indicating that all other IO pins, P0.2-P0.31 are assigned to GPIO, free for us to use.
This is exactly what we want. So, do not disturb these two registers, especially not
the least significant 4 bits in PINSEL0, because they allow us to talk to PLC2104
through UART0. If you change these 4 bits, ARMkey will stop talking to you.
Signals in PLC2104 brought to the pins on ARMkey are show in the following
diagram:
P0.0/TxD0/PWM1
P0.1/RxD0/PWM3
P0.2/SCL/CAP0.0
P0.3/SDA/MAT0.0
P0.4/SCK/CAP0.1
P0.5/MISO/MAT0.1
P0.6/MOSI/CAP0.2
P0.7/SSEL/PWM2
nRESET
P0.8/TxD1/PWM4
P0.9/RxD1/PWM6
P0.10/RTS1/CAP1.0
P0.11/CTS1/CAP1.1
P0.12/DSR1/MAT1.0
P0.13/DTR1/MAT1.1
P0.14/DCD1/EINT1
P0.15/RI1/EINT2
3.3VO
5VO
1
2
3
4
5
6
7
8
9
10
11
12
13
14
15
16
17
18
19
AK100
40
39
38
37
36
35
34
33
32
31
30
29
28
27
26
25
24
23
22
VCC
P0.31/EXTIN0/STDO
P0.30/TRACEPKT3/STDI
P0.29/TRACEPKT2/STCK
P0.28/TRACEPKT1/STMS
P0.27TRACEPKT0/STRST
P0.26/TRACESYNC
P0.25/PIPESTAT2
P0.24/PIPESTAT1
ATN
RTCK
DBGSEL
P0.23/PIPESTAT0
P0.22/TRACECLK
P0.21/PWM5/PTDO
P0.20/MAT1.3/PTDI
P0.19/MAT1.2/PTCK
P0.18/CAP1.3/PTMS
P0.17/CAP1.2/PTRST
All 32 IO ports in GPIO are brought out for your use. You have direction control of
individual bits, separate control of output set and clear. All I/O default to inputs
after reset. You can use these pins to driving LEDs, or other indicators, controlling
off-chip devices, and sensing digital inputs.
The GPIO contains 4 registers as shown here:
Address
Name
Description
Access
0xE0028000
IOPIN
GPIO Pin value register. The current
state of the port pins can always be read
from this register, regardless of pin
direction and mode.
Read Only
0xE0028004
IOSET
GPIO 0 Output set register. This register Read/Set
controls the state of output pins in
conjunction with the IOCLR register.
Writing ones produces highs at the
corresponding port pins. Writing zeroes
has no effect.
0xE0028008
IODIR
GPIO 0 Direction control register. This
register individually controls the
direction of each port pin.
Read/Write
0xE002800C
IOCLR
GPIO 0 Output clear register. This
register controls the state of output pins.
Writing ones produces lows at the
corresponding port pins and clears the
corresponding bits in the IOSET
register. Writing zeroes has no effect.
Clear Only
To do experiments with ARMkey, it is the best to plug this 40 pin DIP device into a
40 pin DIP socket on a printed circuit board or a testing fixture to avoid accidentally
shorting its power supply to ground or other sensitive pins. You can wire grounding
switches to input pins and LED indicators to output pins. Do not forget current
limiting resistors with LED diodes.
For my demo, I connected P0.8-P0.15 to 8 switches between 5 volts and ground. I
also connected P0.16-P0.23 to 8 LED indicators. The LED indicators have their
own driver circuits and they do not draw large currents from the IO pins on ARMkey.
To configure P0.16-P0.23 as output pins while leaving all other pins as input, I write
FF0000 to IODIR register:
FF0000 E0028008 !
To read the input and output pins, read the IOPIN register:
E0028000 ?
The results are FFXXYY00, in which YY shows the status of the switch inputs on
pins P0.8-P0.15, and XX shows the status of the output pins on P0.16-P0.23.
Change the switch positions and you will see the corresponding bits in YY change
accordingly.
To change the outputs on P0.16-P0.23, write different patterns to XX in the IOPIN
register:
550000 E0028000 !
AA0000 E0028000 !
Or, we can clear individual bits by writing into the IOCLR register:
20000 E002800C !
A8000 E002800C !
And, we can set individual bits by writing into the IOSET register:
550000 E0028004 !
AA0000 E0028004 !
This concludes my GPIO demo.
7.
Program ARMkey
It is very important that you can interactively control the microprocessor to test its
functions. It is more important that you can program the microprocessor to do what
you want it to do. LPC2104 has 128 Kbytes of flash memory that you can program
to store your application. You can program the flash memory, so that when you
push the reset button, it starts to execute your application.
ARMkey comes with an eForth metacompiler which can compile your FORTH
application program on the top of the eForth system. You can also select the
program, a FORTH word which runs your application, which get executed on
power-up and when the reset button is pushed. Here I will discuss the detailed
procedure to program its flash memory. Mastering this procedure, you can declared
yourself a firmware engineer, or an embedded system programmer, whichever will
get you a better paying job.
With ARMkey and the LPC2104 User Manual, which you can download from
Phillip’s website:
www.nxp.com/pip/LPC2104_2105_2106_6.html
You should be able to test the peripheral devices you are interested and develop your
application using ARMkey as the microcontroller. You can define a set of FORTH
words which control your hardware components. On the top of this layer of
hardware interfaces, you can develop the control software, which are another set of
FORTH words which runs your application on the hardware. The application is
most likely another FORTH word running in an infinite loop, monitoring the input
devices and controlling the output devices.
Collect all the FORTH words you defined in a file named ARM7EXT.F. Assuming
that your final application word is DEMO, then add the following line for words to
the end of ARM7EXT.F:
‘ DEMO ‘BOOT !
This line forces LPC2104 to execute DEMO on power-up or when Reset button on
ARMkey is pushed.
After you unzip the files provided with ARMkey, there is a fold named EF111, which
contains the following files:
LPCEFG.EXE
LPC2100 eForth Generator. It uses a specific file, called
ARM7EXT.F, as it input file. This input file name can not
be reassigned.
WINCON.DLL
A Windows' constant definition DLL.
ARM7EXE.F
A empty file just with file description.
BIN2HEX.EXE
A tool to convert BIN file to HEX file.
OK.BAT
A batch file converts LPCEF.BIN to LPCEF.HEX in linear
32 addressing.
README.TXT
Just this description file.
Replace the above ARM7EXT.F file with the one you put in your application words.
Double click LPCEFG.EXE, which will compile a new eForth system image with
your application FORTH words. This new image file is a binary file called
LPCEF.BIN. Then double click BIN1HEX.EXE, and it will read LPCEF.BIN to
produce another file LPCEF.HEX. You can examine LPCEF.HEX using any text
editor.
LPCEF.HEX is the file you use to program the flash memory in LPC2104 on
ARMkey. First, you have to install the In-System-Programming (ISP) utility
provided by Philips, which is SETUP.EXE in a folder named lpc2000_flash_utility.
The installer will generate the flash utility file LPC210X_ISP.EXE which is likely to
be in /Program files/LPC2106 ISP folder in your C: drive.
Please follow these procedure to program flash memory:
Close HyperTerminal console if it is still open.
Double click LPC210X_ISP.EXE to start LPC ISP utility. The ISP console is
clearly laid out and quite self-explanatory.
Select the correct COM port in the Communication panel to the right.
Click Read Device Button in the center to make sure ARMkey is communicating
correctly with ISP. It may show a screen asking you to reset LPC2103.
Push Reset button on ARMkey, making sure that one of the pins 16, 17 or 21 is
grounded. If LPC2104 is reset properly, the Part ID and Boot Loader ID windows
will show ID numbers.
Press the radial button Selected Sectors to the left of the Blank Check button.
Select 0 Start Sector and 14 End Sector to the left of the Erase button.
Press Erase button to erase flash memory.
Press Blank Check button to verify the flash memory is erased.
Select the LPCEF.HEX file in the Filename window on the Flash Programming panel.
Press Upload to Flash button to start flash programming.
If everything goes well, you should have your application in the flash memory of
LPC2104. Now, make sure that all three pins 16, 17 and 21 are connected to 3.3
volts and press Reset button. Presto! Your application is now running the show.
If anything goes wrong, ARMkey will sit there silently, refusing to run your
application and even refusing to tell you what is wrong. As Murphy’s Law always
prevails, you will have to find your way out of this morass.
My best suggestion is to comment out the last line in ARM7EXT.F:
\
‘ DEMO ‘BOOT !
This way ARMkey boots up into eForth system, with which you can run all the lower
level FORTH words you defined in the application. Debug all the low level words,
and then move on to higher level words. Repeat the metacompiling and ISP
programming until DEMO actually works when you type it in. Then recompile with
the line
‘ DEMO ‘BOOT !
Firmware engineering and embedded system programming are very difficult jobs.
People are paid handsomely to do these jobs. However, with eForth in ARMkey,
these jobs are made much easier so that mortal souls like you and me can do these
jobs easily.
Let me go through te above procedure with you, using a simple but non-trivial
application using GPIO we tried out before. The entire program is as following:
HEX
E0028000 CONSTANT IOPIN
E0028004 CONSTANT IOSET
E0028008 CONSTANT IODIR
E002800C CONSTANT IOCLR
E002C000 CONSTANT PINSEL0
E002C004 CONSTANT PINSEL1
: PSET IOSET ! ;
: PCLR IOCLR ! ;
: P@ IOPIN @ ;
: P? IOPIN ? ;
: P! IOPIN ! ;
: INITIATE HEX FF0000 IODIR ! ;
: INPUT P@ 100 / FF AND ;
: OUTPUT FF AND 10000 * P! ;
: DEMO CR ." LPC2104 Demo" CR
INITIATE
BEGIN INPUT OUTPUT ?KEY UNTIL
;
'
DEMO
'BOOT
!
Here useful registers are defined as constants and some useful words are defined to
access GPIO functions. The final word DEMO is an infinite loop reading input
switches and turning output LED’s on and off accordingly. The loop is terminated
when any key on the keyboard is pushed. It is a good idea to have an escape route
in your application, in case you have to fix a problem later.
Paste this program into ARM7EXT.F file in EF111 folder. Execute LPCEFG.EXE
to produce LPCEF.BIN, and execute OK.BAT to produce LPCEF.HEX. Open
LPC210X_ISP.EXE to download LPCEF.HEX into LPC2104 on ARMkey.
Reset ARMkey with pins 16, 17 and 21 pulled high and ARMkey will execute DEMO.
You can change the switches and see the results on the LED indicators.