1
F
GB
D
E
I
P
NL
S
DK
N
FIN
GR
H
CZ
RUS
RO
PL
English
REPLACING THE BIT HOLDER AND BIT
(FIG. 1 & 2)
SCREW DRIVER SAFETY PRECAUTIONS
■
■
Stay alert. Watch what you are doing. Use common
sense. Do not operate the tool when you are tired.
Check that no part is damaged. If a tool part or
accessory is damaged, check that it can continue to
work and perform its function correctly before
continuing to use the tool. Check for alignment and
secure attachment of moving parts, as well as any
other factor that may affect tool operation. A casing or
other part that is damaged should be properly
repaired or replaced by an authorised service centre
unless otherwise indicated in this user's manual.
Have defective switches replaced by an Authorised
Ryobi Service Centre. Do not use the tool if the
switch does not turn it on and off.
■
■
■
■
■
SPECIFICATIONS
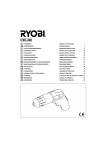
Pull the locking sleeve (1). The locking sleeve and
adjusting sleeve (2) come out of the gear case as
a unit.
Pull the bit holder (7) straight out. If it is difficult to
remove by hand, use pliers.
Remove the bit from the bit holder. If it is difficult to
remove by hand, use pliers.
Insert a new bit in the bit holder. Use a new bit holder
if necessary.
Insert the bit holder (with bit) in the hex. hole of the
spindle until the ball-lock of the bit holder snaps into
the groove in the gear case then push in the adjusting
sleeve as far as it will go.
DEPTH SETTING (FIG. 4)
ESD-6025V
ESD-6040V
■
Voltage
230V / 110V ~ 50Hz
Input
600W
No load speed
0 - 2,500/min 0 - 4,000/min
Overall length
312mm (12-1/4")
Net weight
1.9 kg
Sound pressure level (No load)
78 dB(A)
Sound Power level (No load)
92 dB(A)
Weighted root mean square
acceleration value
less than 2.5 m/s2
■
■
■
■
The tool's adjustable nose piece enables you to
automatically drive a screw to a preset depth.
To adjust your screw driver so it will drive screws to
the desired depth, unlock the locking sleeve.
Turn the adjusting sleeve to the appropriate bit holder
depth or to any desired depth.
Test the driver by screwing in a fastener in scrap
material to determine whether the screwing depth is
correctly adjusted.
Further adjustment may be necessary to increase or
decrease the screwing depth.
STANDARD ACCESSORIES
1/4" Hexagonal bit holder, 1/4" Phil. bit.
TRIGGER SWITCH (FIG. 3)
■
APPLICATION
■
(Only use your tool for the purposes listed below.)
Tightening and loosening screws in drywall.
■
NOISE BUILD-UP
Noise (sound pressure level) in the workplace can
exceed 85 dB (A). In this case, sound insulation and
hearing protection measures must be taken by the
operator.
■
■
5
This tool is started and stopped by depressing and
releasing the trigger (5).
If you want to set a constant speed for continuous
operation, press the lock-on button (6) while the
trigger is depressed. Depress the trigger again to
release the lock.
To reverse the direction of rotation of the bit, stop the
driver by releasing the trigger and push the reversing
switch (4) to the right or left.
When the reversing switch is set to the LEFT the
screw driver will turn clockwise (seen from the handle
end of the driver).
When the reversing switch is set to the RIGHT the
screw driver will turn anti-clockwise.